Mannykillers/ AAPARKAH Street/time Attack/Drift Build (heavy Pics) #Thisisthewolf


 02-27-13, 12:46 PM
#1254
^no problem brotha!
Little Update:
so I was able to finish removing the Sound deadening with the dry ice. I used 1 block the first day, and got 2 more blocks the second day. Some people have reported using 60-100 Lbs of dry ice to complete this? ....I don't know about all that..but I had a pretty good method which I'll explain real quick.
Sound Deadening Removal with Dry Ice:
You will need the following:
* 3-5 Blocks of Dry Ice (most readily found at Albertsons grocery store)
* A flat headed Chisel
* A Rubber Mallet or hammer if your ghetto and angry lol
* A good set of decently thick gloves (required for my method because I use the Dry ice in more than one location.
Method:
Once everything is clear from the sound deadening areas.....
step 1 - Put a block of dry ice into a couple plastic bags and keep it in it's package.
step 2 - Smash it on the ground till all the big pieces are small and a lot of it is granule sized
step 3 - Spread the dry ice powder/small pieces over designated sound deadening. Thoroghly cover it as depcted in the pic below:
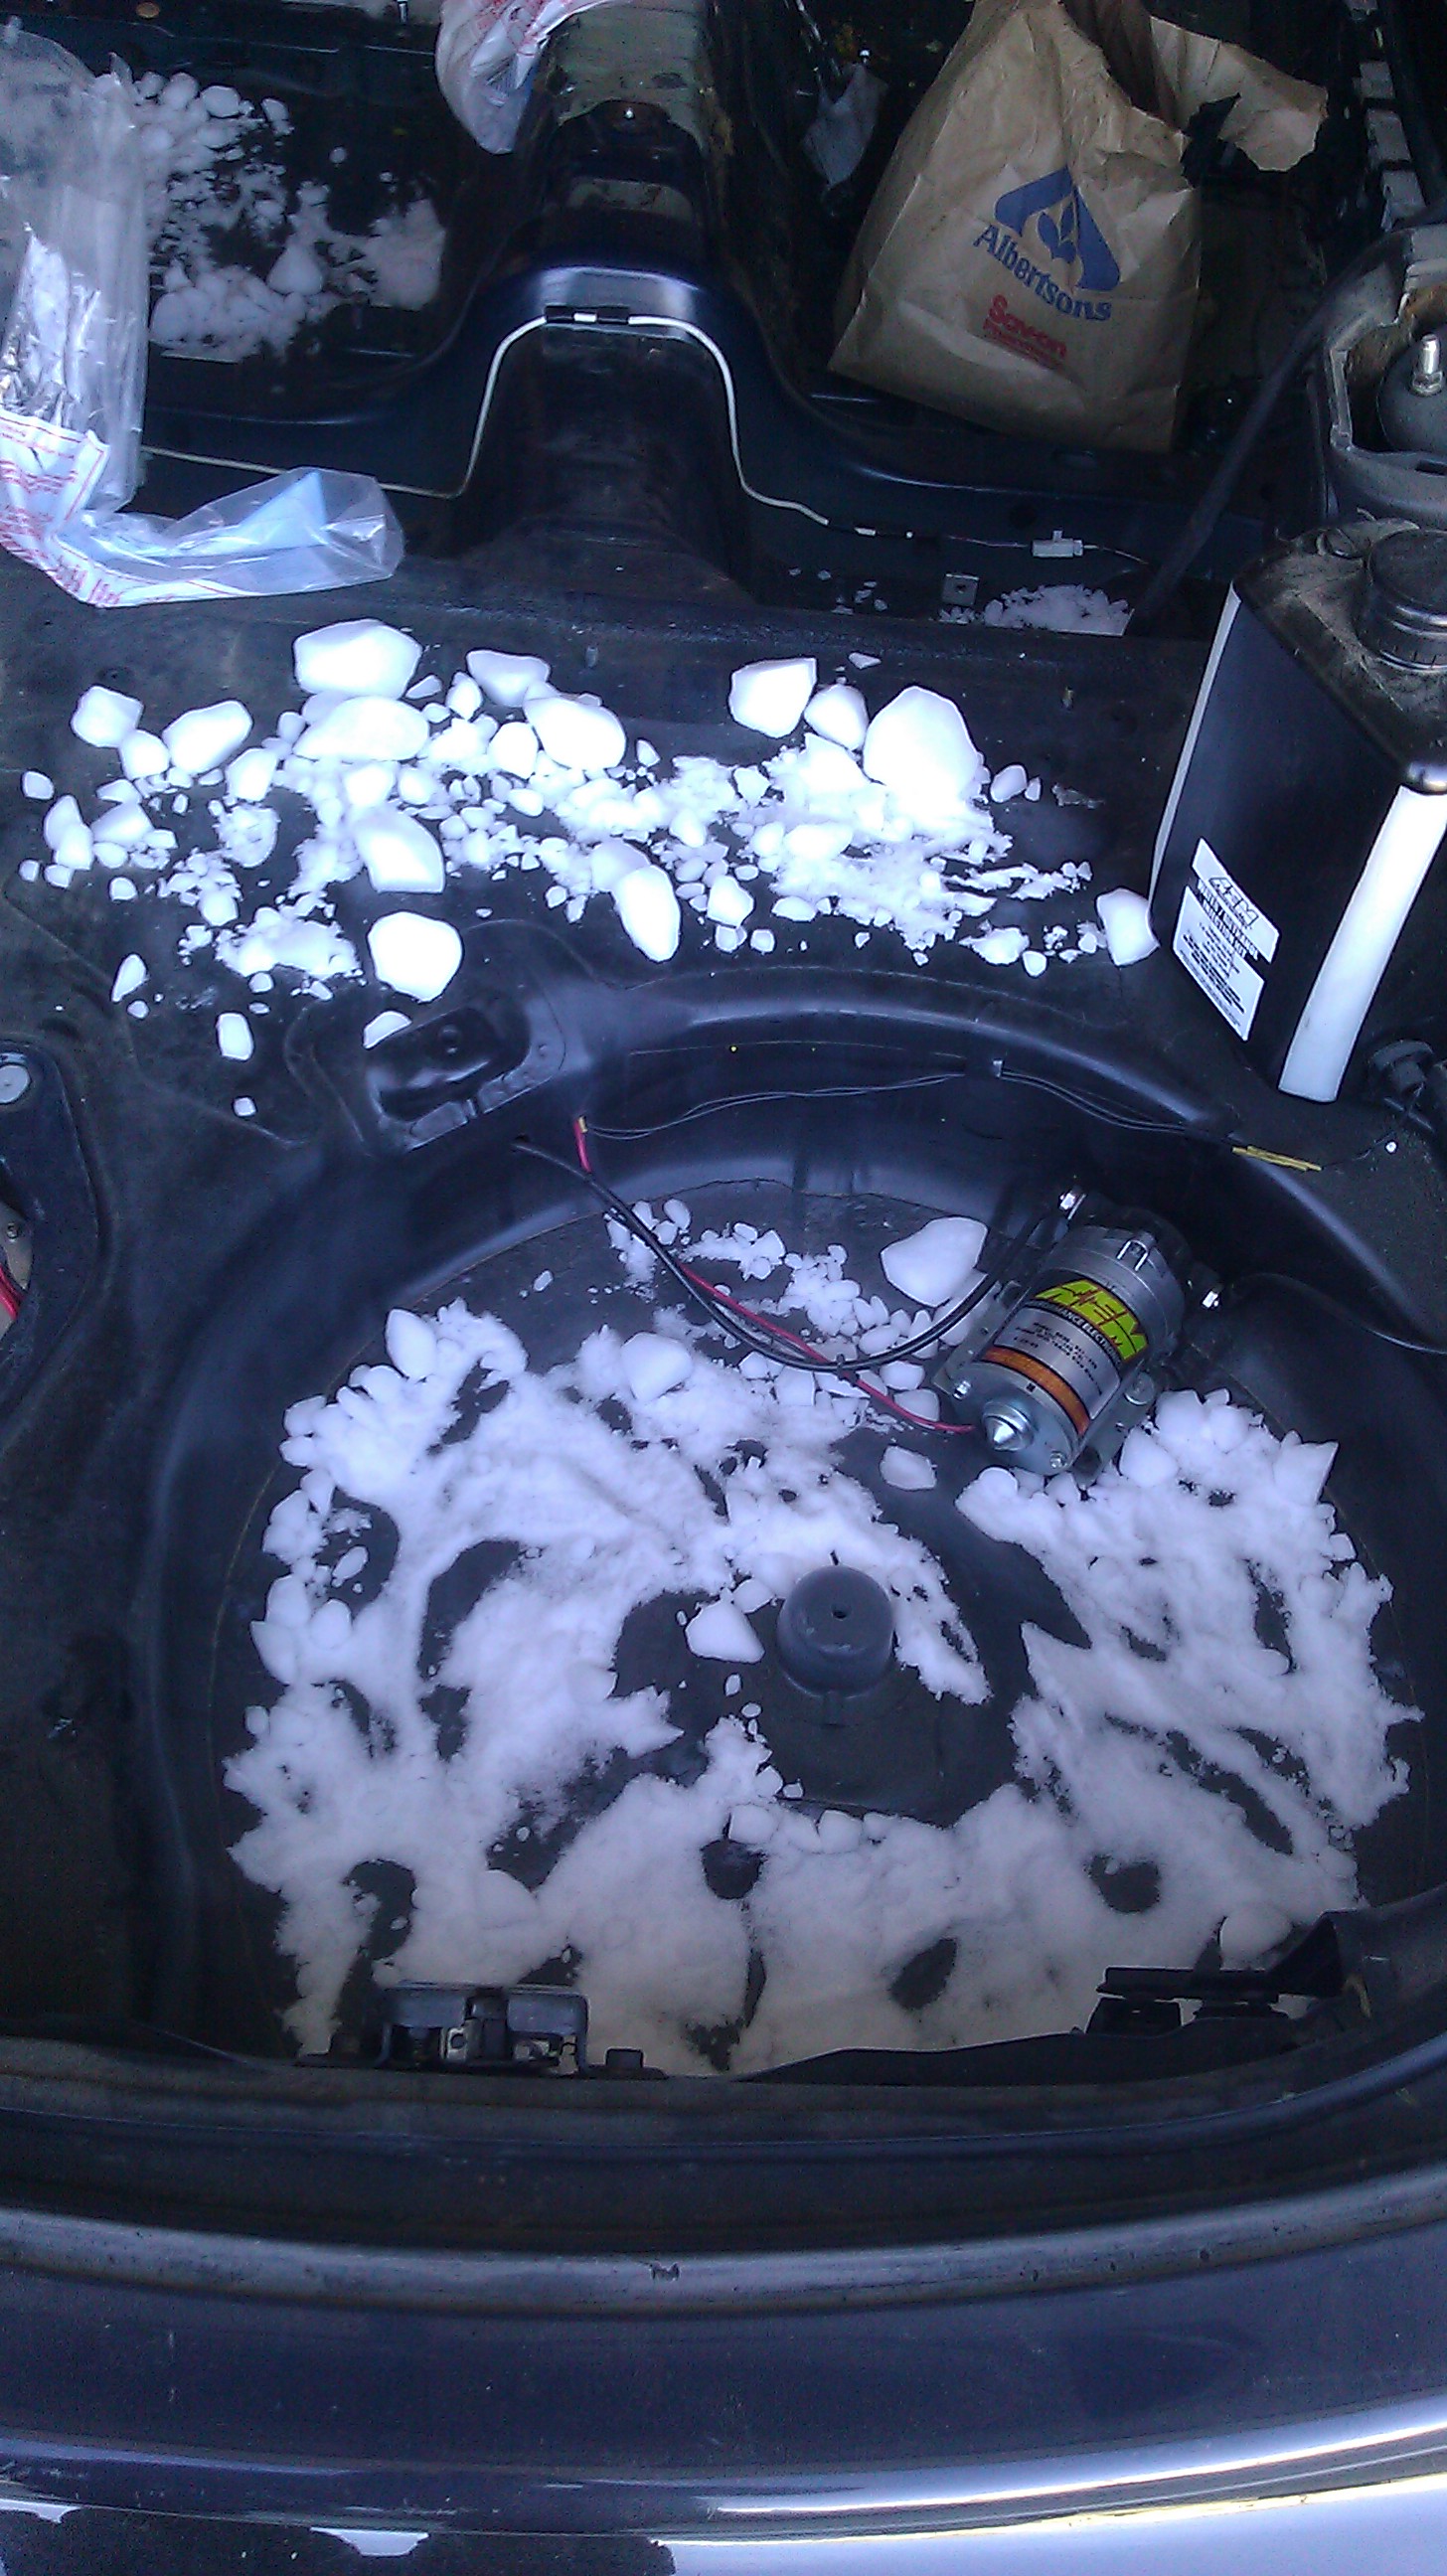
the better you cover it the easier/quicker it will start creaking and cracking.
step 5 - wait till the sound deadening starts creaking and cracking (this is how you know it is working because it is contracting from the change in temperature and seperating from the floor panel)
step 6 - Hit the sound deading evenly pretty hard but not hard enough to dent the floor panel.... all over it. You will hear either a dull thud..which prob means you need to wait longer or you will hear a slight "slapping" sound which means the sound deadening has lifted from the floor pan and is ready to be chizeled. The longer you wait...(5 min compared to 10-12 min) the easier the deadening comes up and in larger pieces. Believe me it's worth the patience.
step 7 - put your gloves on (they should already be on this whole time) and move the dry ice to the next panel of sound deadening. While you pull this one off the left over dry ice can be used more than once on a different location =-)
step 8 - Use the flat headed chizel working at a broad edge and tap it with the rubber mallet. If you covered the deadening good enough with dry ice and let it sit for long enough the whole panel should just pop off in 1-3 or 4 big pieces. If it's breaking in tiny pieces.. re-cover with dry ice and wait longer.
step 9 - For the lateral areas where the sound deading does not sit on a flat level surface...put dry ice in a plastic bag and I used mounting holes and existing bolts and screws to just "hang" the bag against these areas. It worked like a charm...just had to wait a few min more.
step 10 - Use Mineral spirits or brake cleaner to get the left over goo off of the floor pan or any areas the sound deadening left residue.
Other than that...don't get frustrated. A few areas I was just trying to get little pieces off and ended up digging into the floor panel a little bit with my chizel.
Little Update:
so I was able to finish removing the Sound deadening with the dry ice. I used 1 block the first day, and got 2 more blocks the second day. Some people have reported using 60-100 Lbs of dry ice to complete this? ....I don't know about all that..but I had a pretty good method which I'll explain real quick.
Sound Deadening Removal with Dry Ice:
You will need the following:
* 3-5 Blocks of Dry Ice (most readily found at Albertsons grocery store)
* A flat headed Chisel
* A Rubber Mallet or hammer if your ghetto and angry lol
* A good set of decently thick gloves (required for my method because I use the Dry ice in more than one location.
Method:
Once everything is clear from the sound deadening areas.....
step 1 - Put a block of dry ice into a couple plastic bags and keep it in it's package.
step 2 - Smash it on the ground till all the big pieces are small and a lot of it is granule sized
step 3 - Spread the dry ice powder/small pieces over designated sound deadening. Thoroghly cover it as depcted in the pic below:
the better you cover it the easier/quicker it will start creaking and cracking.
step 5 - wait till the sound deadening starts creaking and cracking (this is how you know it is working because it is contracting from the change in temperature and seperating from the floor panel)
step 6 - Hit the sound deading evenly pretty hard but not hard enough to dent the floor panel.... all over it. You will hear either a dull thud..which prob means you need to wait longer or you will hear a slight "slapping" sound which means the sound deadening has lifted from the floor pan and is ready to be chizeled. The longer you wait...(5 min compared to 10-12 min) the easier the deadening comes up and in larger pieces. Believe me it's worth the patience.
step 7 - put your gloves on (they should already be on this whole time) and move the dry ice to the next panel of sound deadening. While you pull this one off the left over dry ice can be used more than once on a different location =-)
step 8 - Use the flat headed chizel working at a broad edge and tap it with the rubber mallet. If you covered the deadening good enough with dry ice and let it sit for long enough the whole panel should just pop off in 1-3 or 4 big pieces. If it's breaking in tiny pieces.. re-cover with dry ice and wait longer.
step 9 - For the lateral areas where the sound deading does not sit on a flat level surface...put dry ice in a plastic bag and I used mounting holes and existing bolts and screws to just "hang" the bag against these areas. It worked like a charm...just had to wait a few min more.
step 10 - Use Mineral spirits or brake cleaner to get the left over goo off of the floor pan or any areas the sound deadening left residue.
Other than that...don't get frustrated. A few areas I was just trying to get little pieces off and ended up digging into the floor panel a little bit with my chizel.
02-27-13, 01:14 PM
#1255
Also little update:
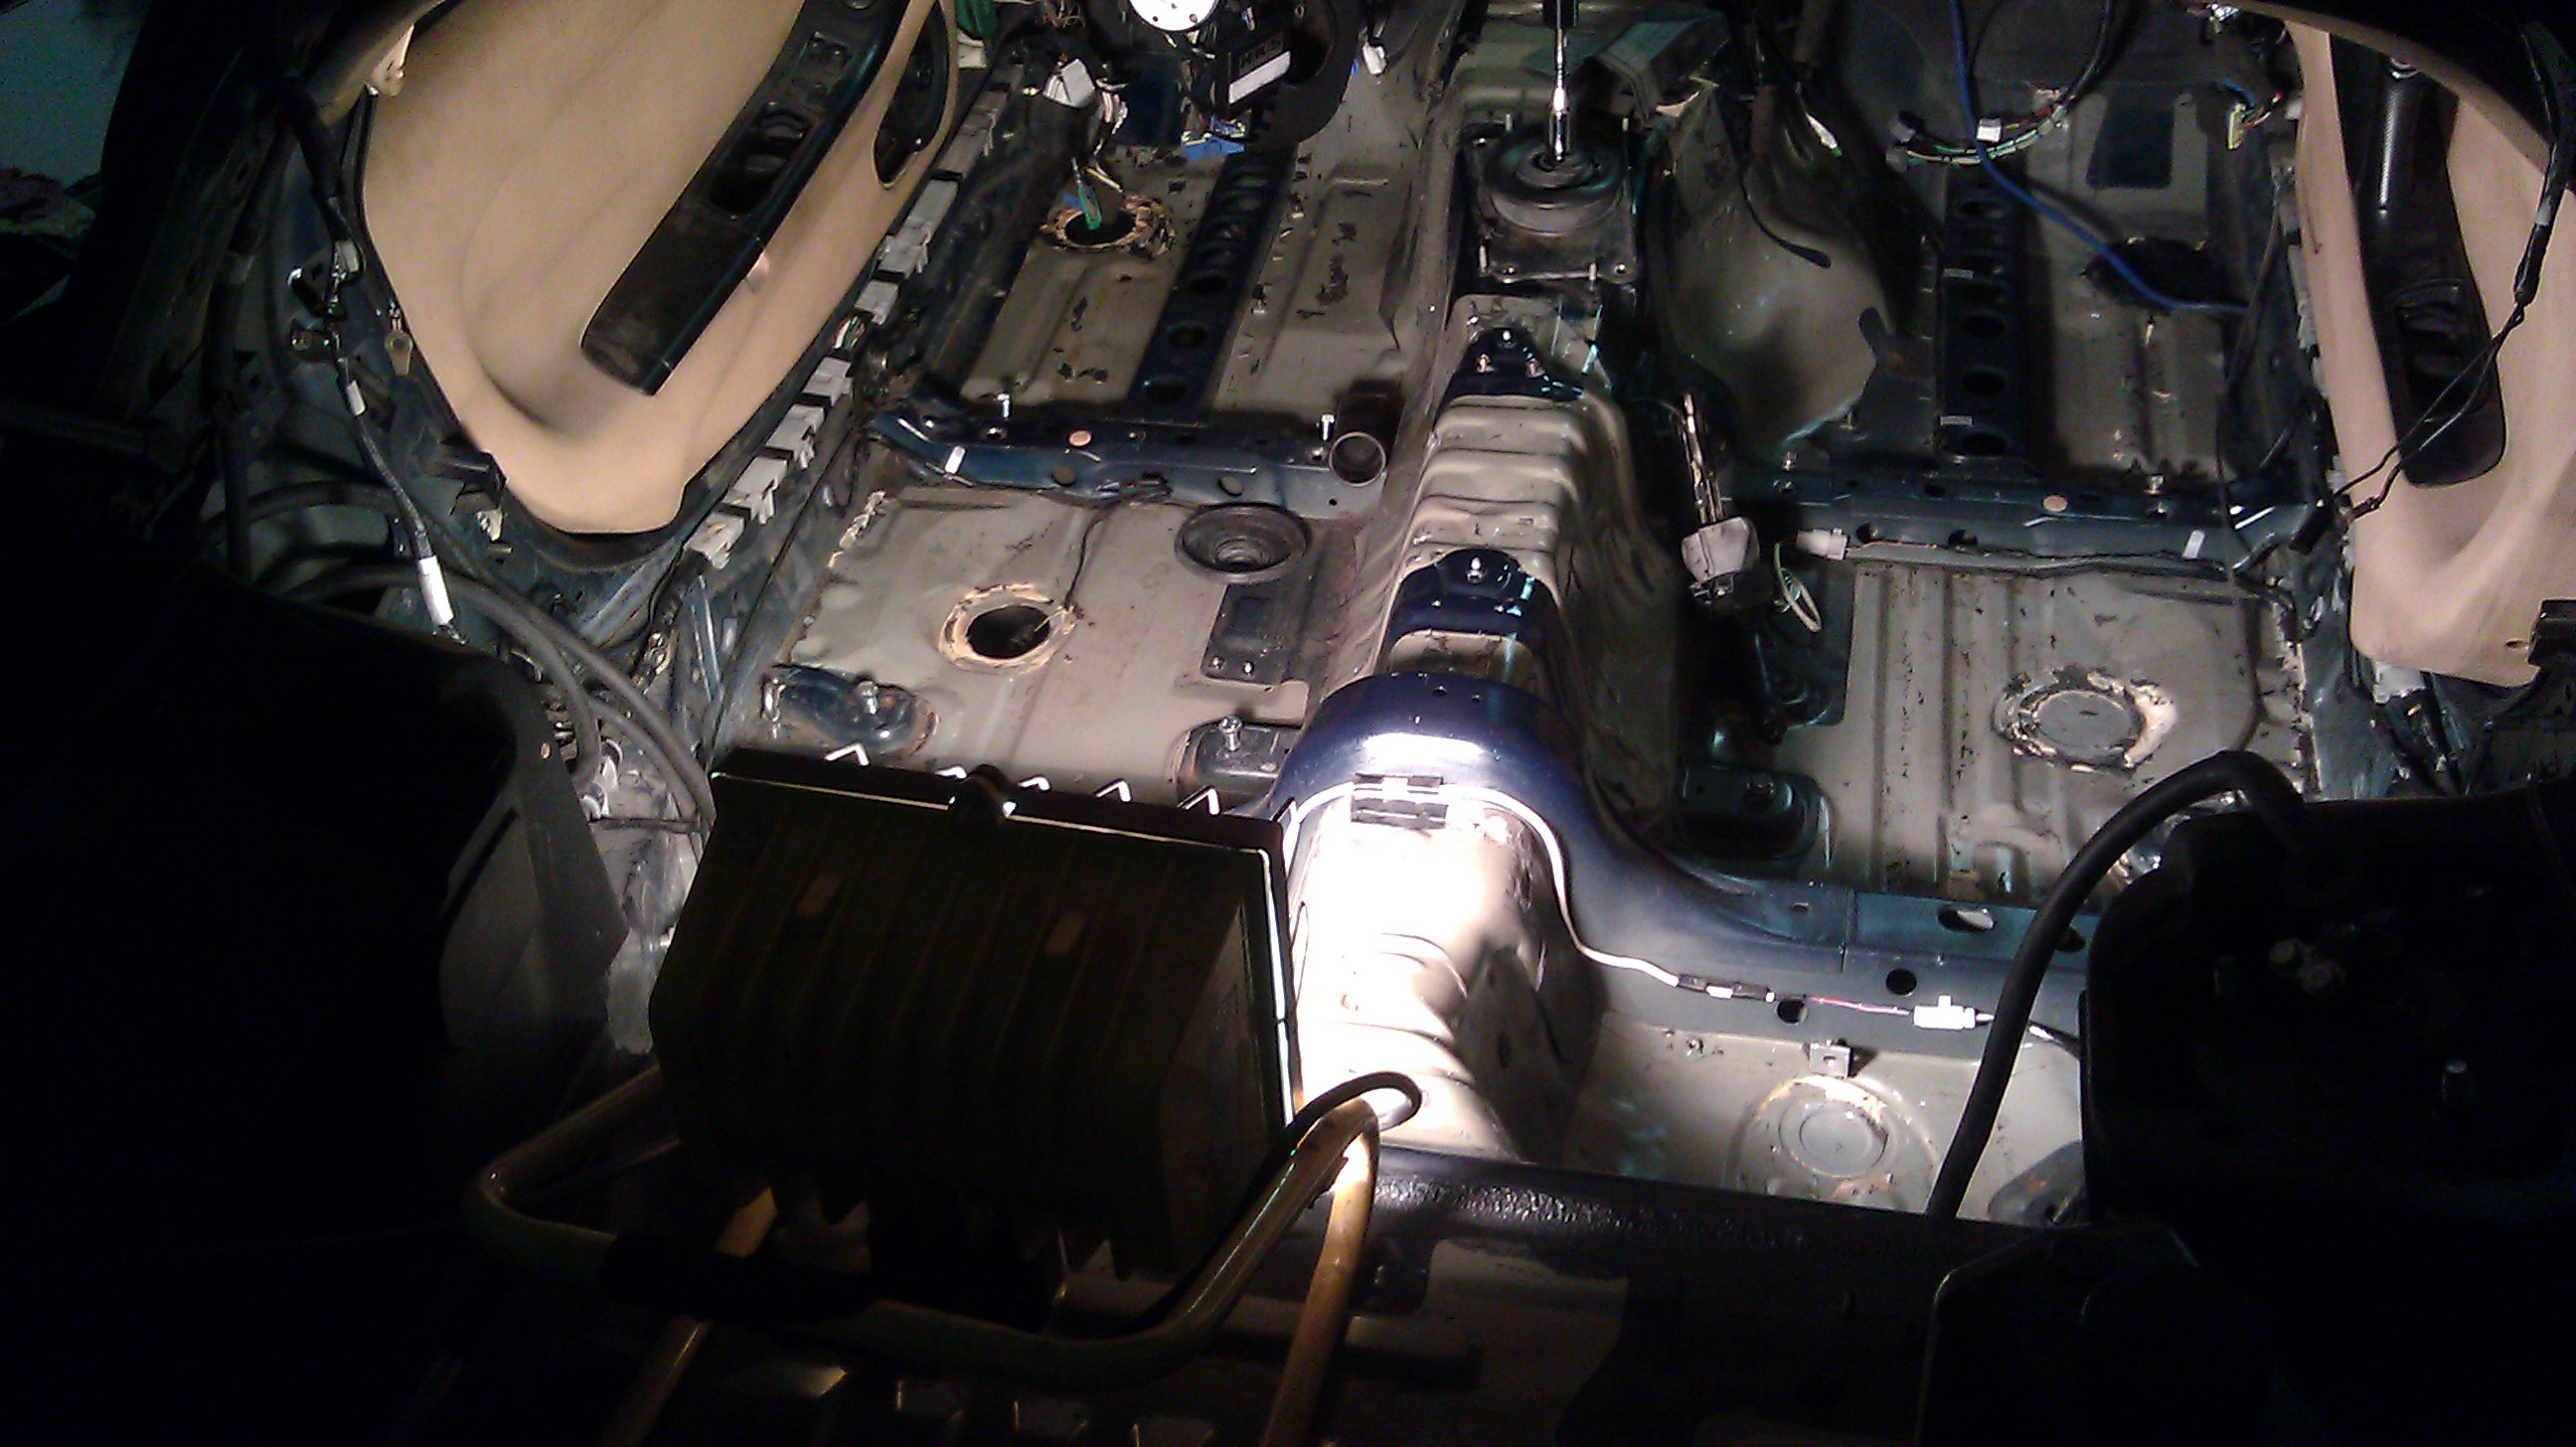
Finished removing the sound deading from the interior of the car
Here is a quick pic before I removed the goo like tar stuff left from the Deadening but you get the Idea
So after forcing myself to wait till round 2 of the build (to paint and do the Fd legal Cage) I can re-install the Dash and start looking to build a little guage/switch panel for my oil cooler fans etc.
Also... you know sometimes when you don't know what to do so you start messing with things?...well I didn't like how little thread was on my turbo flange stud/nut so I was went to remove it to even the thread spacing/nut coverage out and the damn thing snapped just backing it out. I was like...son of a B.. But I guess better now than later. Also ran into a small problem. The manifold support brace is a little too close to the stud nut.. it doesn't allow me to get a socket around it...which is annoying. It's just a tad off so I'm going to take a dremel to it today to get the extra space needed to get the socket around it. Also need to go pick up a new stud now. Cleaned and Vacuumed out the interior and it looks much better. Sucks that I have to leave it all blotchy like this till I paint/POR-15 the interior But I need to get the car running sooner than later. Paint and cage can waite a month or so.
More updates later today
02-28-13, 11:30 AM
#1256
Little Update:
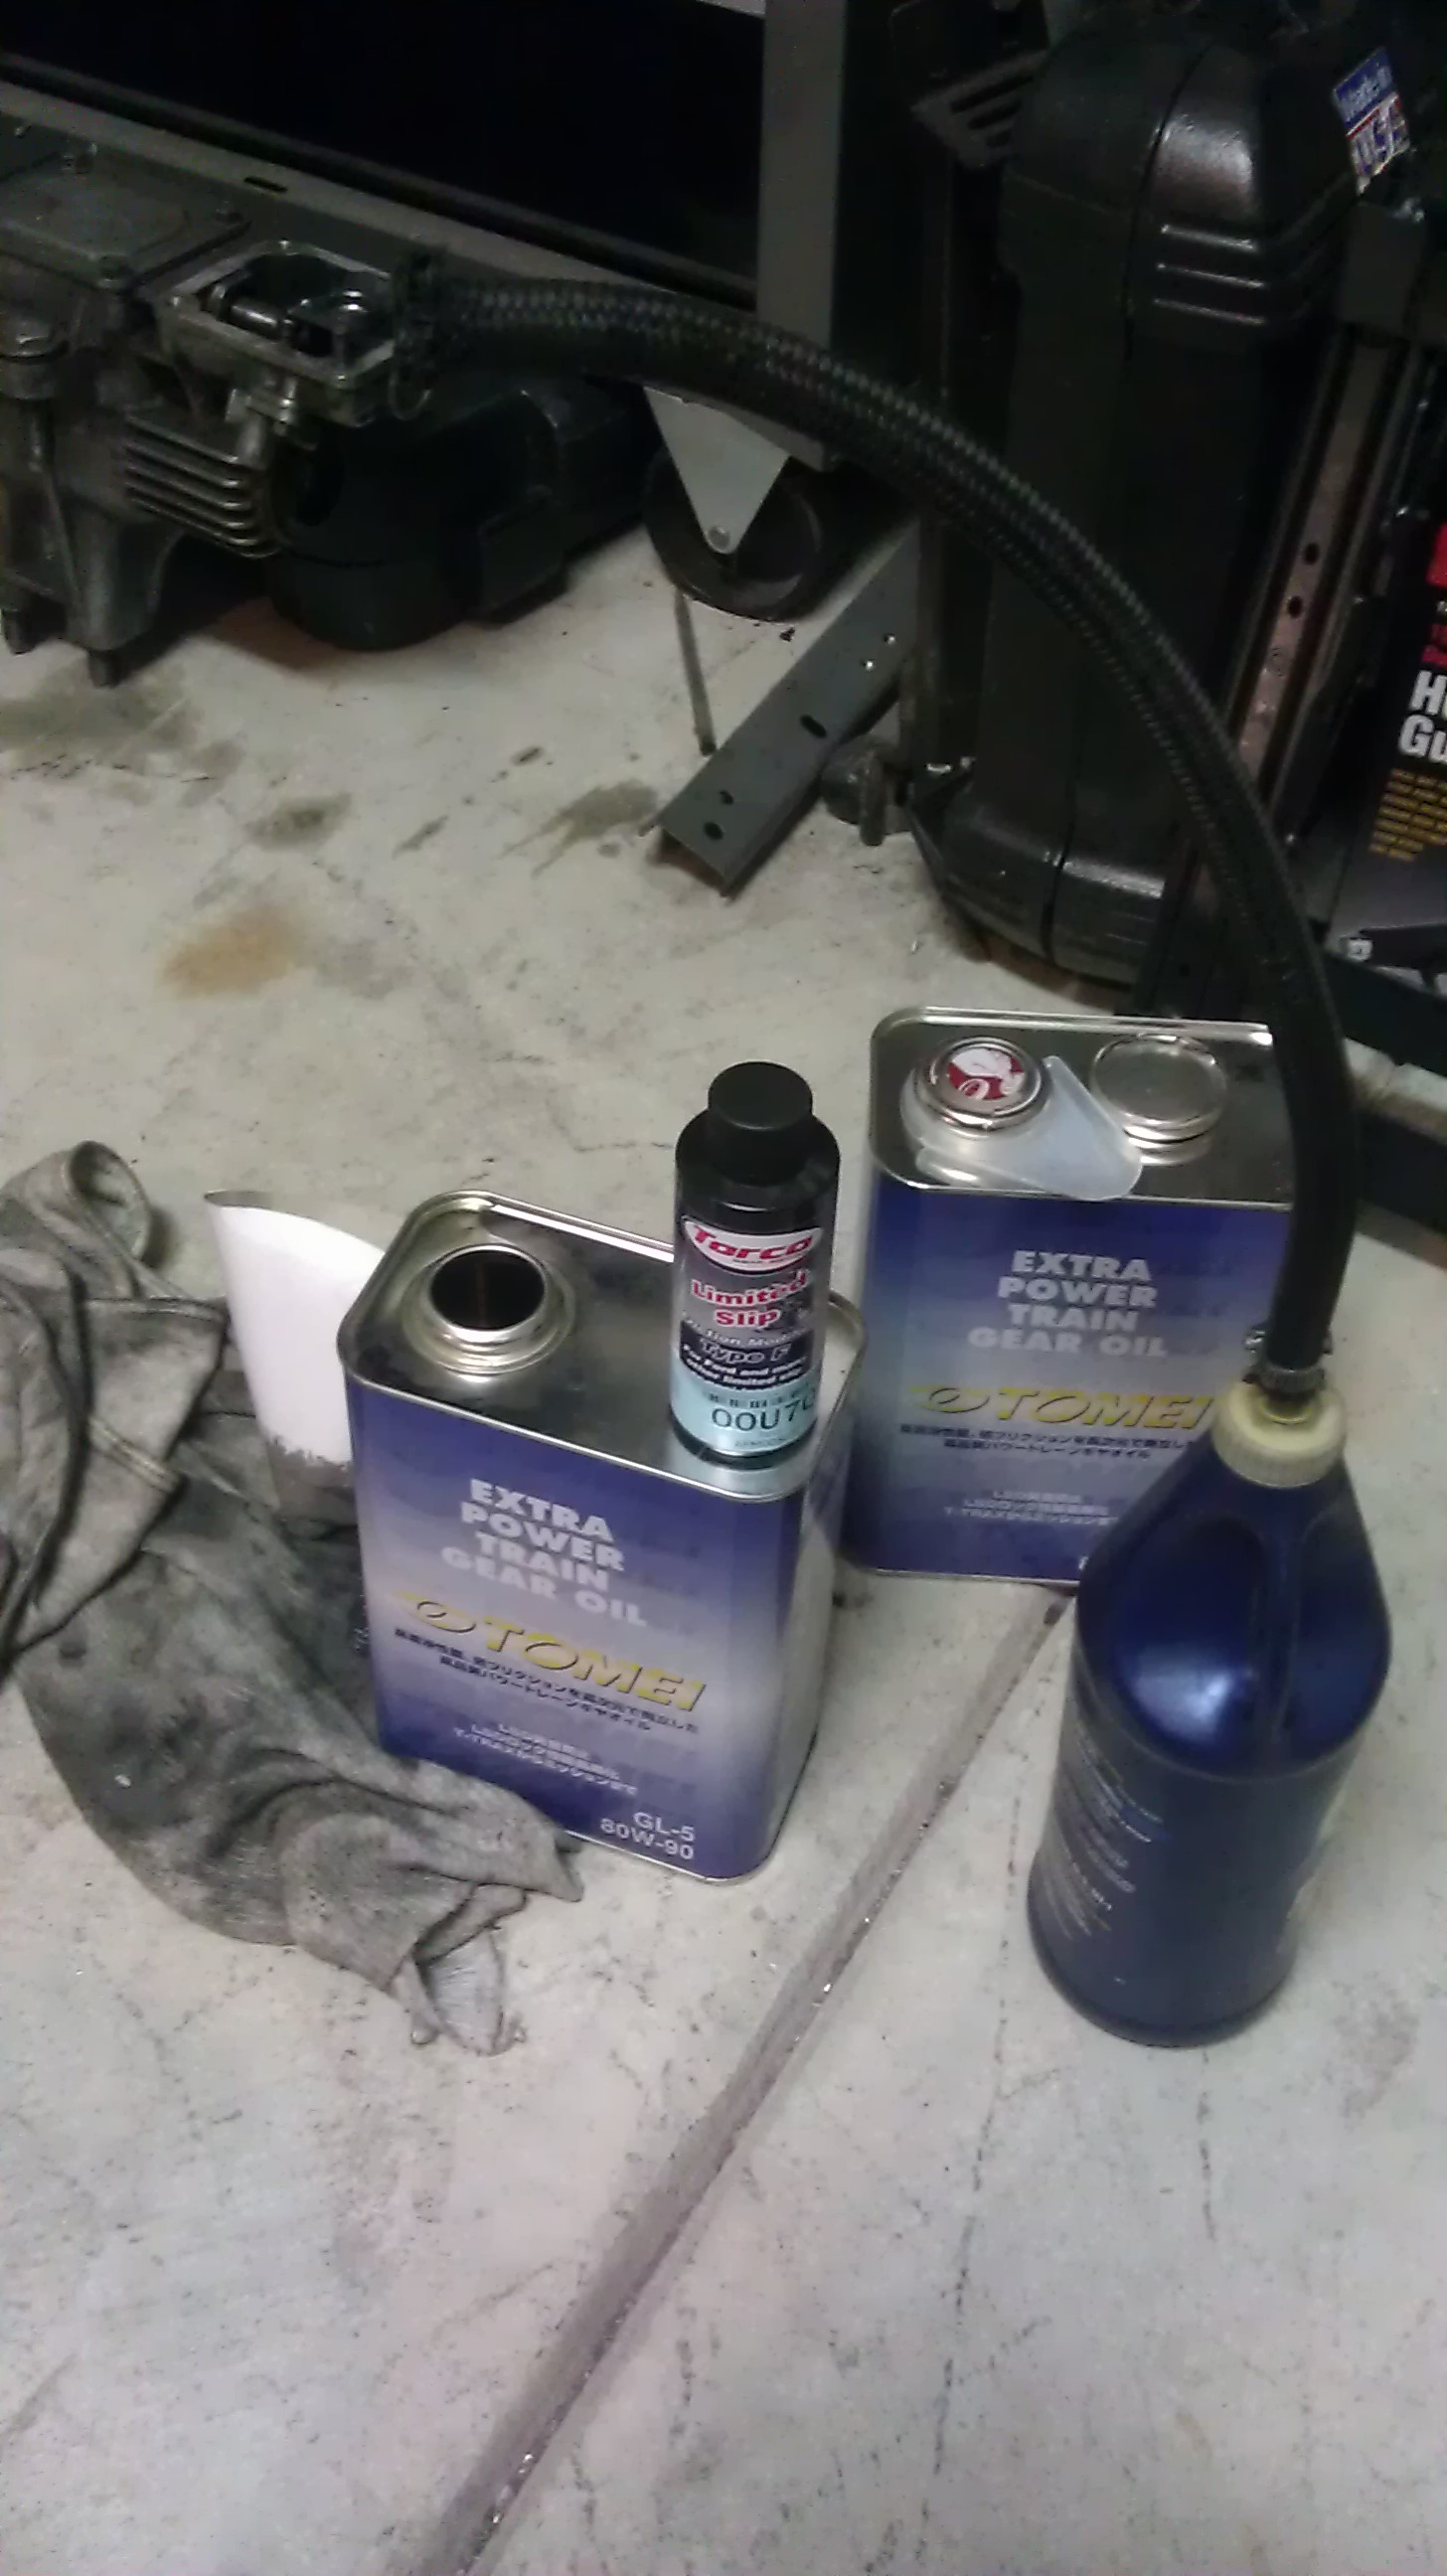
Tomei Differential gear oil and Torco friction modifier along with Brake and Power steering fluid came in yesterday. Filled the power steering up, Filled the Brake res up and Half Bled the brakes just to get fluid into the lines until I have someone to help me bleed the system thoroughly, and Filled the Differential fluid. I used a bottle with some old Fuel line attatched with a worm clamp on the plastic cap to fill the diff up. Worked excellent and didn't spill a drop.
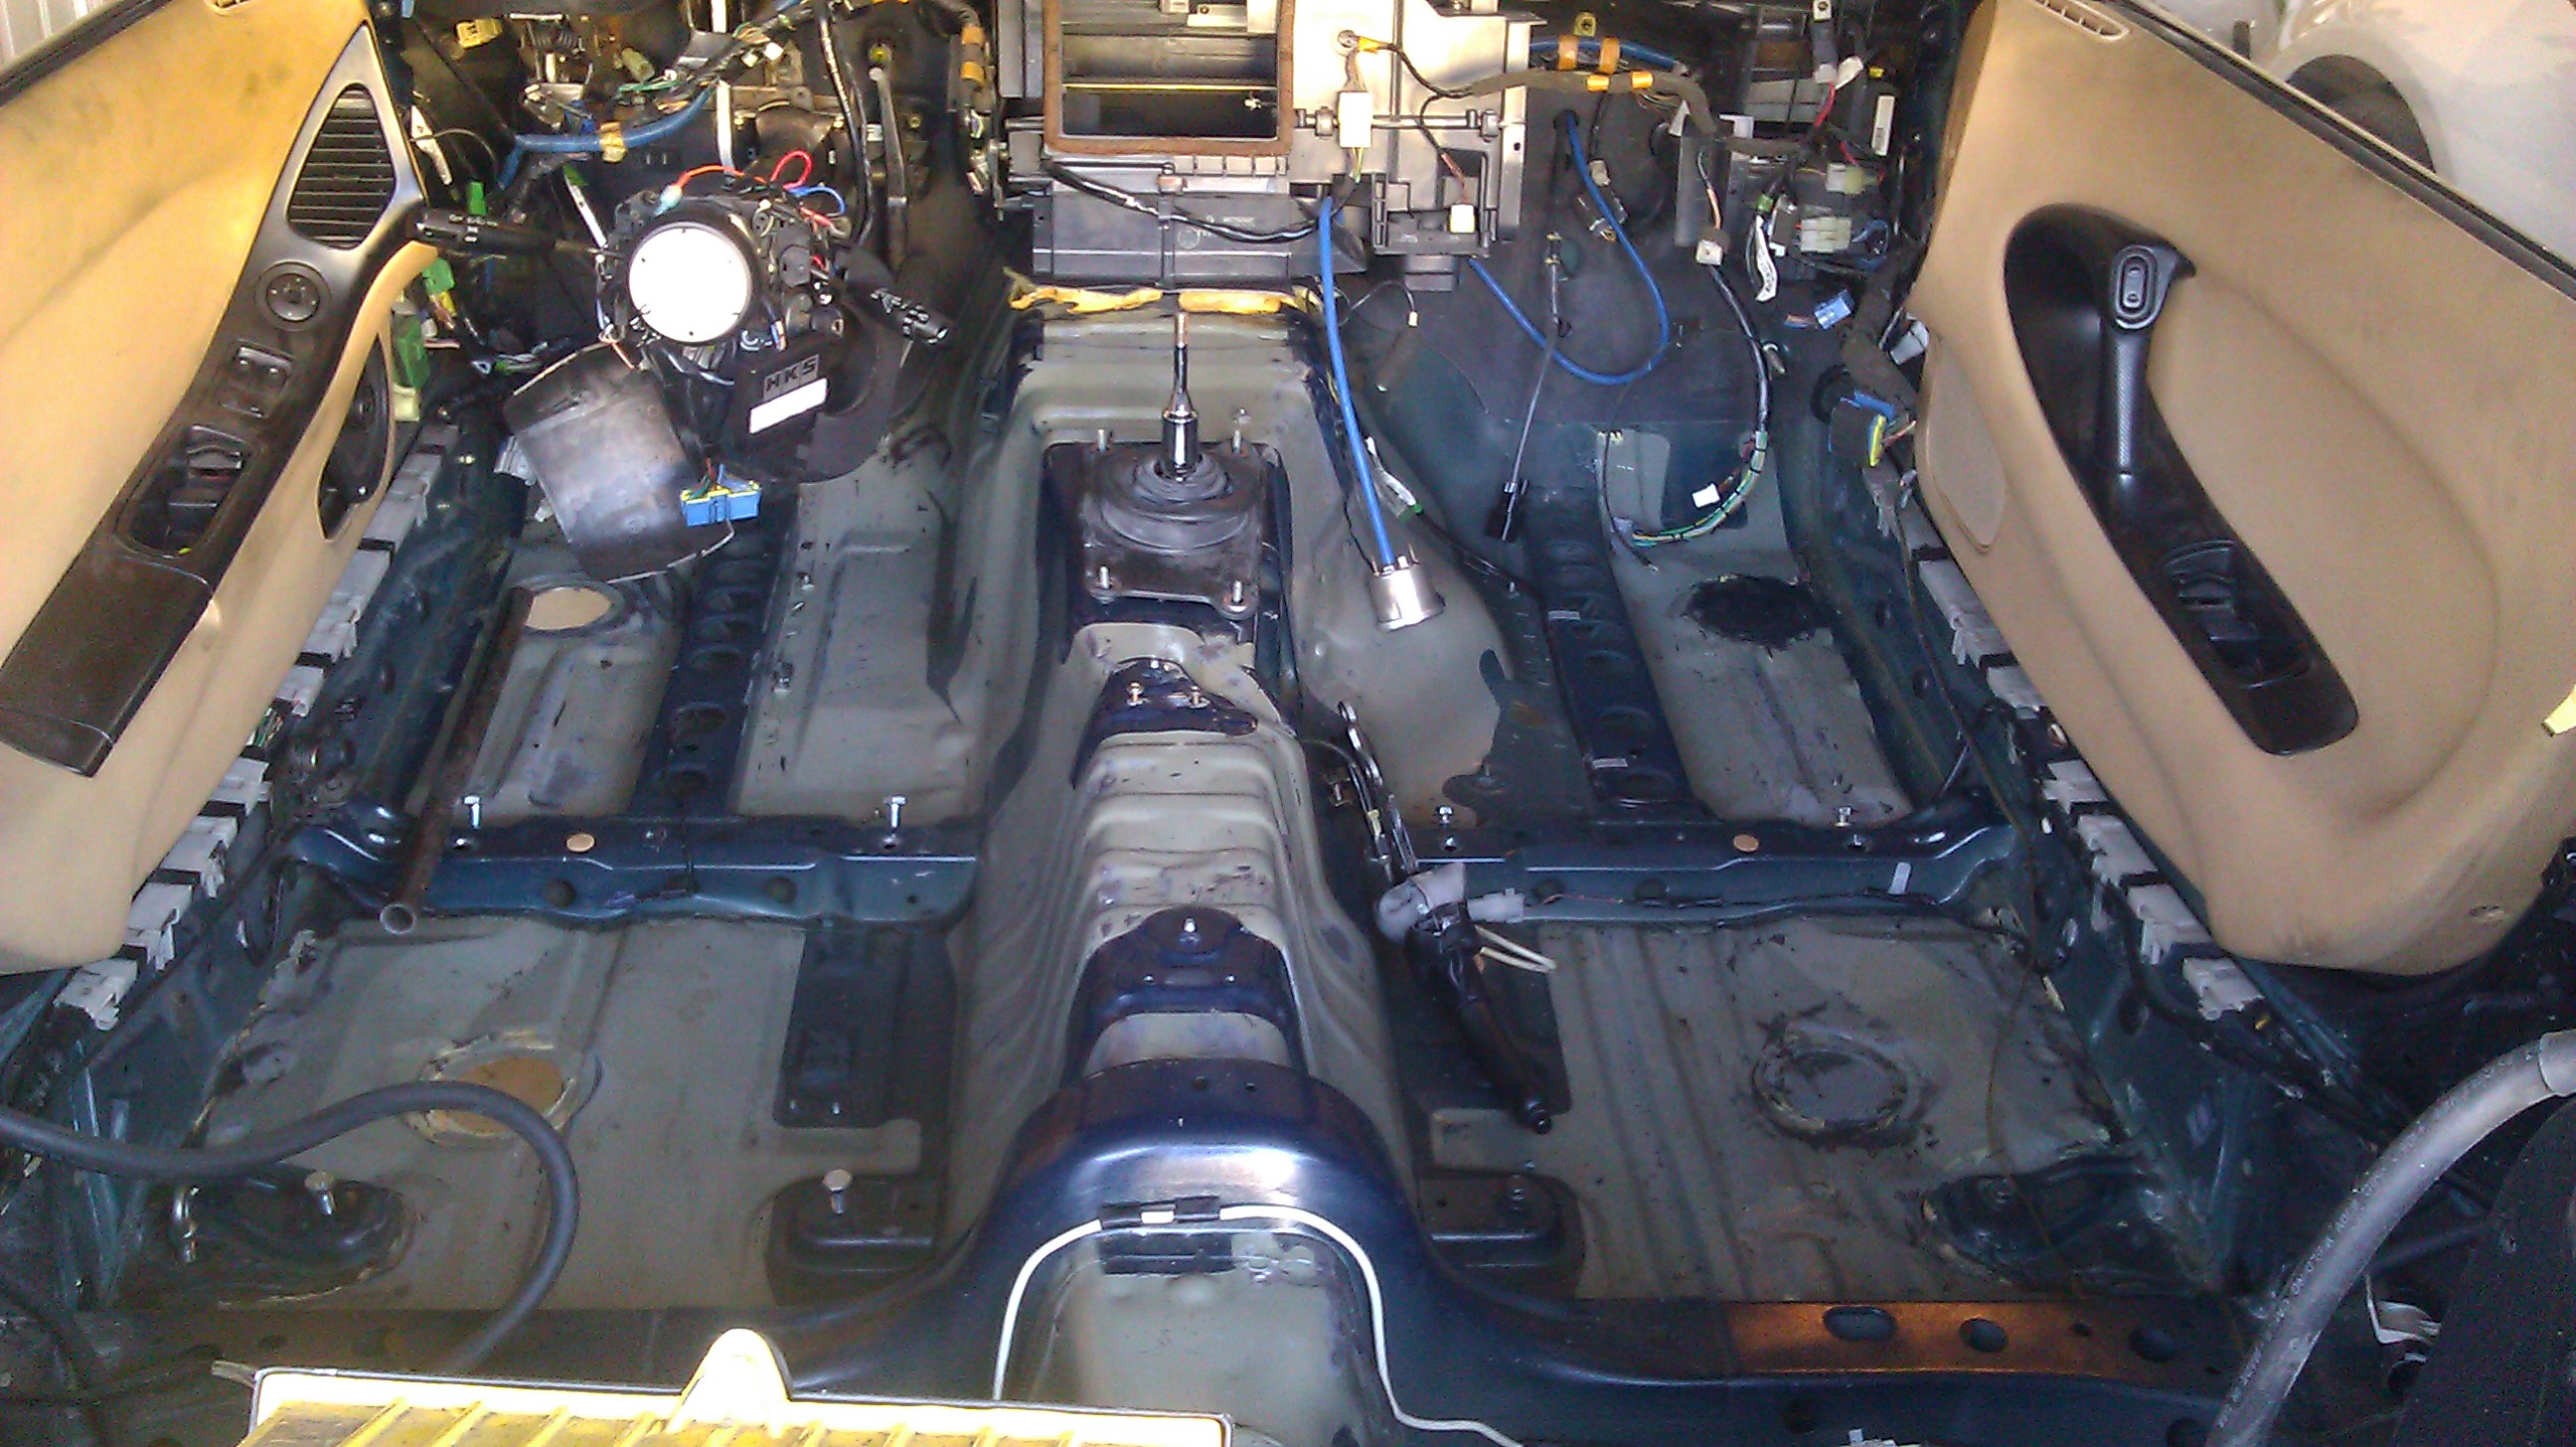
and here's a pic of the interior after being vacuumed and wiped down with Brake cleaner
More updates soon!
Tomei Differential gear oil and Torco friction modifier along with Brake and Power steering fluid came in yesterday. Filled the power steering up, Filled the Brake res up and Half Bled the brakes just to get fluid into the lines until I have someone to help me bleed the system thoroughly, and Filled the Differential fluid. I used a bottle with some old Fuel line attatched with a worm clamp on the plastic cap to fill the diff up. Worked excellent and didn't spill a drop.
and here's a pic of the interior after being vacuumed and wiped down with Brake cleaner
More updates soon!
03-01-13, 06:34 AM
#1259
Full Member

Join Date: Jan 2013
Location: Australia
Posts: 123
Likes: 0
Received 0 Likes
on
0 Posts
Thats never once happend to me in my entire life, nor has it happened to anyone at the track. But I guess I should look for a unicorn prevention kit just in-case one gates across the track while i'm coming down the straight  THink they sell pegasus prevention kits as well?
THink they sell pegasus prevention kits as well?
03-01-13, 11:08 AM
#1261
small update: nothing big...
But I started to bleed the clutch but realized it was pointless without an extra person. I actually used the gusset holes in the frame on the floor and a metal bar to start bleeding the brakes but it just took too long and was a hell of a process so I ended up quitting pre-materly haha. I'll just wait till someone can step on the pedal and I can sit under the car on the bleeder.
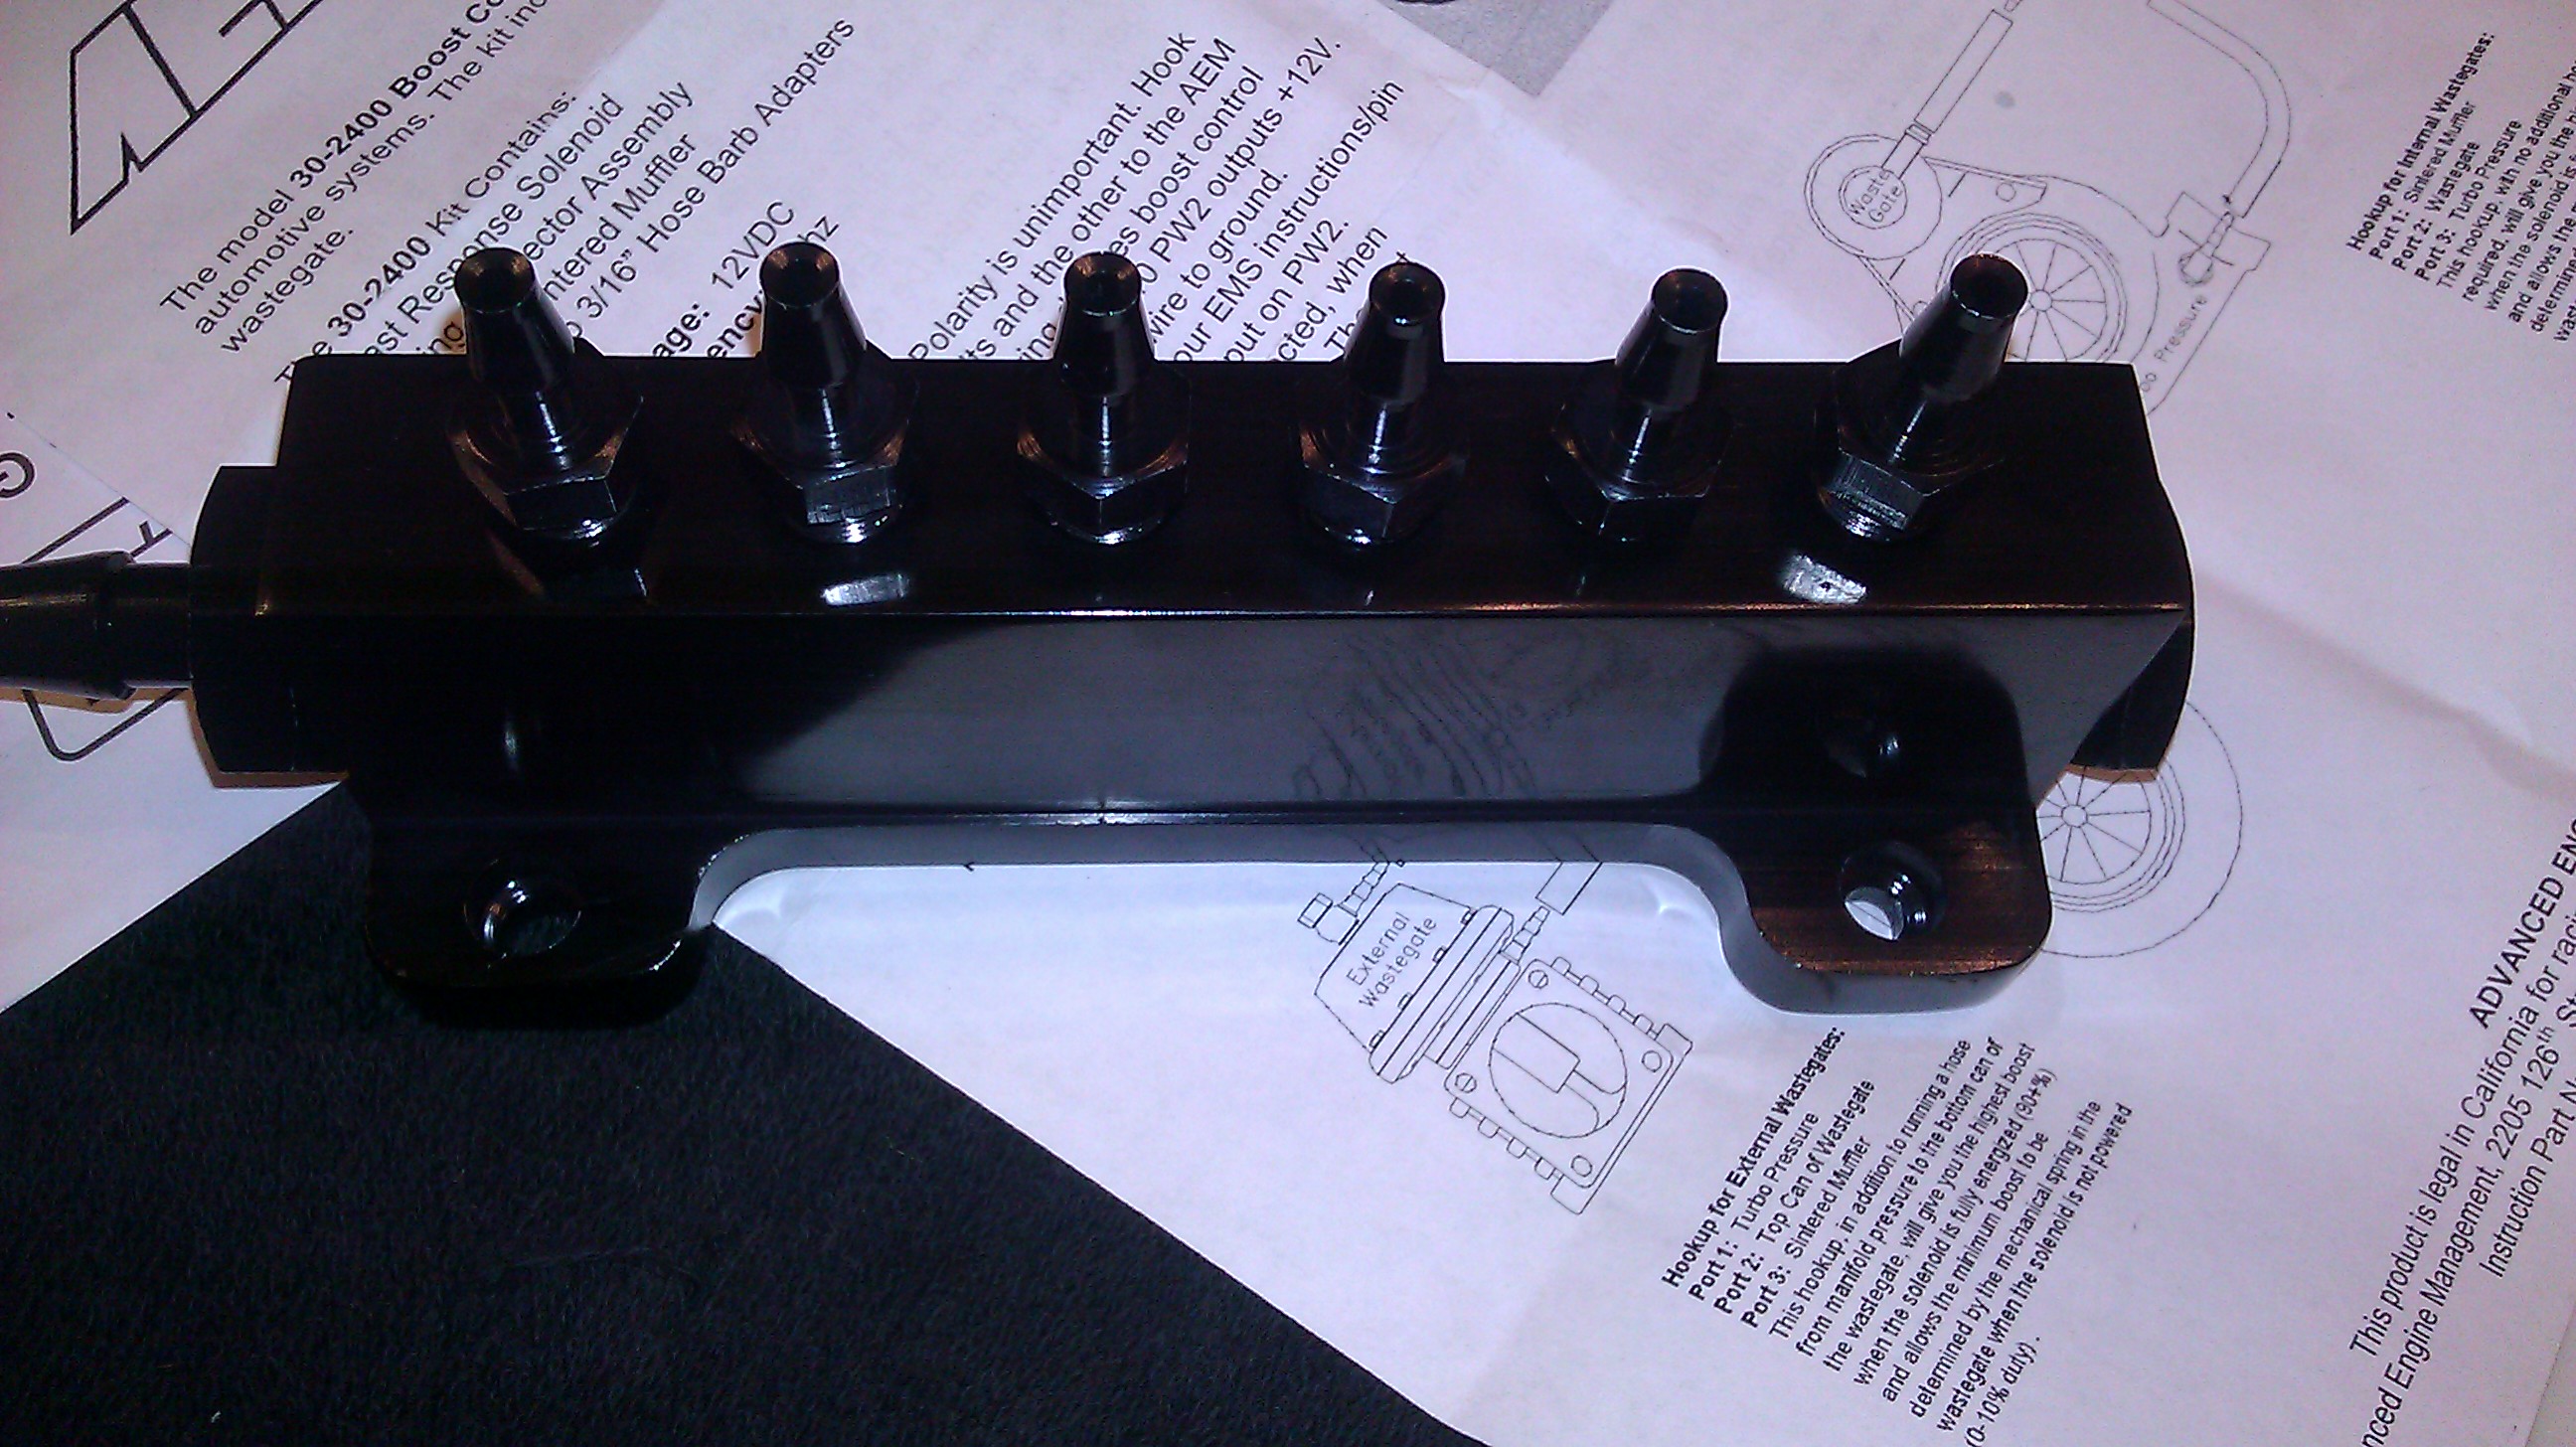
So I need to go over a couple Vacuum diagrams to figure out exactly how i'm going to run my vacuum block lines to it etc. Here's a pic of it. E-bay special.. saved about 25 bucks over the next option and this one came with all these fittings, mounting hardware and extra plugs etc

And lastly...I noticed a small little puddle of fluid under the car and had no idea where it was coming from until I followed it all the way up the drivers side trans tunnel and found the source...Brake fluid. Seems as if the new hose I put on the clutch pedal side of the brake resevoir wasn't tight enough with the generic clamp. I should've put a worm clamp on it from the beginning..so I did and fixed that. I guess it's a good thing it's taking a little bit to get the car finished because it gives the car and all my mistakes time to surface hah.
So I have a diagram for the boost control solenoid to wastegates But i'n gonna need to talk to the wird about exactly how to hook up the synapse gates for optimum consistency.
ALso what do you guys think about this for my Vacuum block routing.
UIM Port to Vacuum Block via largest of 2 ports (-10 in size)
2nd -10 Port on Vacuum Block to Brake Booster Check valve fitting
Vacuum Block small ports:
BOV
Map Sensor
AEM Water/Meth Controller
And i'm unsure if I should add a port on the back of the turbo compressor housing as another source. Or if I should run the Wastegates to the block or to the boost solenoid seperately.
Any Input would be very appreciated!! thanks guys!
But I started to bleed the clutch but realized it was pointless without an extra person. I actually used the gusset holes in the frame on the floor and a metal bar to start bleeding the brakes but it just took too long and was a hell of a process so I ended up quitting pre-materly haha. I'll just wait till someone can step on the pedal and I can sit under the car on the bleeder.
So I need to go over a couple Vacuum diagrams to figure out exactly how i'm going to run my vacuum block lines to it etc. Here's a pic of it. E-bay special.. saved about 25 bucks over the next option and this one came with all these fittings, mounting hardware and extra plugs etc
And lastly...I noticed a small little puddle of fluid under the car and had no idea where it was coming from until I followed it all the way up the drivers side trans tunnel and found the source...Brake fluid. Seems as if the new hose I put on the clutch pedal side of the brake resevoir wasn't tight enough with the generic clamp. I should've put a worm clamp on it from the beginning..so I did and fixed that. I guess it's a good thing it's taking a little bit to get the car finished because it gives the car and all my mistakes time to surface hah.
So I have a diagram for the boost control solenoid to wastegates But i'n gonna need to talk to the wird about exactly how to hook up the synapse gates for optimum consistency.
ALso what do you guys think about this for my Vacuum block routing.
UIM Port to Vacuum Block via largest of 2 ports (-10 in size)
2nd -10 Port on Vacuum Block to Brake Booster Check valve fitting
Vacuum Block small ports:
BOV
Map Sensor
AEM Water/Meth Controller
And i'm unsure if I should add a port on the back of the turbo compressor housing as another source. Or if I should run the Wastegates to the block or to the boost solenoid seperately.
Any Input would be very appreciated!! thanks guys!
 03-01-13, 04:17 PM
#1266
it's my understanding that the theory behind that was to keep pressure from damaging the bearings on the compressor. I'm not so sure i'm convinced newer turbo's need a BOV or not. But i've heard several arguments that probly wouldn't make any noticeable difference by placing it before or after the I/C. I put it where it fit and had the most room Anyone else feel free to comment on this!
I built a 94 all original bodied Intergra GSR. It made 400 whp...and was a blast to drive..It was cherry clean and one of best cars i've ever owned. Idiot 16 year old girl messing around at an intersection destroyed it. She ran a red light and smashed into me... i was doing 60. The car was absolutely totalled and I had a couple pins put into my thumb/hand. Luckily that was the extent of the damage. The fd is the only car i've had any real experience drifting on my own. I've driven a couple friends cars but nothing more than messing around here and there with them.
I built a 94 all original bodied Intergra GSR. It made 400 whp...and was a blast to drive..It was cherry clean and one of best cars i've ever owned. Idiot 16 year old girl messing around at an intersection destroyed it. She ran a red light and smashed into me... i was doing 60. The car was absolutely totalled and I had a couple pins put into my thumb/hand. Luckily that was the extent of the damage. The fd is the only car i've had any real experience drifting on my own. I've driven a couple friends cars but nothing more than messing around here and there with them.
03-01-13, 04:37 PM
#1267
oh ok. just curious to know your roots. you've got great attention to detail, and seem to want to do things right the first time around (which a lot of us learn the hard way). was also curious, since you mentioned an FD legal cage.
keep up the good work
keep up the good work
03-01-13, 04:52 PM
#1268
Yea...well believe it or not i've actually had to do things more than a few times. I actually made a note to myself to re-check my fuel pump wiring... I can't remember but I remember not being 100% happy with it..so i'll have to check that again.. this whole thing is a major process.
03-02-13, 10:33 AM
#1270
RX 4BPT

Join Date: Feb 2011
Location: Huddersfield, England
Posts: 293
Likes: 0
Received 0 Likes
on
0 Posts
03-04-13, 11:02 AM
#1271
I don't know... I've talked to a few different people...and a couple guys I know on here specifically running the Synapse gates. The AEM boost solenoid says to run it off the compressor housing...so thats the route i've chosen.
03-04-13, 11:25 AM
#1272
It doesn't matter much as long as you are tuned for it. If you tune your car with the reference on the compressor, and then move it to the plenum, then your ecu will still be acting like its on the compressor but the pressure will be slightly different.
As long as your you tune the car with consistency in mind (meaning don't change things after you tune, and build it reliably so things don't change by themselves), you should be fine.
As long as your you tune the car with consistency in mind (meaning don't change things after you tune, and build it reliably so things don't change by themselves), you should be fine.
03-04-13, 11:42 AM
#1273
Small Update:
So I didn't get the brakes bled.. But I did end up going to see Meshuggah and Animals as Leaders on Saturday night... Hell of a show.
Meshuggah

Animals as Leaders

onto work done on the car though...
Not sure if I posted this already But I got a vacuum block off E-bay. It was 25 bucks shipped and came with extra port plugs, and mounting gear etc. Next closest option was twice as much....So I took a chance and i'm glad I did because the piece is nice..the fittings are nice and sturdy as well and I saved 20 bucks.
Vacuum block
Mounted to Firewall
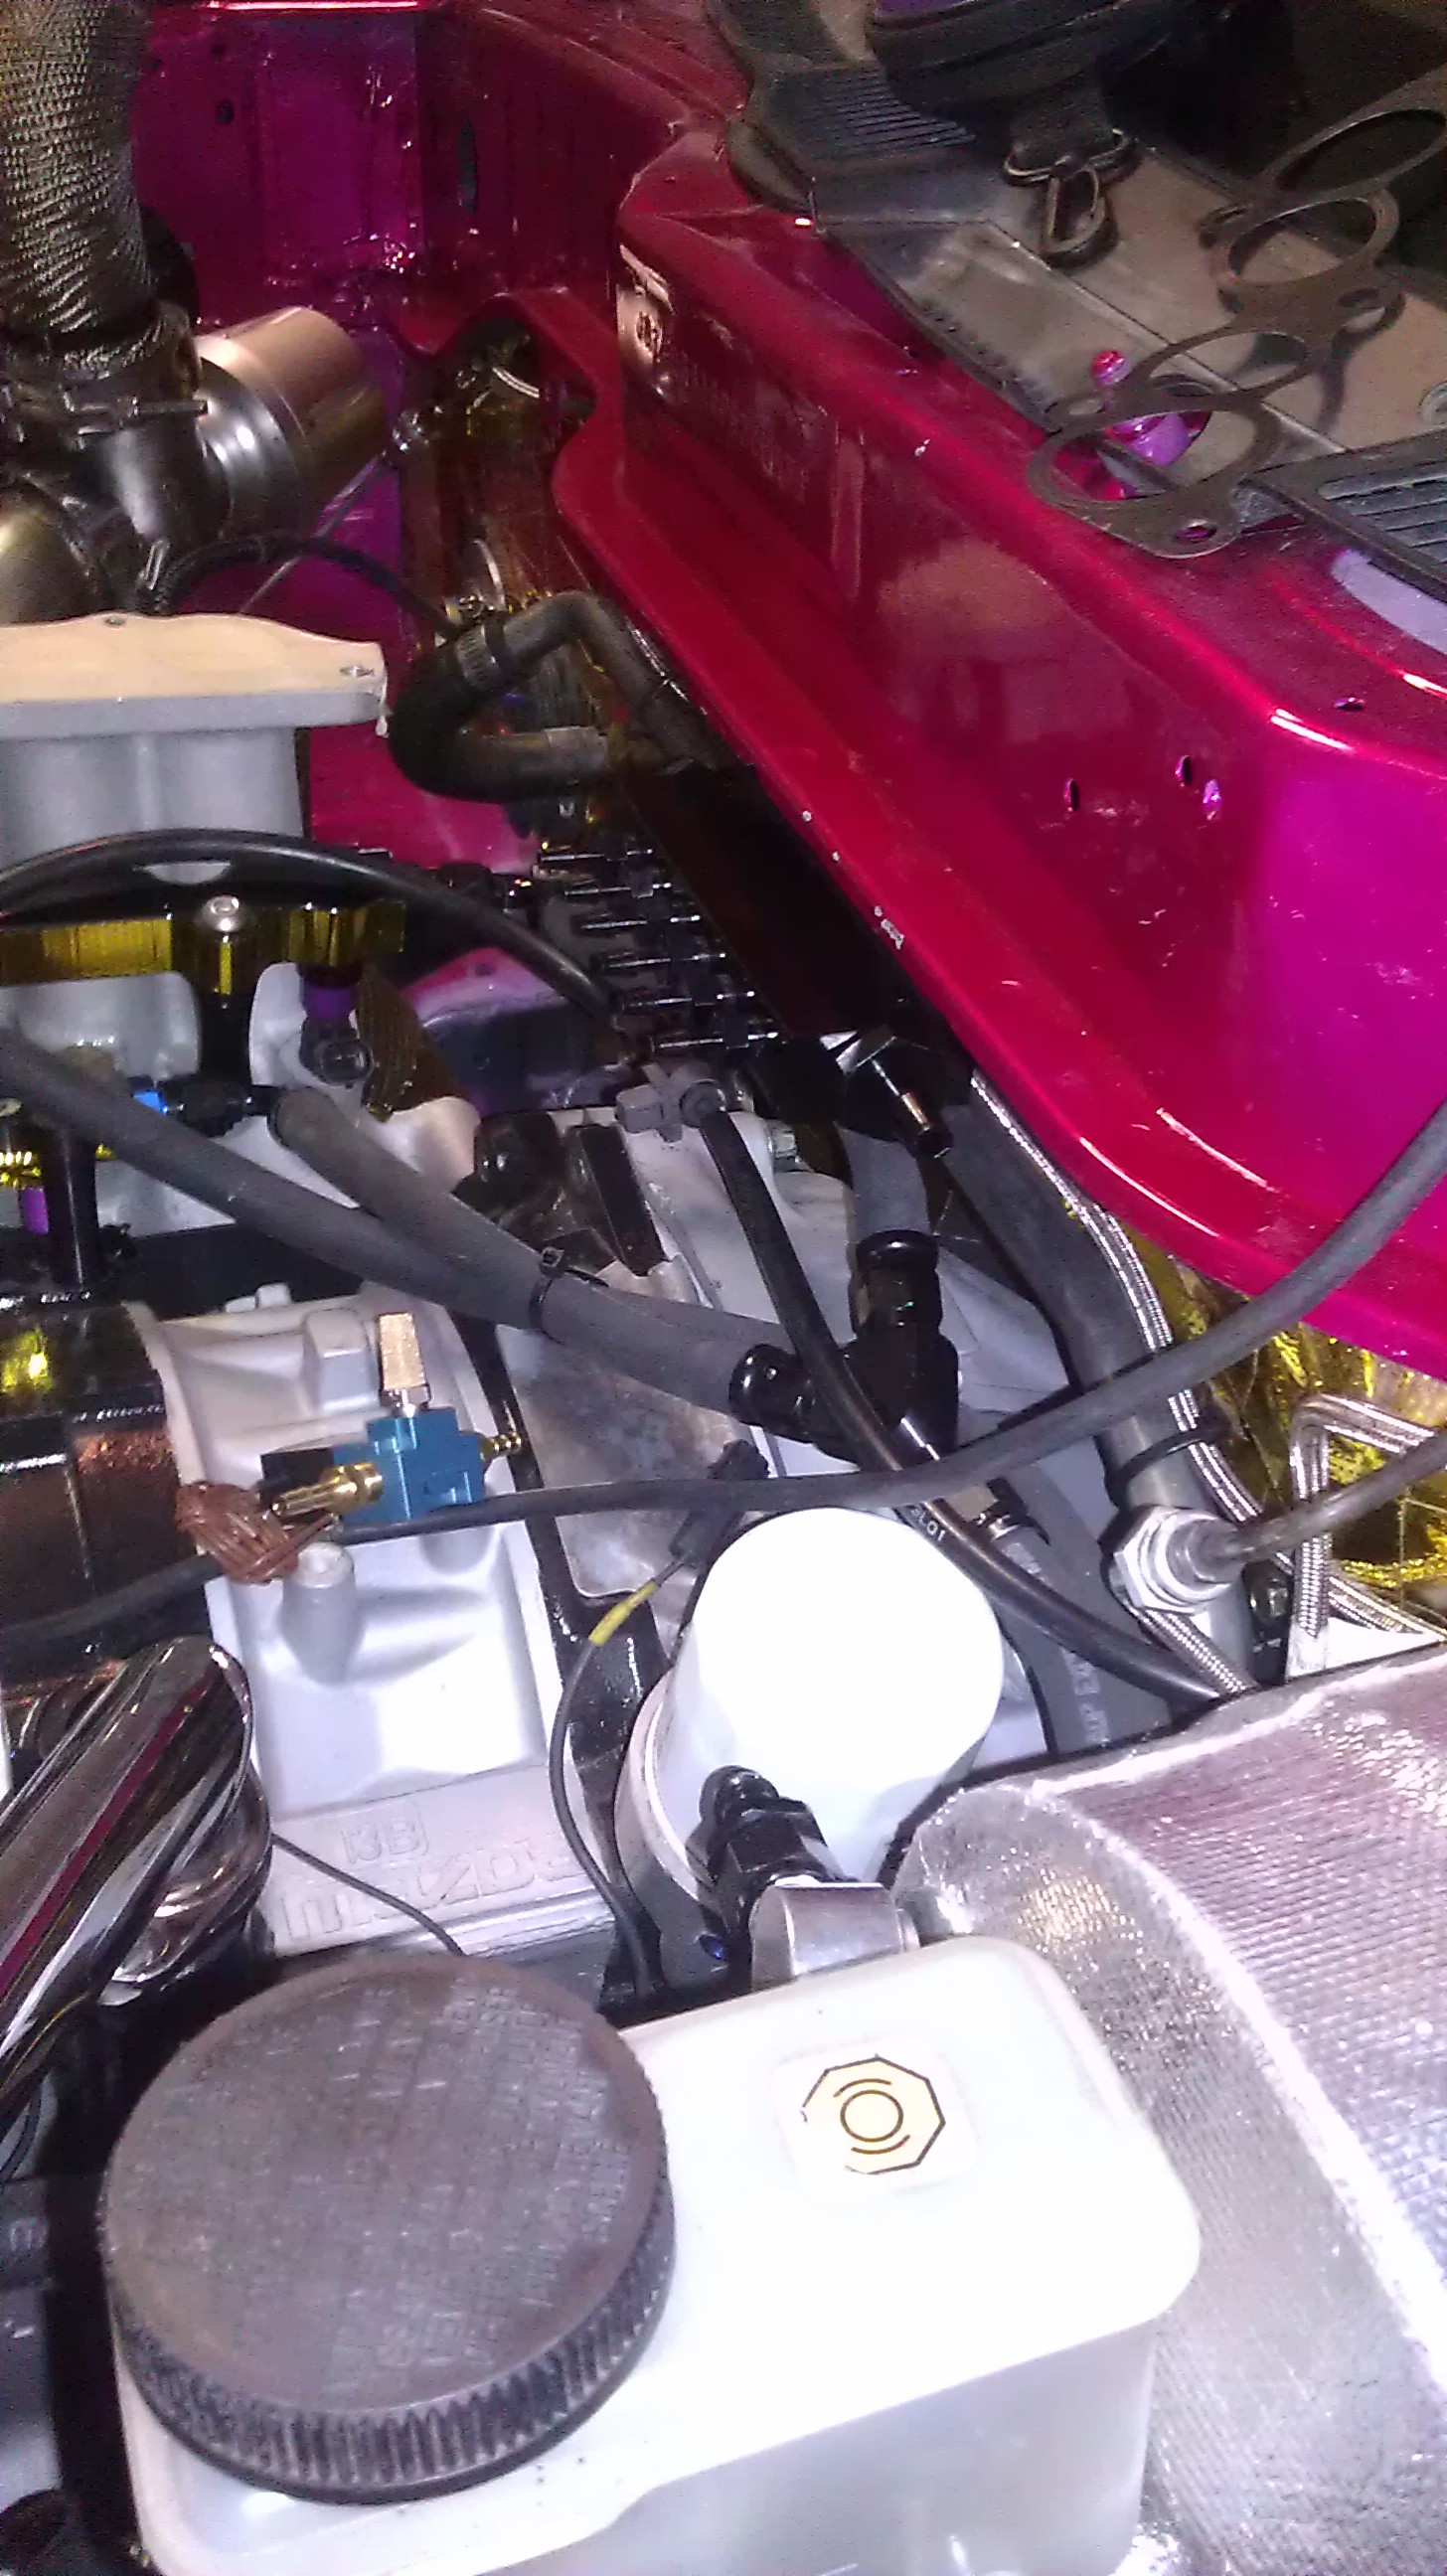
Hooked up one of the larger ports to the Brake booster Check Valve I got from summit (thanks Colin)
And i'm still looking for a neat place to put the AEM water meth controller... ran the Vac line to the block.
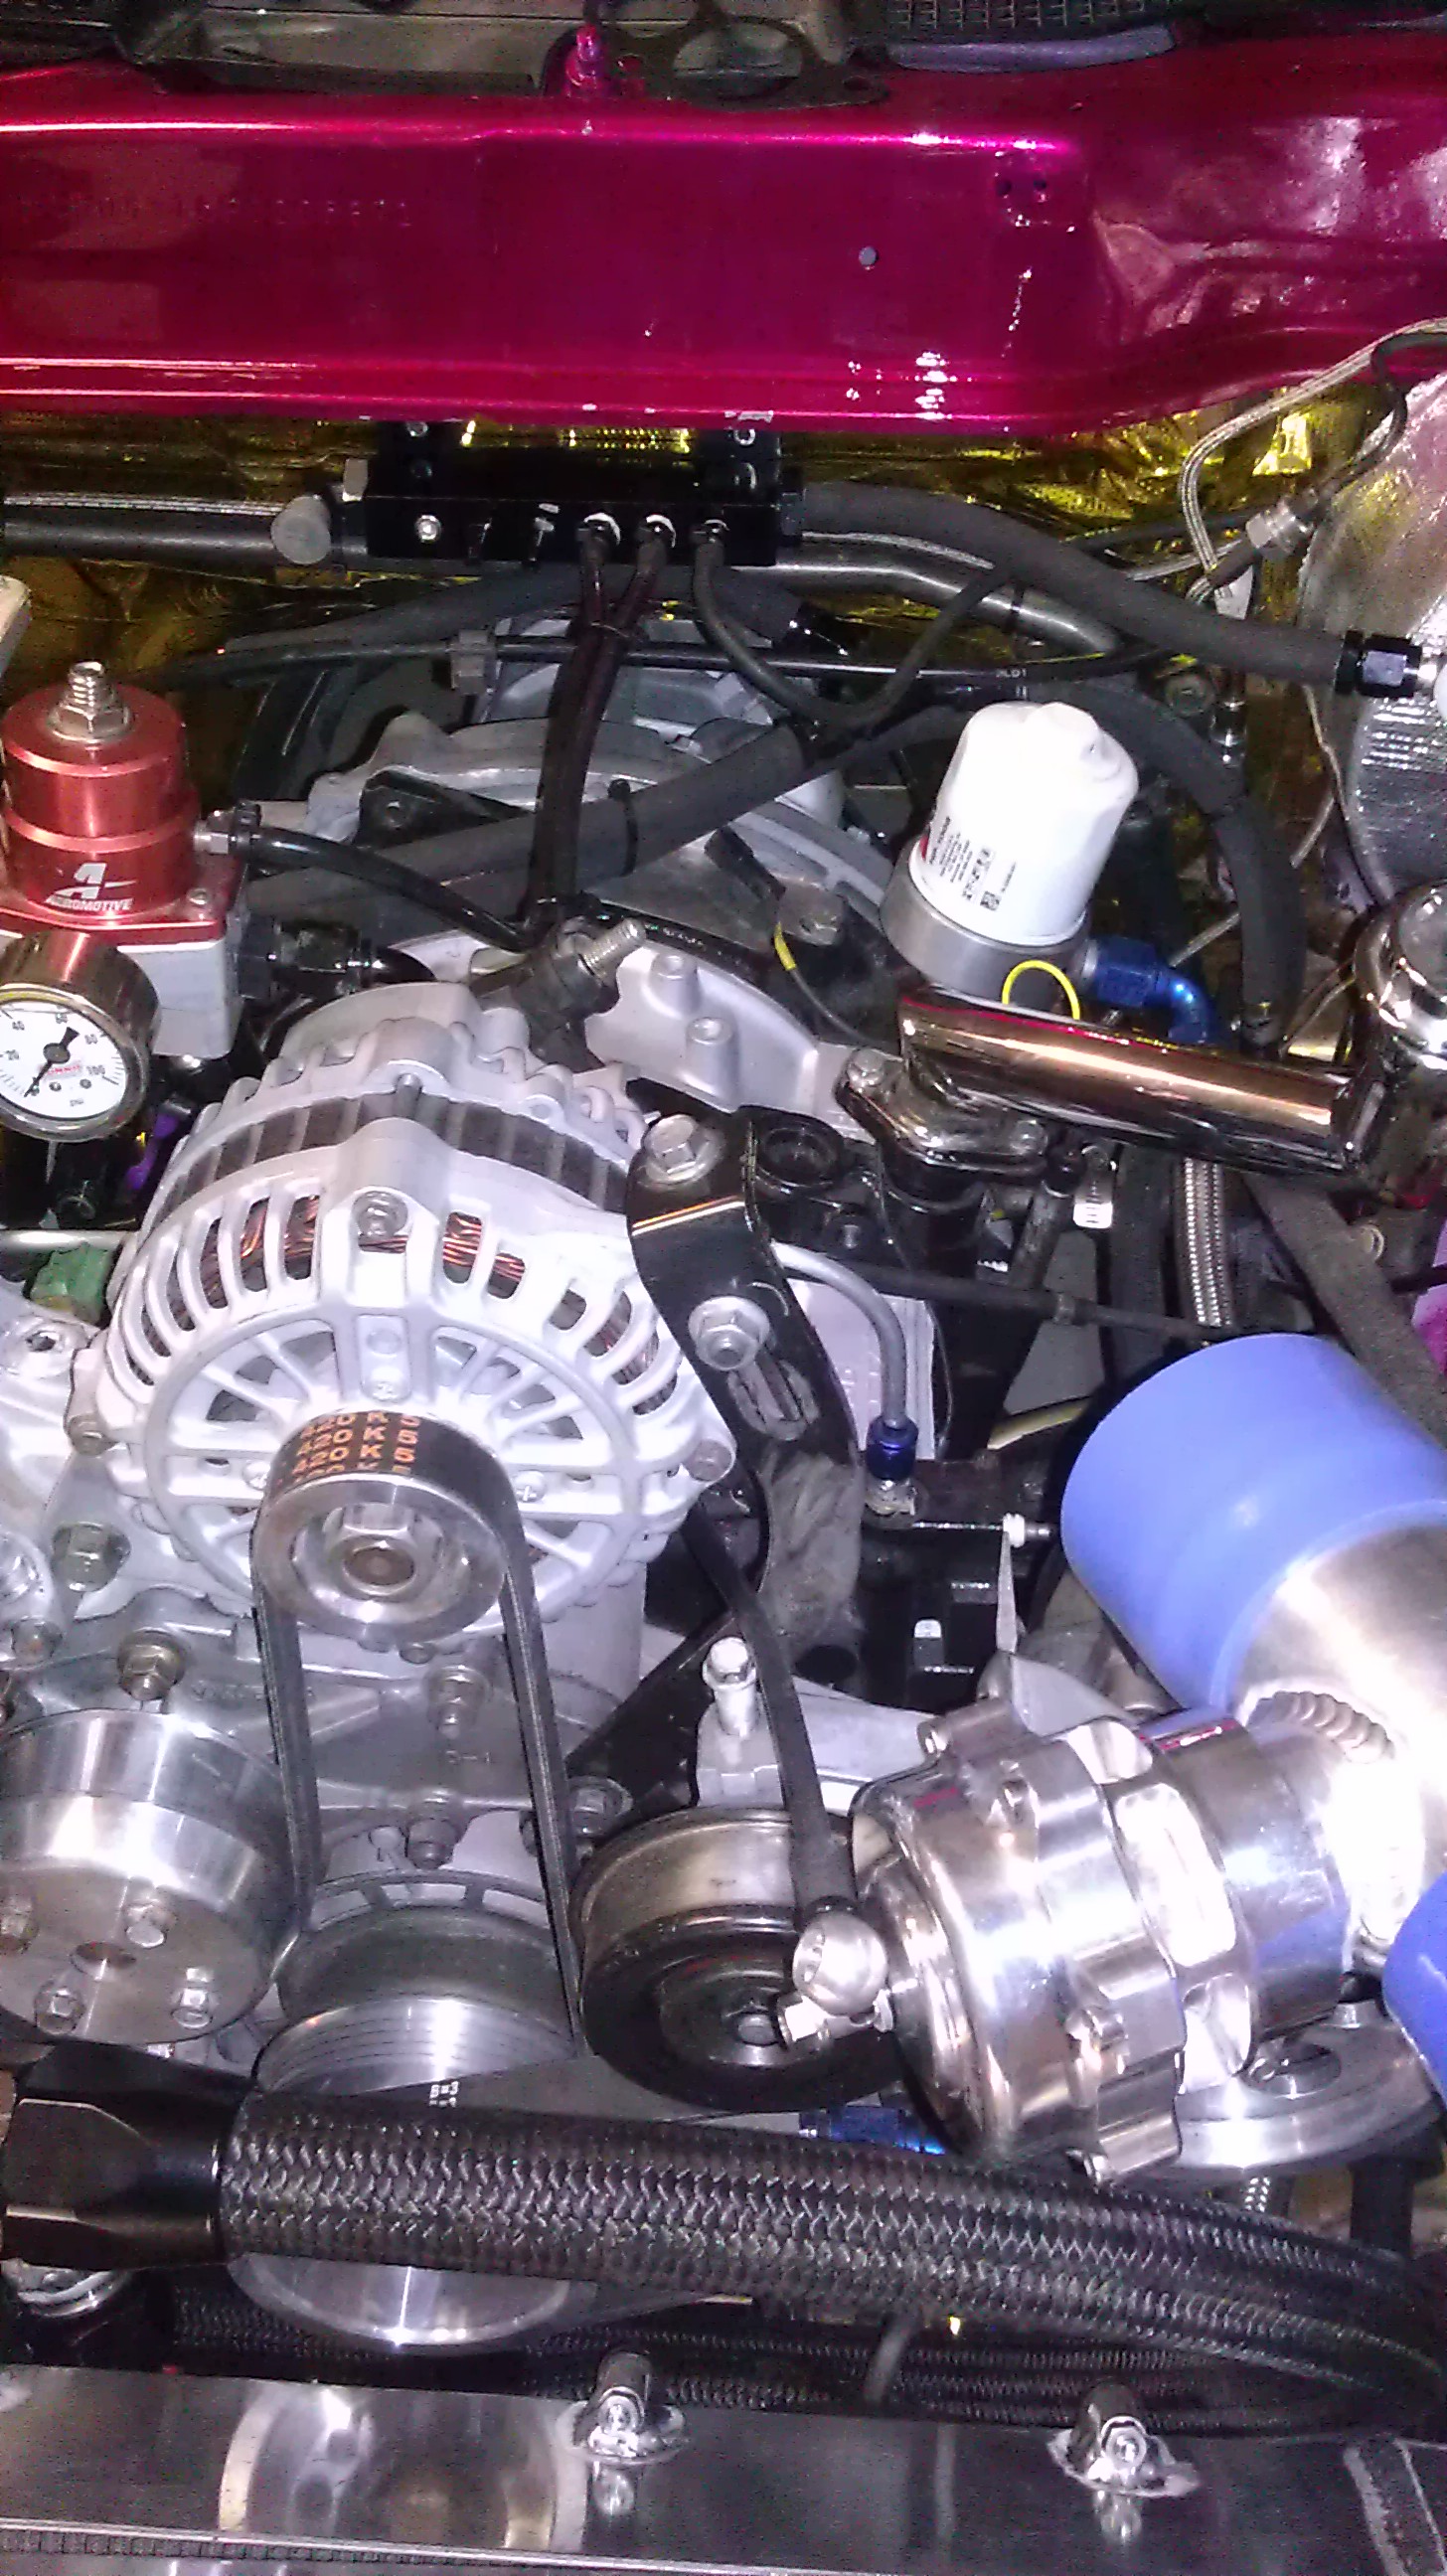
drilled and tapped the compressor housing and used one of the extra vacuum fittings that came with the block. used a 1/8 tap. Wish there were a little bit neater place to run the Line to the Boost Control Solenoid but it was this or running the line too close for comfort next to the turbo hot side.
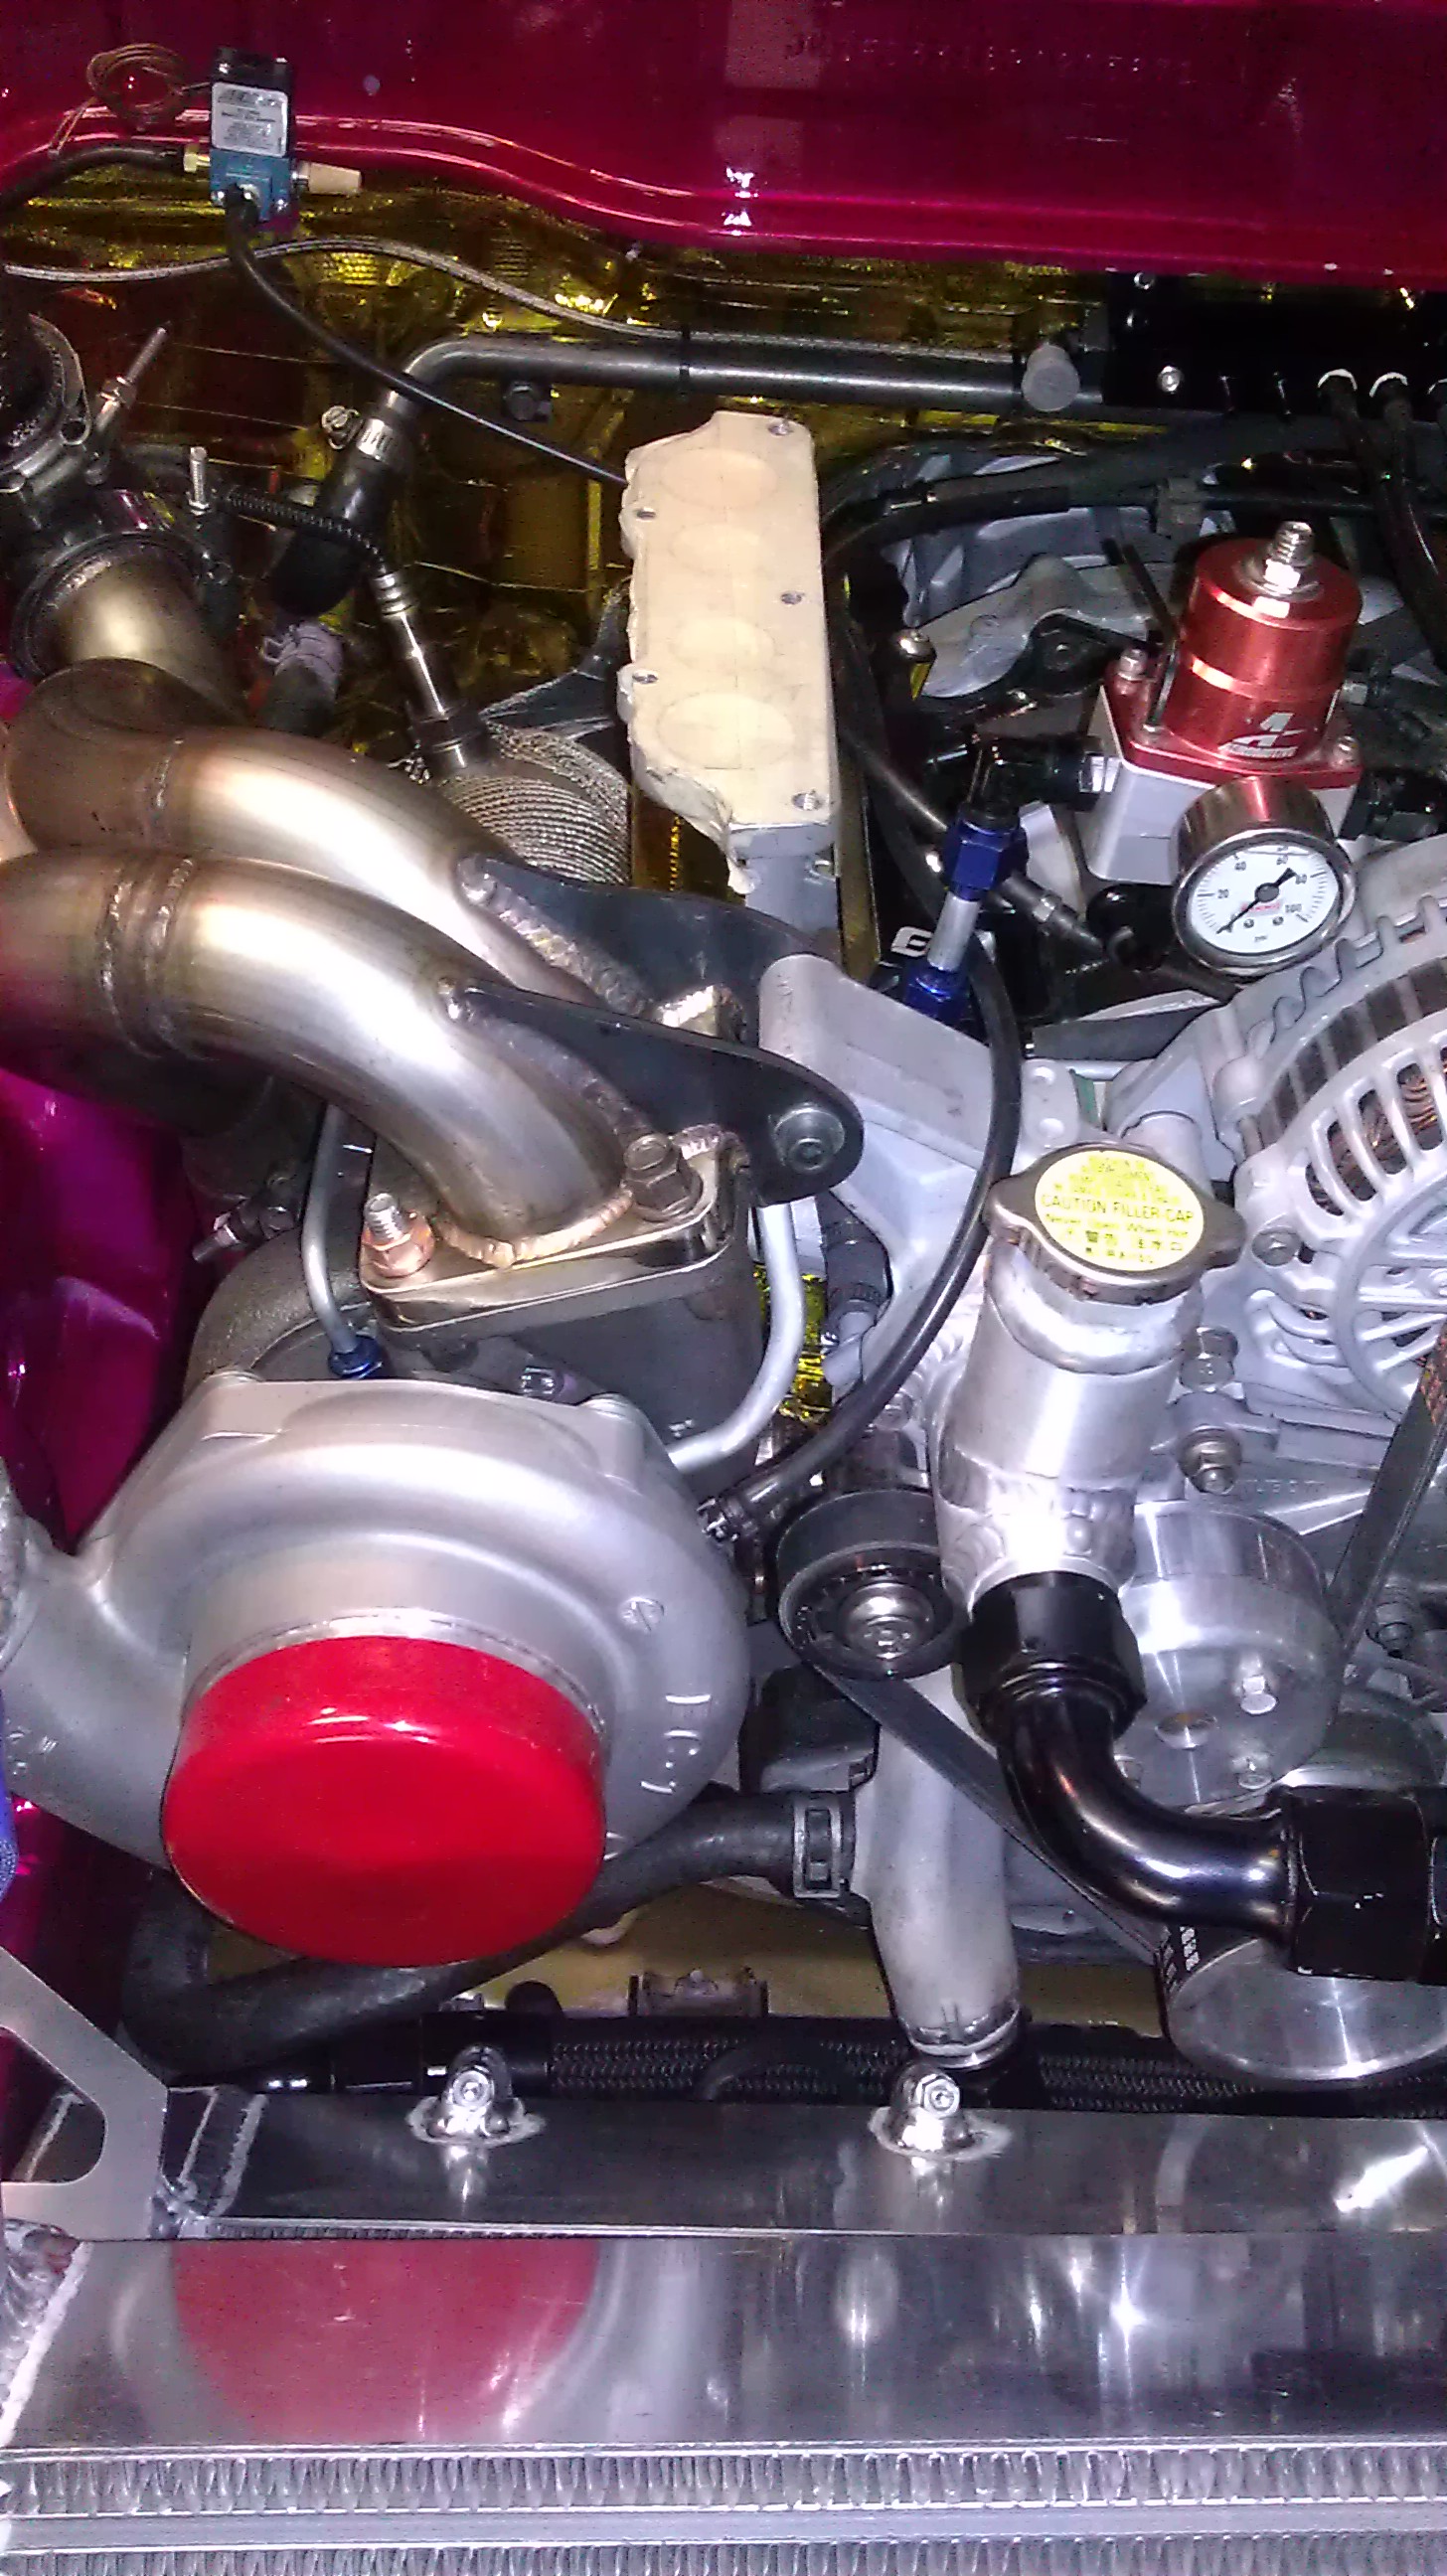
Ran Fuel Pressure Regulator and BOV vac as well. I'm going to label the Vacuum block so I know which line goes where, .....it's super obvious but just for piece of mind. I also used Honda-Bond high temp rtv on all the fittings I used on the Vacuum block and also Zip Tied all the Lines on the fittings just to make sure none of them pop off unexpectedly.
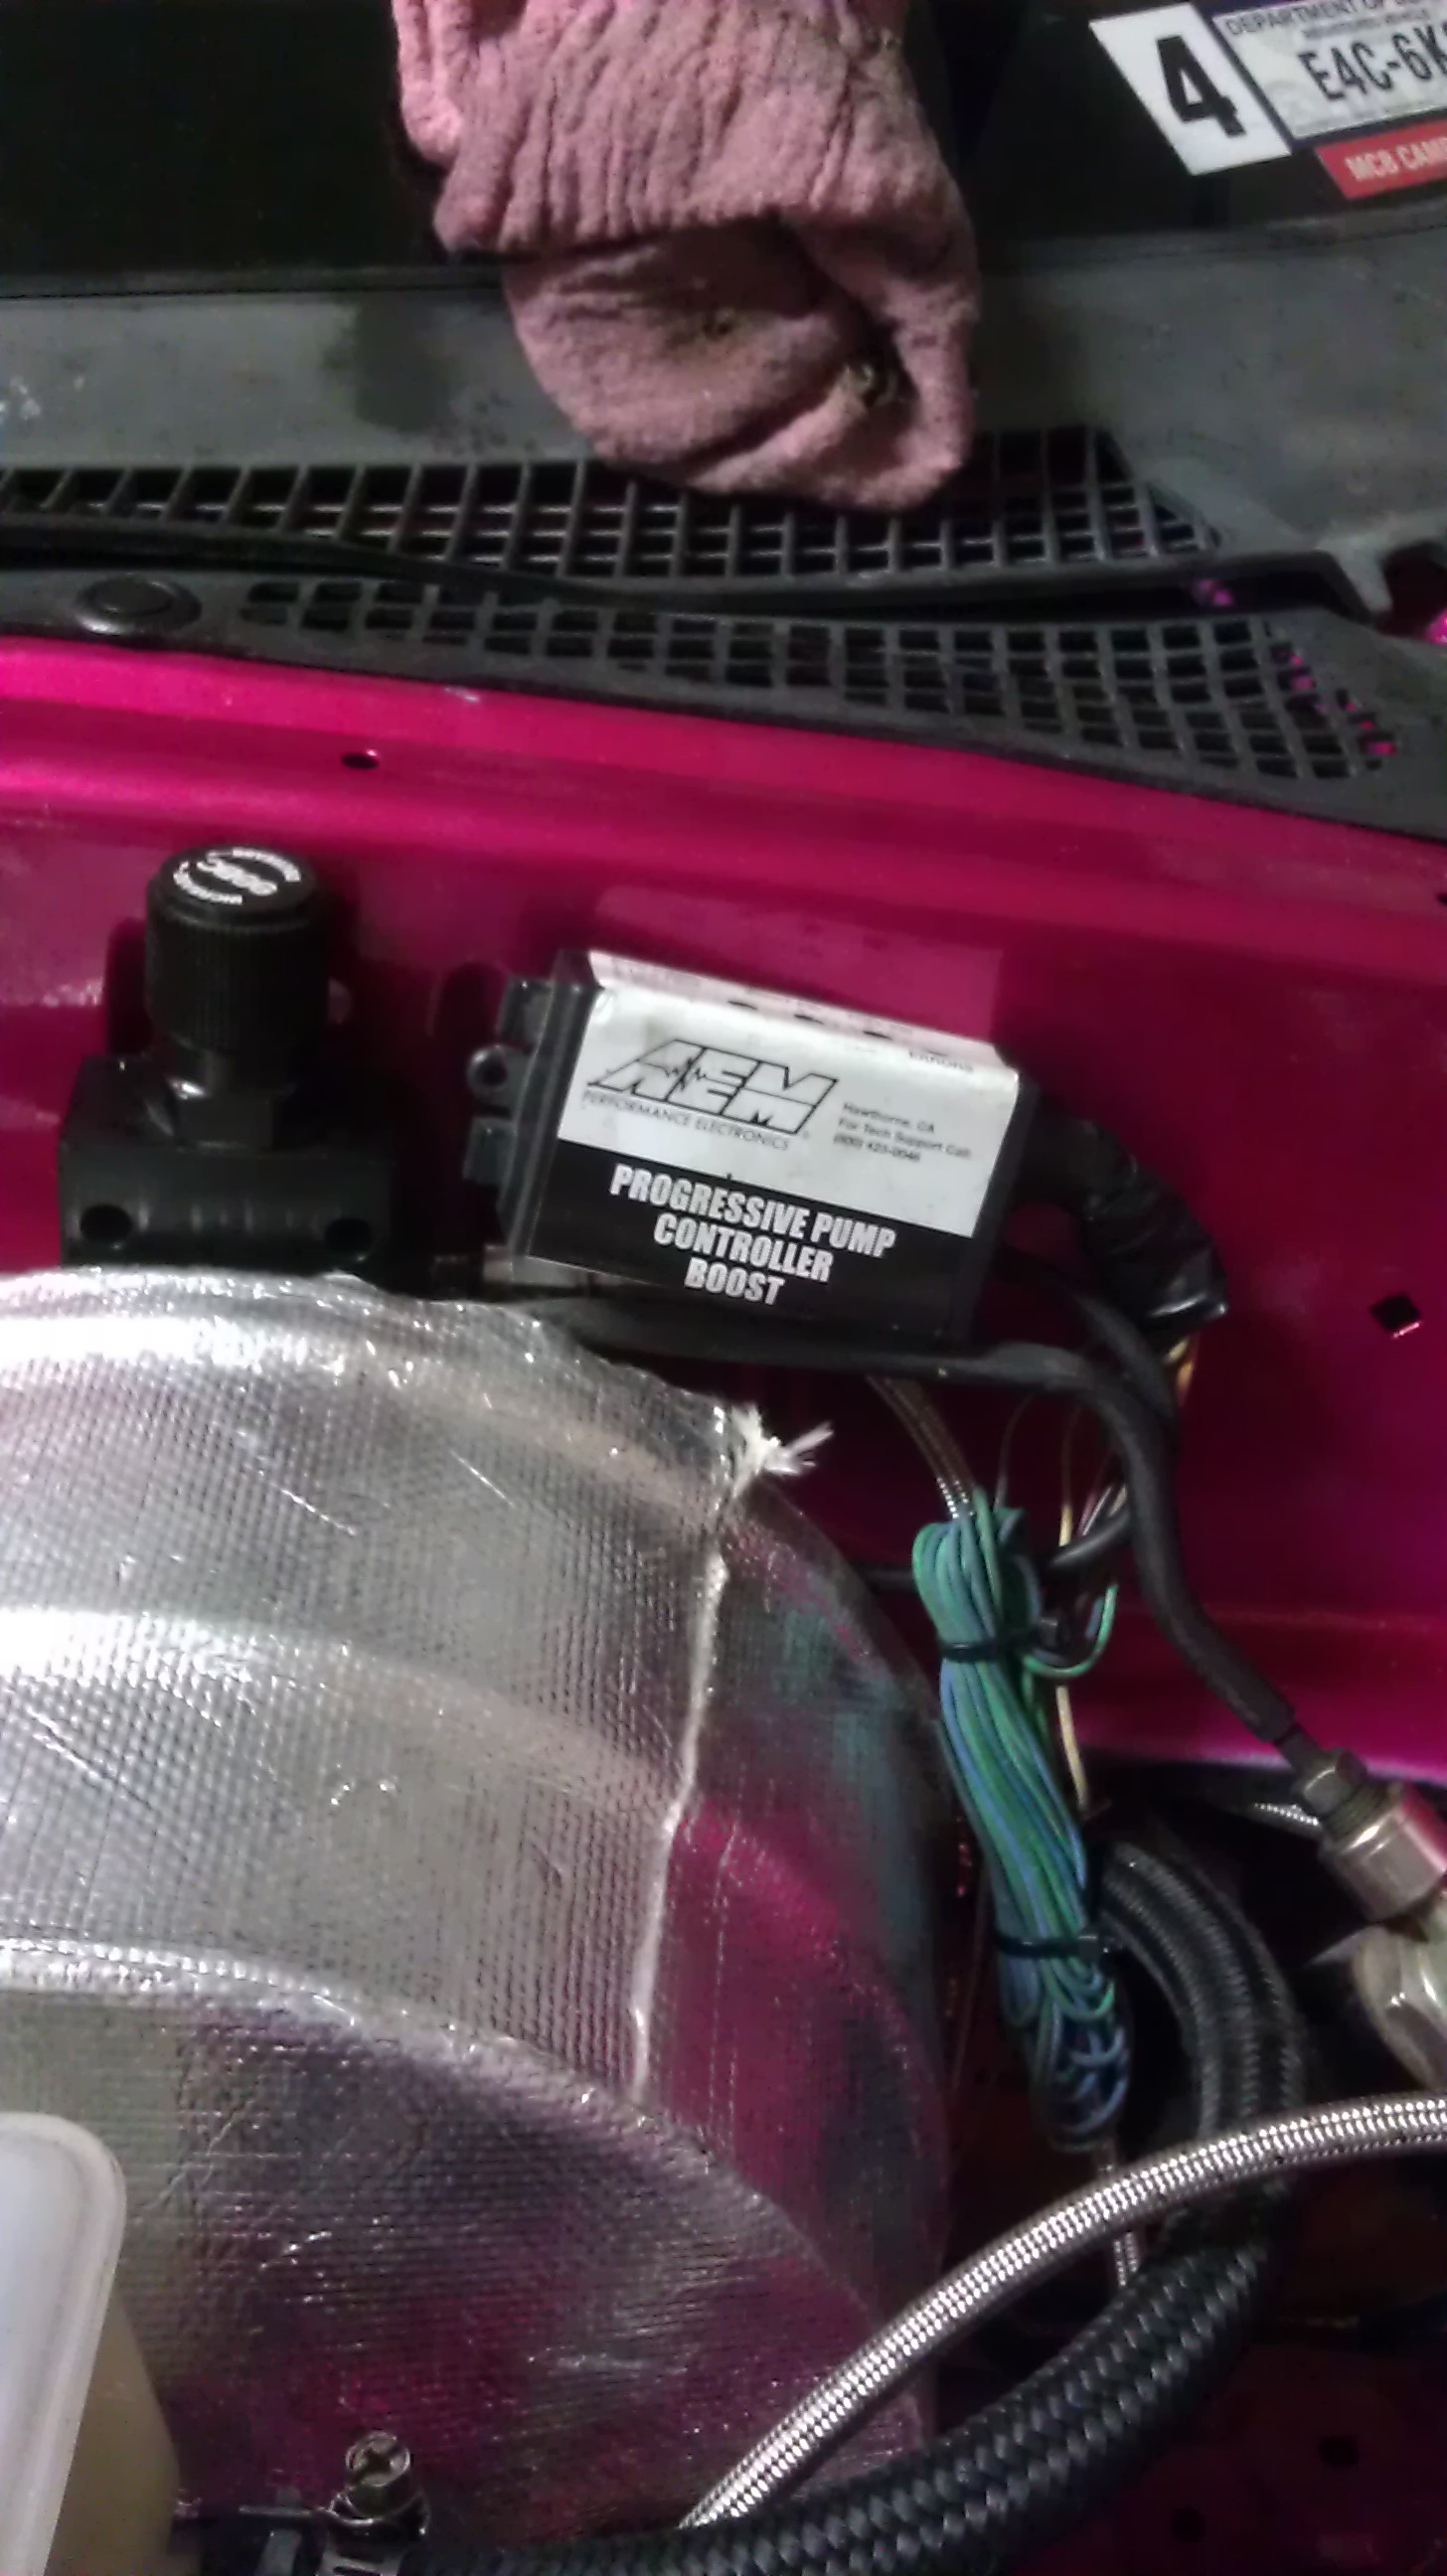
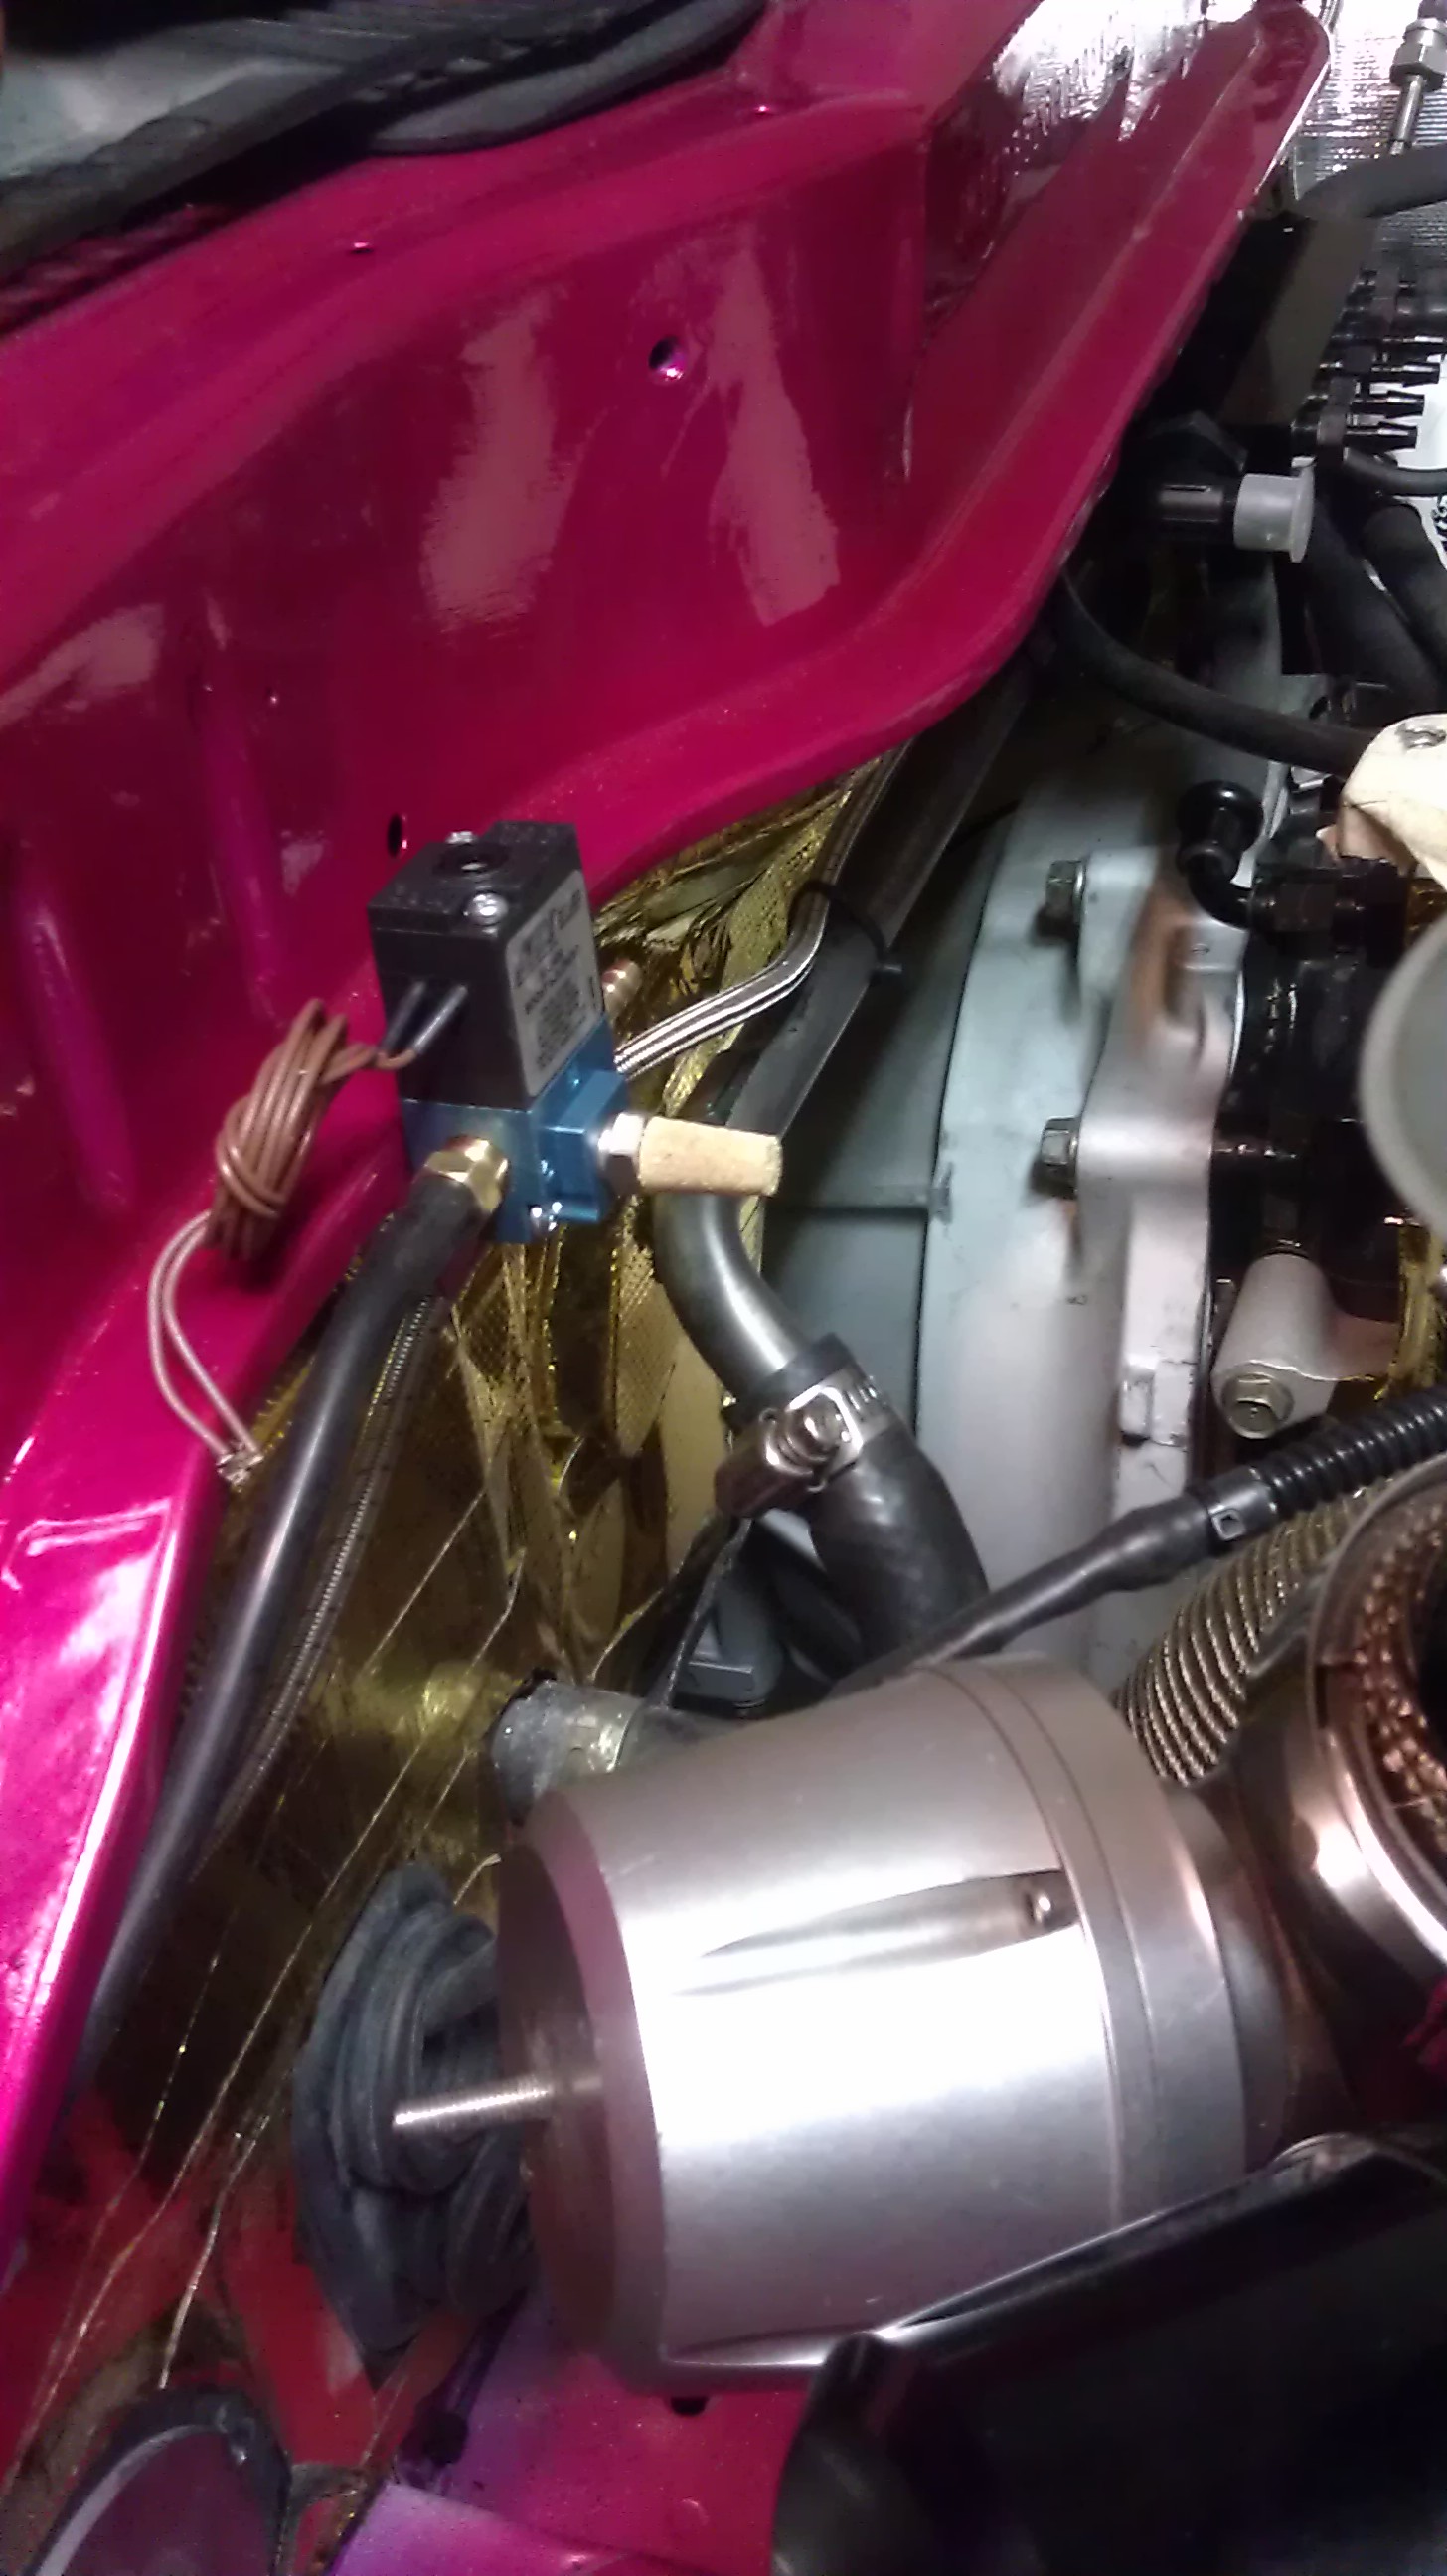
And here's a pic of the AEM boost control Solenoid mounted. Used the little left over tab on the passenger side firewall. W/G lines ran and T'd to the Boost control solenoid via instructions. Running the gates with the Internal routing as A few people have told me this worked best for the gates.
Need to run the ecu vac line when I install the Adaptronic and I'll have 2 Ports on the Vac block left. One for the Boost gauge and the other will be extra. So i'll plug it with one of the supplied allen plugs. The AEM coils came in from Chris Ludwig and he did an excellent job on the Harness. I just need to come up with a nice way to mount it. I like the idea of having the coils all in line but at the same time I'd like them to be packaged a little more compact. We'll see. Going to work on that in the next couple days along with the Body Harness.
So I didn't get the brakes bled.. But I did end up going to see Meshuggah and Animals as Leaders on Saturday night... Hell of a show.
Meshuggah
Animals as Leaders
onto work done on the car though...
Not sure if I posted this already But I got a vacuum block off E-bay. It was 25 bucks shipped and came with extra port plugs, and mounting gear etc. Next closest option was twice as much....So I took a chance and i'm glad I did because the piece is nice..the fittings are nice and sturdy as well and I saved 20 bucks.
Vacuum block
Mounted to Firewall
Hooked up one of the larger ports to the Brake booster Check Valve I got from summit (thanks Colin)
And i'm still looking for a neat place to put the AEM water meth controller... ran the Vac line to the block.
drilled and tapped the compressor housing and used one of the extra vacuum fittings that came with the block. used a 1/8 tap. Wish there were a little bit neater place to run the Line to the Boost Control Solenoid but it was this or running the line too close for comfort next to the turbo hot side.
Ran Fuel Pressure Regulator and BOV vac as well. I'm going to label the Vacuum block so I know which line goes where, .....it's super obvious but just for piece of mind. I also used Honda-Bond high temp rtv on all the fittings I used on the Vacuum block and also Zip Tied all the Lines on the fittings just to make sure none of them pop off unexpectedly.
And here's a pic of the AEM boost control Solenoid mounted. Used the little left over tab on the passenger side firewall. W/G lines ran and T'd to the Boost control solenoid via instructions. Running the gates with the Internal routing as A few people have told me this worked best for the gates.
Need to run the ecu vac line when I install the Adaptronic and I'll have 2 Ports on the Vac block left. One for the Boost gauge and the other will be extra. So i'll plug it with one of the supplied allen plugs. The AEM coils came in from Chris Ludwig and he did an excellent job on the Harness. I just need to come up with a nice way to mount it. I like the idea of having the coils all in line but at the same time I'd like them to be packaged a little more compact. We'll see. Going to work on that in the next couple days along with the Body Harness.
03-04-13, 11:52 AM
#1275
Be careful with your AN hose where you are using it as a Vacuum line. Most are not rated for vacuum. It's probably not a big deal in a boosted application. But in a high horsepower N/A application I would make sure to use something that has a Vacuum rating.
I know it sounds silly, because braided AN lines seem so tough. I've never actually tested one myself, but I've seen a few that specifically say not to use it as a vacuum line because the inside will collapse on itself.
I know it sounds silly, because braided AN lines seem so tough. I've never actually tested one myself, but I've seen a few that specifically say not to use it as a vacuum line because the inside will collapse on itself.