Mannykillers/ AAPARKAH Street/time Attack/Drift Build (heavy Pics) #Thisisthewolf


 05-13-13, 10:22 AM
#1502

i'm glad I watched your video. reminds me of what shift **** I want. just like the rest of you car, it's badass. sounds like it's running great tho.
I really like that pic showing the contrast between the spacers, wheels, and lugs. retake a high res pic so I can use it as my phones screensaver
pm me if you want my brake caliper. my car wont be on the road for a while and i'm sure i'll come across another one by the time it is ready. it's doing me no good just sitting there right now and I just don't think it'd be right for your car to be garaged because of a bad caliper when you've worked so hard. you have a positive attitude and alotta motivation in your build. the car deserves to be on the road and be seen. just lmk if you want it.
 Thanks for the Offer on the Brake caliper.. I may have one coming off a burned up salvaged car, but again thanks for the offer! Keep up the work on your car..love the double sided tape job you did on the a/c/heater core unit...came out very nice!! I don't have my AC unit at all anymore otherwise i'd re-do it just the same. That sound deadening in your interior is really going to be nice. I kinda wish I did the same but I'm really trying to keep weight down as this car will eventually be track only. Anyways, keep up the good work!! Those bushings are a pain in the *** huh?!
haha yea no kidding. I feel bad for offending people by building my car the way I want it.
05-13-13, 10:47 AM
#1503
Small Update:
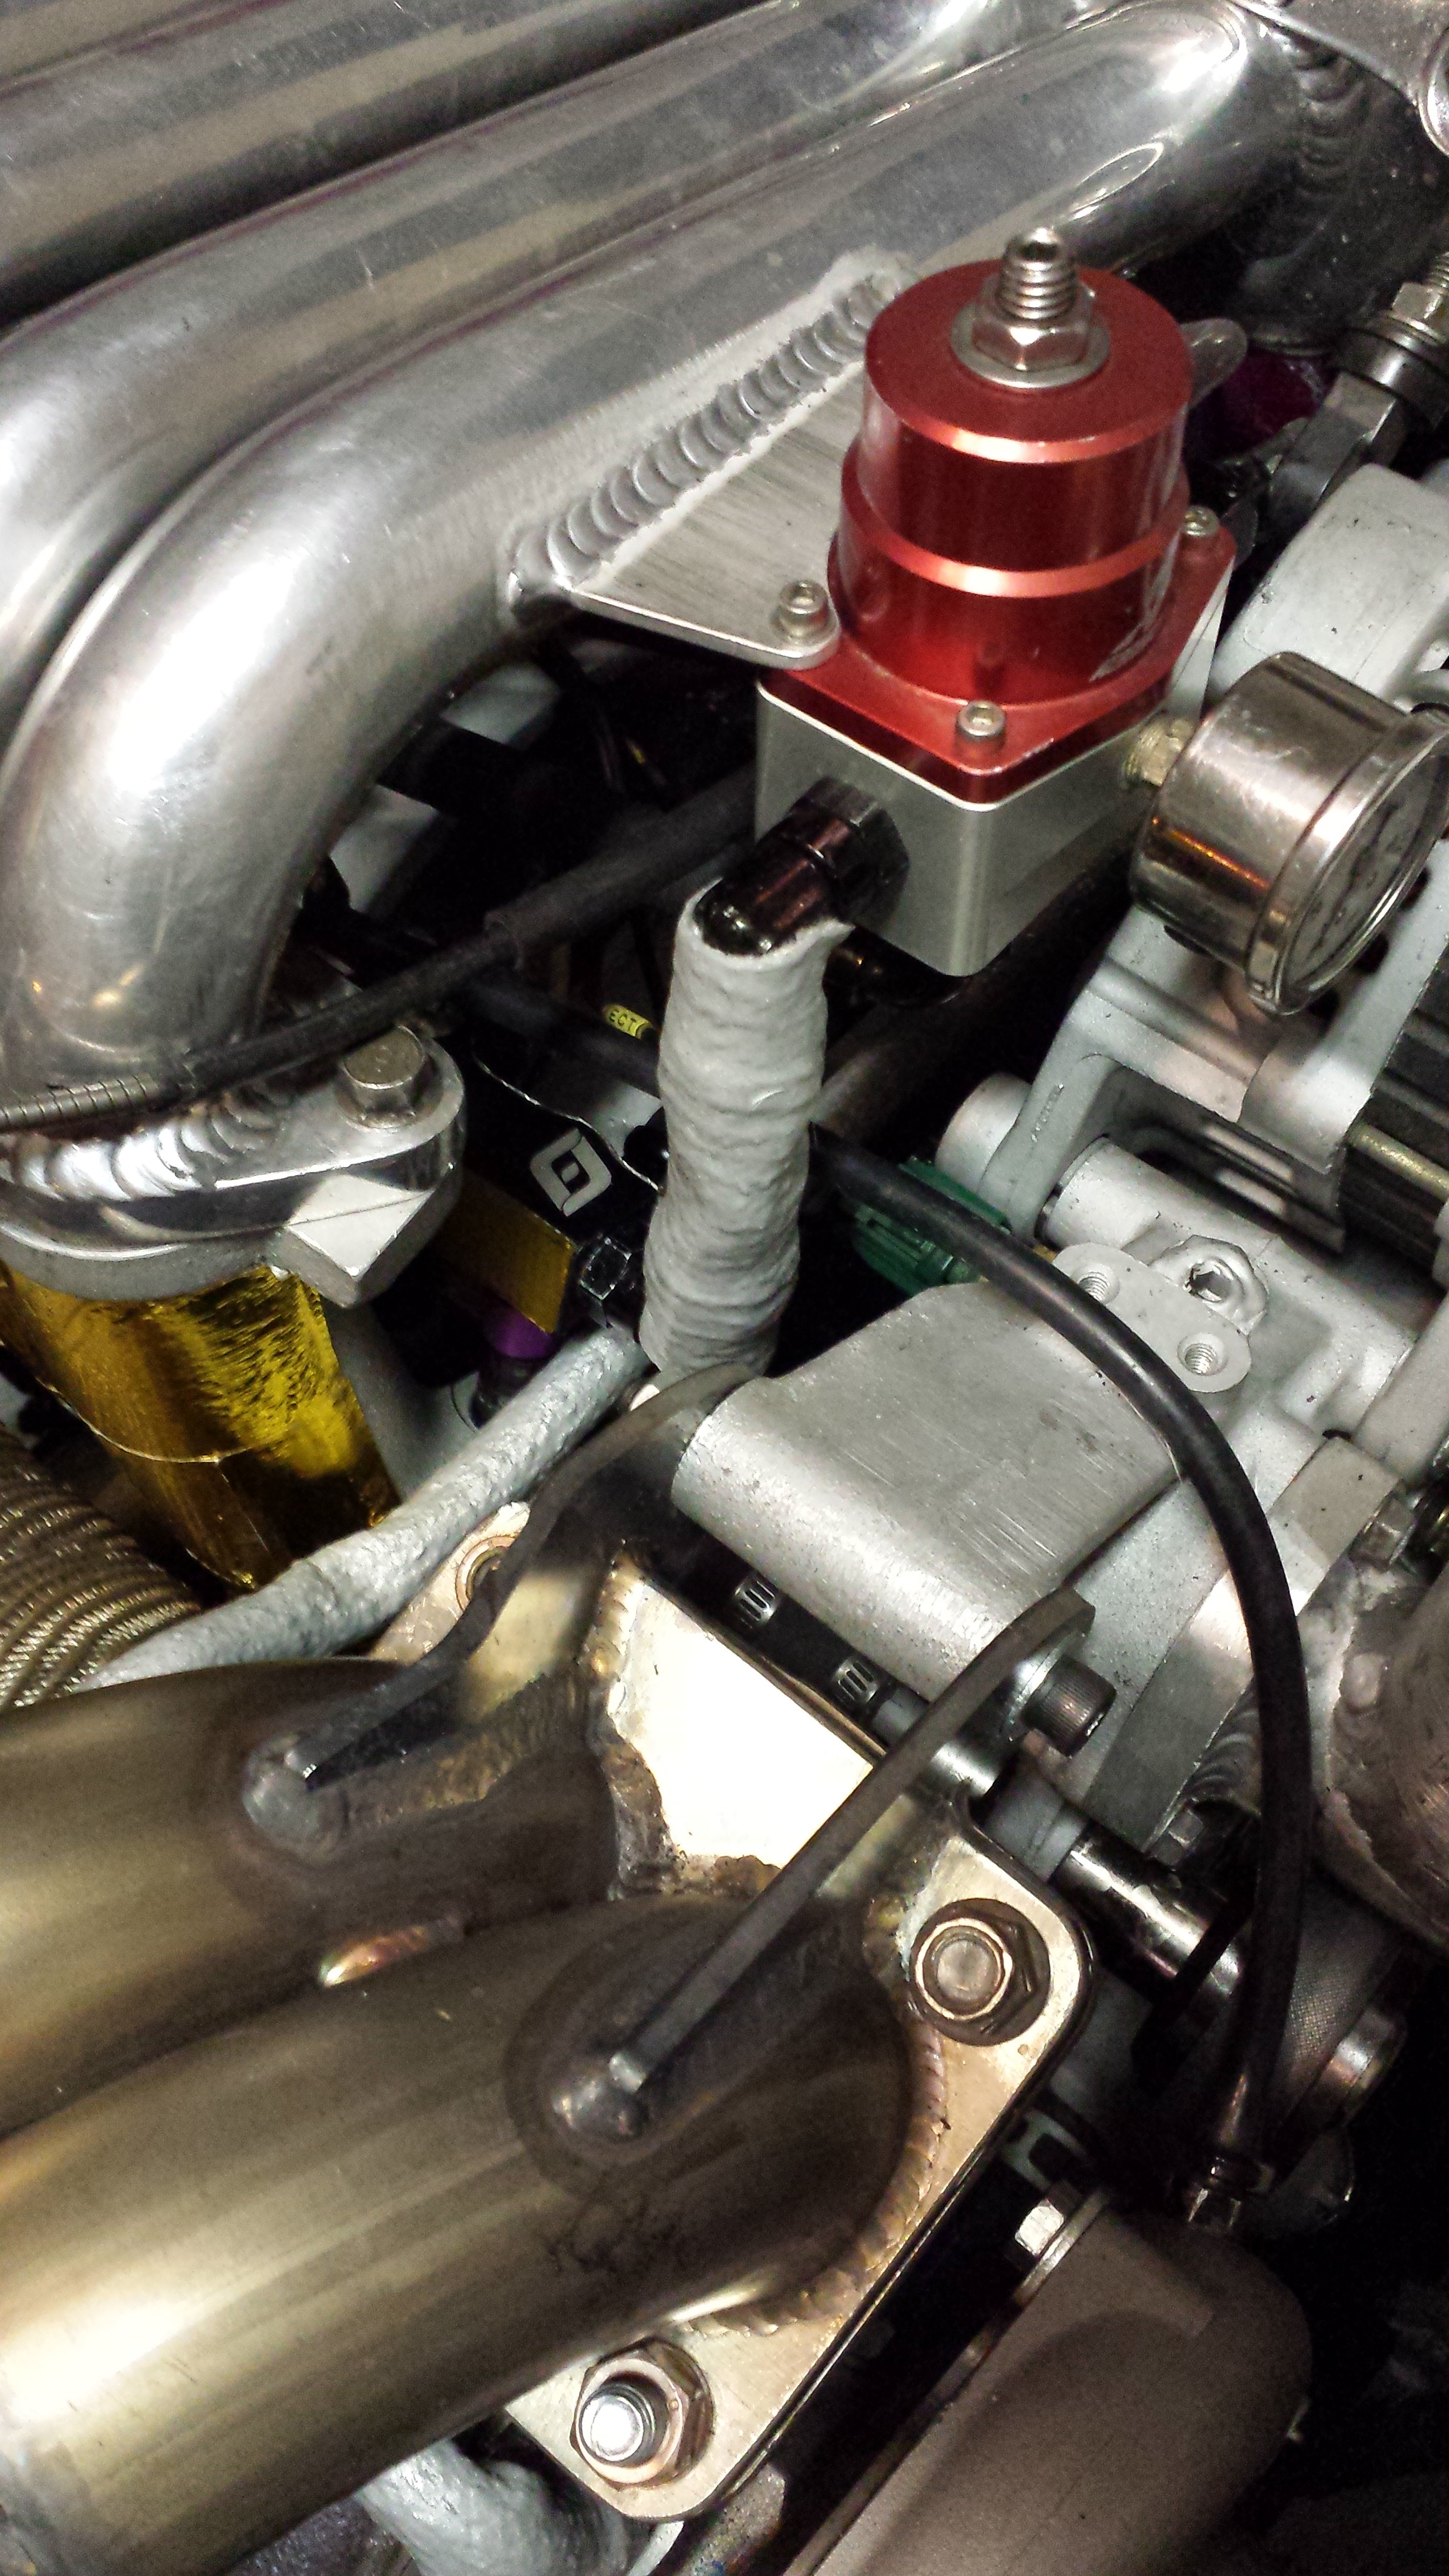
Still chugging through my 9 days of no sleep work schedule. But I think I might've stumbled on a possible fix for the coolant system..and it was cheap.
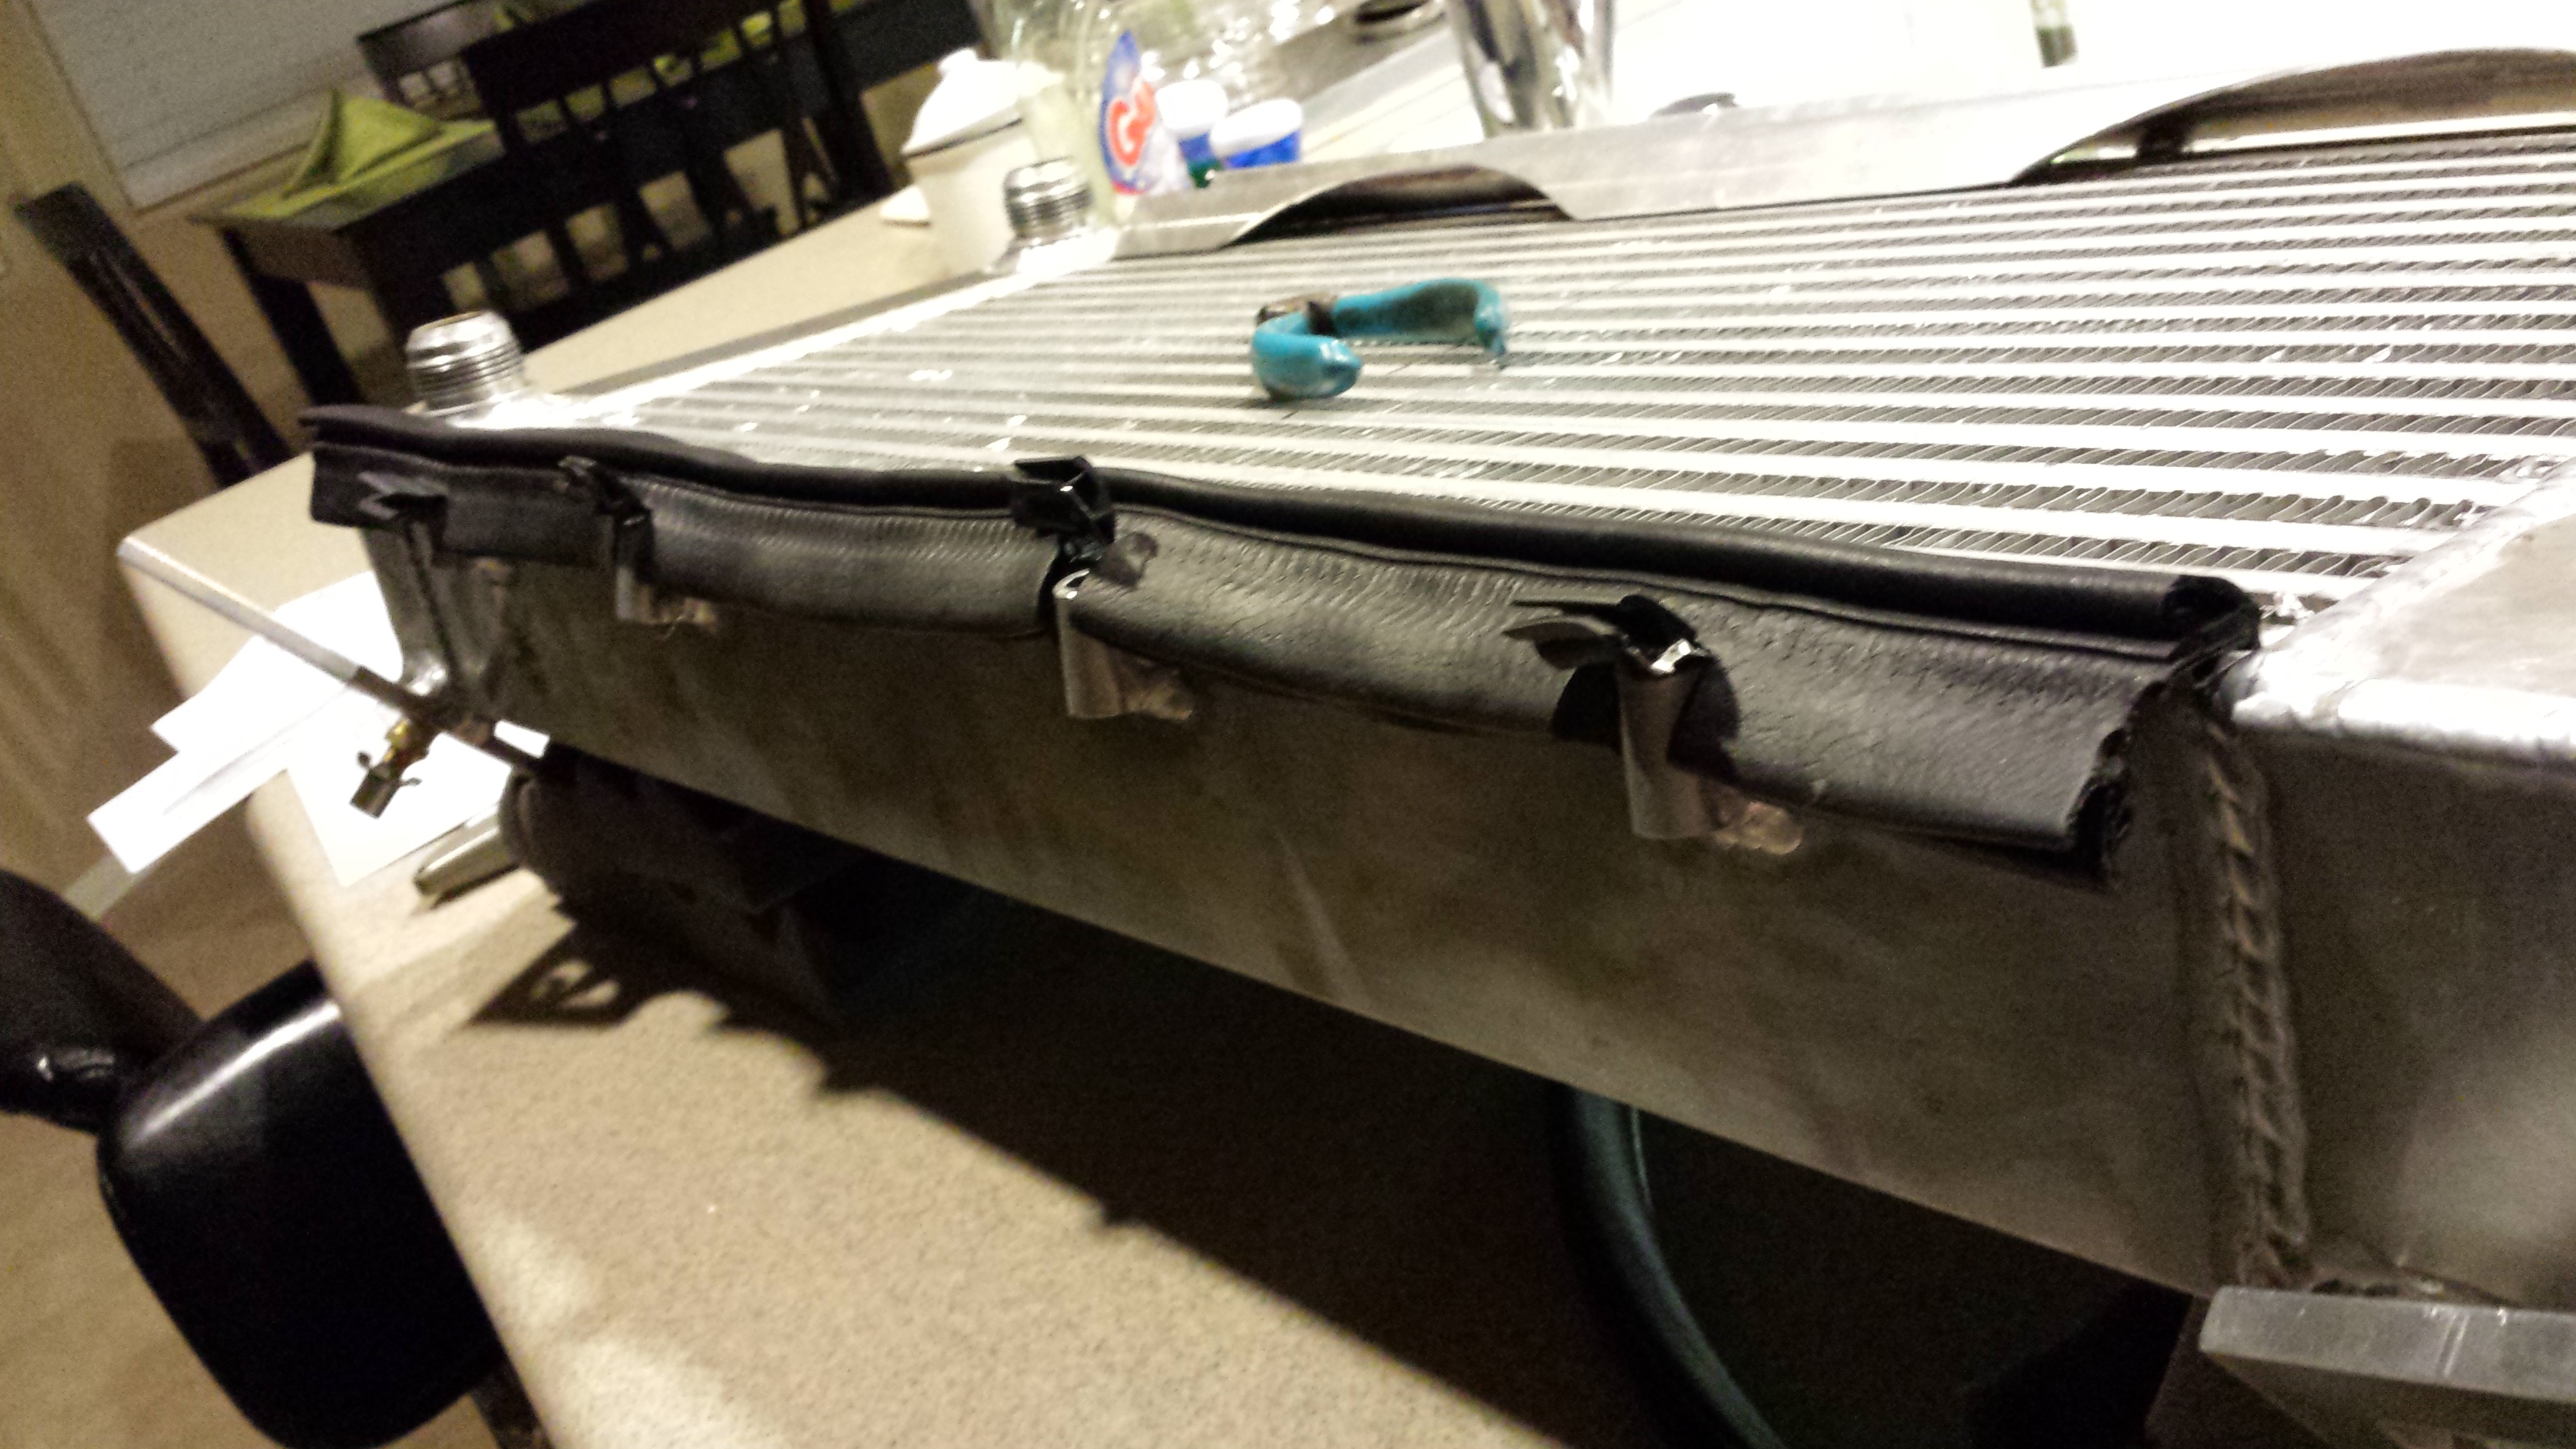
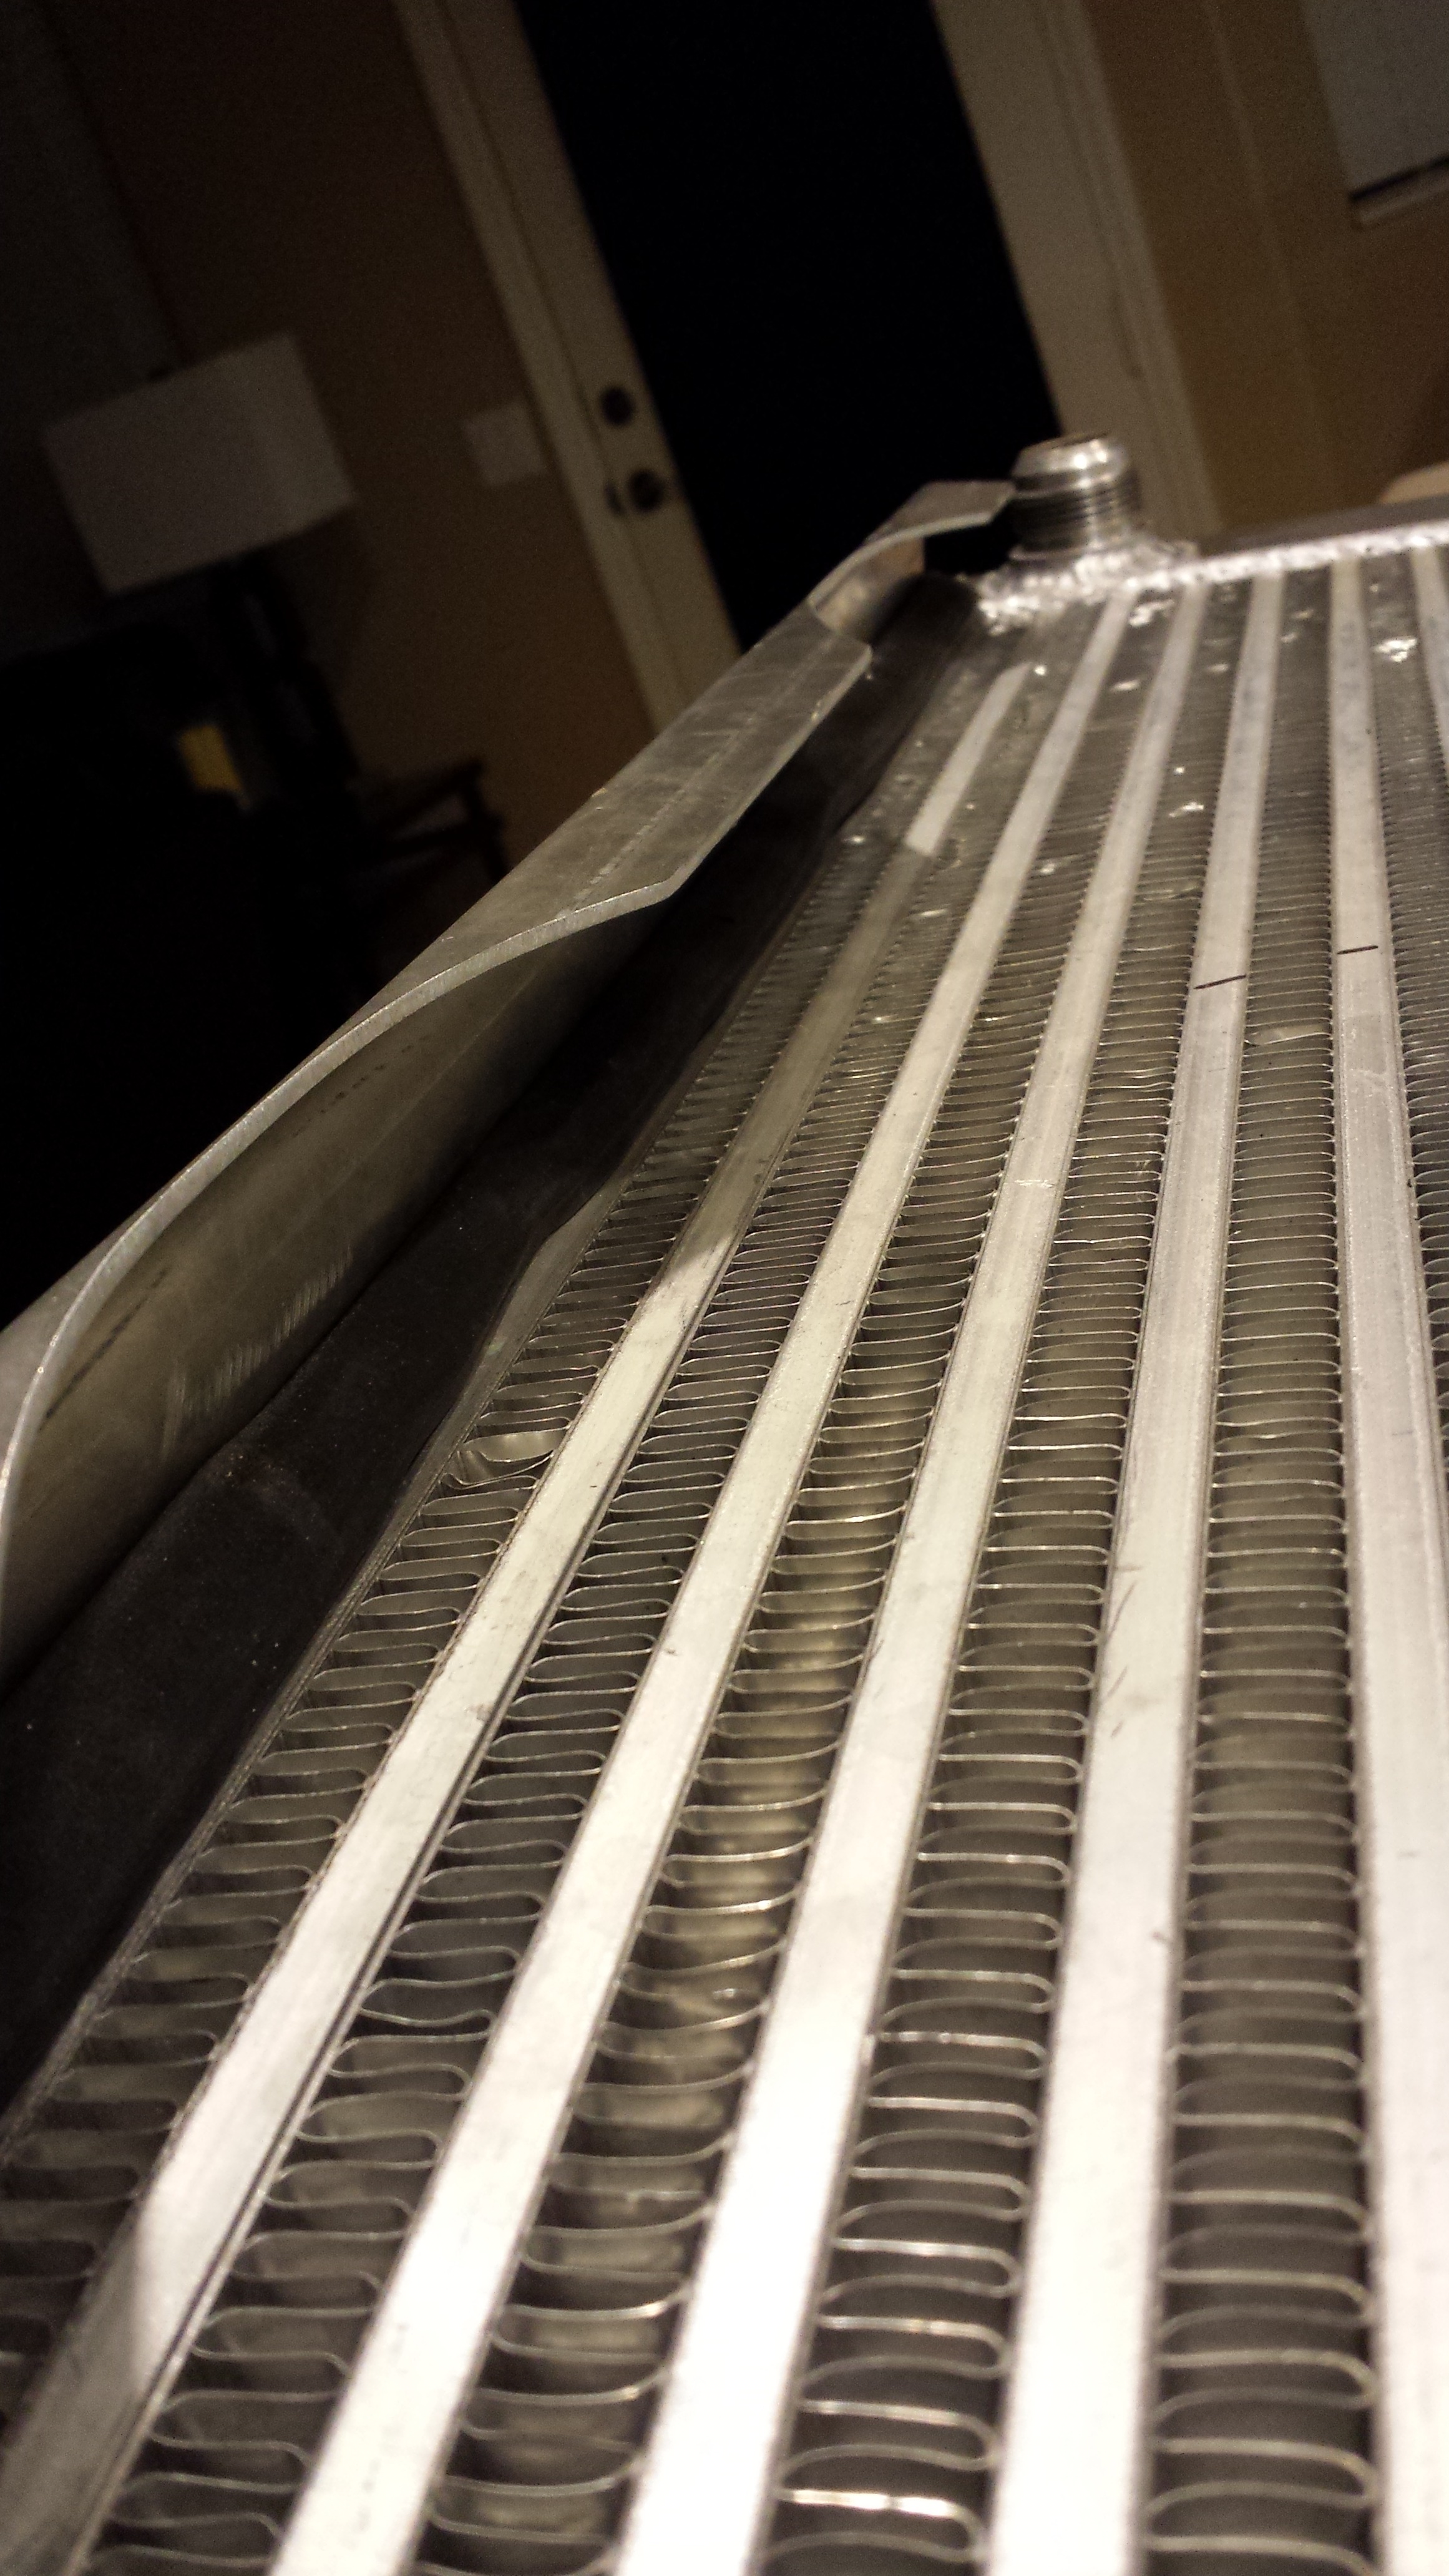
So since air was still getting trapped in the radiator and the outlet was a full 3 rows below the top most point of the system...it was really creating problems. I couldn't get all the air out.....even with a lisle funnel and cycling it. A buddy of mine just suggested tapping a copper hose barb to the top of the radiator to bleed the bubbles out. Great Idea, but I didn't want another line to deal with so I just tapped it with another drain spicket.
Before
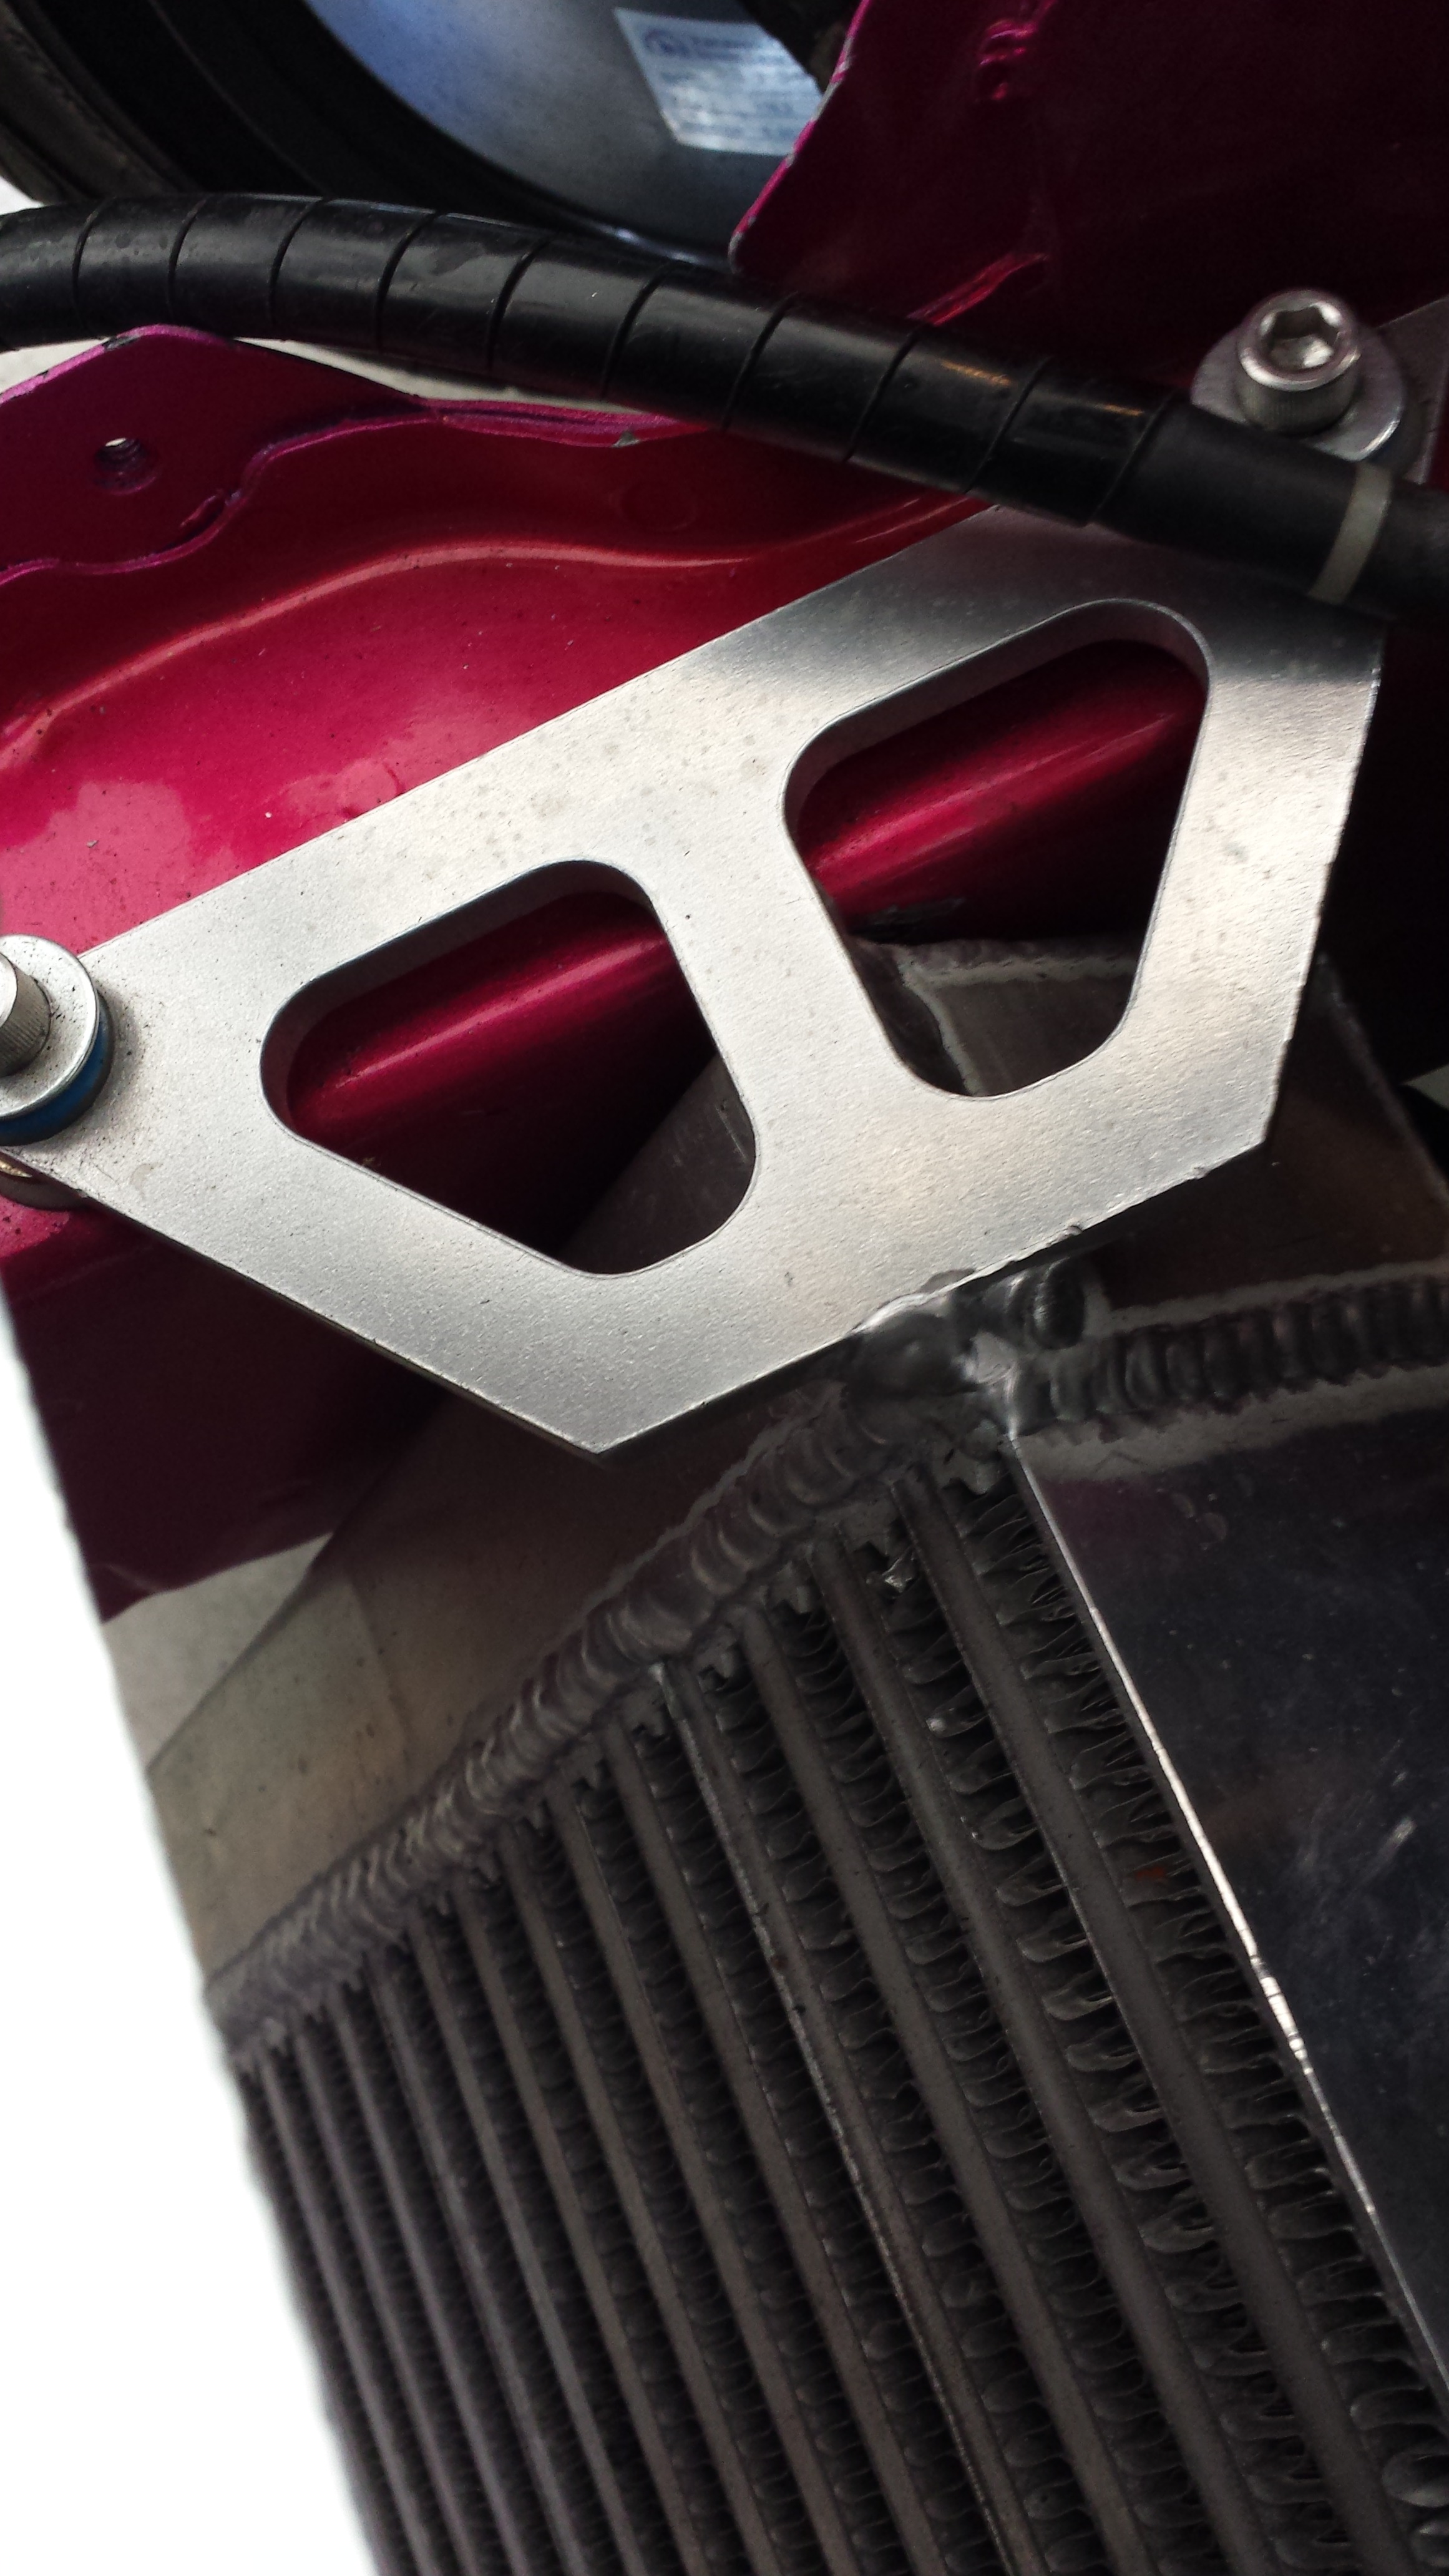
After
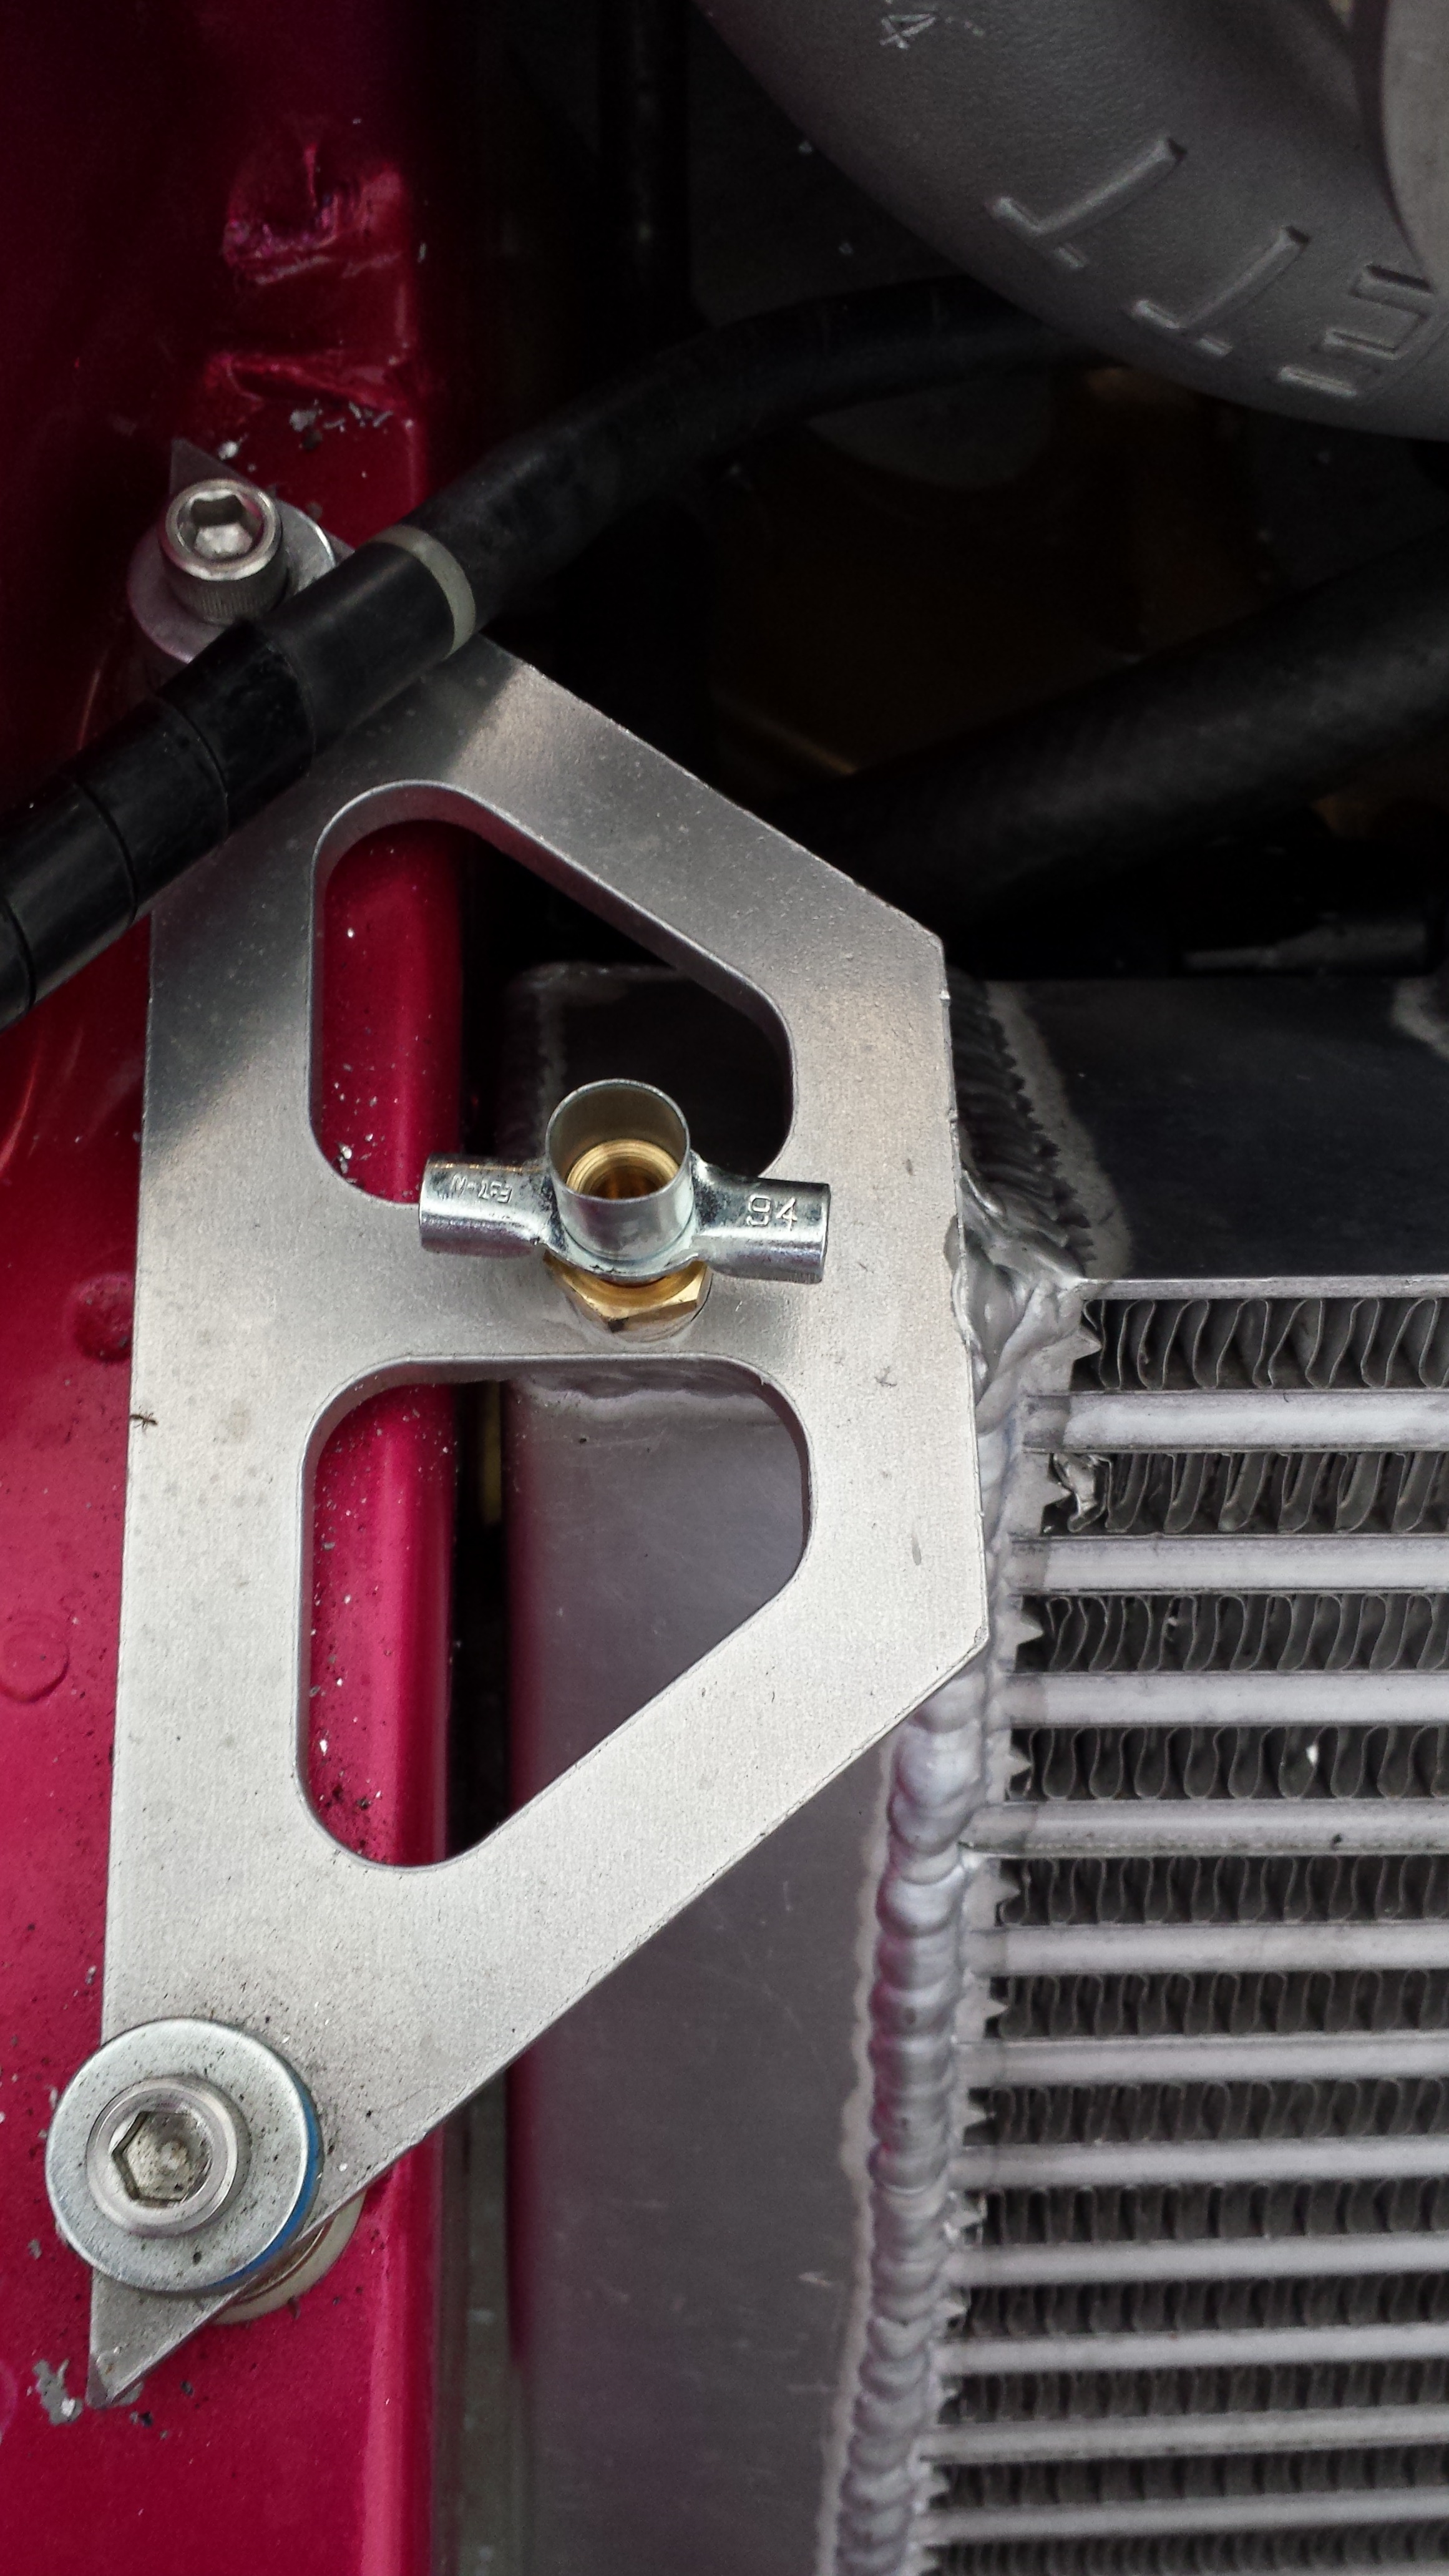
After I did this I re-filled the system and it worked like a charm. Warmed up the car and opened up the bleeder...and sure enough air air air air air bubbles and then finally solid fluid. Let it run and run then pulled out of the garage and drove around. Temp never got over 90C in the 88 degree heat with 2 Bumshit cooling fans. Then let it cool off for about 4 hours... opened up the bleeder again and even more air was trapped. I figure i'll do this until it's effectively bled. Lets hope this works because Last thing I want to do is have to re-do my IC position and piping to make a radiator fit. If it comes down to it..then Of course I'll have to do it..but I don't want to haha.
More updates soon!
Still chugging through my 9 days of no sleep work schedule. But I think I might've stumbled on a possible fix for the coolant system..and it was cheap.
So since air was still getting trapped in the radiator and the outlet was a full 3 rows below the top most point of the system...it was really creating problems. I couldn't get all the air out.....even with a lisle funnel and cycling it. A buddy of mine just suggested tapping a copper hose barb to the top of the radiator to bleed the bubbles out. Great Idea, but I didn't want another line to deal with so I just tapped it with another drain spicket.
Before
After
After I did this I re-filled the system and it worked like a charm. Warmed up the car and opened up the bleeder...and sure enough air air air air air bubbles and then finally solid fluid. Let it run and run then pulled out of the garage and drove around. Temp never got over 90C in the 88 degree heat with 2 Bumshit cooling fans. Then let it cool off for about 4 hours... opened up the bleeder again and even more air was trapped. I figure i'll do this until it's effectively bled. Lets hope this works because Last thing I want to do is have to re-do my IC position and piping to make a radiator fit. If it comes down to it..then Of course I'll have to do it..but I don't want to haha.
More updates soon!
05-13-13, 12:40 PM
#1505
^ thanks...I guess it would've been a little more practical to hook it up and route it to the coolant neck or even add an AST just so it would continuously work to bleed the system. But once I get all the air out I won't need to mess with it again and I won't have to worry about another line/another can/another point of failure.
I actually don't...I was going to do a nice little write up...but I just don't have the time for that right now.....so I just took the 2 pics. It's literally just a pep boys $2.99 universal radiator drain though. Nothing special. It's a beveled seal that twist tightens/loosens.
I actually don't...I was going to do a nice little write up...but I just don't have the time for that right now.....so I just took the 2 pics. It's literally just a pep boys $2.99 universal radiator drain though. Nothing special. It's a beveled seal that twist tightens/loosens.
05-13-13, 07:27 PM
#1506
Junior Member
Join Date: Sep 2006
Location: GA
Posts: 33
Likes: 0
Received 0 Likes
on
0 Posts
Originally Posted by mannykiller
haha yea no kidding. I feel bad for offending people by building my car the way I want it.
05-17-13, 11:37 AM
#1508
Small update:
Well yesterday was my first real day off and I still had a baunch load of stuff to do. I got an hour or so to mess around in the garage but I really just need a weekend 7am to 11pm to really get everything where it needs to be.
I have a giant list of things I need to get done, that may be a bunch of small things, but each little thing is 30 min here 20 min there, blah blah. These things really add up. I'll list it at the end as not to bore you guys hah.
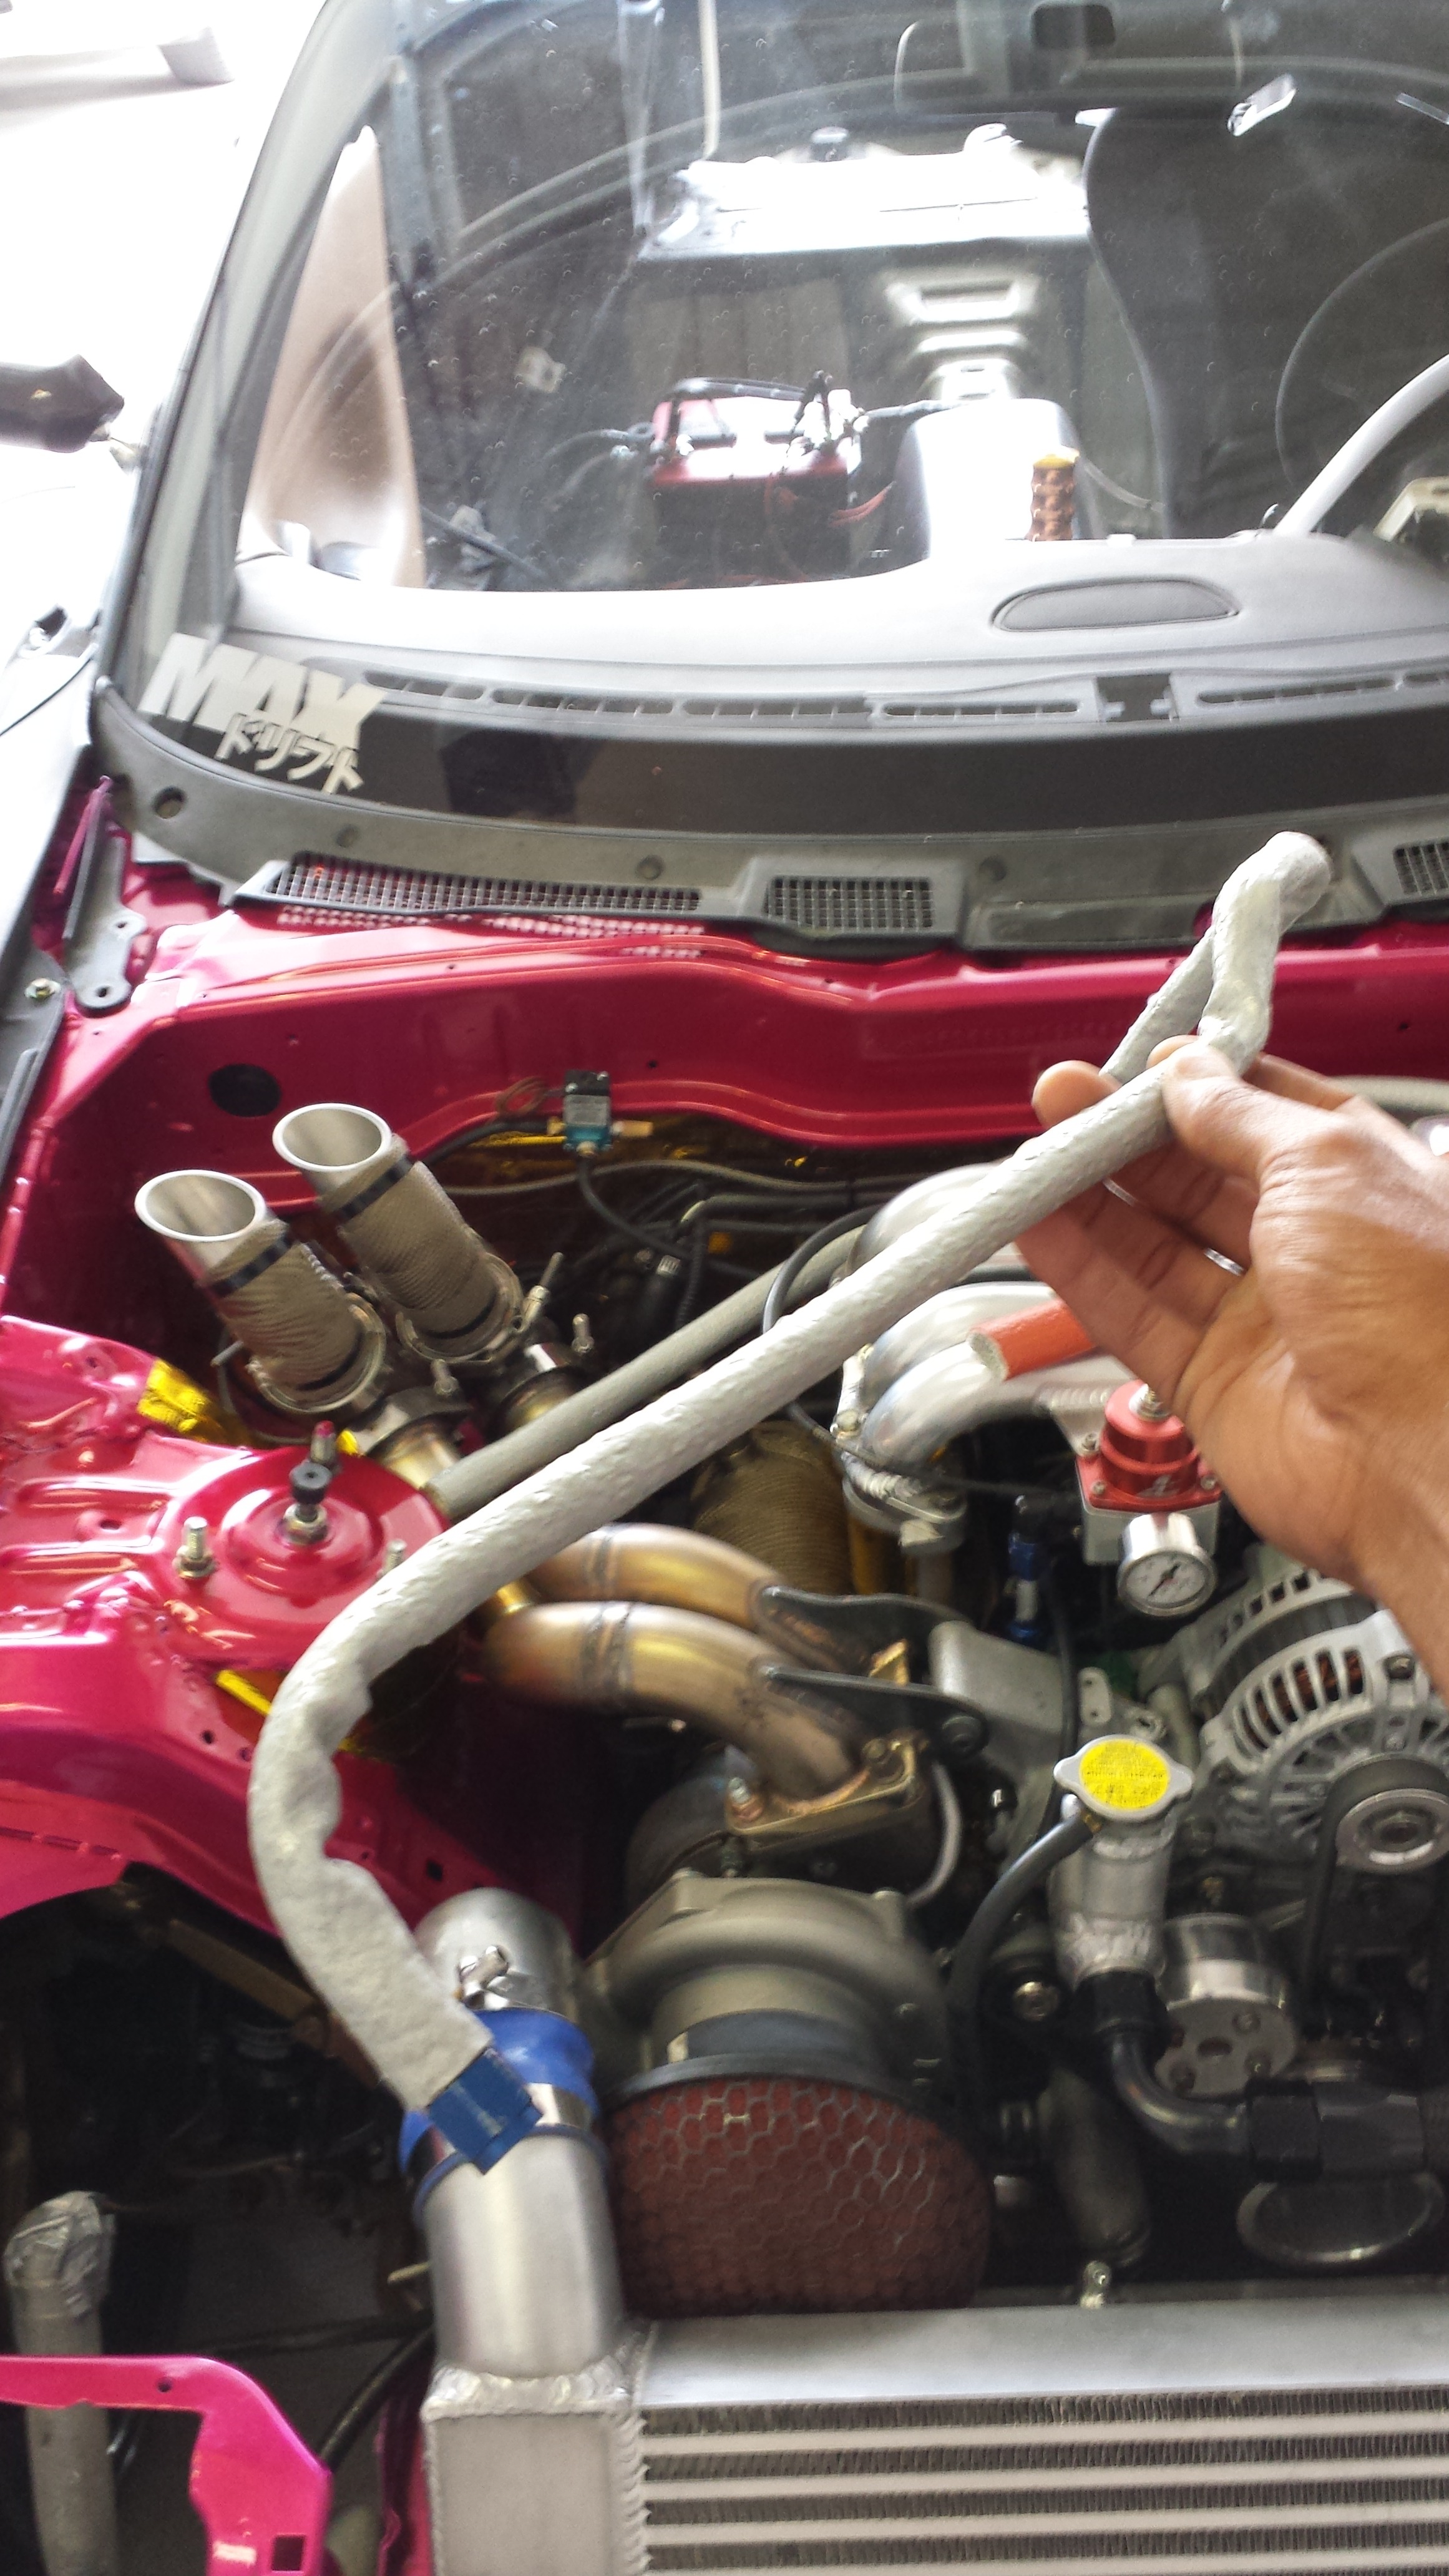
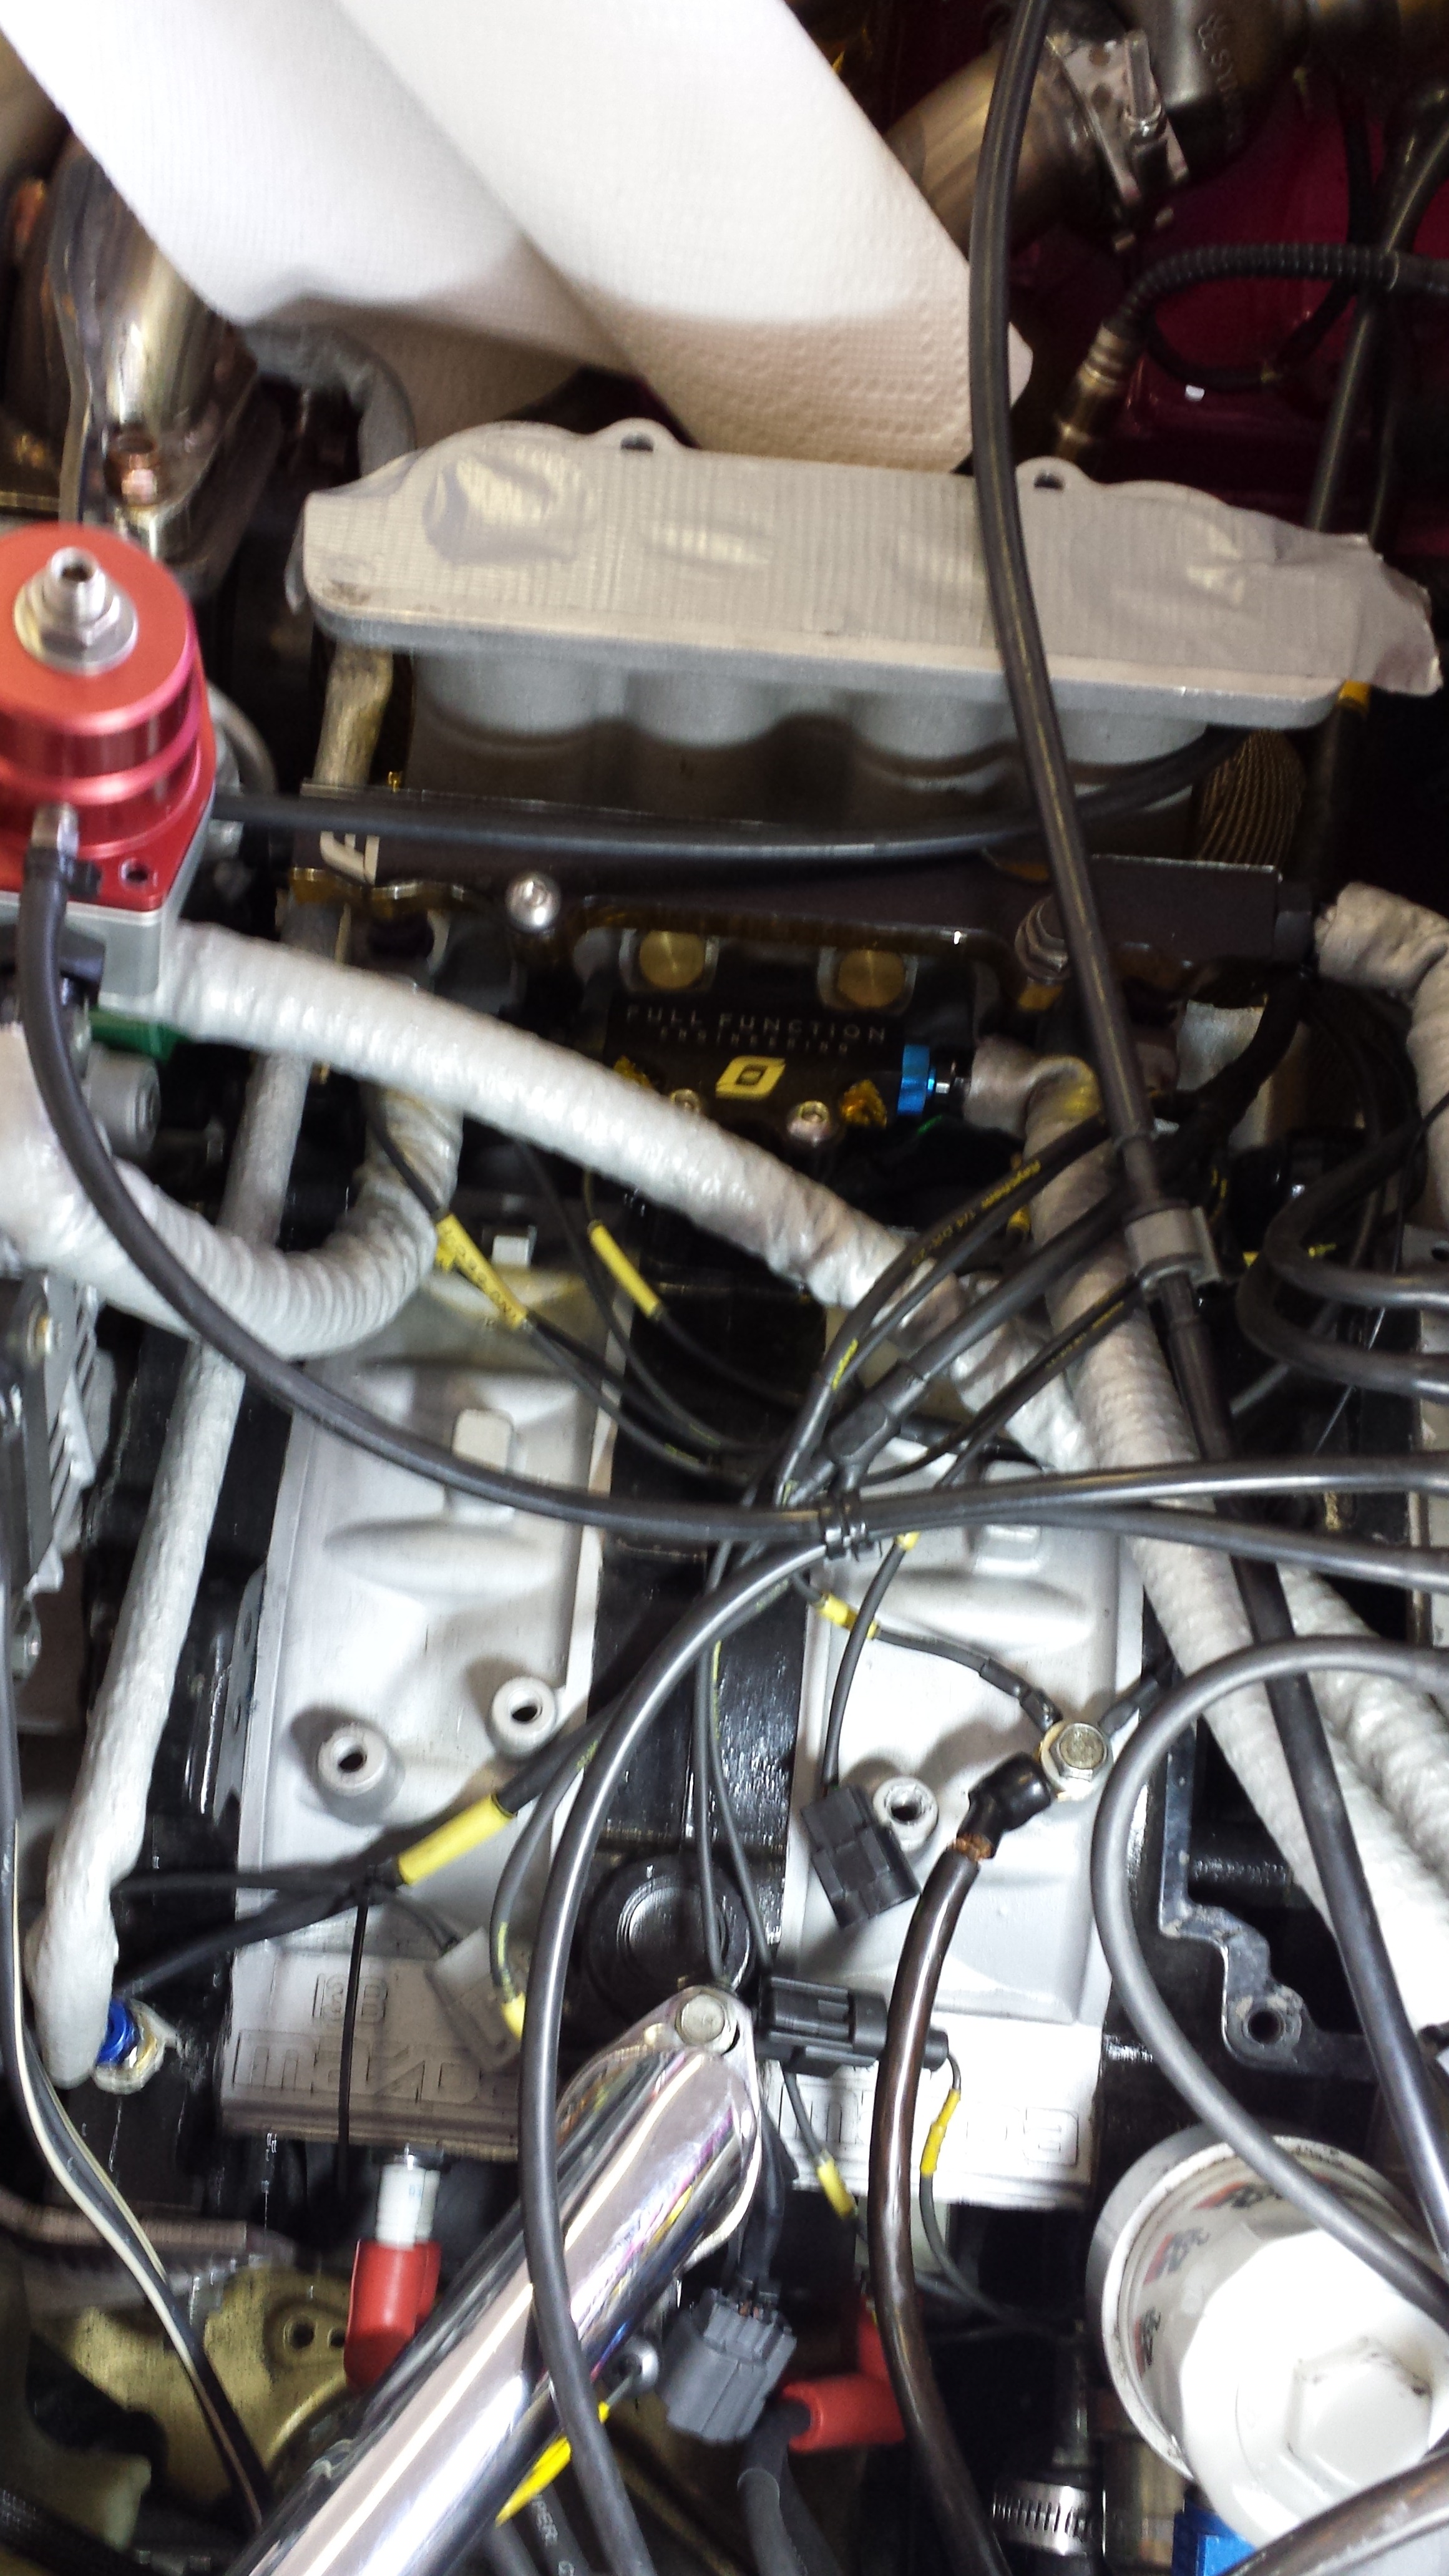
I got my fire sleeve in from Baker Performance. They make it damn easy to purchase because right next to each individual size it lists the -AN size line it will work for. They have silver and Orange. I chose Orange for my turbo oil drain but everything else I got silver....just so that every line didn't stick out like a sore thumb. Actually...I kinda like how it sticks out like a sore thumb hahaha. ANyways..heres some pics...
I got -4 for my oil feed line
-6 for all fuel/water lines
-10 for the turbo Oil drain line

I did the Turbo Oil feed first as it was the easiest to install
Then I did small line that goes from my Secondary FFE rail to the fuel pressure regulator
And I'll be doing the rest of my fuel lines today or tomorrow.
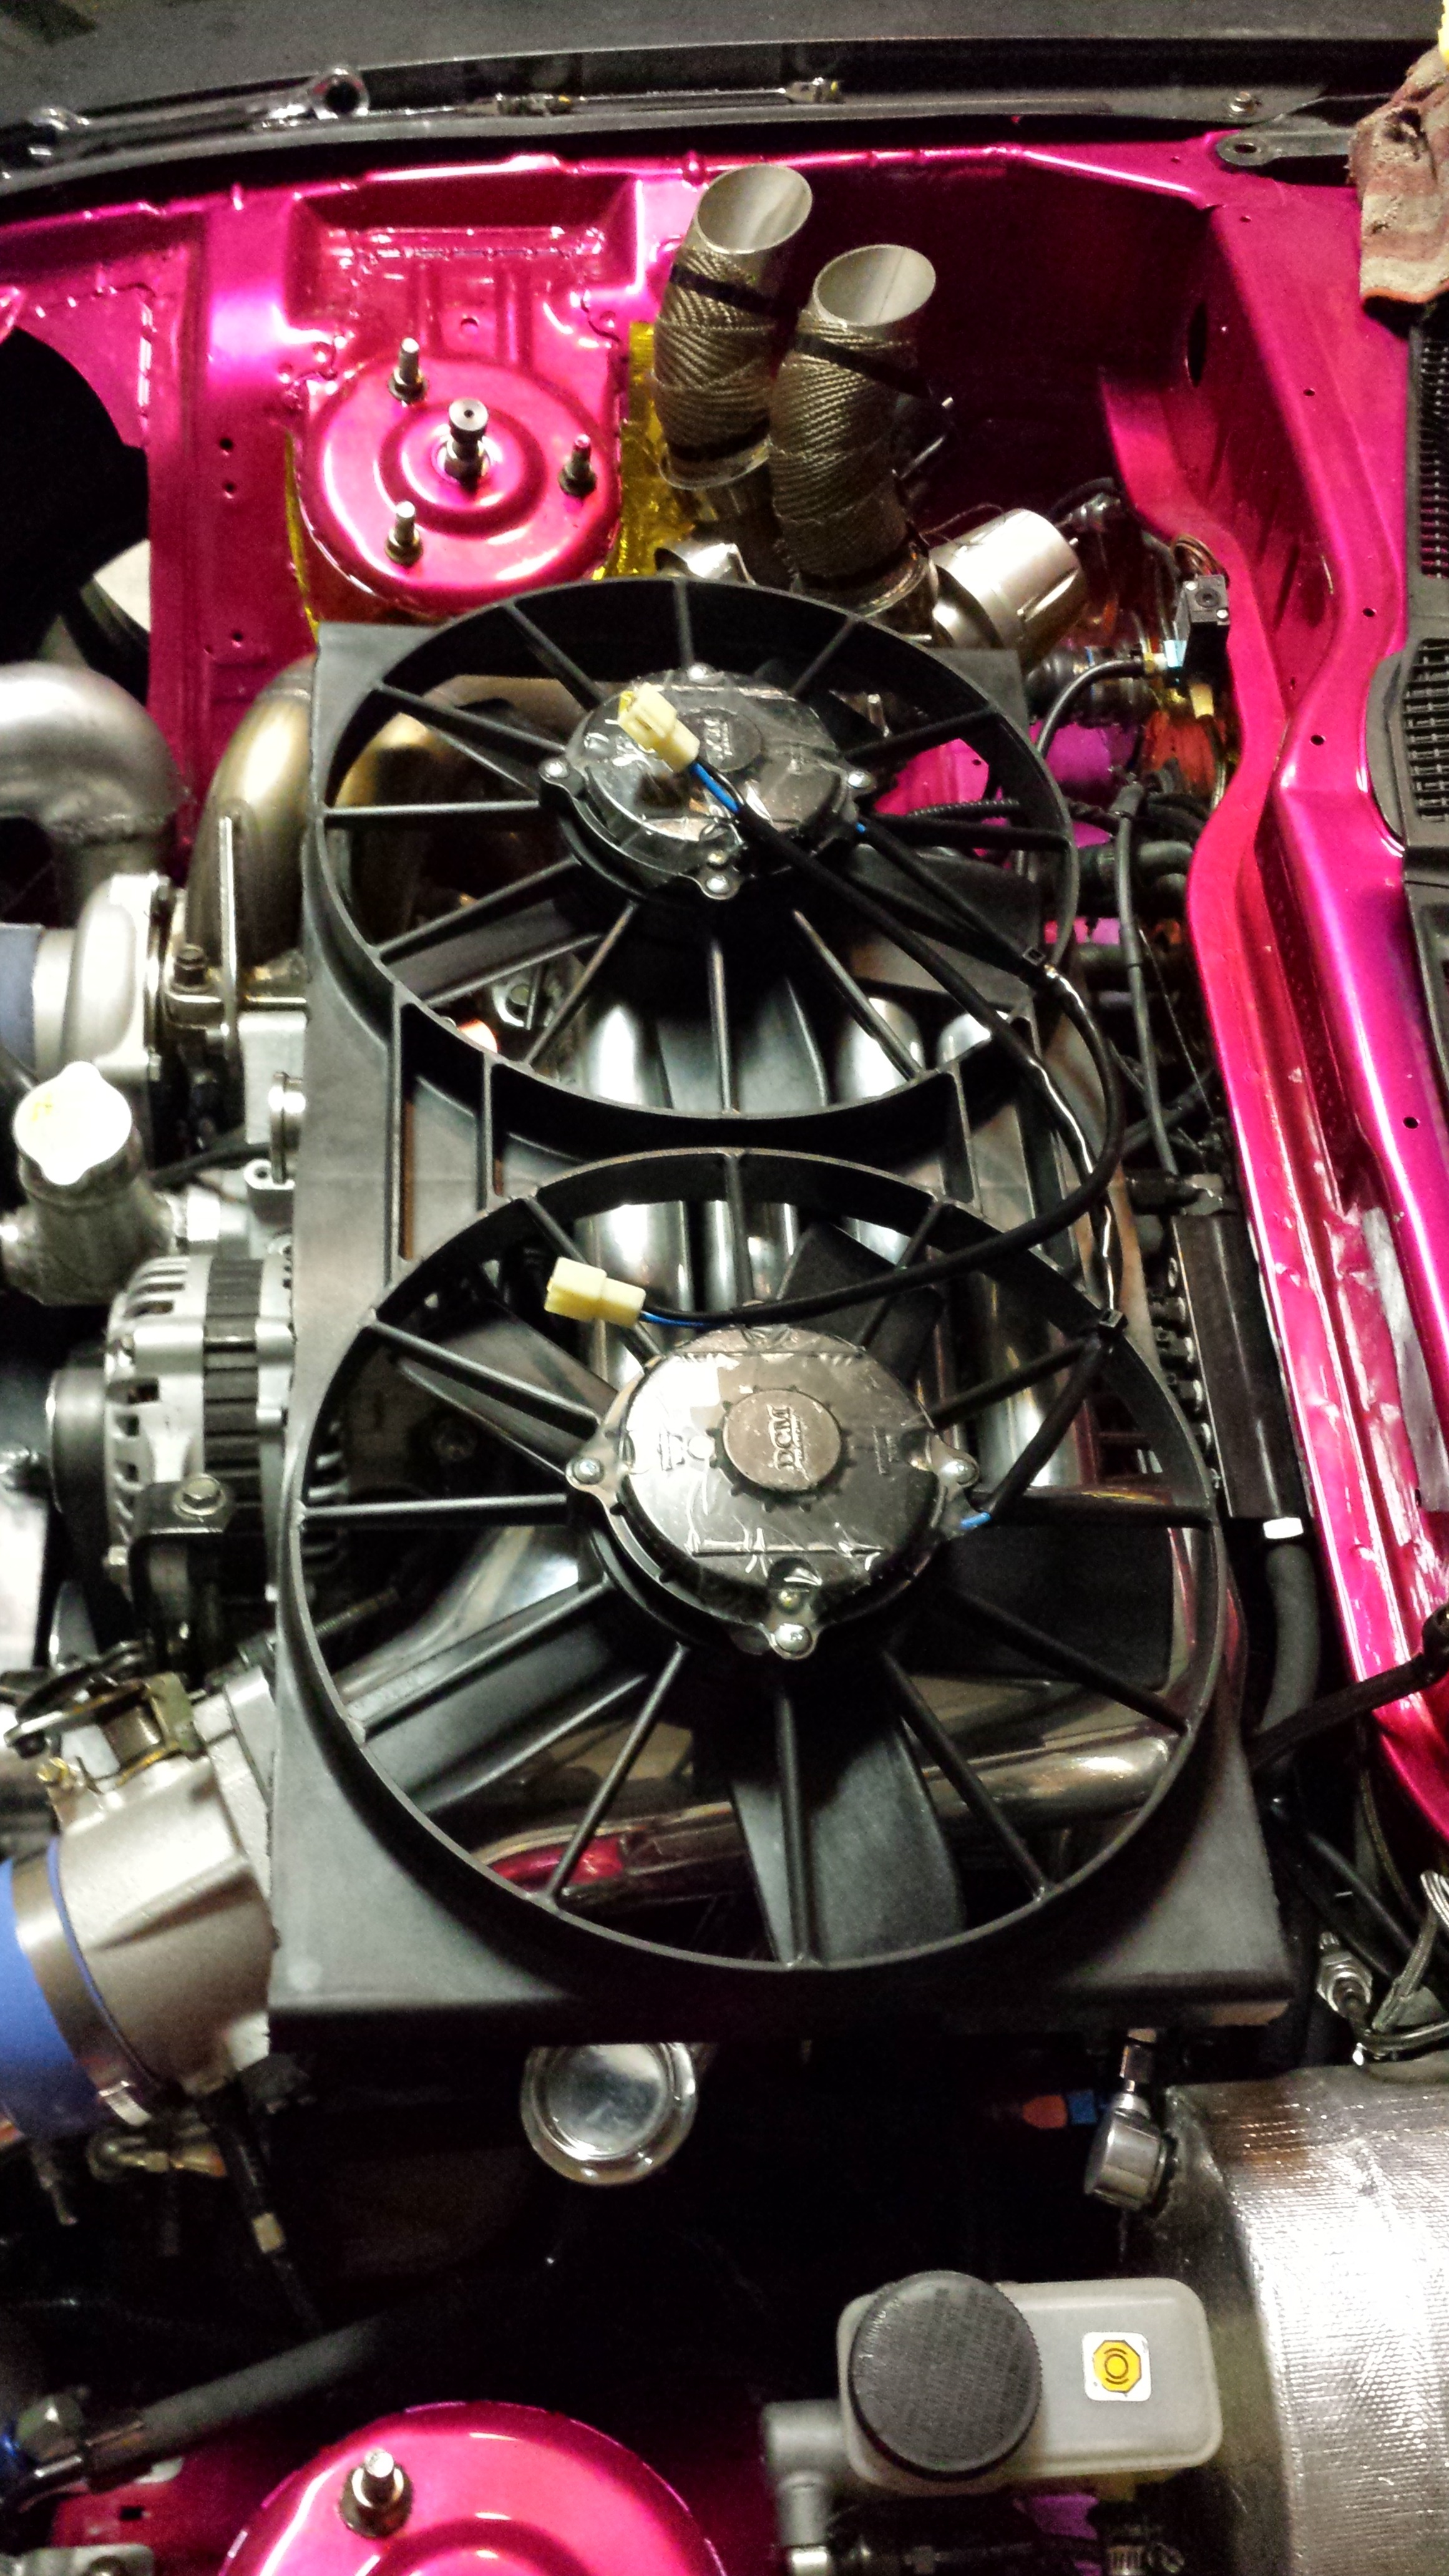
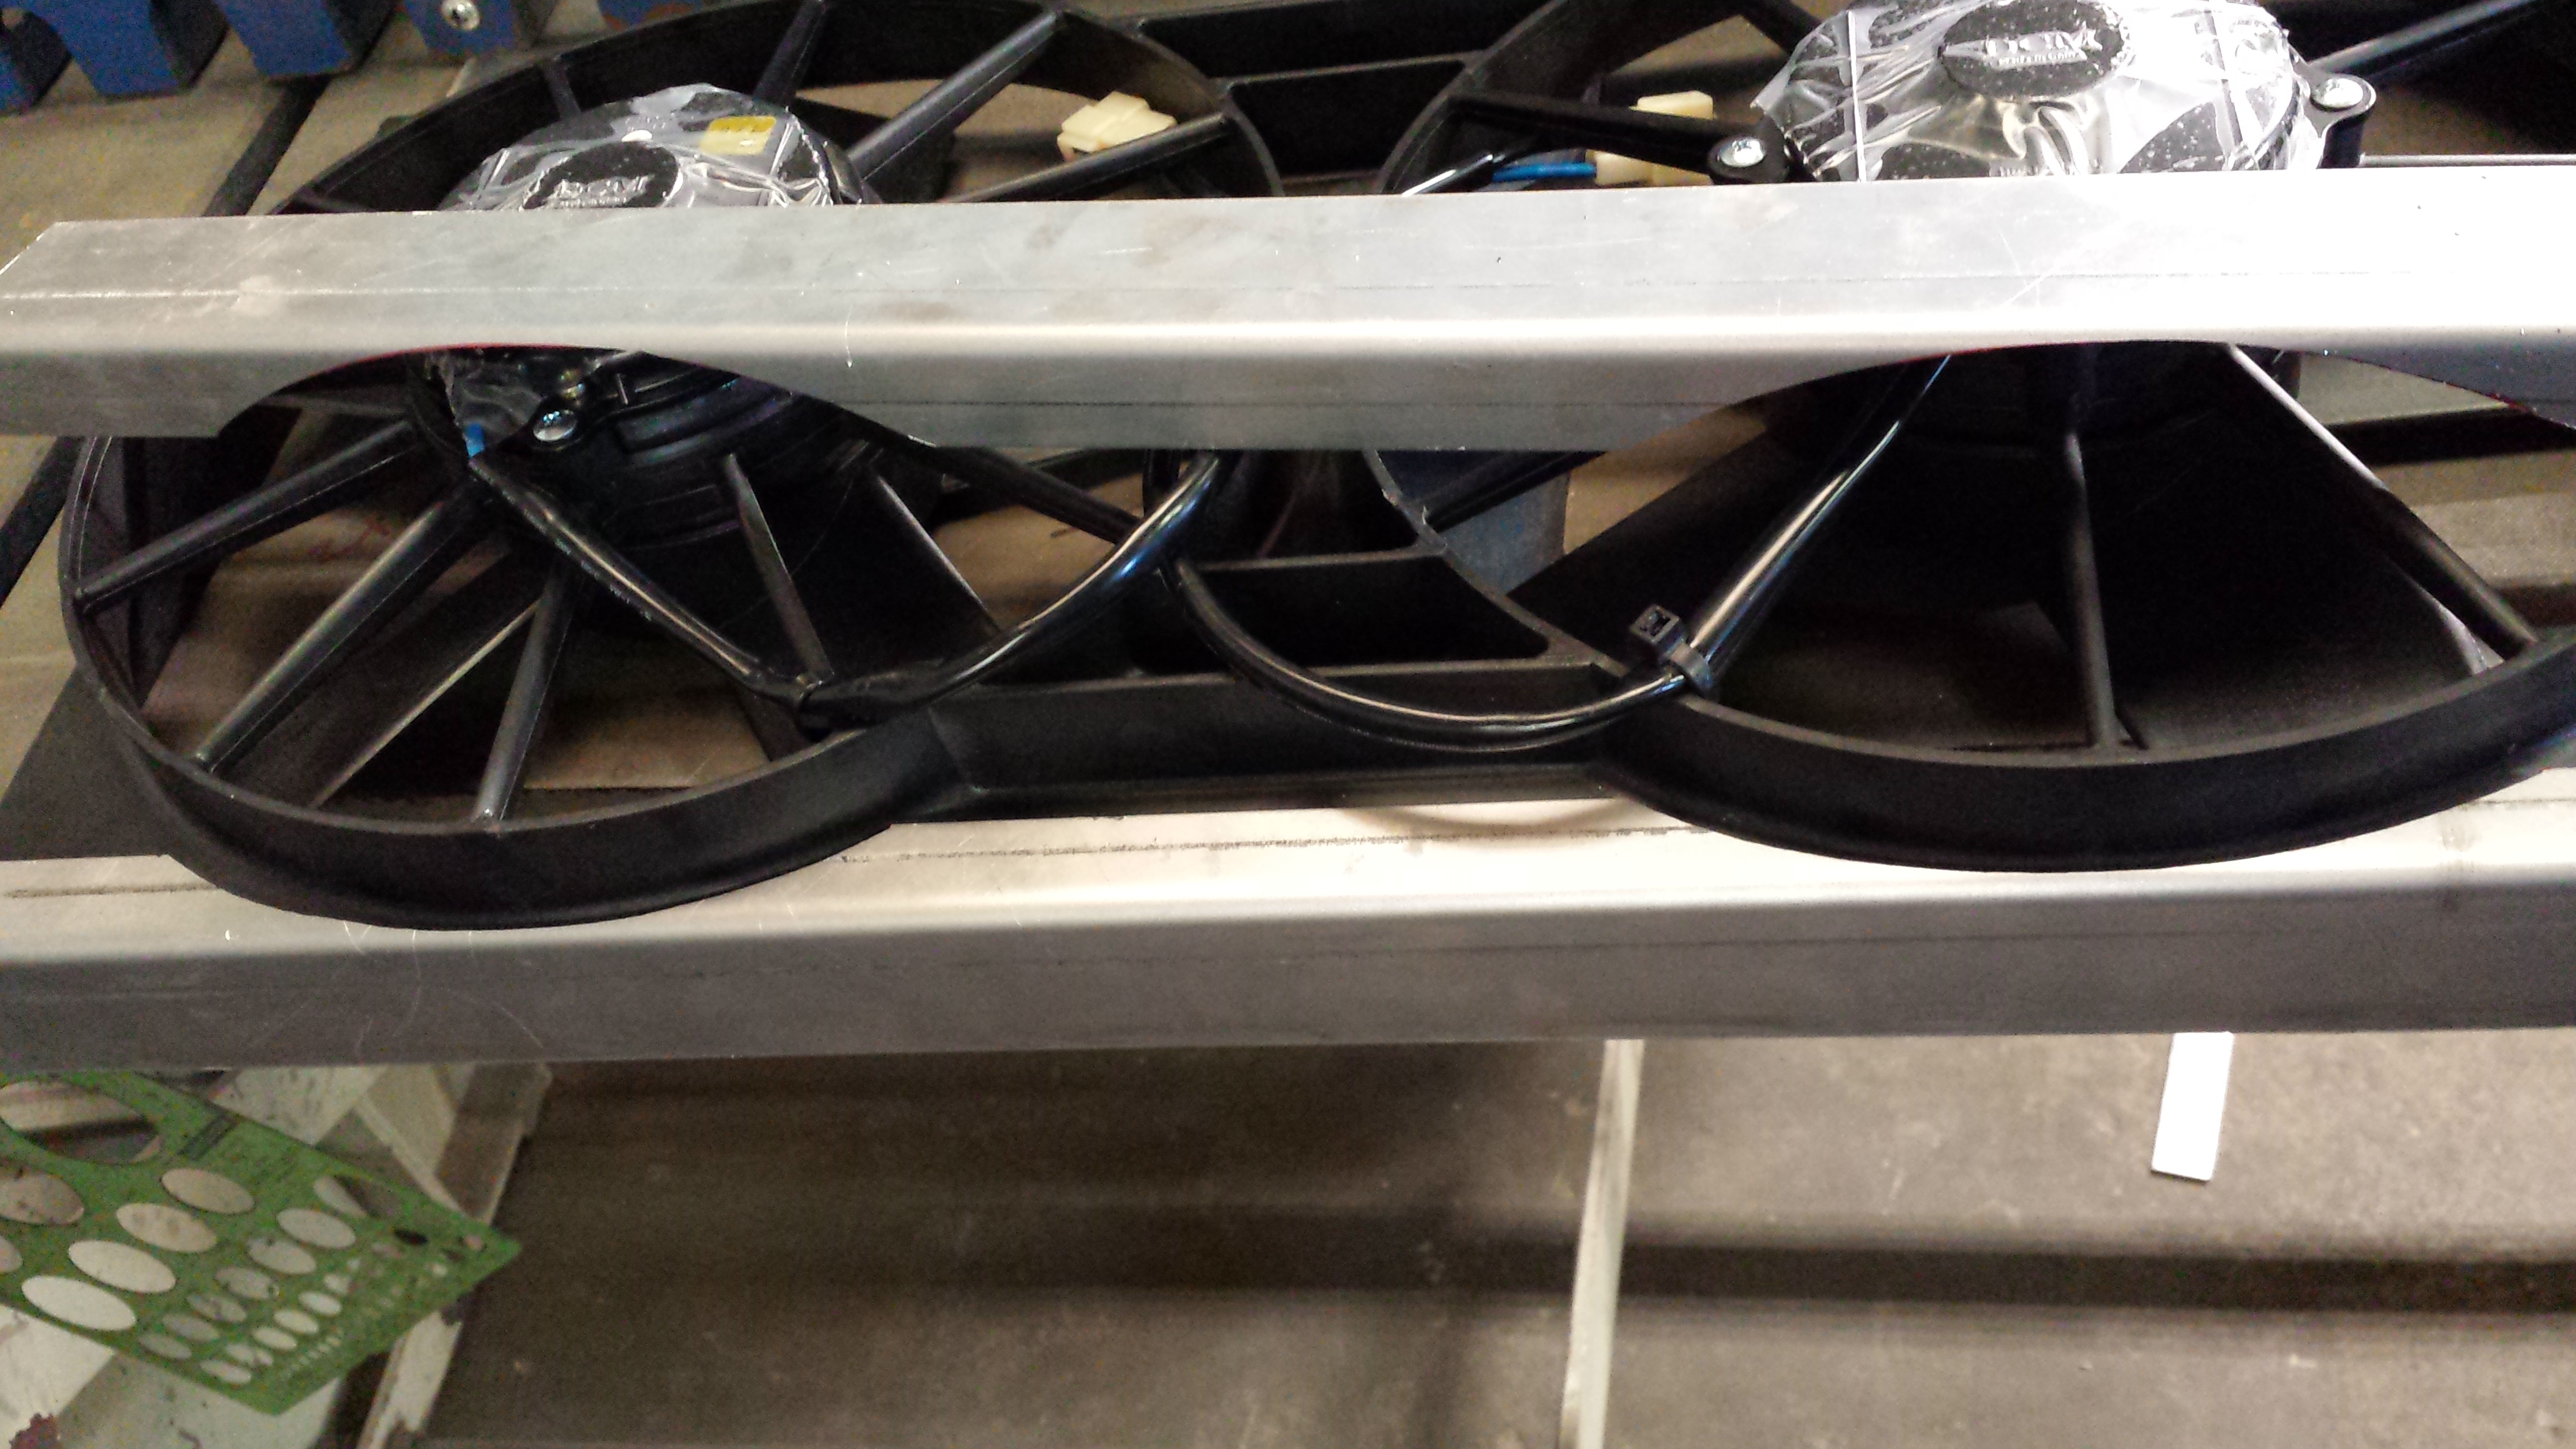
On to my cooling situation. I have yet to hear back from Mishimoto about the sponsorship and the car hasn't got hot since I added the Bleed valve on top of the radiator so no air would get trapped. But I wasn't happy with the mishimoto Radiator fans. So I ordered a set of Jegs HIGH CFM fans. THey're rated at 3600 CFM and come with a shroud. Of course I'd need to cut them but 3600 compared to the measily 1400 total of the current fans is a huge improvement and should really help keep the temps down when they need to come down. THe added shroud will be a definite upgrade because right now the current fans are just mounted to the rad without a shroud.
Here are the fans
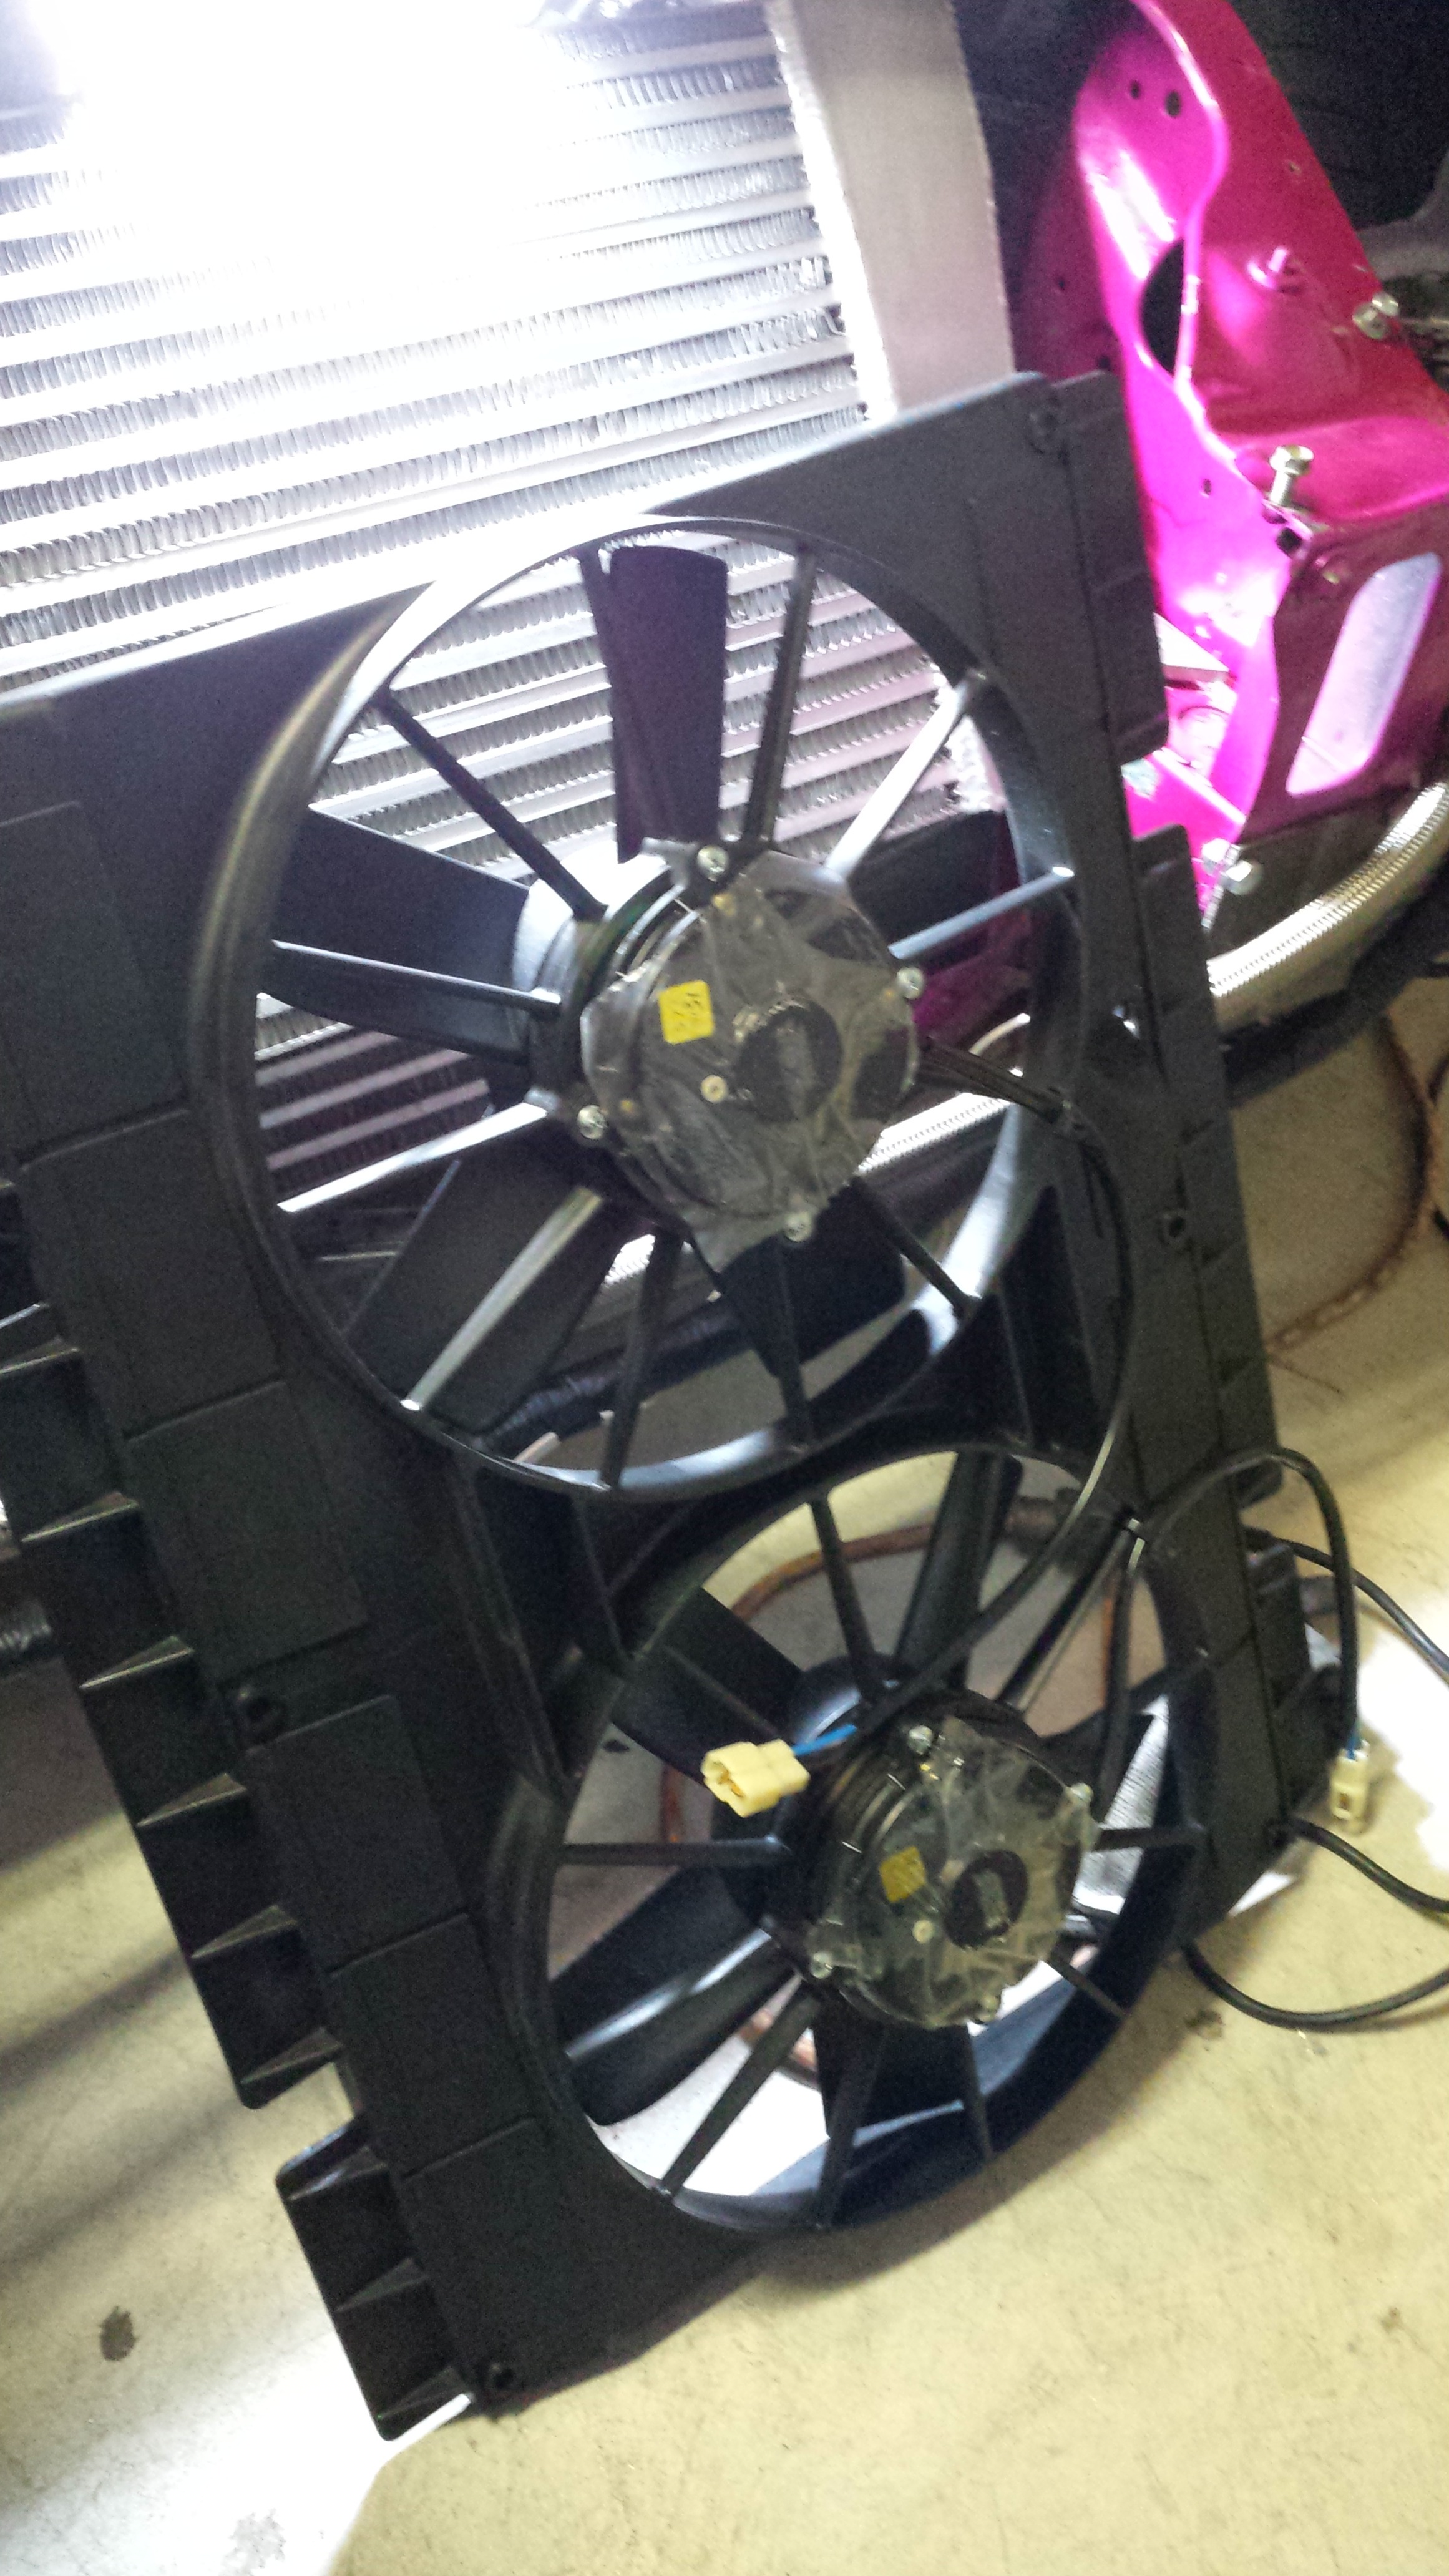
how big they are and how much they'll need to be trimmed to fit
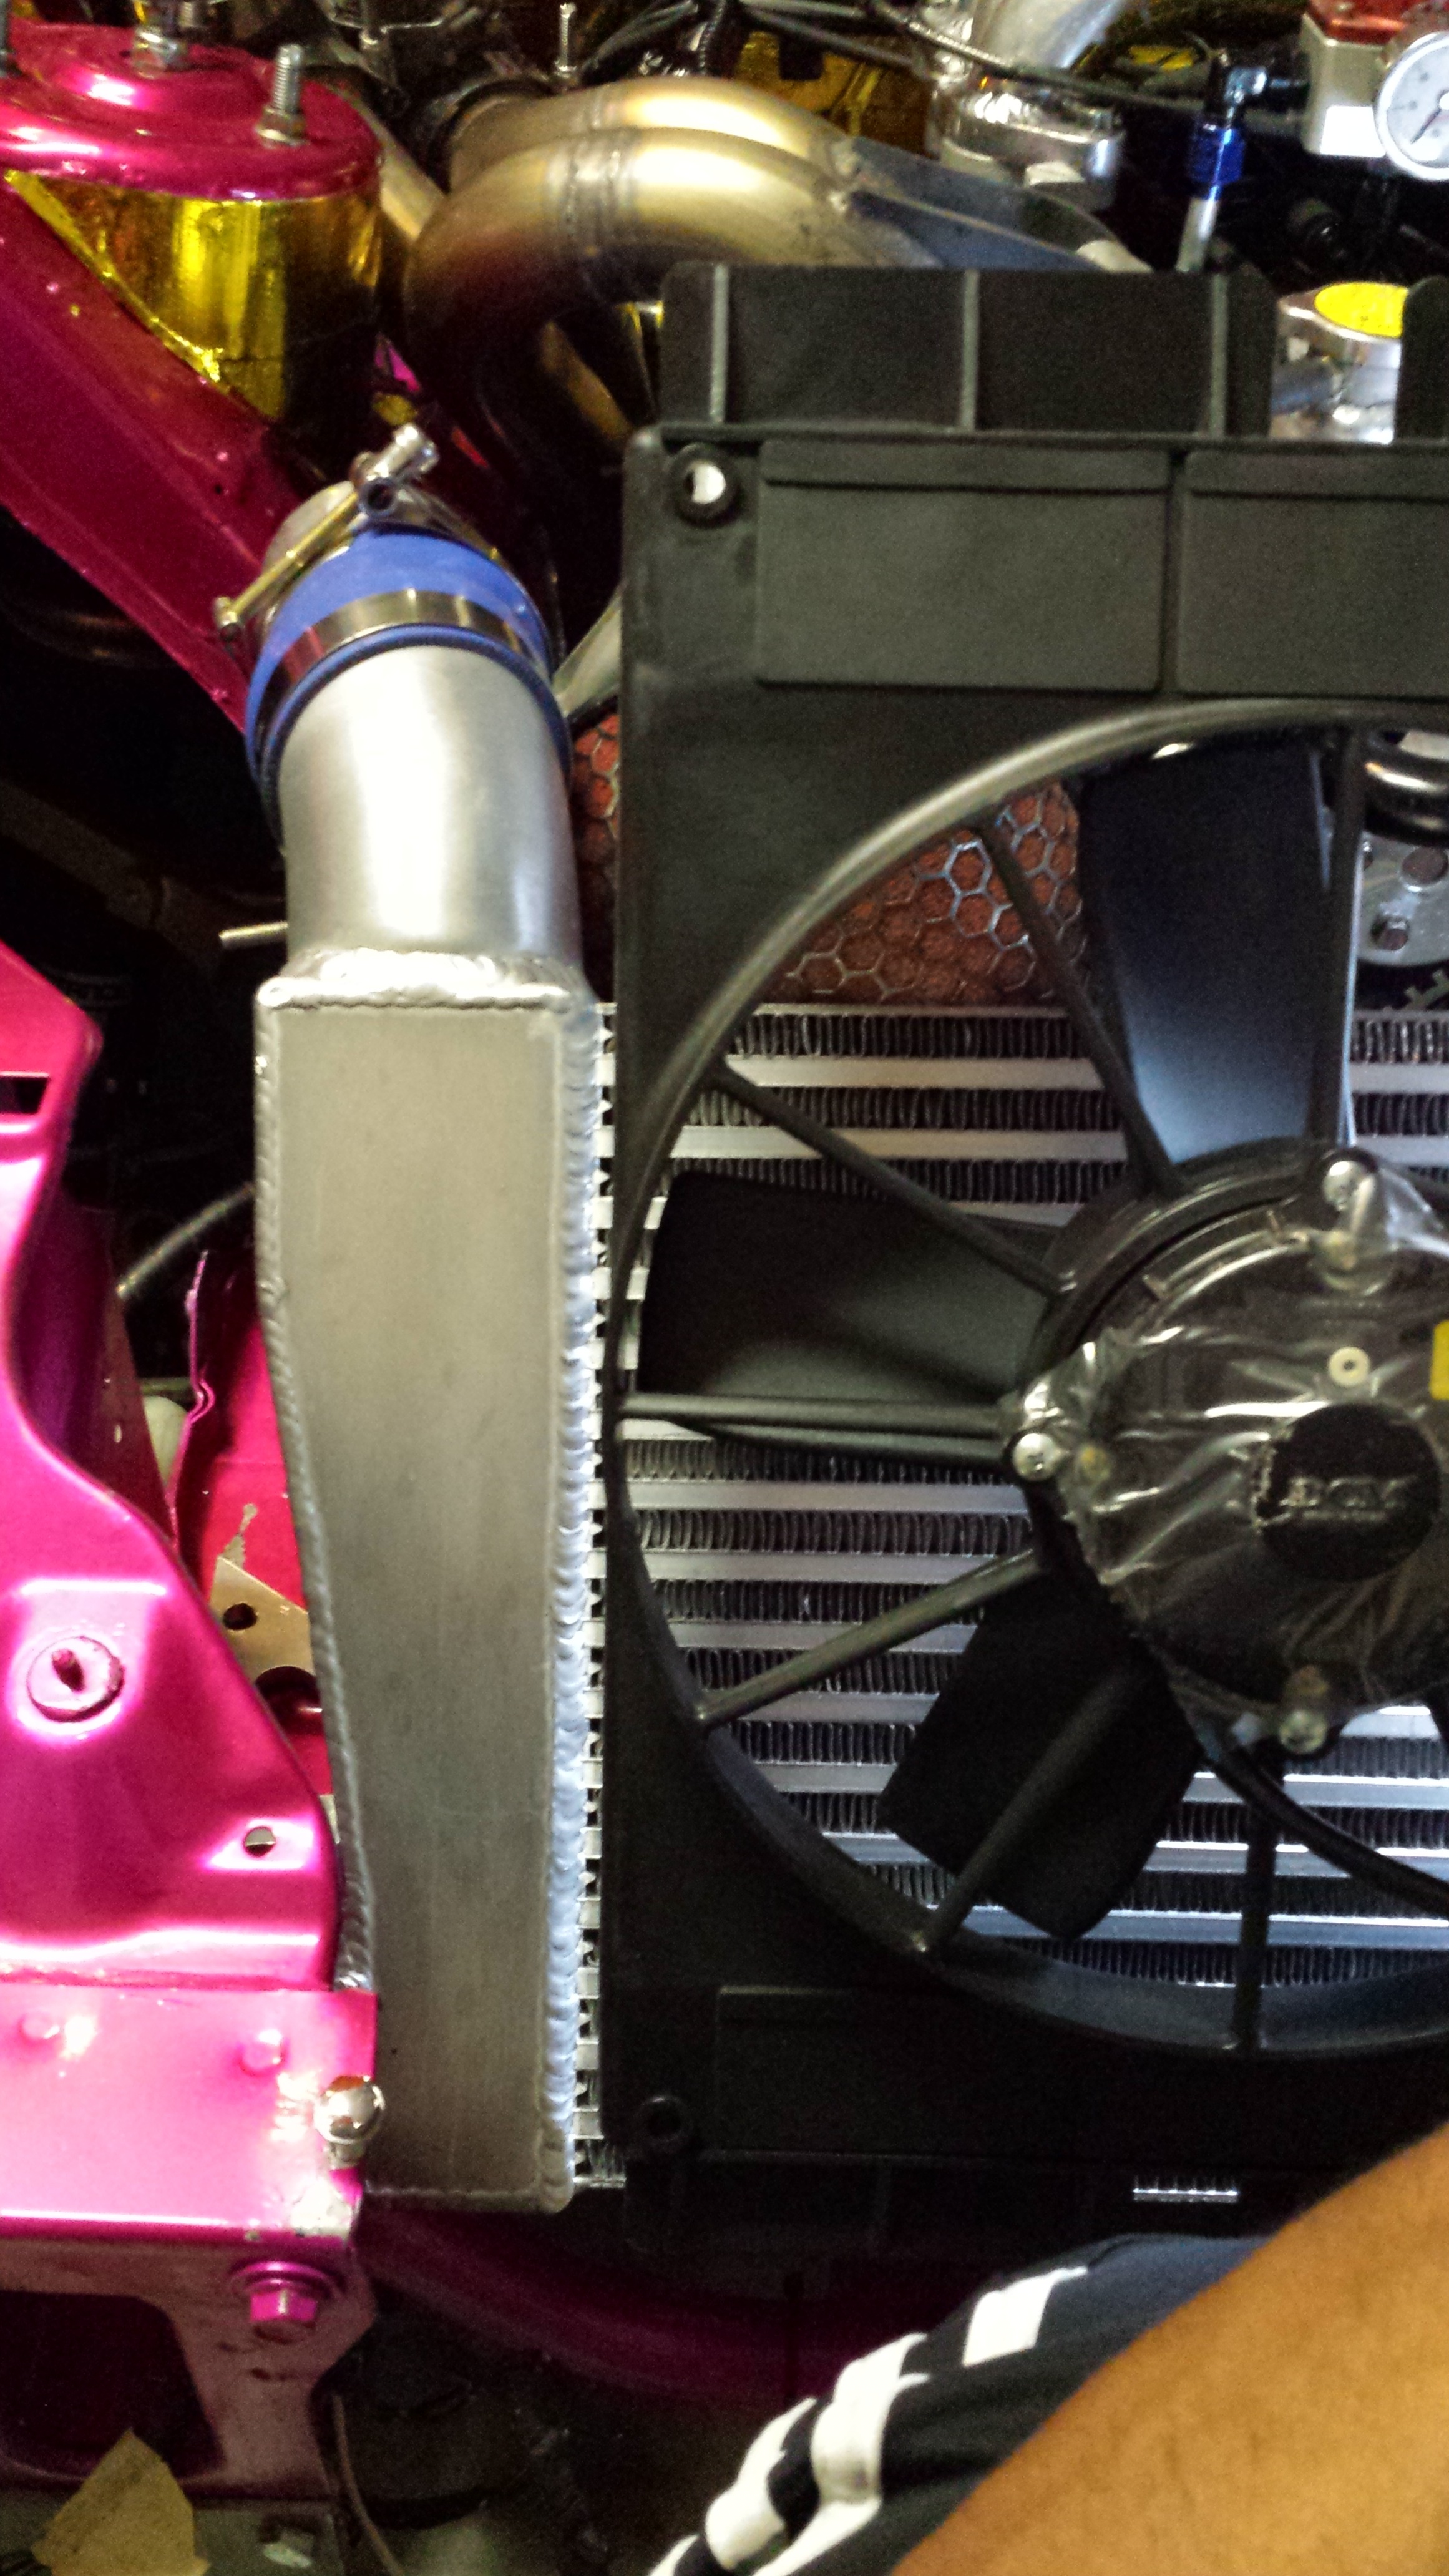
Trimmed with my dremel
1/4 Inch off the alum core... Now I just need to figure out how I can close off the shroud on the top and bottom because I cut the shroud so it would fit...but now I need to have a way to seal the long sides against the radi. I hate working with fiberglass..but it may be what I'll need to do.
unless I want to make a UIM cooler......jkjkjk
That is about all the work I've been able to get done on the car. Like I said I wish I had more time with her.... but hopefully this weekend I can get a nice 5 hour session in. Also sometimes I wish I had a buddy that was as dilligent as I was and I knew I could trust to come help me with some of this stuff. I have a few but they're all so busy working on their own cars...or out of town.. john..ahem...caugh..
Anyways here's my list...be prepared...:
Tires 235/35/18f - 245/40/18R
DIn pocket insert
Hood vent
Hood pins
Front strut brace
Back up lug nuts
Transmission Brace...banzai
Install AIT sensor
EV1 bosch connector for AIT
Calibrate AIT sensor
Paint bodywork exterior
Takata/crow 4pt harness
Passenger side seat
PBM tie rods install
PBM angle mod mod
Tune
Bash Bar
AEM EBC solenoid Install
Intercooler Ducting
Radiator Ducting
Ride Height Adjust
Oil cooler fan switch & mount
Clean fuel filter out
Change Diff Fluid
Water wetter
Tow Hook mount rear and front
Radiator Fan installation
Passenger side Front Spacer secure
Rear brake P-side paint and replace
Bleed Brakes
Headlights
Slot coil mounting Bracket for more adjustability
Finish Exhaust
Register car
smog ;-)
Well yesterday was my first real day off and I still had a baunch load of stuff to do. I got an hour or so to mess around in the garage but I really just need a weekend 7am to 11pm to really get everything where it needs to be.
I have a giant list of things I need to get done, that may be a bunch of small things, but each little thing is 30 min here 20 min there, blah blah. These things really add up. I'll list it at the end as not to bore you guys hah.
I got my fire sleeve in from Baker Performance. They make it damn easy to purchase because right next to each individual size it lists the -AN size line it will work for. They have silver and Orange. I chose Orange for my turbo oil drain but everything else I got silver....just so that every line didn't stick out like a sore thumb. Actually...I kinda like how it sticks out like a sore thumb hahaha. ANyways..heres some pics...
I got -4 for my oil feed line
-6 for all fuel/water lines
-10 for the turbo Oil drain line
I did the Turbo Oil feed first as it was the easiest to install
Then I did small line that goes from my Secondary FFE rail to the fuel pressure regulator
And I'll be doing the rest of my fuel lines today or tomorrow.
On to my cooling situation. I have yet to hear back from Mishimoto about the sponsorship and the car hasn't got hot since I added the Bleed valve on top of the radiator so no air would get trapped. But I wasn't happy with the mishimoto Radiator fans. So I ordered a set of Jegs HIGH CFM fans. THey're rated at 3600 CFM and come with a shroud. Of course I'd need to cut them but 3600 compared to the measily 1400 total of the current fans is a huge improvement and should really help keep the temps down when they need to come down. THe added shroud will be a definite upgrade because right now the current fans are just mounted to the rad without a shroud.
Here are the fans
how big they are and how much they'll need to be trimmed to fit
Trimmed with my dremel
1/4 Inch off the alum core... Now I just need to figure out how I can close off the shroud on the top and bottom because I cut the shroud so it would fit...but now I need to have a way to seal the long sides against the radi. I hate working with fiberglass..but it may be what I'll need to do.
unless I want to make a UIM cooler......jkjkjk
That is about all the work I've been able to get done on the car. Like I said I wish I had more time with her.... but hopefully this weekend I can get a nice 5 hour session in. Also sometimes I wish I had a buddy that was as dilligent as I was and I knew I could trust to come help me with some of this stuff. I have a few but they're all so busy working on their own cars...or out of town.. john..ahem...caugh..
Anyways here's my list...be prepared...:
Tires 235/35/18f - 245/40/18R
DIn pocket insert
Hood vent
Hood pins
Front strut brace
Back up lug nuts
Transmission Brace...banzai
Install AIT sensor
EV1 bosch connector for AIT
Calibrate AIT sensor
Paint bodywork exterior
Takata/crow 4pt harness
Passenger side seat
PBM tie rods install
PBM angle mod mod
Tune
Bash Bar
AEM EBC solenoid Install
Intercooler Ducting
Radiator Ducting
Ride Height Adjust
Oil cooler fan switch & mount
Clean fuel filter out
Change Diff Fluid
Water wetter
Tow Hook mount rear and front
Radiator Fan installation
Passenger side Front Spacer secure
Rear brake P-side paint and replace
Bleed Brakes
Headlights
Slot coil mounting Bracket for more adjustability
Finish Exhaust
Register car
smog ;-)
 05-20-13, 12:48 PM
#1511
Small Update:
Took off the UIM to get to all my fuel lines so I could put the Baker Fire Sleeve on.
I ran the Return line fromt he Fuel Pressure Regulator under the wiring harness wires just to keep the wires off the bare metal. figured a little more heat protection couldn't hurt.
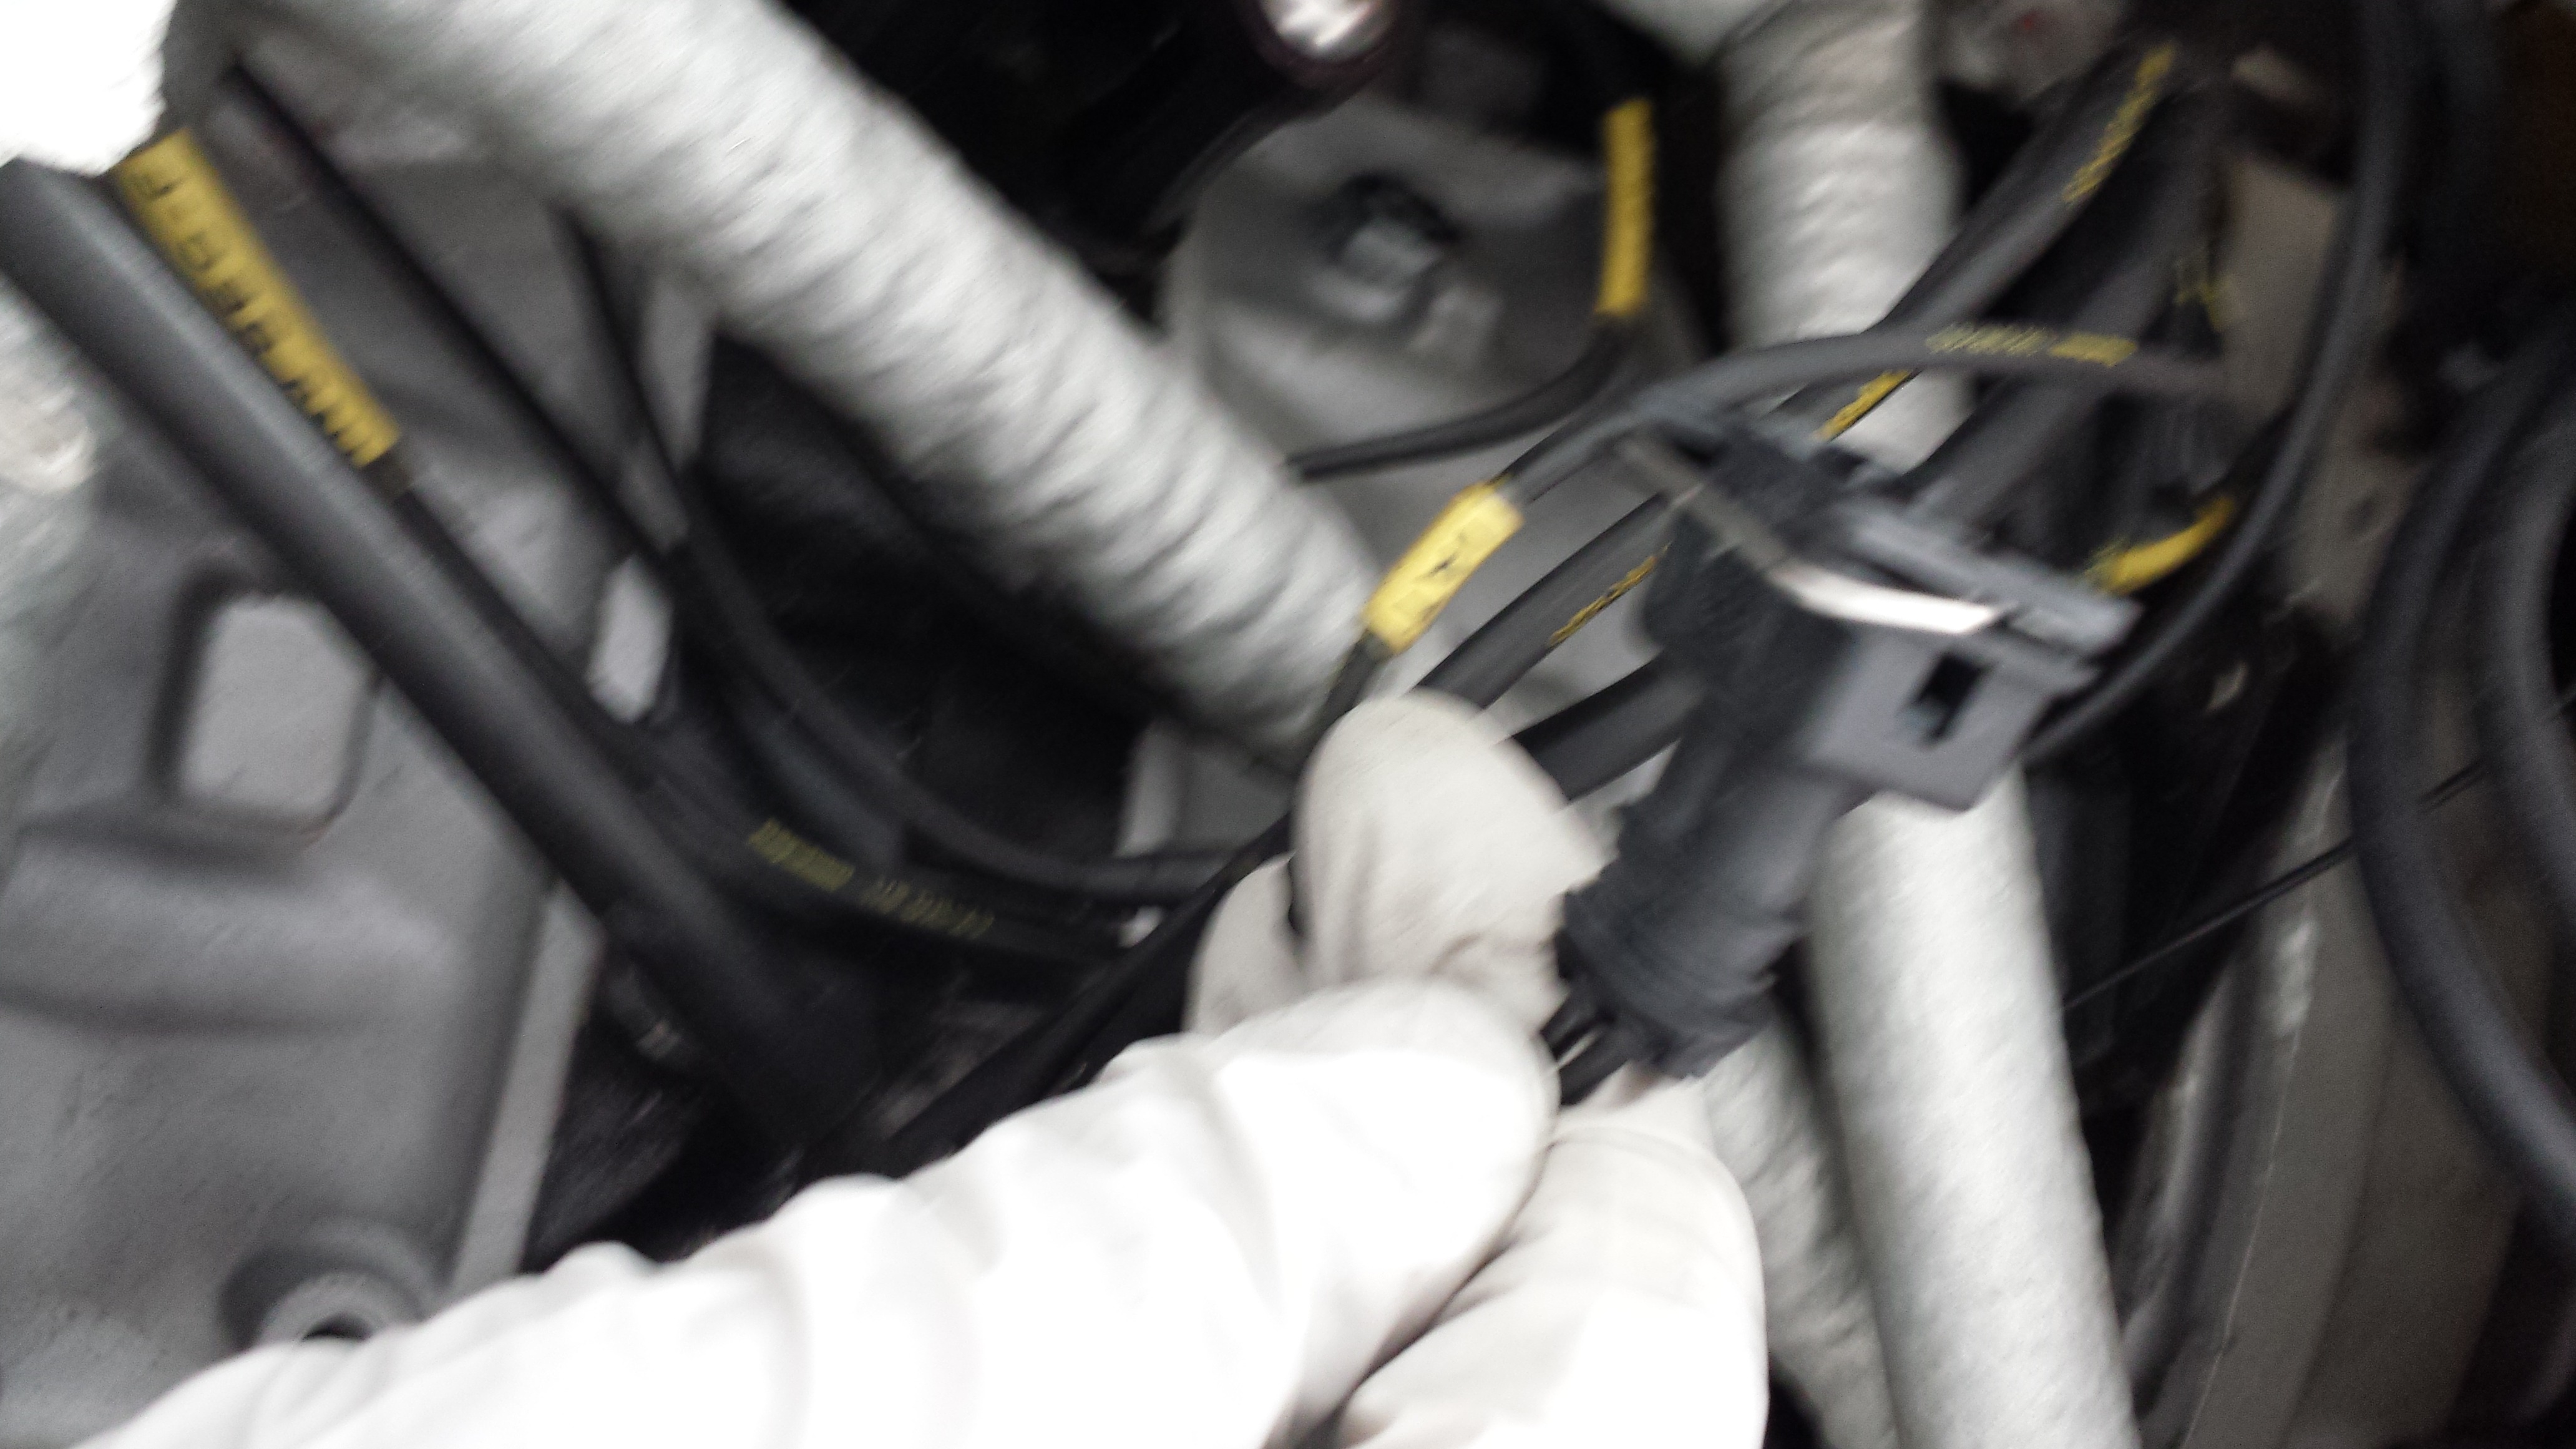
Overall it was really easy to install the Baker Fire Sleeve though. I didn't have to dis-assemble the lines at all....just had to dis-connect them. THe Fire sleeve slipped right over the lines, a little tight but with a little pressure they all went on.
Also installed the passenger side rear sway bar bracket that I was missing. So no more clunking from the right rear. Installed the Rear PBM adjustable spacers, but had to knock out the studs because I don't need them (already hav exteded studs). And.....got a driver side rear caliper in, so I can install the Steel Speed bleeder in it and throw away the old caliper with the Brass fitting melded into it. <that was a pain. Started working on my shroud for the New fans but havn't taken any pictures.
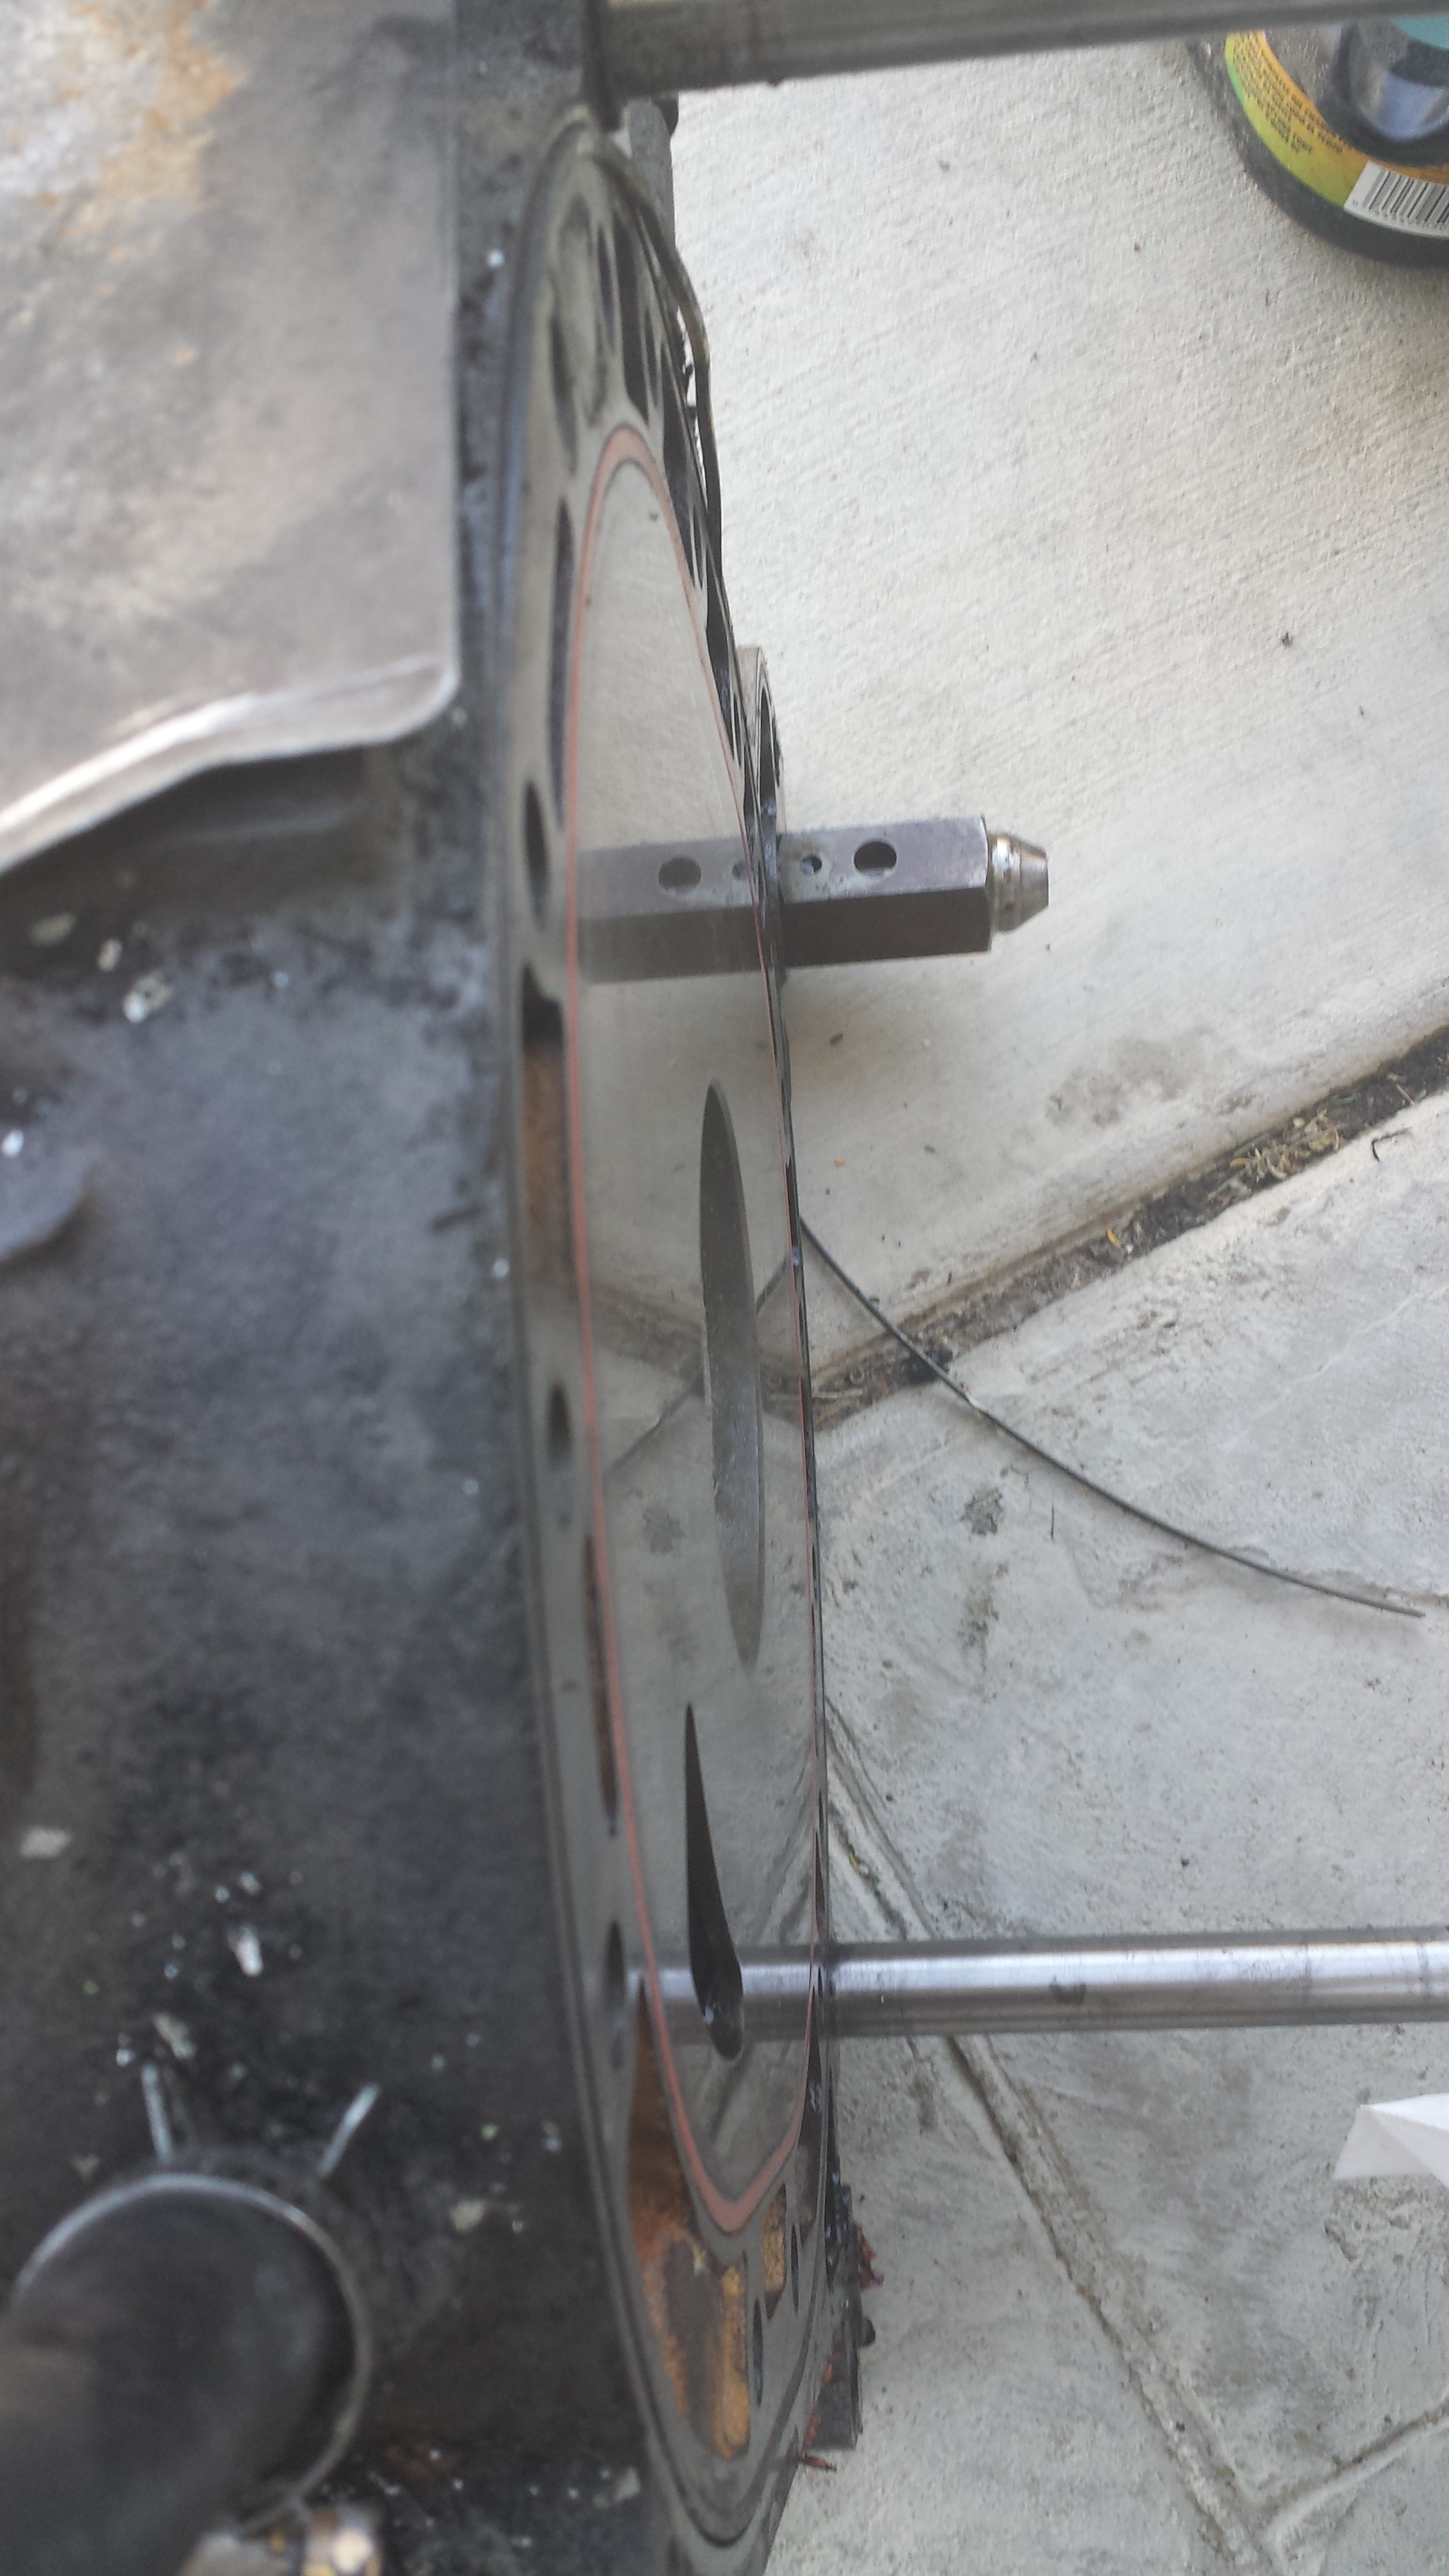
In other news...drove up to sacramento...10 hours, 721 miles later..I had a full long block for a hell of a deal. Guy was going LS1..and was done with rotaries after his latest failed rebuild. He got taken for by Rotary Planet and the guy who he had rebuild it wouldn't refund him the rebuild costs because it had been 3 months. He put 1500 Miles on a brand new reman with new seals in it... Felt bad for him...but I got a hell of a deal.
This is why I LOVE my 2010 Prius

Here was the problem..well one of them:
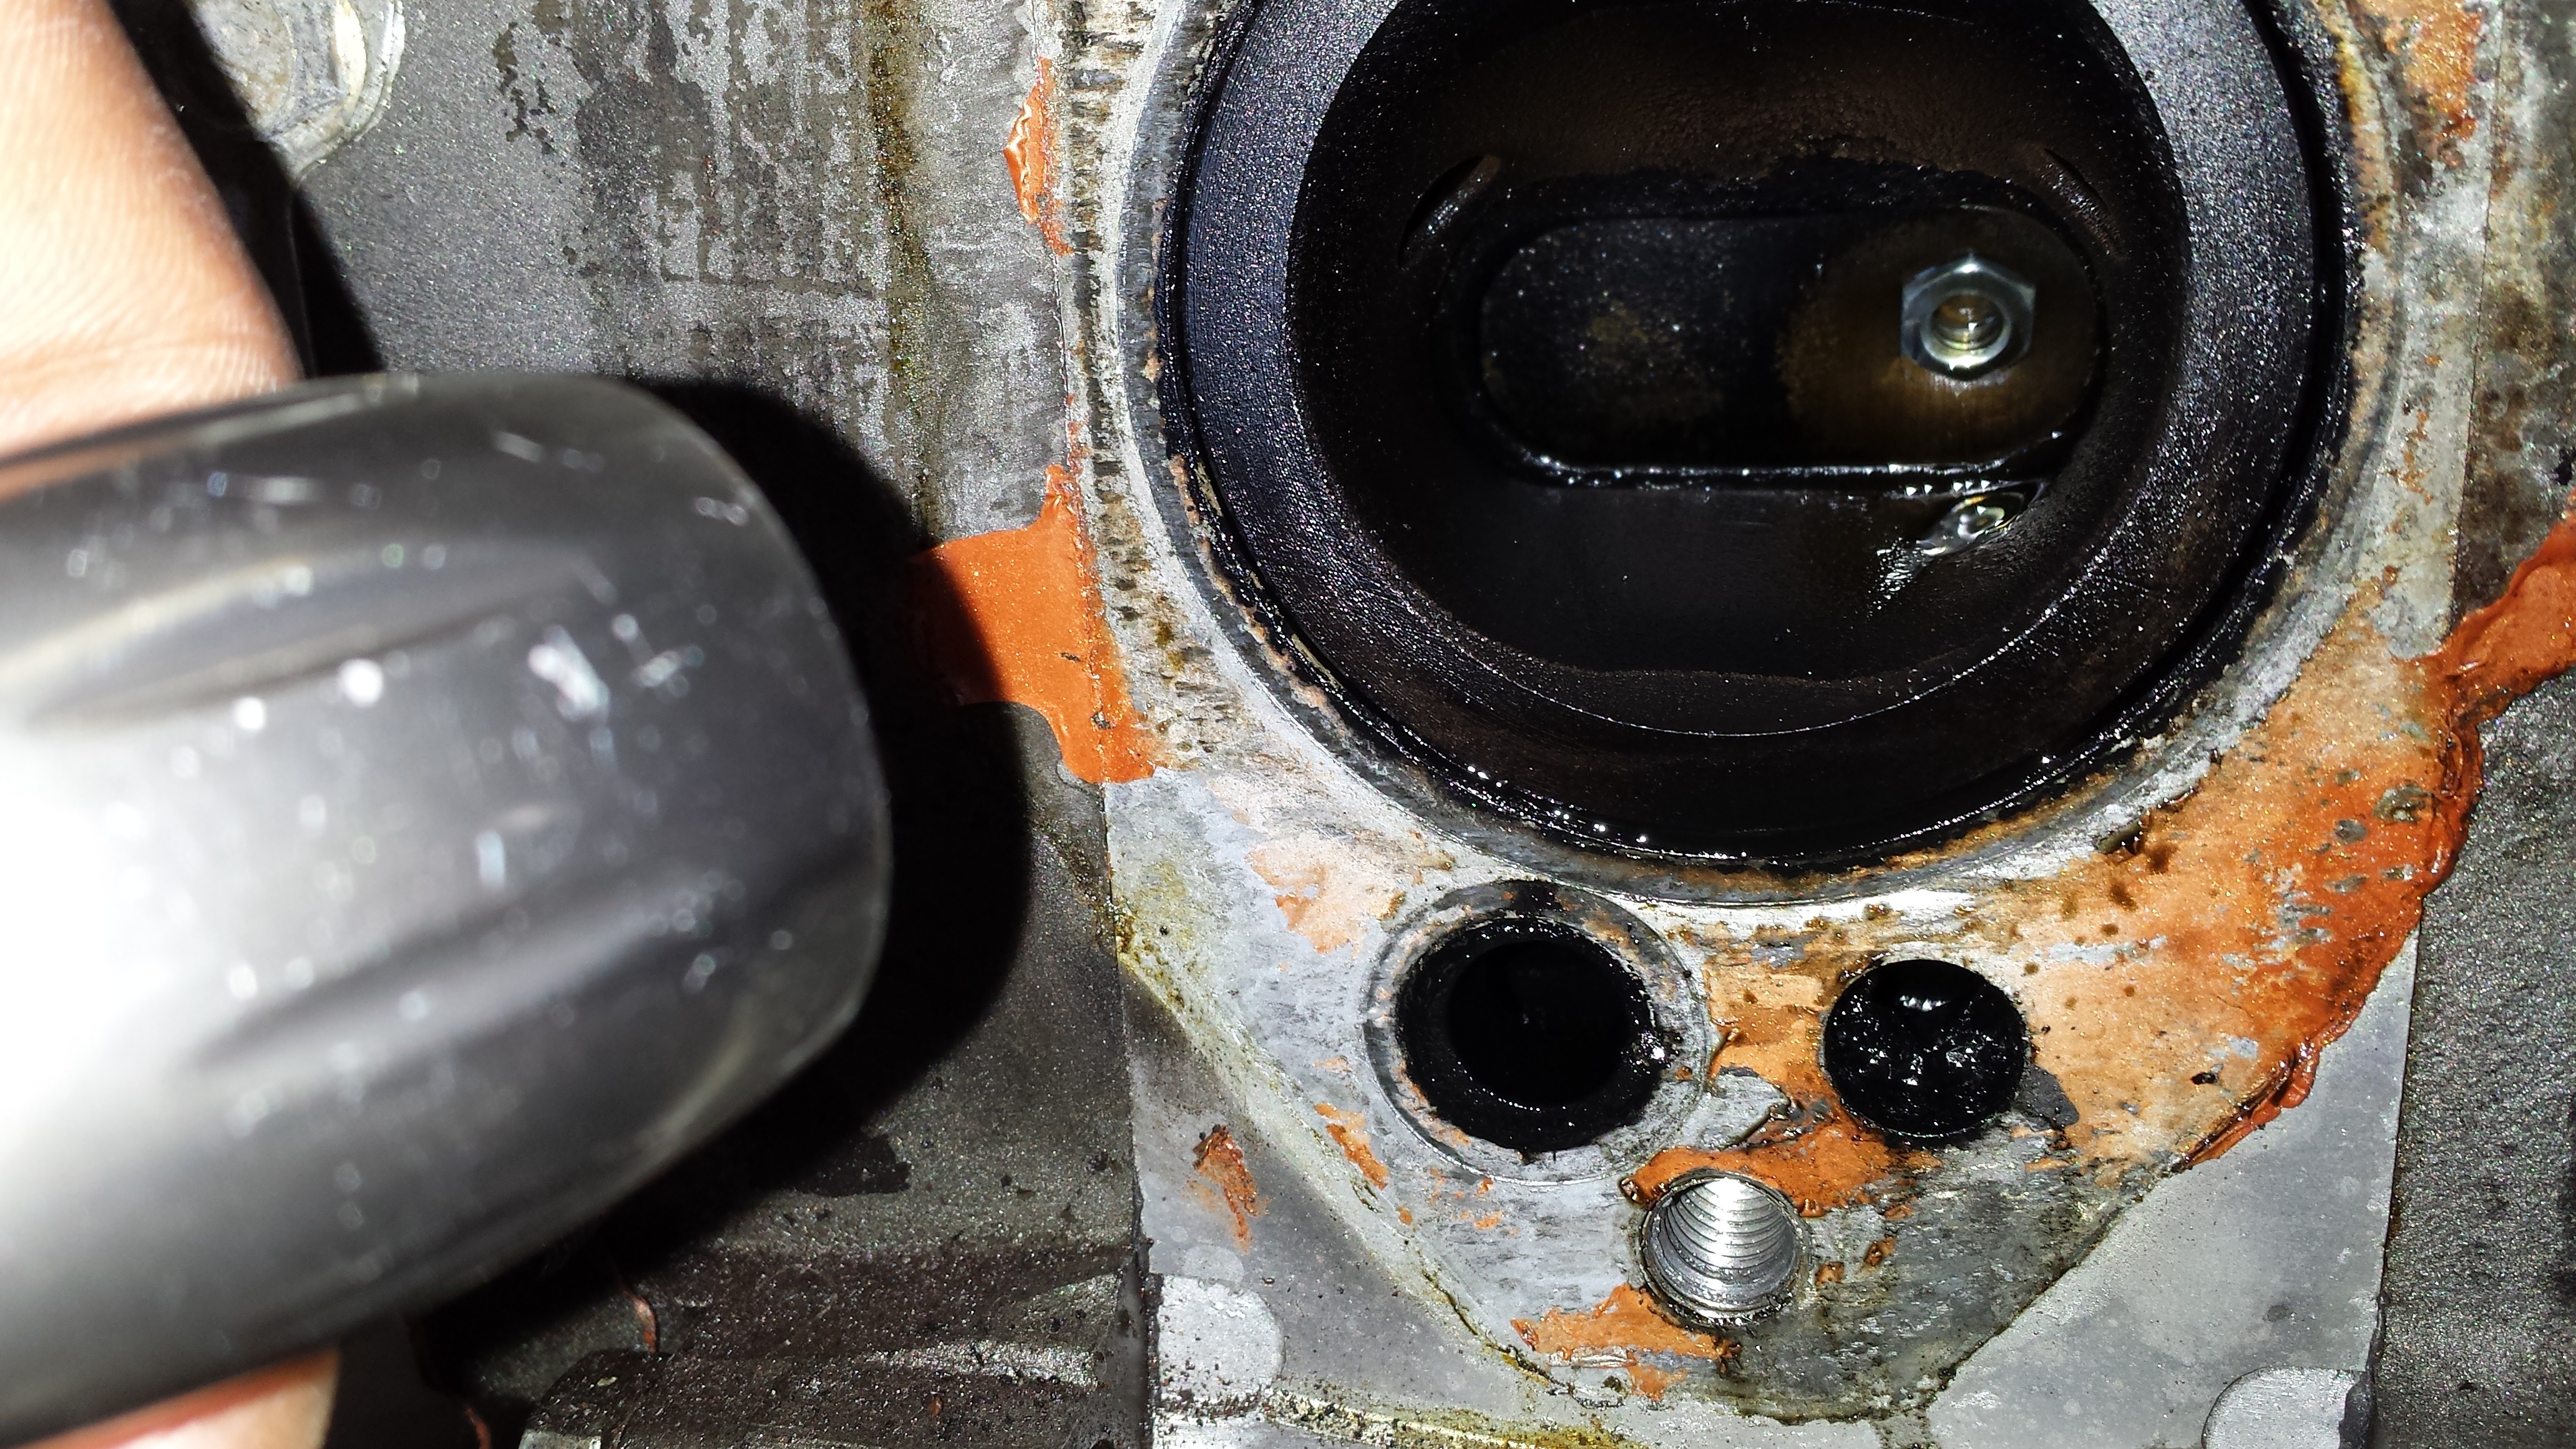
I think he might've done this when he was doing a recent vac job... Because the housings are in Excellent Condition!!
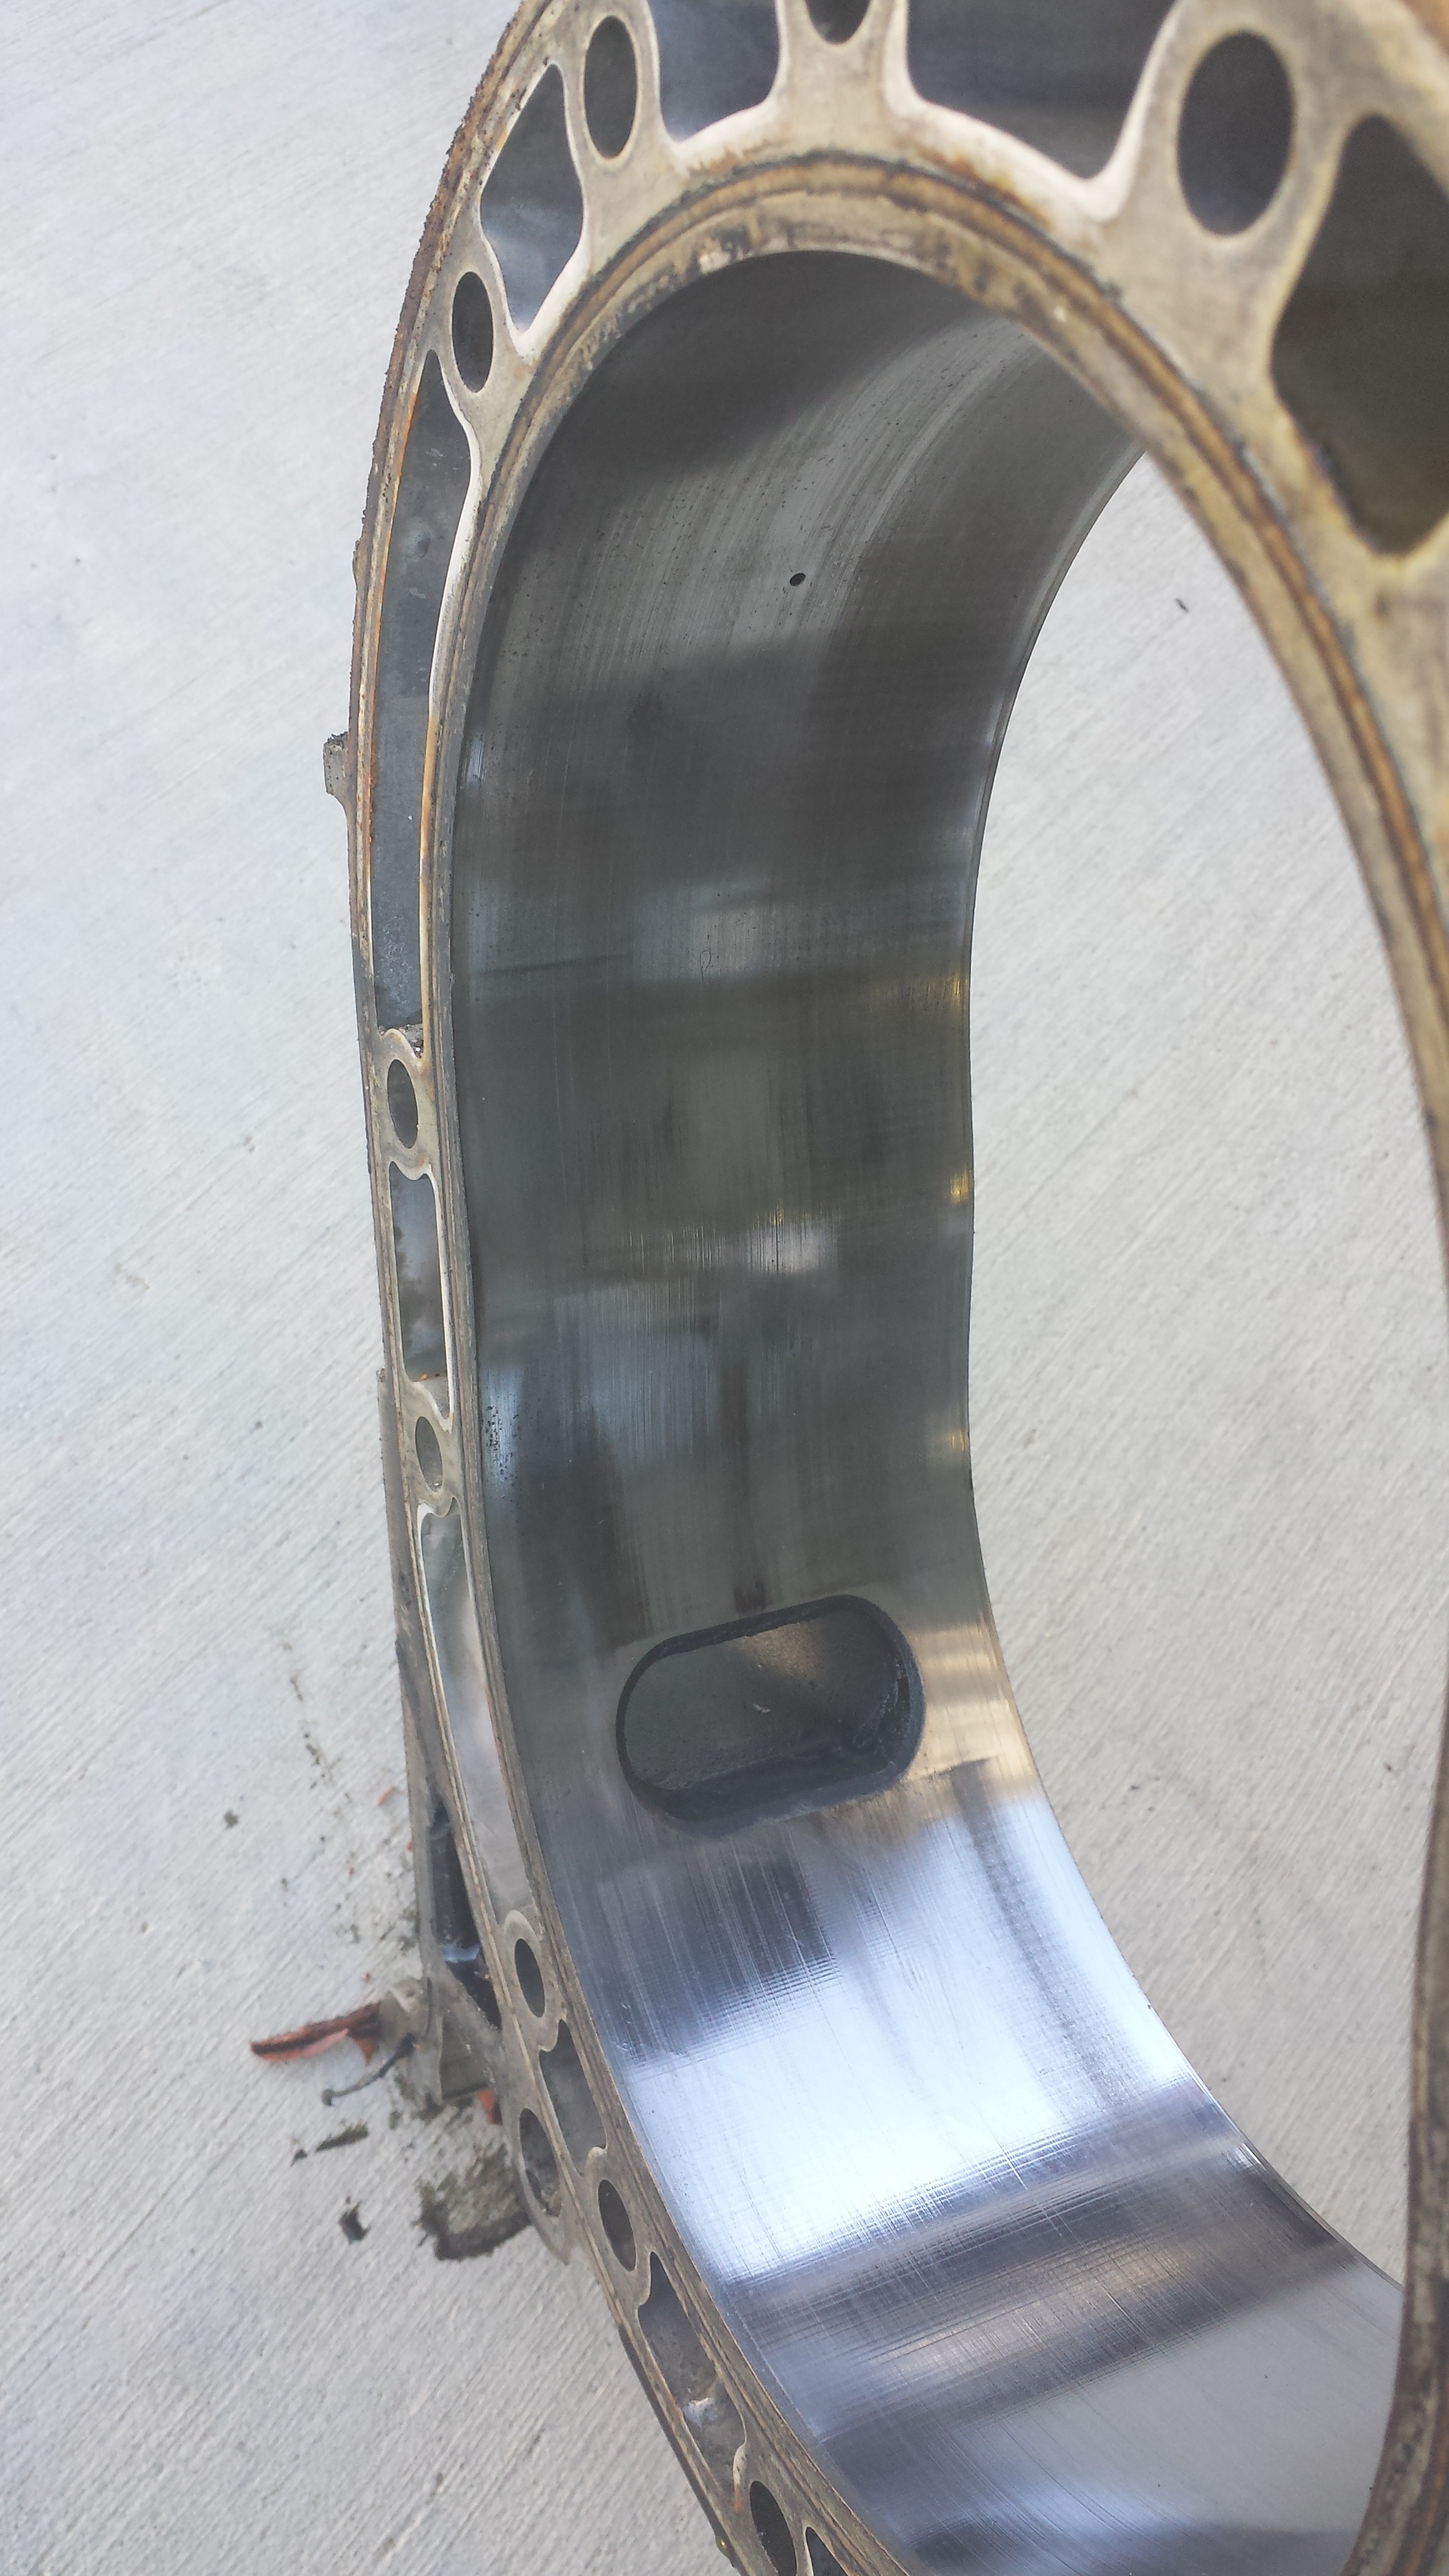

And the Irons were all stock port with practically ZERO to very little Step wear
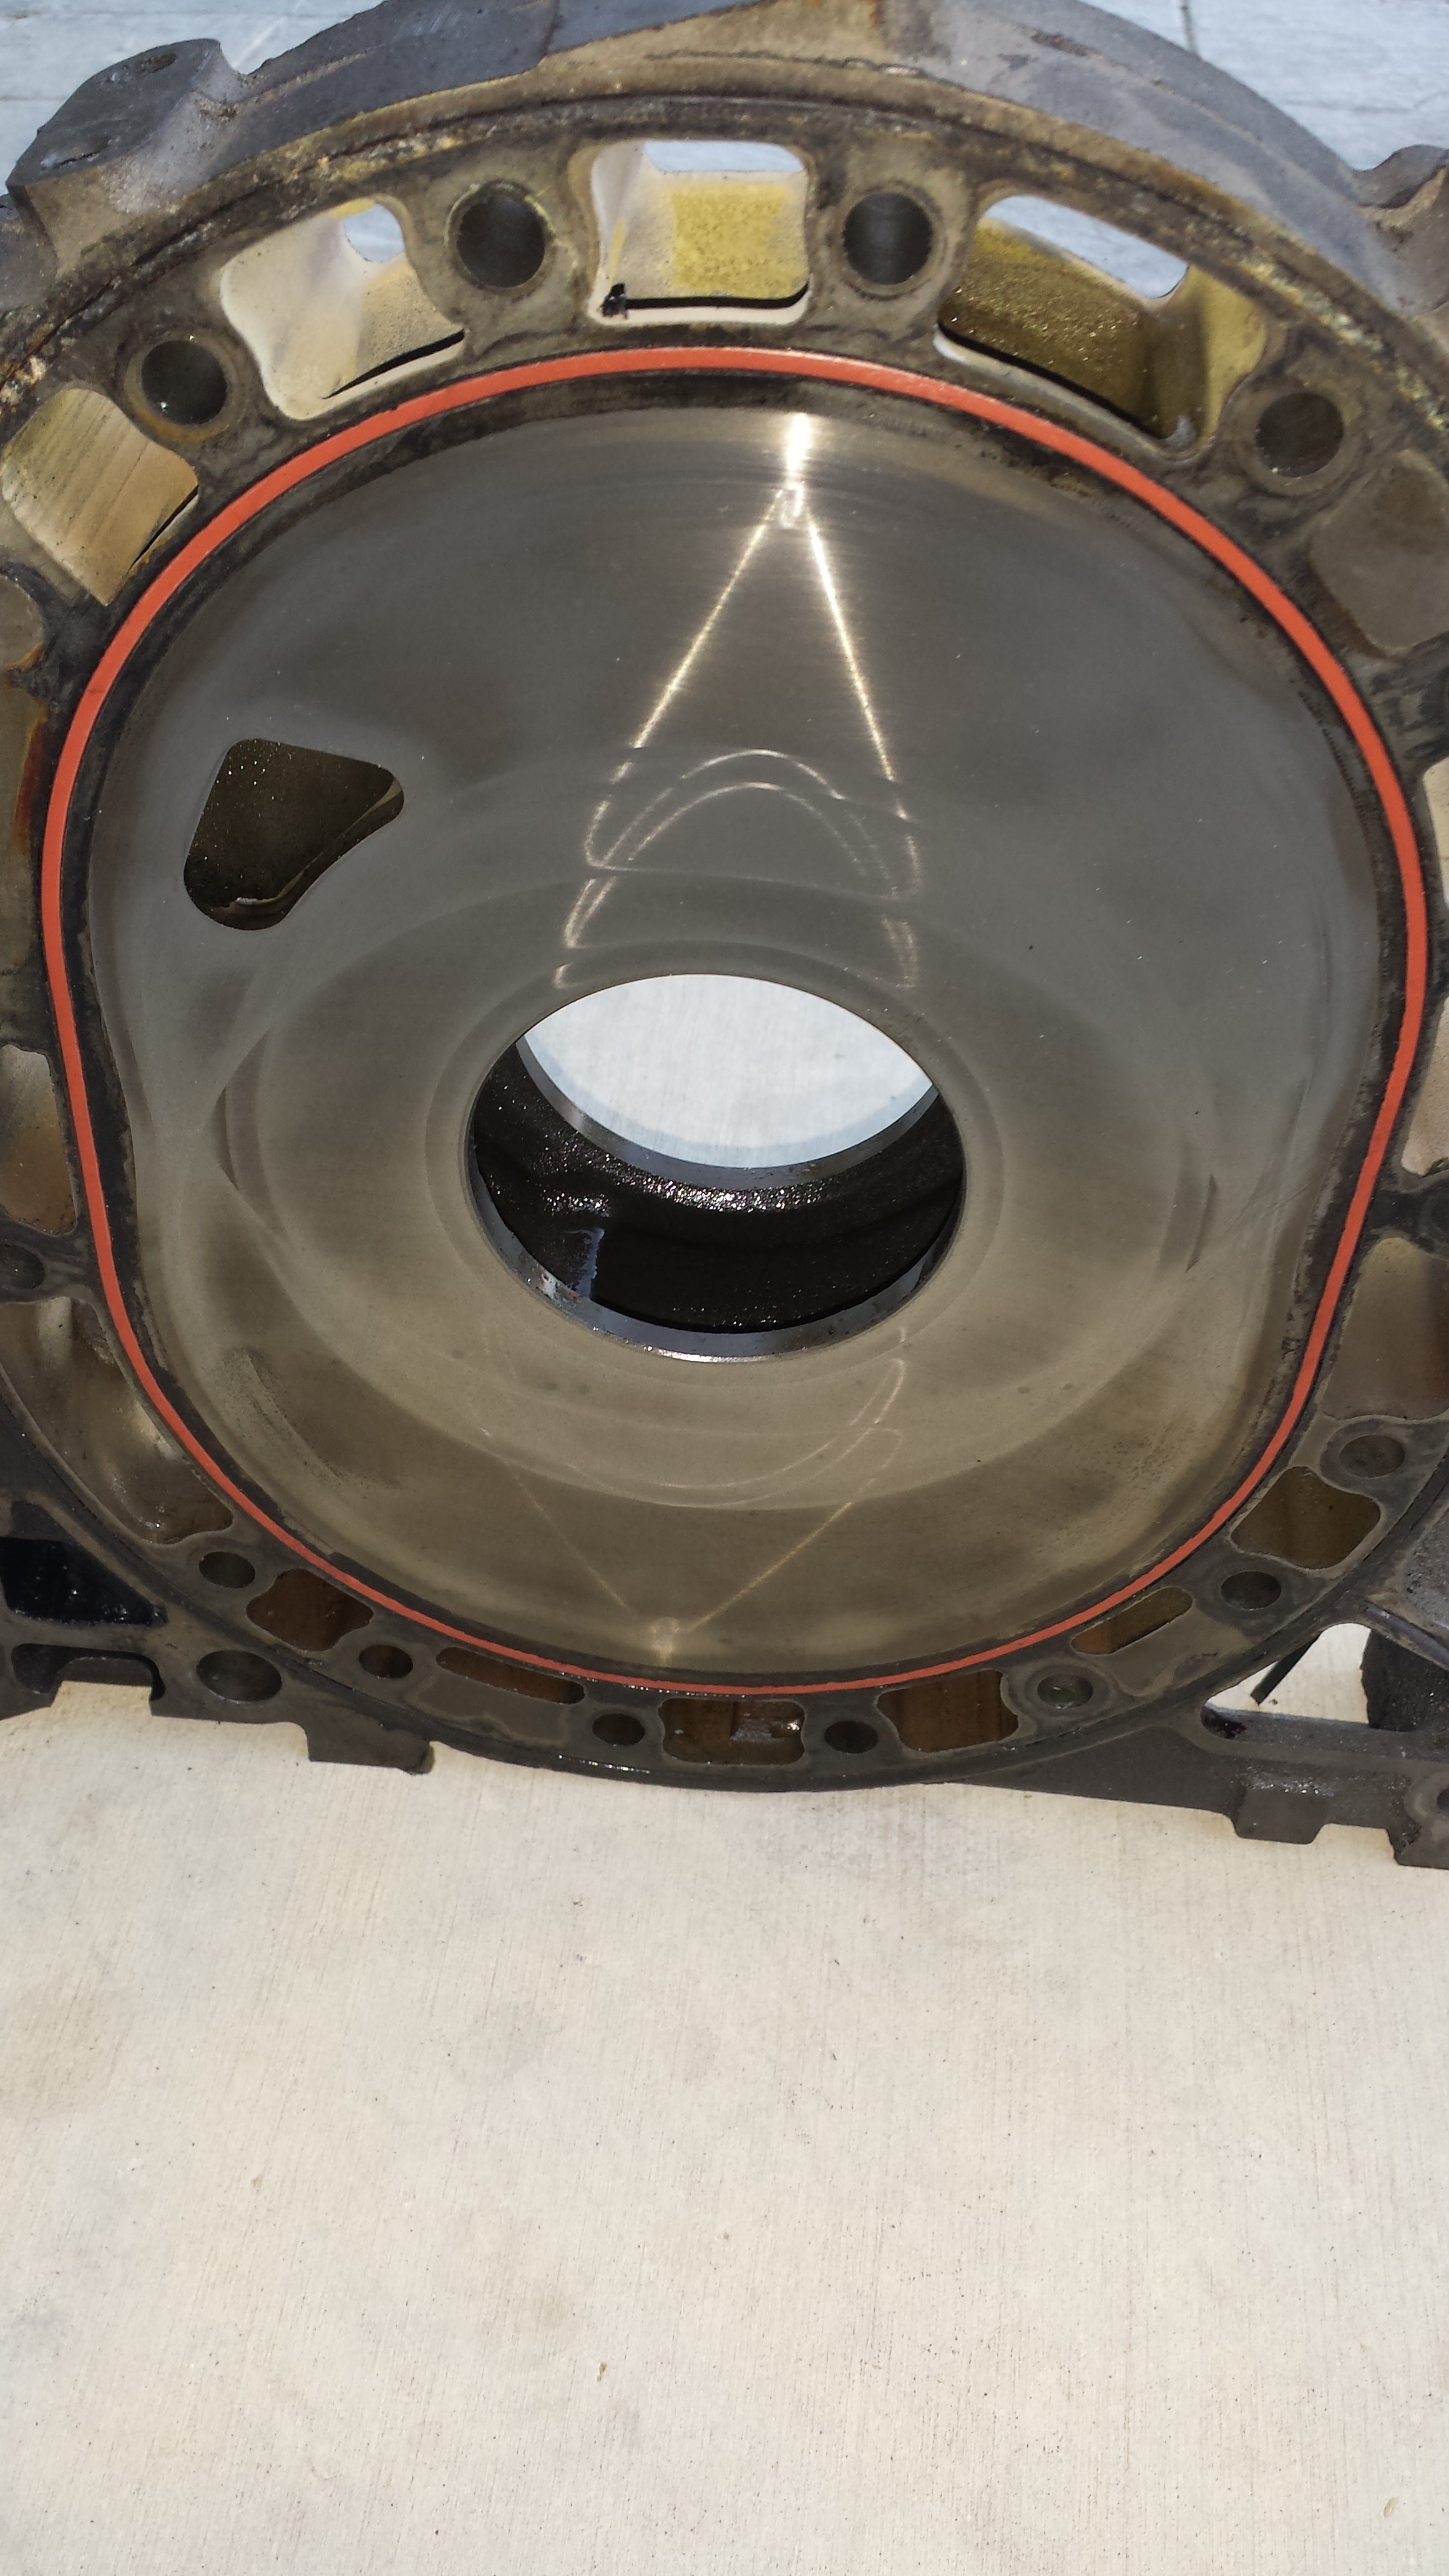
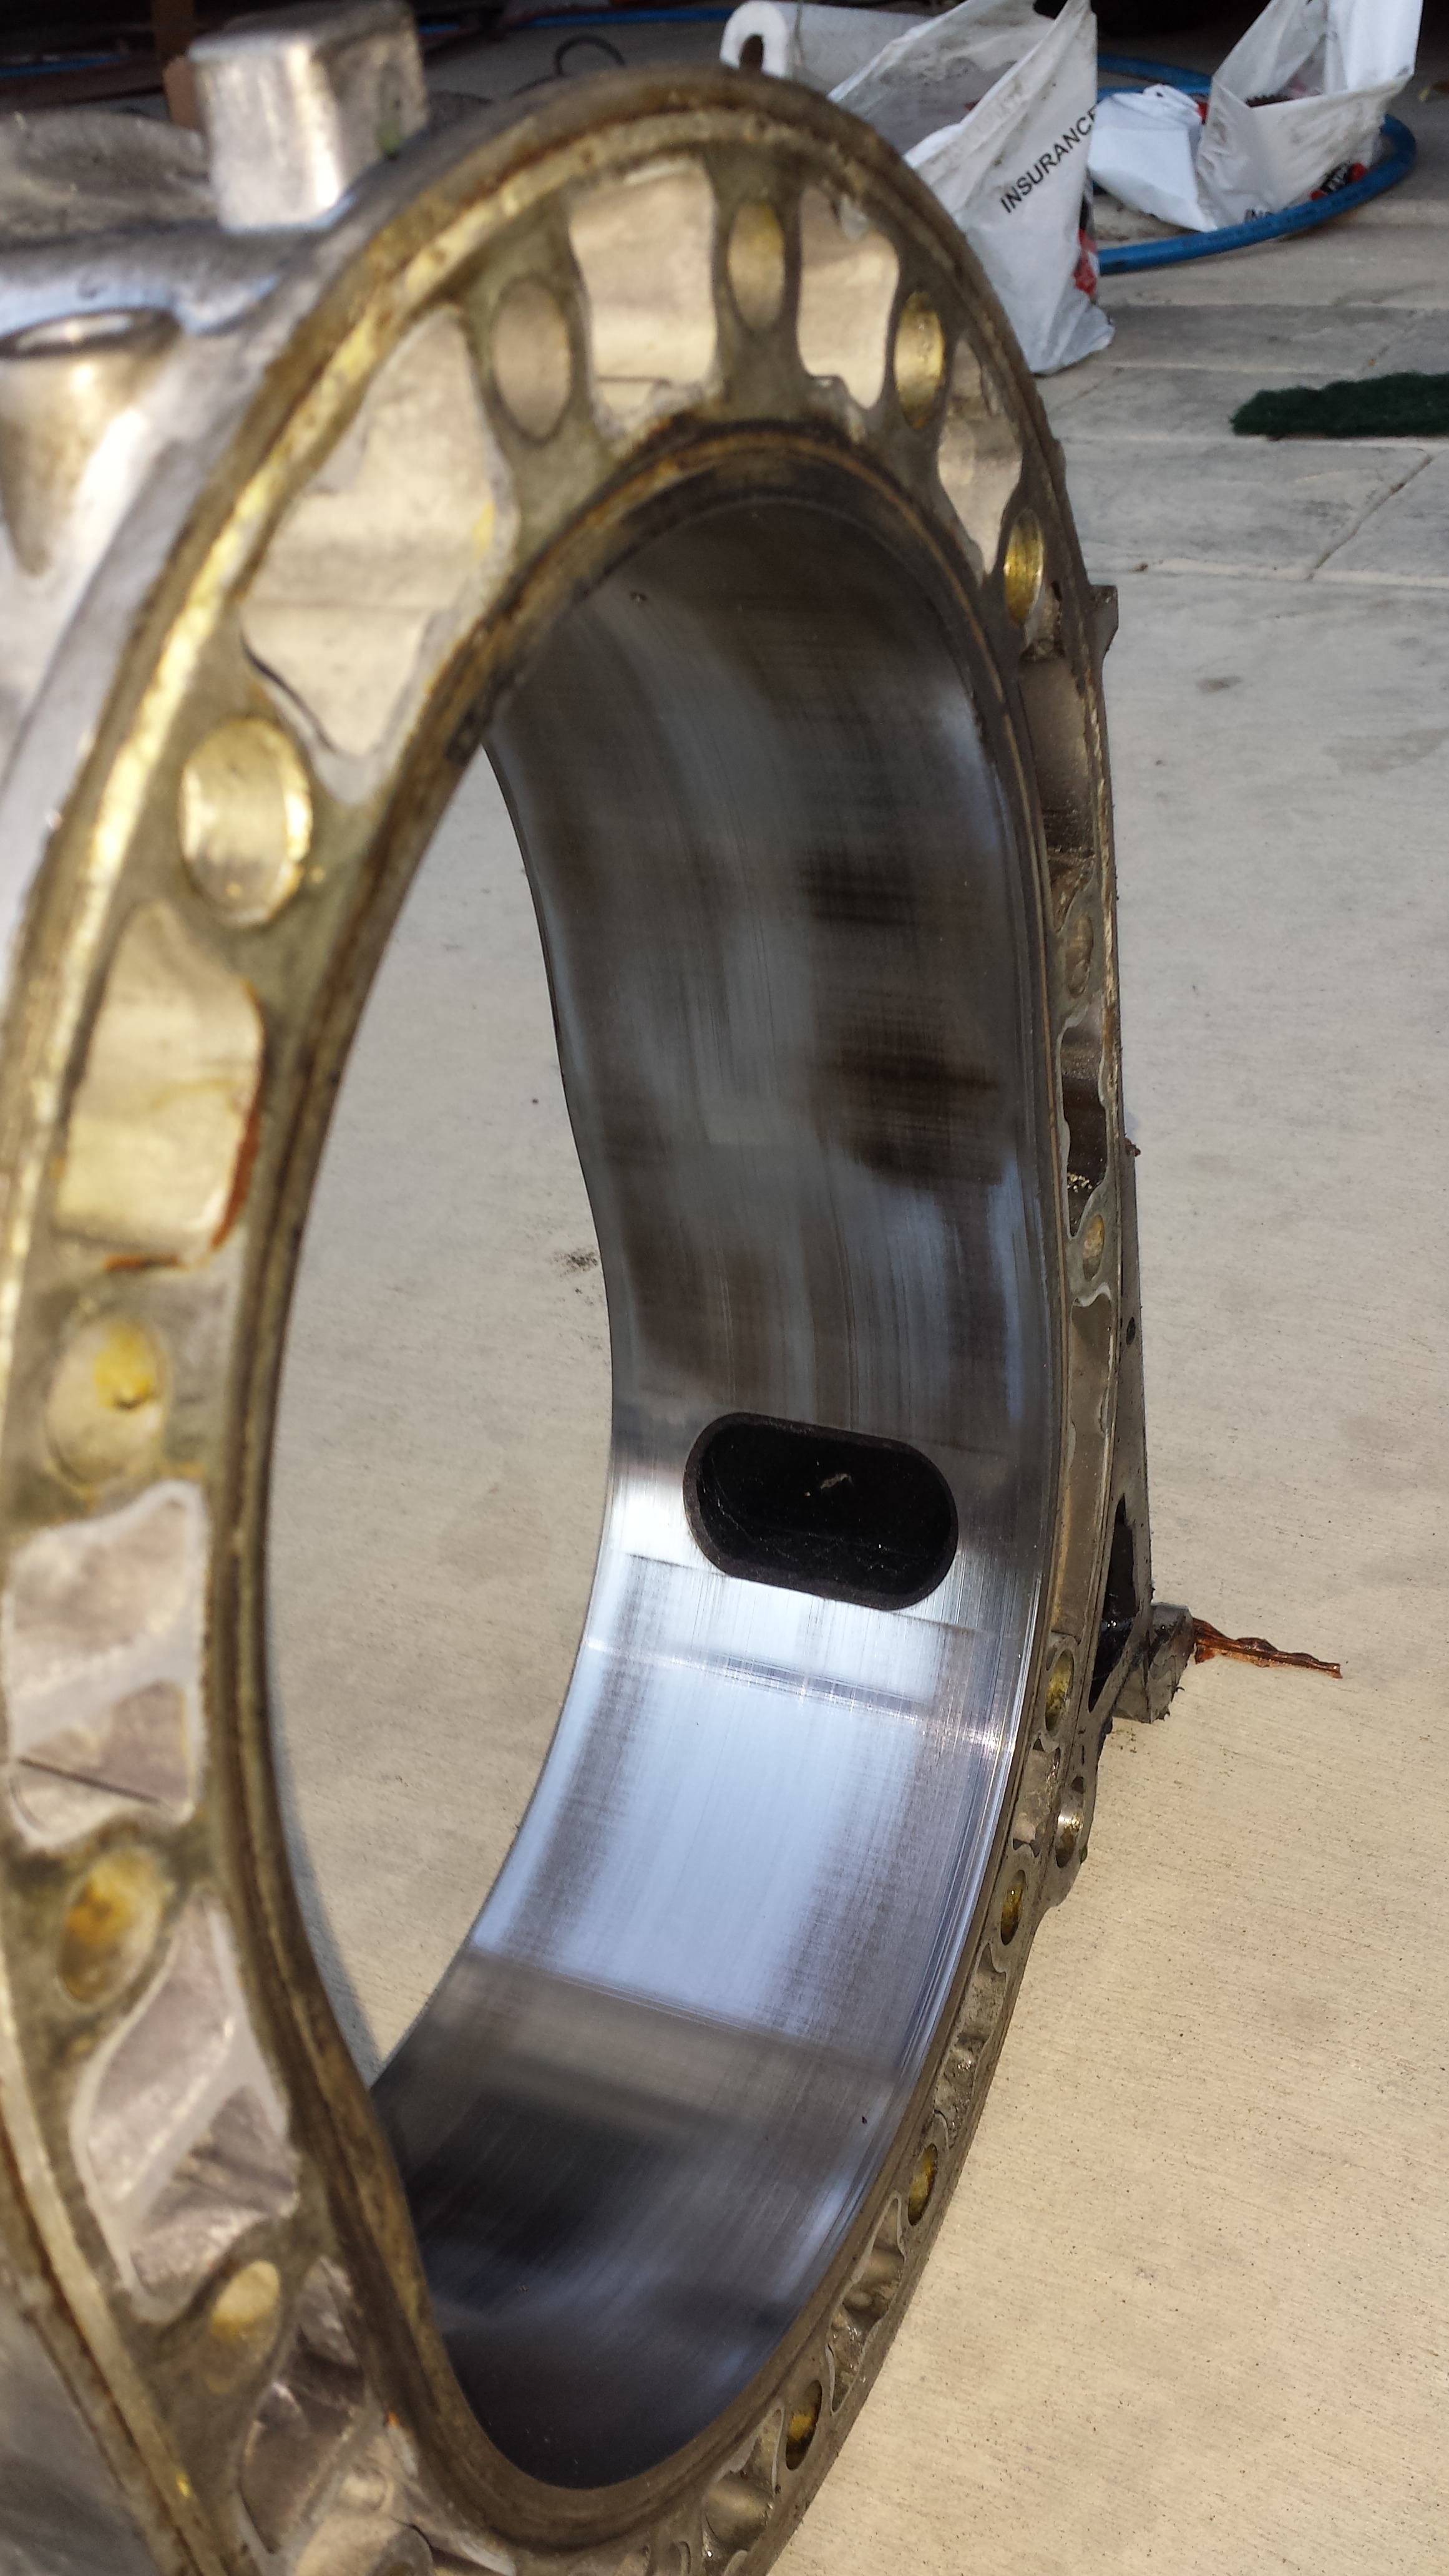
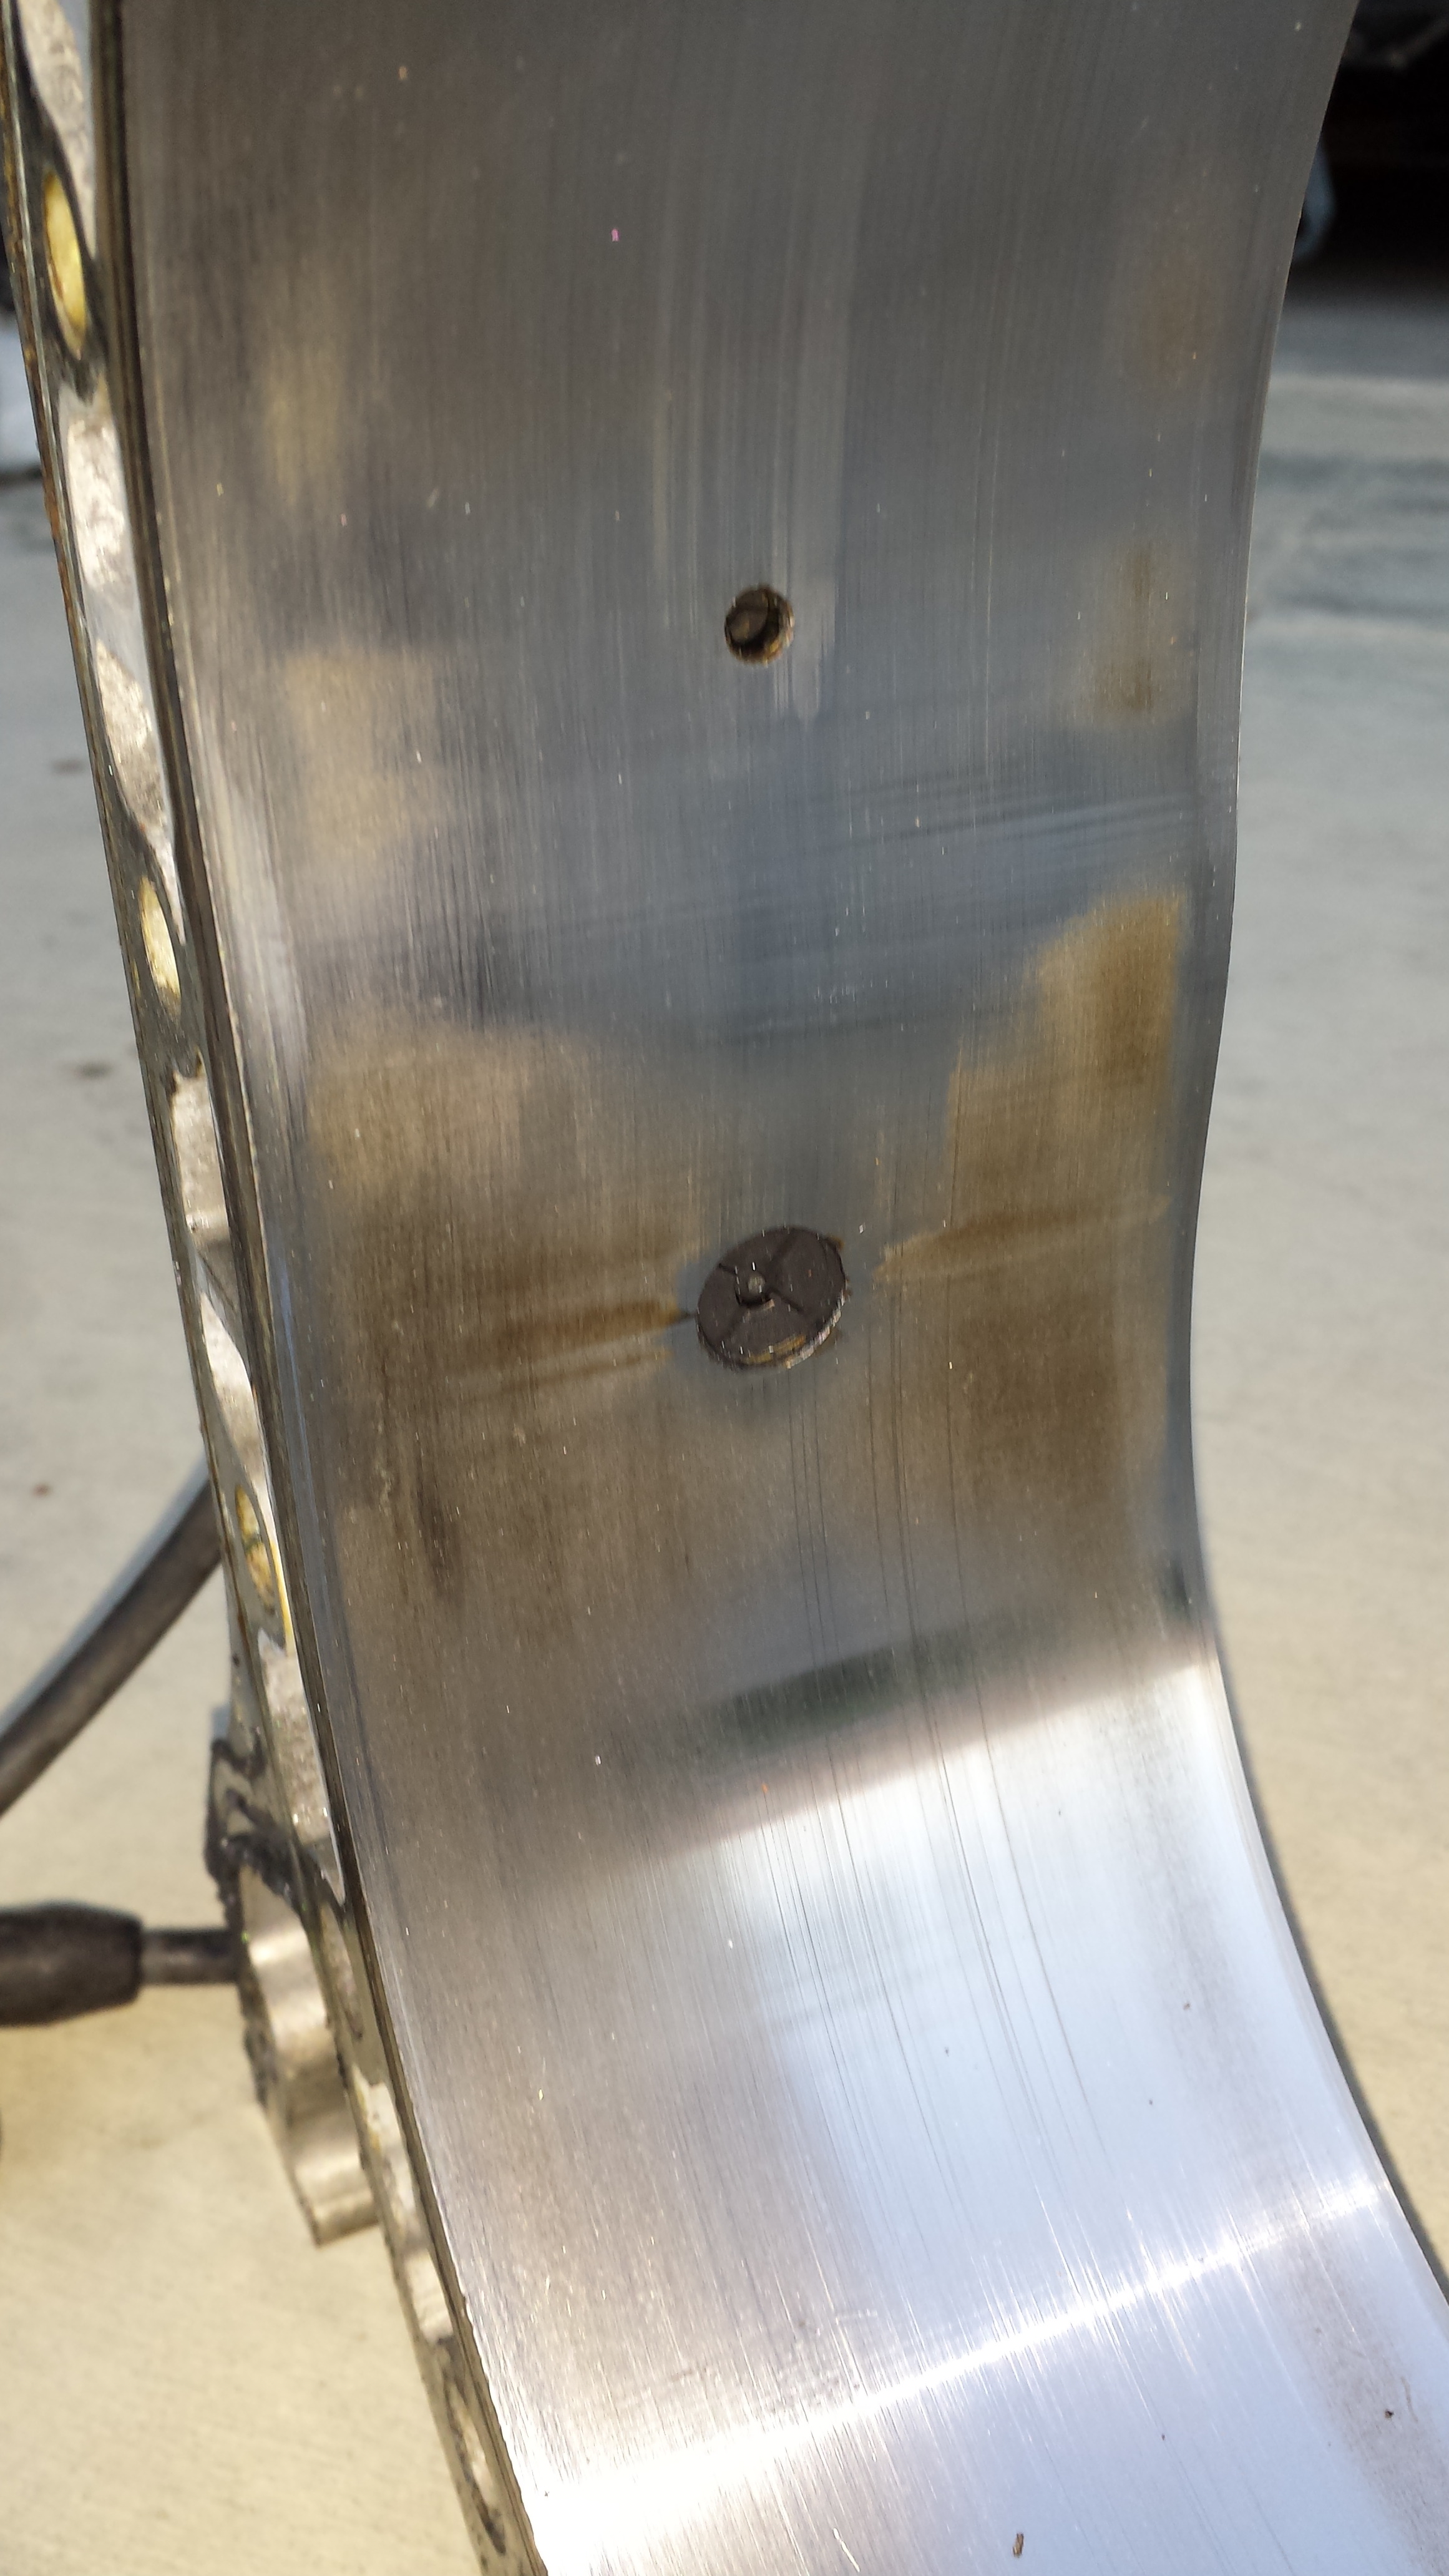
These were all un cleaned pics..just wiped down. Needless to say the embeded nut into the rear rotor won't be used. I'm sure someone could actually use it as the rest of the rotor was fine as well as the seal grooves..but I wouldn't sell it. Motor Had RA Classic Seals in it...2mm 2pc.
Slight chatter marks only....no chrome flaking at all.
Took off the UIM to get to all my fuel lines so I could put the Baker Fire Sleeve on.
I ran the Return line fromt he Fuel Pressure Regulator under the wiring harness wires just to keep the wires off the bare metal. figured a little more heat protection couldn't hurt.
Overall it was really easy to install the Baker Fire Sleeve though. I didn't have to dis-assemble the lines at all....just had to dis-connect them. THe Fire sleeve slipped right over the lines, a little tight but with a little pressure they all went on.
Also installed the passenger side rear sway bar bracket that I was missing. So no more clunking from the right rear. Installed the Rear PBM adjustable spacers, but had to knock out the studs because I don't need them (already hav exteded studs). And.....got a driver side rear caliper in, so I can install the Steel Speed bleeder in it and throw away the old caliper with the Brass fitting melded into it. <that was a pain. Started working on my shroud for the New fans but havn't taken any pictures.
In other news...drove up to sacramento...10 hours, 721 miles later..I had a full long block for a hell of a deal. Guy was going LS1..and was done with rotaries after his latest failed rebuild. He got taken for by Rotary Planet and the guy who he had rebuild it wouldn't refund him the rebuild costs because it had been 3 months. He put 1500 Miles on a brand new reman with new seals in it... Felt bad for him...but I got a hell of a deal.
This is why I LOVE my 2010 Prius
Here was the problem..well one of them:
I think he might've done this when he was doing a recent vac job... Because the housings are in Excellent Condition!!
And the Irons were all stock port with practically ZERO to very little Step wear
These were all un cleaned pics..just wiped down. Needless to say the embeded nut into the rear rotor won't be used. I'm sure someone could actually use it as the rest of the rotor was fine as well as the seal grooves..but I wouldn't sell it. Motor Had RA Classic Seals in it...2mm 2pc.
Slight chatter marks only....no chrome flaking at all.

 05-21-13, 10:24 AM
#1515
Junior Member
remind me
Small update:
Well yesterday was my first real day off and I still had a baunch load of stuff to do. I got an hour or so to mess around in the garage but I really just need a weekend 7am to 11pm to really get everything where it needs to be.
I have a giant list of things I need to get done, that may be a bunch of small things, but each little thing is 30 min here 20 min there, blah blah. These things really add up. I'll list it at the end as not to bore you guys hah.
I got my fire sleeve in from Baker Performance. They make it damn easy to purchase because right next to each individual size it lists the -AN size line it will work for. They have silver and Orange. I chose Orange for my turbo oil drain but everything else I got silver....just so that every line didn't stick out like a sore thumb. Actually...I kinda like how it sticks out like a sore thumb hahaha. ANyways..heres some pics...
I got -4 for my oil feed line
-6 for all fuel/water lines
-10 for the turbo Oil drain line

I did the Turbo Oil feed first as it was the easiest to install


Then I did small line that goes from my Secondary FFE rail to the fuel pressure regulator

And I'll be doing the rest of my fuel lines today or tomorrow.
On to my cooling situation. I have yet to hear back from Mishimoto about the sponsorship and the car hasn't got hot since I added the Bleed valve on top of the radiator so no air would get trapped. But I wasn't happy with the mishimoto Radiator fans. So I ordered a set of Jegs HIGH CFM fans. THey're rated at 3600 CFM and come with a shroud. Of course I'd need to cut them but 3600 compared to the measily 1400 total of the current fans is a huge improvement and should really help keep the temps down when they need to come down. THe added shroud will be a definite upgrade because right now the current fans are just mounted to the rad without a shroud.
Here are the fans

how big they are and how much they'll need to be trimmed to fit

Trimmed with my dremel

1/4 Inch off the alum core... Now I just need to figure out how I can close off the shroud on the top and bottom because I cut the shroud so it would fit...but now I need to have a way to seal the long sides against the radi. I hate working with fiberglass..but it may be what I'll need to do.
unless I want to make a UIM cooler......jkjkjk
That is about all the work I've been able to get done on the car. Like I said I wish I had more time with her.... but hopefully this weekend I can get a nice 5 hour session in. Also sometimes I wish I had a buddy that was as dilligent as I was and I knew I could trust to come help me with some of this stuff. I have a few but they're all so busy working on their own cars...or out of town.. john..ahem...caugh..
Anyways here's my list...be prepared...:
Tires 235/35/18f - 245/40/18R
DIn pocket insert
Hood vent
Hood pins
Front strut brace
Back up lug nuts
Transmission Brace...banzai
Install AIT sensor
EV1 bosch connector for AIT
Calibrate AIT sensor
Paint bodywork exterior
Takata/crow 4pt harness
Passenger side seat
PBM tie rods install
PBM angle mod mod
Tune
Bash Bar
AEM EBC solenoid Install
Intercooler Ducting
Radiator Ducting
Ride Height Adjust
Oil cooler fan switch & mount
Clean fuel filter out
Change Diff Fluid
Water wetter
Tow Hook mount rear and front
Radiator Fan installation
Passenger side Front Spacer secure
Rear brake P-side paint and replace
Bleed Brakes
Headlights
Slot coil mounting Bracket for more adjustability
Finish Exhaust
Register car
smog ;-)
Well yesterday was my first real day off and I still had a baunch load of stuff to do. I got an hour or so to mess around in the garage but I really just need a weekend 7am to 11pm to really get everything where it needs to be.
I have a giant list of things I need to get done, that may be a bunch of small things, but each little thing is 30 min here 20 min there, blah blah. These things really add up. I'll list it at the end as not to bore you guys hah.
I got my fire sleeve in from Baker Performance. They make it damn easy to purchase because right next to each individual size it lists the -AN size line it will work for. They have silver and Orange. I chose Orange for my turbo oil drain but everything else I got silver....just so that every line didn't stick out like a sore thumb. Actually...I kinda like how it sticks out like a sore thumb hahaha. ANyways..heres some pics...
I got -4 for my oil feed line
-6 for all fuel/water lines
-10 for the turbo Oil drain line
I did the Turbo Oil feed first as it was the easiest to install
Then I did small line that goes from my Secondary FFE rail to the fuel pressure regulator
And I'll be doing the rest of my fuel lines today or tomorrow.
On to my cooling situation. I have yet to hear back from Mishimoto about the sponsorship and the car hasn't got hot since I added the Bleed valve on top of the radiator so no air would get trapped. But I wasn't happy with the mishimoto Radiator fans. So I ordered a set of Jegs HIGH CFM fans. THey're rated at 3600 CFM and come with a shroud. Of course I'd need to cut them but 3600 compared to the measily 1400 total of the current fans is a huge improvement and should really help keep the temps down when they need to come down. THe added shroud will be a definite upgrade because right now the current fans are just mounted to the rad without a shroud.
Here are the fans
how big they are and how much they'll need to be trimmed to fit
Trimmed with my dremel
1/4 Inch off the alum core... Now I just need to figure out how I can close off the shroud on the top and bottom because I cut the shroud so it would fit...but now I need to have a way to seal the long sides against the radi. I hate working with fiberglass..but it may be what I'll need to do.
unless I want to make a UIM cooler......jkjkjk
That is about all the work I've been able to get done on the car. Like I said I wish I had more time with her.... but hopefully this weekend I can get a nice 5 hour session in. Also sometimes I wish I had a buddy that was as dilligent as I was and I knew I could trust to come help me with some of this stuff. I have a few but they're all so busy working on their own cars...or out of town.. john..ahem...caugh..
Anyways here's my list...be prepared...:
Tires 235/35/18f - 245/40/18R
DIn pocket insert
Hood vent
Hood pins
Front strut brace
Back up lug nuts
Transmission Brace...banzai
Install AIT sensor
EV1 bosch connector for AIT
Calibrate AIT sensor
Paint bodywork exterior
Takata/crow 4pt harness
Passenger side seat
PBM tie rods install
PBM angle mod mod
Tune
Bash Bar
AEM EBC solenoid Install
Intercooler Ducting
Radiator Ducting
Ride Height Adjust
Oil cooler fan switch & mount
Clean fuel filter out
Change Diff Fluid
Water wetter
Tow Hook mount rear and front
Radiator Fan installation
Passenger side Front Spacer secure
Rear brake P-side paint and replace
Bleed Brakes
Headlights
Slot coil mounting Bracket for more adjustability
Finish Exhaust
Register car
smog ;-)
05-21-13, 10:51 AM
#1516
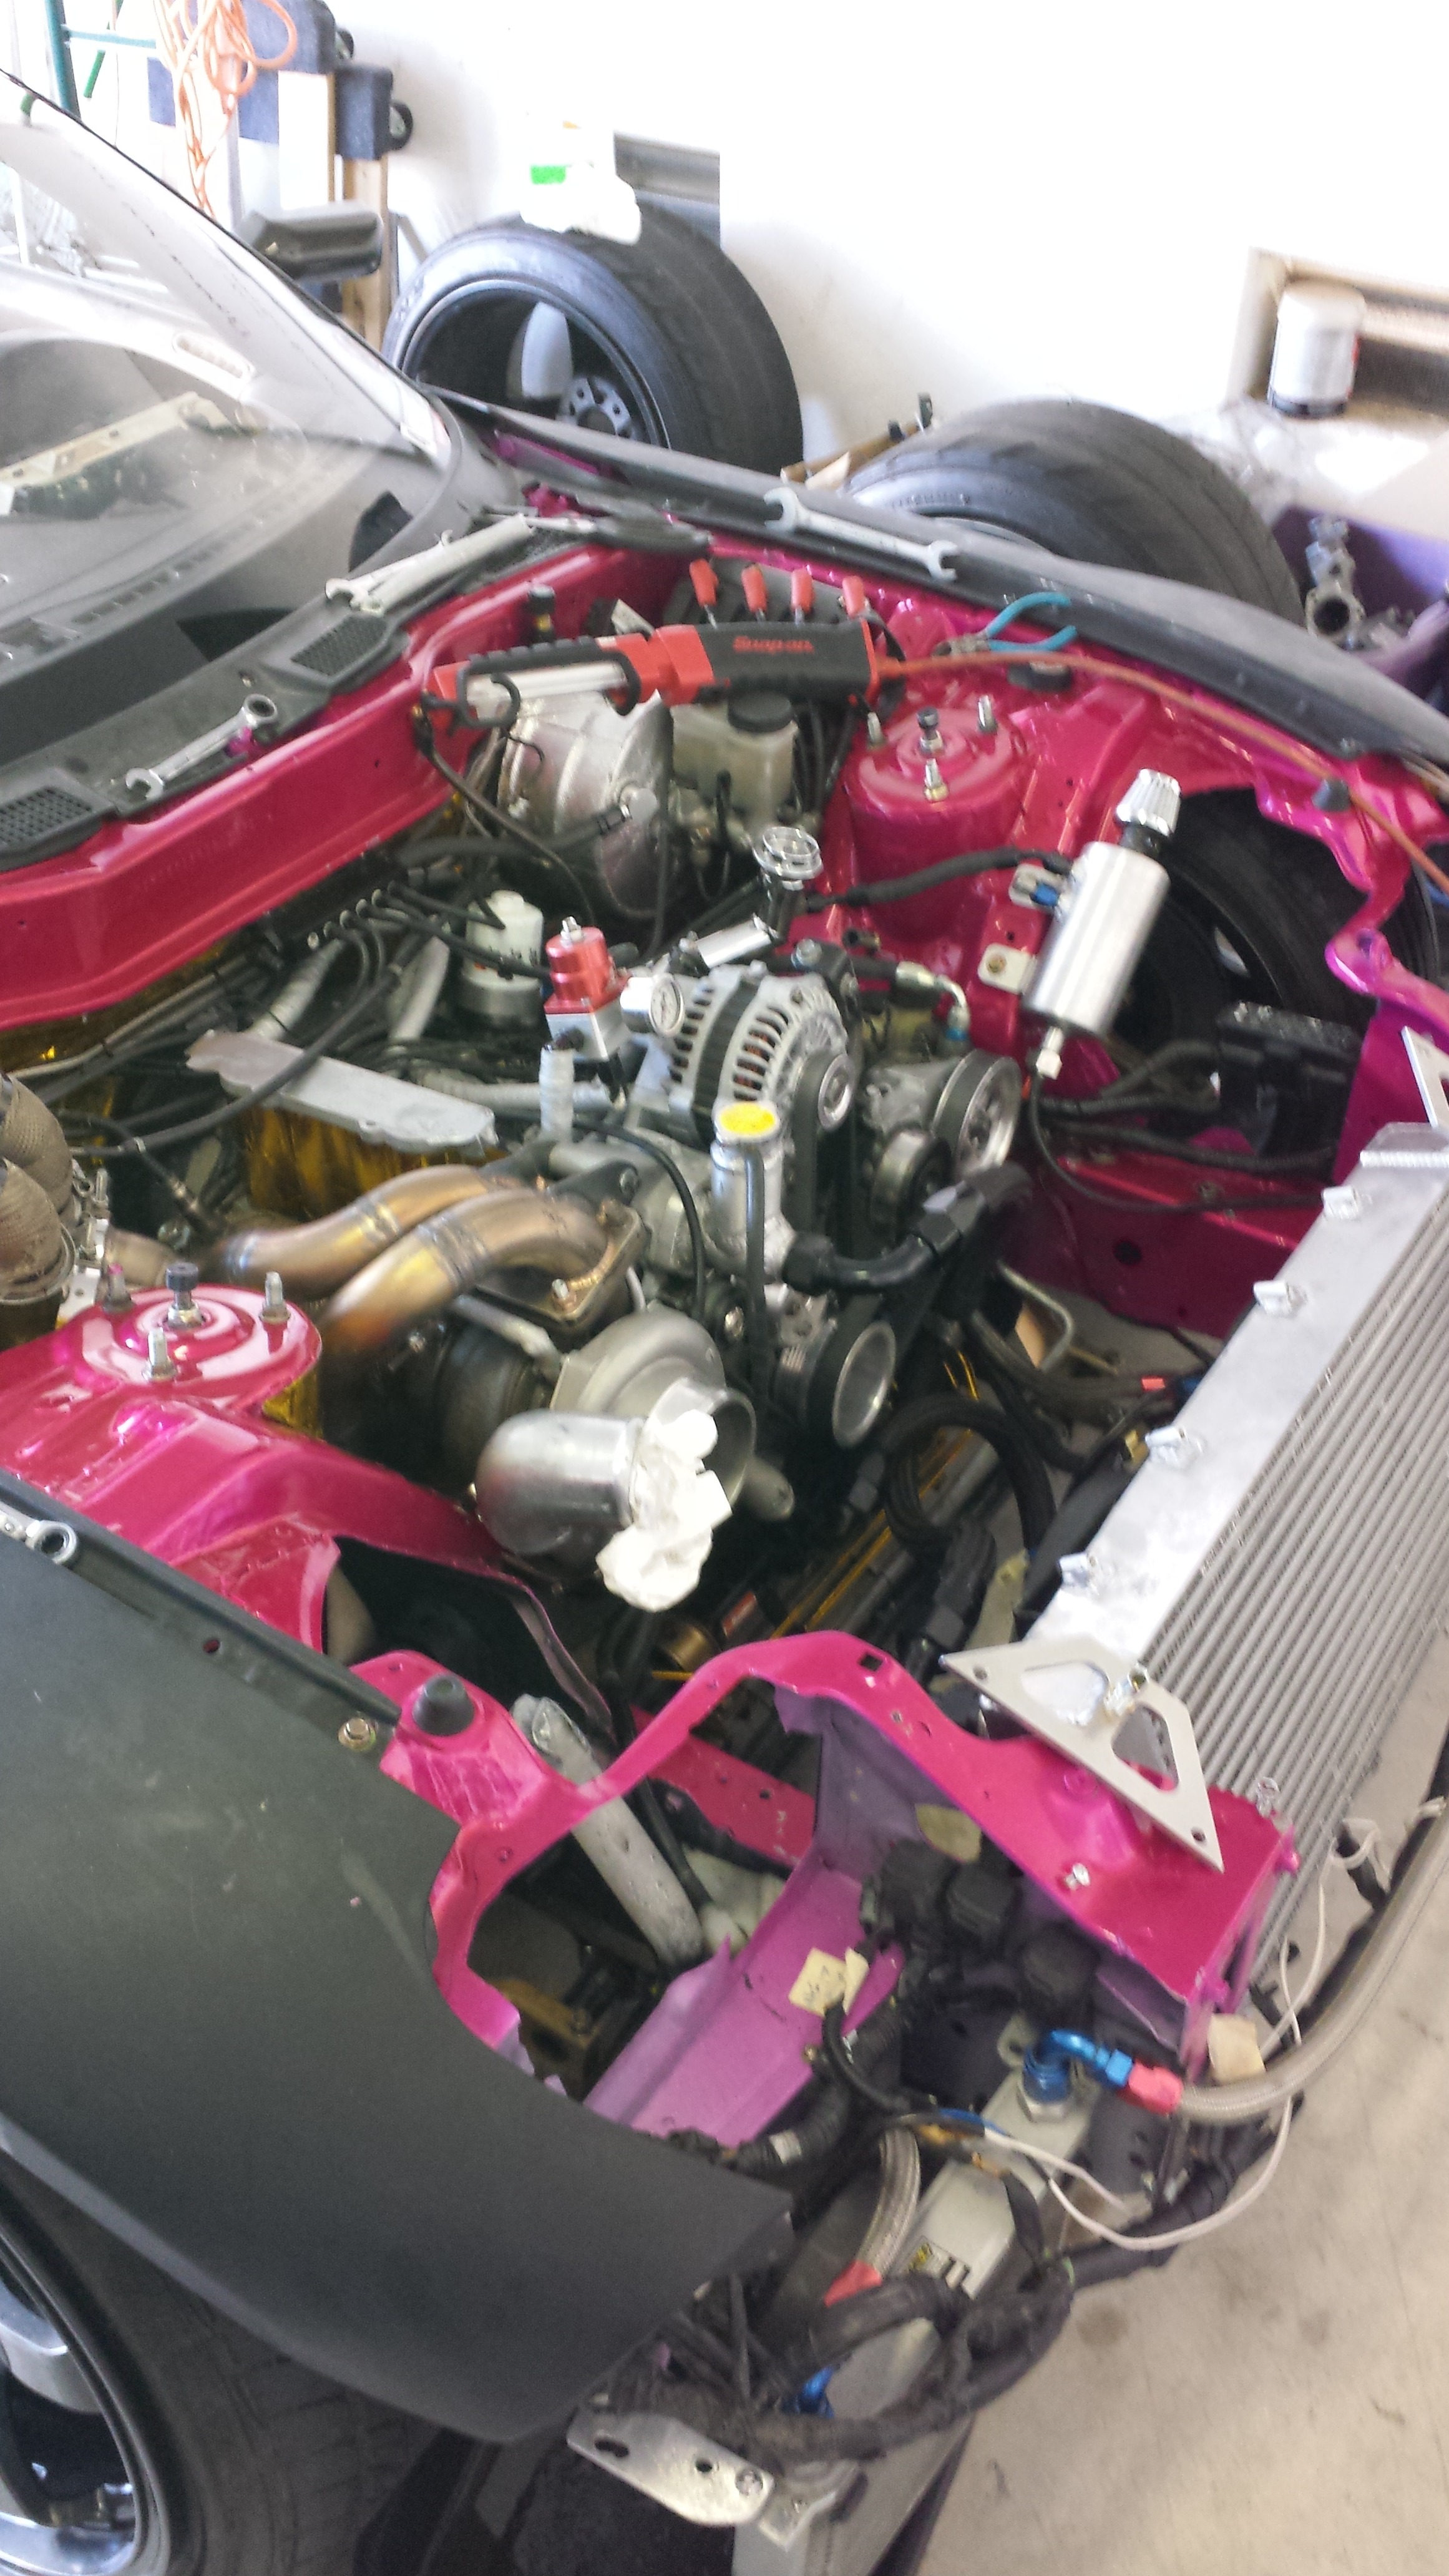
^Adaptronic FD3s PNP Ecu =-)
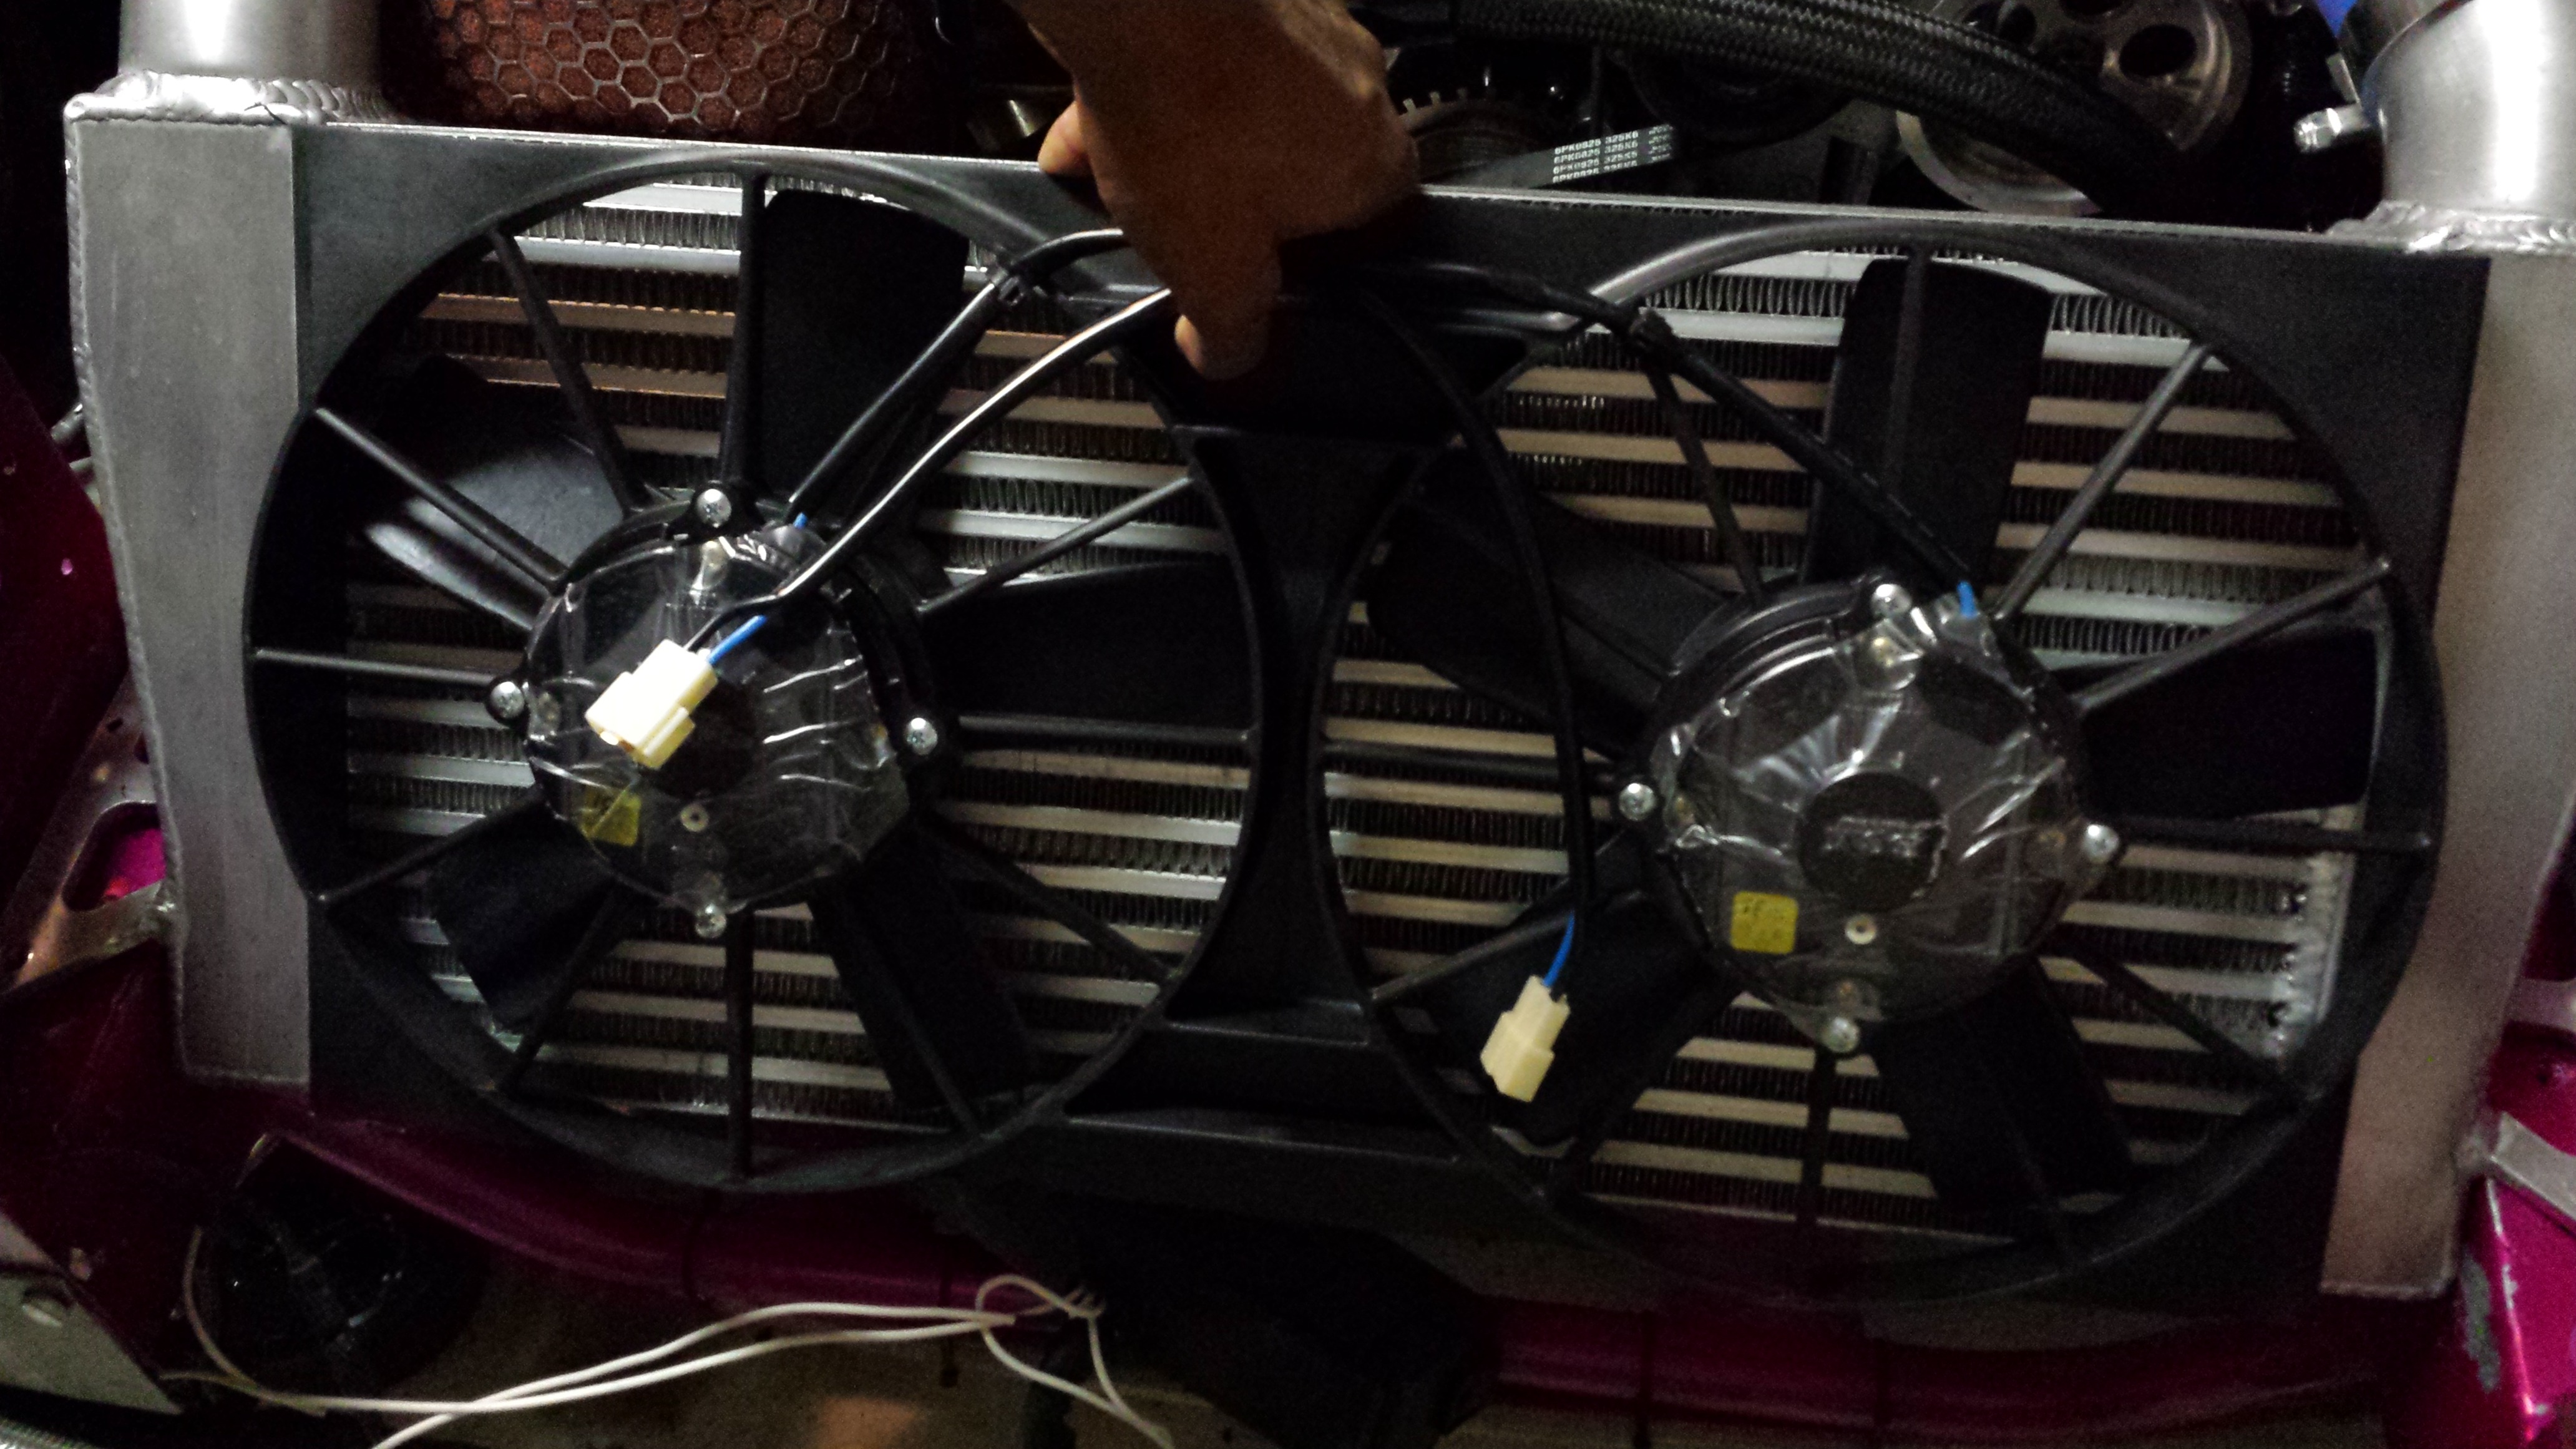
Small Update:
Got access to the fab shop again so I was able to get my radiator shroud worked out. Used the sheet metal cutter to cut out 2 pieces of sheet aluminum. Traced the contour of my fans onto each one, and then used the air bender to bend the sheet to complete the long side of the radiator shrouds. This one piece of alum will act as the mount/shroud/tabs for the radiator and mounts for the fan.
drilled some holes for mounts to the radiator

Used some OEM door molding I had sitting around to help seal the shroud...I really want this thing air tight!
bracket/shroud mounted against radiator with molding acting as seal

Used the same stuff for the side of the radiator fans...but had to trim a little because it was slightly touching the fans...Figure if it still hits..it'll just eat away anything in the way hahaha

And almost finished...forgot to take a pic but I drilled the holes to mount the radiator to the actual shroud brackets as well...All thats left to do is trim a couple sharp edges and Bolt the Fans to the shroud with hardware.
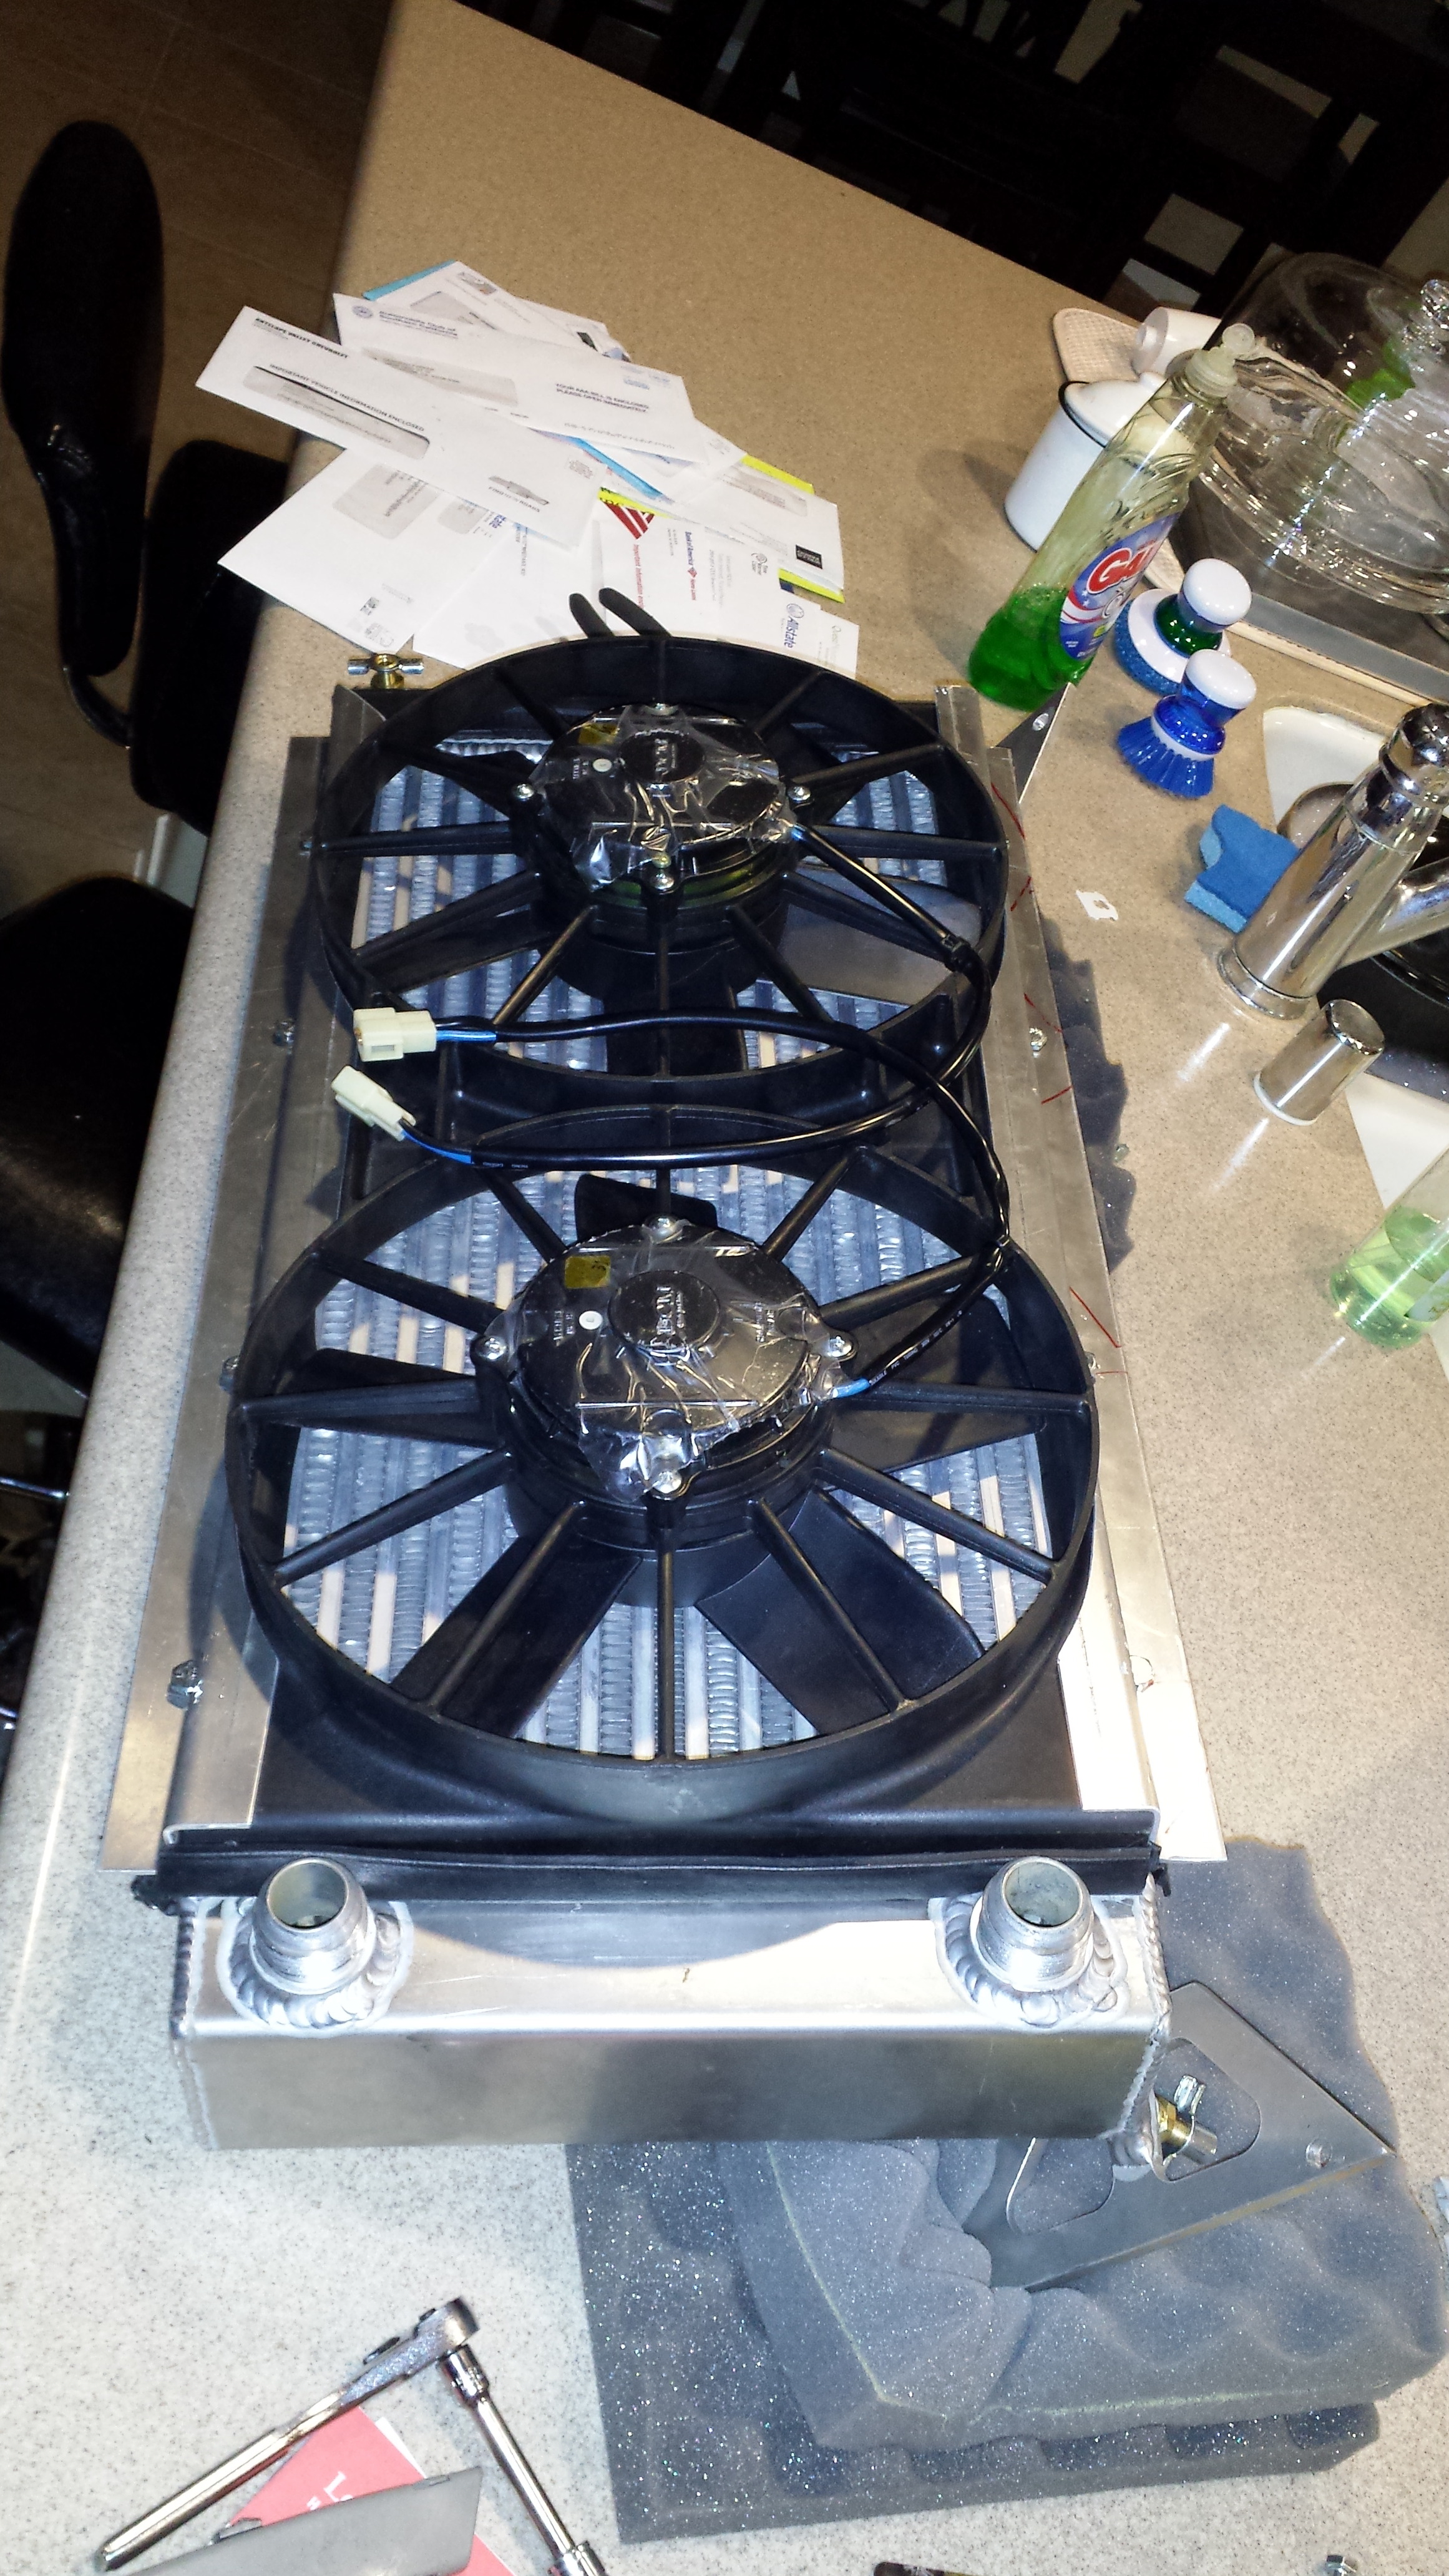
The fan sits a little more than a quarter inch off the actual radiator, and i'm going to use some Honda Bond high temp RTV to seal the radiator to the Alum Bracket so that no air escapes...this will ensure (i hope) that when the fans are running all the air pulled through the radiator is in fact coming through the radiator and not just the surrounding openings. I am a little concerned about the molding I used...it covers 1 row/air passage from the front. So i'm hoping this doesn't decrease cooling capacity too much. We'll see how it works but This will be a huge improvement from the previous set up which consisted of 2x 10" mishimoto fans that pulled a total of 1400CFM together.
Small Update:
Got access to the fab shop again so I was able to get my radiator shroud worked out. Used the sheet metal cutter to cut out 2 pieces of sheet aluminum. Traced the contour of my fans onto each one, and then used the air bender to bend the sheet to complete the long side of the radiator shrouds. This one piece of alum will act as the mount/shroud/tabs for the radiator and mounts for the fan.
drilled some holes for mounts to the radiator
Used some OEM door molding I had sitting around to help seal the shroud...I really want this thing air tight!
bracket/shroud mounted against radiator with molding acting as seal
Used the same stuff for the side of the radiator fans...but had to trim a little because it was slightly touching the fans...Figure if it still hits..it'll just eat away anything in the way hahaha
And almost finished...forgot to take a pic but I drilled the holes to mount the radiator to the actual shroud brackets as well...All thats left to do is trim a couple sharp edges and Bolt the Fans to the shroud with hardware.
The fan sits a little more than a quarter inch off the actual radiator, and i'm going to use some Honda Bond high temp RTV to seal the radiator to the Alum Bracket so that no air escapes...this will ensure (i hope) that when the fans are running all the air pulled through the radiator is in fact coming through the radiator and not just the surrounding openings. I am a little concerned about the molding I used...it covers 1 row/air passage from the front. So i'm hoping this doesn't decrease cooling capacity too much. We'll see how it works but This will be a huge improvement from the previous set up which consisted of 2x 10" mishimoto fans that pulled a total of 1400CFM together.
 05-23-13, 02:11 PM
#1521
Update:
Well I've been in a rush trying to get things ready for the next 5-6 days i'll be out of commision because of work, but I did get a few things done.
I was un-happy with the way the radiator sat.....it was just a little too close to the main e-shaft pulley, so If i wanted to get to a bolt i had to use a small ratchet and really wedge it in there..then when I started loosening it it would hit the radiator because it was really "that close." Also...the outlet for the coolant on the motor was literally a centimeter from the radiator. With this new shroud... it was hitting. The shroud adds approximately an inch and a half of thickness to the unit. With that said.. I decided to re-drill and tap holes to mount it and also move the whole assembly forward 2 inches. I used a larger tap this time so I could use some hefty M10 1.25 bolts. Also... The outlet of the radiator was the lowest point of the car... I didn't like that one bit. So I used some larger bushings to raise the whole assembly an inch. I used some Skateboard Bushing again...this time in the hardest material available.
The bushings fit perfectly!
And here was the first test fit....forgot to take pics of the assembly with washers but oh well.
While I had the compressor housing off the turbo I put the -10 Baker Fire sleeve on the Turbo Drain line.

And also on the water drain line as well. Shame on me though...I could've sworn I ordered enough for all my lines but I guess not... so the water feed line will have to suffer till I catch up on my list and order more.
ALSO! I got the new fans wired up...which was a breeze by the way.. jegs supplies all wiring needed with pig tails... awesome. I was a little dissappointed I didn't find the derale fans before I ordered the jegs fans as they're rated at 4000CFM....but seriously.... After turning these things on... i am really impressed. The fans mixed with the shroud pull a ton of air. I actually took a video of the first test but i'm waiting for it to upload via photobucket...and my service isn't the best here so it's taking the better part of 35 min. I'll upload it as soon as it goes through though. All I have to say is that these fans have to work at the very least...about 4 times better than the previous low cfm fans slapped onto the back of the radiator.
Only thing is....i had to cut the bottom mounts off the cradle that supports the front of the car...and secures the bottom of the radiator. So i'll have to have them cut and welded back on otherwise it'll most likely crackthe mounts and my nifty little air purge on the top of the mount.

in case that one doesn't work
20130522_181807_zps2e8723f2.mp4 Video by mannykiller | Photobucket
Well I've been in a rush trying to get things ready for the next 5-6 days i'll be out of commision because of work, but I did get a few things done.
I was un-happy with the way the radiator sat.....it was just a little too close to the main e-shaft pulley, so If i wanted to get to a bolt i had to use a small ratchet and really wedge it in there..then when I started loosening it it would hit the radiator because it was really "that close." Also...the outlet for the coolant on the motor was literally a centimeter from the radiator. With this new shroud... it was hitting. The shroud adds approximately an inch and a half of thickness to the unit. With that said.. I decided to re-drill and tap holes to mount it and also move the whole assembly forward 2 inches. I used a larger tap this time so I could use some hefty M10 1.25 bolts. Also... The outlet of the radiator was the lowest point of the car... I didn't like that one bit. So I used some larger bushings to raise the whole assembly an inch. I used some Skateboard Bushing again...this time in the hardest material available.
The bushings fit perfectly!
And here was the first test fit....forgot to take pics of the assembly with washers but oh well.
While I had the compressor housing off the turbo I put the -10 Baker Fire sleeve on the Turbo Drain line.
And also on the water drain line as well. Shame on me though...I could've sworn I ordered enough for all my lines but I guess not... so the water feed line will have to suffer till I catch up on my list and order more.
ALSO! I got the new fans wired up...which was a breeze by the way.. jegs supplies all wiring needed with pig tails... awesome. I was a little dissappointed I didn't find the derale fans before I ordered the jegs fans as they're rated at 4000CFM....but seriously.... After turning these things on... i am really impressed. The fans mixed with the shroud pull a ton of air. I actually took a video of the first test but i'm waiting for it to upload via photobucket...and my service isn't the best here so it's taking the better part of 35 min. I'll upload it as soon as it goes through though. All I have to say is that these fans have to work at the very least...about 4 times better than the previous low cfm fans slapped onto the back of the radiator.
Only thing is....i had to cut the bottom mounts off the cradle that supports the front of the car...and secures the bottom of the radiator. So i'll have to have them cut and welded back on otherwise it'll most likely crackthe mounts and my nifty little air purge on the top of the mount.
in case that one doesn't work
20130522_181807_zps2e8723f2.mp4 Video by mannykiller | Photobucket
 05-24-13, 10:17 AM
#1524
It's actually a custom Hot pink......but everyone keeps saying it's Magenta. If that's the case.. then it's magenta haha...and if that's the case... for 28 years of my life i've thought this "hot Pink" was indeed..."hot pink,"...not magenta haha.
Update:
I am very pleased to say that I got the car running yesterday and that this radiator system passed my first test!! Warmed the car up... (need to set the warm up RPM so It can warm up a little quicker) but got it up to 80 and it was still hovering around 80 for a while.. So had to rev her up a little to get it a bit hotter for the thermostat to open up. Once it did... the coolant level dropped dramatically and temps started to rise damn fast... (Air pockets) Opened up my purge valve on the top of the radiator and started dumping distilled water in the filler neck.... turned the car off. and topped it off. Let all the air purge out from the radiator till only solid fluid was coming out and closed it. Started the car again and let it warm up once again. hovering around 83C I had to rev the motor for a good min to get it to hit 84/85 degrees Celsius. Once it hit 85...my fans kicked on.... for about 30 seconds... And the temps dropped all the way to 80C. Now All i have to do is find the sweet spot so I can keep the temp right about 83C. I'm going to raise my fan duty cycle so that it turns on at say 86...and turns off once the temp gets down to 85 I'll play around with the fan settings till I get a cycle that works. But i'm VERY happy with how the fan and shroud work. I was standing by the drivers side door when they kicked on and I could literally feel the hot air being blown under the car. Along with that...after the 30 seconds the radiator was still only warm to the touch. Right before they kicked on and the thermostat opened it was damn hot..couldn't rest my hand on it.
Anyways... I went ahead and ordered the pig-tail for the Fast Acting Air Intake Temp Sensor...this way I don't have to cut my harness any further... just simply Plug it in. I'll have to look about the calibration process though.. Don't you just drop it in some ice water? I'll do some research.
I was also able to install my drivers side spare rear brake caliper. I got the spare off muibubbles for a good price and even though it has rust on it....it should do just fine while I try and clean the threads out of my nice blasted/painted rebuilt caliper. I went ahead and installed the steel Speed bleeder in it before I bolted it on. Also......I don't know why anyone would ever use Brass bleeders over stainless ones anyways.. Seems Idiotic to me. And yea I have 3 on the other 3 calipers of my car....but I'll be replacing them with steel bleeders when I get a BBK in the next year or so.
I'm almost done with my wheel spacer set up. I think I still need another 5mm of spacing to get the wheel where I want it. But for now it's enough. Made up my mind on tire size though, And i'll definitely be running 245's up front. Just not sure if I should put a 35 series or 40 on there. We'll see. More updates soon!
05-31-13, 11:45 AM
#1525
so I had a few days off and got back to work on the car. l went for a little test drive around the block and backed out of the garage.... All the sudden the car was running on one rotor.. then both kicked back on and then one again....then the car died. Started the car again and it started on one rotor then died. EGT's were normal and there was no backfiring. Had to push the car back to the house..and into the garage.. Major pain.
well 4 hours later.. Still wouldn't start. Figured it might be my FPR going out. after all this one was 5 years old. Pulled it apart..and it looked brand new inside...
Only thing i could think of was that some of the insulation from the Fire sleeve got into the fuel lines and was possibly clogging an injector etc.. Tested all injectors..all getting 12 V..and waveform's all looked regular. Ignition checked out.... So I pulled the plugs. They looked normal...so I figured maybe they just fouled out? I wasnt sure so I replaced them. Same crap..thought I might've messed up my plug wire order... nahh all checked out. SO I was stumped. Took a break..talked to a couple friends.. decided to open up the fuel tank to check if the lines might've sprung a leak? the fuel pressure was a little low.. So I pulled my Pump assembly out and......
hi my name is idiot..

My fuel level sensor was broken.. I have a new one but didn't install it yet. And when I put gas in I only put 5 gallons haha..so that was that. Put gas in it and she fired right up, no problems. I guess sometimes we all do stupid stuff..this one just happened to put me in a horrible mood for 2 days hah. Anyways..
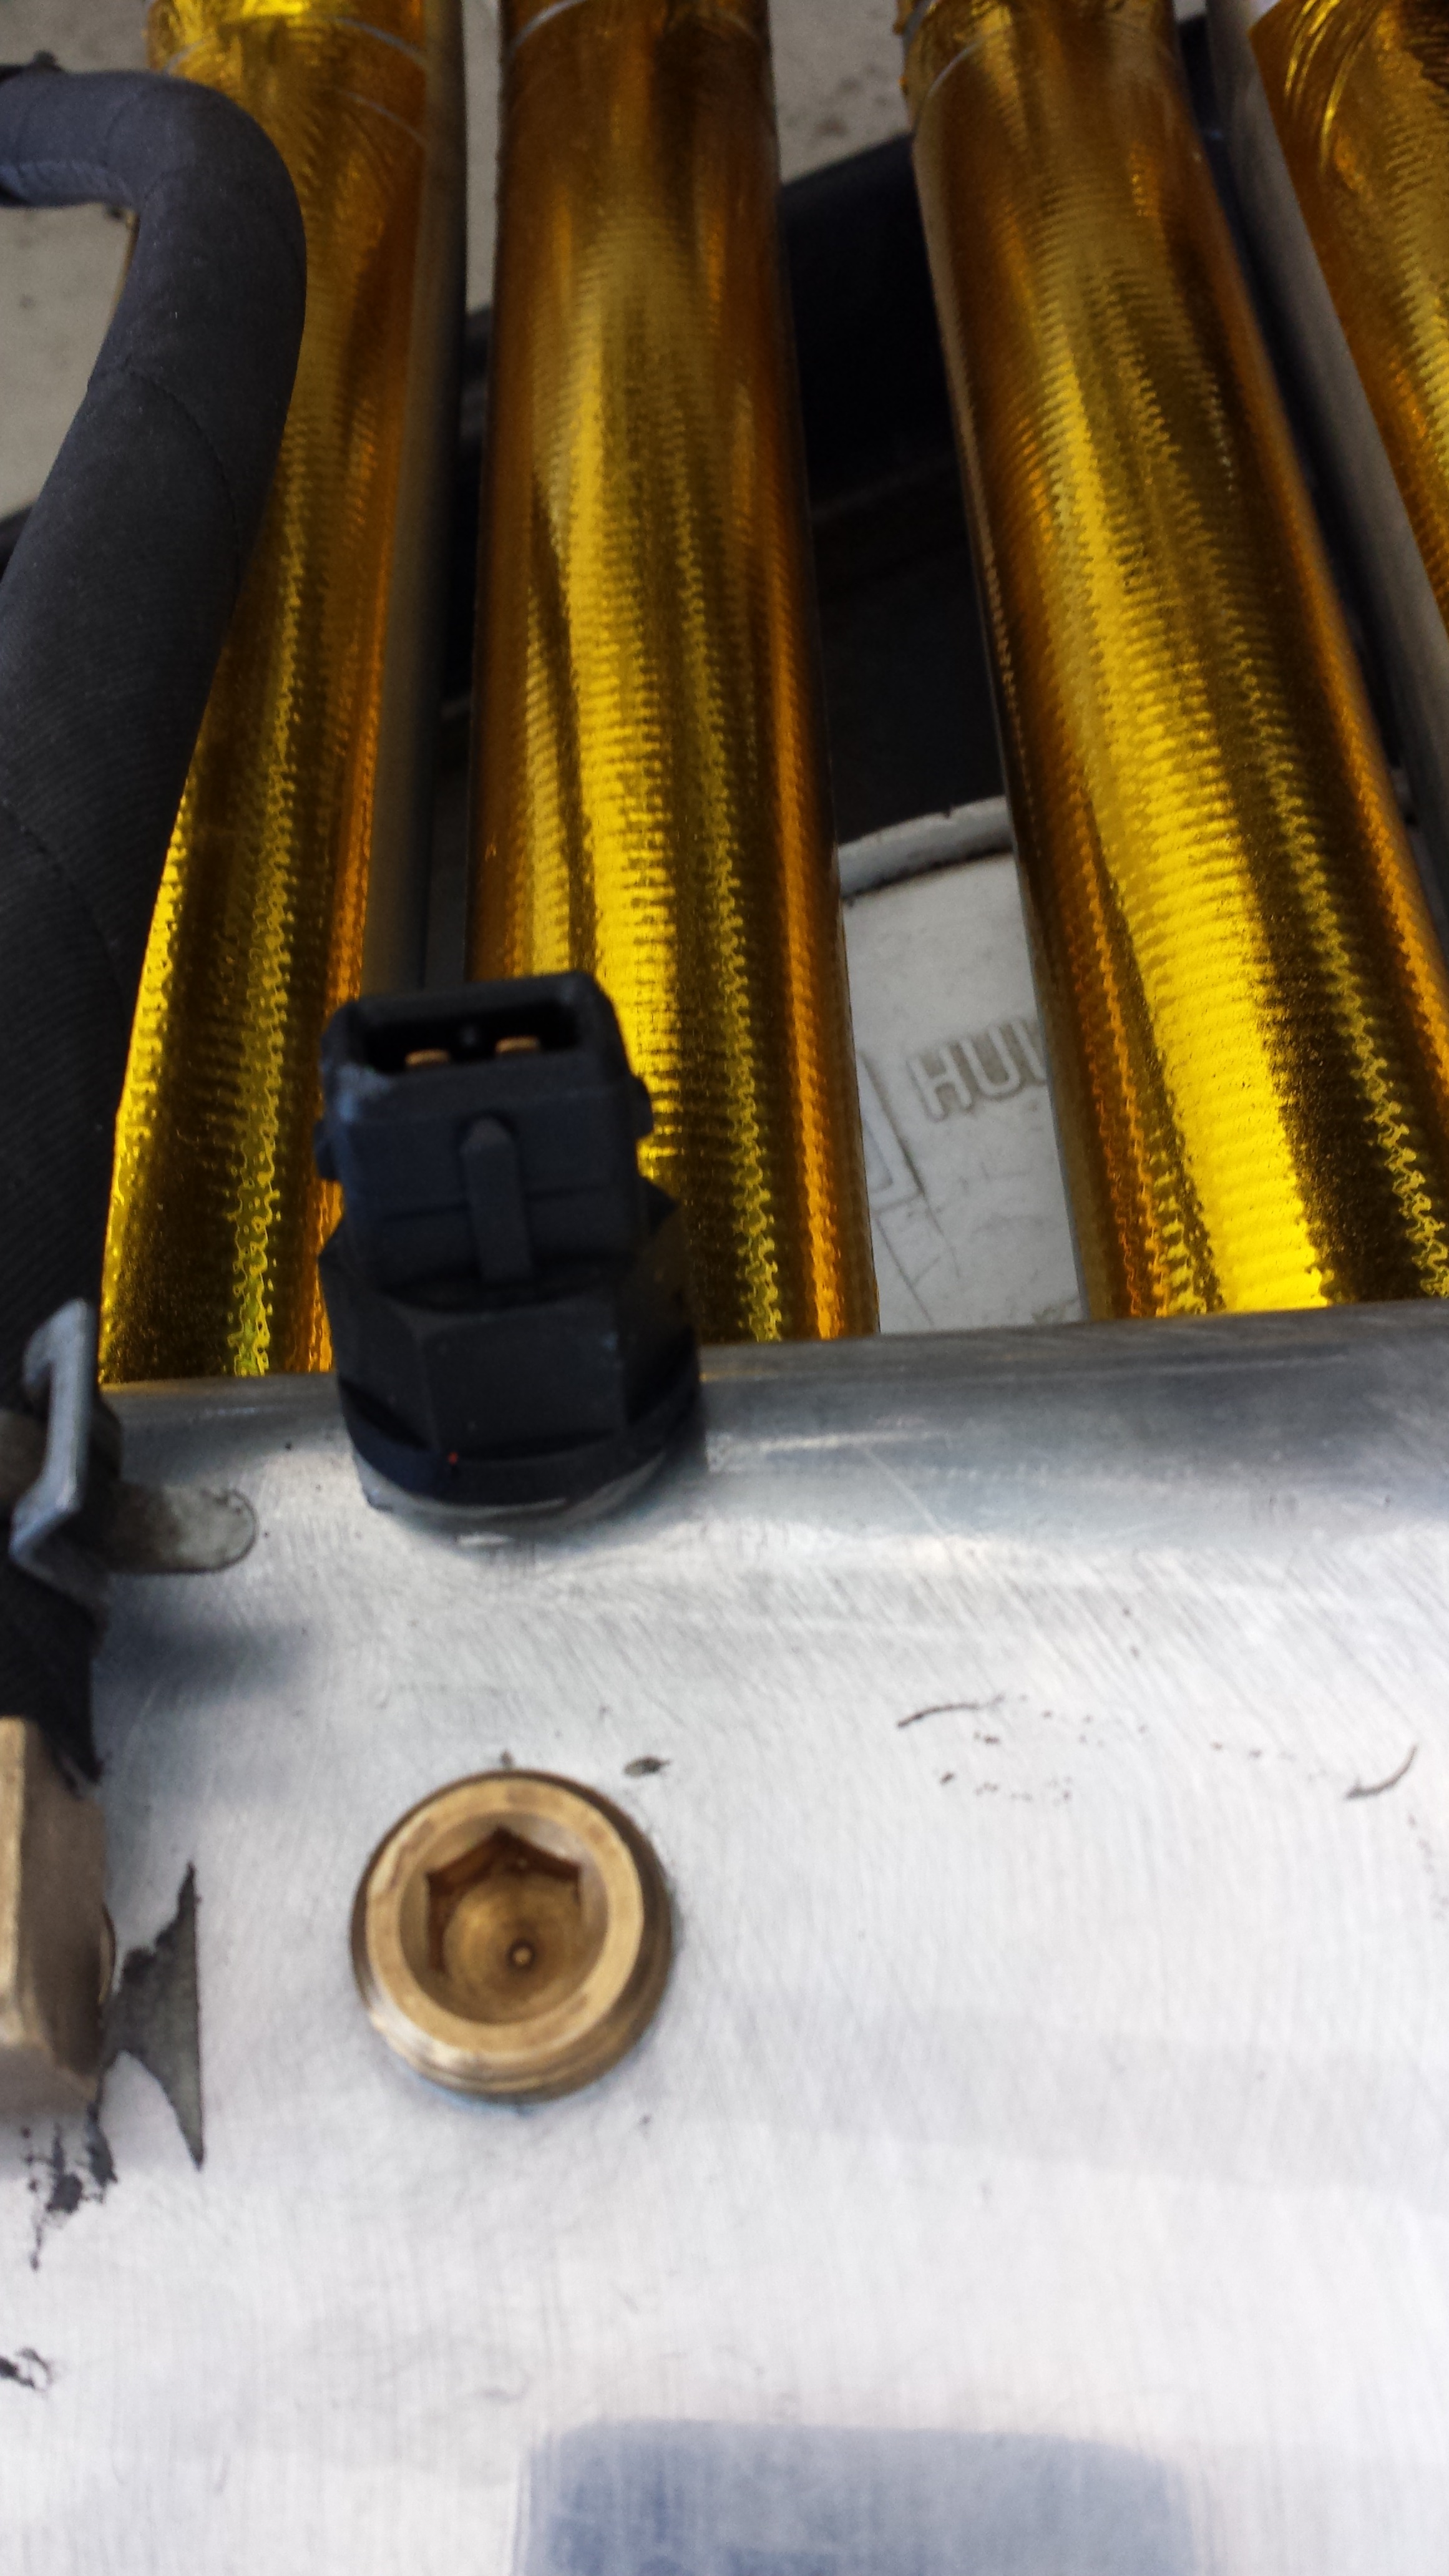
While I had the UIM off I wired in the Triumph Fast acting Air Intake Sensor pig tail..and calibrated the Actual sensor in Ice water before installation.
Heres the location. I guess I could've chosen a better location but It works pretty good where it is from what I could see on the adaptronic live screen display. Had to put a washer and a half to ensure the sensor wouldn't leak because it was on a bend but i'm pretty confident theres no leak.
Plugged in..works great, on to the next. Which is where i'm at today. After work i'll be driving over to the fab shop to get the lower radiator mounts beefed up a bit. Hopefully finishing up my exhaust, Front Bash bar and then the car should be pretty much ready for tune. More updates soon!
Stay tuned!!
well 4 hours later.. Still wouldn't start. Figured it might be my FPR going out. after all this one was 5 years old. Pulled it apart..and it looked brand new inside...
Only thing i could think of was that some of the insulation from the Fire sleeve got into the fuel lines and was possibly clogging an injector etc.. Tested all injectors..all getting 12 V..and waveform's all looked regular. Ignition checked out.... So I pulled the plugs. They looked normal...so I figured maybe they just fouled out? I wasnt sure so I replaced them. Same crap..thought I might've messed up my plug wire order... nahh all checked out. SO I was stumped. Took a break..talked to a couple friends.. decided to open up the fuel tank to check if the lines might've sprung a leak? the fuel pressure was a little low.. So I pulled my Pump assembly out and......
hi my name is idiot..
My fuel level sensor was broken.. I have a new one but didn't install it yet. And when I put gas in I only put 5 gallons haha..so that was that. Put gas in it and she fired right up, no problems. I guess sometimes we all do stupid stuff..this one just happened to put me in a horrible mood for 2 days hah. Anyways..
While I had the UIM off I wired in the Triumph Fast acting Air Intake Sensor pig tail..and calibrated the Actual sensor in Ice water before installation.
Heres the location. I guess I could've chosen a better location but It works pretty good where it is from what I could see on the adaptronic live screen display. Had to put a washer and a half to ensure the sensor wouldn't leak because it was on a bend but i'm pretty confident theres no leak.
Plugged in..works great, on to the next. Which is where i'm at today. After work i'll be driving over to the fab shop to get the lower radiator mounts beefed up a bit. Hopefully finishing up my exhaust, Front Bash bar and then the car should be pretty much ready for tune. More updates soon!
Stay tuned!!