Mannykillers/ AAPARKAH Street/time Attack/Drift Build (heavy Pics) #Thisisthewolf

 02-14-13, 11:23 AM
#1177
small update:
Well if there are a few things you absolutely need in a track drift car....it's a good seat and a correctly set up LSD. So While the motor and transmission are out of the car.....again. I got under there and removed my Diff Pumpkin with the TII Clutch type LSD in it. This Diff probly would've lasted me quite a while But THM motorsport had the black friday deal on their Carbonetic LSD's this past new years for Cheap.
I got their Metal 2-way. I was surprised how quickly I was able to get the pumpkin out but I did smash my finger on the last leg because it slipped off the jack stand and I tried to catch it. Wasn't bad just skinned it a little...but finger and knuckle bruises are annoying.

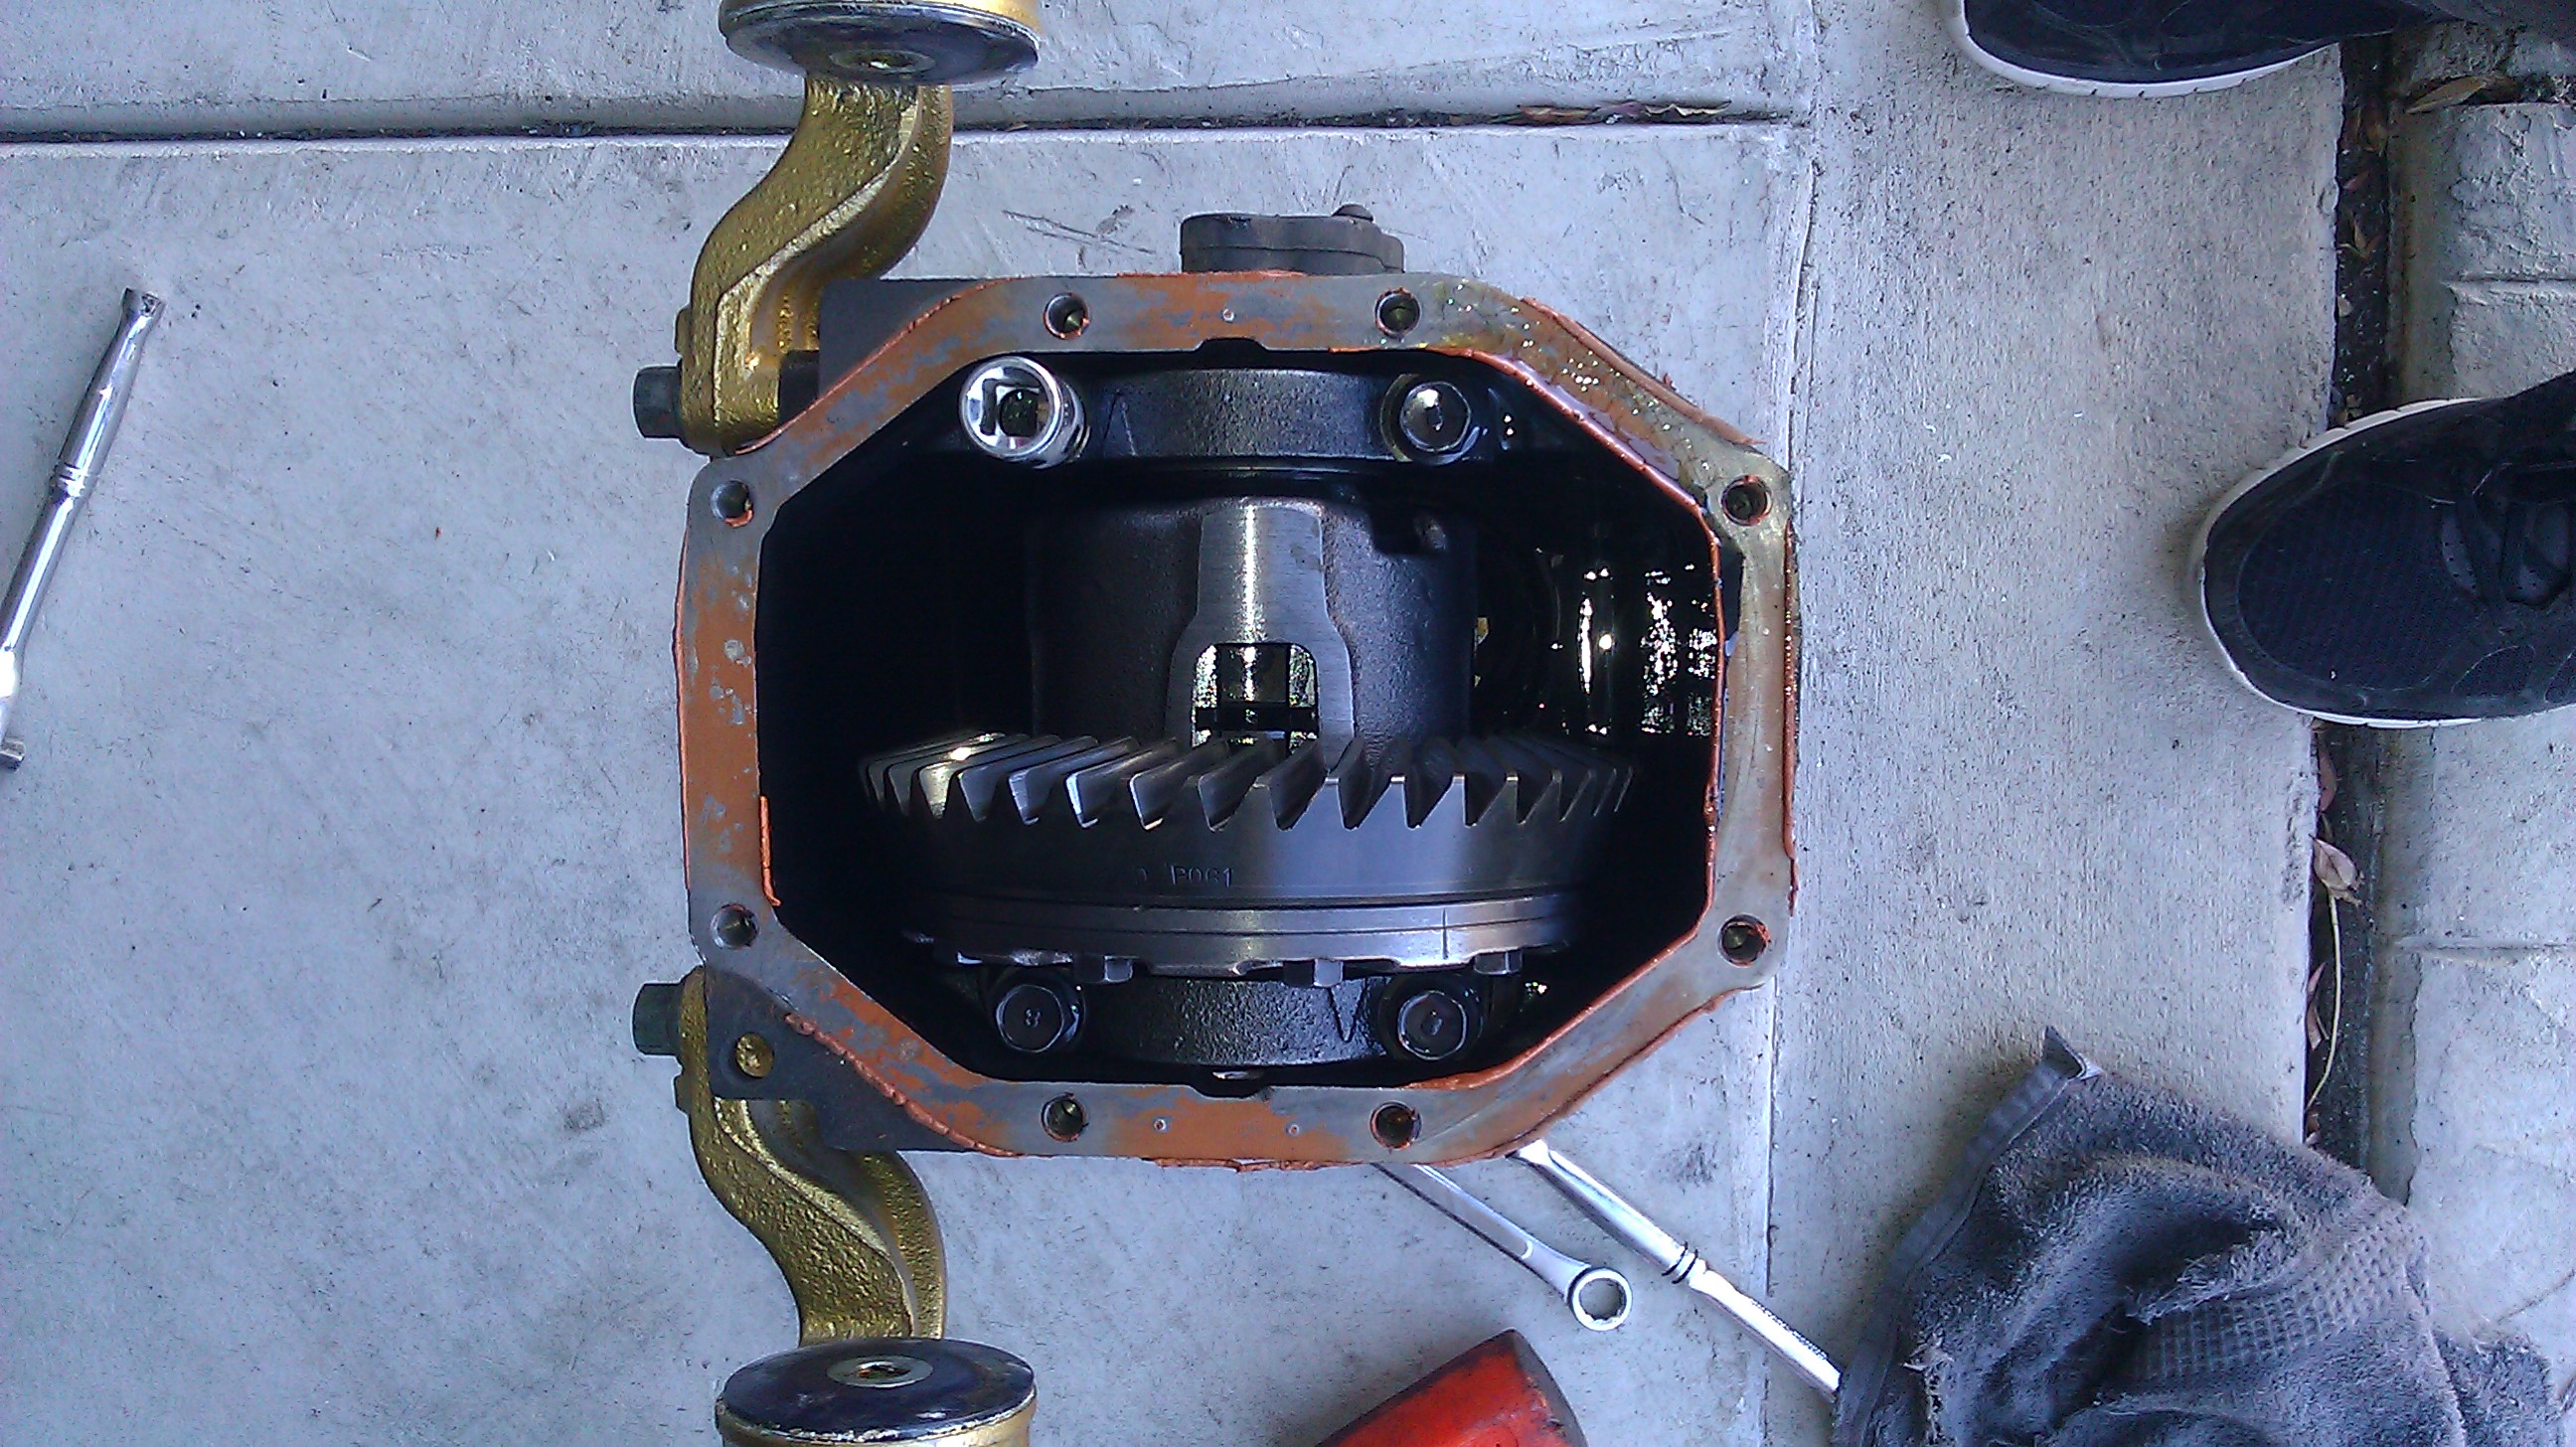
Got the diff cover off and the pinon off and decided I just didn't feel comfortable setting this diff up. That And It has no bearings on it. So I took the whole thing in to Yarmin Driveshafts. He's local and a business thats been around for years out here in the AV. He's going to press new bearings on the new Carbonetic unit and set the backlash and seal up the pumpkin for me so I can simply put gear oil in there and bolt her back in. Here's the Pumpkin opened up with the old TII clutch type Diff in it. Currently for sale..
Should be picking up the Diff Friday night.. may or may not put it in at night and then I get my manifold back from the machine shop saturday. Then I can really get cracking putting the motor and transmission back in.
More updates soon!!
Well if there are a few things you absolutely need in a track drift car....it's a good seat and a correctly set up LSD. So While the motor and transmission are out of the car.....again. I got under there and removed my Diff Pumpkin with the TII Clutch type LSD in it. This Diff probly would've lasted me quite a while But THM motorsport had the black friday deal on their Carbonetic LSD's this past new years for Cheap.
I got their Metal 2-way. I was surprised how quickly I was able to get the pumpkin out but I did smash my finger on the last leg because it slipped off the jack stand and I tried to catch it. Wasn't bad just skinned it a little...but finger and knuckle bruises are annoying.
Got the diff cover off and the pinon off and decided I just didn't feel comfortable setting this diff up. That And It has no bearings on it. So I took the whole thing in to Yarmin Driveshafts. He's local and a business thats been around for years out here in the AV. He's going to press new bearings on the new Carbonetic unit and set the backlash and seal up the pumpkin for me so I can simply put gear oil in there and bolt her back in. Here's the Pumpkin opened up with the old TII clutch type Diff in it. Currently for sale..
Should be picking up the Diff Friday night.. may or may not put it in at night and then I get my manifold back from the machine shop saturday. Then I can really get cracking putting the motor and transmission back in.
More updates soon!!
02-14-13, 03:08 PM
#1178
RX 4BPT

Join Date: Feb 2011
Location: Huddersfield, England
Posts: 293
Likes: 0
Received 0 Likes
on
0 Posts
Have been watching your build since you started. Looking forward to seeing it running.
But if bad news for you but the dragon drift FD took a big crash last year, but they're running an rx8 now, not as fast as th fd but is better to drift Aparently.
But if bad news for you but the dragon drift FD took a big crash last year, but they're running an rx8 now, not as fast as th fd but is better to drift Aparently.
02-14-13, 03:28 PM
#1179
^ahh yes I remember seeing the pics. You know after seeing it I thought it wasn't as bad as I thought it was. THe rx8 is a nice car. But I think it's more driving style or preference when it comes to either car being better or worse... ;-)
02-14-13, 03:38 PM
#1180
RX 4BPT
Join Date: Feb 2011
Location: Huddersfield, England
Posts: 293
Likes: 0
Received 0 Likes
on
0 Posts
Brad hacker, the driver, and Ross Juniper (dragon) have said it easier to drift. Preferred the FD. Dragon is now building GTRs, I believe he is building a drag car for himself, I expect it will be a monster.
02-14-13, 08:23 PM
#1181
You know the OEM torsen unit is actually really good for moderate HP guys on the track. But a 1.5 way will be pretty forgiving on decel when the throttle is off...a2 way will be engaged on decel...which I'd why a lot of drifters love them. Someone correct me if i'm wrong ...
 02-15-13, 04:44 AM
#1184
Rotary for LIFE!
Join Date: Jan 2008
Location: Adelaide, South Australia
Posts: 71
Likes: 0
Received 0 Likes
on
0 Posts

 By engaged, I mean, no differential action.
02-16-13, 12:24 AM
By engaged, I mean, no differential action.
02-16-13, 12:24 AM
#1185
Update: "VENT"
So you know that little voice in the back of your head that tells you something is "off?" Well I should've listened to it because today I feel really taken advantage of.
Well as all of you guys know I took my Carbonetic 2way Diff into a "professional" shop because I just didn't feel comfortable setting the backlash on it. So I eptied the pumpkin of my old diff and took the new diff and the eptied out pumpkin into a local shop out here called "Yarmin Drive-Shafts." I've heard the name all over the place growing up out here and I actually went to school with the guys daughter. So it all started like this. I called them up and asked them how much they charge to set the backlash on differentials...then continued to tell them exactly what type of diff it is. The guy replied with " sorry man It doesn't really sound like you know what your talking about. If you bring it in we can take care of you." So It kinda made me think about it negatively but figured maybe it was just an older guy who wasn't so hip on lingo or the brand in general <---yea red flag and stupid me for ignoring it. So I take the diff in and ask the guy for a quote.. he tells me 20 bucks a pop for brand new bearings and out the door i'm looking at 130 to 180 bucks. Immediately I thought that was too much for just setting the backlash but figured they needed to press new carrier bearings on there and it was a professional shop so I guess that's not un-realistic. But for someone who does things on their own and could probly set the diff exactly the way I wanted if I just watched it done once...that was a lot. But I figured..oh well..its a professional job. Red flag # 2 and again i'm an idiot for not pulling out. So I go in there today and the guy says the debit machine isn't working.. we tried it and it didn't go through.. so I had to go get cash. I went to the ATM and pulled out 200 bucks and went back to Yarmin Drive Shafts. The guy say's that'll be $258.00 ......I was like...HUH? So I said....."Hey man what happened to the 130-180 you Quoted me yesterday?" He said well That was until It was nearly impossible to find bearings that fit that Differential, he called carbonetic, and looked all over the place online and the only thing that fit were the bearings from a toyota pickup. He said him and the other mechanic spent the whole morning looking for a bearings that fit. I got kinda pissed but of course didn't want to leave my stuff there and paid the guy. I drove home pissed...and called my girlfriend which i'm pretty sure she knows the whole damn story by heart at this point..and bi***** about it even more! But I got home and go to install the diff and for no other reason than just being the person I am... I grabbed a cover bolt and shockingly...it was hardly even finger tight. So I went over all of them and they were all ONLY finger tight. I was like WTF is up with that?! So the shop was closed already by this time but I was pissed and usually I kinda get my bearings in order and calm down when I work on my car. It's kinda like therapy in a way. But I just kept getting more and more pissed. I installed the diff and just didn't put any fluids in but when I was finished I started to wonder if the guy even Torque'd down anything for that matter...or even if he set the backlash correctly. So at this point I left the diff where it is...I can always pull the cover off of it while its in the car and go over them with a Torque wrench but i'm wondering if I should call and complain or just Let it be known that this shop definitely took advantage of the wrong customer.. what do you guys think?!
02-16-13, 12:43 AM
#1186
Make an assessment...

iTrader: (3)
I'd definitely complain and tell them you'll report them to BBB if you don't get your money back. The bolts being loose are an indication that they probably didn't do anything else right, or at the very least you can't guarantee they did. And as much as you've put into this car doing it right, you don't want to put this in without knowing for absolute sure that it's done right. I'd see about getting your money back and go with a different company that someone else in the import community recommends, or like you said, do it yourself. As I always say, if you want it done right, do it yourself.
Good luck, Aaron.
Good luck, Aaron.
02-16-13, 12:51 AM
#1187
Rotary for LIFE!
Join Date: Jan 2008
Location: Adelaide, South Australia
Posts: 71
Likes: 0
Received 0 Likes
on
0 Posts
You can check the lash fairly easily, the FSM covers it - totally worth doing if you're not sure especially with a nice new carbonetic center in it! An hour's work could save a lot of money (I'll bet that's going through your head already!)
Of course it's trivial to check the torque settings of the bearing covers too while the cover is off as well.
Well worth doing.
Sorry to hear that though, I'm always worried about situations like that myself.
Of course it's trivial to check the torque settings of the bearing covers too while the cover is off as well.
Well worth doing.
Sorry to hear that though, I'm always worried about situations like that myself.
02-16-13, 12:53 AM
#1188
Sucks to hear. I had a similar story with my diff. Im running an 8.8 cobra diff, and had ordered ford racing 4.30 gears and was looking for someone to install them for me. A friend recommended a shop, which was sort of a "friend of a friend" deal. Older guy, ex Chrysler mechanic of like 30 years so I figured he should know what hes doing anyway. After talking with him and explaining what I needed done and asking for a quote, all I got was "shouldnt be much, easy job". I guess I should have demanded a quote, because the guy charged me well over $300 to set up my diff, and when I went to pick it up (only 2 days later) we had to look for it because he misplaced it. It was just laying on the floor in the corner of the shop under boxes. It really is hard finding people to do work for you that you can be happy with.
02-17-13, 12:56 PM
#1189
^ Yea you know guys it's really eating away at me. So I talked to a buddy of mine who went through something similar and by law the shop is supposed to provide me with a written quote, and then if anything differs from that they're supposed to call and get my consent for it. I called yesterday but of course they were closed. I'm going to call over there tomorrow if they're open and go over some things with the guy. But At this point i'm considering everything a loss.
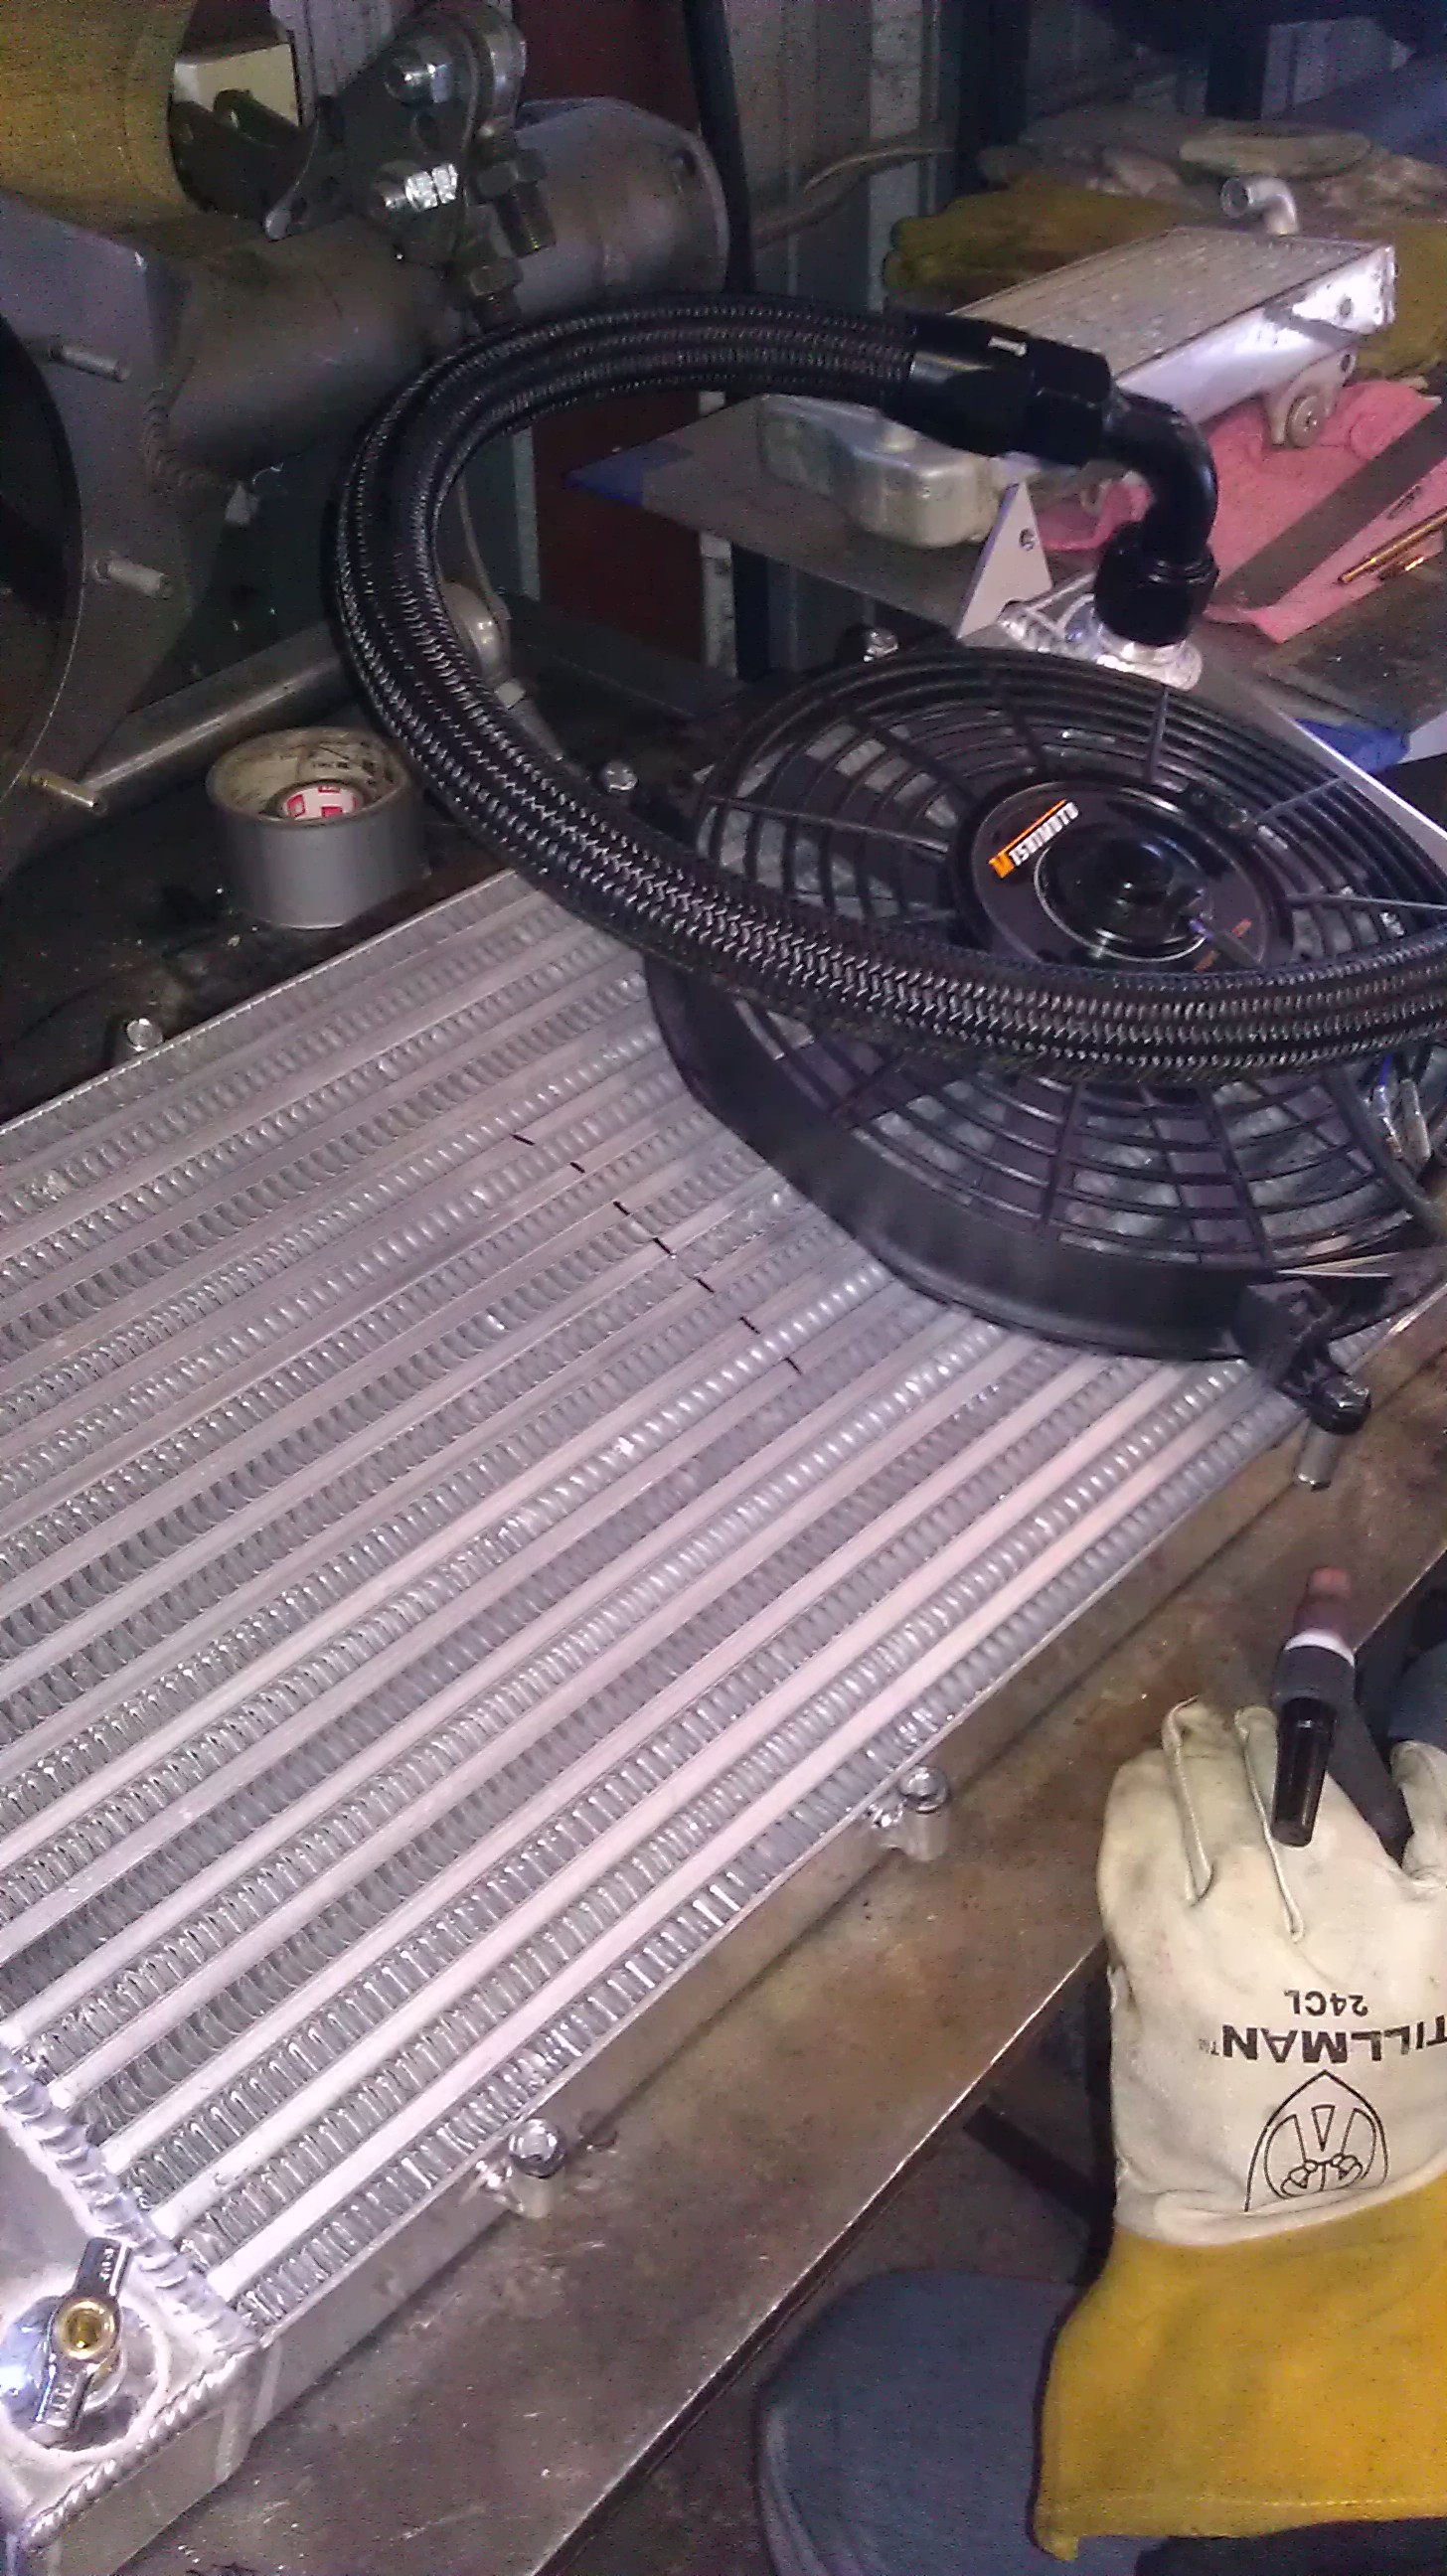
Good news though is I finally had time to work on the Radiator Cooling fan mounts.
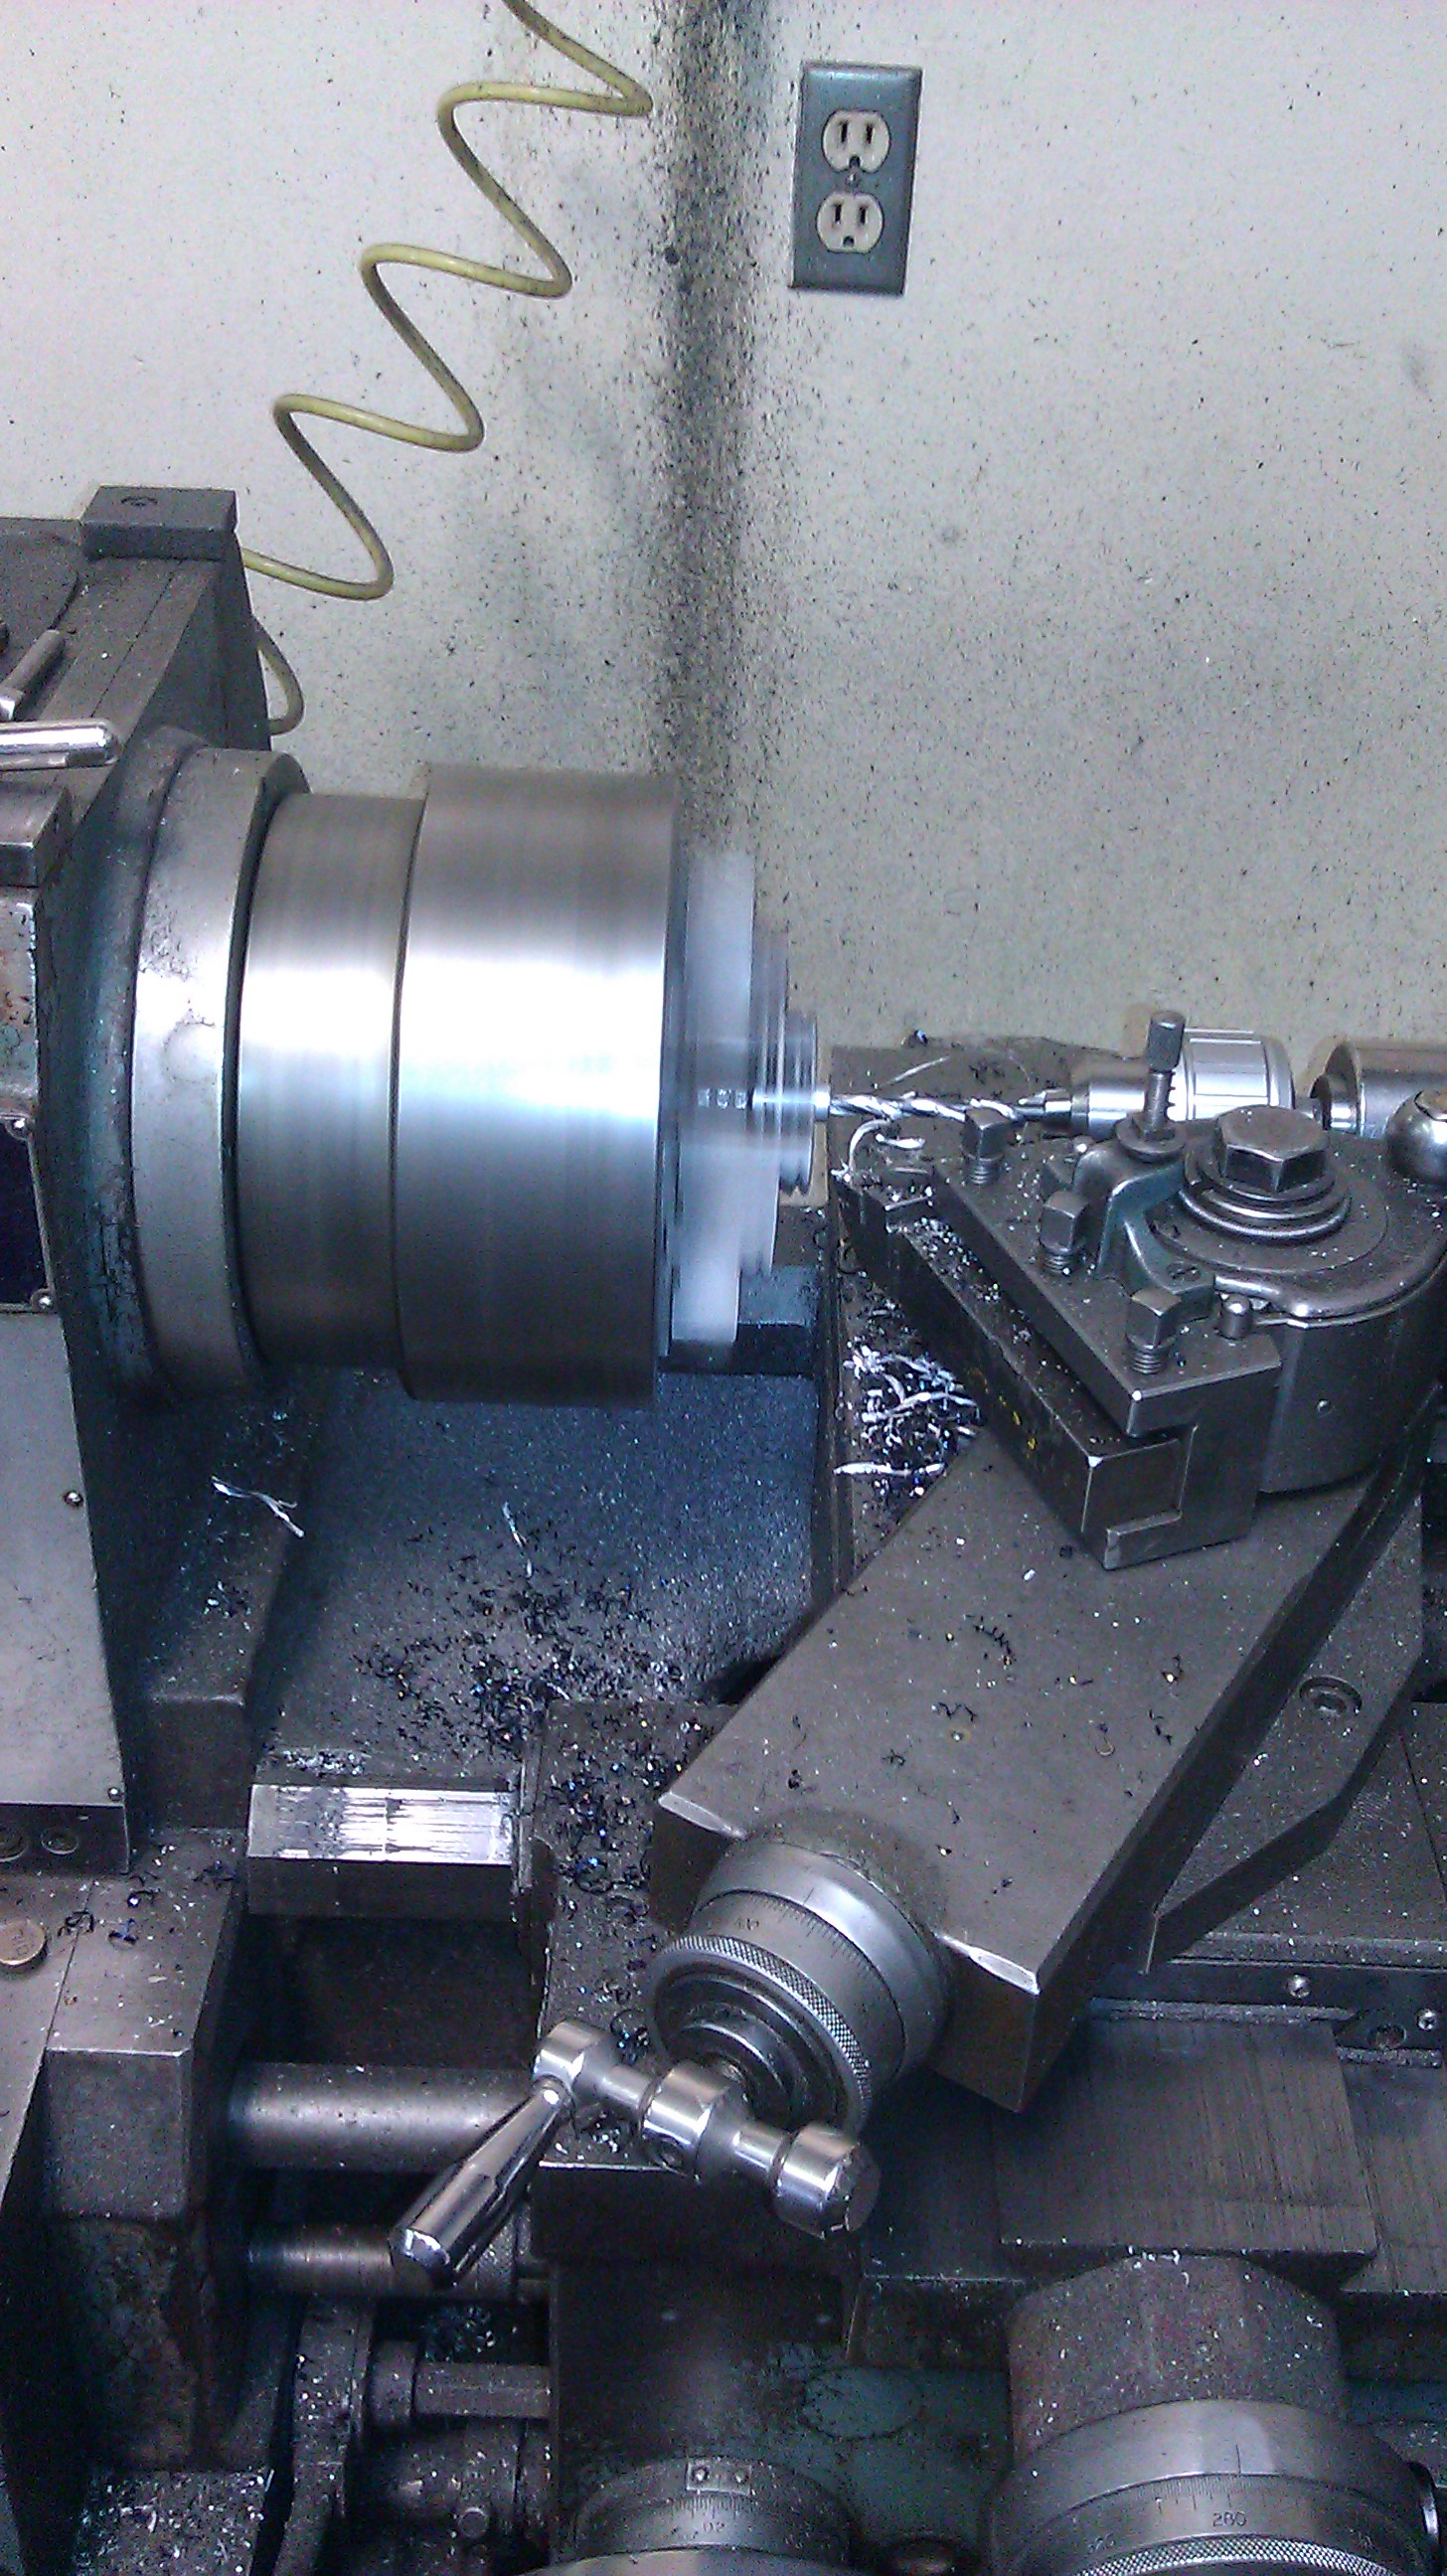
there were a few different ways we coud've gone about doing it but we opted for the easiest route. Which was going to home depot and purchasing 1/2" Alum Bar stock.
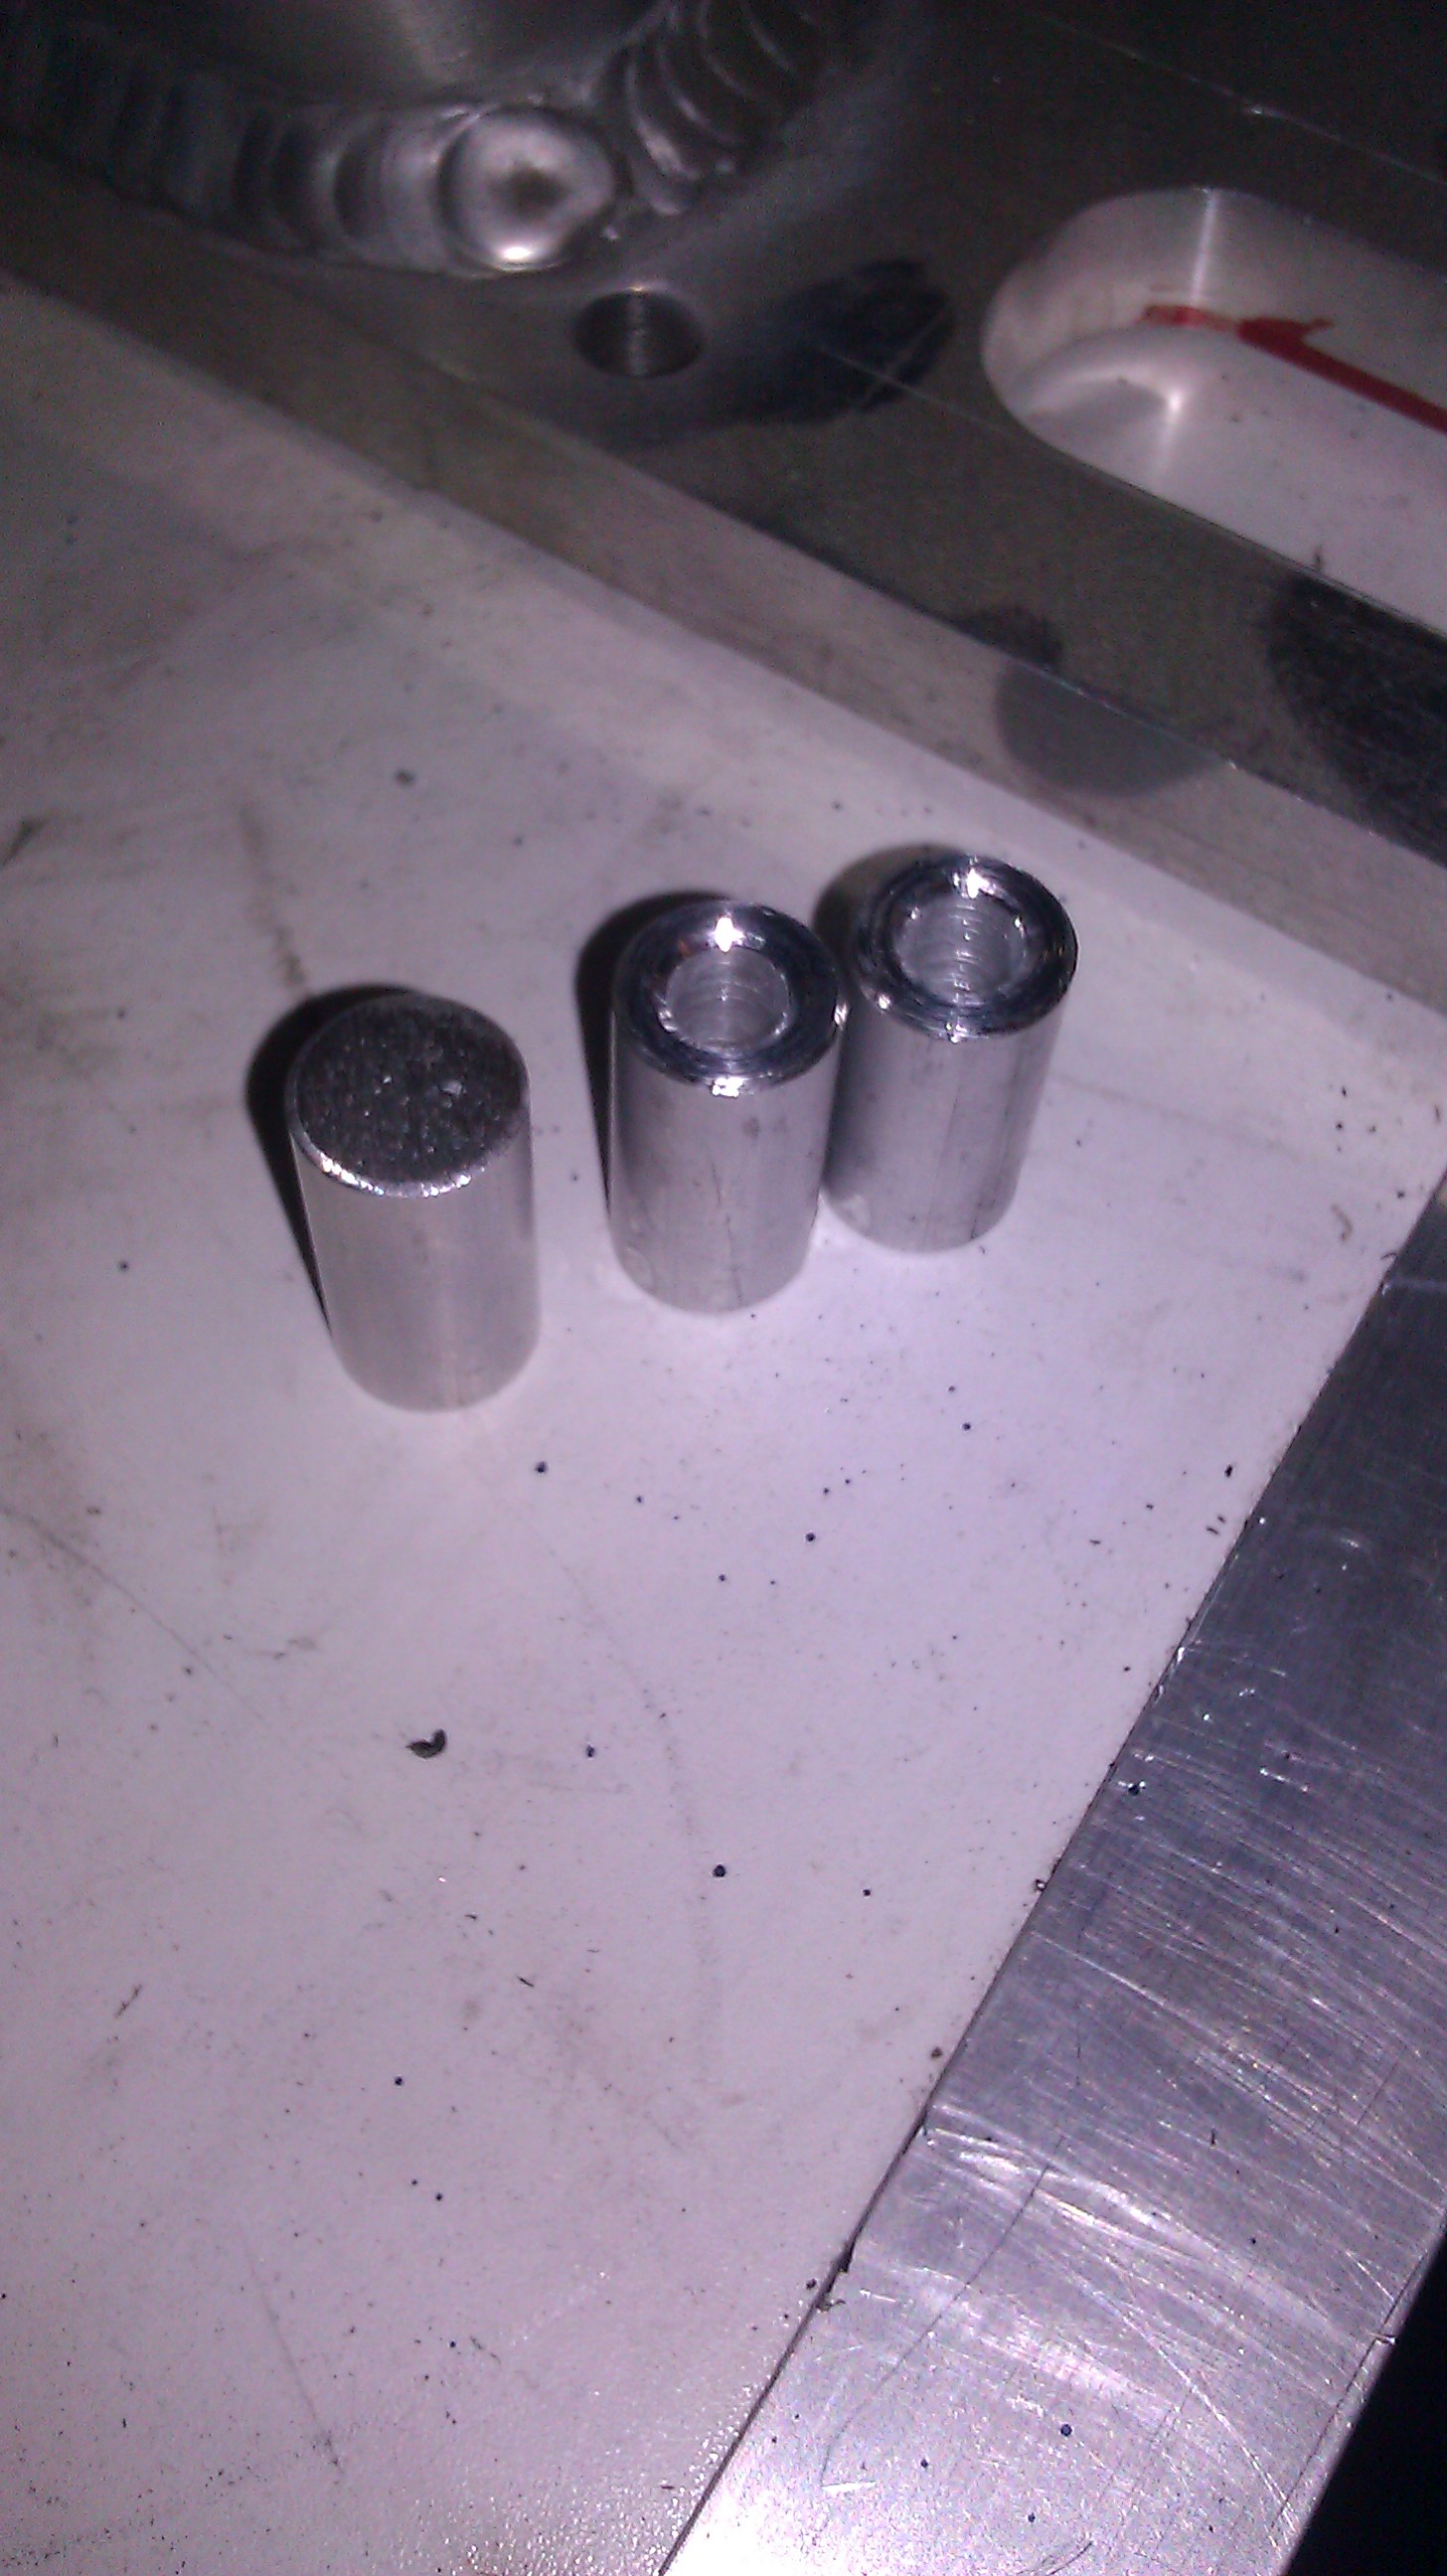
Cutting 8x 1" long pieces...cleaning them up, putting them on the lathe and putting holes in the middle of them to mount with bolts through them. Nice easy/compact and secure. I cut all the mounts, Bj did all the welding as always.
some done.....some not
what it'll look like
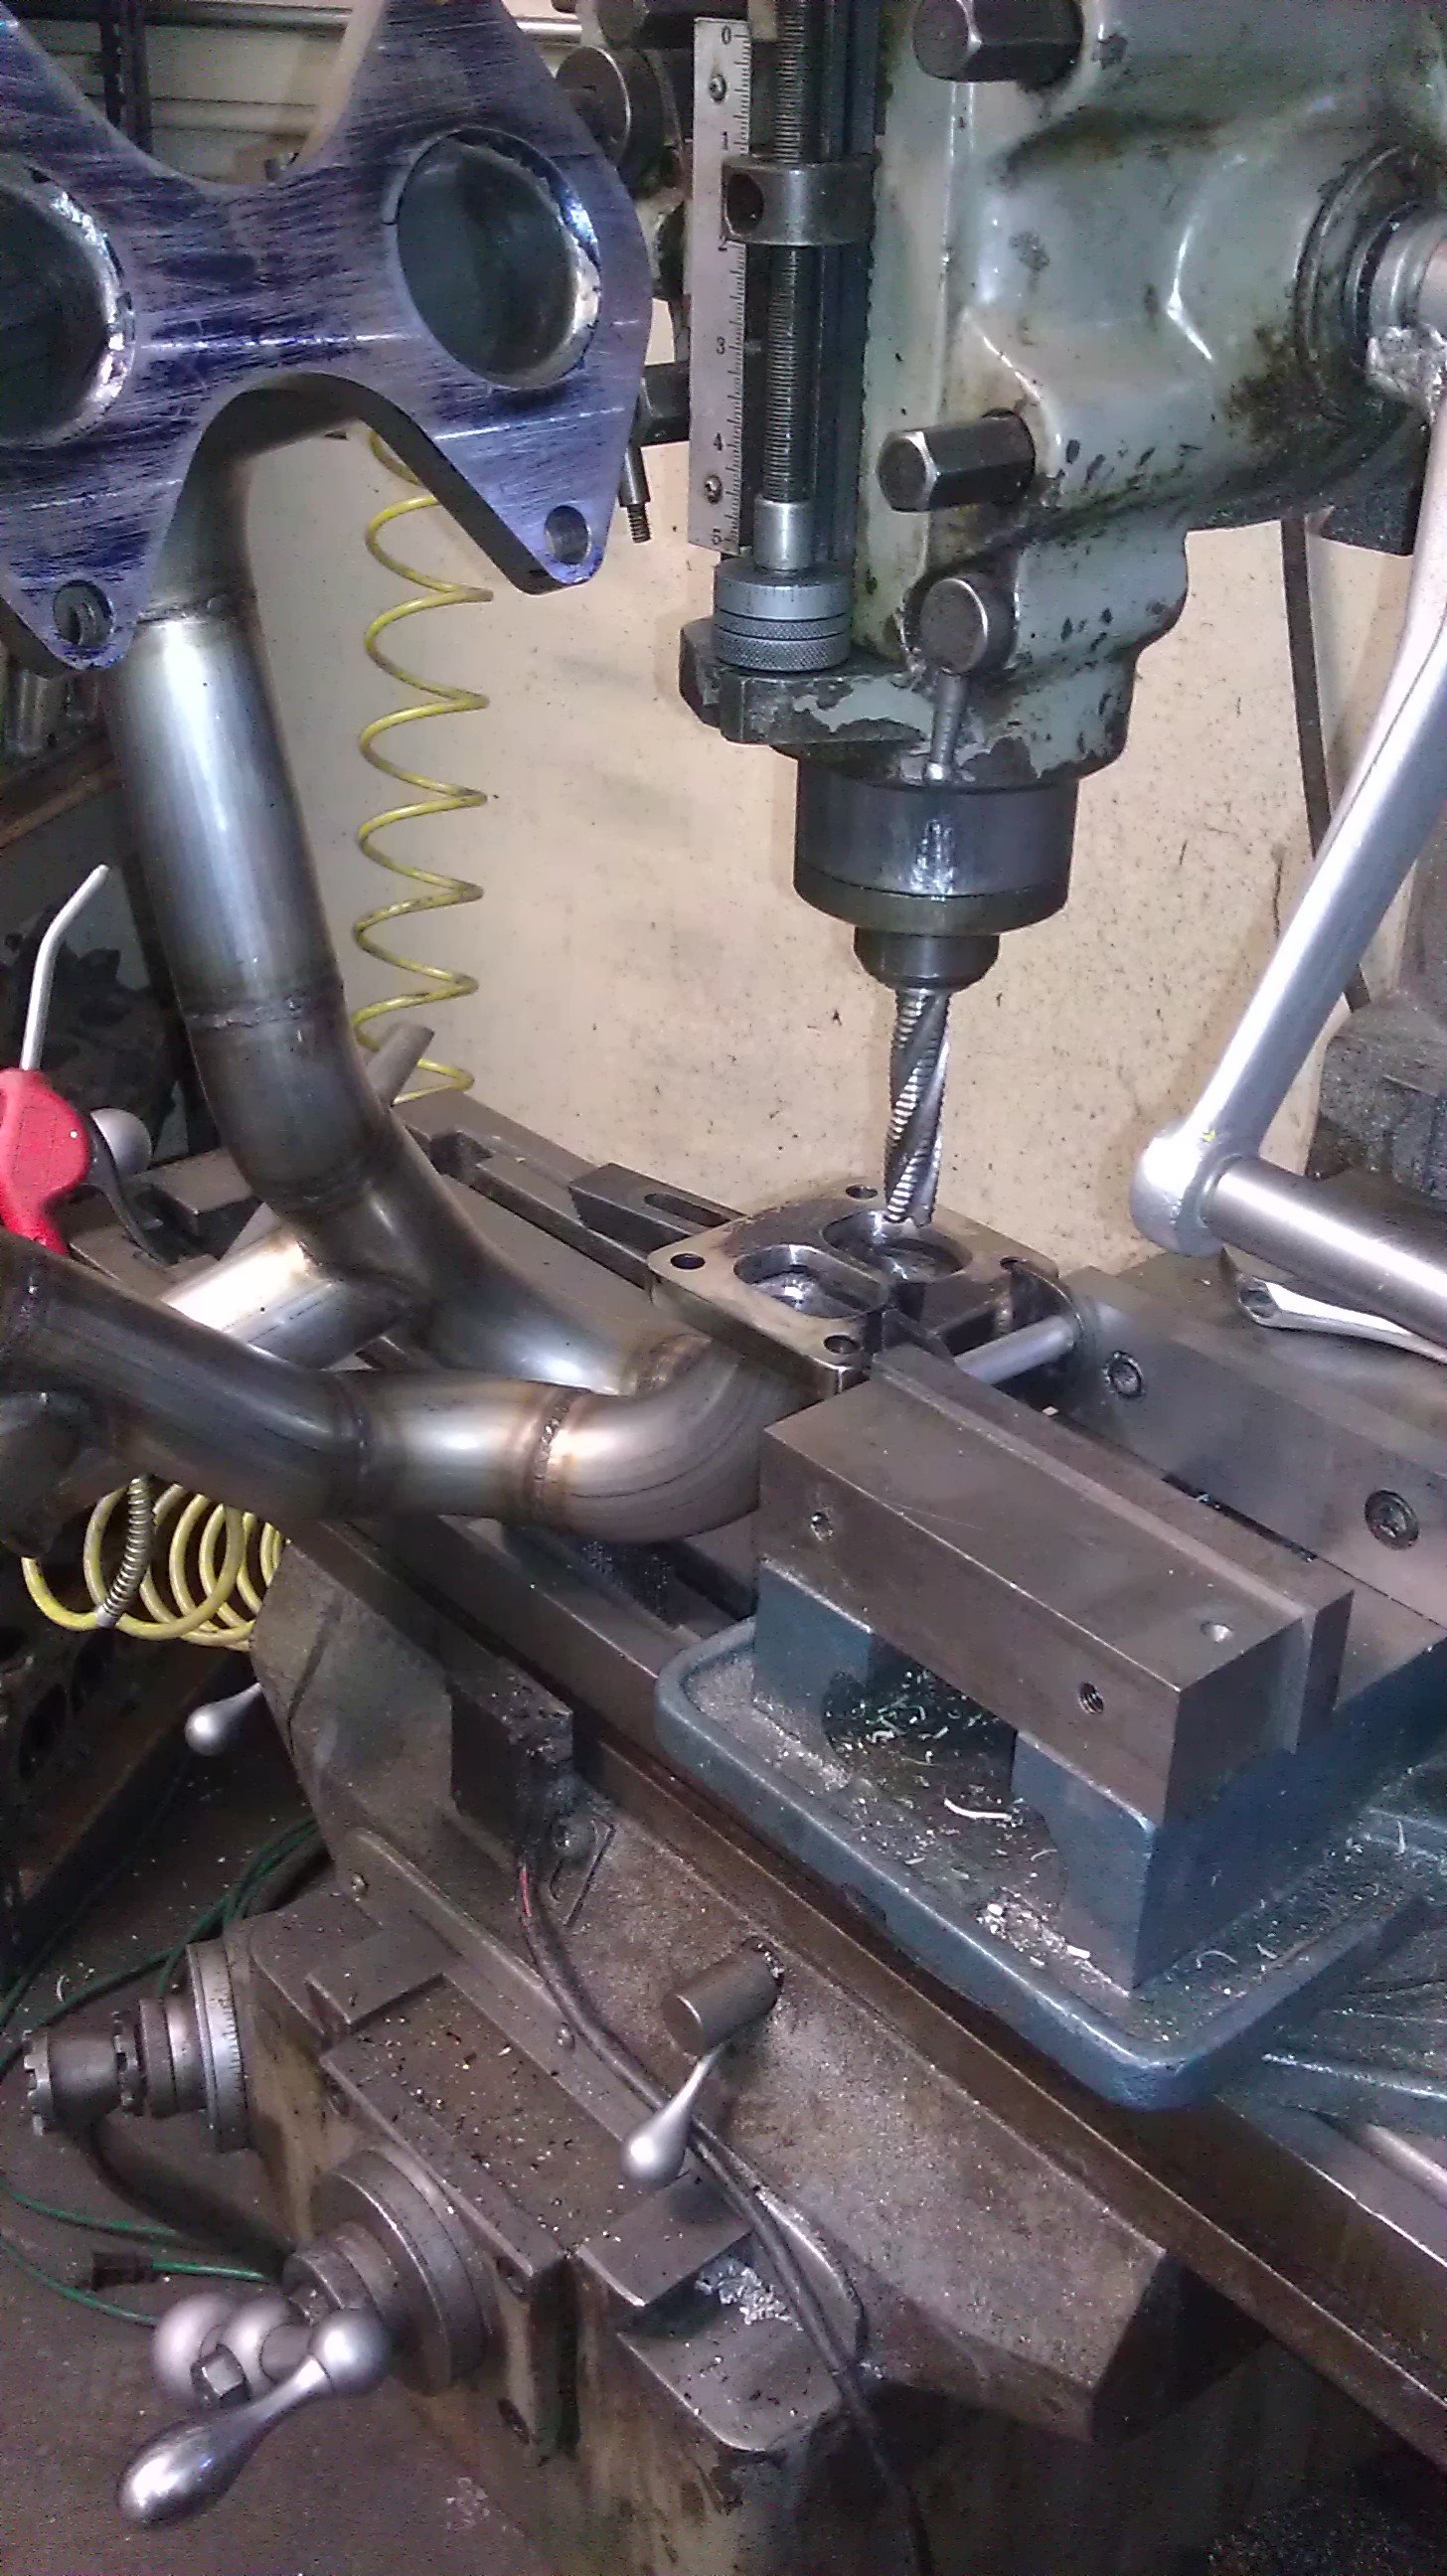
In other updates......
Put some blue marking die on the manifold flanges to make sure they are nice and straight. I hate exhaust leaks.. The Motor/flange side came out nice and straight. The Turbo side Needs machining. Which is what we are doing today.
More updates soon!!
Good news though is I finally had time to work on the Radiator Cooling fan mounts.
there were a few different ways we coud've gone about doing it but we opted for the easiest route. Which was going to home depot and purchasing 1/2" Alum Bar stock.
Cutting 8x 1" long pieces...cleaning them up, putting them on the lathe and putting holes in the middle of them to mount with bolts through them. Nice easy/compact and secure. I cut all the mounts, Bj did all the welding as always.
some done.....some not
what it'll look like
In other updates......
Put some blue marking die on the manifold flanges to make sure they are nice and straight. I hate exhaust leaks.. The Motor/flange side came out nice and straight. The Turbo side Needs machining. Which is what we are doing today.
More updates soon!!
Last edited by mannykiller; 02-17-13 at 01:05 PM.
 02-19-13, 11:28 AM
#1192
Update:
Well I spent quite a long time this weekend making everything was nice and tight. You wouldn't believe how long this takes. All the little bolts you un-do to get other things off the car need to be put back on. I keep all my bolts pretty organized so it's not a matter of finding all the bolts. It's just the time to put everything back together, and have it assembled and ready to run.
So first up was making sure the Turbo side flange of the turbo manifold was nice and straight. Here are a couple process pictures. You can see the blue slowly shrinking these were low spots. If I had to do it again....i'd probly just buy a nicer flange haha.

smaller still
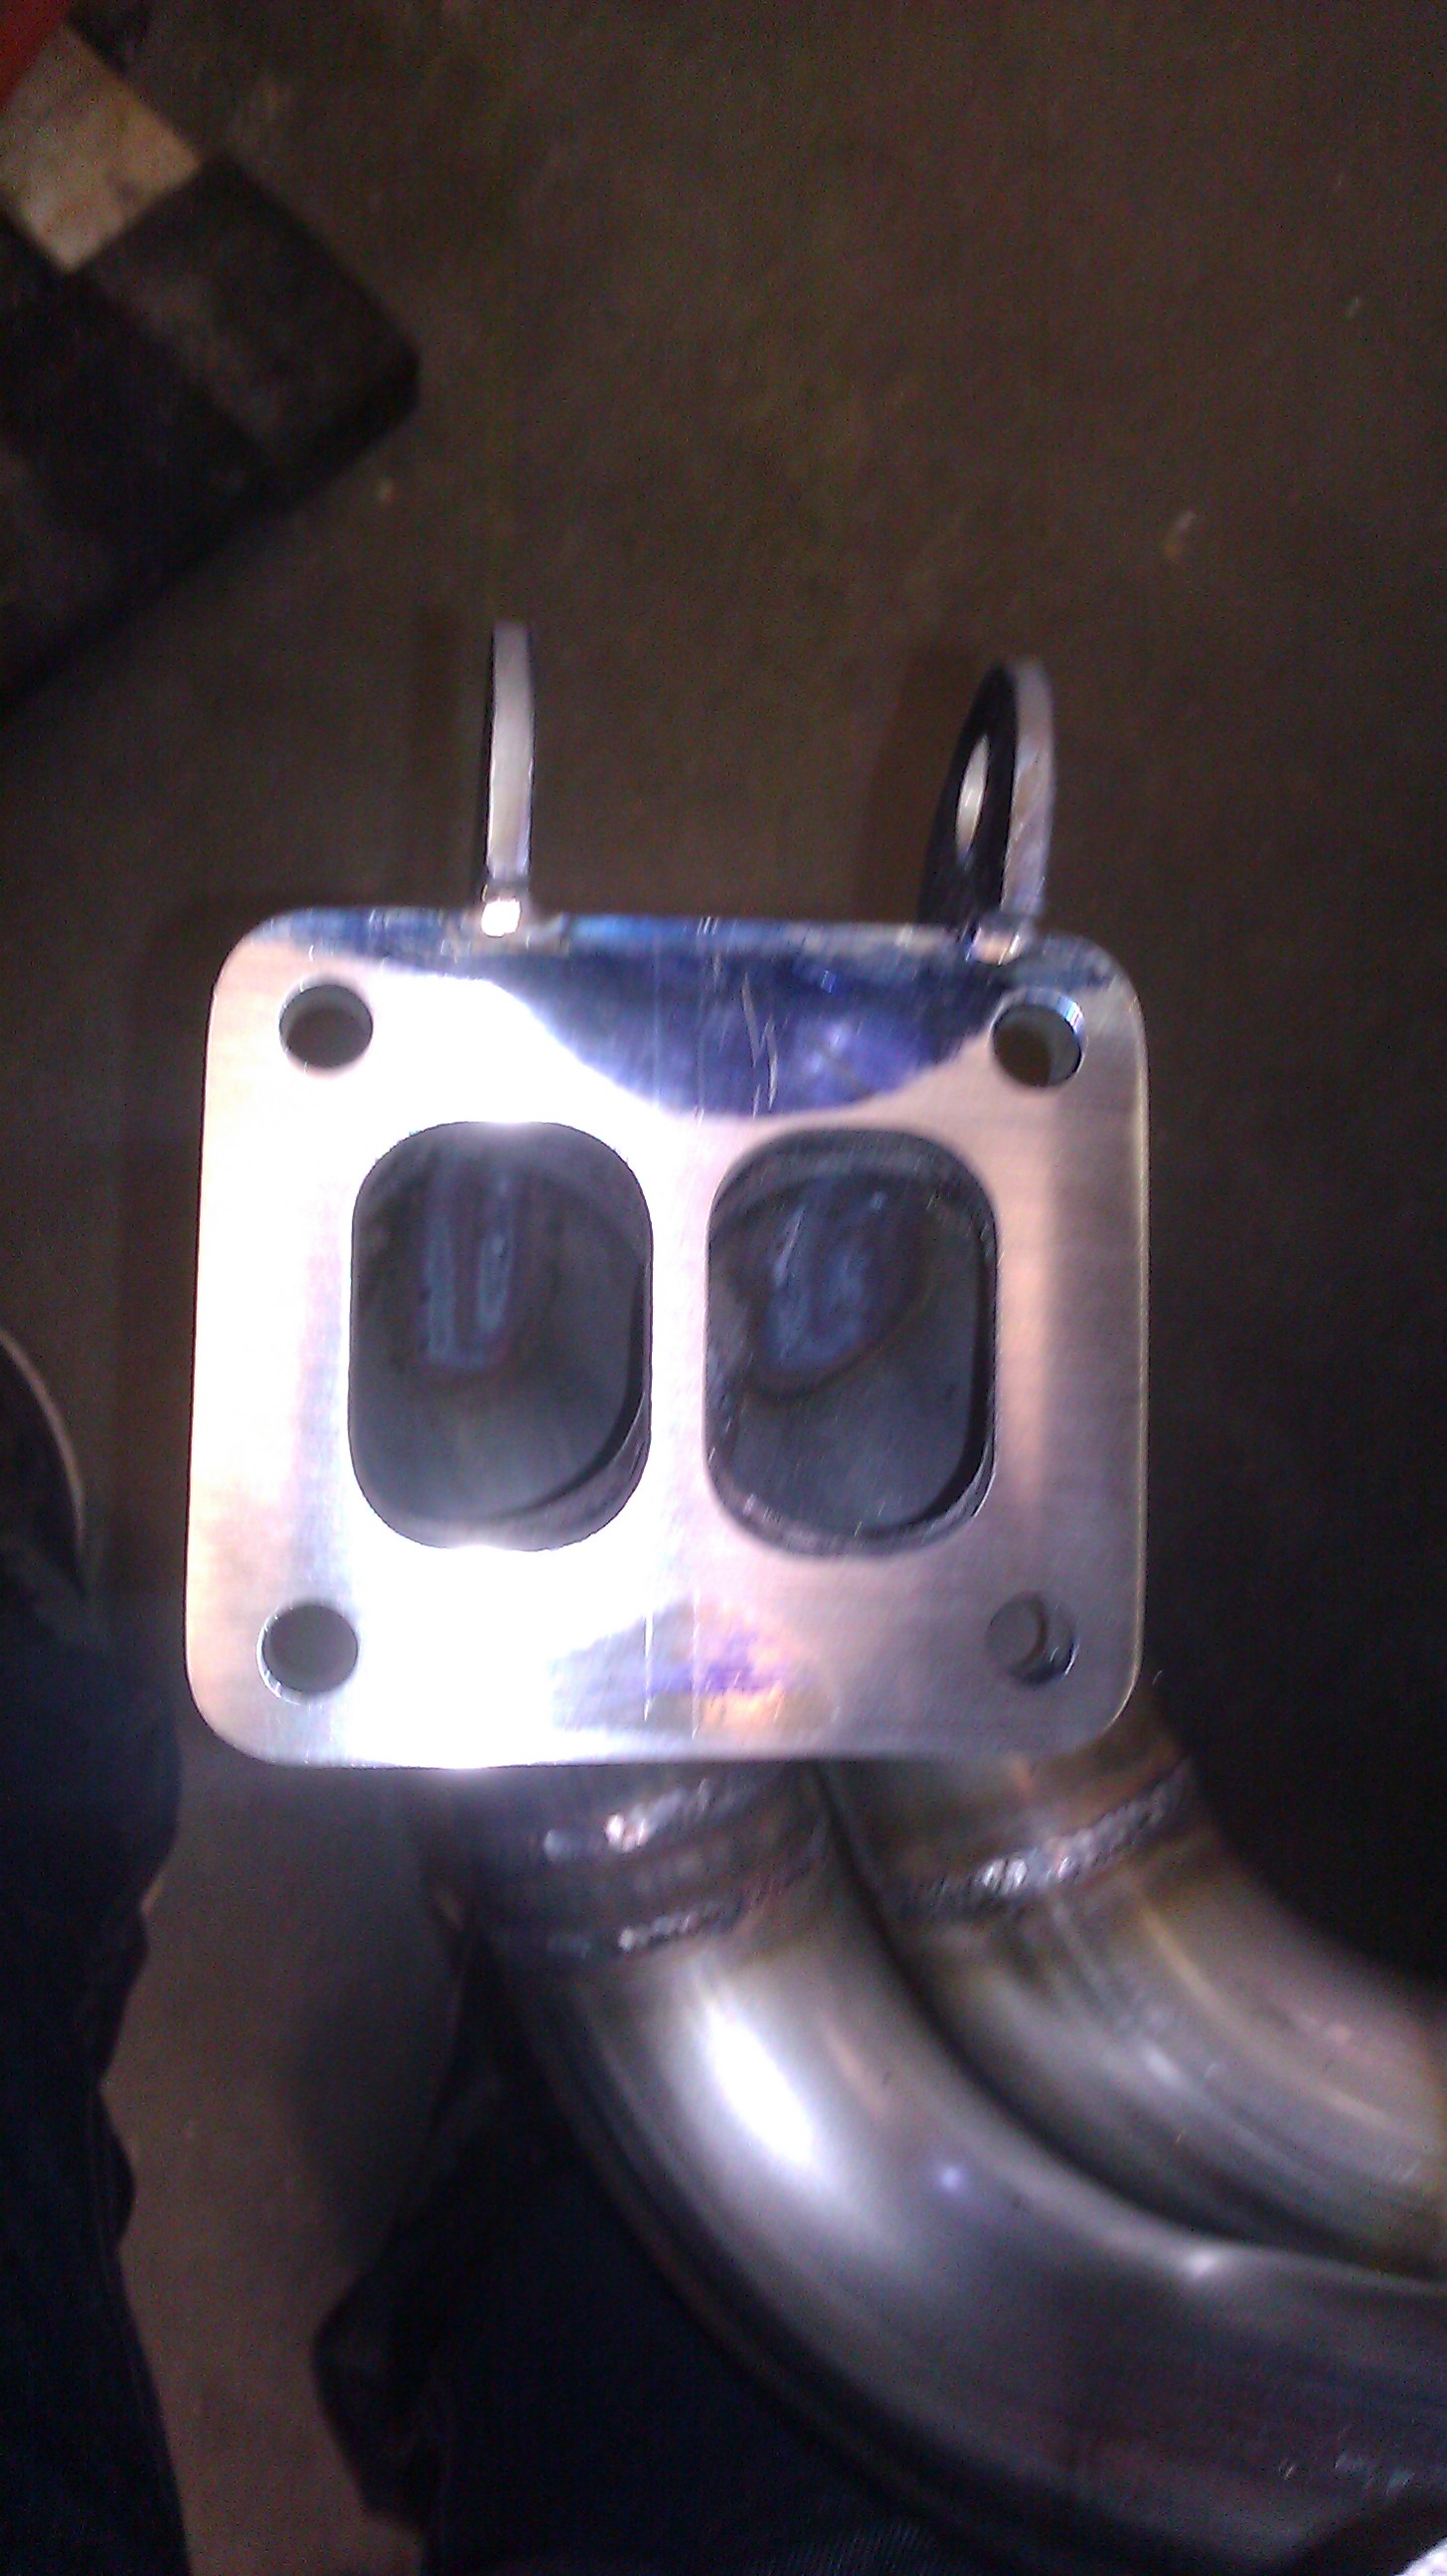
And I totally messed up and didn't take a picture of the flange totally flat..but It took a while to get it nice and flat. Anyways i'm sure you guys get the point...it no longer has blue on it hah.
The motor side flange was perfectly straight already so we didn't even need to touch it. But you take a straight edge file and run it along the whole thing. You can see the low spots because the blue die doest scratch off. Hope sean at A spec is doing ok..last time I heard he was going through some family health problems. But he sold me this flange...and it's a very nice piece.
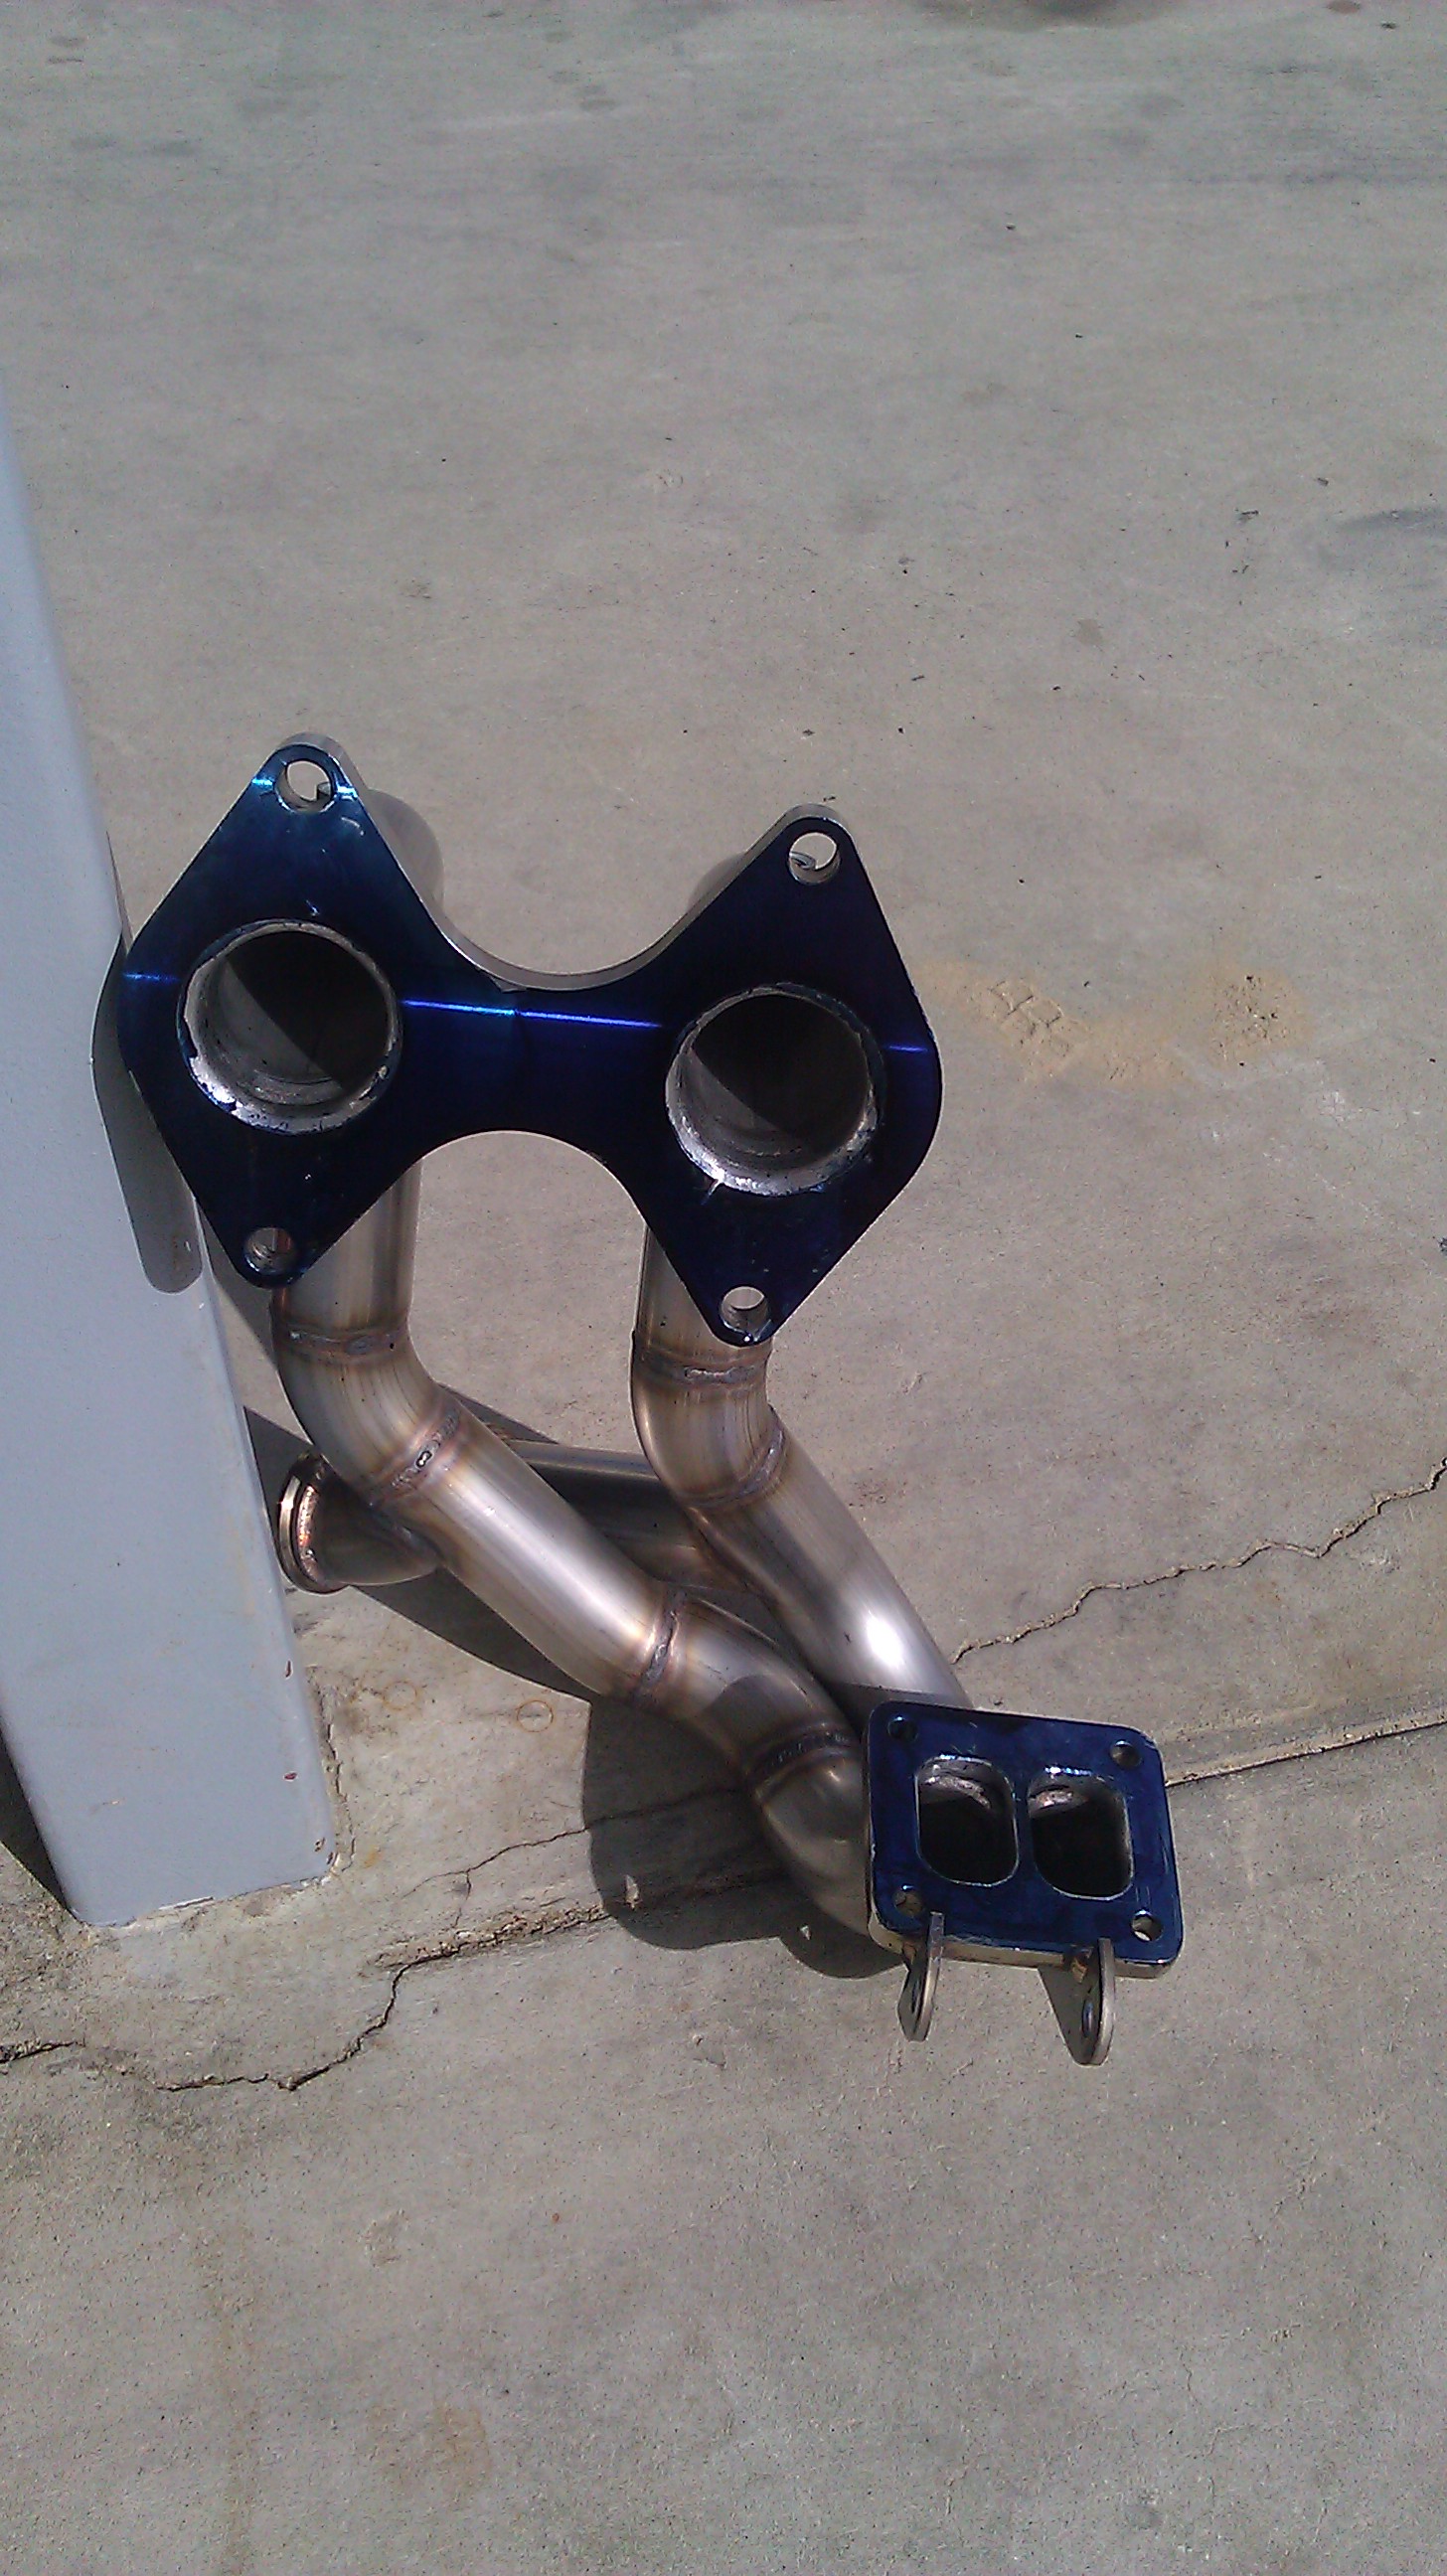 After that I was able to bring the manifold home and Install it. Nice Low mileage OEM exhaust flanges. Was going to use super Copper on them to help seal them further..but seriously.. I don't think that stuff would hold up to the task.
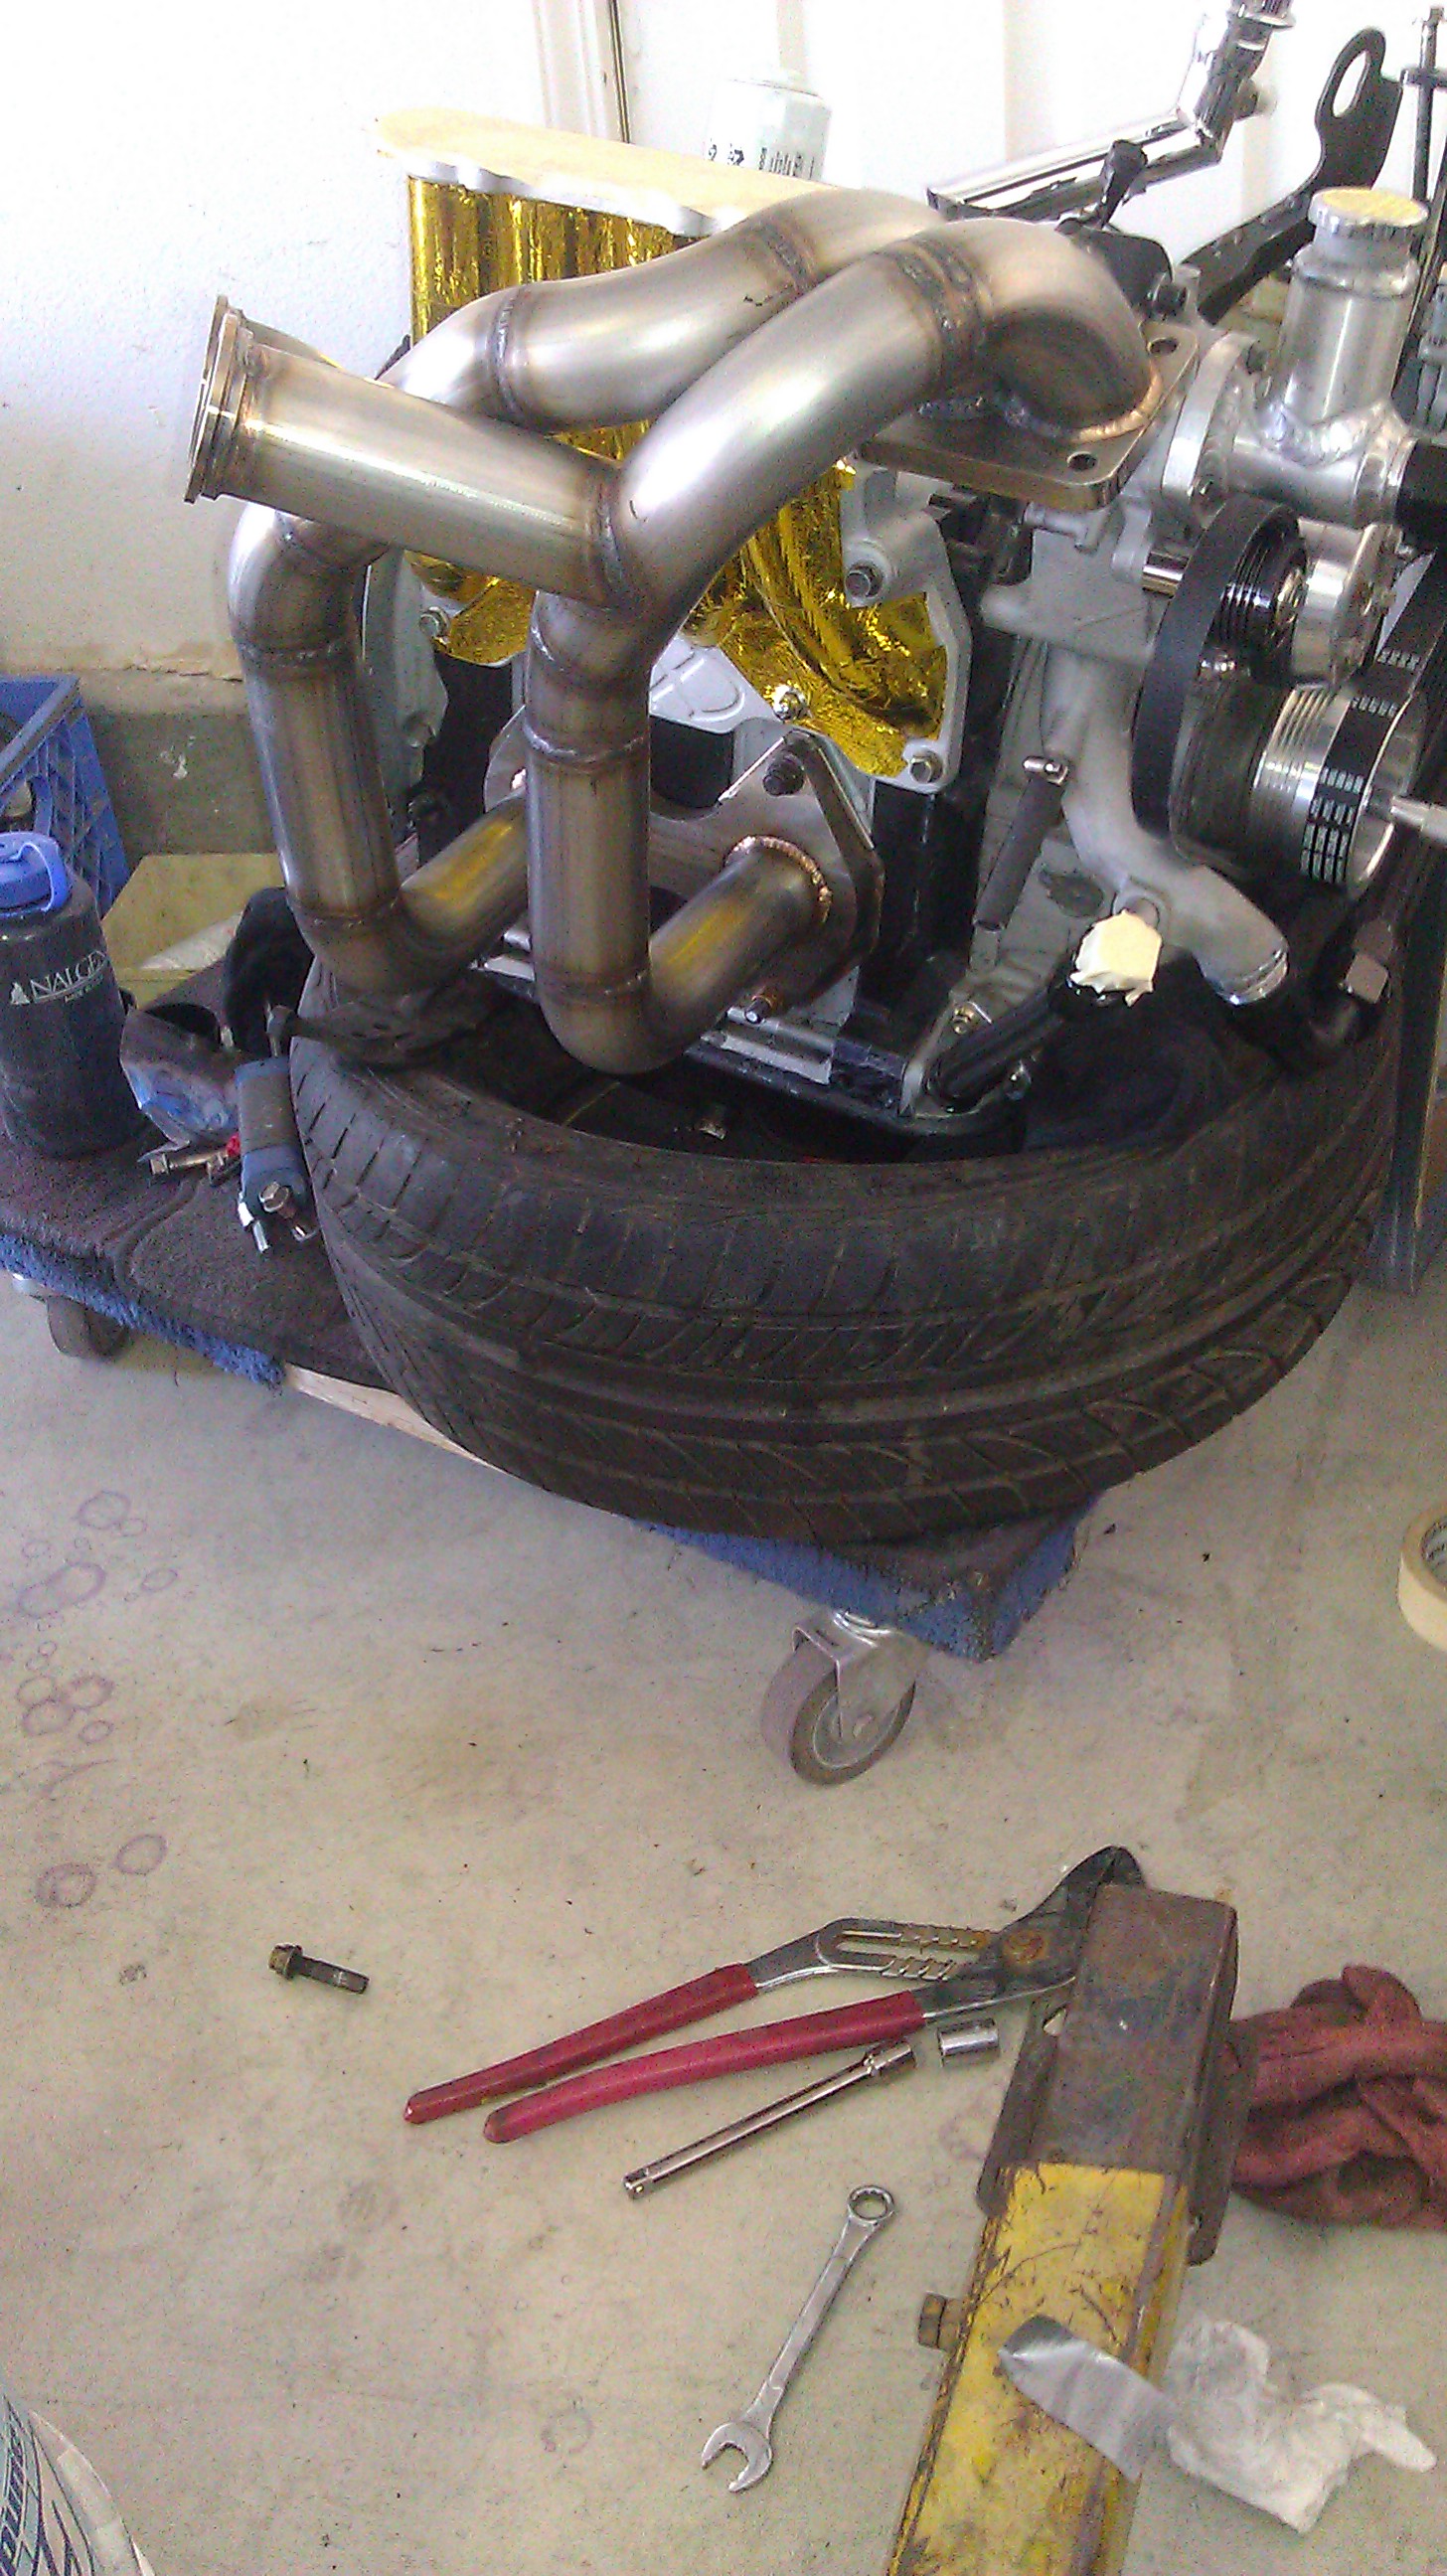
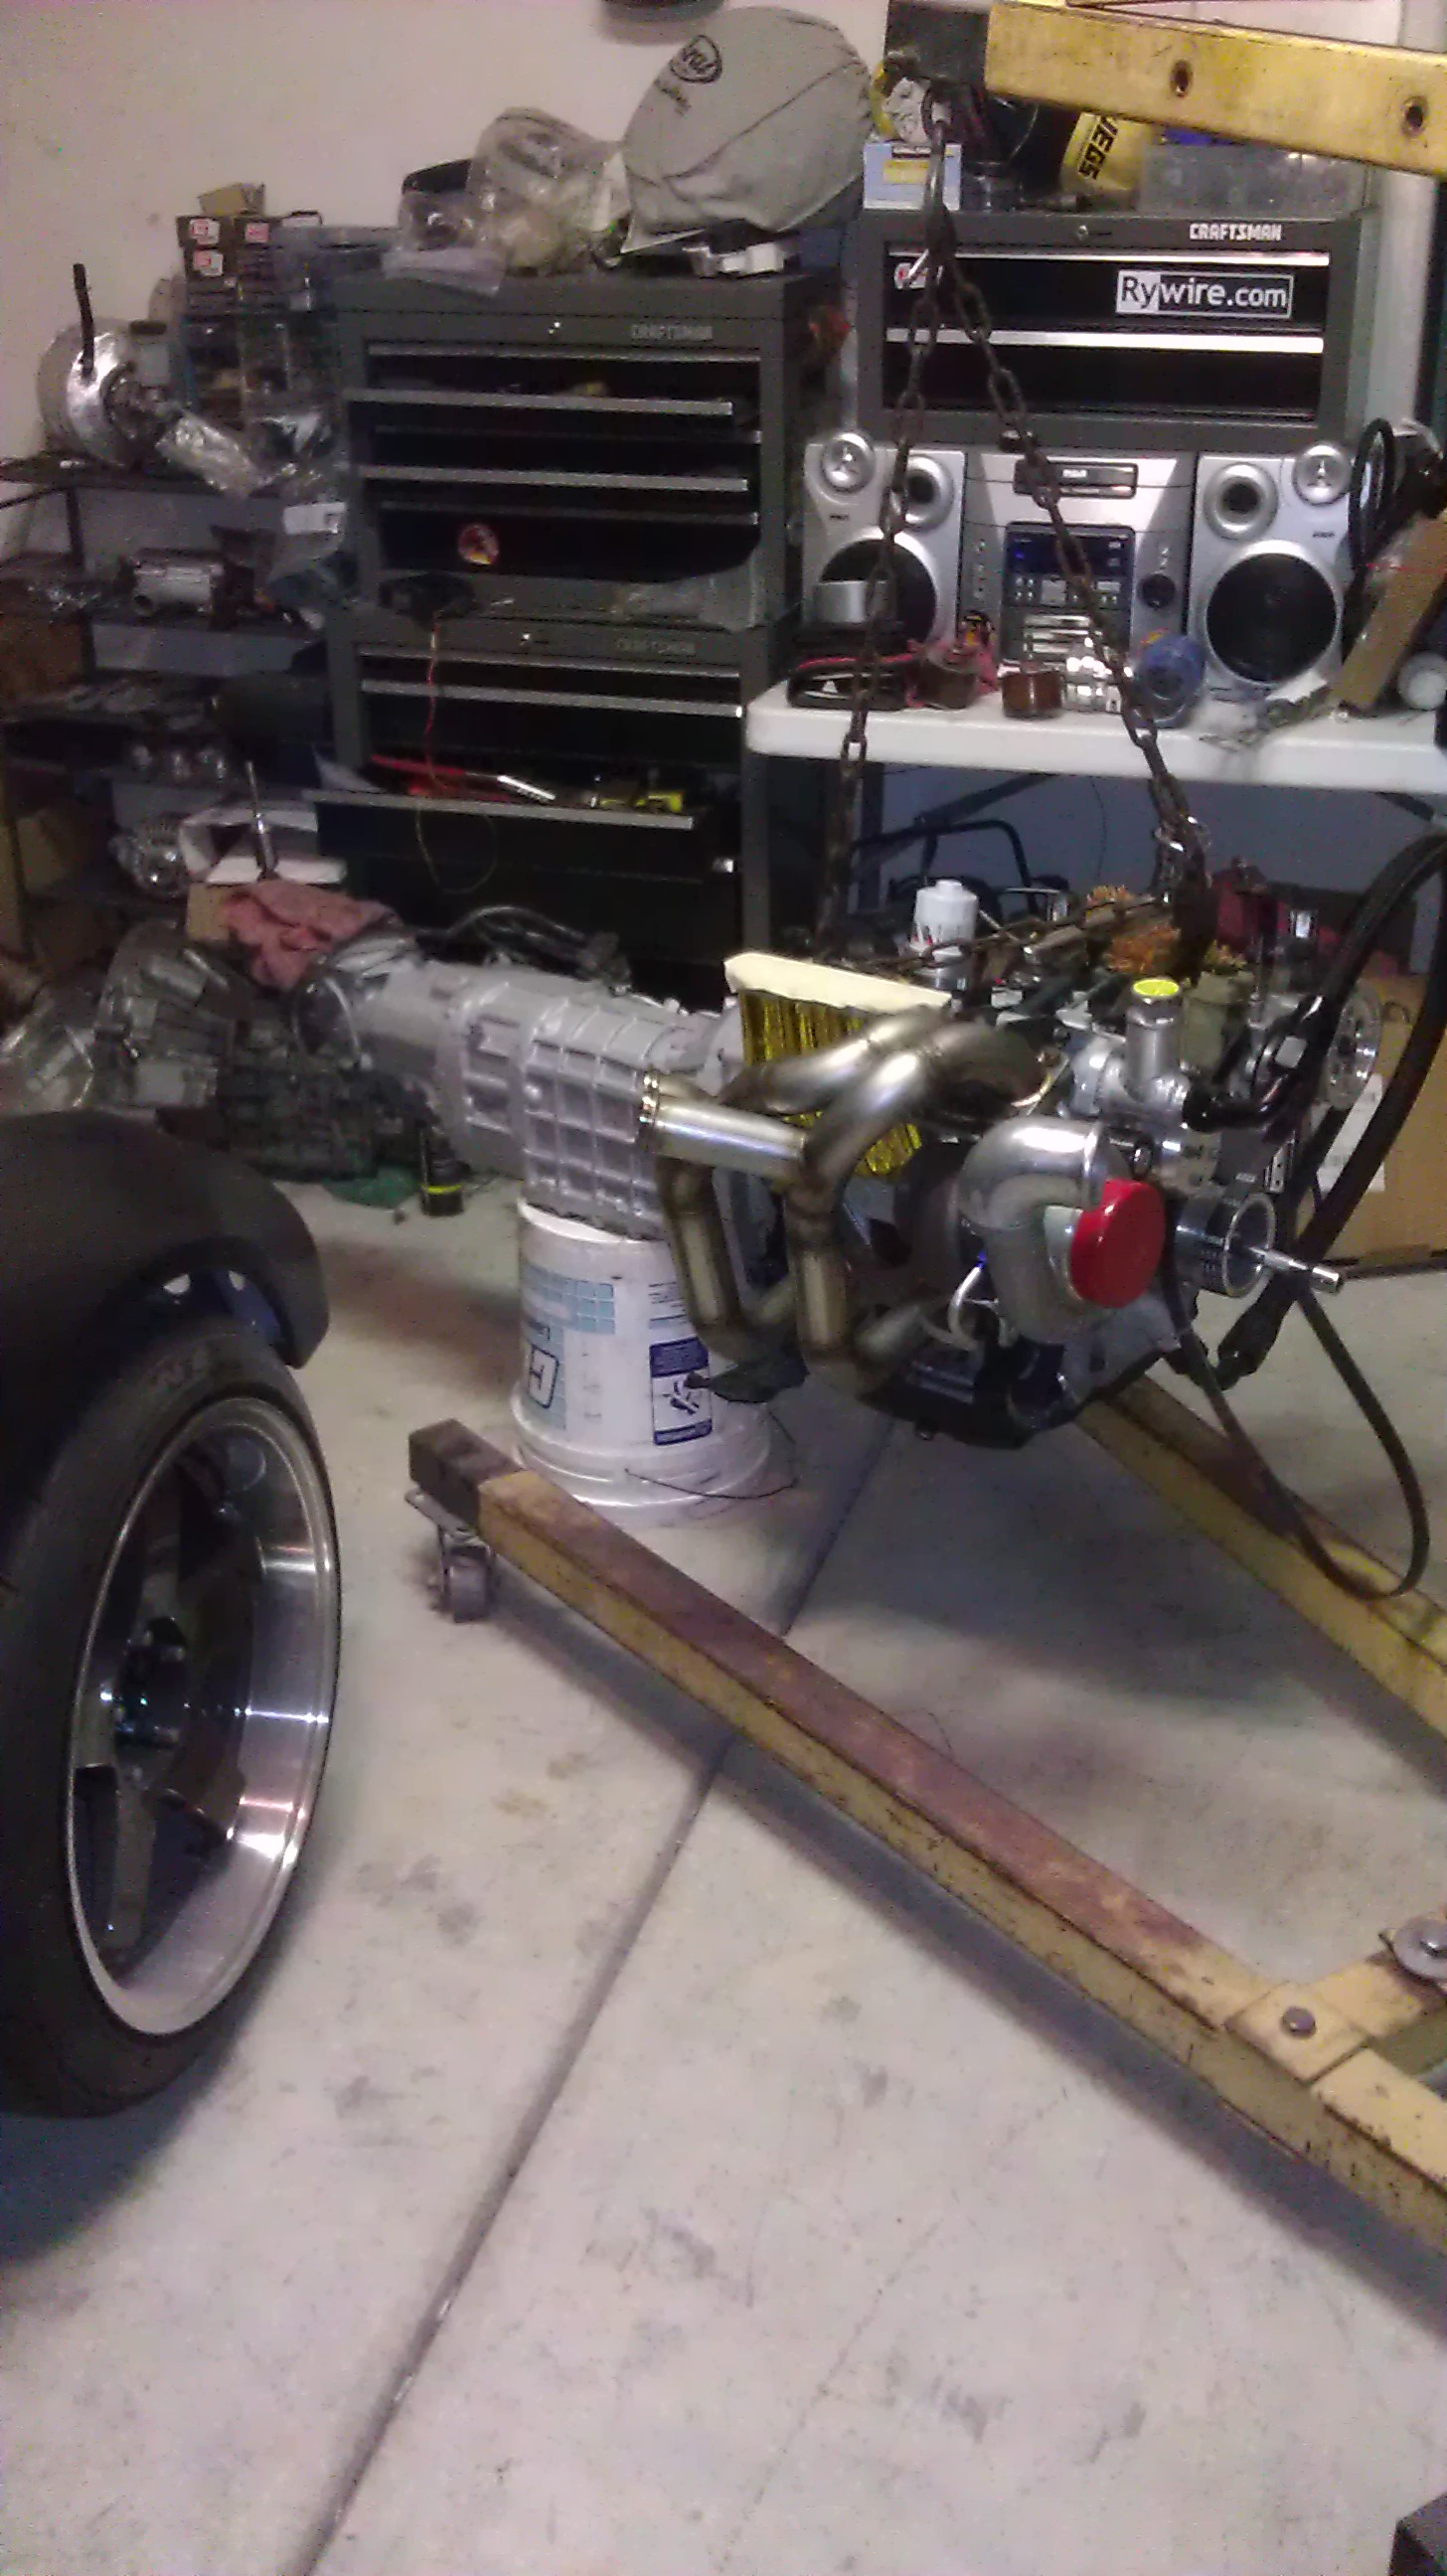
Anyways... after the manifold was on I put the trans on a bucket and positioned the motor with the hoist nice and level.. It was pretty easy mouting them up this way. Took less than 5 min.
Well I spent quite a long time this weekend making everything was nice and tight. You wouldn't believe how long this takes. All the little bolts you un-do to get other things off the car need to be put back on. I keep all my bolts pretty organized so it's not a matter of finding all the bolts. It's just the time to put everything back together, and have it assembled and ready to run.
So first up was making sure the Turbo side flange of the turbo manifold was nice and straight. Here are a couple process pictures. You can see the blue slowly shrinking these were low spots. If I had to do it again....i'd probly just buy a nicer flange haha.
smaller still
And I totally messed up and didn't take a picture of the flange totally flat..but It took a while to get it nice and flat. Anyways i'm sure you guys get the point...it no longer has blue on it hah.
The motor side flange was perfectly straight already so we didn't even need to touch it. But you take a straight edge file and run it along the whole thing. You can see the low spots because the blue die doest scratch off. Hope sean at A spec is doing ok..last time I heard he was going through some family health problems. But he sold me this flange...and it's a very nice piece.
After that I was able to bring the manifold home and Install it. Nice Low mileage OEM exhaust flanges. Was going to use super Copper on them to help seal them further..but seriously.. I don't think that stuff would hold up to the task. Anyways... after the manifold was on I put the trans on a bucket and positioned the motor with the hoist nice and level.. It was pretty easy mouting them up this way. Took less than 5 min.
Last edited by mannykiller; 02-19-13 at 11:34 AM.
 02-19-13, 12:13 PM
#1194
I also was able to mount the turbo and gasket..now the gasket is pretty off So I'm going to purchase another one. Anyone have a good source? Probly just going with one from ATP turbo. I don't really think the inconel ones are worth the money as I've never really had problems with ATP ones.
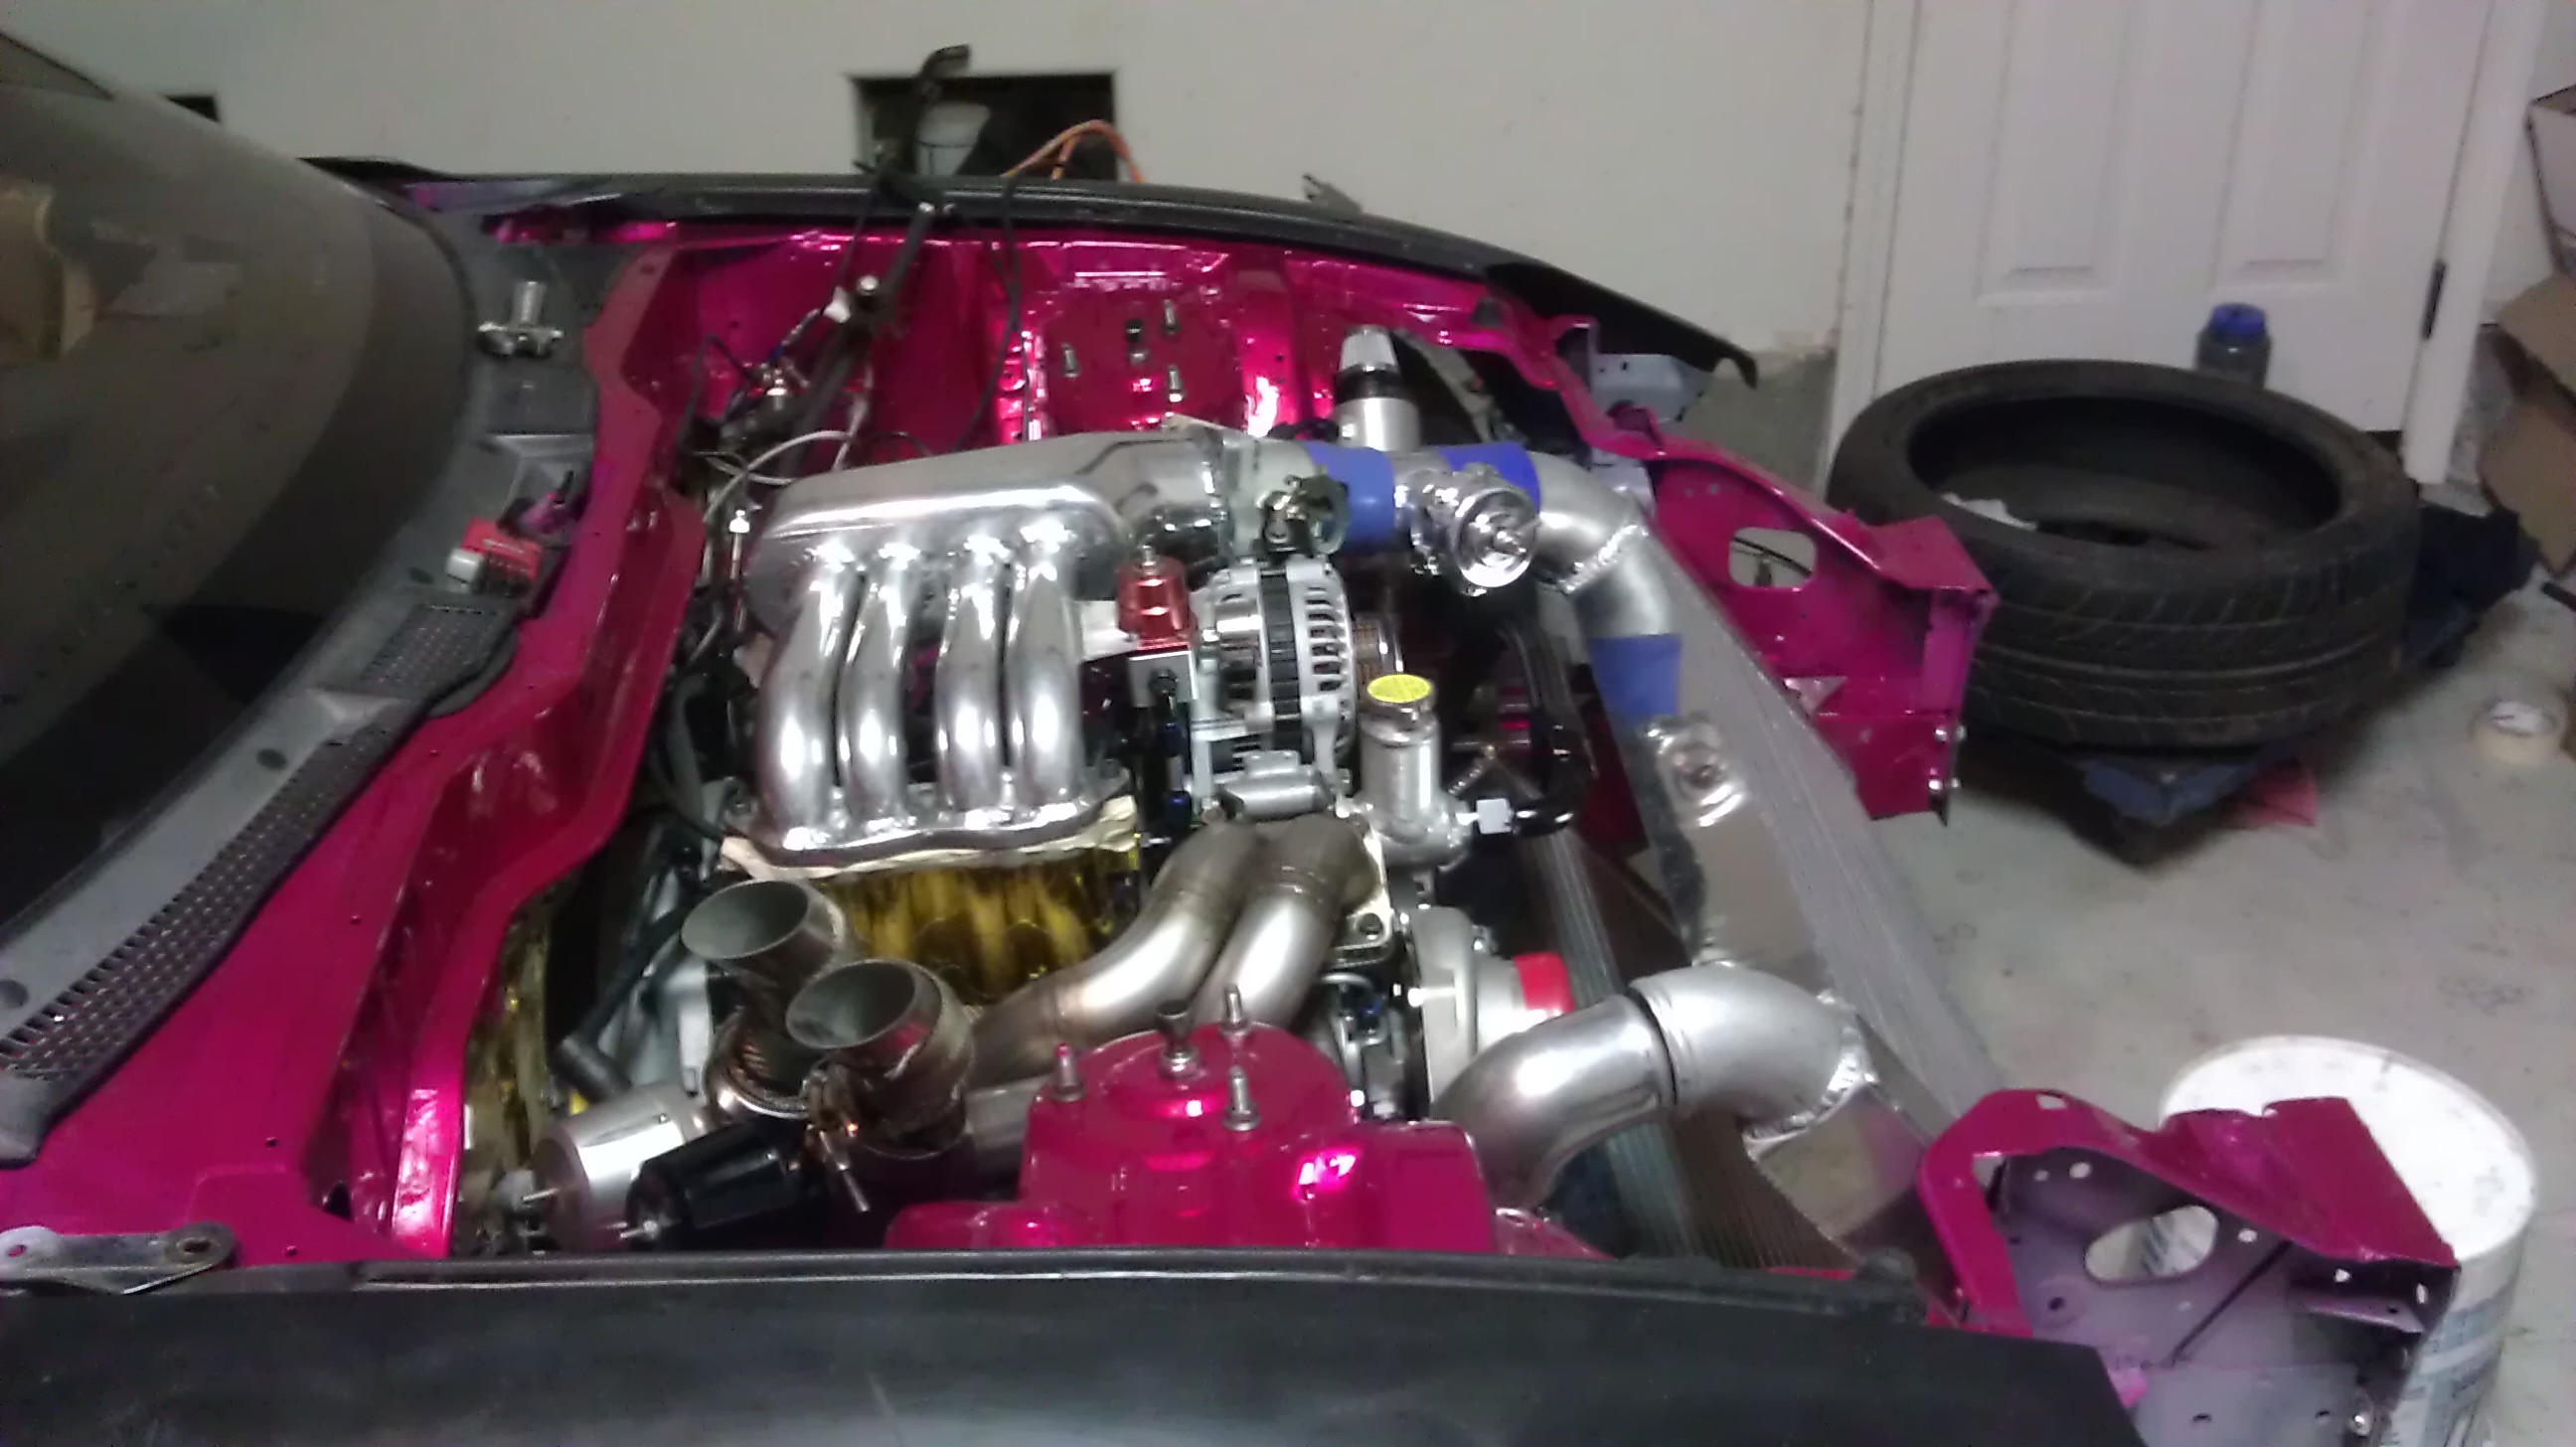
Anyways...The motor goes in.. Much easier with the cross member out of the way. Also plugged up the trans driveshaft hole so no trans fluid would seap out...thats annoying. It's empty but there is still some small amount in there.
So here she's in
another
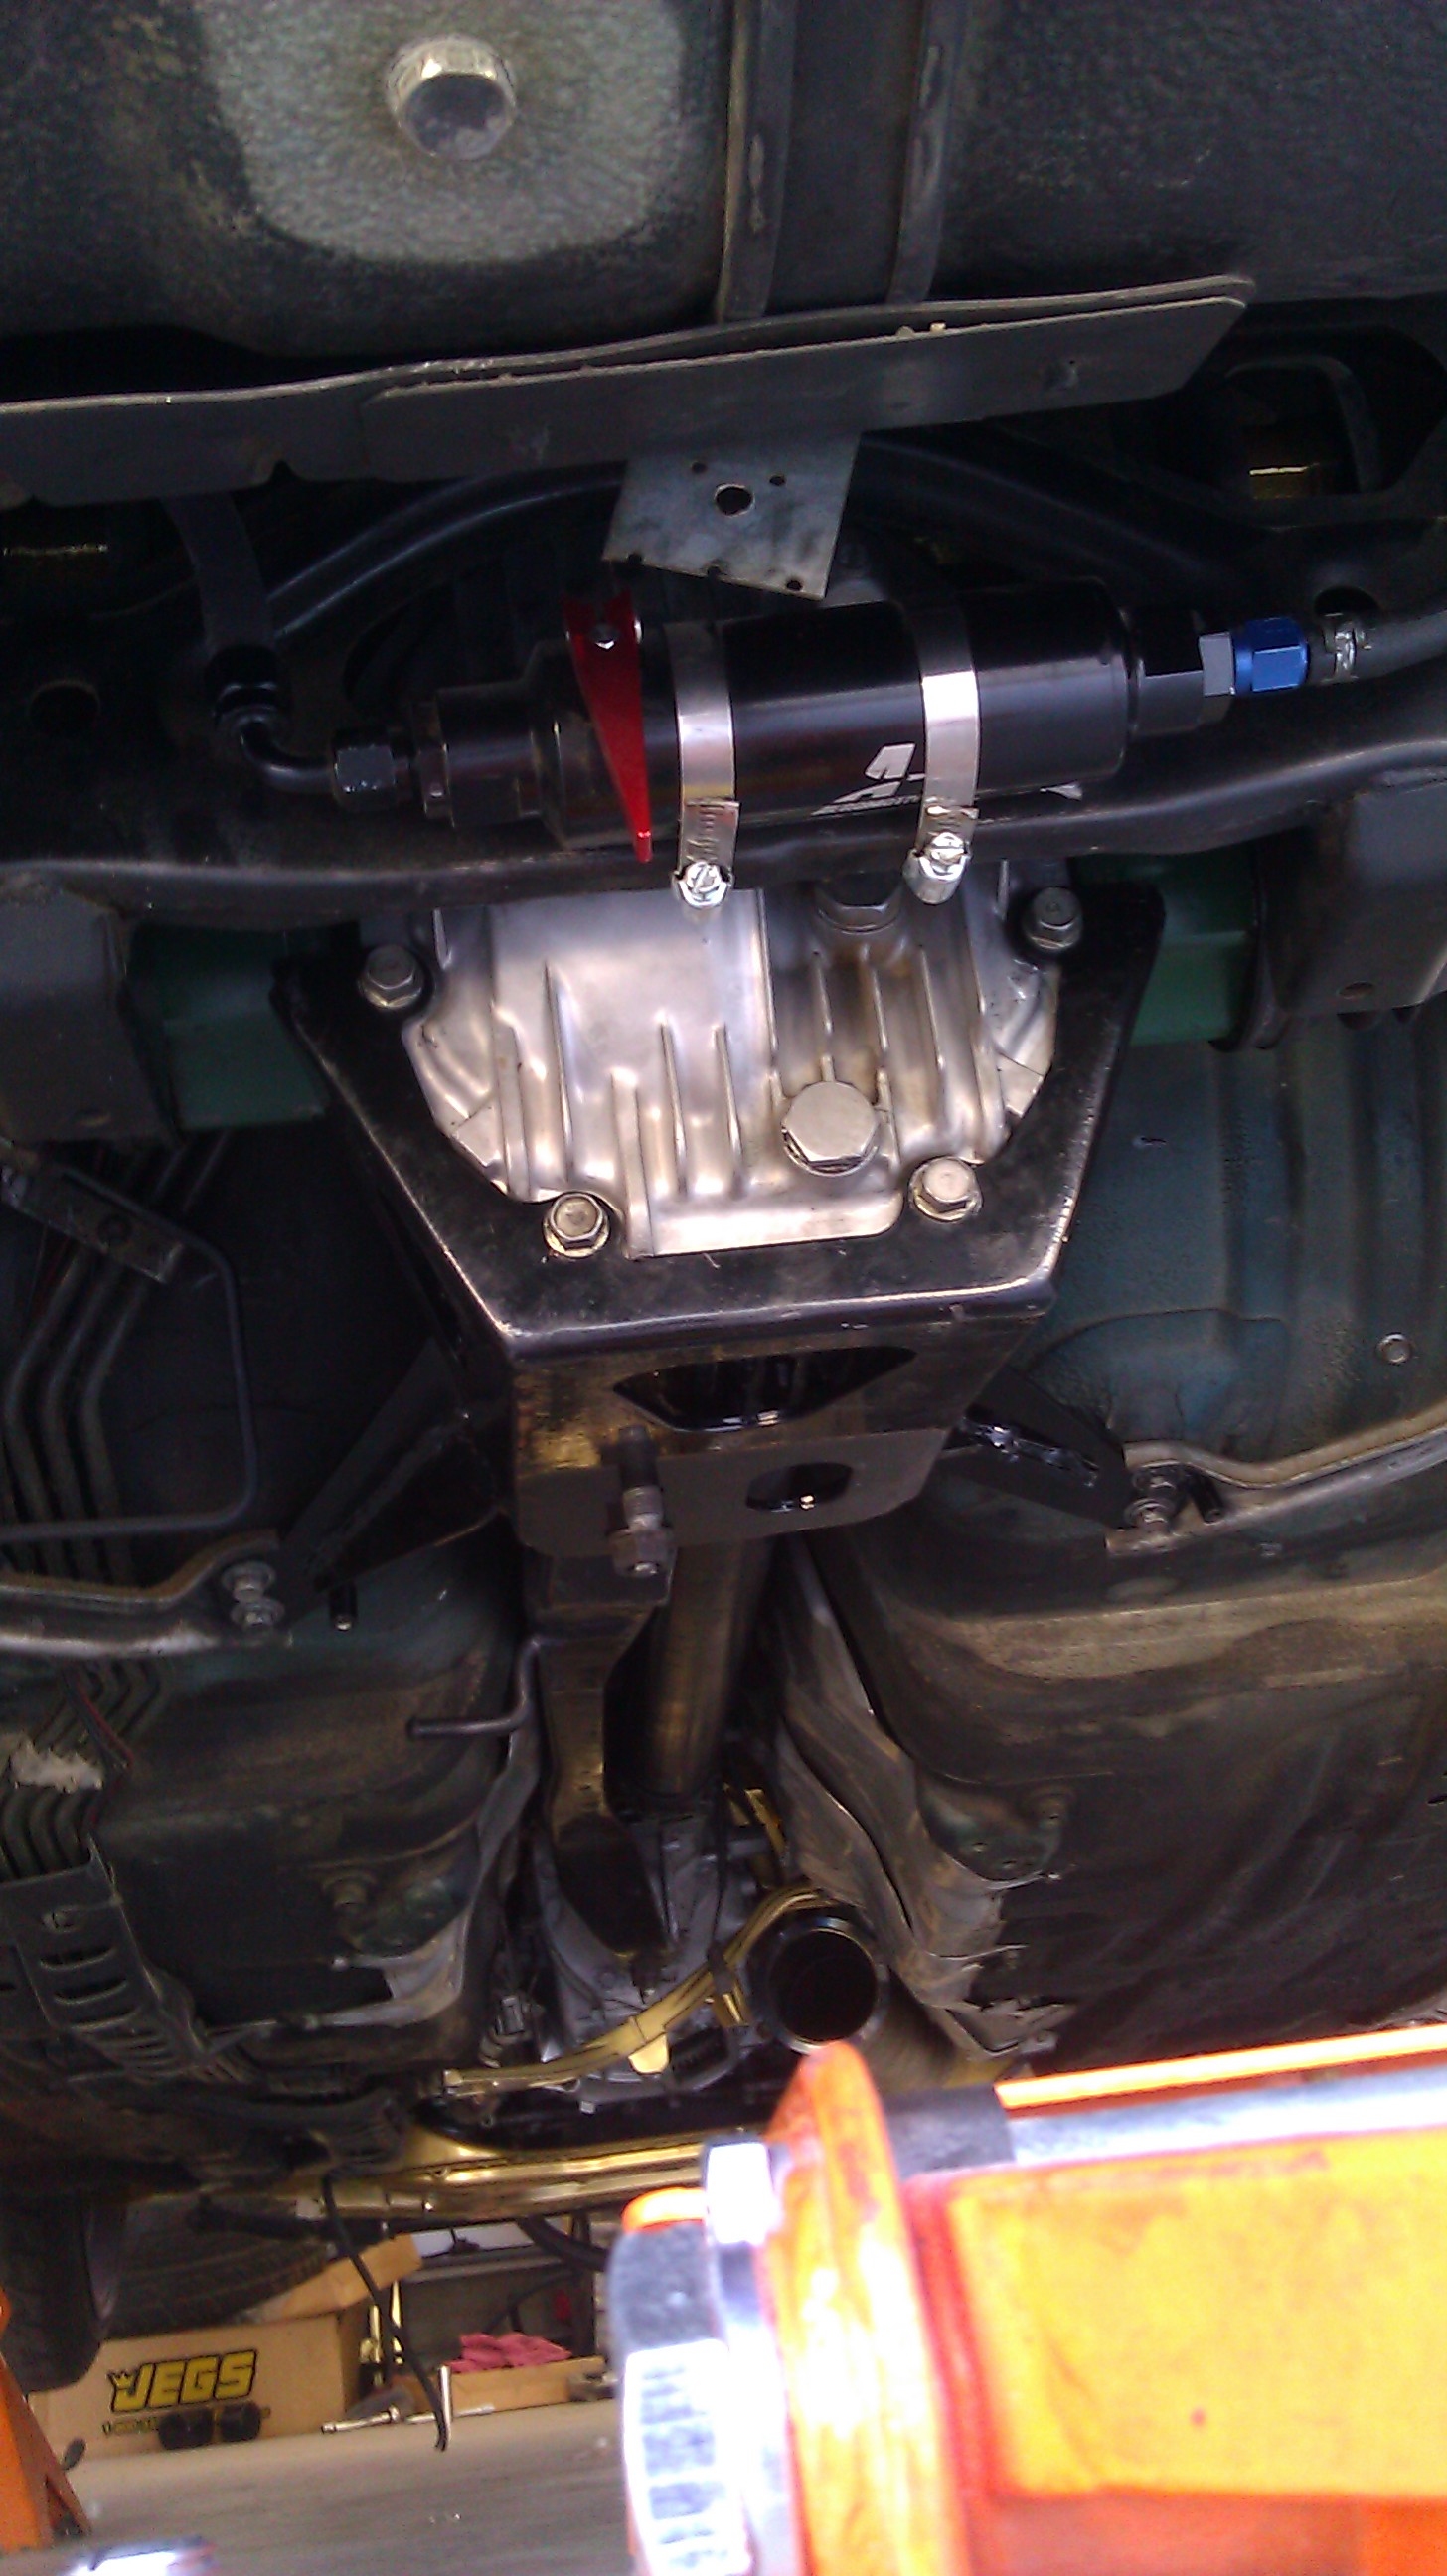
Then I got under the car and pulled the diff case off to check the Torque on my diff because Yarmin Driveshafts Totally Ripped me off. Damn Bastards..i need to call over there today again...258 bucks for a half *** crap job....I'll Never ever go there again and i'm going to detere everyone I can from that hack job of a shop.
Installed the HPP 2-1 Diff brace after I checked the Torque on the carrier bearings. And what do you know... Loose as a Effing Goose. I'll say it again...BASTARDS. Seriously Blows my mind. Good thing was there was actually dye from the contact test for the backlash and it looked and feels good, so at least that was done correctly. But who even knows if these are new bearings or not?! So to all of you who might not have caught it.... Yarmin Driveshafts is a Shady Business that does Half *** work. Worst part was it was the Owner who did it...pfft..anyways onto more positive things..
Installed Nice and Toight.
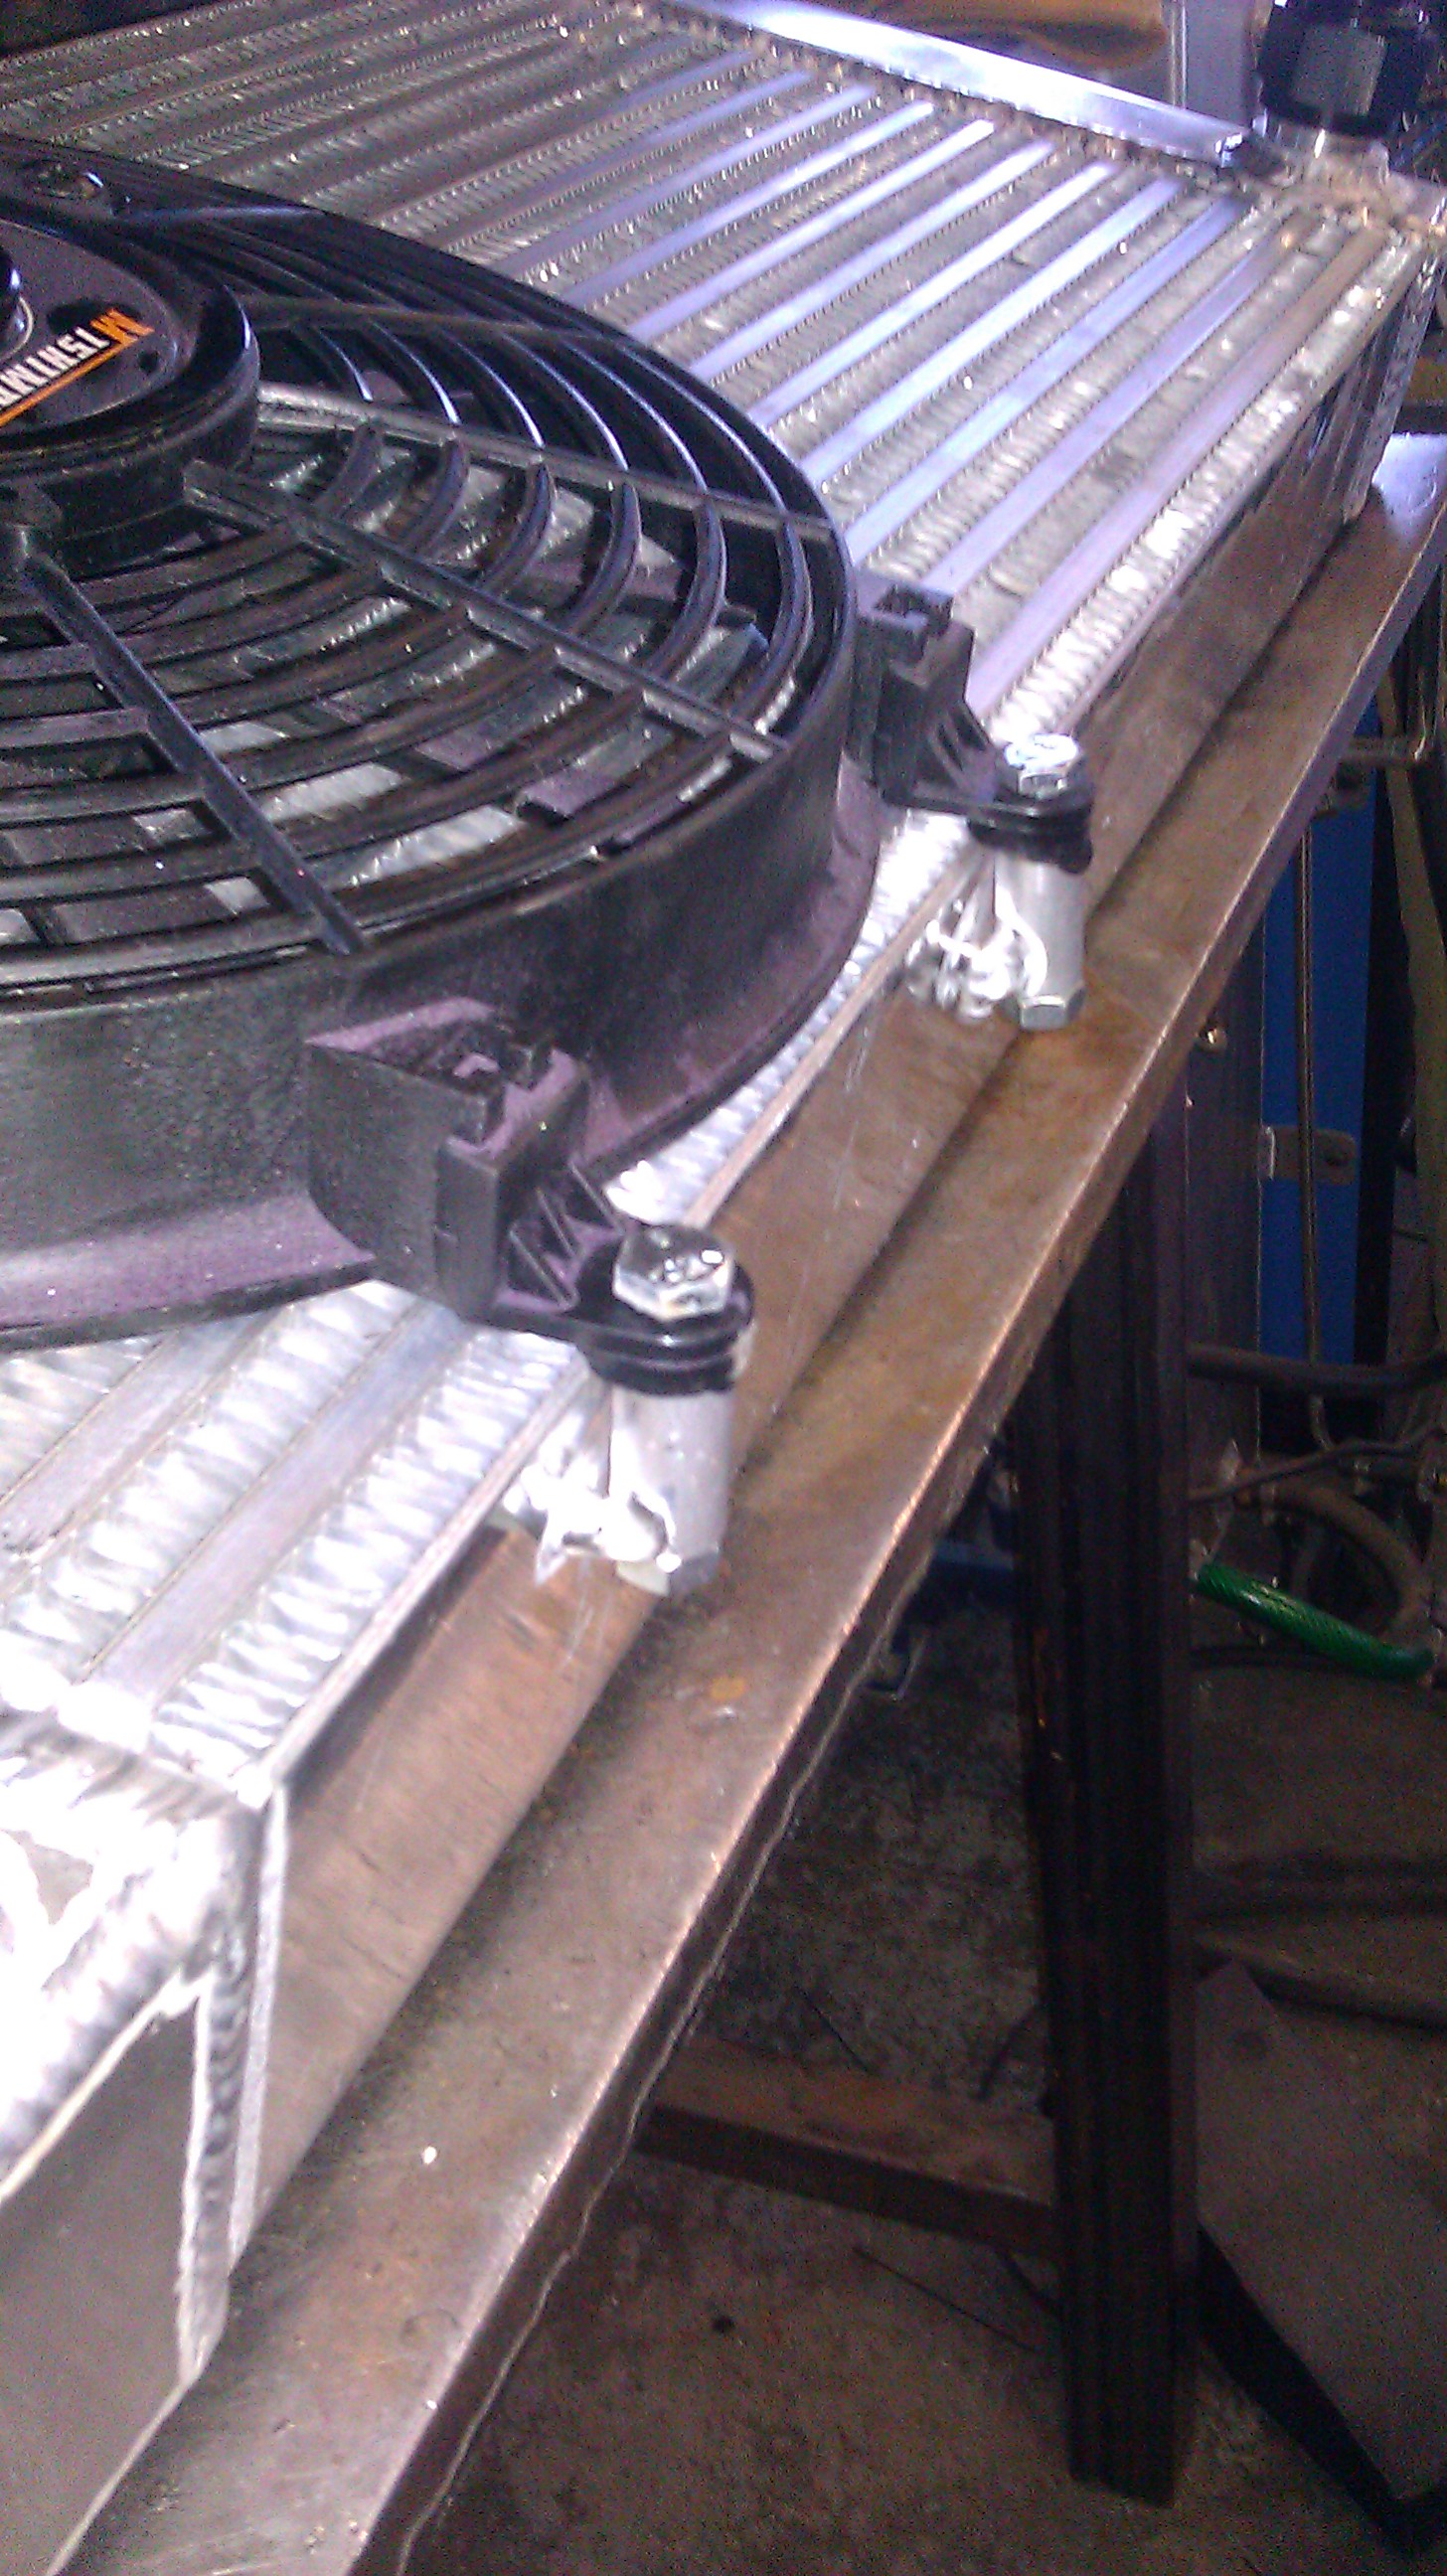
Installed my fans on the Radiator... these mishimoto slim fans save me all sorts of space..although the CFM rating is a bit low I really don't think i'll have any problems with keeping cool. Cfm rating is roughly 1700-1800 CFM for the both of them total.
Radiator
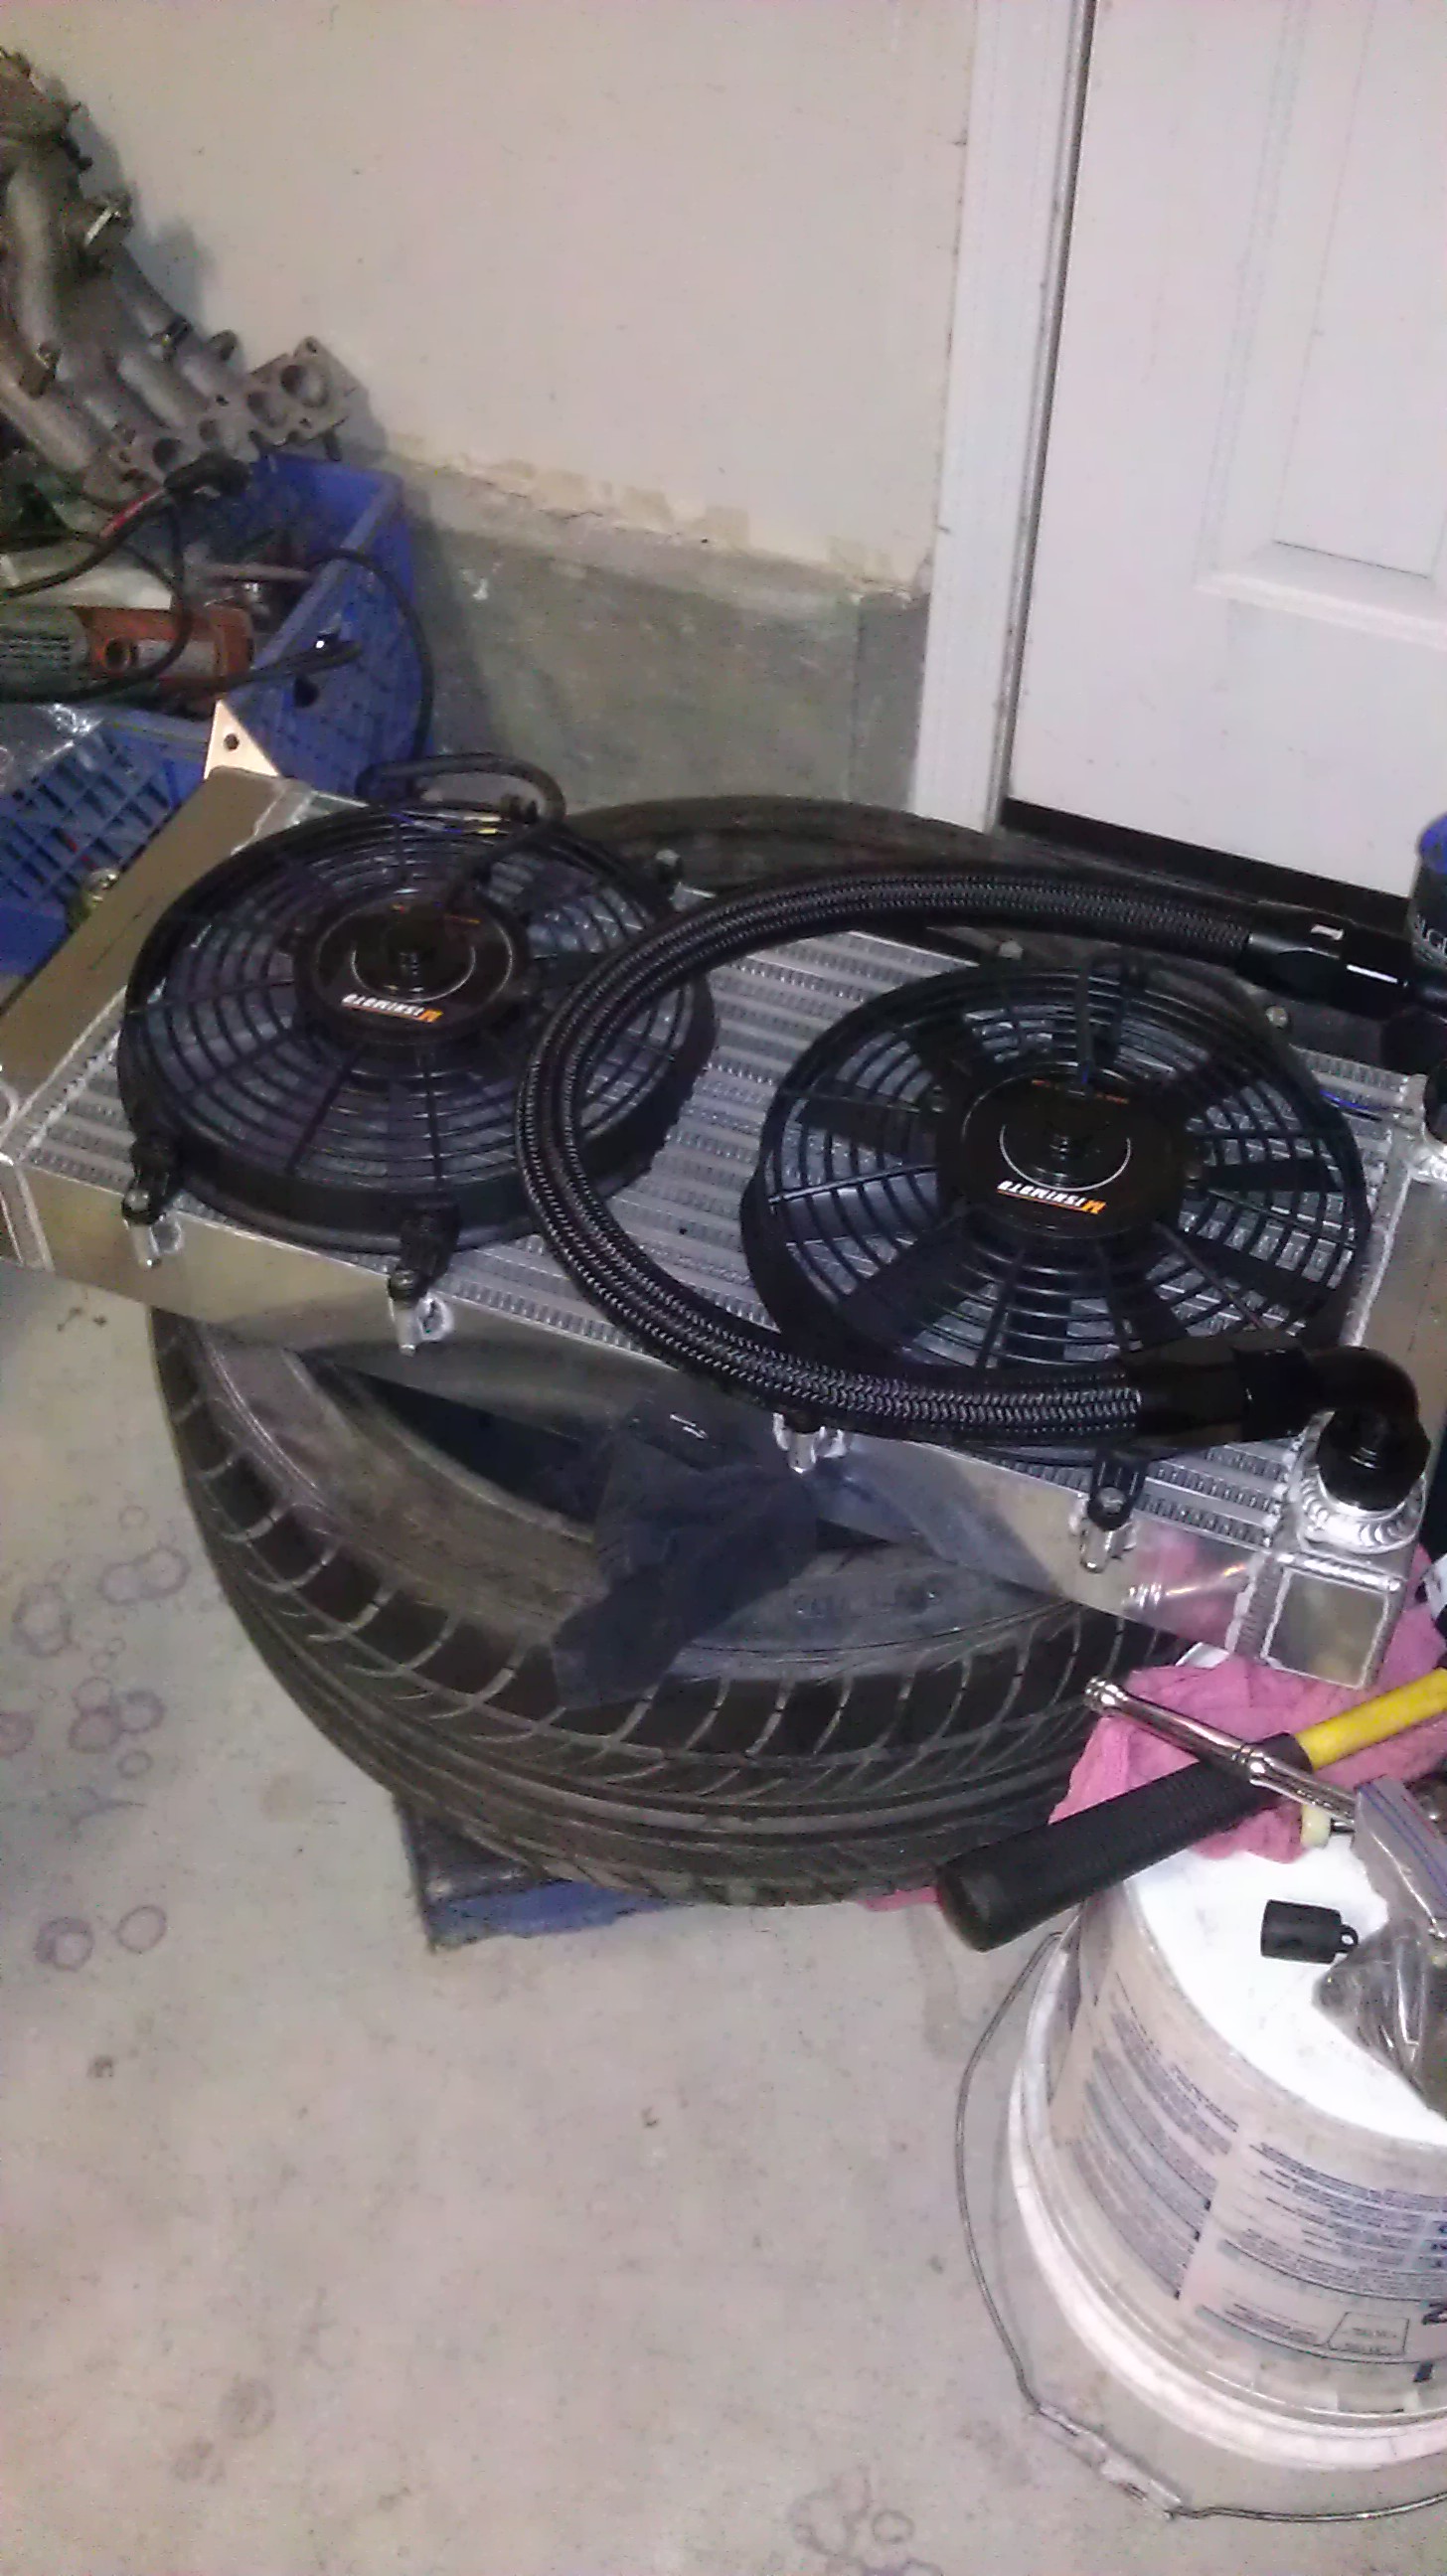
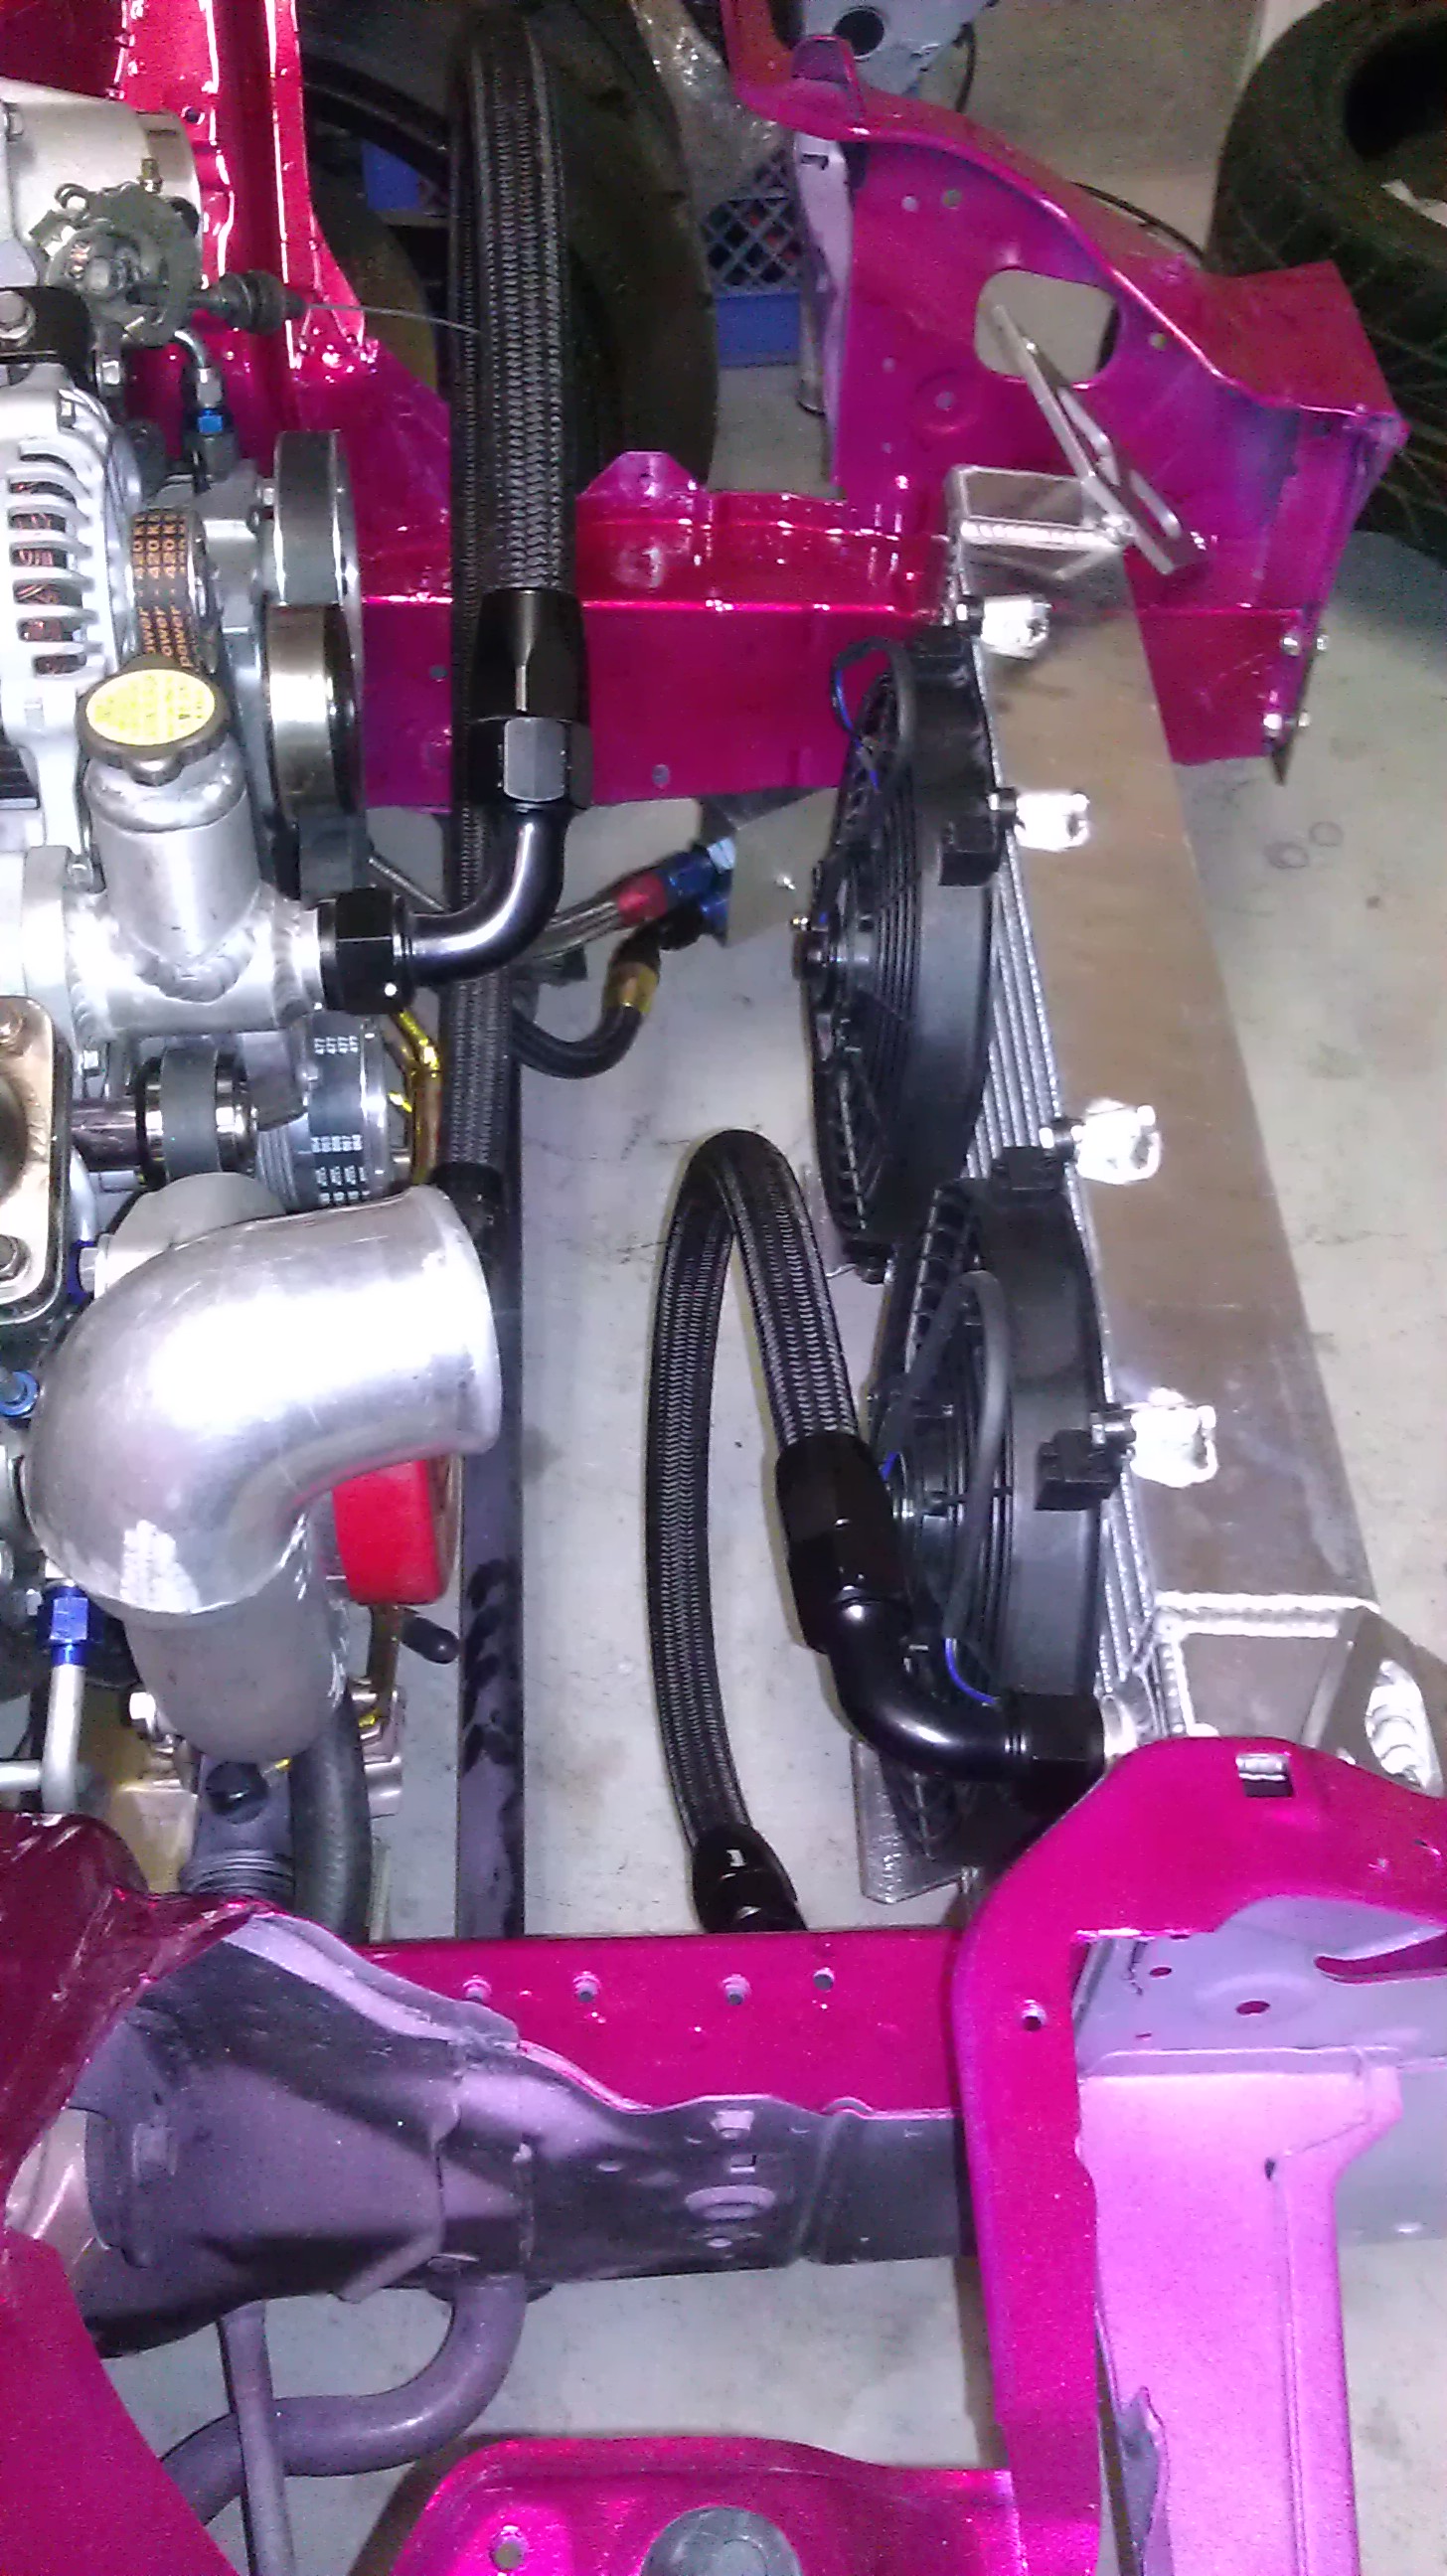
Installed
Also Installed my catch can and Rywire Engine Harness...going to send it back to him so he can switch the TPS plug. Also, I made a mistake... i'm only running One Knock sensor... And Oil and Water Temp sensors will be run seperately. Unsure of what brand to go with, I like the Defi units..but I hate the idea of having to have a control box along-side ya know? We'll see.
It was a lot easier to get the Water and oil lines on with the motor out of the car...there was only one that I really needed to install while the motor was out of the car... the water drain.
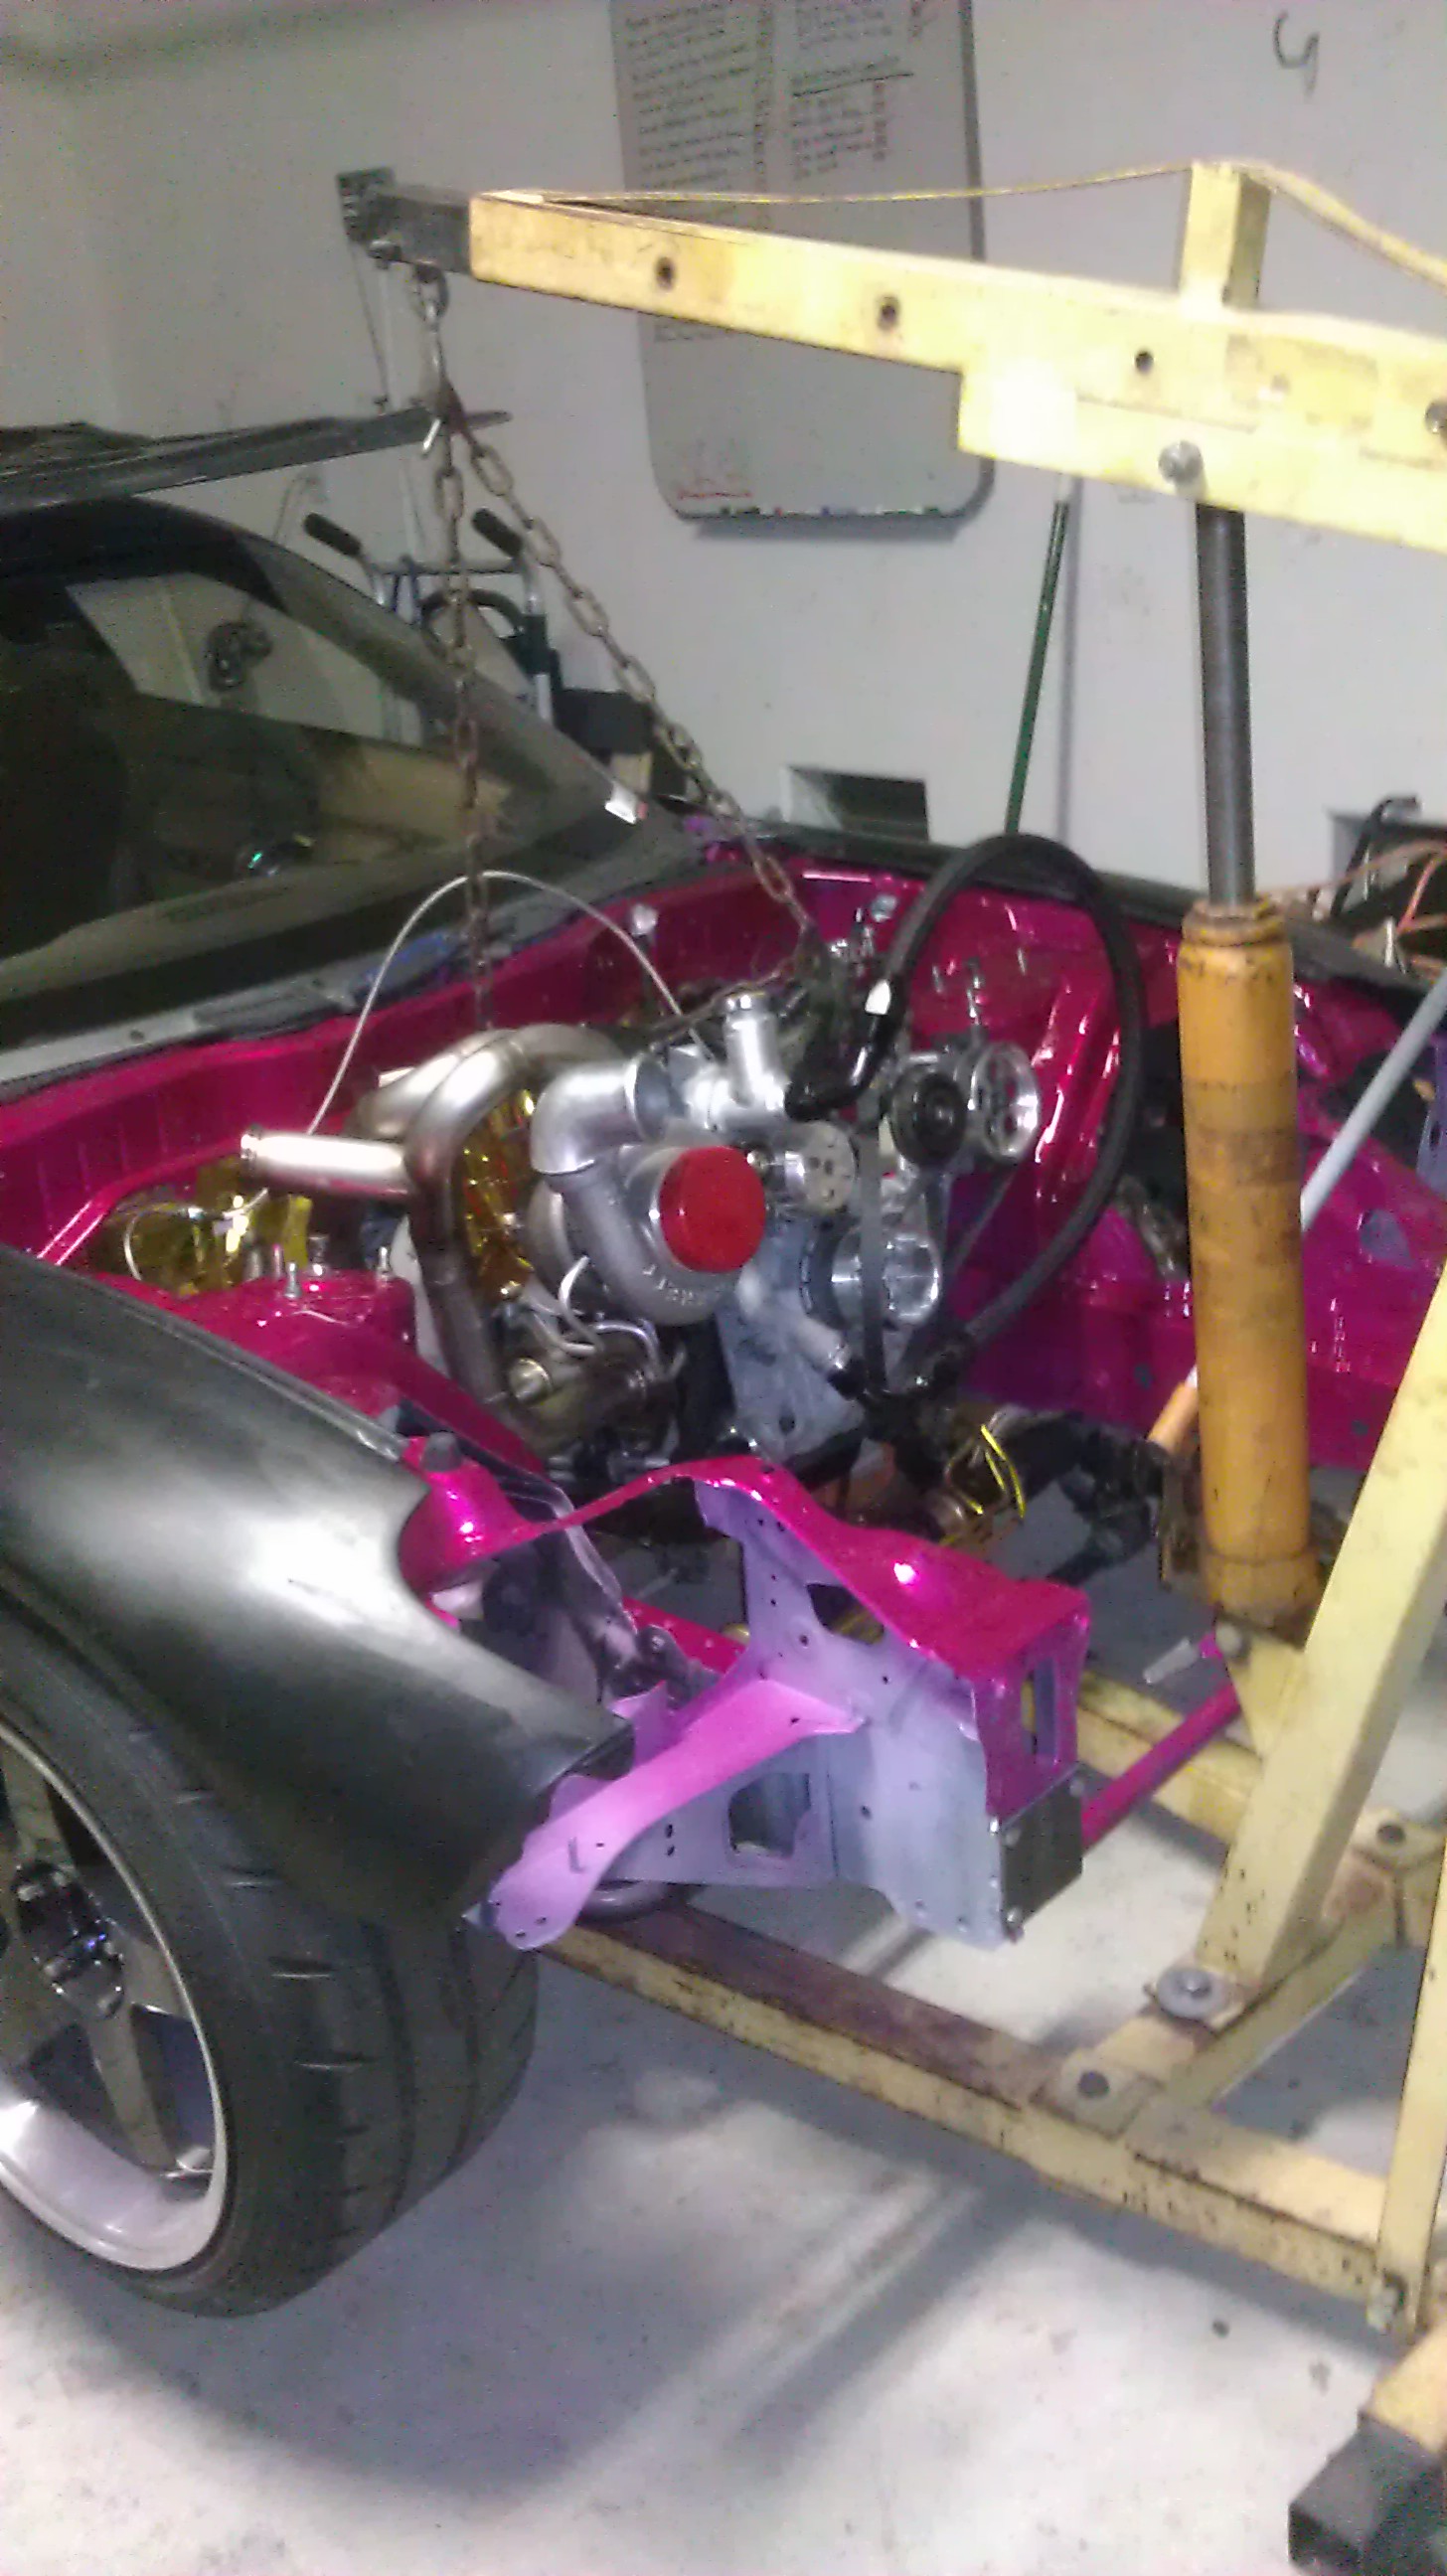
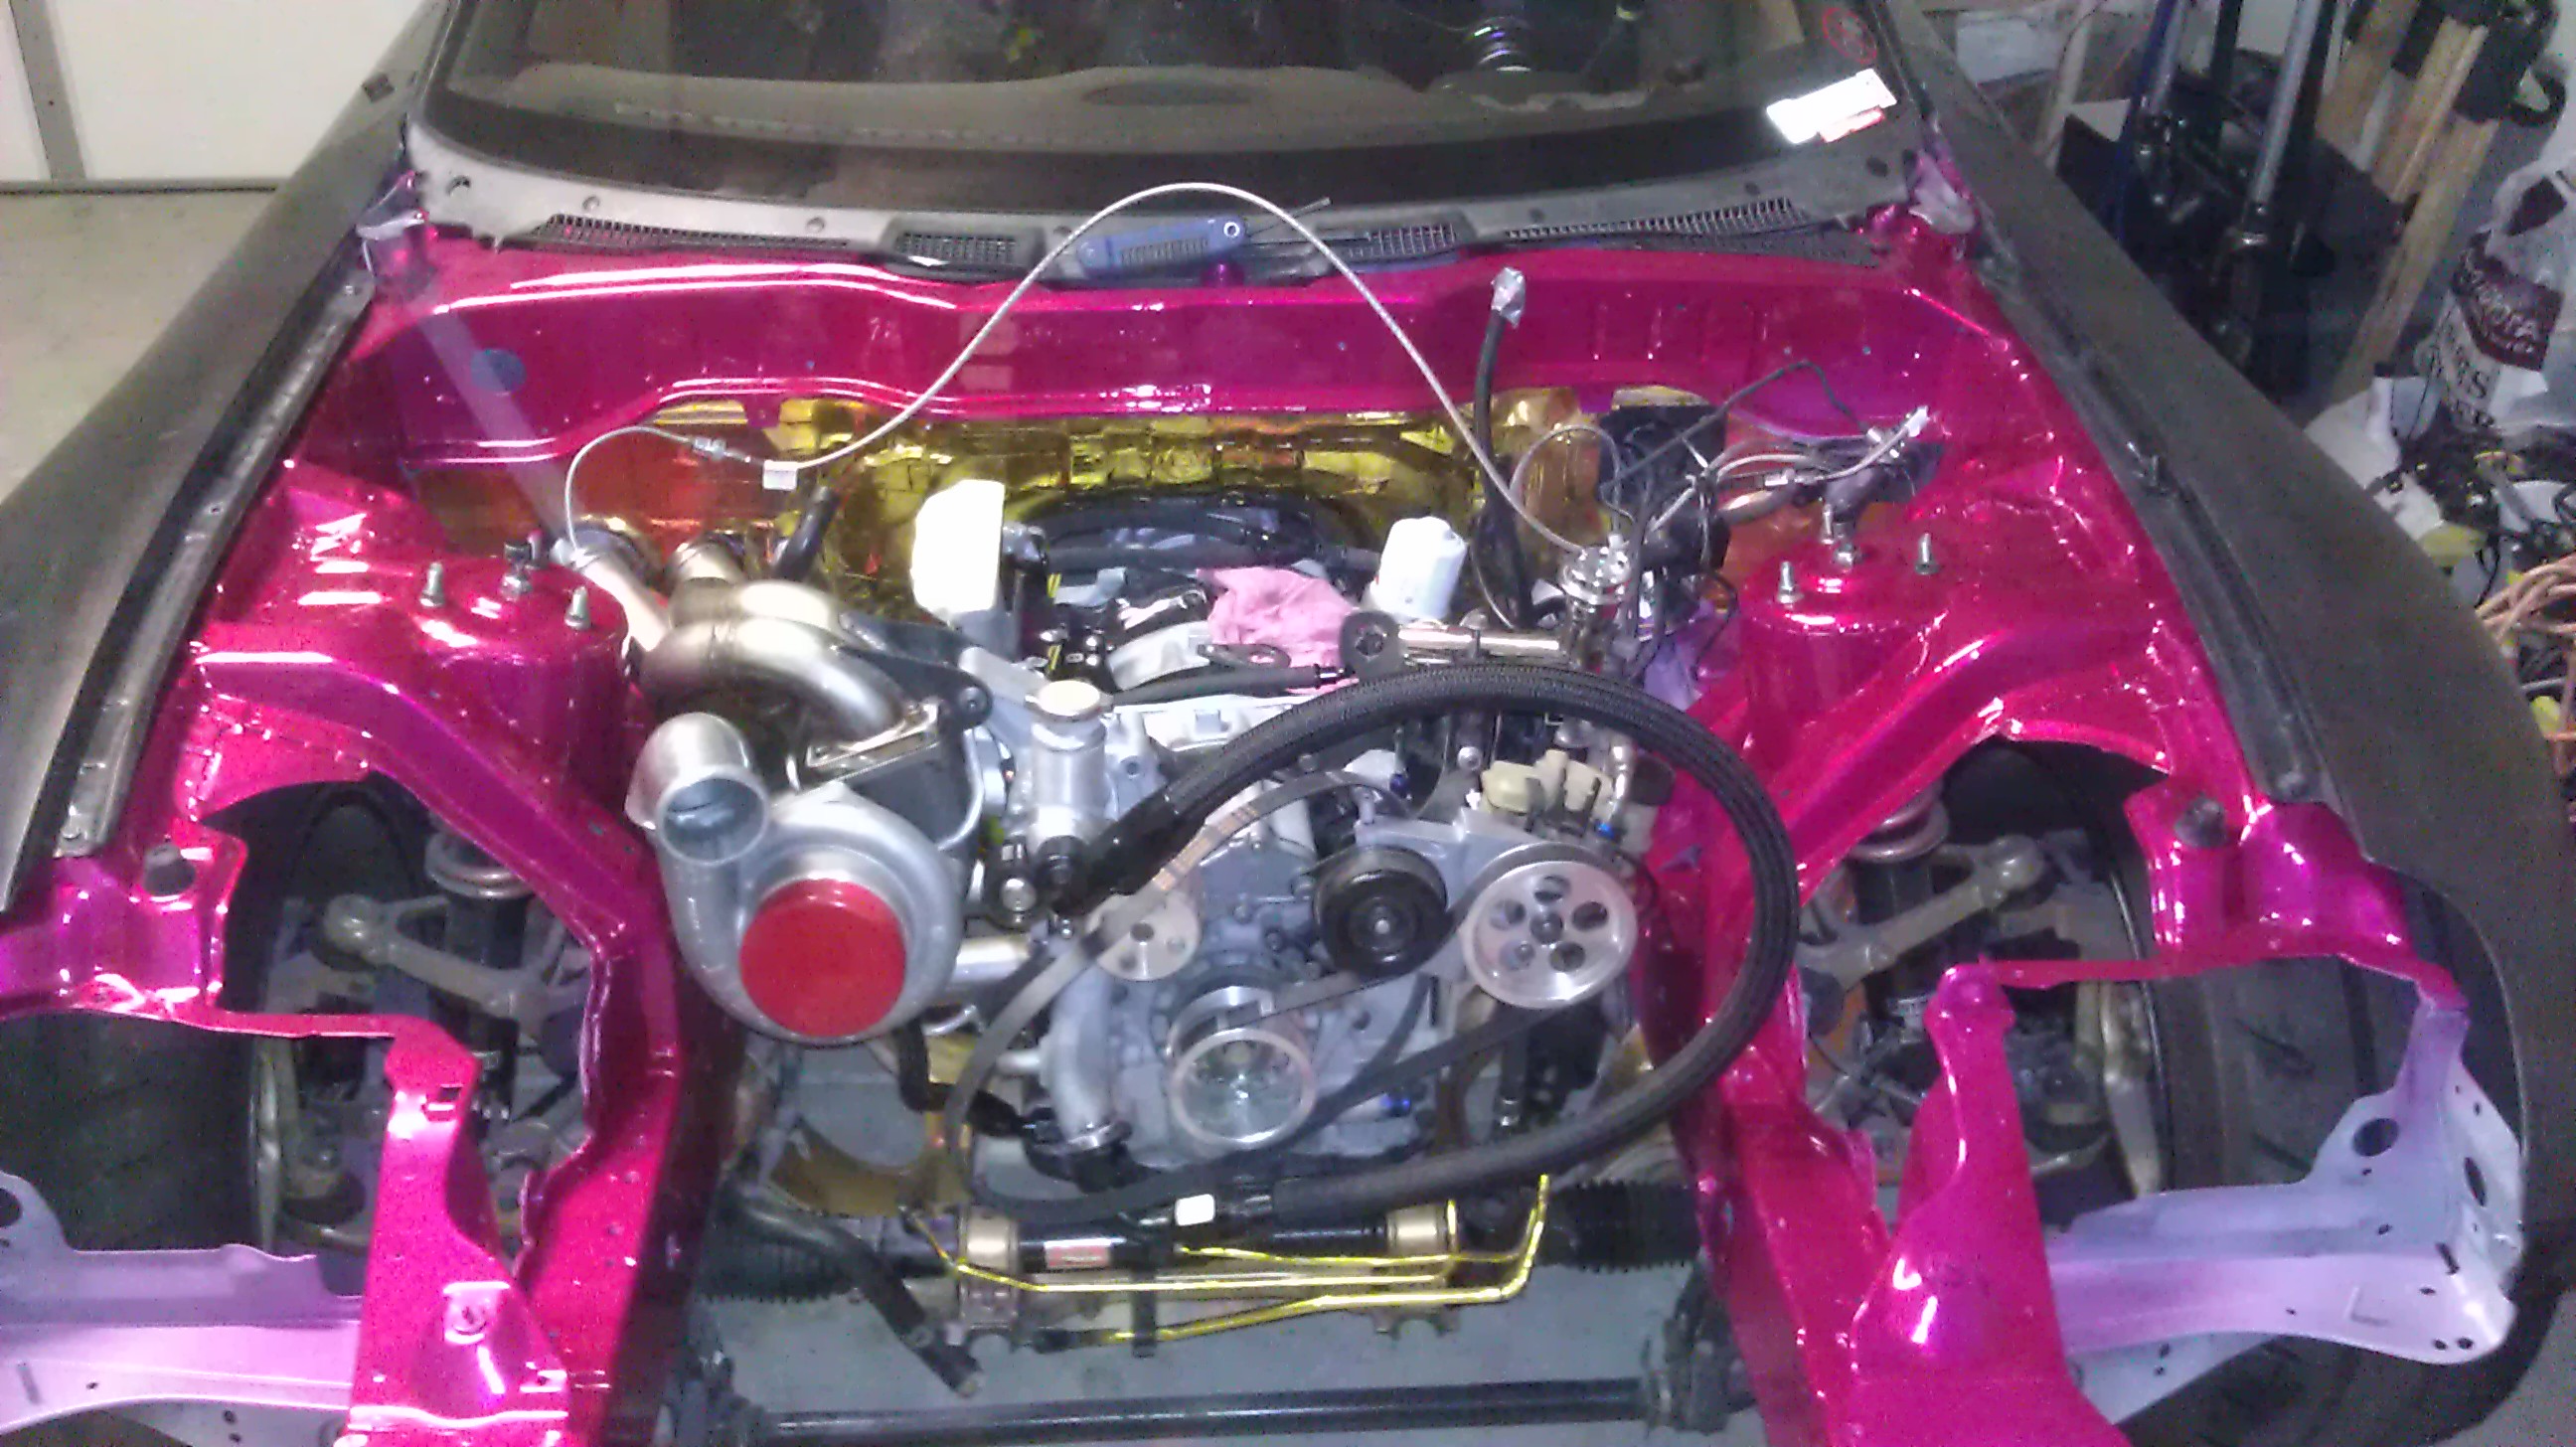
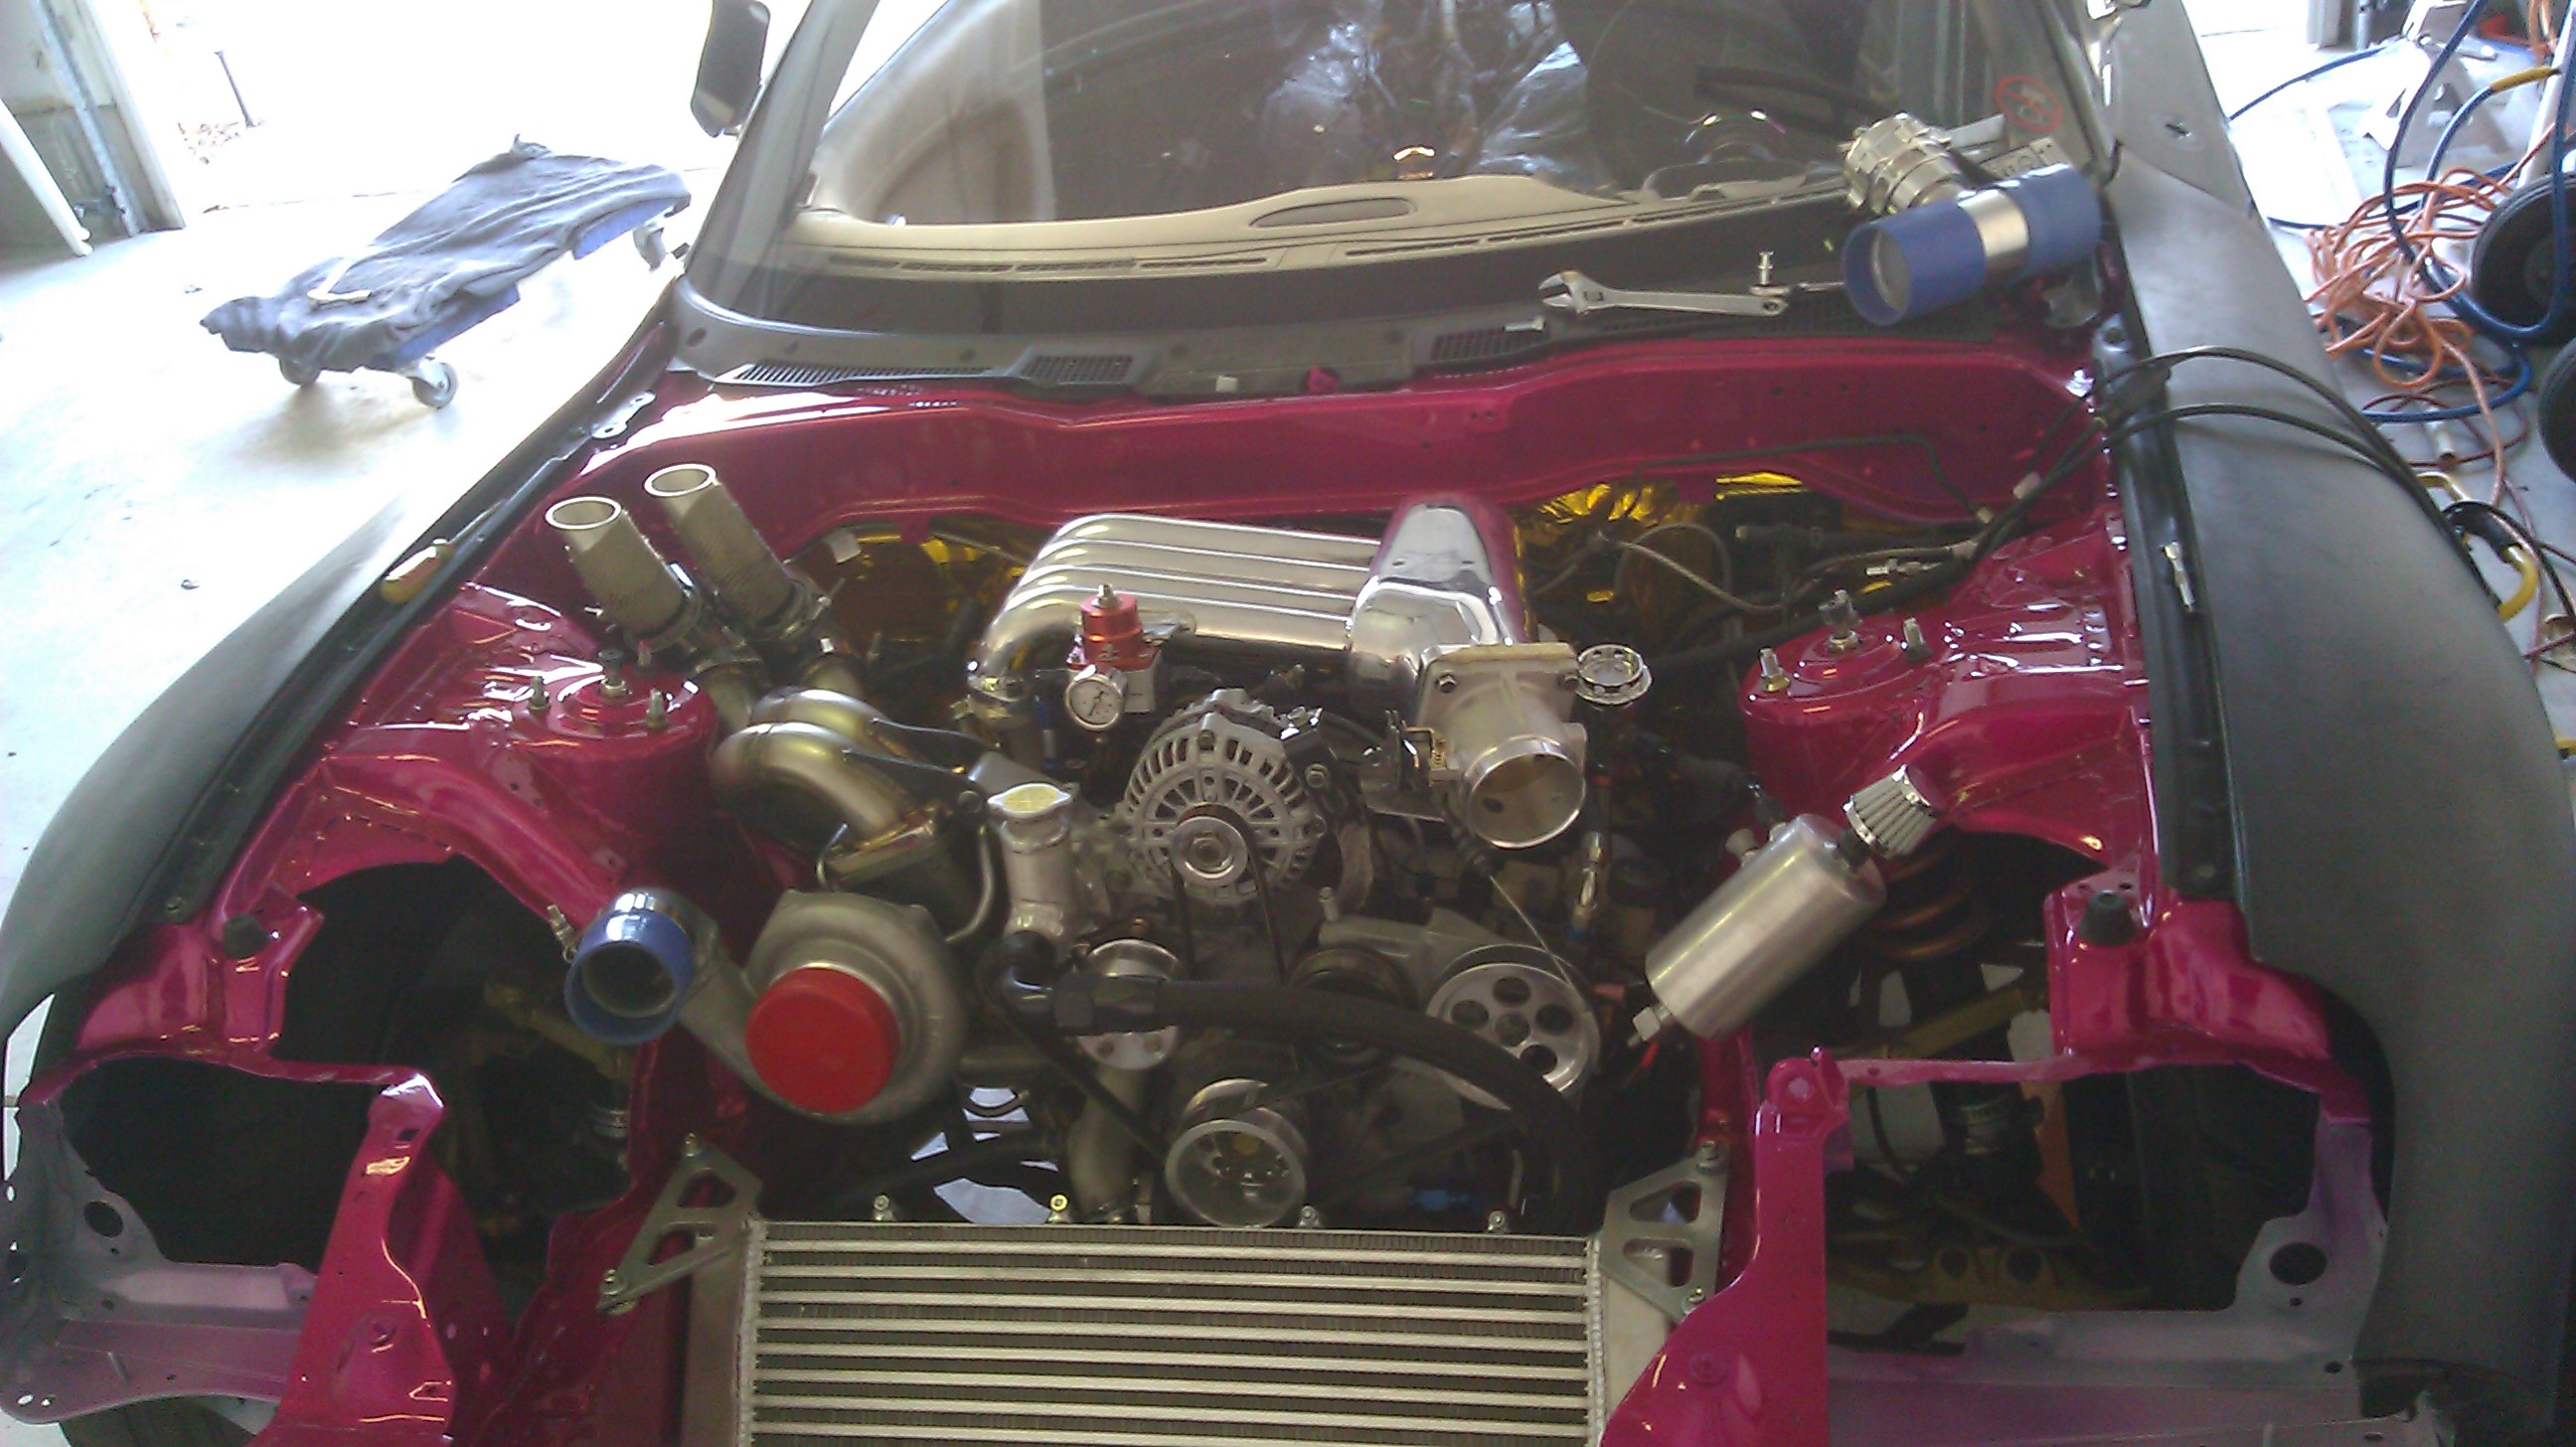
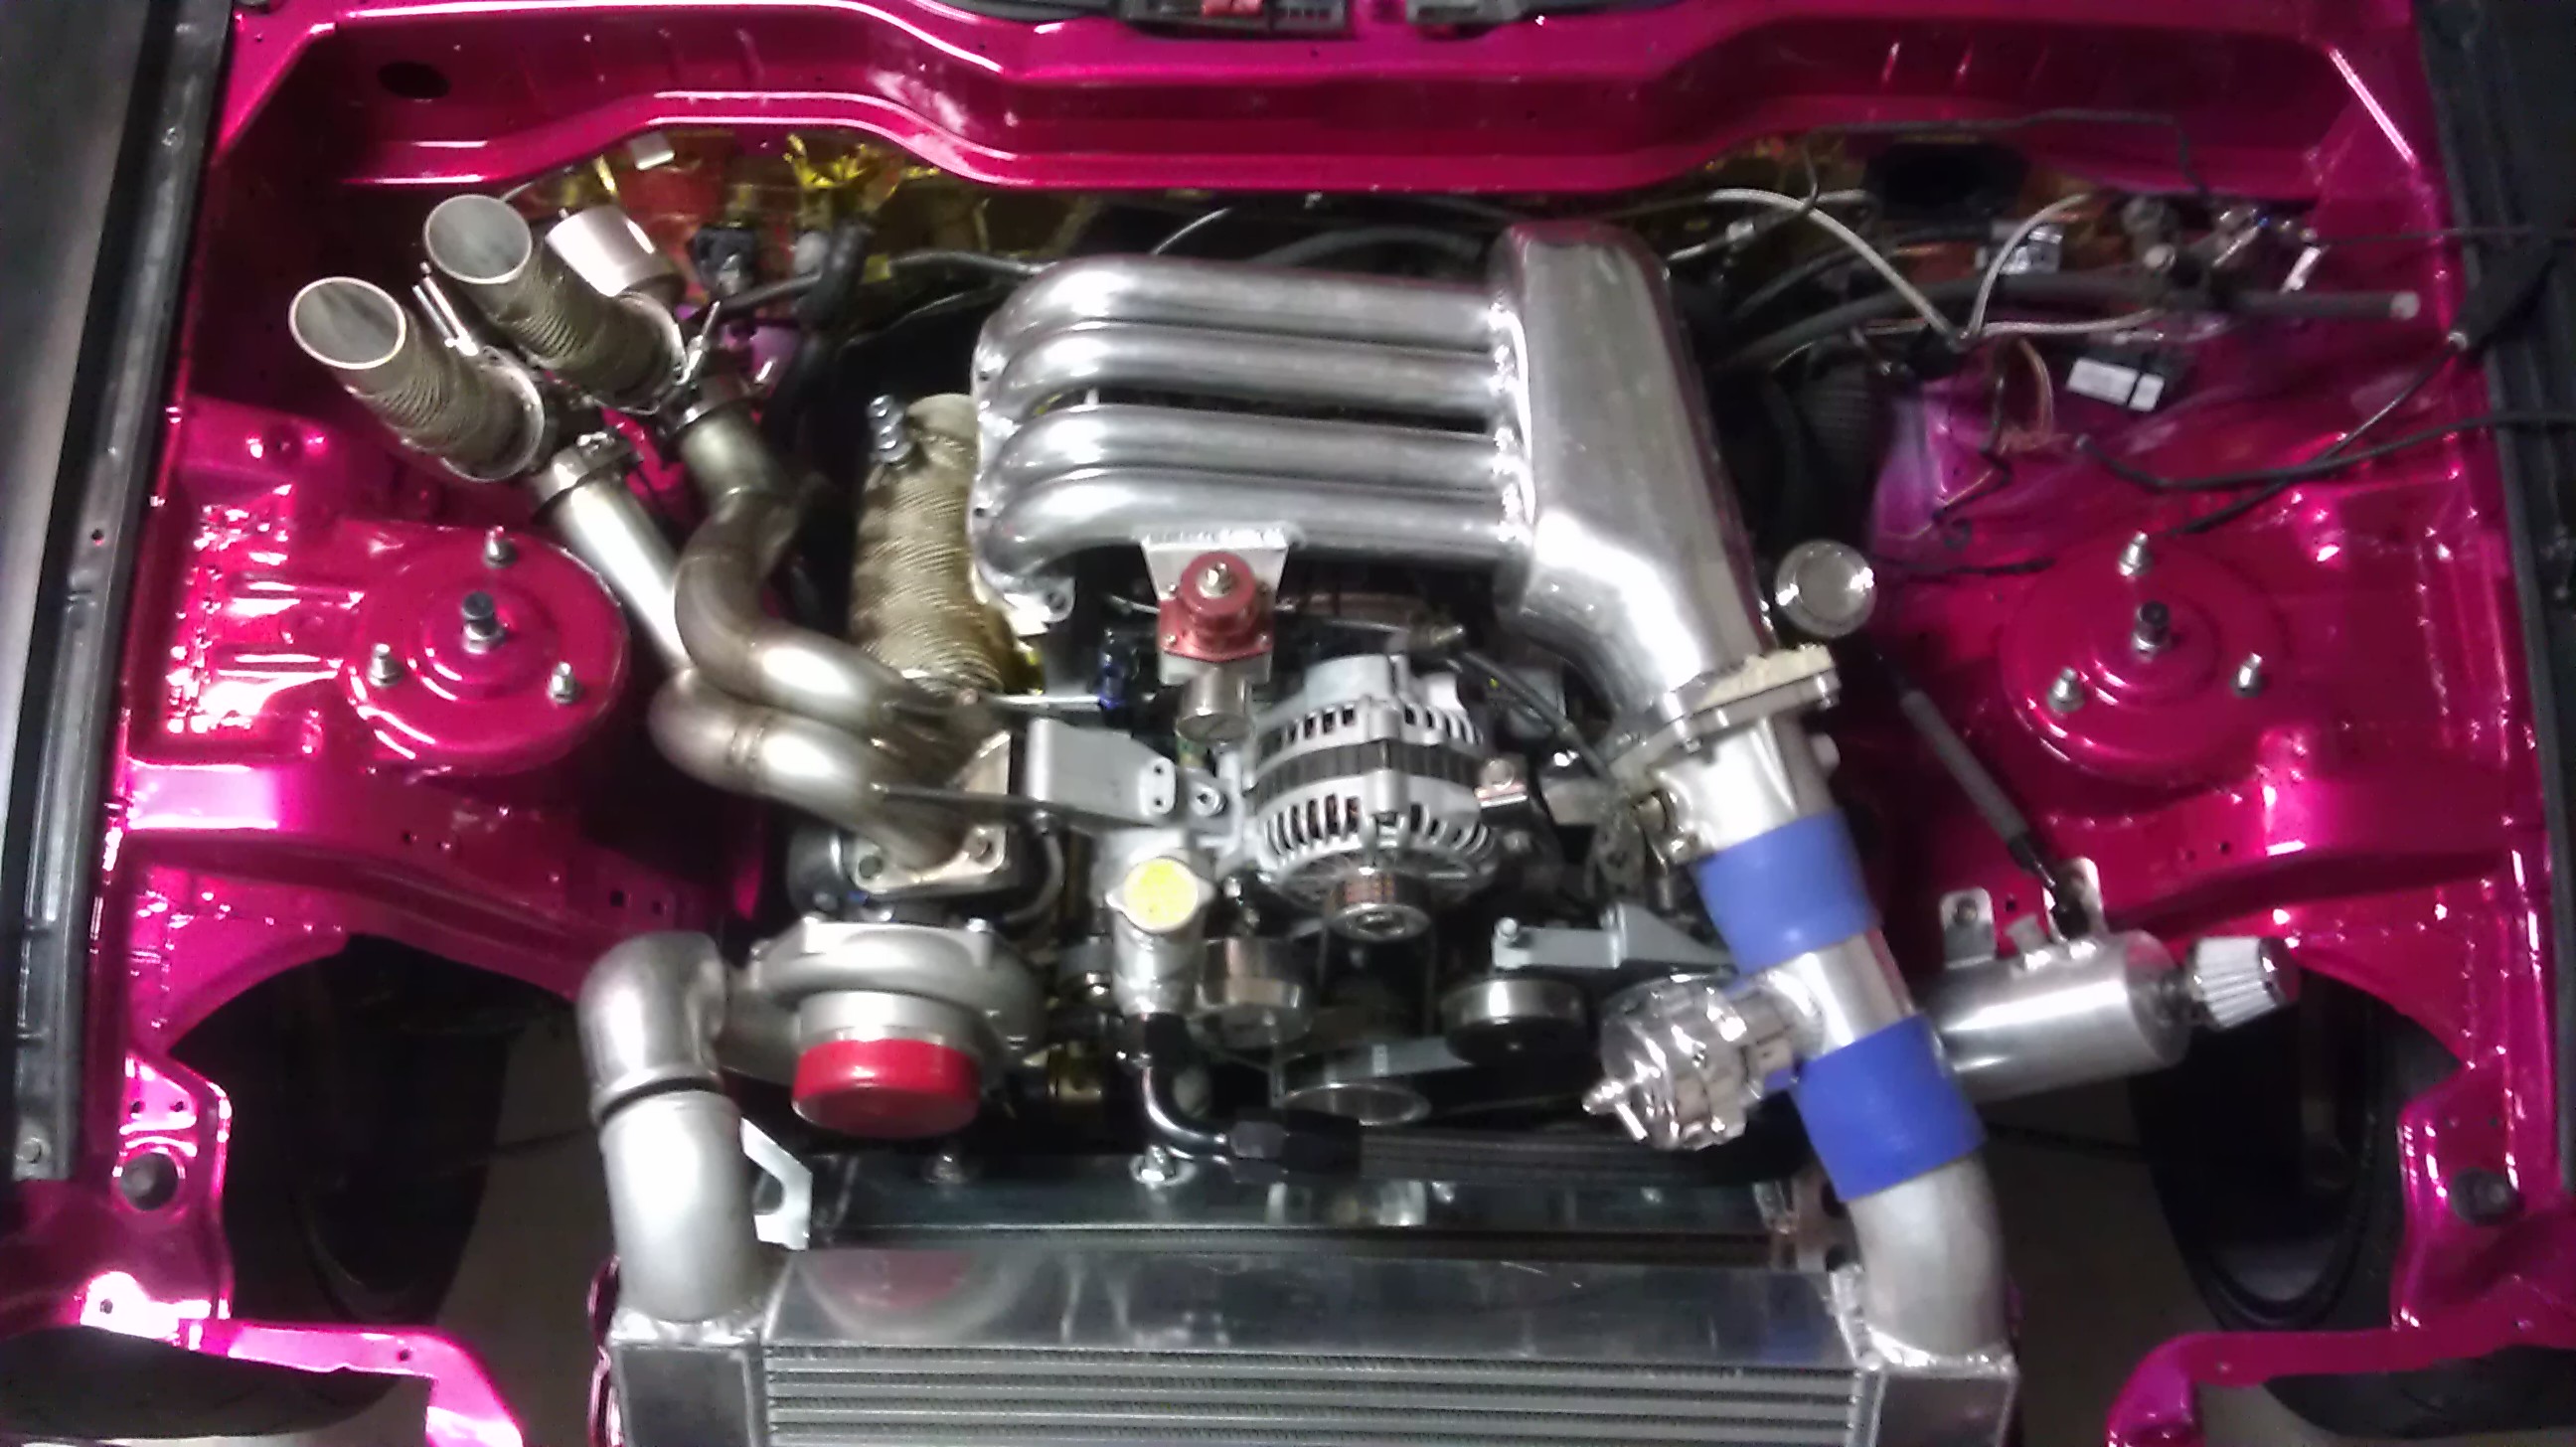
But here's the motor Installed in all it's glory. Put the I/C on just for kicks. Still need to run vac lines to the Wastegates but they're installed along with the Down-pipe

So I needed to get the Brake booster on and while installing it I noticed that the res line was as soft as a soggy gummy bear... it was done.. So i replaced it with a nice new one

I'll try to snap some pics of the old crappy one...but I might've thrown it away. anyways the new line is nice, and should last a hell of a lot longer than the old one
Anyways...The motor goes in.. Much easier with the cross member out of the way. Also plugged up the trans driveshaft hole so no trans fluid would seap out...thats annoying. It's empty but there is still some small amount in there.
So here she's in
another
Then I got under the car and pulled the diff case off to check the Torque on my diff because Yarmin Driveshafts Totally Ripped me off. Damn Bastards..i need to call over there today again...258 bucks for a half *** crap job....I'll Never ever go there again and i'm going to detere everyone I can from that hack job of a shop.
Installed the HPP 2-1 Diff brace after I checked the Torque on the carrier bearings. And what do you know... Loose as a Effing Goose. I'll say it again...BASTARDS. Seriously Blows my mind. Good thing was there was actually dye from the contact test for the backlash and it looked and feels good, so at least that was done correctly. But who even knows if these are new bearings or not?! So to all of you who might not have caught it.... Yarmin Driveshafts is a Shady Business that does Half *** work. Worst part was it was the Owner who did it...pfft..anyways onto more positive things..
Installed Nice and Toight.
Installed my fans on the Radiator... these mishimoto slim fans save me all sorts of space..although the CFM rating is a bit low I really don't think i'll have any problems with keeping cool. Cfm rating is roughly 1700-1800 CFM for the both of them total.
Radiator
Installed
Also Installed my catch can and Rywire Engine Harness...going to send it back to him so he can switch the TPS plug. Also, I made a mistake... i'm only running One Knock sensor... And Oil and Water Temp sensors will be run seperately. Unsure of what brand to go with, I like the Defi units..but I hate the idea of having to have a control box along-side ya know? We'll see.
It was a lot easier to get the Water and oil lines on with the motor out of the car...there was only one that I really needed to install while the motor was out of the car... the water drain.
But here's the motor Installed in all it's glory. Put the I/C on just for kicks. Still need to run vac lines to the Wastegates but they're installed along with the Down-pipe
So I needed to get the Brake booster on and while installing it I noticed that the res line was as soft as a soggy gummy bear... it was done.. So i replaced it with a nice new one
I'll try to snap some pics of the old crappy one...but I might've thrown it away. anyways the new line is nice, and should last a hell of a lot longer than the old one
02-19-13, 12:20 PM
#1195
Also installed the Oil lines all the way to the Thermostat Block, Clutch linkage inside the car, All Fuel lines, And starter.
Going to try to get the Brakes working today, find my Power steering res line, The Line to the heater core installed, Clutch line and fluid, Oil coolers installed, and my dual Powered by max EGT probes as well. More updates soon!!
Going to try to get the Brakes working today, find my Power steering res line, The Line to the heater core installed, Clutch line and fluid, Oil coolers installed, and my dual Powered by max EGT probes as well. More updates soon!!
02-19-13, 02:02 PM
#1197
I see you have additional sensors installed for EGT and oil temp. How about oil or fuel pressure?
What made you go with the Adaptronic P&P ECU over many other good choices out there including the Adaptronic Universal? I would think with the extent of this build you would want to integrate some basic engine protection features into the ECU.
Example:
EGT: You can setup the ECU fuel or ignition trims based on EGT per rotor.
Oil Temp: You can wire an output to a visible alarm or to wastegate failsafe open during over temp situation.
Oil Pressure: Basic engine protection feature in the loss of oil pressure (fuel cut, ignition cut, shutdown, etc).
Fuel Pressure: Basic engine protection feature in the loss of fuel pressure (fuel trim modifier, fuel cut, ignition cut, shutdown, etc).
02-19-13, 02:20 PM
#1198
I see you have additional sensors installed for EGT and oil temp. How about oil or fuel pressure?
What made you go with the Adaptronic P&P ECU over many other good choices out there including the Adaptronic Universal? I would think with the extent of this build you would want to integrate some basic engine protection features into the ECU.
Example:
EGT: You can setup the ECU fuel or ignition trims based on EGT per rotor.
Oil Temp: You can wire an output to a visible alarm or to wastegate failsafe open during over temp situation.
Oil Pressure: Basic engine protection feature in the loss of oil pressure (fuel cut, ignition cut, shutdown, etc).
Fuel Pressure: Basic engine protection feature in the loss of fuel pressure (fuel trim modifier, fuel cut, ignition cut, shutdown, etc).
What made you go with the Adaptronic P&P ECU over many other good choices out there including the Adaptronic Universal? I would think with the extent of this build you would want to integrate some basic engine protection features into the ECU.
Example:
EGT: You can setup the ECU fuel or ignition trims based on EGT per rotor.
Oil Temp: You can wire an output to a visible alarm or to wastegate failsafe open during over temp situation.
Oil Pressure: Basic engine protection feature in the loss of oil pressure (fuel cut, ignition cut, shutdown, etc).
Fuel Pressure: Basic engine protection feature in the loss of fuel pressure (fuel trim modifier, fuel cut, ignition cut, shutdown, etc).
The support you get when you run Adaptronic really is second to none as well. I mean I can get in touch with the owner daily If I needed to. For me the Plug and Play version is the perfect ecu for me. I really don't need anything more. What are your reasons for going with another ecu?
02-19-13, 03:09 PM
#1199
Rotary for LIFE!
Join Date: Jan 2008
Location: Adelaide, South Australia
Posts: 71
Likes: 0
Received 0 Likes
on
0 Posts
02-19-13, 03:13 PM
#1200
I guess I did not explain that well enough... The general idea is this: you want the ECU to monitor all of the critical engine parameters and act upon a high temp / failure situation for you. If you rely on gauges it is hard to react quickly enough, especially during a time attack or drift event where you should be focusing on driving.
Example: Lets say you are pushing your car during a time attack and the fuel pressure begins to drop due to any number of reasons (low voltage, clogged filter, overheating pump) the ECU will see this and apply a fuel trim to compensate for the drop in fuel pressure. If the pressure drops below acceptable limits the ECU could apply some sort of power cut to stop you from seeing a lean condition and damaging the engine.
The same applies for oil pressure, oil temp, EGT, etc. You can setup up a variety of protection features to allow the ECU to step in when something happens to prevent a failure.
The plug and play version seems more suited to a stock to mild upgrade car.