
Knee-deep in my current build


I have to admit that I was extremely impressed with Sake Bomb's HID kit, it pretty much turns night into day. You really have to see it in person, the cutoff, brightness/coloring, and spread of the beam is perfect. You definitely did your HW when you created this Dan, big kudos to you!

Thread Starter


Joined: Mar 2001
Posts: 30,814
Likes: 655
From: FL-->NJ/NYC again!
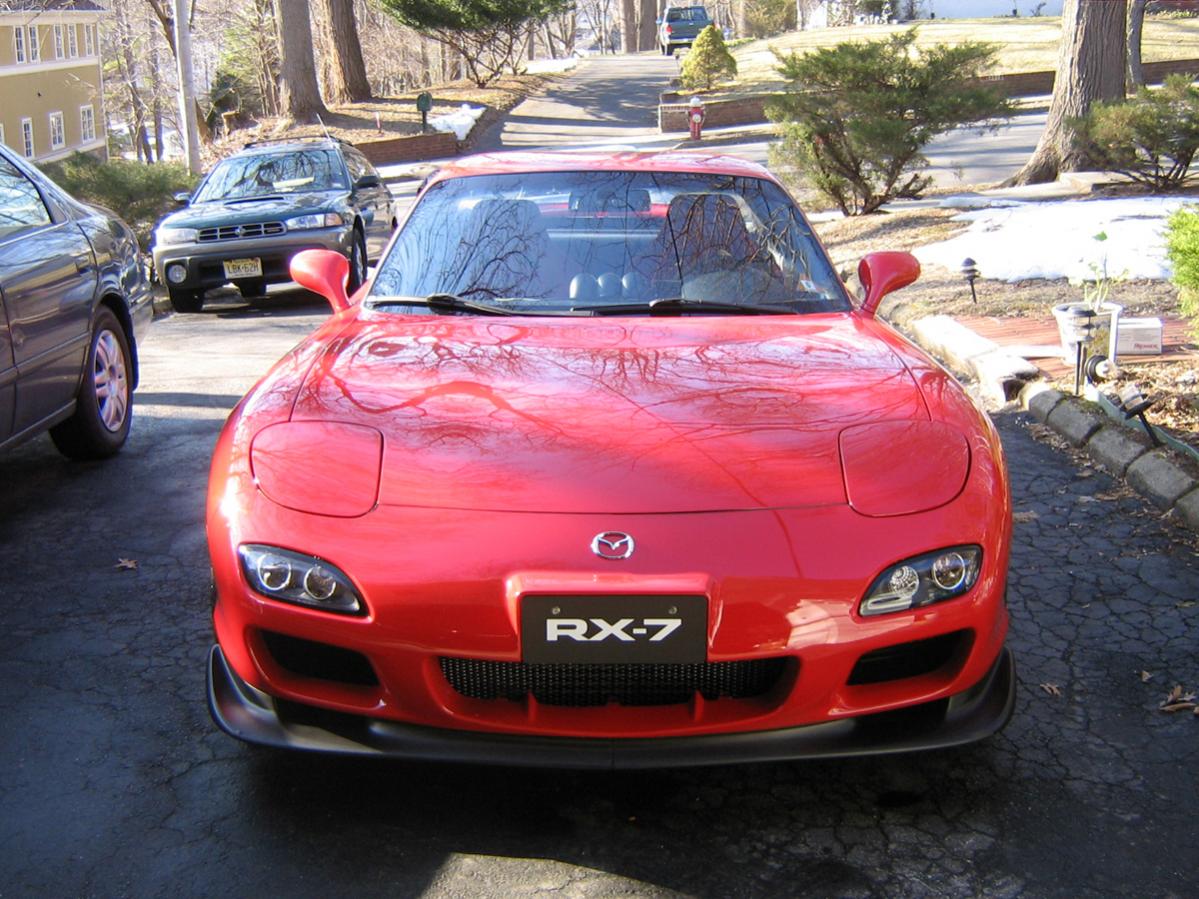
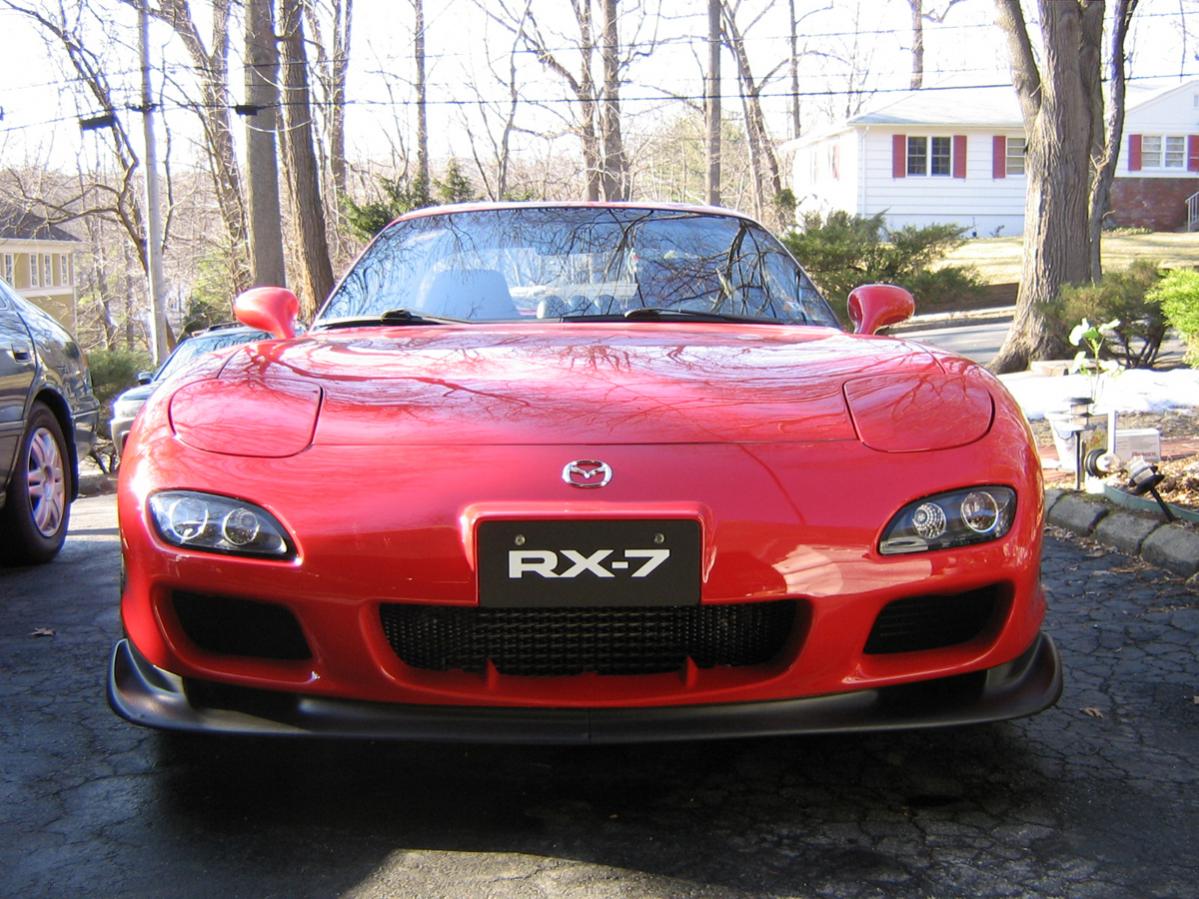
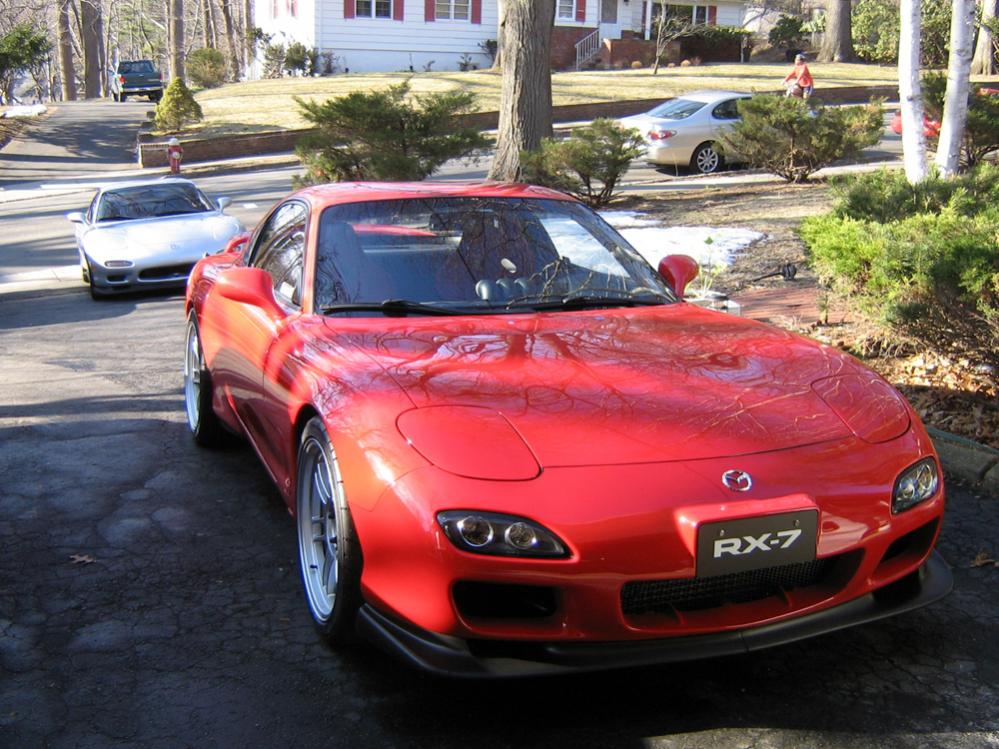
Some recent pics I shot while working on the car recently 
Comparo pics between:
1. 350mm Nardi Deep Corn Punched Leather w/red stitching
2. 330mm Nardi Deep Corn Suede w/red stitching
3. 360mm Nardi Classic Type A Punched Leather w/red stitching


Comparo pics between:
1. 350mm Nardi Deep Corn Punched Leather w/red stitching
2. 330mm Nardi Deep Corn Suede w/red stitching
3. 360mm Nardi Classic Type A Punched Leather w/red stitching
Last edited by GoodfellaFD3S; Jun 9, 2011 at 05:33 PM.
Thread Starter
Joined: Mar 2001
Posts: 30,814
Likes: 655
From: FL-->NJ/NYC again!
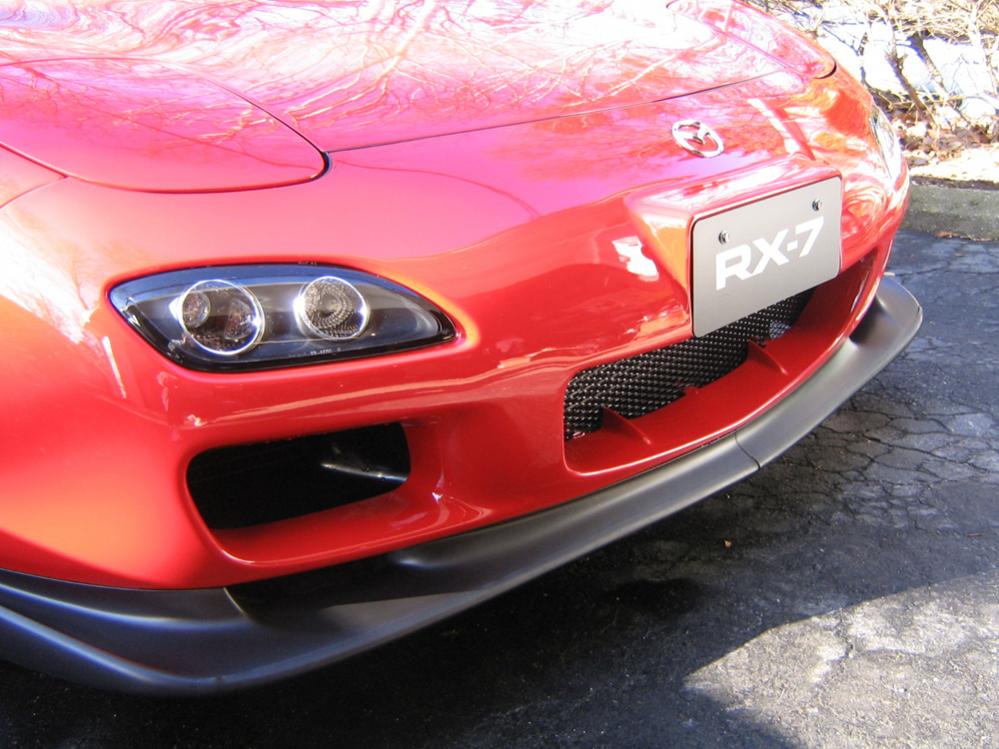
More pictures of the car right before mounting the front bumper, a closeup of the R-Magic Oil Cooler ducts (fitment was perfect btw). I ended up using oem plastic mounting hardware rather than the metal bolts and nuts supplied, I think the FG will be happier that way 
I spent some more time cleaning up all the wiring for the HIDs. Moved the ground and secured the Greddy ballast out of the way. I used some scrap radiator hose as buffer between it and the frame rail.


I spent some more time cleaning up all the wiring for the HIDs. Moved the ground and secured the Greddy ballast out of the way. I used some scrap radiator hose as buffer between it and the frame rail.
Last edited by GoodfellaFD3S; Jun 9, 2011 at 05:33 PM.

Thread Starter
Joined: Mar 2001
Posts: 30,814
Likes: 655
From: FL-->NJ/NYC again!
Guys, the crew at SakeBomb are running a second GB on their Projector HID kits:
https://www.rx7club.com/showthread.p...53#post9830753
Anyone looking for a serious safety upgrade on their FD should consider it, this is definitely money well spent
https://www.rx7club.com/showthread.p...53#post9830753
Anyone looking for a serious safety upgrade on their FD should consider it, this is definitely money well spent

Thread Starter
Joined: Mar 2001
Posts: 30,814
Likes: 655
From: FL-->NJ/NYC again!
Ceylon, the horn button was a gift from GMonsen..... I go to hang out at his batcave b/c he has so many spare parts around I always leave with a present 
There was a nice MS horn button on fleabay I should've snagged but I went to check and it's gone
I'll keep my eyes peeled for ya though.
There was a nice MS horn button on fleabay I should've snagged but I went to check and it's gone
I'll keep my eyes peeled for ya though.

Rich, make sure you cycle the lights up and down before you button things up. Where the black box for the HID's currently is might be an interference problem. The headlight buckets fill things up bigtime when they're down. Learned that one the hard way .
See ya at DGRR!
Dale
.See ya at DGRR!
Dale
Thread Starter
Joined: Mar 2001
Posts: 30,814
Likes: 655
From: FL-->NJ/NYC again!
Thanks Dale, that was the first thing I did post-install
Spent lots o time the last few days working on my dad's FD and on mine.... over the years I've received lots of PMs asking about the attached pics and I usually told them (wrongly, based on memory) to 'widen the light opening by 1-2 inches all around.'
These pics show how we 'modified' his usdm rebar to fit with the 99 spec combo lights. you need those little notches on the top outer section for everything to clear.
Based on my experience on my FD, if you plan to run the R-Magic oil cooler ducts with the 99 setup, it's probably worthwhile to spring for the 99 rebar. Way too much trimming and test-fitting for my tastes
Last edited by GoodfellaFD3S; Jun 9, 2011 at 05:33 PM.
Thread Starter
Joined: Mar 2001
Posts: 30,814
Likes: 655
From: FL-->NJ/NYC again!
Recent work done:
**finished mounting SakeBomb projector HID kit (cleaned up wiring and hard mounted the control unit)
**installed Crispy polished GM 3-bar bracket
**added an exhaust grounding strap (havent had one in forever)
**Installed new: 99 front bumper and lip, URAS combo lights, R-Magic oil cooler ducts, Mazda Flying M emblems, RX-7 front plate, HL covers
**Remove and refurb R1 wing with new mounting hardware and foam mounting pads (like most I've had problems with water leaking through the rear wing holes)
I also had broken the two bottom 10mm head bolts that hold the passenger fender on during my Nagisa fender brace install. The driver's side gave me no problems, but the PS bolts were pretty damn rusty and just snapped off. Sooooooo, while I was doing all of the above, my dad was using a dremel, drill, easy out, and many other tools to fix the situation
In the fifth pic below is my FD, my brother's new 24k mile SSM base, and you can just see my dad's R1 parked on the street
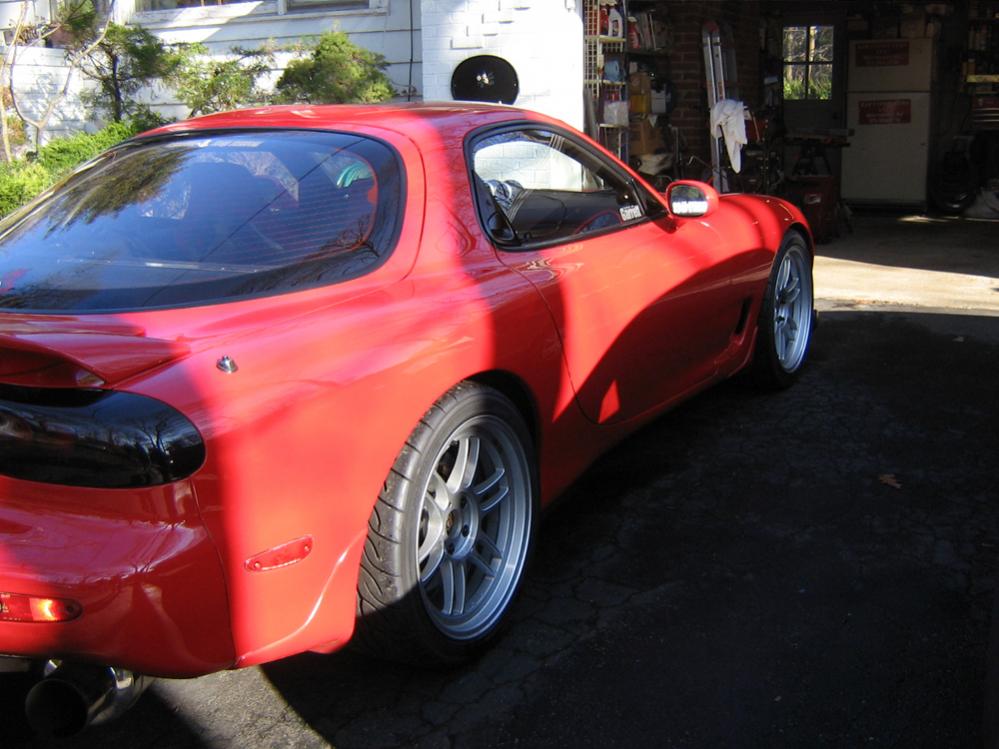
Btw, even after washing the car with the wing off and clay bar-ing the mounting pads, there still was evidence in the paint of the wing mounting outlines. Going wingless just ain't easy....


**finished mounting SakeBomb projector HID kit (cleaned up wiring and hard mounted the control unit)
**installed Crispy polished GM 3-bar bracket
**added an exhaust grounding strap (havent had one in forever)
**Installed new: 99 front bumper and lip, URAS combo lights, R-Magic oil cooler ducts, Mazda Flying M emblems, RX-7 front plate, HL covers
**Remove and refurb R1 wing with new mounting hardware and foam mounting pads (like most I've had problems with water leaking through the rear wing holes)
I also had broken the two bottom 10mm head bolts that hold the passenger fender on during my Nagisa fender brace install. The driver's side gave me no problems, but the PS bolts were pretty damn rusty and just snapped off. Sooooooo, while I was doing all of the above, my dad was using a dremel, drill, easy out, and many other tools to fix the situation
In the fifth pic below is my FD, my brother's new 24k mile SSM base, and you can just see my dad's R1 parked on the street
Btw, even after washing the car with the wing off and clay bar-ing the mounting pads, there still was evidence in the paint of the wing mounting outlines. Going wingless just ain't easy....
Last edited by GoodfellaFD3S; Jun 9, 2011 at 05:33 PM.
 I had the same problems when I took the stock wing off my VR, those marks were a PITA to get out!!
Car looks excellent... Couple quick questions...
1. Do you recall what the part numbers were for the larger foam pieces on the bottom of the wing?
(I removed the wing during a full detail and realized the foam is done along with the brackets all rusted out. Managed to find all the replacement parts but the foam pieces arent listed)
2. What is the purpose of the grounding strap for the exhaust? I noticed that mine is cut, and it's never been installed.

Car looks excellent... Couple quick questions...
1. Do you recall what the part numbers were for the larger foam pieces on the bottom of the wing?
(I removed the wing during a full detail and realized the foam is done along with the brackets all rusted out. Managed to find all the replacement parts but the foam pieces arent listed)
1. Do you recall what the part numbers were for the larger foam pieces on the bottom of the wing?
(I removed the wing during a full detail and realized the foam is done along with the brackets all rusted out. Managed to find all the replacement parts but the foam pieces arent listed)
And Rich, after getting quotes of $500-$1200 to weld the mounting holes and paint the hatch, I gave up on going wingless too (wanted the Autoshine low profile spoiler)
.
Thread Starter
Joined: Mar 2001
Posts: 30,814
Likes: 655
From: FL-->NJ/NYC again!
Some pics from this past weekend during my Nagisa fender brace installation......
Word of caution, the bottom bolts holding the fender on may be seized in place with rust. This will lead to broken bolts, cursing, a drill, a dremel, an easy out, a tap, and some beer


Word of caution, the bottom bolts holding the fender on may be seized in place with rust. This will lead to broken bolts, cursing, a drill, a dremel, an easy out, a tap, and some beer
Last edited by GoodfellaFD3S; Jun 9, 2011 at 05:33 PM.