FC3S 3D Model


Thread Starter
Joined: Dec 2006
Posts: 1,307
Likes: 0
From: Beaverton, OR
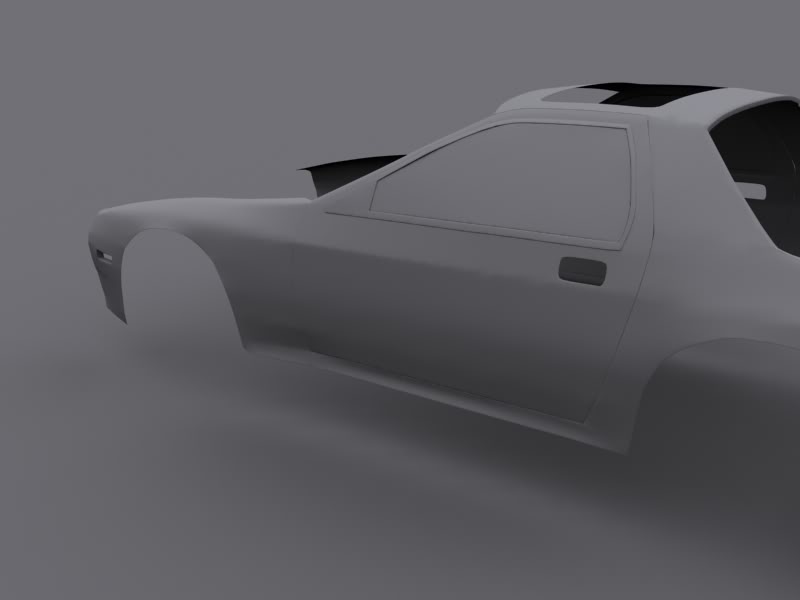
Hehe, glad you like it! One thing that gives away CG look when a project is done is a perfect part, so - you make it perfect, then you BREAK IT!
Hows the accuracy turning out though now? Am I getting the lines better defined? Those pics were great help.
Hows the accuracy turning out though now? Am I getting the lines better defined? Those pics were great help.
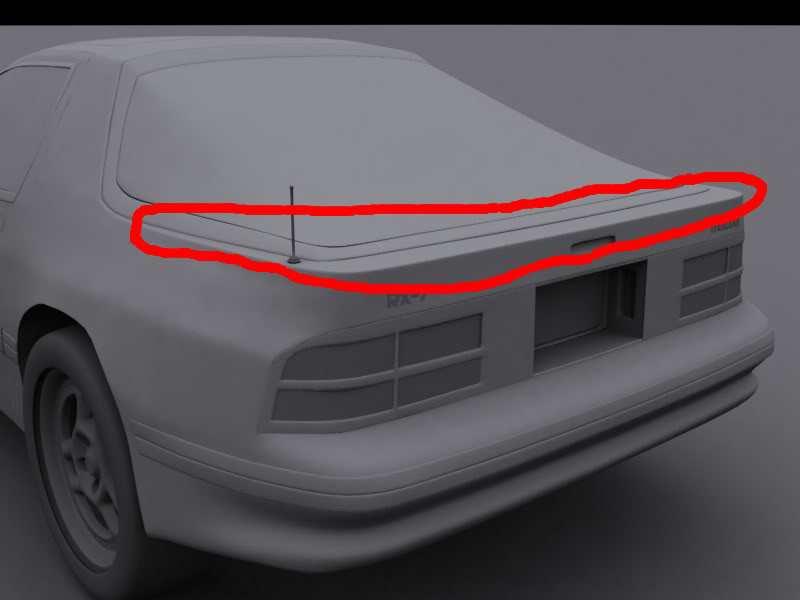
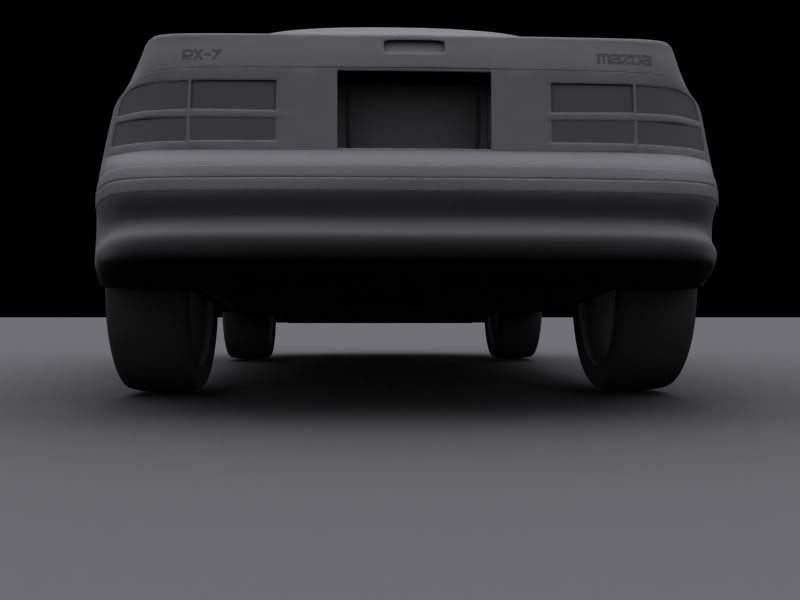
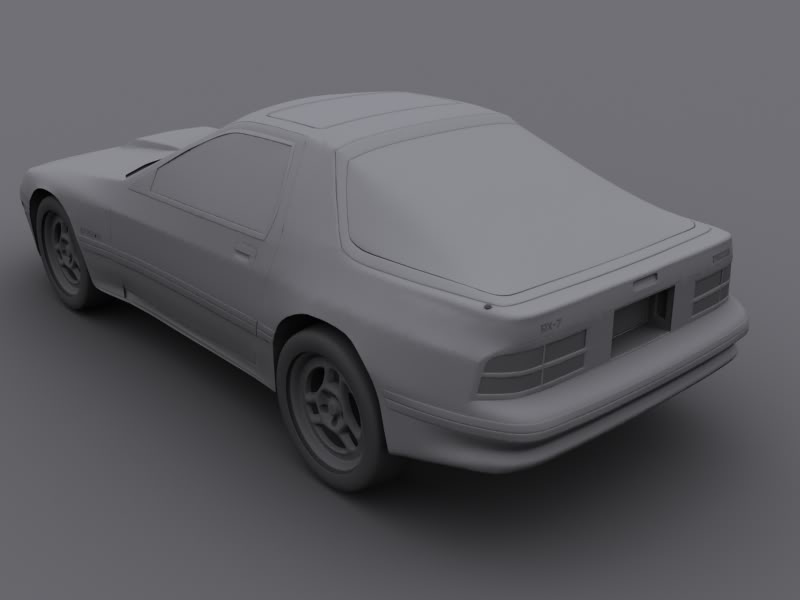
also, the rear part with the emblems and the 3rd brake light is a bit curved forward, and not straight up like that.
I think that it will be best for you to find an FC for sale on craigslist, and go and look at it, to see it in person. The dimensions are hard to get unless you see it IRL.
I think that it will be best for you to find an FC for sale on craigslist, and go and look at it, to see it in person. The dimensions are hard to get unless you see it IRL.


Epilepsy
Joined: Apr 2006
Posts: 675
Likes: 1
From: ..
Sorry to be so picky here (but I know you love it, haha), but there's one more detail to fix.
See how on you model the back end is completely vertical? (the part that meets the tails, which also has the emblems on it)

the top part needs to be angled more towards the hatch (basically in a ' \ ' shape. Seen here (Hazard i'm using your photo)
See how on you model the back end is completely vertical? (the part that meets the tails, which also has the emblems on it)
the top part needs to be angled more towards the hatch (basically in a ' \ ' shape. Seen here (Hazard i'm using your photo)
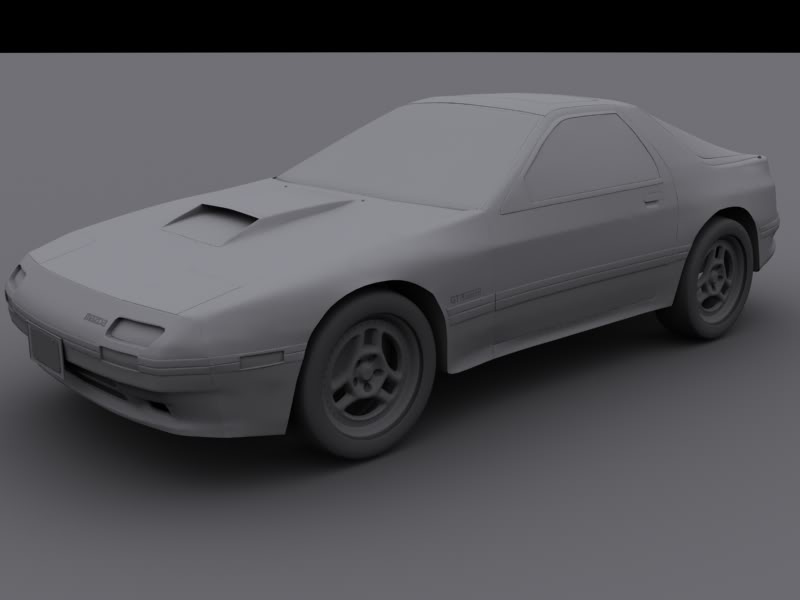
Well i just read all 17 pages ......
AWESOME and im glad you did the better looking S4~!
But you spend all this time with detail for "stock" accuracy, then you dont put stock rims on it
BBS~~~'vert rims.
Cant wait to see the finished product!.........
BTW is this going to be a model you can put together???
AWESOME and im glad you did the better looking S4~!
But you spend all this time with detail for "stock" accuracy, then you dont put stock rims on it
BBS~~~'vert rims.
Cant wait to see the finished product!.........
BTW is this going to be a model you can put together???
Thread Starter
Joined: Dec 2006
Posts: 1,307
Likes: 0
From: Beaverton, OR
Well what I am doing is I'm building this model for me, and possibly others, to use the base model as a reference, and then have the ability to 'preview' aftermarket parts on it. And I won't have stock rims on it anyway, so why bother modeling them?
Thats my $0.02 anyway. :p
And no, it won't be one you can put together, not unless I want to spend a lot of time to put together a working type, figure out how it all would fit together, model THOSE pieces into it, and then find a place to mill it out, plus the cost of materials, and operating the machinery. I'd much rather spend all that money on buying an ACTUAL 7.
$5,000 a quarter for my college, yeah - I don't got money for anything extra until I get loans paid off. Which, is why I'm trying to find a dead RX-7 I could unload off someone for cheap/free, or in return for services such as 3D Modeling, web design, etc etc
I'm glad that you read all 17 pages, it's crazy to hear that so many people have - and I'm glad that my work has paid off. I'm working on a lot of different projects right now, and this 1 is one that I'm going to hopefully be really proud of.
Thread Starter
Joined: Dec 2006
Posts: 1,307
Likes: 0
From: Beaverton, OR
Alright, I got 2 posts coming up, first one will be a question which was asked via PM. And that's what my setup is and how my workflow goes, so I'm doing that here. 
These are however large pictures, so click on them to view.
Below is a wideshot of my setup that I have at home for working.
http://i95.photobucket.com/albums/l1...8/100_1754.jpg
Next is a close up of my monitor area.
http://i95.photobucket.com/albums/l1...8/100_1755.jpg
This is a closeup of my monitor where I model, and how my renders turn out.
http://i95.photobucket.com/albums/l1...8/100_1757.jpg
Next is the setup I have for notes written to myself via my tablet.
http://i95.photobucket.com/albums/l1...8/100_1756.jpg
Tablet:
http://i95.photobucket.com/albums/l1...8/100_1758.jpg
Computer:
http://i95.photobucket.com/albums/l1...8/100_1761.jpg
2 monitors, 1 comp, keyboard, mouse, tablet with pen - great workflow.
Thread Starter
Joined: Dec 2006
Posts: 1,307
Likes: 0
From: Beaverton, OR
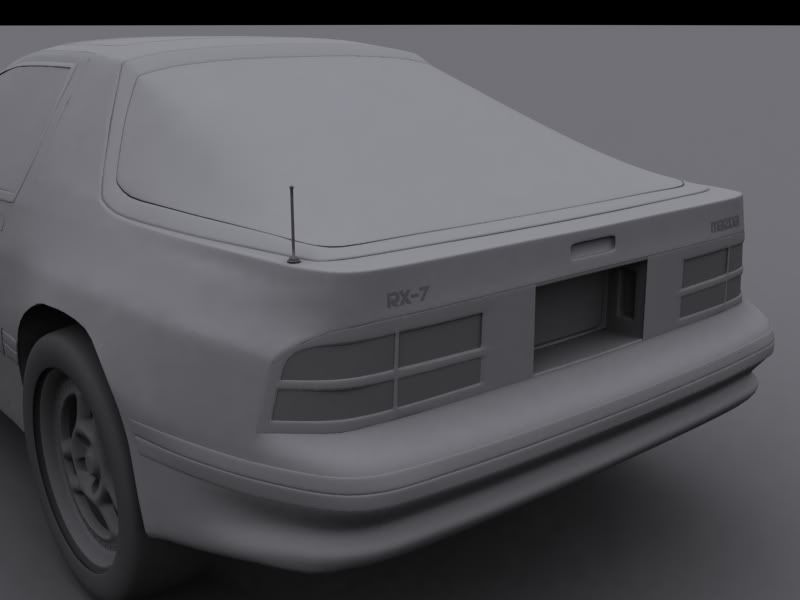
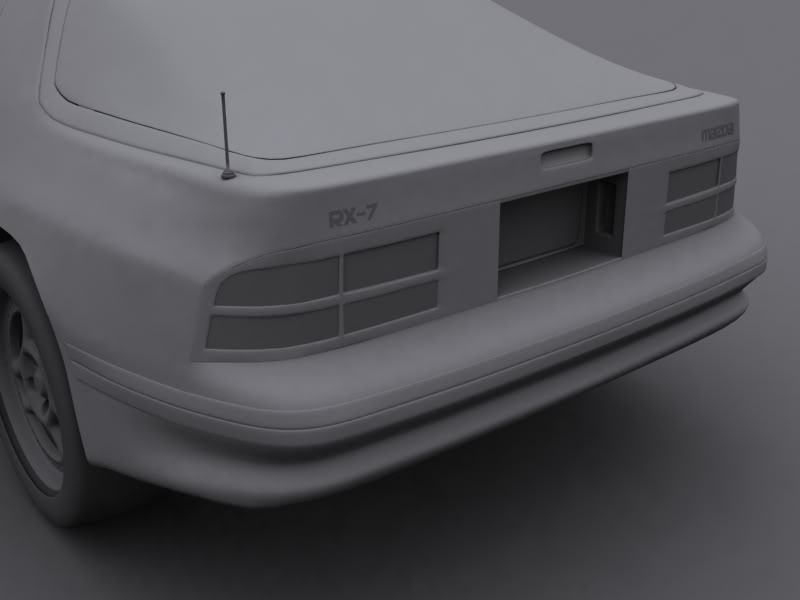
Alright, now for updates.
Fixed the back to give it more of an angle, however that messed up some of my text.
Fixed the text:

Started on defining the side skirt.
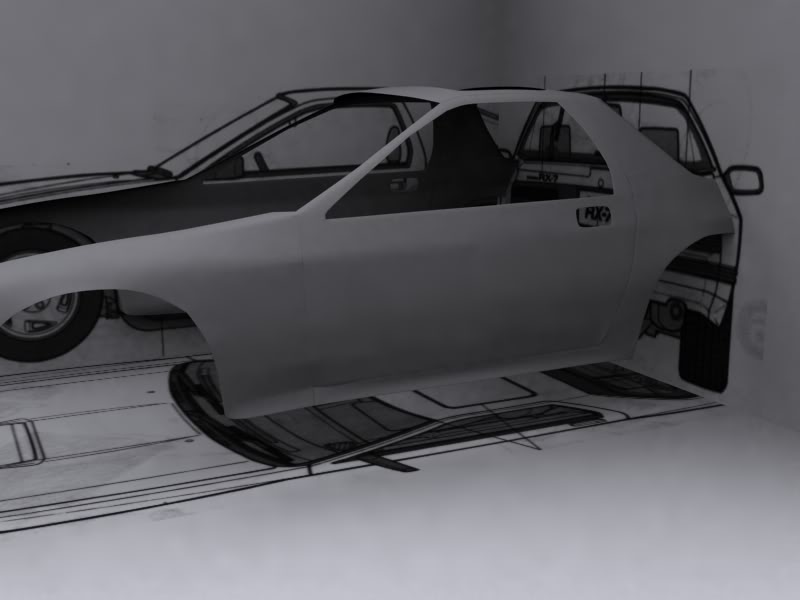
Found out an error in the side skirt:
Fixed:
Felt like it stuck in too much:
Better:
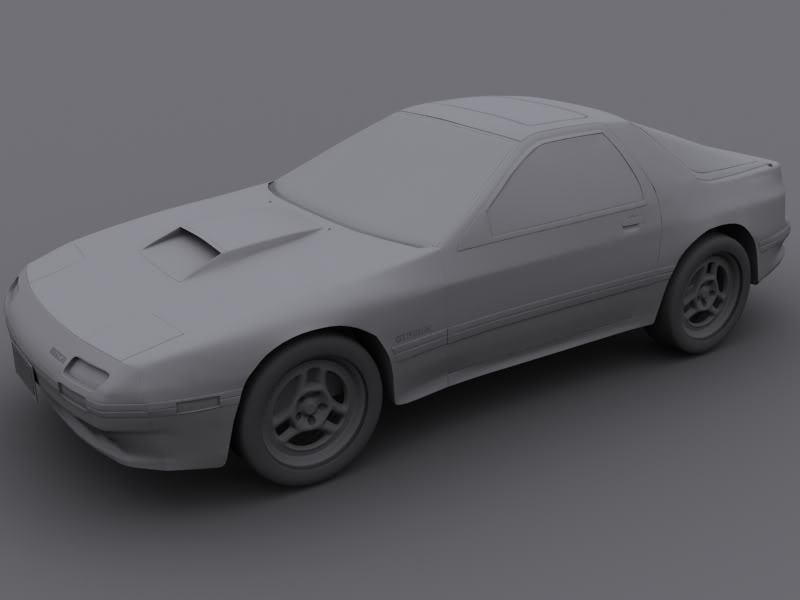
Questions and comments welcome as always.
Fixed the back to give it more of an angle, however that messed up some of my text.
Fixed the text:
Started on defining the side skirt.
Found out an error in the side skirt:
Fixed:
Felt like it stuck in too much:
Better:
Questions and comments welcome as always.
Environmentally-Hostile
Joined: Sep 2005
Posts: 1,662
Likes: 3
From: Ennis/Arlington Texas
Just found this thread and read the whole thing. Awesome! I dabbled in 3d models for a while, but never really had the patience for it. Will the file-type be suited to video games like "Racer?" I might be able to do some physics work if you wanna put it on racer.
Thread Starter
Joined: Dec 2006
Posts: 1,307
Likes: 0
From: Beaverton, OR
What file type does Racer require? If max doesn't directly export I'll use Deep Exploration and convert it. Either post here or PM me, and I'll see about getting the mesh to you.
Looks sweet.
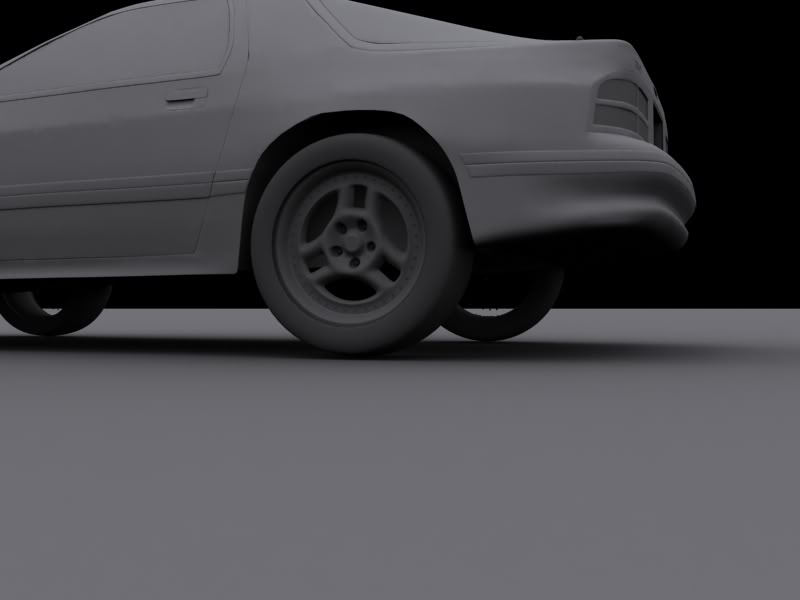
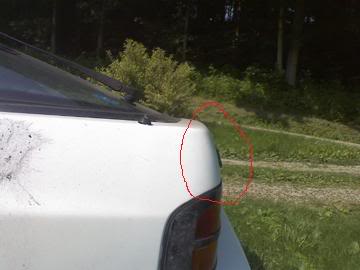
Still something wrong with the back end thou. The shape of the fender, taillights, and rear deck need more tweaking. I attached some pics for reference. You should be able to see what I mean.
Crappy paint, but at least its the same color you are working with and helps show the lines.
Still something wrong with the back end thou. The shape of the fender, taillights, and rear deck need more tweaking. I attached some pics for reference. You should be able to see what I mean.
Crappy paint, but at least its the same color you are working with and helps show the lines.
Environmentally-Hostile
Joined: Sep 2005
Posts: 1,662
Likes: 3
From: Ennis/Arlington Texas
All I can find is .dof, and I'm not sure thats a commonly supported format.
Last edited by Starfox07; Jun 27, 2008 at 07:25 PM.
Thread Starter
Joined: Dec 2006
Posts: 1,307
Likes: 0
From: Beaverton, OR
So how many people would be interested in a pdf of the process of making this? I'm throwing one together for my portfolio and for production purposes, and if people are interested, I'll FTP it for people to download.
Thread Starter
Joined: Dec 2006
Posts: 1,307
Likes: 0
From: Beaverton, OR
Alright, I'm ready to start finishing the back up, and I need pictures like below, for purposes of figuring out how the exhaust and muffler is set up. All angles like the below pictures are needed!!