
FC3S 3D Model

Thread Starter
Joined: Dec 2006
Posts: 1,307
Likes: 0
From: Beaverton, OR
It's the same engine that's in the Avalon, which is my current car.  With VVTi as well.
The 1MZ-FE with VVT-i is used in the Avalon, Highlander, Sienna and Camry. Output is 210 hp (156 kW) at 5800 rpm with 222 ft�lbf (328 N�m) of torque at 4400 rpm. Early versions of the VVT-i 1MZ used a dual throttle body, cast aluminum intake manifold, and EGR block off plates on the exhaust manifolds. Later versions used an ABS plastic intake manifold to further weight reduction and decrease cost. These versions may also have drive-by-wire/electronic throttle control.
Applications:
* 1997-2004 Toyota Avalon
With VVTi as well. The 1MZ-FE with VVT-i is used in the Avalon, Highlander, Sienna and Camry. Output is 210 hp (156 kW) at 5800 rpm with 222 ft�lbf (328 N�m) of torque at 4400 rpm. Early versions of the VVT-i 1MZ used a dual throttle body, cast aluminum intake manifold, and EGR block off plates on the exhaust manifolds. Later versions used an ABS plastic intake manifold to further weight reduction and decrease cost. These versions may also have drive-by-wire/electronic throttle control.
Applications:
* 1997-2004 Toyota Avalon
Thread Starter
Joined: Dec 2006
Posts: 1,307
Likes: 0
From: Beaverton, OR
Haha, wow - I feel dumb now. A simple look at even a picture of one could have shown me that.
I feel de-dee-dee right now. Thanks though. Look for a major update soon! I'm making the lights right now, at least the housing for them.
I feel de-dee-dee right now.
Thanks though. Look for a major update soon! I'm making the lights right now, at least the housing for them.
Thread Starter
Joined: Dec 2006
Posts: 1,307
Likes: 0
From: Beaverton, OR
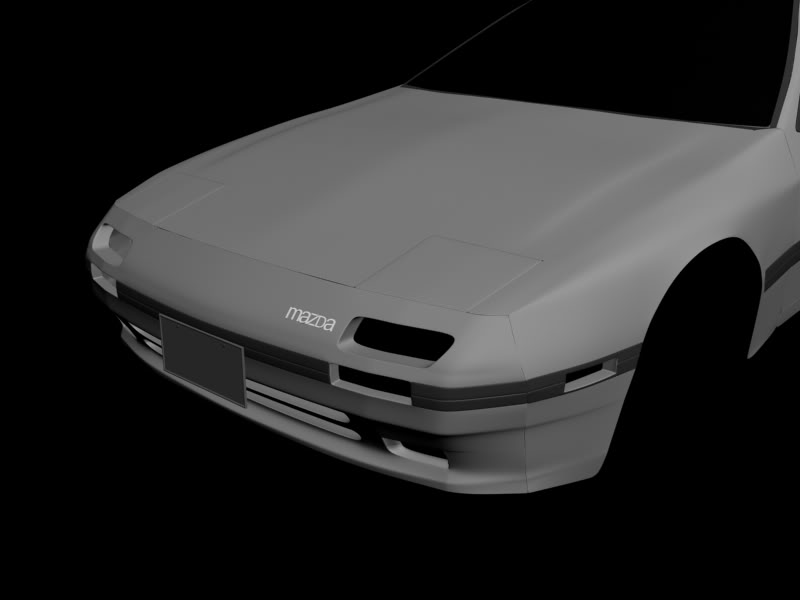
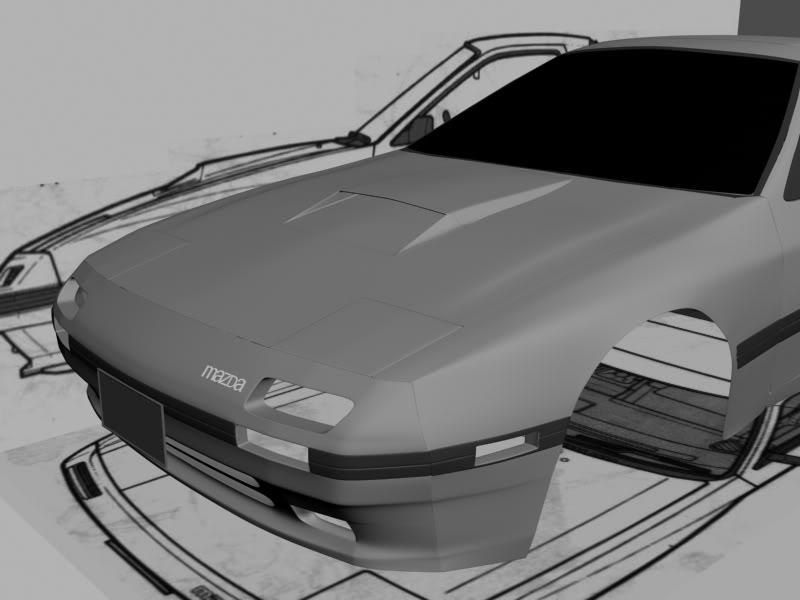
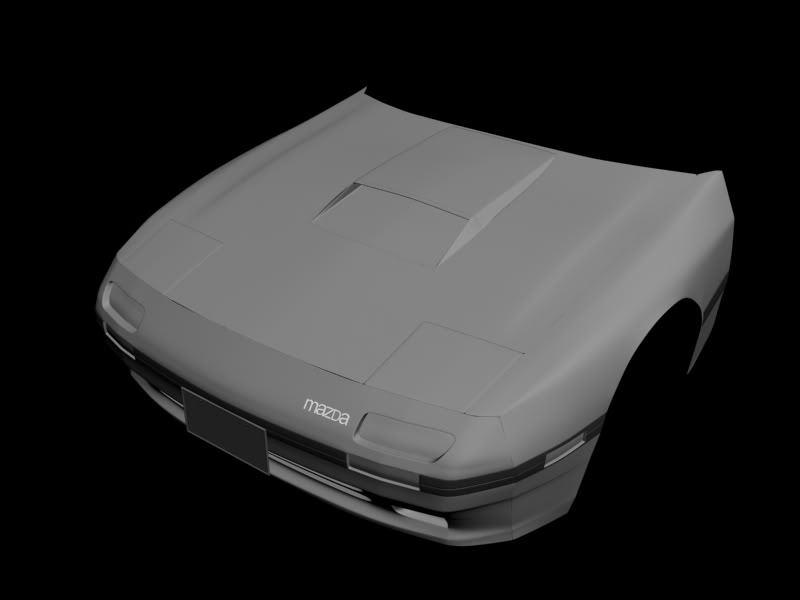
Update of the front, got a lot more work to do left, lots of details to fill in. As well as the headlights cover is pissing me off by not lining up with the hood and front bumper. 
But, I think it's coming along well.
But, I think it's coming along well.

WTF is a Piston?..Anyone?
Joined: Apr 2005
Posts: 872
Likes: 1
From: regina
man i just read all 13 pages of this and wow dude. i wish i had a quarter of your skill. and dont feel dumb asking any question you never had an FC Before so its all good. keep it up man and congrats on collage btw
Thread Starter
Joined: Dec 2006
Posts: 1,307
Likes: 0
From: Beaverton, OR
Alright, another update. Fixed where the headlight cover and the hood meet, as well as the front bumper. Fixed a few seams elsewhere as well.
By the way, love that quote in pink, I showed it to my fiance and she busted up laughing. She agrees. hehe
By the way, love that quote in pink, I showed it to my fiance and she busted up laughing. She agrees.
hehe
Thread Starter
Joined: Dec 2006
Posts: 1,307
Likes: 0
From: Beaverton, OR
Alright people, now's the time I need help, I need every pic location or pic you can get (high res only please) of a TII hood scoop. Links to photobucket accounts are acceptable as well. Thanks!
It's the same engine that's in the Avalon, which is my current car. With VVTi as well.
The 1MZ-FE with VVT-i is used in the Avalon, Highlander, Sienna and Camry. Output is 210 hp (156 kW) at 5800 rpm with 222 ft�lbf (328 N�m) of torque at 4400 rpm. Early versions of the VVT-i 1MZ used a dual throttle body, cast aluminum intake manifold, and EGR block off plates on the exhaust manifolds. Later versions used an ABS plastic intake manifold to further weight reduction and decrease cost. These versions may also have drive-by-wire/electronic throttle control.
Applications:
* 1997-2004 Toyota Avalon
With VVTi as well. The 1MZ-FE with VVT-i is used in the Avalon, Highlander, Sienna and Camry. Output is 210 hp (156 kW) at 5800 rpm with 222 ft�lbf (328 N�m) of torque at 4400 rpm. Early versions of the VVT-i 1MZ used a dual throttle body, cast aluminum intake manifold, and EGR block off plates on the exhaust manifolds. Later versions used an ABS plastic intake manifold to further weight reduction and decrease cost. These versions may also have drive-by-wire/electronic throttle control.
Applications:
* 1997-2004 Toyota Avalon
cool job on the 3d model btw
Thread Starter
Joined: Dec 2006
Posts: 1,307
Likes: 0
From: Beaverton, OR
I'm thinking about dropping a new engine in my Avalon as well, if I can squeeze it inside of the engine bay. 2GR-FSE - Toyota/Lexus engine, little bit over 300hp. 210 to 300 isn't that bad of a jump.
Looking good. This will be sweet when done.
ebay would be a good source for all sorts of pics.
http://motors.shop.ebay.com/Cars-Tru...269670QQ_verZ4
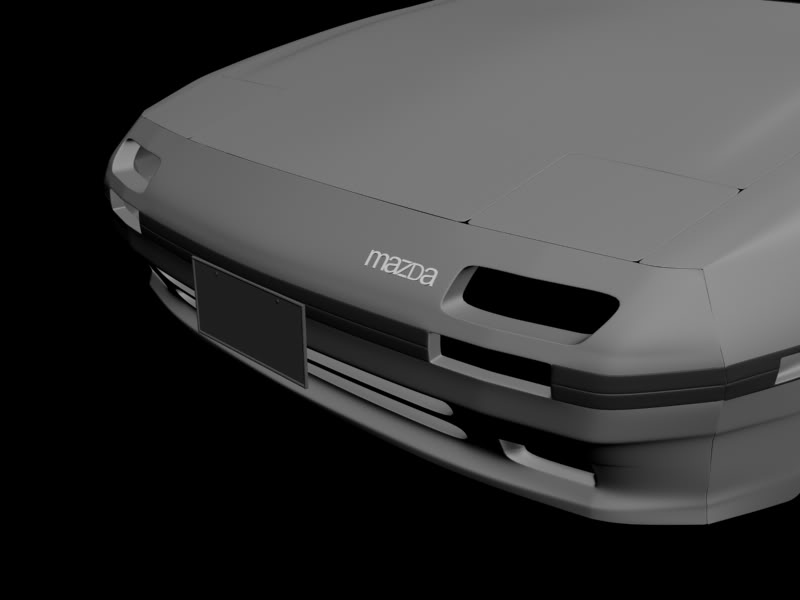
Here are a few details I noticed. It's hard to tell from that angle, but it looks like the hood scoop needs to be offset more to the driver side. Where the bumper meets the fenders needs to be more of a curve, and the lower portion of the fenders have less of an indentation/crease than that.
ebay would be a good source for all sorts of pics.
http://motors.shop.ebay.com/Cars-Tru...269670QQ_verZ4
Here are a few details I noticed. It's hard to tell from that angle, but it looks like the hood scoop needs to be offset more to the driver side. Where the bumper meets the fenders needs to be more of a curve, and the lower portion of the fenders have less of an indentation/crease than that.
dAracIngPhaRmaCist
Joined: Mar 2004
Posts: 877
Likes: 0
From: Fort Lauderdale
Wow this is great work right here... It takes alot of skill... My hat off to you... Your FD was awesome and the FC is looking great too...  I have Maya 08 on my system, but cannot use it... I wanted to try and teach myself modeling using the digital tutor suite... But have been so busy with pharmacy school that I havent even gotten past the first cd yet

The funny thing is that the "Maya Extreme" bundle I have is about 40cds and I havent made it past the first yet... However, I plan on messing with it a little once I finish finals next week b/c I have almost a whole month off until summer school starts (I am going to start during the 3rd session...)
Digital Tutors - Maya - Basics - CD 1 of 4
The funny thing is that the "Maya Extreme" bundle I have is about 40cds and I havent made it past the first yet... However, I plan on messing with it a little once I finish finals next week b/c I have almost a whole month off until summer school starts (I am going to start during the 3rd session...)
Thread Starter
Joined: Dec 2006
Posts: 1,307
Likes: 0
From: Beaverton, OR
Thanks for your imput Valdez, if you could get a picture of mine and highlight the areas that you think need improvement it would help a lot. As far as the hood, below I have attached a file that should show you exactly where it is right now.
Sorry for the bad quality and the size, I didn't want to open up photoshop, so I did it in paint, and then shrunk it down 50% of what it looks like on my screen.
And thank you for your kind comments as well Apathy.
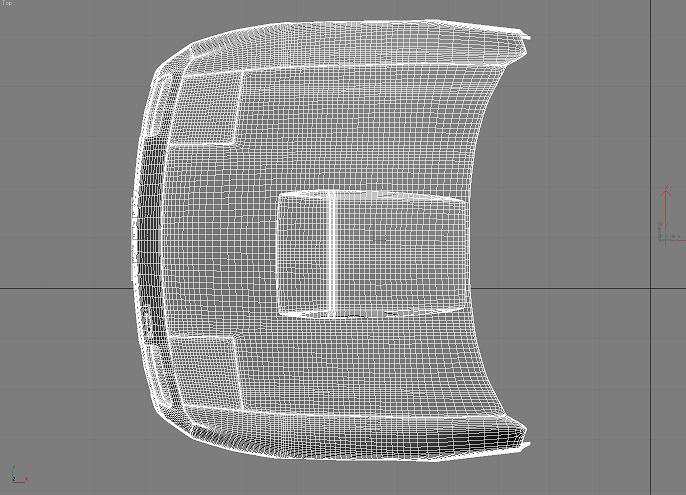
Sorry for the bad quality and the size, I didn't want to open up photoshop, so I did it in paint, and then shrunk it down 50% of what it looks like on my screen.
And thank you for your kind comments as well Apathy.
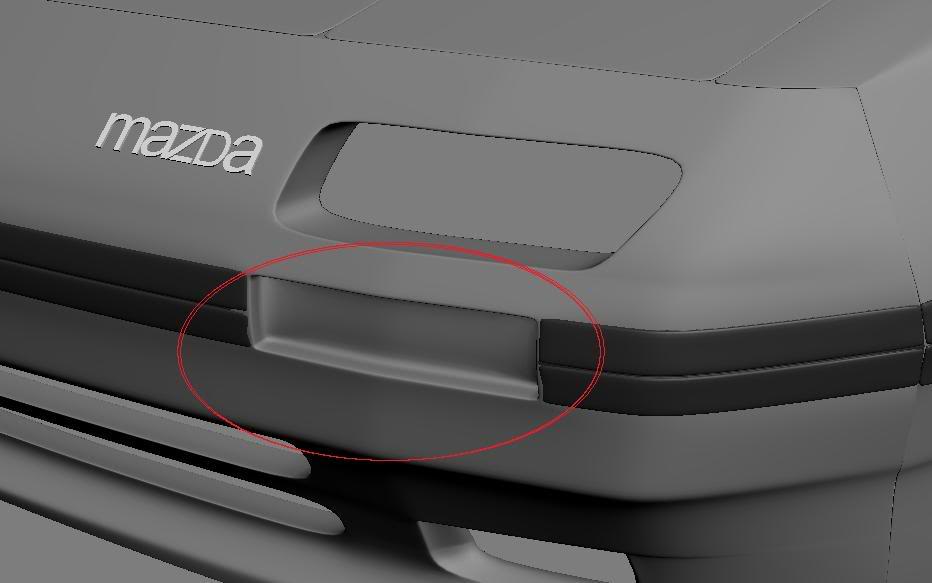
Guess it was just the view angle, the hood scoop looks fine to me.
I circled the other areas I mentioned for you.
Top corner of bumper doesn't come to a point, it is more of a curve.
The creases in the bottom of the fender are more subtle than that. I'd have to find you a pic to explain it better.
I circled the other areas I mentioned for you.
Top corner of bumper doesn't come to a point, it is more of a curve.
The creases in the bottom of the fender are more subtle than that. I'd have to find you a pic to explain it better.

2 Rotors, 1 Turbo
Joined: Feb 2004
Posts: 1,099
Likes: 0
From: Atlanta, GA
Not to threadjack, but I thought maybe you'd be interested to see what I've been cookin' up:

Evolution VIII! I did this in Maya. This is a quick render while I'm setting up the materials for the final renders. I also have to make the wipers, lug nuts and brake calipers.
Evolution VIII! I did this in Maya. This is a quick render while I'm setting up the materials for the final renders. I also have to make the wipers, lug nuts and brake calipers.


Joined: Dec 2006
Posts: 2,859
Likes: 13
From: Sterling Heights, MI
DAAAAMN!! how the hell do you guys do this stuff? I'd never have the patience for it lol. That FC is looking really good and that Evo looks really good too.
Thread Starter
Joined: Dec 2006
Posts: 1,307
Likes: 0
From: Beaverton, OR
Thanks Valdez, I'll work on it asap.
MidnightOwl, I hope that you'll be able to take criticism. :p Your model overall is good, and I love Evo's, but there's some things I saw that stood out to me.

Teal - It appears that there is an extra dip down on a random part on the hood.
Red - what's going on with the poly's around your lights? They look like they got dark spots, and there's lots of uneven poly management.
Cyan - Extra dip down in the front bumper
Yellow - It appears there is a deeper dip here than there is on the actual car, the poly's are a bit darker than I thought they'd be, now this one might just be my eye playing tricks on me however...
Green - What's with the little indent in the door here?
Other than these small things - amazing model! I love the Evo and it's looking great, keep it up!!
MidnightOwl, I hope that you'll be able to take criticism. :p Your model overall is good, and I love Evo's, but there's some things I saw that stood out to me.
Teal - It appears that there is an extra dip down on a random part on the hood.
Red - what's going on with the poly's around your lights? They look like they got dark spots, and there's lots of uneven poly management.
Cyan - Extra dip down in the front bumper
Yellow - It appears there is a deeper dip here than there is on the actual car, the poly's are a bit darker than I thought they'd be, now this one might just be my eye playing tricks on me however...
Green - What's with the little indent in the door here?
Other than these small things - amazing model! I love the Evo and it's looking great, keep it up!!
2 Rotors, 1 Turbo
Joined: Feb 2004
Posts: 1,099
Likes: 0
From: Atlanta, GA
The render was without anti-aliasing, so the door spots look like little errors. If you look, you can see it's on the front of that door too. The headlights look weird due to the blinn shader on the lense reflecting the box it's in, and it looks bad. I took some better quality renders last night and these two things went away.
From my reference pics, the side skirts look that indented, but I still think you're right, it looks strange! Also, there is a ridge on the hood, so that is actually correct. The front bumper is also correct from all the reference photos I've collected, I guess it just looks like a pinch in this render. I'll mess around with it to see if I can't make it look a little nicer.
I'll take some full renders today, so I'll post them up for some critiques.
Thread Starter
Joined: Dec 2006
Posts: 1,307
Likes: 0
From: Beaverton, OR
Ah, I'm not a fan of maya, and I don't use it, so that's probably why I couldn't tell why your renders were off.
The side skirts might be that indented, but you should try a different smoothing group maybe? It just looks like it's got weird normals...
Take a better render, maybe throw some GI on, and then if you want you can PM me, and I'll take a look at the better renders. You do this just in your free time? Or are you going to school for it...? etc etc etc?
The side skirts might be that indented, but you should try a different smoothing group maybe? It just looks like it's got weird normals...
Take a better render, maybe throw some GI on, and then if you want you can PM me, and I'll take a look at the better renders.
You do this just in your free time? Or are you going to school for it...? etc etc etc?
putting it down daily
Joined: May 2003
Posts: 1,294
Likes: 0
From: Auburn, CA
Upon closer inspection of the front bumper cover (looking heaps better!) it looks like the surface above the rub strip is at too steep an angle- it makes the angle at the seam between the leading edge of the hood and the bumper look more drastic than in real life- either the upper surface of the bumper needs to be laid back (raked) a bit more, or the leading edge of the hood needs to dip down a bit to meet that seam, or perhaps a bit of both