
HIRISK's 1988 S4.5 FC3S RX7 - Build Thread


Thread Starter
Full Member
Joined: Sep 2008
Posts: 123
Likes: 1
From: Australia
HIRISK's 1988 S4.5 FC3S RX7 - Build Thread
Hi Guys,
I have not posted details of my ride before, but as I am finally making some progress, I thought I may as well get something on the go.
Anyway, I bought my FC in September 2008.
I bought it unregistered and virtually not running at all, but as the dollars were right, I thought hey, why not. It was completely stock and the owner did not know what the issue was and had given up on it, hence the sale.
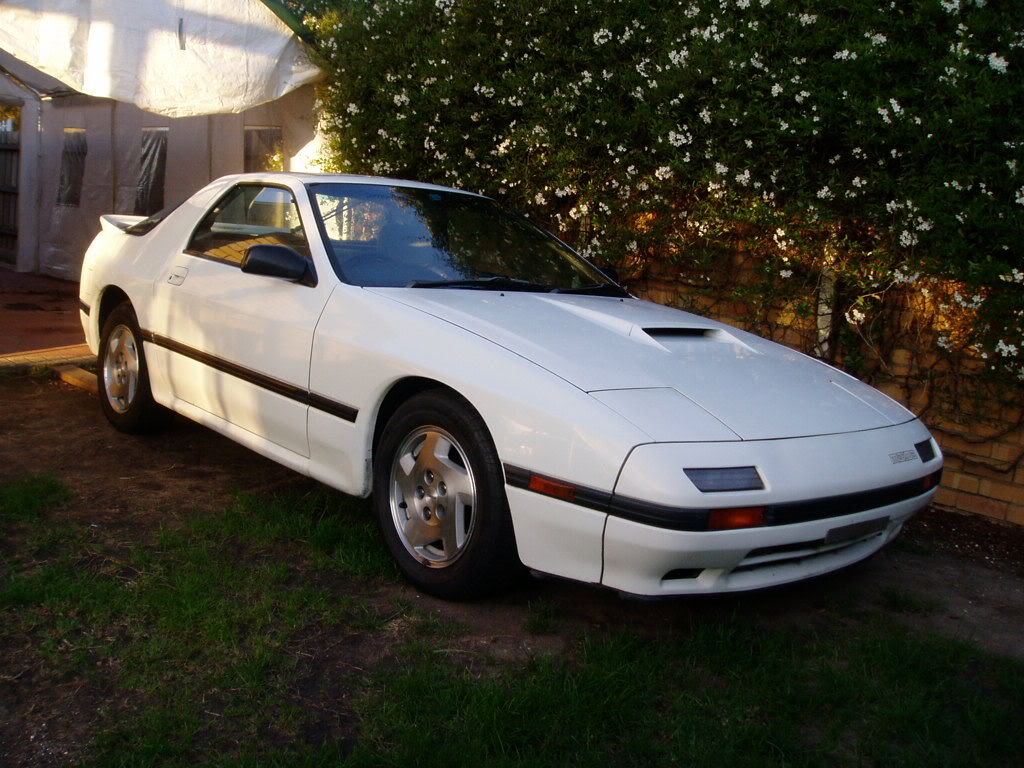
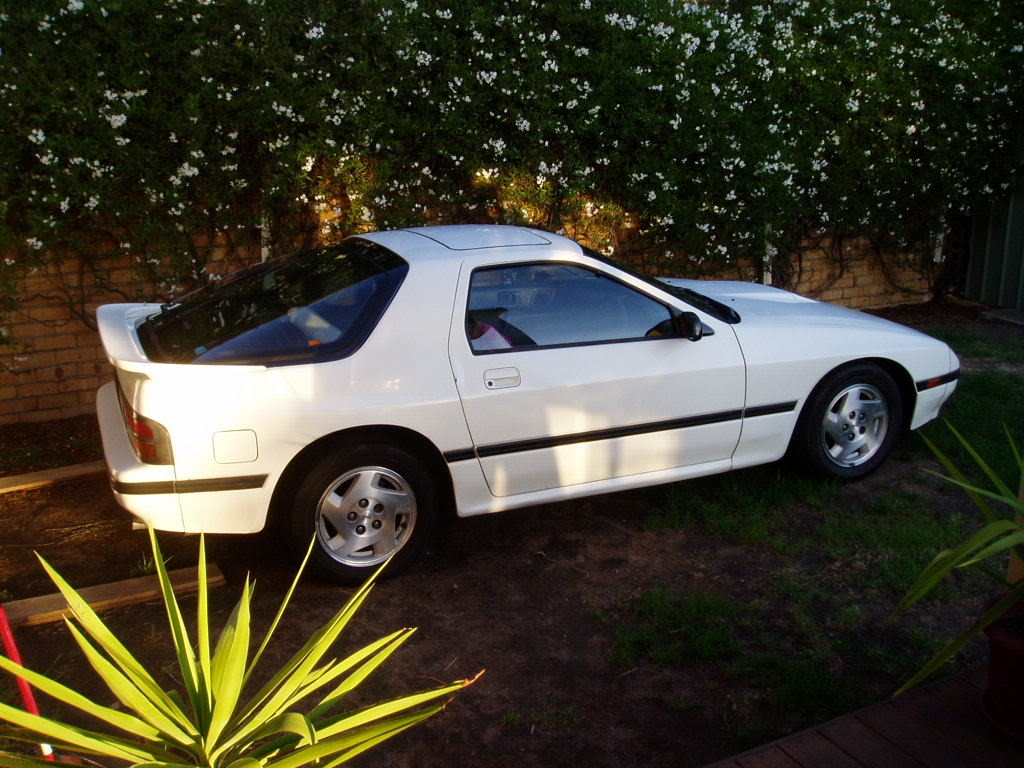
1988 S4 FC3S Mazda RX7 Turbo
Japanese Import
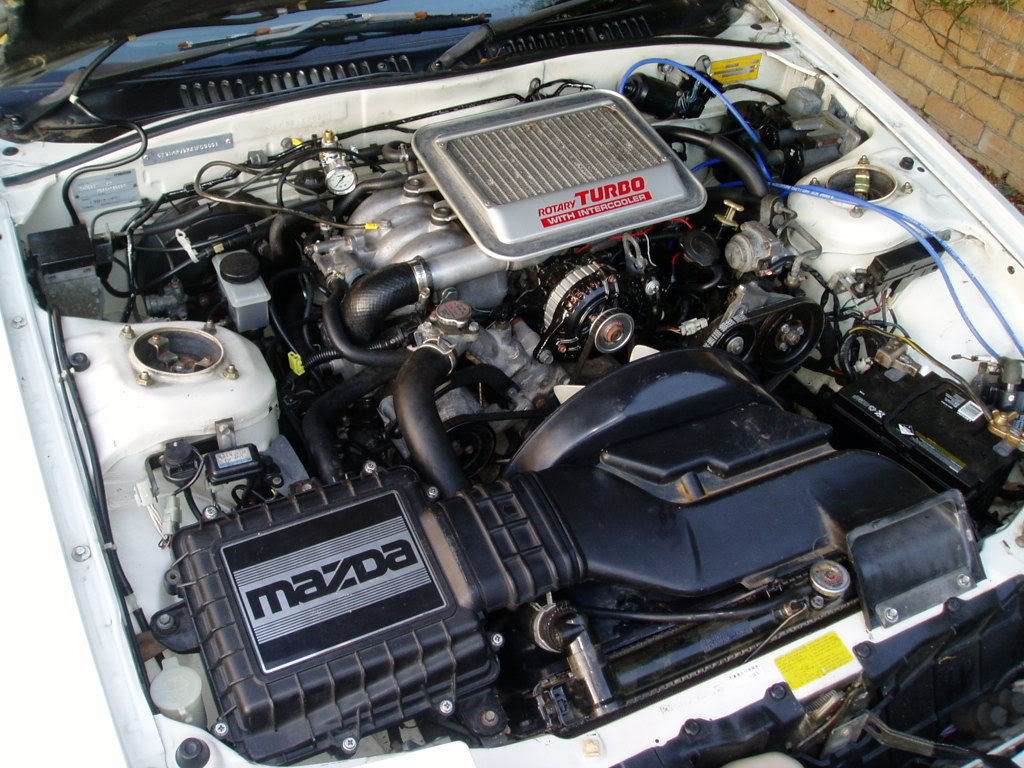
13B Turbo
5 Speed Manual
A bit of a clean up, but pretty much as I bought it...
I have not posted details of my ride before, but as I am finally making some progress, I thought I may as well get something on the go.
Anyway, I bought my FC in September 2008.
I bought it unregistered and virtually not running at all, but as the dollars were right, I thought hey, why not. It was completely stock and the owner did not know what the issue was and had given up on it, hence the sale.
1988 S4 FC3S Mazda RX7 Turbo
Japanese Import
13B Turbo
5 Speed Manual
A bit of a clean up, but pretty much as I bought it...
Thread Starter
Full Member
Joined: Sep 2008
Posts: 123
Likes: 1
From: Australia
Now, I do not want to bore you all with the months of pain I went through in order to get it running, so let me try and summarise.
Keep in mind I have two young kids, so I am lucky to get an hour or two a week to work on the car.
This is just a rough guide, I really can't remember exactly how it all transpired, but you will get the drift of what I have been through to get it running.
September 2008
- Bought not running and towed home on a trailer
- Started to investigate / diagnose possible issues
- Do not have a garage, so makes it really hard
- Remove upper intake manifold
- No fuel
October 2009
- Remove injectors and have them cleaned and rebuilt
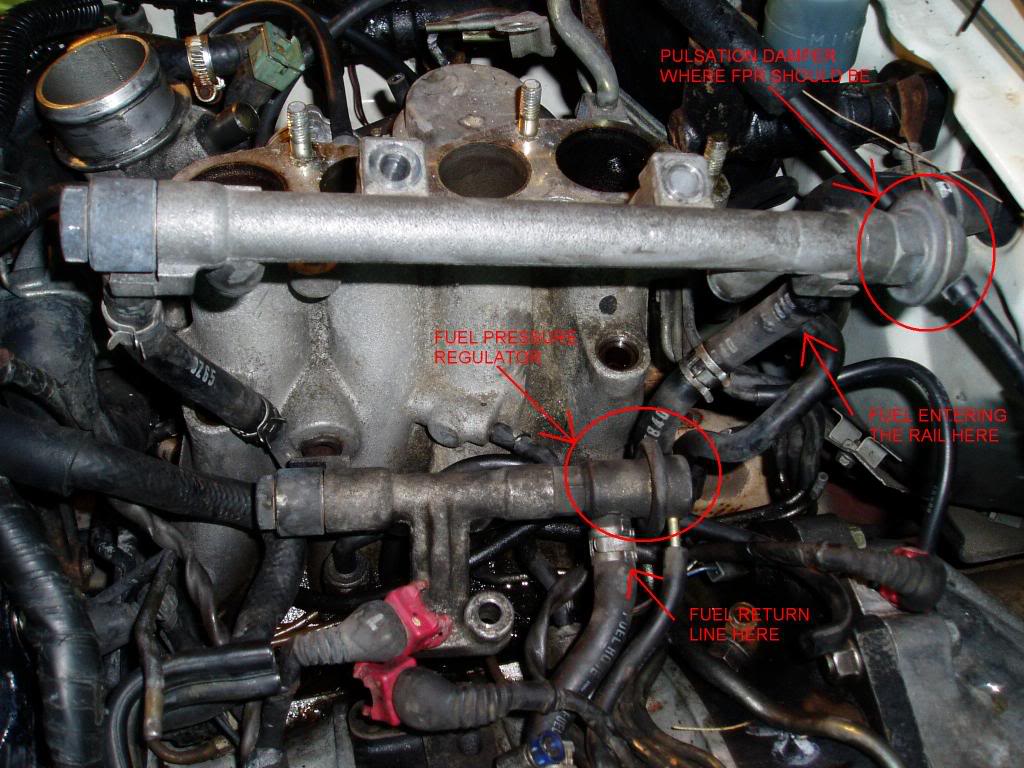
- Remove factory fuel reg and fit aftermarket one
November 2008
- Still no luck
- Does not appear to be getting fuel
December 2008
- Can't get consistent spark
January 2009
- Not much
- I'm over it
February 2009
- FINALLY GOT A GARAGE BUILT - YAY!! SOMEWHERE TO WORK ON THE CAR
- Decide it must be wiring related
- By 2nd hand JDM loom
- install loom
- Still no fuel
- Still spark issues
March 2009
- Still not running
- Can't get fuel to the injectors
- Can't get consistent spark
April 2009
- Maztech are given the car as I have had enough and can't get it running
- They install a Microtech LT10S via the factory loom
- Still issues with TPS and CAS randomly sending wrong signals
- Decided the factory loom is fucked somewhere and easier to bin it and wire in full custom loom
- Loom in and car running OK but STILL ISSUES
- Something dragging on the engine causing it to stall and run bad
- Lino thinks it may be stuffed bearings on the front and rear stationary gears
- Gearbox and front water cover are taken off - sure enough the bearings are stuffed
- Good condition 2nd hand stationary gears and new bearings fitted
FIXED AND RUNNING GREAT!!!
So, in a nutshell, the issues this car had...
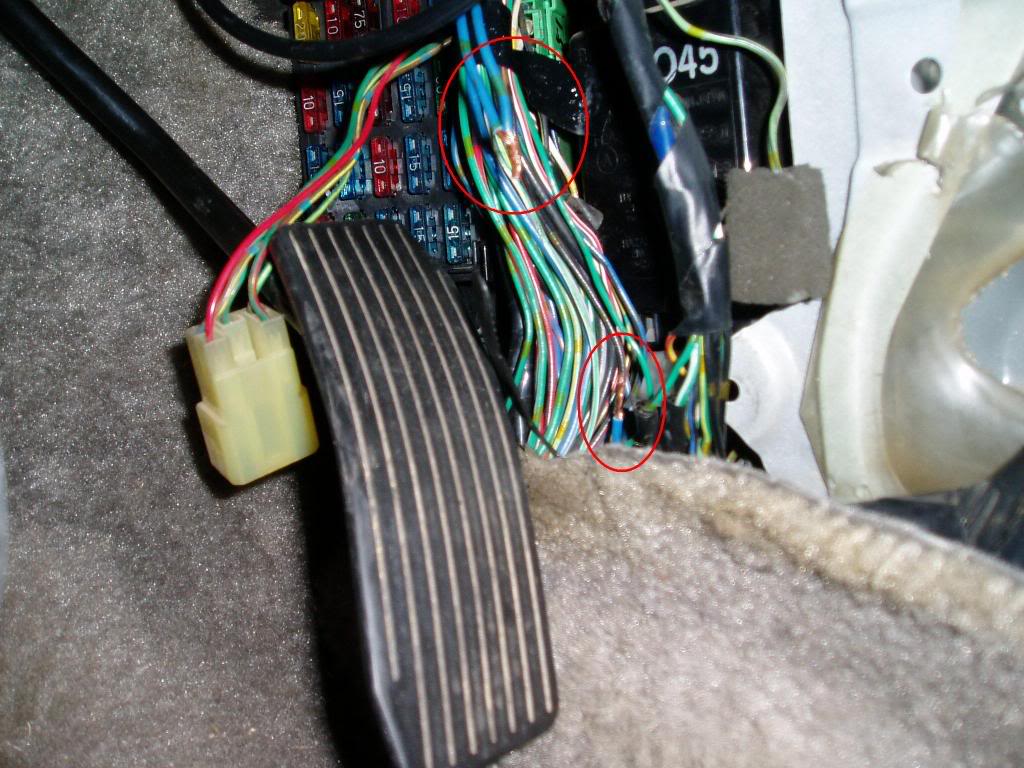
1) Both the front emission loom AND front engine loom are fucked causing bad and no signal from many senders
2) Computer is farked
3) Trailing Coil Pack Farked
4) Front and Rear bearings are farked
Solution...
1) Custom wired loom
2) Microtech LT10S
3) Good condition 2nd hand Trailing Coil Pack installed
4) New stationary gear bearings
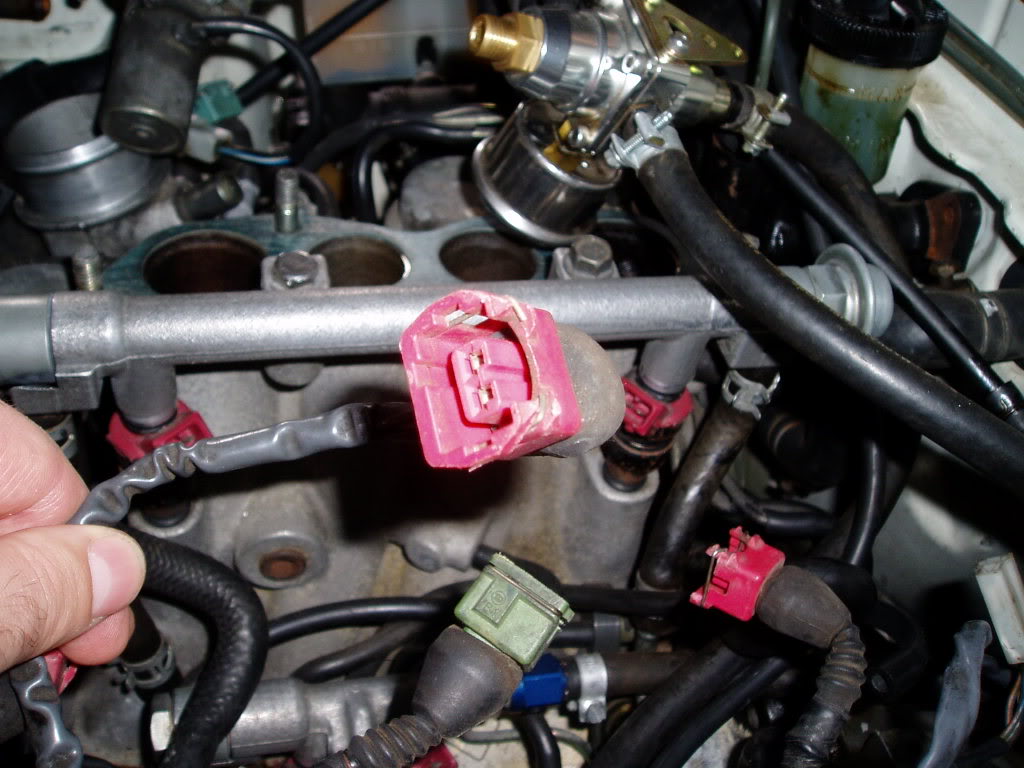
Some various "what the **** is wrong with you" photos...

Keep in mind I have two young kids, so I am lucky to get an hour or two a week to work on the car.
This is just a rough guide, I really can't remember exactly how it all transpired, but you will get the drift of what I have been through to get it running.
September 2008
- Bought not running and towed home on a trailer
- Started to investigate / diagnose possible issues
- Do not have a garage, so makes it really hard
- Remove upper intake manifold
- No fuel
October 2009
- Remove injectors and have them cleaned and rebuilt
- Remove factory fuel reg and fit aftermarket one
November 2008
- Still no luck
- Does not appear to be getting fuel
December 2008
- Can't get consistent spark
January 2009
- Not much
- I'm over it
February 2009
- FINALLY GOT A GARAGE BUILT - YAY!! SOMEWHERE TO WORK ON THE CAR
- Decide it must be wiring related
- By 2nd hand JDM loom
- install loom
- Still no fuel
- Still spark issues
March 2009
- Still not running
- Can't get fuel to the injectors
- Can't get consistent spark
April 2009
- Maztech are given the car as I have had enough and can't get it running
- They install a Microtech LT10S via the factory loom
- Still issues with TPS and CAS randomly sending wrong signals
- Decided the factory loom is fucked somewhere and easier to bin it and wire in full custom loom
- Loom in and car running OK but STILL ISSUES
- Something dragging on the engine causing it to stall and run bad
- Lino thinks it may be stuffed bearings on the front and rear stationary gears
- Gearbox and front water cover are taken off - sure enough the bearings are stuffed
- Good condition 2nd hand stationary gears and new bearings fitted
FIXED AND RUNNING GREAT!!!
So, in a nutshell, the issues this car had...
1) Both the front emission loom AND front engine loom are fucked causing bad and no signal from many senders
2) Computer is farked
3) Trailing Coil Pack Farked
4) Front and Rear bearings are farked
Solution...
1) Custom wired loom
2) Microtech LT10S
3) Good condition 2nd hand Trailing Coil Pack installed
4) New stationary gear bearings
Some various "what the **** is wrong with you" photos...


Thread Starter
Full Member
Joined: Sep 2008
Posts: 123
Likes: 1
From: Australia
JUNE 2009
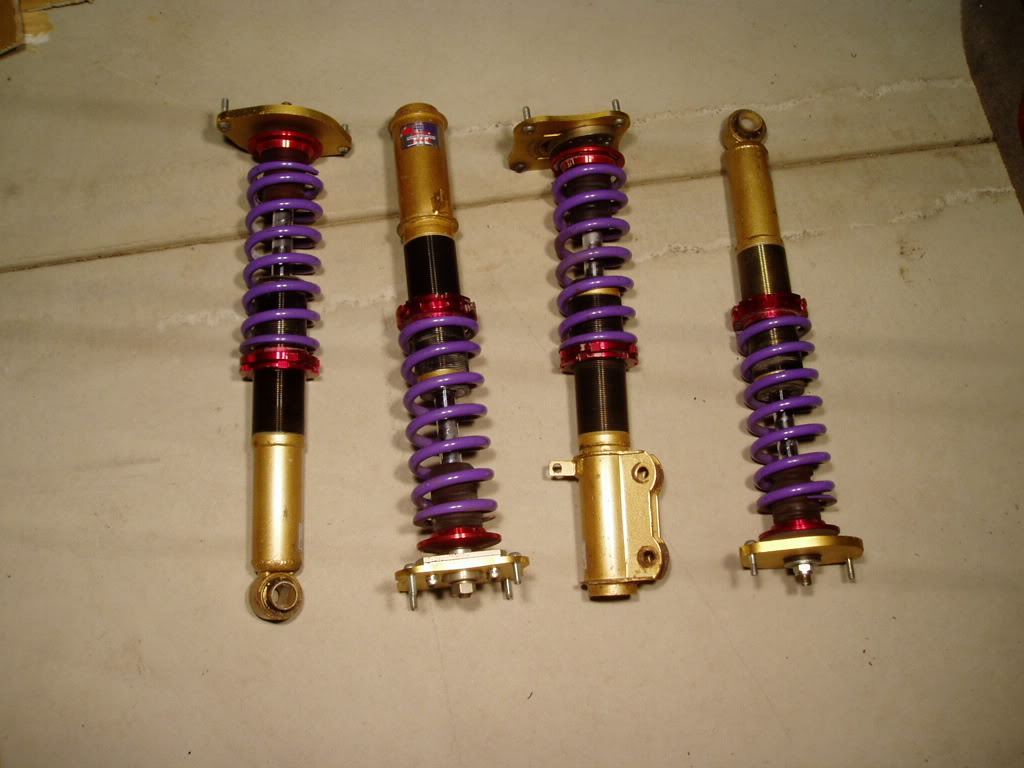
I picked up my JIC coilovers.
Bought them 2nd hand from Japan and have been waiting patiently for them to arrive by container.
Now they are here I am happy as they are in great condition with no leaks etc.
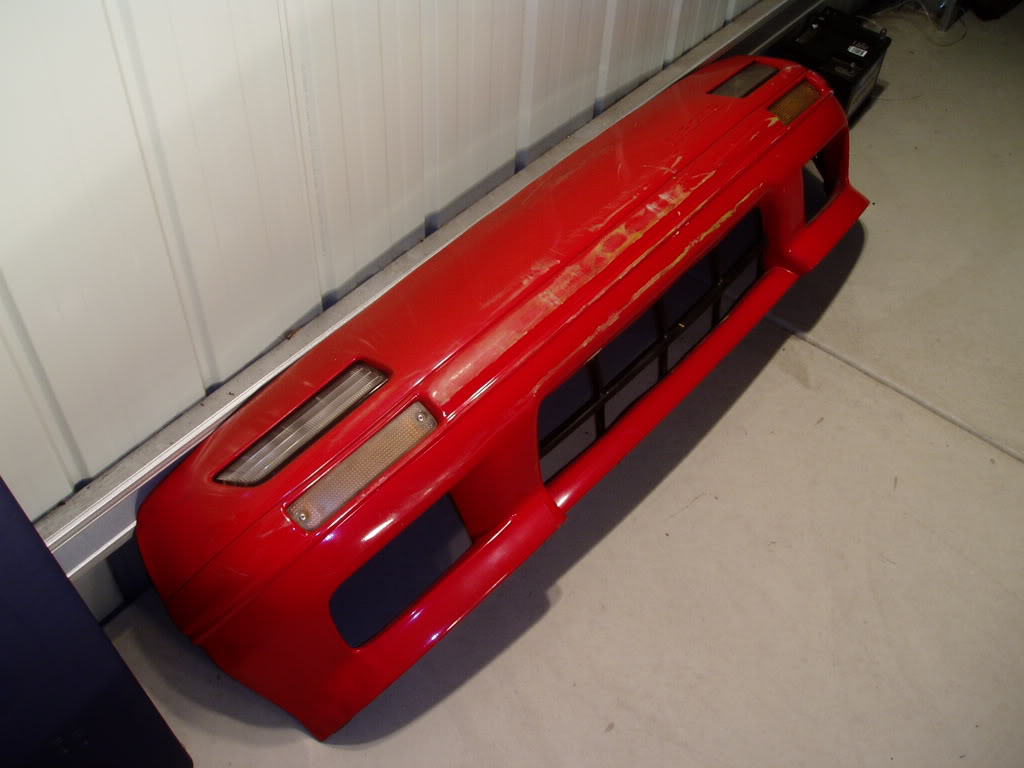
Also picked up a Series 5 front bar thats in pretty good condition. I think with a paint it will look good installed.
I picked up my JIC coilovers.
Bought them 2nd hand from Japan and have been waiting patiently for them to arrive by container.
Now they are here I am happy as they are in great condition with no leaks etc.
Also picked up a Series 5 front bar thats in pretty good condition. I think with a paint it will look good installed.
Thread Starter
Full Member
Joined: Sep 2008
Posts: 123
Likes: 1
From: Australia
JUNE 2009
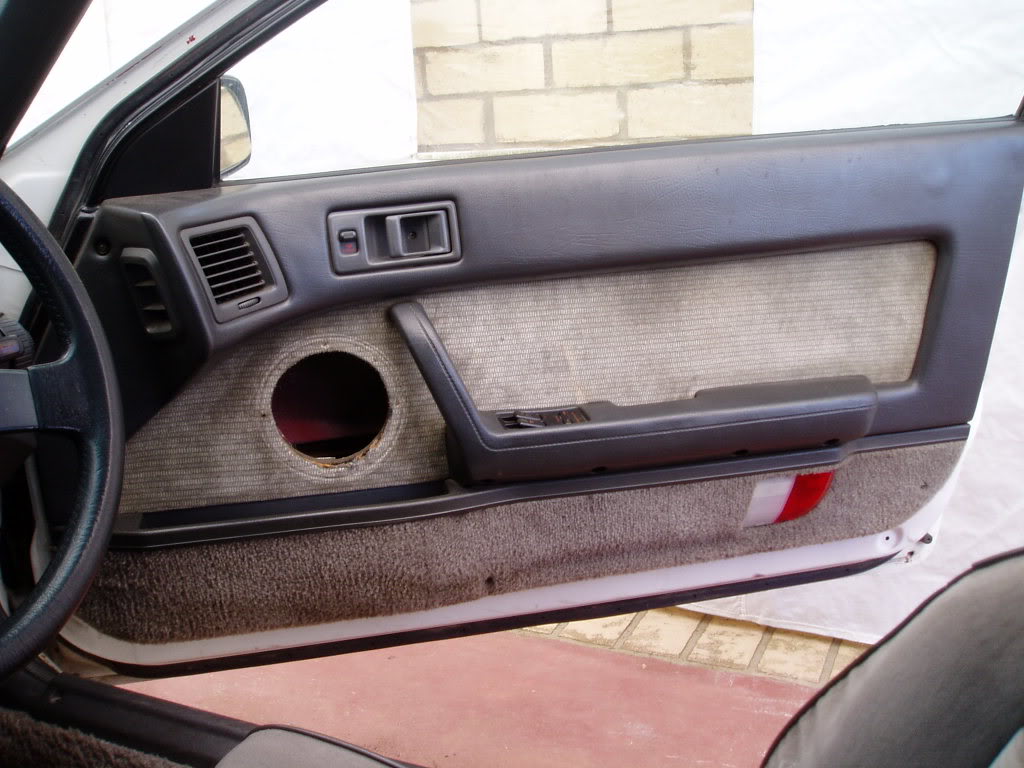
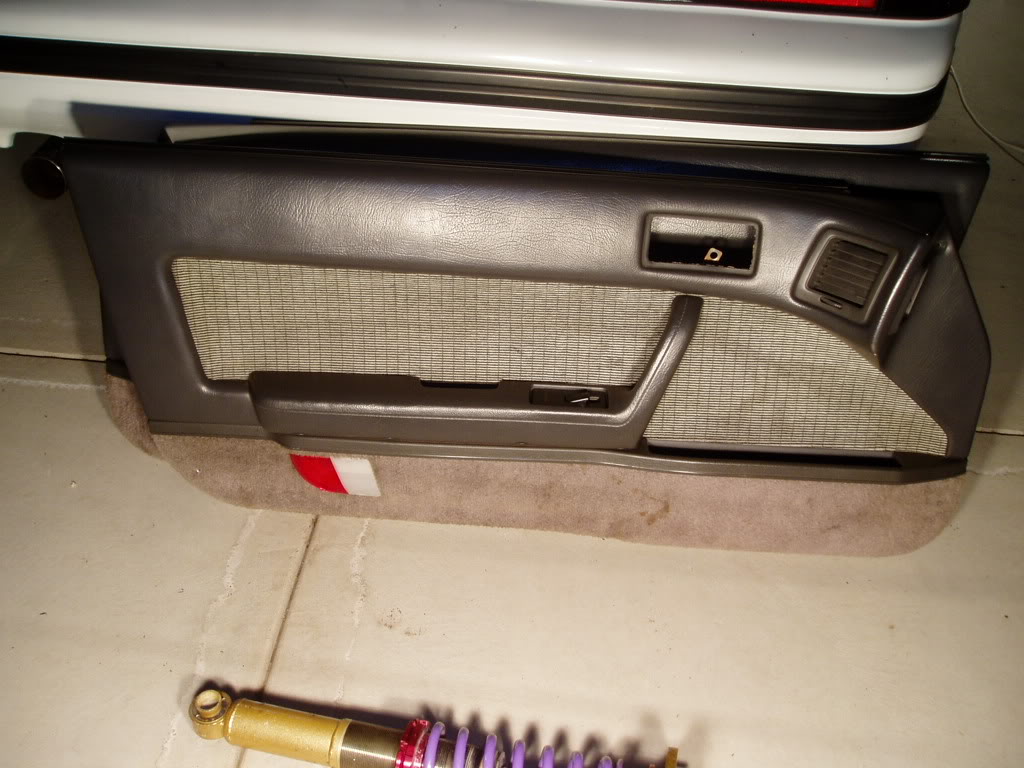
And finally got around to stripping my old crappy door trims that had big speaker holes cut in them and rebuilt them with nice 2nd hand trims I bought on this forum. So I used the vinyl parts (grab handle, map pocket etc) from my trim mixed with the cloth parts of the other trim - much better, no more speaker holes!!
I am not going to refit them yet though as I want to do the relay mod on the power windows first.
From this crap...
To this...

Thread Starter
Full Member
Joined: Sep 2008
Posts: 123
Likes: 1
From: Australia
Thanks.
I have plenty more updates to come.
The last update above dates back to June 2009.
So over the next few days I will keep updating with photos from the build and it progress from then till now.
I have plenty more updates to come.
The last update above dates back to June 2009.
So over the next few days I will keep updating with photos from the build and it progress from then till now.
Trending Topics
Thread Starter
Full Member
Joined: Sep 2008
Posts: 123
Likes: 1
From: Australia
JUNE 2009
I have picked up a Series 5 Instrument Cluster and will be installing it shortly.
I have removed the Series 4 Cluster and am just doing all the re-wiring at the moment.
Once I comfortable the wires are all in the correct spot it will go in.

I have picked up a Series 5 Instrument Cluster and will be installing it shortly.
I have removed the Series 4 Cluster and am just doing all the re-wiring at the moment.
Once I comfortable the wires are all in the correct spot it will go in.
Thread Starter
Full Member
Joined: Sep 2008
Posts: 123
Likes: 1
From: Australia
JULY 2009
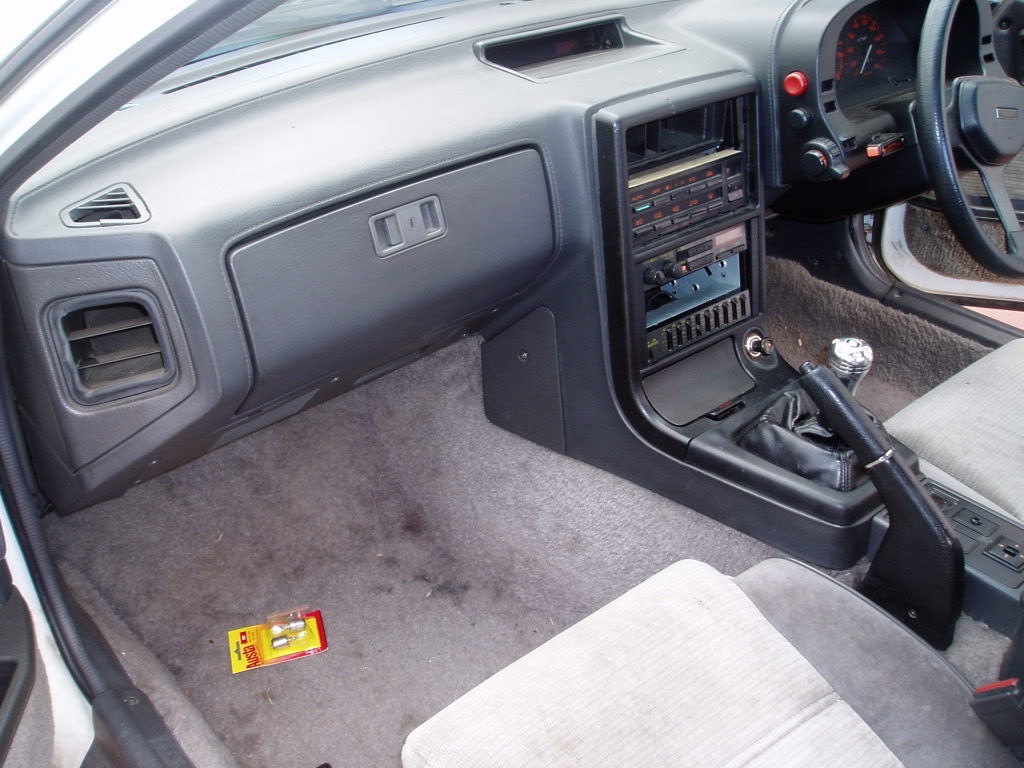
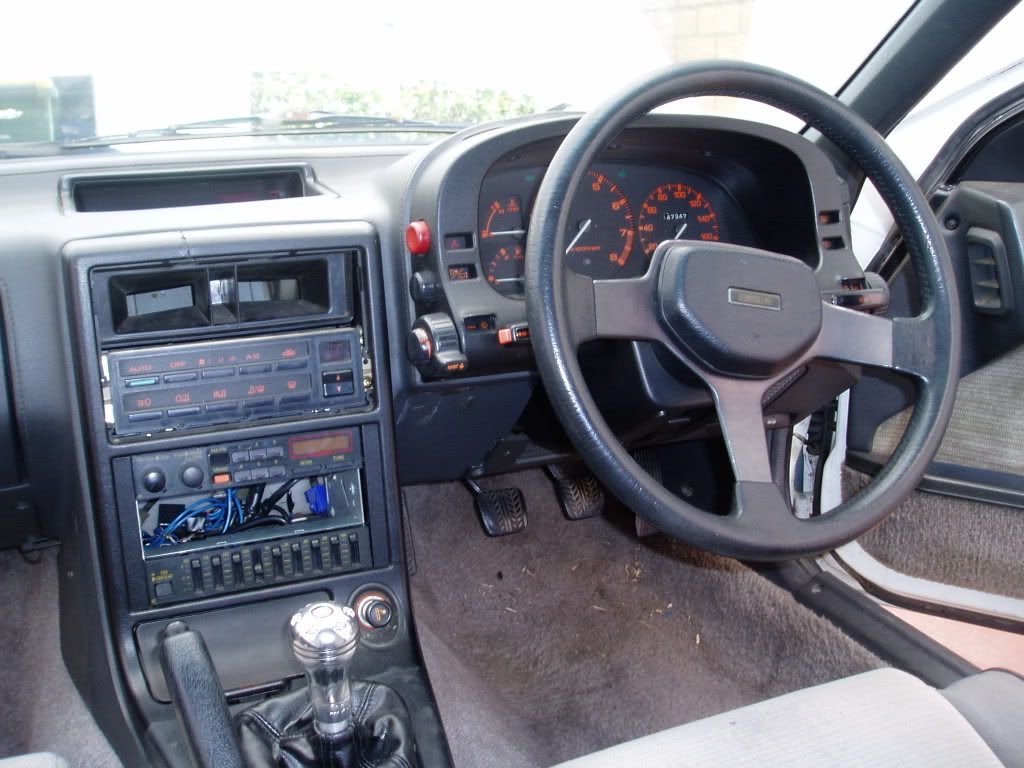
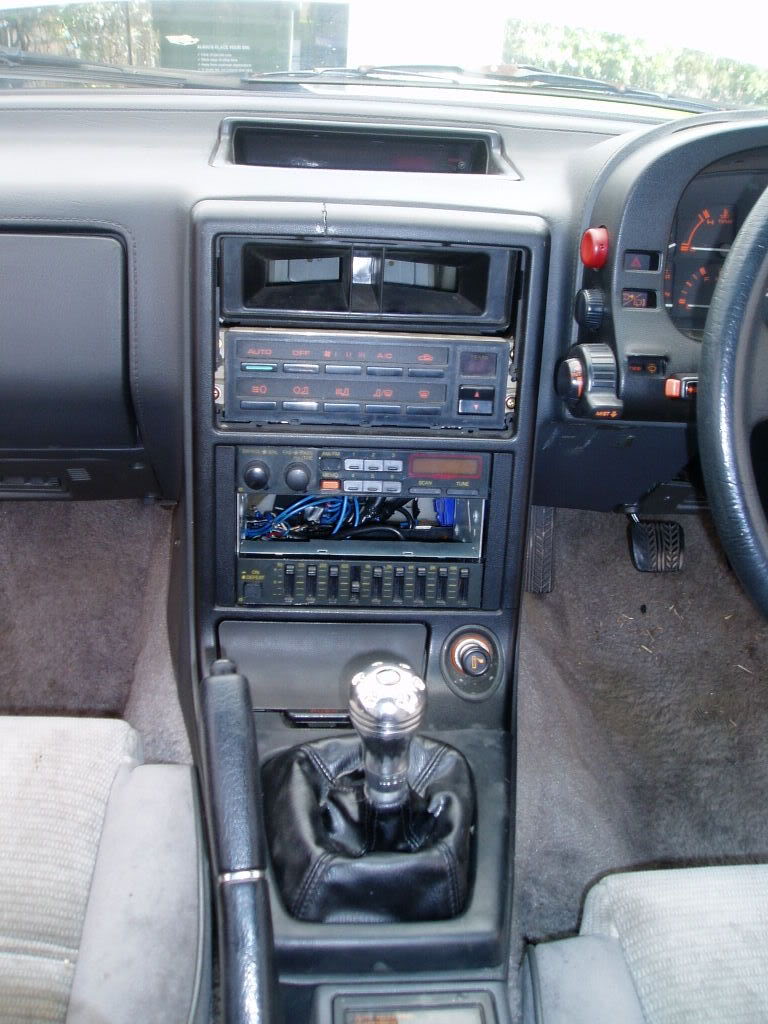
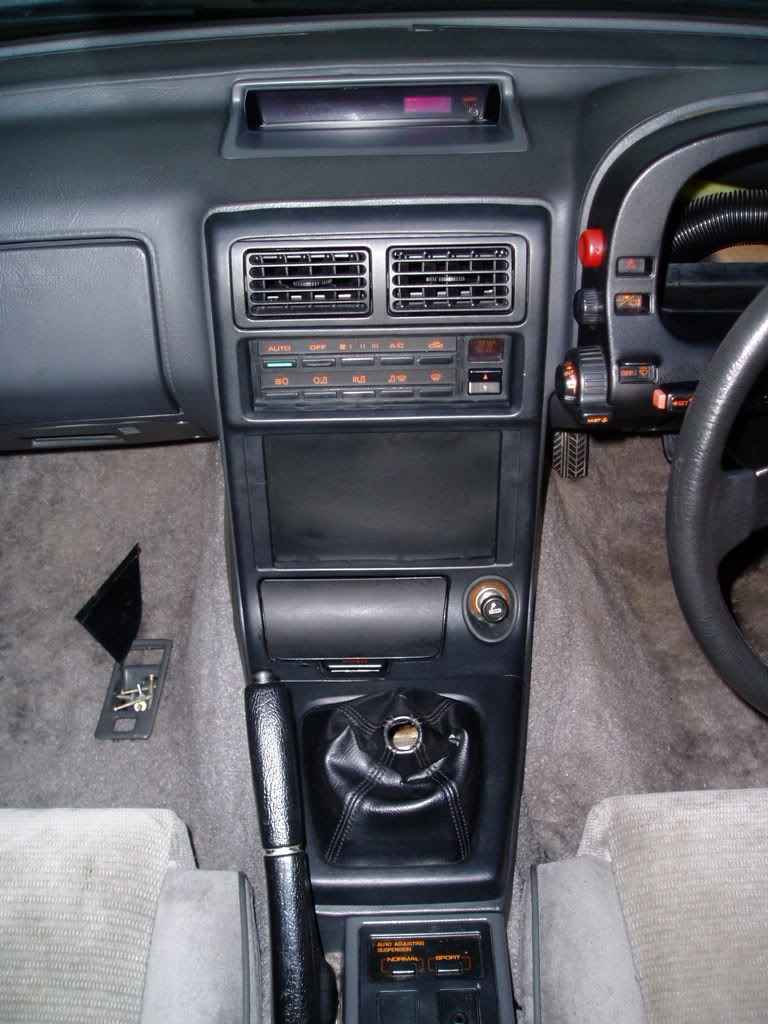
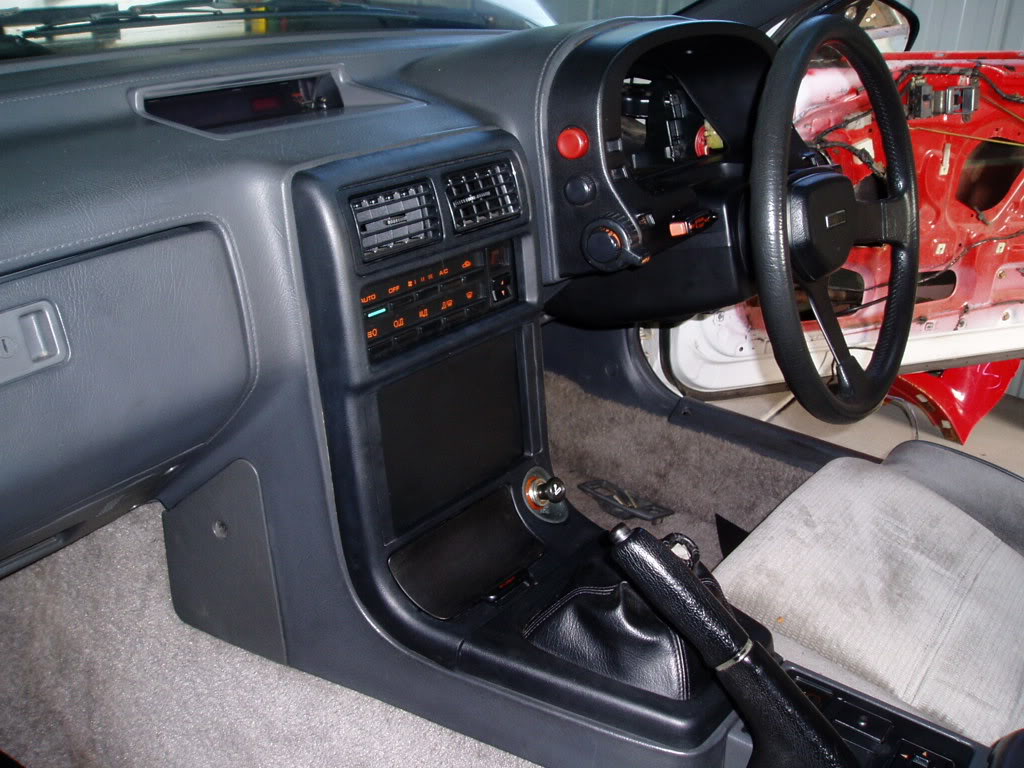
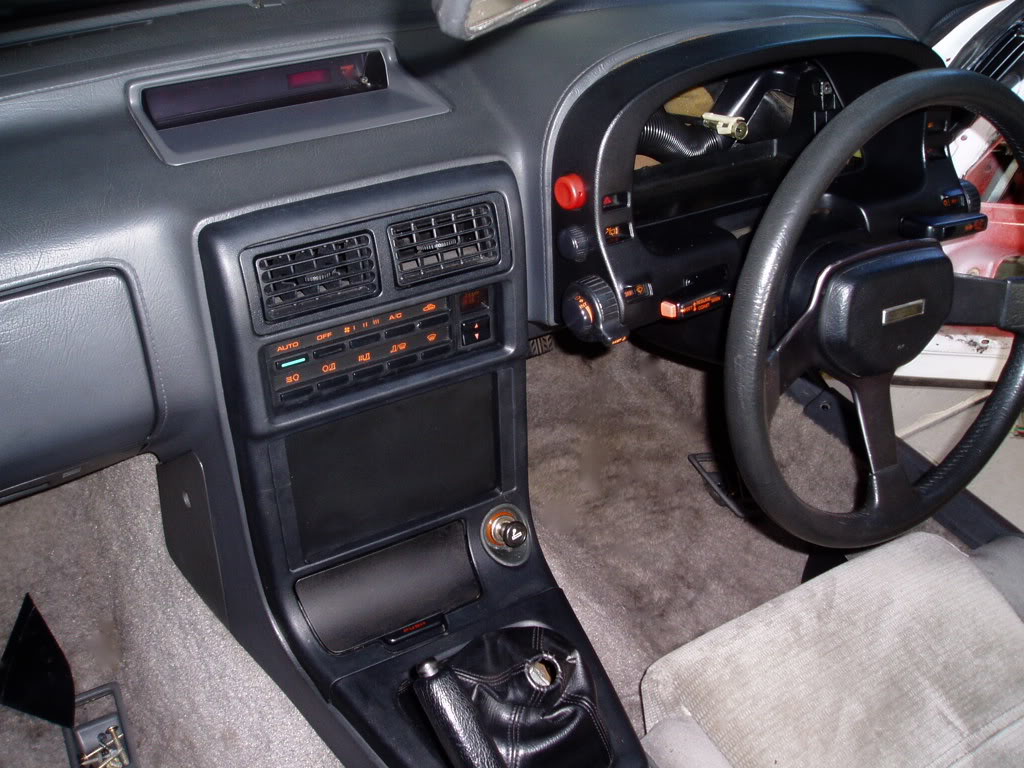
I have pulled all the factory stereo and equaliser out of the centre console as I do not plan on running a stereo at all.
I also bought a S5 centre dash trim and have just made up a temporary blank off for where the stereo was.
I just used a piece of cardboard and covered it in black contact. But will eventually replace this with a nice piece of carbon fiber sheet and mount some gauges.
The S5 centre console fits well and look much nicer as my S4 one was cracked and missing vents.
From this...
To this...


Thread Starter
Full Member
Joined: Sep 2008
Posts: 123
Likes: 1
From: Australia
JULY 2009
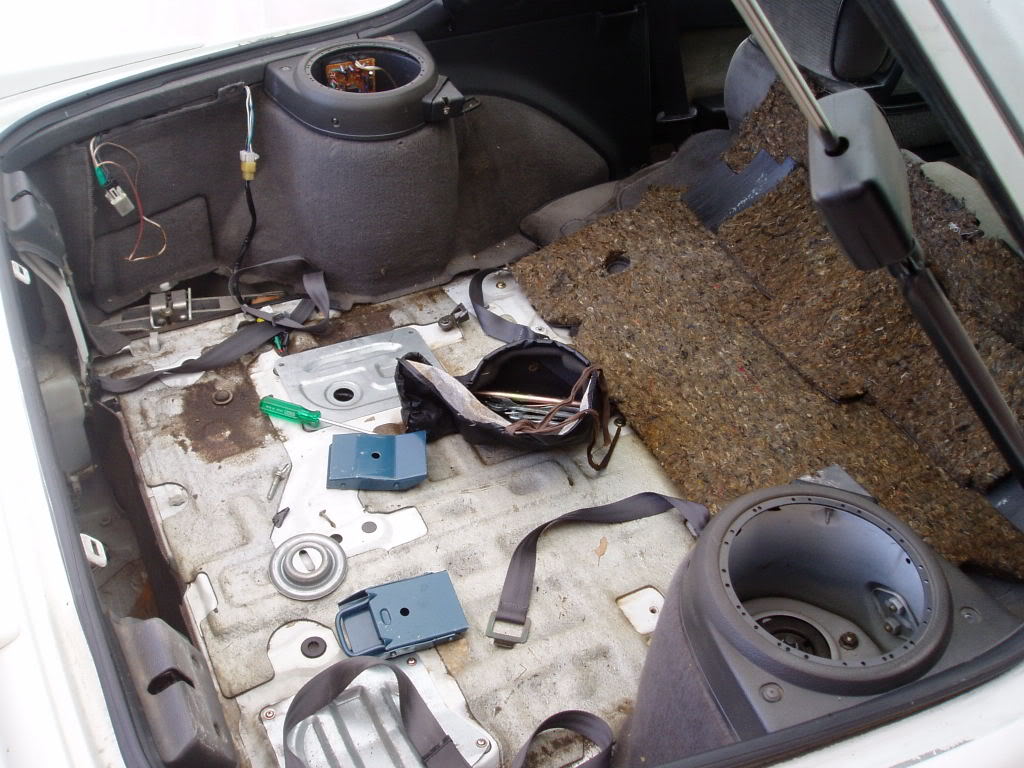
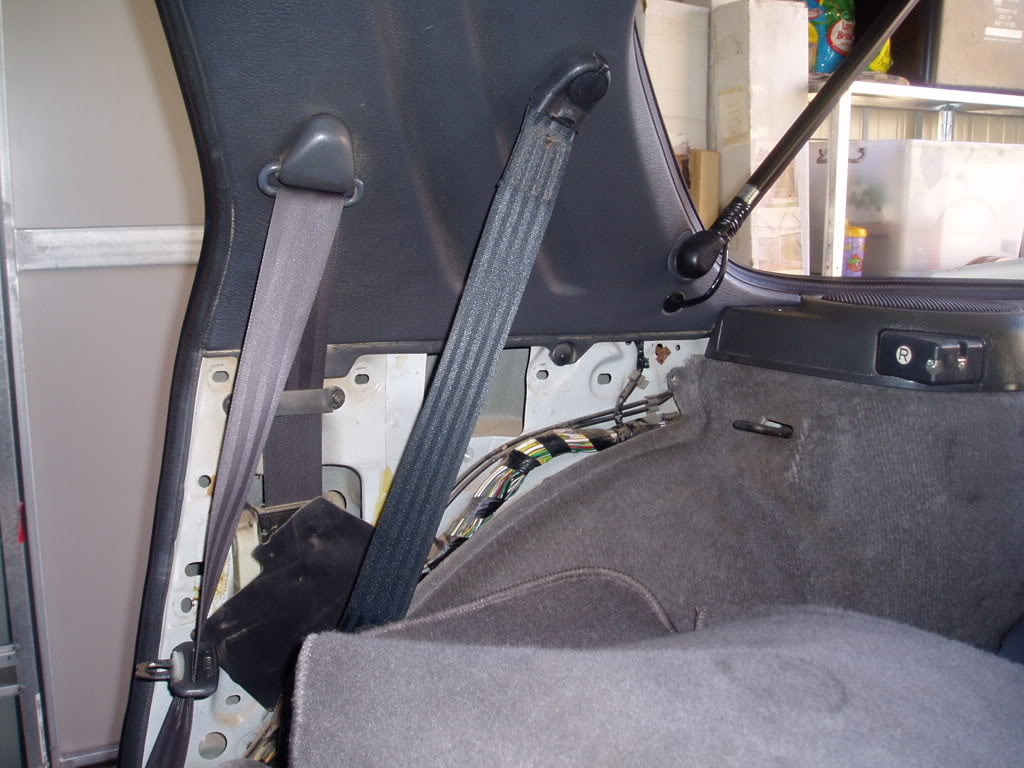
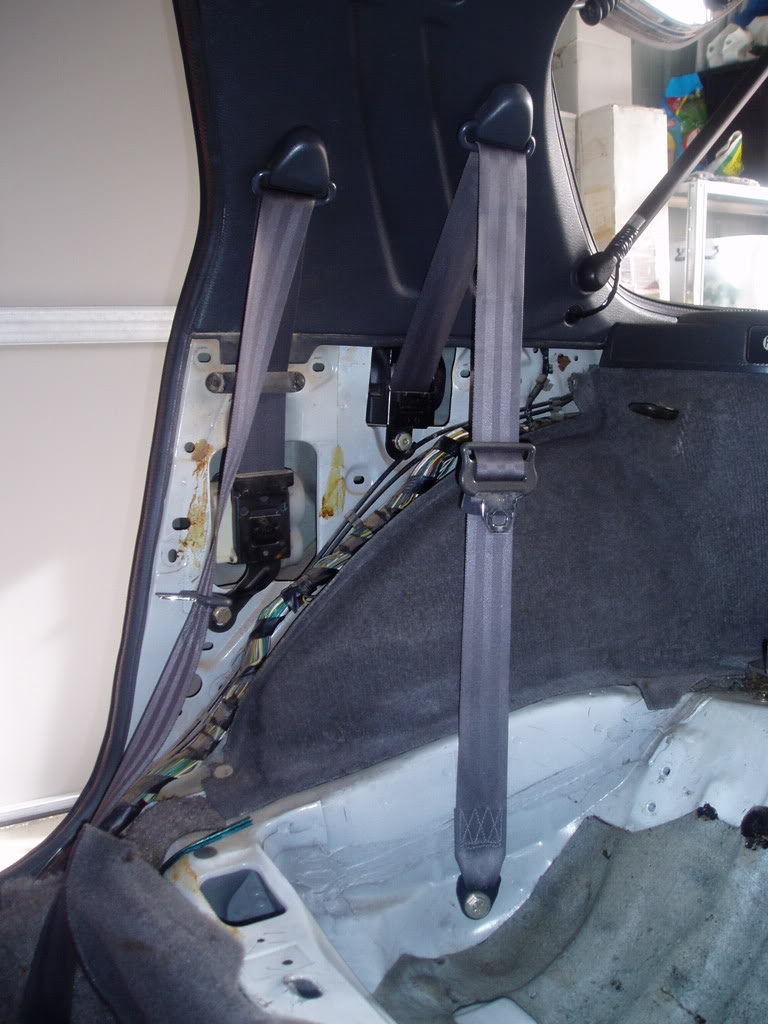
My car came with NON retractable seat belts in the rear. These are a real pain as they just hang there all tangled and ****.
So I bought some genuine Mazda S4 retractable seat belt assemblies and matching trim.
This will look much neater as the retracting mechanism sits BEHIND the trim and just the belt comes out from behind it.
Lucky for me the hole in the body and bolt to attach are all in my model too. It must have been an upgrade or option at some stage to go from fixed to retractable belts?
So here are some progress shots...
TRIM'S OFF BUT FIXED BELTS STILL IN PLACE:
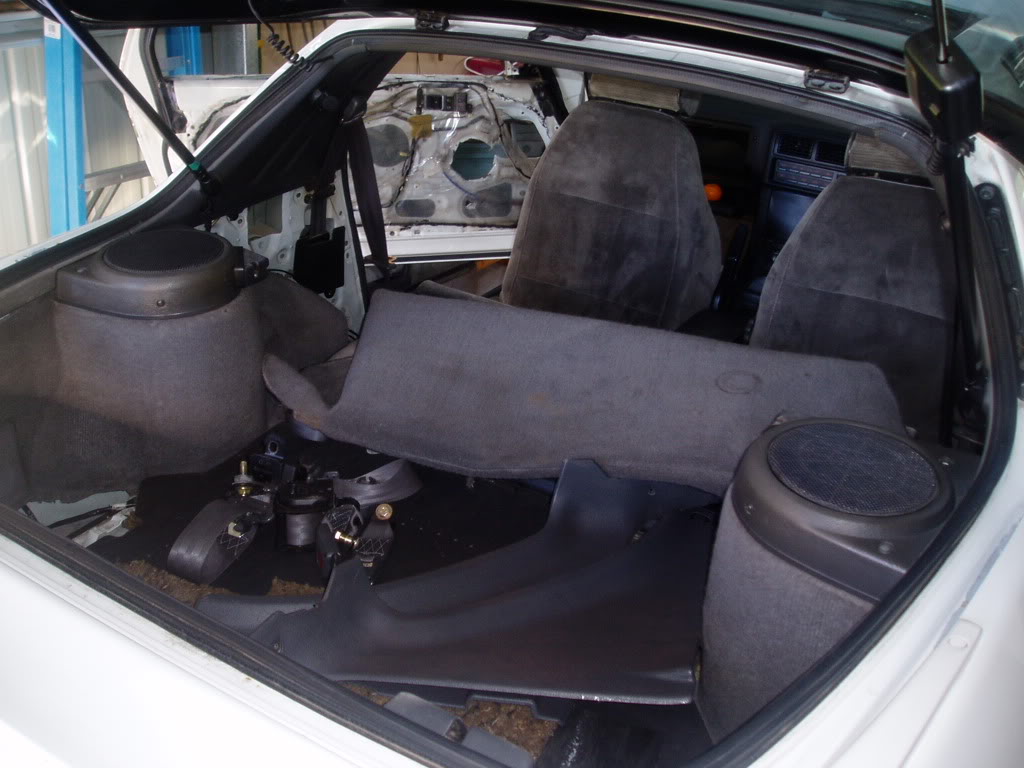
FIXED BELT STILL IN PLACE BUT YOU CAN SEE THE SQUARE CUT OUT BEHIND THE BELT WHERE THE NEW MECHANISM GOES:
RETRACTABLE BELTS ALL IN:

My car came with NON retractable seat belts in the rear. These are a real pain as they just hang there all tangled and ****.
So I bought some genuine Mazda S4 retractable seat belt assemblies and matching trim.
This will look much neater as the retracting mechanism sits BEHIND the trim and just the belt comes out from behind it.
Lucky for me the hole in the body and bolt to attach are all in my model too. It must have been an upgrade or option at some stage to go from fixed to retractable belts?
So here are some progress shots...
TRIM'S OFF BUT FIXED BELTS STILL IN PLACE:
FIXED BELT STILL IN PLACE BUT YOU CAN SEE THE SQUARE CUT OUT BEHIND THE BELT WHERE THE NEW MECHANISM GOES:
RETRACTABLE BELTS ALL IN:
Thread Starter
Full Member
Joined: Sep 2008
Posts: 123
Likes: 1
From: Australia
JULY 2009
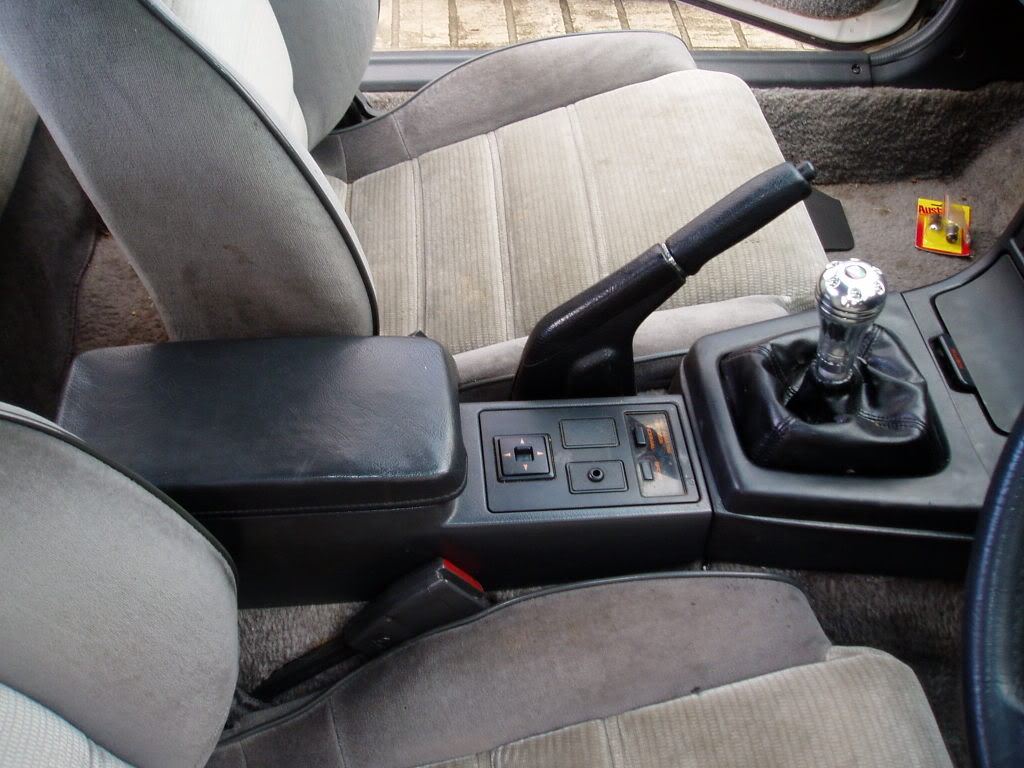
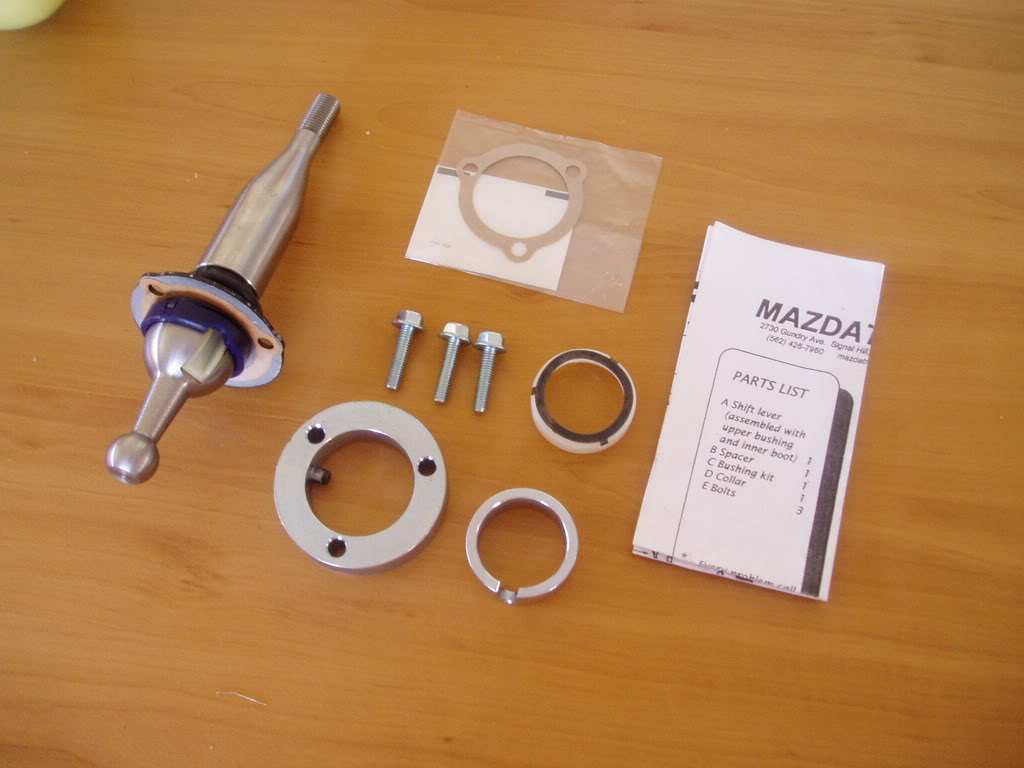
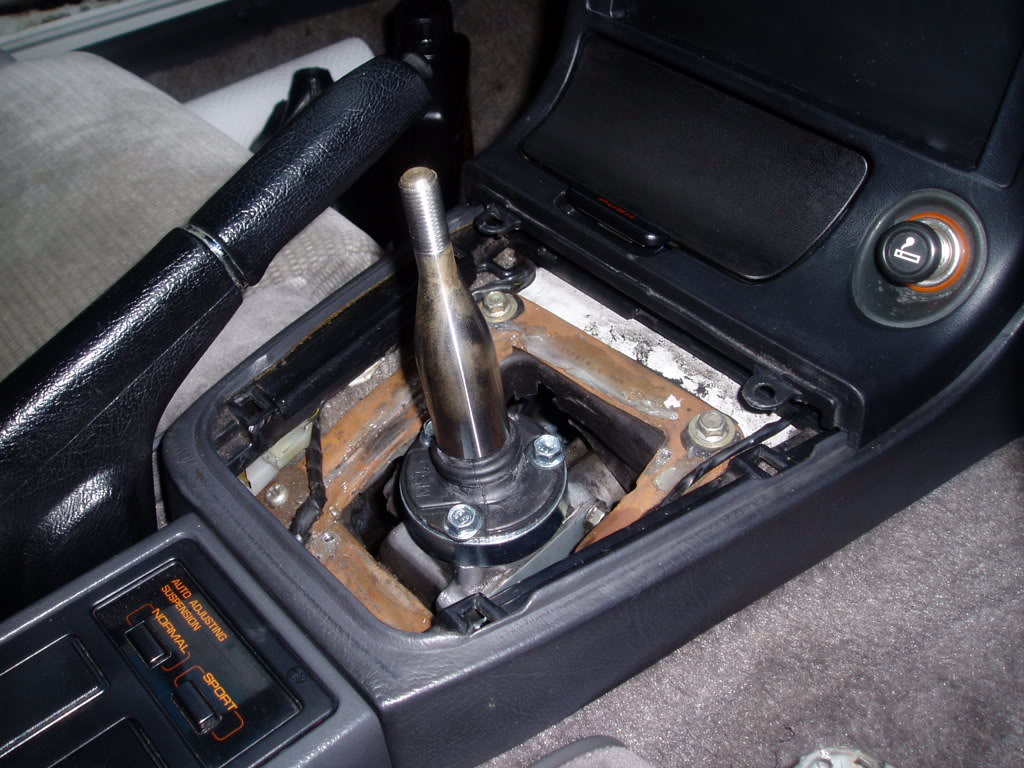
Installed a Mazdatrix Short Shift Kit.
This thing is a really nice piece of kit and comes with everything you could possibly need.
Billet Short Shifter
Genuine Mazda Upper Bush and Spring (already installed on shifter)
Genuine Mazda Lower Bush and Spring
Genuine Mazda Inner Shift Boot (already installed on shifter)
Mazdatrix Lower Alloy Bushing
Genuine Mazda Shifter to Tower Gasket
Alloy Bolts
Thread Starter
Full Member
Joined: Sep 2008
Posts: 123
Likes: 1
From: Australia
AUGUST 2009
I am doing a S4 to S5 make over on a number of interior and exterior items.
So far I have acquired...
S5 Front Bar
S5 Lower Lip
S5 Side Body Moulds
S5 Tail Lights
S5 Centre Console
S5 Instrument Cluster
And as my S4 is a very late 1988 model it already has the S5 warning gauges and surround in the centre of the dash too.
I now just have to get S5 side skirts and S5 rear bar and it will all be done.
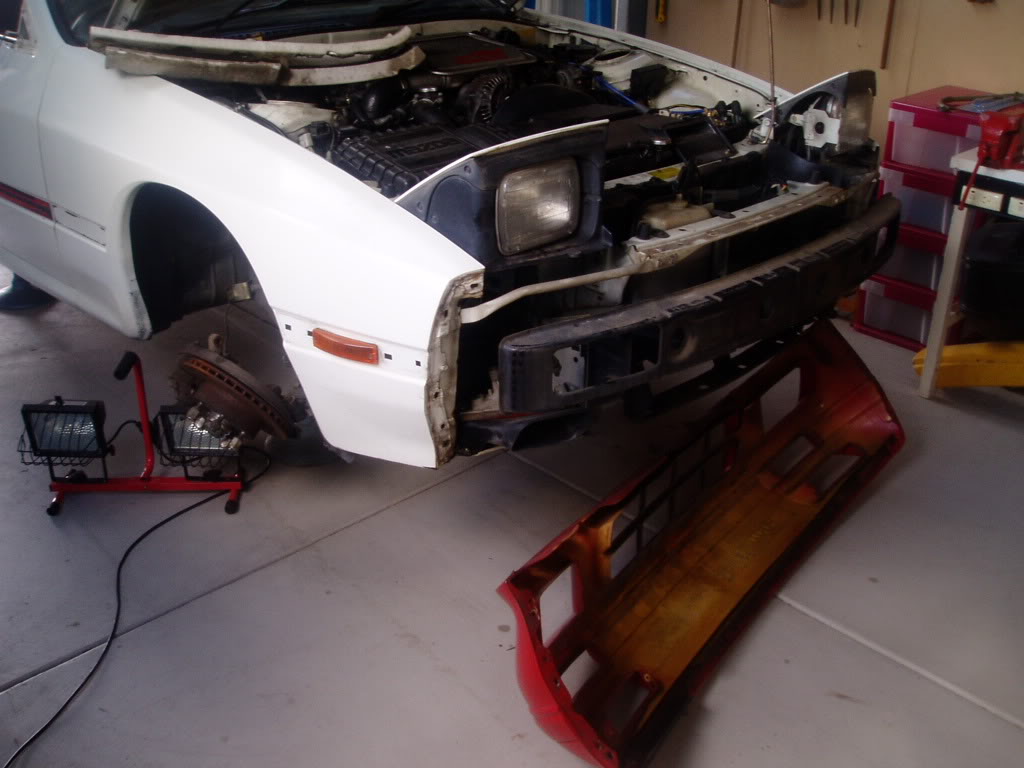
So, I have removed all the body moulds and front bar and need to now remove all the left over double sided tape.
I can then fit the S5 moulds, front bar and lower lip.
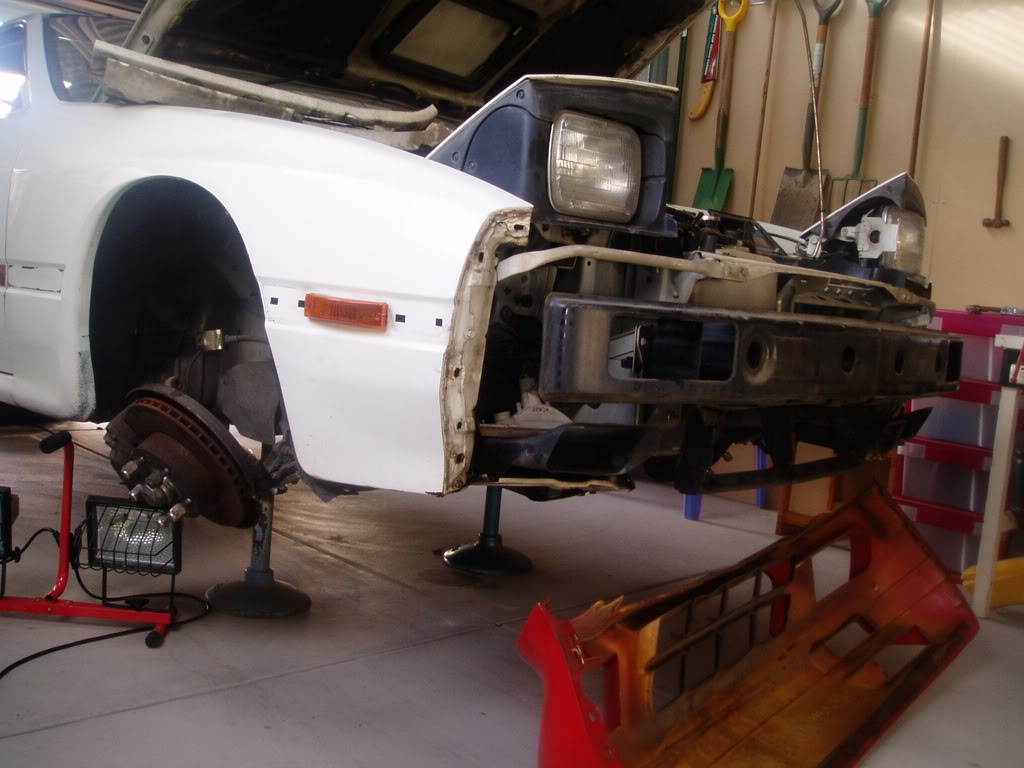
I have also removed the front suspension in preparation for the JIC coil overs to go in.
I am doing a S4 to S5 make over on a number of interior and exterior items.
So far I have acquired...
S5 Front Bar
S5 Lower Lip
S5 Side Body Moulds
S5 Tail Lights
S5 Centre Console
S5 Instrument Cluster
And as my S4 is a very late 1988 model it already has the S5 warning gauges and surround in the centre of the dash too.
I now just have to get S5 side skirts and S5 rear bar and it will all be done.
So, I have removed all the body moulds and front bar and need to now remove all the left over double sided tape.
I can then fit the S5 moulds, front bar and lower lip.
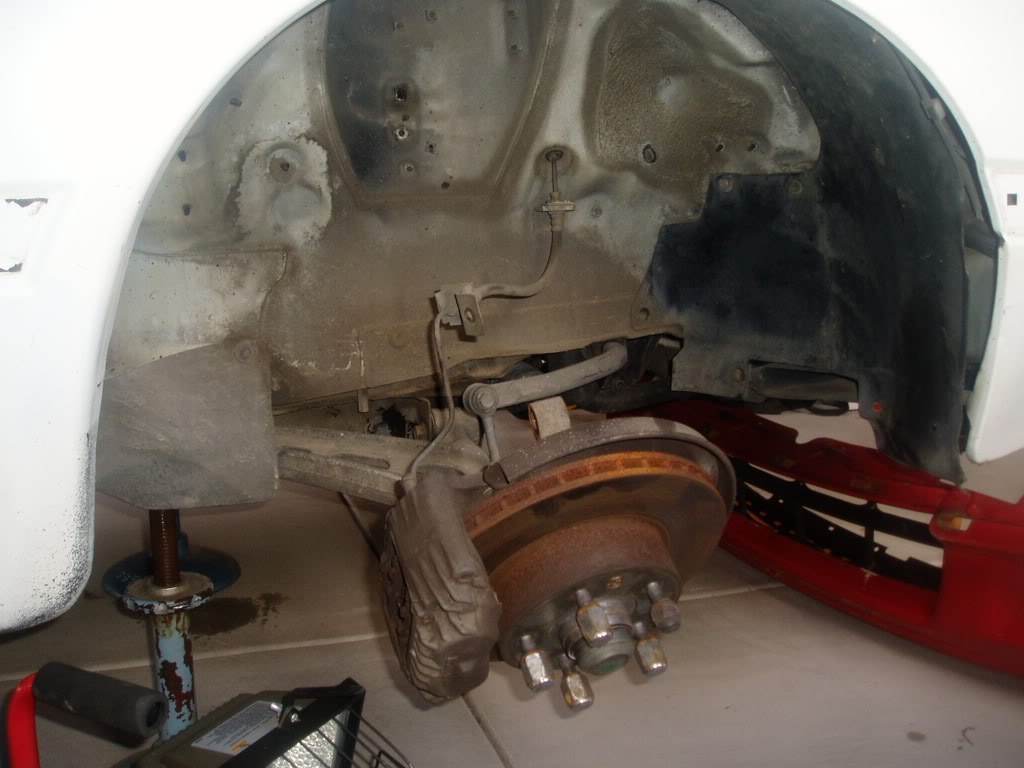
I have also removed the front suspension in preparation for the JIC coil overs to go in.
The seatbelt story confuses me.
Although I've never checked, the rearmost belt location would seem to be for cars with rear seats instead of bins and I also thought that all seatbelts retracted (when working properly).
Although I've never checked, the rearmost belt location would seem to be for cars with rear seats instead of bins and I also thought that all seatbelts retracted (when working properly).


Thread Starter
Full Member
Joined: Sep 2008
Posts: 123
Likes: 1
From: Australia
AUGUST 2009
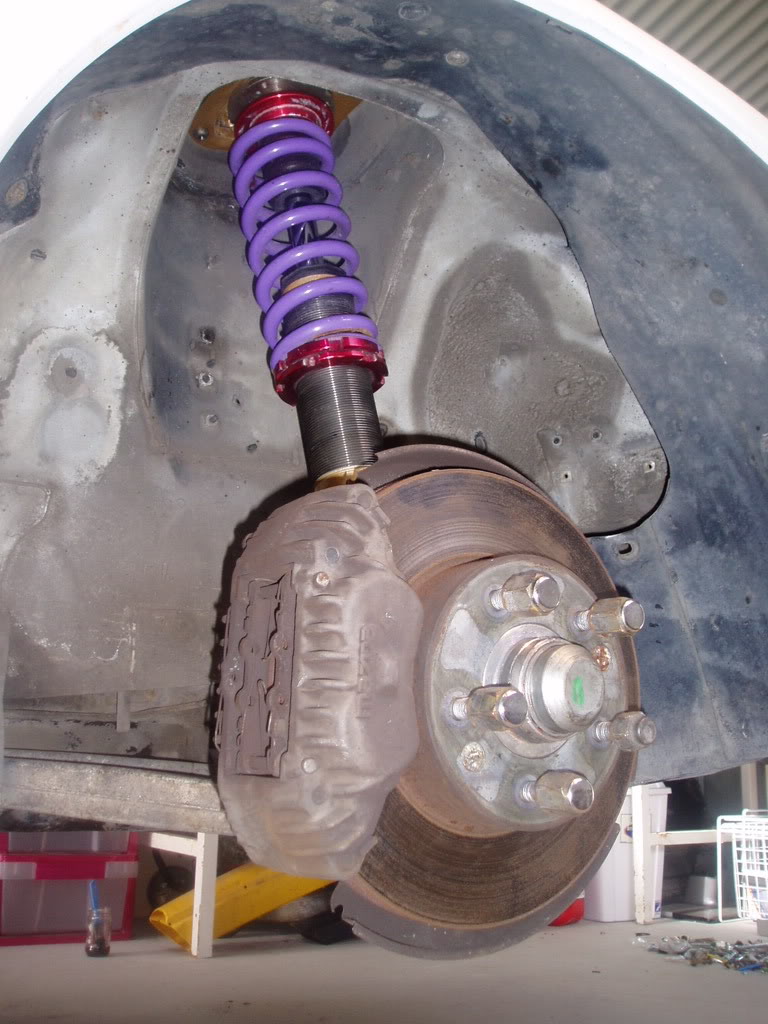
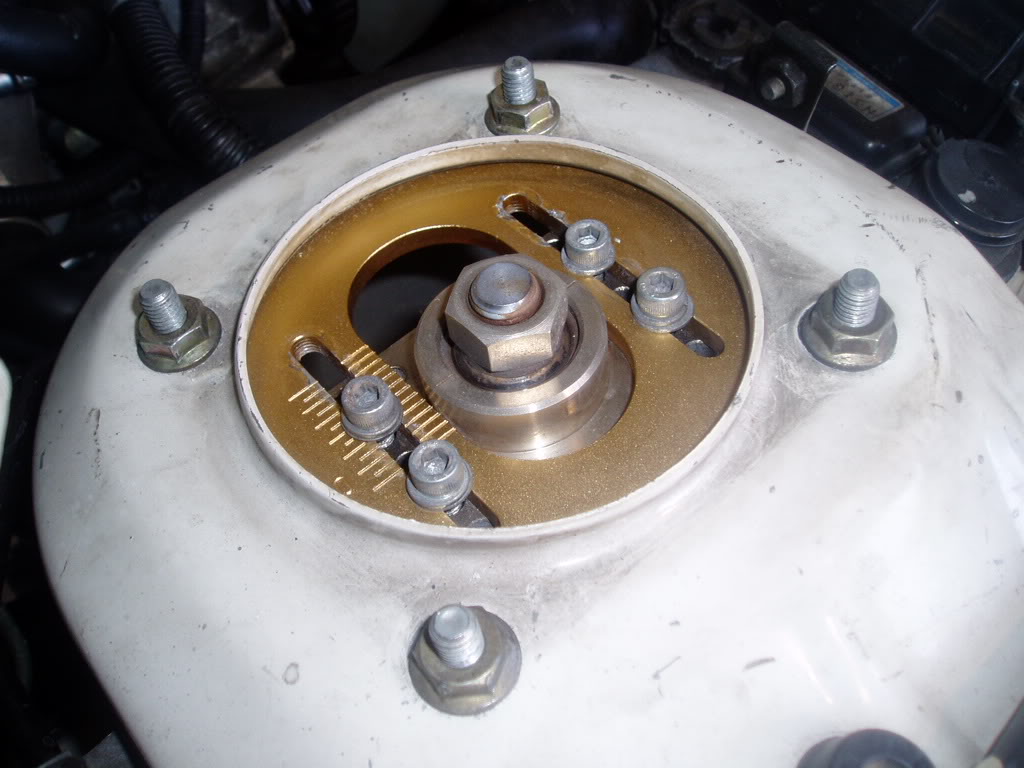
OK, so I finished pulling out all the stock suspension and installed the JIC Magic coilovers.
The install went smooth and all appears to be OK. I can't wait to get an alignment done and see how the car handles now.
Here are some photos of them installed...
REAR:
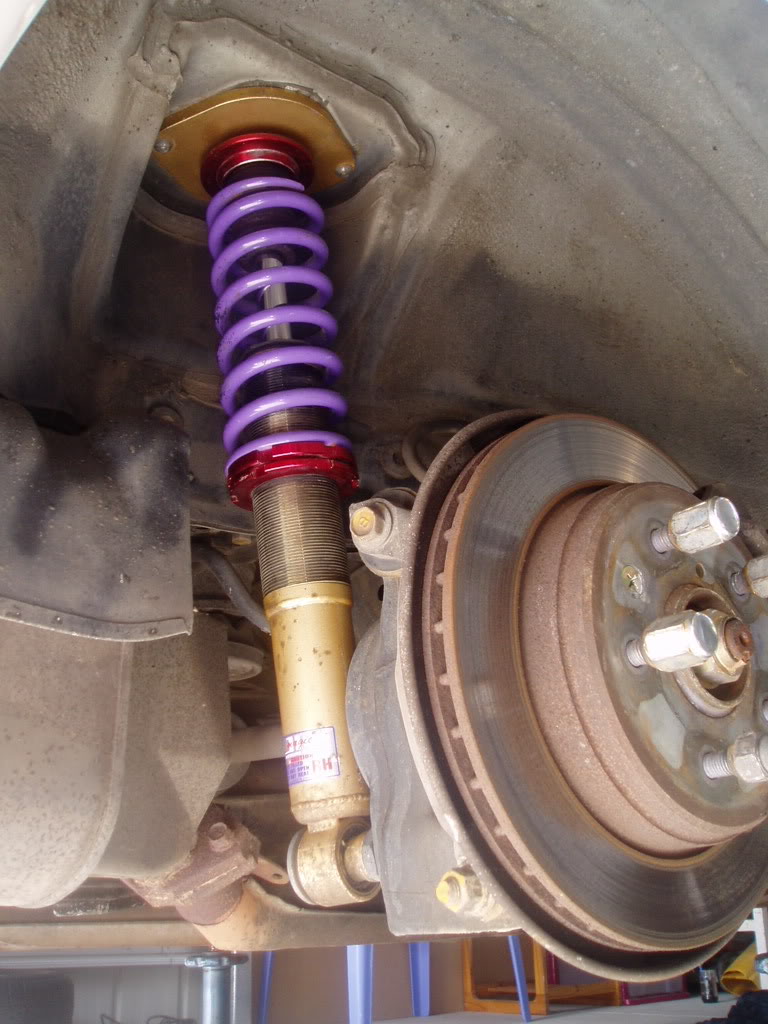
FRONT:
CAMBER TOPS:
OK, so I finished pulling out all the stock suspension and installed the JIC Magic coilovers.
The install went smooth and all appears to be OK. I can't wait to get an alignment done and see how the car handles now.
Here are some photos of them installed...
REAR:
FRONT:
CAMBER TOPS:

Thread Starter
Full Member
Joined: Sep 2008
Posts: 123
Likes: 1
From: Australia
AUGUST 2009
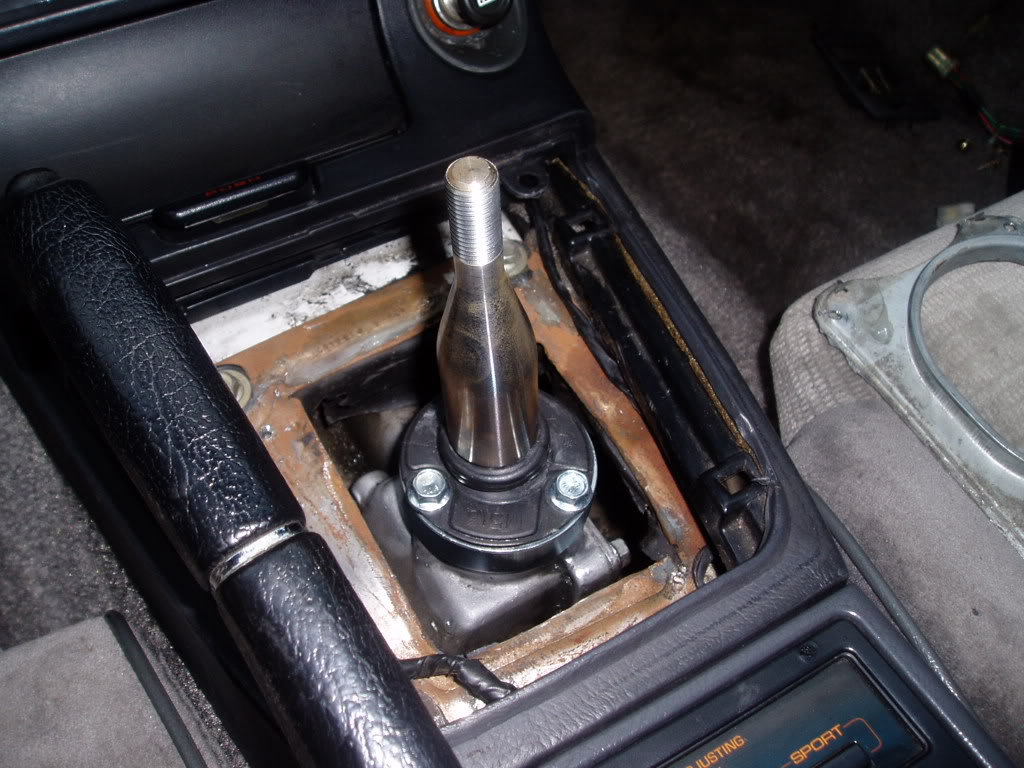
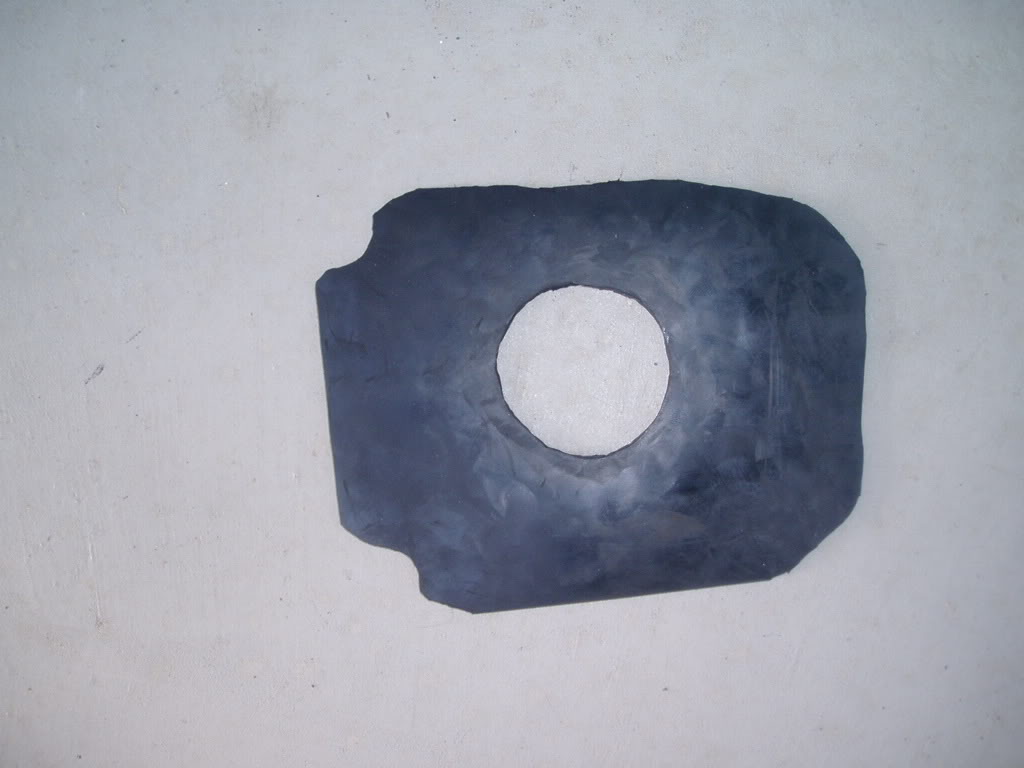
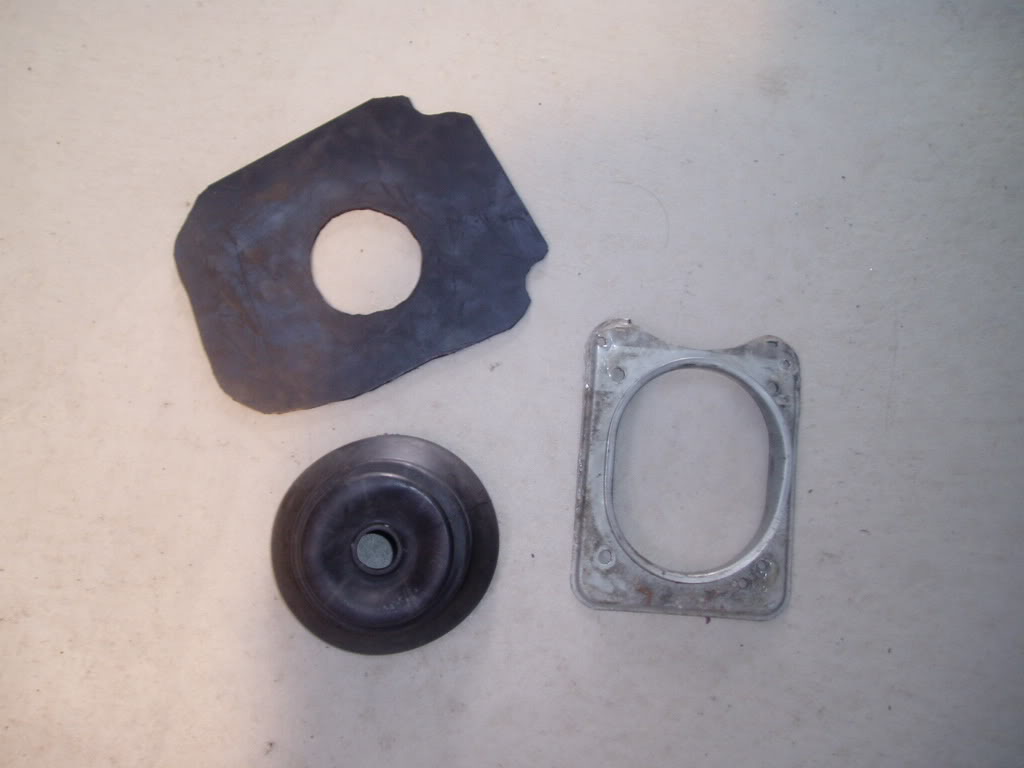
As Mazda charge SHITLOADS for a new middle shifter boot to seal the fumes and noise from the transmission tunnel to the interior, I thought stuff that, I will just try to custom make one!!
I went to Clark Rubber (Australian store) and bought a $3 piece of 3mm thick rubber (I can't remember the name of it, but it is resistant to oil spills etc).
I then slowly cut it bit by bit until I got a shape that fits nice and tight.
I then installed it down over the shifter assembly, screwed the outer boot panel over it, fitted the outer boot and then fitted the interior trim and leather shifter boot all back on.
This should help keep the fumes and noise out.
RUBBER CUT TO SHAPE:
CUSTOM MIDDLE BOOT, OUTER BOOT PLATE AND OUTER BOOT:
TEST FIT OF CUSTOM MIDDLE BOOT:
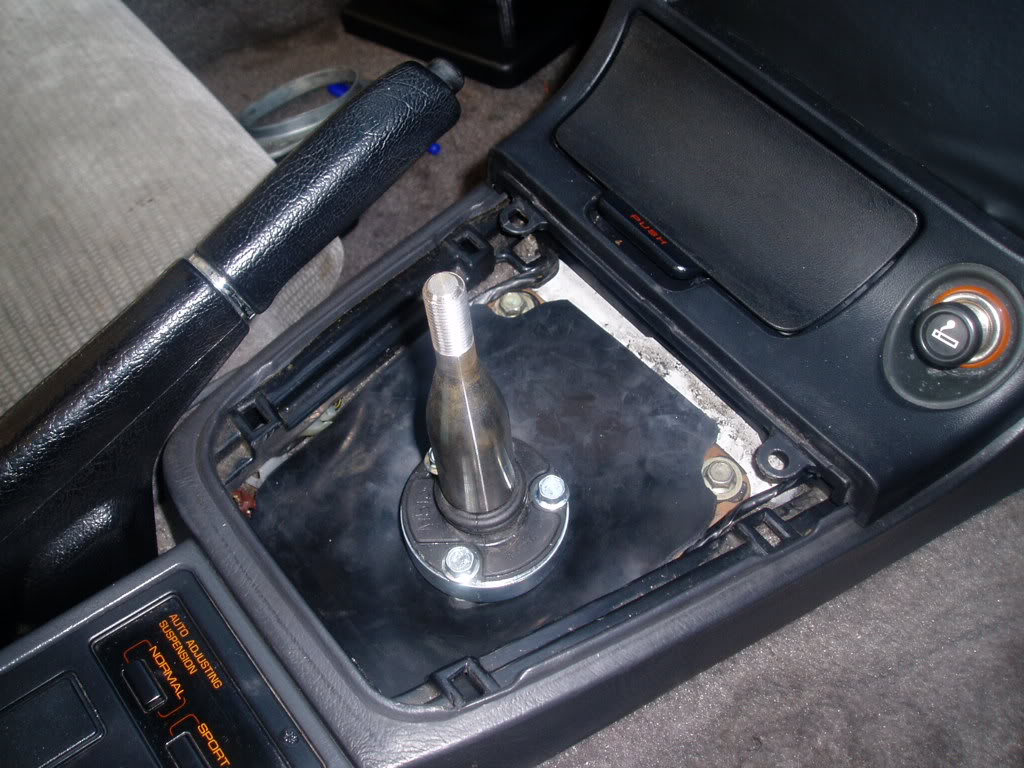
ALL INSTALLED READY FOR INTERIOR TRIM TO GO BACK ON:
[img]https://i5.photobucket.com/albums/y194/swilton75/FC3%20Mazda%20RX7/P1010031_2.jpg[/img
As Mazda charge SHITLOADS for a new middle shifter boot to seal the fumes and noise from the transmission tunnel to the interior, I thought stuff that, I will just try to custom make one!!
I went to Clark Rubber (Australian store) and bought a $3 piece of 3mm thick rubber (I can't remember the name of it, but it is resistant to oil spills etc).
I then slowly cut it bit by bit until I got a shape that fits nice and tight.
I then installed it down over the shifter assembly, screwed the outer boot panel over it, fitted the outer boot and then fitted the interior trim and leather shifter boot all back on.
This should help keep the fumes and noise out.
RUBBER CUT TO SHAPE:
CUSTOM MIDDLE BOOT, OUTER BOOT PLATE AND OUTER BOOT:
TEST FIT OF CUSTOM MIDDLE BOOT:
ALL INSTALLED READY FOR INTERIOR TRIM TO GO BACK ON:
[img]https://i5.photobucket.com/albums/y194/swilton75/FC3%20Mazda%20RX7/P1010031_2.jpg[/img