FD + 20B = project


Rotary Enthusiast
Joined: Aug 2008
Posts: 1,101
Likes: 13
From: Portsmouth UK
McCarthy.. I realised you are not a million miles from me! When I get going I might come and see your build in the flesh if you don't mind. It is way more intense than mine will be but might be worth a look none the less?! Interested to see how the turbo manifold shapes up.
Lee
Lee


Any chance I could talk you into sharing some specs on the materials choice for the manifold? Perhaps OD, wall, and alloy?
I'll be fabricating one here shortly once I get my subframe finished up, and I'd like to keep an eye out for materials.
I'll be fabricating one here shortly once I get my subframe finished up, and I'd like to keep an eye out for materials.
Rotary Enthusiast
Joined: Aug 2008
Posts: 1,101
Likes: 13
From: Portsmouth UK
Nice work McCarthy. I am stripping my FD now so hopefully I will have the 20B offered up early in the new year!
Still trying to get other bits together.. Wondered if you had any spares that may be useful? I am looking for some larger secondary injectors at the mo?
Keep up the hard work!
Lee
Still trying to get other bits together.. Wondered if you had any spares that may be useful? I am looking for some larger secondary injectors at the mo?
Keep up the hard work!
Lee

Thread Starter
Senior Member
Joined: Feb 2007
Posts: 368
Likes: 0
From: Surrey, England
Cheers people,
Not got much laying around on the 20B front to be honest. I only have all the stock injectors. What other things are you looking for?
Are you cutting the firewall on yours or just moving it back in the stock FD engine bay?
Not got much laying around on the 20B front to be honest. I only have all the stock injectors. What other things are you looking for?
Are you cutting the firewall on yours or just moving it back in the stock FD engine bay?

Rotary Enthusiast
Joined: Aug 2008
Posts: 1,101
Likes: 13
From: Portsmouth UK
Well MCarthy.. That is a good question.. I am certain I am not messing with the firewall.. I want to try and mount it in the actual 13B position if possible? Meaning I don't have to modify the box/shifter and prop.. But will need to do something with rack and suspension which I have a couple of thoughts on depending on how far you need to move things to make that work? Alternatively I will do a combo of move it back a bit and move suspension bit less? I want to get the 13B out strip everything out the bay and drop in the bare 20B to see what real options I have?
At the mo I think I have most of what I need but I am sure I will find I am missing plenty when I get rolling a bit more... I will need suspension bushes and a rebuild kit at some point down the road.. but first I want t get it all in mounted and running!
At the mo I think I have most of what I need but I am sure I will find I am missing plenty when I get rolling a bit more... I will need suspension bushes and a rebuild kit at some point down the road.. but first I want t get it all in mounted and running!
Thread Starter
Senior Member
Joined: Feb 2007
Posts: 368
Likes: 0
From: Surrey, England
Well, waiting on a few bits of pipe so i can finish the manifold mock up. Just the 3 - 1 collector really now.
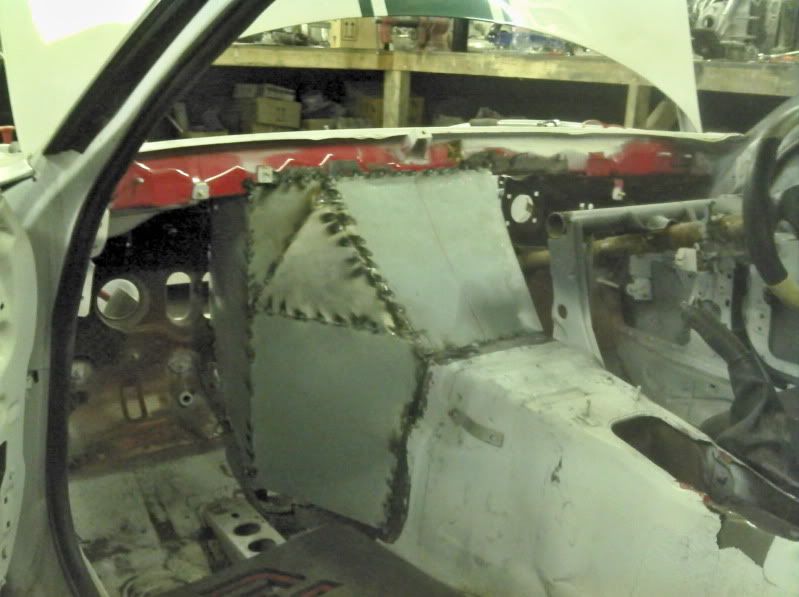
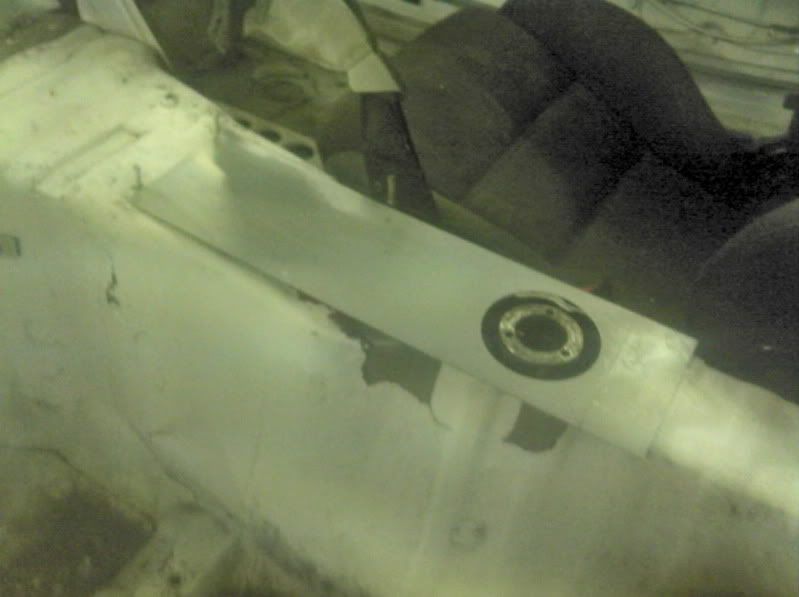
In the mean time whilst waiting for some panels to dry in the oven thought i'd do a couple of bits on the old 20B beast to get the rear of the exhaust set up closer to being finished. The holes cut both sides now. Tunnels now put in and welded up.
Tacked in:


Inside the car:


In the mean time whilst waiting for some panels to dry in the oven thought i'd do a couple of bits on the old 20B beast to get the rear of the exhaust set up closer to being finished. The holes cut both sides now. Tunnels now put in and welded up.
Tacked in:
Inside the car:

Thread Starter
Senior Member
Joined: Feb 2007
Posts: 368
Likes: 0
From: Surrey, England
cheers fella,
Wacked a dummy in there for now so you get a good idea of what its going to lool like. I can build the final part of the exhaust until the wide arch kit is built up so i know what length the tips need to be.


some of the inside and one with the stock seat for the non belivers on the space issue


Started to think about the intercooler position. I have a biltz unit sitting about that never sold so i have given it the chop to work with my set up. I think i will probibly go with a mild V-mounted angle as the cooler is quiet thick Won't be worry about it too much for now.


Wacked a dummy in there for now so you get a good idea of what its going to lool like. I can build the final part of the exhaust until the wide arch kit is built up so i know what length the tips need to be.
some of the inside and one with the stock seat for the non belivers on the space issue
Started to think about the intercooler position. I have a biltz unit sitting about that never sold so i have given it the chop to work with my set up. I think i will probibly go with a mild V-mounted angle as the cooler is quiet thick Won't be worry about it too much for now.
Thread Starter
Senior Member
Joined: Feb 2007
Posts: 368
Likes: 0
From: Surrey, England
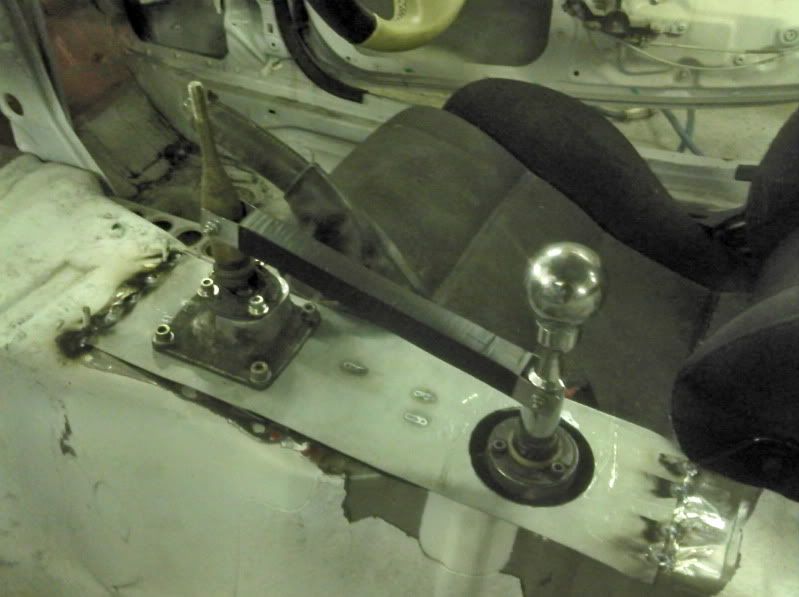
little bit done on the trans tunnel now that both tunnels for the mufflers are all tacked in. Until i get my hand on the rest of the manifold parts i can really build the drivers side of the trans tunnel as i need to build it around the down pipe.
I have also had a play with the gear shift. I took a second gear stick from a spare gearbox and mounted that in the stock position on a supported plate. 'bodged' linkage for now to test the theory, and it worked. So i will have to get a proper linkage machined, few sleeves done for where i drilled through the shifters

Shifter, by no means a long term solution even after the new bits are machined but should work for now.
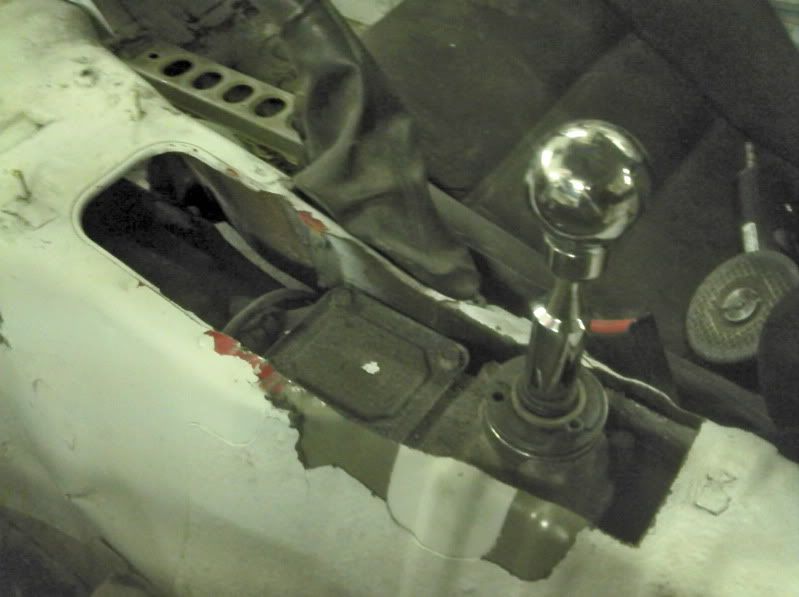
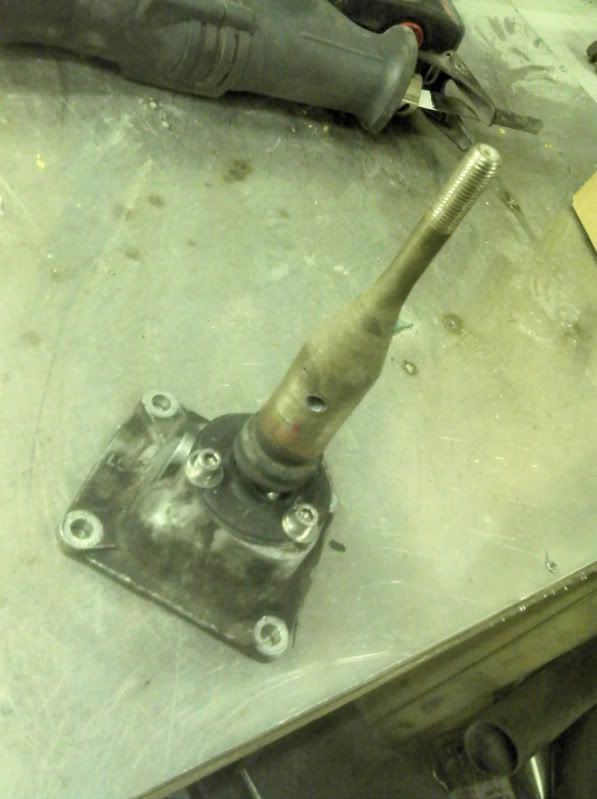
I have also had a play with the gear shift. I took a second gear stick from a spare gearbox and mounted that in the stock position on a supported plate. 'bodged' linkage for now to test the theory, and it worked. So i will have to get a proper linkage machined, few sleeves done for where i drilled through the shifters
Shifter, by no means a long term solution even after the new bits are machined but should work for now.
Rotary Enthusiast
Joined: Aug 2008
Posts: 1,101
Likes: 13
From: Portsmouth UK
McCarthy.. Like your work.. Does it operate all gears okay? I would imagine any play in the linkage would mean the front dummy shifter has to move a lot more to engage a gear?
So what is the long term solution?
Lee
So what is the long term solution?
Lee
Thread Starter
Senior Member
Joined: Feb 2007
Posts: 368
Likes: 0
From: Surrey, England
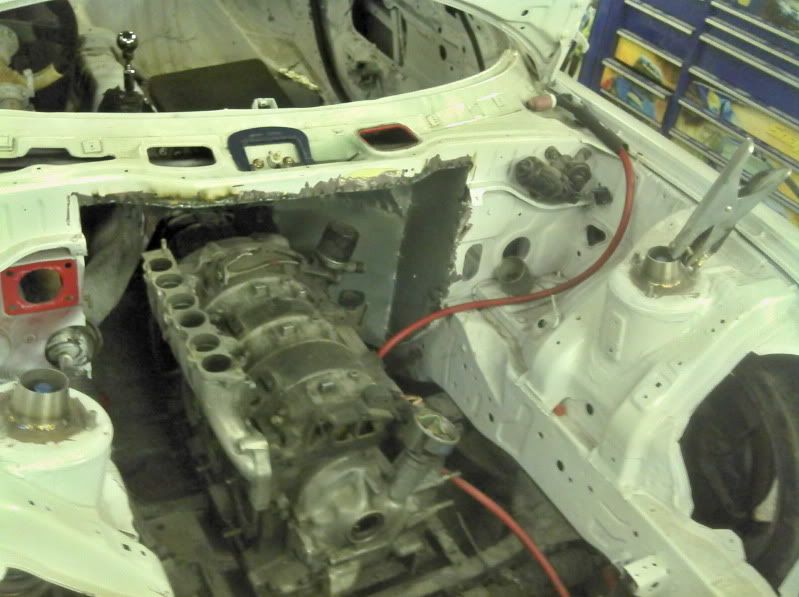
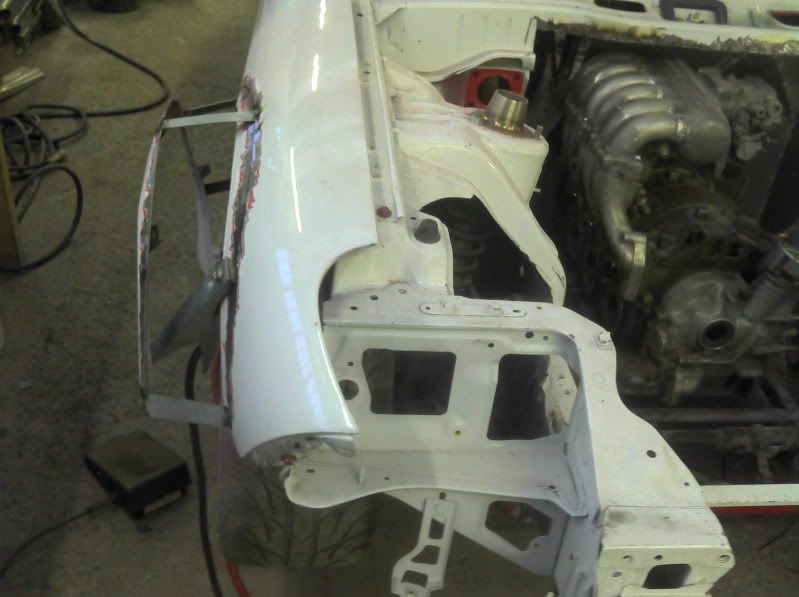
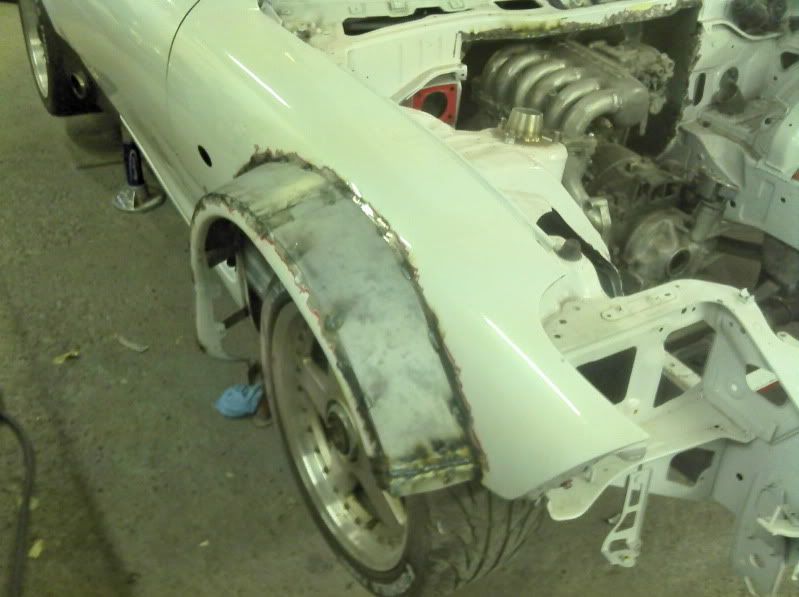
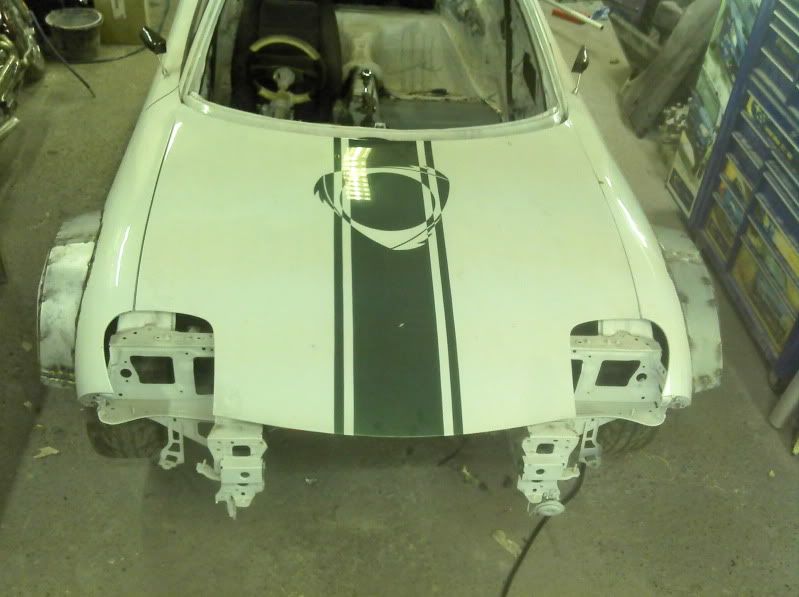
A touch more sheet metal done on the car past few nights.
I'm really just going around tacking all the bits that need doing and then i'll spend a couple of solid days welding the whole thing arfter.
I have left plenty of room around the back of the block so access is nice and easy
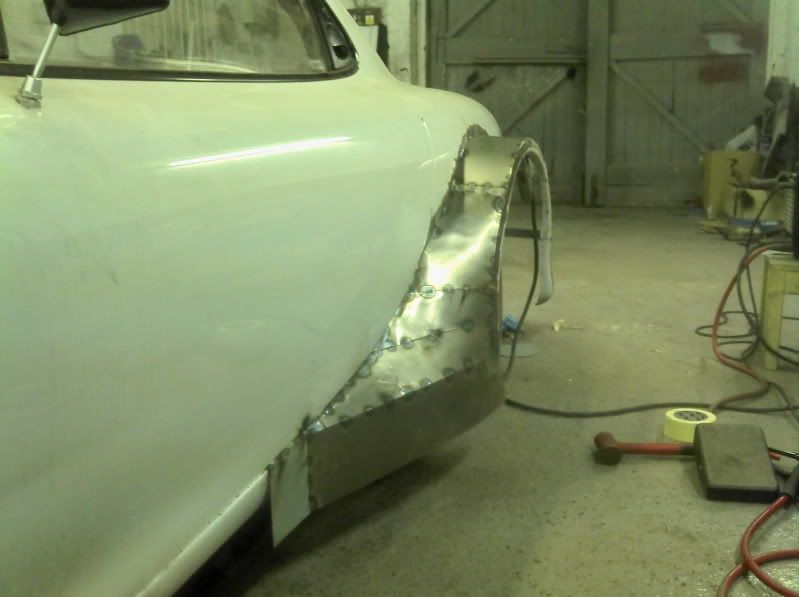
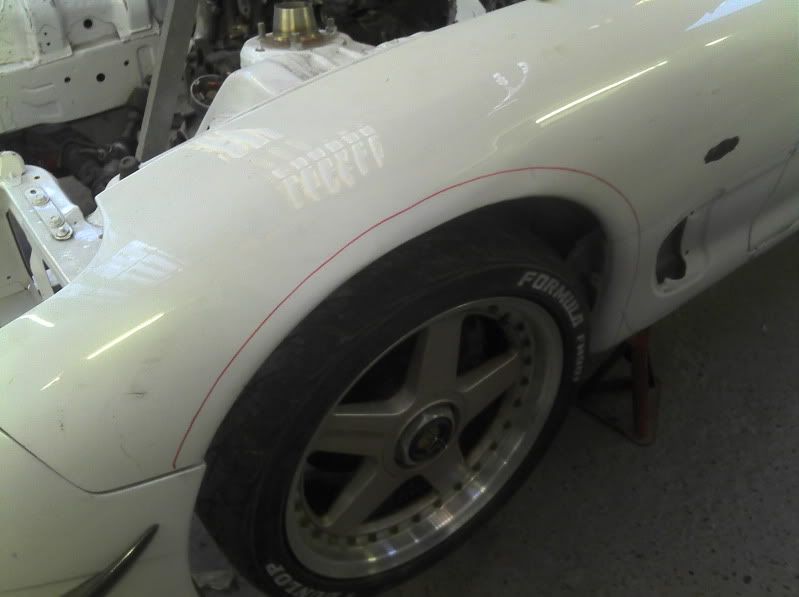
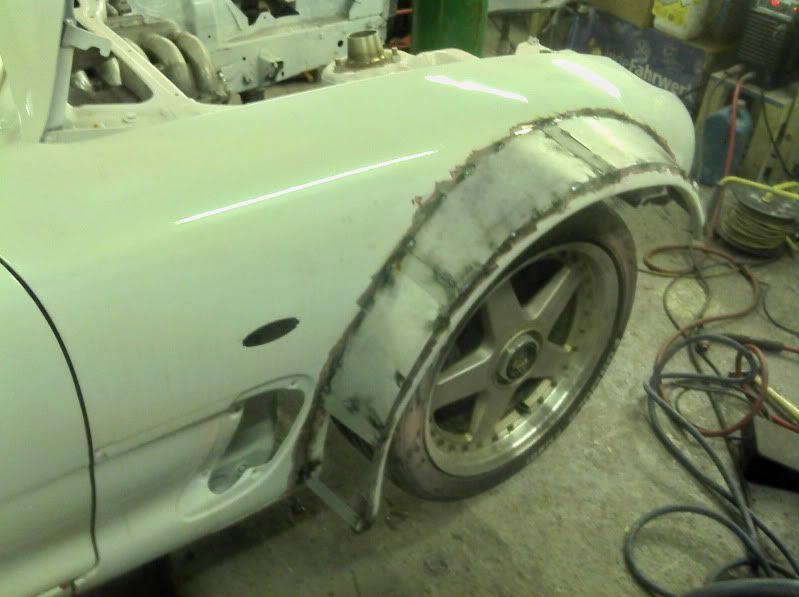
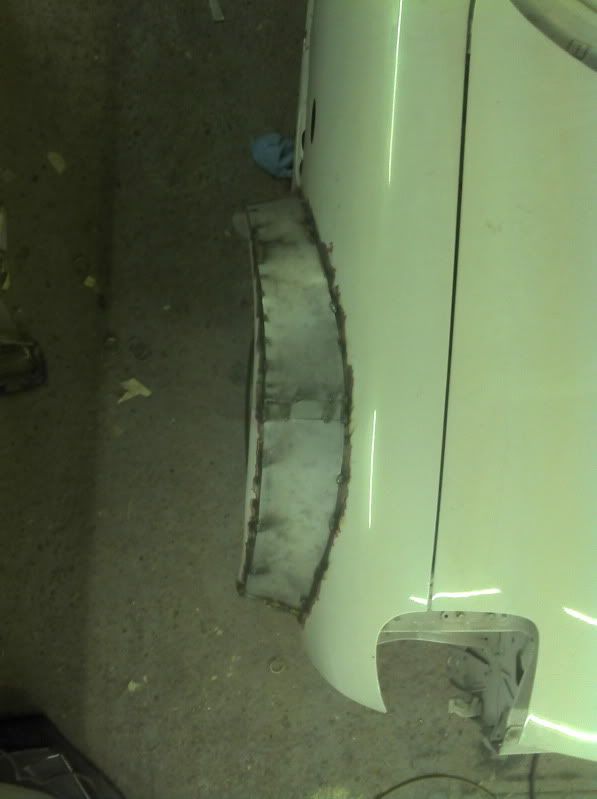
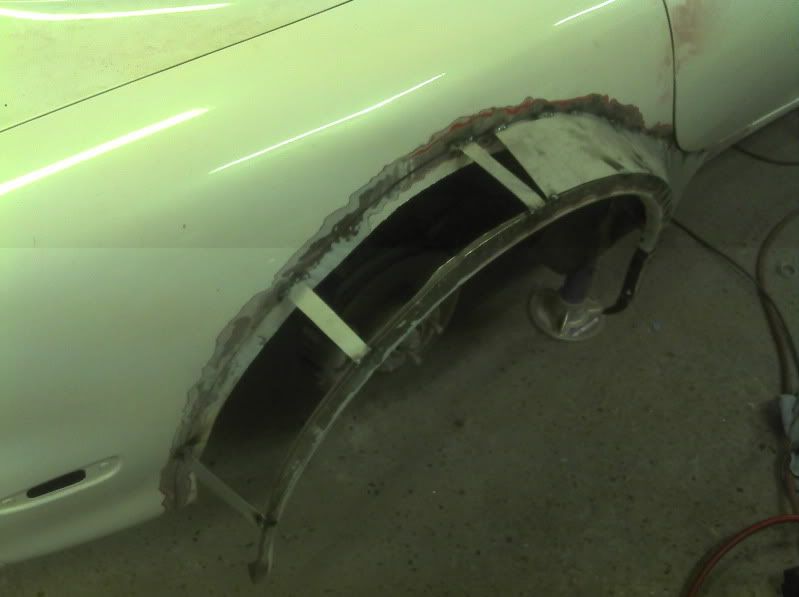
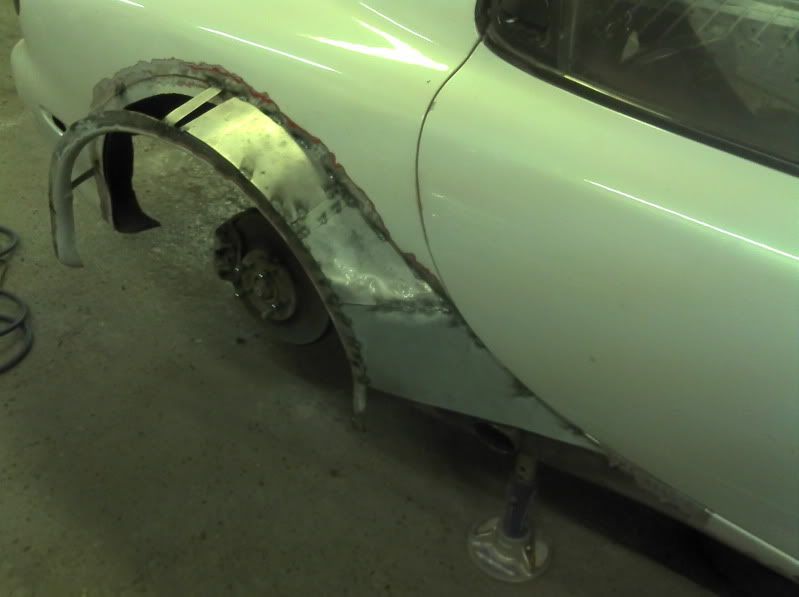
Also now started on the wide arches..... Step one, nice round mark
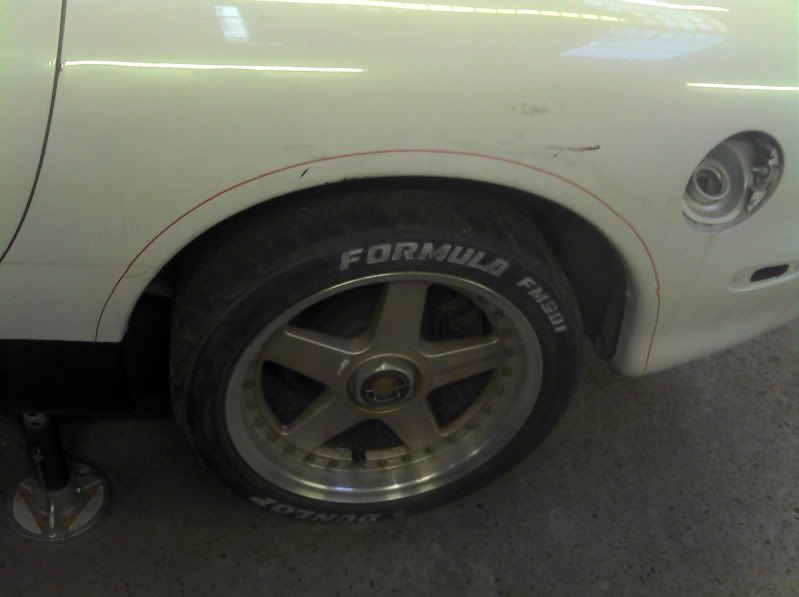
CHOP
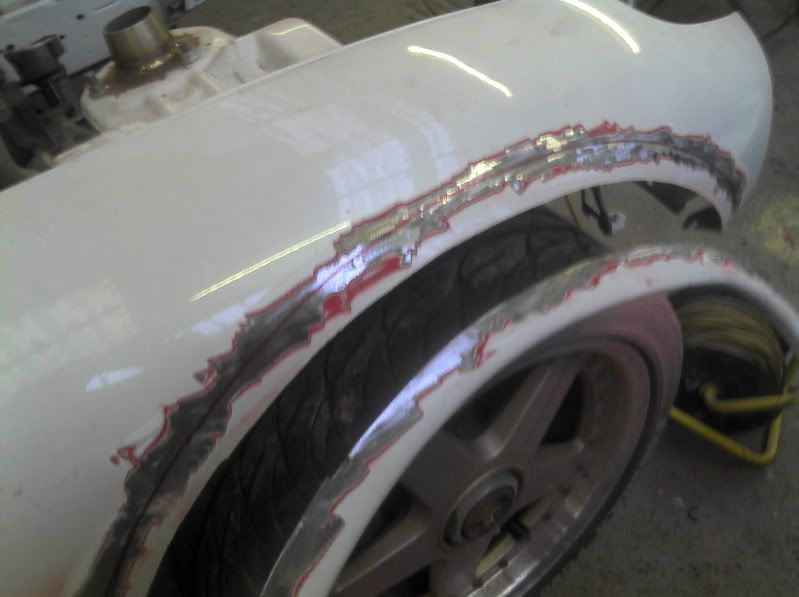
Weld.

I'm really just going around tacking all the bits that need doing and then i'll spend a couple of solid days welding the whole thing arfter.
I have left plenty of room around the back of the block so access is nice and easy
Also now started on the wide arches..... Step one, nice round mark
CHOP
Weld.
Rotary Enthusiast
Joined: Aug 2008
Posts: 1,101
Likes: 13
From: Portsmouth UK
That is going to be one wide FD!
I thought the front wings were ally? Or you got an ally tig welder? Interested to see how it shapes up. I was going to cut an fab my back end as fibre glass kits are a PITA! But I ended up getting some Origin over fenders for a steel so I will see how that goes!
I thought the front wings were ally? Or you got an ally tig welder? Interested to see how it shapes up. I was going to cut an fab my back end as fibre glass kits are a PITA! But I ended up getting some Origin over fenders for a steel so I will see how that goes!
Thread Starter
Senior Member
Joined: Feb 2007
Posts: 368
Likes: 0
From: Surrey, England
You Know i wish i had a clear week to crack on with metal work instead of having to do a bit here and a bit there.... Anyway, a touch more on the arches both side kinda tacked up now. Still not 100% sure how i'm going to finish the rear of these ones yet. Been playing with ideas but nothing has taken my fancy yet. WIll get a little more done on the front wings whilst i chew over some ideas for the rear.