
FD + 20B = project


Thread Starter
Senior Member
Joined: Feb 2007
Posts: 368
Likes: 0
From: Surrey, England
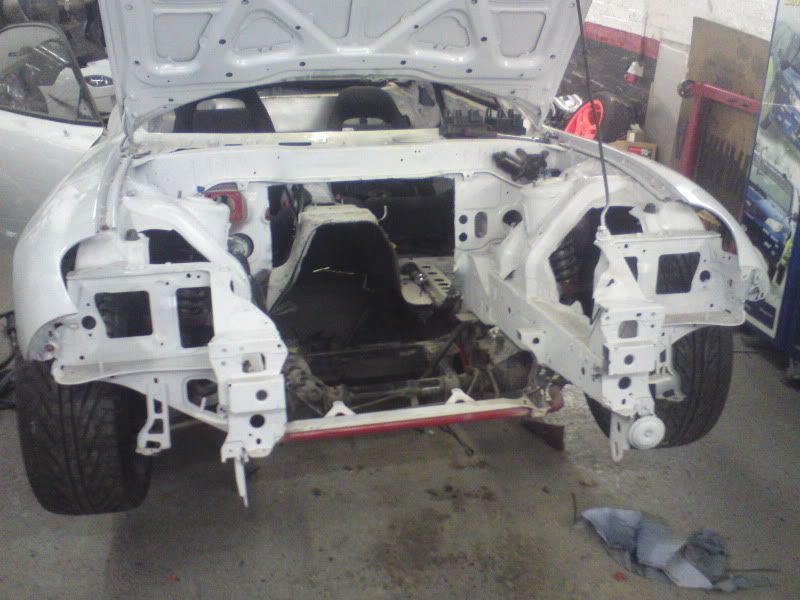
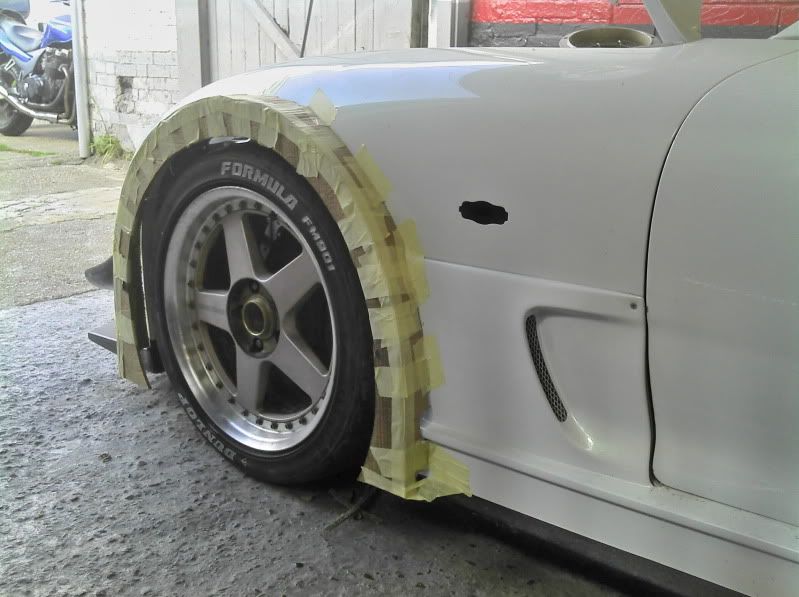
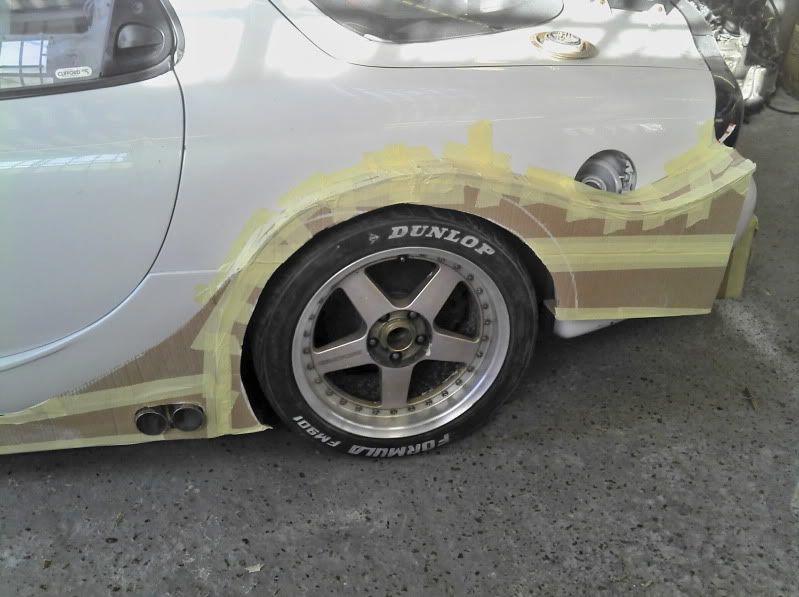
Managed to obtain a few bits after helping out a customer. Got her outside yesterday whilst having a good old tudy up. And the Sun came out. Gives you a much better idea of the modified wing and MS wheels. Really not in great shape at the moment!


Thread Starter
Senior Member
Joined: Feb 2007
Posts: 368
Likes: 0
From: Surrey, England
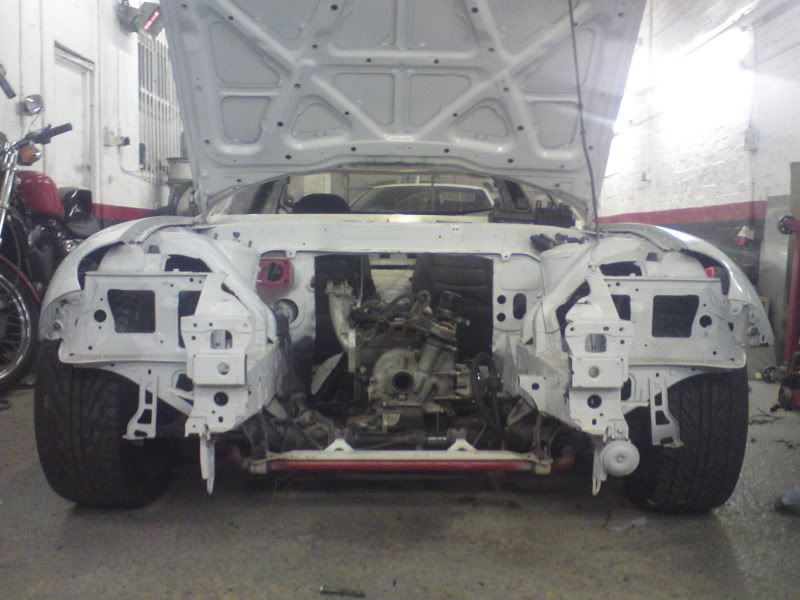
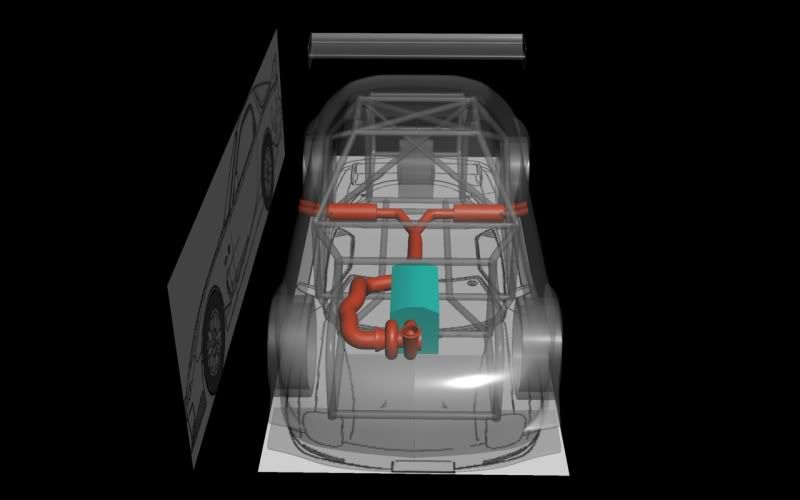
But on another note. Turbo positioning. Few of us where looking at it today. Now i was thinking that i could mount the turbo across the the front of the engine??? Long primaries on the manifold. I could (being RHD) run the manifold to the turbine housing infront of the engine and then the Down pipe down the other other side. Balance a bit of wieght out??


Rotary Enthusiast
Joined: Aug 2008
Posts: 1,101
Likes: 13
From: Portsmouth UK
Hey McCarthy. Top work so far..
Man you have been reading my mind while I sleep! I was planning the exact same trick with turbo position. Thought about it more for another project but if needed I may go this route on my 20B too! Why not I say. I believe Driftworks did it on their S15 drift car with JZ transplant.
Where exactly you based? And what does your company do? Only ask as I seen you doing a bit of CAD here and there!
Thread Starter
Senior Member
Joined: Feb 2007
Posts: 368
Likes: 0
From: Surrey, England
Hey McCarthy. Top work so far..
Man you have been reading my mind while I sleep! I was planning the exact same trick with turbo position. Thought about it more for another project but if needed I may go this route on my 20B too! Why not I say. I believe Driftworks did it on their S15 drift car with JZ transplant.
Where exactly you based? And what does your company do? Only ask as I seen you doing a bit of CAD here and there!
Man you have been reading my mind while I sleep! I was planning the exact same trick with turbo position. Thought about it more for another project but if needed I may go this route on my 20B too! Why not I say. I believe Driftworks did it on their S15 drift car with JZ transplant.
Where exactly you based? And what does your company do? Only ask as I seen you doing a bit of CAD here and there!
Cheers
Rotary Enthusiast
Joined: Aug 2008
Posts: 1,101
Likes: 13
From: Portsmouth UK
Arh yes.. I know it. Been there once!
Ok sounds interesting at least! And you get to play with your own car on the side.. bonus! Don't worry I was not judging the CAD! Quick knock up or not it shows the general idea. Ever so slightly different to my plan but none the less. With your engine moved so far back I reckon that is a winner!
Keep up the good work. I cannot wait to start mine! Although I am sure that will change once I get rolling! Cars are a nightmare!
Lee
Rotary Enthusiast
Joined: Aug 2008
Posts: 1,101
Likes: 13
From: Portsmouth UK
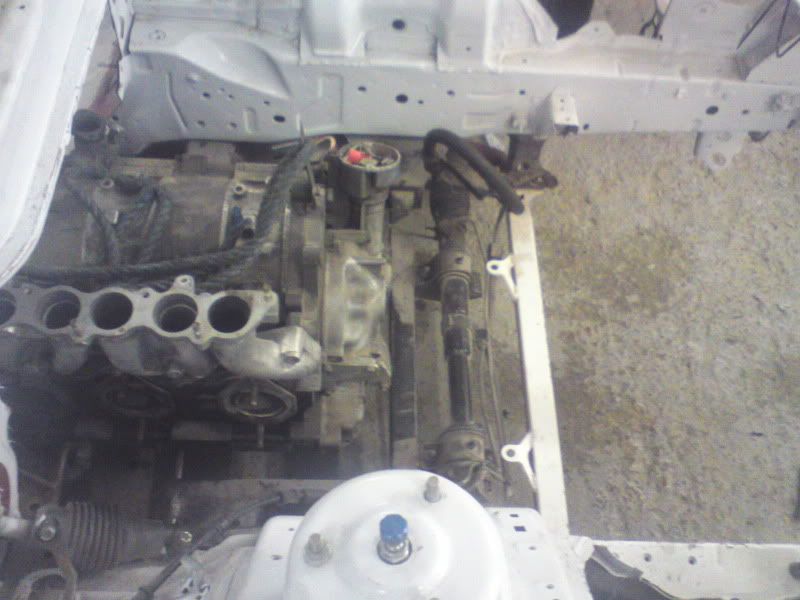
By the way, did you have to modifiy the sump, steering, plenum, bonnet or anything when you had the lump in NA and mounted in the stock 13B position? I did not read anything. But am sure I read on FAQ's or somewhere you could not just drop it straight in? Maybe what I read only applies to LHD?
Thread Starter
Senior Member
Joined: Feb 2007
Posts: 368
Likes: 0
From: Surrey, England
By the way, did you have to modifiy the sump, steering, plenum, bonnet or anything when you had the lump in NA and mounted in the stock 13B position? I did not read anything. But am sure I read on FAQ's or somewhere you could not just drop it straight in? Maybe what I read only applies to LHD?
Since i have shortened the Lower inlet manifold, dry sump plate on mine means that i have no sump clearance issues as its just a thick flat ally plate.
Rotary Enthusiast
Joined: Aug 2008
Posts: 1,101
Likes: 13
From: Portsmouth UK
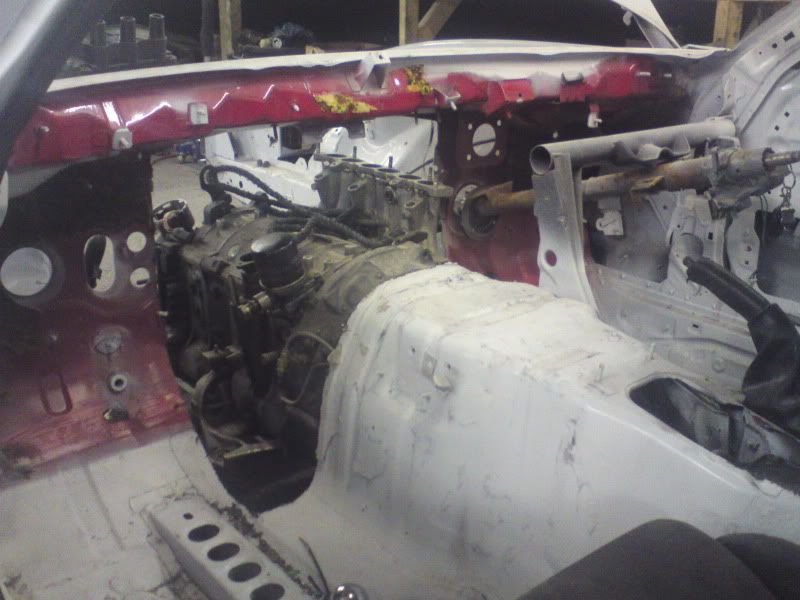
Thanks for the info. So when you were running the NA setup you had an after market subframe? I thought you had just modified the stock 13B one.. okay. Still I plan to make my own subframe using the 13B one for pattern and parts.
I have no issue modding the bonnet or fitting a vented one etc..
On the new rack position yo have I presume the modified rod end have the ball joint swept backwards to retain the angle of the actual steering arms? I had considered moving the rack forward and lengthening the arms on the hub to compensate but the route I am going that probably makes little difference. I am more likely going to want to try and lower the rack a touch to gain sump clearance. But I guess I will have to see what it looks like when I get it near the engine bay!

Thread Starter
Senior Member
Joined: Feb 2007
Posts: 368
Likes: 0
From: Surrey, England
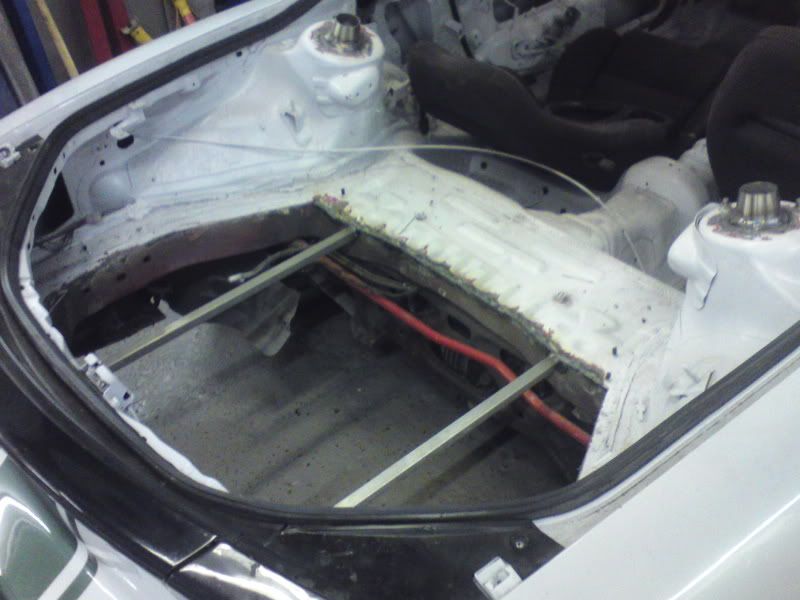
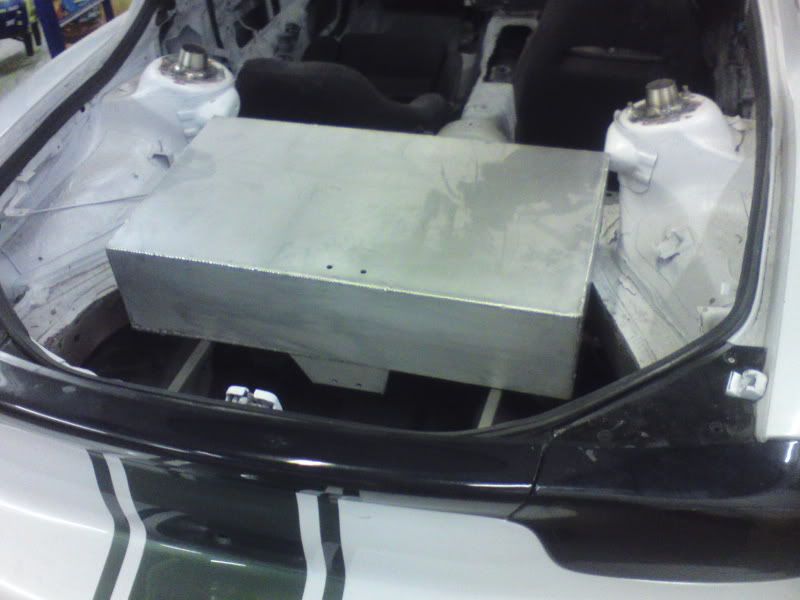
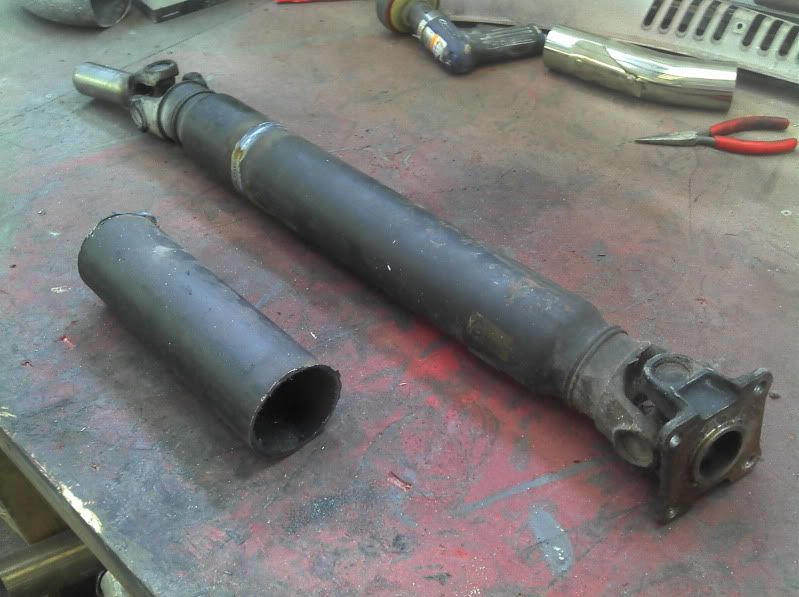
Few thoughts more than anything else at the moment,
Mocked up the prop so thats gone off to have a new one built, you can see the amount chopped out:
New thoughs on exhaust system, i can't really sink my teeth into building this untill i have the main sections of the roll cage in but an idea.
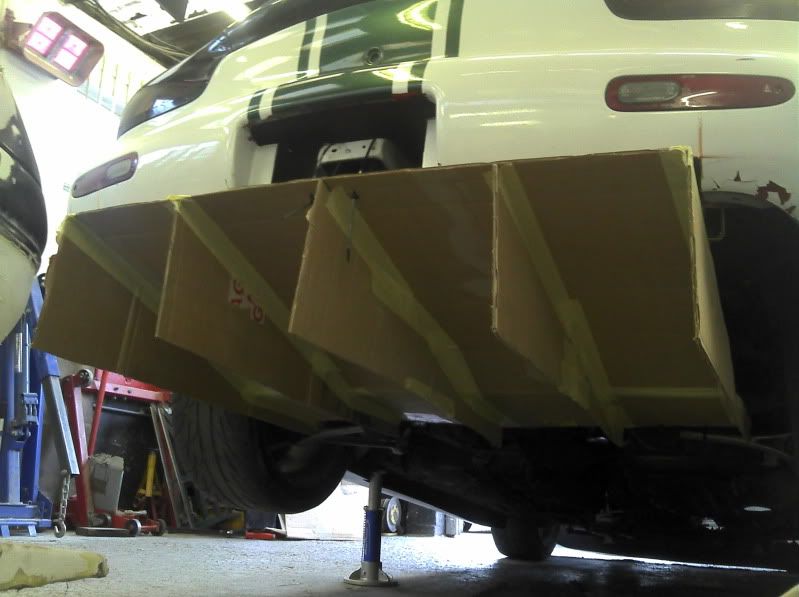
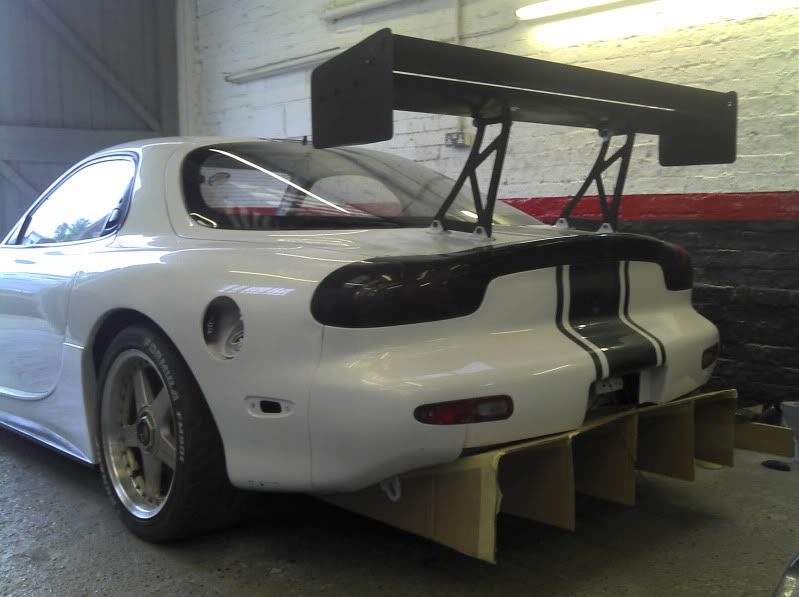
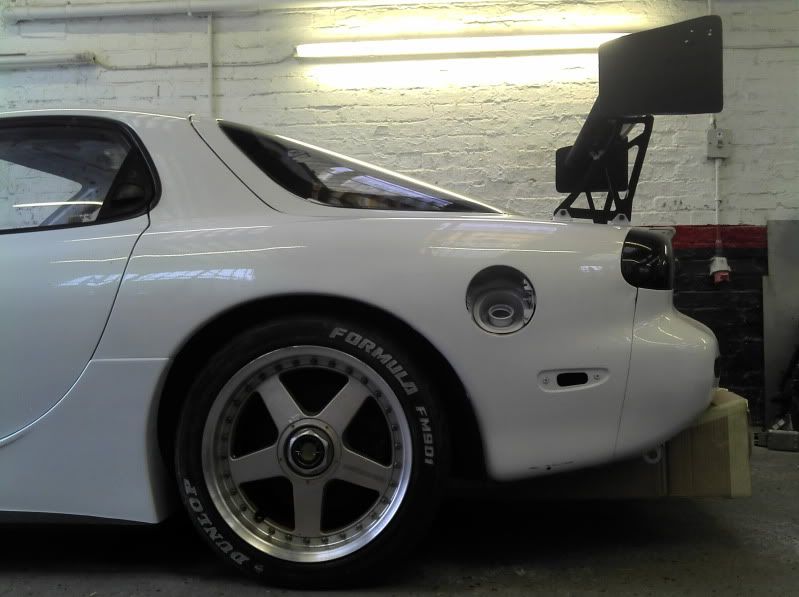
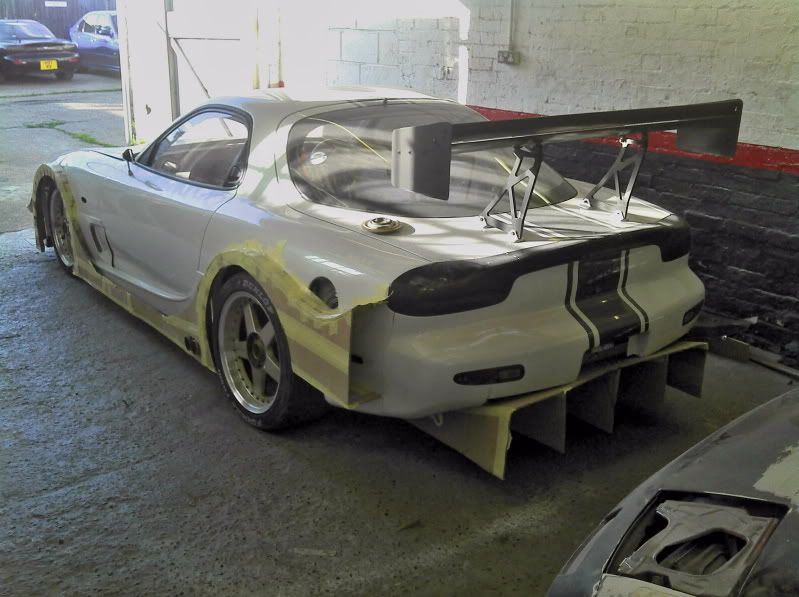
Due to the exhaust being moved forwar i have tons of room at the rear for some nice areo mods. Just some mocking up for now. Still debating on the best meterial to use for it as i done thing the card board will work to well at speed :corkysm21:

Mocked up the prop so thats gone off to have a new one built, you can see the amount chopped out:
New thoughs on exhaust system, i can't really sink my teeth into building this untill i have the main sections of the roll cage in but an idea.
Due to the exhaust being moved forwar i have tons of room at the rear for some nice areo mods. Just some mocking up for now. Still debating on the best meterial to use for it as i done thing the card board will work to well at speed :corkysm21:


Thread Starter
Senior Member
Joined: Feb 2007
Posts: 368
Likes: 0
From: Surrey, England
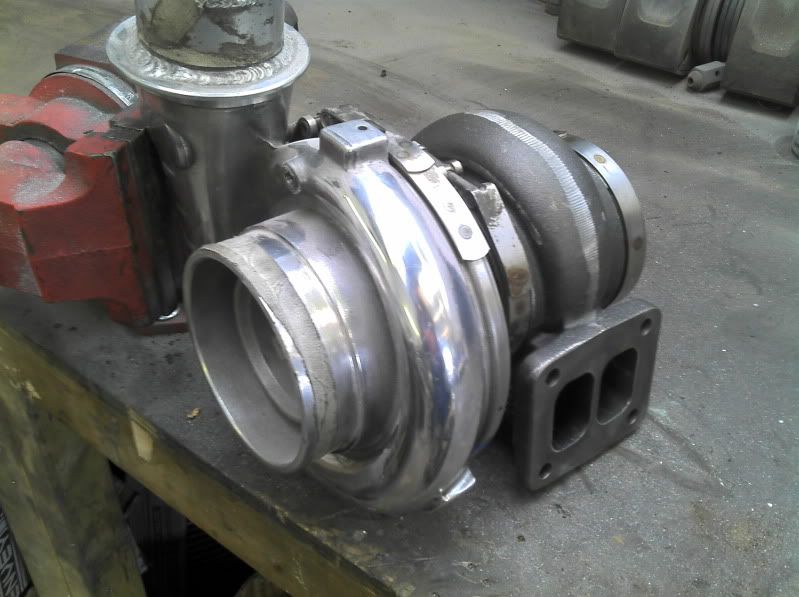
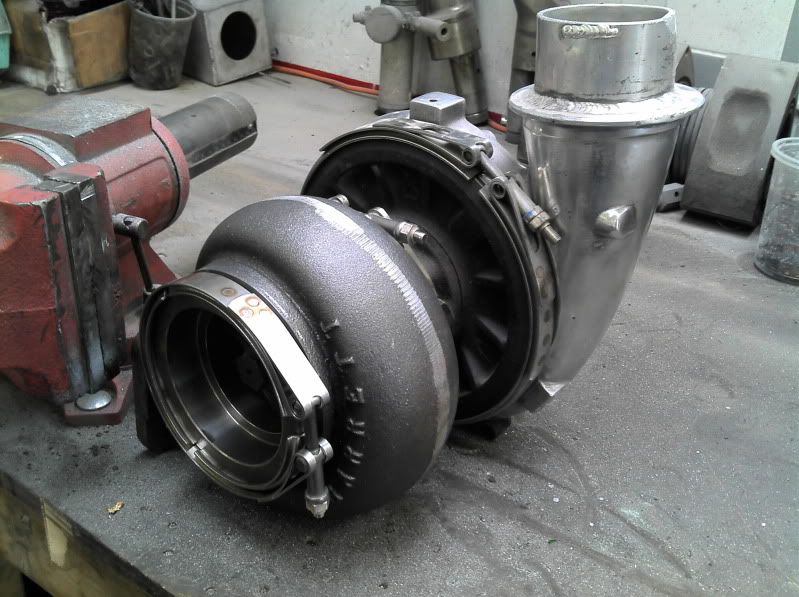
Well its never a bad thing when one of these boxes turns up
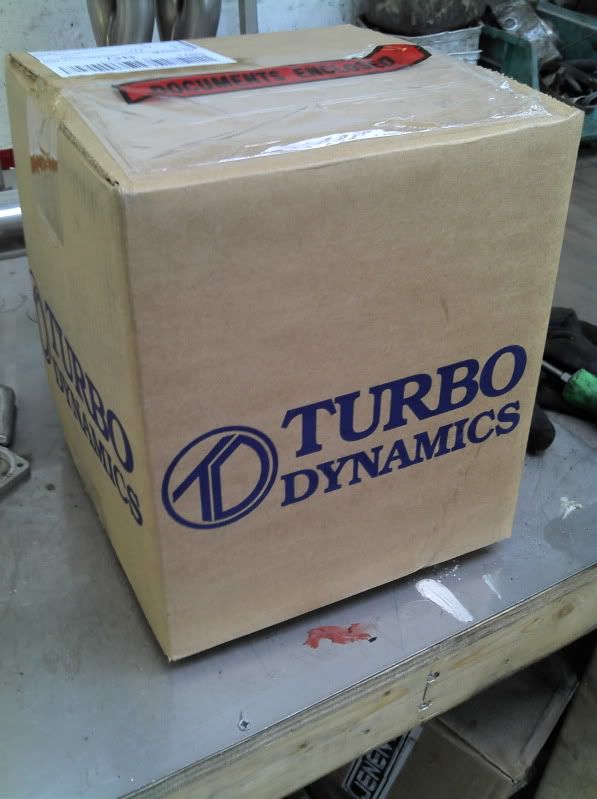
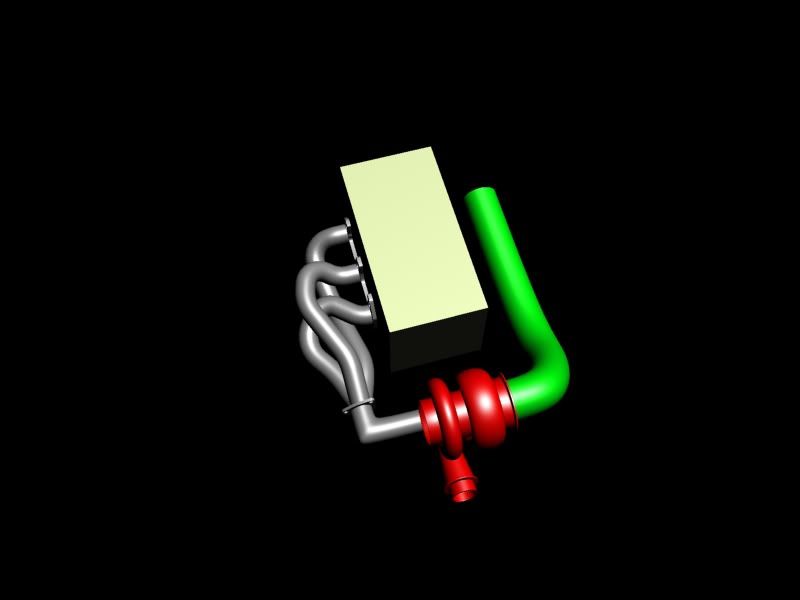
New turbine housing for the GT42. The current one is a HUGE T6 but only has 1.1 A/R.... New one is a samller T4 housing BUT has larges 1.28 A/R so a much better fit to my specs.... Also the outlet on the T4 is more suited to my set up being 3.5" HAppy days
New one on the left and old on the right, also turbo with the 1.28A/R on.... Manifold time i think.

Thread Starter
Senior Member
Joined: Feb 2007
Posts: 368
Likes: 0
From: Surrey, England
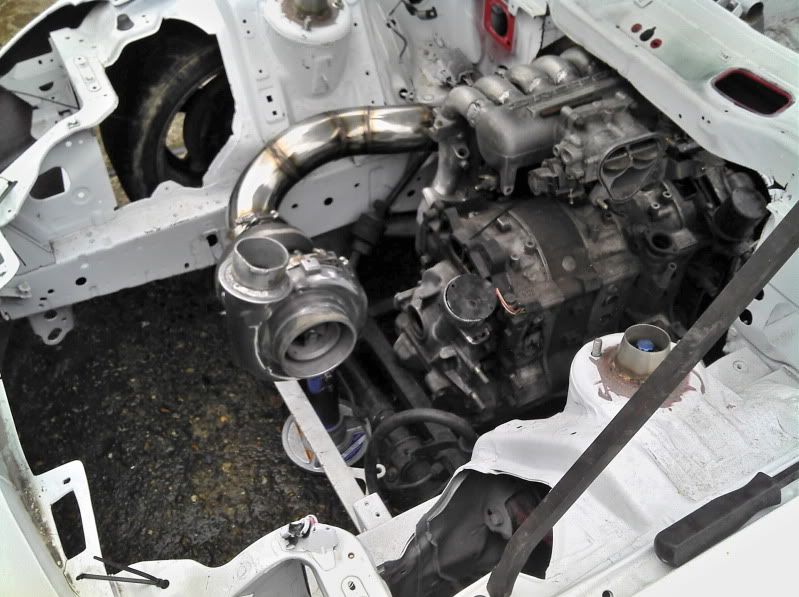
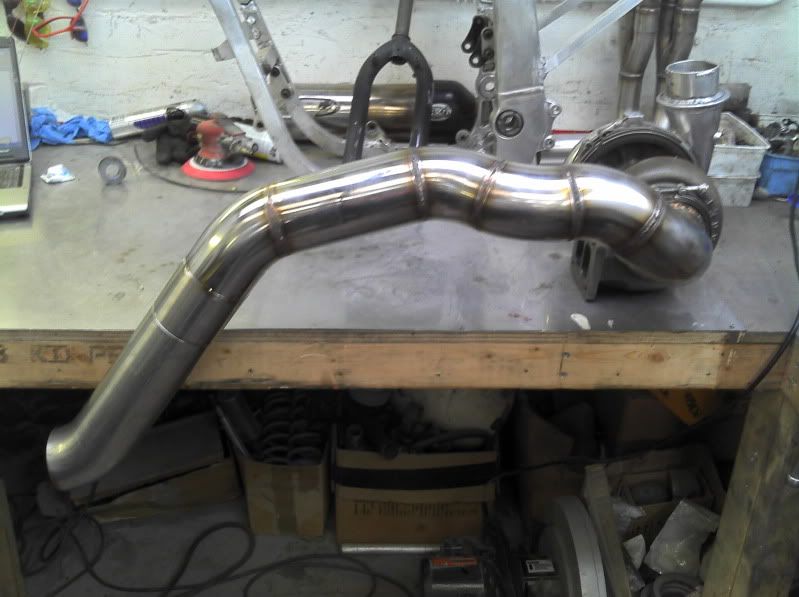
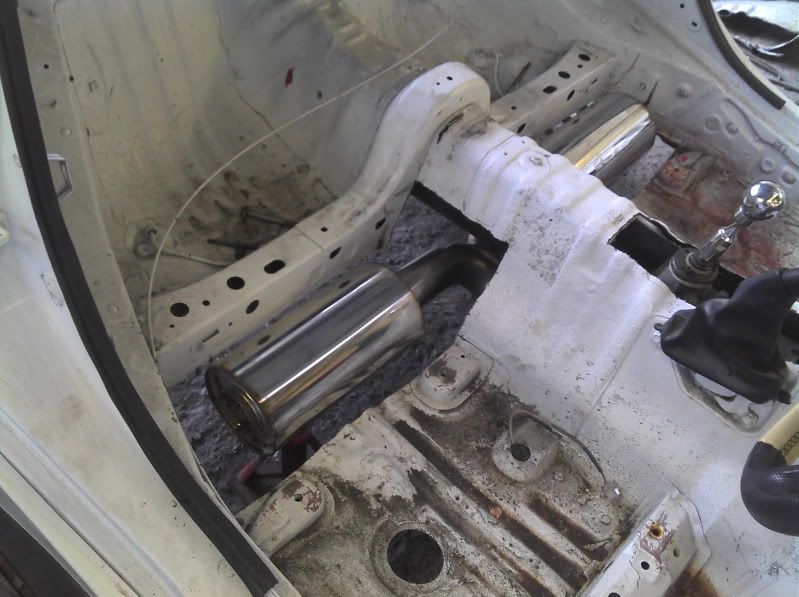
Bit more done after work, not much but small steps. Funny its not until the downpipe id on the bench you realise just how long it is, running from the front of the negine bay to the gearbox!!!
V-band welded on to the pipe work.
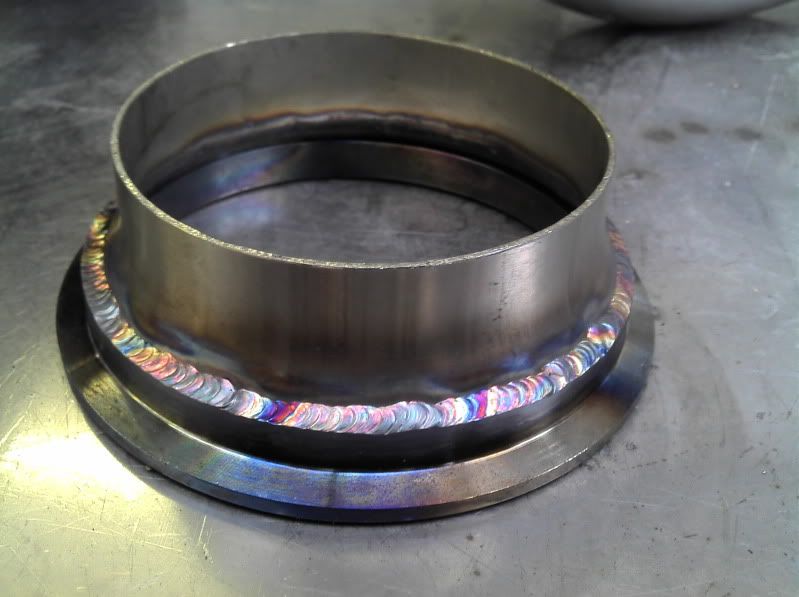
Attached to the section i did before
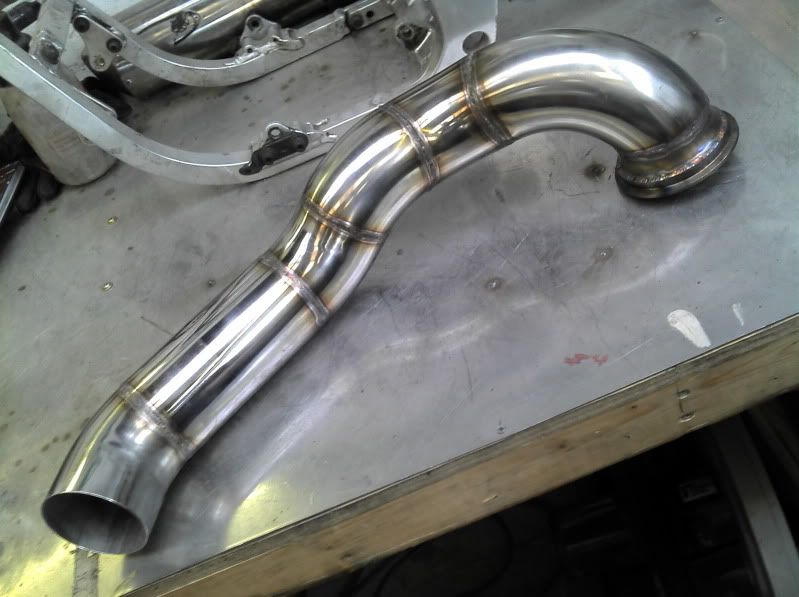
Turbo in place with down pipe,


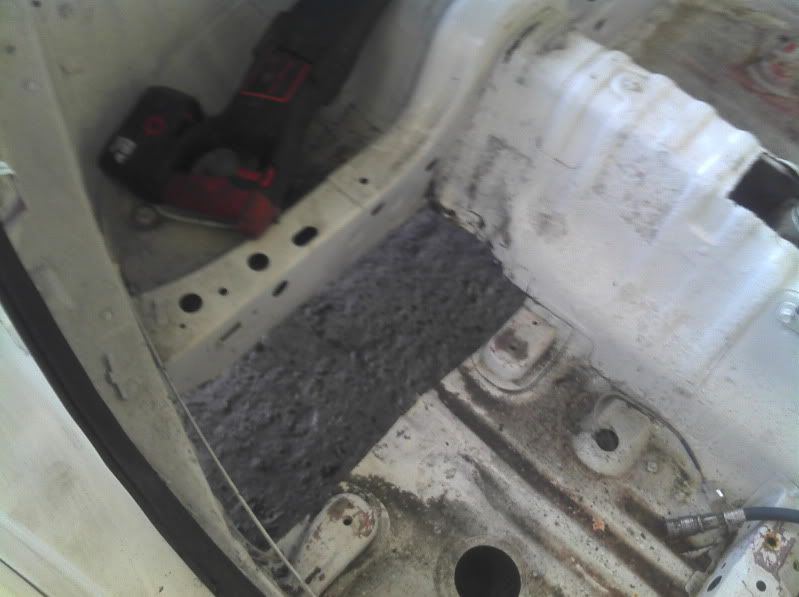
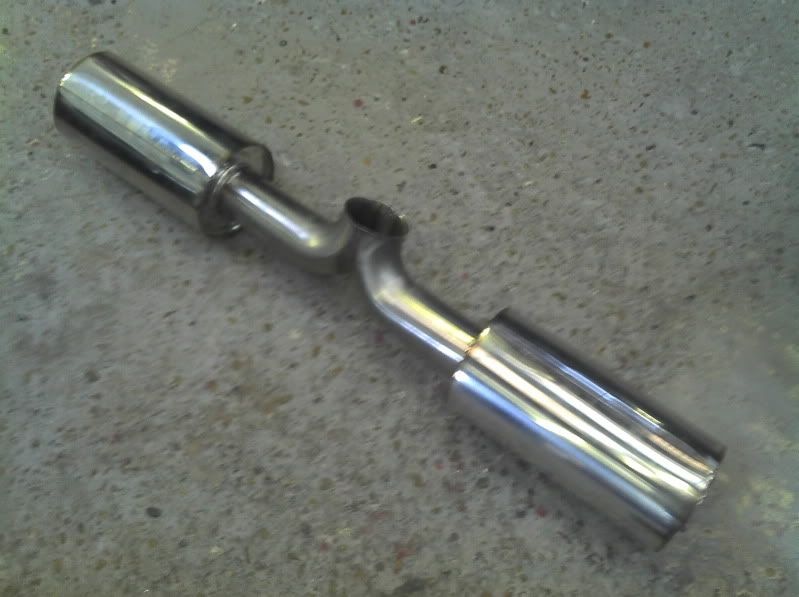
Few bits on the mufflers and floor pan,
V-band welded on to the pipe work.
Attached to the section i did before
Turbo in place with down pipe,
Few bits on the mufflers and floor pan,