What did you do to your FB today?
 04-28-15, 03:43 PM
#5776
Senior Member

Drove mine to a friends house and helped him install a microtech lt9 into his 83gs with a 4 port streetported 13b. We soldered all the wires to the sensors and injectors, all thats left is connect fuel and start it up.
Tune it of course when its all done, very easy to install though.
Thinking bout selling all my carbs and intakes and go fuel injection, dont know yet. Just a thought.
Maybe if im unhappy after setting up my yaw nikki turbo, doubt it though.
Sent from my gs4 using RX7Club app
Tune it of course when its all done, very easy to install though.
Thinking bout selling all my carbs and intakes and go fuel injection, dont know yet. Just a thought.
Maybe if im unhappy after setting up my yaw nikki turbo, doubt it though.

Sent from my gs4 using RX7Club app
 04-29-15, 08:31 PM
#5778
Senior Member
 04-29-15, 09:47 PM
#5780
05-01-15, 08:13 AM
#5783
05-01-15, 10:04 AM
#5784
Got the brake fluid replaced last night, at last. I want to give the rear brake adjustments one final tweak before putting the rear wheels back on. Checked the trans fluid while the car is up on stands and leveled and all seems kosher there.
I've never been a big fan of vacuum bleeding brakes, but when no one's available to help, it's far better than nothing. Main thing I don't like about it is how air leaks in around the bleeder threads under vacuum, making it look like you have massive air in the lines.
I bought a fancy compressed-air vacuum bleed kit from Harbor Freight, which turned out to be a partial win/partial fail.
The win; The kit comes with a very handy reservoir-feed bottle which keeps the brake reservoir full while you're bleeding. Saves a lot of fooling around trying to keep the reservoir from running dry while you're crouching in the wheel well. Holds a full quart of new fluid, has a shutoff valve & when set up right holds the reservoir right at the "Max" line as fluid is drawn down from the bleeders. Almost worth the $24 the whole kit cost.
The fail; the compressed-air-driven vacuum bottle does not produce enough vacuum to pull fluid out effectively. Feeding it 100psi air, it was producing what felt like less than 5 inches of vacuum at the business end. This was a bummer, as it came with a decent hose and nipple setup with anti-reversing valve for the bleeder fitting, and a nice large old-fluid reservoir. Biggest problem with most one-man bleed kits is the stupidly small pickup reservoir, usually they only hold a few ounces and you end up having to empty them a dozen times to get the job done. But this thing simply doesn't provide enough vacuum to pull fluid, even being noisy as hell. Poorly designed venturi is the problem, looks like.
I ended up using the fill bottle from the kit and my old hand-vac bleeder with the tiny 100ml bottle; it can pull 25+ inches of vacuum with only a few squeezes of the handle & gets the job done, it just has to be emptied frequently.
Tonight I'll replace the clutch fluid, check the diff lube, tweak the rear brakes again, and I should be road-ready for the run to WHiV in Vegas next weekend.
05-01-15, 11:52 AM
#5785
Waffles - hmmm good
iTrader: (1)
I found a way to do one man bleeds without using vacuum or any fancy tools. Just get a bleed
kit like this one: One Man Brake Bleeder Kit
What you do is put the bottle using its magnet down below the bleeder but so that you can loop
the bleeder tube up about 3 or so inches higher than the bleeder. Open the bleeder screw a
little, get in and start pumping. Watch the level in the collection bottle and the master stopping
to empty/fill as needed. You don't have to close the bleeder between pumps because the air
bubbles tend to stay trapped up at the top of the loop and don't get sucked back into the
bleeder. I've been doing it like this now the last few times and have had great success and hard
pedals. Only took me 30+ years to learn of it.
 05-02-15, 12:32 AM
#5787
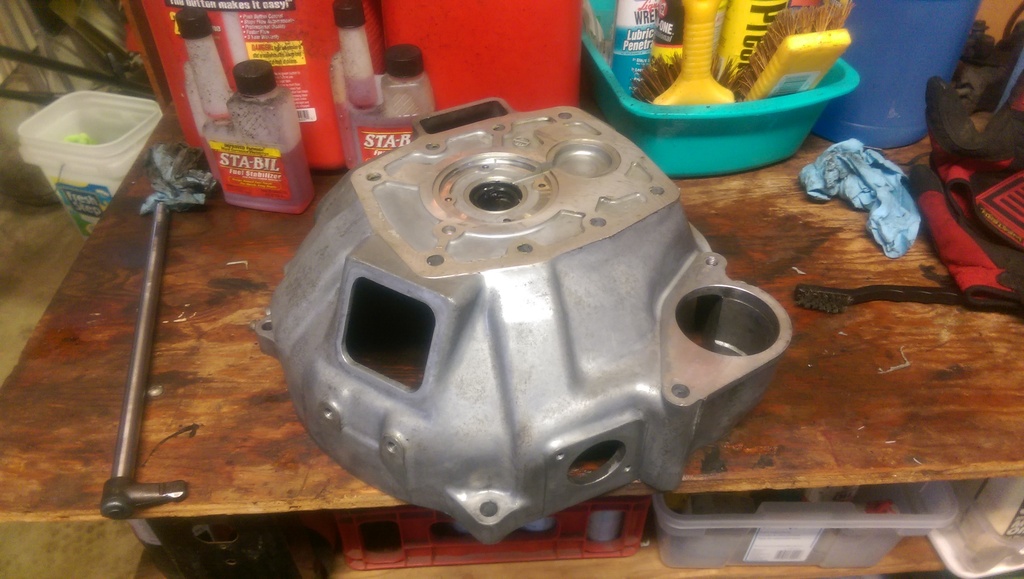
TII transmission before, hasn't been properly clean since it came out of the factory almost 30 years ago now.
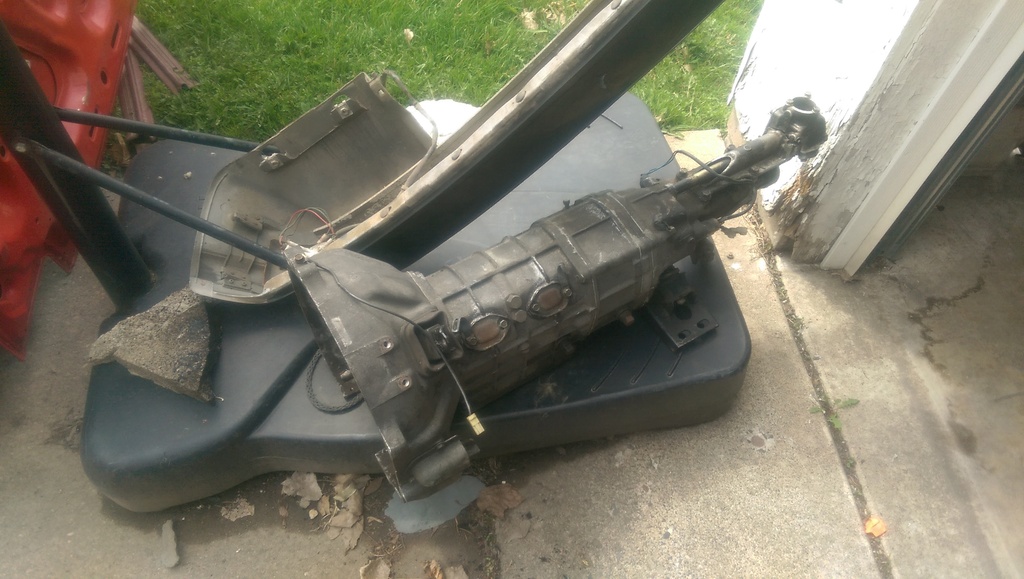
I found this shim out of place between the bell housing and gear case - does it need to be there and replaced when I put it back together?
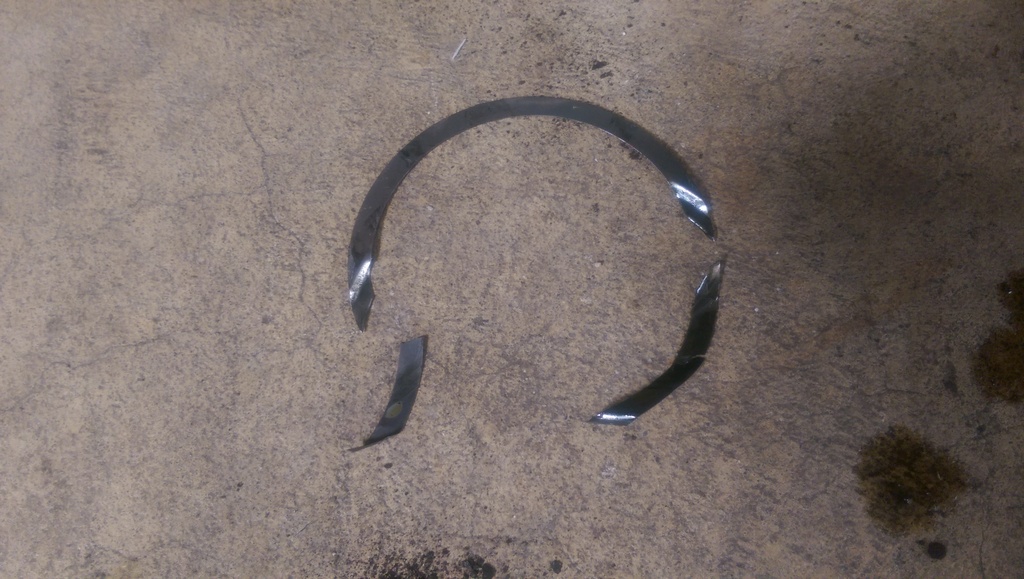
If you look closely at the bolt in the western position (left side from this angle) you can see where that shim slid up and was crushed in that weird pattern.
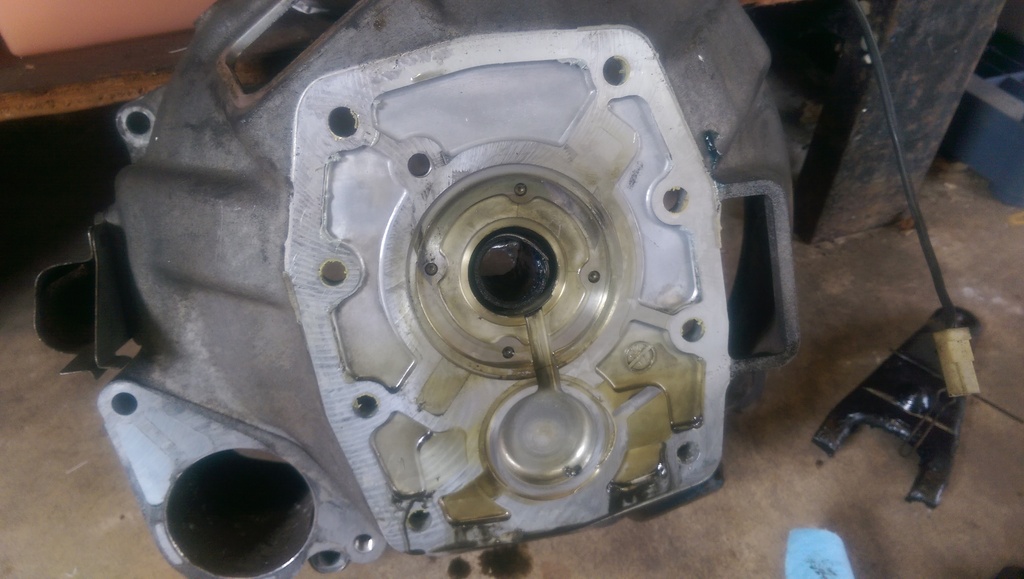
Bell housing looks absolutely awesome though, so glad I spent the time on it today.
 [/QUOTE]
05-02-15, 03:44 PM
[/QUOTE]
05-02-15, 03:44 PM
#5788
Moderator
iTrader: (3)
Join Date: Mar 2001
Location: https://www2.mazda.com/en/100th/
Posts: 30,829
Received 2,597 Likes
on
1,845 Posts
that shim is an adjust shim, so you will want a new one. you need to measure yours, and order that same one. they come in 0.1mm to 0.7mm
05-02-15, 04:32 PM
#5789
Got the clutch bled, took a test drive last night; all seems to be running well.
Realized this AM that I'm at the adjustment limit on my parking brake cable... should I slack it and re-adjust the shoes, or does this mean that I'm out of adjustment due to cable stretch over 35 years and need to replace cables?
Looking at the adjustment mechanism on the 80 rear, the adjustment for the shoes essentially moves the lower pivot point for each shoe nearer or further from the drum. The cylinder spreads the top end of the shoes to exert braking, and the parking brake does the same thing... so it doesn't seem like the shoe adjustment would have all that much dependence on the p-brake adjustment, so long as the p-brake was not over-tight to begin with.
Anyone have input? Just trying to save time endlessly adjusting. OTOH, don't want to bother ordering/replacing p-brake cables if I don't really need to.
Tomorrow will be final mechanical review before next weekend's Vegas run, and the commencement of cleaning.
05-02-15, 07:32 PM
#5790

Tried to change fluids
Took my car out of storage, (actually an SA not FB) a 1980 LS, and took it for a short drive to get a feel for things. I was pleased the car started right up and ran strong. I pulled in the garage to change the fluids and when I raised the hood I noticed antifreeze all over the catch pan below the radiator and the front of the A/C compressor. I was a bit surprised because I didn�t smell the antifreeze. I found the radiator to be leaking at the joint in the left top corner between the top stamping and core seam. But instead of changing the coolant I spent the rest of the day on the interior applying Armor All to the plastic and Lexol to the leather components; I did change the oil. Now I need to look for a new radiator. The original 35 year old existing radiator may be fixable but I think it best to get a new replacement. I see several places offering radiators and would appreciate any comments or experiences when replacing a first gen SA radiator. I�ll change the coolant when I do the radiator. I stopped by the local Mazda dealer and asked if they could service the car but basically they all looked at each other with a very confused look and said the parts are no longer available�have a nice day. Anyway here�s a picture of the interior.
05-02-15, 08:37 PM
#5791
Senior Member
iTrader: (2)
Join Date: May 2013
Location: Los Angeles
Posts: 542
Likes: 0
Received 0 Likes
on
0 Posts
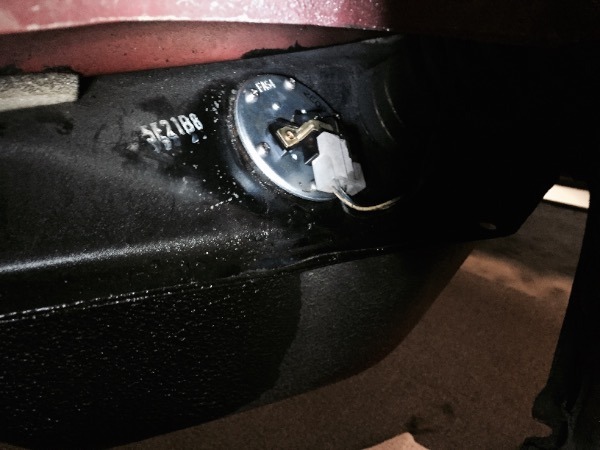
Replaced the Fuel Level Sender. I was worried that after 30 years the screws would be impossible to remove but with a bit of PB Blaster soaking they came right out. Good thing because the clearance to work is minimal. Nice to have a working fuel gauge again!
 05-02-15, 10:27 PM
#5794
turbo or bust
iTrader: (8)
Join Date: May 2012
Location: bristol,pa
Posts: 870
Likes: 0
Received 0 Likes
on
0 Posts
Went to replace thermal pellet, when I removed the e-shaft pulley, I noticed that the thermal pellet was stuck, ended up drilling a hole in it and screwing my slide hammer into it and was able to get it out that way, after finally getting it out and making sure no metal got down into the shaft, I installed the Atkins rotary thermal pellet replacement.
ended up drilling a hole in it and screwing my slide hammer into it and was able to get it out that way, after finally getting it out and making sure no metal got down into the shaft, I installed the Atkins rotary thermal pellet replacement.
05-03-15, 05:13 PM
#5796
Moderator
iTrader: (3)
Join Date: Mar 2001
Location: https://www2.mazda.com/en/100th/
Posts: 30,829
Received 2,597 Likes
on
1,845 Posts
1710AK is the de-code, not the part number. so you need to go to the next step and get the part number the de-code refers to. any Mazda dealership can get the part
05-03-15, 08:06 PM
#5797
Gave it a wax and took it for a drive. Its at just over 300 miles on the rebuild. Im gradually taking it closer to red line. I kissed 5000 RPM a few times today... There is a small exhaust leak at the presilencer though. It needs two new gaskets.
05-03-15, 08:07 PM
#5798
To answer my own question: No, slacking the parking brake cable, then readjusting the shoe adjusters, does not may any noticeable difference - - still had to bring the p-brake cable back to the adjustment limit to get things acceptably tight.
Looks like the culprit is wear in the "pillow block" guides the front cables go through, rather than cable stretch. As the guides wear down, the required length decreases. There's only about an inch total adjustment in the system to start.
Looks like the culprit is wear in the "pillow block" guides the front cables go through, rather than cable stretch. As the guides wear down, the required length decreases. There's only about an inch total adjustment in the system to start.
05-04-15, 12:57 AM
#5799
To answer my own question: No, slacking the parking brake cable, then readjusting the shoe adjusters, does not may any noticeable difference - - still had to bring the p-brake cable back to the adjustment limit to get things acceptably tight.
Looks like the culprit is wear in the "pillow block" guides the front cables go through, rather than cable stretch. As the guides wear down, the required length decreases. There's only about an inch total adjustment in the system to start.
Looks like the culprit is wear in the "pillow block" guides the front cables go through, rather than cable stretch. As the guides wear down, the required length decreases. There's only about an inch total adjustment in the system to start.
So I spent an hour or so a night the past week getting the car ready to start. The rad is back in, the water pump on, dual belt pulley installed on the alternator. I noticed the other day that the coolant temp sensor wasn't installed, so I pulled it from the old 12A. Unfortunately, since this 12A was a reman, they used the later sending unit, which has tapered pipe thread instead of metric thread like the one in my existing 4-port irons. So I had to order a new one from Mazdatrix. That came in and it's installed.
I filled up the rad only to find I'd forgotten to put on the block to heater hose.
 That mess required pushing the car out of the garage, mopping it up and pushing it back in again.
  That made me realize I hadn't fully addressed the beehive delete. After puzzling out what needed to be done, I bought a couple of couplers, t-connectors, hose clamps and a big old bolt and went to work. Ended up blocking off the original block to heater pipe with the bolt and some hose and used the original beehive coolant pipe to go directly a t-fitting that went to the the heater inlet and joined up with the hose that goes down to the rad.
 Last night, I pulled the plug on the fuel pump and cranked her over to build oil pressure. As I hadn't primed the oil pump before putting it on the engine, it took longer than I expected...maybe a minute of 10 second cranks before the needle started to move. Got a little worried there.
 But then the needle moved to about 20psi. I'm fine with that...I'm sure it'll pop up to where it needs to be when I start it.
 So now the car is ready to start. Just waiting for good evening to do it... when I can get a friend over to film and pour gas into the carb if necessary.
fm
05-04-15, 09:38 AM
#5800
Originally Posted by DivinDriver
Looks like the culprit is wear in the "pillow block" guides

The solution: break an old habit. Stop applying the parking brake every time. Result is your parking brake components last longer.
Is it safe? Yep. There is more than enough engine friction in 1st gear to keep a car from rolling on flat level ground. I don't use my e-brake if I don't have to. And in the vehicles without a functioning e-brake, it's kind of necessary.
I know, simple, right?