
What did you do to your FB today?

Today I purchased a NASA legal first gen road racing car.
Along with the deal came a second, running le-wheeled first gen that will also be turned into a race car.
On top of that, we got 3 more 12a engines (2 recently rebuilt), several limited slip rear ends, 2 sets of race wheels, 4 sets of stock wheels, transmissions, brake parts, carbs, and even more.. still trying to process it all.
A good day indeed.
Pics to come
.
Joined: Jun 2008
Posts: 8,376
Likes: 30
From: Chino Hills, CA
Mel put in a cameo appearance, rode out with a friend of his after his ride chose to eat it's brake master cylinder shortly before the trip. Only got to talk to him for a few mintues, once he found our "re"location.
Maybe next year we'll be able to caravan.
On my 'today' list; I cleaned up my spare differential prepertory to checking it out for use, and I also de-skunged the spare transmission (actual Cali-spec 3-switch SA trans) I bought over a year ago, which has since been sitting in a bag on my garage floor waiting for me to do something with it. It's now at least clean enough I don't feel the need for a shower after handling it - - it was DIRTY on arrival.


More pics of GSL-SE front spindle swap w/1st gen 16x7 Volk Rays TE-37s...the rears will look ridiculous until I get the rear axle swap done, hopefully within the next month. The wheels have a custom champagne-colored finish. The Volk decals aren't original, but I've got a fresh set of authentic decals in either black or blue that I'll be putting on. Still deciding which color to use. Although not pictured, I have bronze centers for the wheels as well.
fm


fm
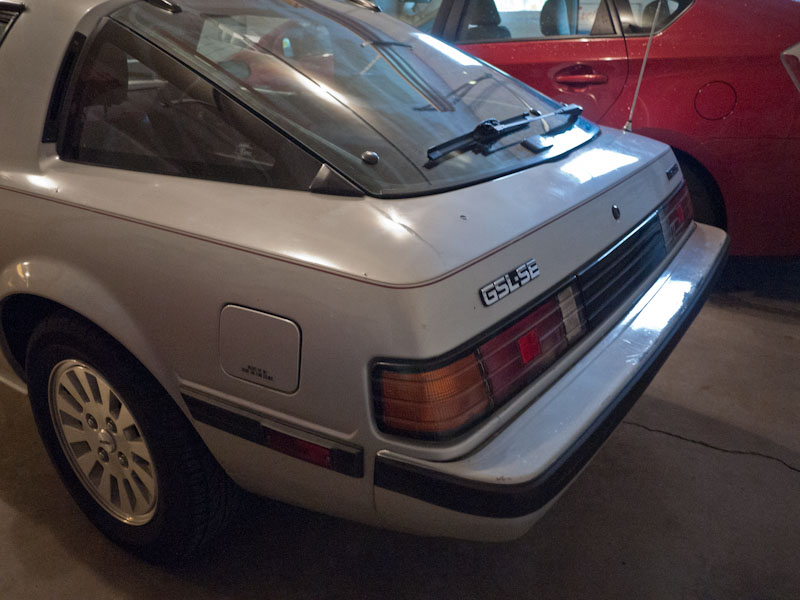
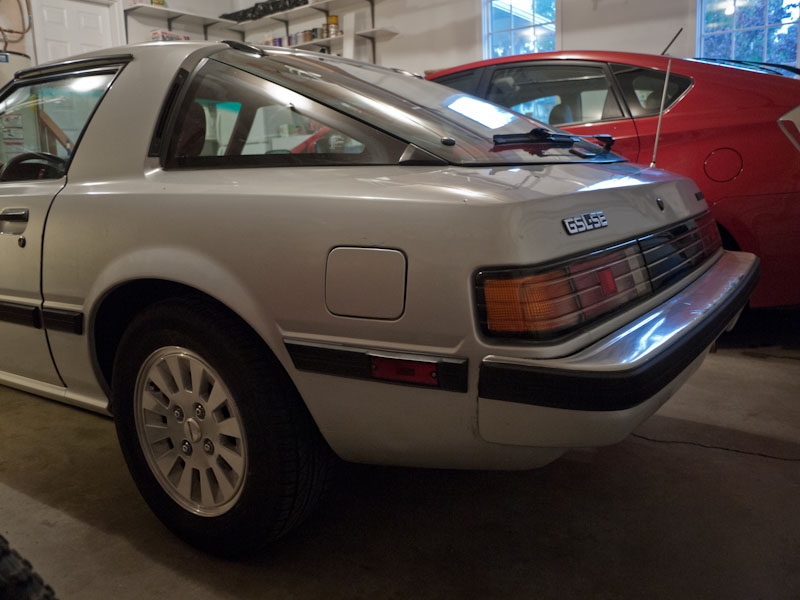
Last night, taking a break from working on the oil bits of the car, I went to work removing the rest of that tired, dated pin striping.
The front fenders and doors came out great:


The rear quarters, not so much. The PO apparently had some body work done on the rear quarters. The lazy-@sses that did the work decided it would be easier to just mask over the old pin striping and paint. Then they put another layer of pin striping over the old to cover up the over spray. After removal, the result is a step in the paint, and in some areas (most notably the hatch area), paint chipped off all the way to the primer. It looks terrible.


I was seeing red when I realized what had been done and what I had done to the paint in the rear as a result of the lame paint work that was done in the past. But I quickly realized that it would be fine. I have an OEM GSL-SE spoiler that I'll be color matching and putting on which will completely cover the sketchy areas.
fm
The front fenders and doors came out great:
The rear quarters, not so much. The PO apparently had some body work done on the rear quarters. The lazy-@sses that did the work decided it would be easier to just mask over the old pin striping and paint. Then they put another layer of pin striping over the old to cover up the over spray. After removal, the result is a step in the paint, and in some areas (most notably the hatch area), paint chipped off all the way to the primer. It looks terrible.
I was seeing red when I realized what had been done and what I had done to the paint in the rear as a result of the lame paint work that was done in the past. But I quickly realized that it would be fine. I have an OEM GSL-SE spoiler that I'll be color matching and putting on which will completely cover the sketchy areas.
fm
FM - those wheels look AMAZING and excellent job on the pinstripe - I've been eyeballing mine as well, its time to pull it off. I have the pinstripe eraser, but i dont know if there's enough left on the wheel to do the whole car. May have to get another tomorrow. Keep up the excellent work and the udpates!
So far this weekend I've been working on the subwoofer box. I WAS going to be installing EFI!!! But my fuel rails didnt make it in time for the holiday weekend, so they'll be showing up this week. That's OK as I didnt have the fasteners for my intake ducting, OR an air filter, so not too big a deal. Hoping to have it finished in time for Old School Reunion on June 9th!
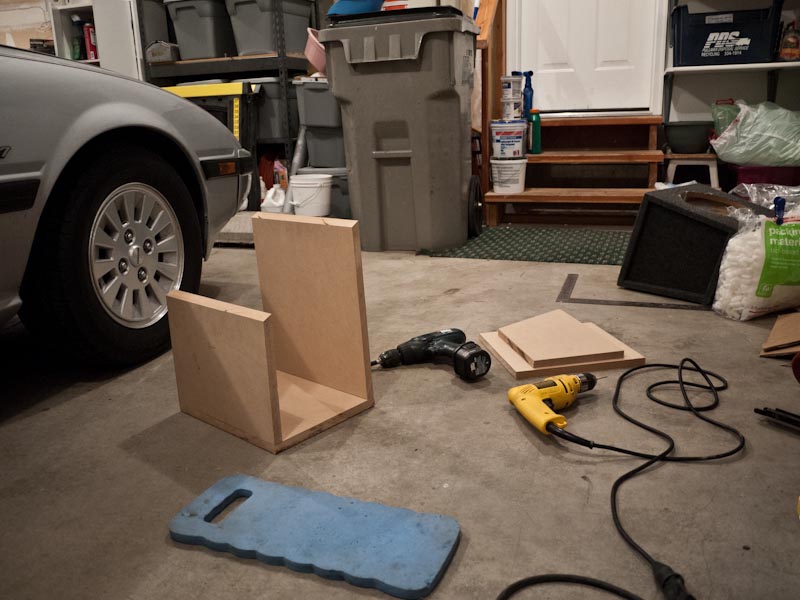
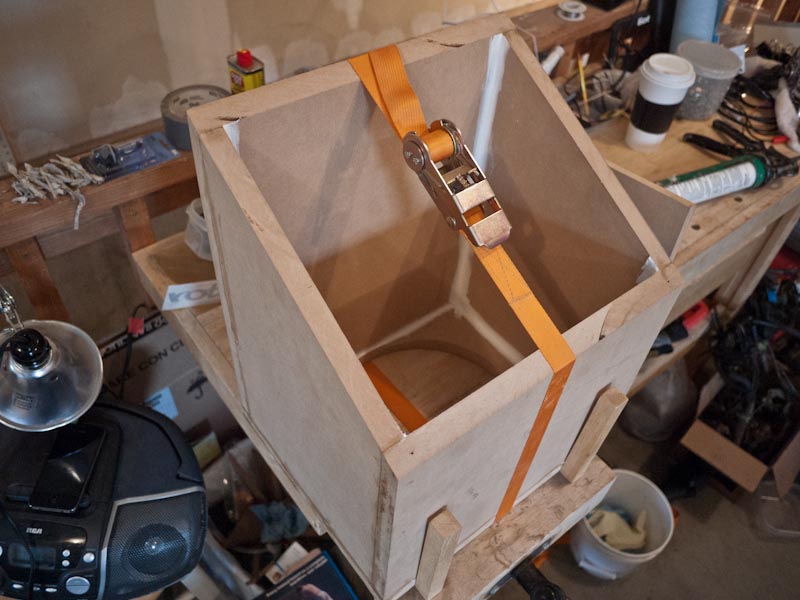
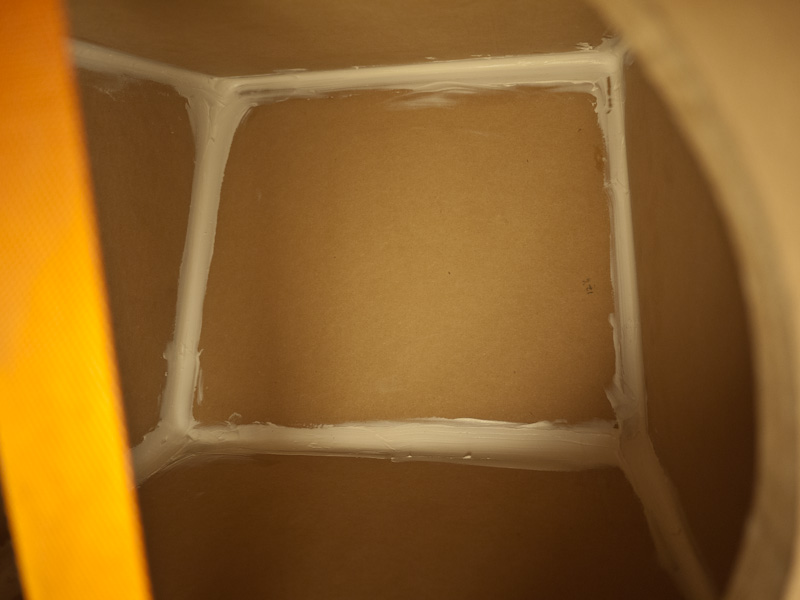
Wood glued, clamped together, seams all lined up and nice and tight. Inside is sealed with copious amounts of "Big Stretch" caulk. I'm going to let this whole thing cure in the garage for 24 hours - so Tuesday after work it should be ready to start mounting.
A key to getting a tight seal is once you've applied the wood glue to the 3/4 edge, wet your finger (or examination glove) and spread the glue across the entire width, so it coats 100% of the seam. This will maximize the surface area of adhesion. The glue will dry stronger than the MDF.
Do the top first, so you can easily caulk the underside. The mount panel is the most important to have solid.
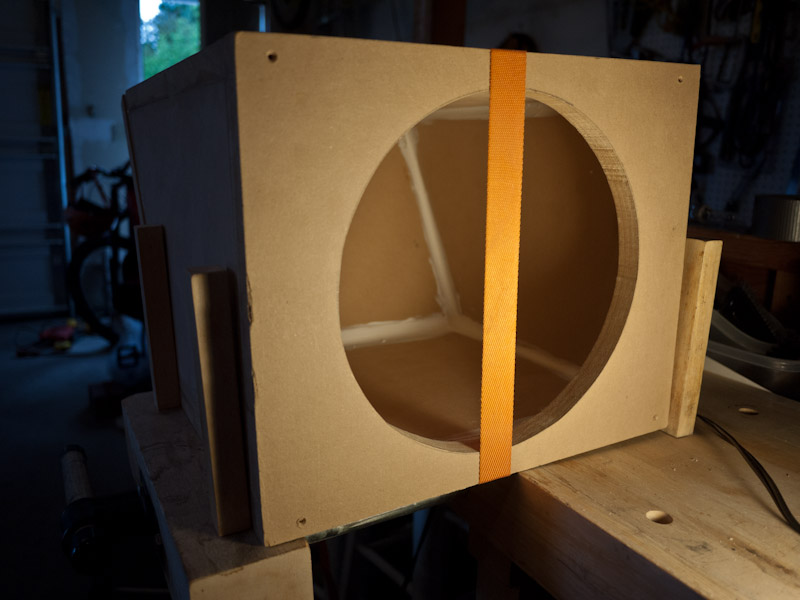
Once the top is sealed, attach the bottom plate and caulk through the hole in the top.
I will be running the wire directly to the subs, no extra wiring for a sub-box terminal. Will cut a hole in the side of the box, pull the 12ga wire through, then seal it with more caulk.
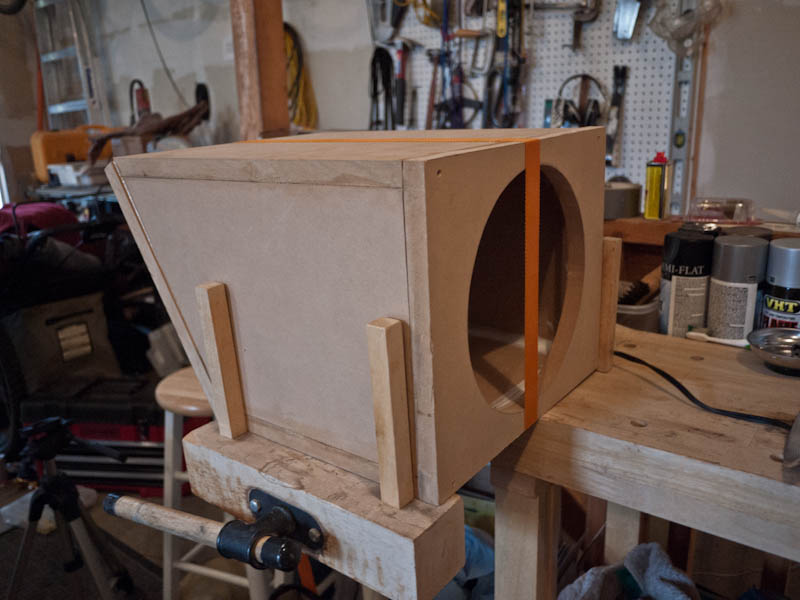
After this whole setup dries I will smooth out all the edges, fill the screw holes (used for clamping the mount down with screws while drying only, will be taken out after), and take a router to all the outside sharp edges for a bit of acoustic treatment.
So far this weekend I've been working on the subwoofer box. I WAS going to be installing EFI!!! But my fuel rails didnt make it in time for the holiday weekend, so they'll be showing up this week. That's OK as I didnt have the fasteners for my intake ducting, OR an air filter, so not too big a deal. Hoping to have it finished in time for Old School Reunion on June 9th!
Wood glued, clamped together, seams all lined up and nice and tight. Inside is sealed with copious amounts of "Big Stretch" caulk. I'm going to let this whole thing cure in the garage for 24 hours - so Tuesday after work it should be ready to start mounting.
A key to getting a tight seal is once you've applied the wood glue to the 3/4 edge, wet your finger (or examination glove) and spread the glue across the entire width, so it coats 100% of the seam. This will maximize the surface area of adhesion. The glue will dry stronger than the MDF.
Do the top first, so you can easily caulk the underside. The mount panel is the most important to have solid.
Once the top is sealed, attach the bottom plate and caulk through the hole in the top.
I will be running the wire directly to the subs, no extra wiring for a sub-box terminal. Will cut a hole in the side of the box, pull the 12ga wire through, then seal it with more caulk.
After this whole setup dries I will smooth out all the edges, fill the screw holes (used for clamping the mount down with screws while drying only, will be taken out after), and take a router to all the outside sharp edges for a bit of acoustic treatment.
GSL-EV
Joined: Jun 2012
Posts: 450
Likes: 8
From: Rapid City, SD
On the GSL-EV: Mounted the last speaker in the left front and wired the speakers to the head unit. Sounds fantastic! Vacuumed the passenger side carpet and put the seat back in. I need to make one more thing and I can call the stereo good. That thing is a 5 volt regulator for the XM radio receiver. Going to take apart the cigarette lighter adapter and see what they have in there. It may be I will just use the guts of that.
The kick panel that covers the left speaker is in sad shape. These things are a kind of cardboard material and this one is curved and split in several places. I should just use it as a template and move the burgundy fabric to the new piece. But in keeping with the theme of trying to overcome OCD I am just going to fix it and put it in the car and try to forget about it.
The kick panel that covers the left speaker is in sad shape. These things are a kind of cardboard material and this one is curved and split in several places. I should just use it as a template and move the burgundy fabric to the new piece. But in keeping with the theme of trying to overcome OCD I am just going to fix it and put it in the car and try to forget about it.
Doug - yeah those kick panel things get a little water on them and they're toast. I'm honestly contemplating just cutting a piece of carpet and using velcro to stick it on to the wall directly - but then I crammed 5.25" speakers up there so the factory cut won't work.
After getting the wire tapped into the sub box, sealing it up, and then adding in a block of wood to adjust the internal volume down to the precise spec for this sub, I was fiending for more. I replaced my driver's side seatbelt, which the retractor took a huge bite out of at one point. Next up:
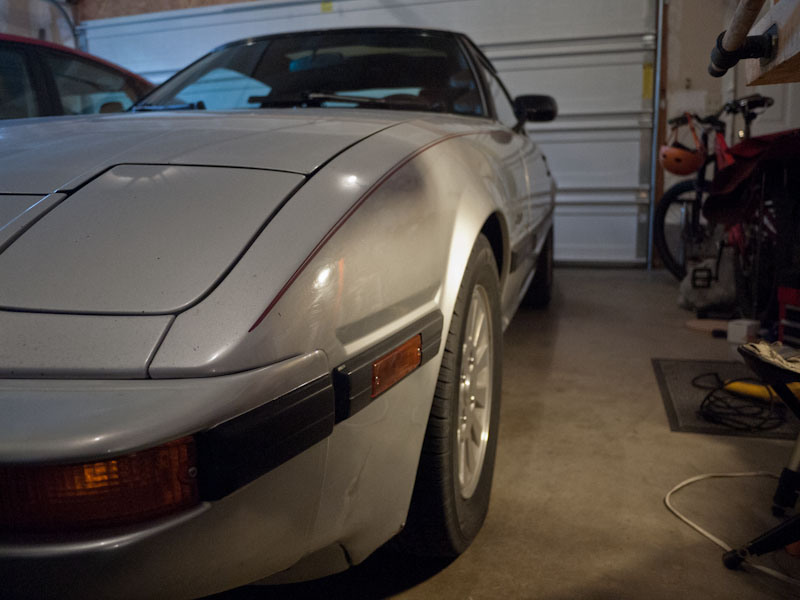
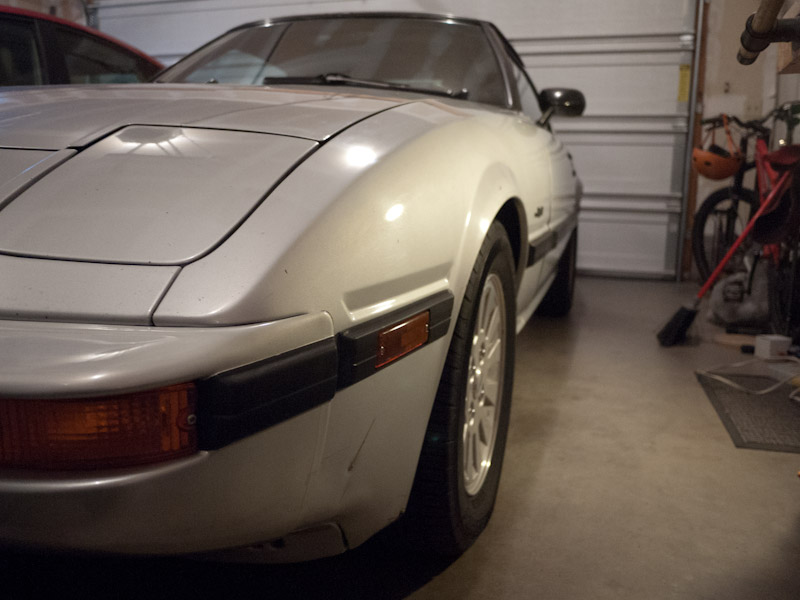
Fungus_Mungus - you inspired me to finally remove the fading/chipping pinstriping. I've never been the biggest fan of it, in my opinion the lines of the car speak for themselves, the stripe just sort of shoves it in your face.
But then there's the side of me that loves the 80's pinstriping. Well, honestly if I do a pinstripe it will probably be a dark grey wide band with smaller line to accent, which would all go below the black side bumpers. That's for another day.
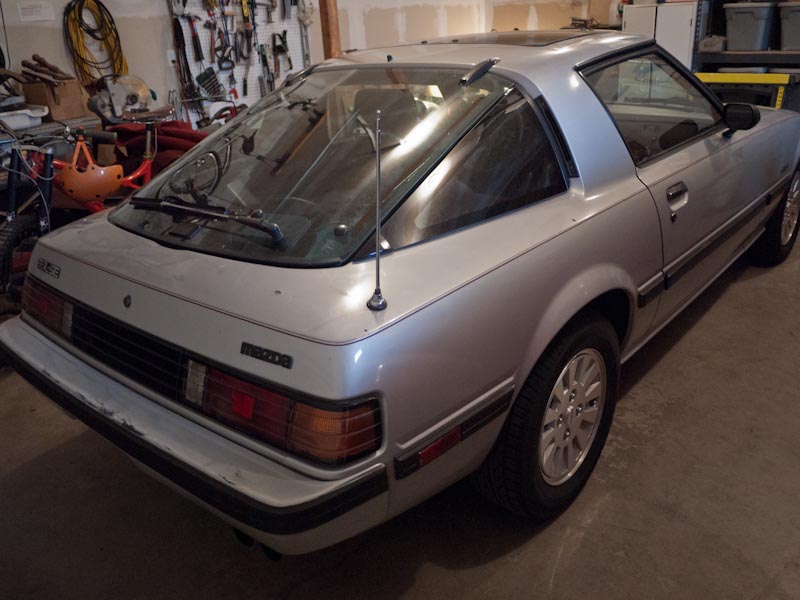
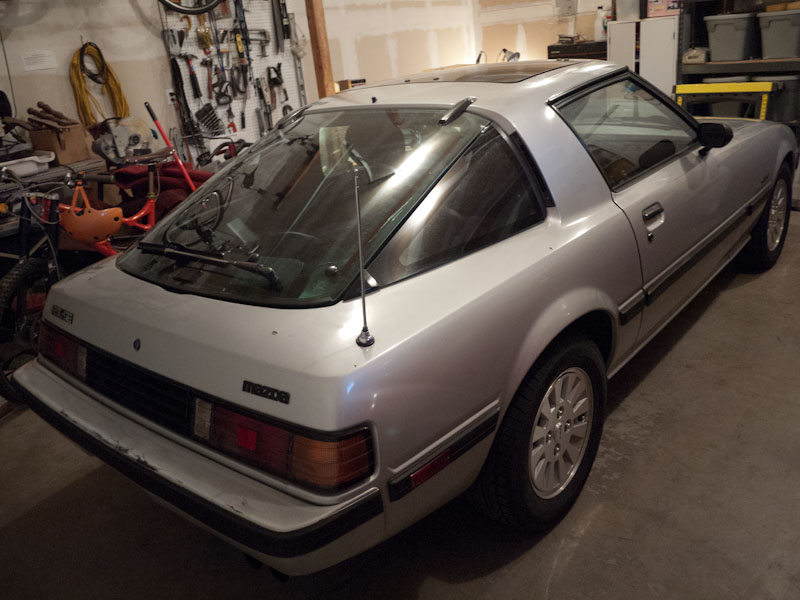
For today, pinstripe is gone. The obligatory before and afters:
---
You can see I also removed the "Unleaded Fuel Only, Seulement Essence Sans Plombe". sad to see it go, but it was so faded and cracked it looked bad
---
---
In other news - My OEM headunit has become possessed by electrical demons. I tapped in some aux. inputs to the PCB on the tape deck, and the inputs work great - SUPER clean sound and ALL noise reduction, loud, balance, and EQ controls (both bass/treb as well as the 9-band) all work for my iPhone input! However I've recently acquired a volume independant whine, and, this ones the weird one - volume dependant line noise (not engine / alternator whine, more like white noise).
That's not the weird part. The weird part is that at high volume when i tap the tape deck buttons, it sounds like I'm tapping a microphone - i can hear it over the car speakers!!?!? The tape shell that I'm using to trigger the system on is empty - there's no wheels, no tape, nothing in there. Just a plastic shell.
Somehow the magnetic reader (or something???) is picking up the vibration and outputting it to my amps.
I have a feeling I'm going to have to tear the whole damn thing apart - desolder my inputs, and see if that resolves anything. If it does not, I have a feeling the head unit is on its way out. There's already a very loud pop when I press the power button. It's entirely probable that all the internals, capacitors transistors whateverthefk are just giving up the ghost.
---
Waiting on my fuel rails, air filter, and cold air intake couplers and then its EFI TIME! Should be getting going this week!
After getting the wire tapped into the sub box, sealing it up, and then adding in a block of wood to adjust the internal volume down to the precise spec for this sub, I was fiending for more. I replaced my driver's side seatbelt, which the retractor took a huge bite out of at one point. Next up:
Fungus_Mungus - you inspired me to finally remove the fading/chipping pinstriping. I've never been the biggest fan of it, in my opinion the lines of the car speak for themselves, the stripe just sort of shoves it in your face.
But then there's the side of me that loves the 80's pinstriping. Well, honestly if I do a pinstripe it will probably be a dark grey wide band with smaller line to accent, which would all go below the black side bumpers. That's for another day.
For today, pinstripe is gone. The obligatory before and afters:
---
You can see I also removed the "Unleaded Fuel Only, Seulement Essence Sans Plombe". sad to see it go, but it was so faded and cracked it looked bad
---
---
In other news - My OEM headunit has become possessed by electrical demons. I tapped in some aux. inputs to the PCB on the tape deck, and the inputs work great - SUPER clean sound and ALL noise reduction, loud, balance, and EQ controls (both bass/treb as well as the 9-band) all work for my iPhone input! However I've recently acquired a volume independant whine, and, this ones the weird one - volume dependant line noise (not engine / alternator whine, more like white noise).
That's not the weird part. The weird part is that at high volume when i tap the tape deck buttons, it sounds like I'm tapping a microphone - i can hear it over the car speakers!!?!? The tape shell that I'm using to trigger the system on is empty - there's no wheels, no tape, nothing in there. Just a plastic shell.
Somehow the magnetic reader (or something???) is picking up the vibration and outputting it to my amps.
I have a feeling I'm going to have to tear the whole damn thing apart - desolder my inputs, and see if that resolves anything. If it does not, I have a feeling the head unit is on its way out. There's already a very loud pop when I press the power button. It's entirely probable that all the internals, capacitors transistors whateverthefk are just giving up the ghost.
---
Waiting on my fuel rails, air filter, and cold air intake couplers and then its EFI TIME! Should be getting going this week!
ioTus,
Glad to be the inspiration for somebody. Looks great! I'm jealous that you have no work to do after removal. Mine will require paint for sure.
Sorry to hear that your head unit is giving you trouble. Mine doesn't work at all. I've had the center console apart since I got the thing last October and still haven't decided what I'm going to do. The truth be told, this car isn't my daily driver...just planning on using it for auto-x and the occasional joy ride. I don't really *need* a stereo, but the hole in the console is disquieting. Something has to go there. Maybe oil temp and AFR gauges? The factory oil pressure and water temp gauges seem fine, so I don't see a point in putting those in. A project for another day.
Last night I jacked up the rear of the car, pulled the wheels off and had a look at the control arm and watts links bushings. 300K miles hasn't been kind to them. Definitely going to have to do something about them when I do the rear end swap. I have a full polyurethane bush kit, but everything I've read says NOT to put urethane bushes on the rear, particularly the upper links. Mazda doesn't sell just the bushings, so I'm stuck with buying new watts links and upper and lower control arms. Then I will still have the binding problem that everyone talks about when they lower their car. Considering putting together custom control arms and links using spherical bushings, but then I have to figure out how I'm going to take up the slack where they they mount, as they're apparently not an exact fit. Maybe I'll just get the OEM links, drill holes in the bushings in the upper links and install them.
Squirted all the bolts with liquid wrench and called it a night.
fm
Glad to be the inspiration for somebody.
Looks great! I'm jealous that you have no work to do after removal. Mine will require paint for sure. Sorry to hear that your head unit is giving you trouble. Mine doesn't work at all. I've had the center console apart since I got the thing last October and still haven't decided what I'm going to do. The truth be told, this car isn't my daily driver...just planning on using it for auto-x and the occasional joy ride. I don't really *need* a stereo, but the hole in the console is disquieting. Something has to go there. Maybe oil temp and AFR gauges? The factory oil pressure and water temp gauges seem fine, so I don't see a point in putting those in. A project for another day.
Last night I jacked up the rear of the car, pulled the wheels off and had a look at the control arm and watts links bushings. 300K miles hasn't been kind to them. Definitely going to have to do something about them when I do the rear end swap. I have a full polyurethane bush kit, but everything I've read says NOT to put urethane bushes on the rear, particularly the upper links. Mazda doesn't sell just the bushings, so I'm stuck with buying new watts links and upper and lower control arms. Then I will still have the binding problem that everyone talks about when they lower their car. Considering putting together custom control arms and links using spherical bushings, but then I have to figure out how I'm going to take up the slack where they they mount, as they're apparently not an exact fit. Maybe I'll just get the OEM links, drill holes in the bushings in the upper links and install them.
Squirted all the bolts with liquid wrench and called it a night.
fm
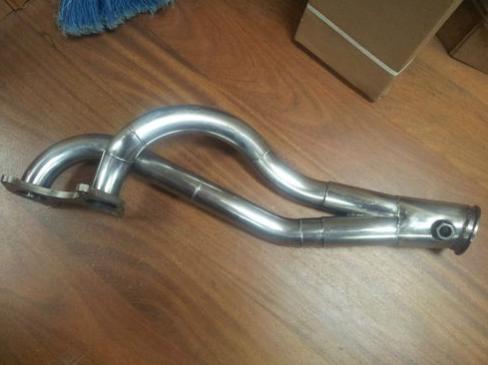
Ordered a new header to replace the restrictive RacingBeat 2" collector. This should suit the extreme streetport 13b a bit better:
http://www.ebay.com/itm/Max-Powers-13b-NA-Header-from-RotaryShack-slightly-used-Mazda-Rx7-Rotary-/151048639752?pt=Motors_Car_Truck_Parts_Accessories&fits=Model%3ARX-7&hash=item232b335508&vxp=mtr
http://www.ebay.com/itm/Max-Powers-13b-NA-Header-from-RotaryShack-slightly-used-Mazda-Rx7-Rotary-/151048639752?pt=Motors_Car_Truck_Parts_Accessories&fits=Model%3ARX-7&hash=item232b335508&vxp=mtr


Joined: Mar 2001
Posts: 31,854
Likes: 3,243
From: https://www2.mazda.com/en/100th/
pulled a lower control arm and drew it up, yes i actually touched my car!
then i virtually built one from rod ends. now that i have spacer dimensions, building ACTUAL part is possible...
then i virtually built one from rod ends. now that i have spacer dimensions, building ACTUAL part is possible...
GSL-EV
Joined: Jun 2012
Posts: 450
Likes: 8
From: Rapid City, SD
Drove my GSL-SE into work today. When I started it up it didnt catch instantly as is normal. Cranked for maybe 10 seconds before it started. And it drove just fine into work. When I went to start it to go to lunch it seemed to turn over more quickly than normal and almost sounds like it is going to start but never does. And I smell raw fuel. I am thinking I have a fuel injector that is weeping or something. Is this unusual? I want to blame the gas I put in on Saturday. Ethanol blend. I wasn't able to find a station that didn't have ethanol (at a price I was willing to pay).
Not sure where to go from here.
Not sure where to go from here.
Can recommend Witch Hunter Performance for cleaning and balancing injectors if need be. Prudent if it hasnt been done in a while. WitchHunter Performance - Injector Cleaning & Flow Testing Services
Also whats the status of your O2 sensor? Fresh?
dougingraham, this is the part you need to delete the pulsation damper.

http://www.summitracing.com/parts/ear-997591erl
http://www.summitracing.com/parts/ear-997591erl
Originally Posted by ioTus
Ordered a new header to replace the restrictive RacingBeat 2" collector. This should suit the extreme streetport 13b a bit better:
Sin City Rotary
Joined: Sep 2009
Posts: 1,707
Likes: 2
From: Las Vegas
You know what - I'd be down to compare side by side on a dyno. Would be fascinating to see the overall powerband differences between long and short primary on the same engine.
You have a long primary, correct? Still eyeballing that PR Extreme muffler??
You have a long primary, correct? Still eyeballing that PR Extreme muffler??
I just have the 81-82 muffler on mine. Still debating whether to try the MegaSquirt or just pull the 6 port to do a 4 port. At the moment I'm working on long primary exhausts so they're on my mind right now. 
Edit: if you're interested I could fab up a nice long primary based on that new header you just got with 2.25" thickwall tubing and presilencers with actual 2.25" cores leading into the PR muffler. That would sing a symphony on a large streetport! Probably max out flow at 10k while still allowing low end torque for better around town driveability. Far better than a short collected header in every way possible.
Edit: if you're interested I could fab up a nice long primary based on that new header you just got with 2.25" thickwall tubing and presilencers with actual 2.25" cores leading into the PR muffler. That would sing a symphony on a large streetport! Probably max out flow at 10k while still allowing low end torque for better around town driveability. Far better than a short collected header in every way possible.
Joined: Mar 2001
Posts: 31,854
Likes: 3,243
From: https://www2.mazda.com/en/100th/
GSL-EV
Joined: Jun 2012
Posts: 450
Likes: 8
From: Rapid City, SD
dougingraham, this is the part you need to delete the pulsation damper.
http://www.summitracing.com/parts/ear-997591erl
http://www.summitracing.com/parts/ear-997591erl
I haven't had a chance to check to see if it is leaking.
GSL-EV
Joined: Jun 2012
Posts: 450
Likes: 8
From: Rapid City, SD
Yes it is - but far LESS important than an engine catching fire and destroying the whole car and possibly seriously injuring or killing you.
You can get new ones at mazdatrix for $150 (worth it IMO but then i'm not the kind of guy that says "$150!? thats more than i paid for the car!"). Or banjo bolt it.
Keep in mind a fuel pressure regulator IS a pulsation dampener, so you wont be left fully without. Basically the PD is there to reduce the jackhammer effect of the injectors opening and closing. In theory it causes insanely fleeting and quick lean or rich conditions in ONE rotor (not both simultaneously) and some will claim that can lead to premature engine detonation. I've not yet seen proof of that as cause of failure though.
RX7.com has O2 sensors for $40:
http://rx7.com/store/rx7/saecu.html
"RP O2 Sensor" 3/4 the way down