What did you do to your FB today?
 05-11-13, 10:50 PM
#2876
today, I autoX'd the ***** off of my car....AND got 3 runs back to back... AAAAAAND got the 2nd fastest time of the day. Was just a lil off pace of a boosted S2000, I clocked faster through the slaloms and technical sections, but a lot of ground can be made up in straits when a car is similar in weight and over double the power
 05-12-13, 07:52 AM
#2877
Saturday:
I had been delaying working on the car stereo wiring on the GSL-EV. I had wanted to run new speaker wires and I needed to route the XM radio antenna cleanly. Spent the afternoon removing seats and pulling up carpet. Found 86 cents (3 quarters a dime and a penny) under the E brake mechanism along with organic debris from the previous owners. Pulled out the OEM Clarion amplifiers that they hide under the storage boxes. If anyone needs those they can have them for shipping costs. Ill keep them around a couple of weeks and then they are going away. The same with the OEM speakers from the GSL-SE although I wouldn't use those as at least one of them is not sounding all that good anymore. They would just be good for someone who really wanted a period accurate car. Pulled the center console apart to see if there is some way to fix the cover. The cover itself is in good shape but the foam they used is almost crumbly and that appears to be what causes them to bow out on the edge. The best thing to do would be to pull off the cover and scrape out all the old foam rubber and remold it using one of the canned spray foams. I am thinking of the expanding material used to weatherproof homes. That would require a custom enclosure to hold the shape while it is expanding. I am going to try to just glue the one edge back in place. I hope epoxy will stick to the cover material.
Took the Red GSL-SE for a drive and on the way home drove slowly through a used car lot. One of the sales guys stopped me and complemented the car. Another young man (late teens) also commented on the car. It is a tribute to the Mazda design staff that these cars still generate interest.
05-12-13, 11:21 PM
#2879
Sin City Rotary
Yesterday clay barred the SA in preparation for next week and WHiV6 ... with DD coming have to atleast look it best lol
Oil change and rear speaker install in the wives GSL ... mocking up of air dam for it as well
tommorow brakes on both cars as there will be two cruises next weekend in addition to all the other running around
Oil change and rear speaker install in the wives GSL ... mocking up of air dam for it as well
tommorow brakes on both cars as there will be two cruises next weekend in addition to all the other running around
05-13-13, 01:41 AM
#2882
Using a dremel w/cutoff wheels, I cut the perch off one of my GSL-SE front struts in prep for the full SE suspension swap to come in the next few weeks. Took a whole package of cutoff wheels to get just one perch off. I still need to grind down the welds so the GC perch will slide onto the shock tube. Guess I'll be getting another package of heavy-duty cutoff wheels for tomorrow night. Or I'll borrow my friend's angle grinder and get a cutoff wheel and make short work of the welds and the second perch.
fm
fm
05-13-13, 11:11 AM
#2885
EZ Lock Cut-off Wheels
Also, having the EZ-Lock arbor (though it's pricey) makes using other attachments like sanding discs and those little scotchbrite-looking buffing pads a whole lot easier.
They work great for heavier cutting of metals. I used them for my air-cleaner mod.
05-13-13, 11:20 AM
#2886
Weekend's progress
So i had huge plans to get 15 projects done, only made progress on one 
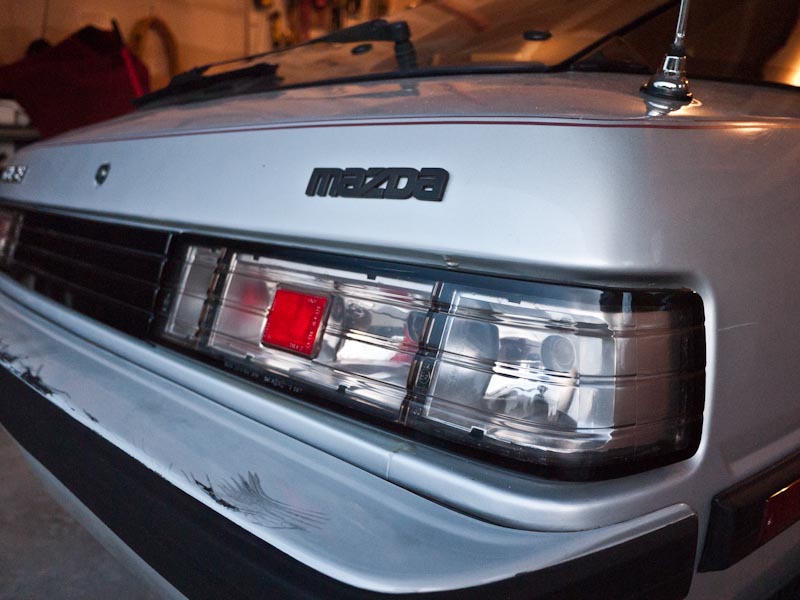
Started with the Mother's headlight polish kit - came with polish, polishing ball, and terry cloth for shining. WOW amazing results. You barely tell from this photo, but here's before:

And after:

If your tail lights and center trim are scratched, faded, generally looking drab, go get this stuff!!! It's $23 or something, and makes your tails and center lens look NEW.
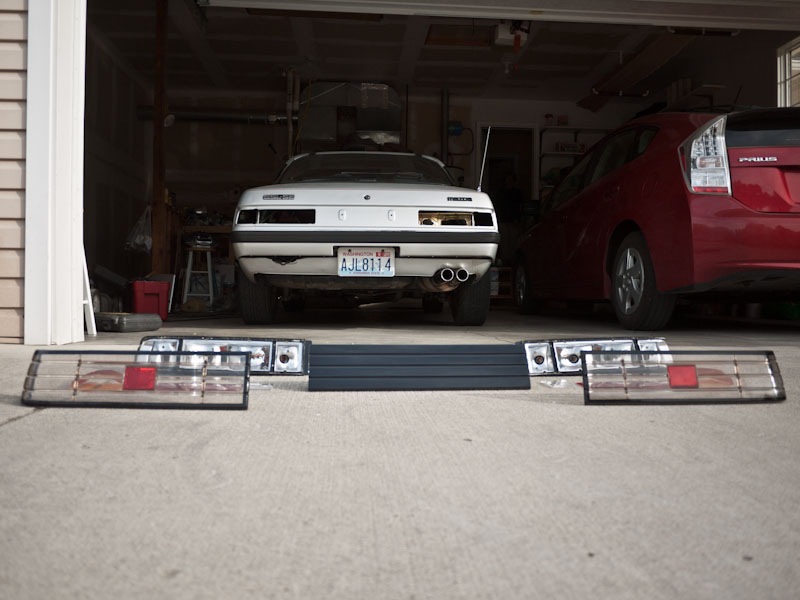
Got the rest of the tail light assembly cleaned and painted. The silver liner paint will make the oem lenses really pop. Normally, with black plastic behind them, they look dull and muddy. white or silver both helps the actual bulb's light as well as external light reflect through the lenses.


I'm letting that cure and then will seal them back up with black silicone caulk and binder clips.
Now, this isn't my style personally, but i had everything apart so I figured I'd set this up and snap a pic in case someone else is inspired:


AGAIN to be perfectly clear I'm not leaving the tail lights euro-style, just figured I'd snap some pics while they were at this stage.
As much as I love round tail lights, I've never been a fan of the painted-rounds that a lot of FB guys have done in the past - they just never look right, especialy at night. A few years ago i came up with an idea to use the OEM housing and build my own light assembly inside. I took the assembly over to O'Reiley's and played around in their auxiliary lights aisle, this is what I came up with:
Pardon the crappy iPhone pic and un-polished lens, but you kinda get the point.
I will definitely be getting a 2nd pair of tail lights and start mocking these up. All the lights they had at O'Reiley's were 2.5" single indicator lights, not dual brake / tail lights. Will have to source some online.
Started with the Mother's headlight polish kit - came with polish, polishing ball, and terry cloth for shining. WOW amazing results. You barely tell from this photo, but here's before:
And after:
If your tail lights and center trim are scratched, faded, generally looking drab, go get this stuff!!! It's $23 or something, and makes your tails and center lens look NEW.
Got the rest of the tail light assembly cleaned and painted. The silver liner paint will make the oem lenses really pop. Normally, with black plastic behind them, they look dull and muddy. white or silver both helps the actual bulb's light as well as external light reflect through the lenses.
I'm letting that cure and then will seal them back up with black silicone caulk and binder clips.
Now, this isn't my style personally, but i had everything apart so I figured I'd set this up and snap a pic in case someone else is inspired:
AGAIN to be perfectly clear I'm not leaving the tail lights euro-style, just figured I'd snap some pics while they were at this stage.
As much as I love round tail lights, I've never been a fan of the painted-rounds that a lot of FB guys have done in the past - they just never look right, especialy at night. A few years ago i came up with an idea to use the OEM housing and build my own light assembly inside. I took the assembly over to O'Reiley's and played around in their auxiliary lights aisle, this is what I came up with:
Pardon the crappy iPhone pic and un-polished lens, but you kinda get the point.
I will definitely be getting a 2nd pair of tail lights and start mocking these up. All the lights they had at O'Reiley's were 2.5" single indicator lights, not dual brake / tail lights. Will have to source some online.
05-13-13, 08:17 PM
#2888
Finished replacing coolant hoses, beehive re-ring w/o removing banjo (thanks jeff20b). Also replaced clutch slave and cleaned fan blades a la iotus. Those items should always go with beehive removal, just cuz they make it a breeze.
Need some vac caps to finish up and put gas in the Sterling in the next few days.
On the whole, I'd rather drive than tinker.
Oh, can one simply poke holes in 3 or 5 letter door cards to accommodate window cranks?
Need some vac caps to finish up and put gas in the Sterling in the next few days.
On the whole, I'd rather drive than tinker.
Oh, can one simply poke holes in 3 or 5 letter door cards to accommodate window cranks?
05-13-13, 09:35 PM
#2889
Ready or not...
Join Date: Dec 2009
Location: Taos, NM
Posts: 261
Likes: 0
Received 0 Likes
on
0 Posts
 05-13-13, 10:18 PM
#2890
Nice Cookboy would love to see the photos!
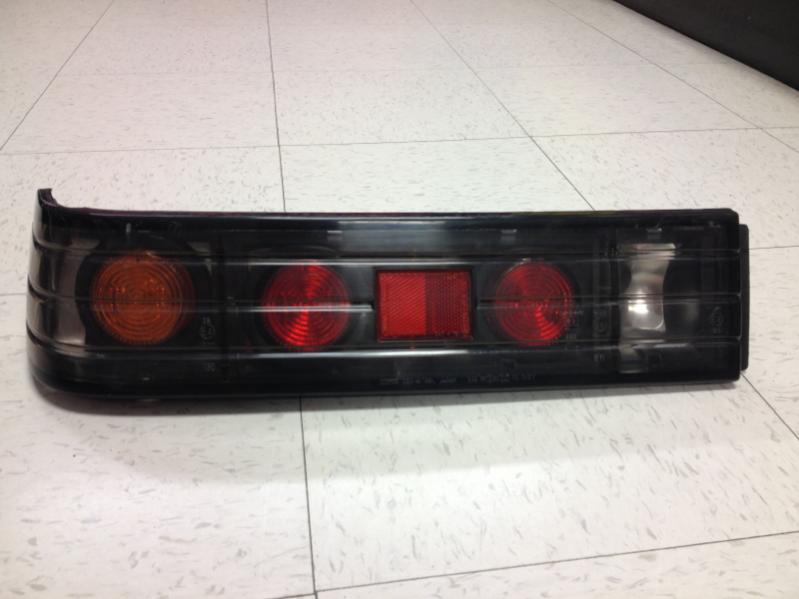
Finished up the tails! The caulk claims 2-4 hour curing period before painting.... not sure if that means thats how long it takes to fully cure or just "to handle", but seeing as the caulk is structural and will be holding on the outer lens, i'll err on the side of caution and leave it overnight.

After they're all sealed up I will be hitting the outer lens with the Mothers lens polisher again, there's still a lot I can clean up on there.
Finished up the tails! The caulk claims 2-4 hour curing period before painting.... not sure if that means thats how long it takes to fully cure or just "to handle", but seeing as the caulk is structural and will be holding on the outer lens, i'll err on the side of caution and leave it overnight.
After they're all sealed up I will be hitting the outer lens with the Mothers lens polisher again, there's still a lot I can clean up on there.
05-13-13, 10:39 PM
#2891
Sin City Rotary
Finished replacing coolant hoses, beehive re-ring w/o removing banjo (thanks jeff20b). Also replaced clutch slave and cleaned fan blades a la iotus. Those items should always go with beehive removal, just cuz they make it a breeze.
Need some vac caps to finish up and put gas in the Sterling in the next few days.
On the whole, I'd rather drive than tinker.
Oh, can one simply poke holes in 3 or 5 letter door cards to accommodate window cranks?
Need some vac caps to finish up and put gas in the Sterling in the next few days.
On the whole, I'd rather drive than tinker.
Oh, can one simply poke holes in 3 or 5 letter door cards to accommodate window cranks?
05-13-13, 11:10 PM
#2893
Originally Posted by Sgt.Stinkfist
Isn't it amazing how empty the harness looks w/ all the junk outta the way?
I bench tested the FC wiring harness and it works! It made the injectors click and the coils spark. So now that I have an idea of what I'm doing, I can test it in the brown car after the Edlebrock

It's funny how sensitive the ECU is. You barely turn the CAS and it sparks. I'm used to the MegaSquirt where it needs a little spin to get going.
05-13-13, 11:12 PM
#2894
Love your attention to detail Iotus. Great looking lights. I've got a set of smoked ones waiting to go on my GS. I did clear mod for my SE, but did not use black sealant. Next set I make I will do that.
Ha! An Fb and a Prius in the garage. Love/Hate relationship there
Ha! An Fb and a Prius in the garage. Love/Hate relationship there
05-13-13, 11:26 PM
#2895
Yah I've used clear caulk the first set I made way back in the day (when I made my first set of frosted tails) and it stood out like a sore thumb! They used tan caulk on many of the OEM units. That's why I spray the outer lens, to cover any scratches or residual over-caulk they inevitably had.
The trick is to fill the trough on the assembly almost completely with caulk, a little bit of an indentation. The very outer round part you fill the outer lens, as there is no trough on the assembly there. Honestly you could just seal up the outside but I don't feel that would be nearly strong enough. Sealing both would ensure no leaks. I'm not doing that on this set, but I have in the past. Hmmm maybe I will...
Yah I call my FB the "carbon offset" - I figure it helps balance out all that gas my parents save with their Prius.
Honestly tho innate the Prius, worst driving experience ever, looks like a short bus, and has ***** visibility.
My gas saver is my 3 bikes which I commute with.
05-13-13, 11:27 PM
#2896
Was doing that heavily last night, pretty crazy when stripped down to only what's necessary. Especially with no emissions requirements, like half of the pins can be taken out.
That's what I did to my 7 last night, 4 hours of wiring to be sure I don't have to do the wiring for the TII swap twice if I can help it. Should be finishing up with the wiring soon, installing it, and swapping in the TII engine within the next 2 weeks.
Pretty stoked about getting her going under TII power, everything has come together and it's just up to me to swap her in
05-14-13, 01:50 AM
#2898
Borrowed an angle grinder and cut the remaining perch off my SE shock tubes. Then ground them down, sanded off the paint in prep for the GC perches. Took a lot less time than it would have with my Dremel.
Also cleaned most of the gasket material off my 13B's intake ports. Still a little left (stubborn stuff). Once that's all off, I'll put the intake on and sort out all the bits that are missing.
fm
Also cleaned most of the gasket material off my 13B's intake ports. Still a little left (stubborn stuff). Once that's all off, I'll put the intake on and sort out all the bits that are missing.
fm

 I killed the power and tried drying it up. FML