
What did you do to your FB today?

Joined: Jun 2008
Posts: 8,376
Likes: 30
From: Chino Hills, CA
Gave my poor tired fingers a break, and decided to conduct a first-pass test of the fine-detail silkscreen for the air cleaner body. Testing the print on glass, because 1) glass is hard to get adherence, so if it works on glass, it will work on any material, and 2) I can easily clean it off the glass and try again until I get the techniques right.
Taped:
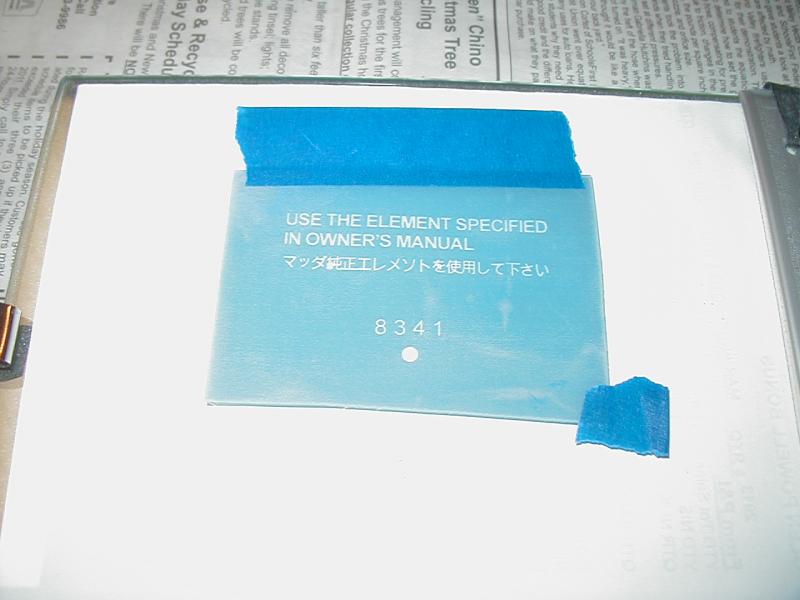
Inked:
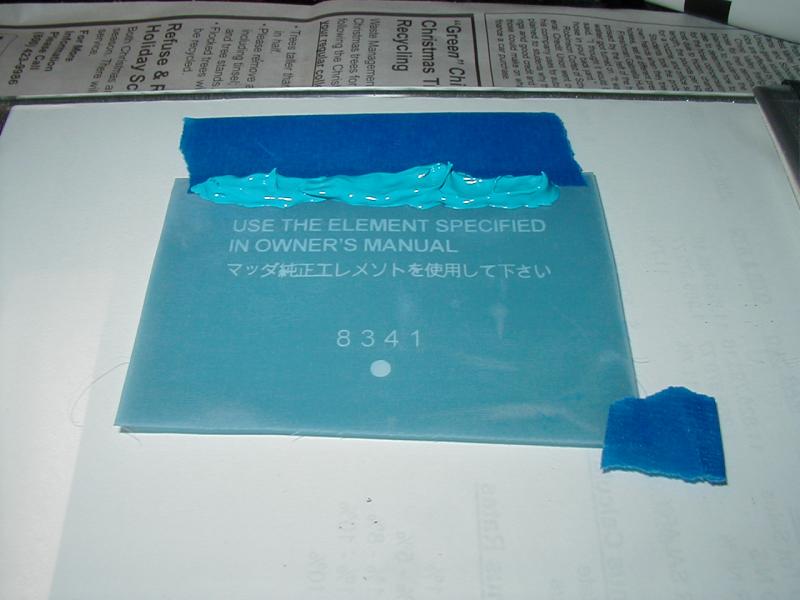
Stroked:

Stoked!
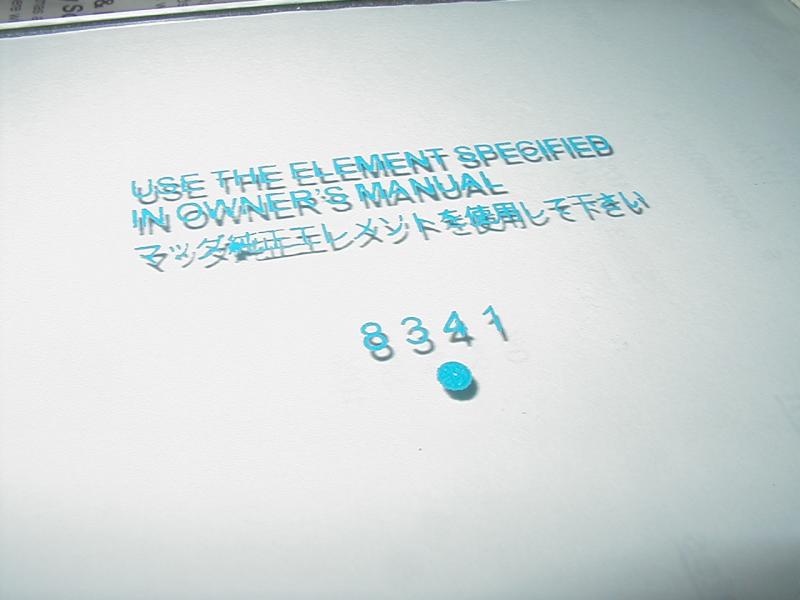
Far better clarity and detail than the original factory legend.
Looks like I could have maybe given it a second pull of ink to better saturate all the corners, but that worked well.
Onward! Sanding!
Taped:
Inked:
Stroked:
Stoked!
Far better clarity and detail than the original factory legend.
Looks like I could have maybe given it a second pull of ink to better saturate all the corners, but that worked well.
Onward! Sanding!
Gave my poor tired fingers a break, and decided to conduct a first-pass test of the fine-detail silkscreen for the air cleaner body. Testing the print on glass, because 1) glass is hard to get adherence, so if it works on glass, it will work on any material, and 2) I can easily clean it off the glass and try again until I get the techniques right.
Taped:

Inked:

Stroked:

Stoked!
Far better clarity and detail than the original factory legend.
Looks like I could have maybe given it a second pull of ink to better saturate all the corners, but that worked well.
Onward! Sanding!
Taped:
Inked:
Stroked:
Stoked!
Far better clarity and detail than the original factory legend.
Looks like I could have maybe given it a second pull of ink to better saturate all the corners, but that worked well.
Onward! Sanding!

Junior Member
Joined: Sep 2011
Posts: 25
Likes: 0
From: Seattle metro
Seems that the consensus is, that my poor old 19085 12a with 194K is past the point of Duct Tape and Baling wire, and in need of a rebuild, my question to all of you, is-Should I do the complete teardown and rebuild on the 12A, or is there enough HP gains from the SE/13B to upgrade? I have two top-notch rotary rebuild specialists in the PNW here(Atkins and Lee's) any input will be elcome
Seems that the consensus is, that my poor old 19085 12a with 194K is past the point of Duct Tape and Baling wire, and in need of a rebuild, my question to all of you, is-Should I do the complete teardown and rebuild on the 12A, or is there enough HP gains from the SE/13B to upgrade? I have two top-notch rotary rebuild specialists in the PNW here(Atkins and Lee's) any input will be elcome
Finished my rear suspension, brakes and exhaust mods. Time for some road testing.
 completed rear suspension 5 | Flickr - Photo Sharing! completed rear suspension 5 | Flickr - Photo Sharing! by GySgtFrank, on Flickr
GSL-EV
Joined: Jun 2012
Posts: 450
Likes: 8
From: Rapid City, SD
85 GSL-SE: Put the repaired battery support back in and started it up. No oil leaks. Put the intake duct work (in front of the radiator) back in and replaced all covers. Tried to start it and found it was flooded. I am pretty sure the fuel injectors are not shutting off completely. I live at the top of a hill so I did a rolling start and headed for the gas station. Put in a bottle of injector cleaner and added gas to the tank. Went for a 15 minute drive with a chase vehicle with tow strap in case it decided to leak. No problems. Went for an approximately 100 mile drive and stopped a couple of times to take some photos. I posted the best 4 of those in the photo thread. The best four are still not all that good. The light was not the best and my composition kind of sucked. That is what practice is for.
I will need to install the splash pan but it needs power washing as it is just coated with a thick layer of oily crud.
I will need to install the splash pan but it needs power washing as it is just coated with a thick layer of oily crud.

OldNewRX7*****
Joined: Sep 2012
Posts: 20
Likes: 0
From: Dumfries, Virginia
83 GSL - Finally got around to replacing the clutch master cylinder - well sort of. Disconnected line from master to slave. removed lower nut. Struggled for 15 minutes to loosen upper nut then decided to call my son in law for a loan of a deep 12mm, 1/4 inch drive socket and universal rather than stay twisted like a pretzel fighting the damn upper nut. Tried to trouble shoot the driver side power window but not sure of validity of test. will pull off door panel as I need to readjust the door catch anyway.


Weekend project actually, but got a bunch done.
got some new peepers. new h4 housings, and cleaned, prepped, painted headlight buckets. Tried to install the upgraded headlight harness - and heeding the warnings about the headlight cover screw bolts (bolts with phillips head damn you Mazda) , I prepped them with pblaster, tapping, more pblaster, more tapping. Stripped 4 out of 8 phillips heads. wasn't up for struggling further with these so i said f*** it and called it a day. Plus I didnt want to set fire to the pblaster fumes by cutting out fresh grooves with a dremel.
I gotta say - the wire routing and screw placement on these headlights is horrible. The lower screw bolts are behind the hood panel. Makes enough sense on an assembly line, obviously the headlights went in before the hood - but seriously they could have just moved the screw mount one inch forward and it would be serviceable with the hood on. /end of rant.
b4


after.


also shaved off the driver's side fender plastic trim. Stuff is uhhh-glay. Pulled it off with a heat gun and it left a narsty strip of glue and rubber (See train photos above, drivers side). Took an eraser wheel to it and they're looking good! As you can see I have yet to do the passenger side.
Also fixed a squeak in my clutch - turned out to be the clutch switch rubbing against the (solidified) rubber pad on the clutch pedal. Put a dab of grease on there and no more squeak every time I push in the clutch! Now I gotta put some dialectric grease on the steering wheel then the interior will be smooth and silent.
got some new peepers. new h4 housings, and cleaned, prepped, painted headlight buckets. Tried to install the upgraded headlight harness - and heeding the warnings about the headlight cover screw bolts (bolts with phillips head damn you Mazda) , I prepped them with pblaster, tapping, more pblaster, more tapping. Stripped 4 out of 8 phillips heads. wasn't up for struggling further with these so i said f*** it and called it a day. Plus I didnt want to set fire to the pblaster fumes by cutting out fresh grooves with a dremel.
I gotta say - the wire routing and screw placement on these headlights is horrible. The lower screw bolts are behind the hood panel. Makes enough sense on an assembly line, obviously the headlights went in before the hood - but seriously they could have just moved the screw mount one inch forward and it would be serviceable with the hood on. /end of rant.
b4
after.
also shaved off the driver's side fender plastic trim. Stuff is uhhh-glay. Pulled it off with a heat gun and it left a narsty strip of glue and rubber (See train photos above, drivers side). Took an eraser wheel to it and they're looking good! As you can see I have yet to do the passenger side.
Also fixed a squeak in my clutch - turned out to be the clutch switch rubbing against the (solidified) rubber pad on the clutch pedal. Put a dab of grease on there and no more squeak every time I push in the clutch! Now I gotta put some dialectric grease on the steering wheel then the interior will be smooth and silent.
Oh and as you'll also notice in the last pics - no more front mazda emblem.
It needed to be painted, so I was VERY carefully pushing the pins out from underneath, when SNAP SNAP the emblem cracked in two places. Oh well. Time for a new one. At least they're ONLY $44 each.
It needed to be painted, so I was VERY carefully pushing the pins out from underneath, when SNAP SNAP the emblem cracked in two places. Oh well. Time for a new one. At least they're ONLY $44 each.
The headlights do look good man. Sucks you couldn't get the harness in. I used that stripped screw remover to tear those crappy screws out. I will warn you to remove your hood if you do. I used a large size electric drill and it tapped the paint.  She needs a new paint job but it still hurts a bit.
She needs a new paint job but it still hurts a bit.
The headlights do look good man. Sucks you couldn't get the harness in. I used that stripped screw remover to tear those crappy screws out. I will warn you to remove your hood if you do. I used a large size electric drill and it tapped the paint. She needs a new paint job but it still hurts a bit.
She needs a new paint job but it still hurts a bit.Good call on the easy-out, I'll pick one up next time i'm by the hardware store. I will be replacing these philips head with low-profile hex bolts. socket makes way mo sense here.
~Geoff
Good plan. Did the same thing.
Just after my last post I got my needed drill bits, and in less that 10 minutes I drilled out all the sizes I need on my lathe.
I also got another set of Grose jets.
Just after my last post I got my needed drill bits, and in less that 10 minutes I drilled out all the sizes I need on my lathe.
I also got another set of Grose jets.
Honestly I'd either make your own or buy used.
I plan on making my own after I get an upholsterist to match the carpet color, as my speakers are much larger than stock.
I was looking what the material was called. But yes, the kickpanels.
We're going to have to make our own because that's probably not something Mazda still has around. If they do have some they will probably want the moon for them.
Joined: Aug 2011
Posts: 3,078
Likes: 42
From: Cambridge, Minnesota
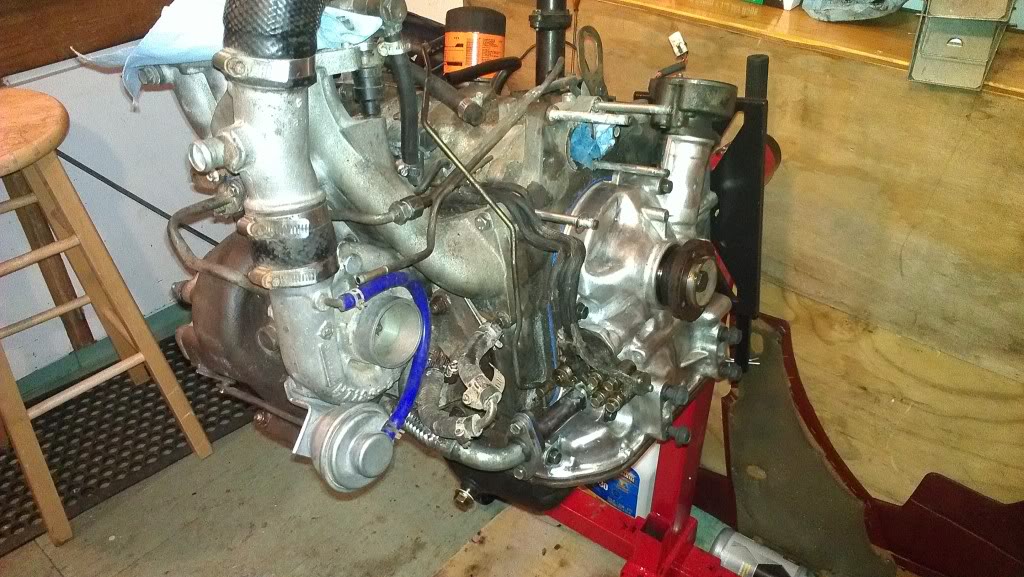
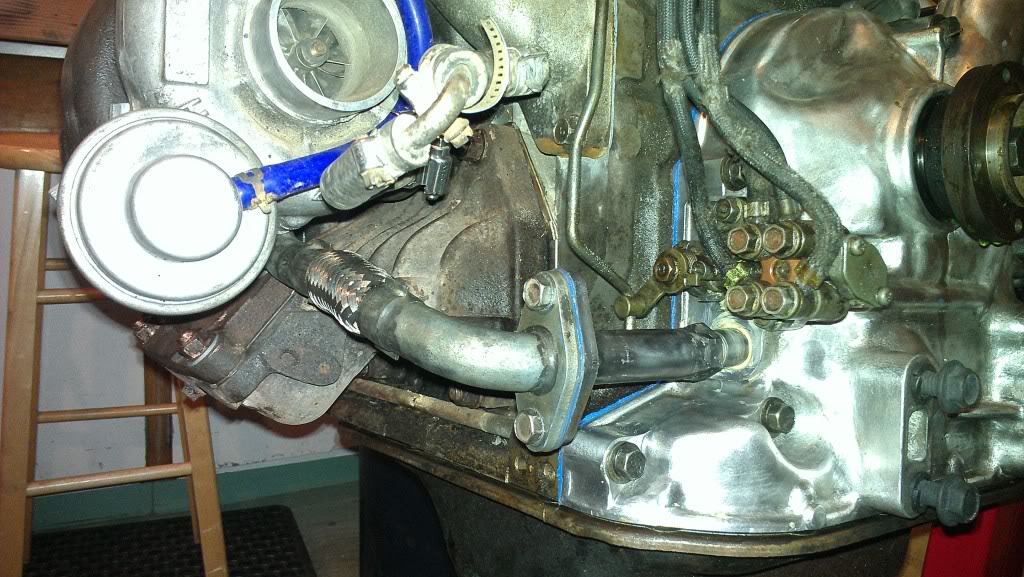
Got my 13BT almost ready to drop in. If I really wanted to I could finish modding the 12a engine mount and start installing the whole shebang tomorrow but I have to wait for an Atkins order to get here on Friday.
Started:

Finished.
Got a lot done tonight and pretty happy with the progress. Should be swapping it in on Saturday hopefully and getting the driveshaft made early next week so I can start driving it!
Started:
Finished.
Got a lot done tonight and pretty happy with the progress. Should be swapping it in on Saturday hopefully and getting the driveshaft made early next week so I can start driving it!
ioTus, can you post pics of your car with the side trim removed? I really want to do this with mine, but I know it's been repainted and I'm super paranoid I'm going to hate life if I do this.
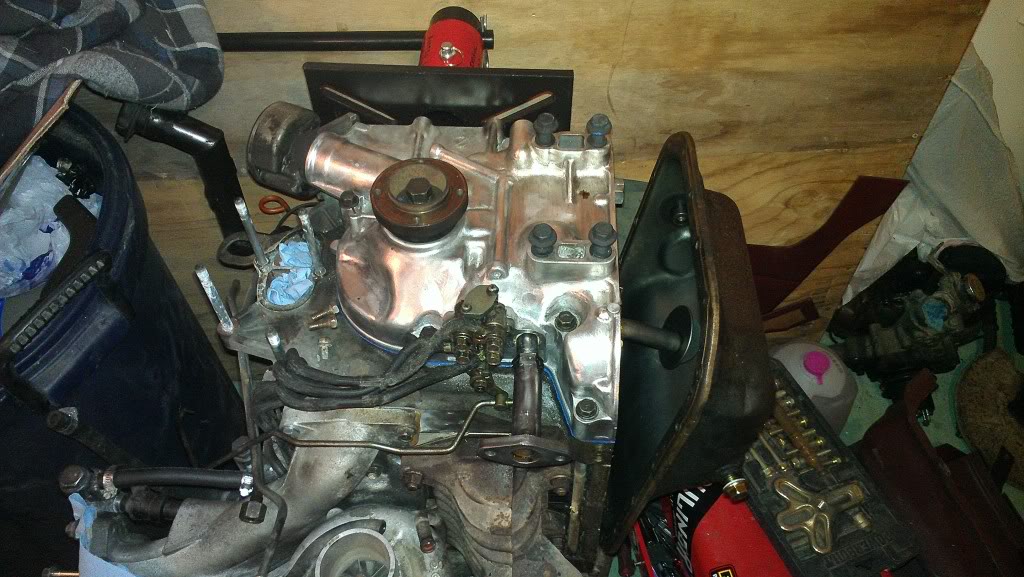
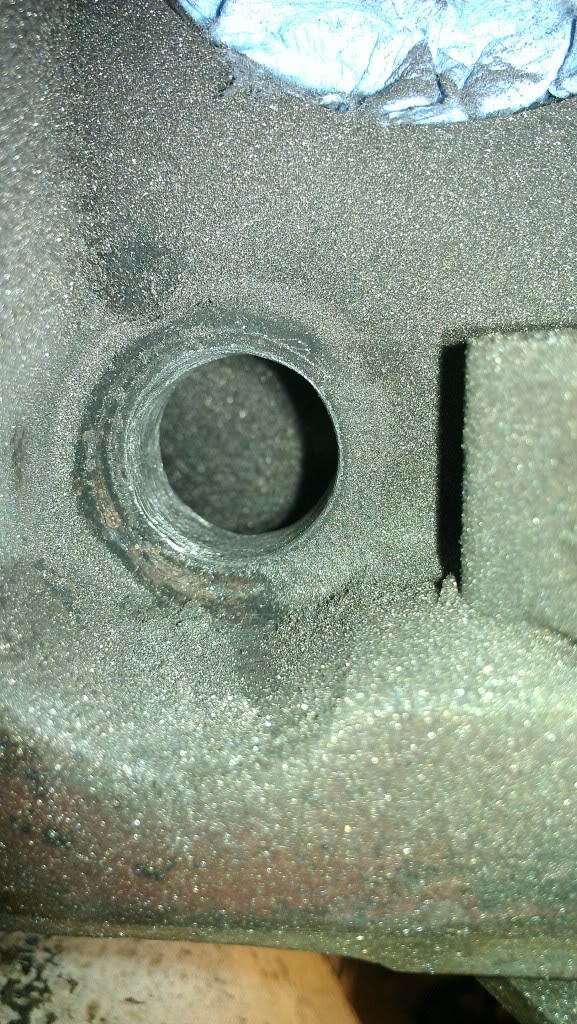
Tonight I pulled the auxiliary port actuators our of my 13B lower intake manifold, cleaned them up, and reinstalled them. Much better. Also pulled out the upper intake manifold and dynamic chamber and cleaned off the remaining gasket. Now more cleaning...this thing is fugly. :p
fm
Tonight I pulled the auxiliary port actuators our of my 13B lower intake manifold, cleaned them up, and reinstalled them. Much better. Also pulled out the upper intake manifold and dynamic chamber and cleaned off the remaining gasket. Now more cleaning...this thing is fugly. :p
fm