GT35R Here I come! :D


 12-28-06, 12:25 PM
#229
Rotary Enthusiast
Thread Starter

I am almost done!
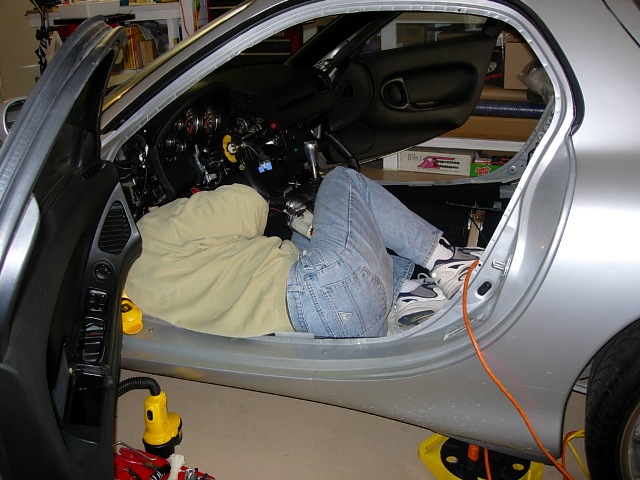
Damn wiring! Sure is fun soldering in such tight places, especially not breathing in fumes .
.
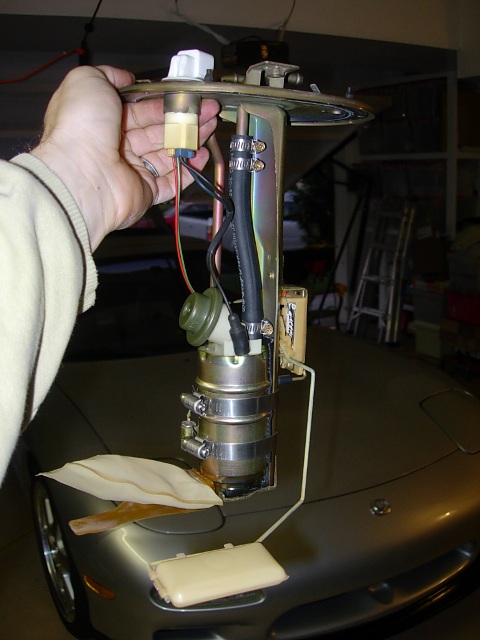
I'm almost done putting the interior back together. I have a new Nardi steering wheel to swap air bags, and lastly to install the new Apexi BNR32 fuel pump that just came in.
It took me a little longer because I took everything apart to put in a ground from the battery directly to the starter!
If all things fall into place, I might have a startup vid this weekend.
Damn wiring! Sure is fun soldering in such tight places, especially not breathing in fumes
.I'm almost done putting the interior back together. I have a new Nardi steering wheel to swap air bags, and lastly to install the new Apexi BNR32 fuel pump that just came in.
It took me a little longer because I took everything apart to put in a ground from the battery directly to the starter!
If all things fall into place, I might have a startup vid this weekend.
12-31-06, 09:40 PM
#231
Rotary Enthusiast
Thread Starter
Happy New Year!
WooHoo!
Well I finished everything this morning!
Put the fuel pump in...
I put in about 5 gallons of new fuel on top of the 3-4 gallons of old fuel.
I had a little brain fart and connected the Injector Driver to the cig lighter circuit... to my surprise it disconnects when you turn the ignition to crank the engine.
So I ran a quick wire to an ignition wire and voila! It started on the first try!
I took a couple of short vids of the startup!
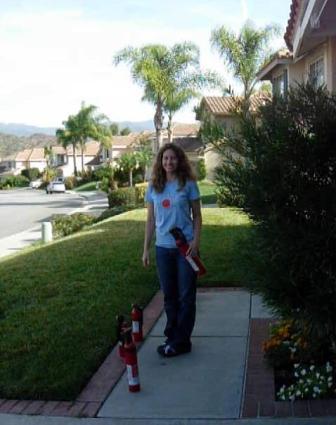
Here's my little helper, just in case...
Here's the vids; they're 'a bit' large and in Quicktime format. I will try and convert/shrink it for those that are internet connection challenged. I need to find some software on the other PC to do it. (right click / save as...)
http://www.atihun.com/pictures/Rebui...6/dscn3277.mov
http://www.atihun.com/pictures/Rebui...6/dscn3280.mov
BTW, I let it idle for about 15 minutes and it's F'ing LOUD! With some preliminary settings it idles at 1100 RPM and AFR is about 12. I leaned it out to about 13.5 and it ran a bit better. Obviously it will need more work as it's running quite rich.
Oh yea, after the exhaust smoke cleared, the exhaust wrapping heated up and it stank/smoked like crap for a while.
I later drove it around the block and it definitely needs a good bit of tuning.
Thanks to K for supporting my project!
Also thanks to Chuck (cewrx7r1) for the help, tuning notes and initial map; they helped get the car started on the first try!
Thanks to all for the ideas and inspiration for getting to this point.
WooHoo!
Well I finished everything this morning!
Put the fuel pump in...
I put in about 5 gallons of new fuel on top of the 3-4 gallons of old fuel.
I had a little brain fart and connected the Injector Driver to the cig lighter circuit... to my surprise it disconnects when you turn the ignition to crank the engine.
So I ran a quick wire to an ignition wire and voila! It started on the first try!
I took a couple of short vids of the startup!
Here's my little helper, just in case...
Here's the vids; they're 'a bit' large and in Quicktime format. I will try and convert/shrink it for those that are internet connection challenged. I need to find some software on the other PC to do it. (right click / save as...)
http://www.atihun.com/pictures/Rebui...6/dscn3277.mov
http://www.atihun.com/pictures/Rebui...6/dscn3280.mov
BTW, I let it idle for about 15 minutes and it's F'ing LOUD!
With some preliminary settings it idles at 1100 RPM and AFR is about 12. I leaned it out to about 13.5 and it ran a bit better. Obviously it will need more work as it's running quite rich.Oh yea, after the exhaust smoke cleared, the exhaust wrapping heated up and it stank/smoked like crap for a while.
I later drove it around the block and it definitely needs a good bit of tuning.
Thanks to K for supporting my project!
Also thanks to Chuck (cewrx7r1) for the help, tuning notes and initial map; they helped get the car started on the first try!
Thanks to all for the ideas and inspiration for getting to this point.
Last edited by atihun; 12-31-06 at 09:45 PM.
12-31-06, 10:15 PM
#232
Rotary Enthusiast
Thread Starter
Forgot to mention that the vids are boring...
The first is just a quick shot of the engine and interior.
The second is the car starting and idling only.
The first is just a quick shot of the engine and interior.
The second is the car starting and idling only.
01-01-07, 12:31 PM
#233
Rotary Enthusiast
Thread Starter
Okay so they're not boring , but there's not a lot of action...
I converted the files to mpeg-2 so they can be opened with M$ windows media player:
engine and interior:
http://www.atihun.com/pictures/Rebui...006/engine.mpg
idling:
http://www.atihun.com/pictures/Rebui...006/idling.mpg
, but there's not a lot of action...I converted the files to mpeg-2 so they can be opened with M$ windows media player:
engine and interior:
http://www.atihun.com/pictures/Rebui...006/engine.mpg
idling:
http://www.atihun.com/pictures/Rebui...006/idling.mpg
01-01-07, 01:44 PM
#234
damn man... you're setup is perfect... almost the exact thing I'm doing but I'm in too much of a hurry to get everything spotless like yours... GREAT job on the build up... and I got alot of inspiration from the way you mounted your v-mount, I'm now gonna do it the same way (I was having a problem figureing out good mounting points). Do you have air temp sensors and gauges? I'm just wondering how well the v-mount is working out. Also I heared the duel oil coolers actually works TOO well, IE: the oil stays like 40 degrees too cold. anyhow Keep the updates going.... oh and maybe I missed it but what ems are you using?
01-01-07, 01:46 PM
#235
Building my car...
iTrader: (1)
Join Date: Apr 2004
Location: Arizona
Posts: 441
Likes: 0
Received 0 Likes
on
0 Posts
Man, I have been in the rotary world for a long while and worked on some really trick full race cars and some major street beasts and I have to say I am really impressed. Good work Atihun.
01-01-07, 10:09 PM
#236
Rotary Enthusiast
Thread Starter
Thanks! I don't have any data yet on the cooling, I will soon.
I think the hard part starts now; the tuning.
I think I had about 4 gallons of 1.8 year old fuel in the tank and I added 5 gallons new, which is contributing to the rough idle. Even when I lean it out to 13-14 it's still a bit rough. We'll see...
I think the hard part starts now; the tuning.
I think I had about 4 gallons of 1.8 year old fuel in the tank and I added 5 gallons new, which is contributing to the rough idle. Even when I lean it out to 13-14 it's still a bit rough. We'll see...
 01-02-07, 10:11 AM
#240
Originally Posted by atihun
Thanks! I don't have any data yet on the cooling, I will soon.
I think the hard part starts now; the tuning.
I think I had about 4 gallons of 1.8 year old fuel in the tank and I added 5 gallons new, which is contributing to the rough idle. Even when I lean it out to 13-14 it's still a bit rough. We'll see...
I think the hard part starts now; the tuning.
I think I had about 4 gallons of 1.8 year old fuel in the tank and I added 5 gallons new, which is contributing to the rough idle. Even when I lean it out to 13-14 it's still a bit rough. We'll see...
The hard part is done. Tuning is just something that you will do to the car from now on. More changes in the beginning and less as time goes on. Sounds like you have a start map going...and you are in the break-in period so it's tuning the no-boost rpm range. You need help, hollar.
Tony
 01-06-07, 12:18 PM
#243
Rotary Enthusiast
Thread Starter
Thanks guys!
I am very happy with the build, but I have so much to sort out to make sure that it's going to run well!
Fine tuning the throttle body setup, idle, and the 3 bar map sensor to start.
I'll keep posting updates as they come up.
On a side note, there are no leaks at all and the stock gauges I took apart are working pretty well.
01-08-07, 10:28 PM
#244
thats not paint....
I have to say, I have been following this thread for some time. It is nice to see some of the quality work & unique ideas, plus the posts & progress are kept up with.
I did have a couple of questions... about that wire mesh for the air damn. I think it looks clean, tasteful, and serves a purpose. What quantity did you order from McMaster? They list it out in square feet... correct me if my math is wrong... but for a 8.5"x35" diagonal section you would need like 6 sq feet and they are selling it for $14 a square foot? Thats close to $100 for wire mesh. Maybe Im not wise to the price of wire mesh these days...
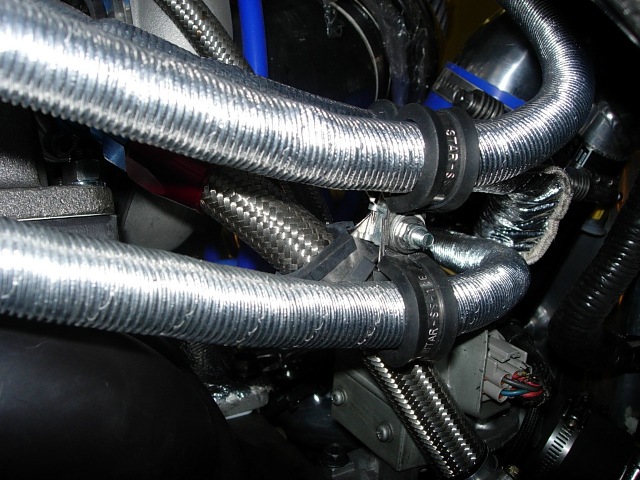
Also, not that I am about to tackle the wiring in my car yet, but for future reference... what products did you use to clean up those harnesses? I know you mentioned something about silicone self fusing tape and it looks like there is some split corrugated tubing, anything else?
Its good to see you got the car started, hope shes a blast to drive!!!
Thanks,
Chris
I did have a couple of questions... about that wire mesh for the air damn. I think it looks clean, tasteful, and serves a purpose. What quantity did you order from McMaster? They list it out in square feet... correct me if my math is wrong... but for a 8.5"x35" diagonal section you would need like 6 sq feet and they are selling it for $14 a square foot? Thats close to $100 for wire mesh. Maybe Im not wise to the price of wire mesh these days...
Also, not that I am about to tackle the wiring in my car yet, but for future reference... what products did you use to clean up those harnesses? I know you mentioned something about silicone self fusing tape and it looks like there is some split corrugated tubing, anything else?
Its good to see you got the car started, hope shes a blast to drive!!!
Thanks,
Chris
01-21-07, 04:05 AM
#245
Senior Member

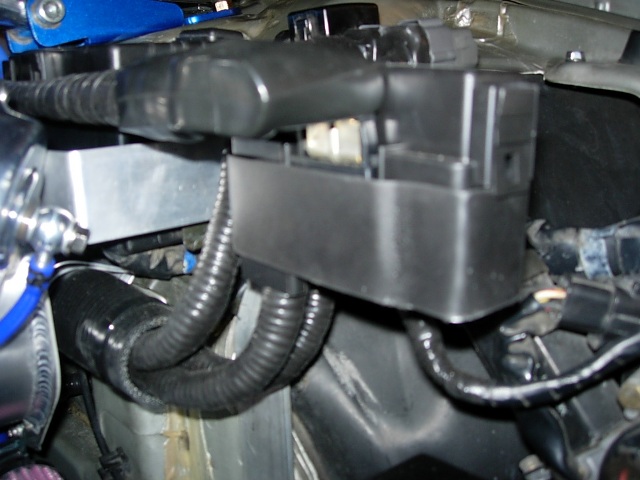
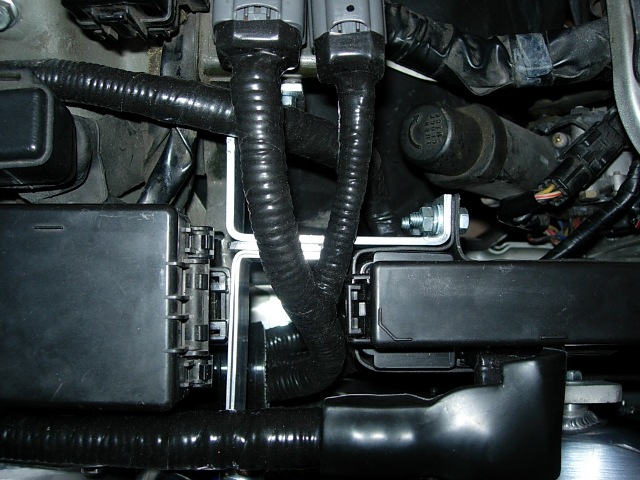
Here's the relocation of the fuseboxes:
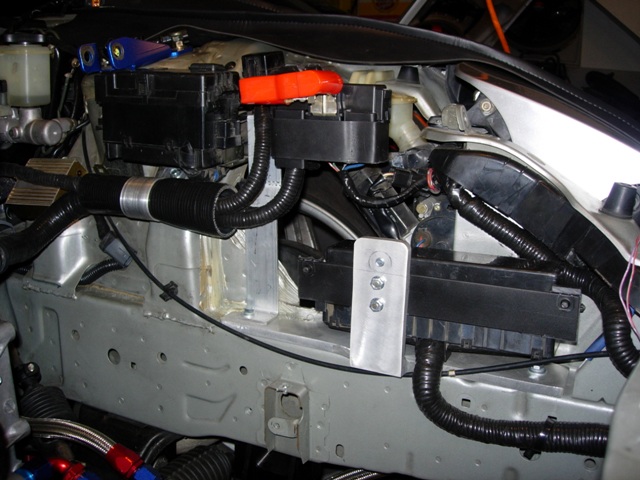
Little by little...
BTW, silicone self fusing tape is the best thing ever!
Little by little...
BTW, silicone self fusing tape is the best thing ever!
I know you mentioned how you made the bracket for the long fuse box...but what about the battery/short fusebox? Mine has been dangling for years now as I have yet to figure out a clean and feasible way to attach a metal bracket to it.
02-02-07, 02:04 PM
#246
Rotary Enthusiast
Thread Starter
Originally Posted by 7-sins
What quantity did you order from McMaster? They list it out in square feet... correct me if my math is wrong... but for a 8.5"x35" diagonal section you would need like 6 sq feet and they are selling it for $14 a square foot? Thats close to $100 for wire mesh. Maybe Im not wise to the price of wire mesh these days...
Also, not that I am about to tackle the wiring in my car yet, but for future reference... what products did you use to clean up those harnesses? I know you mentioned something about silicone self fusing tape and it looks like there is some split corrugated tubing, anything else?
Also, not that I am about to tackle the wiring in my car yet, but for future reference... what products did you use to clean up those harnesses? I know you mentioned something about silicone self fusing tape and it looks like there is some split corrugated tubing, anything else?
Yes, that is about what you will need, and I paid for the mesh. You end up with some left over because of the way you will cut diagonally. Remember this is stainless, hence the added cost. Should last quite a while though.
As for the harness, I started with a brand new one and hacked that up. Once I removed the wires that I didn't need, I made sure to re-route it so I know where the bends needed to be. I used the silicone tape, some high temp electrical tape over some areas of silicone tape, yes some split looming that I then covered in silicone tape and in some areas also covered that in a heat shielding wrap.
I built it to last.
Originally Posted by FDeez
I know you mentioned how you made the bracket for the long fuse box...but what about the battery/short fusebox? Mine has been dangling for years now as I have yet to figure out a clean and feasible way to attach a metal bracket to it.
 02-02-07, 02:35 PM
#248
Full Member
Join Date: Feb 2005
Location: In the driver's seat.
Posts: 110
Likes: 0
Received 0 Likes
on
0 Posts
Great job!!! I just went through all the pages of this thread and its like watching a Discovery Channel show on how to properly build an RX-7. Thanks for this--it's giving me some inspiration for my own build. I look forward to more updates.