FD3S: KS-Auto Burnout Style Full Aero Kit ...... Now Available.
 04-26-09, 10:21 AM
#476
BOOSTLI
iTrader: (2)
Join Date: Apr 2005
Location: Minnesota
Posts: 728
Likes: 0
Received 0 Likes
on
0 Posts
Hey Im not done yet buddy the car hasent been droped yet and things arent set to where I want them to be cause I need to do some adjusting first. Slow down this work takes time and cant rush because you dont want to just slam it and start driving and bust anything up. Gotta make sure everything is clear. And as for the side still thinking on if I want to run the feed sides. One step at a time you know all the stuff I just did cost alot of money. But when the car is totally finish I will load up finish pics. Those pics were just the car painted and installed parts and wetsanded and buffed so its still not complete yet, but thanks for the great compliments guys. Now I can slow my paste down now.
The paint looks great.
I dont mean to sound like an *******, but I think you should pick up the burnout sides or maybe the feed ones? It looks good right now, but lower and some skirts would be amazing on that car.
Nice work though, thank god you did the rear fenders correctly.
I dont mean to sound like an *******, but I think you should pick up the burnout sides or maybe the feed ones? It looks good right now, but lower and some skirts would be amazing on that car.
Nice work though, thank god you did the rear fenders correctly.
 04-27-09, 11:55 AM
#477
Junior Member

Join Date: Apr 2009
Location: Little Rock, AR
Posts: 14
Likes: 0
Received 0 Likes
on
0 Posts
Looking good touturboRX7! 
Is that the Shine rear tail light cover? Did you have any fitment issues?
Also, when you do decide on rims, what size/offset are you going to order?
Is that the Shine rear tail light cover? Did you have any fitment issues?
Also, when you do decide on rims, what size/offset are you going to order?
04-27-09, 10:49 PM
#478
BOOSTLI
iTrader: (2)
Join Date: Apr 2005
Location: Minnesota
Posts: 728
Likes: 0
Received 0 Likes
on
0 Posts
Yes that is the shine auto tail light cover. The fittment isnt all that. It fits but the top part of the tail light cover where its supposed to cover the center light doesnt fit good.Also at the ends of the tail light cover it doesnt meet at the ends and looks like it was cut too short so you end up seeing edges of the tail lights. Not soo good in my opinion but it looks nice but doesnt cover all of the parts of the taillight cover. And as for rims I am going to get 18x9 +20 fronts and 18x10+20 rears that s what I am going to be running. anyt other questions that I can answer I would be willing to answer for anyone. Talk to you guys later

 05-05-09, 08:02 AM
#482

 05-18-09, 07:43 AM
#485
Junior Member
Join Date: Apr 2009
Location: Little Rock, AR
Posts: 14
Likes: 0
Received 0 Likes
on
0 Posts

Just call, he will give you a good estimate of how long it will take...
 [/IMG]
 [/IMG]
 [/IMG]
06-07-09, 03:59 PM
[/IMG]
06-07-09, 03:59 PM
#488
BOOSTLI
iTrader: (2)
Join Date: Apr 2005
Location: Minnesota
Posts: 728
Likes: 0
Received 0 Likes
on
0 Posts
hey when you molded your rear bumper and tail light cover did you grind down the body panel and stuff and then fiberglass all the pieces together to mold it in as one piece? I hope so cause If you didnt do that its going to crack on you if you just bondo over the stuff. you should reinforce the panels that you are fiberglassing together to make it strong so it wont ever crack on you. just making sure cause I would hate to mold that and have it crack a week later. Also how are you ever going to change your tail lights if the bulb went out are you cutting slots in the back to you can change them?
 06-07-09, 10:51 PM
#490
Junior Member
Join Date: Apr 2009
Location: Little Rock, AR
Posts: 14
Likes: 0
Received 0 Likes
on
0 Posts
hey when you molded your rear bumper and tail light cover did you grind down the body panel and stuff and then fiberglass all the pieces together to mold it in as one piece? I hope so cause If you didnt do that its going to crack on you if you just bondo over the stuff. you should reinforce the panels that you are fiberglassing together to make it strong so it wont ever crack on you. just making sure cause I would hate to mold that and have it crack a week later. Also how are you ever going to change your tail lights if the bulb went out are you cutting slots in the back to you can change them?
First thing he did was modify the trunk to change out the bulbs, put the lights back in the car and made sure he could change them all.
One other problem is the draining of the rear deck lid. Something I didn't personally think of. With the tailight cover completely molded, the deck lid wouldn't drain correctly, so he molded in some vents inside the deck lid to allow water to go behind the bumper to drain. It was his idea to add/mold this piece and he said it ended up being the hardest piece because of all the challenges associated with it.
I can post more pix if you want...


 06-16-09, 12:19 PM
#492
Would you mind taking a closer, more focused picture of the rear, near the mid brake light and bumper junction? The gap on mine there is huge (fitment has been appalling with every single piece of the kit but that rear bumper gap there is really bad on my car).
06-16-09, 04:24 PM
#493
w00t
iTrader: (4)
Join Date: May 2007
Location: miami
Posts: 310
Likes: 0
Received 0 Likes
on
0 Posts
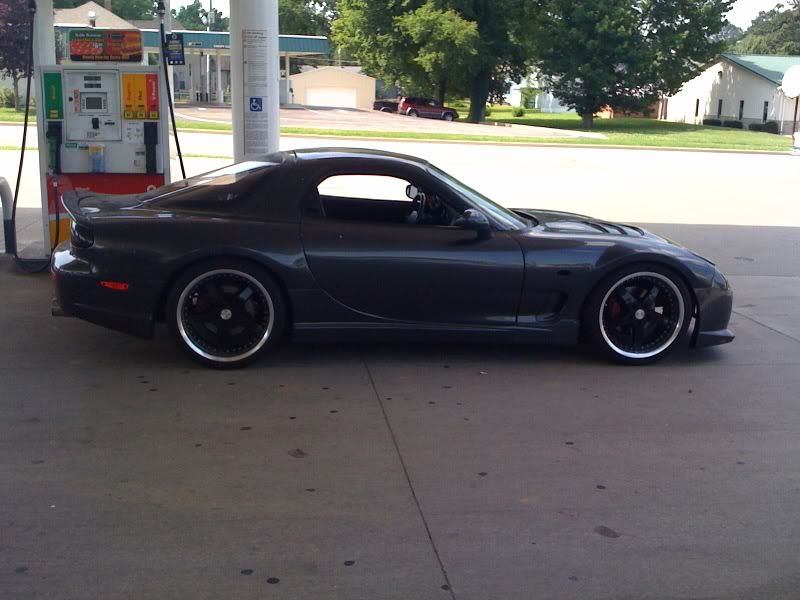
My fitment is a bit funky on the front, especially near the lights. Also the rear has a little bit of a gap as you described, but it's not too bad.
I will get more pics all around once it's off the lift and everything has been secured properly.
06-17-09, 07:23 PM
#494
I will take it once it's off the lift in a few days, there's really no light and or clearance behind the lift...
My fitment is a bit funky on the front, especially near the lights. Also the rear has a little bit of a gap as you described, but it's not too bad.
I will get more pics all around once it's off the lift and everything has been secured properly.
My fitment is a bit funky on the front, especially near the lights. Also the rear has a little bit of a gap as you described, but it's not too bad.
I will get more pics all around once it's off the lift and everything has been secured properly.
You can literally see through to the rear hatch on mine, that's how bad it is. Probably about 1/2" gap!
Front fenders were far from peachy as well...
 06-22-09, 10:08 PM
#496
Be a Hero...Punch a Koala
Join Date: Aug 2005
Location: Evansville, IN
Posts: 1,022
Likes: 0
Received 0 Likes
on
0 Posts
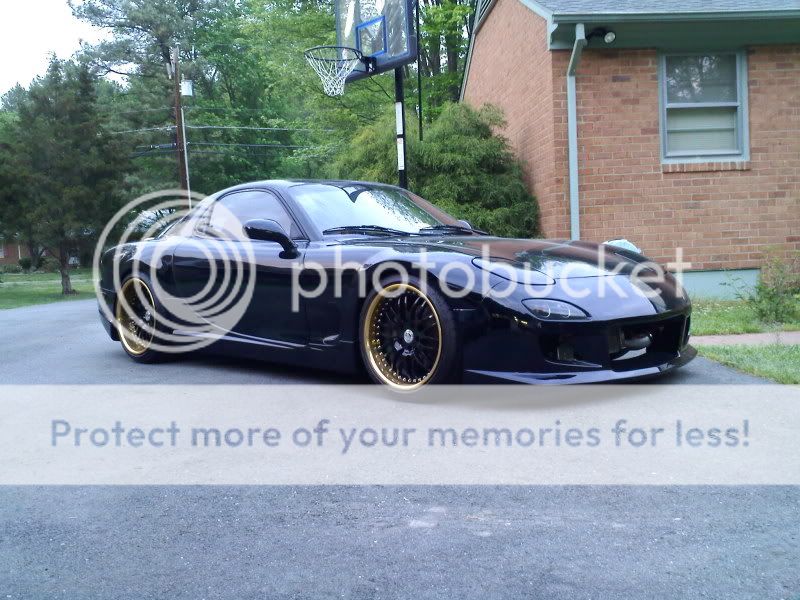
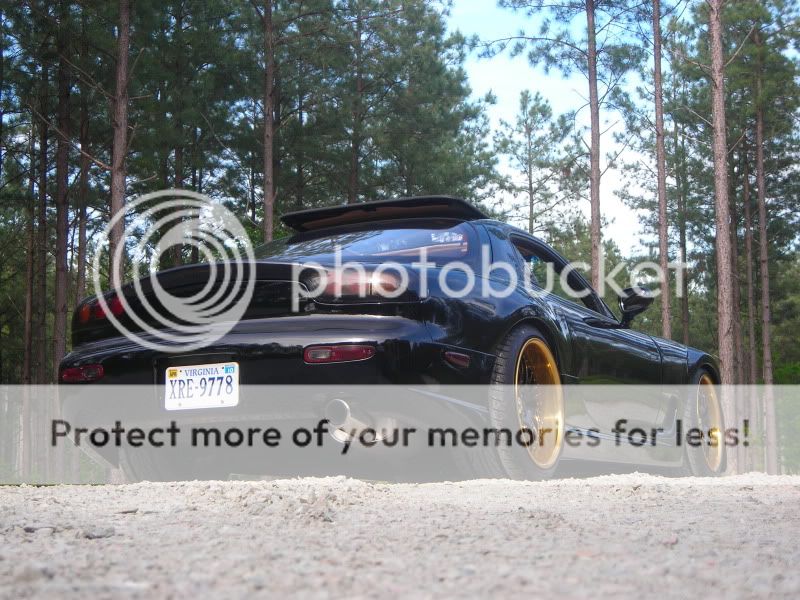
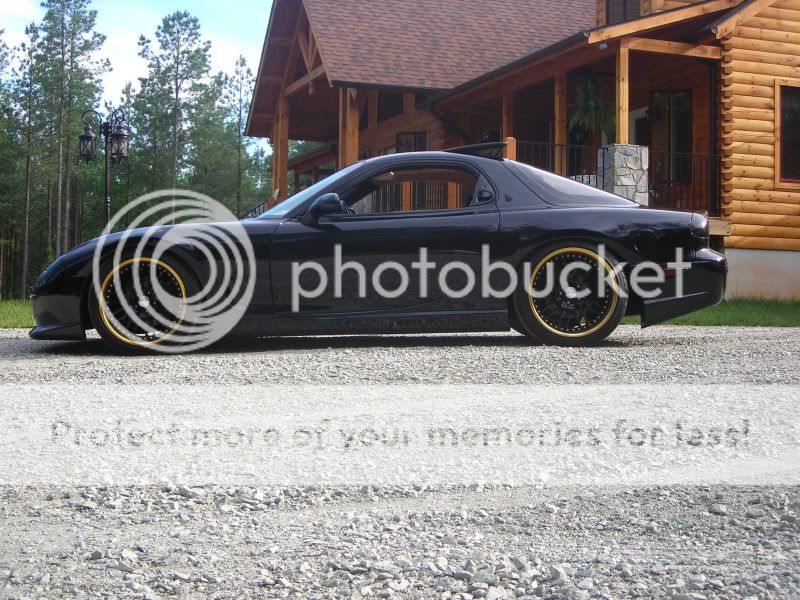
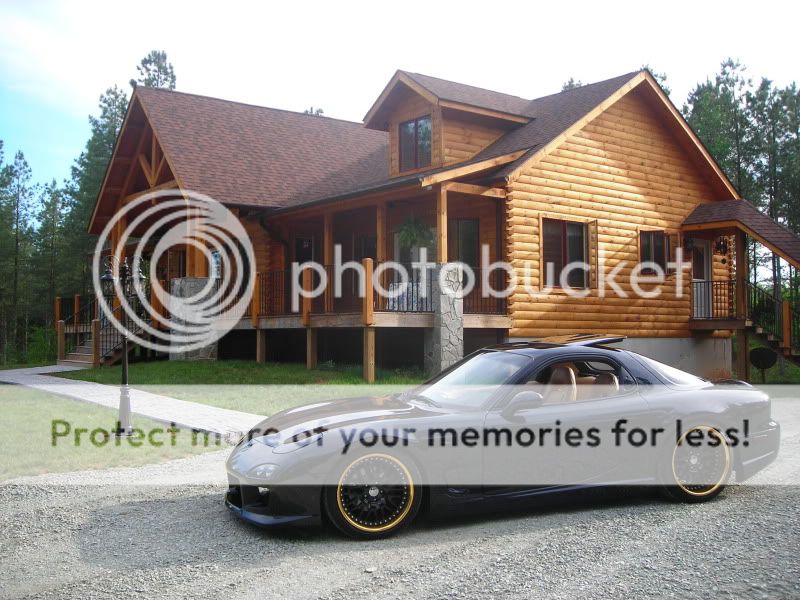
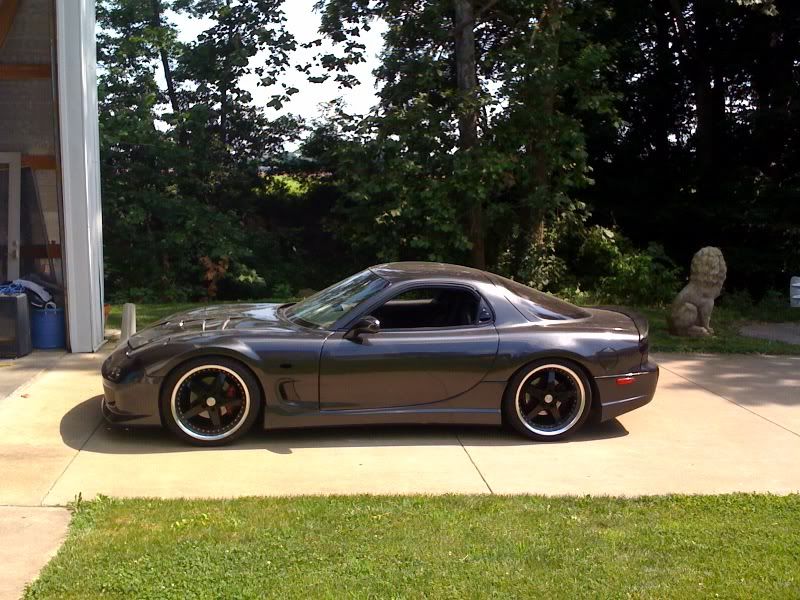
here's an updated pic of mine
Just got the wheels in today 19" Sevas Stars
Also included is the C/f Low Pro Spoiler and the C/f fender vents from shine
Just got the wheels in today 19" Sevas Stars
Also included is the C/f Low Pro Spoiler and the C/f fender vents from shine
