
NOOB'S GUIDE TO PORTING (56K Beware)


Thread Starter
Joined: Aug 2002
Posts: 2,828
Likes: 1
From: Houston Tx
NOOB'S GUIDE TO PORTING (56K Beware)
Ok here we go......
There has been alot of talk on here about porting, and i really have'nt found a central source for the info on how to port. This is not for what type of port to do, nor what not to do.
The next few days i will show you how to do a Half Bridge Port to a FD 13B
There will be 3 Parts to this
#1 Rotor Housing Porting
#2 Secondary Intake Bridge Porting / Rotor Housing Notching
#3 Primary intake porting
Keywords : Porting Bridgeport Bridgeporting Street Port Race Port Exhaust


Ok here is the order that i do things, again this is just my way.
#1 ROTOR HOUSING PORTING
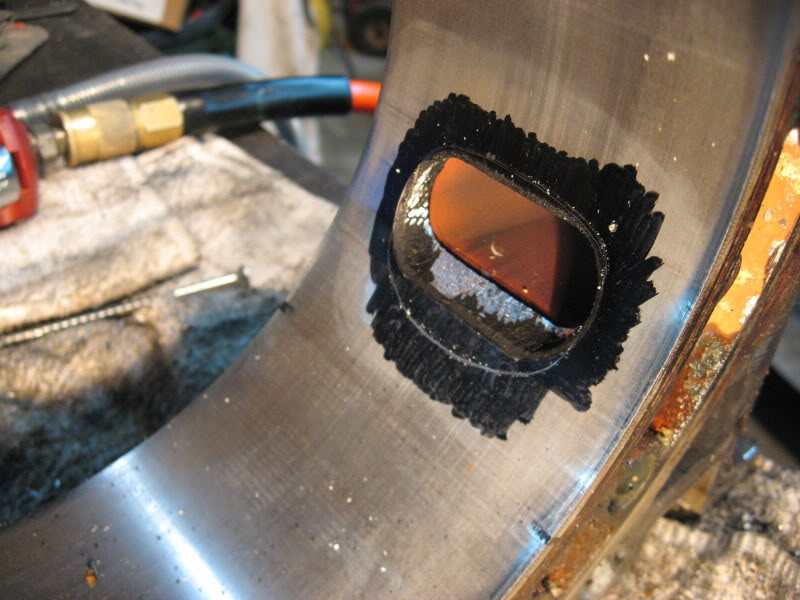
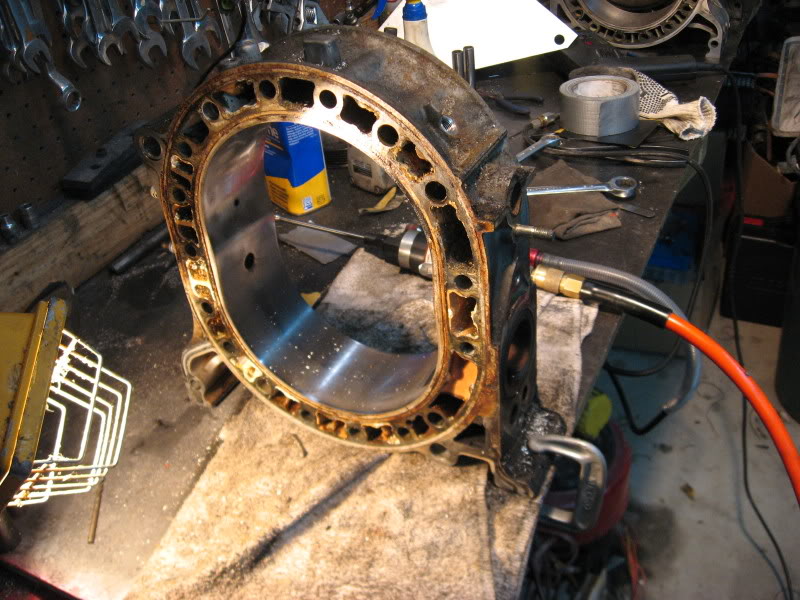
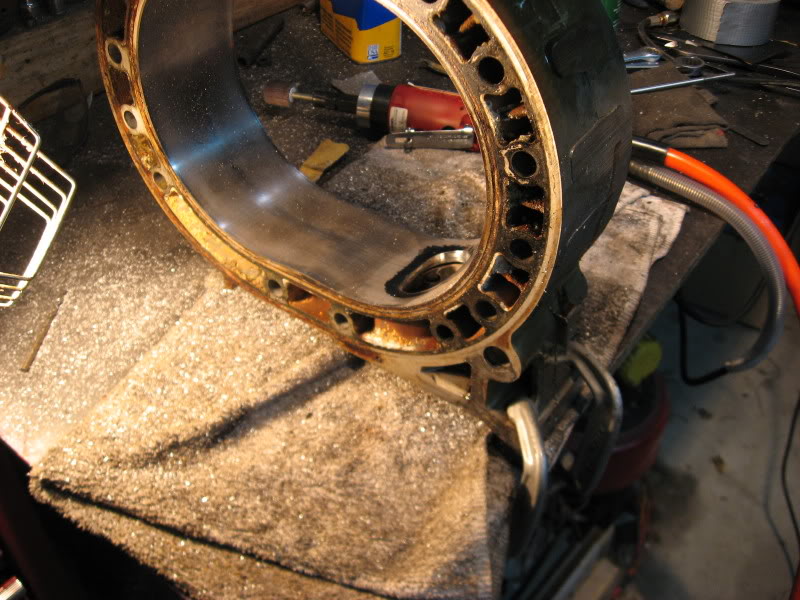
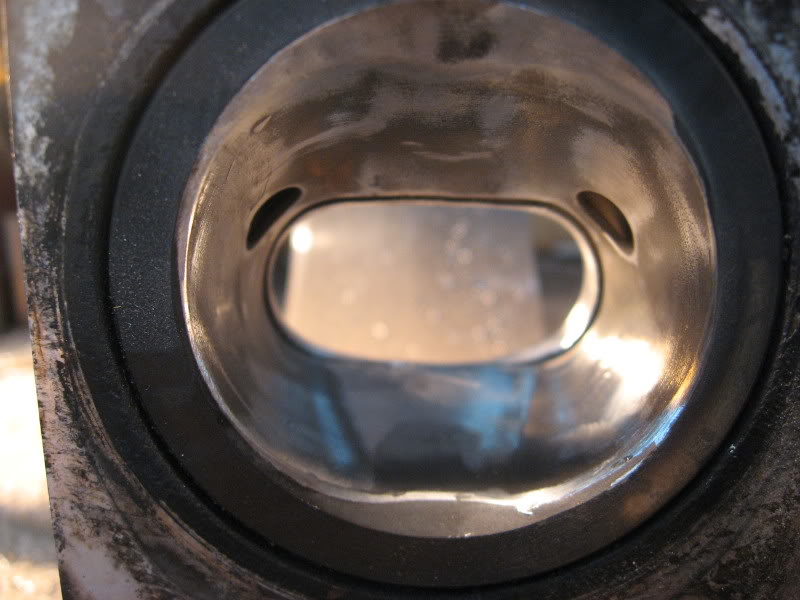
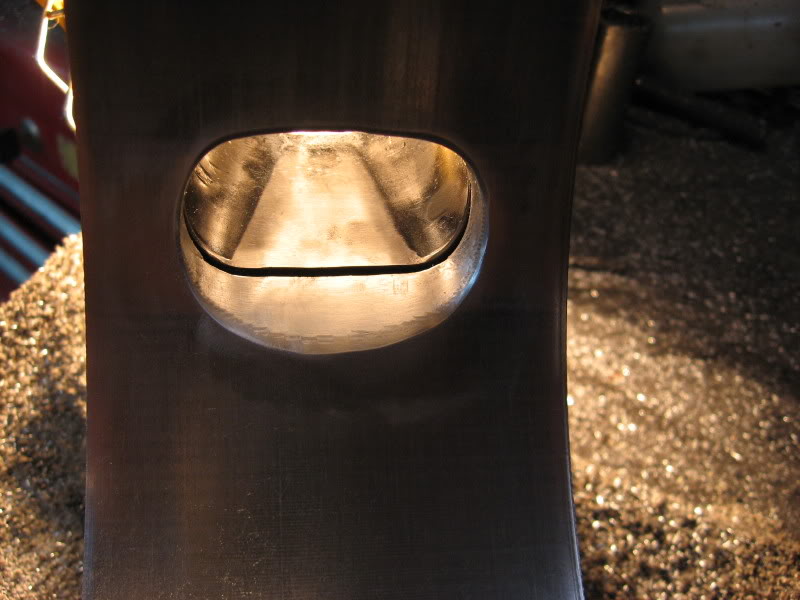
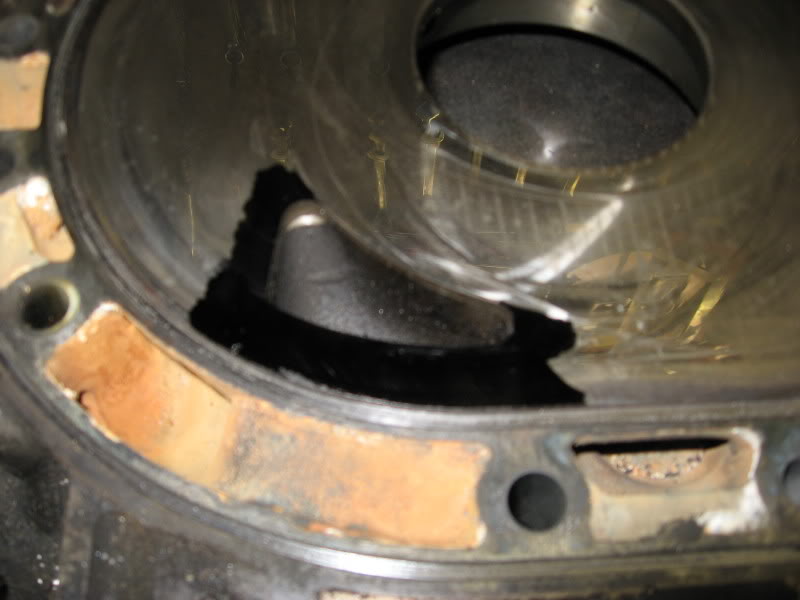
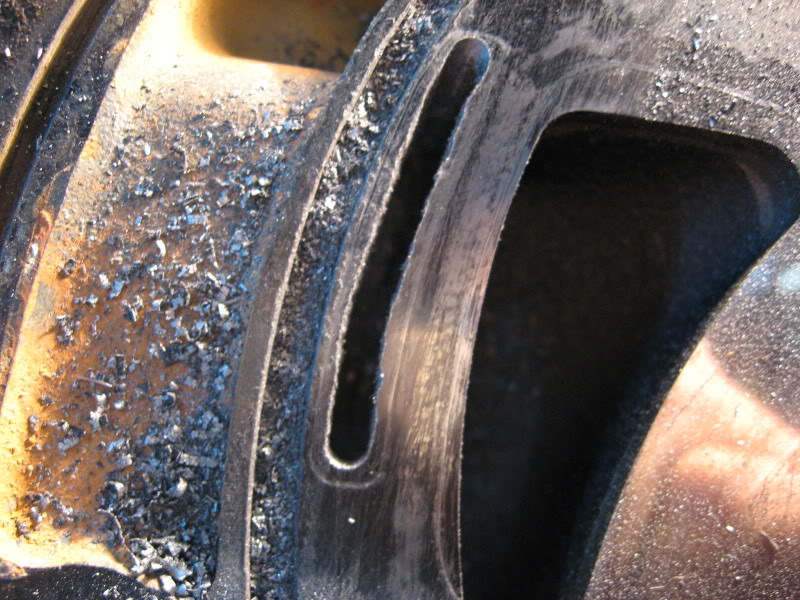
Step one scribe your port template onto the Rotor housing, Ether spray paint the housing or use a Black marker to help show the line. Make sure that you line the template up like it needs to be. Most places will give you some input on where. You can see the black marks on the Rotor Housing that i made to line mine up.
Then from the out side of the motor you will start your porting
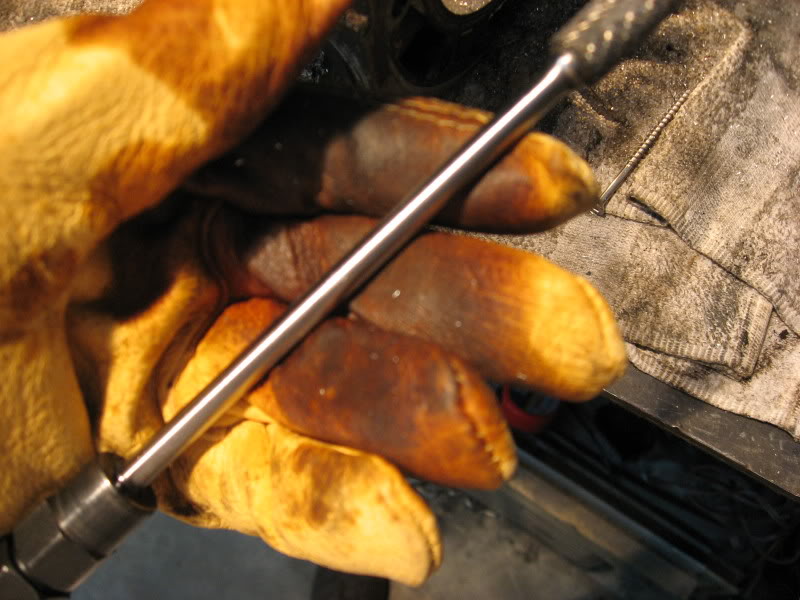
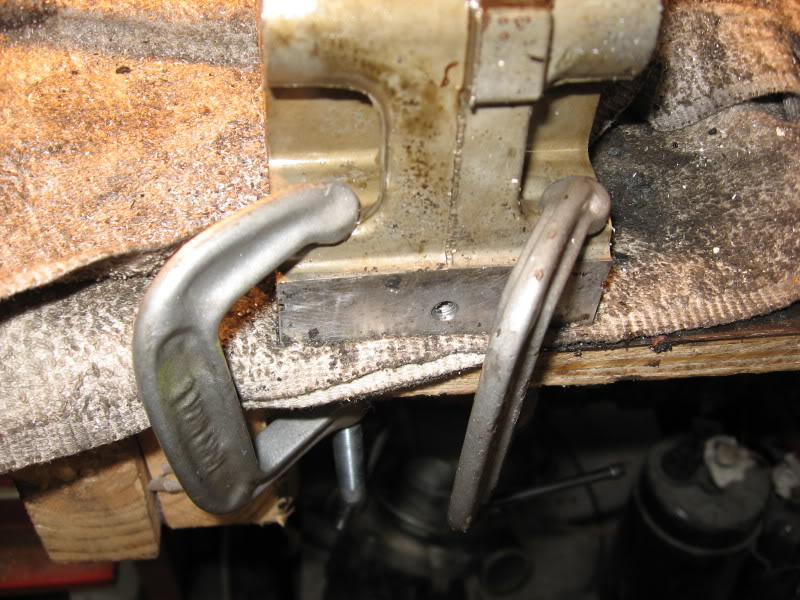
It is a good idea to use two hands with the die grinder, use a leather glove with some oil on it so you dont burn your hand
Also use a clamp so you dont have the rotor housing, this will save your butt.
After you get the porting very close to the line, DONT GO TO THE LINE, just before the line
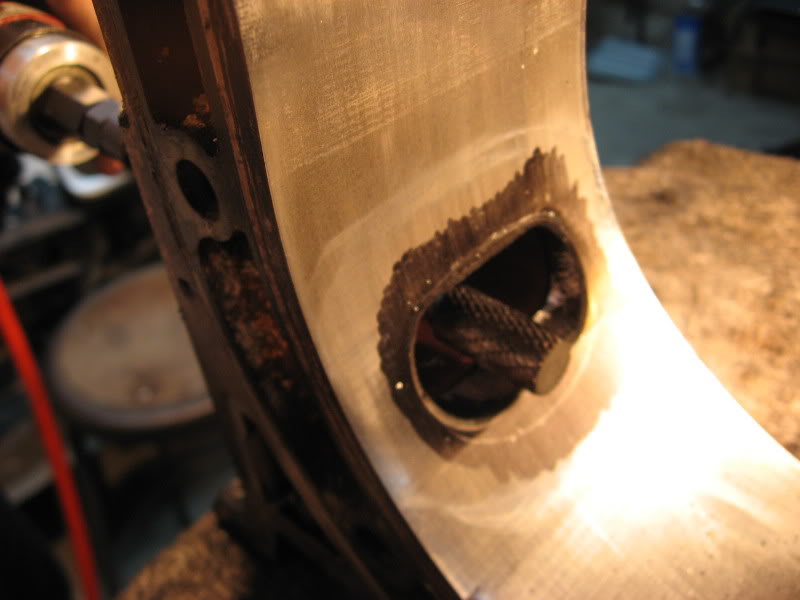
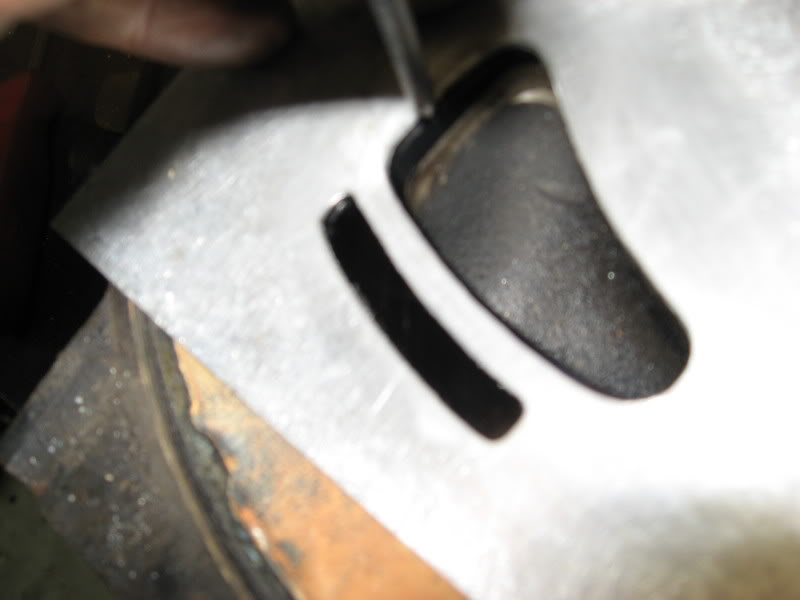
Now make sure that the insert is about the same size as the port you just grinded out
There has been alot of talk on here about porting, and i really have'nt found a central source for the info on how to port. This is not for what type of port to do, nor what not to do.
The next few days i will show you how to do a Half Bridge Port to a FD 13B
There will be 3 Parts to this
#1 Rotor Housing Porting
#2 Secondary Intake Bridge Porting / Rotor Housing Notching
#3 Primary intake porting
Keywords : Porting Bridgeport Bridgeporting Street Port Race Port Exhaust
!!!!!!!IT IS NOT MY FAULT IF YOU MESS UP ANTHING!!!!
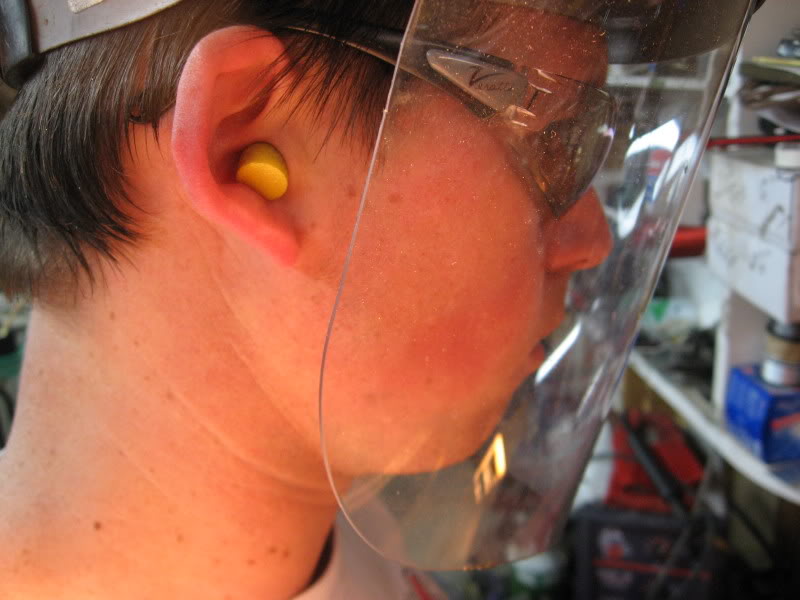
!!!!!!!!!!!!!!!!SAFETY FRIST!!!!!!!!!!!!!!!!
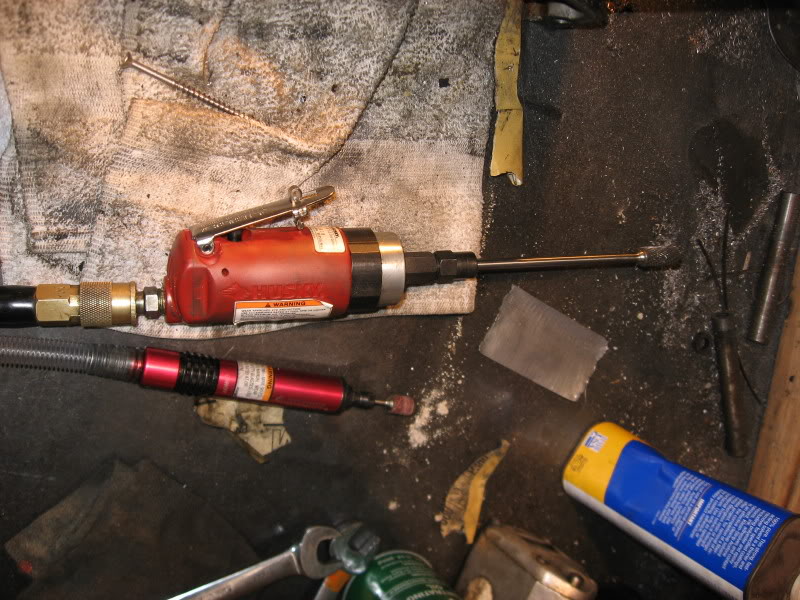
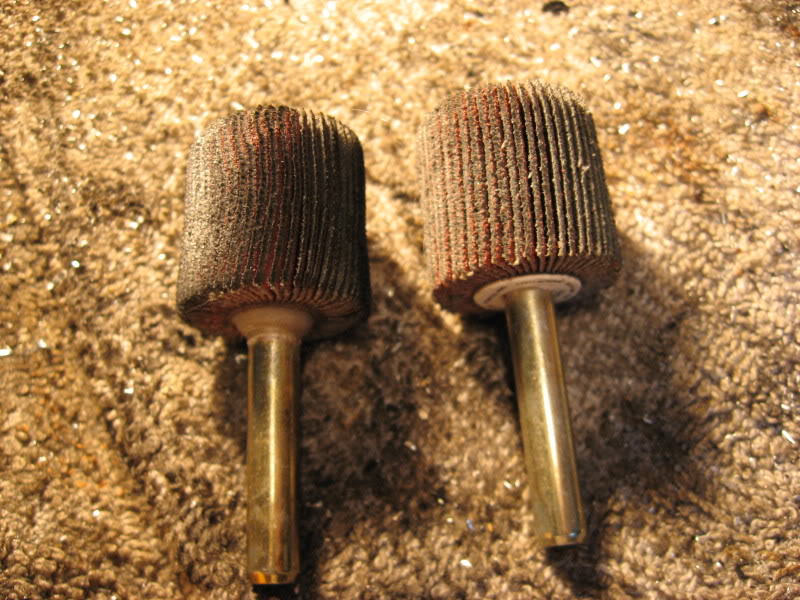
TOOLS
You will need a die grinder, if you can get both a big and small one then that is great, you really need both to do a good job. You can get away with the big one for the Rotor housing. You also will need alot of different bits, I really dont no witch you have to have, just try and get a asortment.Ok here is the order that i do things, again this is just my way.
#1 ROTOR HOUSING PORTING
Step one scribe your port template onto the Rotor housing, Ether spray paint the housing or use a Black marker to help show the line. Make sure that you line the template up like it needs to be. Most places will give you some input on where. You can see the black marks on the Rotor Housing that i made to line mine up.
Then from the out side of the motor you will start your porting
It is a good idea to use two hands with the die grinder, use a leather glove with some oil on it so you dont burn your hand
Also use a clamp so you dont have the rotor housing, this will save your butt.
After you get the porting very close to the line, DONT GO TO THE LINE, just before the line
Now make sure that the insert is about the same size as the port you just grinded out
Last edited by Rx7_Nut13B; Feb 2, 2007 at 12:42 AM.
Thread Starter
Joined: Aug 2002
Posts: 2,828
Likes: 1
From: Houston Tx
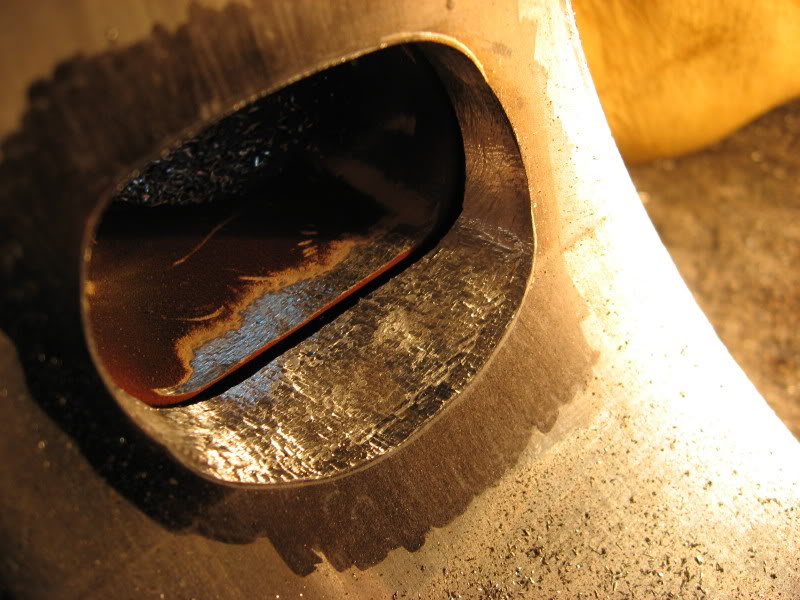
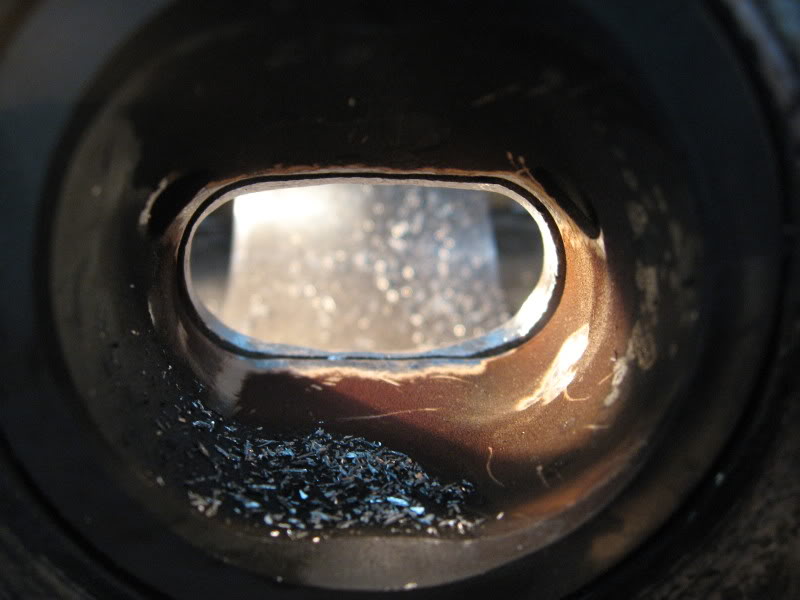
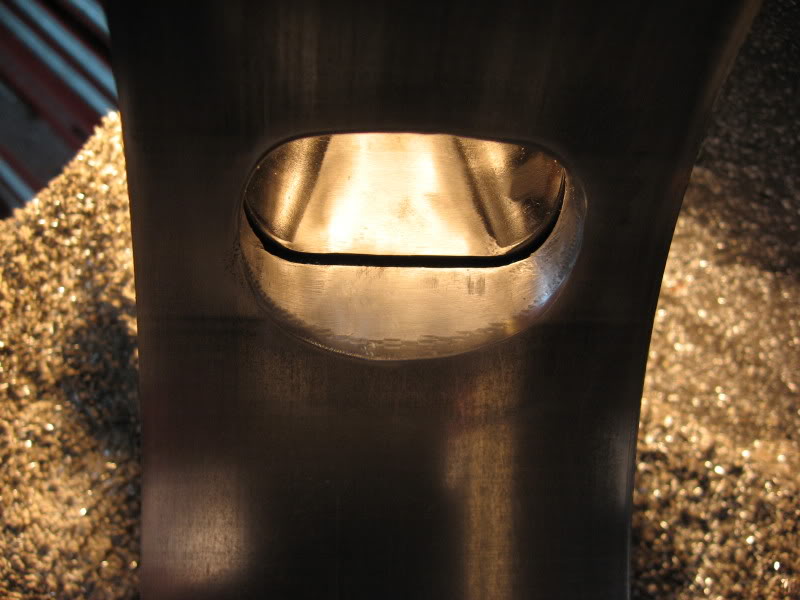
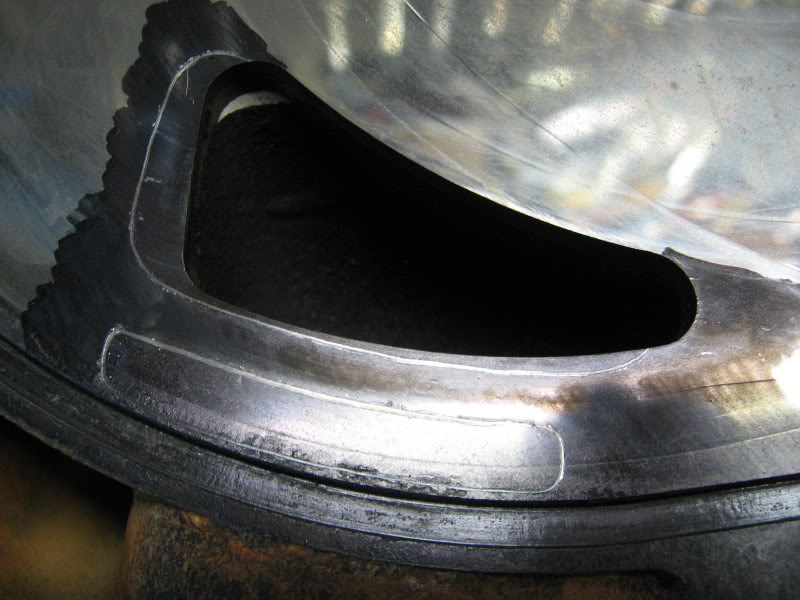
Now it is time to start the smoothing process. Start buy cleaning up the exhaust insert.
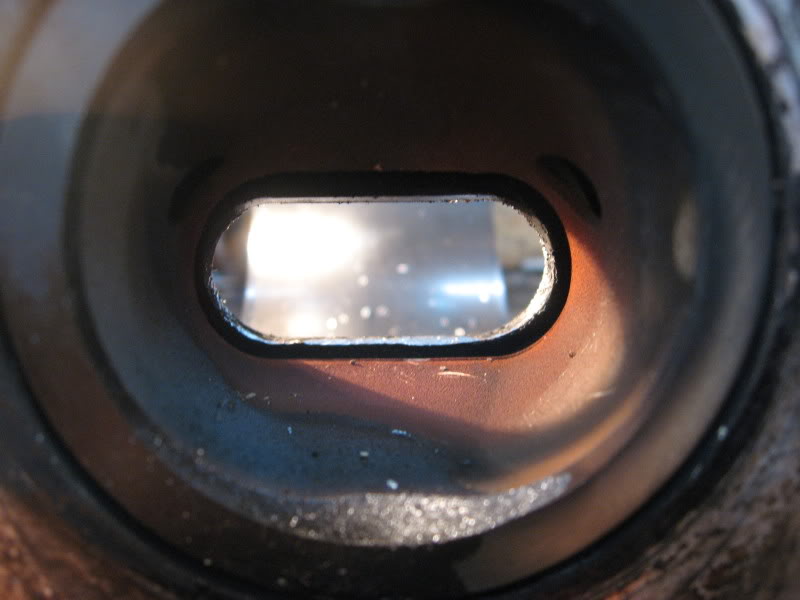
Now start to smooth the bottom edge of your port. You want to make the transision that smoothest you can.
Now that you have the bottom done start with the top, you want to make the on-to transition smooth as possible agian, this will add many miles on your motor if you take your time in this area.

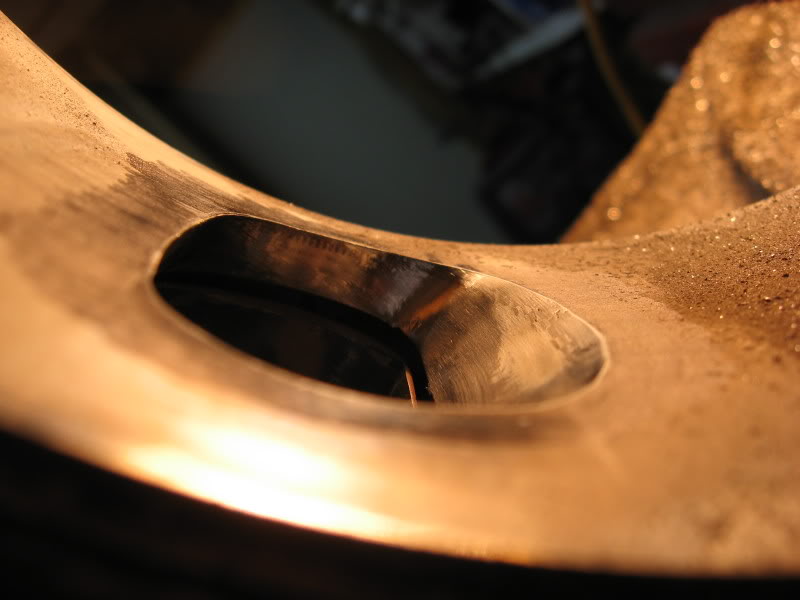
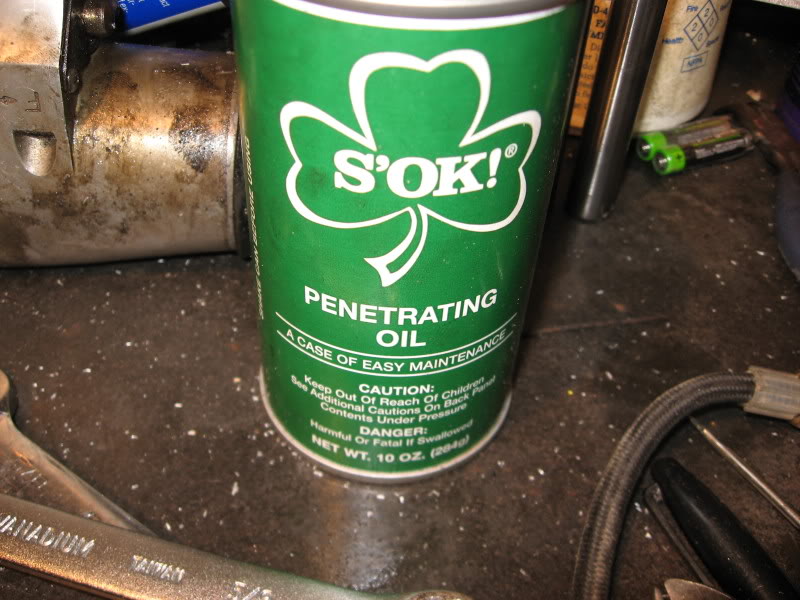
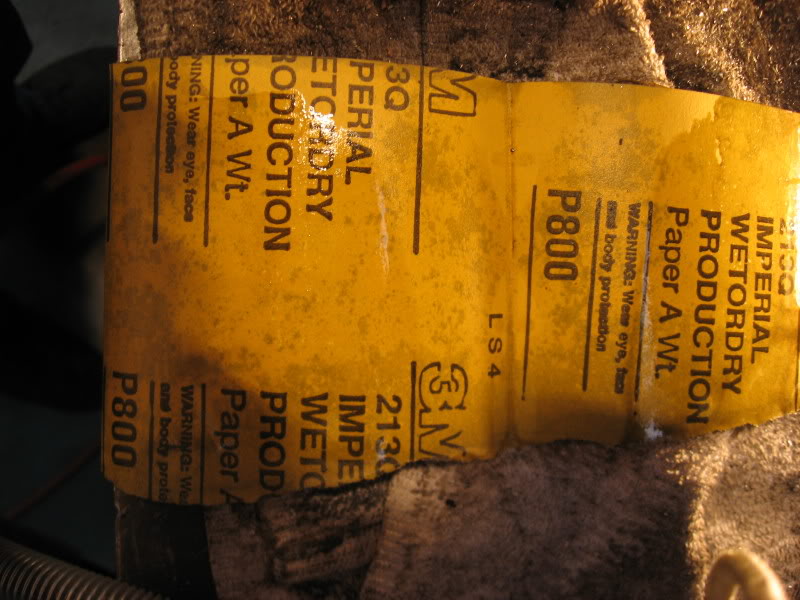
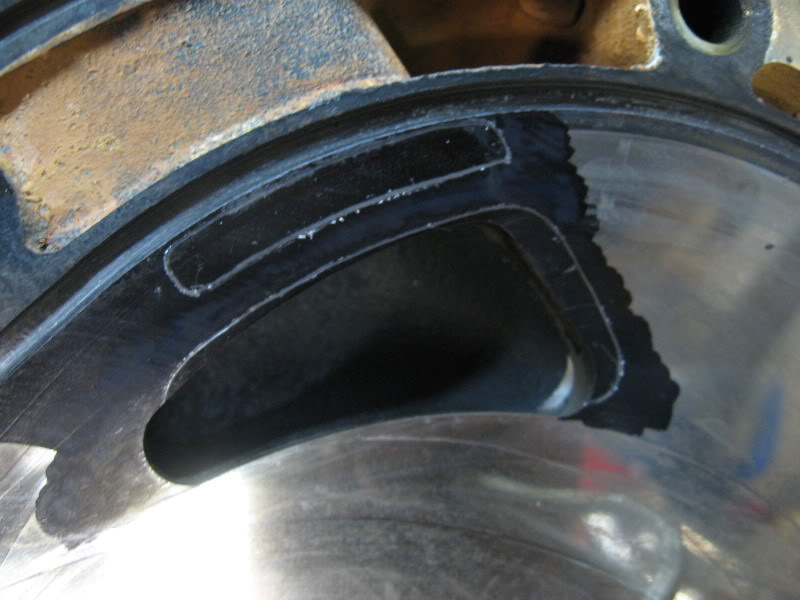
Now that you have that done, it is time to really smooth it out, and feel for anything that is not perfect. Use some oil on the housing with some 800-1000 grit wet/dry sand paper
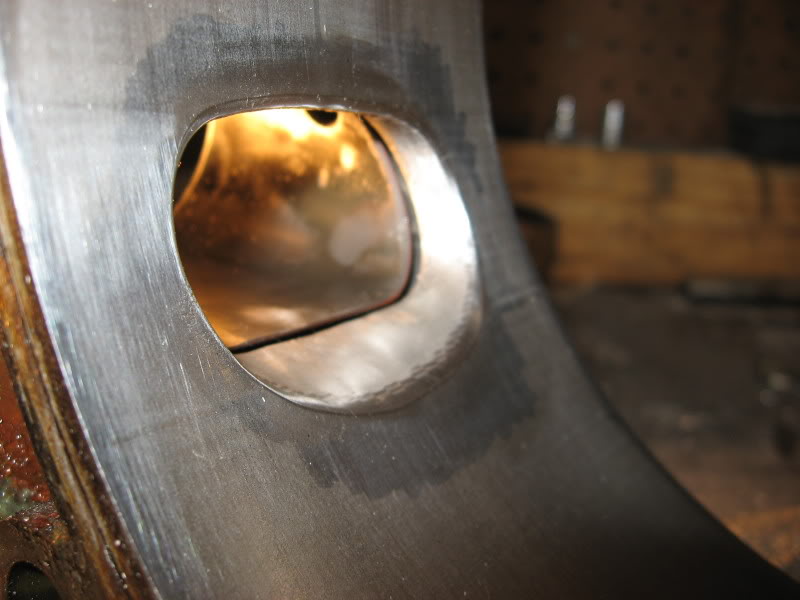
Work the entire port over as long as you think you need to.
AND THAT IS IT, You should have a very nice port done, just start agian with your other rotor housing.
I will be back tomarrow to show you how to do a Bridge Port, and How to notch the rotor housing to get the max out of your porting.
Now start to smooth the bottom edge of your port. You want to make the transision that smoothest you can.
Now that you have the bottom done start with the top, you want to make the on-to transition smooth as possible agian, this will add many miles on your motor if you take your time in this area.
Now that you have that done, it is time to really smooth it out, and feel for anything that is not perfect. Use some oil on the housing with some 800-1000 grit wet/dry sand paper
Work the entire port over as long as you think you need to.
AND THAT IS IT, You should have a very nice port done, just start agian with your other rotor housing.
I will be back tomarrow to show you how to do a Bridge Port, and How to notch the rotor housing to get the max out of your porting.
Chuck we really need to get you a smoother exhaust port template. You should also get a Dremel with the extension that basically is the size of a pencil. That way you can get any edges real smooth controllably without worrying about digging into the housings. You can also get inside the runners much easier. The main porting is fine with the die grinder but you really need something small with finesse to do the finish work.
Beveling the closing edge of the exhaust port is way overrated and not always necessary. It is a myth that it will always chew up apex seals. It can but it doesn't have to. The only engines this happens to are the ones where people got too greedy and ported the exhaust ports overly wide which leads to little support area. If you ported the exhaust properly, you don't need it. A small bevel (1/8") is good for flow but a large one (1/4") is not better. I have seen people break the top half of apex seals and blame it on the exhaust port closing edges but detonation can do that to the seals too. A bevel on the closing of the intake ports is also unneccesary unless you get too greedy and open them too early.
Beveling the closing edge of the exhaust port is way overrated and not always necessary. It is a myth that it will always chew up apex seals. It can but it doesn't have to. The only engines this happens to are the ones where people got too greedy and ported the exhaust ports overly wide which leads to little support area. If you ported the exhaust properly, you don't need it. A small bevel (1/8") is good for flow but a large one (1/4") is not better. I have seen people break the top half of apex seals and blame it on the exhaust port closing edges but detonation can do that to the seals too. A bevel on the closing of the intake ports is also unneccesary unless you get too greedy and open them too early.
Thread Starter
Joined: Aug 2002
Posts: 2,828
Likes: 1
From: Houston Tx
Originally Posted by theflatlander
you gonna bevel that port?
Thread Starter
Joined: Aug 2002
Posts: 2,828
Likes: 1
From: Houston Tx
Originally Posted by mono4lamar
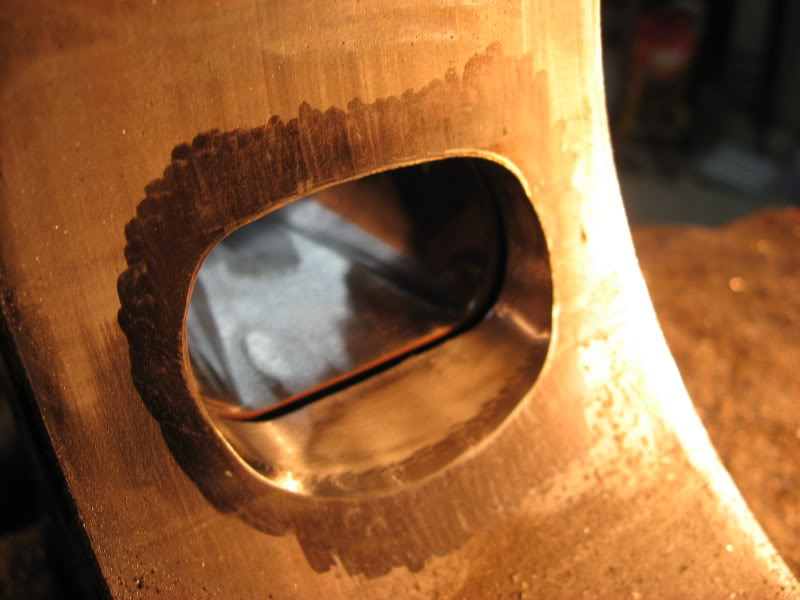
on the last picture to the left it looks like you went a little nuts on the left side...
You mean on the inside of the port, yea. But that doesnt really matter what the inside looks like, Yes if you can get it really really smooth it will cut down on carbon sticking to it.
I really worry about the smoothness where it mets the housing and the closing lip.
Trending Topics


i'd just like to echo the sentiment about getting a Dremel to do the finish work, not just because it's what i do, but because i do believe it makes for better control when polishing. aside from that constructive criticism, i love what you did. i give you even more kudos for initiating a "How To -"-thread on porting. i always thought this board could do with a dedicated porting/building section, like you know where. maybe this could start it off. moderators??? 
as for the beveling, i'm a firm believer in them, but i do agree that they are not needed if you don't go ape-**** with port width. so i think Rotarygod is spot on with his assessment.
as for the beveling, i'm a firm believer in them, but i do agree that they are not needed if you don't go ape-**** with port width. so i think Rotarygod is spot on with his assessment.
Thread Starter
Joined: Aug 2002
Posts: 2,828
Likes: 1
From: Houston Tx
Originally Posted by rotarygod
Chuck we really need to get you a smoother exhaust port template. You should also get a Dremel with the extension that basically is the size of a pencil. That way you can get any edges real smooth controllably without worrying about digging into the housings. You can also get inside the runners much easier. The main porting is fine with the die grinder but you really need something small with finesse to do the finish work.
What do you mean by smoother template?
This is not my first bull ride (Texas joke, wink wink)
I have done enuff of these ports to be able to do nice ports with my steady hand and the big grinder, but i do have a small one with a Shxt load of carbide bits for it. I really use the small one for intake porting, I HAVE NEVER used the big one on a intake port, you can slip easy with the big one. It may take 2X longer with the smaller die grinder but you get a very very nice finish.
But yea the Dremel attachment is nice, but i just dont need it. I use my finger and sandpaper where i want to really get closes.
Thanks RotaryGod
AGIAN I JUST WANTED TO SHOW SOME OF THE NOOB's THAT HAVE NEVER PORTED BEFORE WHAT THEY NEED TO DO IF THEY WANT TO TRY IT FOR THERE SELF.


Thread Starter
Joined: Aug 2002
Posts: 2,828
Likes: 1
From: Houston Tx
Originally Posted by diabolical1
i love what you did. i give you even more kudos for initiating a "How To -"-thread on porting. i always thought this board could do with a dedicated porting/building section, like you know where. maybe this could start it off. moderators???
Thanks Dude
Please don't think I was criticizing you chuck. I wasn't. I just see that big cumbersome sanding device you are using and am just saying that there is a much easier more way to do it with more finesse.
Thread Starter
Joined: Aug 2002
Posts: 2,828
Likes: 1
From: Houston Tx
Originally Posted by rotarygod
Please don't think I was criticizing you chuck. I wasn't. I just see that big cumbersome sanding device you are using and am just saying that there is a much easier more way to do it with more finesse.
NO NO Dude, i wasnt thinking that.
I have smaller sanding discs for my small grinder
BDC Motorsports
Joined: Jun 2002
Posts: 3,667
Likes: 6
From: Grand Prairie, TX
Good stuff. Great post. Glad to see the SAFETY FIRST!!! being splashed all over the top of the post, also. Can't ever go wrong with that. Infact, I almost ruined my left eye a couple of years ago when I got an iron splinter stuck in the lens. It began forming rust and enabled conjunctivitis. $150 from an emergency procedure and 2 weeks later on anti-biotics...
B
Can't ever go wrong with that. Infact, I almost ruined my left eye a couple of years ago when I got an iron splinter stuck in the lens. It began forming rust and enabled conjunctivitis. $150 from an emergency procedure and 2 weeks later on anti-biotics... B
BDC Motorsports
Joined: Jun 2002
Posts: 3,667
Likes: 6
From: Grand Prairie, TX
Originally Posted by rotarygod
Please don't think I was criticizing you chuck. I wasn't. I just see that big cumbersome sanding device you are using and am just saying that there is a much easier more way to do it with more finesse.
B
Thread Starter
Joined: Aug 2002
Posts: 2,828
Likes: 1
From: Houston Tx
Originally Posted by BDC
Good stuff. Great post. Glad to see the SAFETY FIRST!!! being splashed all over the top of the post, also. Can't ever go wrong with that. Infact, I almost ruined my left eye a couple of years ago when I got an iron splinter stuck in the lens. It began forming rust and enabled conjunctivitis. $150 from an emergency procedure and 2 weeks later on anti-biotics...
B
Can't ever go wrong with that. Infact, I almost ruined my left eye a couple of years ago when I got an iron splinter stuck in the lens. It began forming rust and enabled conjunctivitis. $150 from an emergency procedure and 2 weeks later on anti-biotics... B
Dude i had one in a LONG time ago, like when i was 14 or so, I dont want to EVER have that happen agian, it totally sucks.
One other thing on the 1/8 shank, I use it for everything except the rotor housing. I just like how the rotor housing come out with the big one. But it would be perfect with a smaller one.
Just a update
The next update is coming on Monday
Thread Starter
Joined: Aug 2002
Posts: 2,828
Likes: 1
From: Houston Tx
OK i no i said that i would have the next part done today, well I had to go to work sorry, but i did have some time to work on it today
Ok here is your standard FD Secondary port
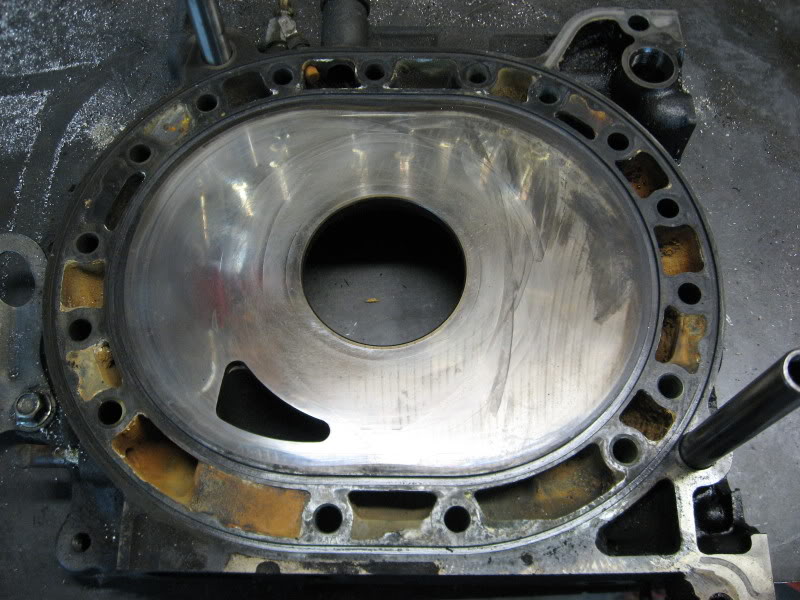
Here is how much you will be adding to this port
Apply something to the Iron so that your marks will show up better, Magicmarker and flat black paint works well.
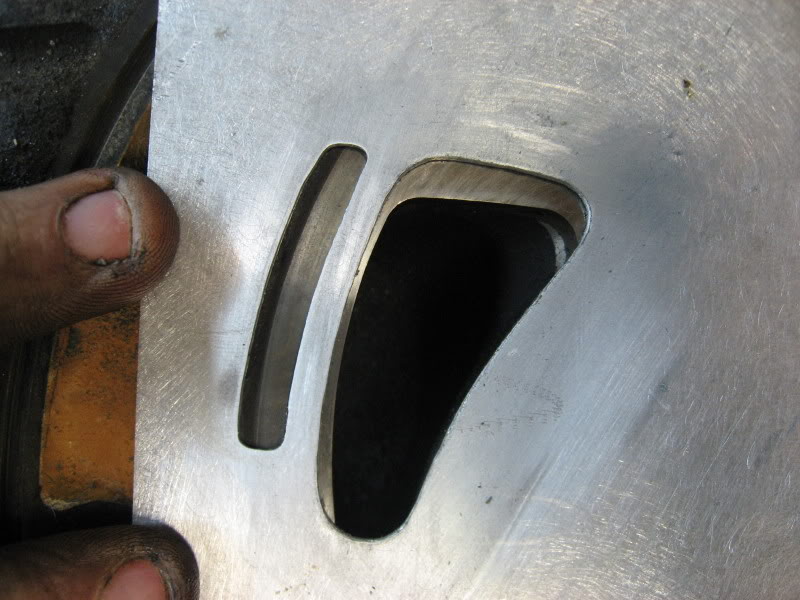
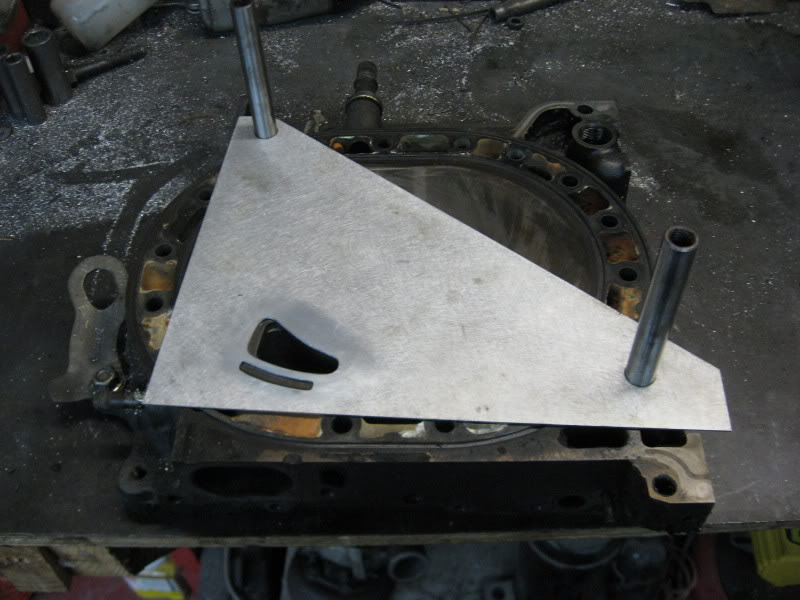
Use something sharp to scrib the patter onto the Iron
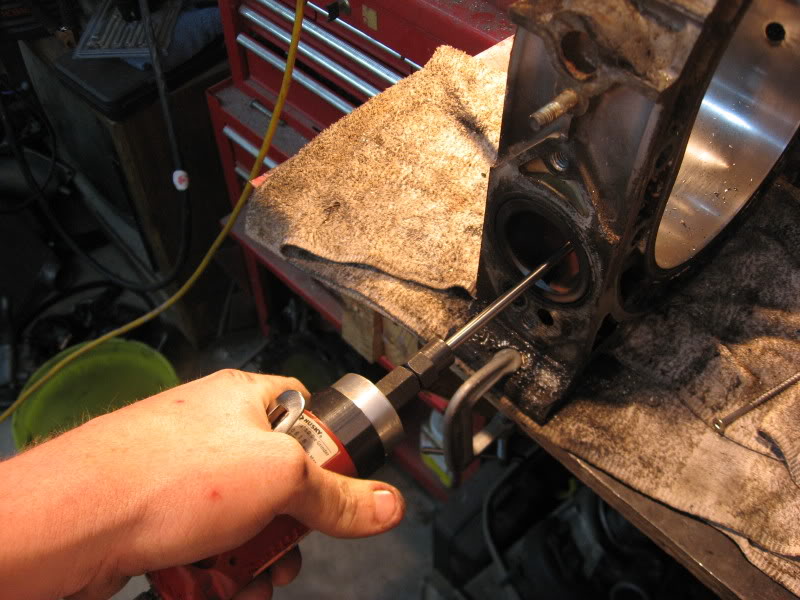
Take a drill and put small holes INSIDE THE LINES, i have seen some people messup with this
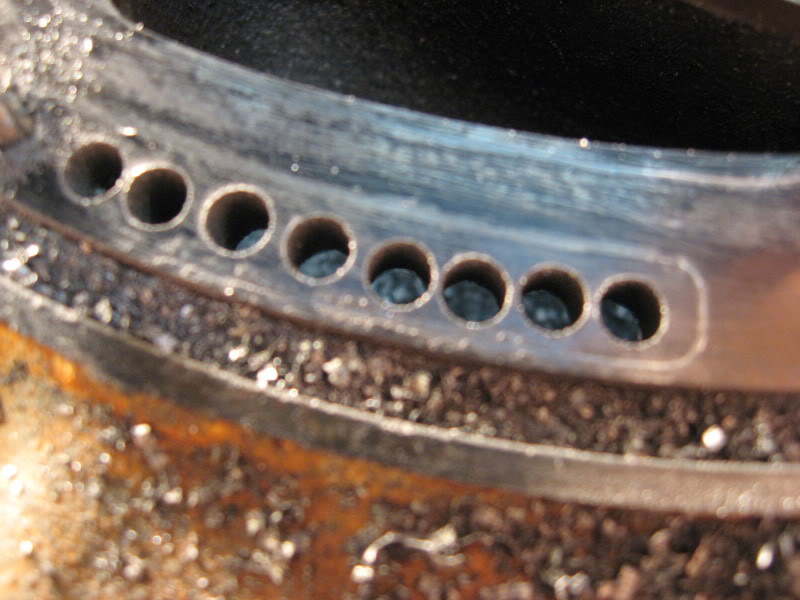
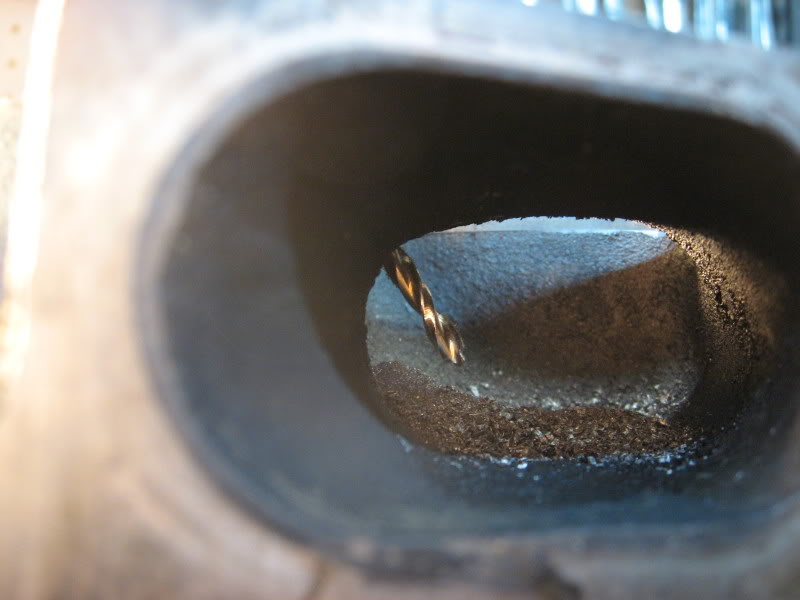
On the upper sets of holes, you start to run out of stock runner, so you need to drill at a angle so you dont hit the water jacket
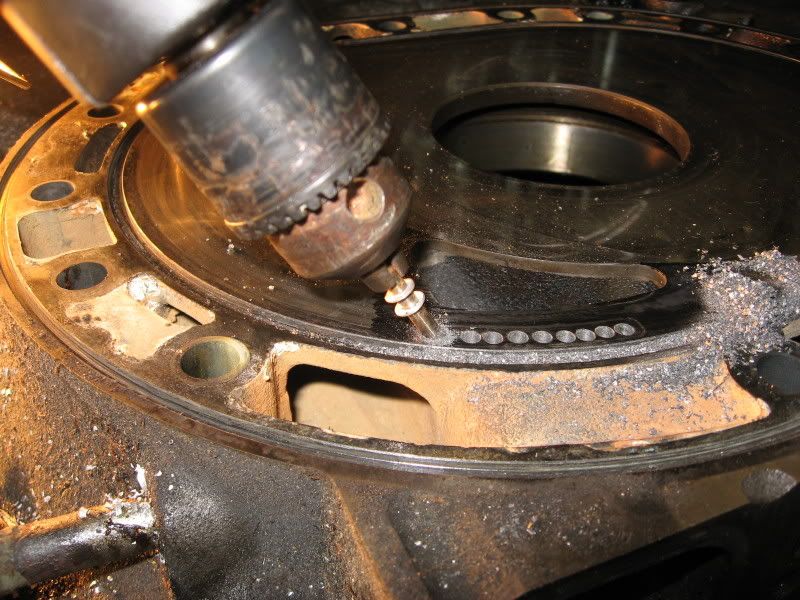
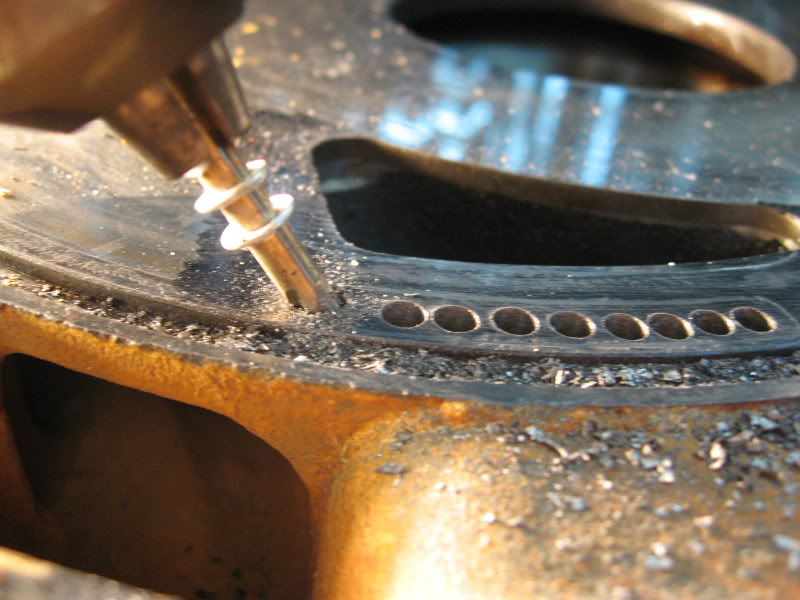
Now the easy part, Use the DRILL to attach all the holes you have just drilled. Just go side to side untill they touch each other

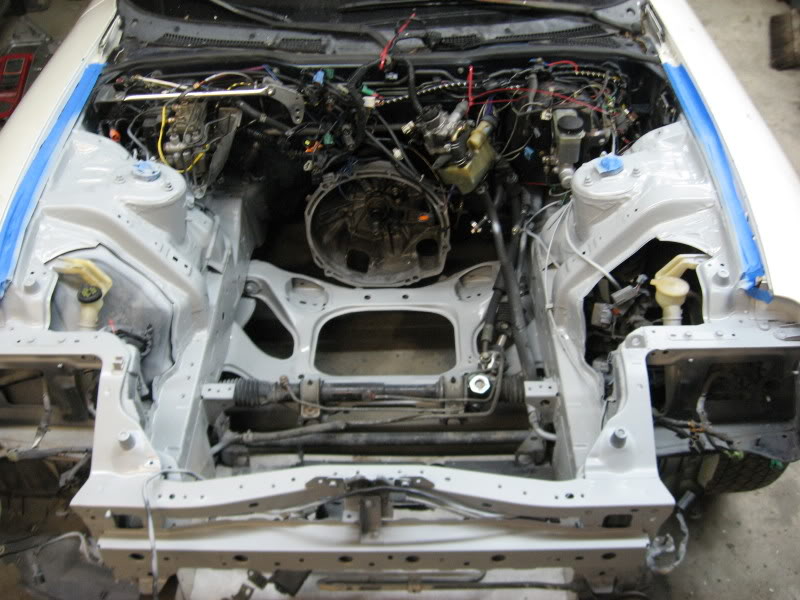
This is as far as i got last night, was working on painting my engine bay. Will finish tomarrow night
Ok here is your standard FD Secondary port
Here is how much you will be adding to this port
Apply something to the Iron so that your marks will show up better, Magicmarker and flat black paint works well.
Use something sharp to scrib the patter onto the Iron
Take a drill and put small holes INSIDE THE LINES, i have seen some people messup with this
On the upper sets of holes, you start to run out of stock runner, so you need to drill at a angle so you dont hit the water jacket
Now the easy part, Use the DRILL to attach all the holes you have just drilled. Just go side to side untill they touch each other
This is as far as i got last night, was working on painting my engine bay. Will finish tomarrow night
Rotary Freak
Joined: Dec 2001
Posts: 2,402
Likes: 0
From: chandler, AZ
Originally Posted by Rx7_Nut13B
Dude i had one in a LONG time ago, like when i was 14 or so, I dont want to EVER have that happen agian, it totally sucks.
One other thing on the 1/8 shank, I use it for everything except the rotor housing. I just like how the rotor housing come out with the big one. But it would be perfect with a smaller one.
One other thing on the 1/8 shank, I use it for everything except the rotor housing. I just like how the rotor housing come out with the big one. But it would be perfect with a smaller one.
Just a update
The next update is coming on Monday
I got a metal shaving in my eye a couple years ago from doing my bridge-port irons. Ironic thing is they used a mini die grinder to get that rust out of my eyeball!!
couple questions as far as getting some templates... what companies have some and what sizes do they have? also the 13b and 20b have the same housings right? meaning you can use the same templates... i always wondered that!
i just wanted to say this is a great thread so far!!! props for putting your ***** out there
-Lance
i just wanted to say this is a great thread so far!!! props for putting your ***** out there
-Lance
