
RECOVERING My Shift Knob/Wheel/E-brake...

How to tutorial
All,
Here is a photographic How-To for leather wrapping steering wheels. I have gathered the photos from various steps in previous projects to give an understanding to my explanations. Please note that if your wheel was not previously leather covered, you will destroy the original. This cannot be undone!
Here goes�
Materials Sources
Leather Hides & Tools http://www.tandyleatherfactory.com/
Nylon Thread http://www.beadfx.com/catalogue/cordclon.php
Wax can be obtained from most sewing shops etc.
Materials & Tools Required
Leather
1.2-1.8mm Automotive Leather (Must be automotive UV protected!)
You will need approximately 4Sq Ft of leather for one wheel
Note: Vinyl cannot be used as it will tear when stitching tight to the wheel
Thread
0.5mm Waxed Nylon Thread (no comprimise)
Anything other than waxed nylon will simply wear out
As there are limited colors available at leather retailers I buy unwaxed Nylon
Thread from beadfx.com and wax it myself using honeyless beeswax
#69 Nylon thread is used to machine sew the seams together
You will also need:
Upholstery glue
Large head stick pins
Masking Tape
Fine tip sharpie markers
Rubbing alcohol
Large sharp needle attached to some sort of handle for punching holes
Seamstress measuring tape
Crazy glue
Hard ruler
Sharp fabric scissors
Xacto blades
Various sized sewing needles
Sewing Awl
Access to an industrial strength sewing machine
(I�ll update this as things come to mind)
Stitching Choices
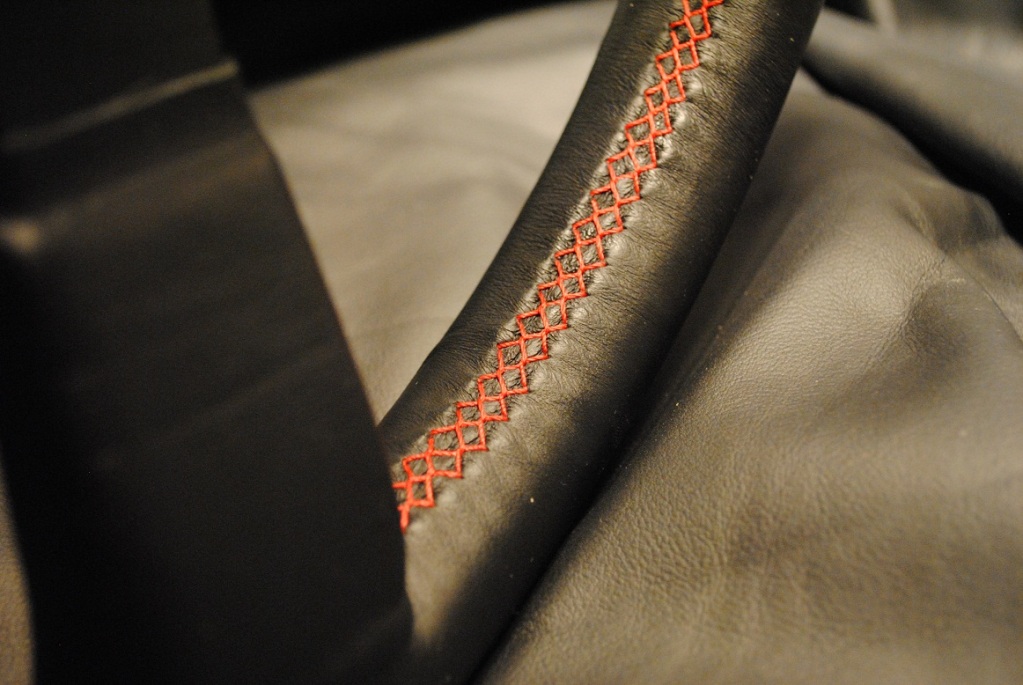
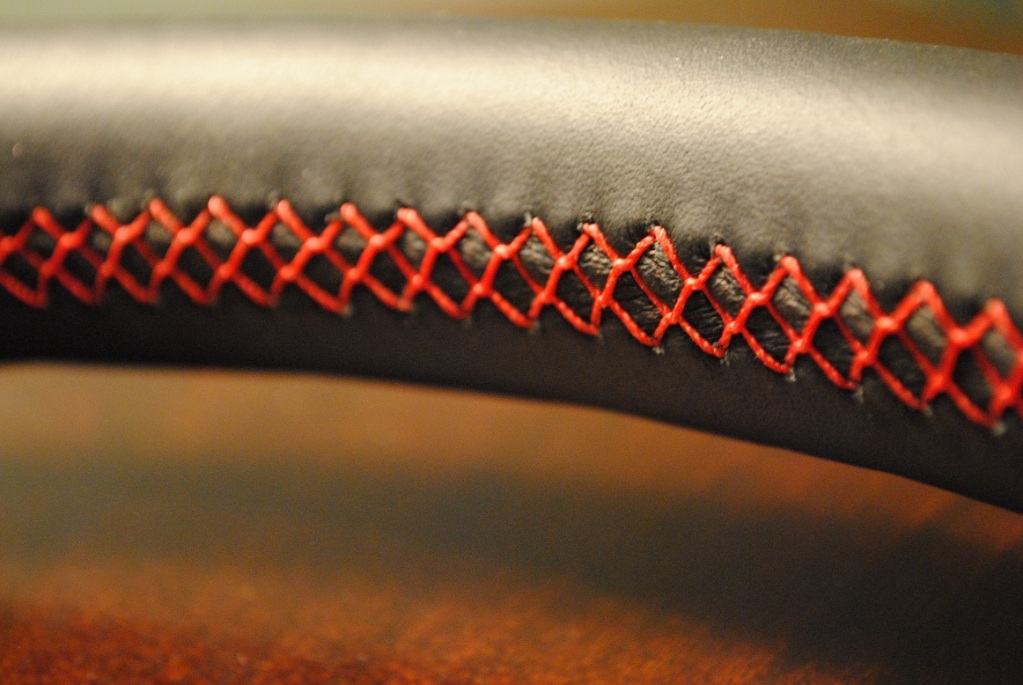
There are two types of stitching used in lacing leather wheels. The diamond stitch and the
baseball stitch. Both will be explained later in the tutorial.
European Diamond Stitch

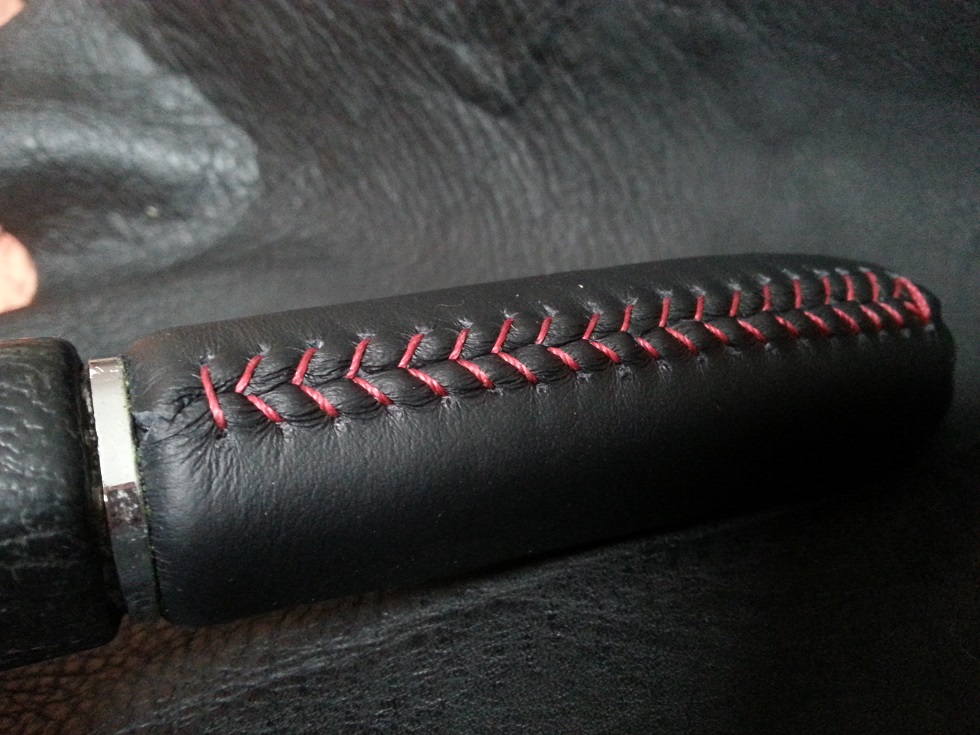
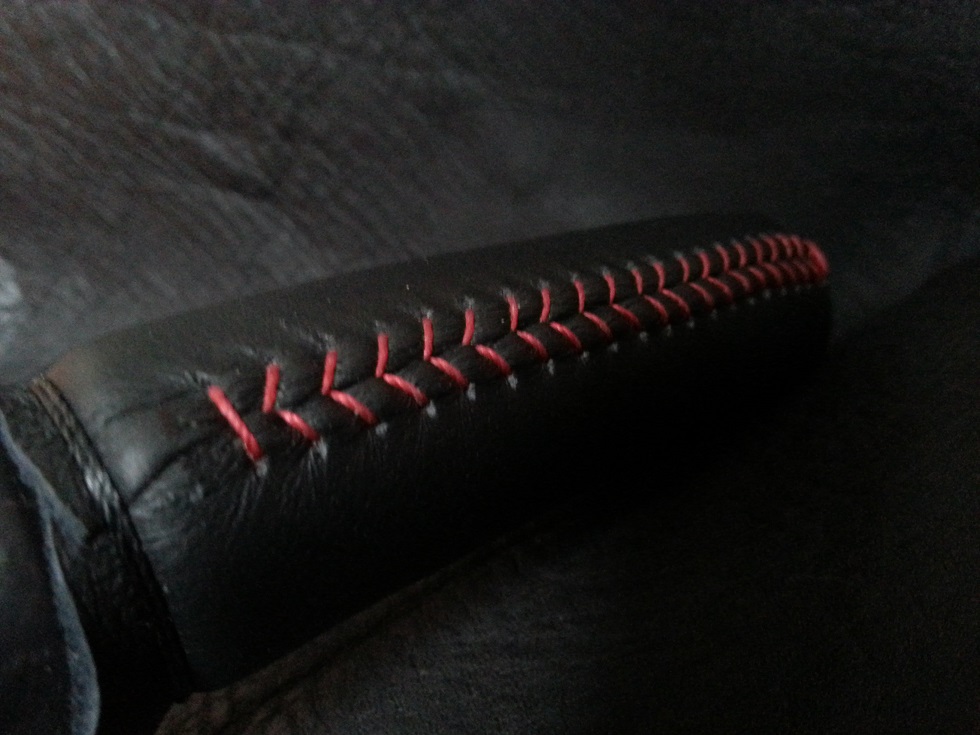
Baseball Stitch

PART A: Developing a pattern
For example I will use a three spoke wheel
In most cases the original pattern cannot be reused as the leather has dried up. When removed it cannot be laid flat to trace a new pattern with the correct dimensions.
1: Using your seamstress tape (man that sounds feminine), measure the circumference of the wheel.
Example *42�
Now measure the circumference of the grip
Example *4�
2: Mark Points using your fine tip marker at the RED Lines shown in the diagram on the outer most surface of the wheel
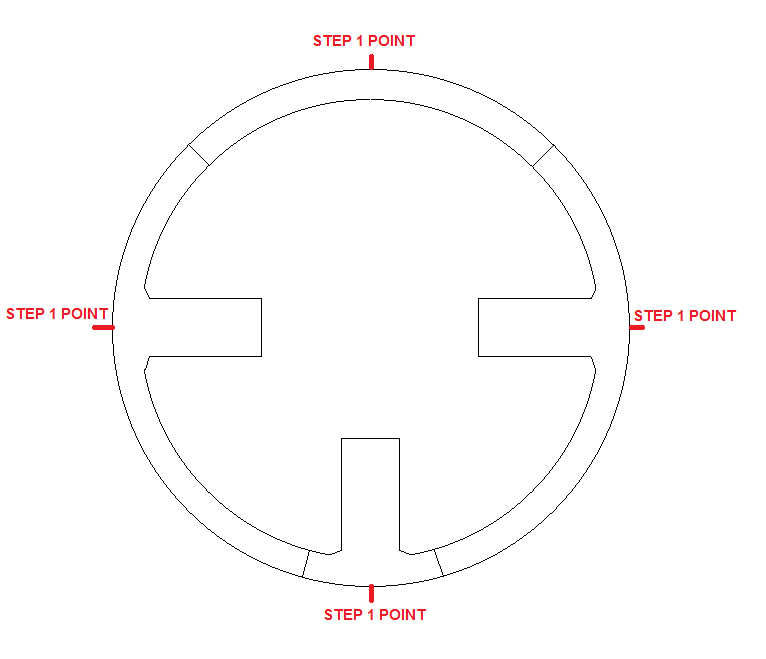
Diagram 01
3: Decide where you want your leather pieces to join. There can be multiple joins as seen in my Jetta wheel or one full pattern with only one join (One join requires a longer solid piece of leather. Keep this in mind when shopping for a partial hide). In this wheel I decided to follow the OEM join locations as outlined in BLUE on the diagram.
Note:Measure evenly from the top most point for all measurements to keep a single point of reference.
There are 4 joins in this example wheel. Measure the distance from each blue line to get the length of each piece of the pattern. For example the top part is 14�, the sides are 12� each and the bottom is 4�. These all add to complete the circumference of 42�.

Diagram 02
4: We now need to get the pattern for the spokes. In this three spoke wheel since the right spoke is simply the reverse of the left spoke we will only need to tape two spokes. In this example we will use the left and bottom spoke.
Cover the entire spoke with masking tape wrapping it tightly to ensure it sticks everywhere. Layer the masking tape several times to avoid distortion while removing. In wheels with tight curves at the spokes you can apply a stronger tape on top of the masking tape such as packing tape. It is not necessary to tape all the way to your seam lines (Blue Lines in diagram 2) as we will scribe the red reference line (step 1 point) in the tape as we apply it.
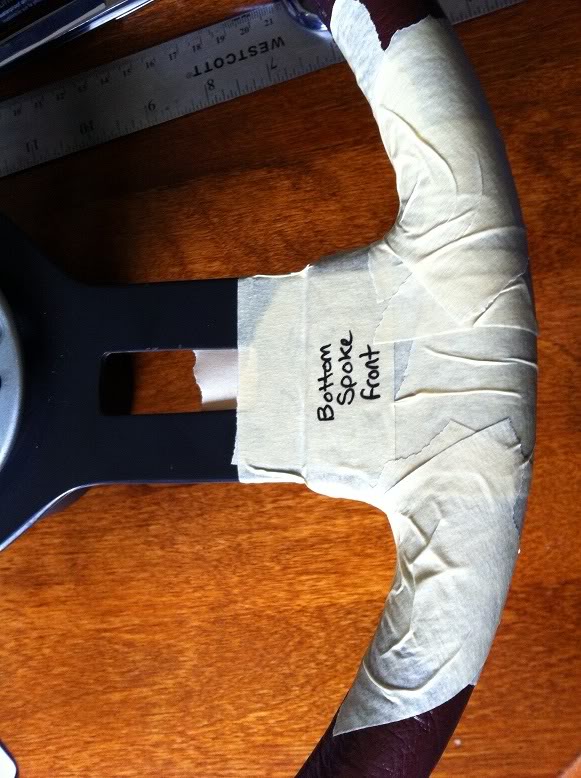
Diagram 03
Once the tape has been applied, using your fine point marker carefully draw a center line as shown in diagram 04 below and cut the masking tape using your xacto blade.

Diagram 04
Carefully remove the tape from the spoke starting at the freshly cut seam and working outward. Once the tape has been removed apply it evenly to a large piece of Bristol board as shown below. Once applied you need to square up the sides and ensure it meets the grip circumference as measured in step 1.
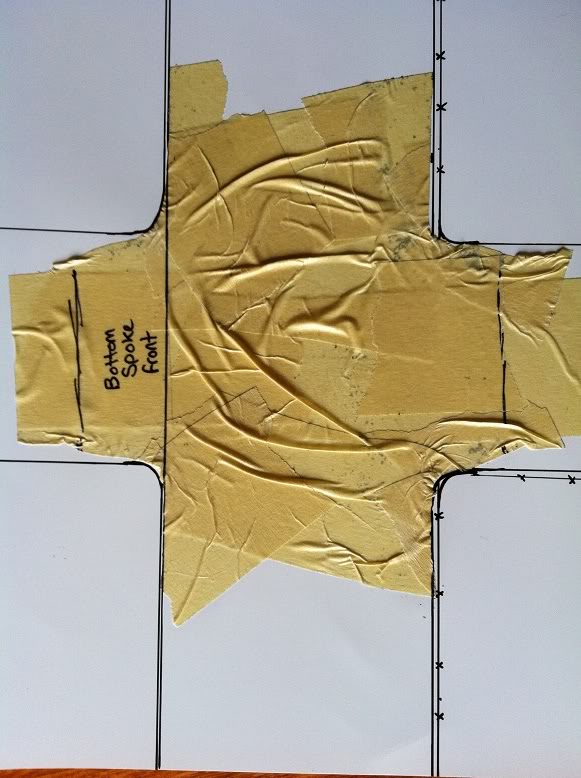
Diagram 05
You can now remove the tape from the bristol board and label it as shown below.
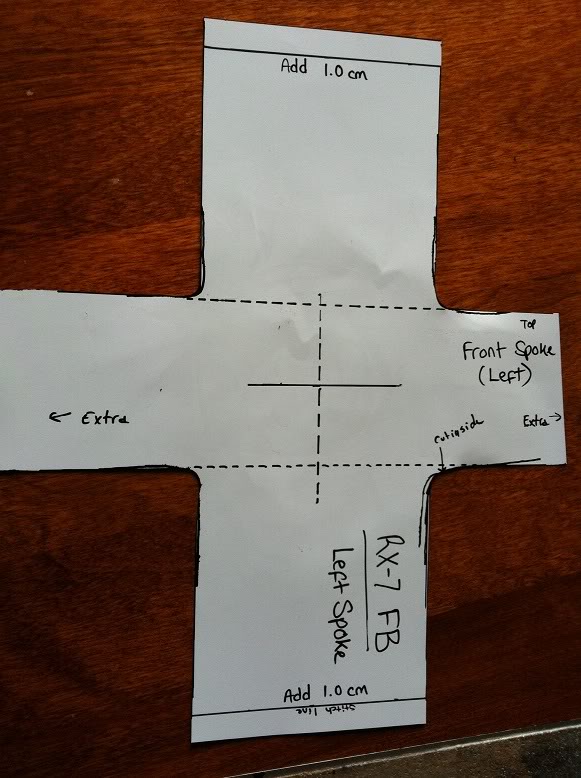
Diagram 06
5: Lay your newly created pattern on your leather hide as to have the least wastage. Add slightly extra on both sides of the spokes for trimming and tucking away the leather after stitching. Using your fine point marker trace the pattern on the leather and cut it out using your scissors. You now should have pieces as shown in the photos below.

Diagram 07
Diagram 08
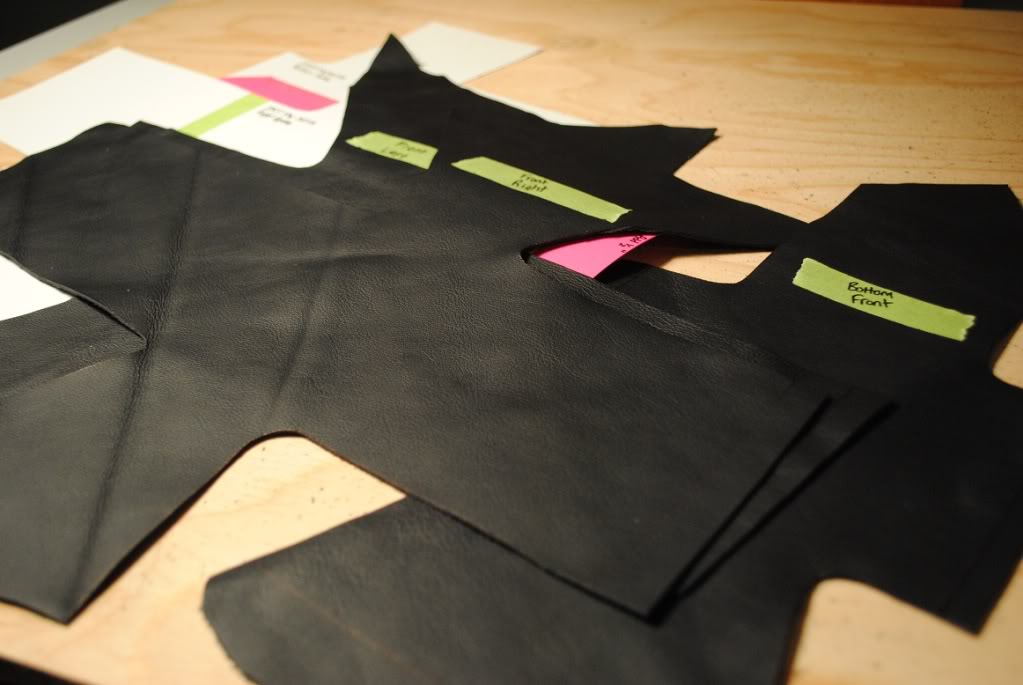
Diagram 09
6: pin your pattern together and sew the seams. You will need to use an industrial sewing machine designed for sewing leather. A standard home machine will not penetrate the leather easily. This type of use can damage the machine and will prematurely wear internal components. Past experience has shown that it is not necessary to add for seam allowance.
You want your pattern to fit snugly on the wheel and you should be required to apply force to pull the cover over the wheel. Keep sewing the seams tighter together until this is achieved. Sew all seams evenly at the same time as removing material from one seam only will distort the pattern.
You should now have similar to the following
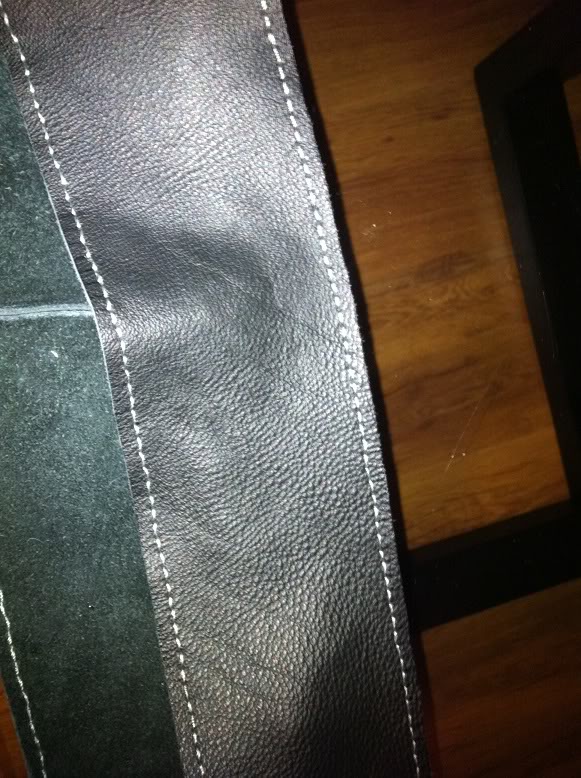
Diagram 10
Continued.....
Here is a photographic How-To for leather wrapping steering wheels. I have gathered the photos from various steps in previous projects to give an understanding to my explanations. Please note that if your wheel was not previously leather covered, you will destroy the original. This cannot be undone!
Here goes�
Materials Sources
Leather Hides & Tools http://www.tandyleatherfactory.com/
Nylon Thread http://www.beadfx.com/catalogue/cordclon.php
Wax can be obtained from most sewing shops etc.
Materials & Tools Required
Leather
1.2-1.8mm Automotive Leather (Must be automotive UV protected!)
You will need approximately 4Sq Ft of leather for one wheel
Note: Vinyl cannot be used as it will tear when stitching tight to the wheel
Thread
0.5mm Waxed Nylon Thread (no comprimise)
Anything other than waxed nylon will simply wear out
As there are limited colors available at leather retailers I buy unwaxed Nylon
Thread from beadfx.com and wax it myself using honeyless beeswax
#69 Nylon thread is used to machine sew the seams together
You will also need:
Upholstery glue
Large head stick pins
Masking Tape
Fine tip sharpie markers
Rubbing alcohol
Large sharp needle attached to some sort of handle for punching holes
Seamstress measuring tape
Crazy glue
Hard ruler
Sharp fabric scissors
Xacto blades
Various sized sewing needles
Sewing Awl
Access to an industrial strength sewing machine
(I�ll update this as things come to mind)
Stitching Choices
There are two types of stitching used in lacing leather wheels. The diamond stitch and the
baseball stitch. Both will be explained later in the tutorial.
European Diamond Stitch
Baseball Stitch
PART A: Developing a pattern
For example I will use a three spoke wheel
In most cases the original pattern cannot be reused as the leather has dried up. When removed it cannot be laid flat to trace a new pattern with the correct dimensions.
1: Using your seamstress tape (man that sounds feminine), measure the circumference of the wheel.
Example *42�
Now measure the circumference of the grip
Example *4�
2: Mark Points using your fine tip marker at the RED Lines shown in the diagram on the outer most surface of the wheel
Diagram 01
3: Decide where you want your leather pieces to join. There can be multiple joins as seen in my Jetta wheel or one full pattern with only one join (One join requires a longer solid piece of leather. Keep this in mind when shopping for a partial hide). In this wheel I decided to follow the OEM join locations as outlined in BLUE on the diagram.
Note:Measure evenly from the top most point for all measurements to keep a single point of reference.
There are 4 joins in this example wheel. Measure the distance from each blue line to get the length of each piece of the pattern. For example the top part is 14�, the sides are 12� each and the bottom is 4�. These all add to complete the circumference of 42�.
Diagram 02
4: We now need to get the pattern for the spokes. In this three spoke wheel since the right spoke is simply the reverse of the left spoke we will only need to tape two spokes. In this example we will use the left and bottom spoke.
Cover the entire spoke with masking tape wrapping it tightly to ensure it sticks everywhere. Layer the masking tape several times to avoid distortion while removing. In wheels with tight curves at the spokes you can apply a stronger tape on top of the masking tape such as packing tape. It is not necessary to tape all the way to your seam lines (Blue Lines in diagram 2) as we will scribe the red reference line (step 1 point) in the tape as we apply it.
Diagram 03
Once the tape has been applied, using your fine point marker carefully draw a center line as shown in diagram 04 below and cut the masking tape using your xacto blade.
Diagram 04
Carefully remove the tape from the spoke starting at the freshly cut seam and working outward. Once the tape has been removed apply it evenly to a large piece of Bristol board as shown below. Once applied you need to square up the sides and ensure it meets the grip circumference as measured in step 1.
Diagram 05
You can now remove the tape from the bristol board and label it as shown below.
Diagram 06
5: Lay your newly created pattern on your leather hide as to have the least wastage. Add slightly extra on both sides of the spokes for trimming and tucking away the leather after stitching. Using your fine point marker trace the pattern on the leather and cut it out using your scissors. You now should have pieces as shown in the photos below.
Diagram 07
Diagram 08
Diagram 09
6: pin your pattern together and sew the seams. You will need to use an industrial sewing machine designed for sewing leather. A standard home machine will not penetrate the leather easily. This type of use can damage the machine and will prematurely wear internal components. Past experience has shown that it is not necessary to add for seam allowance.
You want your pattern to fit snugly on the wheel and you should be required to apply force to pull the cover over the wheel. Keep sewing the seams tighter together until this is achieved. Sew all seams evenly at the same time as removing material from one seam only will distort the pattern.
You should now have similar to the following
Diagram 10
Continued.....
Continued....
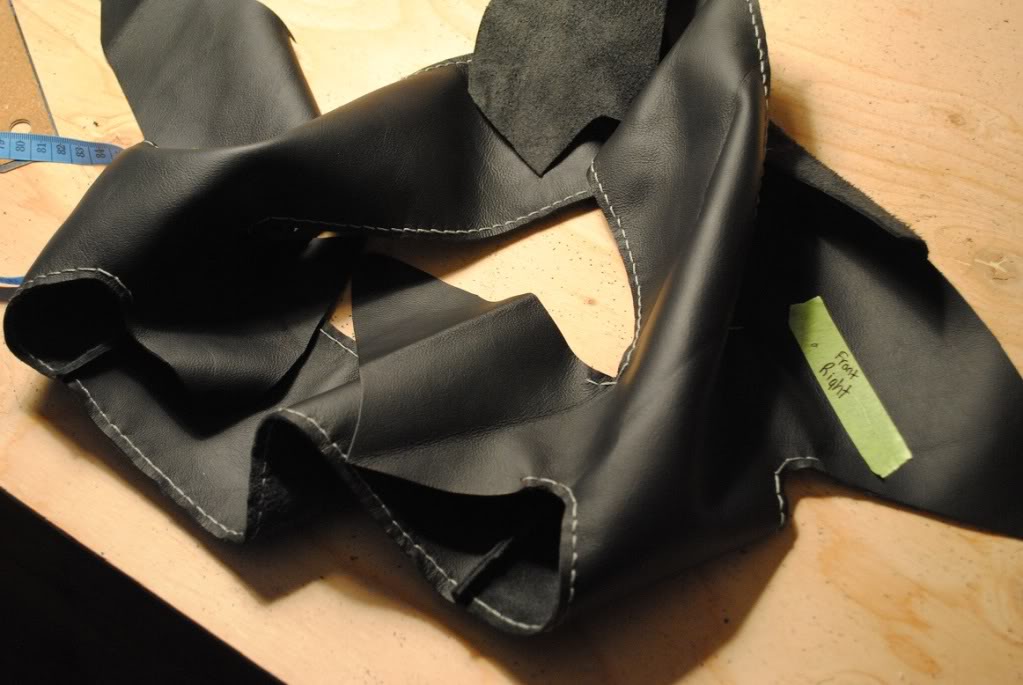
Diagram 11
PART B: Preparing the Wheel to Accept the New Leather
1: If your wheel was not previously leather covered it is necessary to modify the wheel to accept the new cover. At the seam marks you measured in part A step 3 above (see diagram 02) it is necessary to cut grooves in the wheel in order to bury the thick seams so they do not stand out and interfere with control of the vehicle. At each seam mark outline a small groove using masking tape and cut the rubber out using your xacto blade. The grooves should be wide enough to contain two pieces of leather loosely.
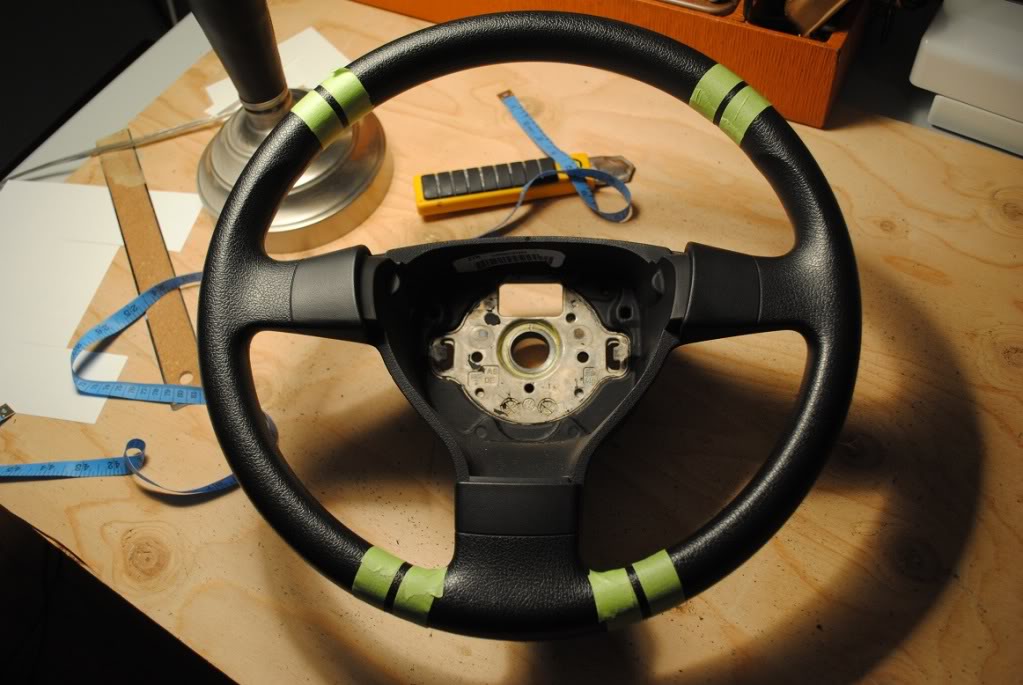
Diagram 12
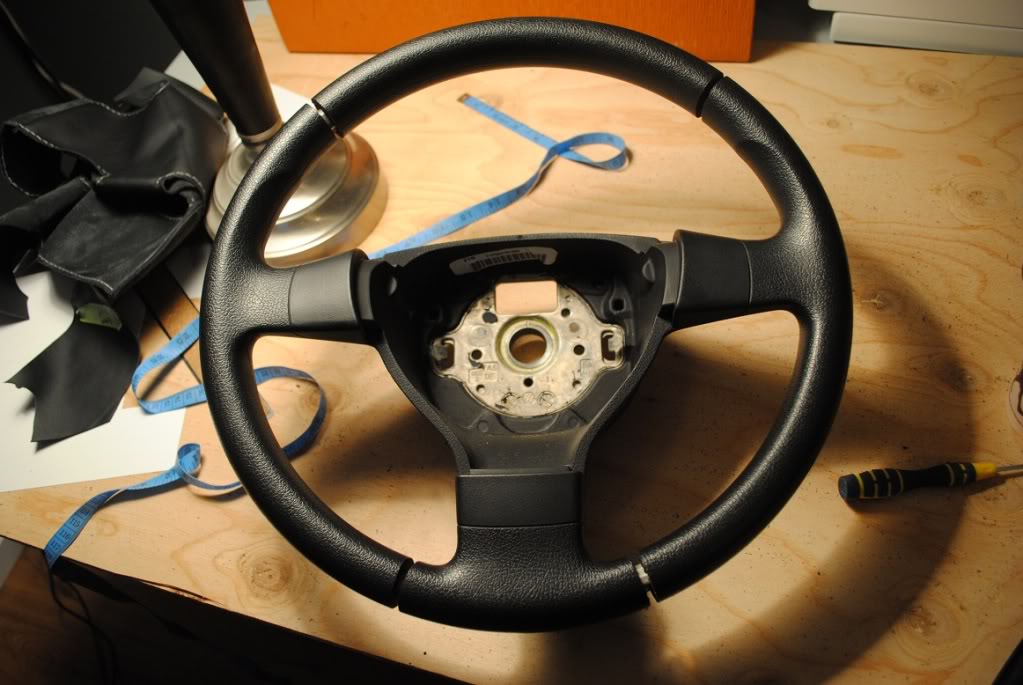
Diagram 13
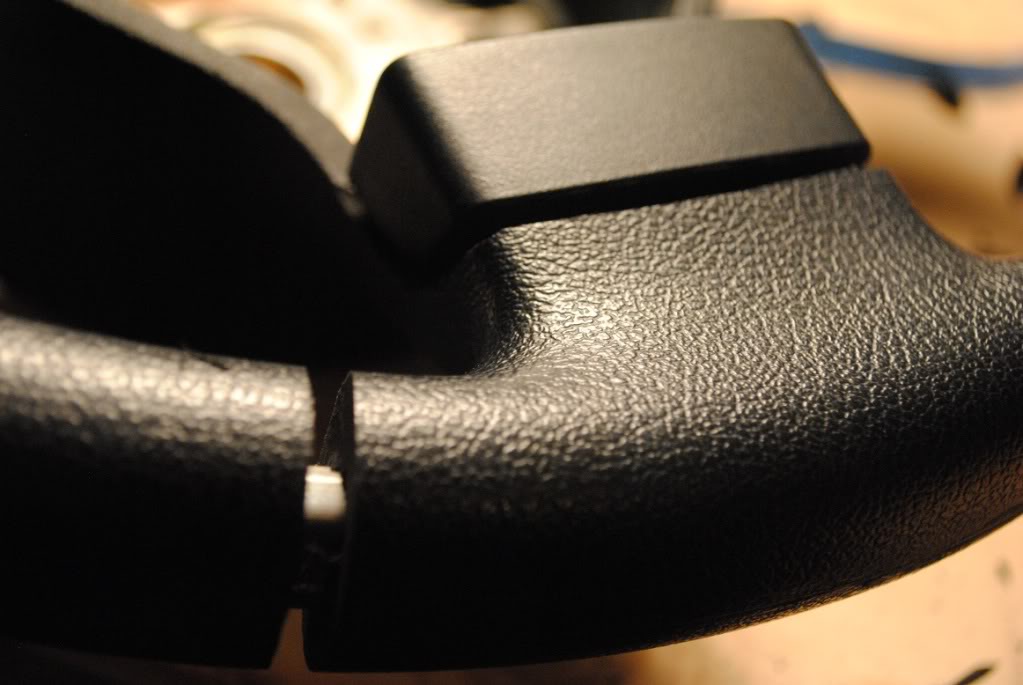
Diagram 14
Once the grooves have been created test fit your cover and check tightness. It may be necessary to sew in closer on the seams so the cover fits snug.
2: Depending on the type of wheel you are covering it may be necessary to use your imagination when you are required to finish the leather at the spokes. In the photos of my Jetta wheel I cut grooves at the pre scribed lines on the wheel to tuck the leather under for that finished look. I am more than happy to offer suggestions so please don�t hesitate to ask.
Here are a few examples of the grooves in the Jetta wheel
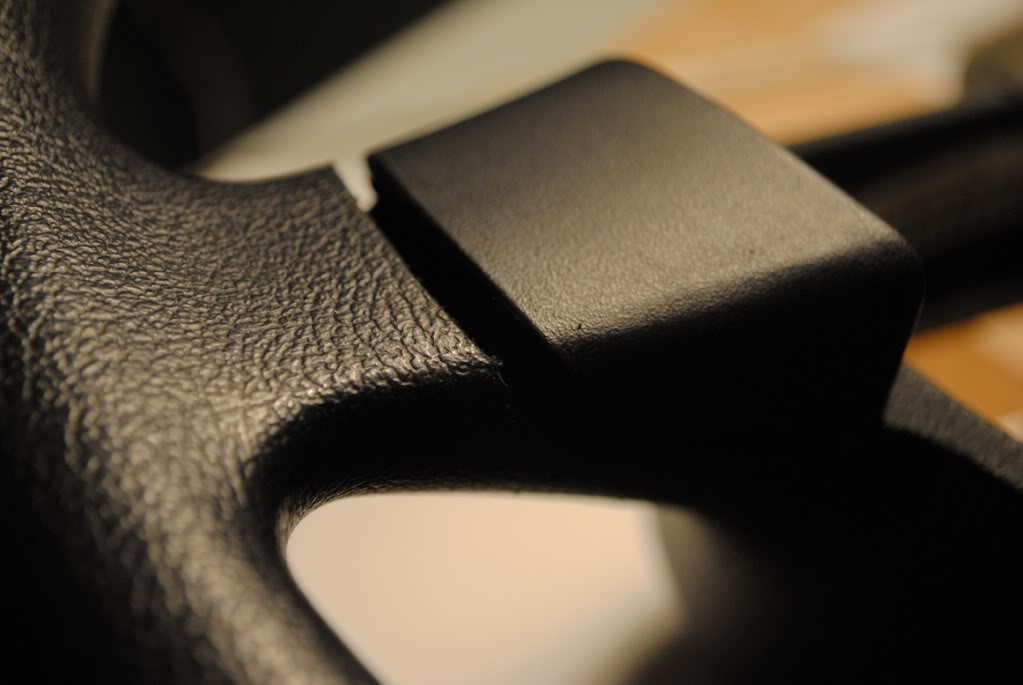
Diagram 15
Diagram 16
PART C: Preparing the Cover, Punching the Holes & Stitching
1: Stretch your cover over your wheel and line up the seams with the grooves you cut in the steps above. In the groove align both sides of the cover to the center of the inner part of the wheel. There should be a center line along the inside of the wheel where the halves of the mold met when the wheel was formed. We will use this as our centerline for the stitching. Pin the leather in place tightly on all four seams.
2: Align the cover on the spokes so both sides meet the centerline. Pin the cover tightly around the spokes as shown in the photos below. Mark on both sides where the stitching will begin (or end) as shown by the faint black marks in the photos below. The stitch will run from one spoke to the other and we�ll need an even amount of stitches on both sides of the pattern for uniformity in the stitching pattern. Do this for all spokes.
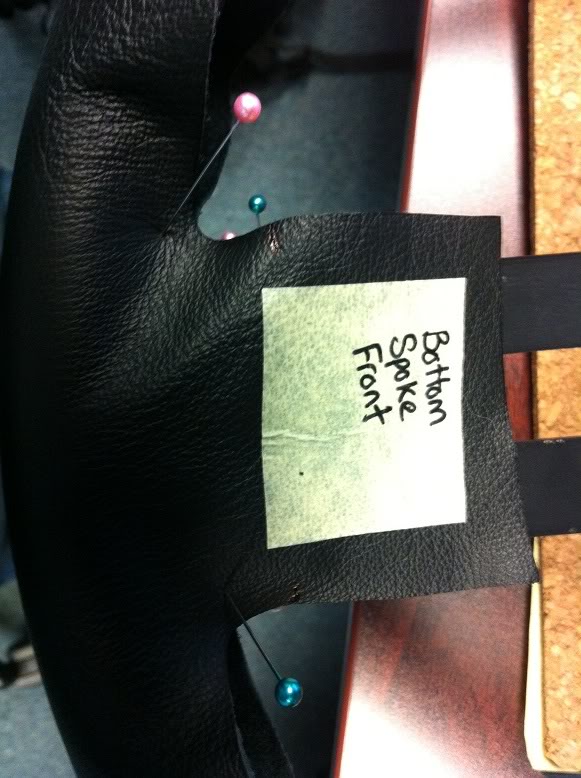
Diagram 17
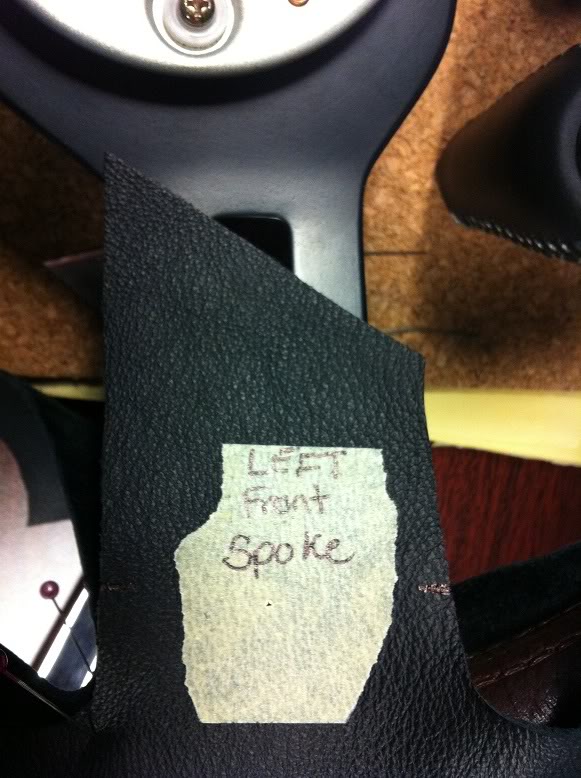
Diagram 18
3: Remove the marked cover and pin it to a soft flat material such as a cork board or thick Styrofoam (I use a cork board). Using your seamstress tape to accommodate the curves in the pattern measure from one starting mark to the other (One side of a spoke to the side of another) and place a mark at every � inch. Count the marks before punching the holes to ensure an even amount on both sides.
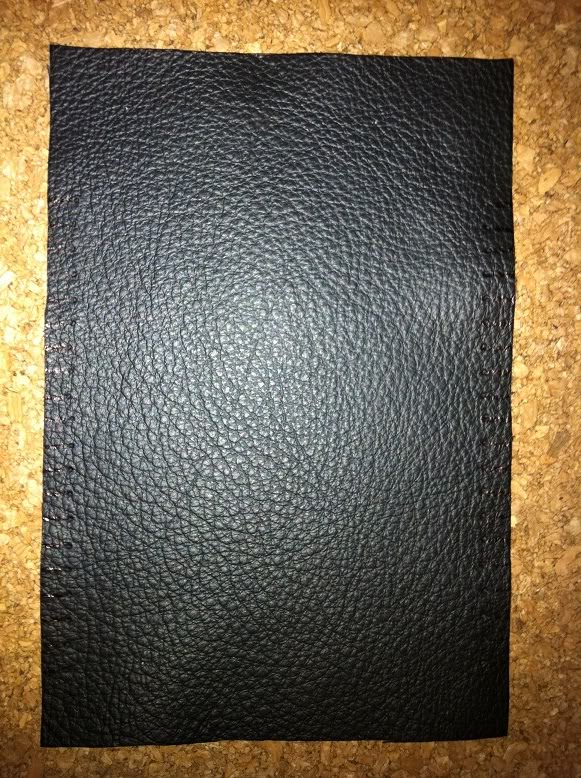
Diagram 19

Diagram 20
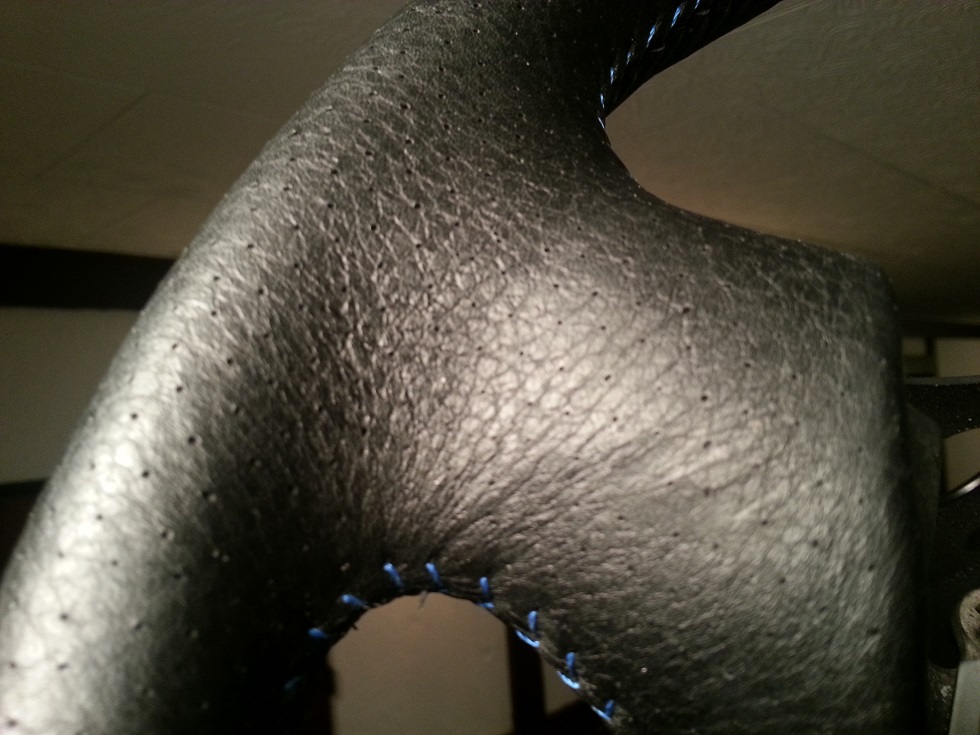
4: Punch the holes as shown in the photo above at each � inch mark. Sorry for the non detailed photo it was the only example of my work I could find.
5: For the baseball stitch punching the holes is all that�s required before permanently mounting the cover on the wheel. For the diamond stitch you must now hand stitch the 0.5mm waxed nylon thread to the cover. This is accomplished by using a sewing awl equipped with a needle compatible with the large diameter thread. These can be obtained from the link to Tand Leather above. Please search youtube for demonstrations on how to use a sewing awl to stitch your cover. Don�t forget to wax your nylon thread by pulling the thread over the beeswax. This is very important for the longevity of your project.
If you decided to use the diamond stitch your cover should now look like this:
Diagram 21

Diagram 22
Continued....
Diagram 11
PART B: Preparing the Wheel to Accept the New Leather
1: If your wheel was not previously leather covered it is necessary to modify the wheel to accept the new cover. At the seam marks you measured in part A step 3 above (see diagram 02) it is necessary to cut grooves in the wheel in order to bury the thick seams so they do not stand out and interfere with control of the vehicle. At each seam mark outline a small groove using masking tape and cut the rubber out using your xacto blade. The grooves should be wide enough to contain two pieces of leather loosely.
Diagram 12
Diagram 13
Diagram 14
Once the grooves have been created test fit your cover and check tightness. It may be necessary to sew in closer on the seams so the cover fits snug.
2: Depending on the type of wheel you are covering it may be necessary to use your imagination when you are required to finish the leather at the spokes. In the photos of my Jetta wheel I cut grooves at the pre scribed lines on the wheel to tuck the leather under for that finished look. I am more than happy to offer suggestions so please don�t hesitate to ask.
Here are a few examples of the grooves in the Jetta wheel
Diagram 15
Diagram 16
PART C: Preparing the Cover, Punching the Holes & Stitching
1: Stretch your cover over your wheel and line up the seams with the grooves you cut in the steps above. In the groove align both sides of the cover to the center of the inner part of the wheel. There should be a center line along the inside of the wheel where the halves of the mold met when the wheel was formed. We will use this as our centerline for the stitching. Pin the leather in place tightly on all four seams.
2: Align the cover on the spokes so both sides meet the centerline. Pin the cover tightly around the spokes as shown in the photos below. Mark on both sides where the stitching will begin (or end) as shown by the faint black marks in the photos below. The stitch will run from one spoke to the other and we�ll need an even amount of stitches on both sides of the pattern for uniformity in the stitching pattern. Do this for all spokes.
Diagram 17
Diagram 18
3: Remove the marked cover and pin it to a soft flat material such as a cork board or thick Styrofoam (I use a cork board). Using your seamstress tape to accommodate the curves in the pattern measure from one starting mark to the other (One side of a spoke to the side of another) and place a mark at every � inch. Count the marks before punching the holes to ensure an even amount on both sides.
Diagram 19
Diagram 20
4: Punch the holes as shown in the photo above at each � inch mark. Sorry for the non detailed photo it was the only example of my work I could find.
5: For the baseball stitch punching the holes is all that�s required before permanently mounting the cover on the wheel. For the diamond stitch you must now hand stitch the 0.5mm waxed nylon thread to the cover. This is accomplished by using a sewing awl equipped with a needle compatible with the large diameter thread. These can be obtained from the link to Tand Leather above. Please search youtube for demonstrations on how to use a sewing awl to stitch your cover. Don�t forget to wax your nylon thread by pulling the thread over the beeswax. This is very important for the longevity of your project.
If you decided to use the diamond stitch your cover should now look like this:
Diagram 21
Diagram 22
Continued....
Continued....
PART D: Installing and lacing the cover
1: Stretch the cover over the wheel and align the seams with the cut grooves. The first place we will secure with glue is at each seam. Align both sides of the cover with the centerline and glue within 1� of either side of the groove.
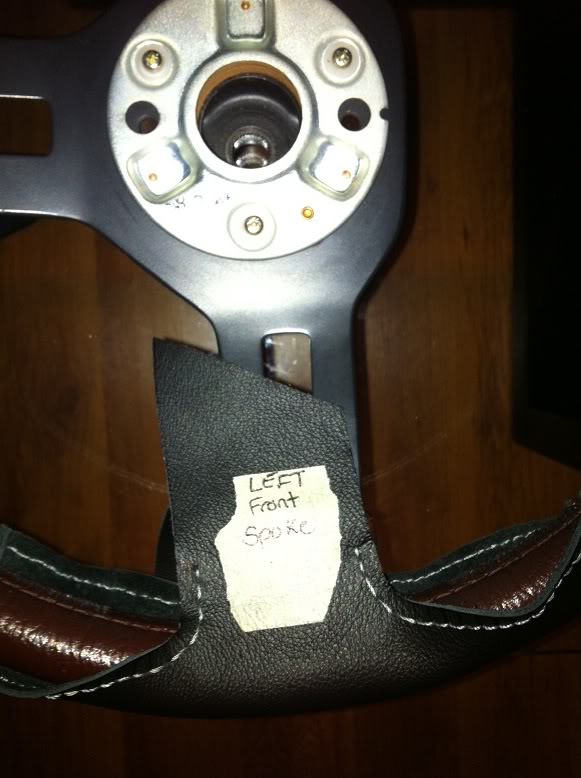
Diagram 23
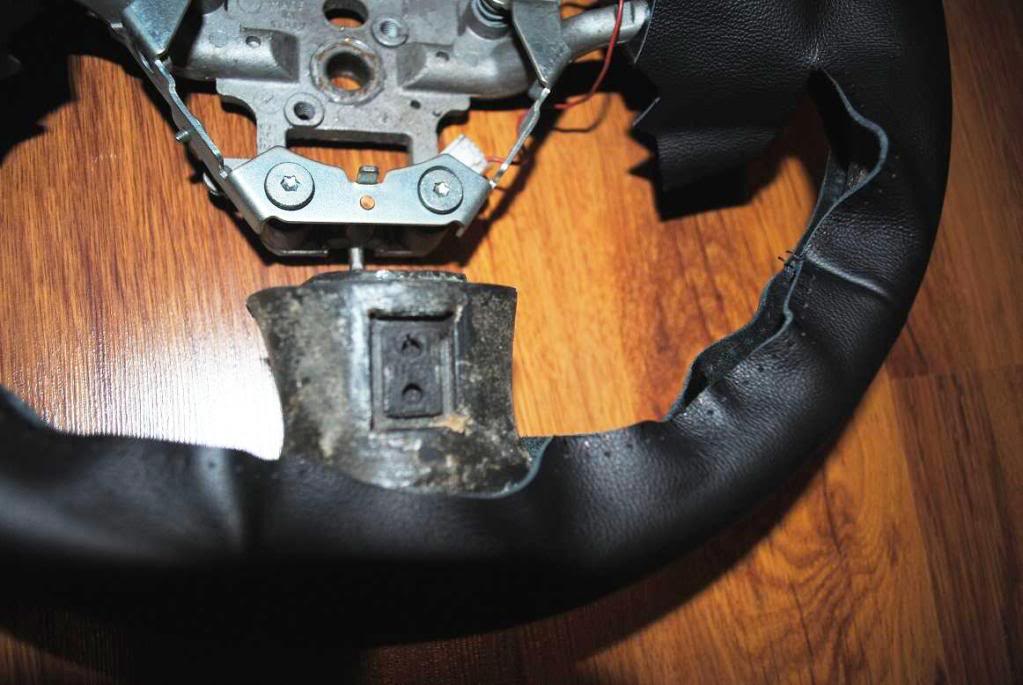
Diagram 24
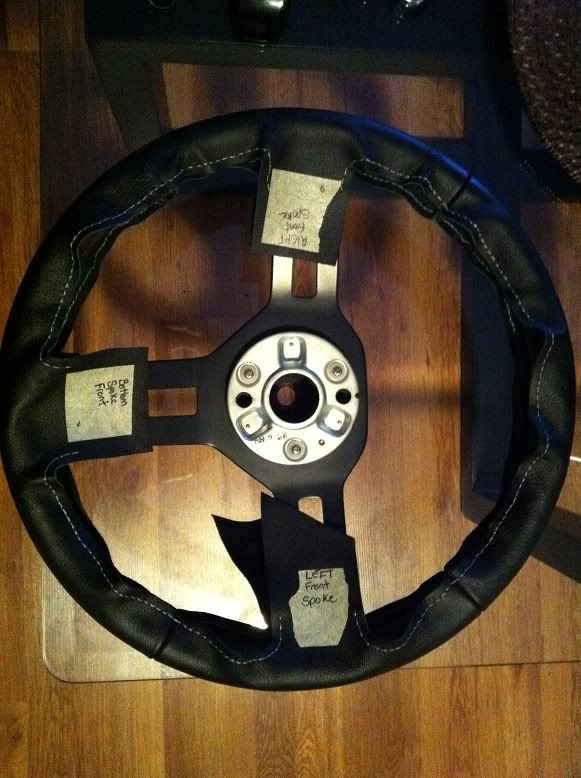
Diagram 25
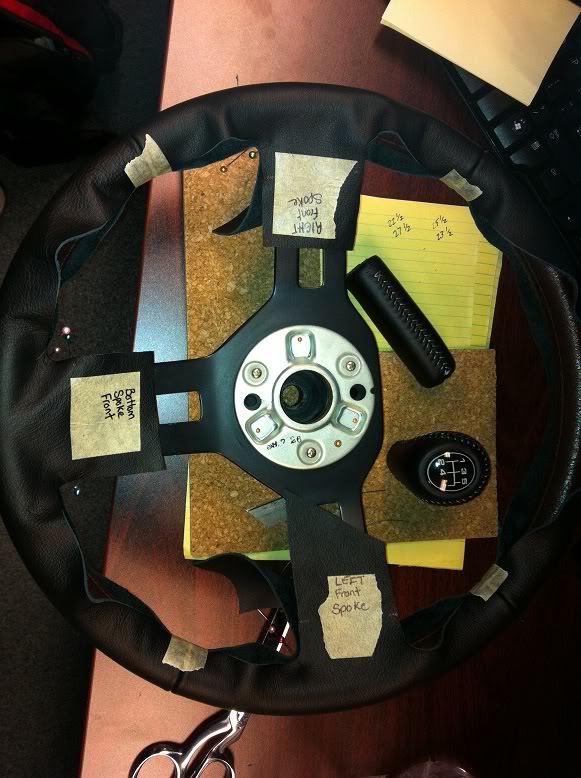
Diagram 26
Once the seams have been glued Stitch the cover together around the seams to secure it in place while you align the remainder. (I used masking tape in the above images but have since discovered that stitching it together is much more secure)
2: Alight the remainder of the cover with the centerline gluing it to the wheel as you go. Place a small stitch approximately every 10 stitches to secure the cover in place and keep alignment. These will be removed individually as you are permanently stitching the cover.
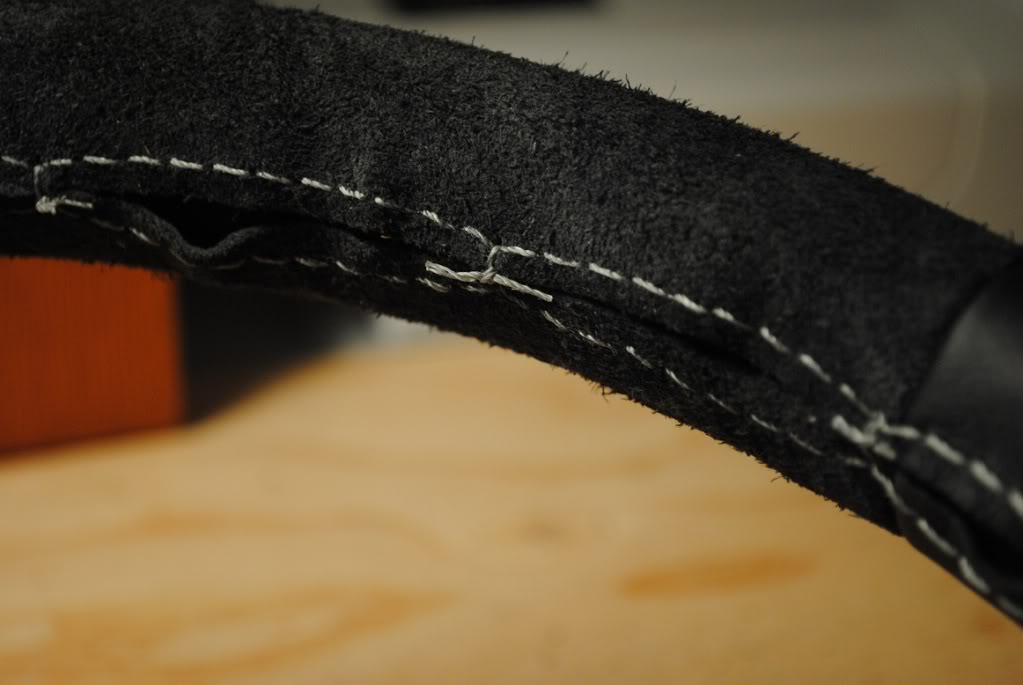
Diagram 27
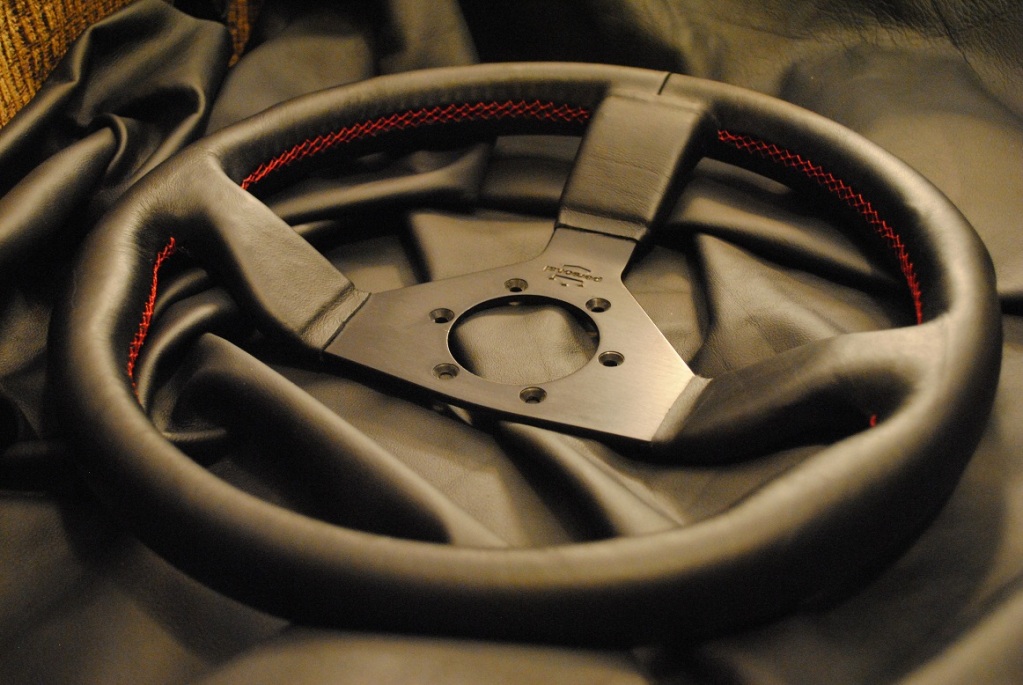
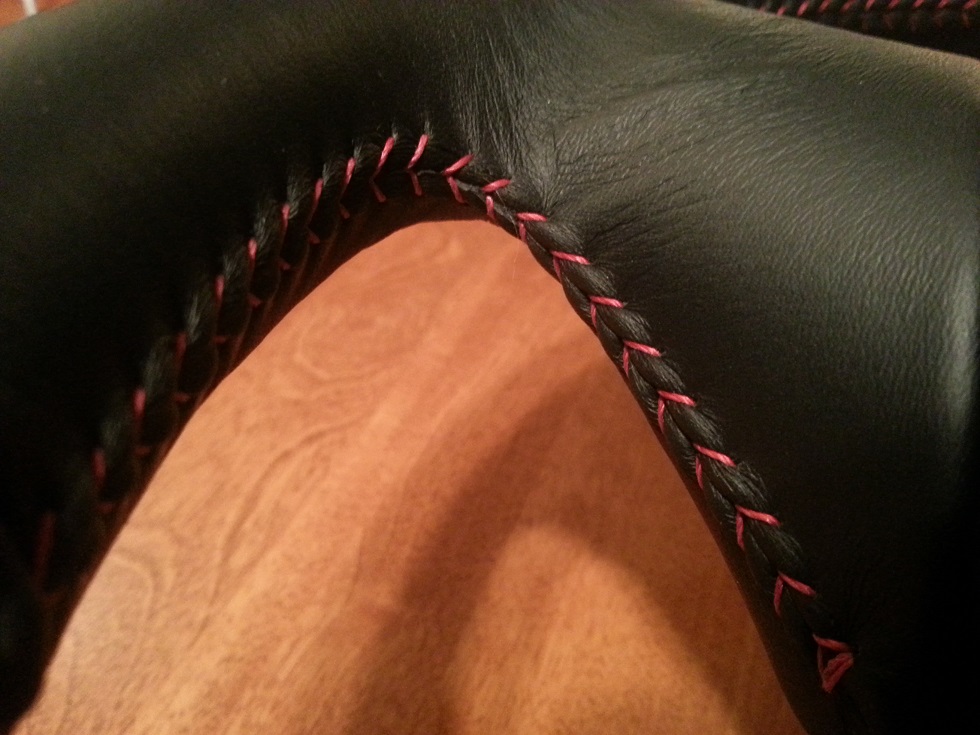
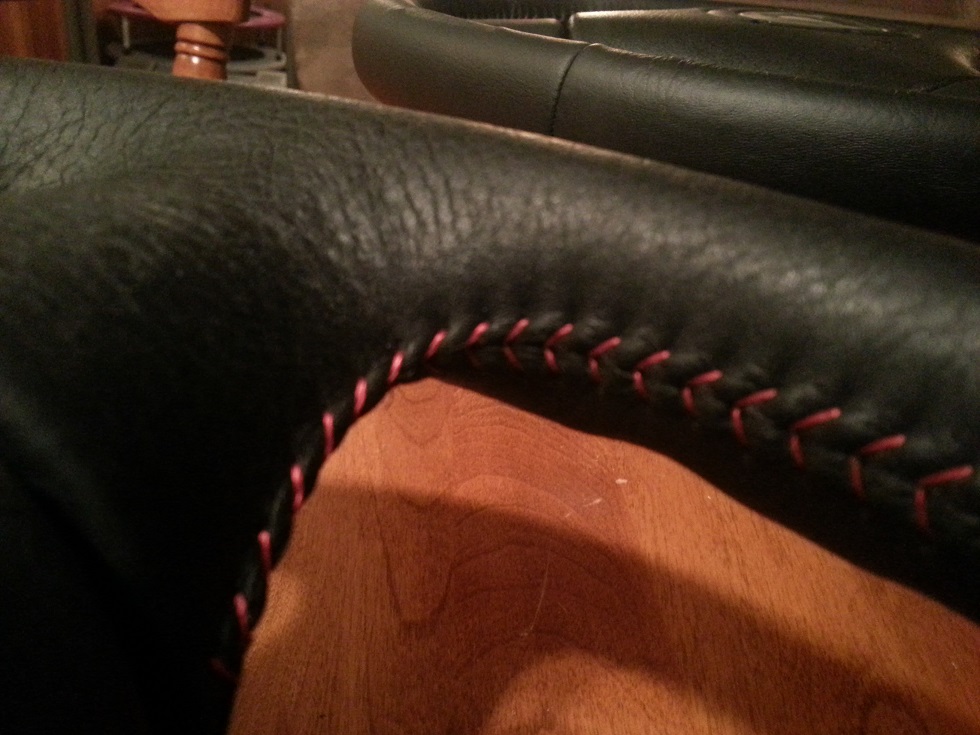
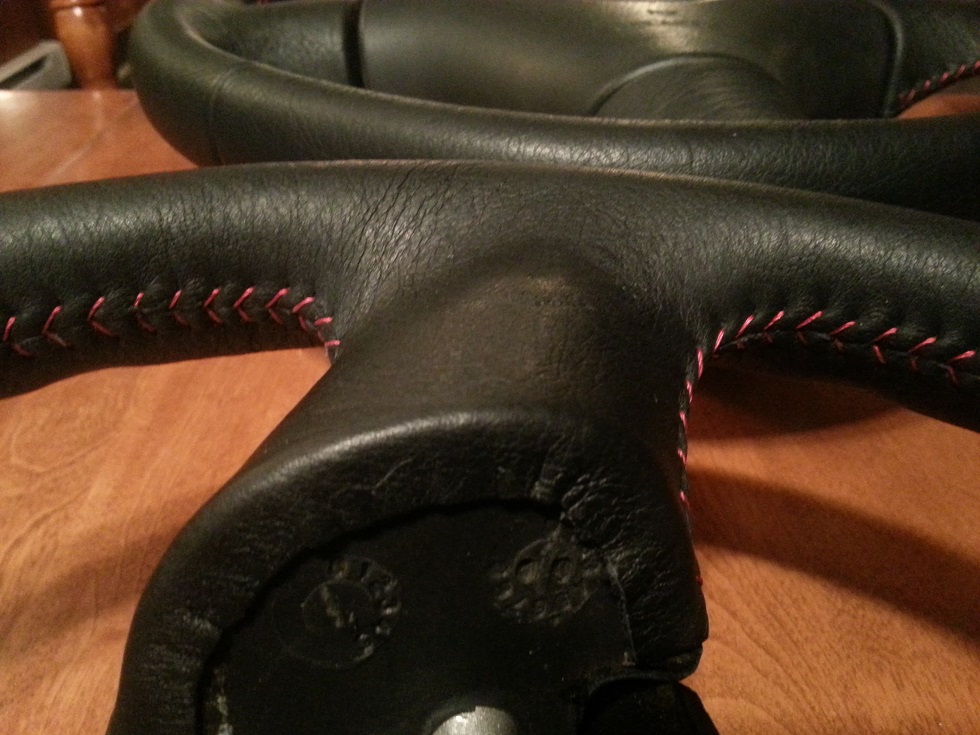
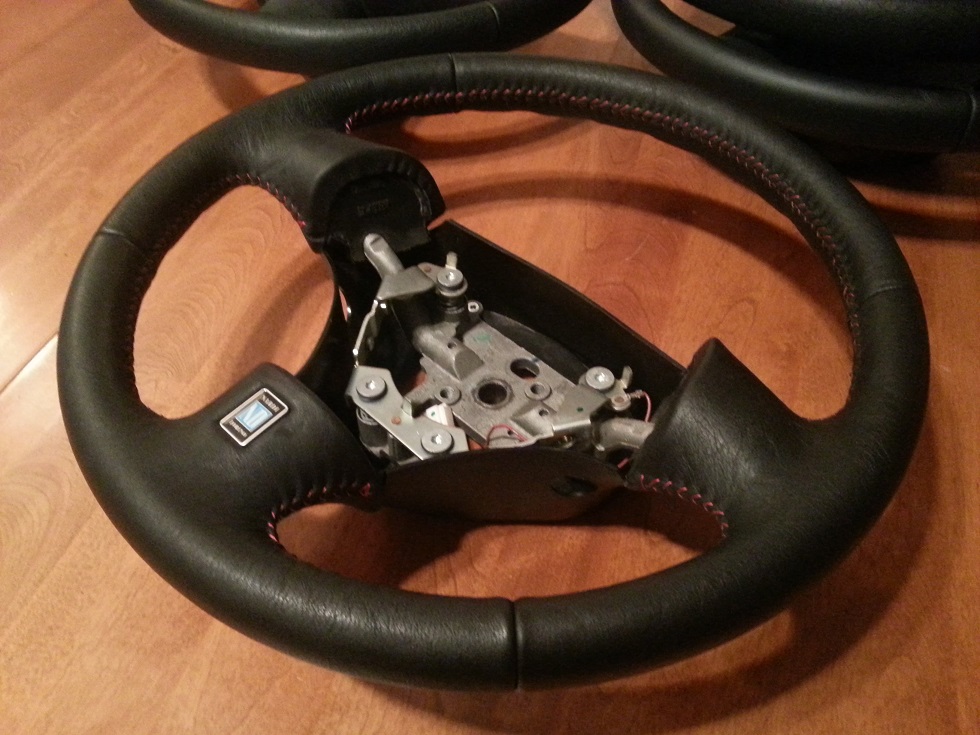
3: Starting at one spoke commence the stitching (baseball or diamond) pulling tightly on the leather to secure it in place. Please search youtube for a tutorial on the type of stitching you wish to accomplish. There are many out there. During my next project I will make a video of both stitches and post the link here to avoid long searches. Here are some of my finished products:
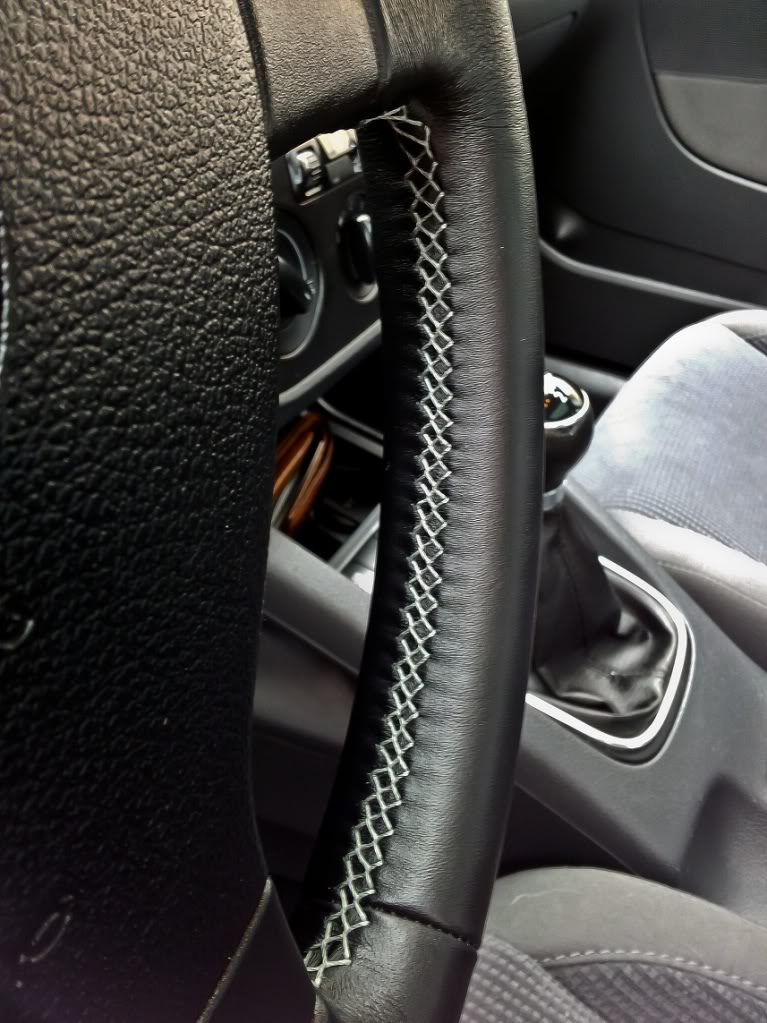
Diagram 28
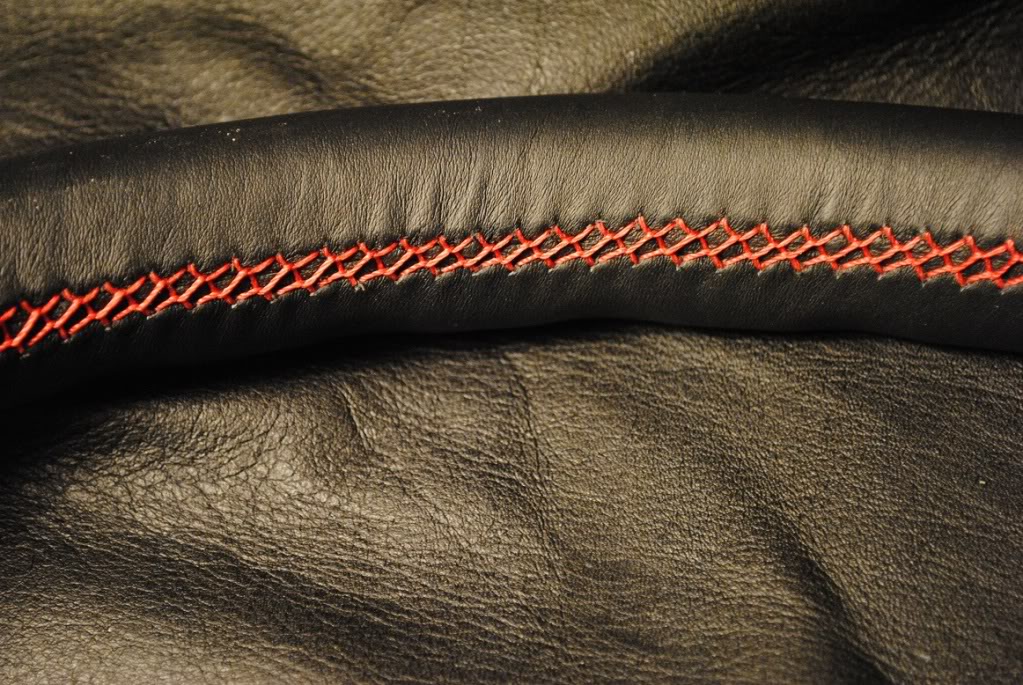
Diagram 29
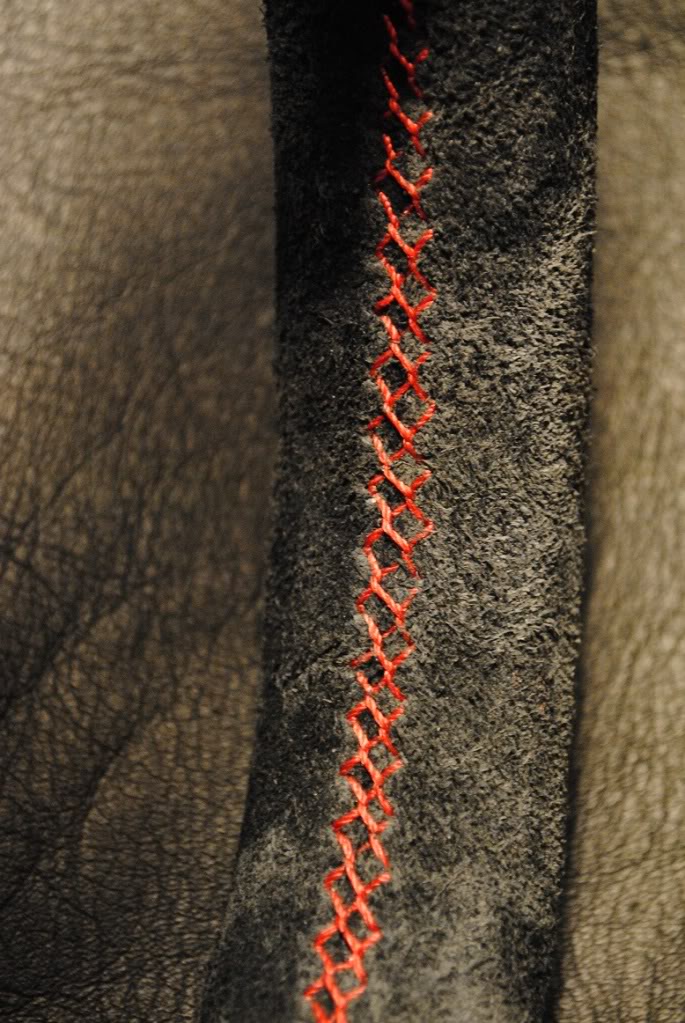
Diagram 30
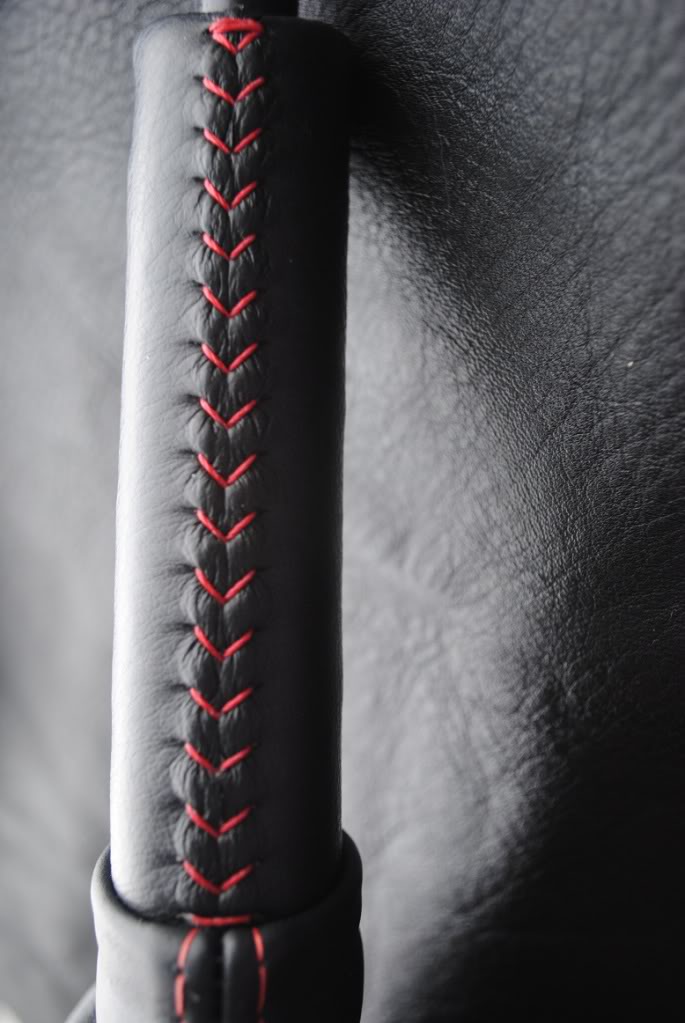
Diagram 31
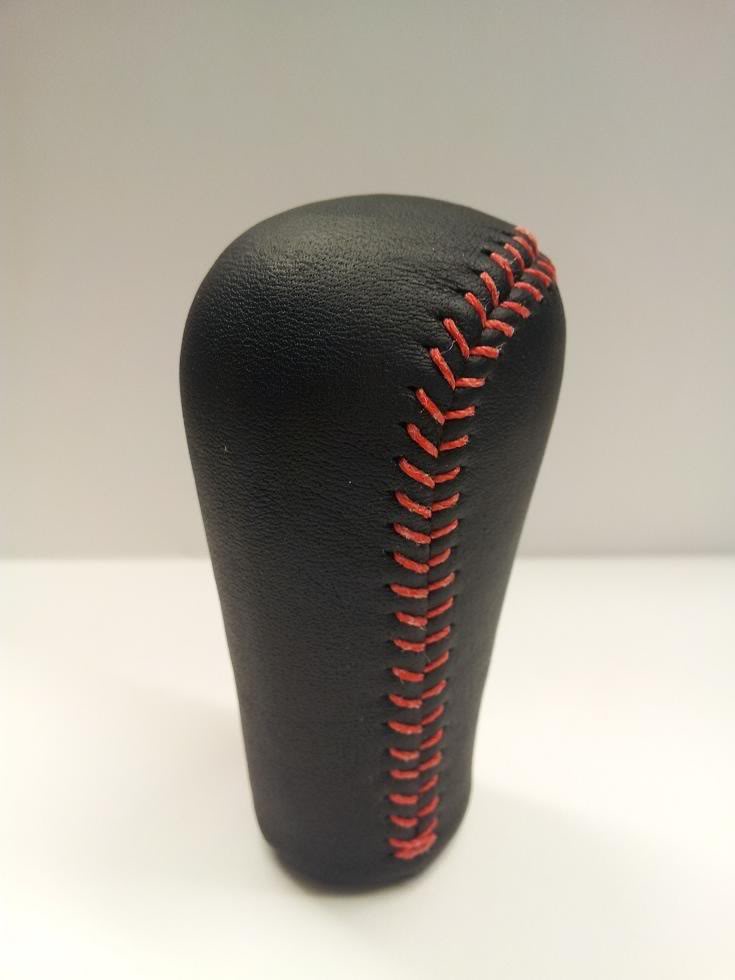
Diagram 32
I hope this has encouraged everyone to give it a shot. I am open to constructive criticism about the tutorial. I�m sure there are confusing instructions and missing parts. If you have a question post it in the thread and I�ll update the tutorial as more information is gained. If I have time during my next project I will make a video of the stitching process and post it here.
Enjoy!
PART D: Installing and lacing the cover
1: Stretch the cover over the wheel and align the seams with the cut grooves. The first place we will secure with glue is at each seam. Align both sides of the cover with the centerline and glue within 1� of either side of the groove.
Diagram 23
Diagram 24
Diagram 25
Diagram 26
Once the seams have been glued Stitch the cover together around the seams to secure it in place while you align the remainder. (I used masking tape in the above images but have since discovered that stitching it together is much more secure)
2: Alight the remainder of the cover with the centerline gluing it to the wheel as you go. Place a small stitch approximately every 10 stitches to secure the cover in place and keep alignment. These will be removed individually as you are permanently stitching the cover.
Diagram 27
3: Starting at one spoke commence the stitching (baseball or diamond) pulling tightly on the leather to secure it in place. Please search youtube for a tutorial on the type of stitching you wish to accomplish. There are many out there. During my next project I will make a video of both stitches and post the link here to avoid long searches. Here are some of my finished products:
Diagram 28
Diagram 29
Diagram 30
Diagram 31
Diagram 32
I hope this has encouraged everyone to give it a shot. I am open to constructive criticism about the tutorial. I�m sure there are confusing instructions and missing parts. If you have a question post it in the thread and I�ll update the tutorial as more information is gained. If I have time during my next project I will make a video of the stitching process and post it here.
Enjoy!


Highwayman
Joined: Nov 2008
Posts: 570
Likes: 0
From: Houston
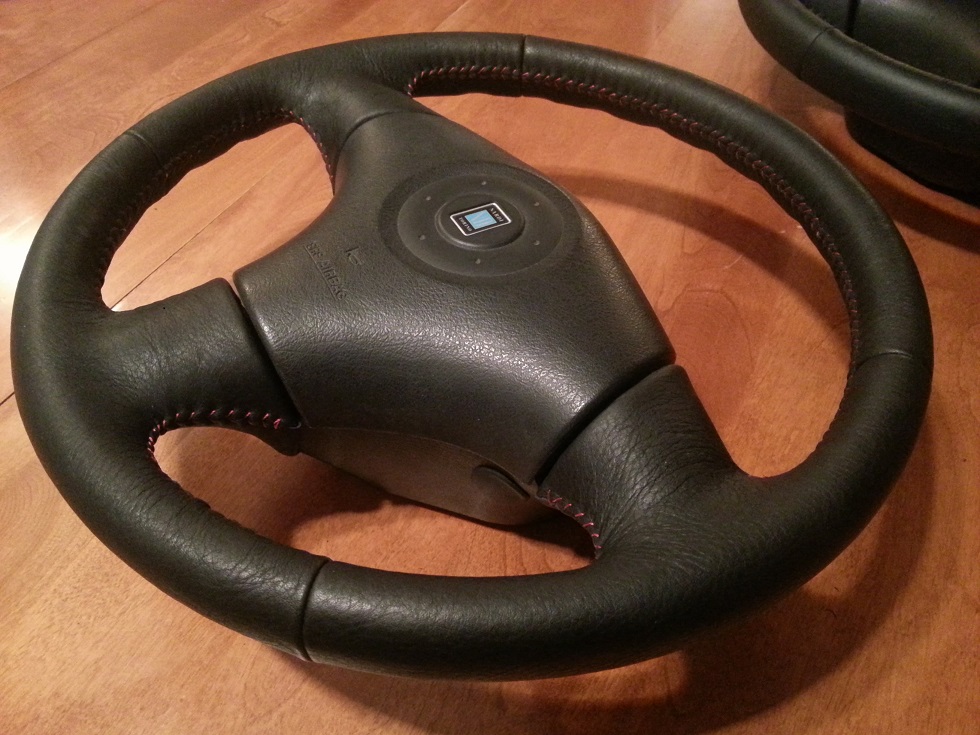
Matt -- finally installed the wheel and matching shiftknob last night and couldn't be happier, looks exactly how I wanted.
For all of those FD owners looking at this thread considering their options, do the following and you won't be dissapointed:
a. Find a scuffed up, ragged protege or miata wheel off ebay ($50)
b. Find the cleanest airbag for such wheel ($70)
c. Send wheel to Matt to have reupholstered and stitched however you like (excellent price)
d. Install via:
https://www.rx7club.com/3rd-generati...-wheel-830139/
and
https://www.rx7club.com/interior-ext...ummies-716233/
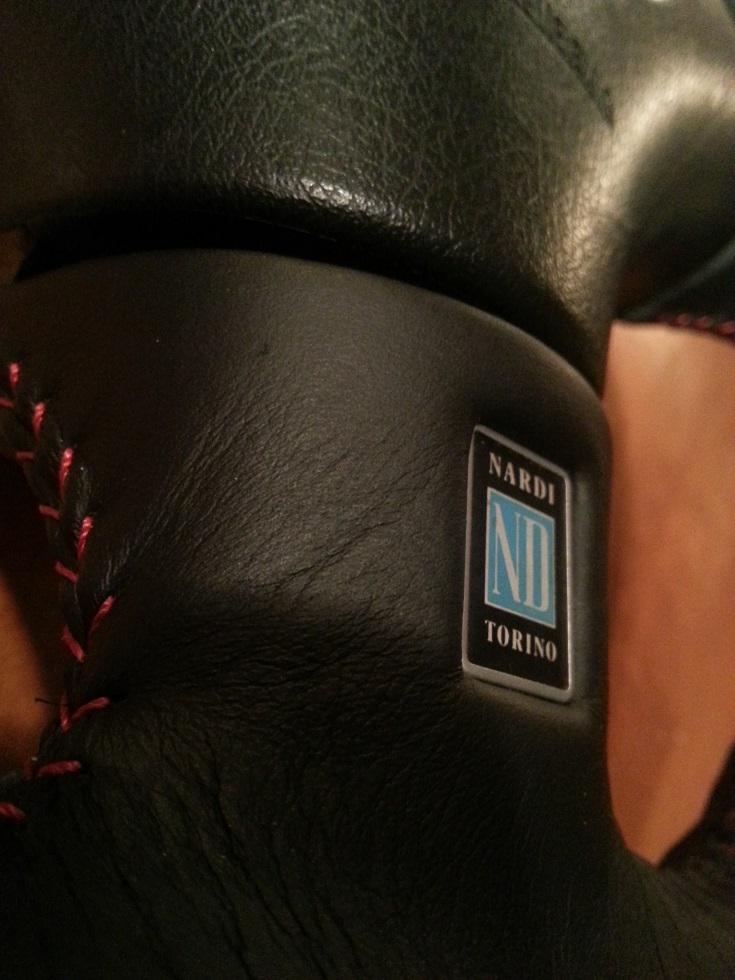
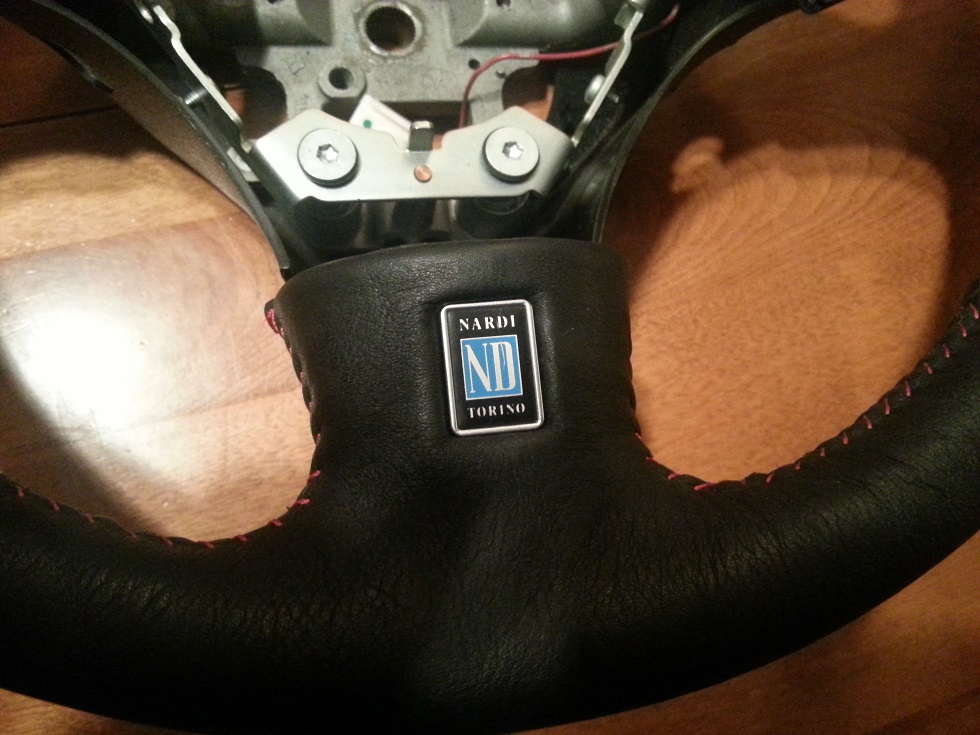
The only difference between the miata/protege wheel and the true 99-spec is that you need to drill out two small 3/16 (I believe) holes for the turn-stops which took all of 3 minutes. ****, my miata wheel I found even has the Nardi logo identical to a spirit r wheel.
Really couldn't be happier, one of my favorite mods yet and will always be so I'd bet.
Will post pics when I can!
For all of those FD owners looking at this thread considering their options, do the following and you won't be dissapointed:
a. Find a scuffed up, ragged protege or miata wheel off ebay ($50)
b. Find the cleanest airbag for such wheel ($70)
c. Send wheel to Matt to have reupholstered and stitched however you like (excellent price)
d. Install via:
https://www.rx7club.com/3rd-generati...-wheel-830139/
and
https://www.rx7club.com/interior-ext...ummies-716233/
The only difference between the miata/protege wheel and the true 99-spec is that you need to drill out two small 3/16 (I believe) holes for the turn-stops which took all of 3 minutes. ****, my miata wheel I found even has the Nardi logo identical to a spirit r wheel.
Really couldn't be happier, one of my favorite mods yet and will always be so I'd bet.
Will post pics when I can!
That's great glad you're pleased with it! I'll keep checking back for the photos!
Cheers
Cheers
Matt -- finally installed the wheel and matching shiftknob last night and couldn't be happier, looks exactly how I wanted.
For all of those FD owners looking at this thread considering their options, do the following and you won't be dissapointed:
a. Find a scuffed up, ragged protege or miata wheel off ebay ($50)
b. Find the cleanest airbag for such wheel ($70)
c. Send wheel to Matt to have reupholstered and stitched however you like (excellent price)
d. Install via:
https://www.rx7club.com/3rd-generati...-wheel-830139/
and
https://www.rx7club.com/interior-ext...ummies-716233/
The only difference between the miata/protege wheel and the true 99-spec is that you need to drill out two small 3/16 (I believe) holes for the turn-stops which took all of 3 minutes. ****, my miata wheel I found even has the Nardi logo identical to a spirit r wheel.
Really couldn't be happier, one of my favorite mods yet and will always be so I'd bet.
Will post pics when I can!
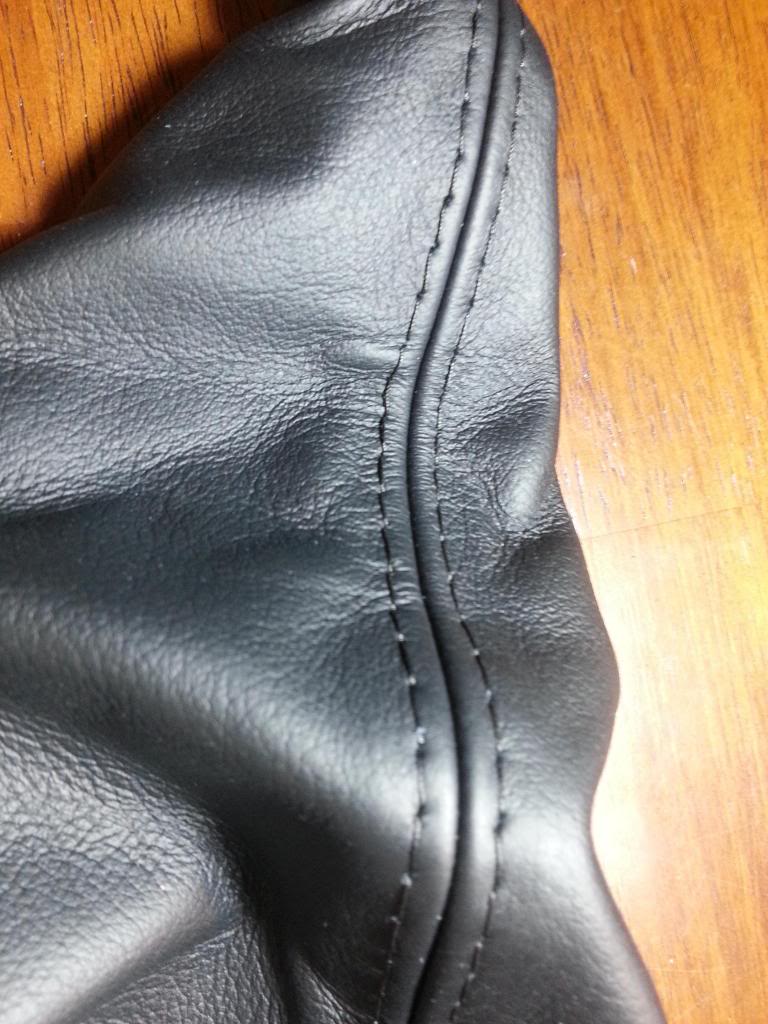
Hi All,
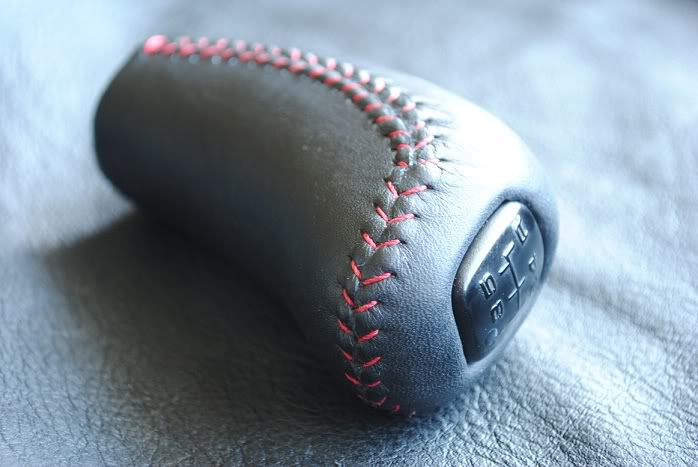
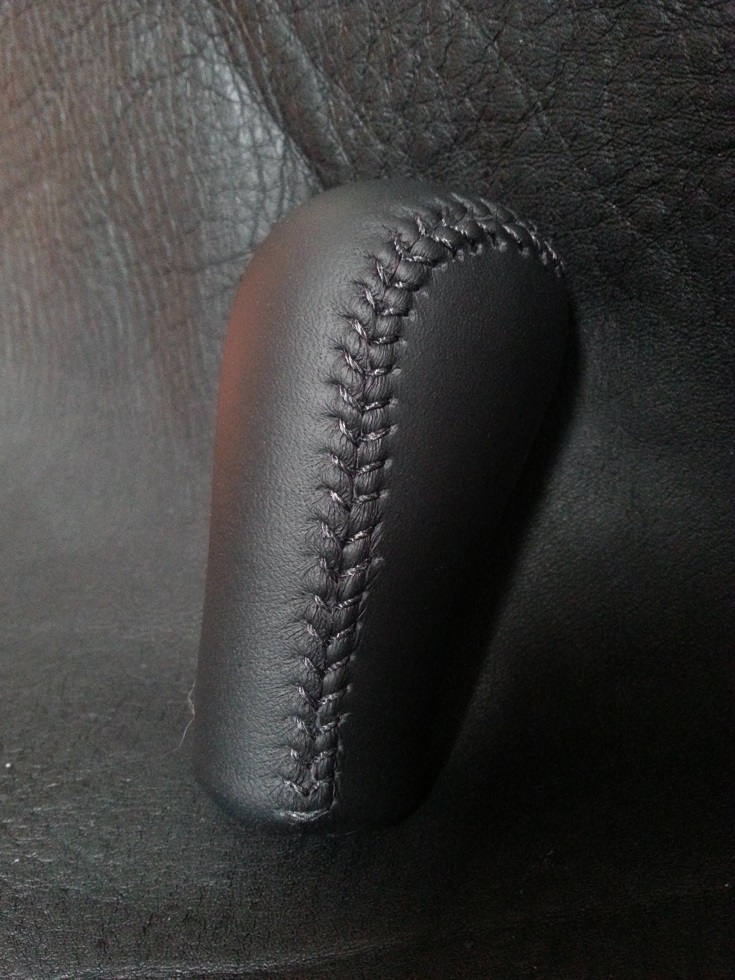
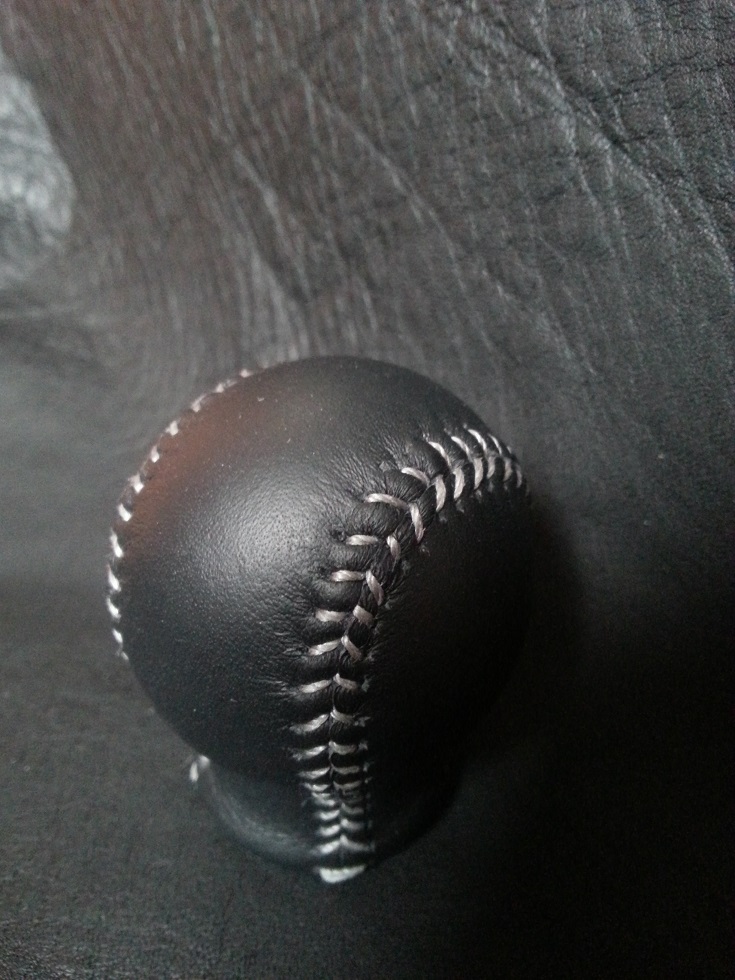
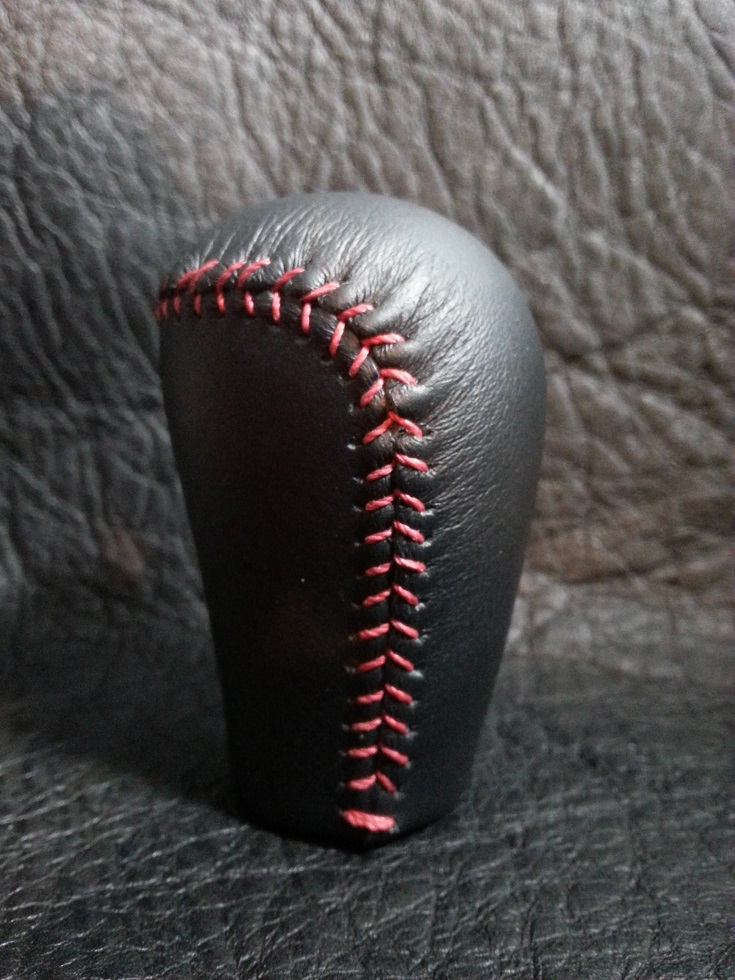
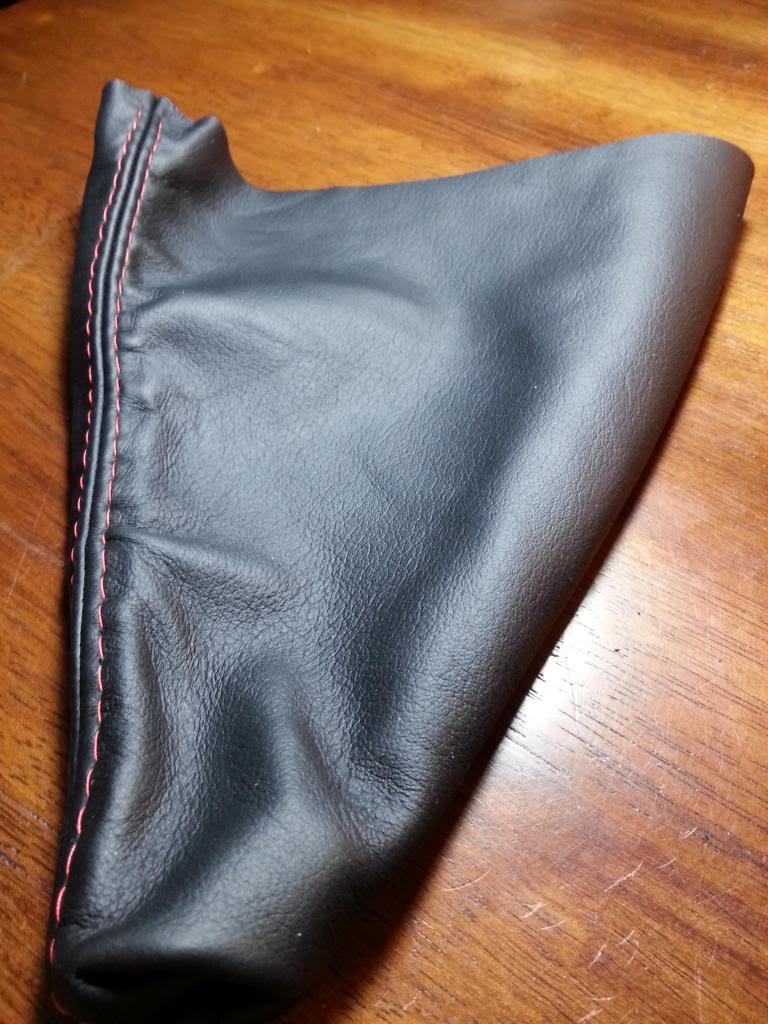
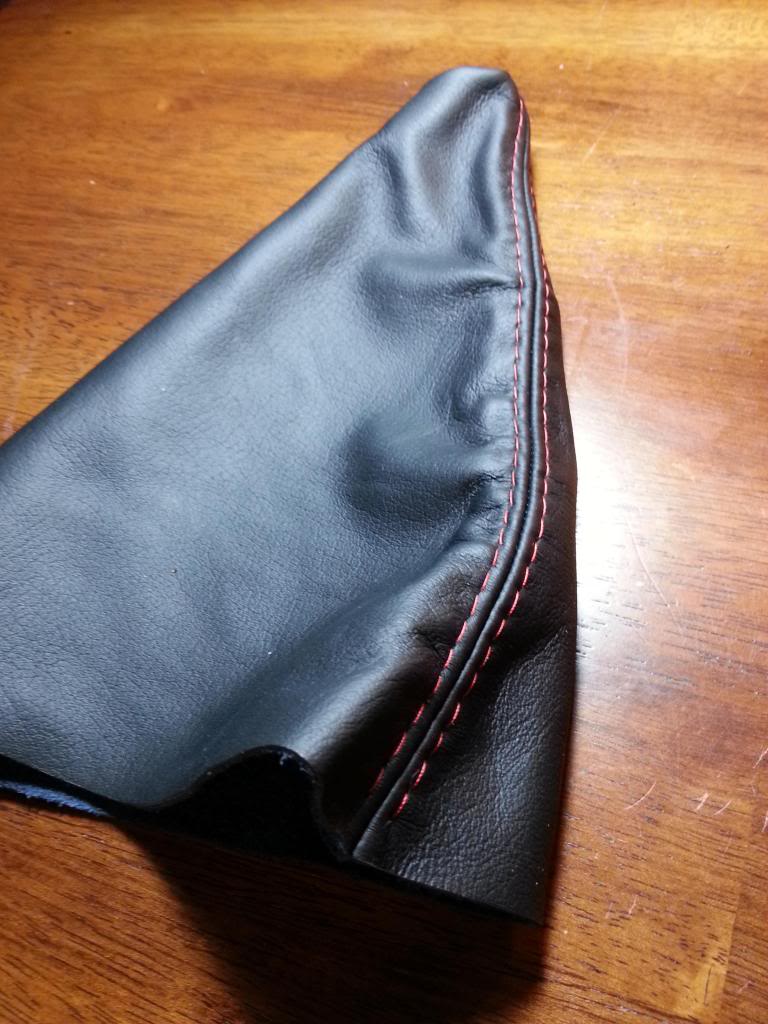
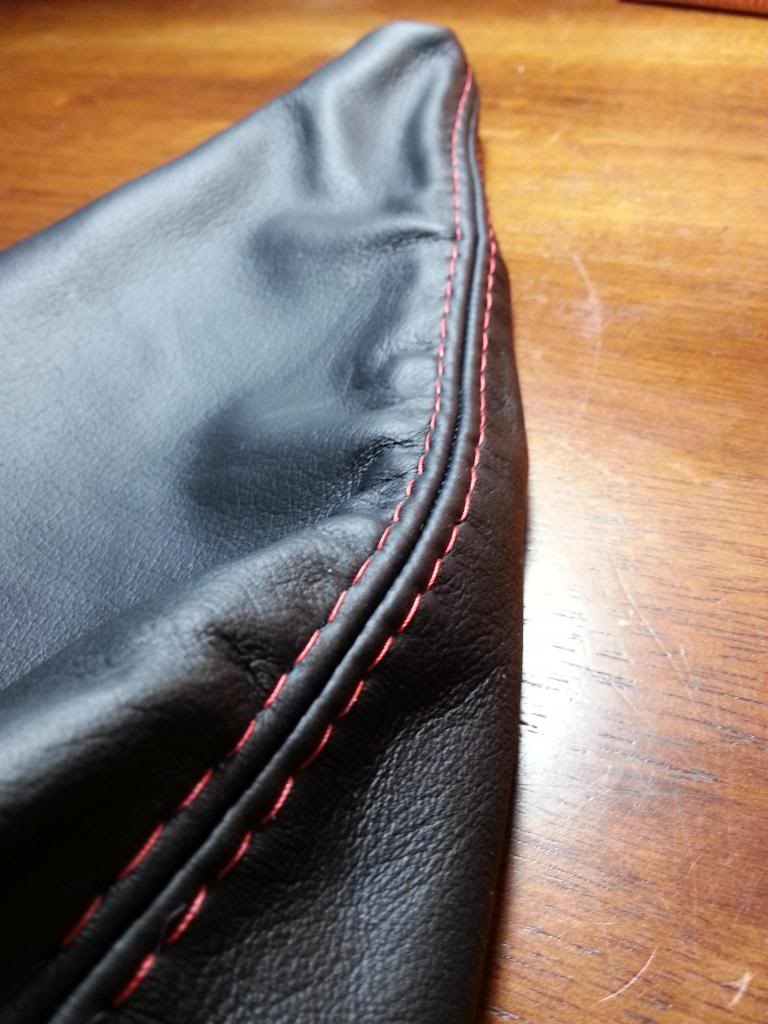
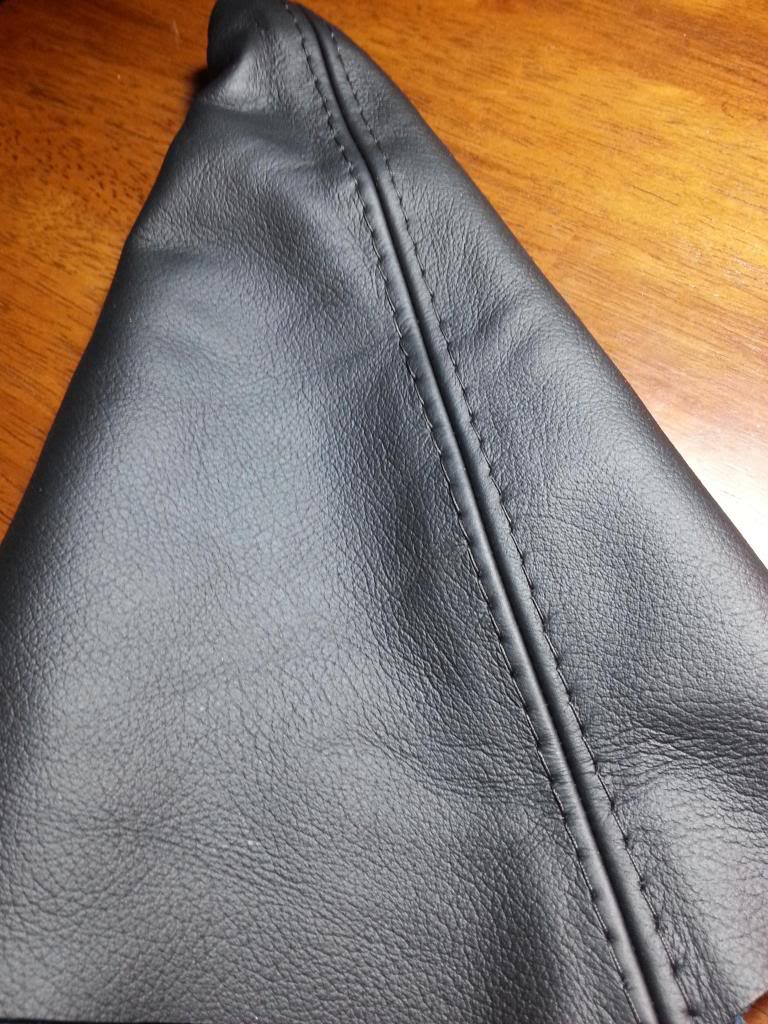
Photos of a shift **** and brake lever from an FC. This shift **** was not OEM leather covered. The leather on the brake lever had srunk to what must have been 60% of it's original size.
This on'e going to Australia.
Enjoy!
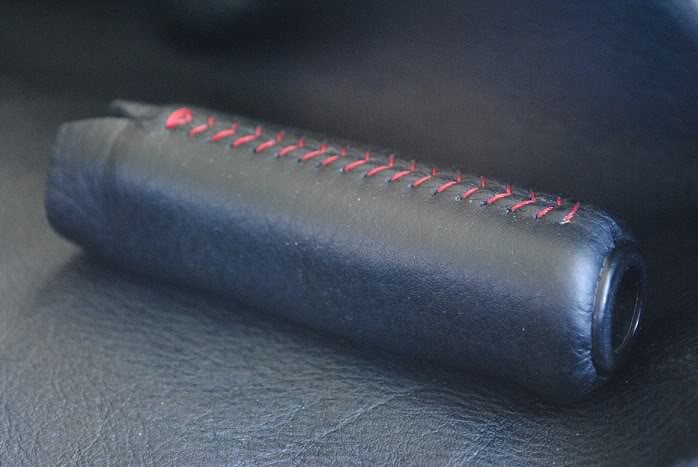
Photos of a shift **** and brake lever from an FC. This shift **** was not OEM leather covered. The leather on the brake lever had srunk to what must have been 60% of it's original size.
This on'e going to Australia.
Enjoy!


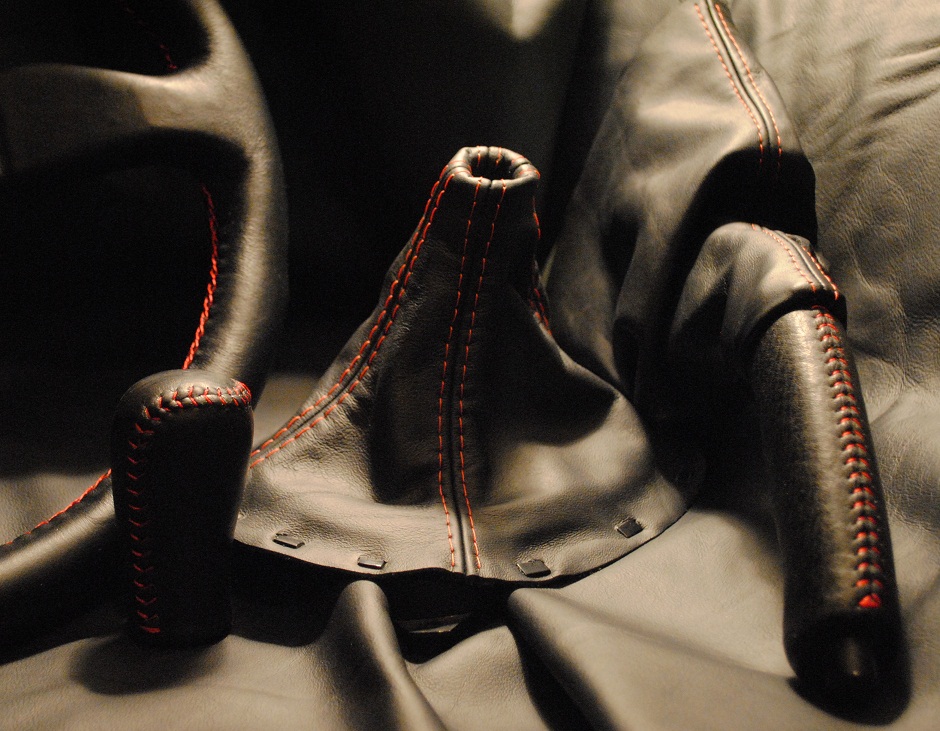


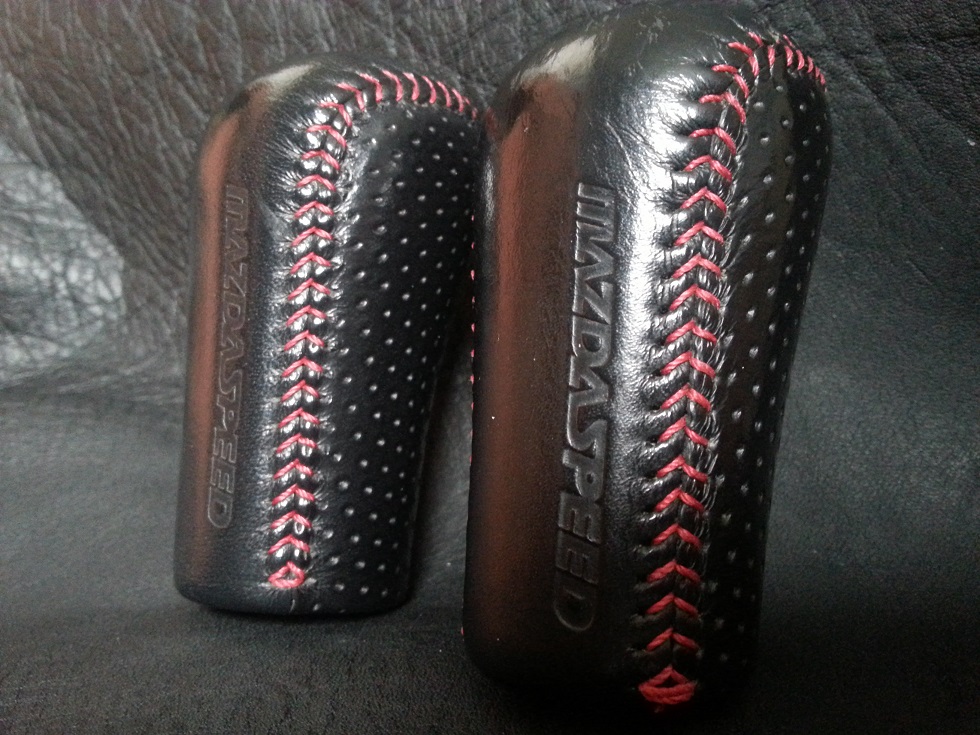
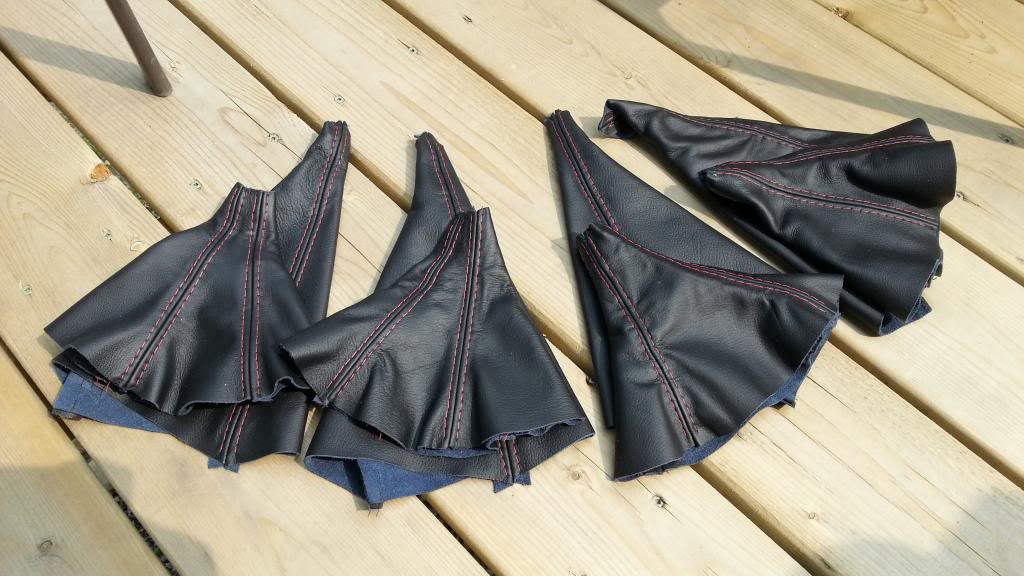
Some shift ***** & Brake Levers for goodfella.....
Some OEM FD *****
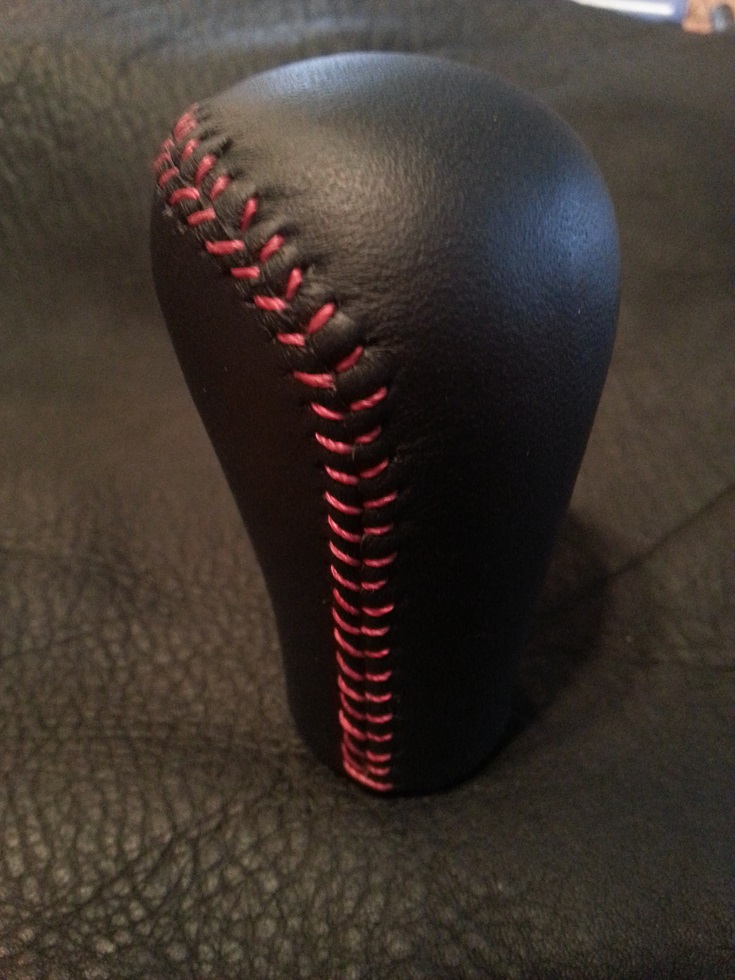
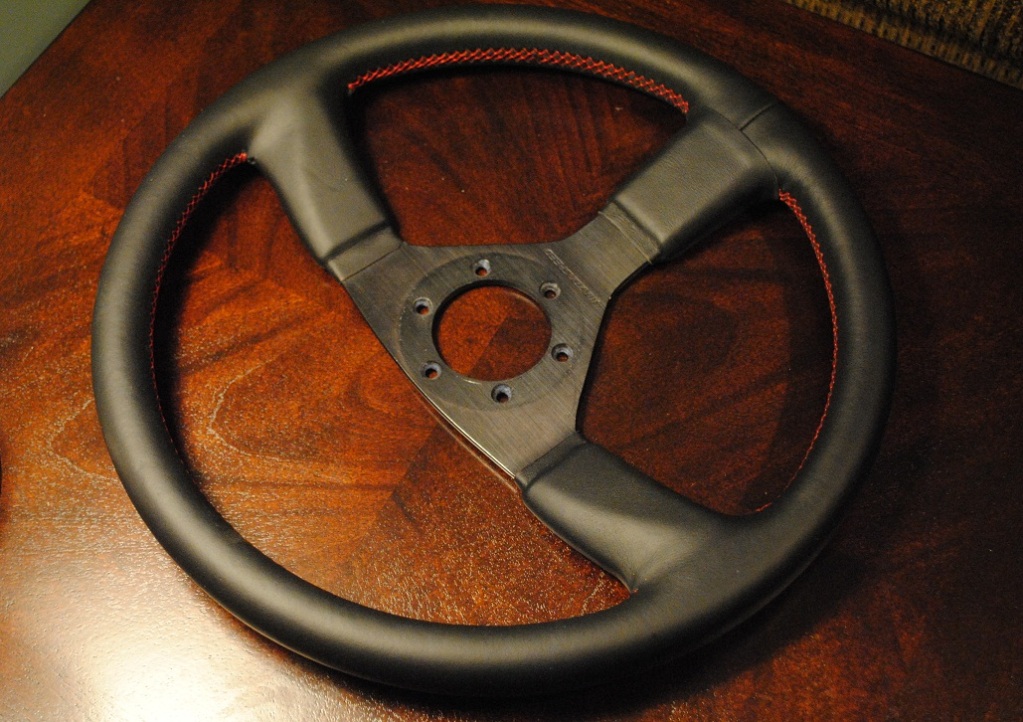
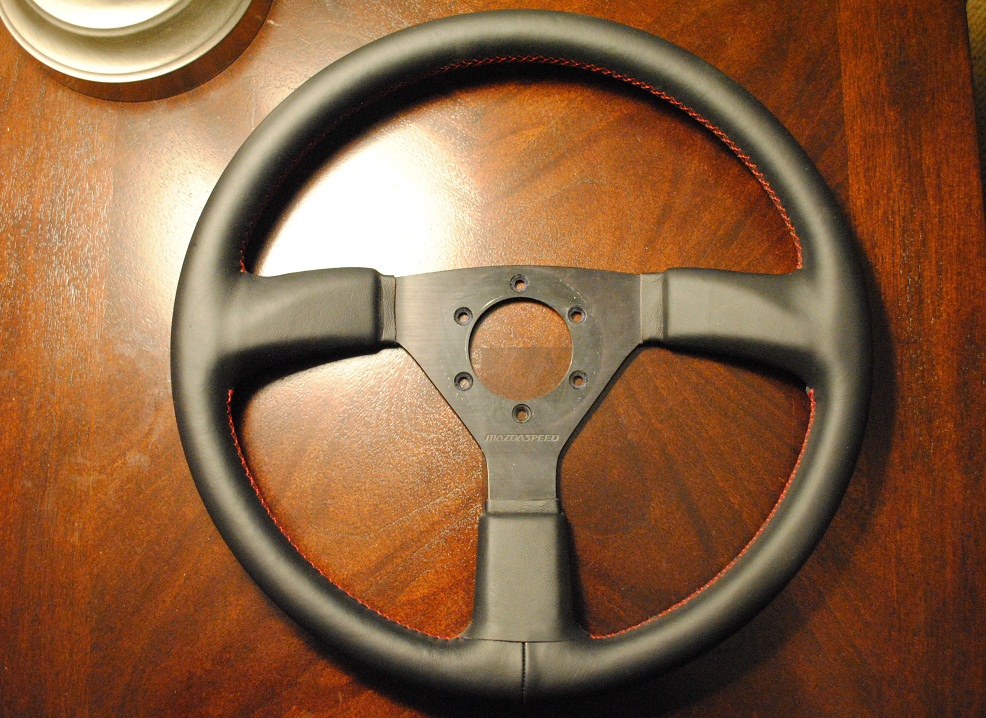
Mazdaspeed ***** Re-Stitched in Red
Mitsubishi Lancer Evo Shift ****

FC Brake Lever
FD Brake Lever
Miata ****
Some OEM FD *****
Mazdaspeed ***** Re-Stitched in Red
Mitsubishi Lancer Evo Shift ****
FC Brake Lever
FD Brake Lever
Miata ****


hulanfd3s,
Looks even better in person! Thanks for the hard work you put into my set. It was worth the wait.
ps. sorry for the late reply, everything arrived perfectly weeks ago shortly after our last conversation.
Looks even better in person! Thanks for the hard work you put into my set. It was worth the wait.
ps. sorry for the late reply, everything arrived perfectly weeks ago shortly after our last conversation.
Great glad you like it. Post some installed photos if you have time.
Enjoy it!
Enjoy it!


It's been a while since I've updated the thread so here are a few photos of some projects. I've been quite busy the summer and have not had much time for anything fun.
Sorry for the delay. Enjoy!
Sorry for the delay. Enjoy!


Hi All,
It's been a while since I've posted in this thread but I have completed some projects lately that I thought might spark some motivation.
Speaking of motivation, has anyone successfully completed a wheel or other part using my tutorial? Has it been helpful?
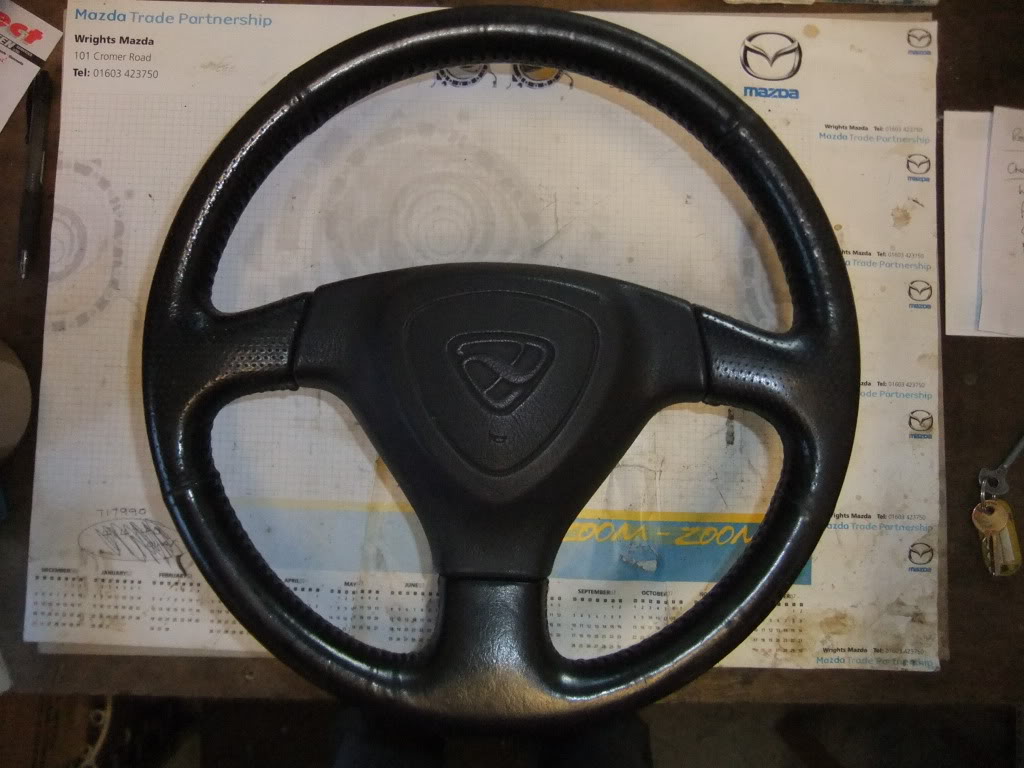
A friend's TRD wheel from his supra:
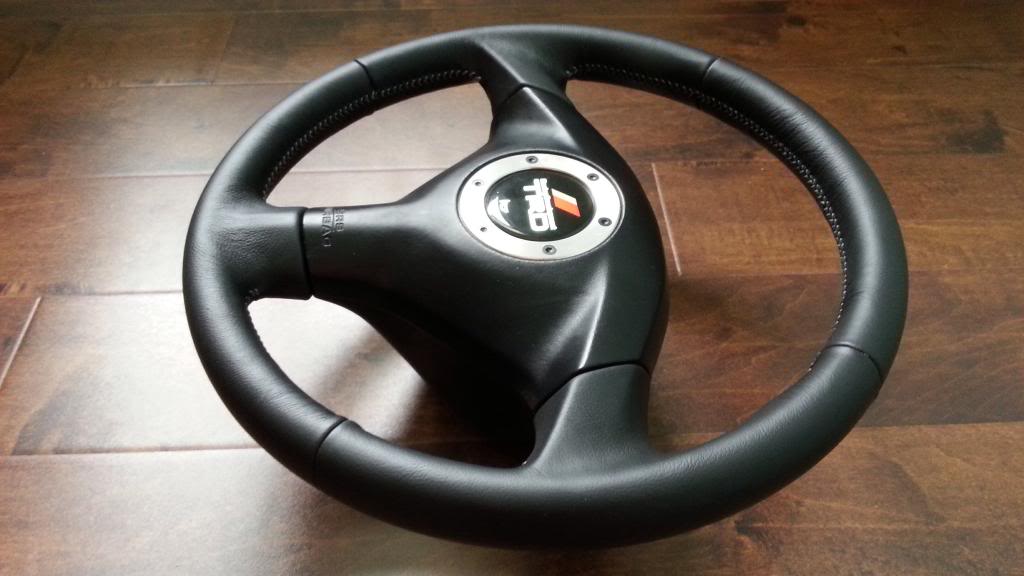
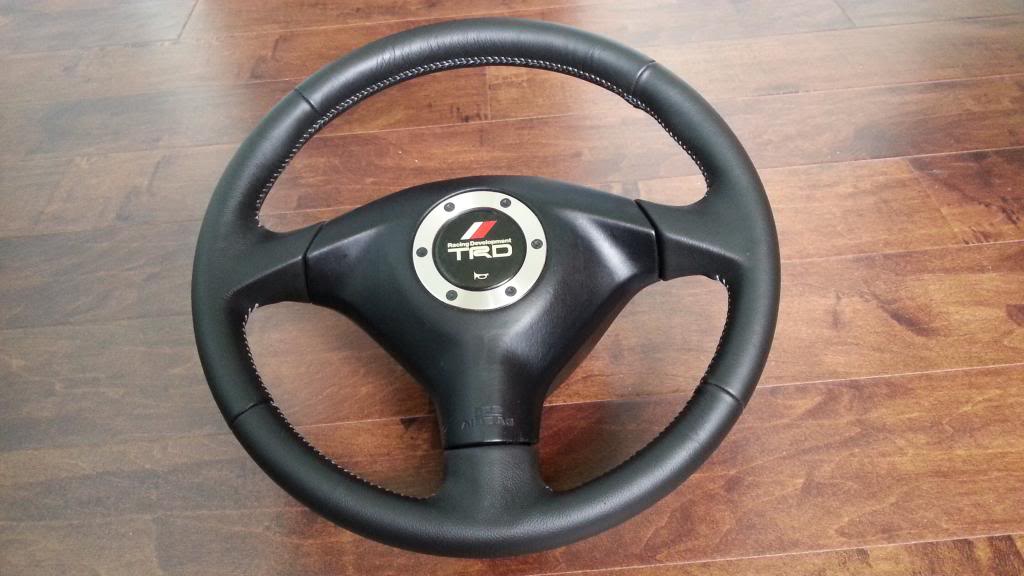
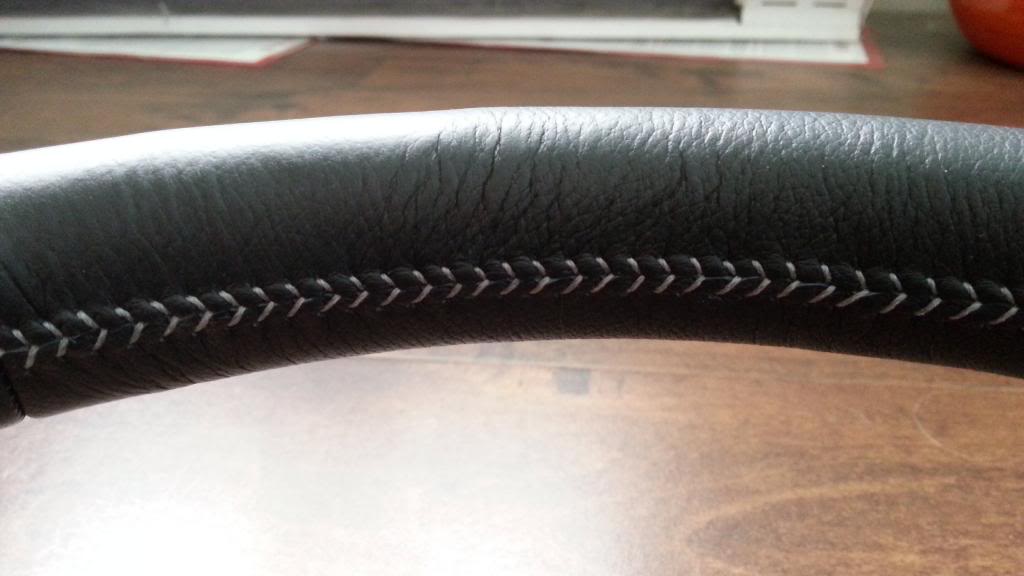
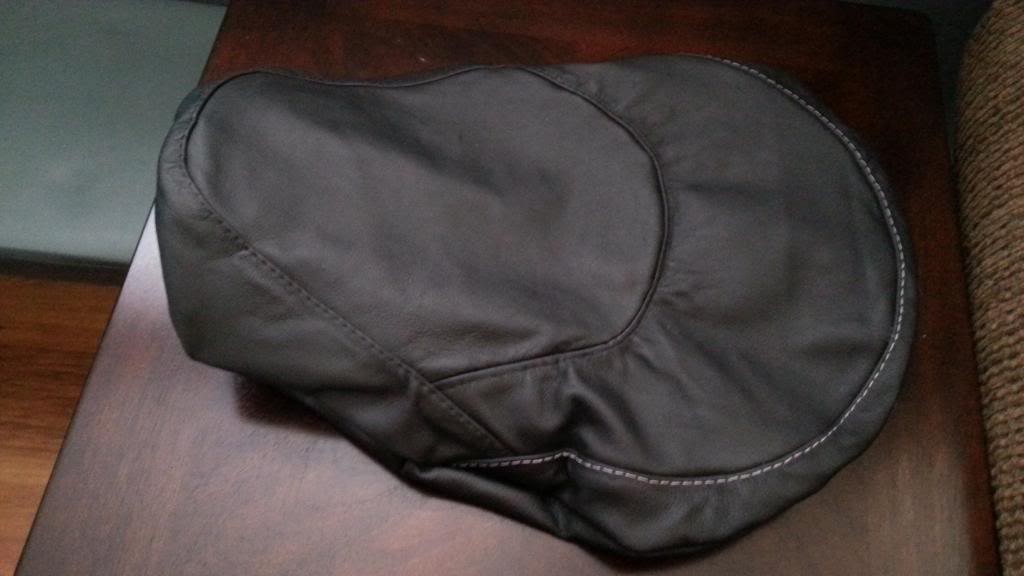
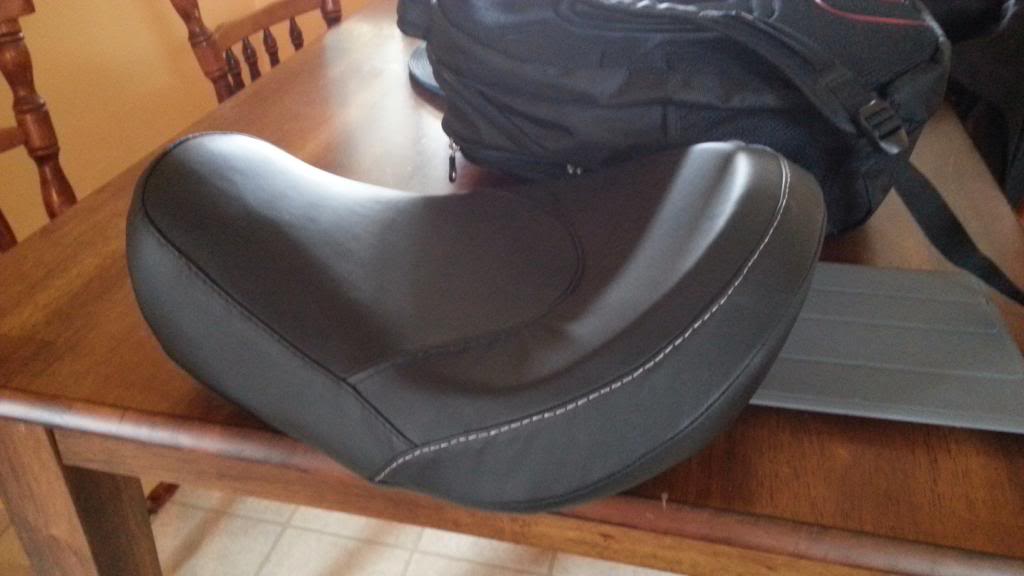
A seat for a friend's Harley:
It's been a while since I've posted in this thread but I have completed some projects lately that I thought might spark some motivation.
Speaking of motivation, has anyone successfully completed a wheel or other part using my tutorial? Has it been helpful?
A friend's TRD wheel from his supra:


A seat for a friend's Harley:


Hi All,
It's been a while since I've posted in this thread but I have completed some projects lately that I thought might spark some motivation.
Speaking of motivation, has anyone successfully completed a wheel or other part using my tutorial? Has it been helpful?
A friend's TRD wheel from his supra:


A seat for a friend's Harley:


It's been a while since I've posted in this thread but I have completed some projects lately that I thought might spark some motivation.
Speaking of motivation, has anyone successfully completed a wheel or other part using my tutorial? Has it been helpful?
A friend's TRD wheel from his supra:
A seat for a friend's Harley:
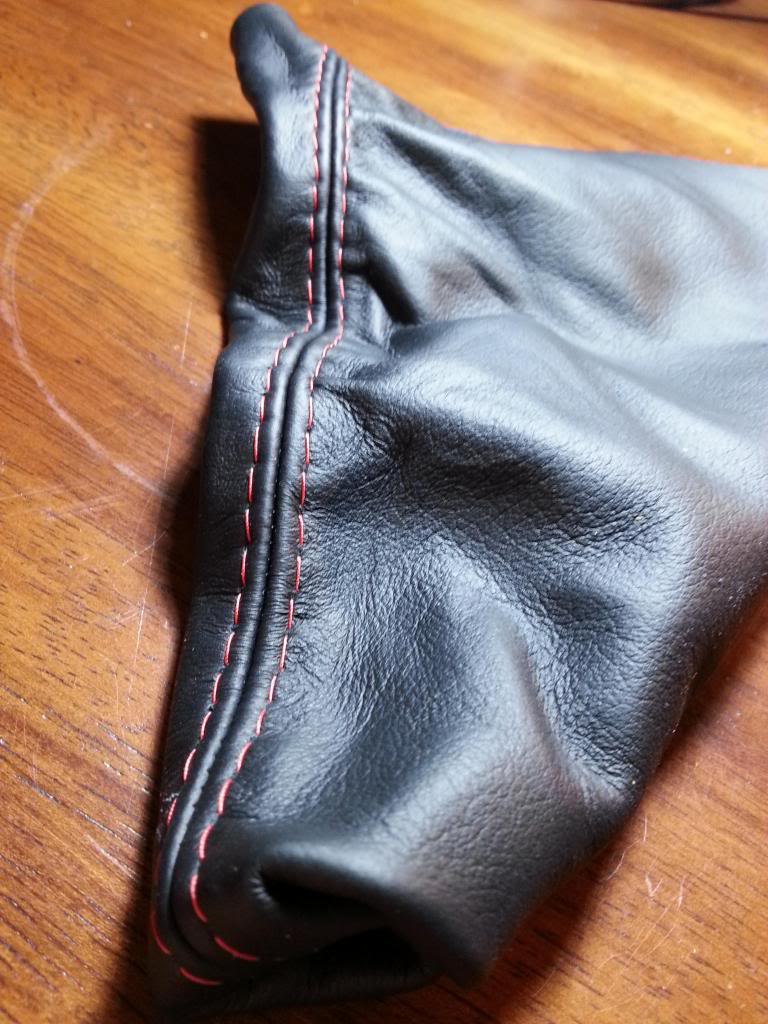
i had a question about doing a shifter boot. i wanted to ask how do i go about doing one? i was thinking i can take my old ripped boot and trace out the panels onto new material, but the sewing is the part id have trouble with. is there a specific sewing pattern for the boot or is mere personal preference?
Happened to run across this old thread. Wow, amazing work!!! Anyone know if Matt (hulanfd3s) is still doing this auto artwork?
I wonder if I could take my **** apart, and use the removed old leather pieces as templates for cutting new pieces.
I wonder if I could take my **** apart, and use the removed old leather pieces as templates for cutting new pieces.

