
[Rx7Boutique Pictorial] How to install an OEM Nardi Steering Wheel!

Thread Starter
Registered User
iTrader: (61)
Joined: Apr 2004
Posts: 7,334
Likes: 8
From: Los Angeles, CA
[Rx7Boutique Pictorial] How to install an OEM Nardi Steering Wheel!
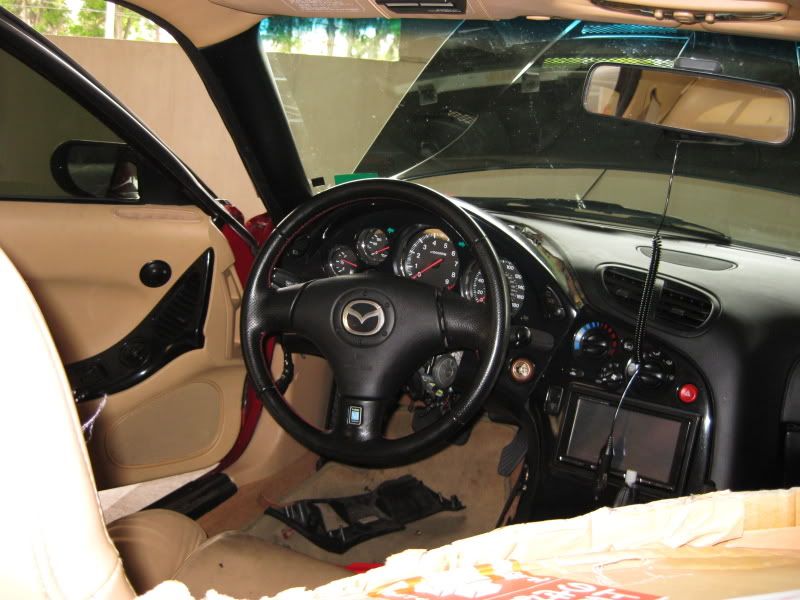
This pictorial is to show you how to install an OEM Nardi wheel that comes with an airbag. It is very simple to install and should only take about 30 minutes to install. This is a GREAT improvement over stock, it made the car *feel* much lighter and more responsive. It is slightly smaller then the stock so it gives the car a more dynamic feel.
Tools:
Screw-driver: Flat and Phillips
Wrench and sockets: 21MM and 10MM
Tools for splicing: wiring strippers and connectors/caps
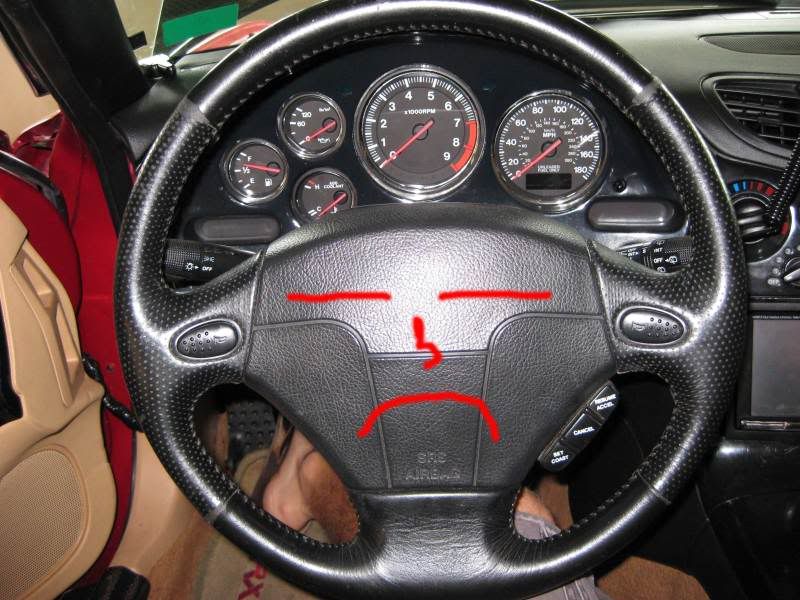
Start: This is the ugly stock steering wheel we are replacing, notice the inherent un-happy face.
Step One: This is the MOST IMPORTANT STEP. DISCONNECT THE NEGATIVE BATTERY. If you forget to do this, then you could have the airbag deploy at 300mph into your face, causing serious injury or death. Think about doing a smart install and not a fast install, although if you own a fd this should just be common knowledge.

Step two: You need to remove the three screws that hold the column cover on, it is a phillips head, the two pieces will then seperate.
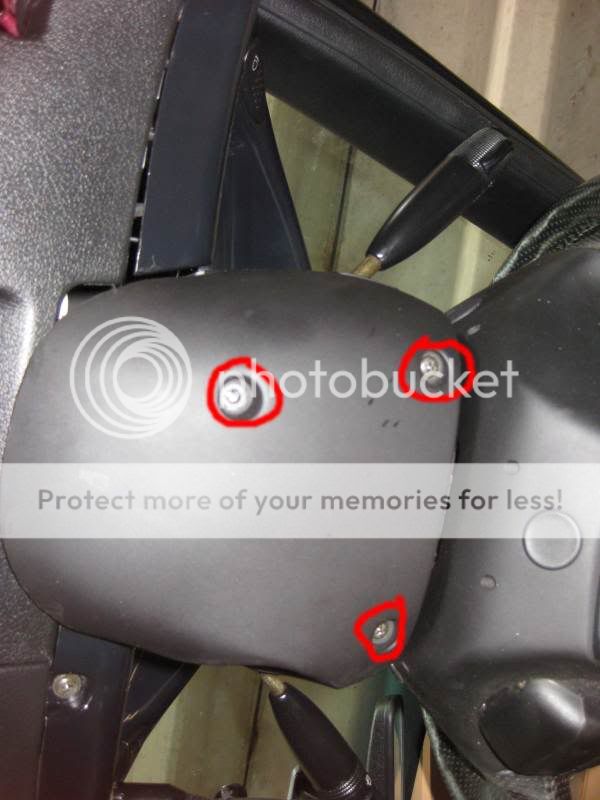
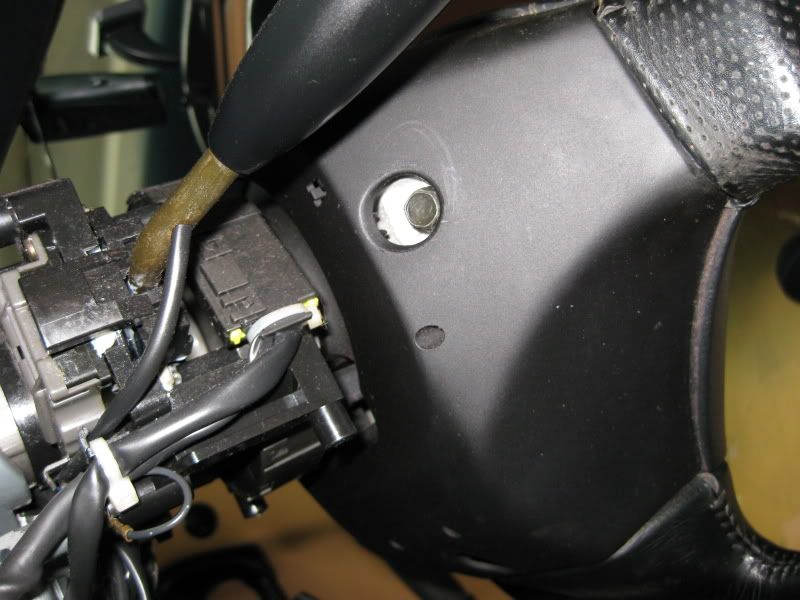
Step Three: There are three plugs that cover the bolts that hold the air bag together, take a flat head screw driver and pry them up, should take minimal effort. There are plugs on the left, right and bottom side of the steering wheel, as noted below.
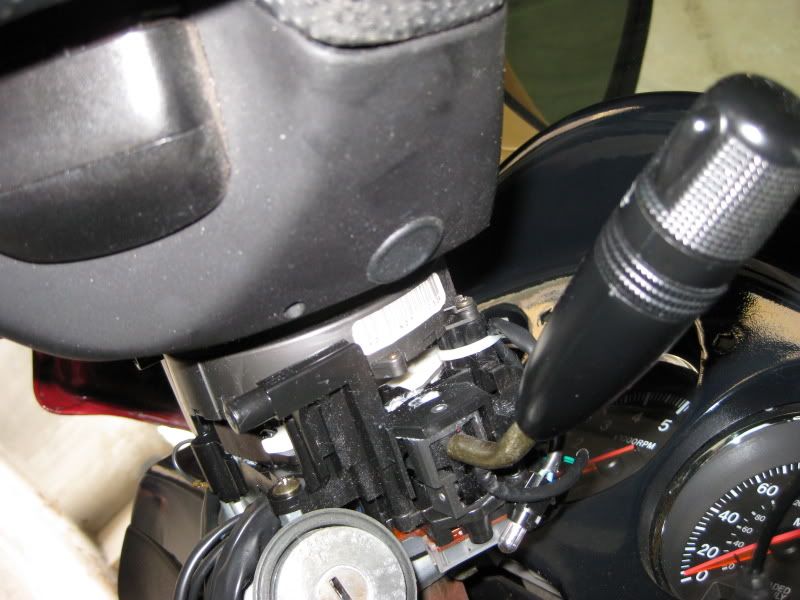
Step Four. Now that the plugs are removed, remove the 3 10mm bolts that were behind the black plus. Be careful, this will now de-attach the airbag from the wheel.
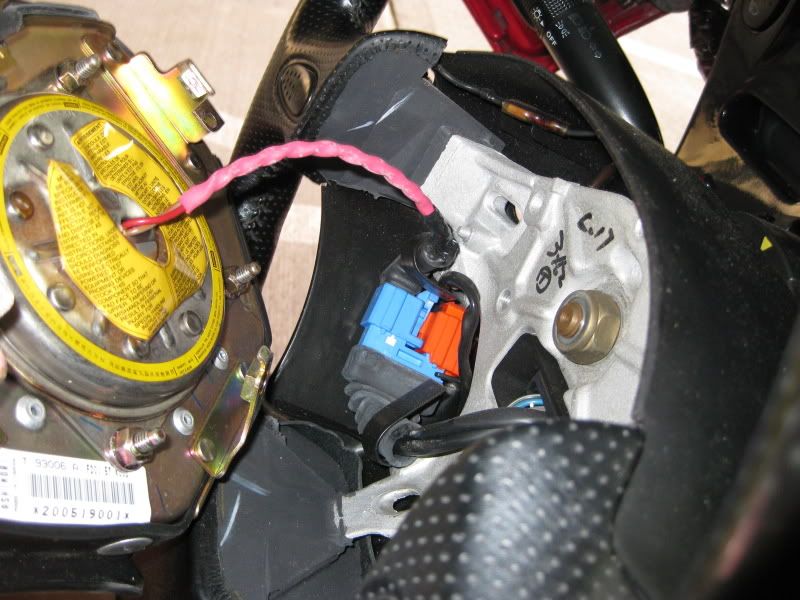
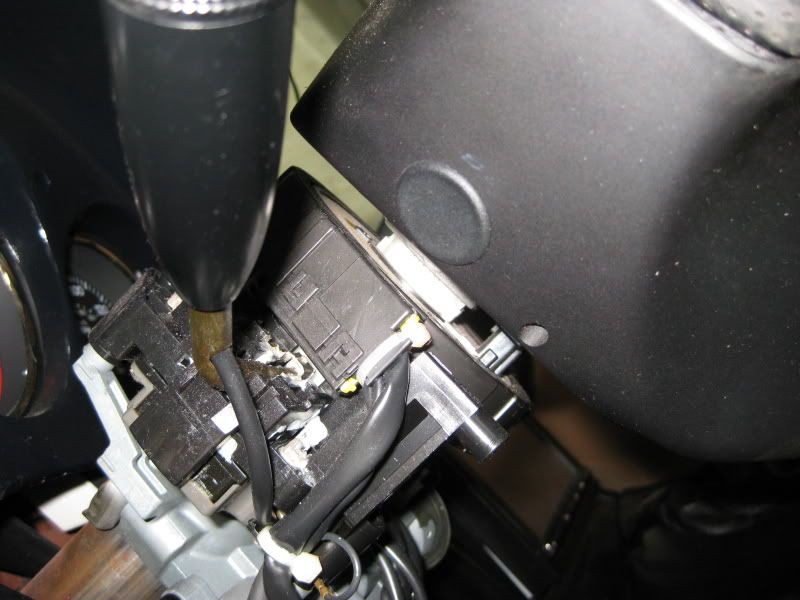
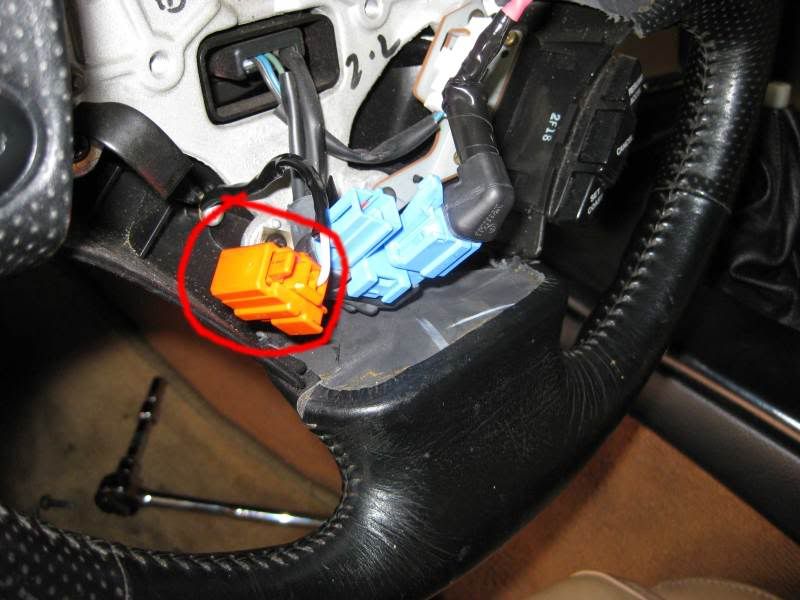
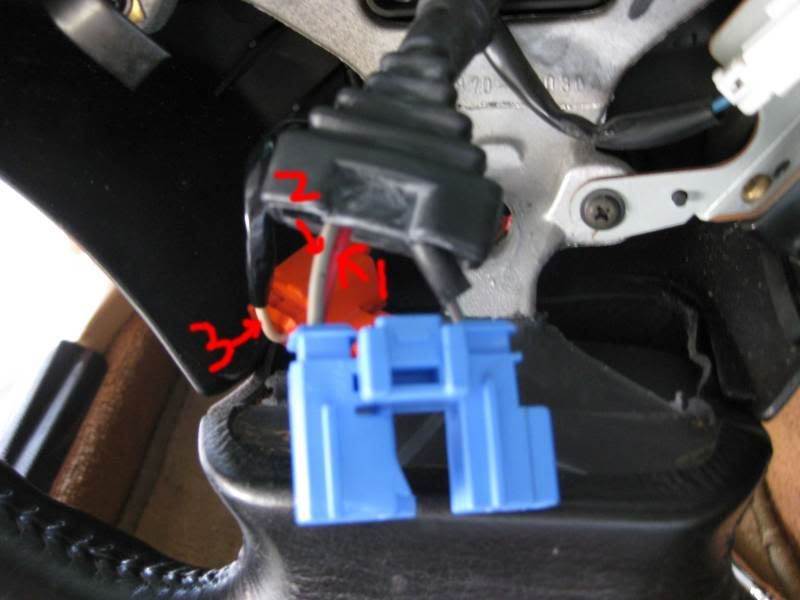
Step Five: Depending on which model you have, you will have an extra plug. If you have cruise control, you will have an extra white plug to the right of the steering wheel (white). For those with no cruise control, there are one big blue plug with two plugs (orange and blue) attached to it. First disconnect the orange plug from the big blue plug, you need to disconnect the orange plug first! Then remove the blue connect from the big blue connector. Now all your connections should be untied from the airbag and it should come completely out.
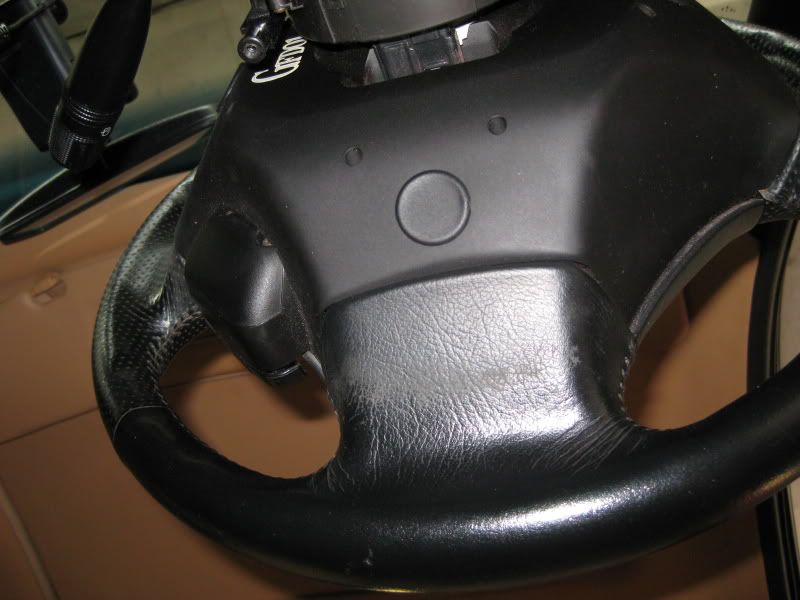
Step 6. Now you just need to get the steering wheel it-self off.
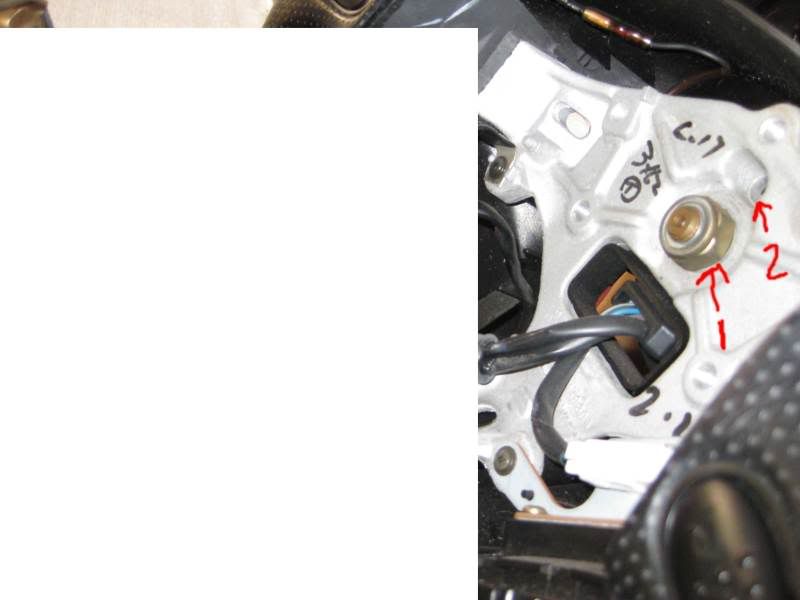
1. This is a 21mm nut, remove with a socket wrench.
Now pull on the wheel to get it off, if it does not come off, which mind didnt, follow step 2.
2. Take a paper-clip and bend it in half, insert into the hole labeled 2 and jiggle it around. I dont know why this works, but after I did it, the wheel came right off with ease.
Tools:
Screw-driver: Flat and Phillips
Wrench and sockets: 21MM and 10MM
Tools for splicing: wiring strippers and connectors/caps
Start: This is the ugly stock steering wheel we are replacing, notice the inherent un-happy face.
Step One: This is the MOST IMPORTANT STEP. DISCONNECT THE NEGATIVE BATTERY. If you forget to do this, then you could have the airbag deploy at 300mph into your face, causing serious injury or death. Think about doing a smart install and not a fast install, although if you own a fd this should just be common knowledge.
Step two: You need to remove the three screws that hold the column cover on, it is a phillips head, the two pieces will then seperate.
Step Three: There are three plugs that cover the bolts that hold the air bag together, take a flat head screw driver and pry them up, should take minimal effort. There are plugs on the left, right and bottom side of the steering wheel, as noted below.
Step Four. Now that the plugs are removed, remove the 3 10mm bolts that were behind the black plus. Be careful, this will now de-attach the airbag from the wheel.
Step Five: Depending on which model you have, you will have an extra plug. If you have cruise control, you will have an extra white plug to the right of the steering wheel (white). For those with no cruise control, there are one big blue plug with two plugs (orange and blue) attached to it. First disconnect the orange plug from the big blue plug, you need to disconnect the orange plug first! Then remove the blue connect from the big blue connector. Now all your connections should be untied from the airbag and it should come completely out.
Step 6. Now you just need to get the steering wheel it-self off.
1. This is a 21mm nut, remove with a socket wrench.
Now pull on the wheel to get it off, if it does not come off, which mind didnt, follow step 2.
2. Take a paper-clip and bend it in half, insert into the hole labeled 2 and jiggle it around. I dont know why this works, but after I did it, the wheel came right off with ease.
Thread Starter
Registered User
iTrader: (61)
Joined: Apr 2004
Posts: 7,334
Likes: 8
From: Los Angeles, CA
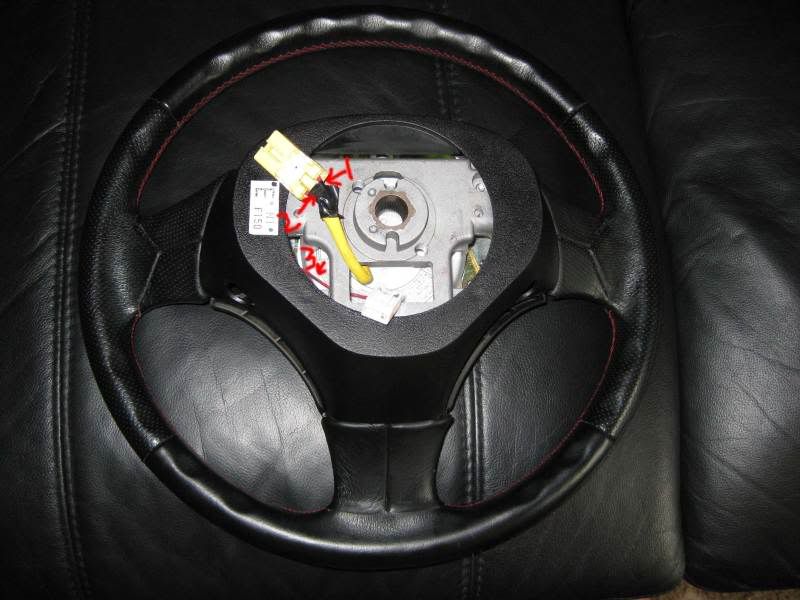
Step 7. Now the wheel is completely off. You obviously need to remove the airbag from your new nardi wheel. Place this back onto the steering column and re-attach the 21mm nut. Now this next part is the wiring. I did not splice the wires in the picture below, as that spirit-r wheel is for sale and i did not want to de-value it. Splicing wires is common sense, if you cant splice wires, you should not be working on an FD. The two pictures below show which wires to connect. Number one on picture one goes to number one on picture two. Cut the clip off and splice the wires. On the old harness there are two wires, one is red and one is grey. The new wheel has two red wires. According to the forums, the polarity does not matter, so you can match up either of the two wires, it does not matter. Next, splice wires 3 together.
Step 8: Bolt the airbag back on with the 3 10mm screws and enjoy!
For those interested, this spirit-r steering wheel is currently for sale! Donations are also welcome
Step 8: Bolt the airbag back on with the 3 10mm screws and enjoy!
For those interested, this spirit-r steering wheel is currently for sale! Donations are also welcome
Last edited by purerx7; Apr 1, 2009 at 11:42 PM.

Very nice write up!! I'm very glad you are now offering your Japanese importing services to the community. To supplement your write up, here is another one from a while back 
https://www.rx7club.com/interior-exterior-audio-26/oem-nardi-wheels-dummies-716233/
I just edited my first post of my write up on the other forum and added you to the top of the list of vendors. If I could edit the first post on here, I'd add you in there. Very nice and super rare steering wheel!!
https://www.rx7club.com/interior-exterior-audio-26/oem-nardi-wheels-dummies-716233/
I just edited my first post of my write up on the other forum and added you to the top of the list of vendors. If I could edit the first post on here, I'd add you in there. Very nice and super rare steering wheel!!
you may want to mention the safety precautions that are in the factory manuals, center the steering before taking the old wheel off, and the correct torque on the steering wheel main nut.
Thread Starter
Registered User
iTrader: (61)
Joined: Apr 2004
Posts: 7,334
Likes: 8
From: Los Angeles, CA


Trending Topics


Thread Starter
Registered User
iTrader: (61)
Joined: Apr 2004
Posts: 7,334
Likes: 8
From: Los Angeles, CA
Bend like such, left end:

Then stick and jiggle all around in the hole for about a minute. Then rock the wheel back and forth. ie push left hand forward while right hand pulls wheel back to you.
If that does not work, you can take a hammer, and lightly tap behind the wheel in opposing directions like you would take off a wheels lugnuts.
Bryan

Joined: Mar 2001
Posts: 30,818
Likes: 656
From: FL-->NJ/NYC again!
^ First off this write up was PERFECT for me. Rich you were dead on... no need for the paperclip trick, just use your fist and bang around and she slides right off.
I will start a new thread on this, but I am going to fit a Mazda5 Protege set of cruise control buttons to my wheel as it fits the wheel form factor perfectly. and i have some questions.
I will start a new thread on this, but I am going to fit a Mazda5 Protege set of cruise control buttons to my wheel as it fits the wheel form factor perfectly. and i have some questions.
Joined: Mar 2001
Posts: 30,818
Likes: 656
From: FL-->NJ/NYC again!