
RECOVERING My Shift Knob/Wheel/E-brake...

Kevin,
Here is the finished products. On it's way back in the mail tomorrow. E-mail you tomorrow.
Hope you like it!
(Explanation for thread readers)
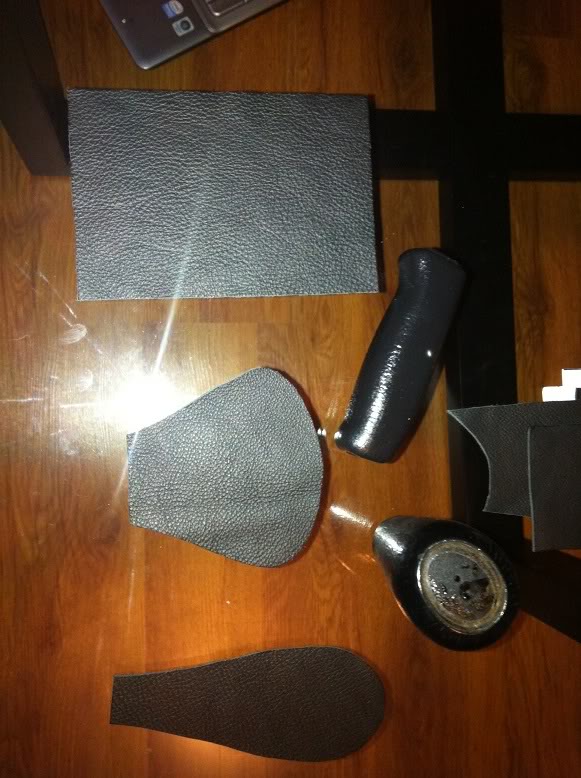
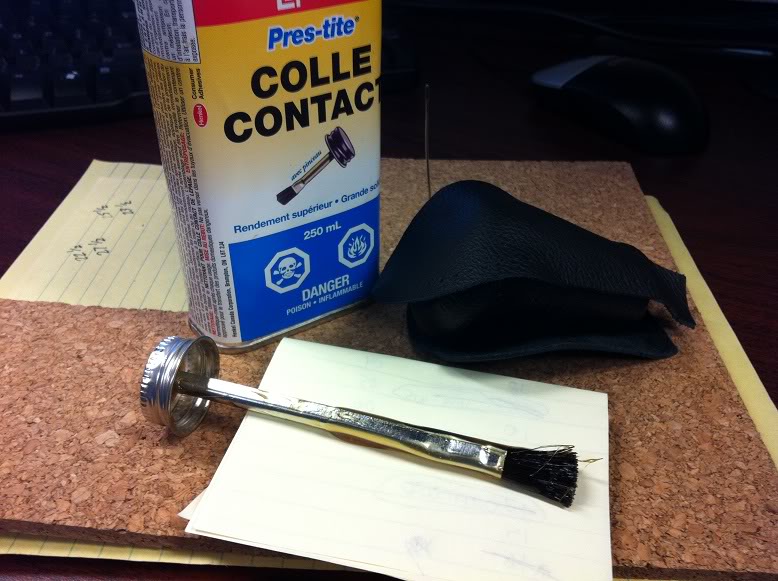
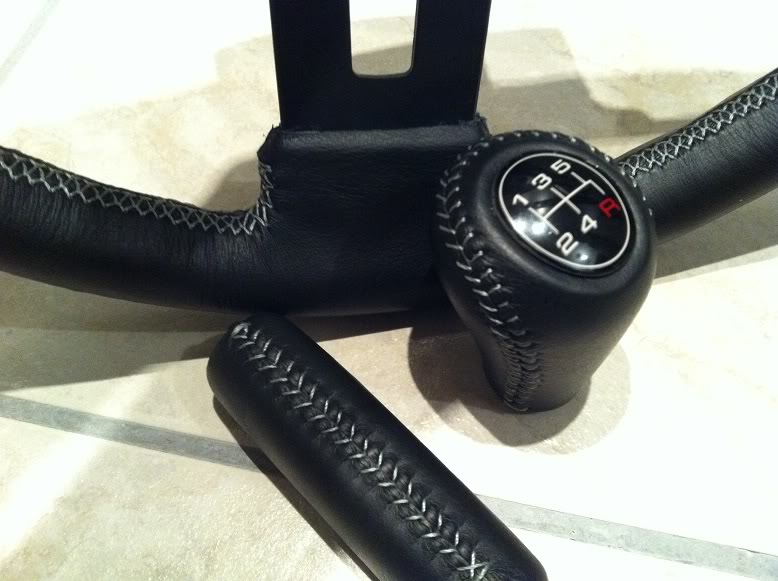
Just thought I would post a few pictures of the whole process. The shift **** and brake lever pictured were not originally covered in leather. The original pattern for the wheel was missing. I have taken photos while extrapolating a pattern. To complete all of this, it took about 55 hours total.
Shift **** & Brake Lever Process

Here is the finished products. On it's way back in the mail tomorrow. E-mail you tomorrow.
Hope you like it!
(Explanation for thread readers)
Just thought I would post a few pictures of the whole process. The shift **** and brake lever pictured were not originally covered in leather. The original pattern for the wheel was missing. I have taken photos while extrapolating a pattern. To complete all of this, it took about 55 hours total.
Shift **** & Brake Lever Process


On the fasttrack!
iTrader: (22)
Joined: Oct 2006
Posts: 2,494
Likes: 2
From: virginia beach, virginia
damn, i got this tall *** aluminum shifter **** i was thinking of doing in alcantara or leather.....i might just have to send it to you....too bad youre in canada 
Lloyd
Lloyd
Being in Canada is no big deal. The shipping is not that pricey at all. If you would like to know what the cost of the recover is just shoot me a PM, you'll be very surprised
Thanks,
Matt
Thanks,
Matt
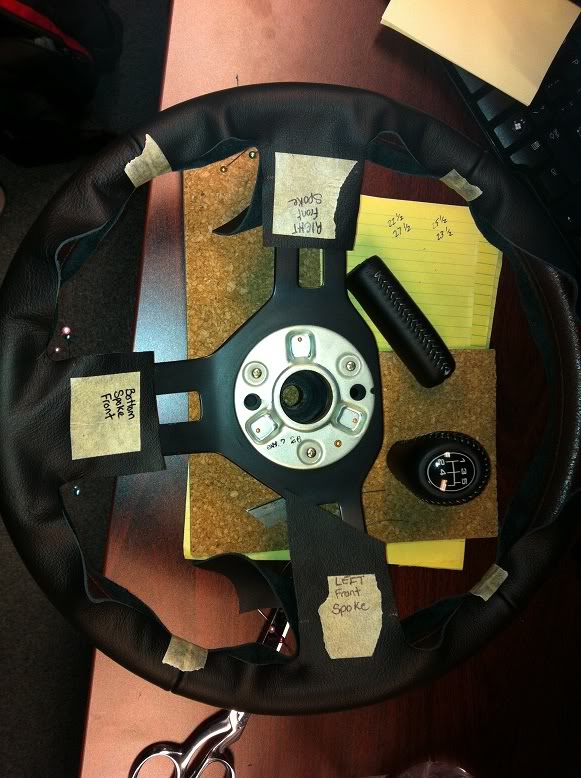
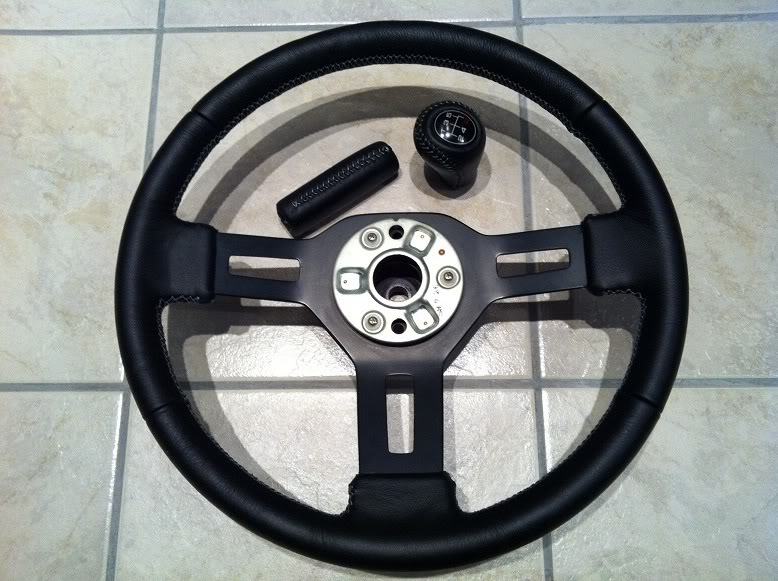
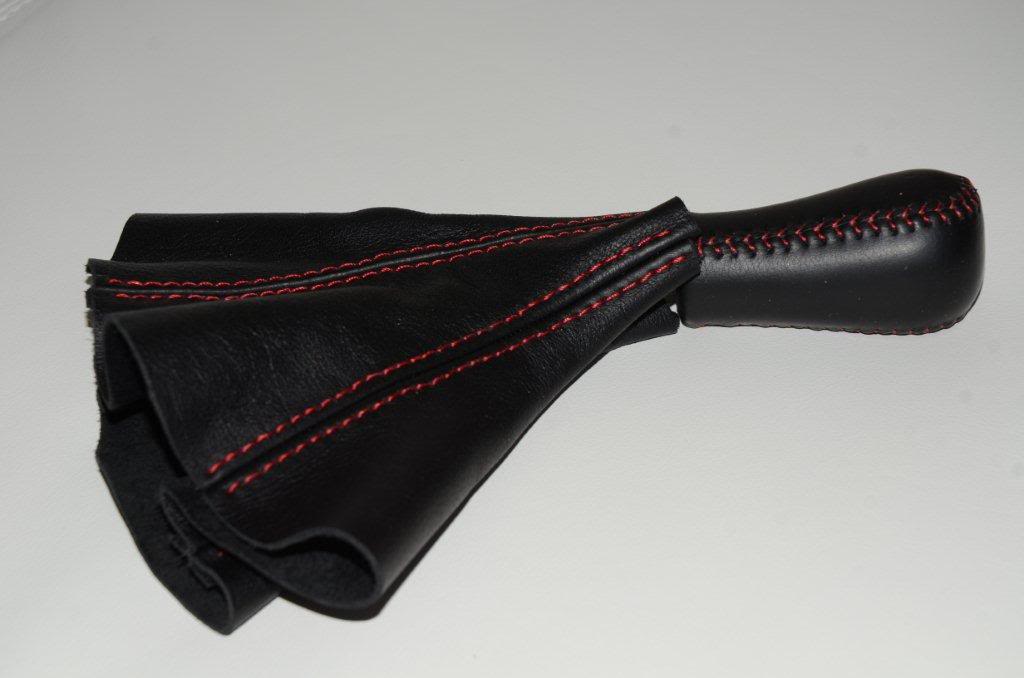
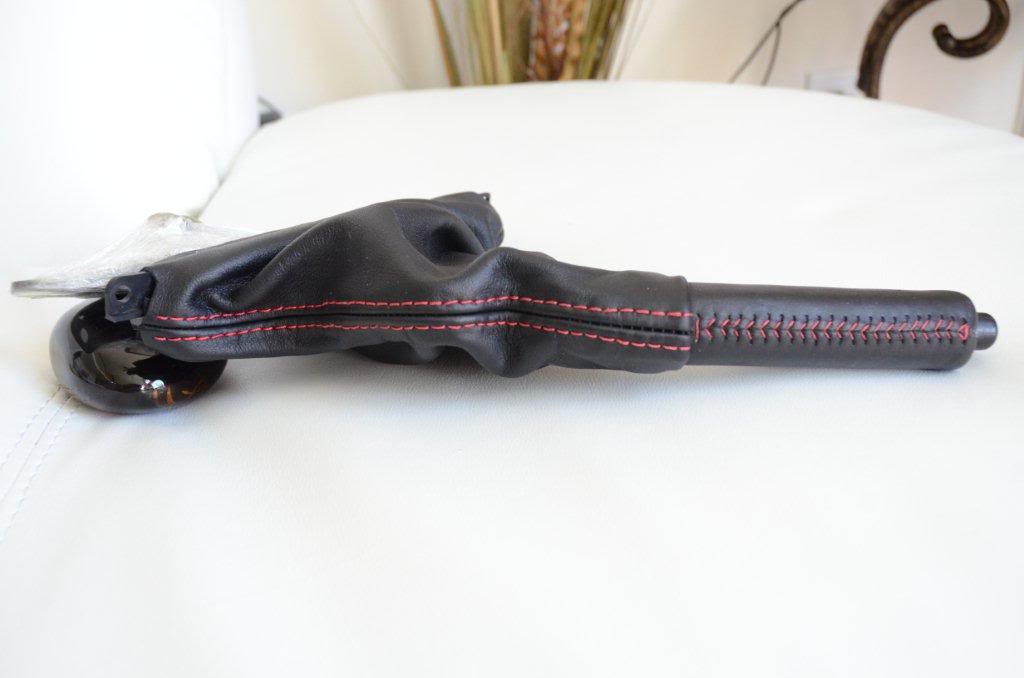
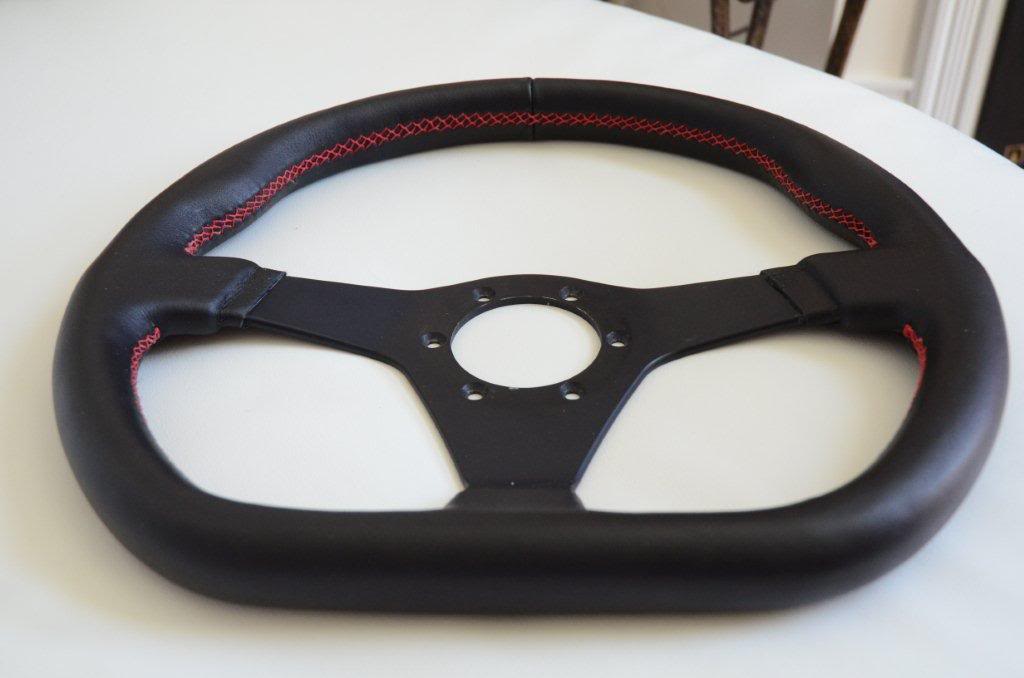
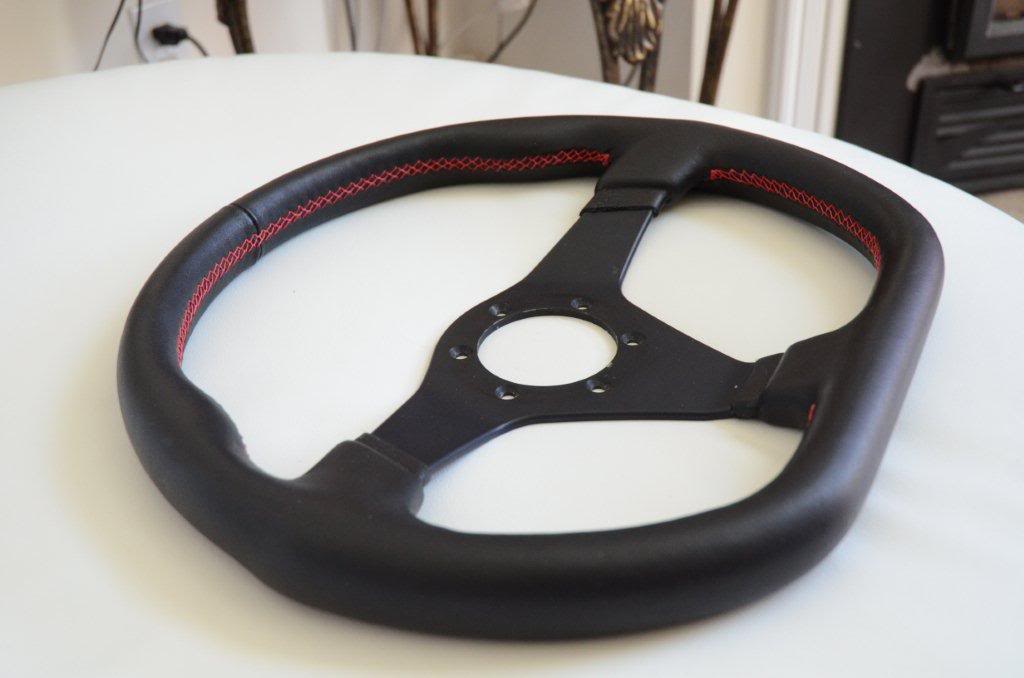
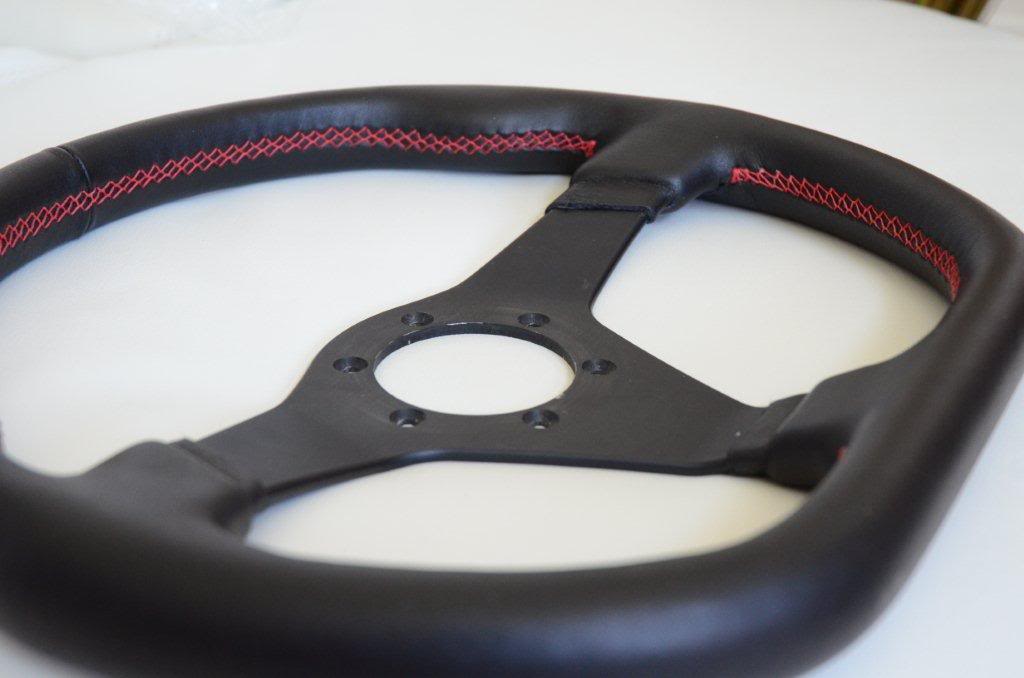
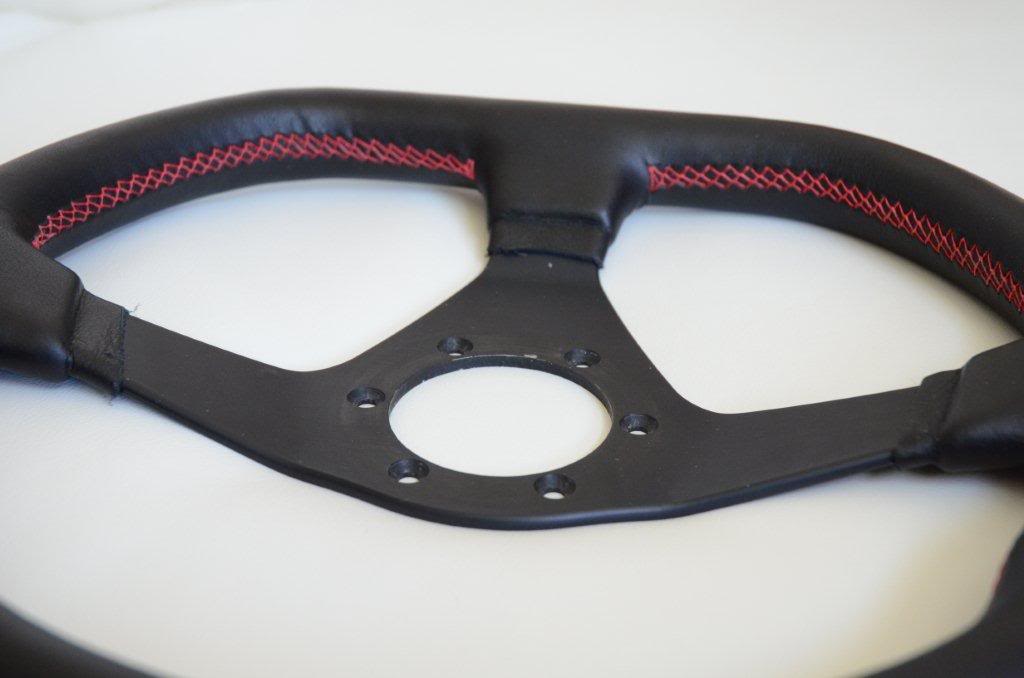
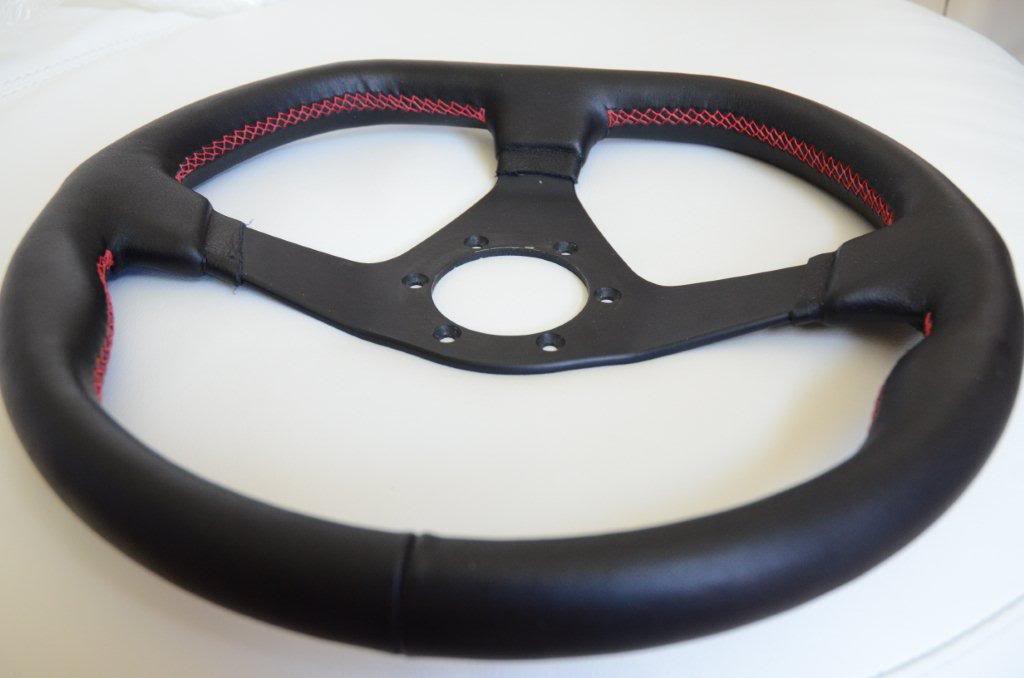
Photos for rlee429.Recovery work i did. All from Scratch. Steering wheel, Shift ****, Brake lever, Brake Boot and Shift boot.
On it's way Rob Enjoy!... Post some photos when you have it all installed.
On it's way Rob Enjoy!... Post some photos when you have it all installed.
Thanks,
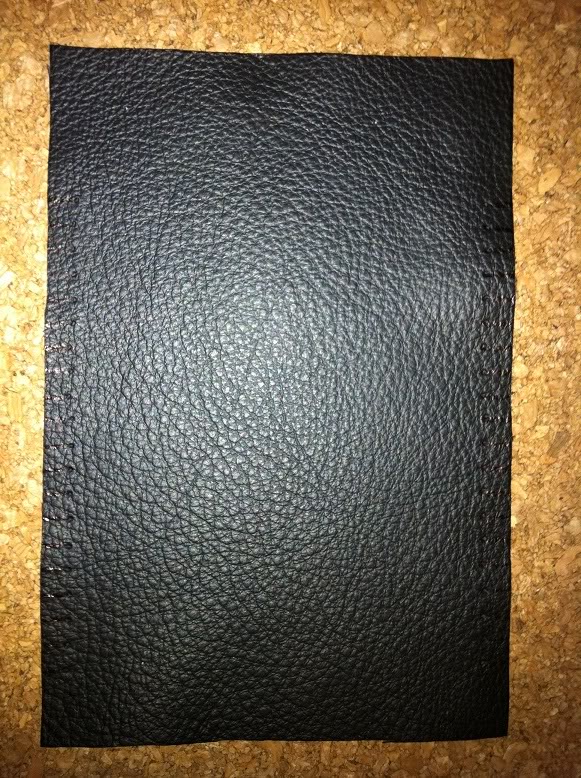
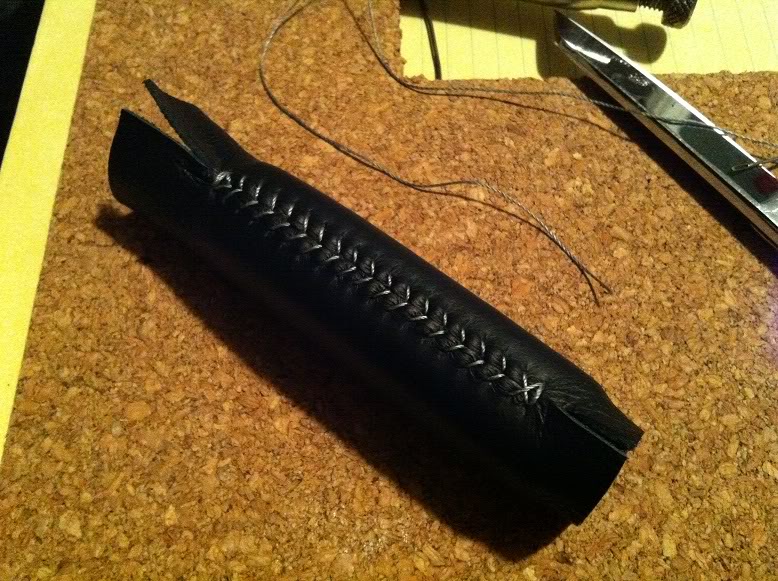
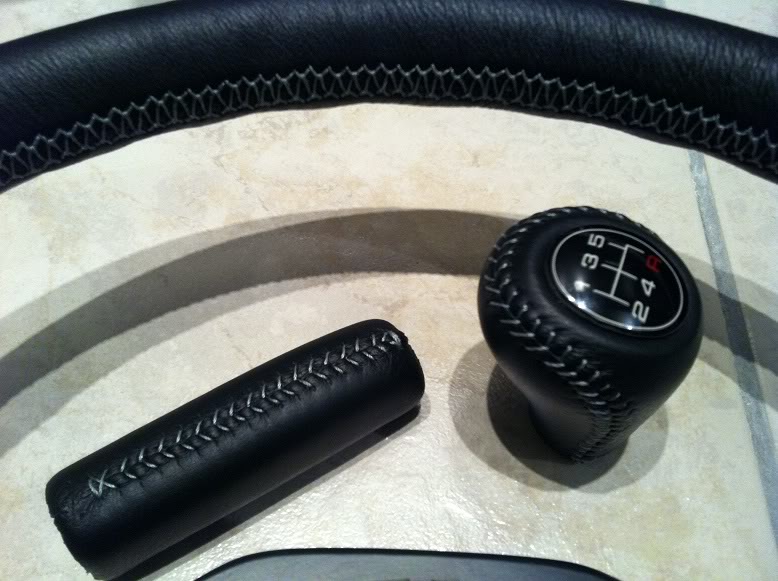
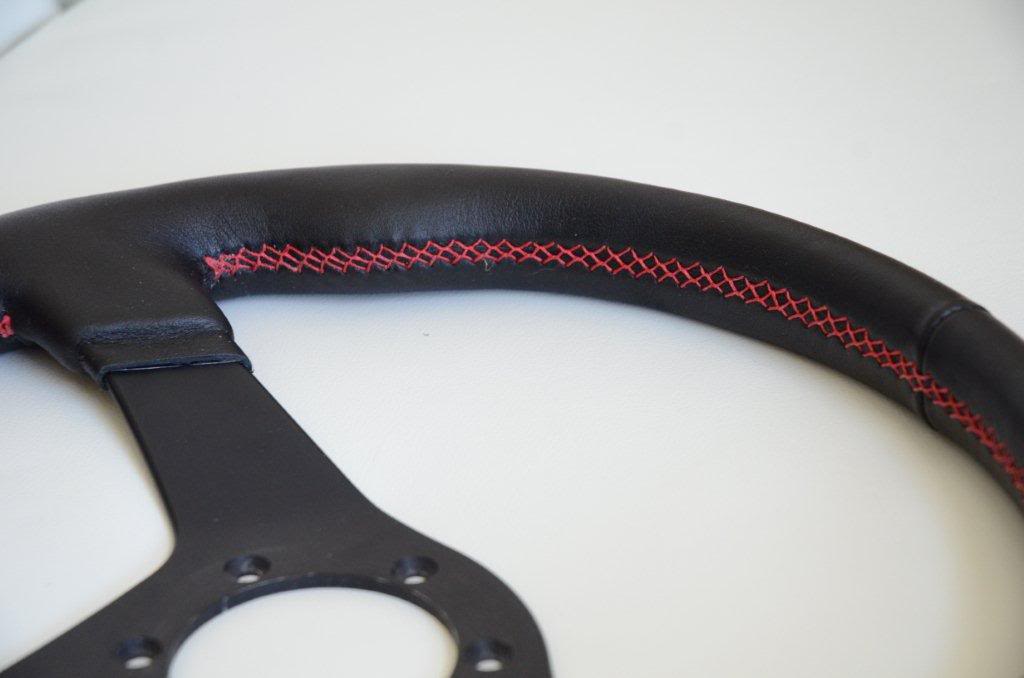
That stitch is done by sewing both sides on the leather with the machine, then lacing the stitches together across each side.
Check out some videos on youtube: European Diamond stitch.
Matt
That stitch is done by sewing both sides on the leather with the machine, then lacing the stitches together across each side.
Check out some videos on youtube: European Diamond stitch.
Matt
 Looks very nice
The only leather I have right now is black however, I do have access to browns. I think I know the color you are describing. Do you have a picture of your wheel or whatever it is you would like covered?
Post it here and we can go from there.
Thanks,
Matt
[QUOTE=Jhereg;10716152]Any chance you have leather that would match the black/brown from an Rx8?[/QUOTE)
Post it here and we can go from there.
Thanks,
Matt
[QUOTE=Jhereg;10716152]Any chance you have leather that would match the black/brown from an Rx8?[/QUOTE)
Here is everything installed (from pics above) in my 85 GSL-SE. Everything is top notch. It's good to see people still taking pride in their work. Again, GREAT job Matt!!
[IMG] Uploaded with ImageShack.us[/IMG]
[IMG]
 Uploaded with ImageShack.us[/IMG]
Last edited by slvrghst; Jul 23, 2011 at 10:40 AM.
Another Shift ****...
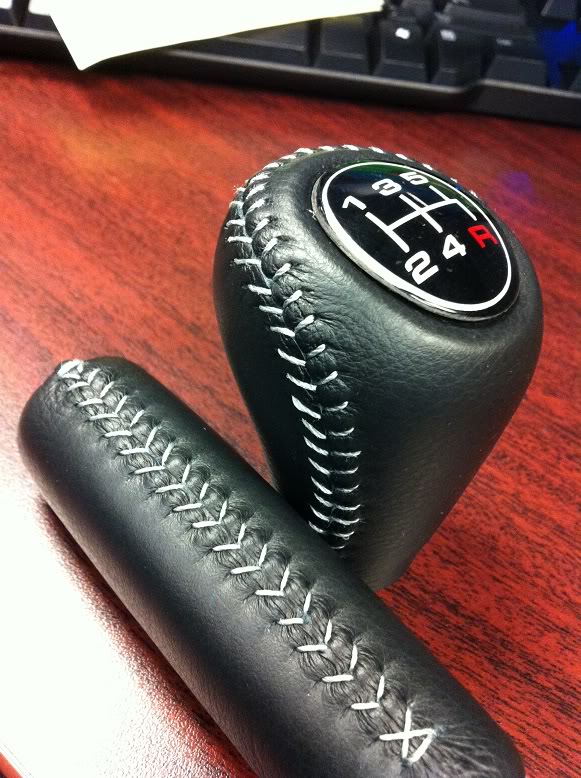
This is a New OEM Mitsubishi ****. The stitch was originally black and I restitched in red for a friend's Lancer, Keeping the original leather intact.

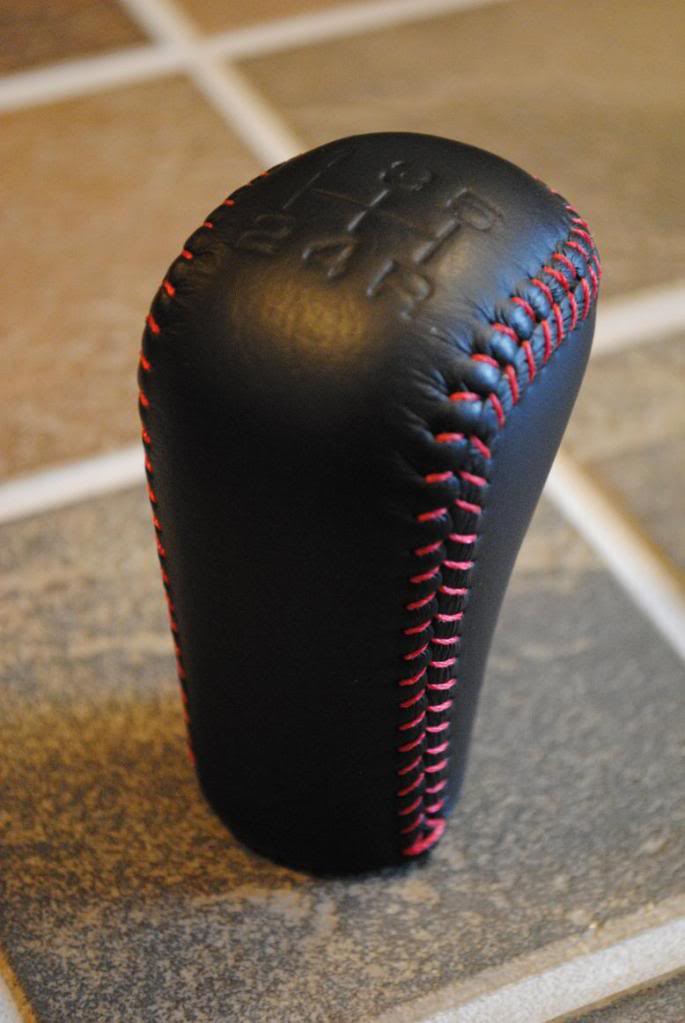
This is a New OEM Mitsubishi ****. The stitch was originally black and I restitched in red for a friend's Lancer, Keeping the original leather intact.

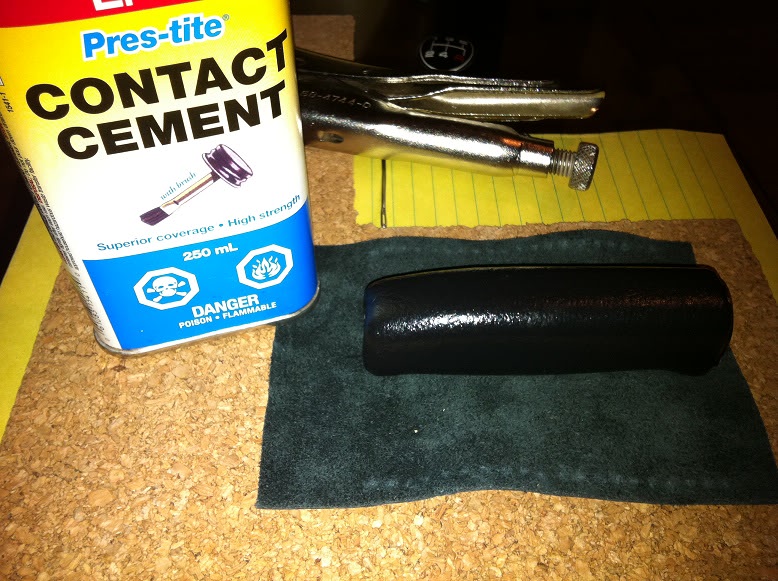
The thread used for this boot is 0.5mm as opposed to the standard #69 thread. It is more pronounced and every stitch is clearly visible. I wanted it to look perfectly even so:
It was sewn on my industrial machine but...
For three joins (one join left open) I measured and punched the holes using a leather punch first then placed the boot in the machine. I then rotated the machine by hand and ligned the needle up with the holes.
For the fourth join after sewing the seam together on the machine using 69 thread, again I punched the holes and used a sewing awl to stitch. The machine could not be used as it would have simply sewn through the other side of the boot.
For standard boots with #69 thread I use the machine as normal for the first three and the awl for the last.
Hope that helps!
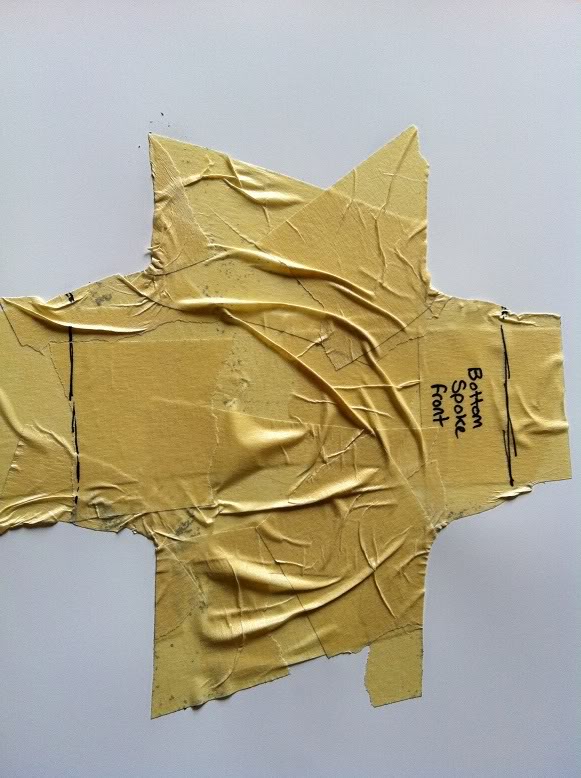
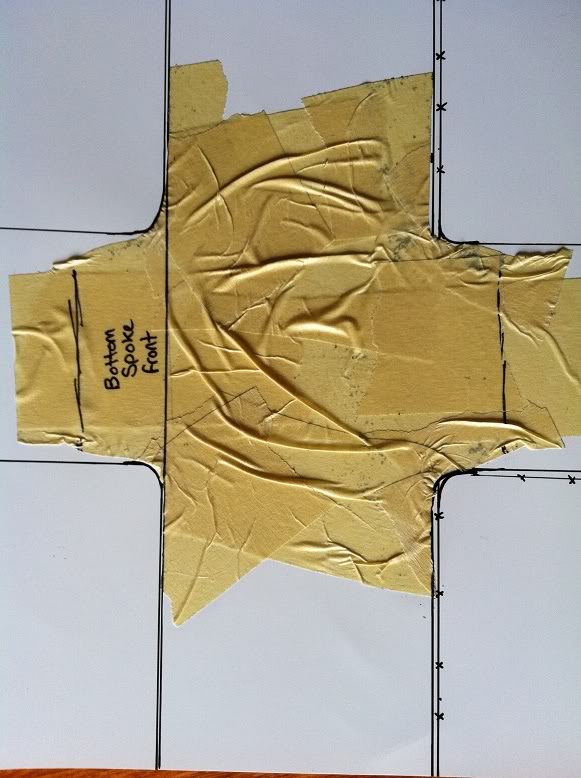
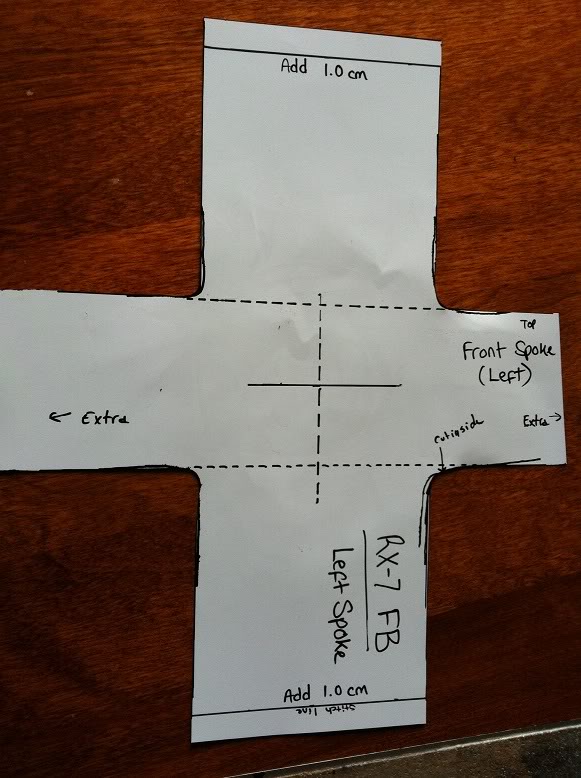
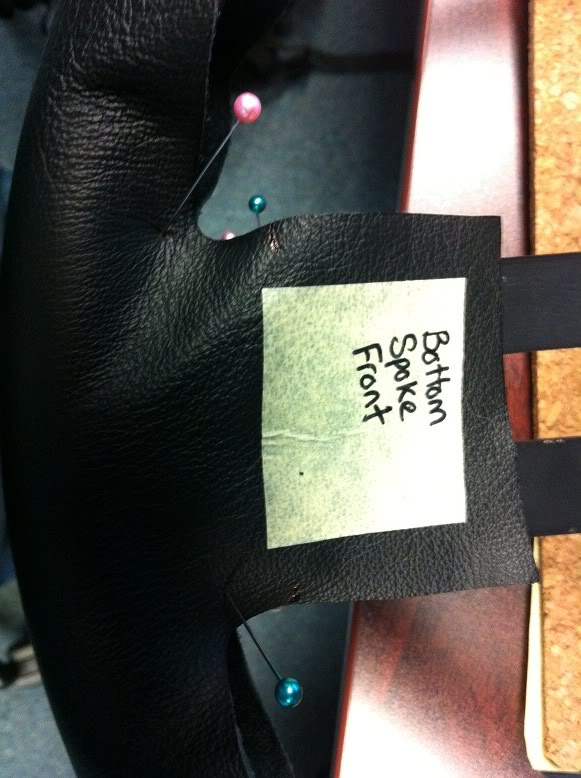
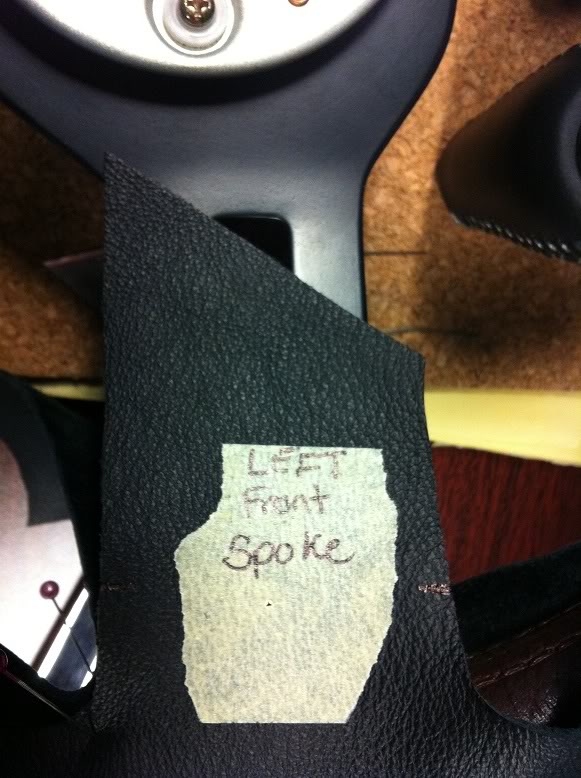
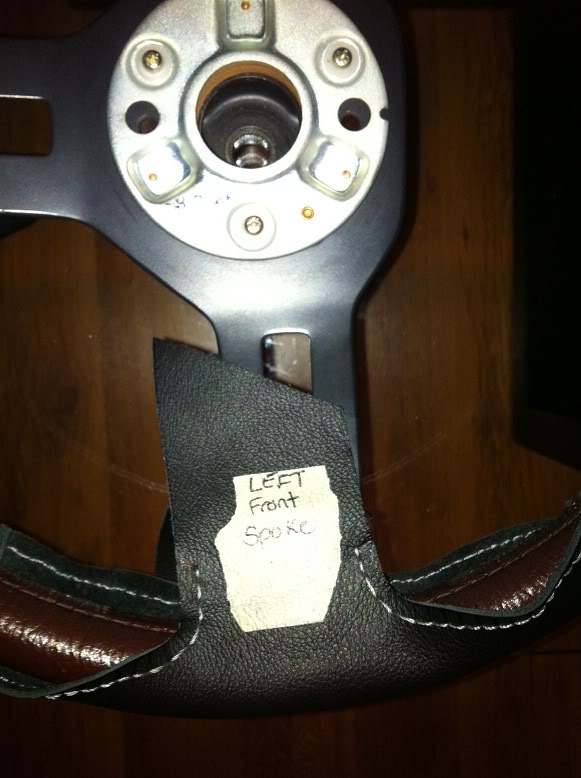
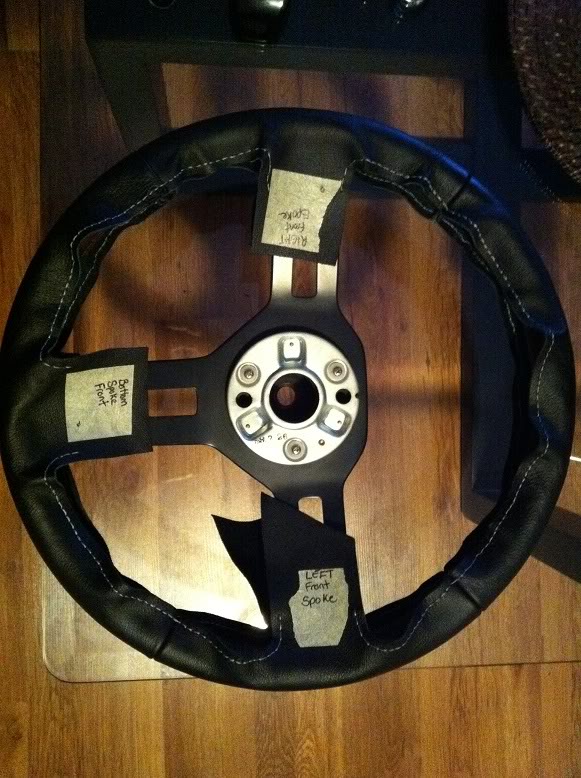
Reference photos for Rob:
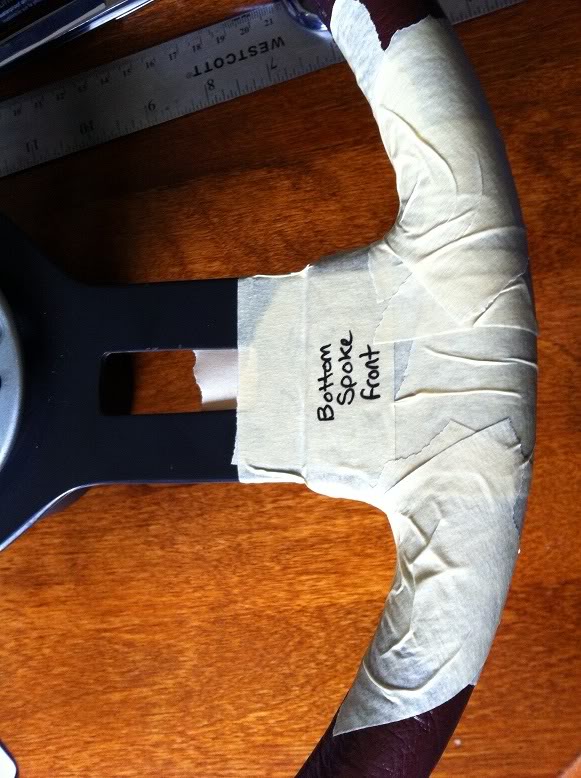
Example cut pattern for one Spoke

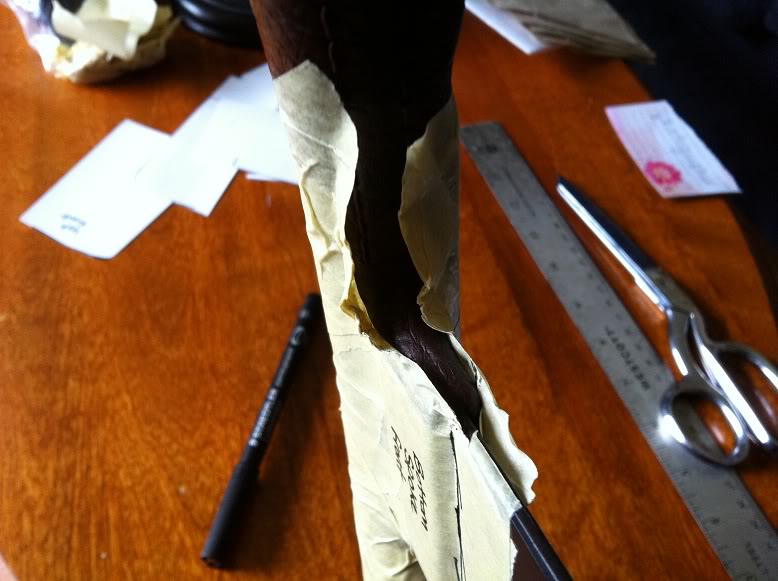
See the photos in the thread of a pattern I devised from an uncovered wheel using masking tape. Basically you cover each spoke in it's entirety with masking tape and cut along the propsed stitch line with a hobby knife. Remove the tape, place it on some photo paper then square it up as shown using the circumference measurement from your wheel (Measure with a seamstress tape or caliper). If you plan to wrap the wheel similar to my Nardi wheel with the leather joined at the back, then mark your cut lines to stop where the originals end and leave the excess to wrap around the back.
Example cut pattern for one Spoke
See the photos in the thread of a pattern I devised from an uncovered wheel using masking tape. Basically you cover each spoke in it's entirety with masking tape and cut along the propsed stitch line with a hobby knife. Remove the tape, place it on some photo paper then square it up as shown using the circumference measurement from your wheel (Measure with a seamstress tape or caliper). If you plan to wrap the wheel similar to my Nardi wheel with the leather joined at the back, then mark your cut lines to stop where the originals end and leave the excess to wrap around the back.
Thank you! If you are referring to the pattern above, it is not a pattern for an actual wheel simply a reference of cut lines. The wheel above that with the red stitching is manufactured by nardi but I am unsure the model.
Amazing work, everything you've done looks fantastic. Do you just buy the thread from anywhere? If someone wanted to start this which piece is easiest the shift **** or the e-brake handle?