When you click on links to various merchants on this site and make a purchase, this can result in this site earning a commission. Affiliate programs and affiliations include, but are not limited to, the eBay Partner Network.
Hi everyone! I'm Thad, and this thread is to document the progress of turning this beat up 1987 RX-7 into a touge machine. If you haven't already, please check out my intro post in the Introduce Myself section:https://www.rx7club.com/introduce-yo...oject-1157660/ for context on this build and who I am! Progress can also be found on Instagram under the handle @touge.fc3s
Here's what the car looked like when I first took it home: theives spray painted for whatever reason interior in shambles stole the cat theives probably slid it into a curb, massive toe out and positive camber
She was missing a battery, igntion harness, and fuel pump. Bought battery from O'Reilly and the ignition harness and fuel pump from Atkin's Rotary. Once we got those in, she started on the second crank! Felt bad for my neighbors since it was at 10 at night and the exhaust sound was exiting at the midpipe because of the stolen cat, but just had to see if she would run! I fixed the exhaust by taking my friend's stock midpipe mating it to a used dual exit catback.
You wouldn't really expect the next thing for me to tackle would be the interior, but I honestly couldn't bear how bad it was. Myself being 6 feet tall and lanky, I had to outstretch my arms to reach the steering wheel too far to be comfortable. Therefore, I purchased a MOMO Mod. 07 with NRG quick release 2.0 and short hub. Wheel position is perfect now. As for the rest of the interior, I used Turtle Wax carpet cleaner and Griot's Garage interior cleaner and leather restorer to clean it up. Some things could be glued back together while other things I got from Facebook part outs. The original floor mats were in terrible condition, so I purchased a lovely pair from Garage Alpha. I think it really brings the interior together Before and after pics!
By this time I had already taken the car on its first touge run. Standard maintenance like fluids and spark plugs and wires had already been done. The touge build was finally ready to be started. The first thing I decided to modify was the exhaust to unlock that sealed-off power. I went with the Racing Beat NA Downpipe and Presilencer, which mated not-so-well to the used catback I have. The holes in the catback's y-pipe flange were too far apart. It was apparent that the catback was either meant for a turbo model exhaust or just simply a custom application. We drilled the holes further in without punching into the pipe, and with some washers it worked! The left muffler comes down too low compared to the right which I've heard is common with dual exits for some reason. I'll eventually take it to a shop and have it adusted.
About the downpipe, many people think that since the car is an NA it cant have a "downpipe" and it has "headers". Well Racing Beat DOES sell a "downpipe", but it's really just a pipe that replaces the second part of the headers and gets rid of the cats when mated to the presilencer. They only recommend this pipe for people who arent doing engine tuning, because while the power gains from STOCK are very similar to their well-renowned headers, on built motors it isn't the same case. Of course I plan to get headers further down the line, but for now this "downpipe" has helped free up the exhaust AND the car isn't crazy loud, which is the number one complaint from people running the headers. Now, enjoy some rotary ASMR and some flames in the second vid:
As you can see, it's just a pipe that comes after the first part of the stock headers
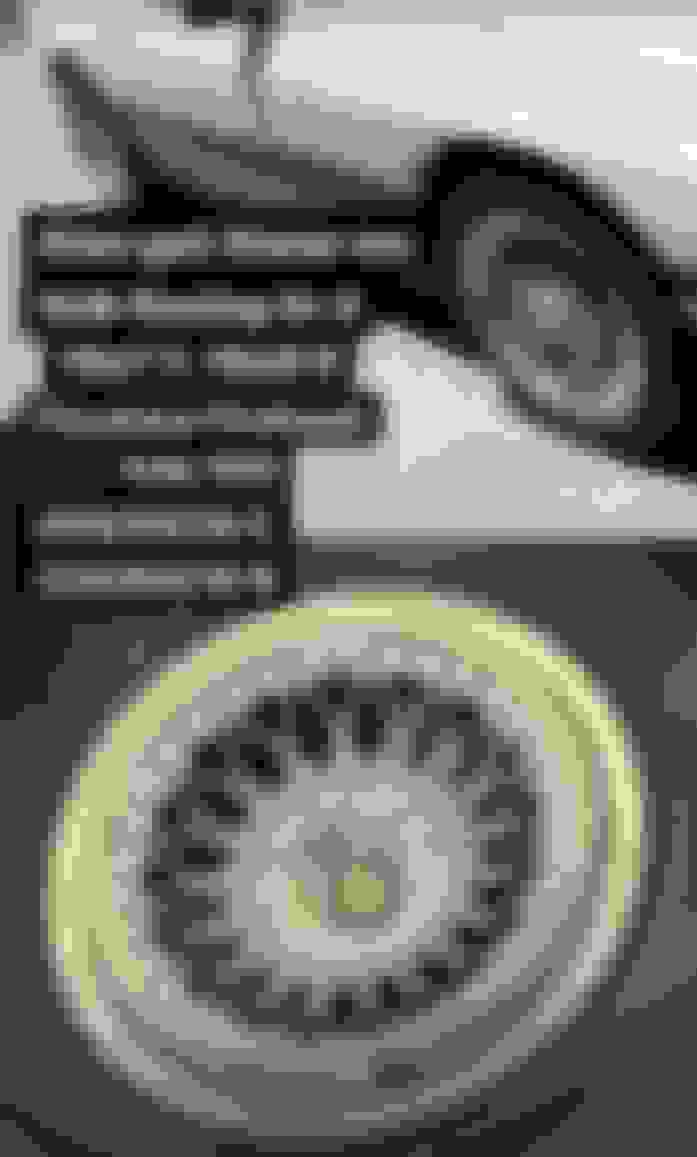
The car was fun to drive, but I got sick of the lack of traction it had with the stock tires. They were so aged that after a few runs the front sidewalls were cracking. Wanting the style to be as period correct as possible (and just me loving mesh wheels on S4s), I got my hands on a rare set of Volk Racing Group A wheels. On the Volk archive site I found that these wheels were part of their first forged wheel line in 1986! I wrapped them in Firestone Firehawk Indy 500s. Wheel and tire specs in first photo! I opted for 16 inch wheels because i wanted to stay 4 lug and there are very few 17 inch wheels in 4 lug, I think they look better on S4s than 17s, and i wanted to run more sidewall to protect against any bumps and debris on the roads. This setup really grips well, I've only heard the fronts squeal once, gotta start gradually increasing my pace.
Those wheels are awesome! I've gone to a 5 lug setup now, but if I still had the 4 lug I would love a set of those.
Excellent work restoring the car too. Even if the interior isn't the most "important" part of the car, just getting it clean at a minimum always makes the car way more pleasant to drive
Well after three consecutive runs the stock brakes were shot, the rear left was SMOKING after the last run and they all constantly made noise on the way home, not even being on brakes. I picked up BrakeBest rotors from O�Reilly and Hawk HPS pads from rotary13b1.com. Braking has definitely improved, and slamming on them gets the rears to chirp but not lock up completely, so I�ve got good balance between tire grip and braking force. From install XD
We�ve now caught up to where the car currently is in terms of modifications, the latest mod being coilovers. I picked up a set of BC Racing DS Series coilovers, 8kg front and 6kg rear, opting for these instead of the BR series because they boast better low speed damping while also being budget friendly. The rest of their line has features better used on track (heavier duty stuff), so these were a good middle ground.
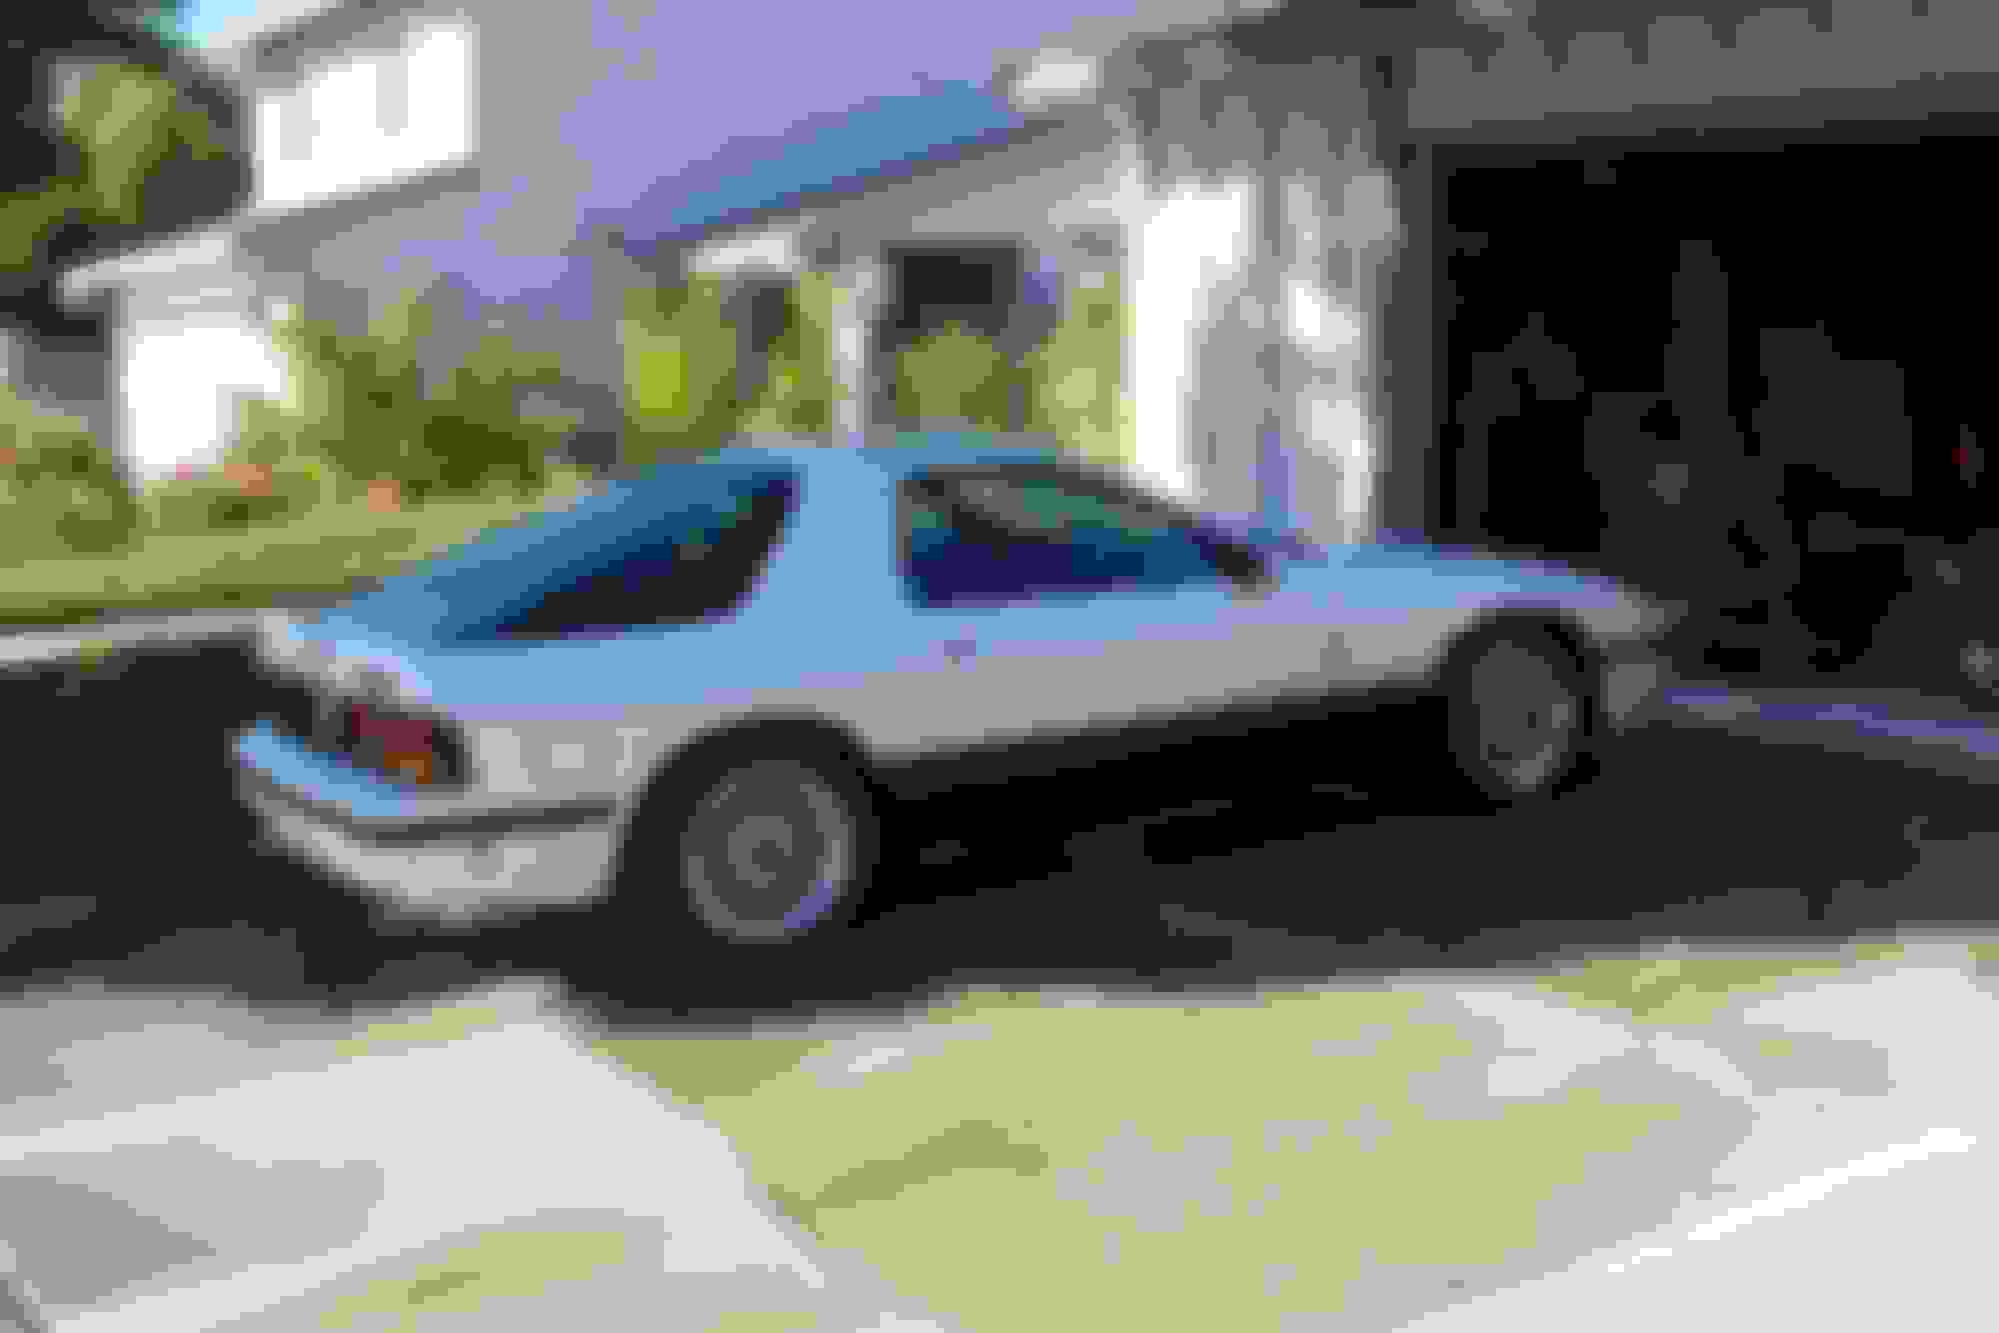
Thankfully had an easy time with installation, the front height needed to be given a good amount of turns to raise it up, but the rear height was perfect out of the box. As a baseline I�m currently running 16 out of 30 clicks of damping in the rear and 25 of 30 in the front. Getting an alignment tomorrow, so we�ll see how she handles on the touge afterward. Here�s some pics: She sits really well, perfect amount of tuck for me, hoping she doesnt rub on the touge
So the car got her first alignment today, and I gotta face some truths. I knew to expect this but the negative rear camber gained from lowering the car is horrendous, -2.7 degrees on the left, -1.1 on the right. This also means that despite replacing the old bent toe link, something else is more than likely bent in the rear right suspension geometry. On the bright side, I was able to get my desired -2 degrees in the front.
As for the shakedown run, this is the car�s first time on the touge since getting the coilovers in and the alignment. Despite the excessive rear camber, it grips incredibly well and feels planted and responsive. No tire rubbing, but the bumper scrapes on some deep bumps during turns. In the future I�ll probably raise the front a bit and get swaybars to keep the roll to a minimum, but for now this setup will do nicely. Enjoy this short clip of me taking corners recorded by my lovely gf
Good Compression Numbers! But Bad Oil Control Rings
I�ll let the photo speak for itself. I was very surprised that the engine is this healthy all things considered.
The motor runs well, but could be better. It�s most likely due to things like the fuel injectors, MAF, O2 sensor, or TPS. I�m definitely running too rich so besides cleaning/replacing the mentioned parts I�ll be looking to advance my timing a little bit as well.
Lastly, despite the compression numbers, my oil control rings are on their way out as you�ll see in the video:
The car is finally one color! Now I don't feel self conscious about people thinking I drive a sh*tbox XD. I wet sanded and used Goof Off Overspray Remover for everything that wasnt white except for the bottom halves of the car, the surface was both bumpy at the bottom and there were too many contours to worry about, so we painted over them with factory paint code white aeresol paint from AutomotiveTouchup.com and repainted the black trim pieces. I'm extremely happy with how it turned out. All thats left is touching up some spots with paint marker. Here's some pics throughout the stages of the process:
After completing the paint I didn�t do anything to the car for awhile, but eventually my stock temp gauge started giving readings all over the place (within the safe temp area) varying from 1/4 to just under 1/2. I grew anxious about overheating, so I bought some things:
First was an undertray. The car didn�t have the factory one when I bought it, and not having one negatively affects cooling so I got LRB Speed�s.
Next was a bunch of items from Prosport Gauges. Water temp, oil temp, and oil pressure sensors and gauges, the adapter that goes under the oil filter for the oil sensors, and not shown in the picture but a coolant hose adapter for the coolant sensor. I picked up a single din cluster meant for FDs to use for the gauges, and filled in the empty space with a Continental stereo. Was going for a period-correct look of course. Still need to hook it up.
Heres how they look lights on
On top of all this I replaced the thermostat and bought a new upper rad hose for the sensor location. The end result is the peace of mind that the car is running cool, always at least under 190 while normal driving, and its still hot weather over here. But I still have yet to take her down the touge and see how much she and the stock radiator can really take before getting close to overheating.