
Peripheral Port FC.


Thread Starter
Senior Member
Joined: Feb 2007
Posts: 368
Likes: 0
From: Surrey, England
Peripheral Port FC.
Hey people,
I've had this up in the N/A forum for ait but i think the thread needs to here at home with the other Gen 2s.
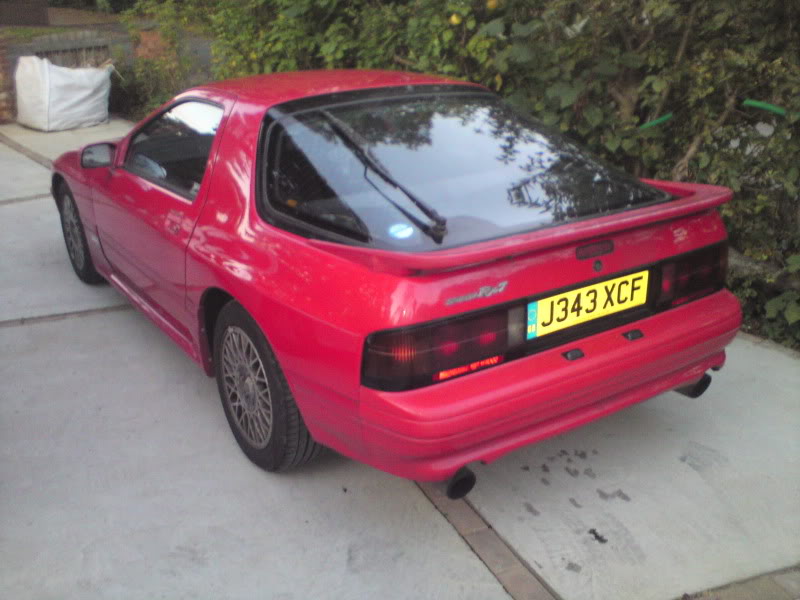
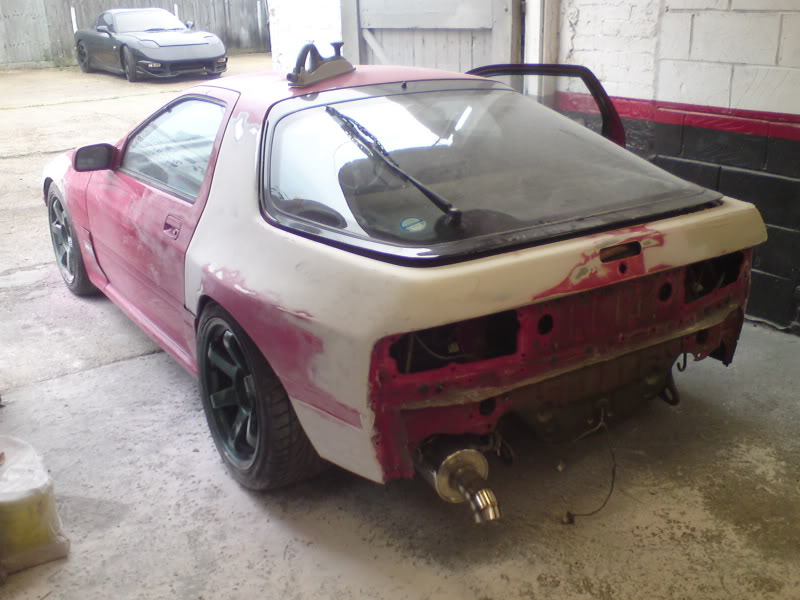
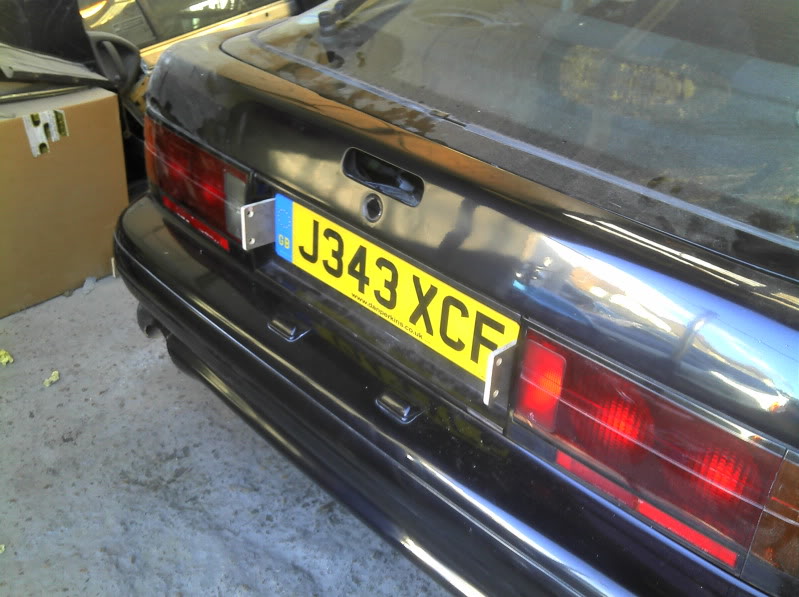
I bought this FC to replace a very knackerd EGI where the chassis wasn't worth saving. Too far gone. Purchased as a verutally bog standard TII, had a manky 3" down pipe and pretty old Greddy/trust exhaust she seemed like a good base for a peripheral ported 13B motor i had been building for my old FC, but after stripping that FC EGI to bits that chassis was way to far gone. So the bits for the EGI i had went on the TII.

After a quick rivet here and there and some wheel nut swapping:
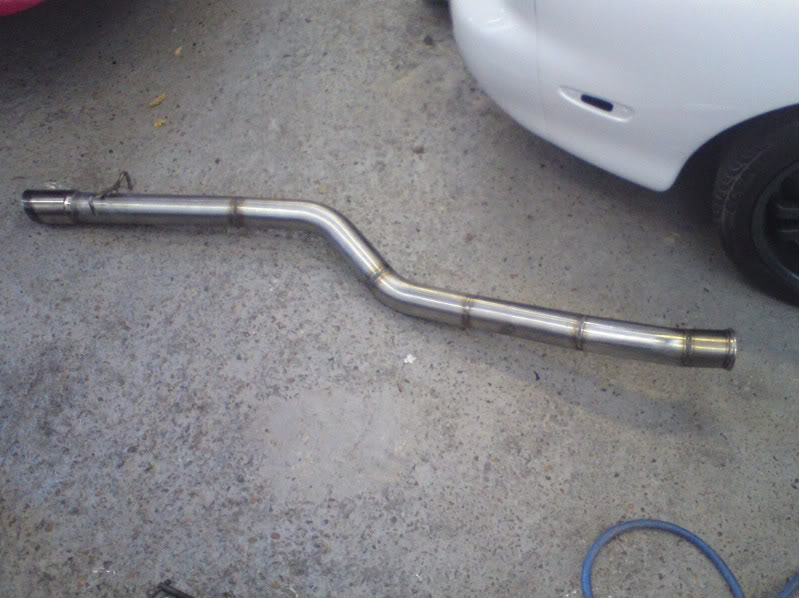
Obivously with bigger mods in mind i set about fabbing a nicer exhaust from the down pipe, with a single sinlencer in the middle of the car, and then a striaght system from there back. Had a lovely rasp of a noise.... great for tunels
I've had this up in the N/A forum for ait but i think the thread needs to here at home with the other Gen 2s.
I bought this FC to replace a very knackerd EGI where the chassis wasn't worth saving. Too far gone. Purchased as a verutally bog standard TII, had a manky 3" down pipe and pretty old Greddy/trust exhaust she seemed like a good base for a peripheral ported 13B motor i had been building for my old FC, but after stripping that FC EGI to bits that chassis was way to far gone. So the bits for the EGI i had went on the TII.
After a quick rivet here and there and some wheel nut swapping:
Obivously with bigger mods in mind i set about fabbing a nicer exhaust from the down pipe, with a single sinlencer in the middle of the car, and then a striaght system from there back. Had a lovely rasp of a noise.... great for tunels
Thread Starter
Senior Member
Joined: Feb 2007
Posts: 368
Likes: 0
From: Surrey, England
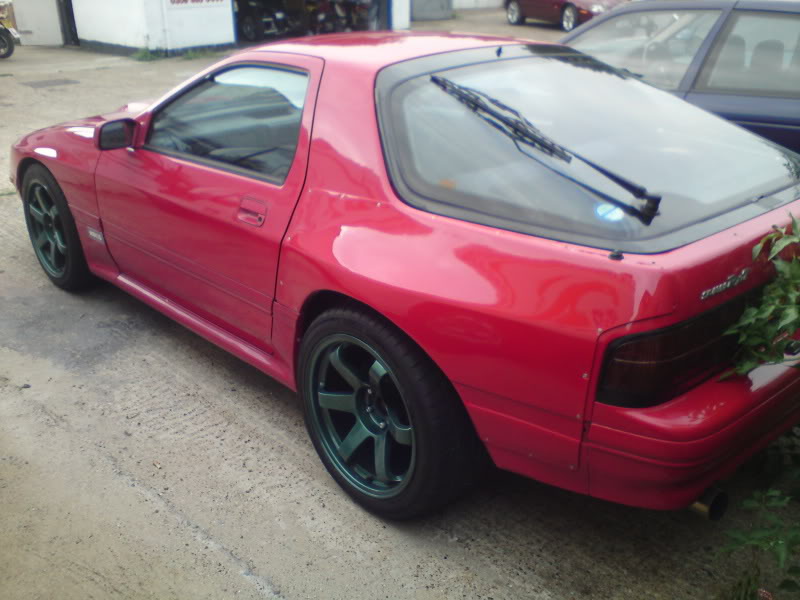
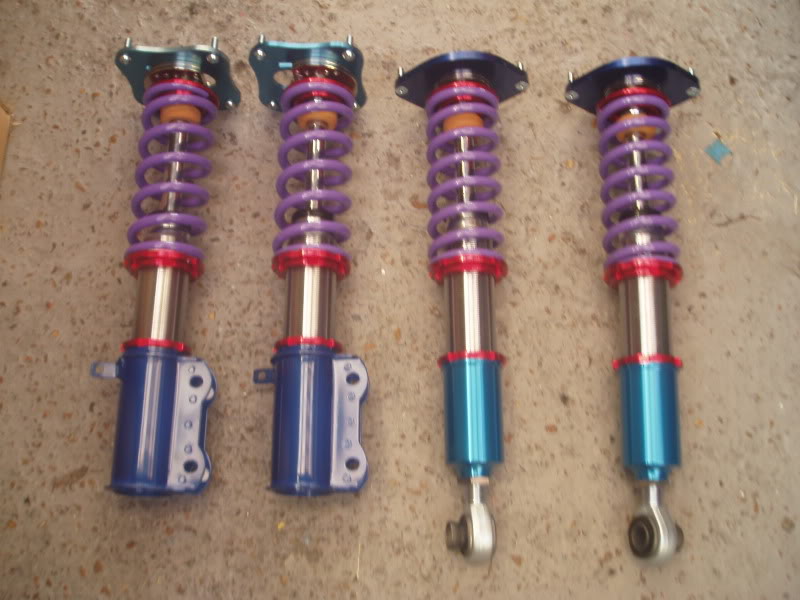
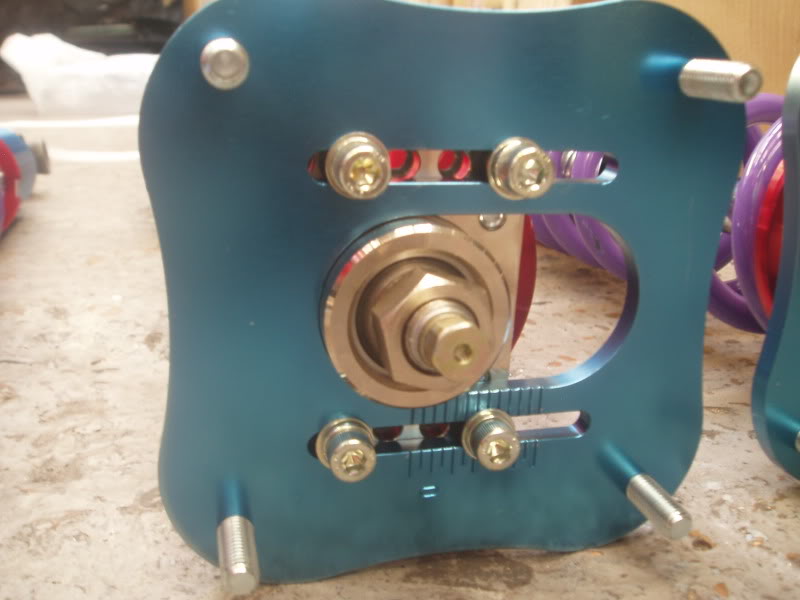
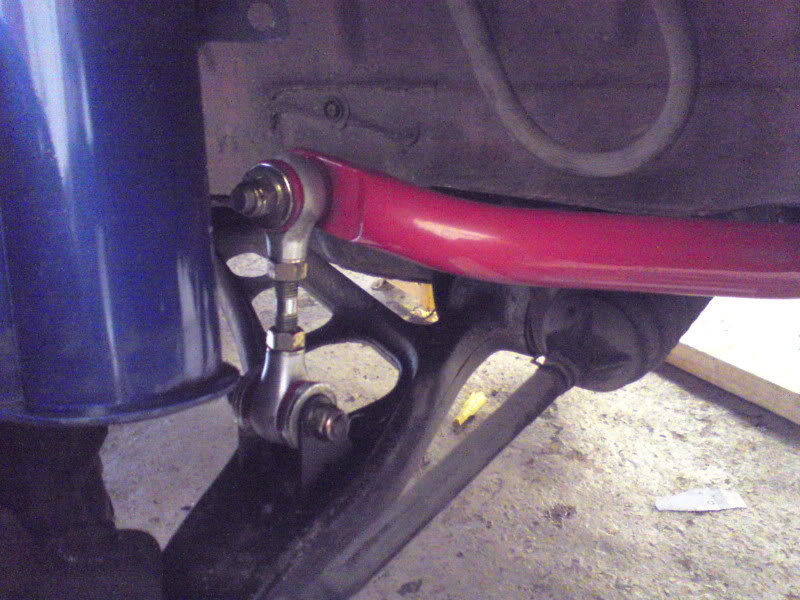
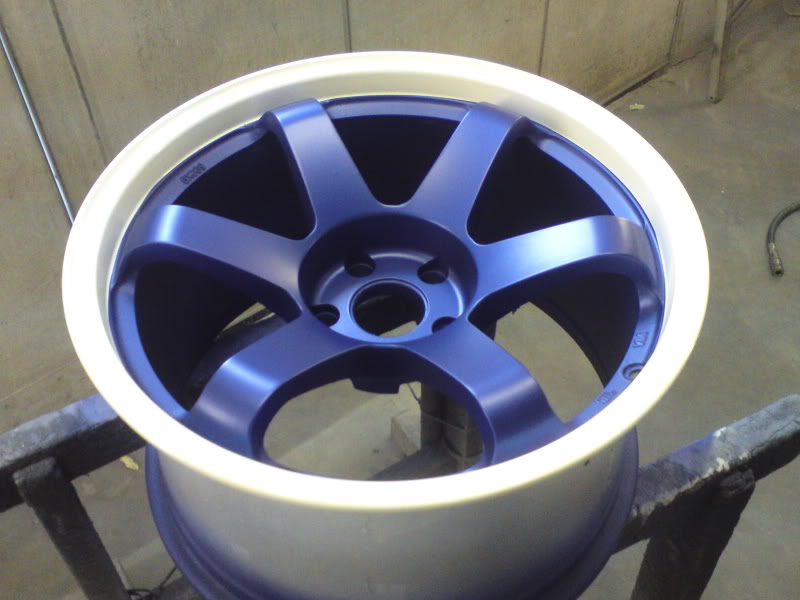
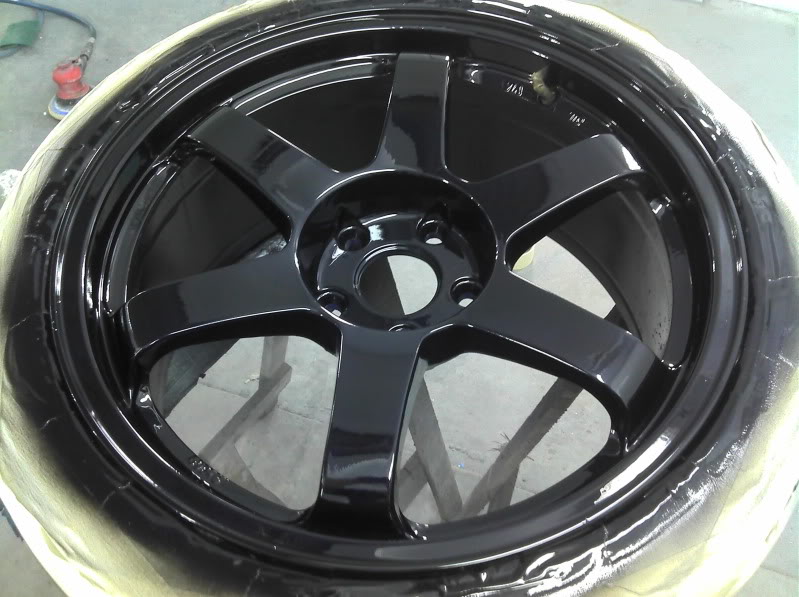
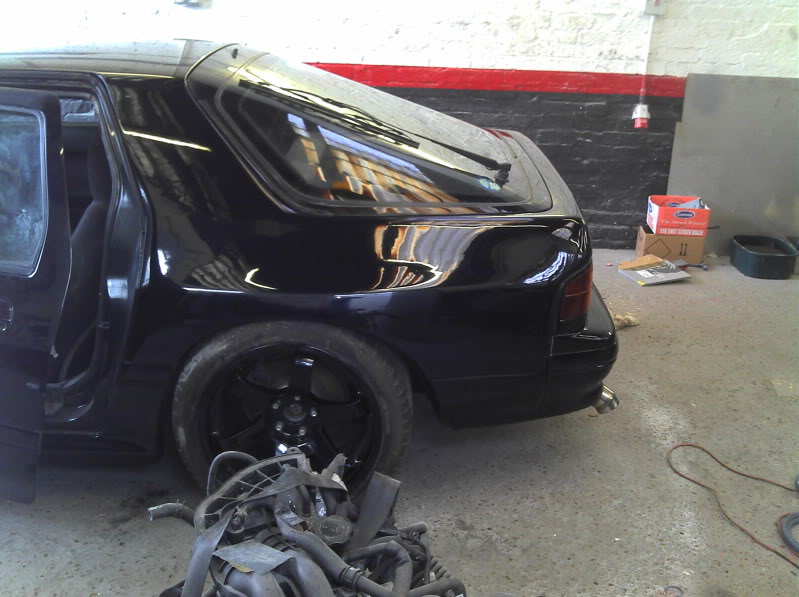
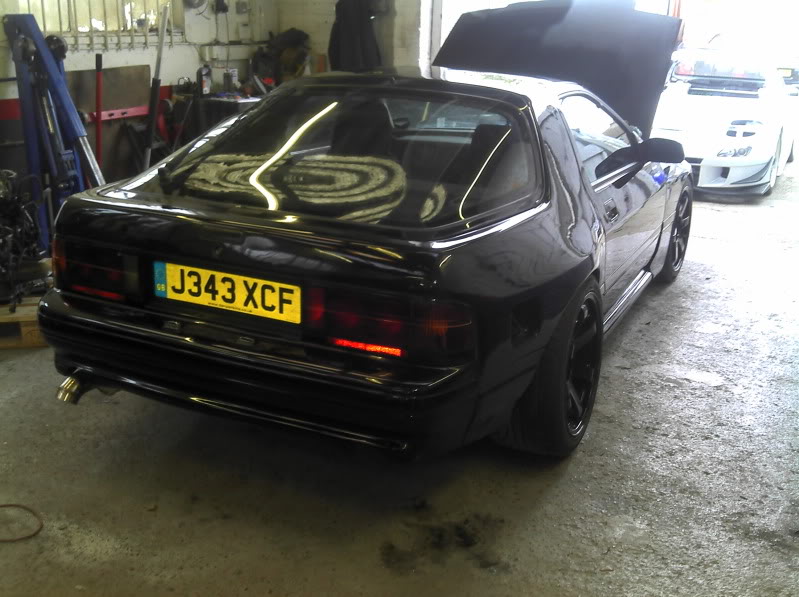
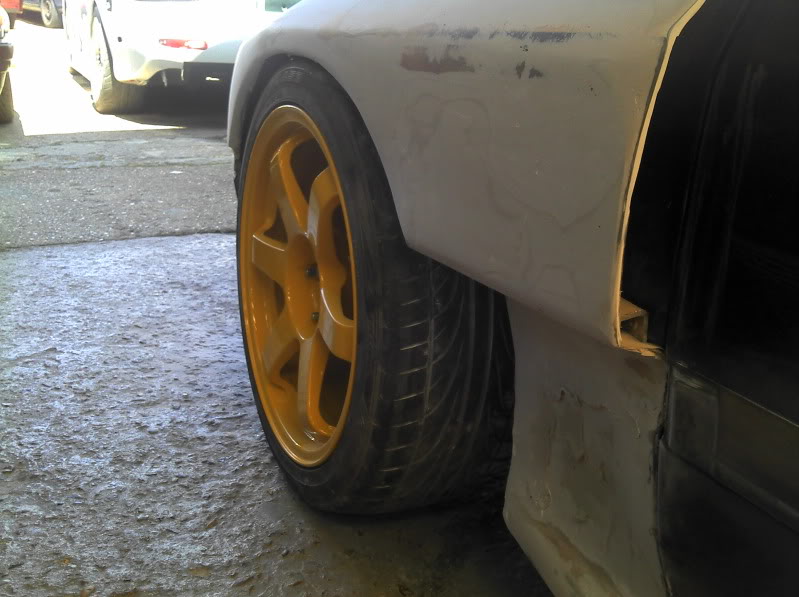
As you can see in the pic above set of Cusco's went on. Had a massive result with these. Found them on Yahoo Japan fully refurbished with Swift springs �500 delivered.... awsome
Other chassis mods where:
Racing Beat front and rear Roll Bars
Racing Beat roll bar end links
Racing Beat rear toe eliminator
Racing Beat chamber bar
Modified steering rod ends to match the ride hight drop to stop bump steer.
Other chassis mods where:
Racing Beat front and rear Roll Bars
Racing Beat roll bar end links
Racing Beat rear toe eliminator
Racing Beat chamber bar
Modified steering rod ends to match the ride hight drop to stop bump steer.
Thread Starter
Senior Member
Joined: Feb 2007
Posts: 368
Likes: 0
From: Surrey, England
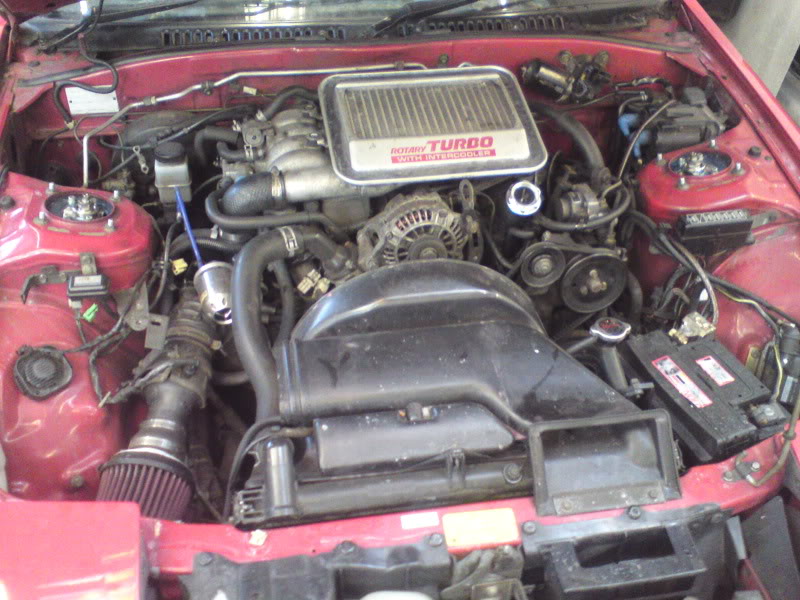
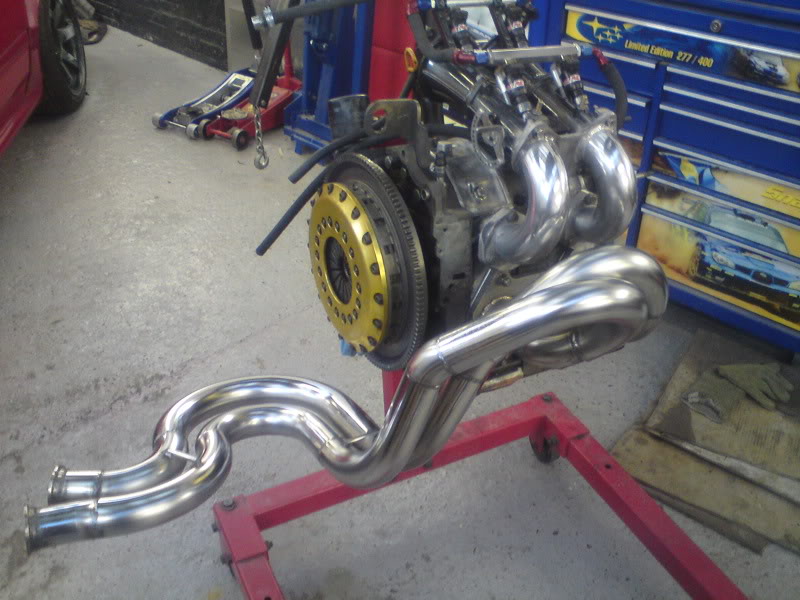
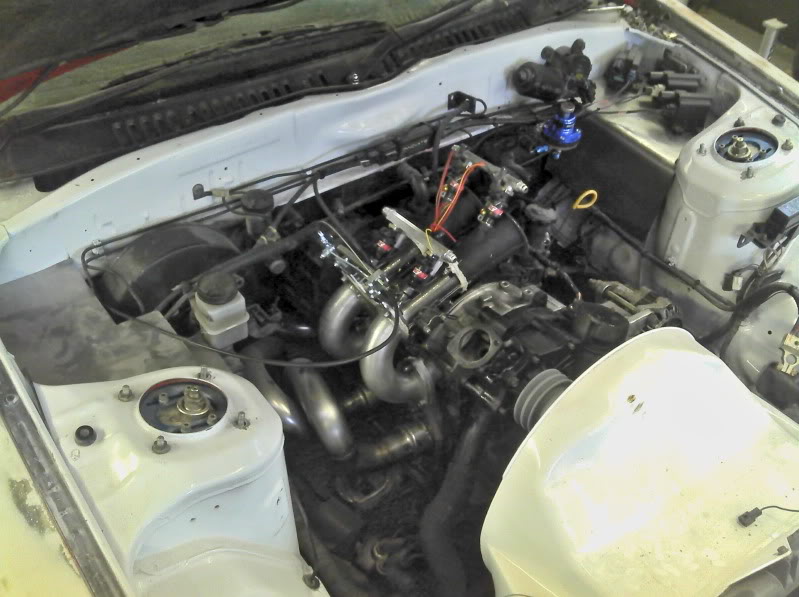
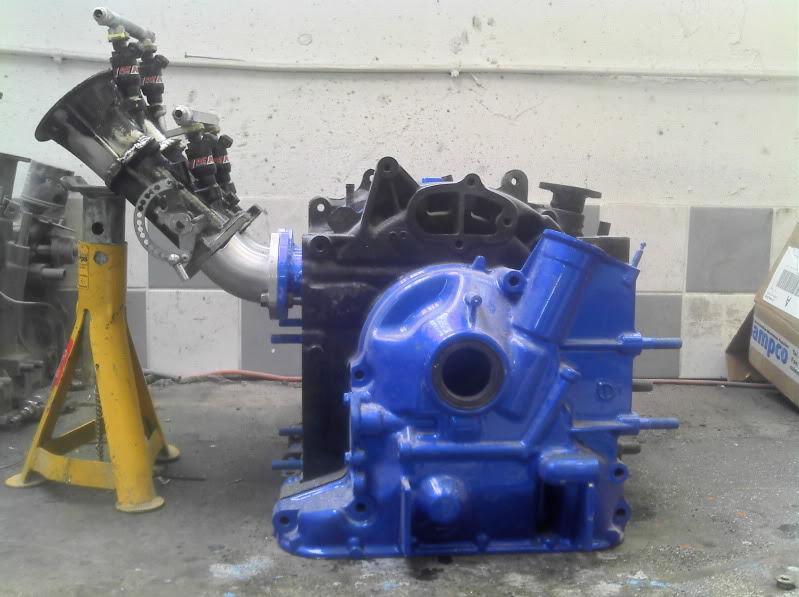
So chassis a little more tweeked it was time to remove the engine and put the Peripheral Ported one in.
Stock set up
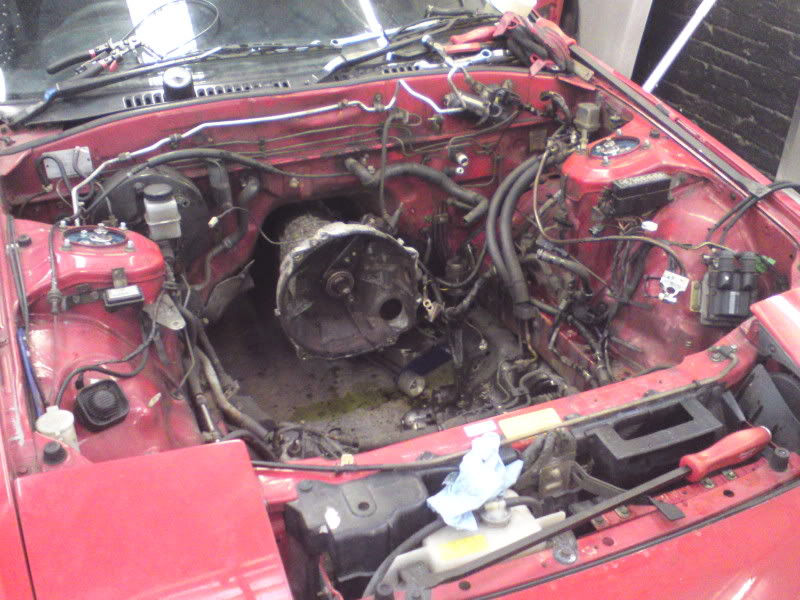
The motor
motor in

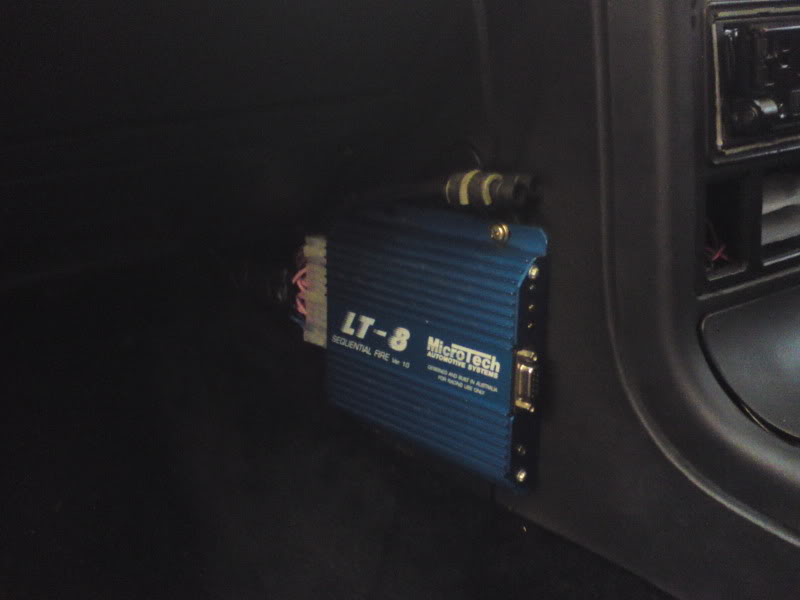
For the new peripheral port i needed new managment. I found a second hand Microtech LT8 ideal for the motor. Once it was all wired in i found the car had no crank signal... after a few conversations with the seller and guys down at RX Motors, who eventually found the problem, turned out the unit was very faulty with 2 intermitent problems that either it should go bk to Aus to be sorted out, or i could have tims old one off their drag car..... so i will be buying the one off the drag car soon.
Stock set up
The motor
motor in
For the new peripheral port i needed new managment. I found a second hand Microtech LT8 ideal for the motor. Once it was all wired in i found the car had no crank signal... after a few conversations with the seller and guys down at RX Motors, who eventually found the problem, turned out the unit was very faulty with 2 intermitent problems that either it should go bk to Aus to be sorted out, or i could have tims old one off their drag car..... so i will be buying the one off the drag car soon.
Thread Starter
Senior Member
Joined: Feb 2007
Posts: 368
Likes: 0
From: Surrey, England
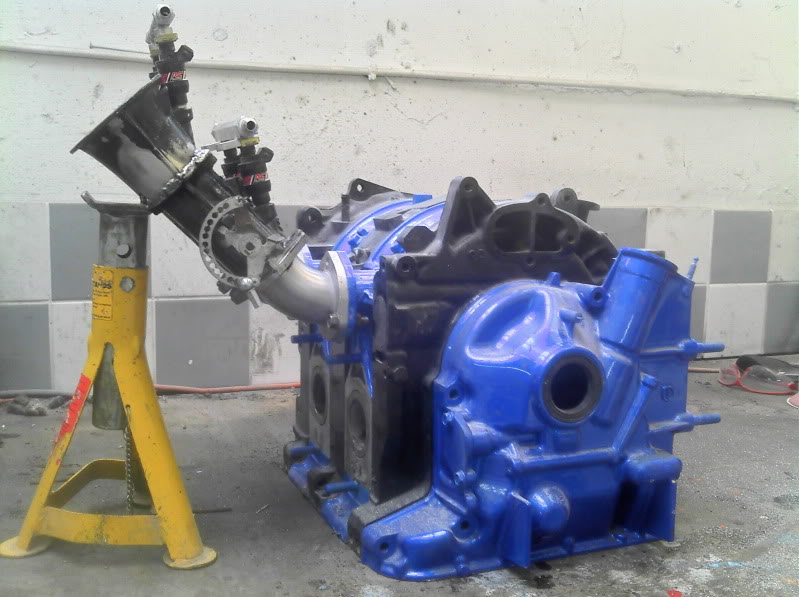
Microtech in (before fault was found!)
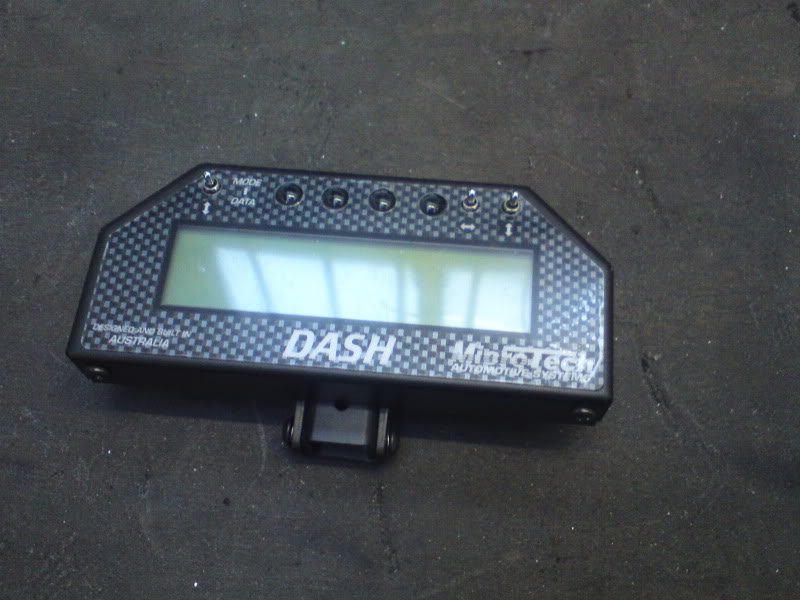
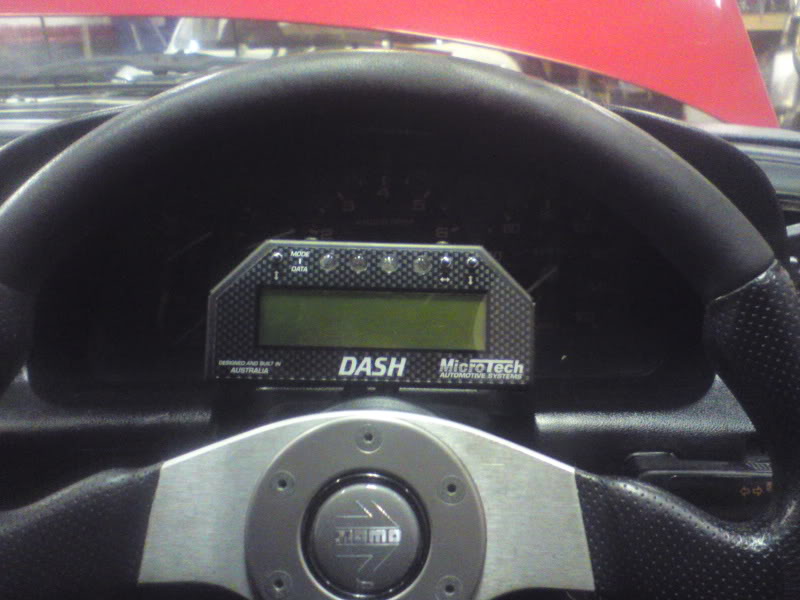
Pip at WGT hand a nice little dash unit hanging around. Handy unit this. Also acts like a Power FC Commander. You can change alot of peramiters on the unit. Wicked.
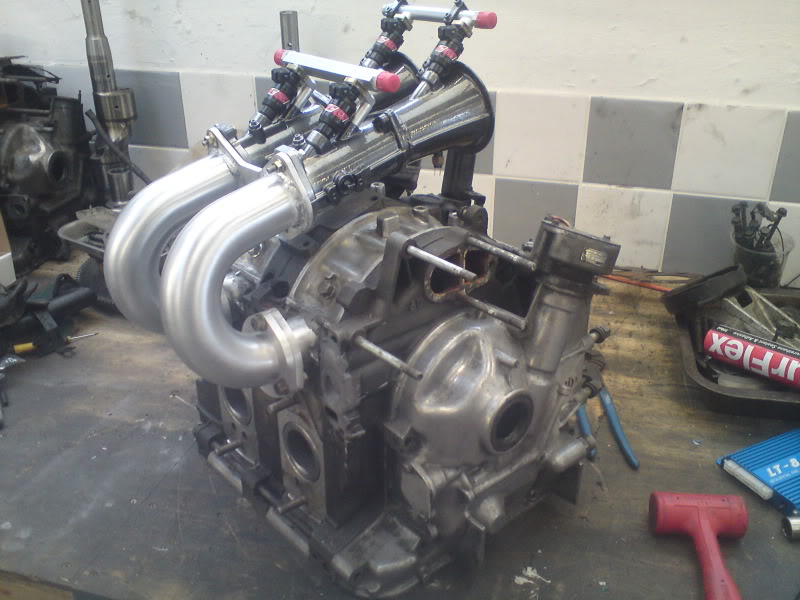
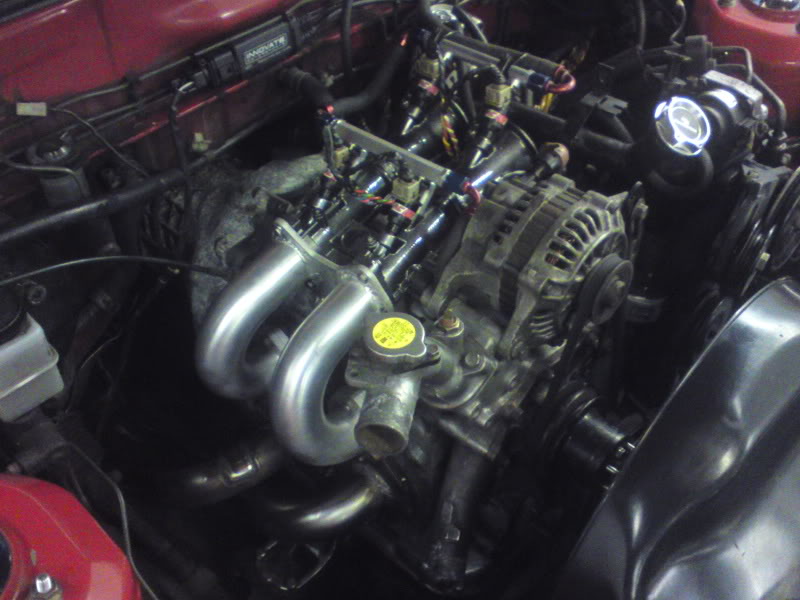
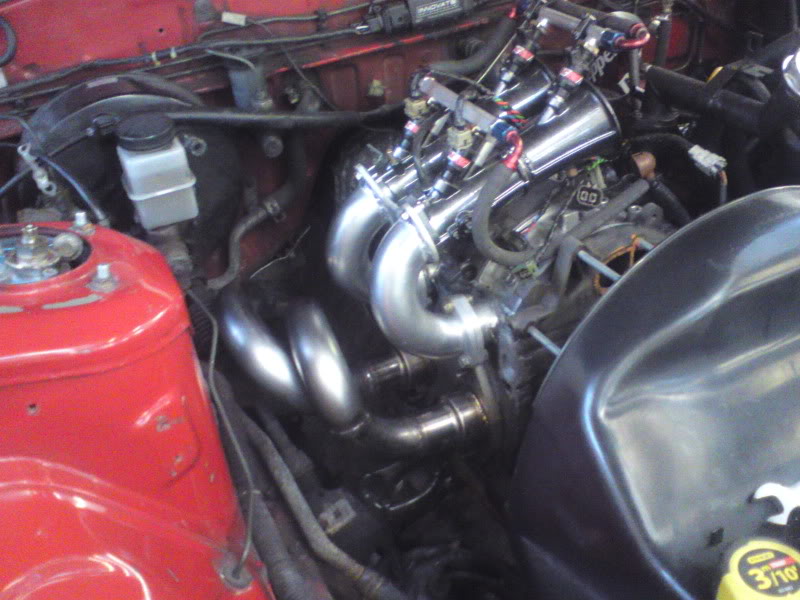
And bodies on the motor. You can aslo see a very nicely bodged manifold in there too That was doen just to get the motor started.
Pip at WGT hand a nice little dash unit hanging around. Handy unit this. Also acts like a Power FC Commander. You can change alot of peramiters on the unit. Wicked.
And bodies on the motor. You can aslo see a very nicely bodged manifold in there too
That was doen just to get the motor started.
Thread Starter
Senior Member
Joined: Feb 2007
Posts: 368
Likes: 0
From: Surrey, England
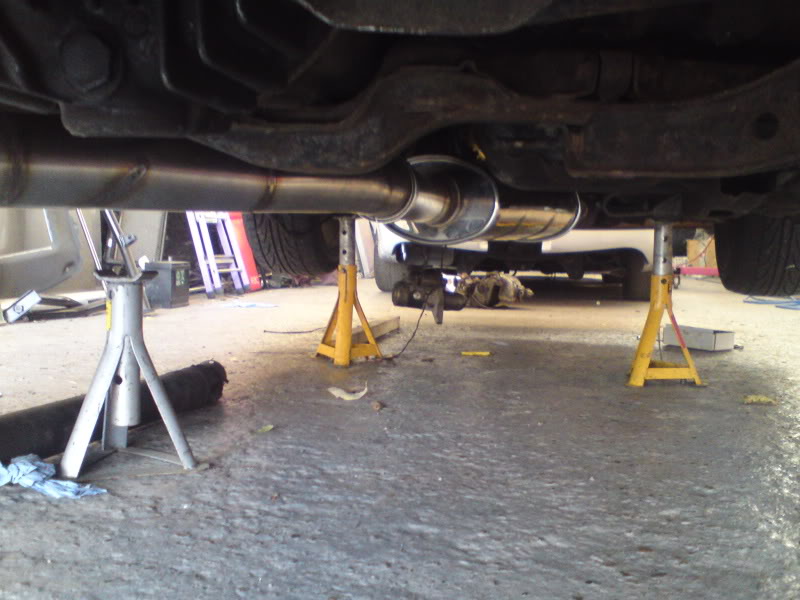
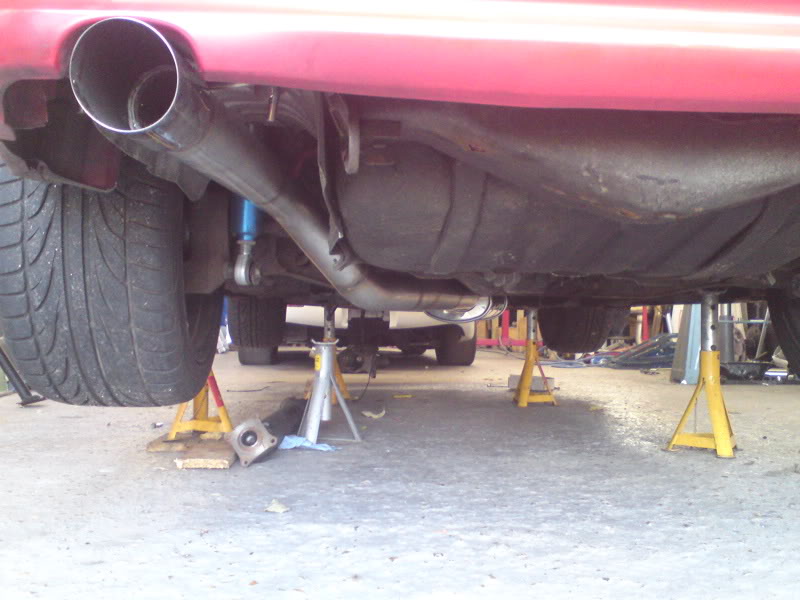
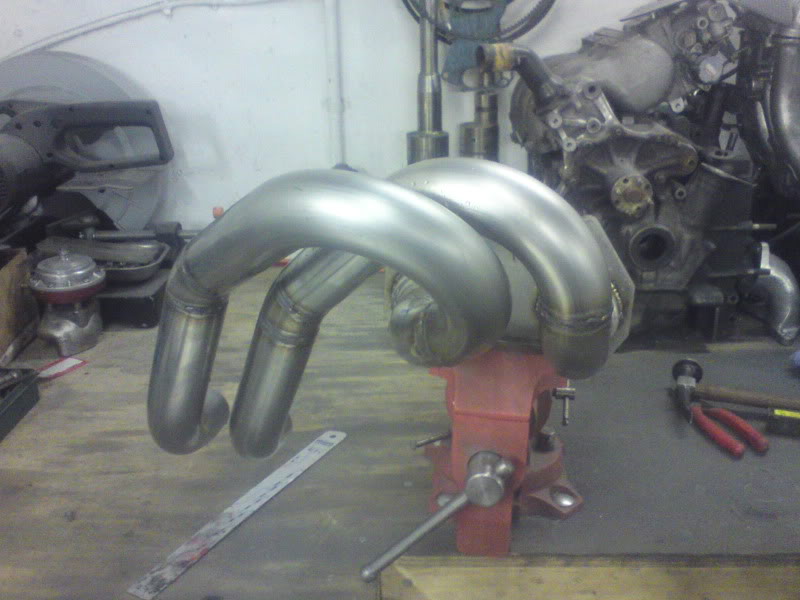
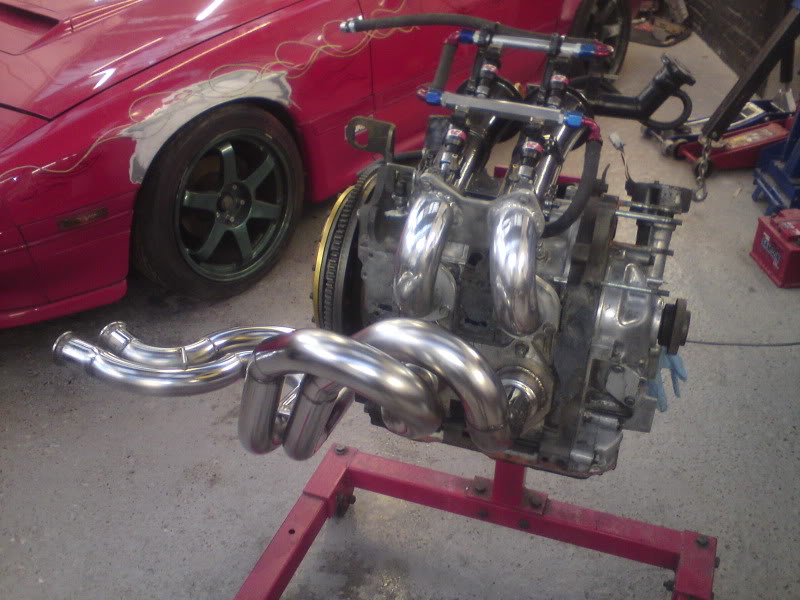
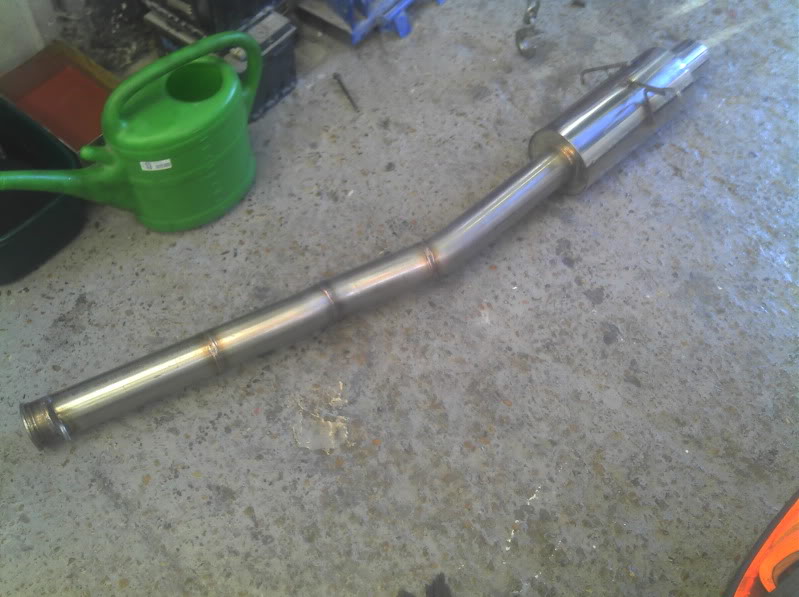
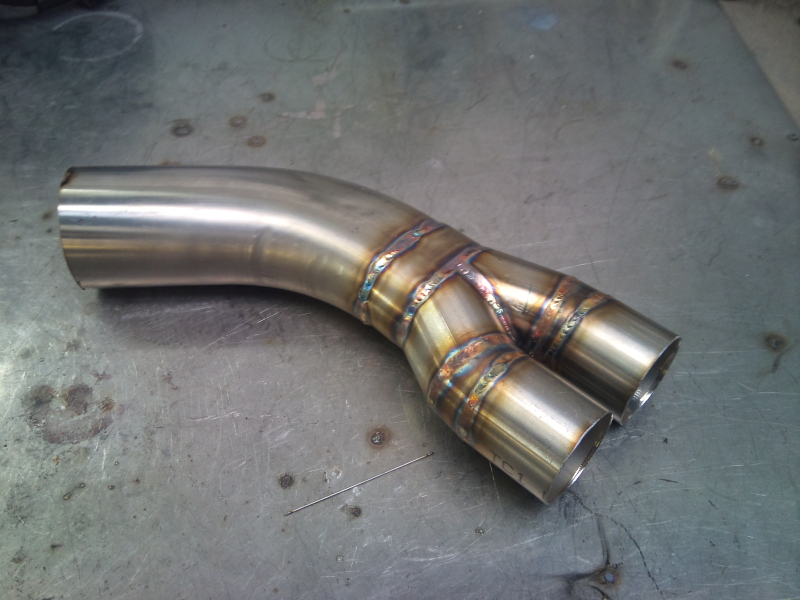
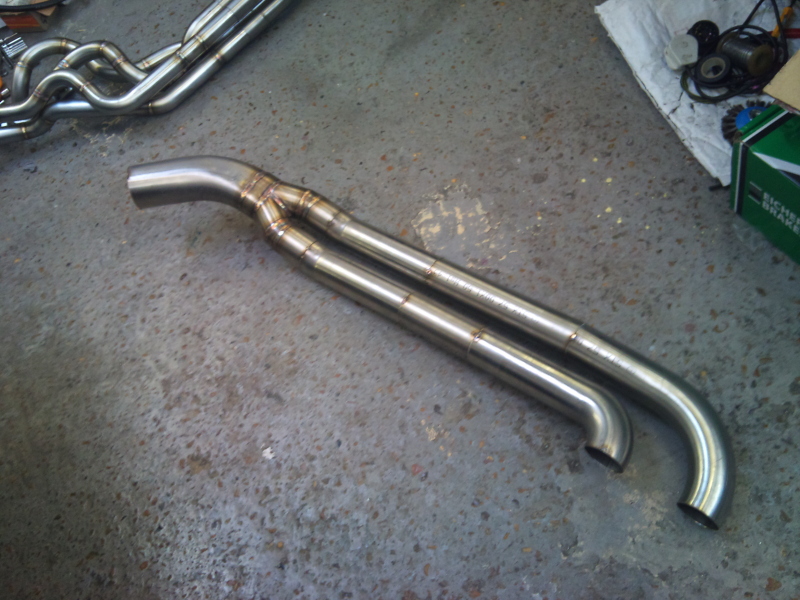
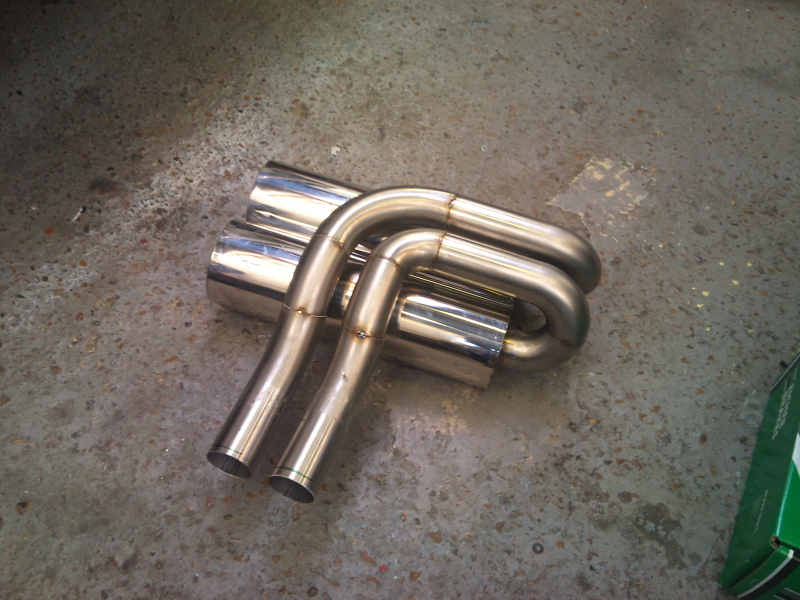
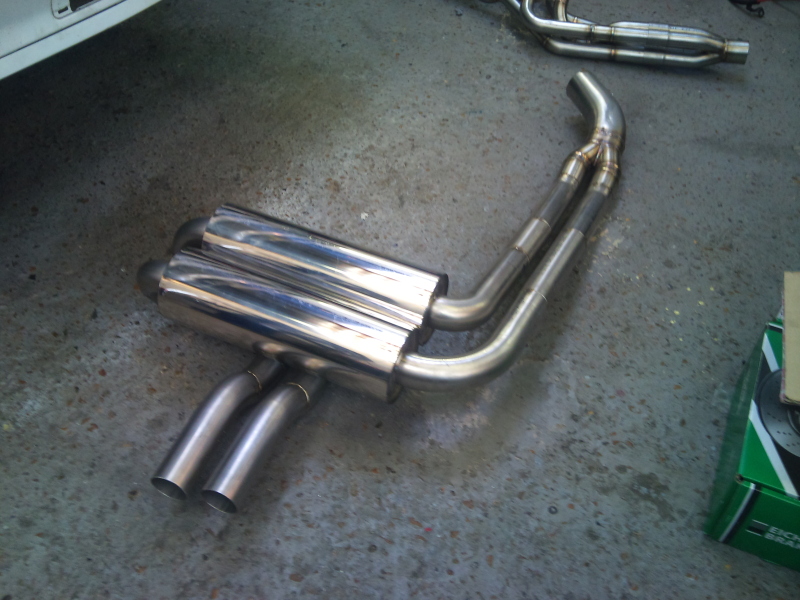
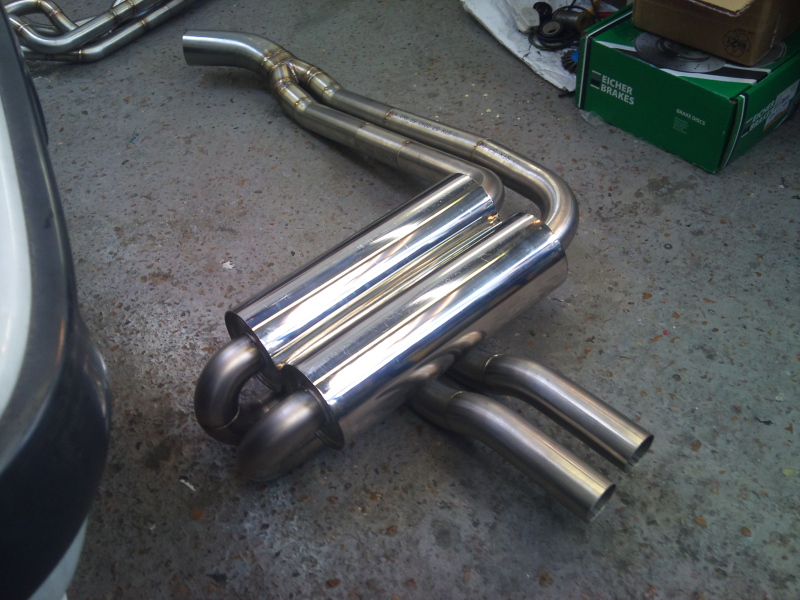
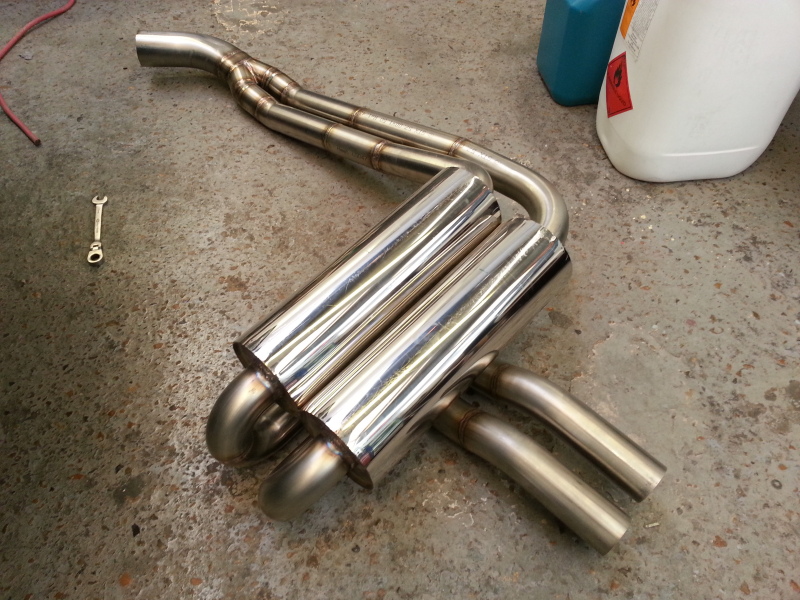
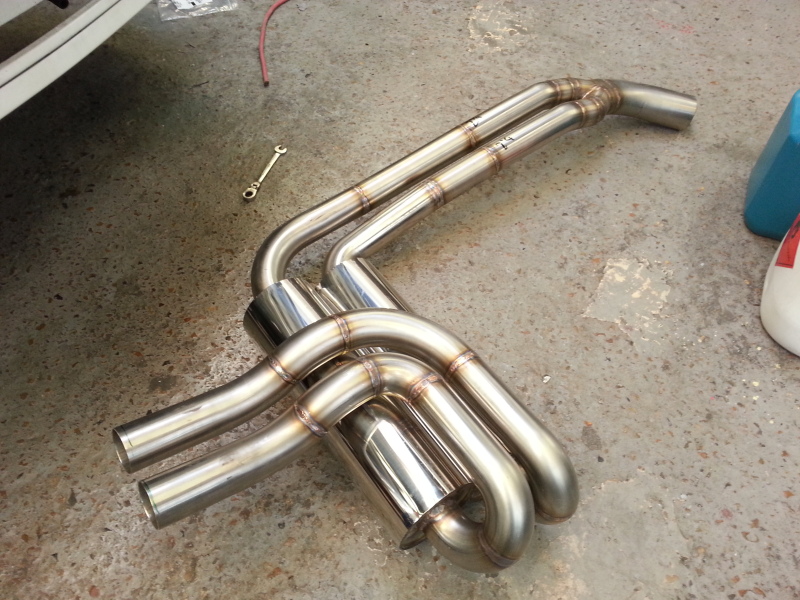
With the ECU ou of action it gave me a chance to revise a few other areas of the car. First off was the exhaust system. The one i had in place would be no good for the N/A set up. Also i'm sure as some of you know N/A + rotary = bleeding ear horriable head tremor syndrome. The diffeculty is getting a balance between velocity and noise. So i went for a set up with 3 silencers. one on each priamary and on at the rear. Then V-banded the whole thing for good measure.
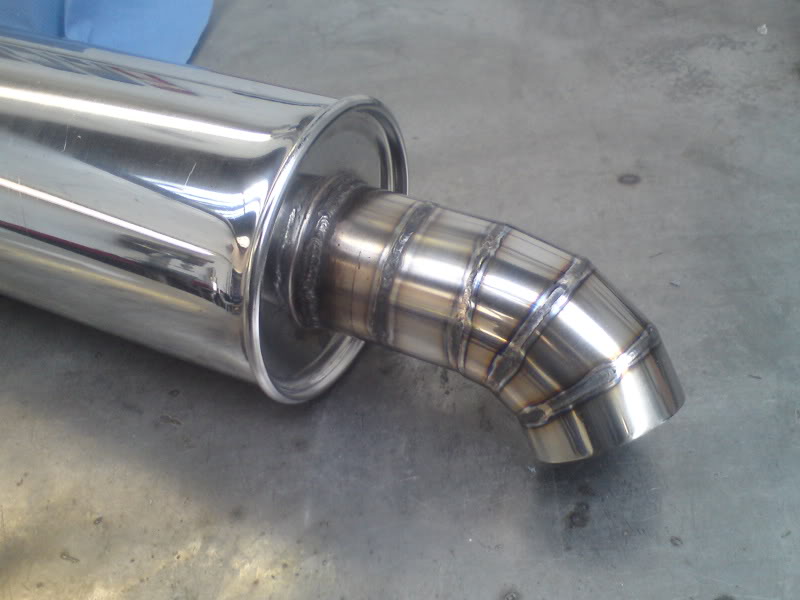
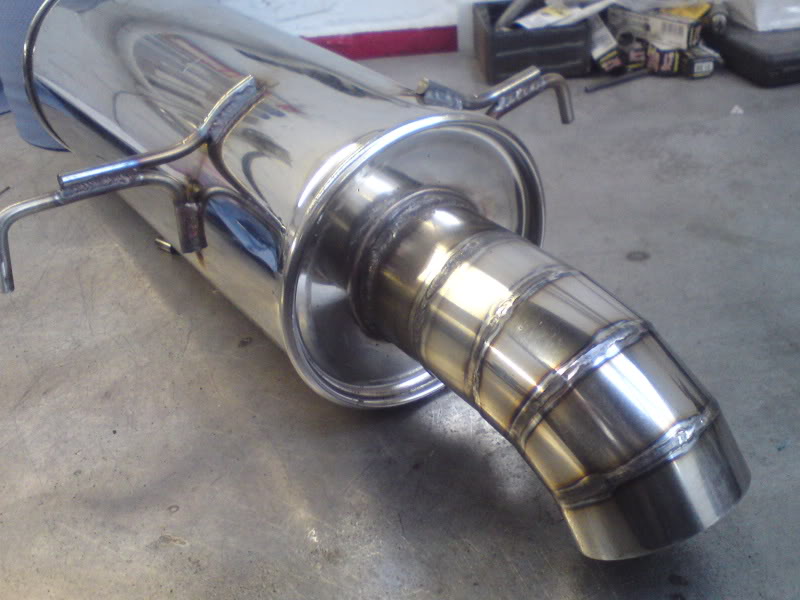
Mid section:
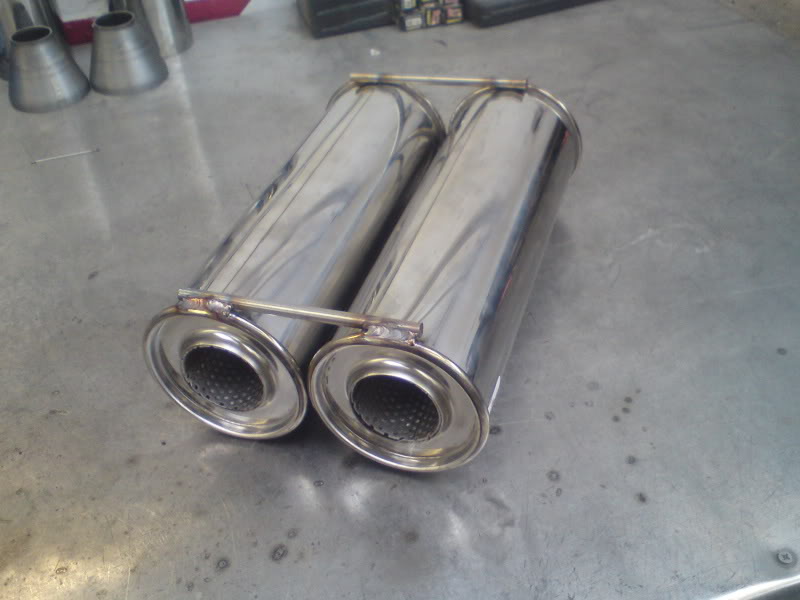
onto the headers. Sort or long.... I decided as i shortened the intake runners down to about 10" from the butterflies in the throttle bodies to run 94" primaries. For people who don't know the primary length on the exhaust is where the first join on the pipes from the engine is.... In this case on have 2 exhaust ports so the primary join is 94" away from the exhaust ports. N/A cosworth engine with Throttle bodies in a 4-1 set up this length would be around 22". Or 4-2-1 Primary at (4-2) 18" secondaries (2-1) at 8-10" depending on final engine tune............
Sorry babbeling on !

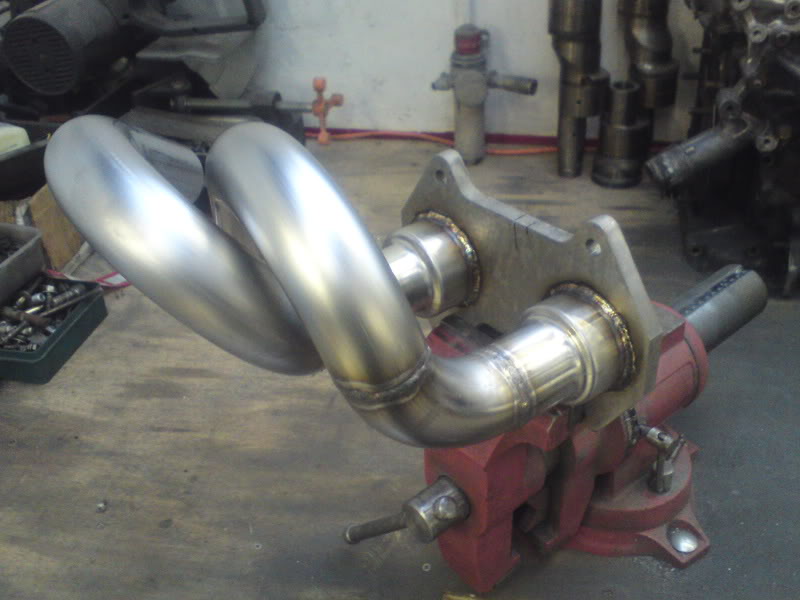
test fit
On the stand with New OS Giken Twin. A touch OTT for the HP / TRQ but such a lovely clutch to drive with.
Mid section:
onto the headers. Sort or long.... I decided as i shortened the intake runners down to about 10" from the butterflies in the throttle bodies to run 94" primaries. For people who don't know the primary length on the exhaust is where the first join on the pipes from the engine is.... In this case on have 2 exhaust ports so the primary join is 94" away from the exhaust ports. N/A cosworth engine with Throttle bodies in a 4-1 set up this length would be around 22". Or 4-2-1 Primary at (4-2) 18" secondaries (2-1) at 8-10" depending on final engine tune............
Sorry babbeling on !
test fit
On the stand with New OS Giken Twin. A touch OTT for the HP / TRQ but such a lovely clutch to drive with.
Thread Starter
Senior Member
Joined: Feb 2007
Posts: 368
Likes: 0
From: Surrey, England
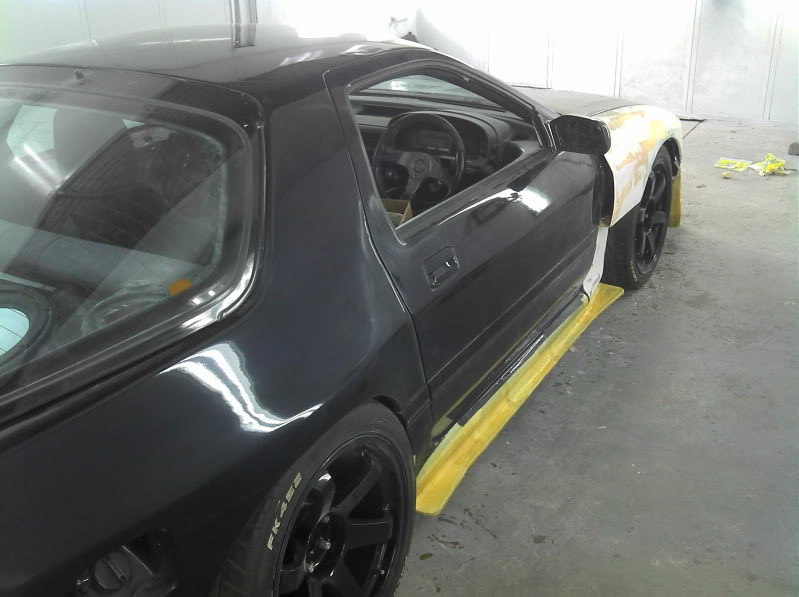
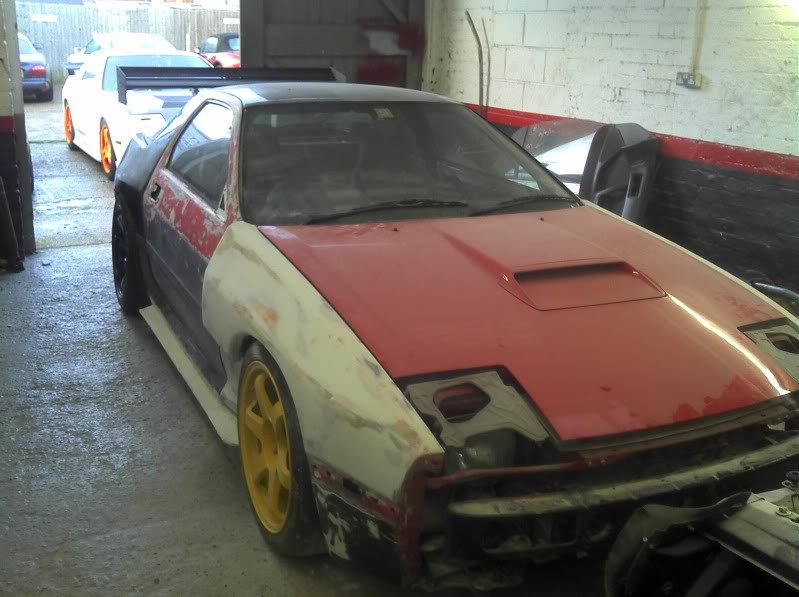
Unfortunatly the body work has a high point followed by a low followed by a high.
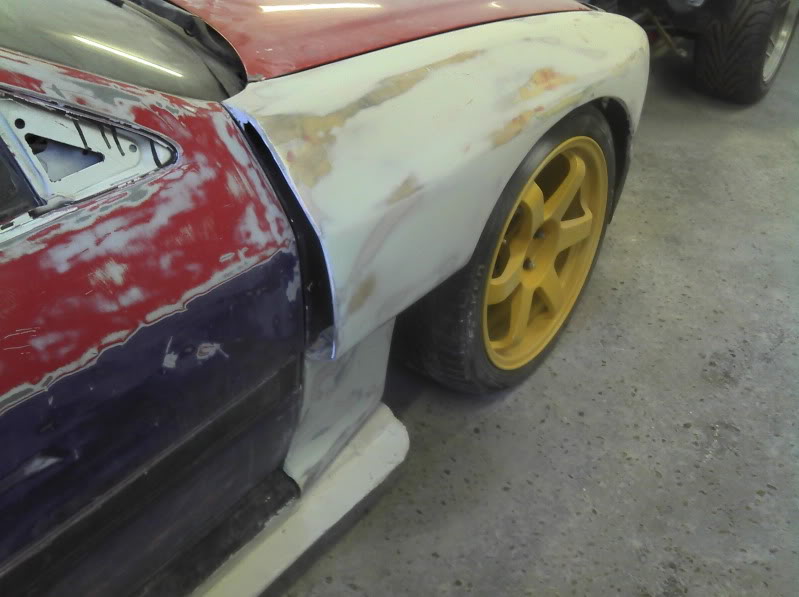
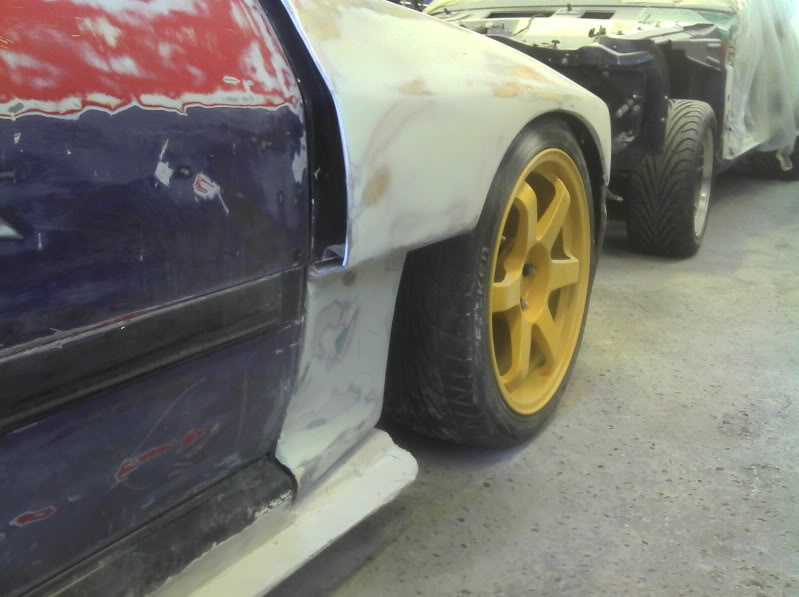
I wanted to go 2 tone white blue. And the result was indeed sick.... Well i thougth so.
Wide at the rear stock for the rest, Wheels first
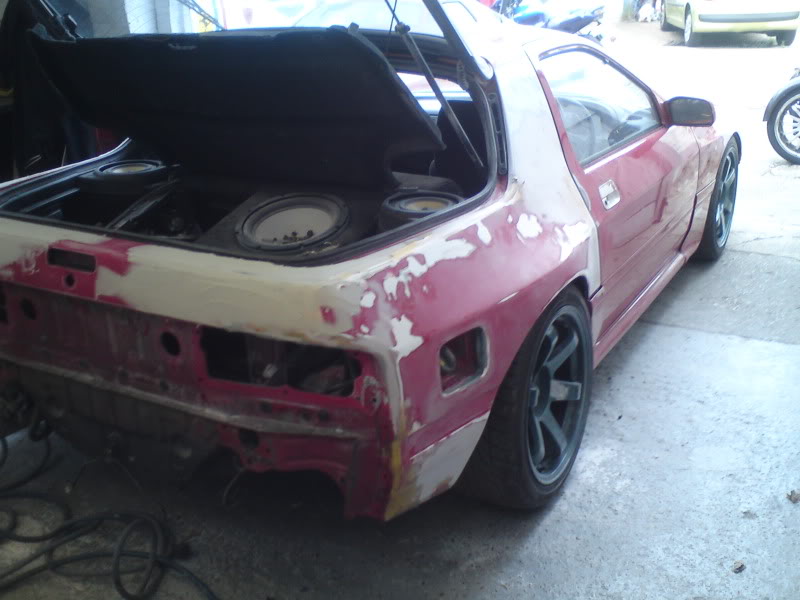
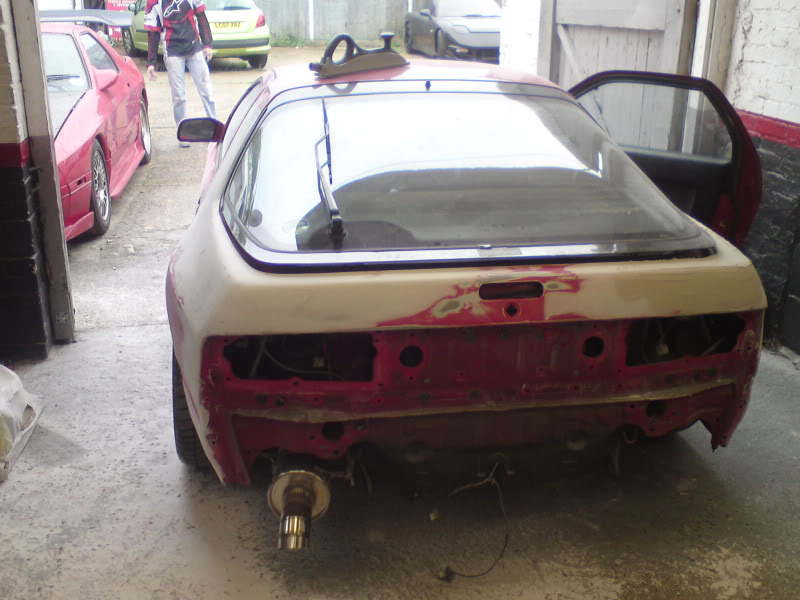
She ended up like this

Now some **** hit the car in the yard and smashed the rear bumper and rear quater. Too make matters worse SEM who supplied the paint for the car Discontuned the paint colours that where used So unfortunalty due to the layering of the paint even after a few attempts nothing was close enough. With not enough time to do anything fancy this time around... kept it simple.

I wanted to go 2 tone white blue. And the result was indeed sick.... Well i thougth so.
Wide at the rear stock for the rest, Wheels first
She ended up like this
Now some **** hit the car in the yard and smashed the rear bumper and rear quater. Too make matters worse SEM who supplied the paint for the car Discontuned the paint colours that where used So unfortunalty due to the layering of the paint even after a few attempts nothing was close enough. With not enough time to do anything fancy this time around... kept it simple.
Trending Topics
Thread Starter
Senior Member
Joined: Feb 2007
Posts: 368
Likes: 0
From: Surrey, England
The ody then got some more attention. Custom wings, bumper and skirts
Skirt skin: Looks a little odd with the wide arch and the 8.5" wheel in there!!! Wish my 10s would turn up.
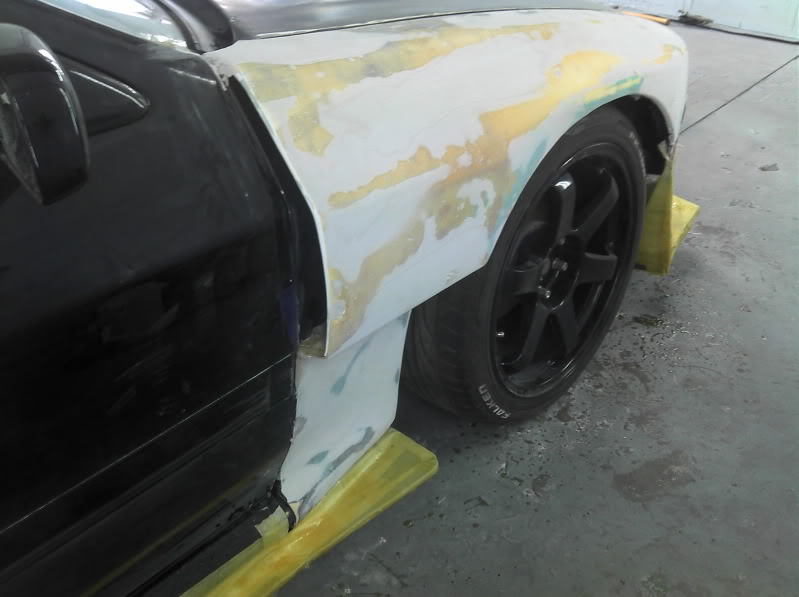
Skirt skin: Looks a little odd with the wide arch and the 8.5" wheel in there!!! Wish my 10s would turn up.


Thread Starter
Senior Member
Joined: Feb 2007
Posts: 368
Likes: 0
From: Surrey, England
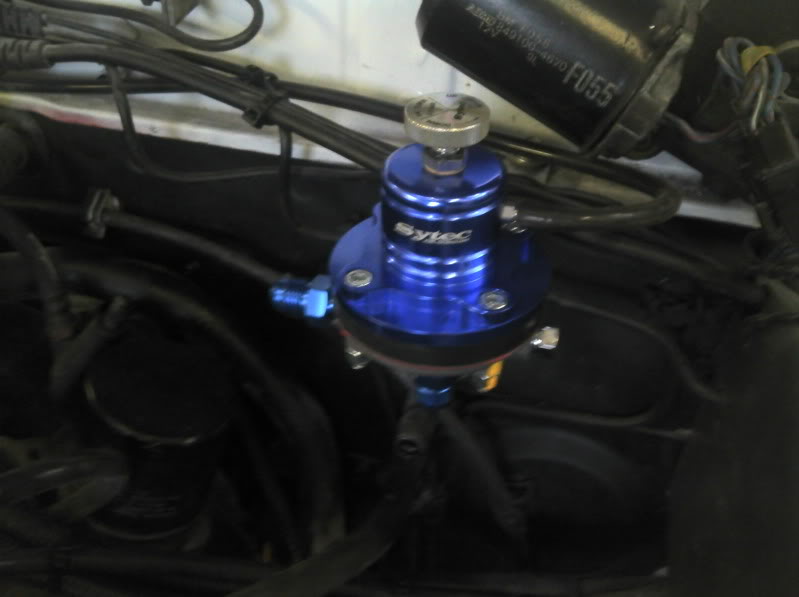
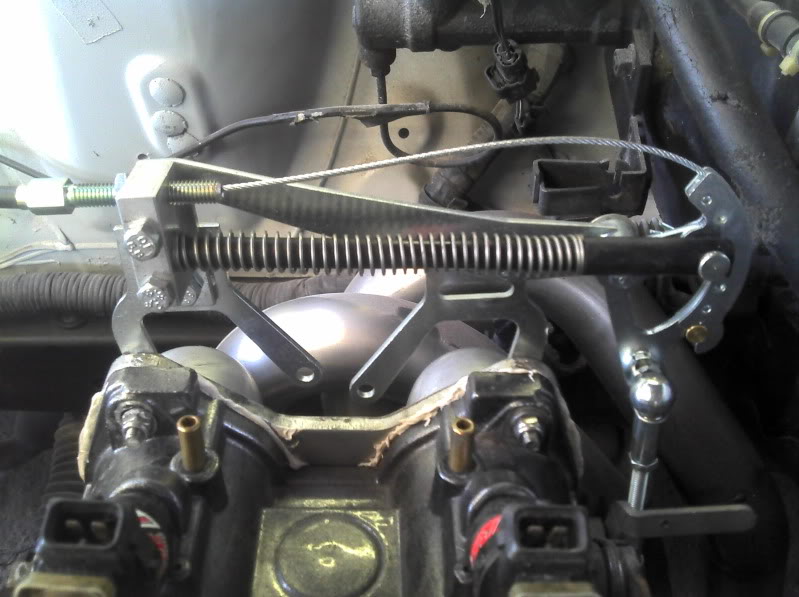
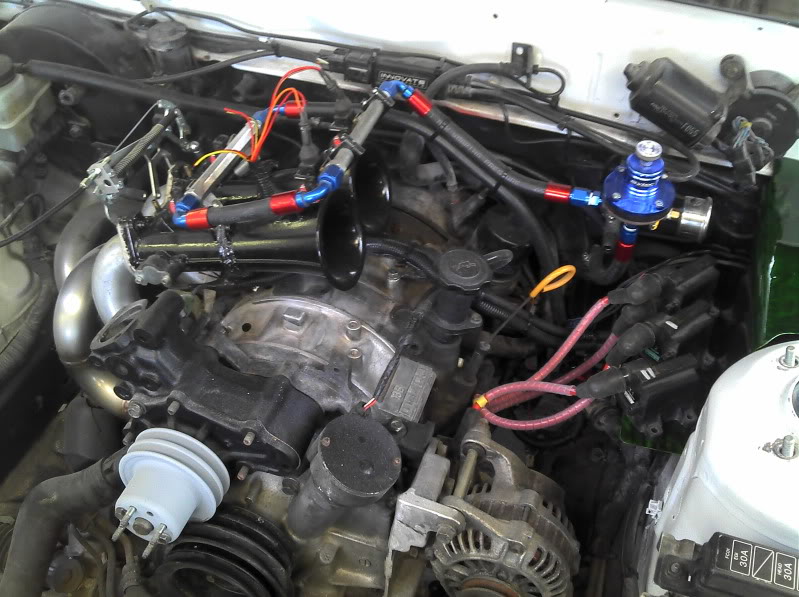
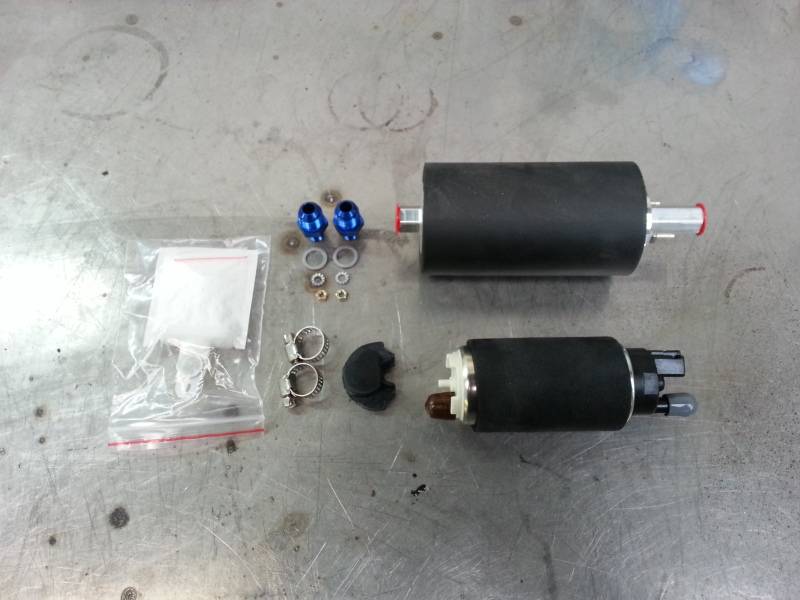
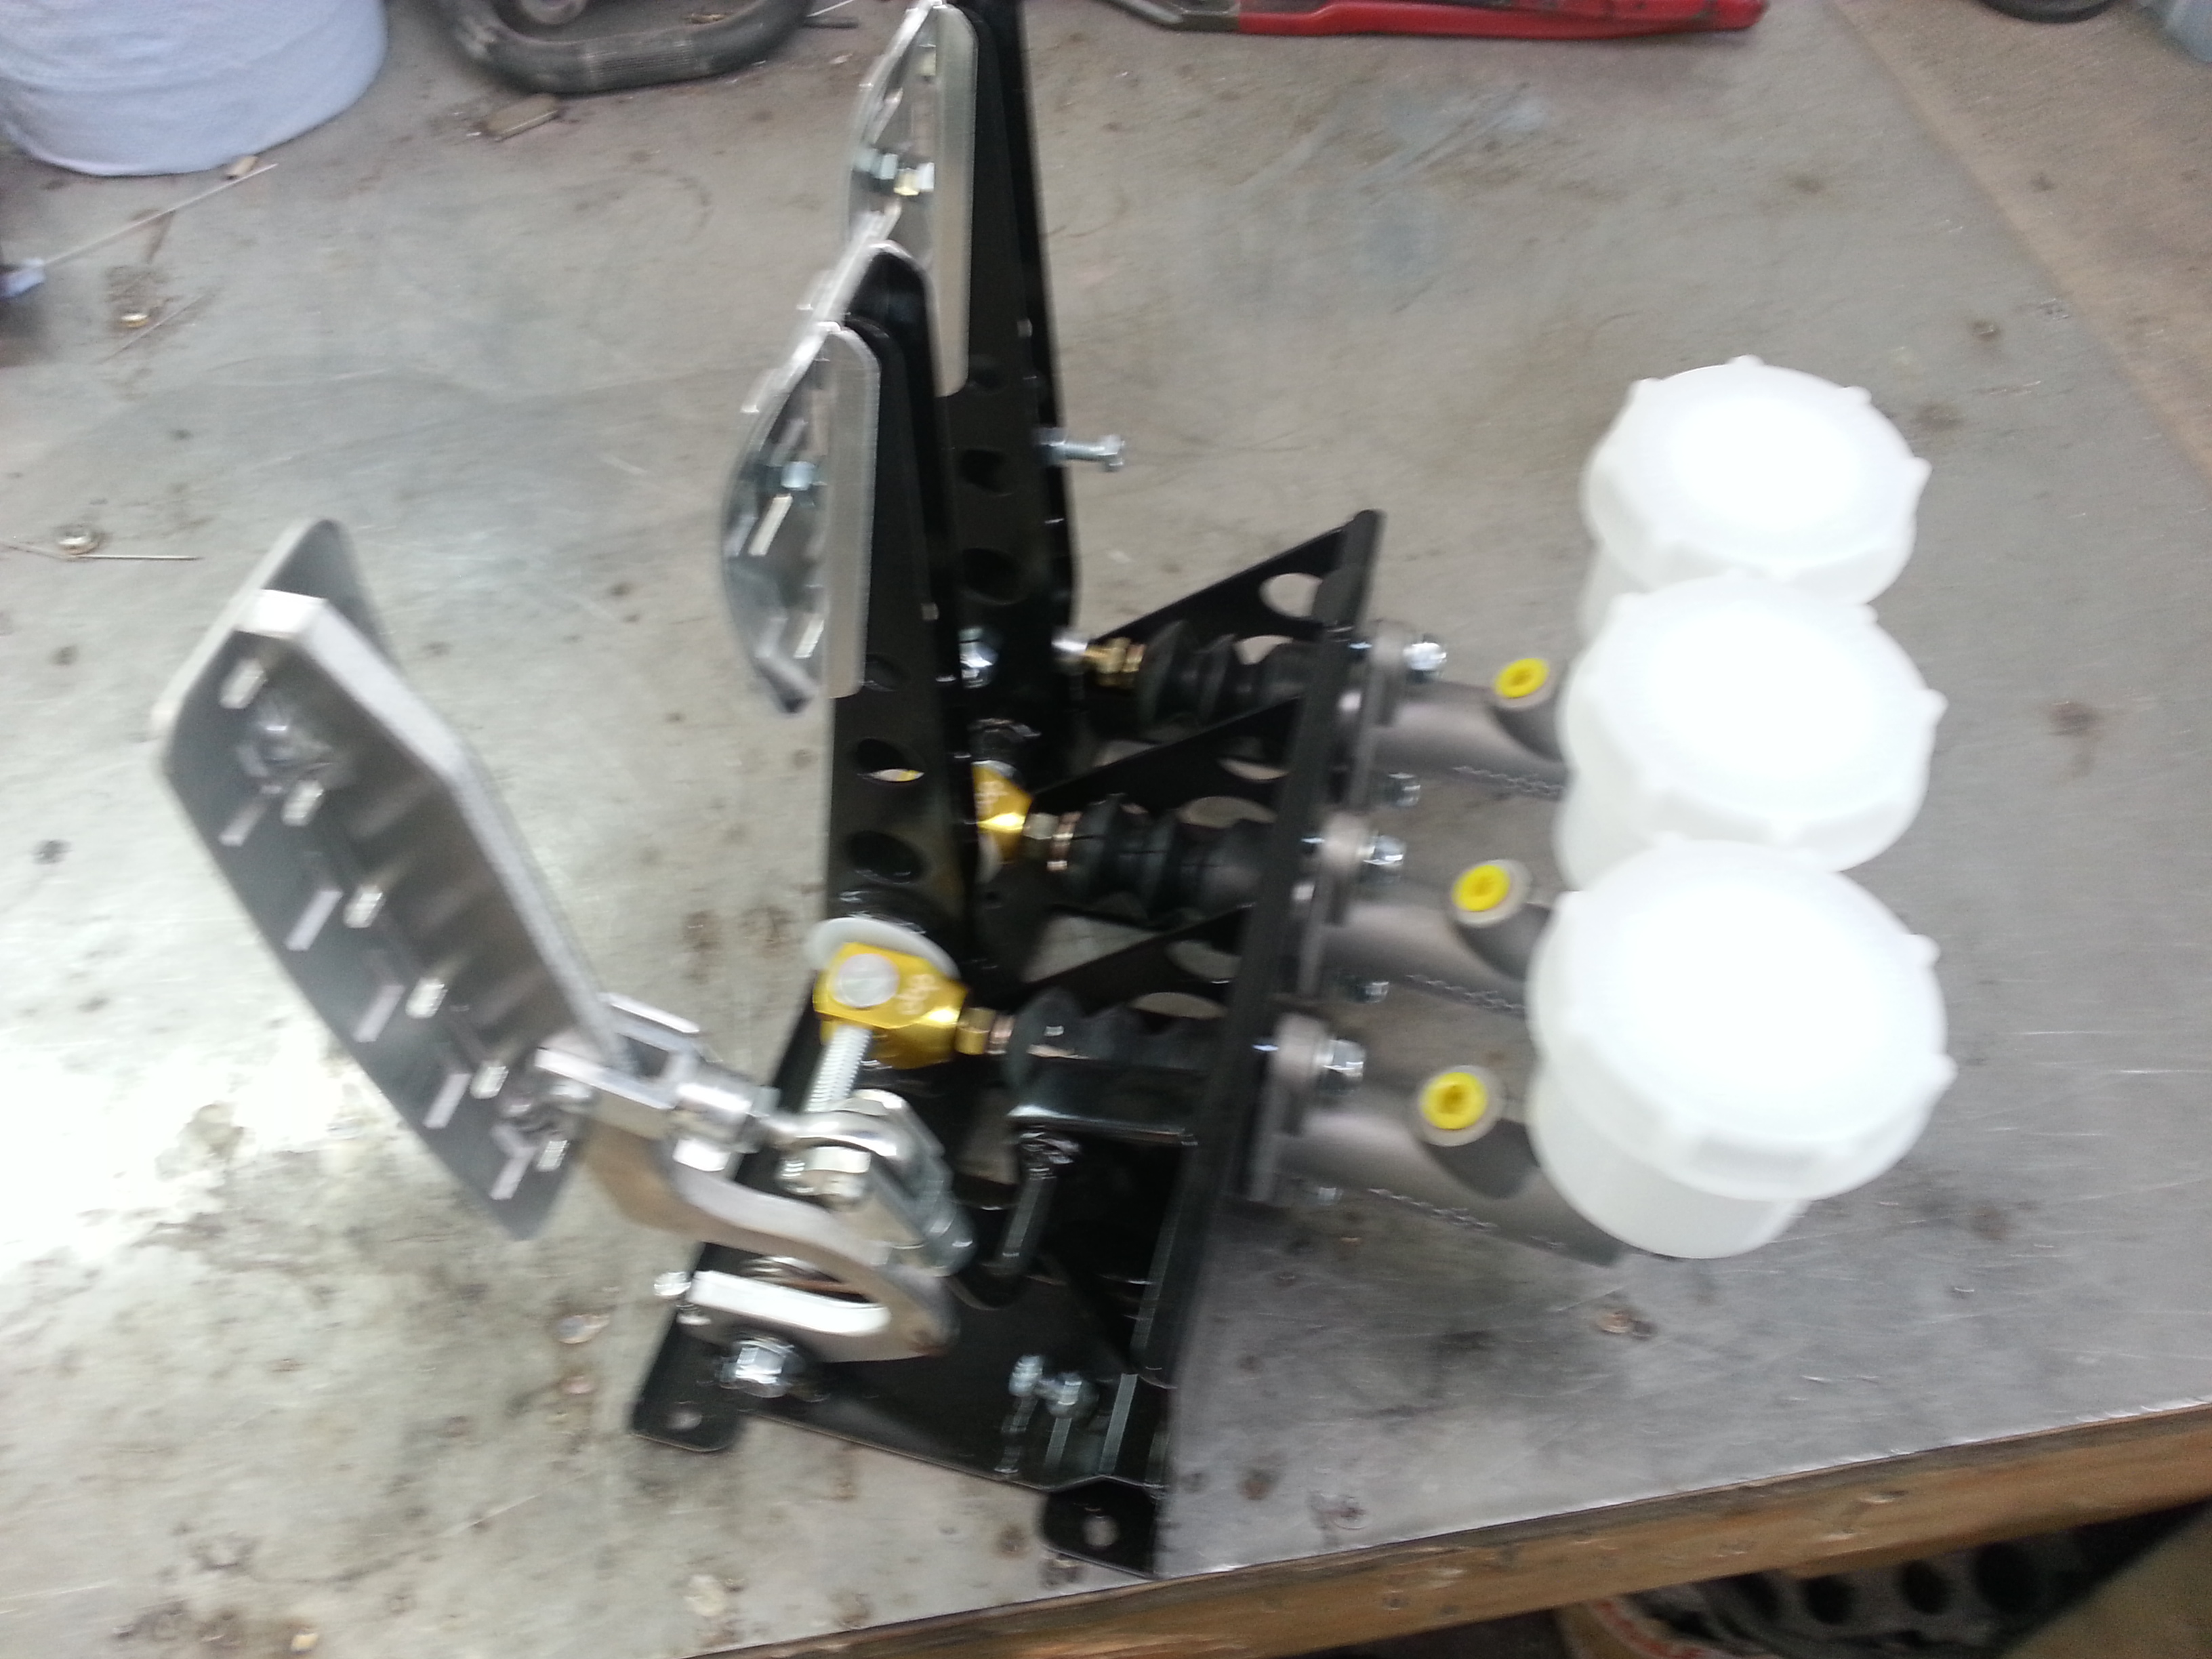
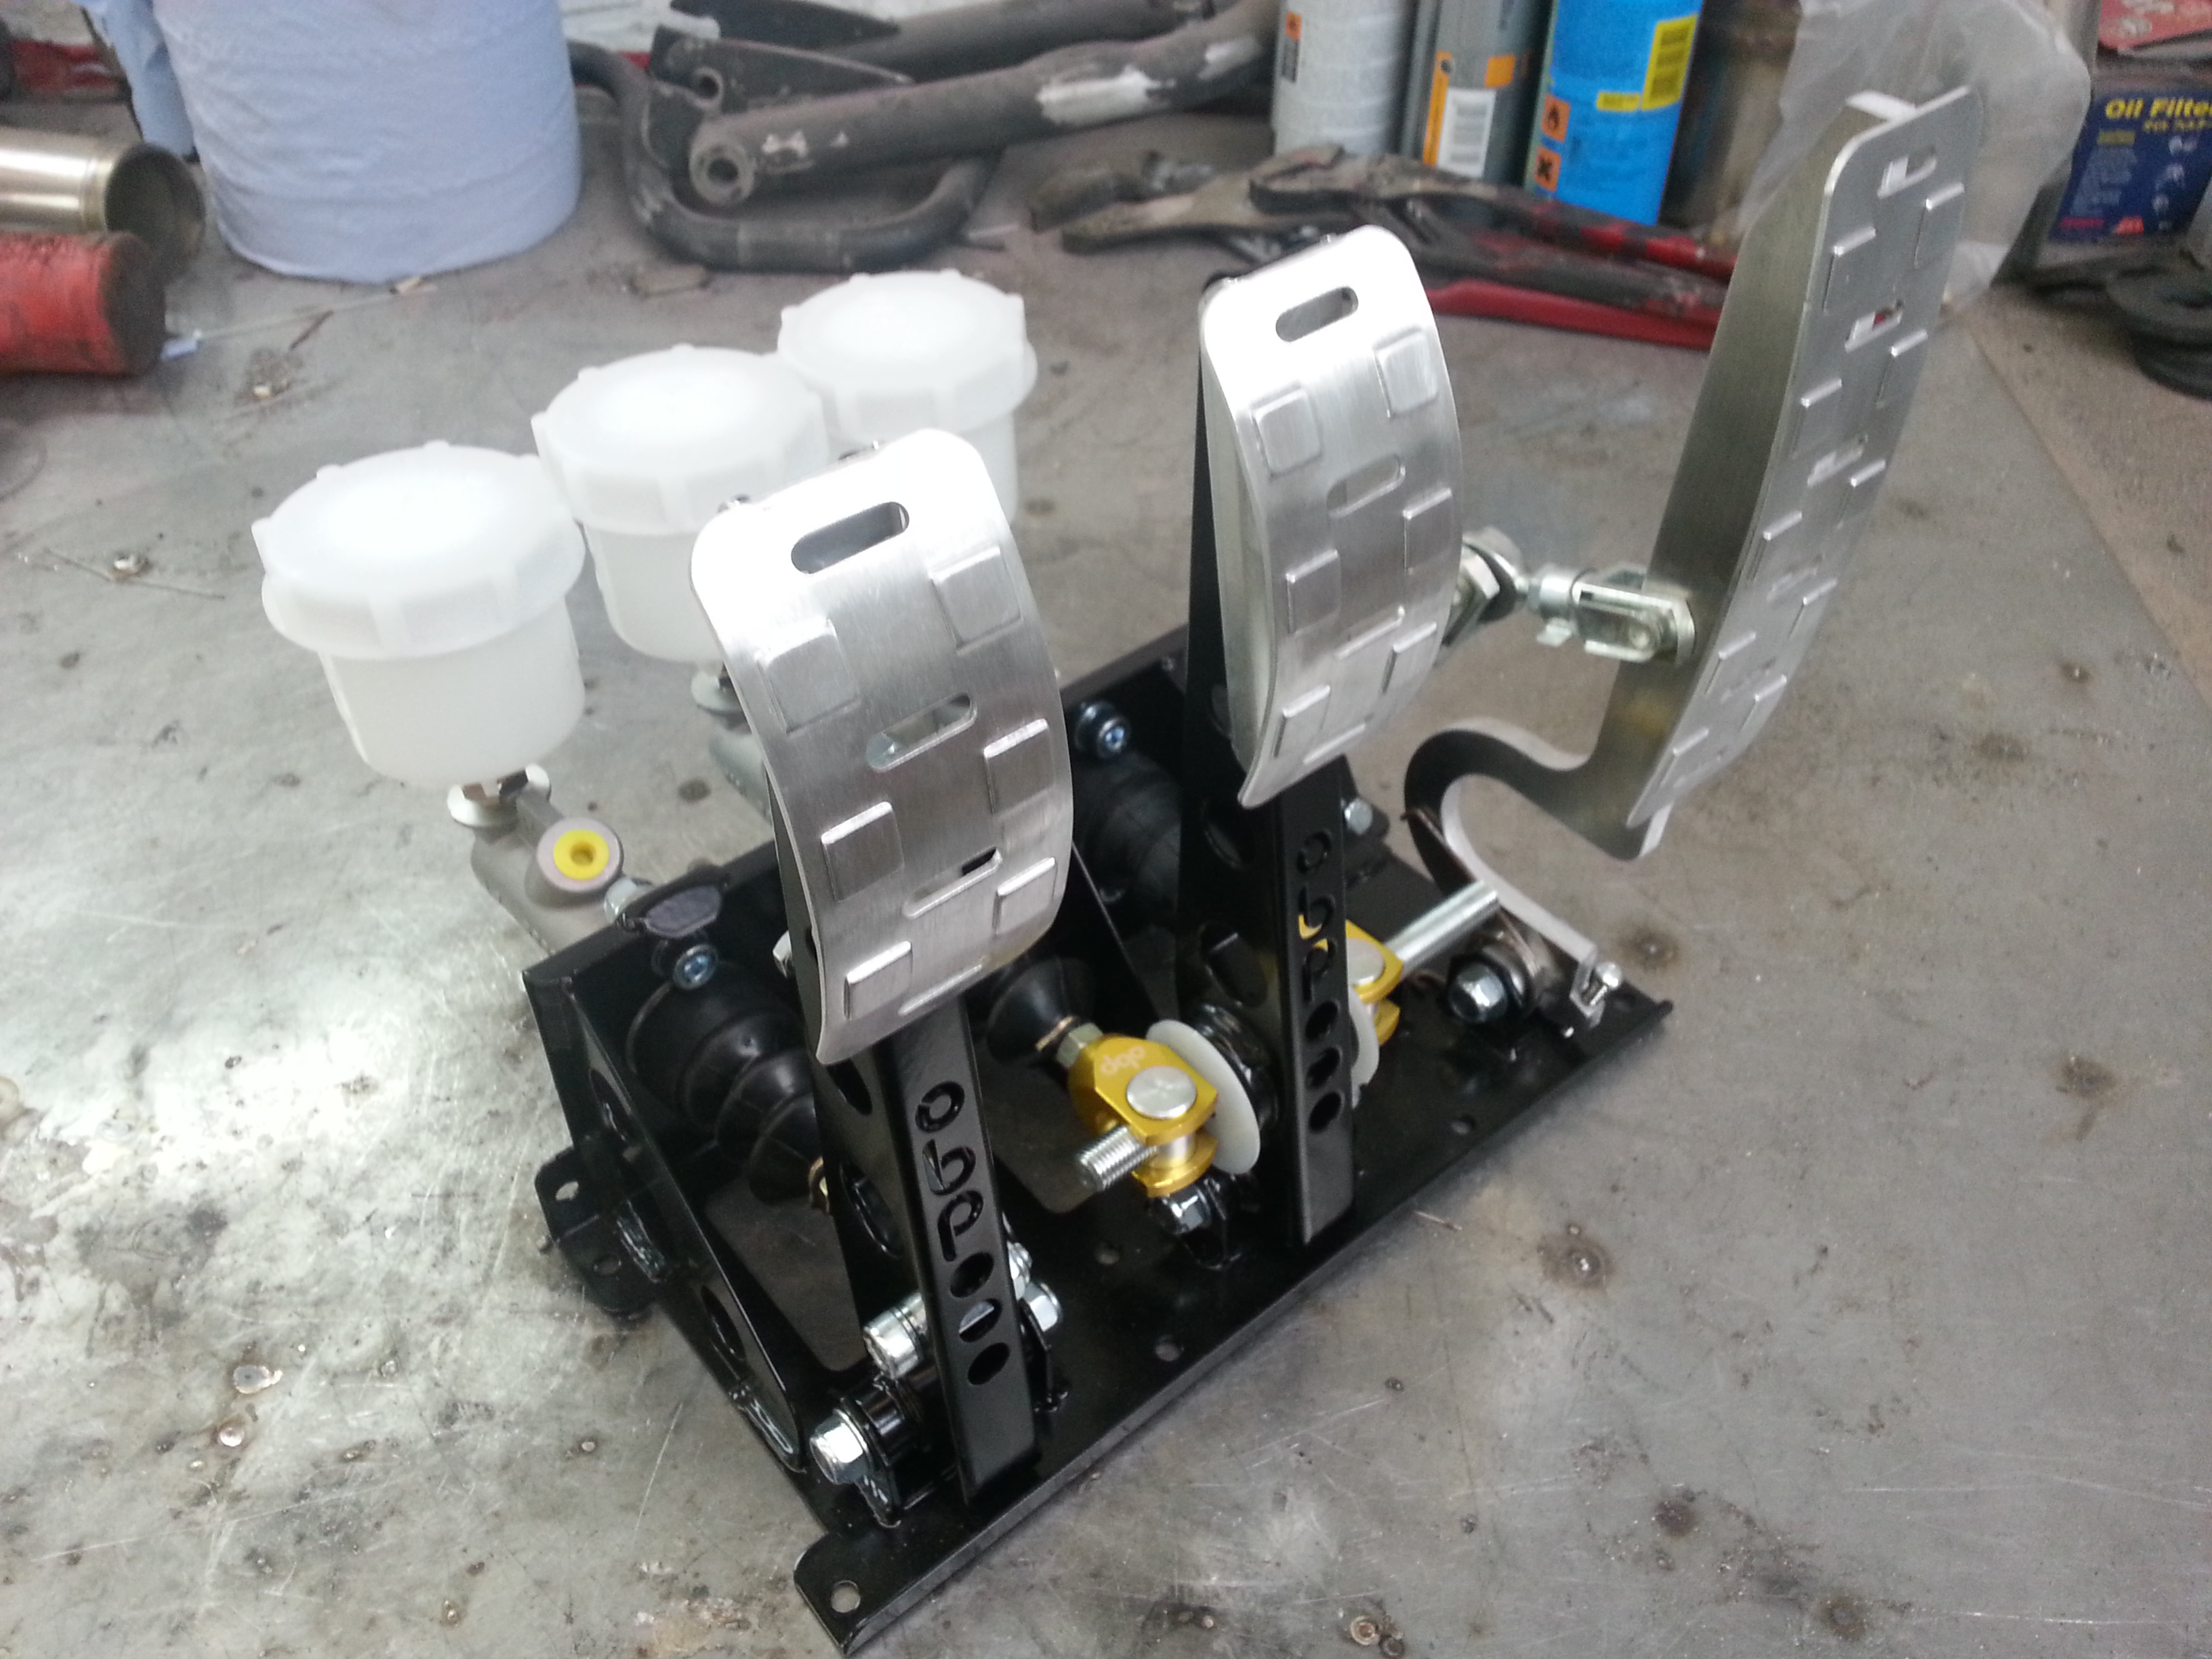
Got a few more bits done a few more items checked off the list of things left to do. Starter motor back on, Sytec fuel filter now in, pump in, Pressure reg on, New throttle linkage on. Changed the trumpets on the inlet out for longer ones. The pain in the *** is the don't do the size / lengh in the items i need so a little cut and shut is needed as i had to do last time!
... slowly slowly catchy monkey.
The Cut
Tacked up in place.

The pressure reg, Just waitng on fuel lines and fittings which i should have tomorrow
The linkage
Painted trumpets and all fitted ready for duty.
... slowly slowly catchy monkey.
The Cut
Tacked up in place.
The pressure reg, Just waitng on fuel lines and fittings which i should have tomorrow
The linkage
Painted trumpets and all fitted ready for duty.
Thread Starter
Senior Member
Joined: Feb 2007
Posts: 368
Likes: 0
From: Surrey, England
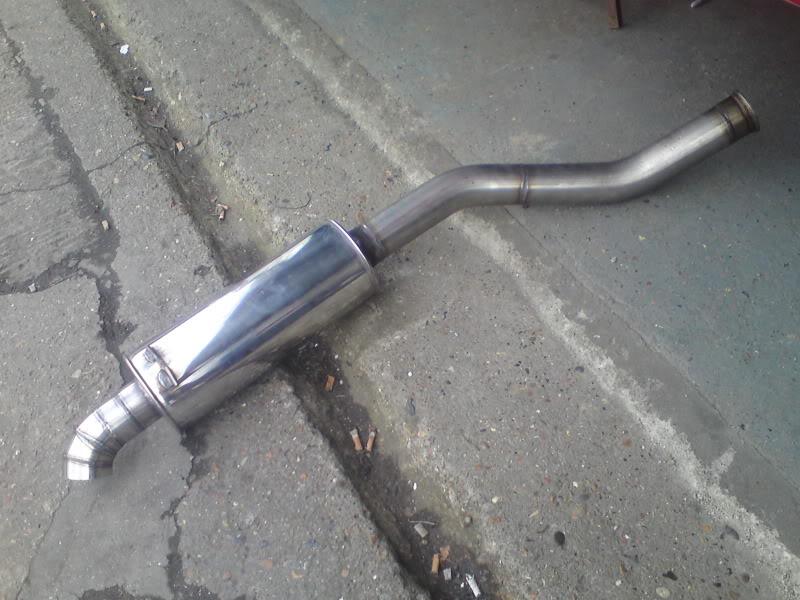
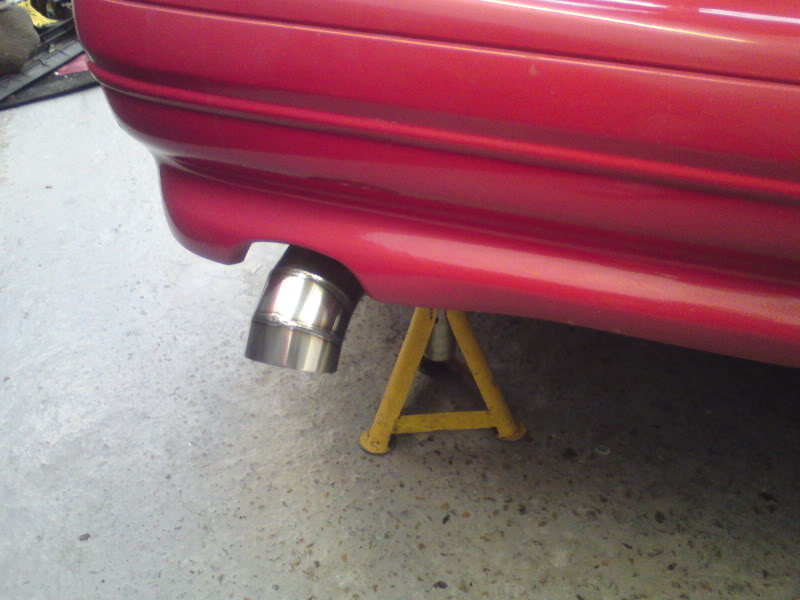
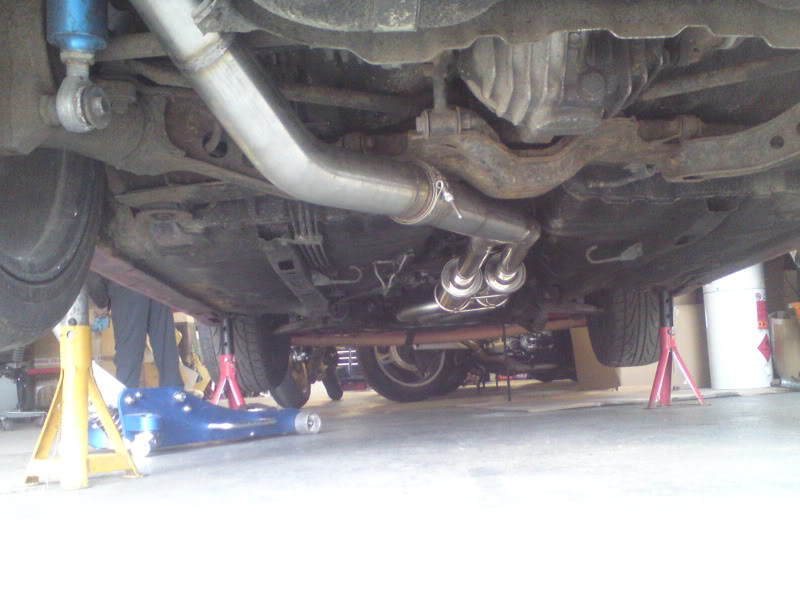
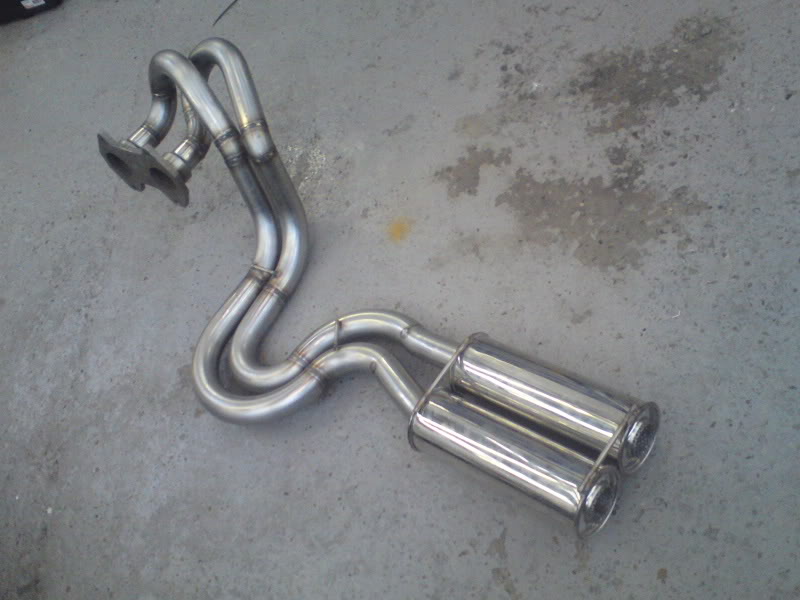
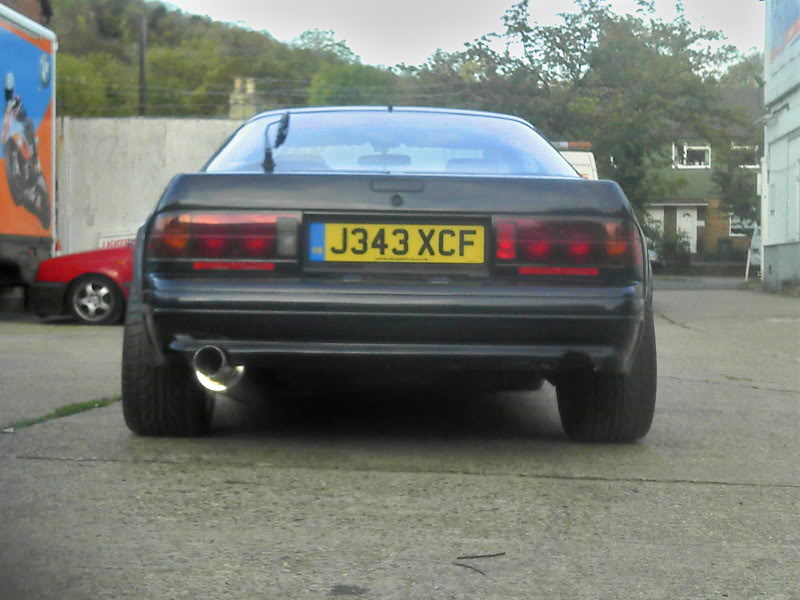
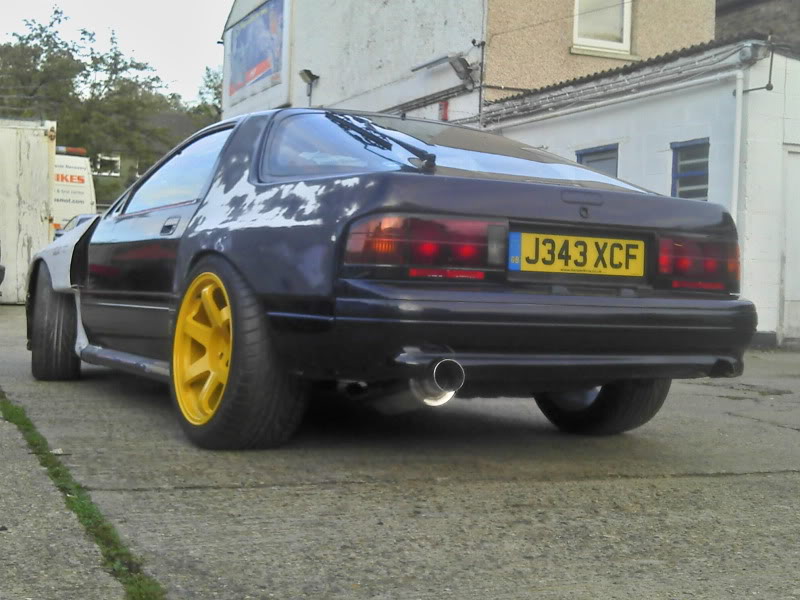
New rear section for the car. The dual 2.5" system was too big and ment for shody responce. Just finished fabbing up the new single exit muffler. which now goes from dual 2" long primary manifold into 2.5" collector then its coned up to 3" for the rear section. Job done. Looks way more aggressive too so just waht i wanted really.

Thread Starter
Senior Member
Joined: Feb 2007
Posts: 368
Likes: 0
From: Surrey, England
All of this so far it ply. Easiest medium to mock this kind of thing up in before doing it in ally.
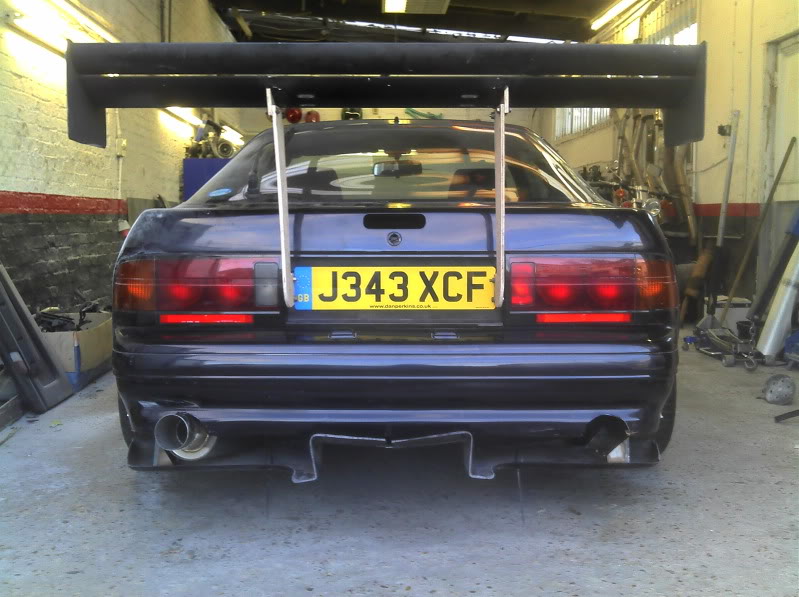
Wing mounts placed either side of the number plate:
All the peices fitted together with the wing balanced on top:
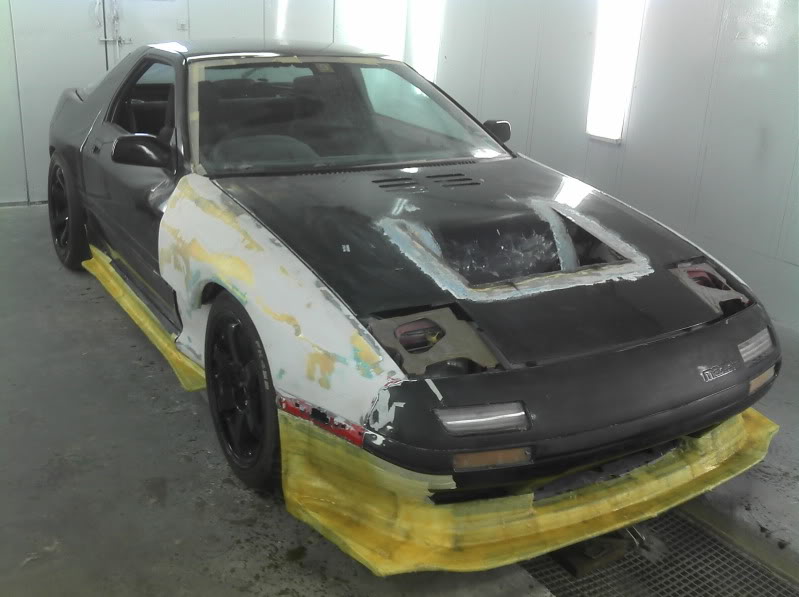
Just a few other s of the body and skirts as they have progessed. Front arches are now 100% ready for paint. Skirts still a way off yet. Not 100% on the diffuser yet. May make my own to flow with the rest of the car better.
Wing mounts placed either side of the number plate:
All the peices fitted together with the wing balanced on top:
Just a few other s of the body and skirts as they have progessed. Front arches are now 100% ready for paint. Skirts still a way off yet. Not 100% on the diffuser yet. May make my own to flow with the rest of the car better.
Thread Starter
Senior Member
Joined: Feb 2007
Posts: 368
Likes: 0
From: Surrey, England
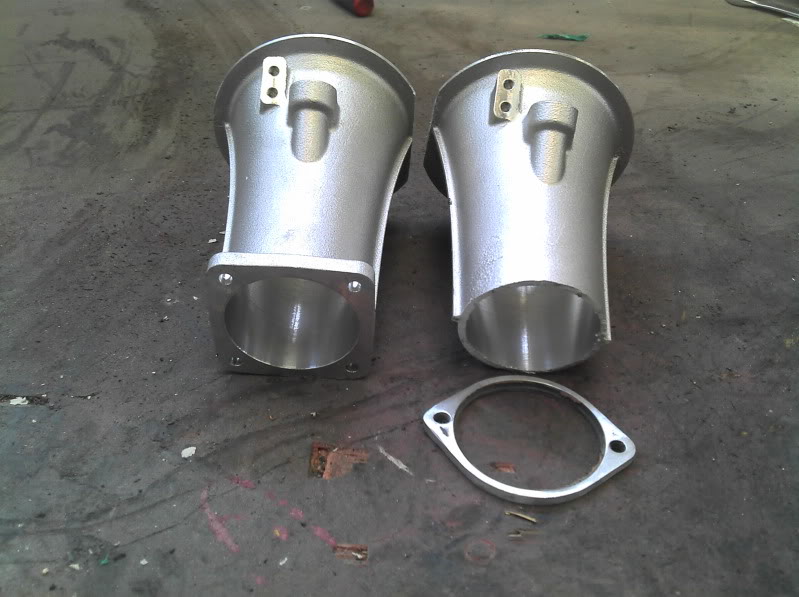
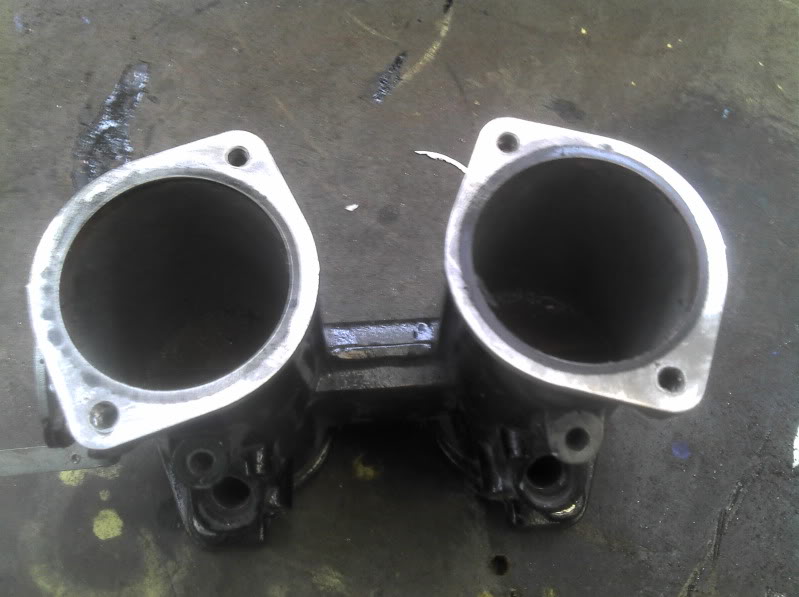
Had a little play with the intake. Waiting on a new flange to turn up to finish it off but very obviuos the difference! I wanted to make the inlet shorter to match the exhaust set up.
Prior length - 410mm About 16"
new length - 250mm about 9"
Shortening variuos bits led to some matching up issues that would have caused sets in the throttle bodies and pipes. so this happened:
Chopped air horns
With the tapper and the cut is let a far larger exit on the air horn so there would have been a step on the way in. Not good for the air/fuel flow so marked it all up and honed it out so the from the tip of the air horn down to the butterfly's in the throttle body is a nice grandual tapper. Nice and smooth.
The step
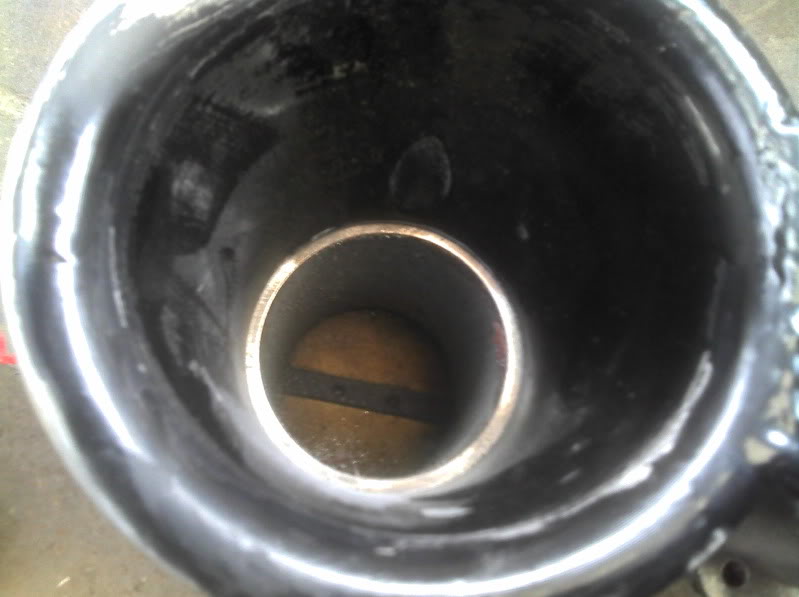
You can see the difference in the black rings
Honed
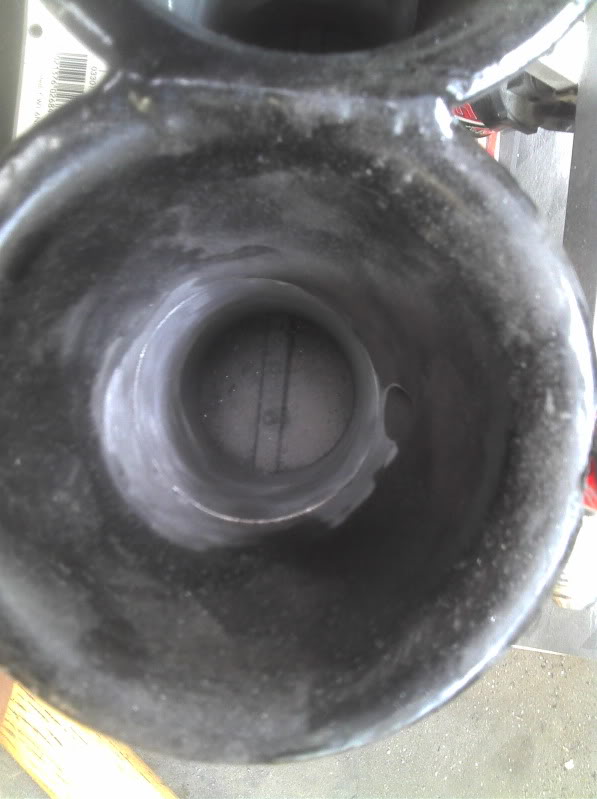
The bodies in new location with the inlet tubes cut too. The top pic is the old and the bottom is the new
BEFORE :
AFTER :
Prior length - 410mm About 16"
new length - 250mm about 9"
Shortening variuos bits led to some matching up issues that would have caused sets in the throttle bodies and pipes. so this happened:
Chopped air horns
With the tapper and the cut is let a far larger exit on the air horn so there would have been a step on the way in. Not good for the air/fuel flow so marked it all up and honed it out so the from the tip of the air horn down to the butterfly's in the throttle body is a nice grandual tapper. Nice and smooth.
The step
You can see the difference in the black rings
Honed
The bodies in new location with the inlet tubes cut too. The top pic is the old and the bottom is the new
BEFORE :
AFTER :
Thread Starter
Senior Member
Joined: Feb 2007
Posts: 368
Likes: 0
From: Surrey, England
ALL CHANGE!
There is a massive issue having a car sitting in the workshop for a long time. You just KEEP changing your mind. Too much time looking at it saying..... What if i do this!!!
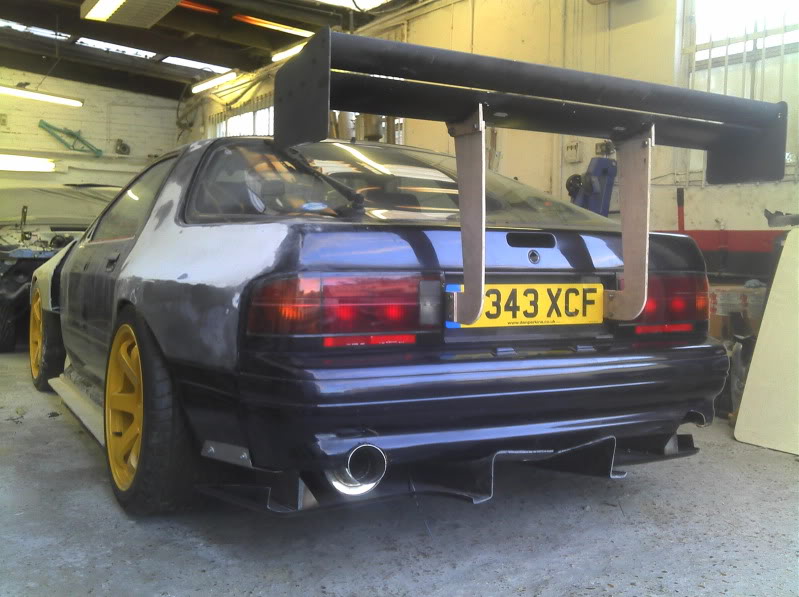
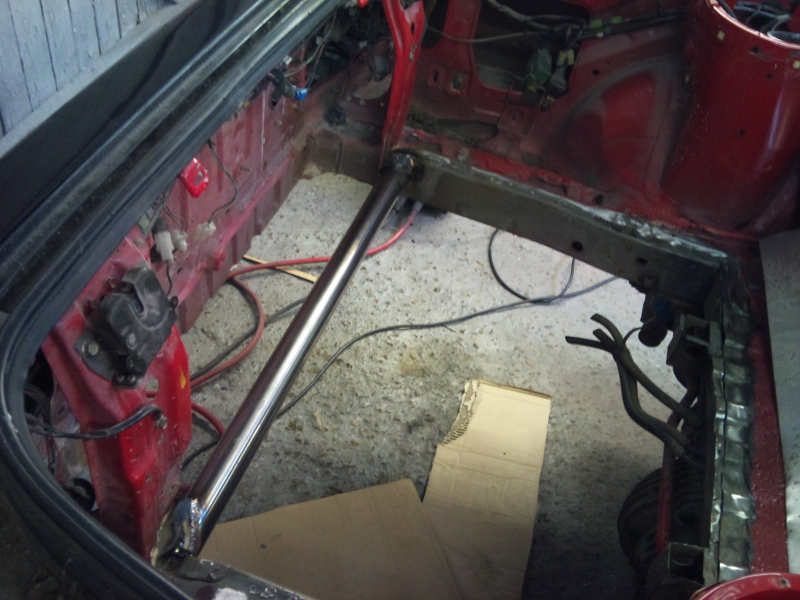
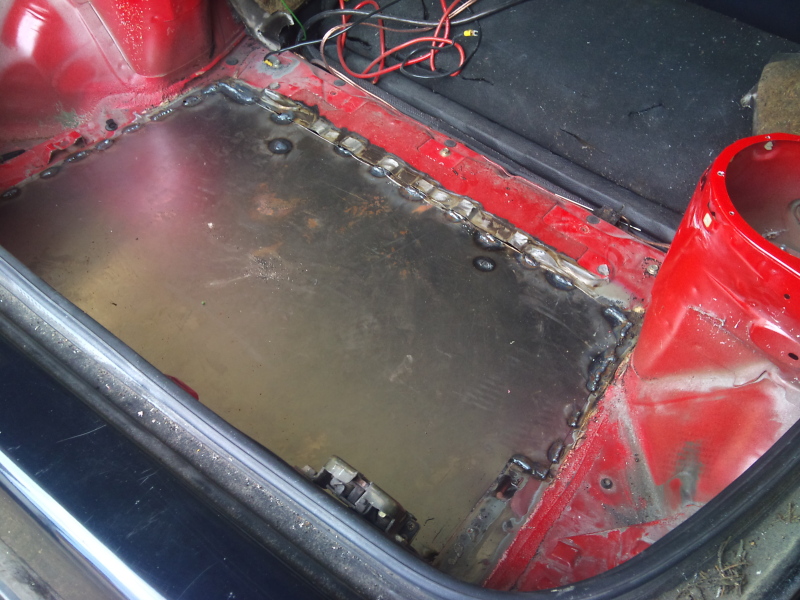
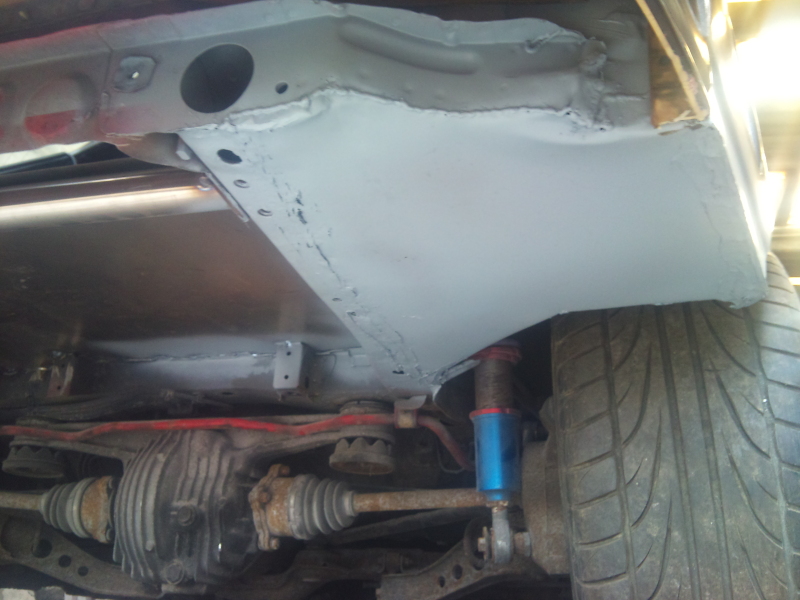
Any way, stock fuel tank dropped, boot floor and some more of the underside cut out and removed. Should counter act the weight in the rear Qtrs. Another potentional exhaust change for areo reasons to stop flow being spoiled on the way out. Customs diffuser to come.
Hopefully the front and body work is on the way so i should see that soon. Front bumper, stacked carnards and splitter. I'll then make an undertray for that!
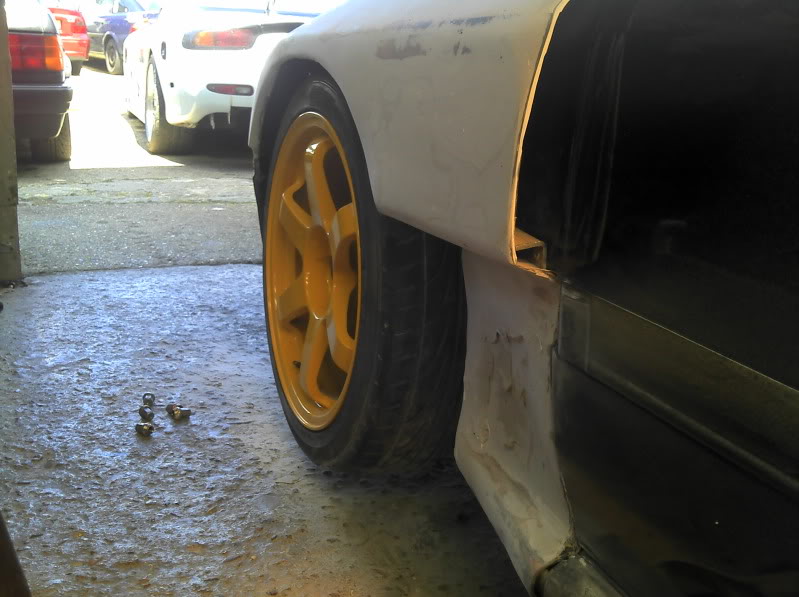
The Rota's are back on as they didn't sell and the MS-01's did. Shame but they went to a good home so thats cool.
Only have a couple of pics and the exhaust ones are an old unit i did years ago but wont be desimilar to the newly fabricated one. Reasons for the change, aero and noise cutting (not so concerned about the last one)
I'm going to keep the single exit rear section so when we eventually get her to a dyno i can compare the two.
Mock up but basically how i'll have it
There is a massive issue having a car sitting in the workshop for a long time. You just KEEP changing your mind. Too much time looking at it saying..... What if i do this!!!
Any way, stock fuel tank dropped, boot floor and some more of the underside cut out and removed. Should counter act the weight in the rear Qtrs. Another potentional exhaust change for areo reasons to stop flow being spoiled on the way out. Customs diffuser to come.
Hopefully the front and body work is on the way so i should see that soon. Front bumper, stacked carnards and splitter. I'll then make an undertray for that!
The Rota's are back on as they didn't sell and the MS-01's did. Shame but they went to a good home so thats cool.
Only have a couple of pics and the exhaust ones are an old unit i did years ago but wont be desimilar to the newly fabricated one. Reasons for the change, aero and noise cutting (not so concerned about the last one)
I'm going to keep the single exit rear section so when we eventually get her to a dyno i can compare the two.
Mock up but basically how i'll have it
Thread Starter
Senior Member
Joined: Feb 2007
Posts: 368
Likes: 0
From: Surrey, England
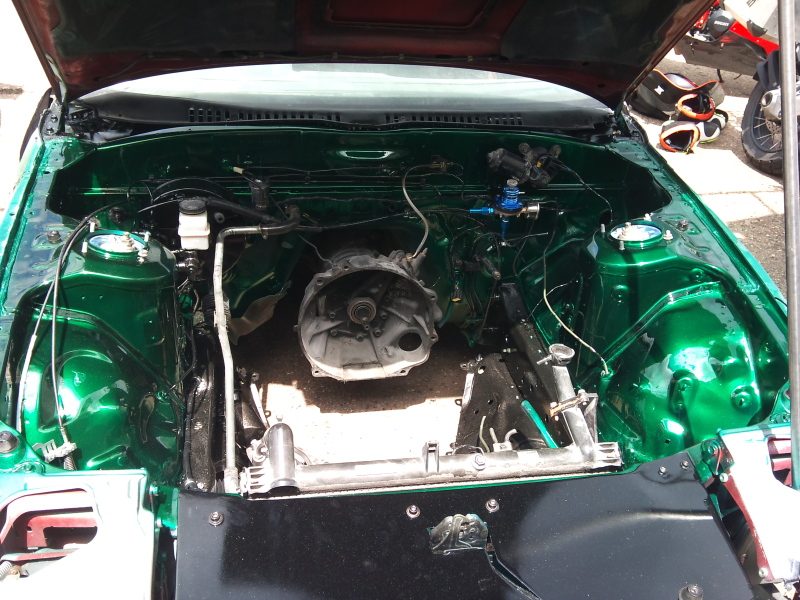
With a few bits awaiting delivery i decided at this point to crack on with the engine bay as the motor could then go back in.
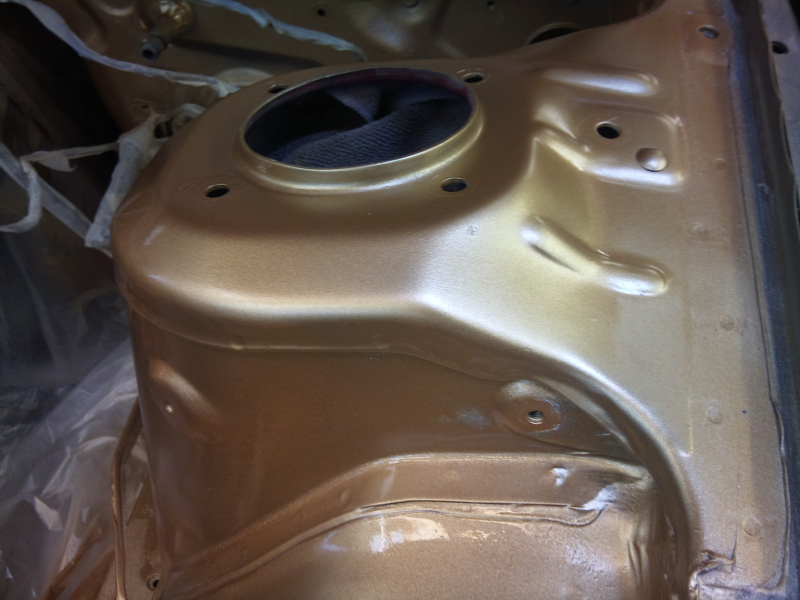
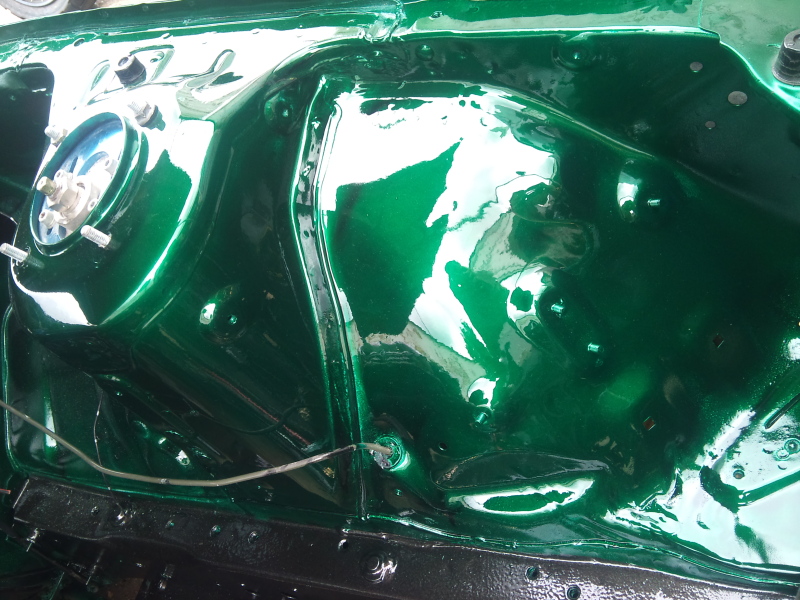
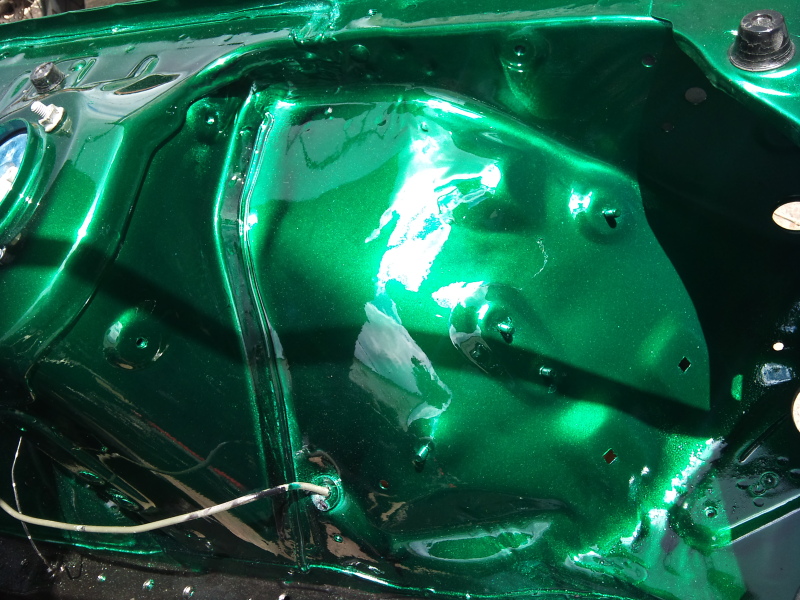
So first off i striped the original loom right back to bare minimum. Just the light, pop up motors and wiper looms survived. The ECU loom has to be re built as the ECU is now in the rear of the car with the fuses/relays and battery. once chopped wrapped and sorted i could get on with a very quick once over of the engine bay in my lovely green.
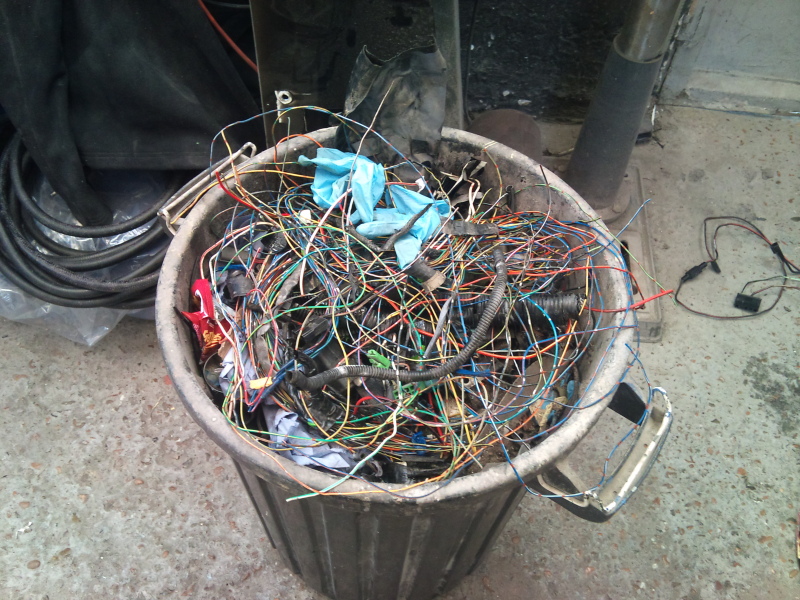
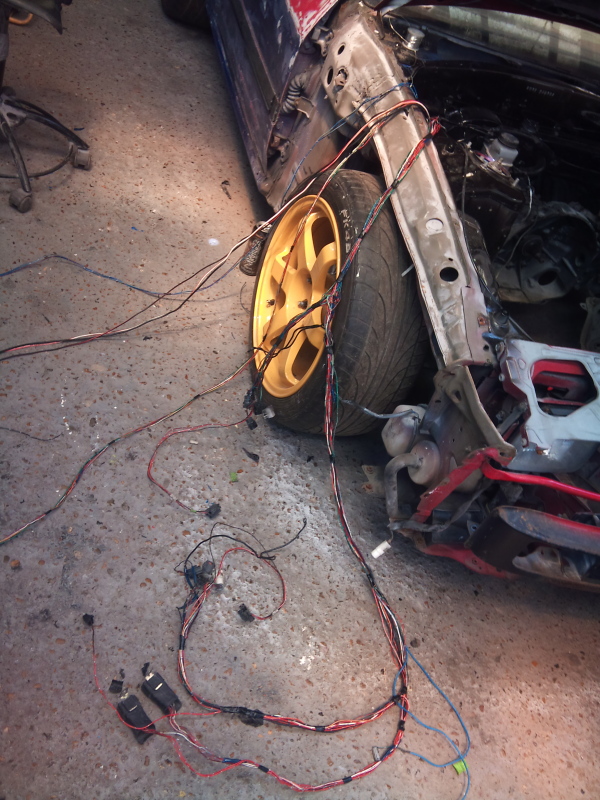
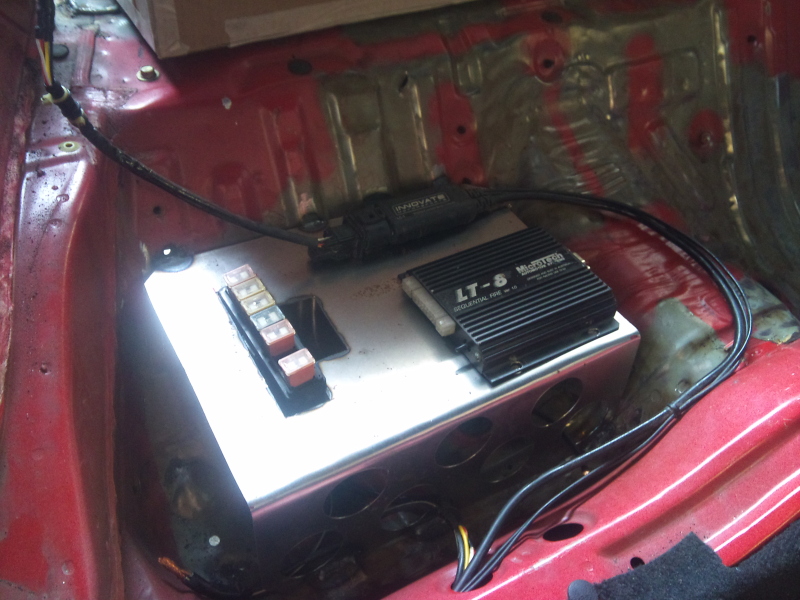
So first off i striped the original loom right back to bare minimum. Just the light, pop up motors and wiper looms survived. The ECU loom has to be re built as the ECU is now in the rear of the car with the fuses/relays and battery. once chopped wrapped and sorted i could get on with a very quick once over of the engine bay in my lovely green.

Thread Starter
Senior Member
Joined: Feb 2007
Posts: 368
Likes: 0
From: Surrey, England
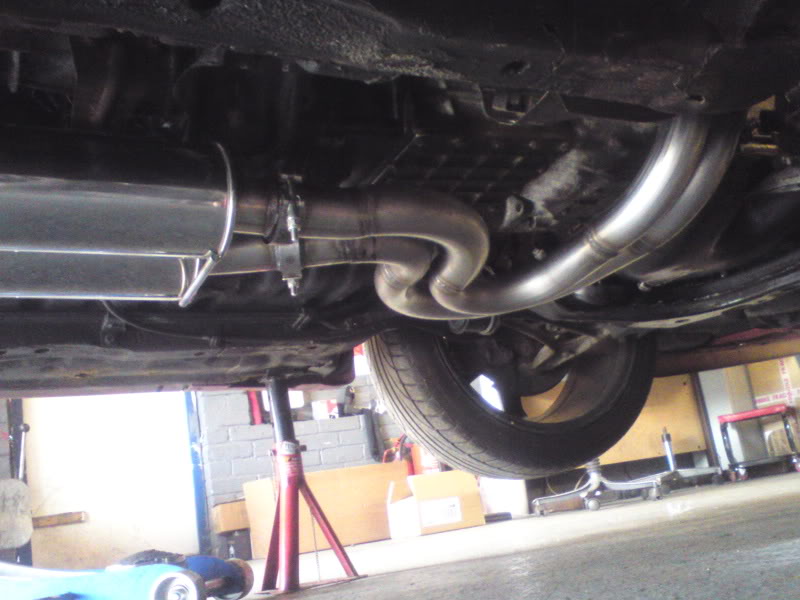
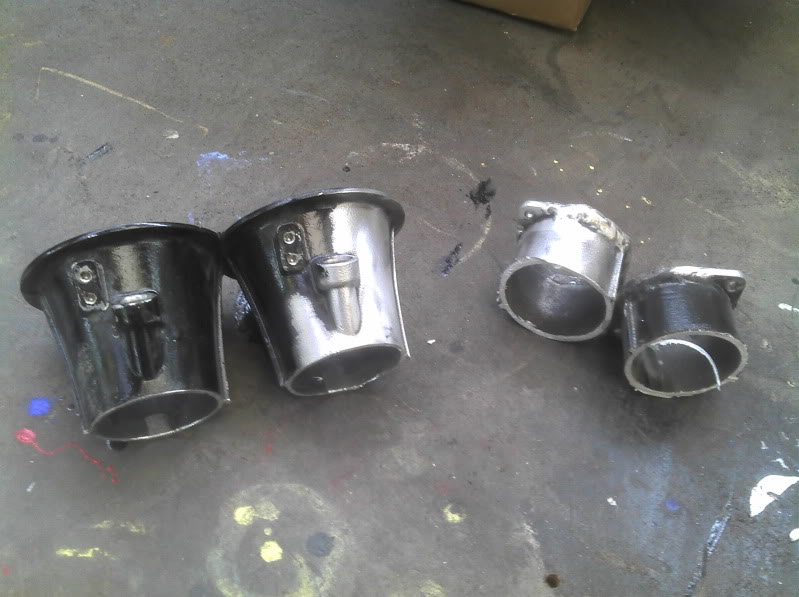
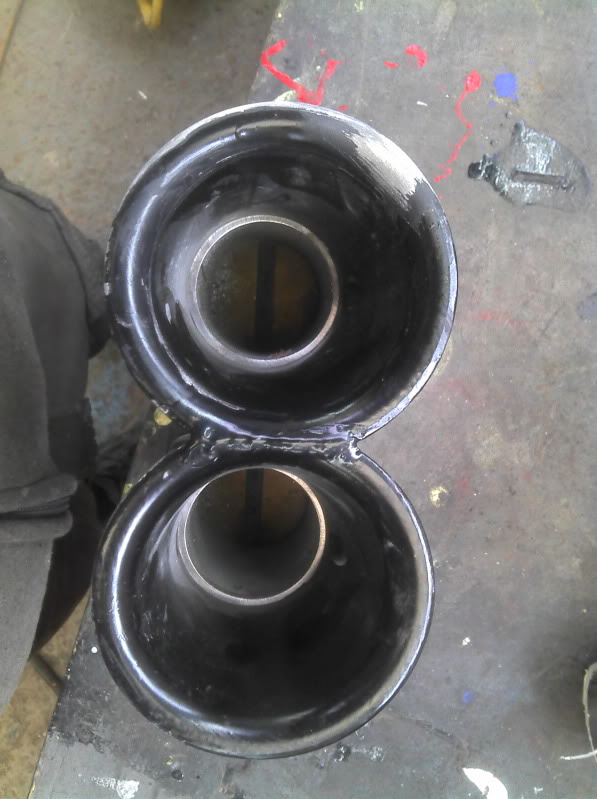
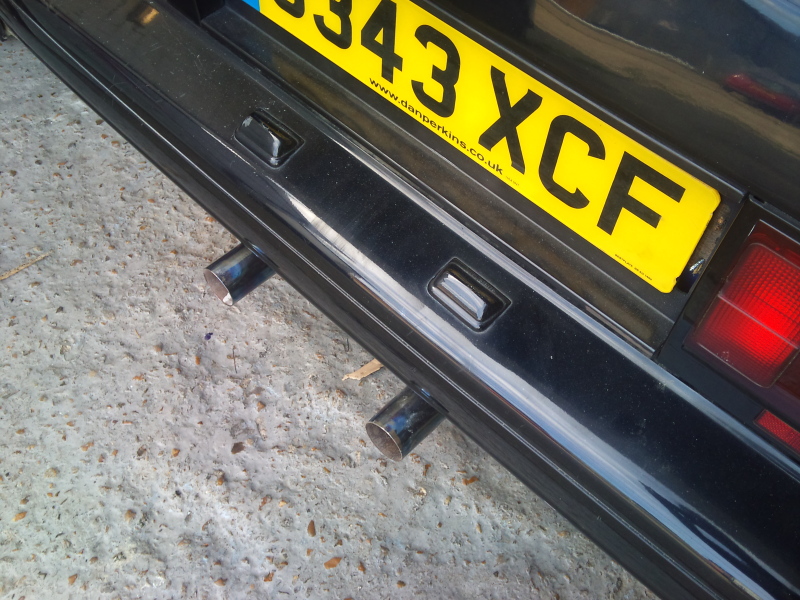
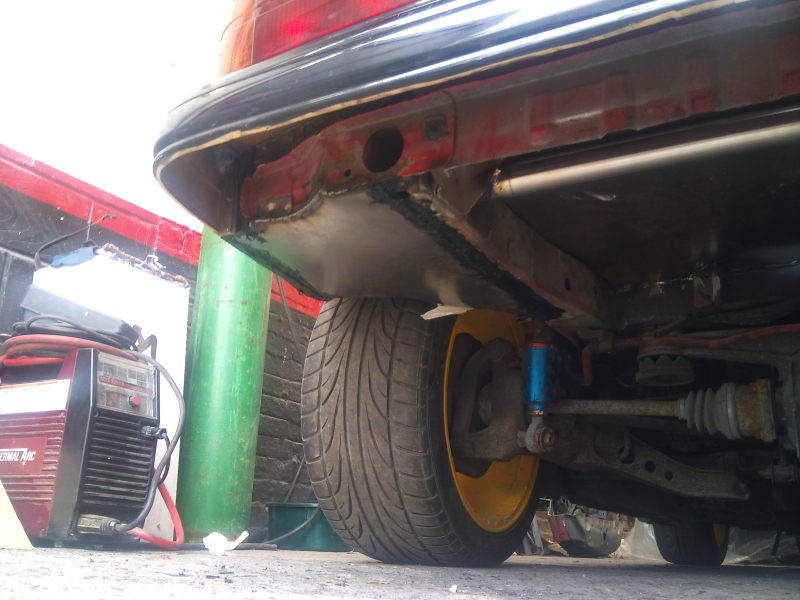
Righty then, did a fraction more on the exhaust this morning, got it all tacked up. Will havr to weld it up during the week at some point!
This will be known as the road system. Twin box's dual 2 1/4" pipes. There will be another race style system too which will be single 3" with one box.
The split
This will be known as the road system. Twin box's dual 2 1/4" pipes. There will be another race style system too which will be single 3" with one box.
The split
Thread Starter
Senior Member
Joined: Feb 2007
Posts: 368
Likes: 0
From: Surrey, England
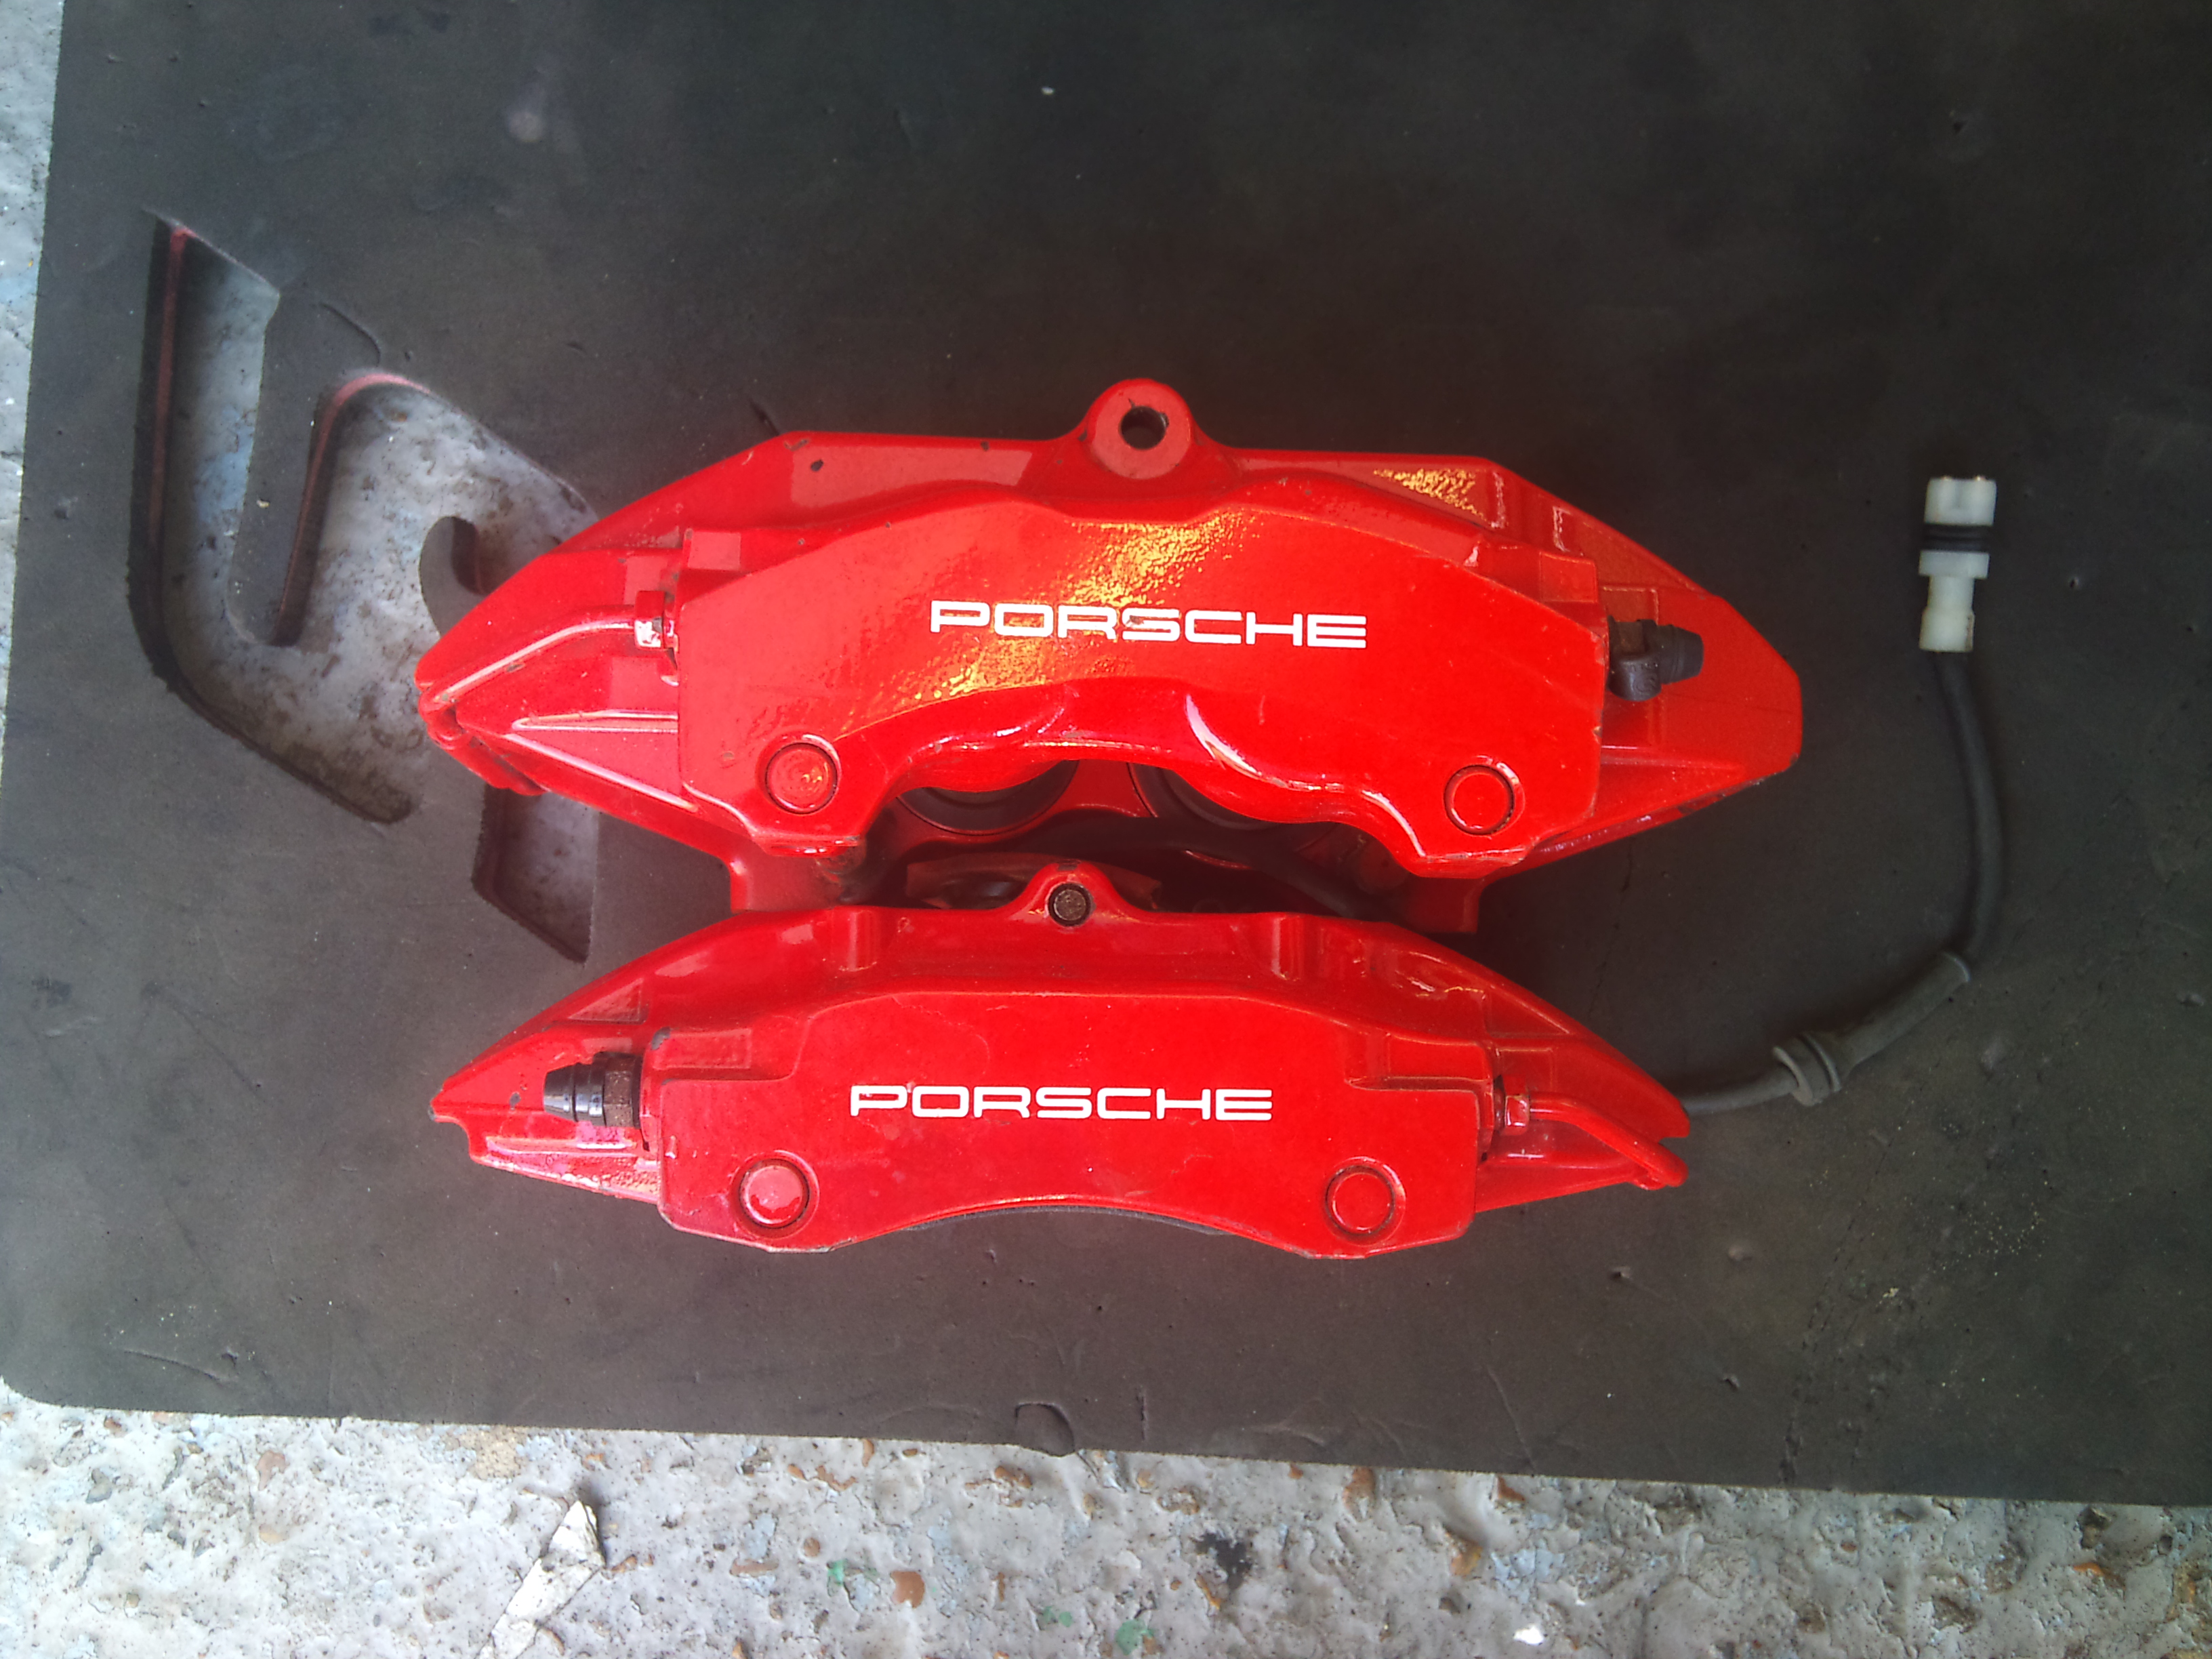
Well i managed to find a set of calipers through a top dude that should just about do the trick. You can see in the picture there are 2 of calpiers both porsche items. The small of the pair is commonly found on things like the evo's and scoob's. The larger ones are mine and are from the porsche turbo range. Bigger pistons and larger pads. I'll marry these up to a set of 2 peice brembo rotors in the future.
Righty now. The bremos. I'm helping a chap with S62 V8 E30 at the moment so took advantage of the brake discs he's using (M3 CSL) to come to conculsions about what size i'm going to be with the Brembos. These are 345mm x 27mm. The pad sweep is perfect but i think i can get away with a 345mm x 30mm set up. Which brembo conviently do a 2 peice set up. So thats just super. Here is the brembos with the CSL dics.
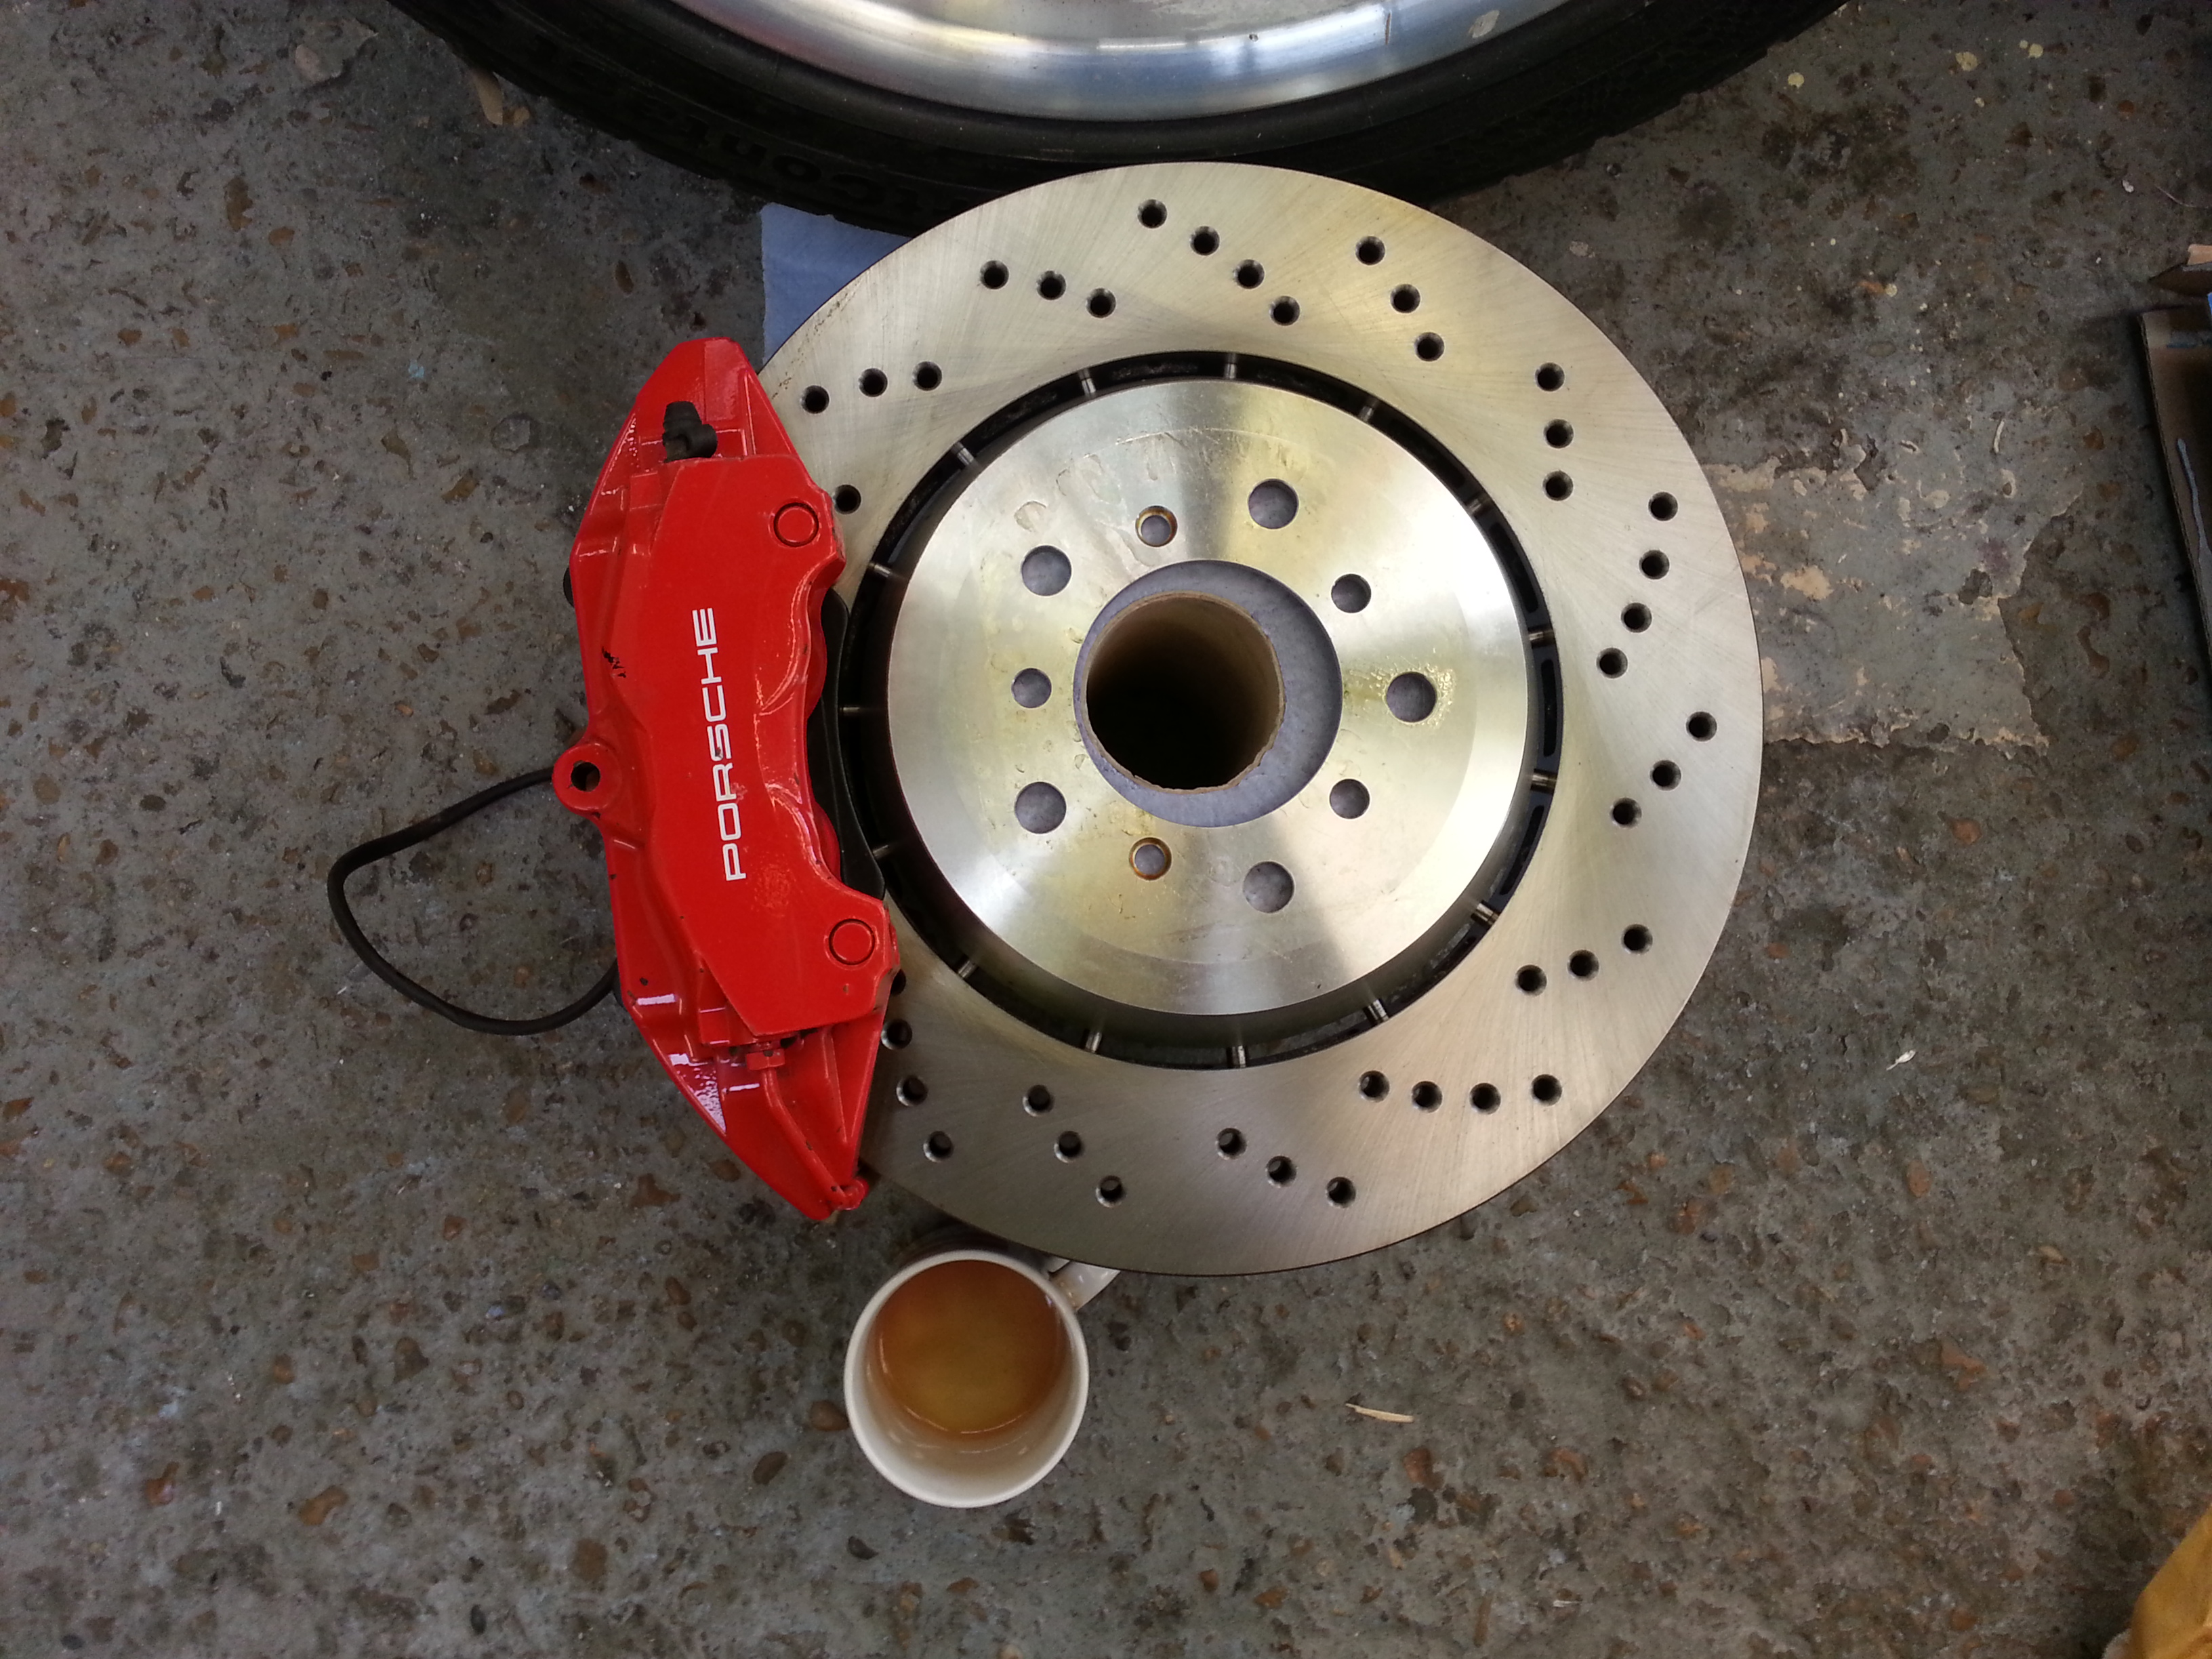
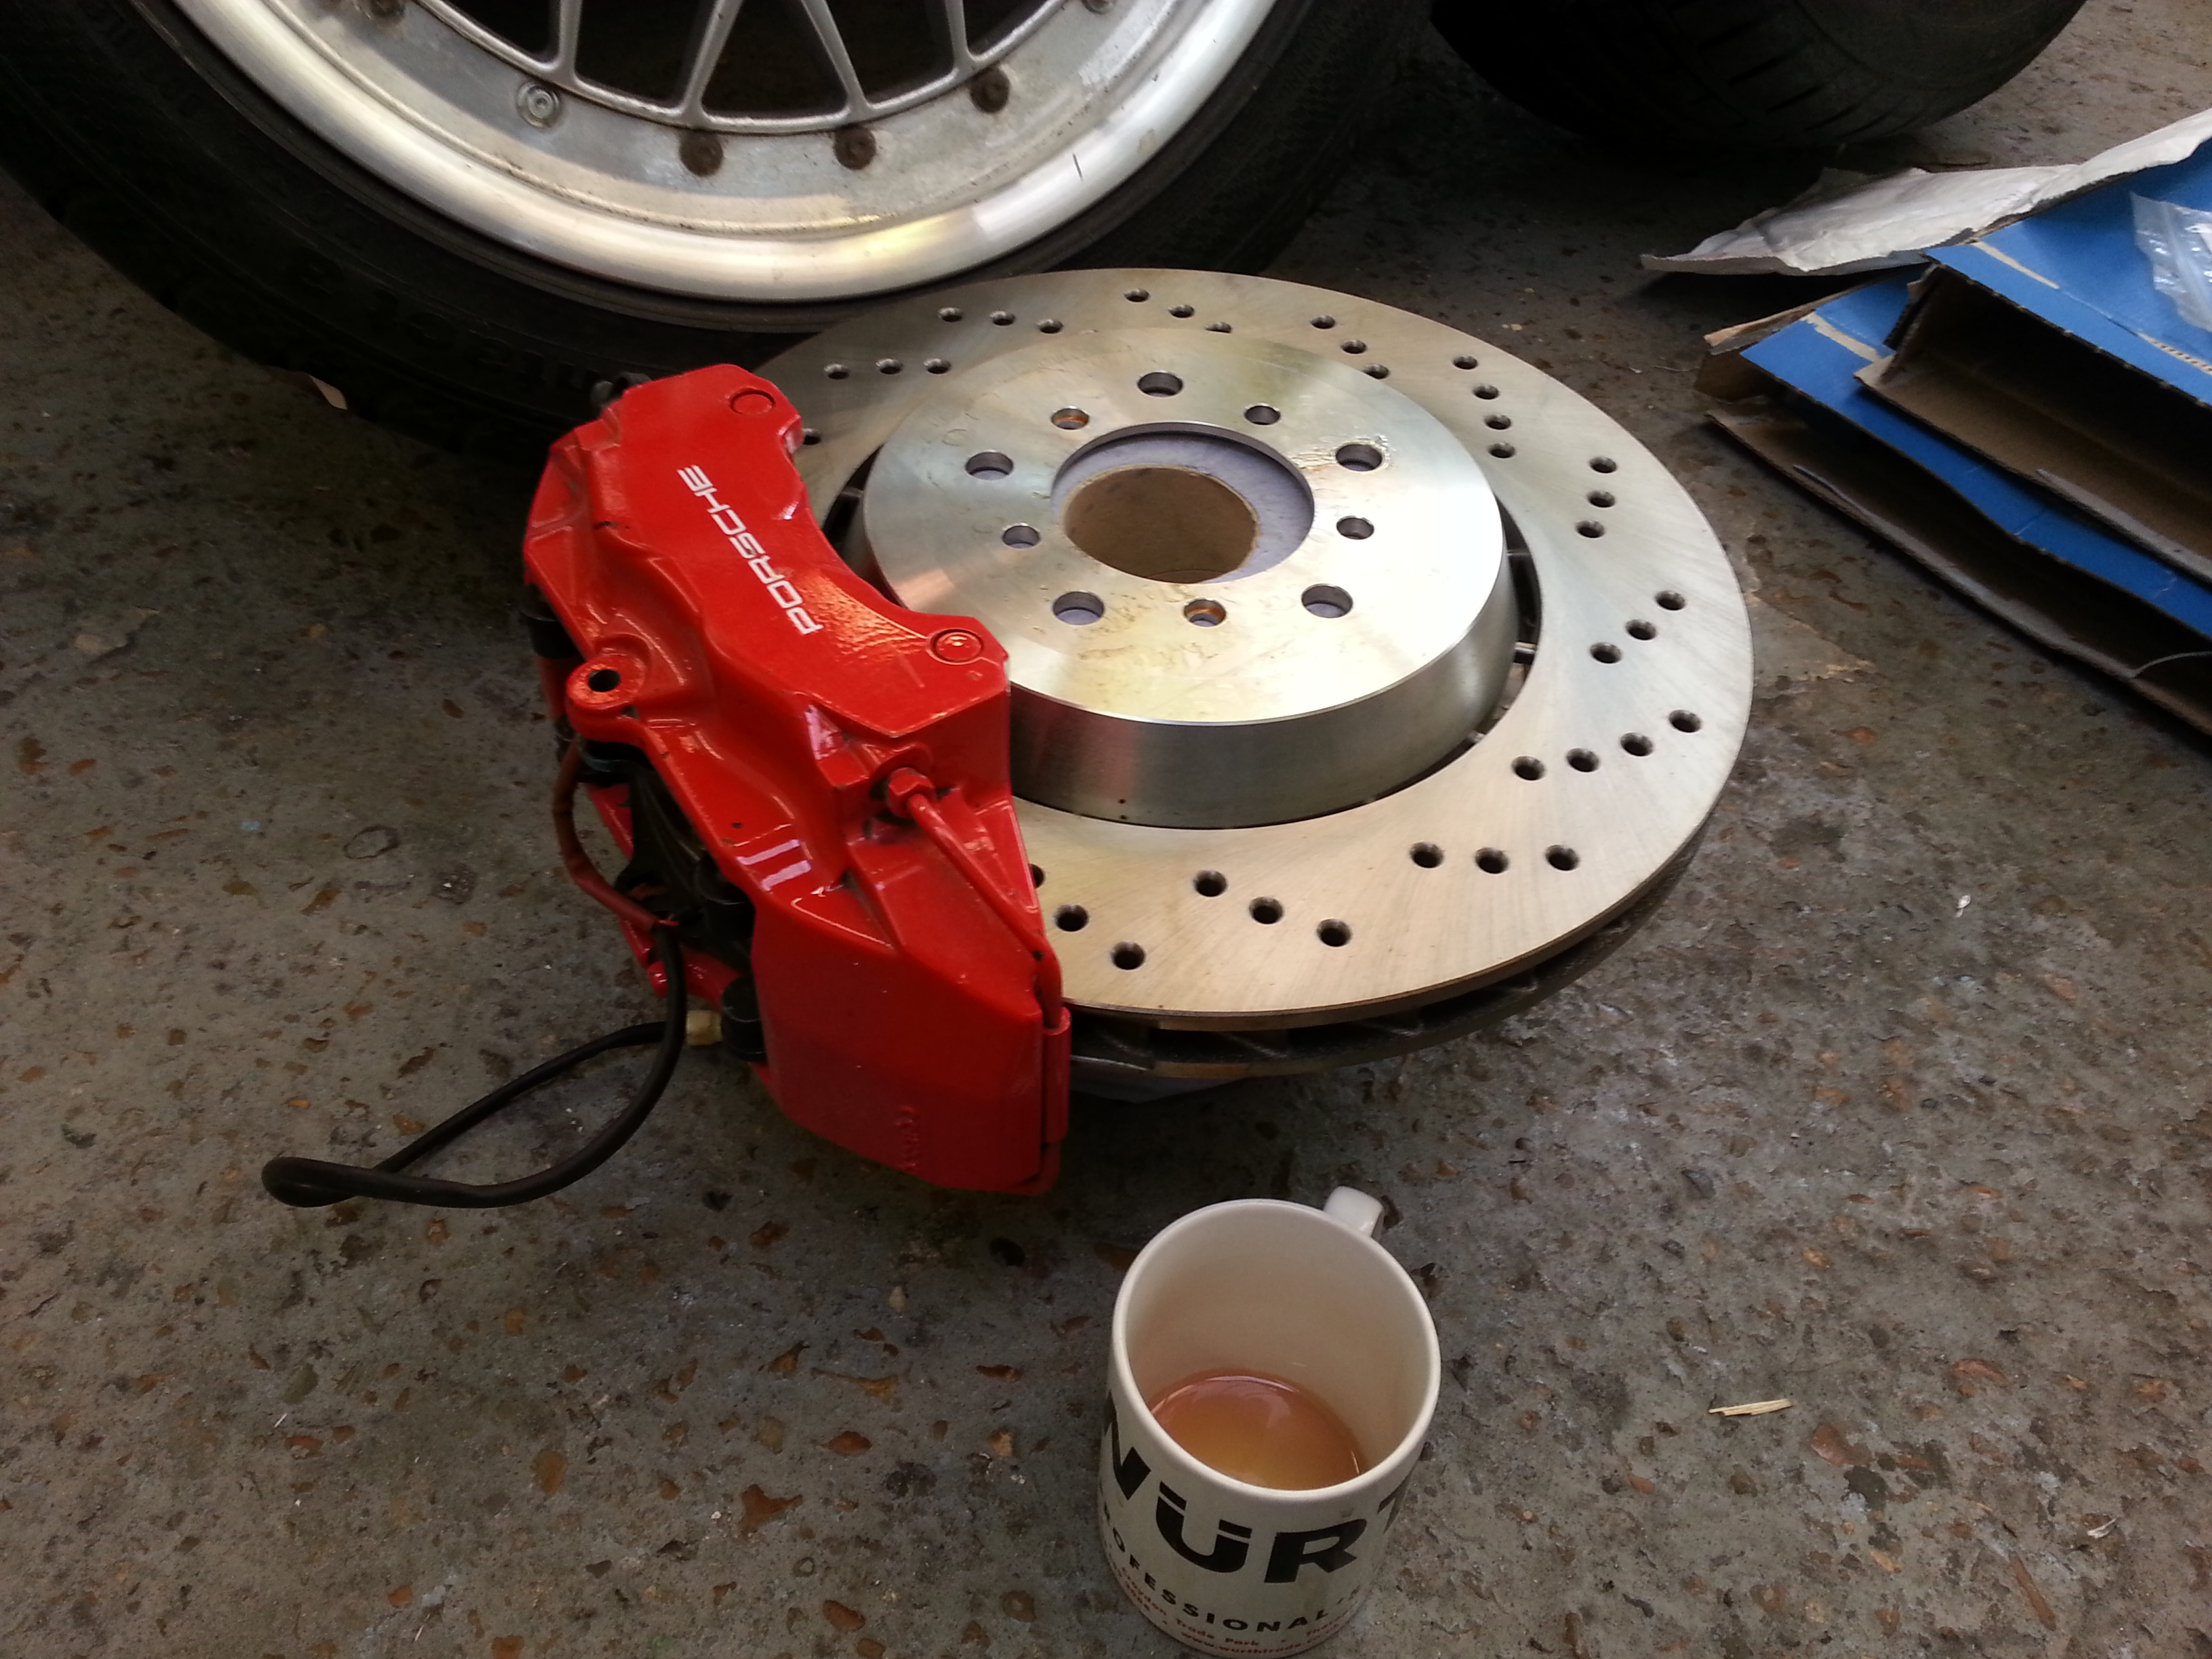
Righty now. The bremos. I'm helping a chap with S62 V8 E30 at the moment so took advantage of the brake discs he's using (M3 CSL) to come to conculsions about what size i'm going to be with the Brembos. These are 345mm x 27mm. The pad sweep is perfect but i think i can get away with a 345mm x 30mm set up. Which brembo conviently do a 2 peice set up. So thats just super. Here is the brembos with the CSL dics.
Thread Starter
Senior Member
Joined: Feb 2007
Posts: 368
Likes: 0
From: Surrey, England
Was going to start with the fuel cell but decided to get the swirl pot done first. Its a 1.5 (ish) liter pot. Was just going to buy one but.....

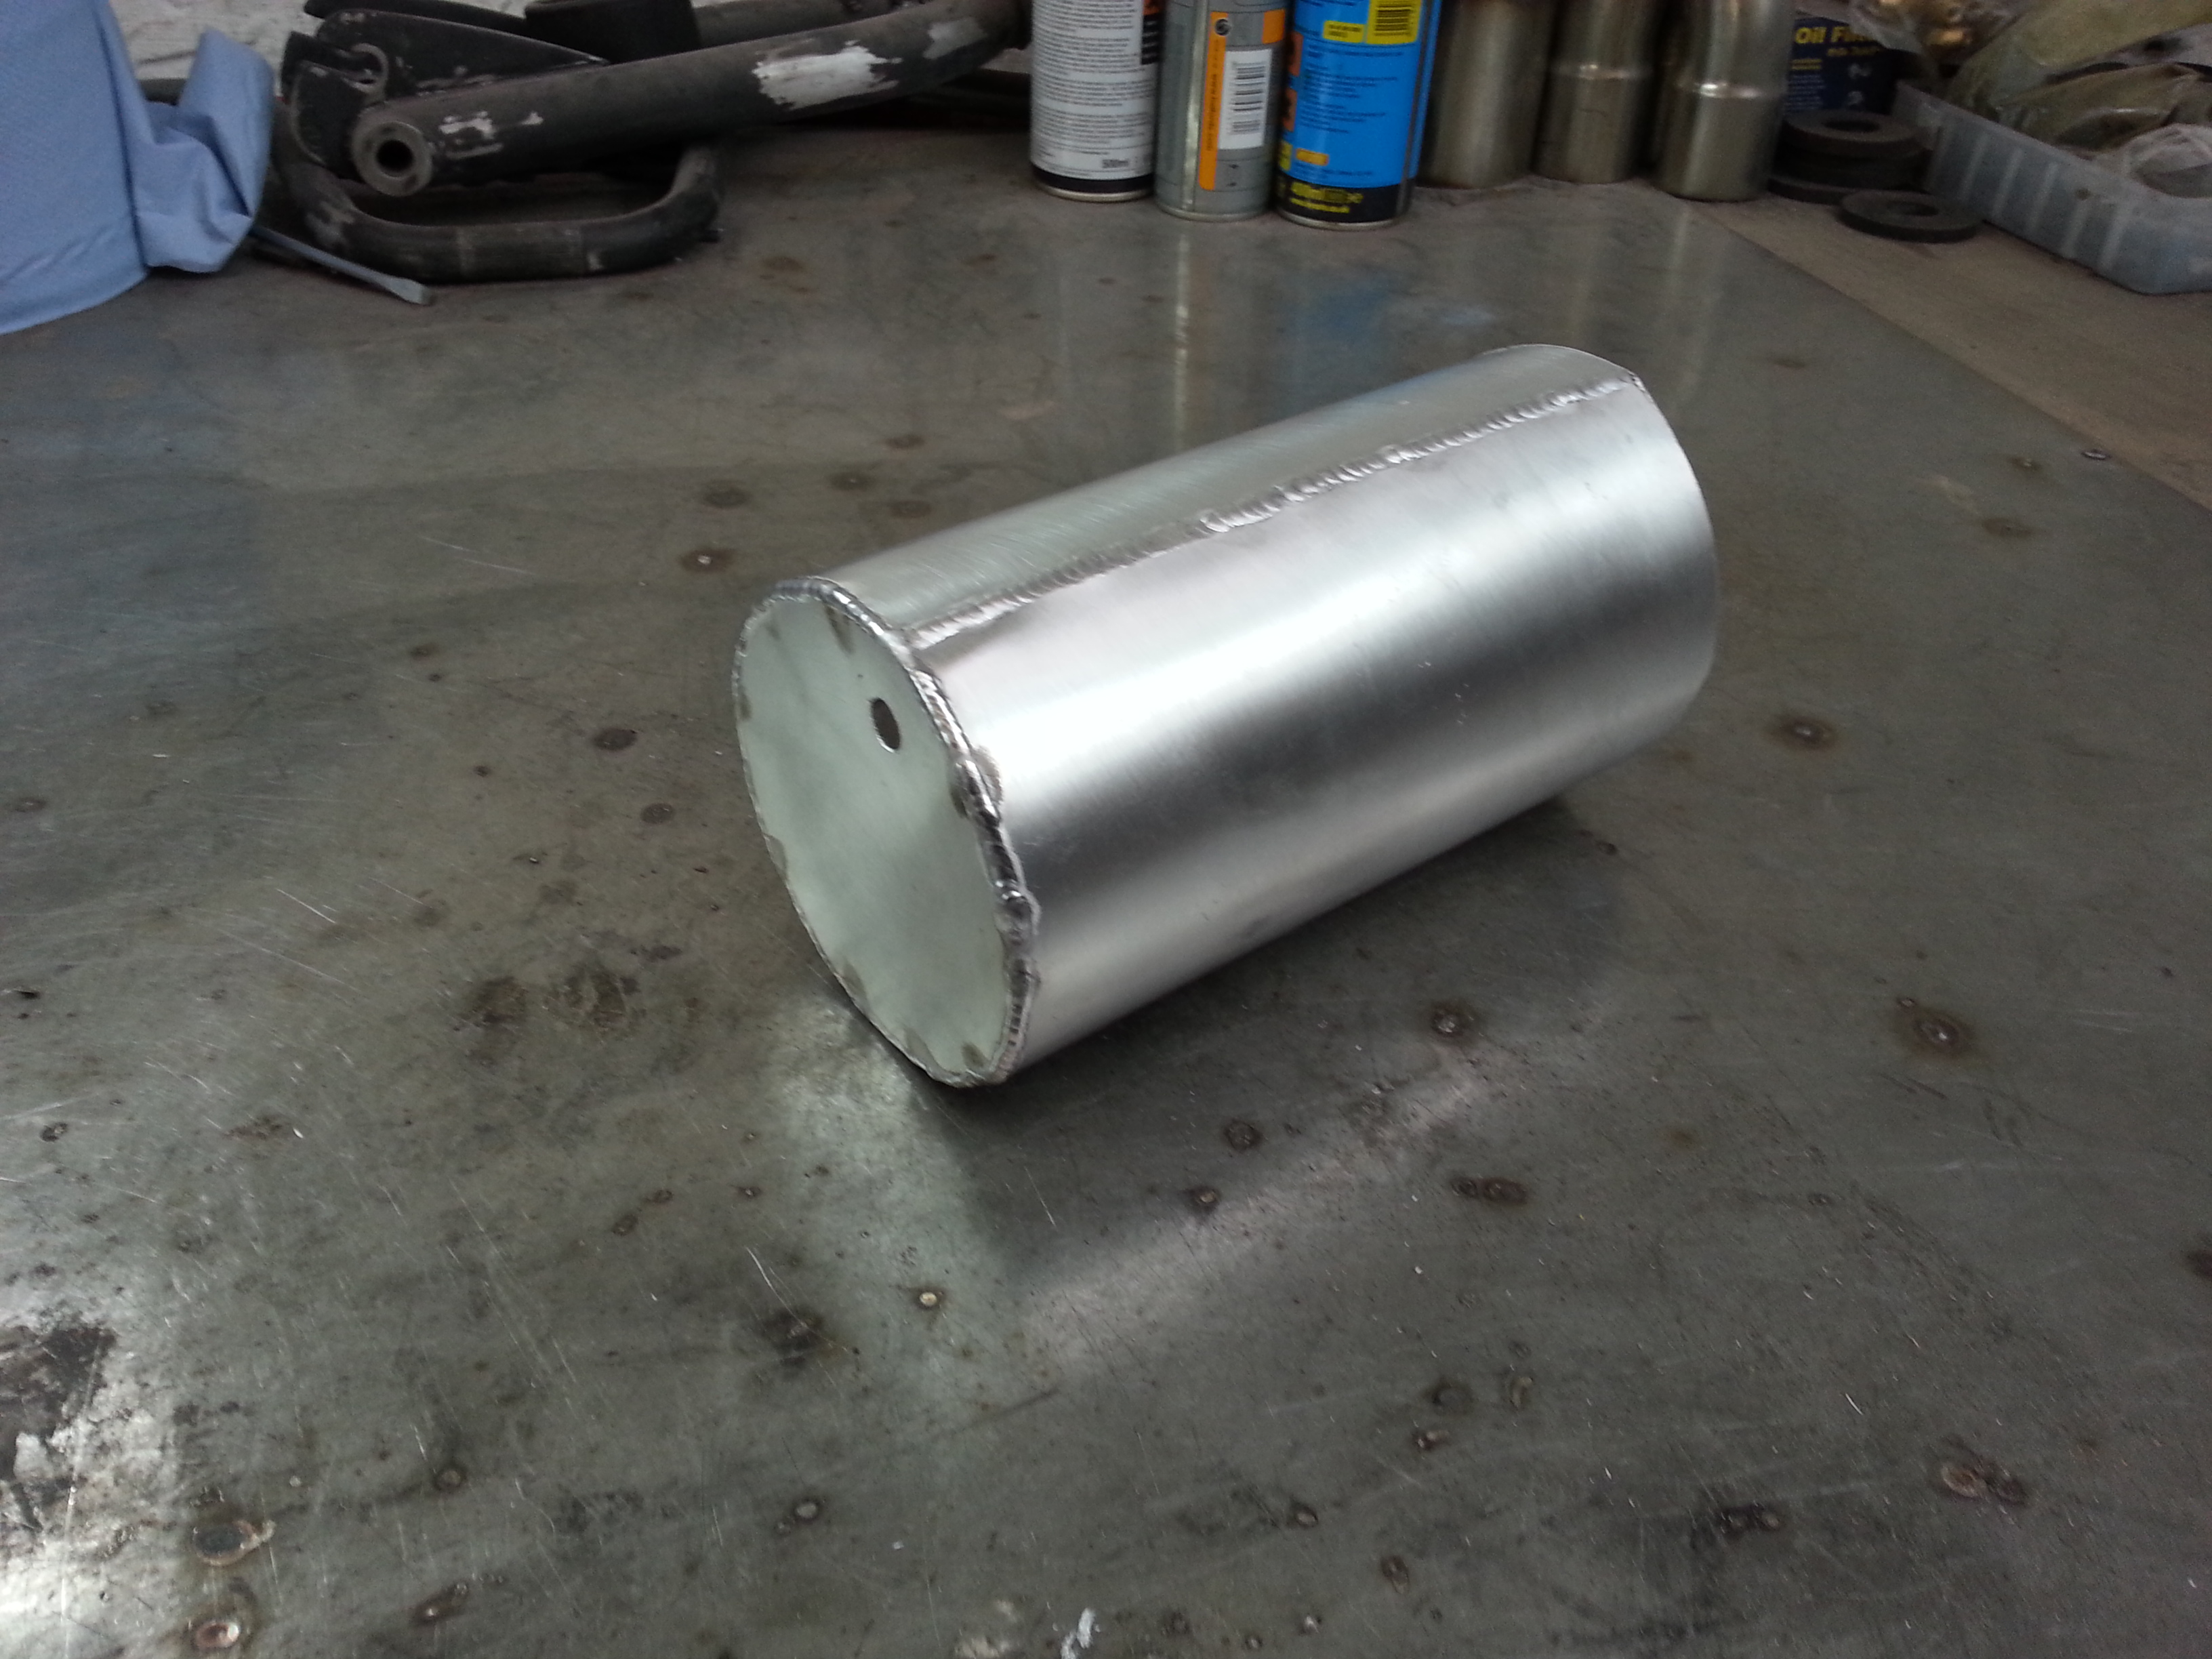
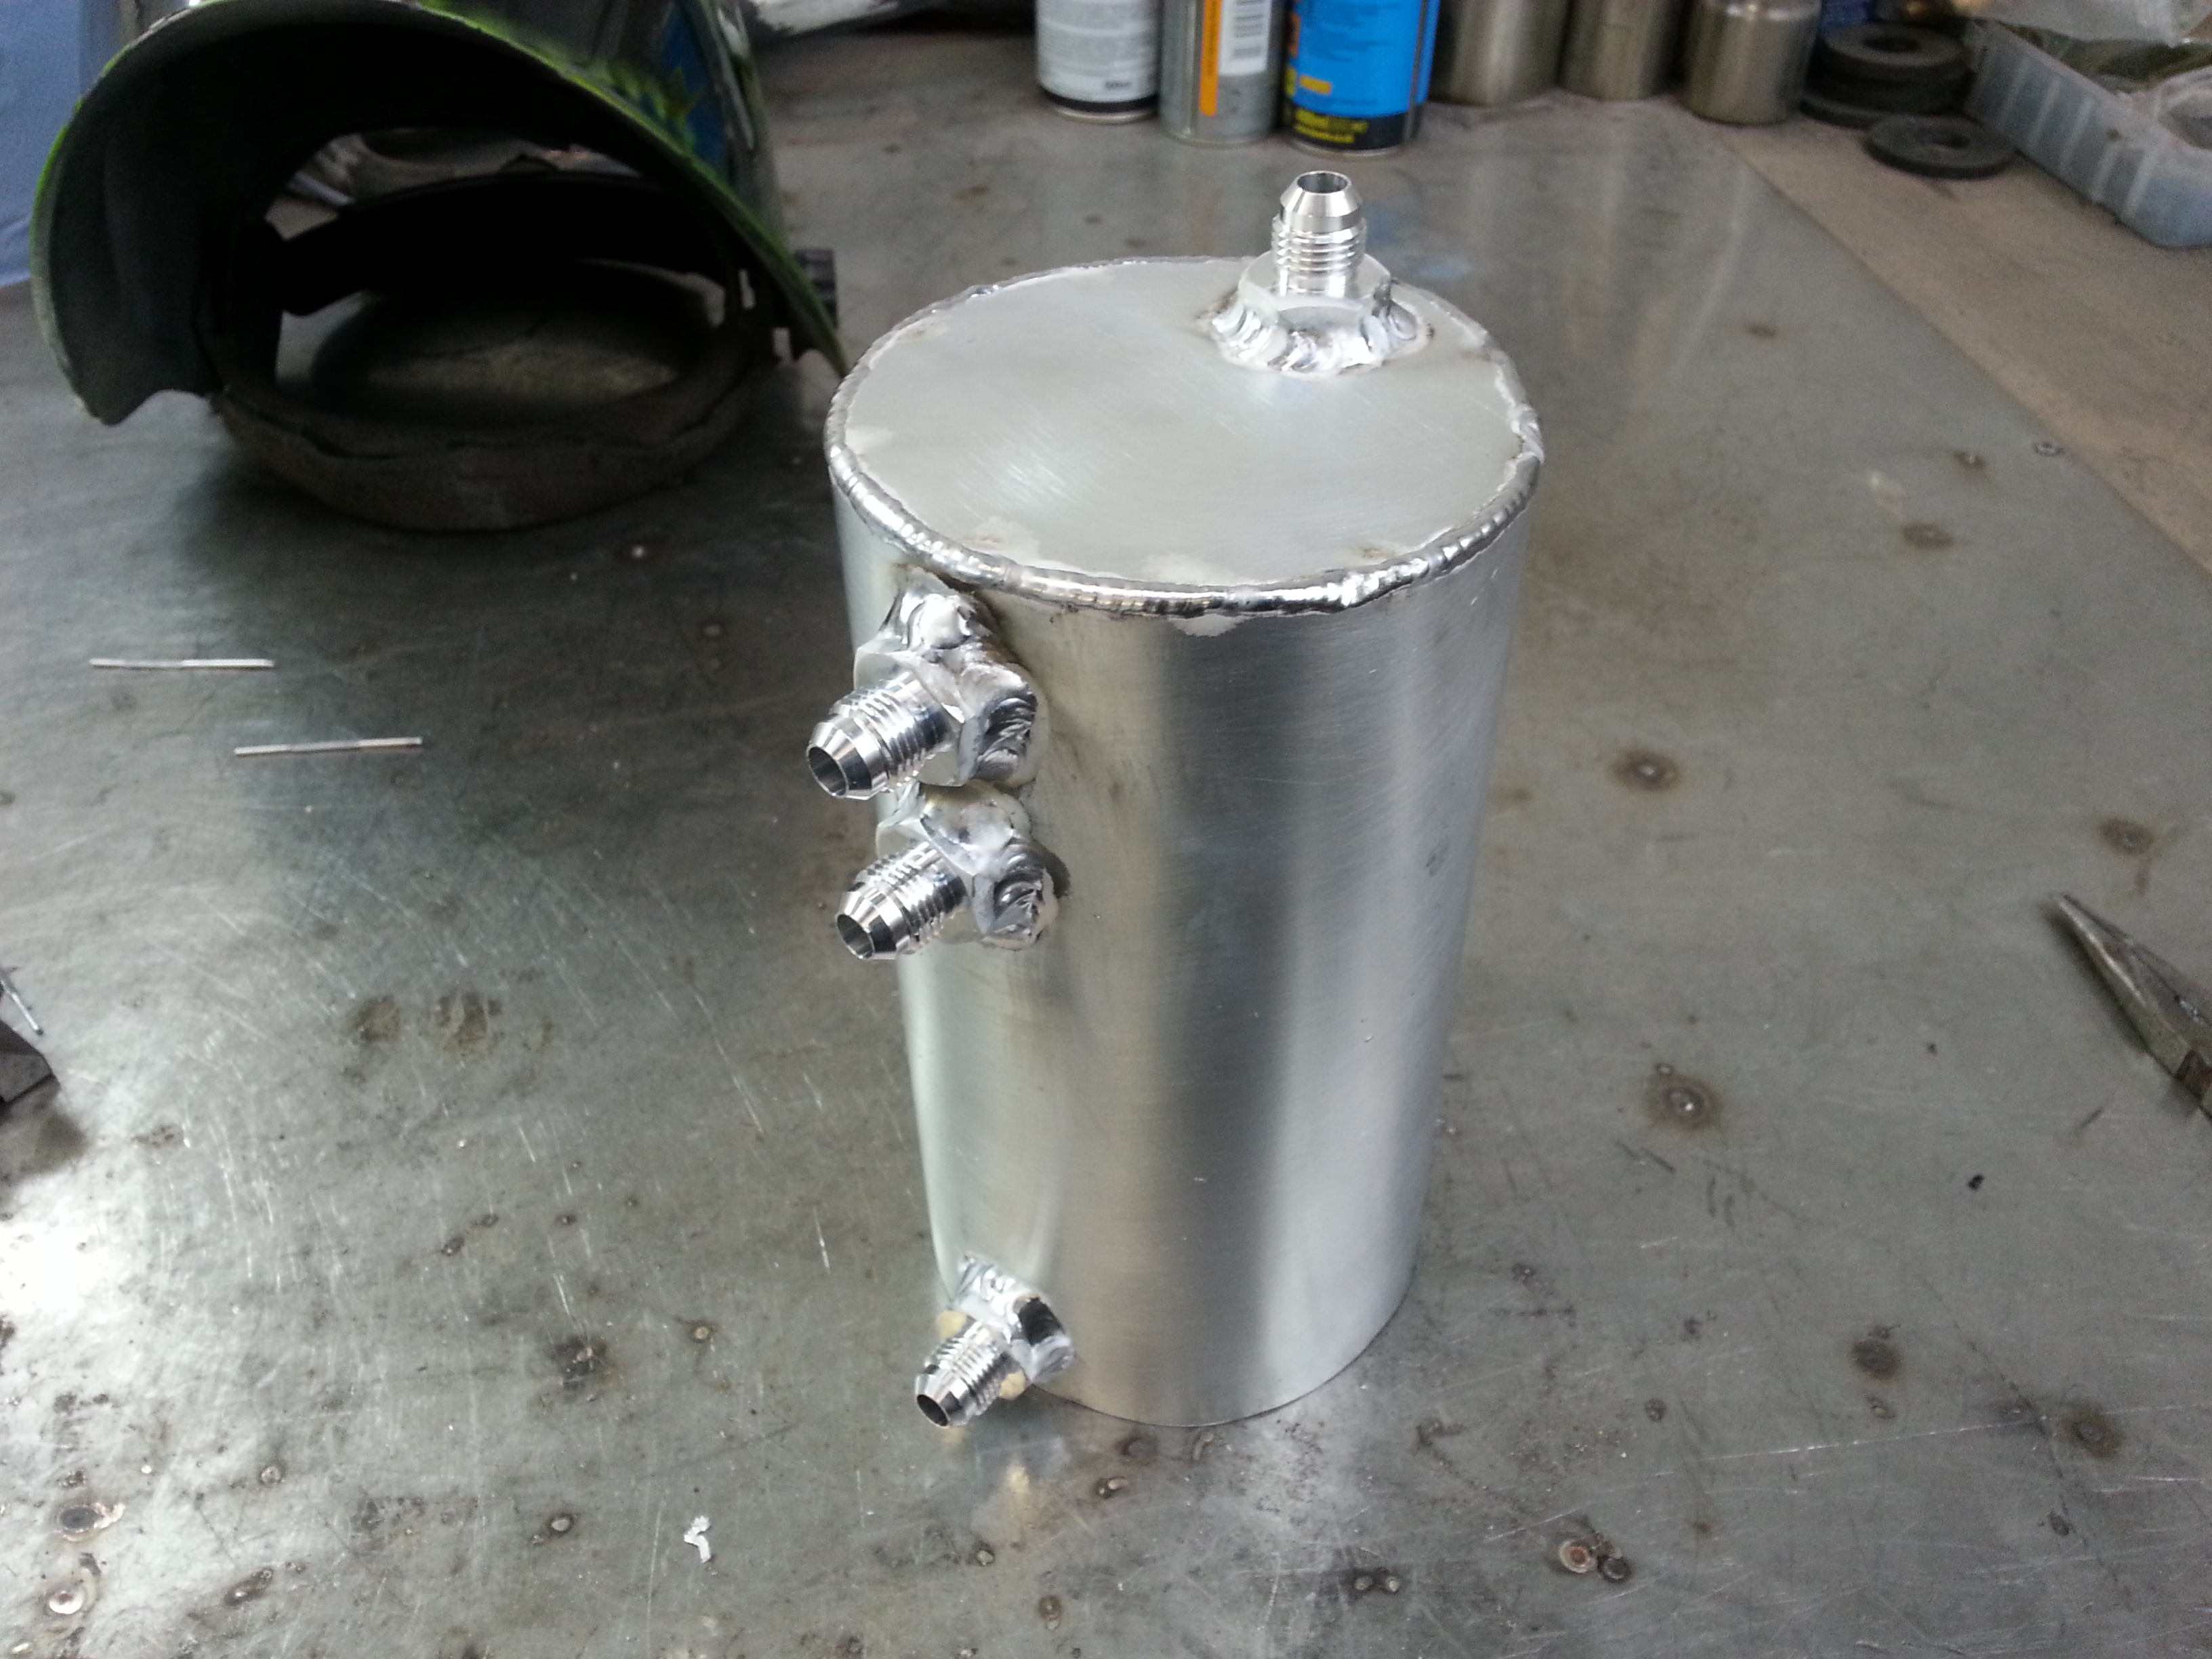

I'd like to say it was perfectly round and glorious but its not. However it holds fuel, doesn't leak and does the job. I'm going to be painting all the fuel componants black. Will look better than the plan ally against the candy green. Not sure about satin or gloss black yet but we'll see.
I'd like to say it was perfectly round and glorious but its not. However it holds fuel, doesn't leak and does the job. I'm going to be painting all the fuel componants black. Will look better than the plan ally against the candy green. Not sure about satin or gloss black yet but we'll see.
 I love your fab job on e exhaust. you sir have skills. But please use an air filter though! I'd hate to see it suck in something!


