
Kamikaze's 13B TII rebuild /expensive /no 56k


i got one of my rotors that clean in about 5 minutes with a drill and a wire wheel attachment, doesnt look like it did anything bad that would effect it but mine is just for decoration so i didnt care.
Thread Starter
Vintage sportcars
Joined: Jun 2010
Posts: 348
Likes: 1
From: Germany
Hello,
here are some new pictures from our 13B T2 Build. As I already stated a few posts earlier we are still waiting on a corner seal to arrive.
Hehe, enjoy the pictures =)

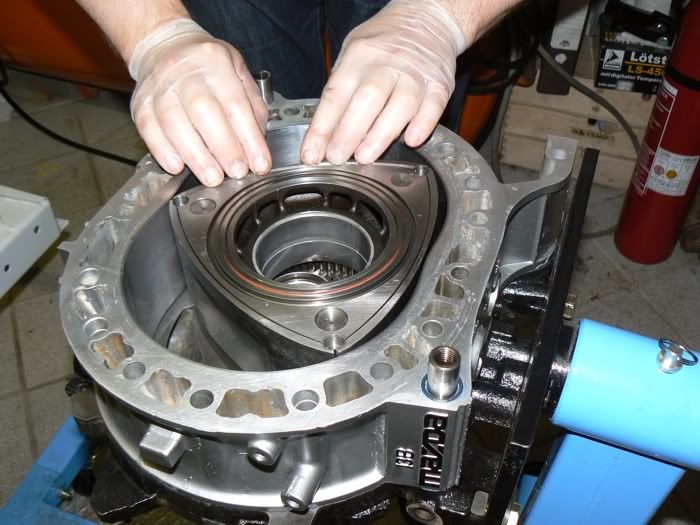
Housing mounted to the engine stand and first housing stacked !
Did I mention that my FC got hit while I was traveling to the store to get those damn 1,25 mm bolts to mount it on the stand ?? Assurance totaled it. *facepalm*

Loading the rotor with most of the seals. Some seals have been installed once the rotor went into its housing.

Side seal fun.

Damn ! It doesn�t fit. Tried another one ...
Fits perfectly...
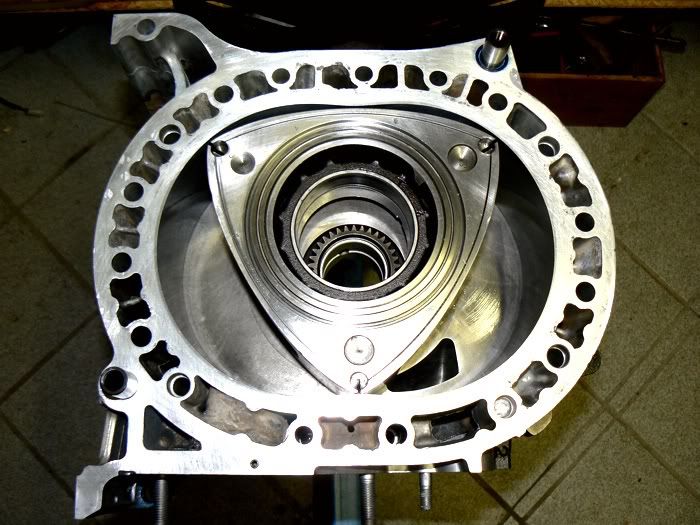
A nice shot before all the side seals went in. I kinda like the atmosphere.
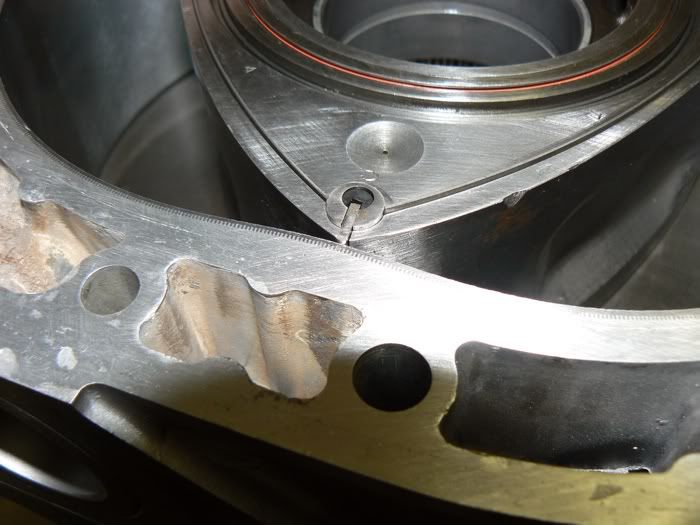
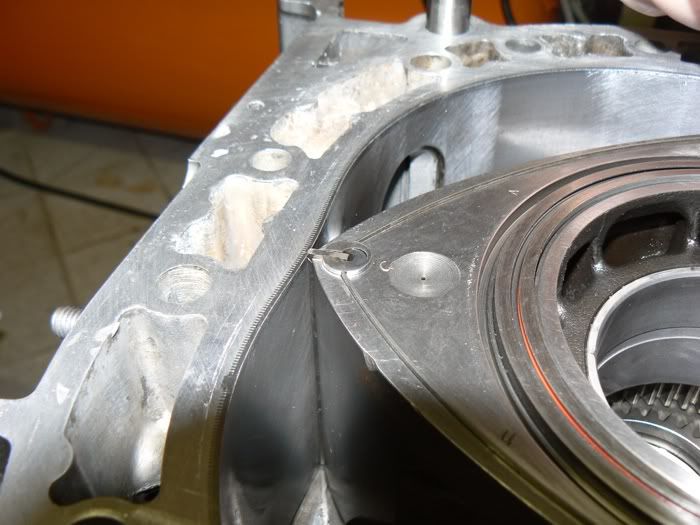
Apex seal went in. We used the OEM corner seals with FD springs. The rubber plugs are new of course =)
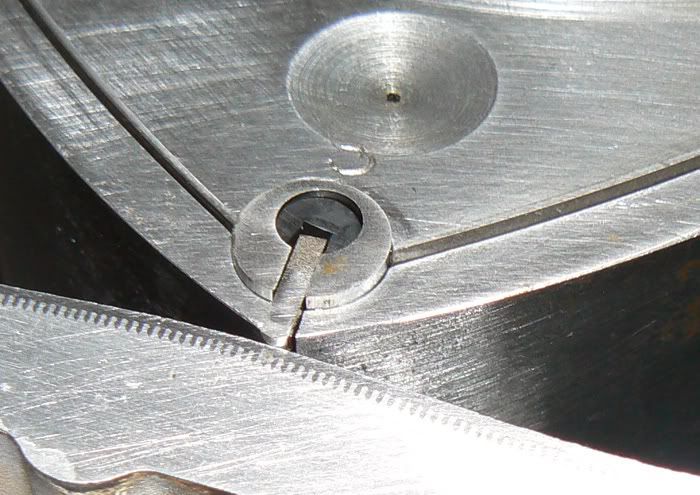
A nice close up. Every scratch is visible ...
Oiling the surfaces ... Castrol 10W40.

Took a break for today. It was already morning. Someone recognize the suspension chilling there ? lol I bet you won't =)
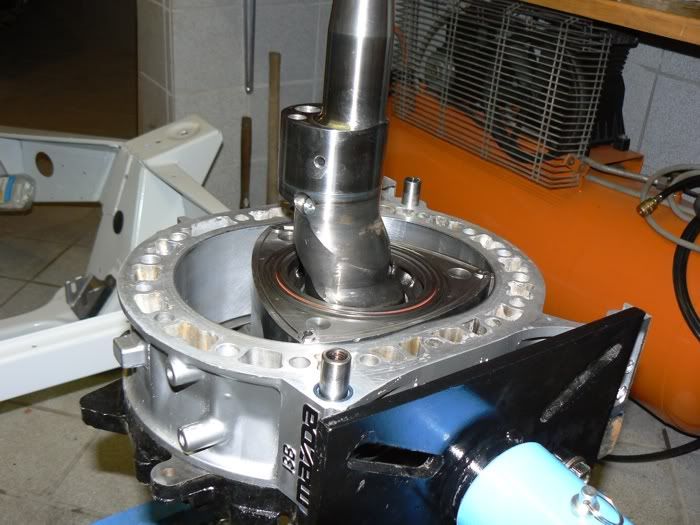
Polished E-shaft went in. Polishing that thing was not necessairy but its always a good idea. Cost 60$. Looks like new.
here are some new pictures from our 13B T2 Build. As I already stated a few posts earlier we are still waiting on a corner seal to arrive.
Hehe, enjoy the pictures =)
Housing mounted to the engine stand and first housing stacked !
Did I mention that my FC got hit while I was traveling to the store to get those damn 1,25 mm bolts to mount it on the stand ?? Assurance totaled it. *facepalm*
Loading the rotor with most of the seals. Some seals have been installed once the rotor went into its housing.
Side seal fun.
Damn ! It doesn�t fit. Tried another one ...
Fits perfectly...
A nice shot before all the side seals went in. I kinda like the atmosphere.
Apex seal went in. We used the OEM corner seals with FD springs. The rubber plugs are new of course =)
A nice close up. Every scratch is visible ...
Oiling the surfaces ... Castrol 10W40.
Took a break for today. It was already morning. Someone recognize the suspension chilling there ? lol I bet you won't =)
Polished E-shaft went in. Polishing that thing was not necessairy but its always a good idea. Cost 60$. Looks like new.
Thread Starter
Vintage sportcars
Joined: Jun 2010
Posts: 348
Likes: 1
From: Germany

I guess this might be the right amount of hylomar.
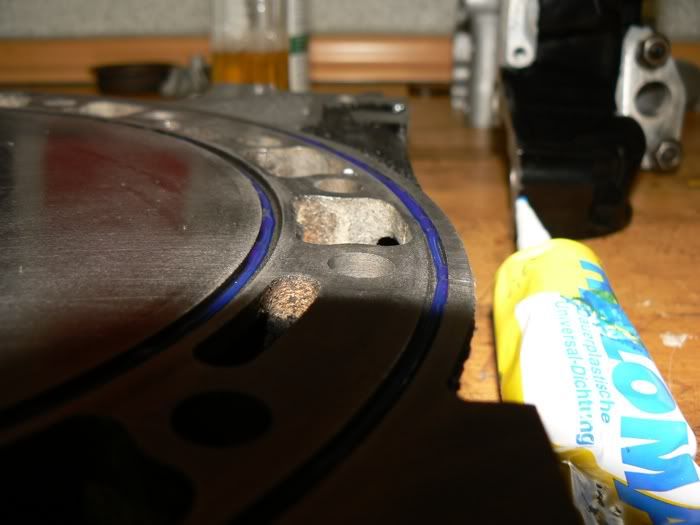
This stuff really is a pita.
The next time I will hylomar the seals instead of the irons. Might be much better.

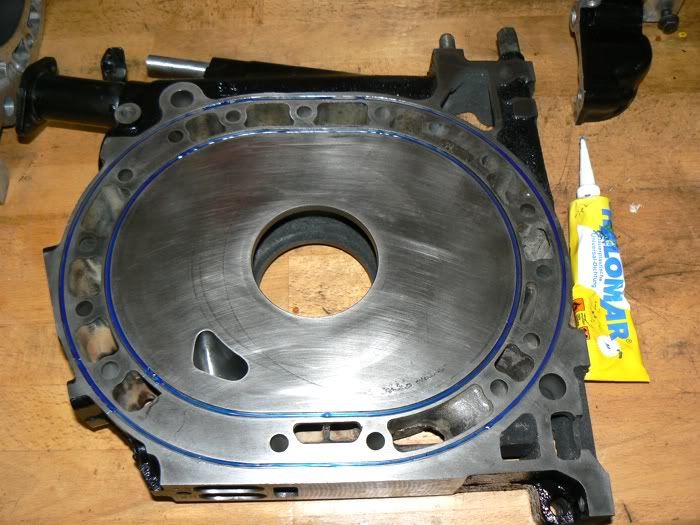
But looks good. I like the porting too

@ R-X-R
Is that a 12A rotor ? It looks a bit different from my 13B rotors. Specially the bathtub.
For the rust pits, apparently they are not that big of a deal as long as they are not too deep.
The 13B T2 rotors have them too. For the polishing I figured it works best when placing
the cloth on a wood plate putting polish ing liquid on it and sliding the rotor over it. This way you dont have to rub hours.
I used "Nigrin aluminium pflege", you might call it aluminium polish or chrome polish.
It is slightly abrasive. I found it removes the yellowish/brownish residue thats still on the rotor even after a good cleanup.
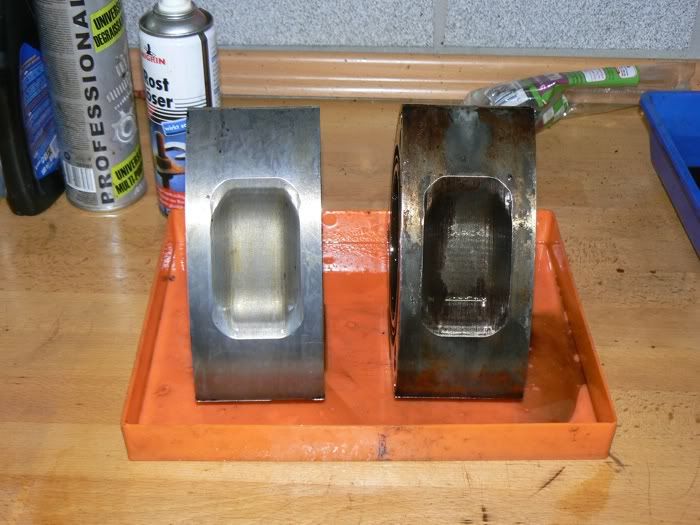
The rotor on the left has been cleaned with wheel and parts cleaner. I used green scotch brite pads to get rid of the carbon. Before polish I washed it with water and then used brake cleaner to prevent rust.
The rotor on the right has not been cleaned at all. Thats how it came out.
I noticed WD40 did help a bit to for cleaning rotor, nothing to write home about but it did a bit. Also it keeps the rotor shiny and prevents rust while the rotor is outside.
Steven
So i did wut u said except using a wheel with dril because i am scared  . i uses mothers aluminum polish.,.,


by the way what kind of wheel are using with the drill.,.,i really dont want to take metal ,u know.,.
. i uses mothers aluminum polish.,.,by the way what kind of wheel are using with the drill.,.,i really dont want to take metal ,u know.,.

Thread Starter
Vintage sportcars
Joined: Jun 2010
Posts: 348
Likes: 1
From: Germany
Still waiting for a corner seal lol 
We didn't really worked on it for the last couple of months.
It has to be finished. Took my 7 in the shop too, getting repaired and restored.
Not to mention the RX-8 sitting outside waiting for a new renesis
PO ran it dry of oil ... Such a waste ... You dont want to see the mess ...
We will travel over to london next week to pick up a new renesis
Steven

Thread Starter
Vintage sportcars
Joined: Jun 2010
Posts: 348
Likes: 1
From: Germany
Funny you mention fuel. Yesterday our heater went out in our house. 5k l tank was empty
, had to use a good ol' can of diesel, 20 liter lasted me a day. Time to switch to pellets, for the saving I can buy every year a RX7
Hi, great topic! Love all the pictures, and the detail this rebuild is done with.
1,79€/L for 98 here... :-(
Riz.
Gasoline ? Thats no fuel, thats liquid money ! (1,344€/L and counting...)
Riz.
Senior Member
Joined: Aug 2008
Posts: 493
Likes: 0
From: Belgium (2800)
Since we are busy about fuel prices: I tank always in the Dats 24 in Mechelen and the price for 98 (Super+) is currently 1€627 and normal 95 = 1€573. I'm happy my daily car is a diesel 1€405


Thread
Thread Starter
Forum
Replies
Last Post
[For Sale] Scratch & Dent, Used, and Open-Box Sale!
SakeBomb Garage
Vendor Classifieds
5
Aug 9, 2018 05:54 PM
Nosferatu
2nd Generation Specific (1986-1992)
7
Sep 5, 2015 02:13 PM