
Kamikaze's 13B TII rebuild /expensive /no 56k

Thread Starter
Vintage sportcars
Joined: Jun 2010
Posts: 348
Likes: 1
From: Germany
Hello,
since I am often posting questions about this and that ... I want to show you a bit of what I have done in the past few months.
The engine:
The engine comes out of my friends 91 FC TII, we are rebuilding it together, actually the engine sits in my garage.
I am working most time on it when I have nothing else to do.
History:
He bought the car about 5 years before with broken engine ...
Car is in an amazingly overall shape with nice oem paint (dark blue/anthrazit like) and it got wide decals all over it.
Turned out it was the famous front-iron-coolant-passage-crack.
He replaced the iron with a good used one and did a basic rebuild.
Unfortunatly the front torrington bearing got squeezed by the spacer and allowed the front counterweight during operation
to touch the front cover, shaving aluminium off here and there...
Aluminium chips and grains falls into the oil pan, and got sucked in by the pump.
Taking out the oil pump, rotor bearings, stationary bearings and turbo bearings.
I am yet waiting on the old oil filter to arrive to do further inspection. My guess is that the filter caught the big chips and let pass the very very small ones allowing them to make a carnage.
Finally time to do a re-rebuild and streetport while in there.
Enough said, here are the pics :
I dont have any pics by hand showing the bay and car, thats how I got the engine.
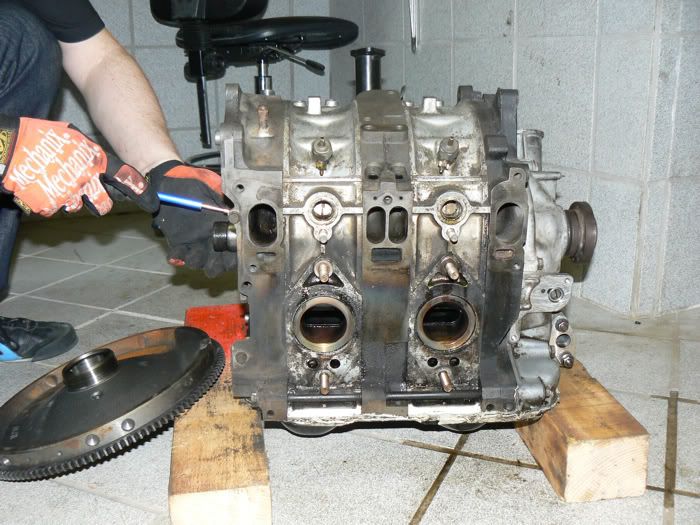
The flywheel was a piece of cake with the Racing Beat flywheel stopper and the right size socket.
Now removing the front pully hub and front cover. Nothing special here to tell.
Note that I dont use an engine stand to disassemble the block, my stand was not arrived yet.
My cousin will get slapped next time for taking my money and never deliver my stuff ordered...

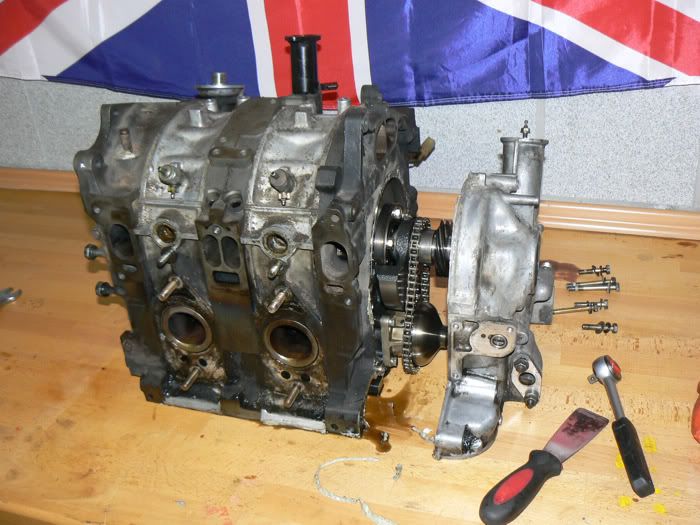
Loosening the tension bolts. Surprisingly it works very well without stand, well at least disassembly...

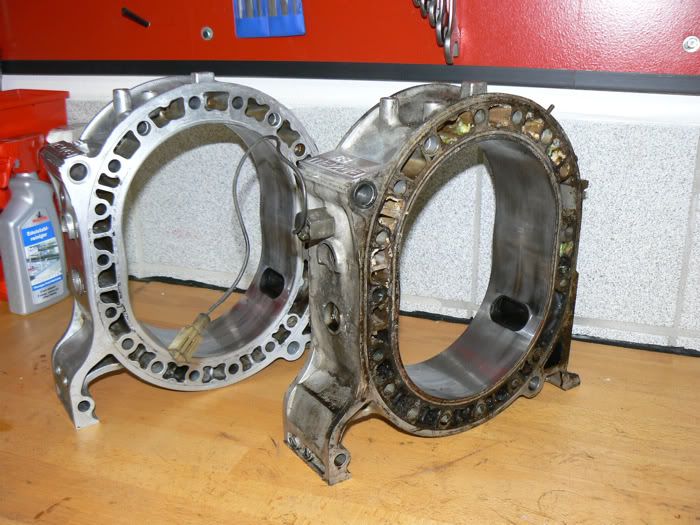
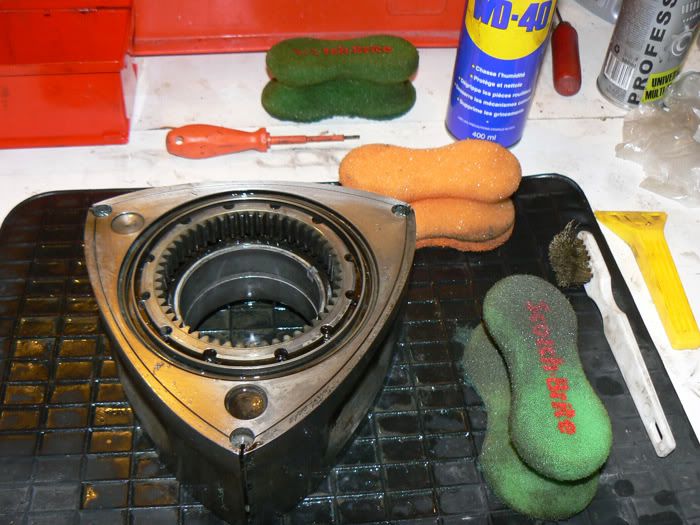
Oho, here it gets interesting, front plate removed and first look onto the housings.
They are amazing !! The rotors too but they need a lot of cleaning...
You see that stuff chilling in the rotor housing coolant passages ? Unbelievable.
If you havent noticed yet, change your coolant regulary or the lucky person who rebuilds your keg will find lots of **** and corrosion. Seriously.
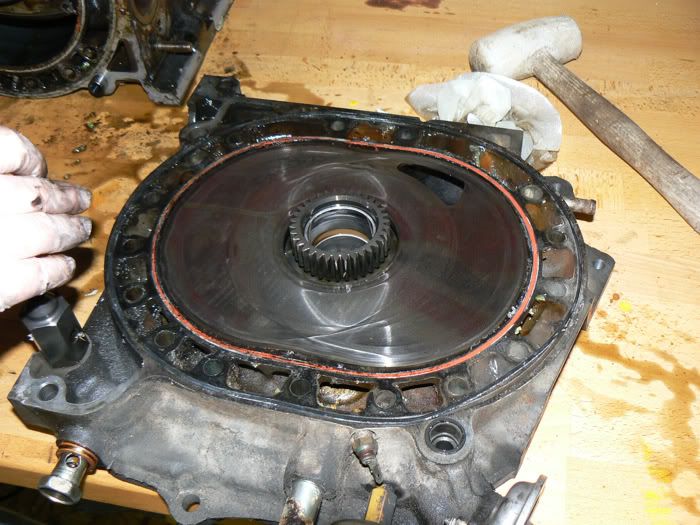
A quick glaze at the front plate, no scars or marks, seal grooves undamaged.
Lucky, this housing is reusable.

Took out one rotor and removing the seals to put in sorted, numbered box.
Yes the housing and irons look amazing.
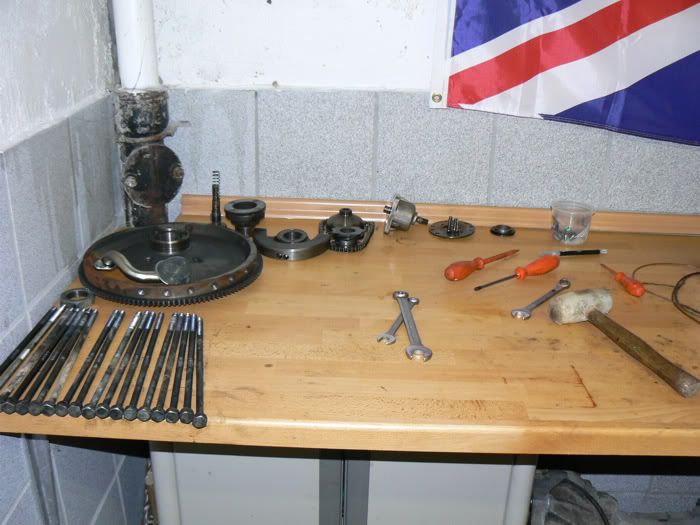
Sorting all the stuff on the table, oil pump is shot, can be thrown right away. You can see the scar marks on the intermediate spacer from this distance ...

Putting all the parts on side. Yes I know the rotor housings are reversed ... lol
Trash bin needs to be emptied too...
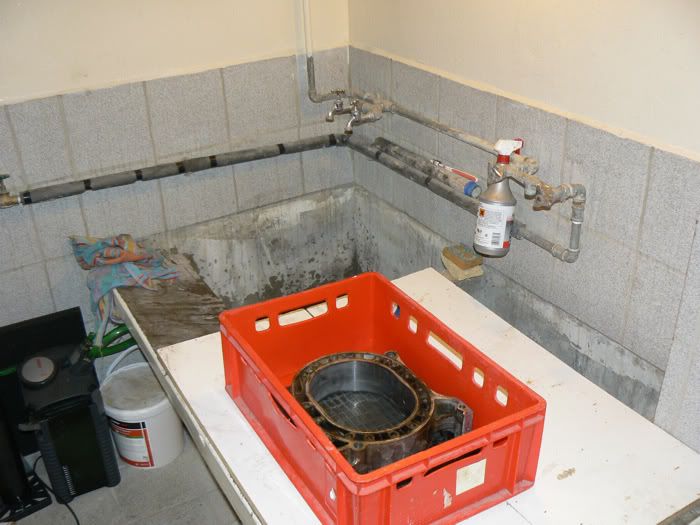
This is my cleaning room serves as parts store too, today extra clean and new painted. Served as a cowshed during WWII.
Oh wait you havent seen the other side of it
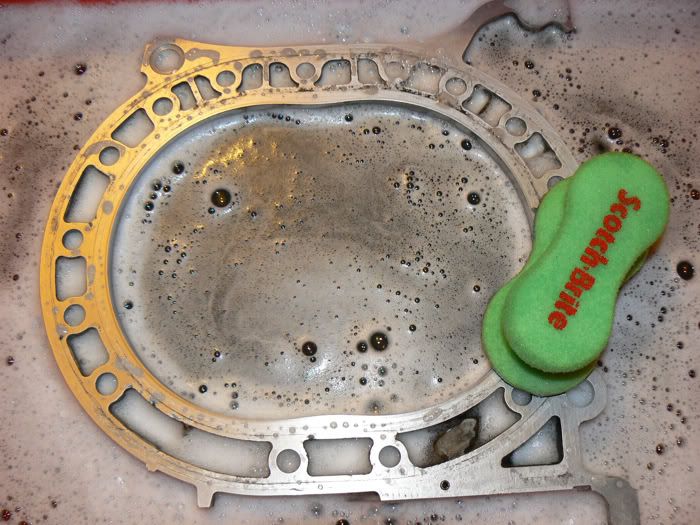
Giving the housing a good cleanup with dish soap and a scotch brite pad.
The green ones are the best, orange and yellow ones are for the kitchen, the green ones for the engine.
since I am often posting questions about this and that ... I want to show you a bit of what I have done in the past few months.
The engine:
The engine comes out of my friends 91 FC TII, we are rebuilding it together, actually the engine sits in my garage.
I am working most time on it when I have nothing else to do.
History:
He bought the car about 5 years before with broken engine ...
Car is in an amazingly overall shape with nice oem paint (dark blue/anthrazit like) and it got wide decals all over it.
Turned out it was the famous front-iron-coolant-passage-crack.
He replaced the iron with a good used one and did a basic rebuild.
Unfortunatly the front torrington bearing got squeezed by the spacer and allowed the front counterweight during operation
to touch the front cover, shaving aluminium off here and there...
Aluminium chips and grains falls into the oil pan, and got sucked in by the pump.
Taking out the oil pump, rotor bearings, stationary bearings and turbo bearings.
I am yet waiting on the old oil filter to arrive to do further inspection. My guess is that the filter caught the big chips and let pass the very very small ones allowing them to make a carnage.
Finally time to do a re-rebuild and streetport while in there.
Enough said, here are the pics :
I dont have any pics by hand showing the bay and car, thats how I got the engine.
The flywheel was a piece of cake with the Racing Beat flywheel stopper and the right size socket.
Now removing the front pully hub and front cover. Nothing special here to tell.
Note that I dont use an engine stand to disassemble the block, my stand was not arrived yet.
My cousin will get slapped next time for taking my money and never deliver my stuff ordered...
Loosening the tension bolts. Surprisingly it works very well without stand, well at least disassembly...
Oho, here it gets interesting, front plate removed and first look onto the housings.
They are amazing !! The rotors too but they need a lot of cleaning...
You see that stuff chilling in the rotor housing coolant passages ? Unbelievable.
If you havent noticed yet, change your coolant regulary or the lucky person who rebuilds your keg will find lots of **** and corrosion. Seriously.
A quick glaze at the front plate, no scars or marks, seal grooves undamaged.
Lucky, this housing is reusable.
Took out one rotor and removing the seals to put in sorted, numbered box.
Yes the housing and irons look amazing.
Sorting all the stuff on the table, oil pump is shot, can be thrown right away. You can see the scar marks on the intermediate spacer from this distance ...
Putting all the parts on side. Yes I know the rotor housings are reversed ... lol
Trash bin needs to be emptied too...
This is my cleaning room serves as parts store too, today extra clean and new painted. Served as a cowshed during WWII.
Oh wait you havent seen the other side of it
Giving the housing a good cleanup with dish soap and a scotch brite pad.
The green ones are the best, orange and yellow ones are for the kitchen, the green ones for the engine.
Thread Starter
Vintage sportcars
Joined: Jun 2010
Posts: 348
Likes: 1
From: Germany
Next series:

Removing the last sticky debris and imperfections with 400 grid sandpaper and MOS2.
I really like the finish of the surface once done.
Before / after: Thats how it looks 5 mins later. Note that the cooling passages are still not completly cleaned. They will be done later.
Taking some time to clean the rotors, I dont remember exactly, but it took about 3 hours per rotor to get it acceptable clean.
Still not completly clean, as the side seal grooves and apex grooves needs to be cleaned.

Cleaning almost done. After this the rotor will get polished by hand, not completly but enough to remove the last coat of yellowish stuff,
leaving a shiny metal like finihs.
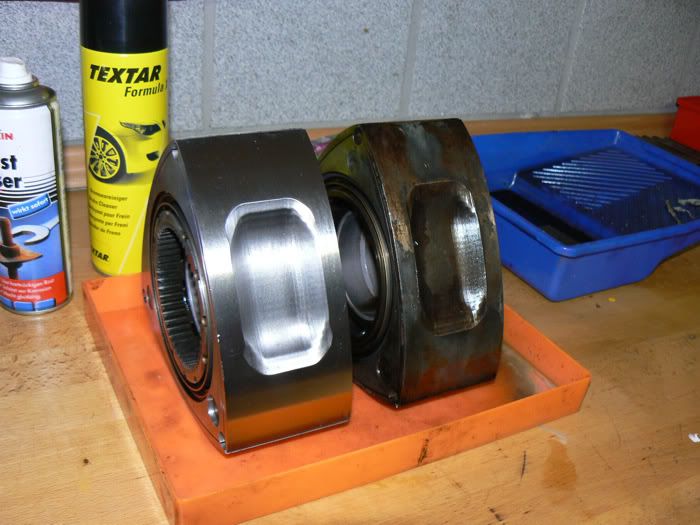
Hand polished rotor versus uncleaned rotor. I believe thats how the rotor left Hiroshima in 91. (The left one of course)
Driving to the UK for bringing the housings and irons to Hurley Rotary Service for porting. He also painted the irons and housings.
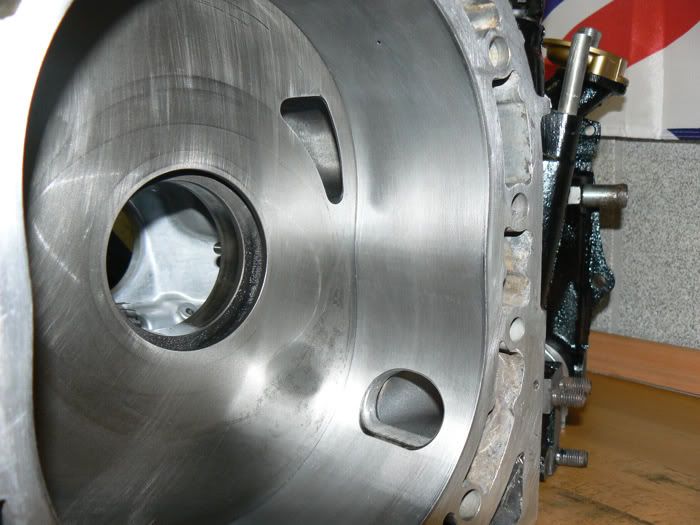
This is how the porting work looks like. I have to say its amazing. And kudos to the owner for driving from Luxembourg to London and back to get the engine ported.
I believe we are the only 2 people in the country who do rotary work, there is no rotary shop or builder. Am I smelling business ?
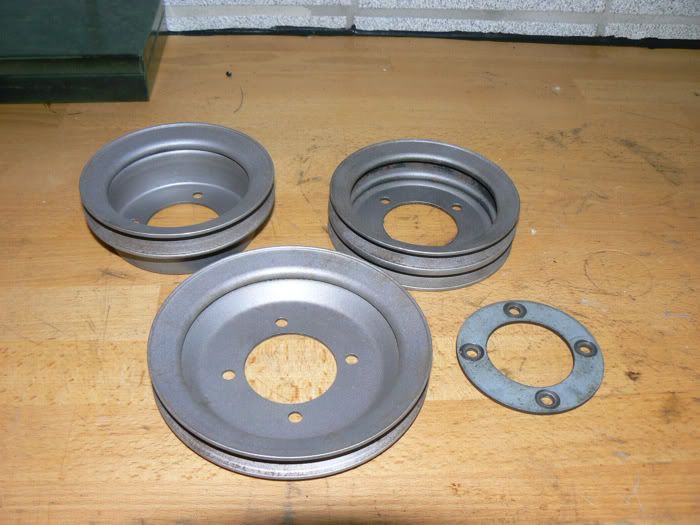
Getting the pully sandblasted, by the shop who cant mount slotted brake discs the right way. The sandblasting could be done better but
hey, nothing can beat free...

Here is the pully painted with brass color, it gives a golden shine. In person the pully looks not as dirty, but really nice golden.
Oh and of course, the rotors look nice too.
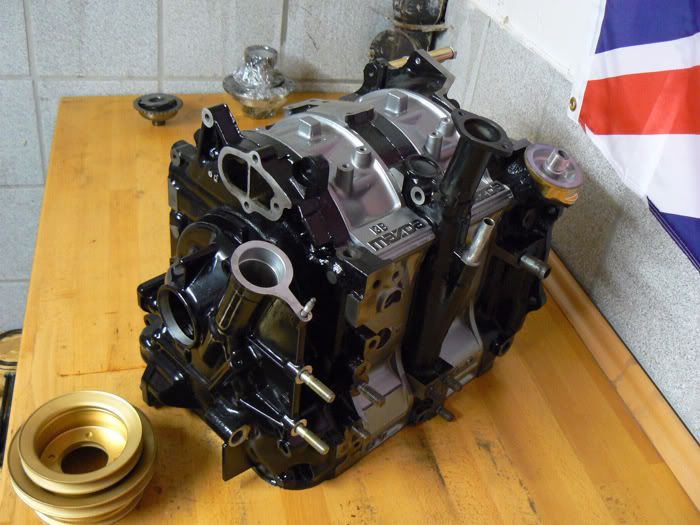
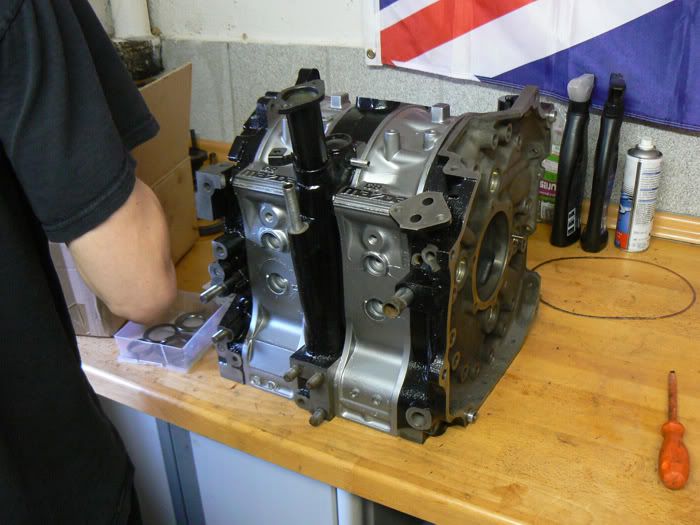
The engine how it looks right now as it sits in my garage. Layed out temporary so I can take pics of the paint sheme.
Black/silver with some golden accents.
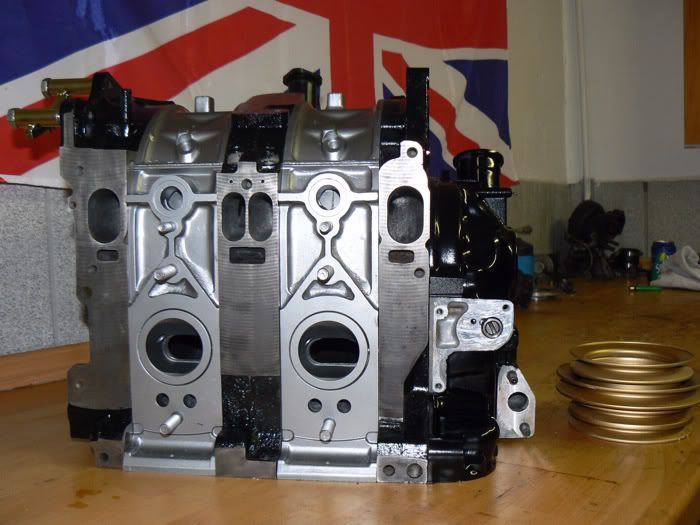
Who is able to see the porting done ? =)
That was it for today, my head hurts, its 3:20 over here.
Damn that pic resizing took to much time.
Will upload pics of the turbo being rebuild right now, tomorrow.
Steven
Removing the last sticky debris and imperfections with 400 grid sandpaper and MOS2.
I really like the finish of the surface once done.
Before / after: Thats how it looks 5 mins later. Note that the cooling passages are still not completly cleaned. They will be done later.
Taking some time to clean the rotors, I dont remember exactly, but it took about 3 hours per rotor to get it acceptable clean.
Still not completly clean, as the side seal grooves and apex grooves needs to be cleaned.
Cleaning almost done. After this the rotor will get polished by hand, not completly but enough to remove the last coat of yellowish stuff,
leaving a shiny metal like finihs.
Hand polished rotor versus uncleaned rotor. I believe thats how the rotor left Hiroshima in 91. (The left one of course)
Driving to the UK for bringing the housings and irons to Hurley Rotary Service for porting. He also painted the irons and housings.
This is how the porting work looks like. I have to say its amazing. And kudos to the owner for driving from Luxembourg to London and back to get the engine ported.
I believe we are the only 2 people in the country who do rotary work, there is no rotary shop or builder. Am I smelling business ?
Getting the pully sandblasted, by the shop who cant mount slotted brake discs the right way. The sandblasting could be done better but
hey, nothing can beat free...
Here is the pully painted with brass color, it gives a golden shine. In person the pully looks not as dirty, but really nice golden.
Oh and of course, the rotors look nice too.
The engine how it looks right now as it sits in my garage. Layed out temporary so I can take pics of the paint sheme.
Black/silver with some golden accents.
Who is able to see the porting done ? =)
That was it for today, my head hurts, its 3:20 over here.
Damn that pic resizing took to much time.
Will upload pics of the turbo being rebuild right now, tomorrow.
Steven
Thread Starter
Vintage sportcars
Joined: Jun 2010
Posts: 348
Likes: 1
From: Germany
Thanks for the comments 
Yeah I like to have it clean when I am building engines.
As for the timing marks, they are engraved (+- 0,5 mm) on the outer pully. Also the bolts are offset in a certain way so the pully fits only 1 way to the hub.
For the sake of originality I will put a small drop pf paint on the timing marks to make reading easyer.
Steven
Trending Topics
I sandblasted and powdercoated my main pulley and could still find the timing marks. A sharpie had to define them once it came time to adjust timing, but still easily found.
Nice job on the engine build!
Nice job on the engine build!
Thread Starter
Vintage sportcars
Joined: Jun 2010
Posts: 348
Likes: 1
From: Germany
Thank you for all the replies. It makes work easier when it gets appreciated.
I planned to update this site last week but I had final exams coming up so I had to put the engine aside for a week or 2. (I passed exams btw...)
So whats happening ? Oh right the turbo is being disassembled right now and gets rebuild. Still waiting on rebuild kit.
Same for the engine, I still need a few parts here and there, front cover and rear iron O seal for example, new corner seals. We decided not to reuse the old ones with inserts.
I gave the stationary gears and some of the oil pump assembly parts a final cleaning and oiling and they are now plastic wrapped and waiting to go in.
Got a new "used" oil pump. It looks way better than the old ones which had lots of scars. Old oil filter arrived too, but actually I dont feel like cutting up filters for inspection...
For first fill up and lubing parts I use Castrol magnatec 10W40.
Final oil still not decided, will be castrol edge 10W60 or some 20W50 from another brand.
I prefer the castrol edge 10W60, its expensive but real good stuff.
I use industrial grade and quantity parts cleaner, its called "Tegeprocess Rapid" made by tegee-rumler.eu. Good stuff, but has to be used with great care. Toxic stuff... You won't get it on the counter =)
I found that some aluminium wheel cleaner (with phosphoric) works wonders on some parts. Has to be used with caution on sensible parts.
For the rest its all about the scotchbrite, scotchbrite, scotchbrite and scotchbrite of course. About 60% scrubbing and 40% chemicals will do the trick.
Thank you very much ! I try to do the best I can. I believe something has to be done right or it needs to be done twice.
Still this engine is not near as perfect as I would like it to be. We had to find a compromis between quality and money.
I think we made out a good compromis. This engine will hold good compression for a long while, but of course its not gonna be a race engine, even if it might look like it with the nice paint and all that.
I still drive my S4 NA, when time comes for a rebuild I will put all my rotary knowledge I learned over time and lots of effort into it, to make the best engine I am capable of.
BTW I love NA engine tuning. There is so much that can be learned from that. Turbos are nice, but thats easy power and thats not the goal.
I will try to upload the next bunch of pictures as soon as I can, aiming for this weekend.
Steven
I planned to update this site last week but I had final exams coming up so I had to put the engine aside for a week or 2. (I passed exams btw...
)So whats happening ? Oh right the turbo is being disassembled right now and gets rebuild. Still waiting on rebuild kit.
Same for the engine, I still need a few parts here and there, front cover and rear iron O seal for example, new corner seals. We decided not to reuse the old ones with inserts.
I gave the stationary gears and some of the oil pump assembly parts a final cleaning and oiling and they are now plastic wrapped and waiting to go in.
Got a new "used" oil pump. It looks way better than the old ones which had lots of scars. Old oil filter arrived too, but actually I dont feel like cutting up filters for inspection...
Which engine oil do you use?
Final oil still not decided, will be castrol edge 10W60 or some 20W50 from another brand.
I prefer the castrol edge 10W60, its expensive but real good stuff.
What chemicals did you use along with the scotchbrite to clean it all up.?
I found that some aluminium wheel cleaner (with phosphoric) works wonders on some parts. Has to be used with caution on sensible parts.
For the rest its all about the scotchbrite, scotchbrite, scotchbrite and scotchbrite of course. About 60% scrubbing and 40% chemicals will do the trick.
That is awesome work. I always love when people post quality work with pics and descriptions! Thank you Steven
- Marco
- Marco
Still this engine is not near as perfect as I would like it to be. We had to find a compromis between quality and money.
I think we made out a good compromis. This engine will hold good compression for a long while, but of course its not gonna be a race engine, even if it might look like it with the nice paint and all that.
I still drive my S4 NA, when time comes for a rebuild I will put all my rotary knowledge I learned over time and lots of effort into it, to make the best engine I am capable of.
BTW I love NA engine tuning. There is so much that can be learned from that. Turbos are nice, but thats easy power and thats not the goal.
I will try to upload the next bunch of pictures as soon as I can, aiming for this weekend.
Steven
Last edited by StevenL5975; Jul 1, 2011 at 06:33 PM. Reason: typo


Unbelievable cleaning job on the engine parts. I also love it when people take the time to throughly clean things and repaint them. It makes an inredible difference in the aesthetics of the finished product.
Thread Starter
Vintage sportcars
Joined: Jun 2010
Posts: 348
Likes: 1
From: Germany
Thanks for the replys,
Yes we started assembly last week. I took lots of pics but could not get around to resize and upload ...
We now have both rotors installed but one corner seal was accidentaly damaged,
we decided not to reuse it as we don't like inviting problems, so we are waiting on a replacement from UK.
Thats why the rear plate is not mounted yet. Once the seal arrives it will be put right into place.
By the way, we are using an OEM Mazda gasket kit with RA-Classic (2 piece 2mm) Apex seals and FD corner seal springs. New bearings too.
The housings are in good condition, only a few wear marks at the sides, the other surface is just nice. I would have used ceramic seals but my friend does not want to spend that much
New metal oil control rings and viton inserts =) Got another Oil pump too, old one was trashed cause it sucked aluminium chips in.
(Front counterweight touched front cover due to pinched / missaligned spacer bearing assembly -> previous rebuild 50 kms ago)
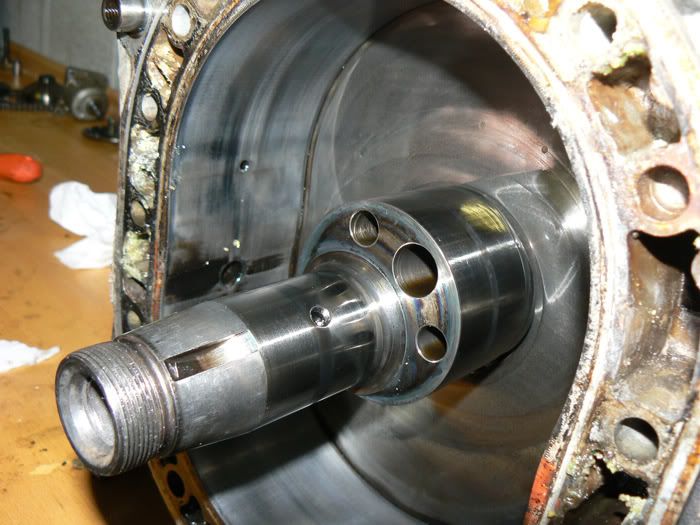
Ah and the E-shaft went to the machine shop for polishing, look really great. Pics to come this weekend.
By the way my S4 NA today lost almost all its coolant on the highway at 8 grand passing a truck. There was a heater hose that took a crap and decided to tear itself up
and spill the coolant all over the bay and thermal reactor Got Lucky, car just reached OP temp and I shut it off immediatly as I heard the buzzzzzzzzz
Man that was a lot of smoke.
Steven
Yes we started assembly last week. I took lots of pics but could not get around to resize and upload ...
We now have both rotors installed but one corner seal was accidentaly damaged,
we decided not to reuse it as we don't like inviting problems, so we are waiting on a replacement from UK.
Thats why the rear plate is not mounted yet. Once the seal arrives it will be put right into place.
By the way, we are using an OEM Mazda gasket kit with RA-Classic (2 piece 2mm) Apex seals and FD corner seal springs. New bearings too.
The housings are in good condition, only a few wear marks at the sides, the other surface is just nice. I would have used ceramic seals but my friend does not want to spend that much
New metal oil control rings and viton inserts =) Got another Oil pump too, old one was trashed cause it sucked aluminium chips in.
(Front counterweight touched front cover due to pinched / missaligned spacer bearing assembly -> previous rebuild 50 kms ago)
Ah and the E-shaft went to the machine shop for polishing, look really great. Pics to come this weekend.
By the way my S4 NA today lost almost all its coolant on the highway at 8 grand passing a truck. There was a heater hose that took a crap and decided to tear itself up
and spill the coolant all over the bay and thermal reactor
Got Lucky, car just reached OP temp and I shut it off immediatly as I heard the buzzzzzzzzz Man that was a lot of smoke.
Steven


Thread Starter
Vintage sportcars
Joined: Jun 2010
Posts: 348
Likes: 1
From: Germany
To get that I used parts cleaner and scotch brite. Wheel cleaner for aluminium works wonders too sometimes.
Then polishing, I took a microfaser rag and used some aluminium/chrome polish. And then go for it
Trick for the rotor faces: Lay down the microfaser with polish liquid on the bench and slide the rotor over it. (from apex seal tip to tip)
As soon as the rag gets black change side, do the bathtubes. Rinse with water & voila.
Steven
PS
Pics will be up to go today