
4-Rotor FC Build

I agree that the concept of the snubber seems good (I just installed one myself) but have some problems with the standard install (mine included).
My issue is that the usually employed snubber is basically an inverted pyramid but there's no corresponding flat surface on the diff nose for it to bear against. The small contact patch of the snubber and the rounded surface of the diff nose is hardly ideal as a consistent restraint.
I would propose- and John is certainly capable of making- a snubber made from a rectangular block that would straddle the top of the diff case.
A simple (or perfect, if you prefer) profile cut on the bottom would ensure wider and more certain engagement and erase the possibility of misalignment.
NVH may increase but could perhaps be mitigated with material choice or relief cuts in the flat (upper) surface that mates with the floorpan.
they should be the same as far is precision goes if the pinion was welded.

I swap. Do you?
Joined: Mar 2009
Posts: 34
Likes: 1
From: Waukesha, WI
I tried the snubber method but I still had problems with it. Here's how I have my pinion setup now. I boxed the mount around the rubber with steel stock. I have Delrin diff bushings and DTSS Eliminators. A little more NVH but not bad by any means. No wheel hop at all.


I am a fan of the snubber. I use fender washers to adjust preload which is a pretty nice feature. I have never had any problem with this setup in either my 20b or my nitrous LS1. Everyone I know who has has solid mounts eventually broke them.
Thread Starter
Joined: Oct 2010
Posts: 605
Likes: 13
From: The Netherlands
I'll see how it goes with this rack, and maybe switch to a longer stroke aluminium rack with electric power steering later.
I tried the snubber method but I still had problems with it. Here's how I have my pinion setup now. I boxed the mount around the rubber with steel stock. I have Delrin diff bushings and DTSS Eliminators. A little more NVH but not bad by any means. No wheel hop at all.
https://lh3.googleusercontent.com/-r...nionBrace1.jpg
https://lh5.googleusercontent.com/-0...nionBrace8.jpg
https://lh3.googleusercontent.com/-S...nionBrace3.jpg
https://lh3.googleusercontent.com/-r...nionBrace1.jpg
https://lh5.googleusercontent.com/-0...nionBrace8.jpg
https://lh3.googleusercontent.com/-S...nionBrace3.jpg
Nice! I saw those pictures already a while ago. I also made a mount that secures the front of the differential to the subframe but I did it a bit differently:


I'll put some rubber bushings between the nuts and the subframe so it's not 100% solid. Maybe I'll also add a snubber between the chassis and the top of the diff, just to be sure.


Senior Member
Joined: Nov 2003
Posts: 533
Likes: 3
From: Sweden
It seemes like you all want it to be stuck to the subframe, but all of you keep the rubber and weld around it?
Am I missing something here, or why you don't replace the rubber with a billet steel-plate?
Maybe in Aluminium to get some little space if it wants to move...
Am I missing something here, or why you don't replace the rubber with a billet steel-plate?
Maybe in Aluminium to get some little space if it wants to move...
Joined: Mar 2001
Posts: 31,857
Likes: 3,243
From: https://www2.mazda.com/en/100th/
i would HATE the noise...

Not only does it perfectly fill the CC switch hole but it has a pseudo electrical socket on the backside to hold the unused harness plug.
Someone really loved their job...
Triangles?
Joined: Apr 2012
Posts: 19
Likes: 0
From: Canton, MA
Joined: Mar 2001
Posts: 31,857
Likes: 3,243
From: https://www2.mazda.com/en/100th/
you'd think it would save a lot of bandwidth because then there is no "where does this connector go" thread, but it probably doesn't

Thread Starter
Joined: Oct 2010
Posts: 605
Likes: 13
From: The Netherlands
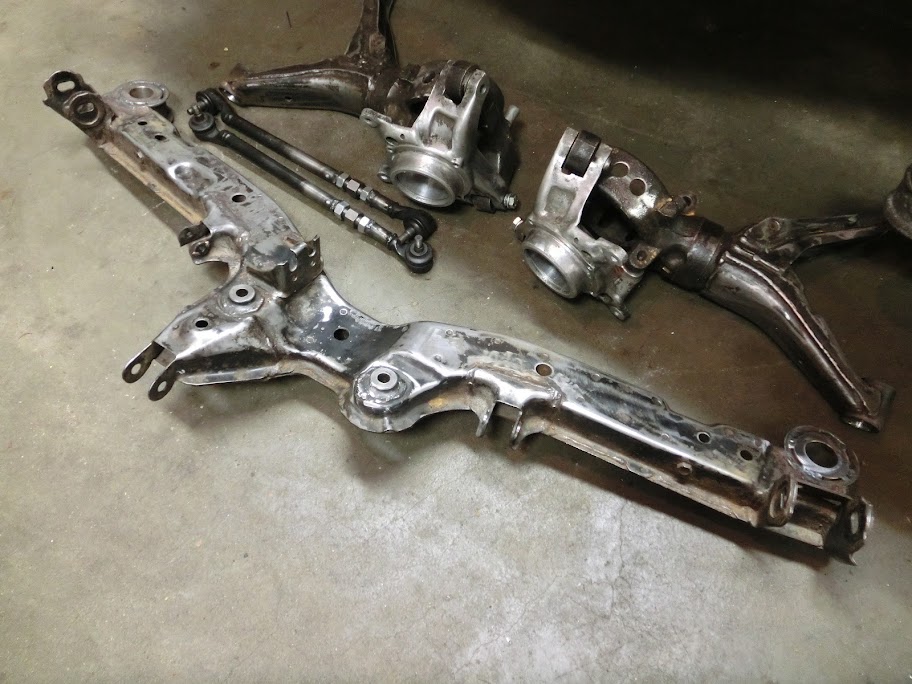
Ok, work on the car has been a bit slow because of some other car projects but I got some stuff done. The wheels had a BMW stud pattern, so I machined the mazda pattern into them, also removed the parking damage and fitted some rubber  . The rear suspension and diff is now prepped and painted, got all the machined steel suspension hardware electroplated. With all the parts ready I started working on the differential. I'm swapping out the stock open diff for an LSD one.
First thing I did was recheck and shim the LSD. I tried different shims, and different stacking combinations. I ended up with the disc springs in the stock location, with a 0.3mm shim added between two of the disc springs and the clutch plates stacked differently so two friction surfaces are added. Preload at this moment is about 110Nm's. I don't know if it's the right amount of preload but at least it's a start.
After the LSD unit was in check I mounted the differential in the housing, and setup the bearing preload and backlash. I got those both perfect, but when checking the gear meshing pattern I noticed it wasn't centered. The loading part was biased to the toe side of the ring gear, so I needed to reduce the shimming between the pinion gear and the rear pinion bearing. I pressed the driveshaft out of the diff housing, and tried pressing the rear bearing of the shaft. Which didn't work because that bearing was really stuck on there! Problem is holding that bearing in place while pressing. Long story short, I got it off, but the rear bearing is damaged. Does anyknow know if this bearing is a normal item, or is it a special mazda item? The bearing says NSK HR 32307 C, so I think it's a normal bearing I can get locally for cheap but I'm not sure.
 )
)
Subframe closer to the chassis, and you will very likely have space issues with inner ends of lateral links touching chassis.
Thread Starter
Joined: Oct 2010
Posts: 605
Likes: 13
From: The Netherlands
 . Not bad, I thought I was screwed when I messed up the old one!
Machine 0.1mm off the pinion shim decreasing it's width to 3.14mm, machine a tool and use it to press the new pinion bearing in, fit the input shaft, machine another tool and use it to press that center bearing on with 900kgf, mount the flange and set the input shaft preload to 1.5Nms, mount the differential, set the backlash to 0.09mm's and preload to 204.48mm, tighten the bearing caps, recheck backlash and backlash consistancy, recheck preload, adjust and recheck things a little bit until it was right, check the gear contact pattern, which was perfect!
, clean everything up, recheck LSD breakaway torque, apply some sealant and mount the rear differential case. It's all good to go now! 
Differential during assembly:

Nah, I didn't move it up that much, maybe like 5-8mm's. You run in major fitment issues after that, not just with the lateral links. I already testfitted it like this, and it's close but fine.
Thread Starter
Joined: Oct 2010
Posts: 605
Likes: 13
From: The Netherlands
Got the front suspension on there:

Got everything for the rear suspension together:
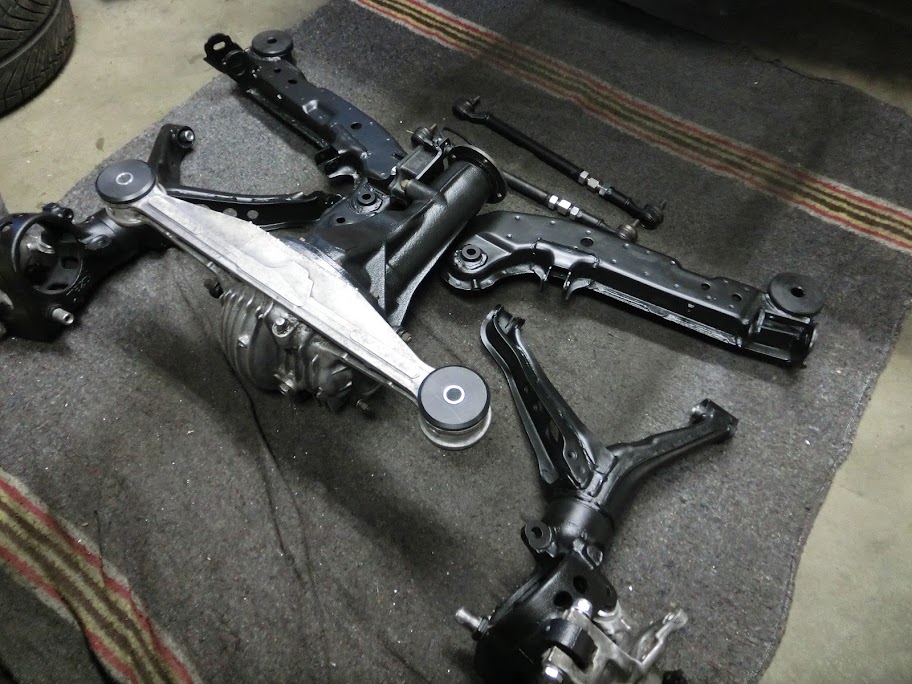
Showing front diff mount:

Here the suspension is mounted on the car. Everything moves really well without any binding whatsoever, while still feeling very solid. Those independent camber adjusters fit very well too, Suspension-wise, I'm happy, just need to space out the pinion snubber a bit.
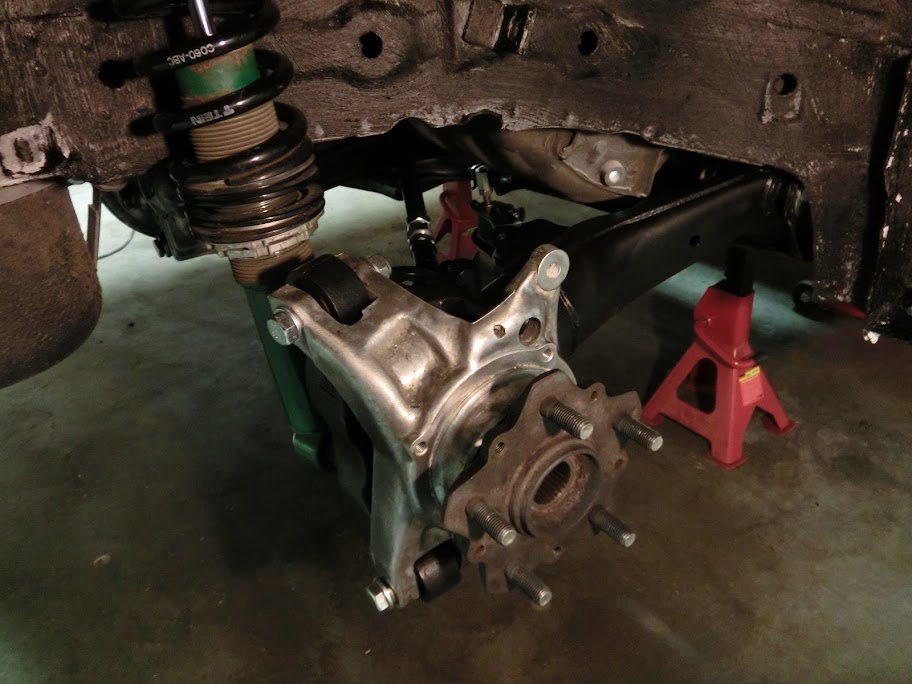
Almost ready to remove the axle stands, finally

Got everything for the rear suspension together:
Showing front diff mount:
Here the suspension is mounted on the car. Everything moves really well without any binding whatsoever, while still feeling very solid. Those independent camber adjusters fit very well too, Suspension-wise, I'm happy
, just need to space out the pinion snubber a bit.Almost ready to remove the axle stands, finally
