
SCCA Super Touring U Build

Thread Starter


Joined: Nov 2006
Posts: 1,578
Likes: 288
From: Parkville, Mo
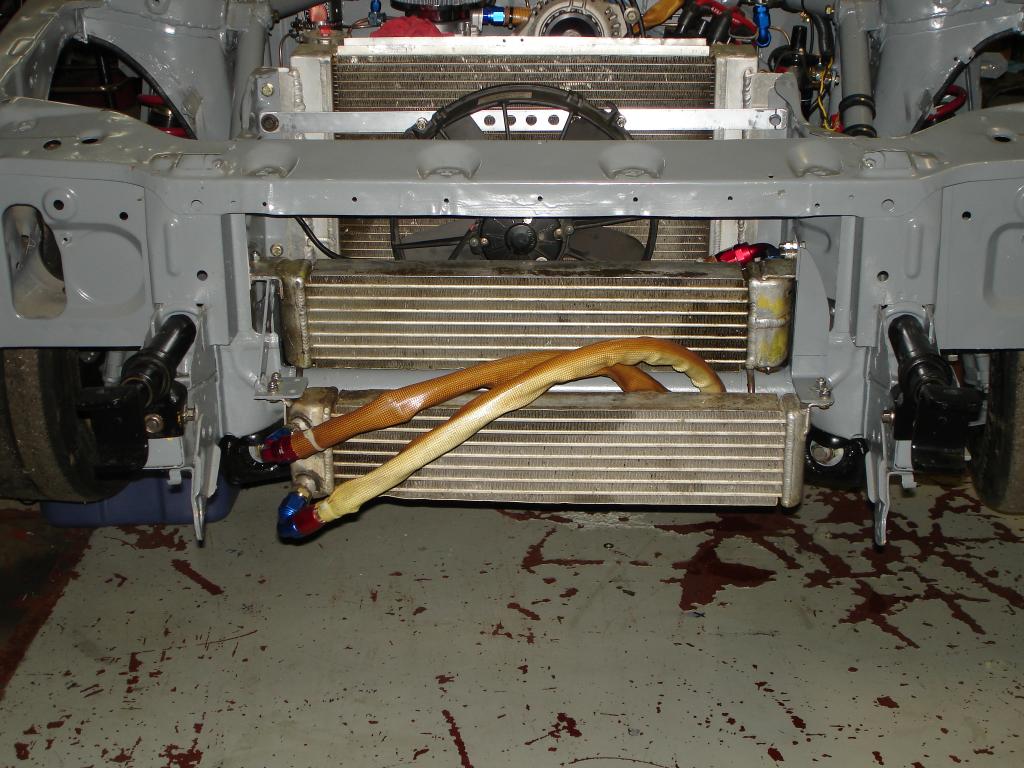
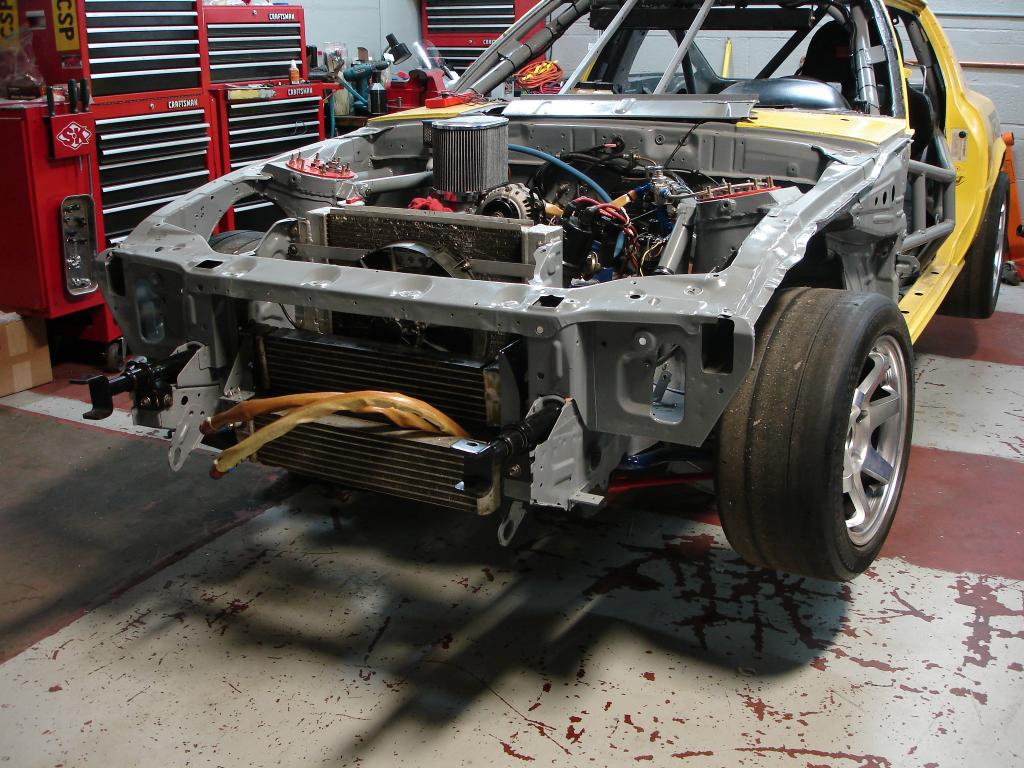
More progress. I have installed the cooling system for oil and water. I am reusing the setup I had on the car when I raced it last time because it worked.
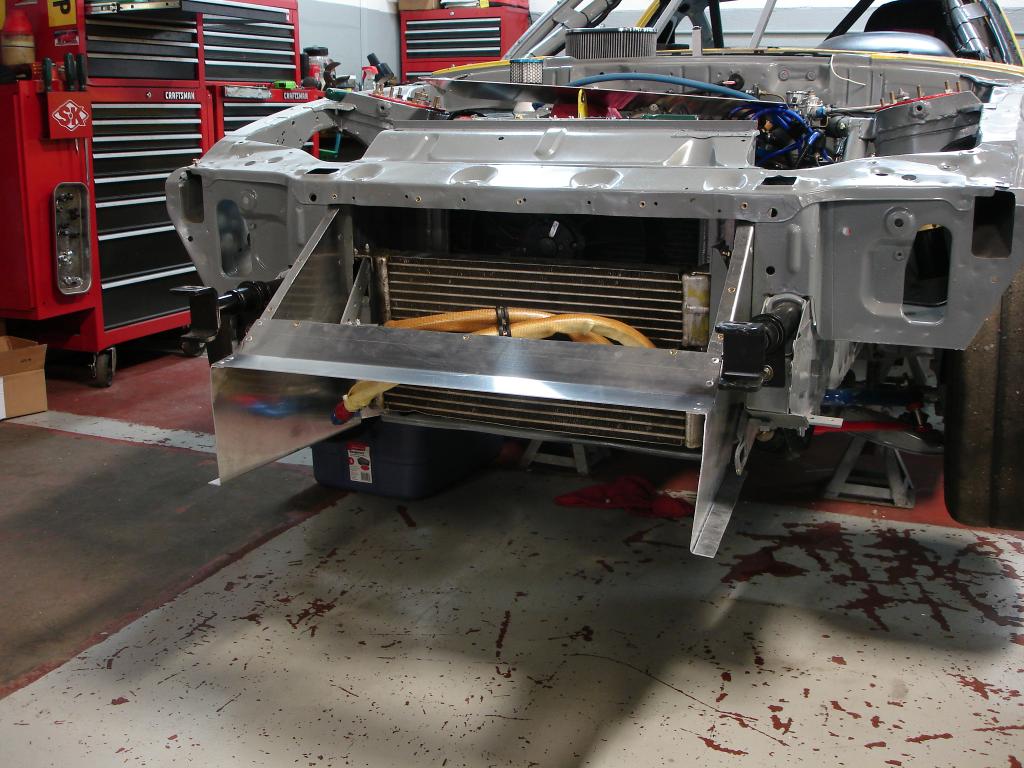
For oil I am using two OE Mazda coolers plumbed in parallel. I teed the oil line out and oil line in fittings so I am running 4 separate lines to the coolers. All of the lines are -10 braided stainless covered with surplus fire sleeve. I got the fire sleeve at one of the Runoffs that were held at Heartland Park. Mostly using for anti-abrasion purposes because braided steel hose will gnaw on things like a hack saw blade.
For water I am using a modified Ron Davis dual pass radiator that measures 19x21. I have an electric fan that is controlled manually for autox and post race cool down use.
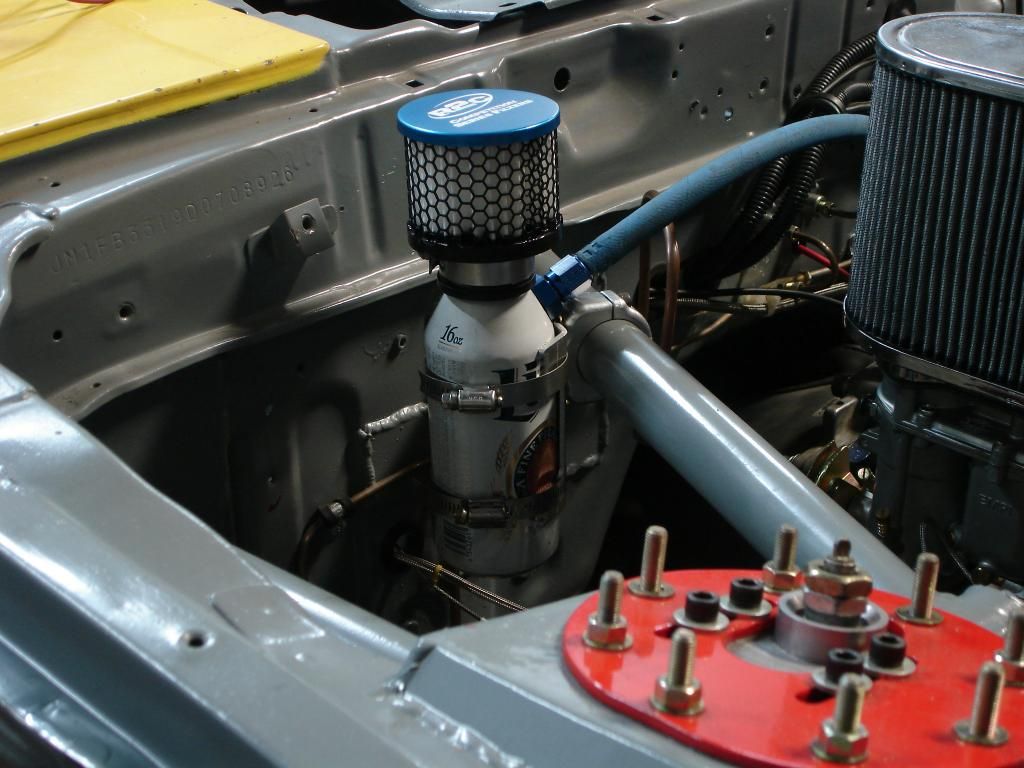
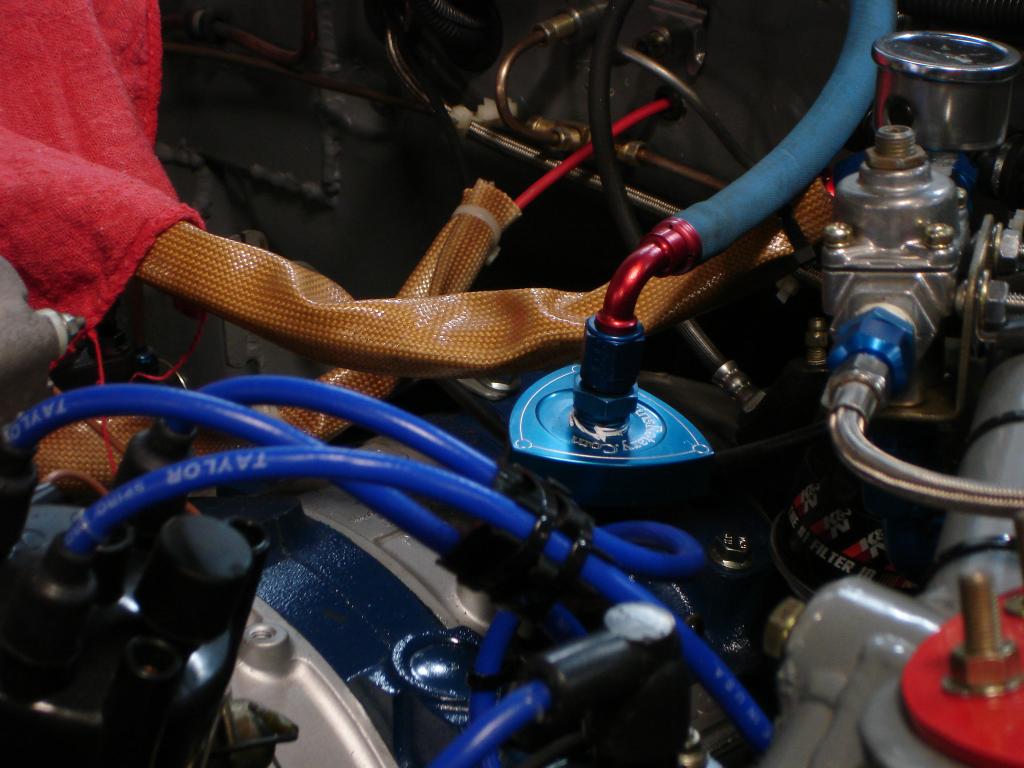
While I was at it I made a catch can for the engine.
Oil Coolers, radiator and oil cooler out fittings.

Catch Can
For oil I am using two OE Mazda coolers plumbed in parallel. I teed the oil line out and oil line in fittings so I am running 4 separate lines to the coolers. All of the lines are -10 braided stainless covered with surplus fire sleeve. I got the fire sleeve at one of the Runoffs that were held at Heartland Park. Mostly using for anti-abrasion purposes because braided steel hose will gnaw on things like a hack saw blade.
For water I am using a modified Ron Davis dual pass radiator that measures 19x21. I have an electric fan that is controlled manually for autox and post race cool down use.
While I was at it I made a catch can for the engine.
Oil Coolers, radiator and oil cooler out fittings.


Catch Can


Thread Starter
Joined: Nov 2006
Posts: 1,578
Likes: 288
From: Parkville, Mo
Very happy to report that the engine is running. Sounds really strong and has 100psi oil pressure with no oil or coolant leaks, Now moving on to radiator ducting and an air dam.
Thread Starter
Joined: Nov 2006
Posts: 1,578
Likes: 288
From: Parkville, Mo
Thanks guys!
More work on the cooling system. Now building a duct that will seal the radiator and coolers to an opening in the air dam. So far just have the sides and the top made. I will build the bottom panel later.
The duct tucks under the bumper and is behind the panel between the head lights. It also slips into the OE under tray and creates a seal around the tension rod mounts.
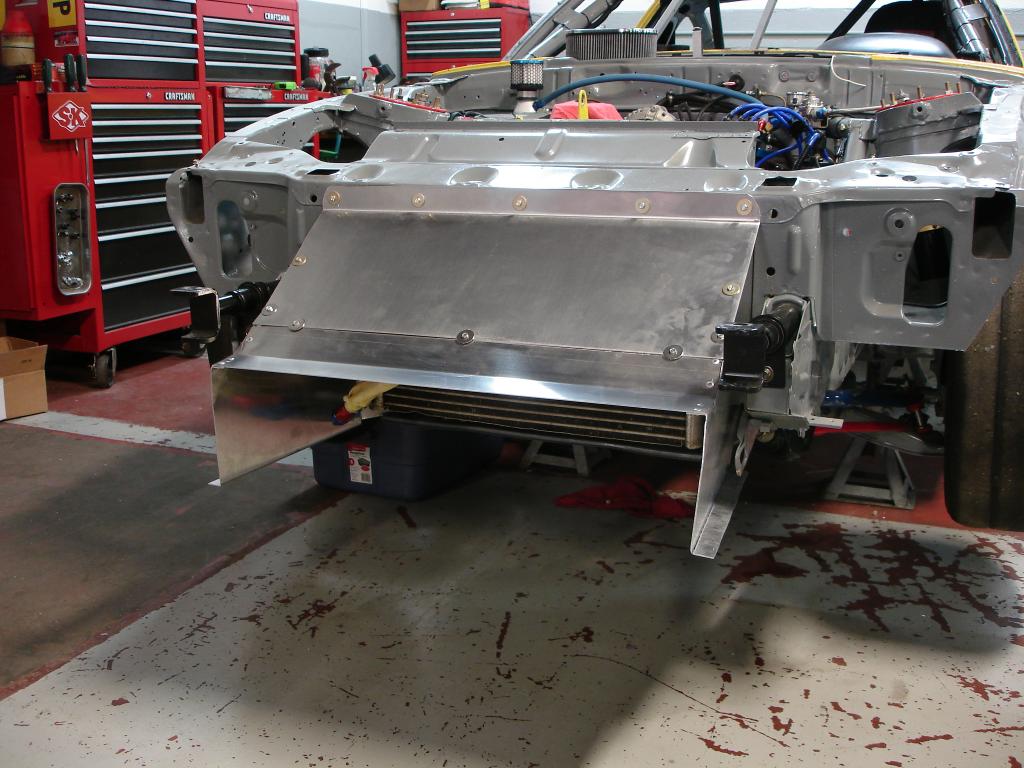
I made a portion of the top of the duct removable so that I can service the oil coolers. I used 10/24 riv-nuts to and 12 10/24 bolts. The bottom will also be removable for cooler service.
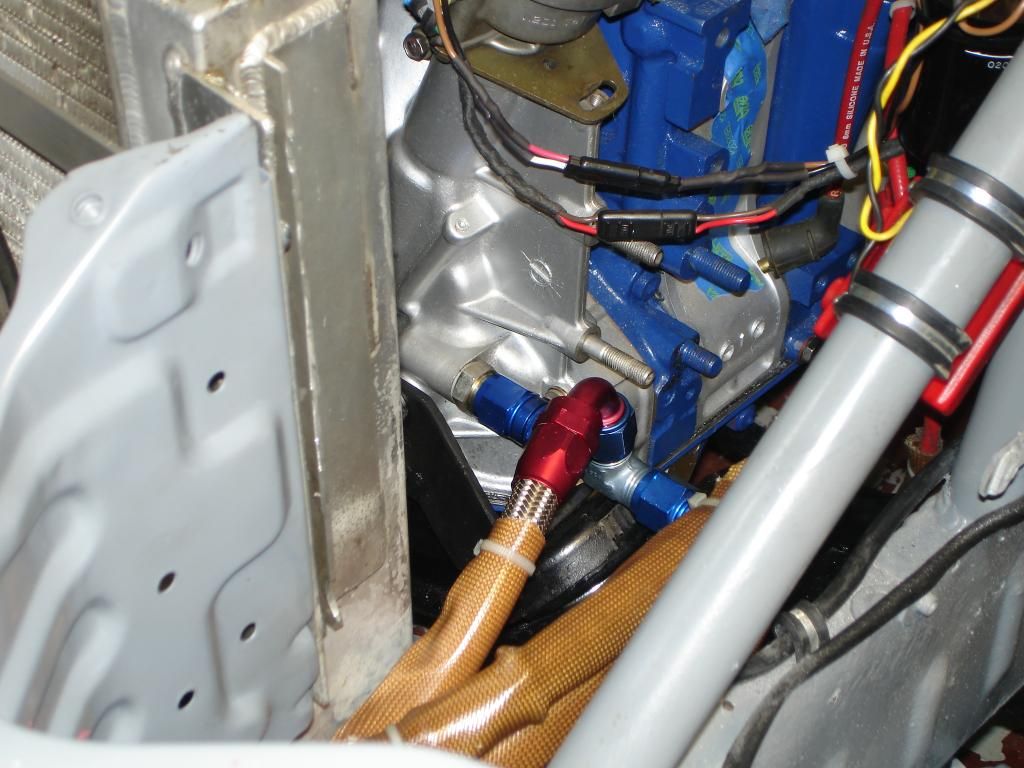
Here is the other end of the catch can line. I used an Adkins billet oil cap and had it drilled and tapped to 3/8 pipe. Then installed a -6 fitting.

Thread Starter
Joined: Nov 2006
Posts: 1,578
Likes: 288
From: Parkville, Mo
Switched gears of late and have been focusing on getting interior/safety equipment installed. Nothing exciting. Built a cool shirt cooler mount, added right side net mounts to the cage and installed a new six point harness. The goal is to complete interior modes and get all of my safety gear installed before hanging the doors.
Thread Starter
Joined: Nov 2006
Posts: 1,578
Likes: 288
From: Parkville, Mo
Safety Equipment and Body Work
Nothing exciting but several projects that were a little challenging.
New 6pt G Force harness installed. Not hard but getting the anti-submarine straps adjusted correctly was time consuming. Next I setup the NASA required right side net using a seat belt latch from a Ford Van. Finished up by installing a new left side net.
In addition to driver safety gear, I made a Cool Box mount and finished wiring all of the accessories. So the cool shirt system, helmet blower and defroster is ready to go.
After that was finished I installed the doors. I did remove the OE door bars and that lightened them up quite a bit.
I'll post up some photos of this stuff when I get time.
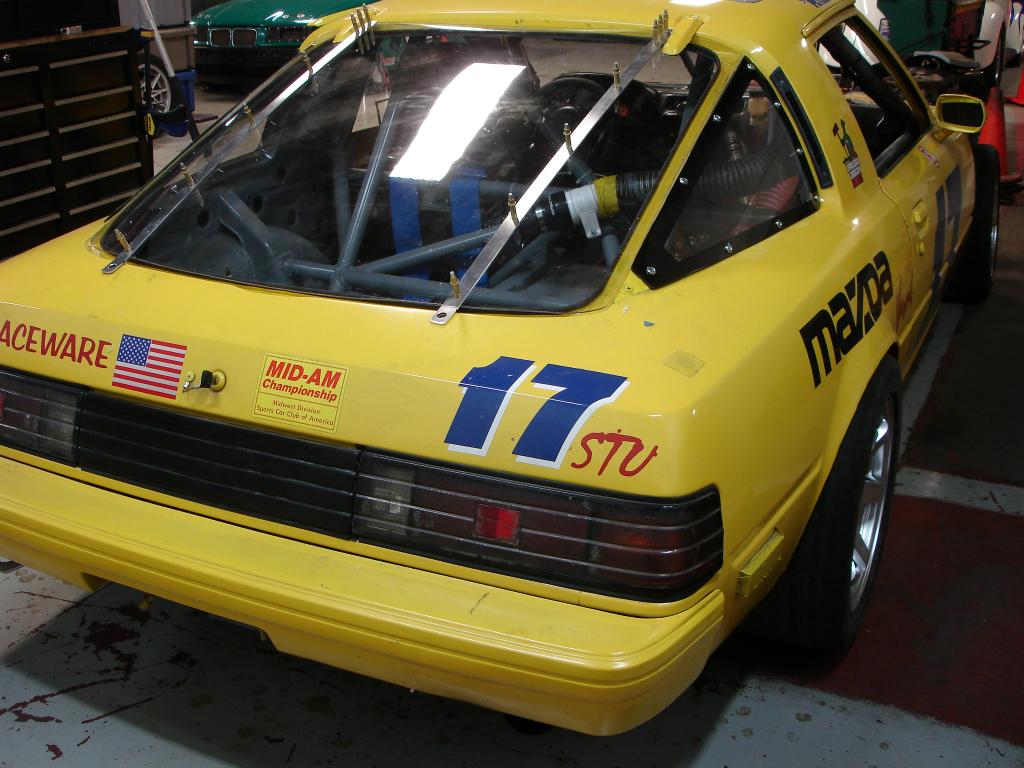
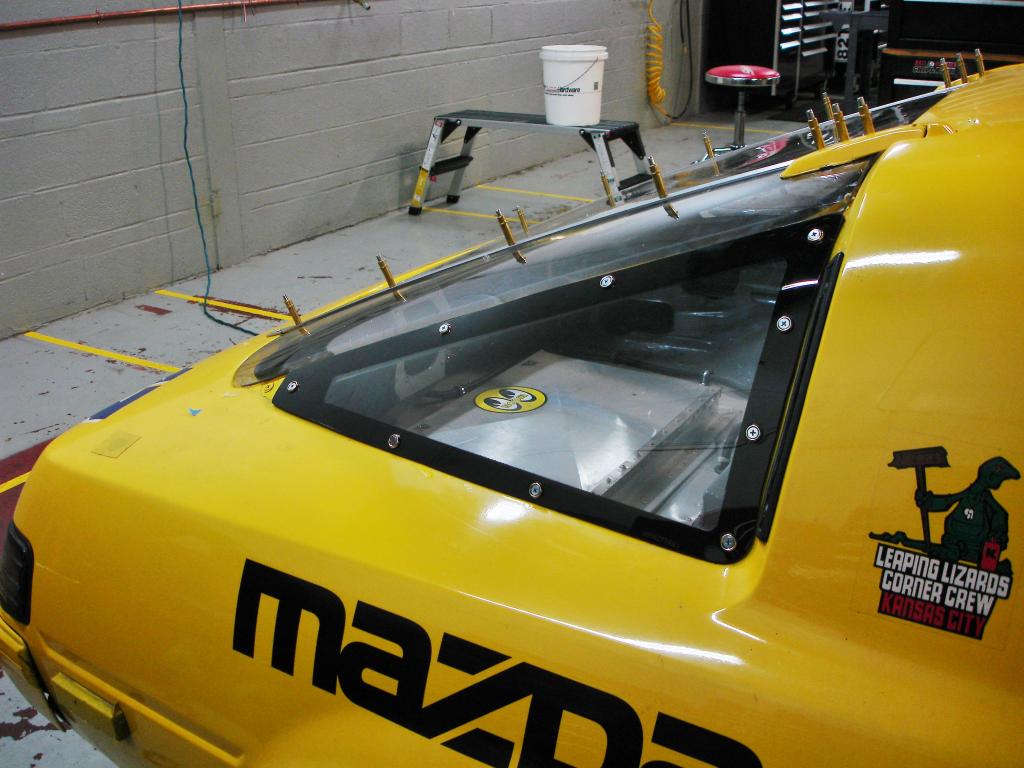
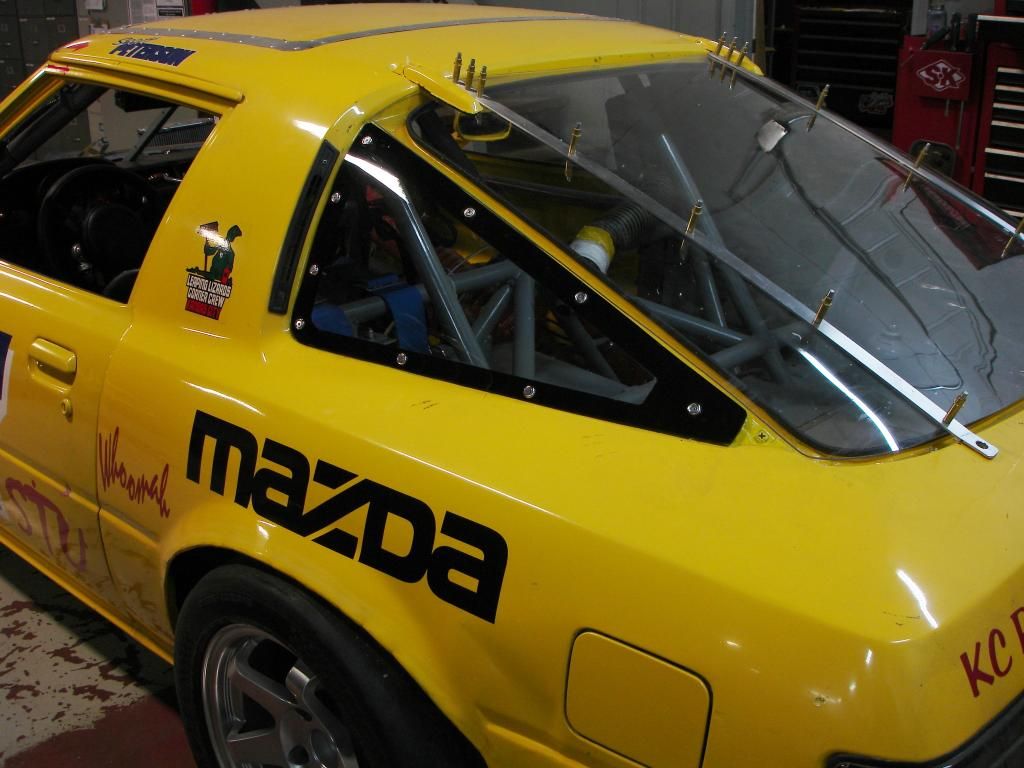
I did get some shots of the KC Racware Lexan quarter windows and rear hatch that I have installed. All of the pieces are made out of .125" lexan that are cut to match the OE pieces and then molded to shape in KC Raceware's quartz oven. Contact Charlie Clark at www.kcraceware,com - he makes .250" front windshields too.
I used Rivet Nuts and 10/24 screws to hold in the quarter windows. The black border was painted on the inside of the quarter windows. The rear hatch is held in place with the OE hinges and will be latched down with Dzus fastners at the ends of the aluminum straps.
New 6pt G Force harness installed. Not hard but getting the anti-submarine straps adjusted correctly was time consuming. Next I setup the NASA required right side net using a seat belt latch from a Ford Van. Finished up by installing a new left side net.
In addition to driver safety gear, I made a Cool Box mount and finished wiring all of the accessories. So the cool shirt system, helmet blower and defroster is ready to go.
After that was finished I installed the doors. I did remove the OE door bars and that lightened them up quite a bit.
I'll post up some photos of this stuff when I get time.
I did get some shots of the KC Racware Lexan quarter windows and rear hatch that I have installed. All of the pieces are made out of .125" lexan that are cut to match the OE pieces and then molded to shape in KC Raceware's quartz oven. Contact Charlie Clark at www.kcraceware,com - he makes .250" front windshields too.
I used Rivet Nuts and 10/24 screws to hold in the quarter windows. The black border was painted on the inside of the quarter windows. The rear hatch is held in place with the OE hinges and will be latched down with Dzus fastners at the ends of the aluminum straps.


Thread Starter
Joined: Nov 2006
Posts: 1,578
Likes: 288
From: Parkville, Mo
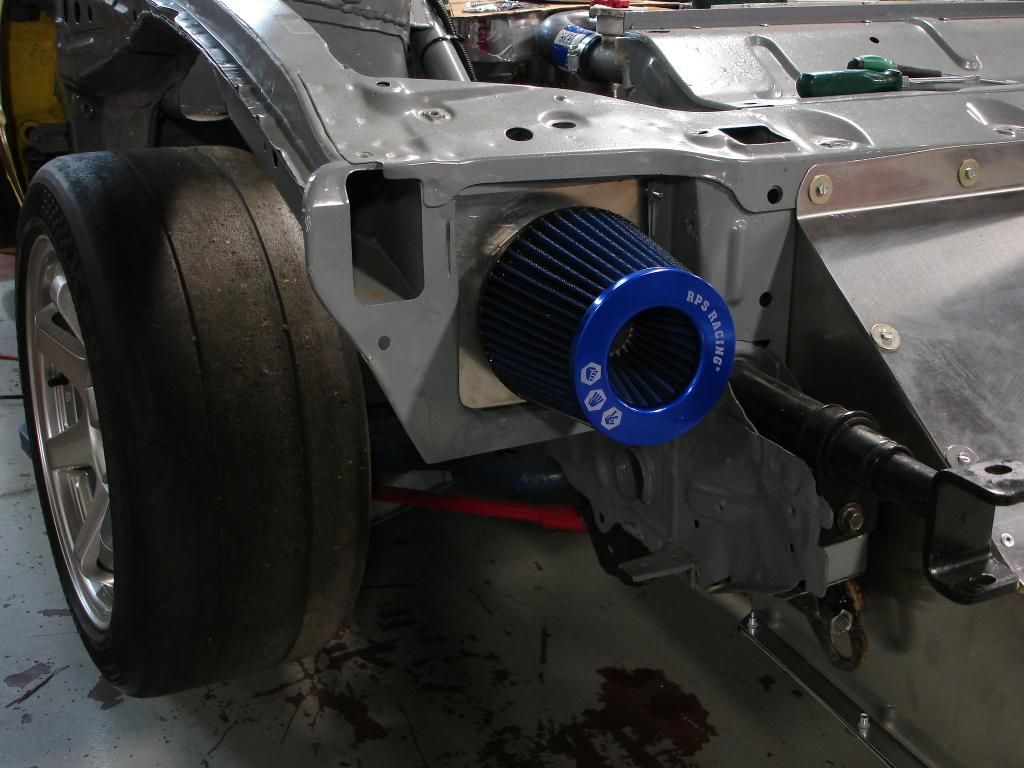
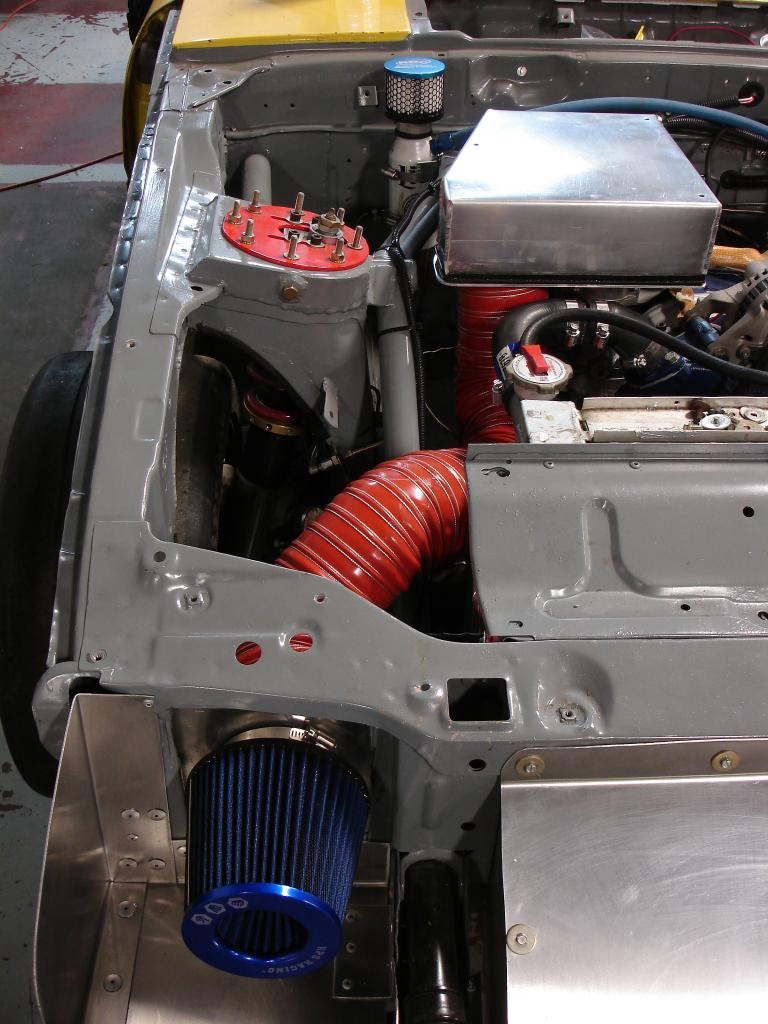
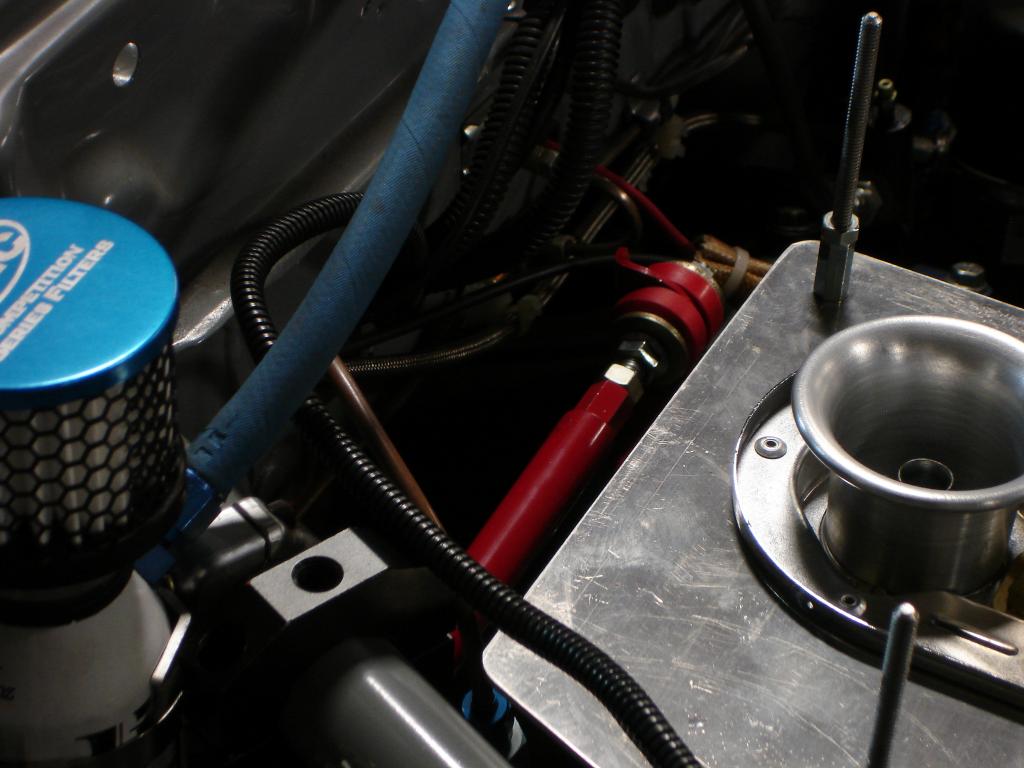
Cold Air system. Just about done with this, here is where I am at now
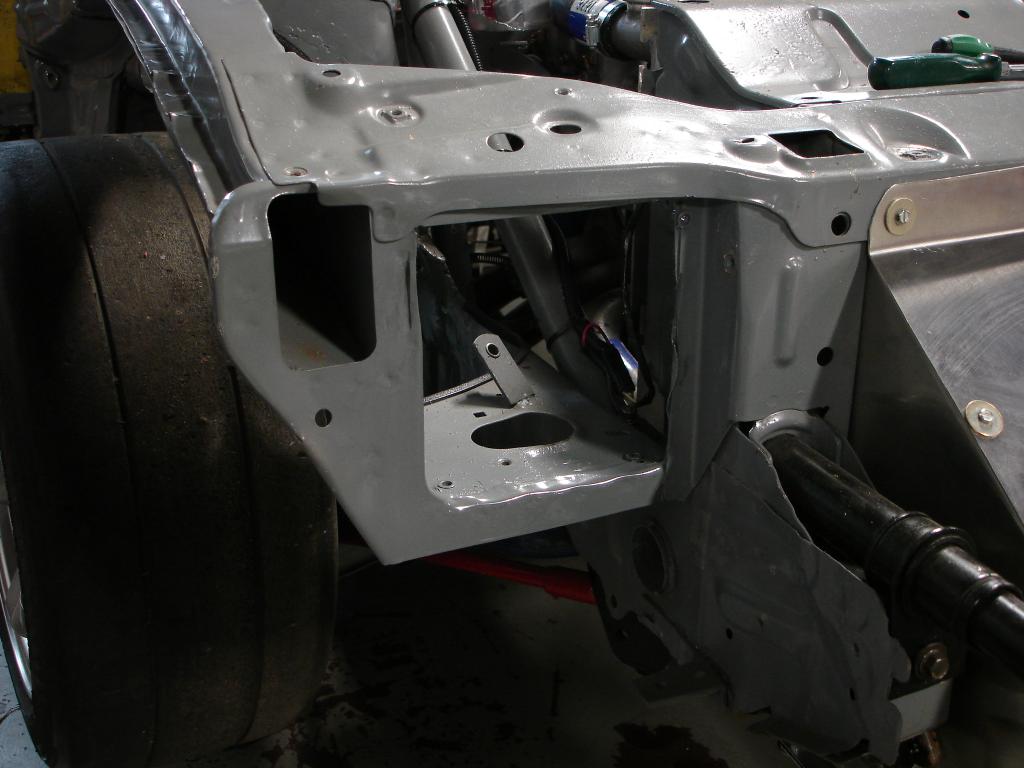
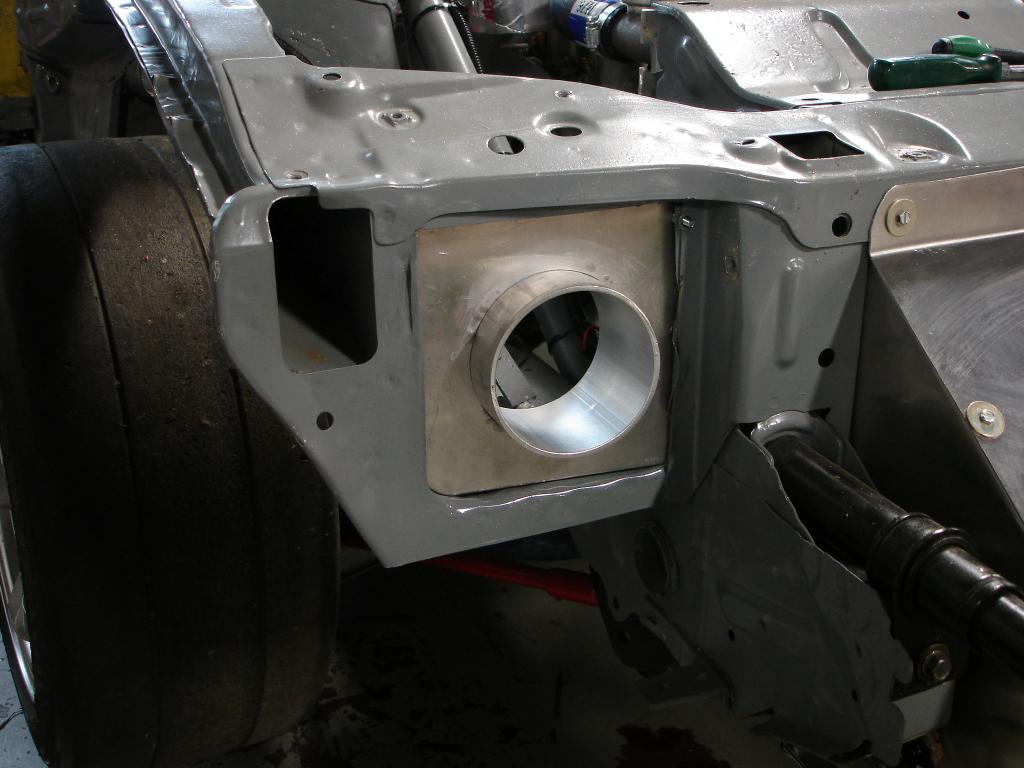
The system will consist of a remote mounted 4" air filter that will get cold air through the right front turn signal opening. A 4" hose will connect to a sealed air box over the carb.
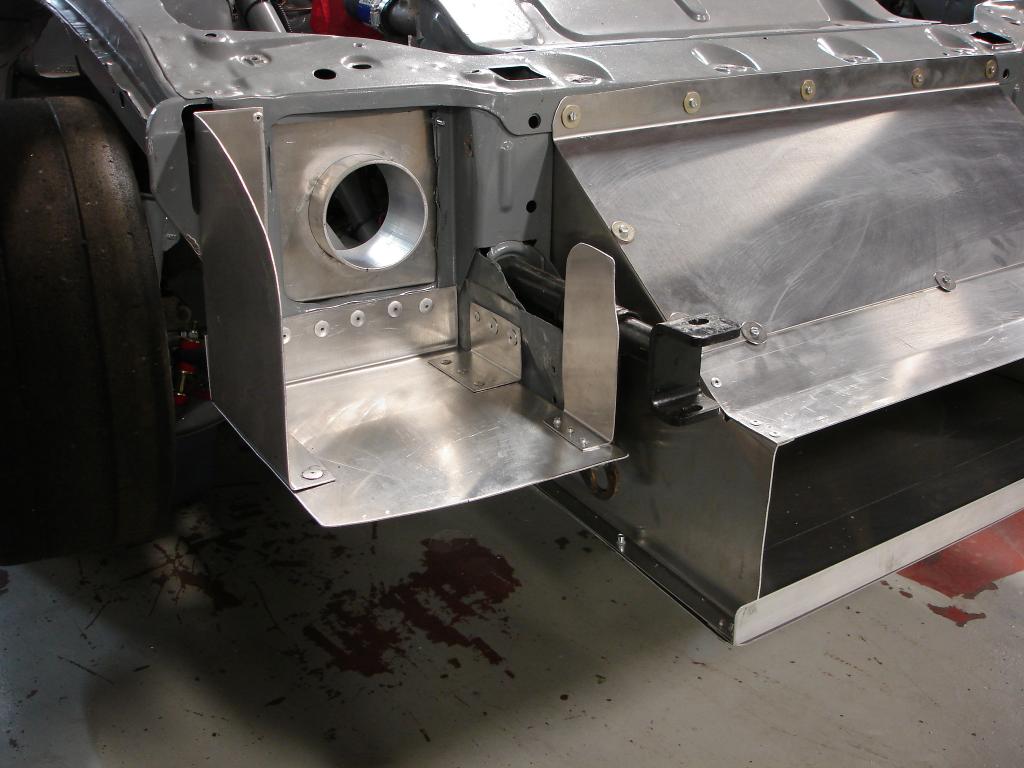
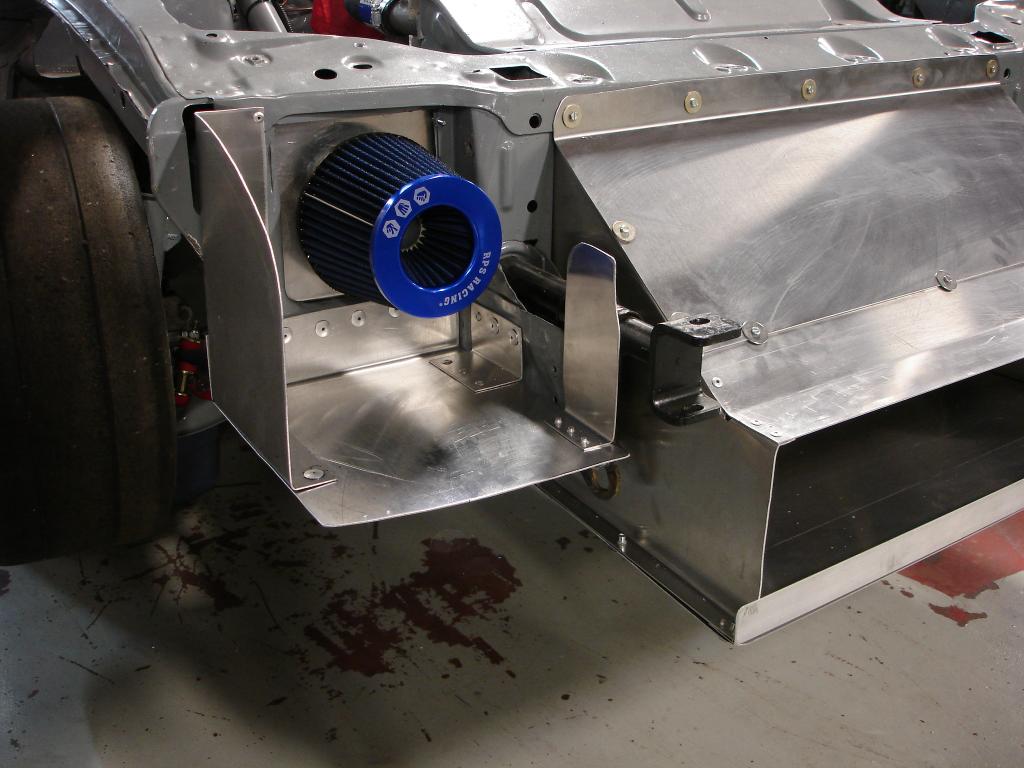
First thing I did was cut out the head light mounting panel on the right front of the car. Then I built a filter mount that bolts into place and allows the filter to be pulled back into the engine compartment for service. Then I built baffles around the filter to better seal it to the turn signal opening.
The system will consist of a remote mounted 4" air filter that will get cold air through the right front turn signal opening. A 4" hose will connect to a sealed air box over the carb.
First thing I did was cut out the head light mounting panel on the right front of the car. Then I built a filter mount that bolts into place and allows the filter to be pulled back into the engine compartment for service. Then I built baffles around the filter to better seal it to the turn signal opening.


Thread Starter
Joined: Nov 2006
Posts: 1,578
Likes: 288
From: Parkville, Mo
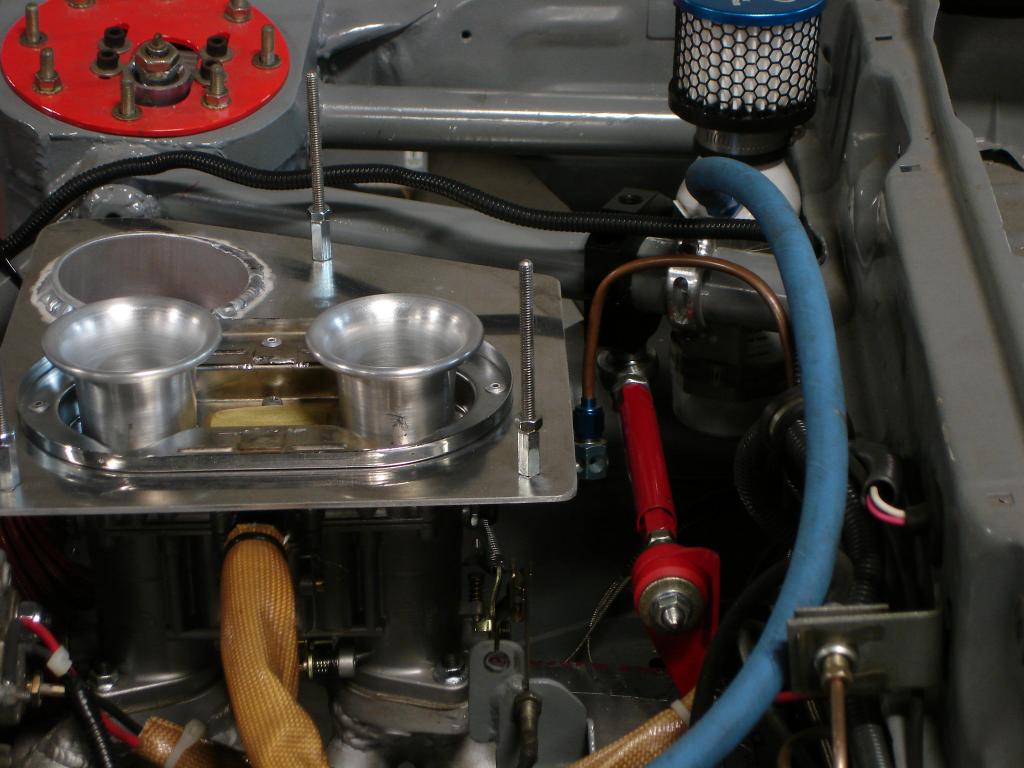
Air Box
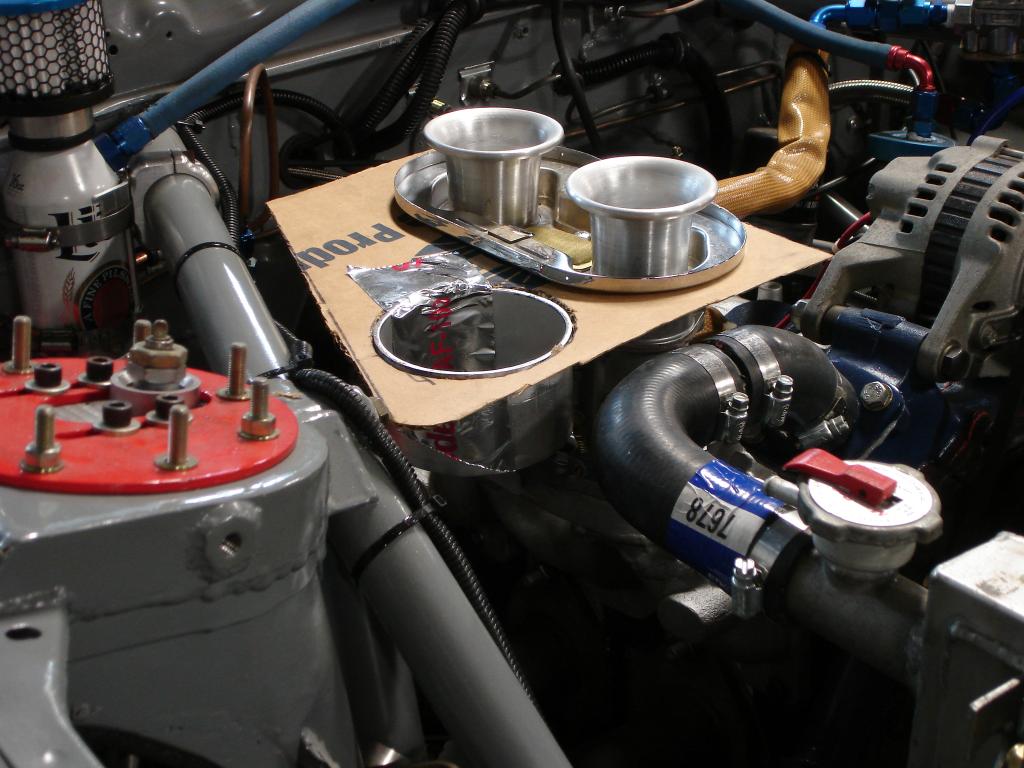
The air box will consist of two parts. A flat base with a sheet aluminum cover.
The base is made out of .125 aluminum and will mount the carb adapter and a 4" aluminum tube. The carb adapter is the base for a EMPI Godzilla IDA air filter assembly which turned out to the be cheapest way to get what I need. The adapter will be riveted to the base with and the 4" tube welded.
I made a cardboard template to get the shape of the base.
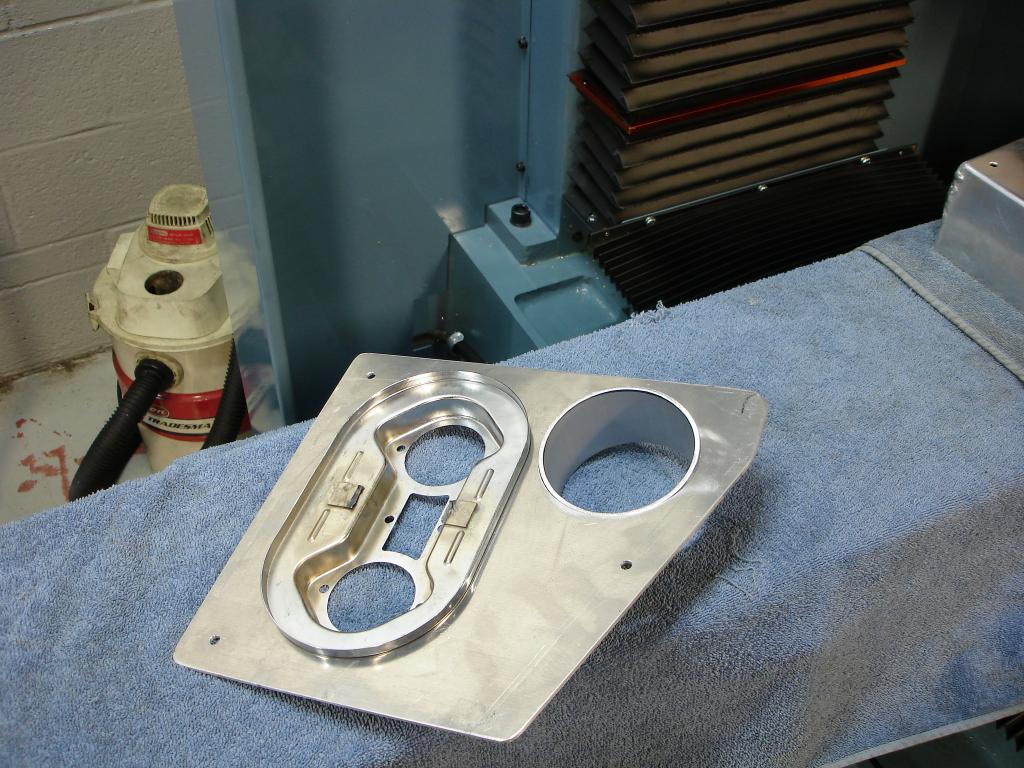
The air box cover is made out of .080 aluminum that I folded up on the shop's brace. David Long of Santa Fe Garage (Santa Fe Garage Automotive Services in Independence, MO) tig welded the seams
The air box will consist of two parts. A flat base with a sheet aluminum cover.
The base is made out of .125 aluminum and will mount the carb adapter and a 4" aluminum tube. The carb adapter is the base for a EMPI Godzilla IDA air filter assembly which turned out to the be cheapest way to get what I need. The adapter will be riveted to the base with and the 4" tube welded.
I made a cardboard template to get the shape of the base.


The air box cover is made out of .080 aluminum that I folded up on the shop's brace. David Long of Santa Fe Garage (Santa Fe Garage Automotive Services in Independence, MO) tig welded the seams

Thread Starter
Joined: Nov 2006
Posts: 1,578
Likes: 288
From: Parkville, Mo
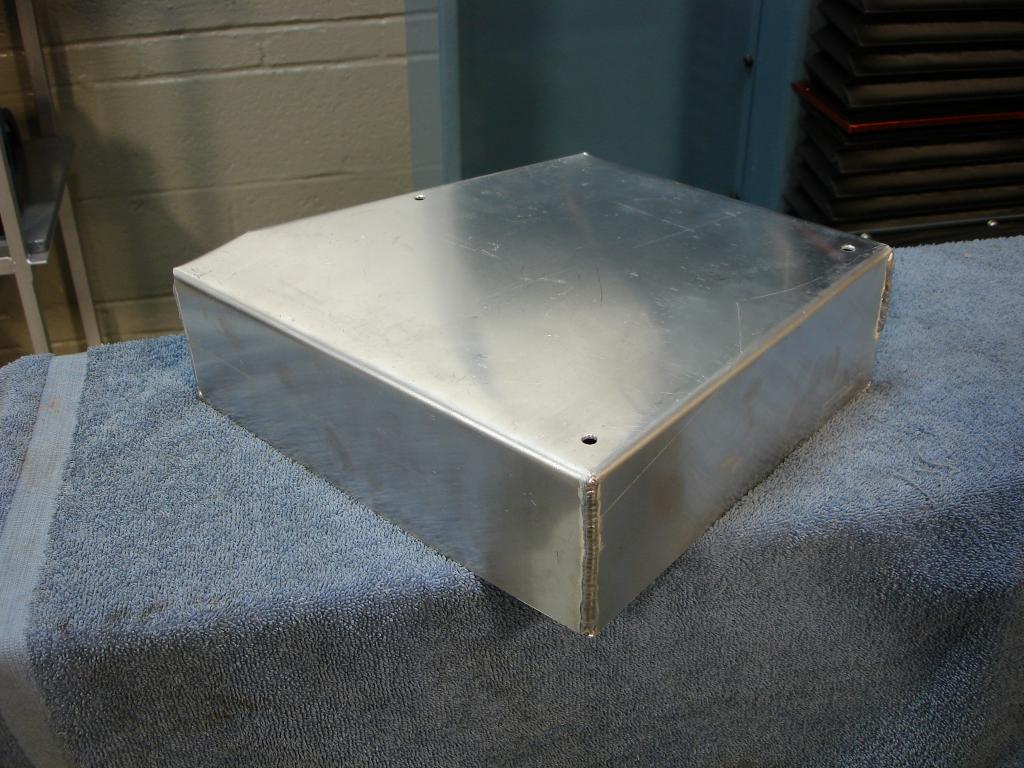
Air Box finished. The inlet tube was welding in and I have attached the air filter base. Many thanks to Dave Long at Sante Fe Garage for the great Tig work.

Also built a heat shield. It uses a steel mount that attaches to the top header studs using some metric coupler nuts and metric all thread. A .063 aluminum sheet provides the heat barrier.
Steel mount
With aluminum shield attached


Also built a heat shield. It uses a steel mount that attaches to the top header studs using some metric coupler nuts and metric all thread. A .063 aluminum sheet provides the heat barrier.
Steel mount

With aluminum shield attached

Thread Starter
Joined: Nov 2006
Posts: 1,578
Likes: 288
From: Parkville, Mo
Thanks Craaazzy. Given that a race car is never really done, early 2015 the car will be race ready. I had a plan for late 2014 to cut some corners and make some races but that fell through. So I have decided to do everything I have in my build plan and be ready for the first race weekends.
Thread Starter
Joined: Nov 2006
Posts: 1,578
Likes: 288
From: Parkville, Mo
Yep, David is really good at this. But you are on the right track, this is a skill takes practice and he gets allot of it. I really need to learn how to do this.
Thread Starter
Joined: Nov 2006
Posts: 1,578
Likes: 288
From: Parkville, Mo
Torque Limiter
I've had a torque limiter on my race car for many years. The main benefit is that it keeps the shifter located where it should be. Makes shifting the car easier during a race.
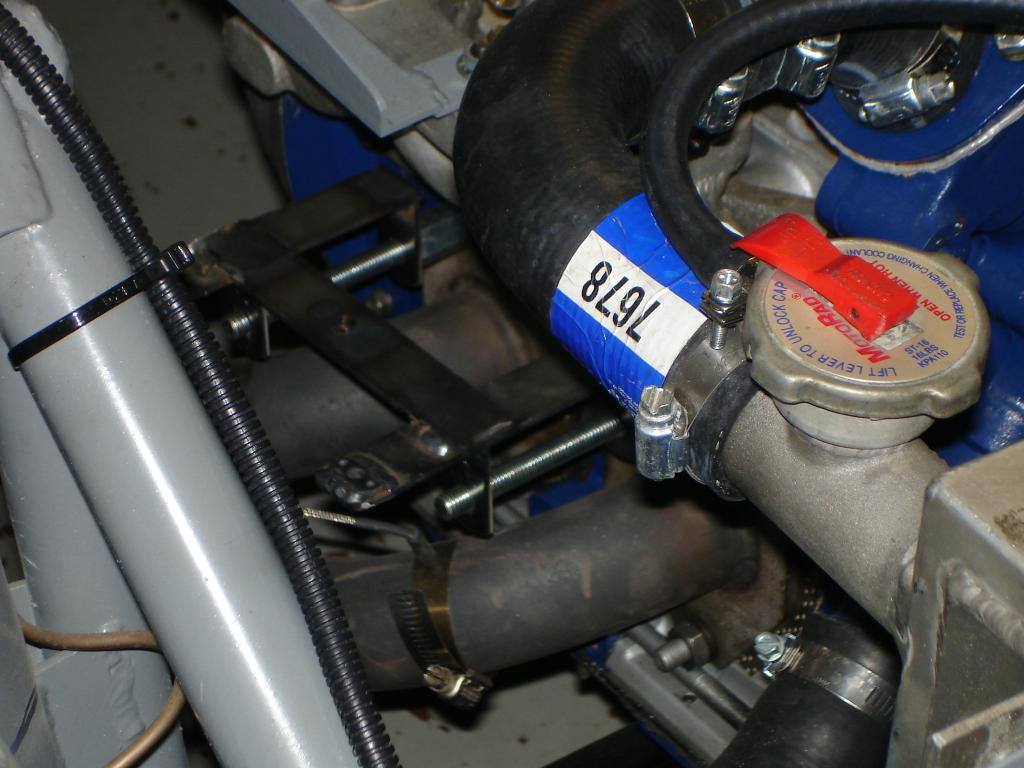
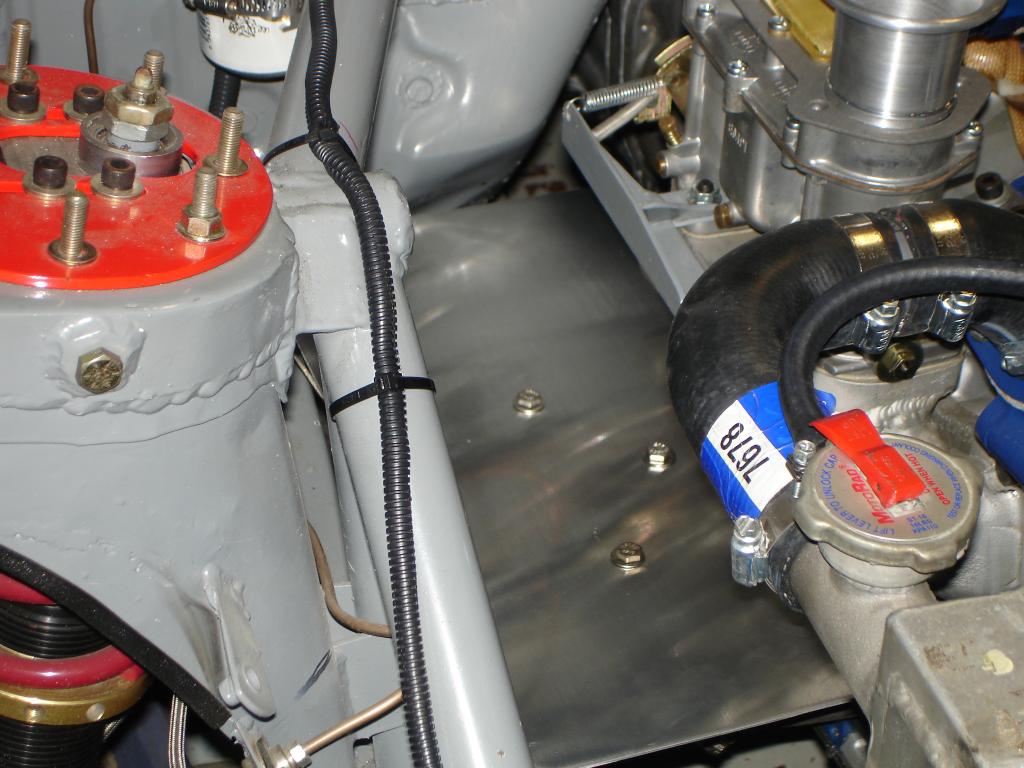
The limiter will mount to the engine in the right side and connect to the roll cage.
Here it is mocked up on the bench. The bracket the bolts to the engine is made of .125 steel and the tube is .75 steel with a 1/2" coupling nut one end and a 3/8" coupling nut on the other. An aluminum ballast clamp is the roll cage attachment.
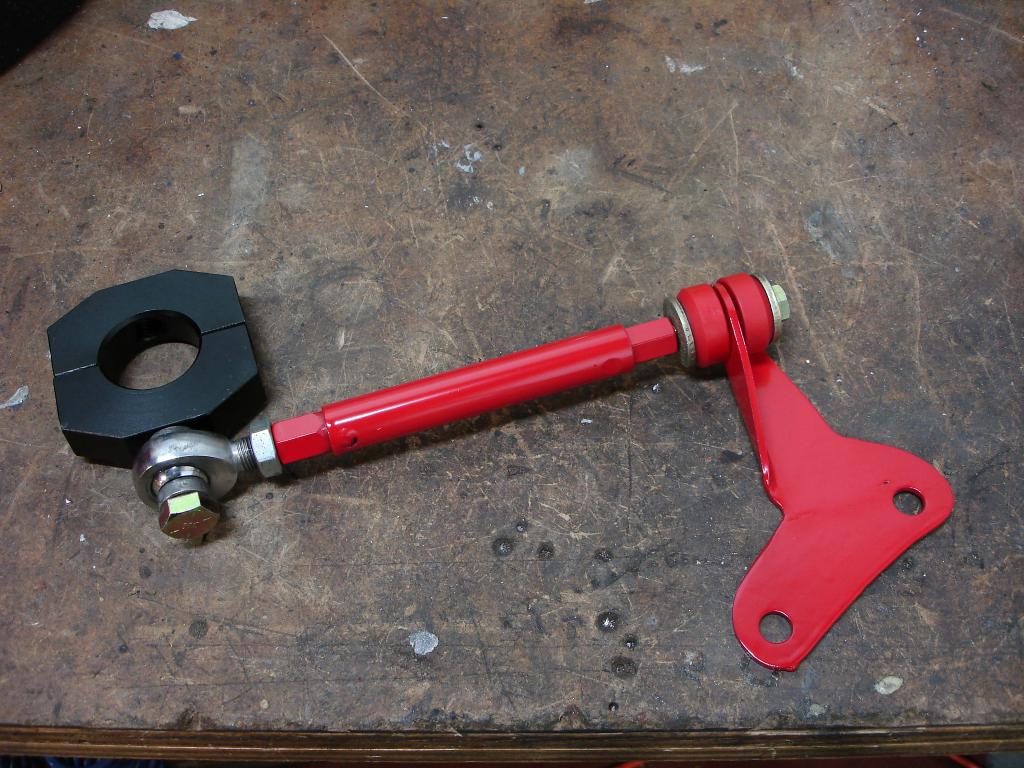
Mounted to the car. I ended up using a short piece 3/8 threaded rod instead of a bolt on the engine mount end.


so many cool touches everywhere. I wish we lived closer, I would love to just drink a beer and look at the car in person.
is that engine torque arm supposed to act like a top engine mount? So the engine doesn't rock back and forth when you throttle on/off
is that engine torque arm supposed to act like a top engine mount? So the engine doesn't rock back and forth when you throttle on/off