
SCCA Super Touring U Build

Thread Starter


Joined: Nov 2006
Posts: 1,578
Likes: 288
From: Parkville, Mo
Thanks!
The struts are Koni 8610 Single Adjustable inserts. They are in modified 84-85 spindles that were bored out and fitted with 2" tubes.
I will eventually replace these struts with 8612 Double Adjustable struts but I need my budget to catch up to my dreams first.
The struts are Koni 8610 Single Adjustable inserts. They are in modified 84-85 spindles that were bored out and fitted with 2" tubes.
I will eventually replace these struts with 8612 Double Adjustable struts but I need my budget to catch up to my dreams first.
Thread Starter
Joined: Nov 2006
Posts: 1,578
Likes: 288
From: Parkville, Mo
Engine porting continues and is starting to be a grind...pun intended. I am now understanding why a professional engine builder charges 4-5K for a street ported racing engine. Anyway, at least this is easier that porting a set of V8 heads...been there done that.
New rotor housings have been ordered along all the seals/parts I need to finish the project
Photos when things get closer to being assembled.
New rotor housings have been ordered along all the seals/parts I need to finish the project
Photos when things get closer to being assembled.
Thread Starter
Joined: Nov 2006
Posts: 1,578
Likes: 288
From: Parkville, Mo
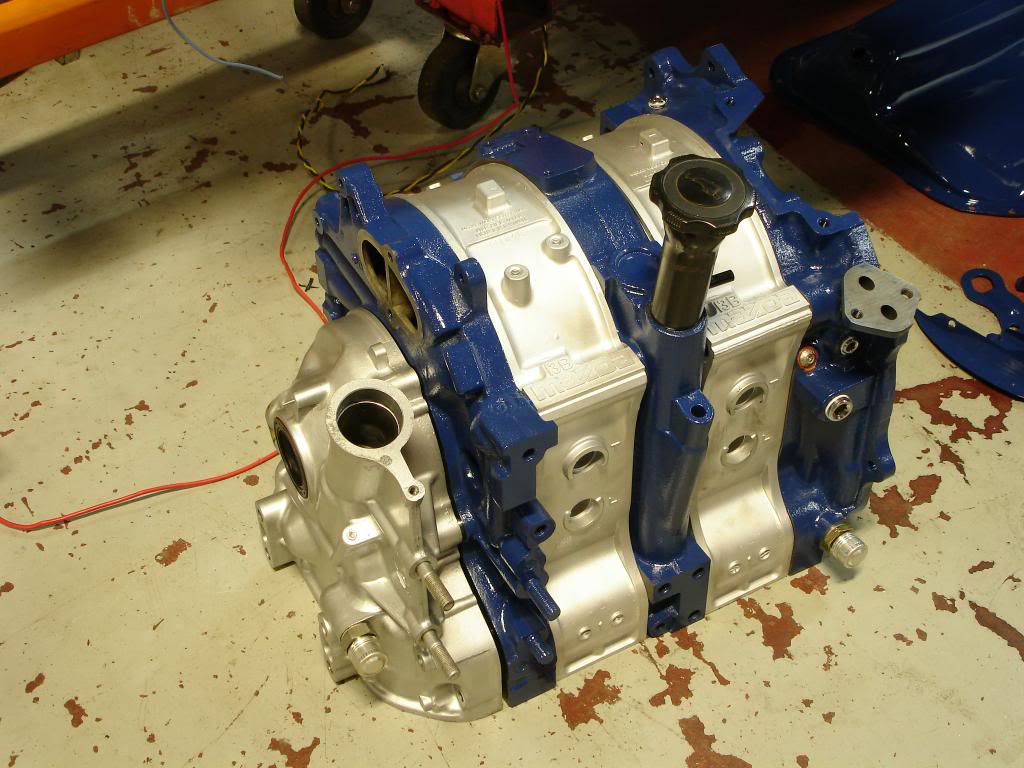
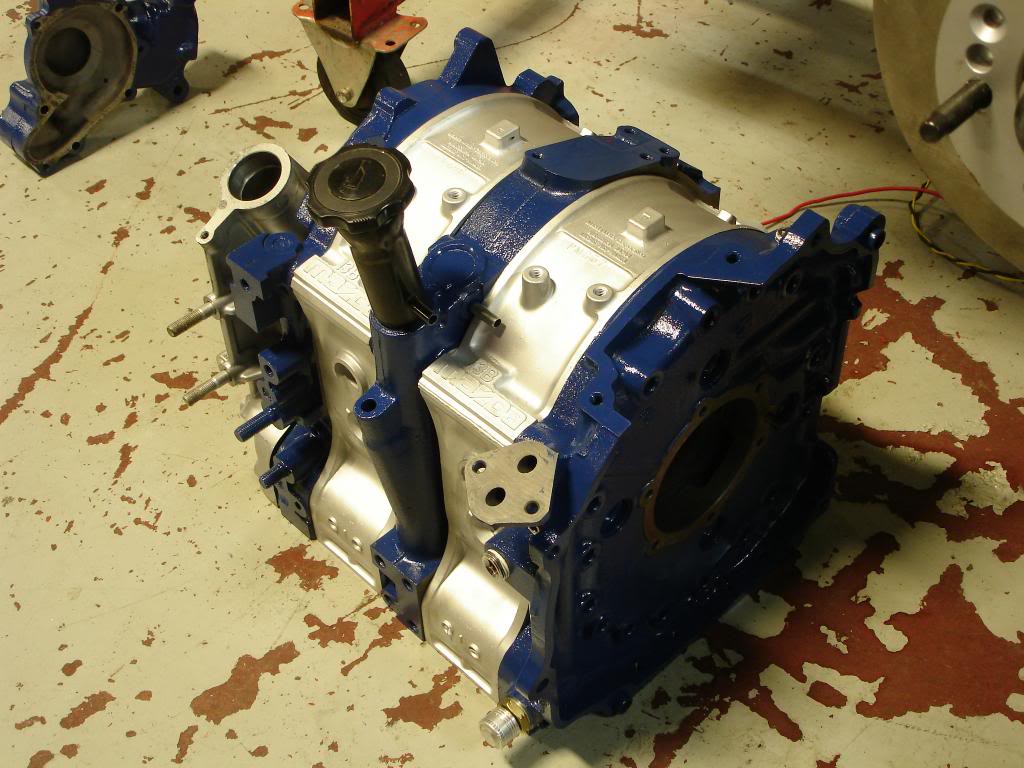
I finished the port work and have all the engine parts cleaned up. Here are some shots of the engine. The rotor housings are new. The rear iron has had all the water and oil ports tapped and plugged with pipe plugs. I have also made a few modifications to the water pump housing and I'll post pictures up in a few days.


Thread Starter
Joined: Nov 2006
Posts: 1,578
Likes: 288
From: Parkville, Mo
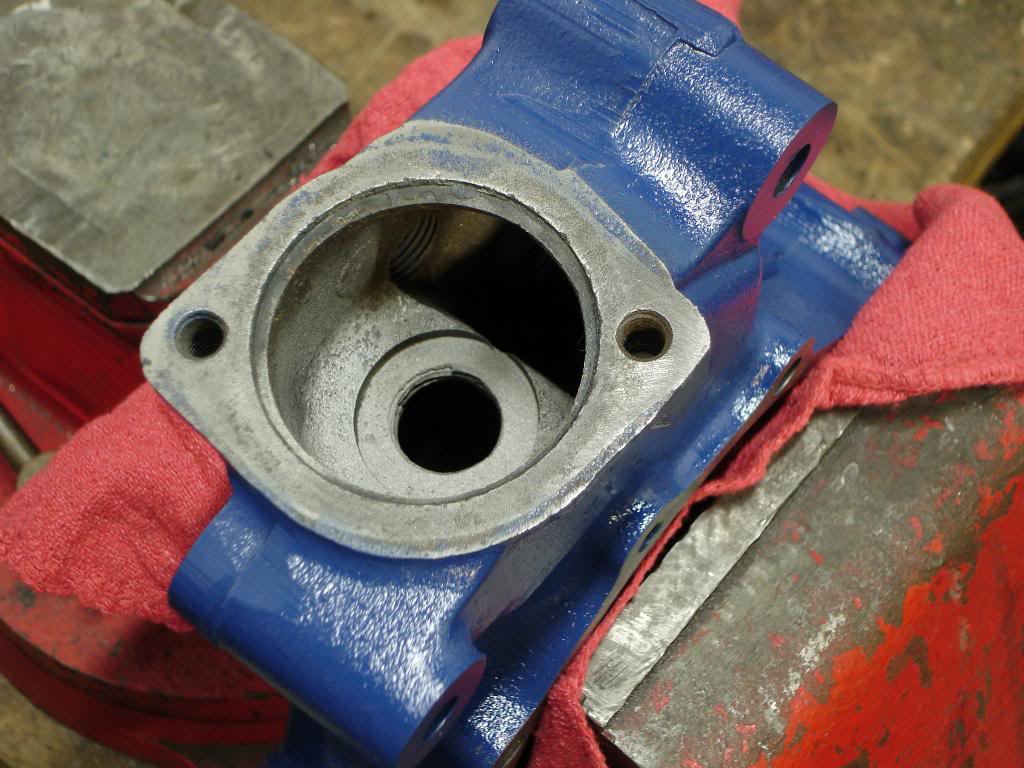
I made a few water pump housing modifications. Since this is a racing only application I am not running a thermostat because they can fail. Instead I will use a restrictor with somewhere between .75" and .625" in diameter hole. The problem is that the thermostat also opens and closes a bypass hole in the water pump housing. So I have to plug the bypass.
This the bypass hole in the water pump housing. When the thermostat is closed, this hole is open. When the thermostat opens this hole is closed off. Fortunately the hole, as cast, is the perfect size for a 3/4" NPT tap.
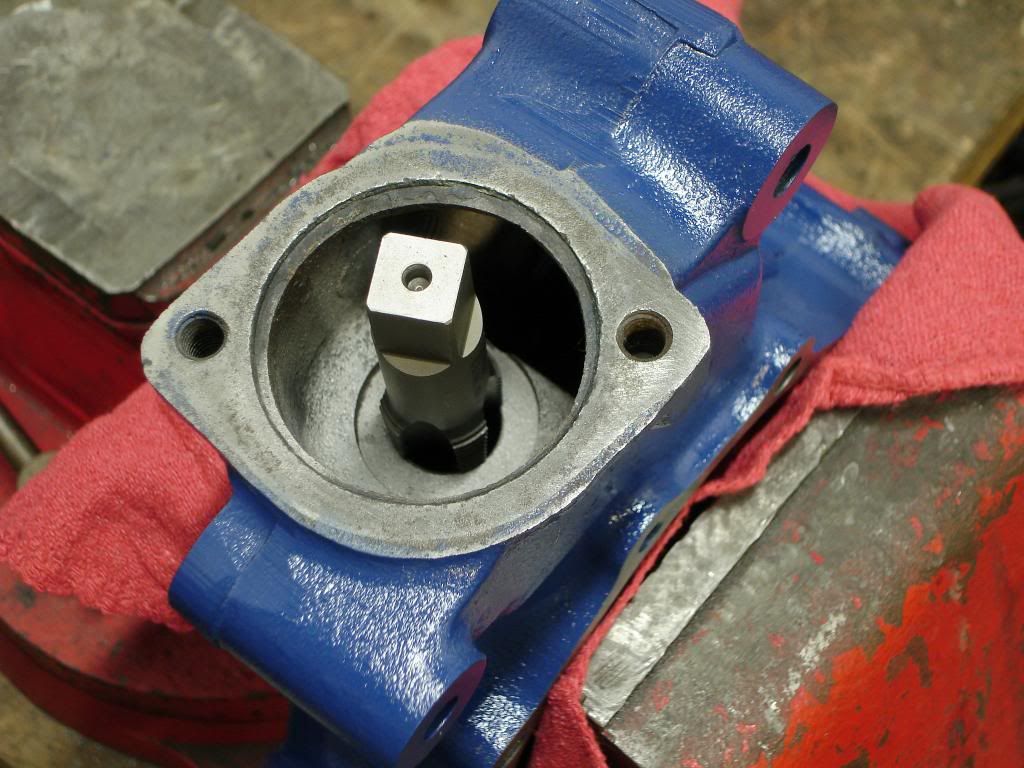
Plug installed
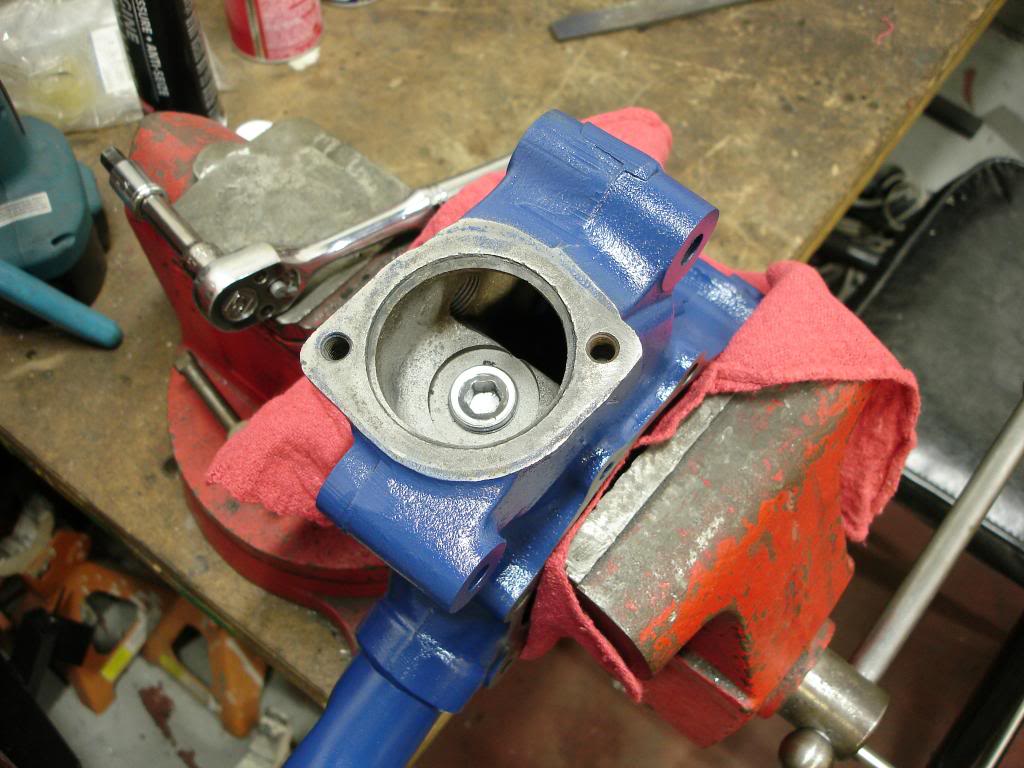
In addition to this I drilled out the sensor hole and tapped it out to 3/8" NPT so I can use this for a temperature gauge prob. I also removed the pressed in nipple and drilled and tapped it for a 1/4 NPT plug.
This the bypass hole in the water pump housing. When the thermostat is closed, this hole is open. When the thermostat opens this hole is closed off. Fortunately the hole, as cast, is the perfect size for a 3/4" NPT tap.


Plug installed

In addition to this I drilled out the sensor hole and tapped it out to 3/8" NPT so I can use this for a temperature gauge prob. I also removed the pressed in nipple and drilled and tapped it for a 1/4 NPT plug.
Thread Starter
Joined: Nov 2006
Posts: 1,578
Likes: 288
From: Parkville, Mo
Oops my rear brakes are on backwards!!!
So file this one under under things that make you go damn.... The brakes on my car are of an FC Turbo - front and rear. The fronts are fine but I have had a devil of a time getting the rears to bleed. So, I got another set of eyes on the problem and they determined that the way the bleeders are arranged on the caliper (they have two bleeders per caliper) there is no way to get get air out. This despite the fact that I have a bleeder pointing straight up.
So after a little research I figured out the issue. On an FC, the rear brakes are on the front of the rotor. I had mounted them on the rear of the rotor....cause that's where they go on an FB, right??. So the fix was to put the Left caliper on the Right and the Right Caliper on the Left. The brakes bleed perfectly after that!
So after a little research I figured out the issue. On an FC, the rear brakes are on the front of the rotor. I had mounted them on the rear of the rotor....cause that's where they go on an FB, right??. So the fix was to put the Left caliper on the Right and the Right Caliper on the Left. The brakes bleed perfectly after that!
Thread Starter
Joined: Nov 2006
Posts: 1,578
Likes: 288
From: Parkville, Mo
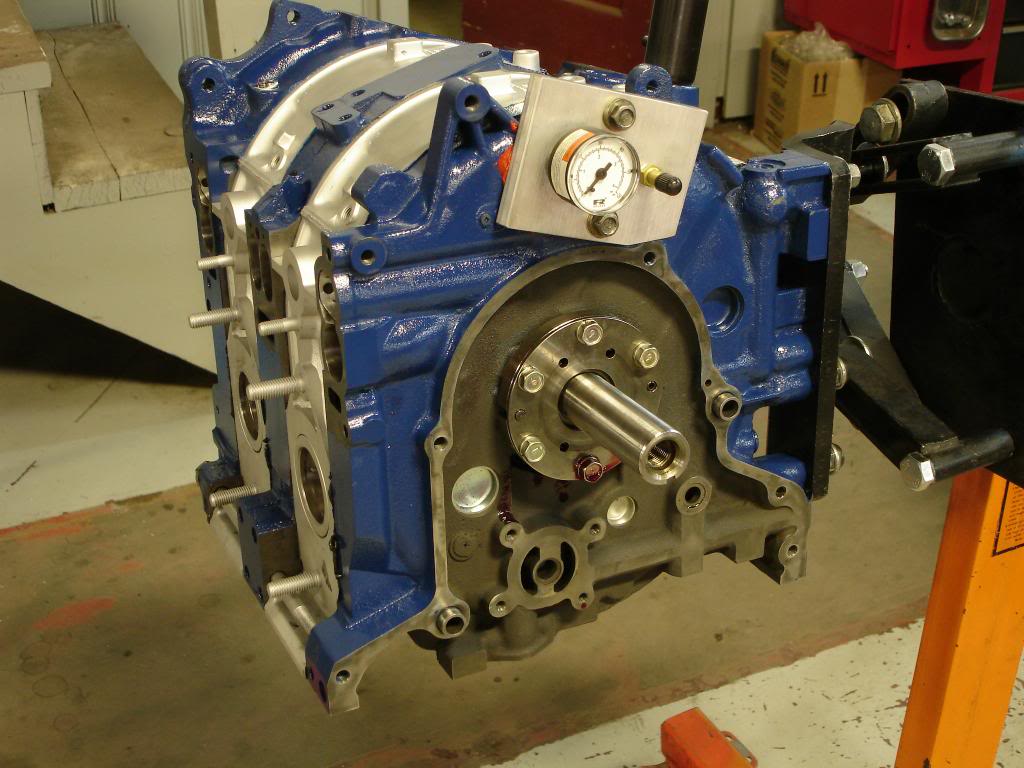
Engine Assembled!
Put this together last Saturday. Waiting on 10.9 bolts for the flywheel so I can torque that down, set end play and put the rest of it together. The engine passed the pressure test.

Thread Starter
Joined: Nov 2006
Posts: 1,578
Likes: 288
From: Parkville, Mo
Thanks. Buying the rear swap kit at the same time I bought the front from Billy might have been a good idea.
Will have to document the rear brake setup and explain why the calipers/brackets are swapped side to side.
Will have to document the rear brake setup and explain why the calipers/brackets are swapped side to side.
The dual bleeder setup on the rear FC Turbo calipers doesn't help. It always seems to take some fiddling, going back and forth between the two bleeders to finally get all the air out. Pretty annoying...
Thread Starter
Joined: Nov 2006
Posts: 1,578
Likes: 288
From: Parkville, Mo
The issue is with the way the bleed channels are drilled into the caliper bore. The way I had them mounted originally the air trapped at the top of the caliper bore had no way to escape. This is the case, even though there was a bleeder at the 12 o'clock position. If you look at the way the caliper is cast the bleeder screw I was trying to use has an opening at the bottom of the caliper bore, not the top. The second bleeder that was pointing down at the 7 o'clock position had the same issue.
I tried to bleed the brakes 3 or 4 times as I originally installed them. Each time I found new leaks that I thought was contributing to my issues - this car was completely replumbed. But when I finally got everything sealed up and there was NO bubbles in the bleeder hose there was still an air pocket in the rear calipers. To the extent that the rear brakes weren't working at all.
Flipping them side to side fixed this instantly. I had the rear brakes bleed in ten minutes.
The bottom line is the calipers need to be oriented the way they were from the factory. If you can put them on the leading edge of the rotor then you can use the Left/Righ markings on the calipers. If you are putting the calipers on the trailing side of the rotor then you have to do the opposite. After that it is easy peezy lemon squeezy
Thread Starter
Joined: Nov 2006
Posts: 1,578
Likes: 288
From: Parkville, Mo
Clutch
I am going to use an 7.25 2 disk AP Racing Clutch. The weight of the entire assembly including counter balance is 17lbs. Here is the install
Aluminum flywheel
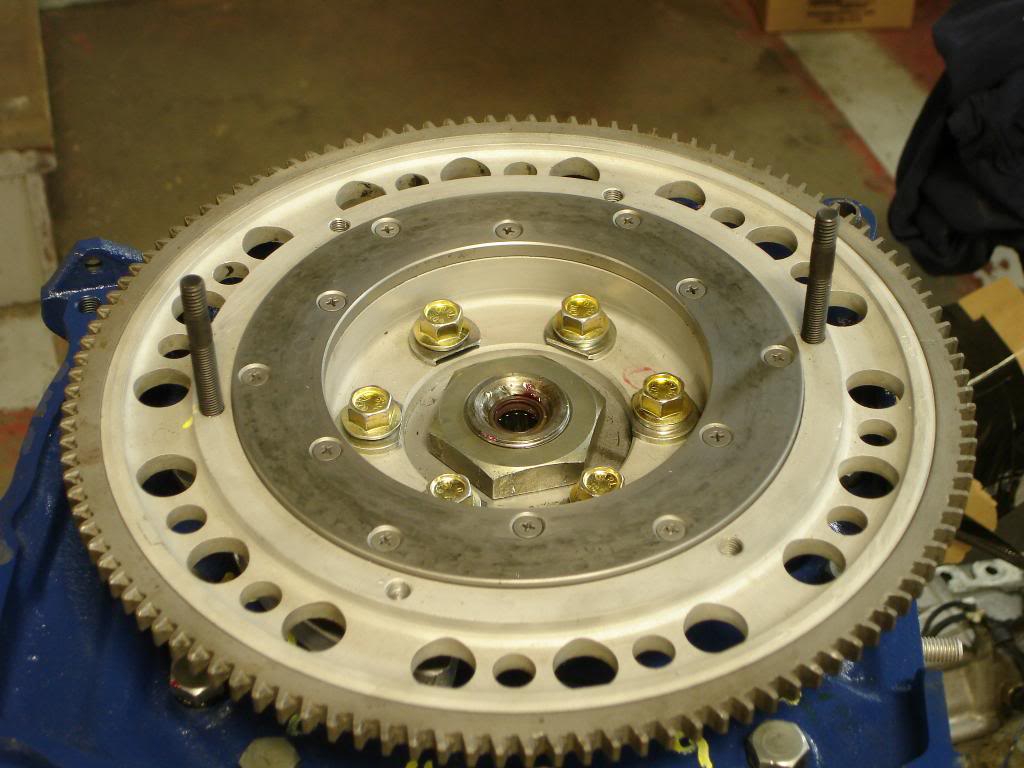
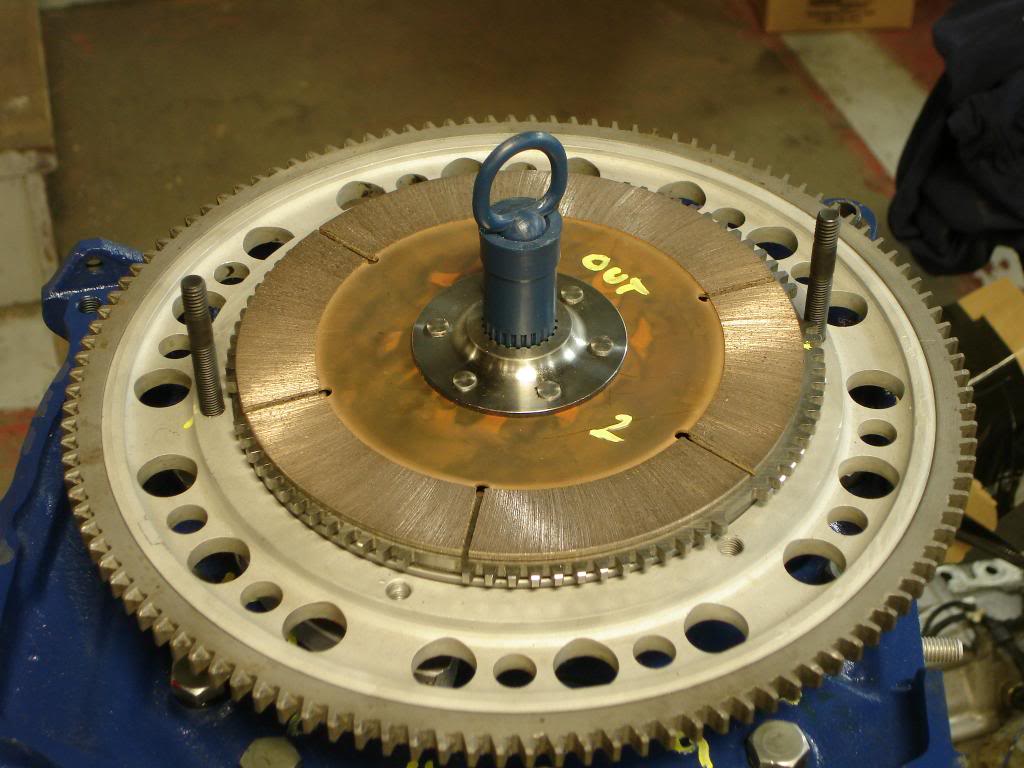
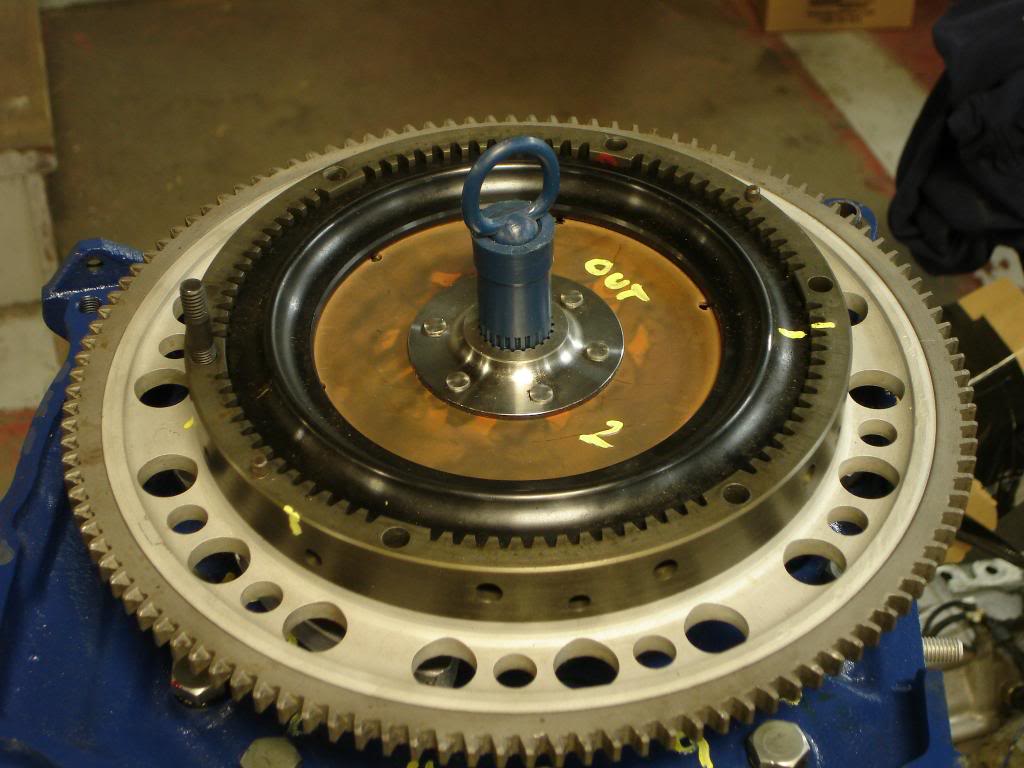
Friction disks, middle driven plate and drive ring installed
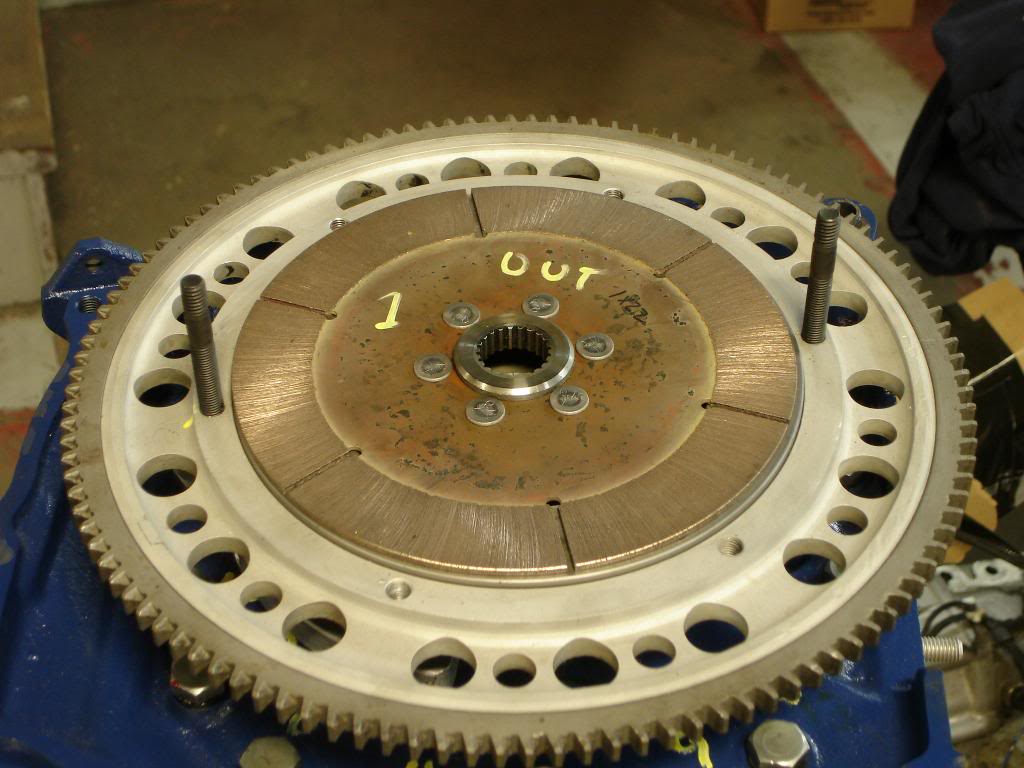
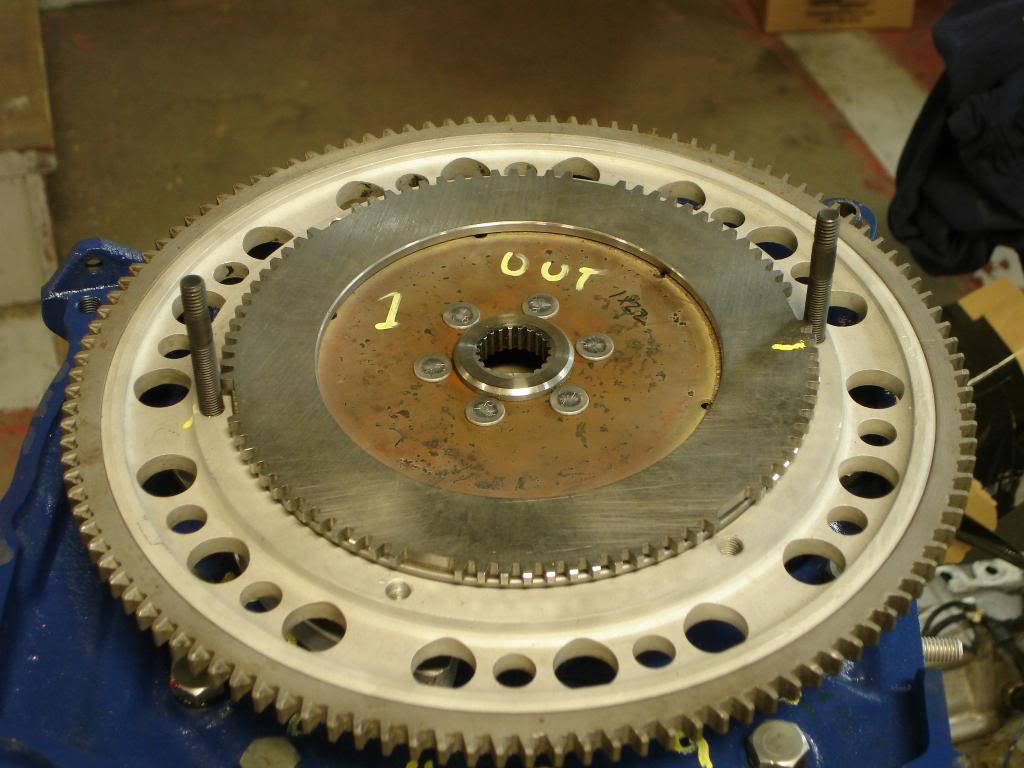

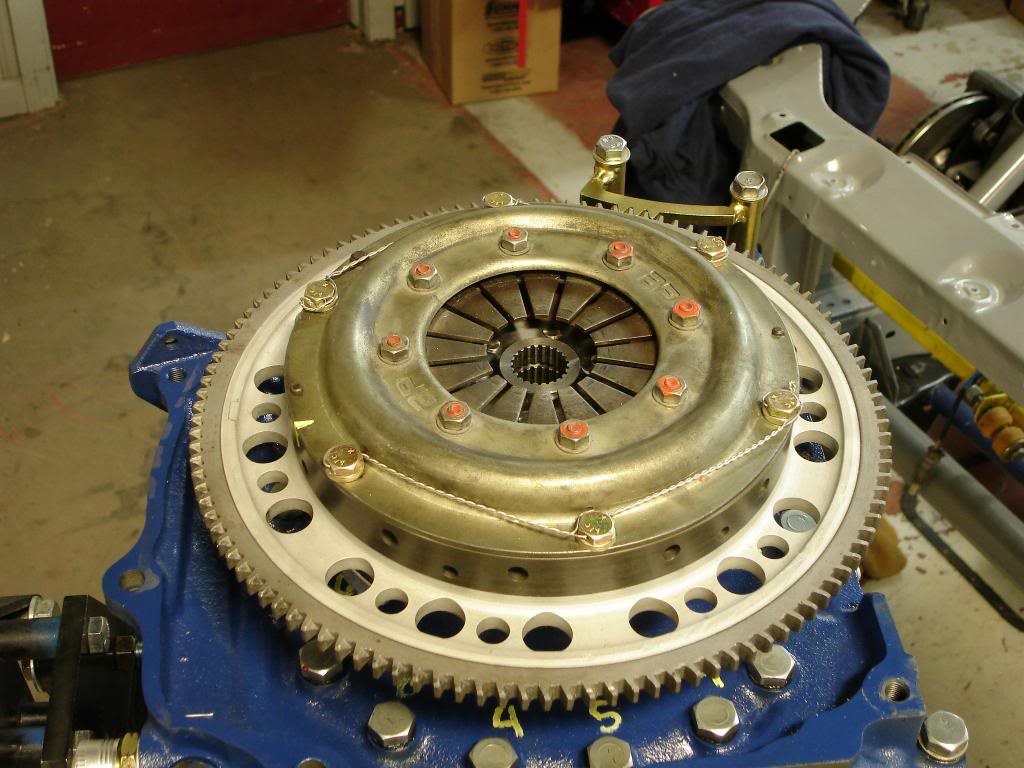
Top driven plate and clutch cover installed. Bolts torqued down and safety wired.
Aluminum flywheel

Friction disks, middle driven plate and drive ring installed


Top driven plate and clutch cover installed. Bolts torqued down and safety wired.


Thread Starter
Joined: Nov 2006
Posts: 1,578
Likes: 288
From: Parkville, Mo
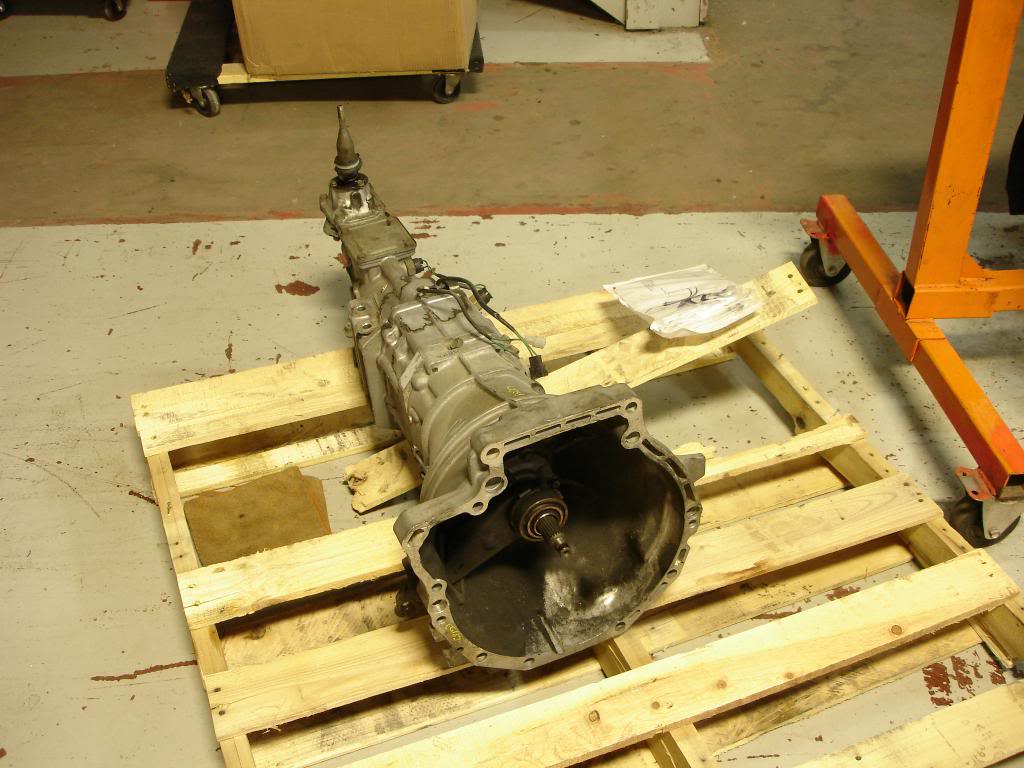
Transmission
I am going to use the gear set from a 1999 Miata transmission for the race car. Miata transmission have better gear ratios especially 2nd gear. These boxes are fairly popular in E Production.

Thread Starter
Joined: Nov 2006
Posts: 1,578
Likes: 288
From: Parkville, Mo
Thanks Happyjack.
Updates.
I farmed the Miata to RX7 transmission conversion out to Carriage and Motorworks in Kansas City Ks. Should have that back in a few weeks. In the mean time I mated the engine to a good RX7 box I have so I could put it in the car.
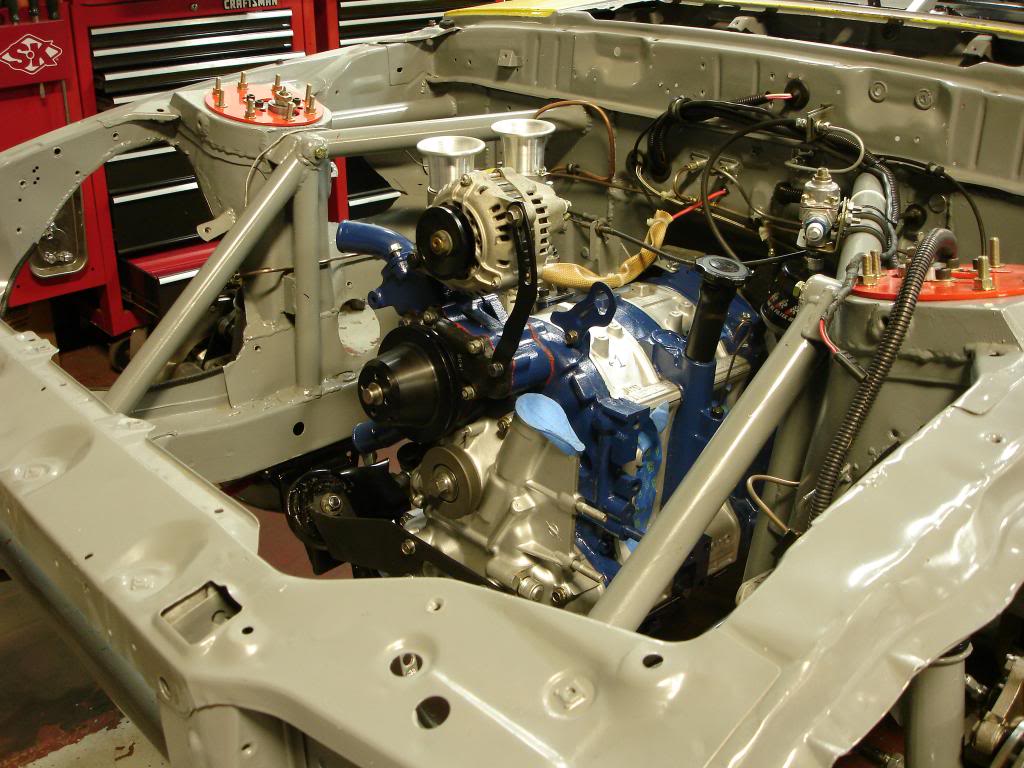
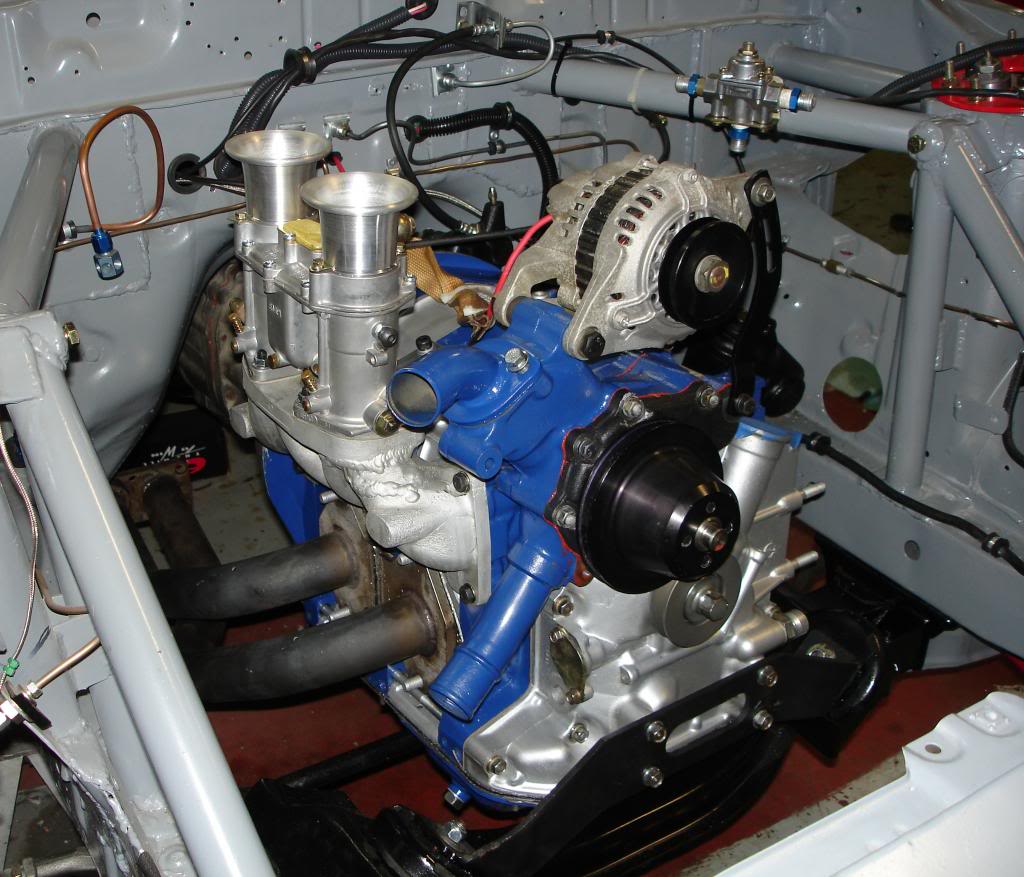
Right now everything I am working on is focused on getting the engine fired up. So at the top of the list is the carb. I bought the EMPI EPC51 new (51mm Weber IDA knock off) several years ago and didn't do much with it. Now I need to get it ready for service and the first order of business was to change the chokes. It was delivered with 46mm chokes and the SCCA allows only 42s. Not real hard to do except that EMPI decided to loc-tite the screws that hold in the secondary venturies. After the unsuccessful application of heat I ended up drilling out the brass screws and putting in new 8mm bolts and lock nuts. PITA
Here are a few shots of the engine in the car. I have the starter and alternator wired. Also have all of the gauges hooked up.
Updates.
I farmed the Miata to RX7 transmission conversion out to Carriage and Motorworks in Kansas City Ks. Should have that back in a few weeks. In the mean time I mated the engine to a good RX7 box I have so I could put it in the car.
Right now everything I am working on is focused on getting the engine fired up. So at the top of the list is the carb. I bought the EMPI EPC51 new (51mm Weber IDA knock off) several years ago and didn't do much with it. Now I need to get it ready for service and the first order of business was to change the chokes. It was delivered with 46mm chokes and the SCCA allows only 42s. Not real hard to do except that EMPI decided to loc-tite the screws that hold in the secondary venturies. After the unsuccessful application of heat I ended up drilling out the brass screws and putting in new 8mm bolts and lock nuts. PITA
Here are a few shots of the engine in the car. I have the starter and alternator wired. Also have all of the gauges hooked up.


Thread Starter
Joined: Nov 2006
Posts: 1,578
Likes: 288
From: Parkville, Mo
Thanks guys. I just finished the exhaust system and am moving on to the carb and engine bay plumbing. Then it is ignition wiring, install radiator, mount oil coolers and then real live motor noises.
Thread Starter
Joined: Nov 2006
Posts: 1,578
Likes: 288
From: Parkville, Mo
Thanks Wangracing.
Updates:
Worked on the Carb and fuel lines this weekend. On the Carb, I shortened the booster venturies so that they start where the velocity stacks narrow. This is supposed to help them work better with the short velocity stacks that I am using. Then I verified the float level and documented all of the jets and air correctors. Next up I built the final fuel lines. I am using -8 AN lines from the cell to the carb.
Few other things taken care of. I welded on a couple of ground lugs and a trailing coil mount in the engine compartment. Finally I repainted the floor on the passenger side. The brake and clutch reservoirs leaked brake fluid and stripped off allot of paint. Fluid leaks have been a real pain in the *** but I think I have them under control now.
Thread Starter
Joined: Nov 2006
Posts: 1,578
Likes: 288
From: Parkville, Mo
On it tires!
So needed to move the car over to the lift to swap out its transmission. I had a 99 Miata transmission converted by Carriage and Motorworks in KC so now I have better transmission ratios to work with. The cool part is I get to get the car on the ground again. It SLAMMED - I forgot how low to the ground these cars are
On the lift. The BMW behind it is the Pool Shark - a LeMons/WRL race car
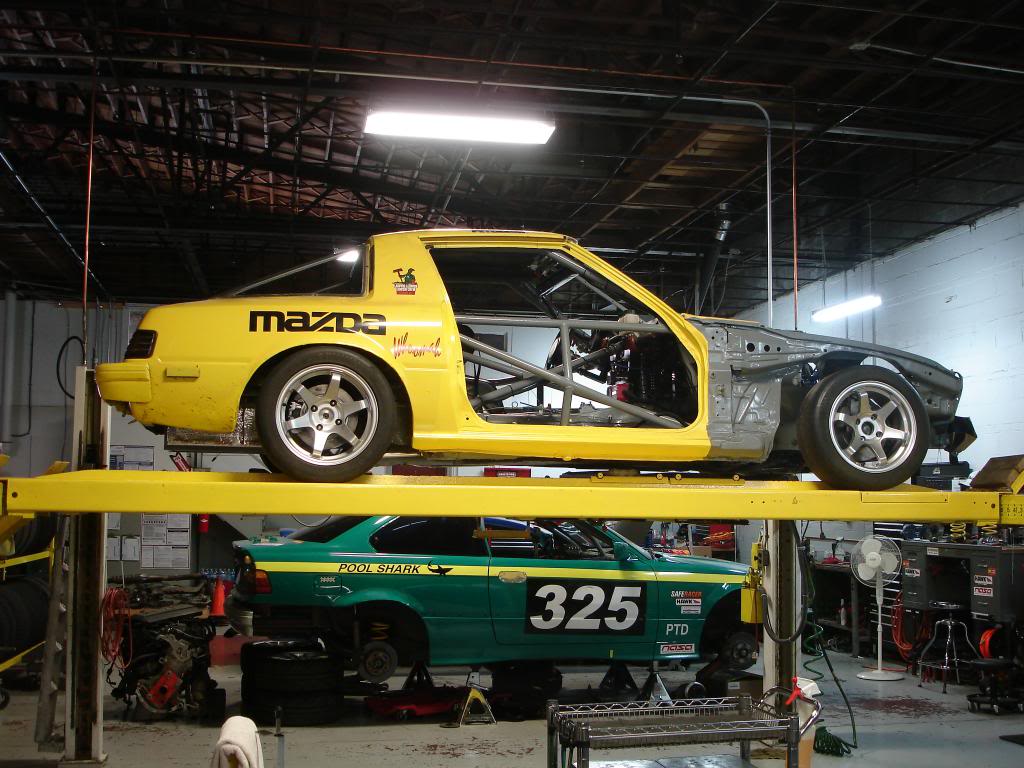
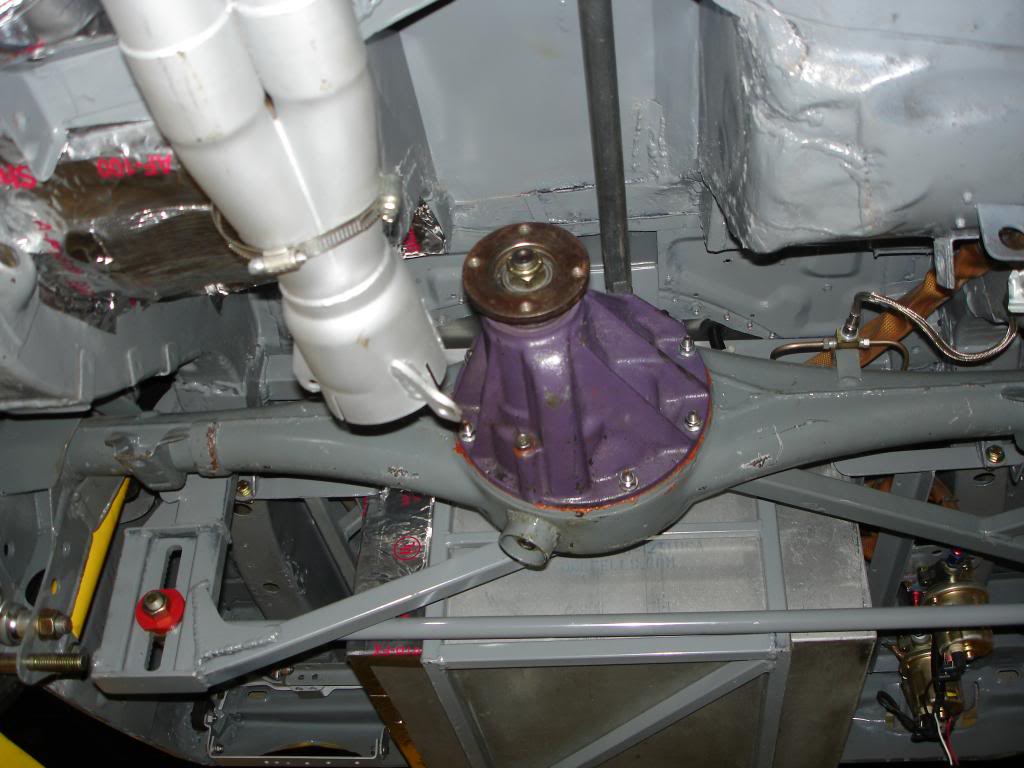
After the transmission was bolted up (it slipped in like butta) I added the front drive shaft safety loop. I made it out of a 2" thick piece of 6'' x 3/16" pipe that we have in the shop. I had to beat on it with a big hammer to oval it out a bit and then welded in to place.
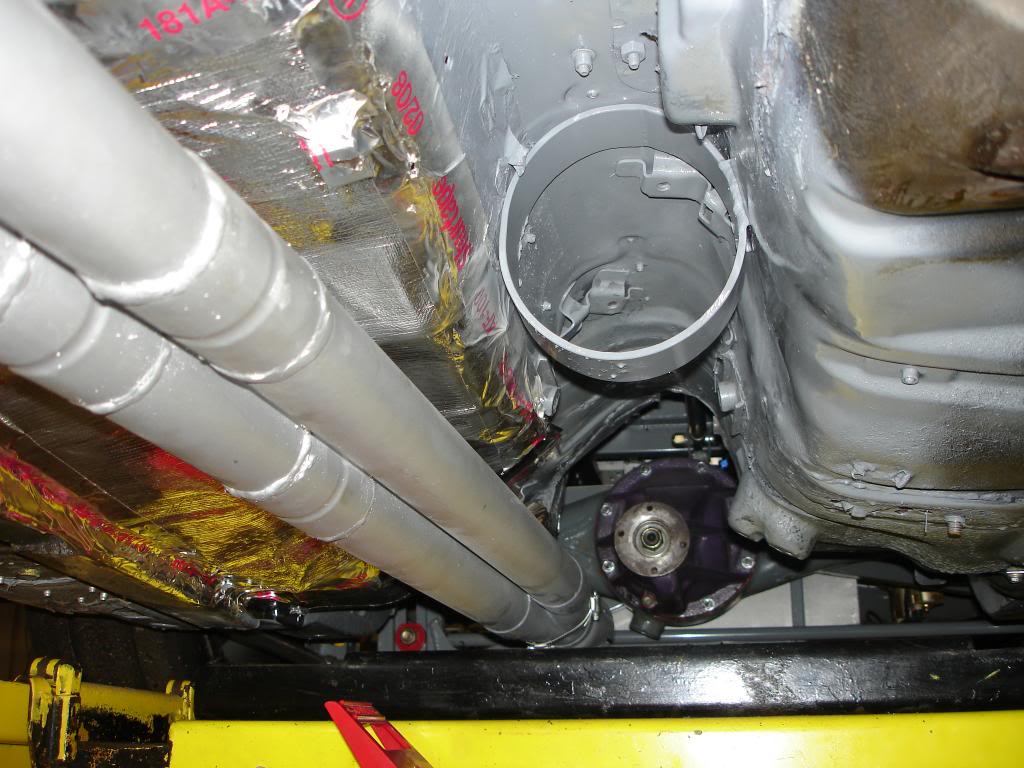
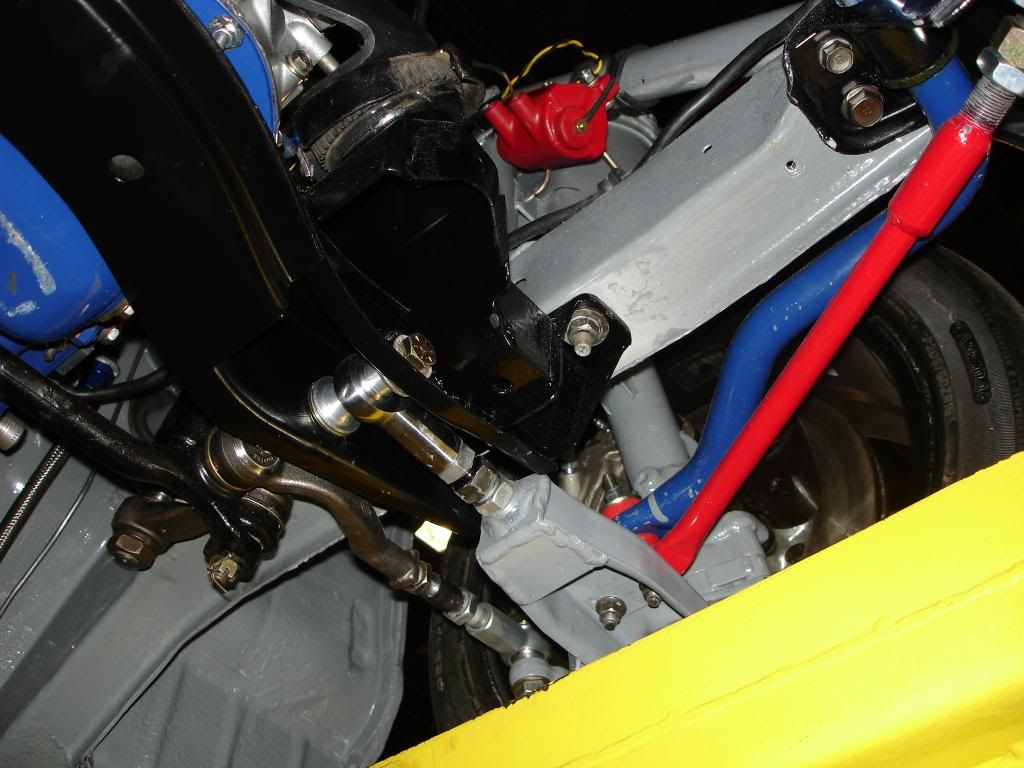
While the car was up in the air I took a few shots of the front and rear suspension. The techs in the shop are really excited about setting the alignment on the car. Everything is adjustable!
On the lift. The BMW behind it is the Pool Shark - a LeMons/WRL race car

After the transmission was bolted up (it slipped in like butta) I added the front drive shaft safety loop. I made it out of a 2" thick piece of 6'' x 3/16" pipe that we have in the shop. I had to beat on it with a big hammer to oval it out a bit and then welded in to place.

While the car was up in the air I took a few shots of the front and rear suspension. The techs in the shop are really excited about setting the alignment on the car. Everything is adjustable!


Thread Starter
Joined: Nov 2006
Posts: 1,578
Likes: 288
From: Parkville, Mo