Rising from the Ashes... (Pics be warned!)
 10-20-09, 11:37 PM
#176
Wrkn Toyota, Rootn Wankel
Thread Starter
Join Date: Sep 2007
Location: "Haystack" Hayward, CA
Posts: 1,642
Likes: 0
Received 1 Like
on
1 Post
Any shop that does hydraulic hoses should be able to make up new lines for you. I think trochoid did a writeup on what size hose and crimp fittings to use. Of course the other rout is to go with -an fittings/hose.
Depending on the length added, the additional volume will be minimal. If you really want to know, just use the formula for the volume of a cylinder (pi*r^2*h).
Depending on the length added, the additional volume will be minimal. If you really want to know, just use the formula for the volume of a cylinder (pi*r^2*h).

Hey, what about Billy? He makes SS lines right?
 10-21-09, 12:59 PM
#177
Moderator
iTrader: (3)
Join Date: Mar 2001
Location: https://www2.mazda.com/en/100th/
Posts: 30,901
Received 2,644 Likes
on
1,873 Posts
SS lines are really simple to make, you just buy the fittings and make the hose... the added length won't really affect oil level, you know, just overfill it by a quart, and then start it, like any other car.
my 12a with the aluminum oil pan is like 7 qts or something, i kept putting oil in and checking the dipstick, and its like "still nothing?"
my 12a with the aluminum oil pan is like 7 qts or something, i kept putting oil in and checking the dipstick, and its like "still nothing?"
10-28-09, 05:44 PM
#178
Wrkn Toyota, Rootn Wankel
Thread Starter
Join Date: Sep 2007
Location: "Haystack" Hayward, CA
Posts: 1,642
Likes: 0
Received 1 Like
on
1 Post
Okay I am in a bind here and I am just being told one thing by the diagrams and not finding it in real life. So I am asking for help guys..
What does a 2nd gen Fuel Pump Relay look like and what does the GSL-SE one look like? I know what they are supposed to look like in the wiring diagrams, but I want to know what they physically look like because the diagrams are lyin' to me again.
What does a 2nd gen Fuel Pump Relay look like and what does the GSL-SE one look like? I know what they are supposed to look like in the wiring diagrams, but I want to know what they physically look like because the diagrams are lyin' to me again.
04-02-10, 01:41 AM
#179
Wrkn Toyota, Rootn Wankel
Thread Starter
Join Date: Sep 2007
Location: "Haystack" Hayward, CA
Posts: 1,642
Likes: 0
Received 1 Like
on
1 Post
OMG! IT LIVES!...
Well okay not yet... so April Fool's...
BUT!
I did finish the chassis harness and started putting back the interior, I've got the seats and seatbelts, carpet and most of the dash bits in! I'm going to double check my Engine harness before I go ahead and drop it in and move on to finishing the car off and fluids and such. Sorry there hasn't been much of an update. I am working at the dealership and as a teaching assistant at the auto lab at school and then there's the whole money issue.
I'll try and snap some pictures of the interior for you guys tomorrow after work if it doesn't rain. I'm so excited! One step closer to hearing my baby purr again!
Edit~ Why is this in Non-Technical? I thought this had a bit of technical info in it.
04-02-10, 03:14 PM
#182
Wrkn Toyota, Rootn Wankel
Thread Starter
Join Date: Sep 2007
Location: "Haystack" Hayward, CA
Posts: 1,642
Likes: 0
Received 1 Like
on
1 Post
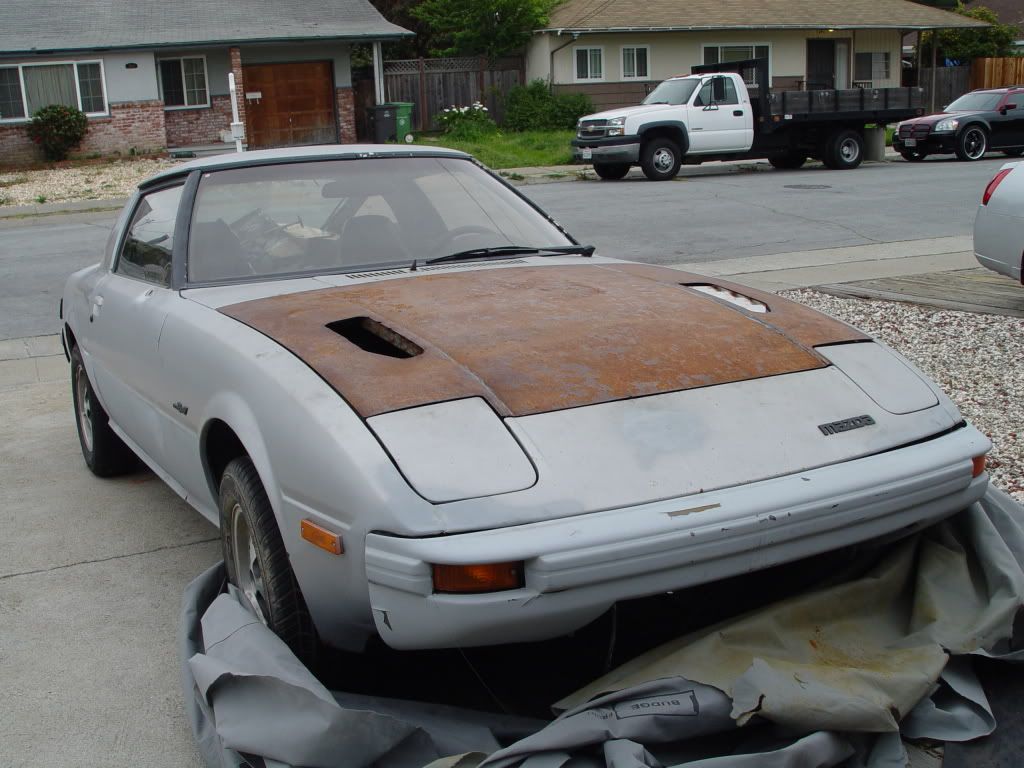
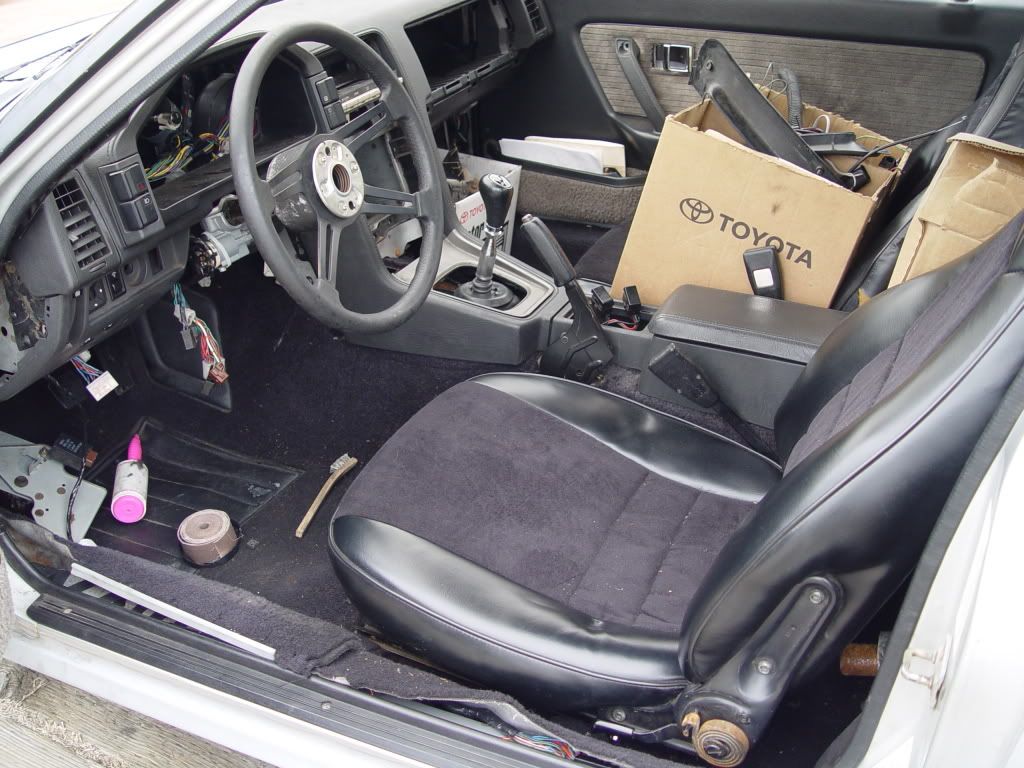
As promised, I snapped a few pictures of the progress on the car before the rain hit. 
So here's how she looks on the outside right now:

And now here is the interior as it stands now, Put the finished chassis harness in, all the carpeting, seats, seatbelts, and reinstalled the dash. There are still connectors to put together and I won't set-up the HVAC until I have my Engine harness done, but that's basically a lot of work I did anyways.
and here's a picture of the engine IN the engine bay! OMG! Needs hoses, and some finishing work, but she's pretty much ready. the radiator and fan are in the hatch until i decide how I will mount them.

Sorry for the delay in updating, been really busy even though I don't have a life.
So here's how she looks on the outside right now:
And now here is the interior as it stands now, Put the finished chassis harness in, all the carpeting, seats, seatbelts, and reinstalled the dash. There are still connectors to put together and I won't set-up the HVAC until I have my Engine harness done, but that's basically a lot of work I did anyways.
and here's a picture of the engine IN the engine bay! OMG! Needs hoses, and some finishing work, but she's pretty much ready. the radiator and fan are in the hatch until i decide how I will mount them.
Sorry for the delay in updating, been really busy even though I don't have a life.
04-02-10, 03:49 PM
#183
Moderator
iTrader: (3)
Join Date: Mar 2001
Location: https://www2.mazda.com/en/100th/
Posts: 30,901
Received 2,644 Likes
on
1,873 Posts
 04-02-10, 11:16 PM
#185
Wrkn Toyota, Rootn Wankel
Thread Starter
Join Date: Sep 2007
Location: "Haystack" Hayward, CA
Posts: 1,642
Likes: 0
Received 1 Like
on
1 Post
I work as an entry level mechanic at a Toyota Dealership near my house. Also, does anyone have any suggestions for replacing the metal clips that hold the interior trim panels? The particle board ones. A lot of mine are missing.
04-03-10, 01:28 PM
#186
Moderator
iTrader: (3)
Join Date: Mar 2001
Location: https://www2.mazda.com/en/100th/
Posts: 30,901
Received 2,644 Likes
on
1,873 Posts
simplest thing with the clips is probably to buy some, they are probably cheap

 04-04-10, 10:13 PM
#189
Moderator
iTrader: (3)
Join Date: Mar 2001
Location: https://www2.mazda.com/en/100th/
Posts: 30,901
Received 2,644 Likes
on
1,873 Posts
jack built it, mike #2 bought it, i had it for a while, sold it back to mike #2, then they sold it to someone, who parted it and then gave it to demonspawn =)
that's what it looked like when i bought it, i painted the window mouldings, and took off the rub strips.
where did you get that pic?
04-05-10, 12:56 AM
#190
i'm a poser
iTrader: (1)
Join Date: Apr 2006
Location: san leandro, Ca
Posts: 1,919
Likes: 0
Received 0 Likes
on
0 Posts
from mike.. aldea
they sold it to mack and his brother i think... then paul picked it up... >.<
its weird how i was talking with mike and then found out all this info the next day (from another friend) lol
they sold it to mack and his brother i think... then paul picked it up... >.<
its weird how i was talking with mike and then found out all this info the next day (from another friend) lol
04-05-10, 11:57 AM
#191
Moderator
iTrader: (3)
Join Date: Mar 2001
Location: https://www2.mazda.com/en/100th/
Posts: 30,901
Received 2,644 Likes
on
1,873 Posts
 04-05-10, 02:18 PM
#193
Moderator
iTrader: (3)
Join Date: Mar 2001
Location: https://www2.mazda.com/en/100th/
Posts: 30,901
Received 2,644 Likes
on
1,873 Posts
 04-06-10, 06:11 PM
#196
Wrkn Toyota, Rootn Wankel
Thread Starter
Join Date: Sep 2007
Location: "Haystack" Hayward, CA
Posts: 1,642
Likes: 0
Received 1 Like
on
1 Post
Anyways, I am doing good Alex you should stop by the school in the morning and bring that rustbucket of yours over.
Anyone ever heard of KBS Coatings? I just saw a pamphlet at work and they seems real pro...
04-12-10, 04:14 PM
#197
Wrkn Toyota, Rootn Wankel
Thread Starter
Join Date: Sep 2007
Location: "Haystack" Hayward, CA
Posts: 1,642
Likes: 0
Received 1 Like
on
1 Post
I have no clue how to do the cool thumbnail thingie, but I got bored while resetting my odometer and decided to take scans of all the gauge faces.

05-03-10, 09:51 PM
#198
Wrkn Toyota, Rootn Wankel
Thread Starter
Join Date: Sep 2007
Location: "Haystack" Hayward, CA
Posts: 1,642
Likes: 0
Received 1 Like
on
1 Post
So the car's coming together piece by piece, finished checking the engine harness and only have a few spots to fix on it, have it draped and half hooked up in the engine bay. I started looking at some other things to hook up and that's when I came across a couple of problems that are going to be difficult...
The first is the radiator is not going to want to mount the way I originally wanted and so this is going to be an issue...
Second, the S4 Airbox and most likely even the GSL-Se Airbox will not work so Now I have to set up a Cold Air style intake and mount the AFM somewhere on the strut tower.
I will try and get pictures as soon as I can, forgot to charge the camera and I am at work most likely all day tomorrow.
PS- Moderators, could you please delete the post I made above this? I made a thread and so its redundent to post the picture twice.
05-03-10, 10:01 PM
#199
Moderator
iTrader: (3)
Join Date: Mar 2001
Location: https://www2.mazda.com/en/100th/
Posts: 30,901
Received 2,644 Likes
on
1,873 Posts
So the car's coming together piece by piece, finished checking the engine harness and only have a few spots to fix on it, have it draped and half hooked up in the engine bay. I started looking at some other things to hook up and that's when I came across a couple of problems that are going to be difficult...
The first is the radiator is not going to want to mount the way I originally wanted and so this is going to be an issue...
Second, the S4 Airbox and most likely even the GSL-Se Airbox will not work so Now I have to set up a Cold Air style intake and mount the AFM somewhere on the strut tower.
I will try and get pictures as soon as I can, forgot to charge the camera and I am at work most likely all day tomorrow.
PS- Moderators, could you please delete the post I made above this? I made a thread and so its redundent to post the picture twice.
The first is the radiator is not going to want to mount the way I originally wanted and so this is going to be an issue...
Second, the S4 Airbox and most likely even the GSL-Se Airbox will not work so Now I have to set up a Cold Air style intake and mount the AFM somewhere on the strut tower.
I will try and get pictures as soon as I can, forgot to charge the camera and I am at work most likely all day tomorrow.
PS- Moderators, could you please delete the post I made above this? I made a thread and so its redundent to post the picture twice.
05-03-10, 10:27 PM
#200
Wrkn Toyota, Rootn Wankel
Thread Starter
Join Date: Sep 2007
Location: "Haystack" Hayward, CA
Posts: 1,642
Likes: 0
Received 1 Like
on
1 Post
Its a stock S5 Radiator, the old one for my 12A was mangled in the accident, and the GSL-SE I have is missing that entire shroud used to mount it. So I was just going to mount the S5 radiator in, but I just realized that with the engine in I can't maneuver it to get the lower radiator hose opening between the tube and sway bar... so if I cut it i need to route the heater line somehow and I am not sure I have enough room to angle mount it.