
85' Stripped Corner Carver


Thread Starter
Full Member
Joined: Apr 2012
Posts: 201
Likes: 0
From: Louisiana
85' Stripped Corner Carver
In the process of tweaking and modding an 85' with a 12a in it. I've been posting in a regular thread and figured I may as well make a build log of it.
Link to the image album
^ Pics of the car ^
Probably going to tear the bolt in cage out and put a weld in. I think it is out of spec anyways. Same with the harness and seat, both go out of spec in 2013. I have a new Corbeau seat and a new 5-point harness (for about 1 year now) and I am going to be using that. The Corbeau seat is currently on a racing sim I built with panoramic display.
The guy who owned it before me was going to run it in a Spec-7 class and thusly some mods that have been done are:
That's the big things, everything else that is modded is just stuff that was stripped (interior dash and a/c etc.) or mods to the exterior. The heater core and blower were still inside but I ripped that junk out. I am not running this in Spec-7 class but rather time based classes.
I have a buttload of spare parts:
Rear Bumper
Set of front fenders
Rear Hatch glass w/ shocks
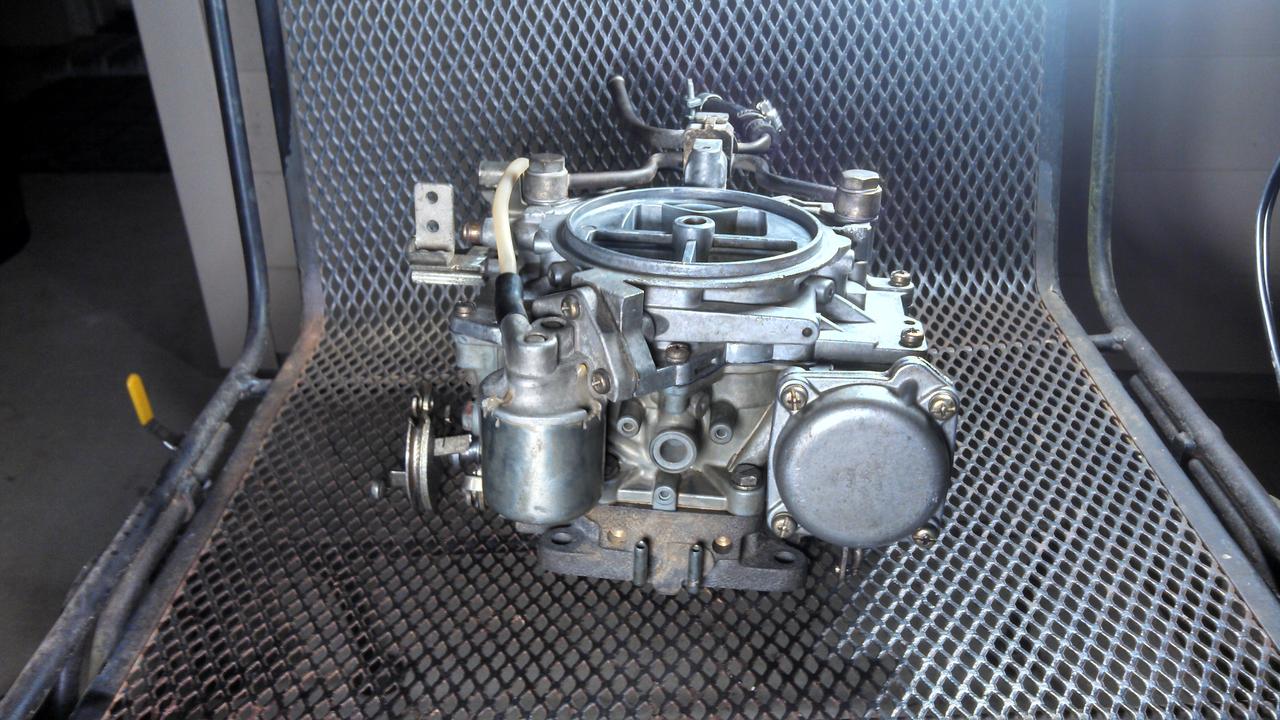
Mikuni PHH44 2-barrel Carb (I cleaned this biatch up and got it running, first carb I ever worked on. Sounds AMAZING at high rpms but is an absolute terror to drive sub 4k rpms. It loves to bog and kill if you so much as look at the pedal too heavily.
2 spare Nikki Carbs (not including the one working one on the car)
Rear housing bearings or something like that
Roller Bearings
Hawk brake pads
Case of Idemitsu premix
Spare rear end
Spare rear lower control arms
5 sets of tires
2 sets of race rims
1 set of stock looking rims with rain tires (has "mazda" on the rim)
Spare passenger side door
Spare Hood
That's just the stuff off the top of my head. There is a whole box of small parts that I am not even going to begin inventorying until I need something to replace.
So right now the car runs. It doesn't like to idle while until it's totally warm and even then if you let it idle too (minute or so) it will kill. I've messed with the idle mixture on the nikki but I am no expert and don't really know what to look for.
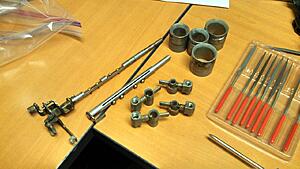
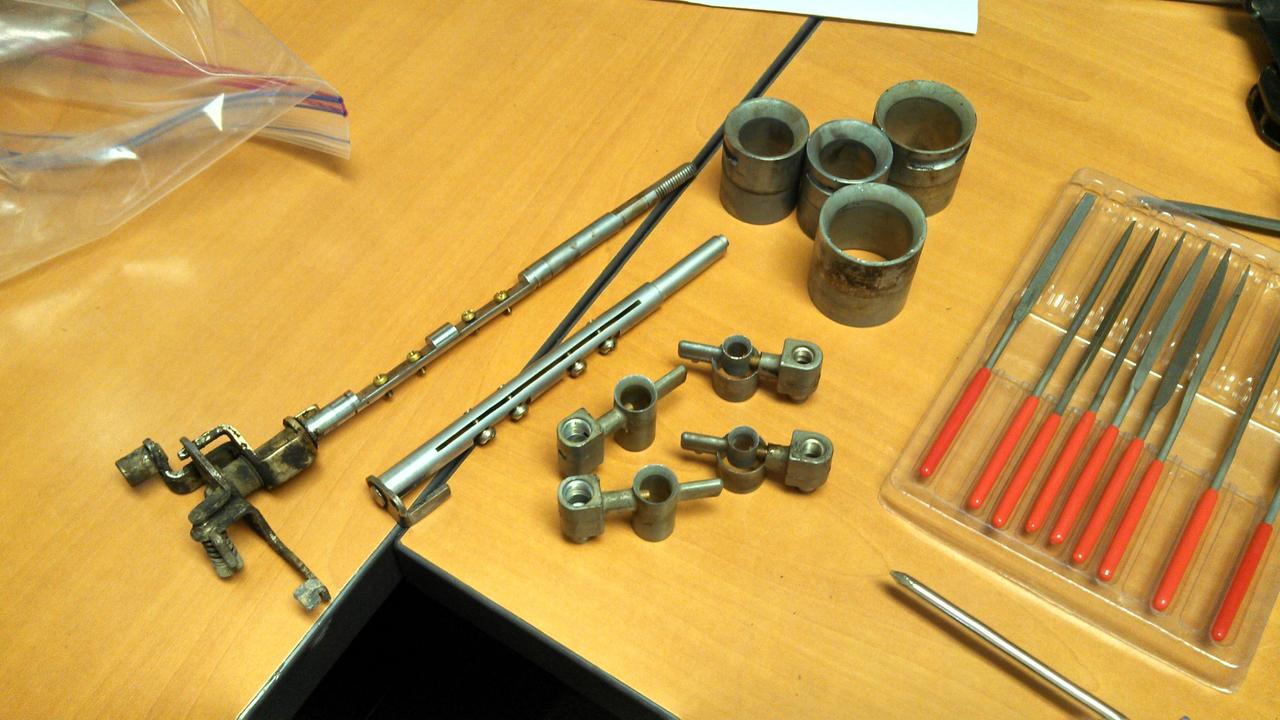
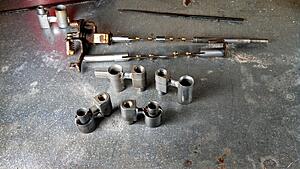
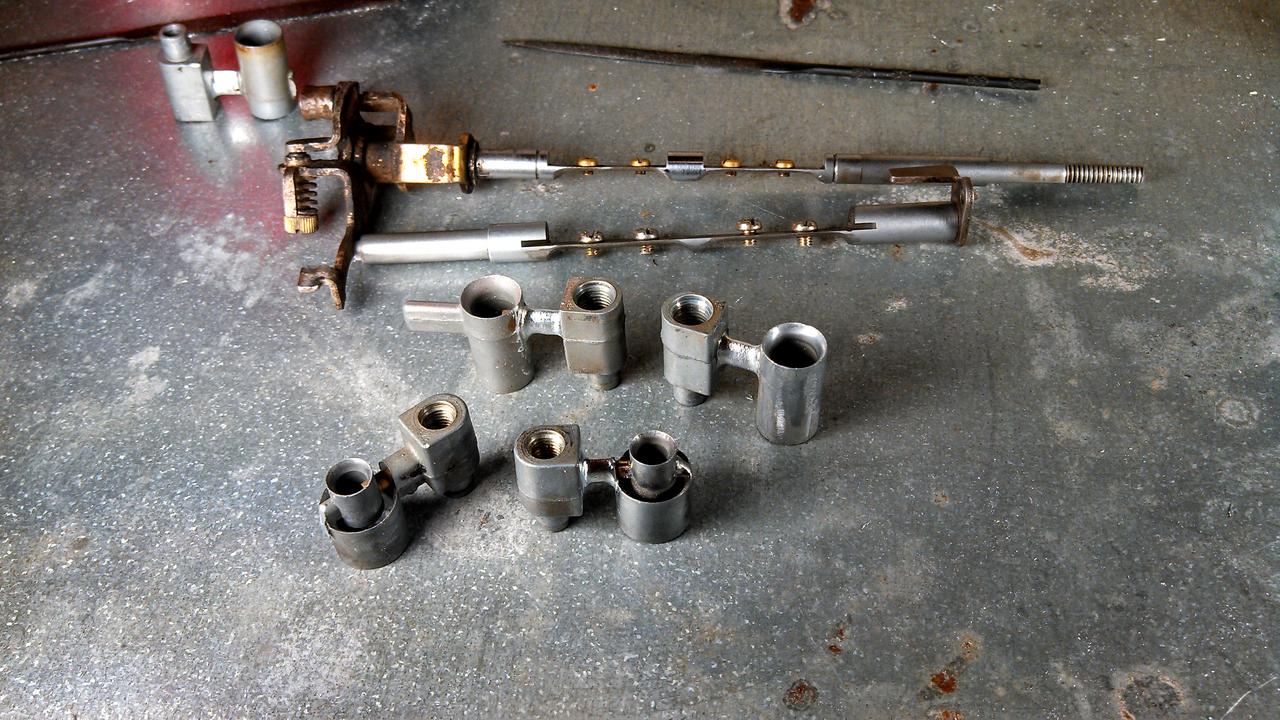
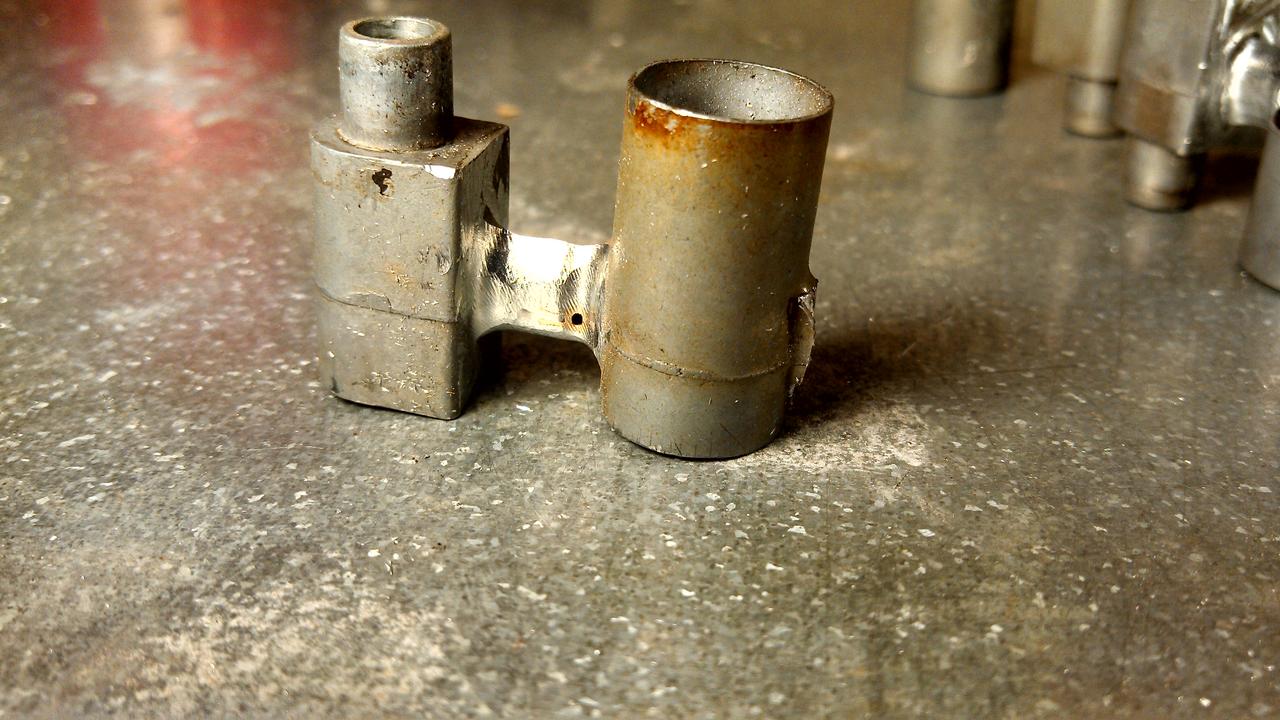
In the interim I have broken down one of the spare nikki carbs and ripped out the internals (jets and venturis and butterfly linkage) I am in the process of cleaning up the jets. The edges are pretty jagged so I am EXTREMELY lightly filing them sharp.
My plan for the venturis is to rig them up in a 555 bender I have and put it on slow then rig up a table in front of it that I can rest my dremel on to get a consistent grind angle. Theses are all spare parts and I have a whole second set of spares in the other nikki if I mess up so no harm no foul.
I am going to mod the butterfly linkage to allow for more flow as per the guides on this forums.
Here is what I am doing right now as I write this up:

Filed one in the back, untouched in the front.
Link to the image album
^ Pics of the car ^
Probably going to tear the bolt in cage out and put a weld in. I think it is out of spec anyways. Same with the harness and seat, both go out of spec in 2013. I have a new Corbeau seat and a new 5-point harness (for about 1 year now) and I am going to be using that. The Corbeau seat is currently on a racing sim I built with panoramic display.
The guy who owned it before me was going to run it in a Spec-7 class and thusly some mods that have been done are:
- Chopped Strut Towers
- Tokico blues
- Lightweight Rims (ugly as all hell but light)
- Racing Beat Header with open exhaust
- Stripped Nikki (internals not modded, vaccum secondaries)
- Oil Pump delete (runs Idemitsu premix)
- Oil Baffle Plate
- Electronic Radiator Fan
- Fuel Pump upgrade
- Sway Bars (TMC - CSM-4018 w/ TMC end-links)
- Front Suspension Bushings from Mazda Comp for control arm, tension rod and idler arm
That's the big things, everything else that is modded is just stuff that was stripped (interior dash and a/c etc.) or mods to the exterior. The heater core and blower were still inside but I ripped that junk out. I am not running this in Spec-7 class but rather time based classes.
I have a buttload of spare parts:
Rear Bumper
Set of front fenders
Rear Hatch glass w/ shocks
Mikuni PHH44 2-barrel Carb (I cleaned this biatch up and got it running, first carb I ever worked on. Sounds AMAZING at high rpms but is an absolute terror to drive sub 4k rpms. It loves to bog and kill if you so much as look at the pedal too heavily.
2 spare Nikki Carbs (not including the one working one on the car)
Rear housing bearings or something like that
Roller Bearings
Hawk brake pads
Case of Idemitsu premix
Spare rear end
Spare rear lower control arms
5 sets of tires
2 sets of race rims
1 set of stock looking rims with rain tires (has "mazda" on the rim)
Spare passenger side door
Spare Hood
That's just the stuff off the top of my head. There is a whole box of small parts that I am not even going to begin inventorying until I need something to replace.
So right now the car runs. It doesn't like to idle while until it's totally warm and even then if you let it idle too (minute or so) it will kill. I've messed with the idle mixture on the nikki but I am no expert and don't really know what to look for.
In the interim I have broken down one of the spare nikki carbs and ripped out the internals (jets and venturis and butterfly linkage) I am in the process of cleaning up the jets. The edges are pretty jagged so I am EXTREMELY lightly filing them sharp.
My plan for the venturis is to rig them up in a 555 bender I have and put it on slow then rig up a table in front of it that I can rest my dremel on to get a consistent grind angle. Theses are all spare parts and I have a whole second set of spares in the other nikki if I mess up so no harm no foul.
I am going to mod the butterfly linkage to allow for more flow as per the guides on this forums.
Here is what I am doing right now as I write this up:

Filed one in the back, untouched in the front.
Last edited by Shrimp; Jun 12, 2013 at 03:16 PM.
Thread Starter
Full Member
Joined: Apr 2012
Posts: 201
Likes: 0
From: Louisiana
Race only.
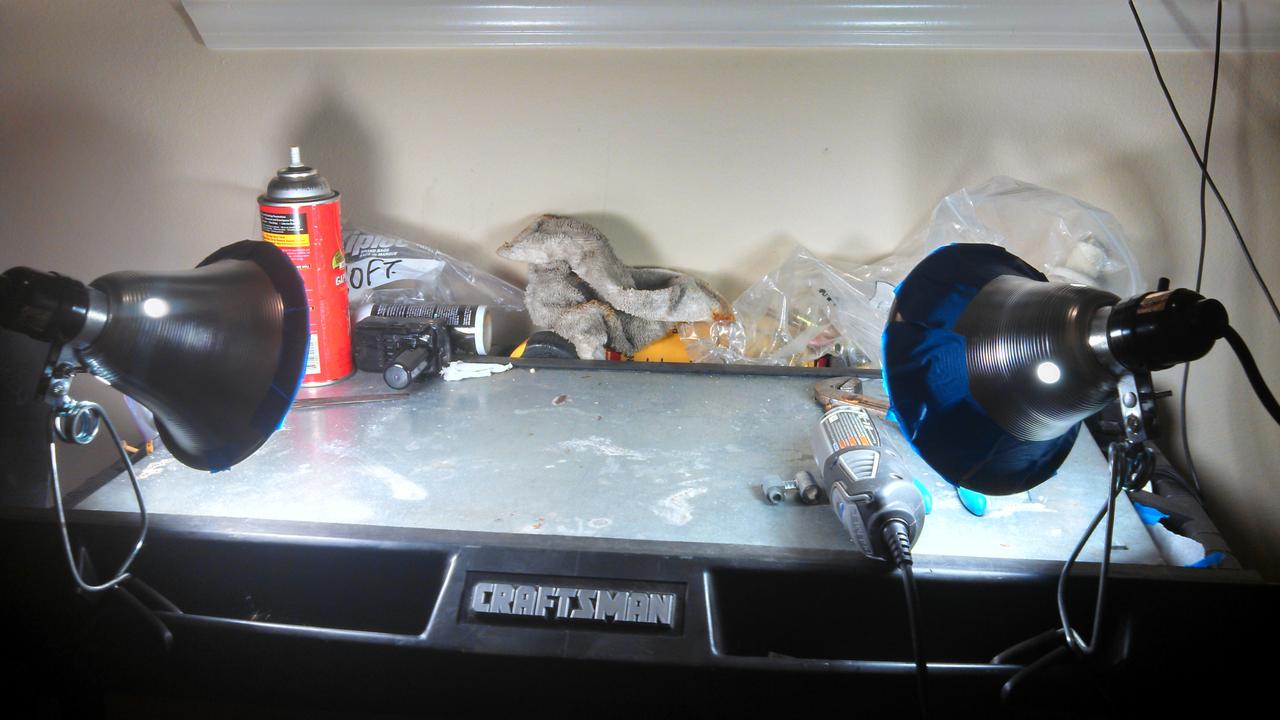
Step 1 - GOOD LIGHTING

Step 2 - Get to work


What I have completed so far as of tonight:
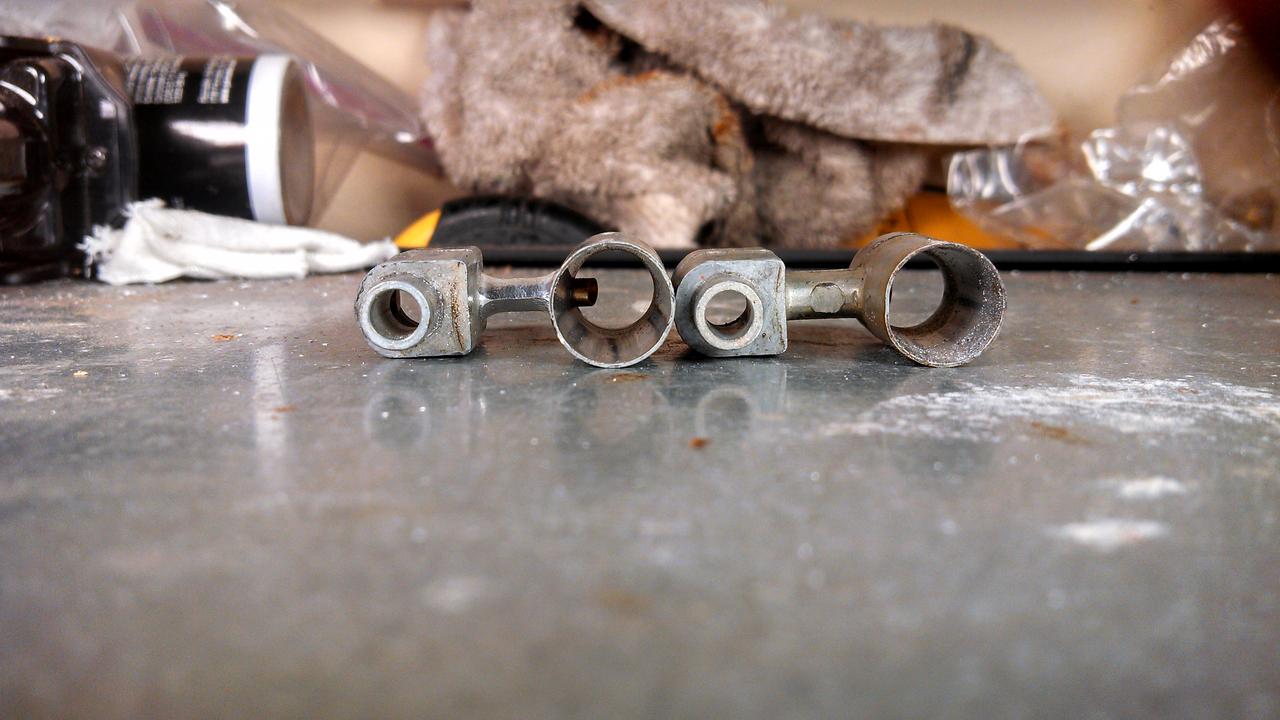
Managed to find the brass on one of the secondary jets. Broke open the second spare and busted out a fresh one so no harm no foul I guess. Least I learned something in the process.

Step 1 - GOOD LIGHTING
Step 2 - Get to work

What I have completed so far as of tonight:
Managed to find the brass on one of the secondary jets. Broke open the second spare and busted out a fresh one so no harm no foul I guess. Least I learned something in the process.
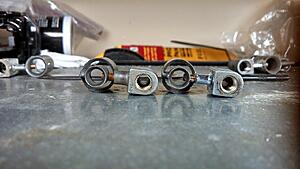
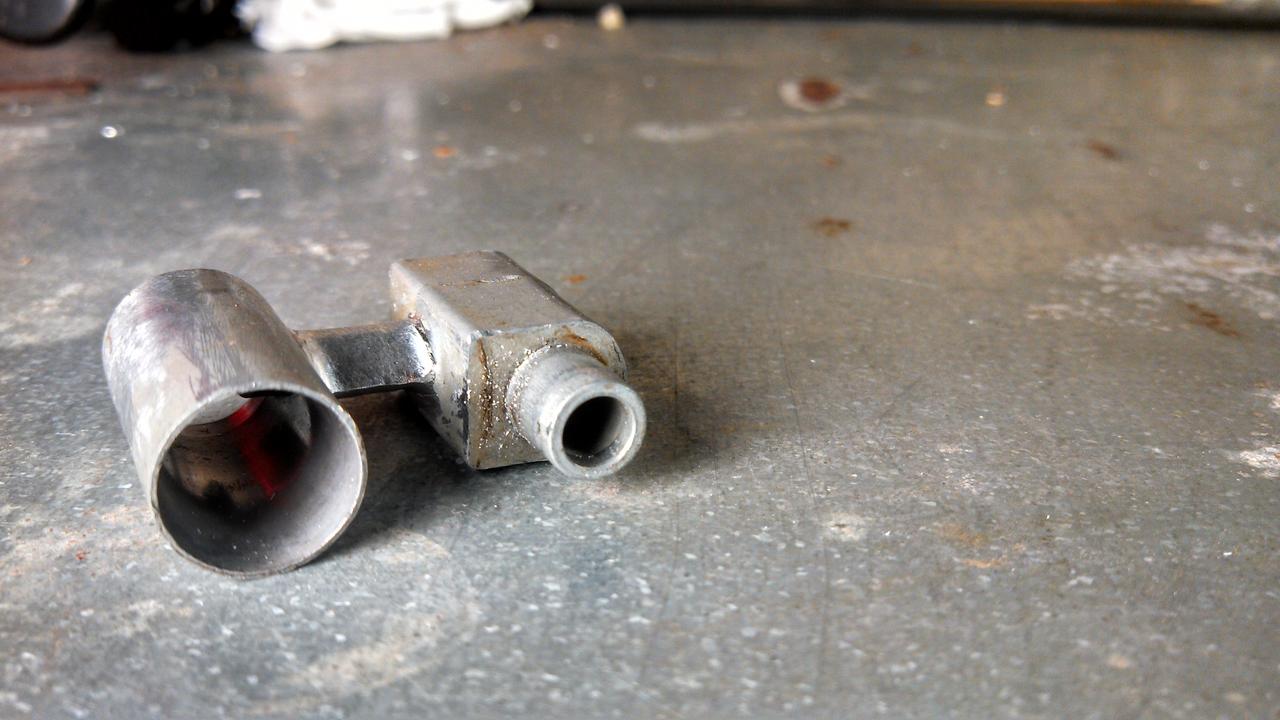
Nice work  Be careful with those throttle shafts though, I think those are the thinnest I've ever seen! They're known to twist and could even snap, sending pieces into your motor.
Thread Starter
Full Member
Joined: Apr 2012
Posts: 201
Likes: 0
From: Louisiana
The pic may be a little misleading, they are pretty thin, but the edges also taper off so it may look thinner than it is. I'll put a caliper on it and measure it tomorrow.
Thread Starter
Full Member
Joined: Apr 2012
Posts: 201
Likes: 0
From: Louisiana
The throttle shafts are .050" at their thinnest. I can't twist them by hand unless I really f'n tried.
I am enjoying working on the nikki, I may break out the Mikuni PH44 next and get it tuned up. I love the way that thing sounds and performs at high rpm.
I am enjoying working on the nikki, I may break out the Mikuni PH44 next and get it tuned up. I love the way that thing sounds and performs at high rpm.
You'll probably be fine then. Easiest test is to put everything together, open the throttle all the way, and see if the plates are open evenly. These things are fun to put together. There's so much crap you can remove from them and they'll still work great.
Trending Topics


Joined: Mar 2001
Posts: 31,851
Likes: 3,239
From: https://www2.mazda.com/en/100th/
you might want to build a simple throttle stop, fixes the twisting shaft "problem"
Thread Starter
Full Member
Joined: Apr 2012
Posts: 201
Likes: 0
From: Louisiana
I am still trying to determine if my throttle linkage is correct for vaccum secondaries, or if I should just mod to mech secondaries and forget trying to figure it out. It may be set up correctly, I just want to make sure before I tackle other issues.
Having a CnC shop has it's benefits. I may not have a mill or a lathe but I've got a 535 pipe threader and a dremel.
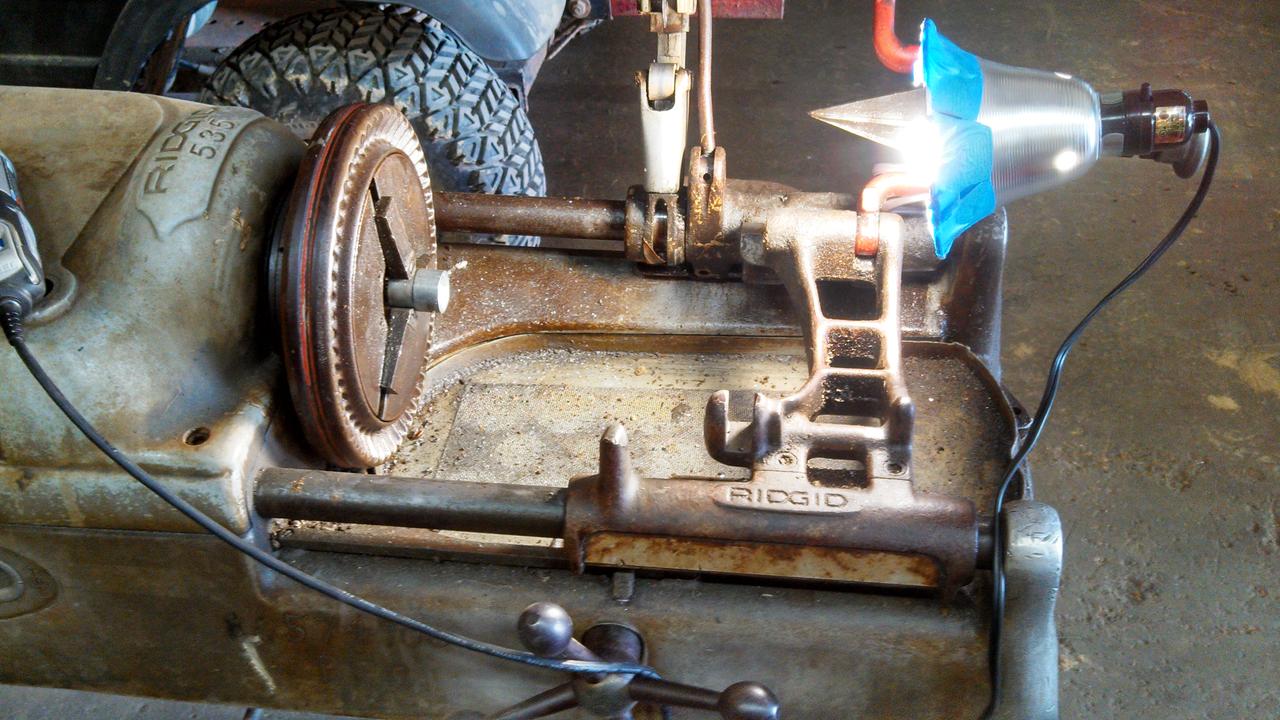
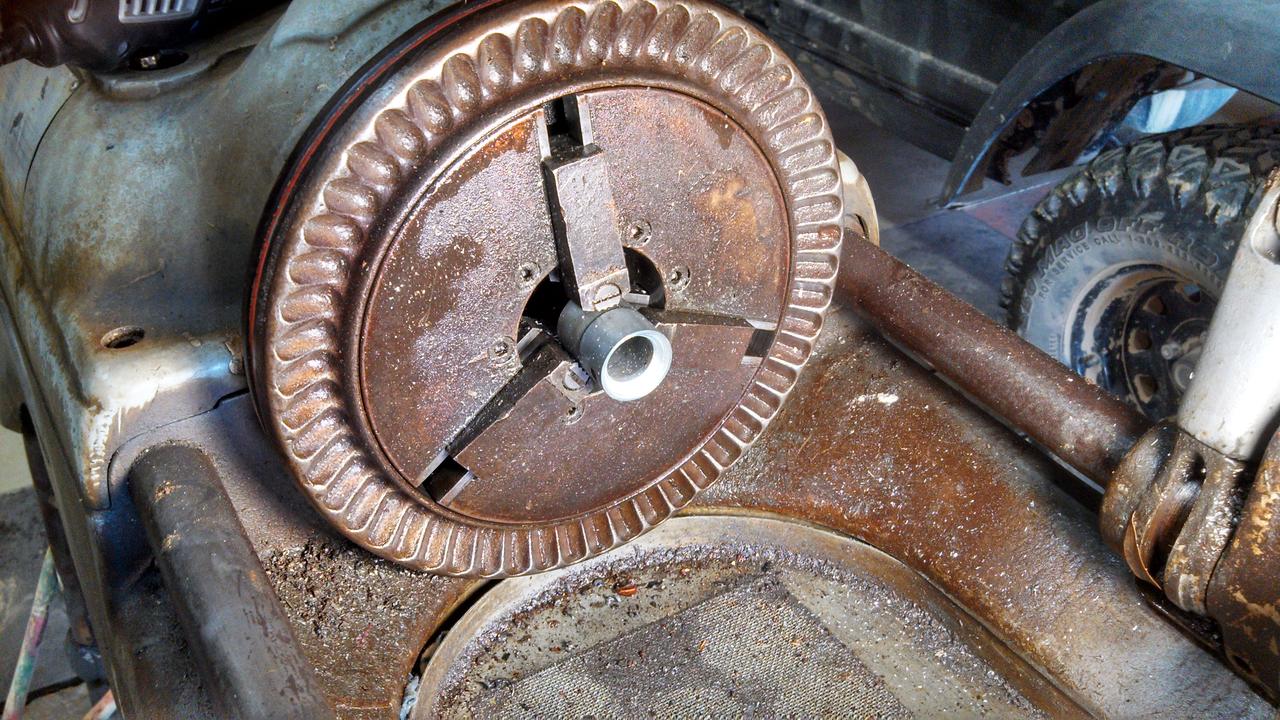
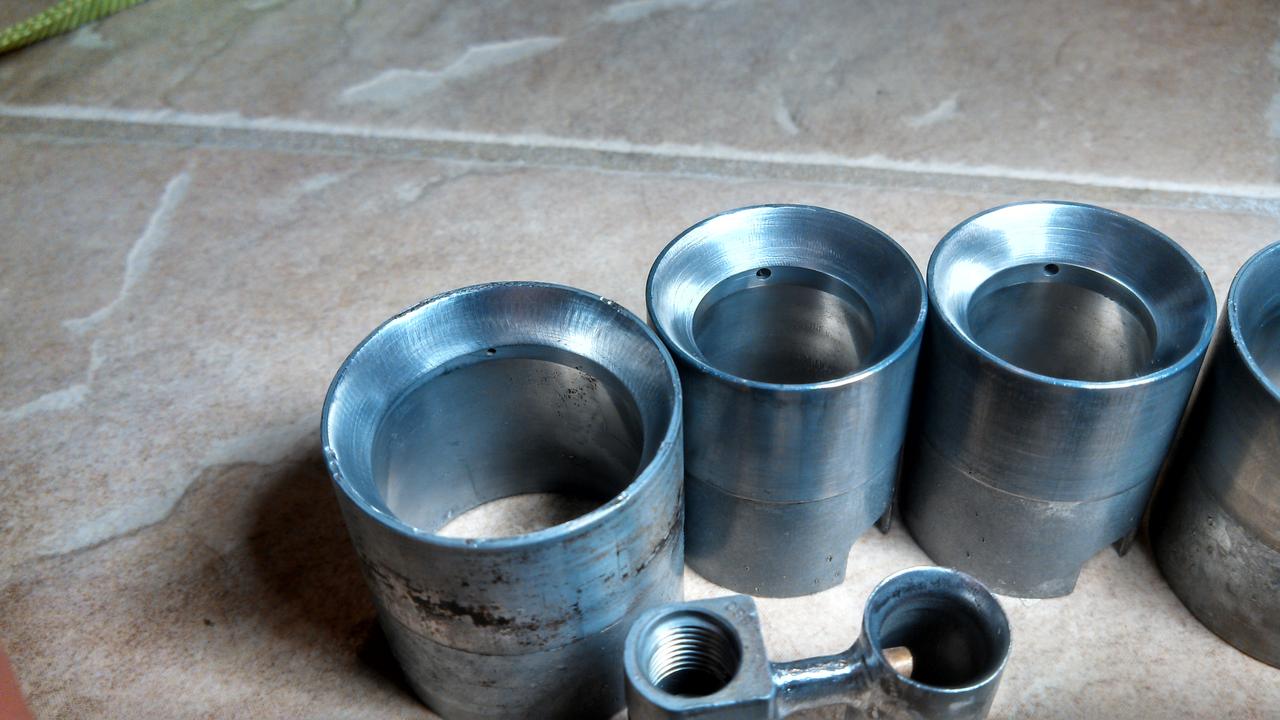
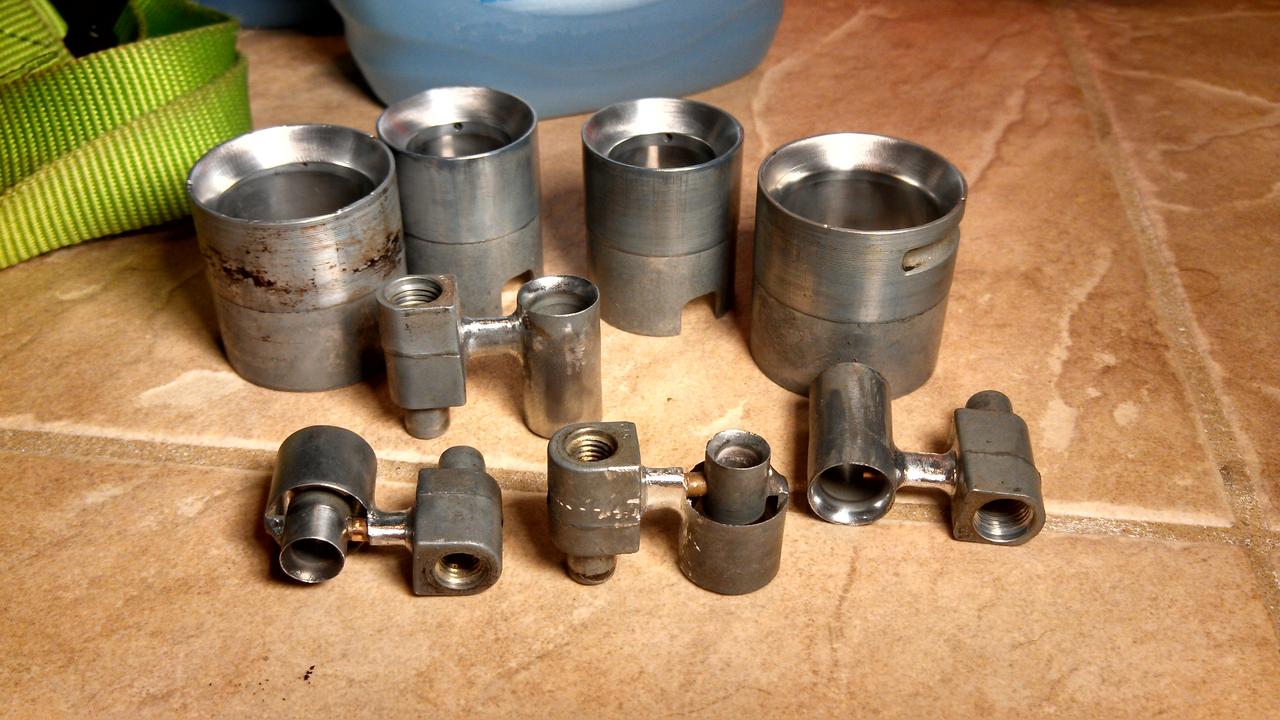
I need to dunk them in some parts cleaner to get all the gunk off and get them totally clean but they don't need any more grinding.
Is there anything I should do while I have the carb off? I am thinking of getting some freeze plugs and modding the irons so I can swap when needed without adding more coolant. I still have the manifold on right now but it's no big to take it off and mod it.
Maybe check for compression or something? I dunno... I am new to rotaries and I want to go over every inch of this car to make sure it's running properly. I don't know what to expect and how it should run with the mods it has on it (not the mods I am doing to the carb parts) so I will need some guidance (as in, should I be expecting a lumpy idle or being extremely cold natured etc.). I don't want to be troubleshooting a problem that isn't a problem, know what I mean?
Last edited by Shrimp; Jun 13, 2013 at 08:45 PM. Reason: grammar
Thread Starter
Full Member
Joined: Apr 2012
Posts: 201
Likes: 0
From: Louisiana
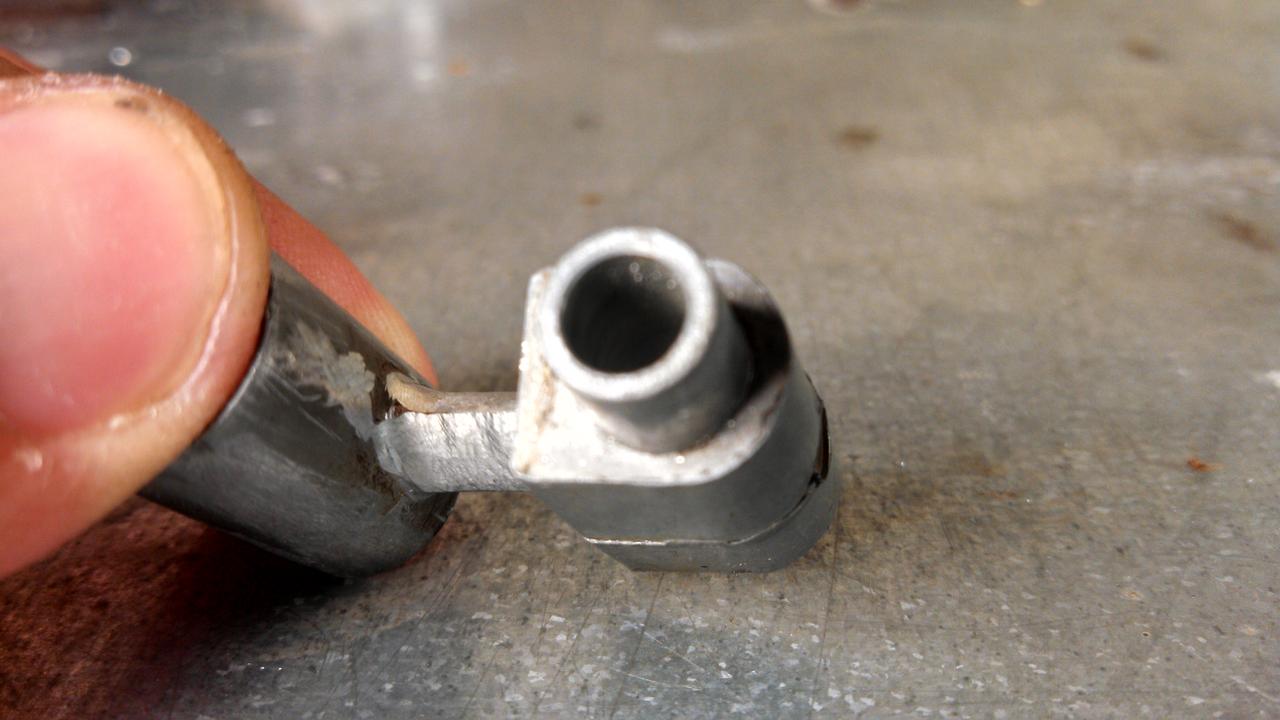
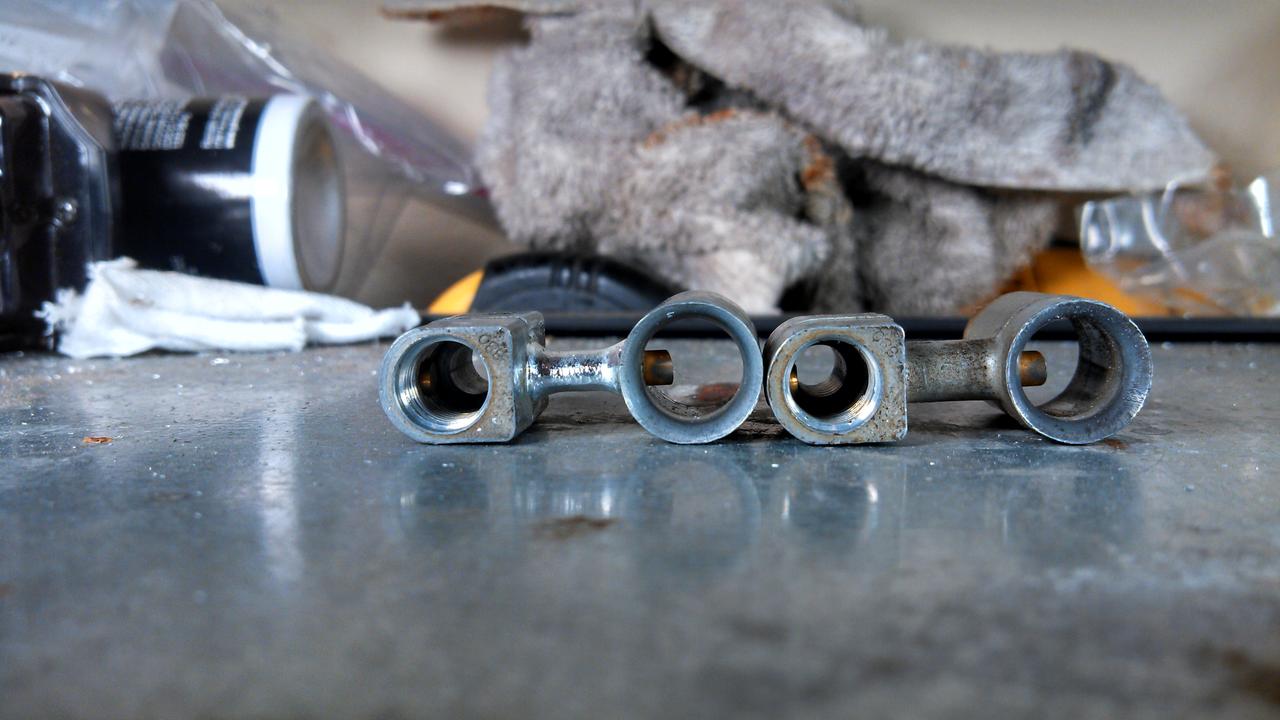
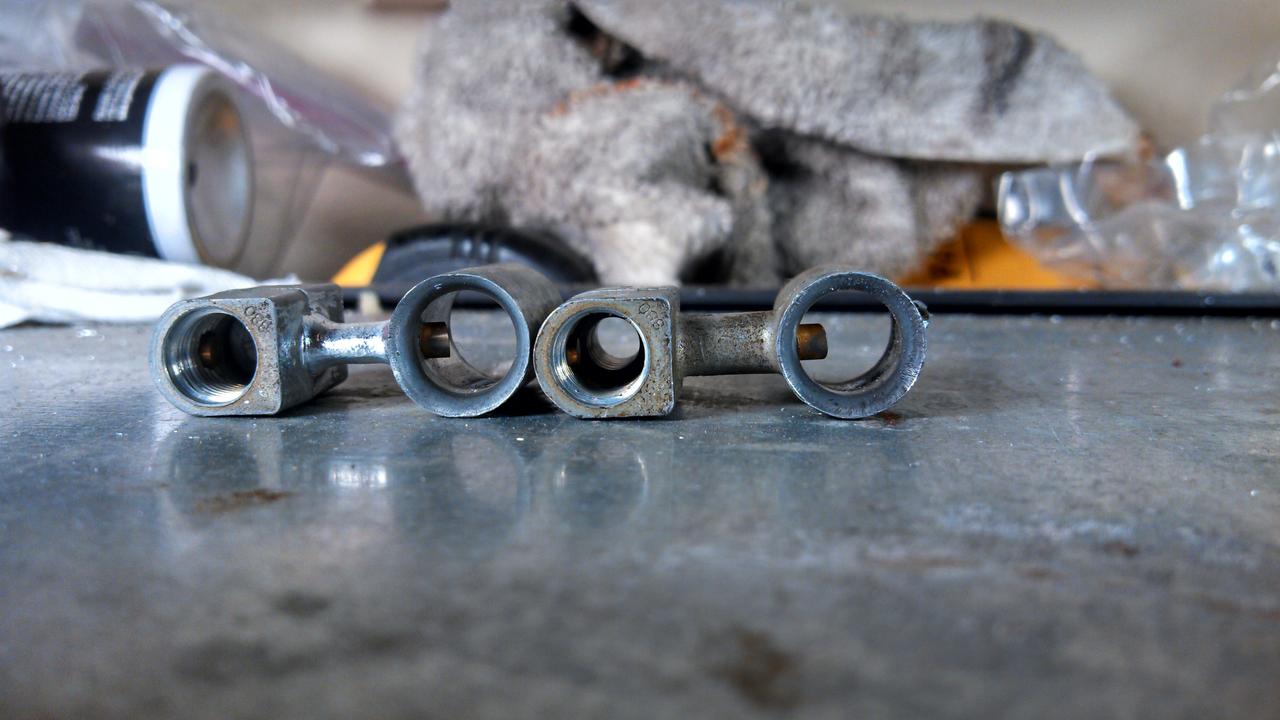
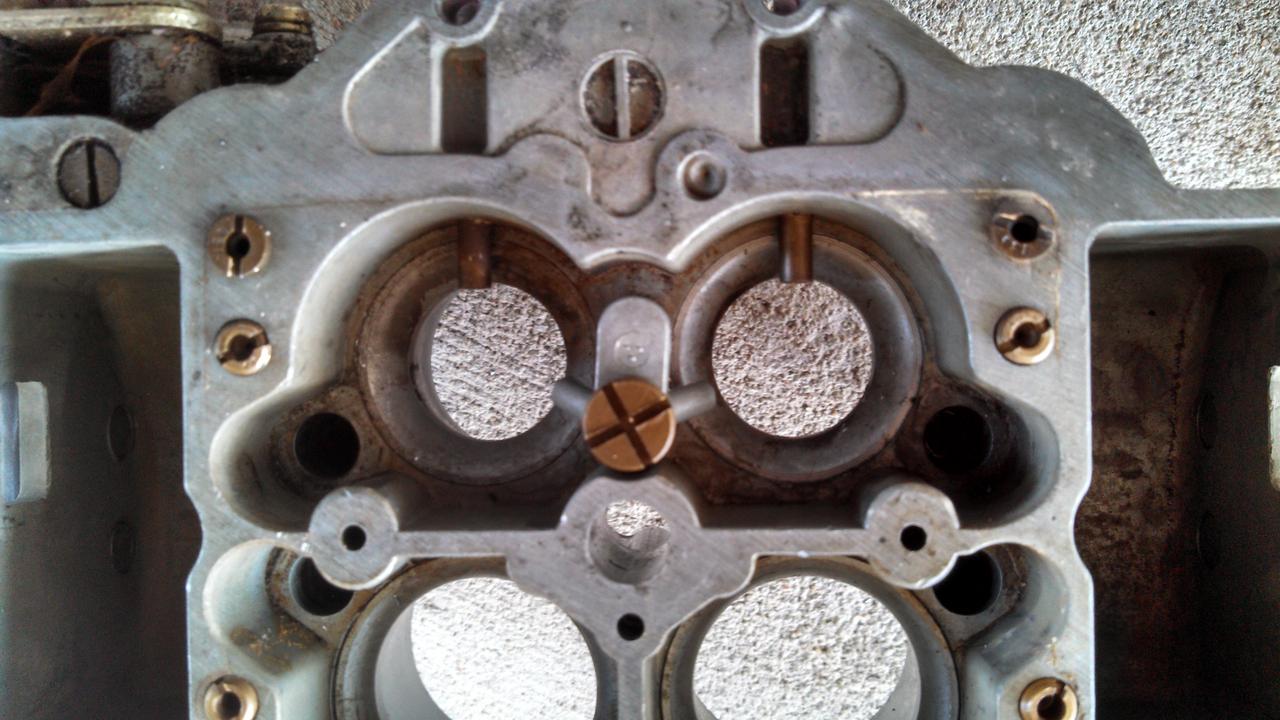
Broke open the working carb to put the new internals inside and check out the inside of the rest of it. One gasket has a small tear in it but I think I can still use it. What do you guys think?

One of the jets was completely blocked off.
So do I swap in the jets from the donor carb and just roll with it? They are larger. 70/140 are the stock jets and 90/160 are the donor jets.
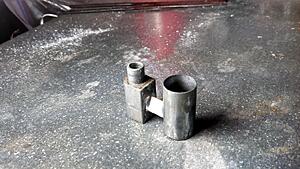
And can I grind off the brass tubes sticking out over the venturis as seen here?
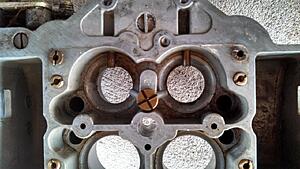
The other ends have vacuum caps on them.
Also, does anyone know where I can get a good gasket kit? If I can get some new gaskets I will just go ahead and replace them.

One of the jets was completely blocked off.

So do I swap in the jets from the donor carb and just roll with it? They are larger. 70/140 are the stock jets and 90/160 are the donor jets.
And can I grind off the brass tubes sticking out over the venturis as seen here?
The other ends have vacuum caps on them.
Also, does anyone know where I can get a good gasket kit? If I can get some new gaskets I will just go ahead and replace them.
Last edited by Shrimp; Jun 14, 2013 at 01:33 PM.
Looks like progress!
I'd use the bigger jets, you should flow more air now. If it's too much, go back to smaller.
I wouldn't cut the oil tubes down. Seems to me the oil would then be clinging to venturies rather than zooming into the motor where you want it. If you're premixing you could remove them altogether and fill with quick steel.
The Sorensen kits I've used twice lately with fine results. If you only need gaskets, an exacto knife and gasket material would be cheaper.
Last edited by Cookboy; Jun 14, 2013 at 02:34 PM.
Thread Starter
Full Member
Joined: Apr 2012
Posts: 201
Likes: 0
From: Louisiana
Looks like progress!
I'd use the bigger jets, you should flow more air now. If it's too much, go back to smaller.
I wouldn't cut the oil tubes down. Seems to me the oil would then be clinging to venturies rather than zooming into the motor where you want it. If you're premixing you could remove them altogether and fill with quick steel.
The Sorensen kits I've used twice lately with fine results. If you only need gaskets, an exacto knife and gasket material would be cheaper.
I'd use the bigger jets, you should flow more air now. If it's too much, go back to smaller.
I wouldn't cut the oil tubes down. Seems to me the oil would then be clinging to venturies rather than zooming into the motor where you want it. If you're premixing you could remove them altogether and fill with quick steel.
The Sorensen kits I've used twice lately with fine results. If you only need gaskets, an exacto knife and gasket material would be cheaper.
I need to also figure out the thread size of the screws used to connect the butterflys to the throttle shaft so I can replace them with alan head screws or maybe torx.
Thread Starter
Full Member
Joined: Apr 2012
Posts: 201
Likes: 0
From: Louisiana
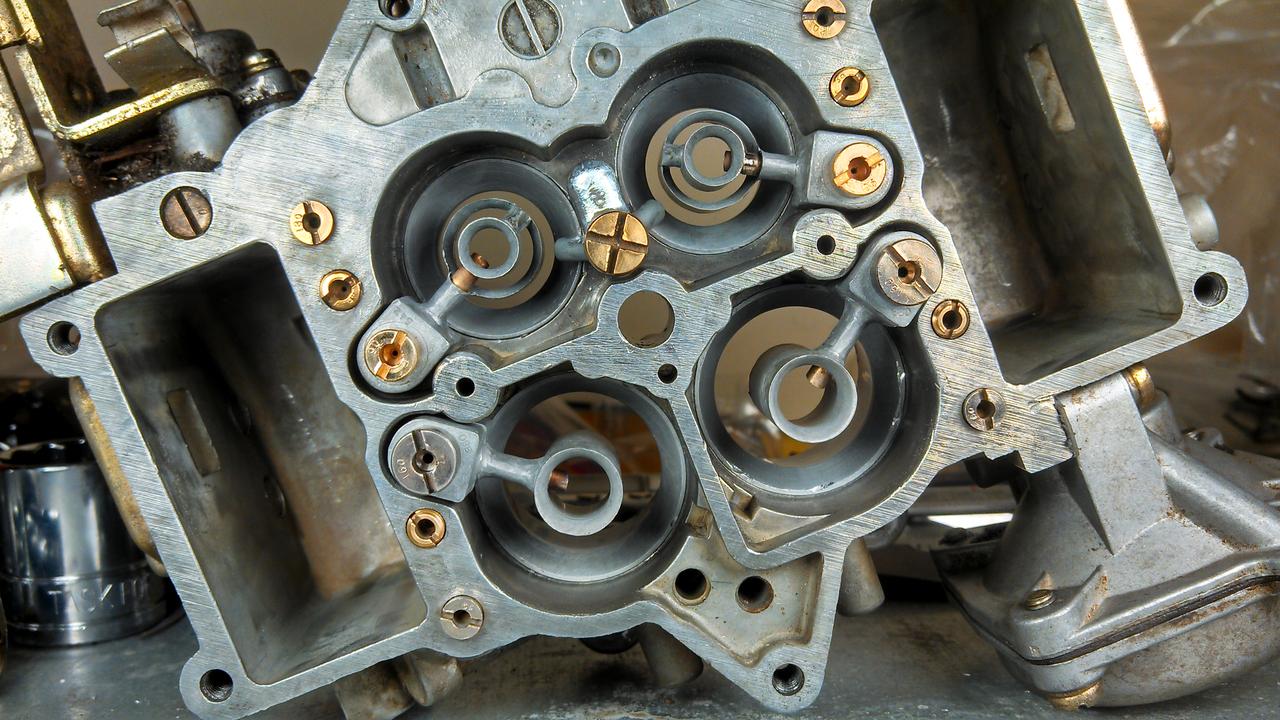
Went to re-install everything and I realized the venturis are numbered and I dont know the orientation on how to install.
Lookin for some help here. I searched the forum but couldn't find anything on this specifically.
Lookin for some help here. I searched the forum but couldn't find anything on this specifically.
My neighborhood Ace hardware has been able to provide nearly every screw, nut, and bolt I've needed. Try Em out.
Keep at it, I'll be interested to see how the new carb works for you.
Keep at it, I'll be interested to see how the new carb works for you.
Thread Starter
Full Member
Joined: Apr 2012
Posts: 201
Likes: 0
From: Louisiana
I looked at it for a while, realized they can only go in one way really. Also confirmed using the second spare carb.
The float needles are VERY dirty on the end. Do I need to replace these or can I just scuff them clean... Or should I just leave them alone?
I am ready to put it all back together (all except the throttle body, that is soaking in carb cleaner). Pics incoming later tonight.
The float needles are VERY dirty on the end. Do I need to replace these or can I just scuff them clean... Or should I just leave them alone?
I am ready to put it all back together (all except the throttle body, that is soaking in carb cleaner). Pics incoming later tonight.
Thread Starter
Full Member
Joined: Apr 2012
Posts: 201
Likes: 0
From: Louisiana
Forget the pics... Had taken a crap load of pics of the throttle linkage before I tore it down and of course I had to delete them all before I went to put it back together. F my life.
Need guidance on how to rig back up a stripped nikki with vaccum secondaries.
Need guidance on how to rig back up a stripped nikki with vaccum secondaries.


Thread Starter
Full Member
Joined: Apr 2012
Posts: 201
Likes: 0
From: Louisiana
It runs. Still has a bit of a lumpy idle. It used to kill after idling for too long but now it can idle all day at 850-900.
New guy just moved into the neighborhood and he races a mazda speed. He has a buddy who has 3 FC's and knows a lot about rotaries. Hopefully I can get him to take a look at mine.
New guy just moved into the neighborhood and he races a mazda speed. He has a buddy who has 3 FC's and knows a lot about rotaries. Hopefully I can get him to take a look at mine.
Thread Starter
Full Member
Joined: Apr 2012
Posts: 201
Likes: 0
From: Louisiana
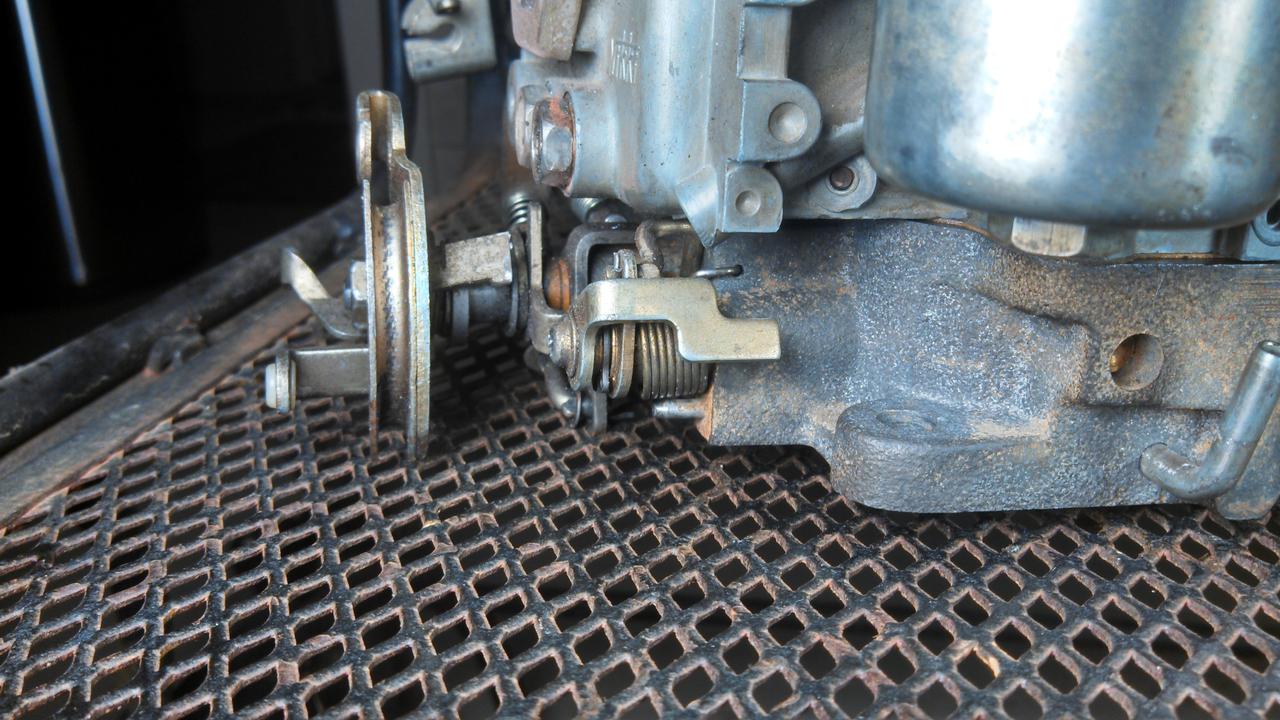
After looking it all work and move I realized I still had some problems.
1. I hadn't put on the primary throttle stop.
2. I realized this before I put it all back together (while I was modding the shafts). The donor primary shaft is shorter so I had to remove a few things from the throttle stop side. It also isn't thread and has a screw cap end whereas the original was threaded.
3. Some of the secondary linkage was catching on itself (the part that is linked to the primary) and was therefore forcing the primaries open sometimes (when it caught). I broke it down and straightened everything out so it doesn't do that anymore.
Video below.
Getting freeze plugs and pins tomorrow for the carb linkage.
LINK TO VIDEO
Last edited by Shrimp; Jun 15, 2013 at 10:30 PM.
After looking it all work and move I realized I still had some problems.
1. I hadn't put on the primary throttle stop.
2. I realized this before I put it all back together (while I was modding the shafts). The donor primary shaft is shorter so I had to remove a few things from the throttle stop side. It also isn't thread and has a screw cap end whereas the original was threaded.
3. Some of the secondary linkage was catching on itself (the part that is linked to the primary) and was therefore forcing the primaries open sometimes (when it caught). I broke it down and straightened everything out so it doesn't do that anymore.
Video below.
Getting freeze plugs and pins tomorrow for the carb linkage.
LINK TO VIDEO
1. I hadn't put on the primary throttle stop.
2. I realized this before I put it all back together (while I was modding the shafts). The donor primary shaft is shorter so I had to remove a few things from the throttle stop side. It also isn't thread and has a screw cap end whereas the original was threaded.
3. Some of the secondary linkage was catching on itself (the part that is linked to the primary) and was therefore forcing the primaries open sometimes (when it caught). I broke it down and straightened everything out so it doesn't do that anymore.
Video below.
Getting freeze plugs and pins tomorrow for the carb linkage.
LINK TO VIDEO
Thread Starter
Full Member
Joined: Apr 2012
Posts: 201
Likes: 0
From: Louisiana
Thread Starter
Full Member
Joined: Apr 2012
Posts: 201
Likes: 0
From: Louisiana
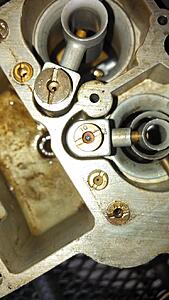
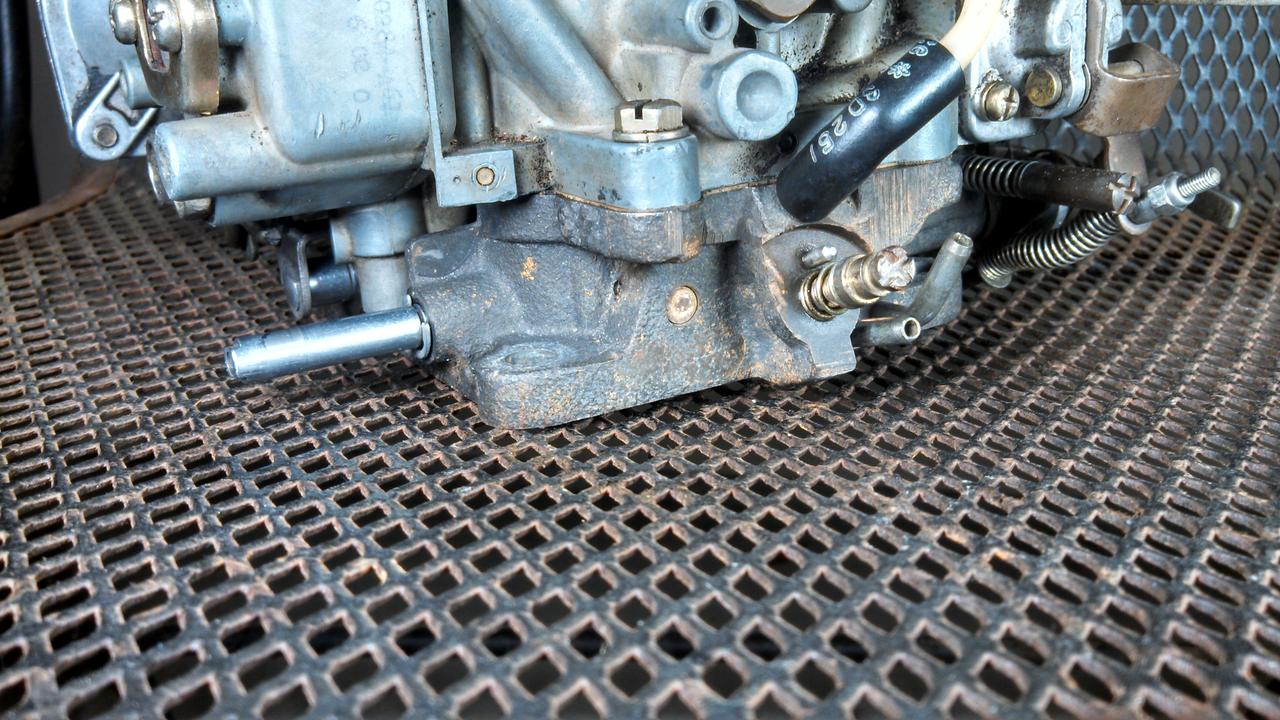
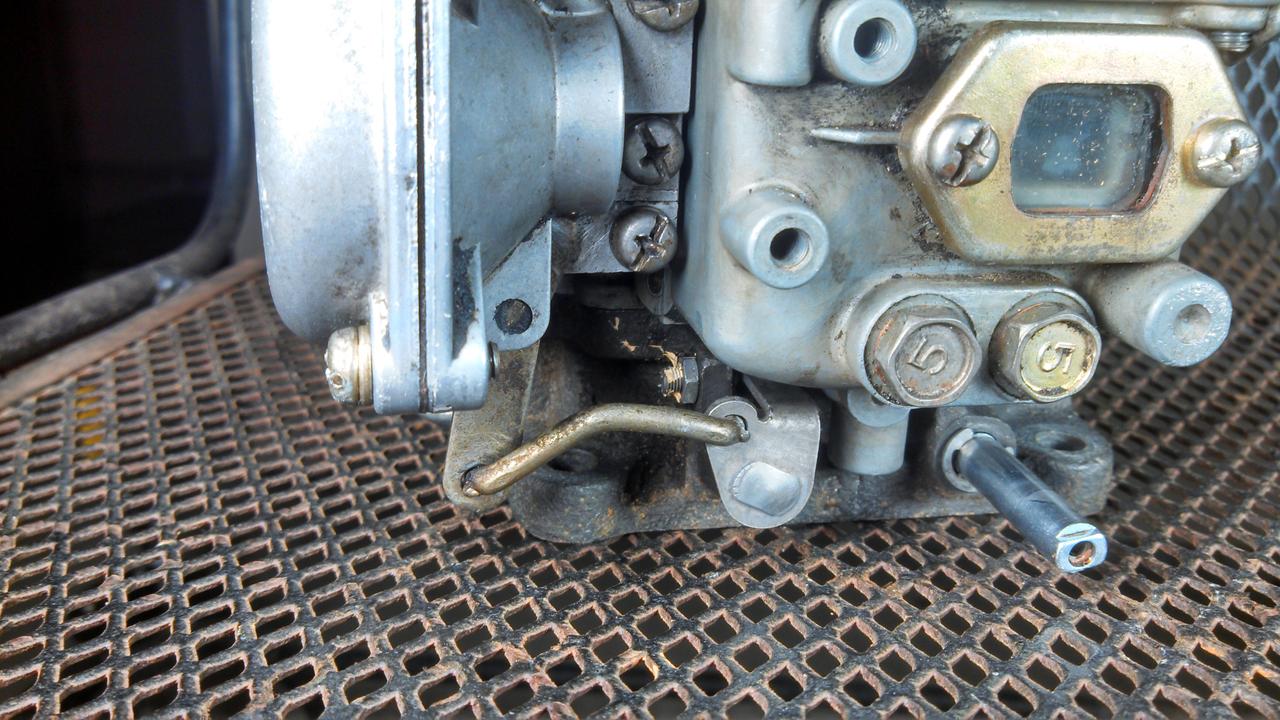
I fixed the linkage and got everything back together. I need help identifying what this port is in the pic below. It's not blocked off or connected to anything.
There's also this solid line coming from the car that doesn't go to anything I just blocked it off originally but I'd like to know what it is.
There's a bit of flex on the butterflys when I try to twist it past the throttle stop. Guess I just need to be light on the pedal at WOT.
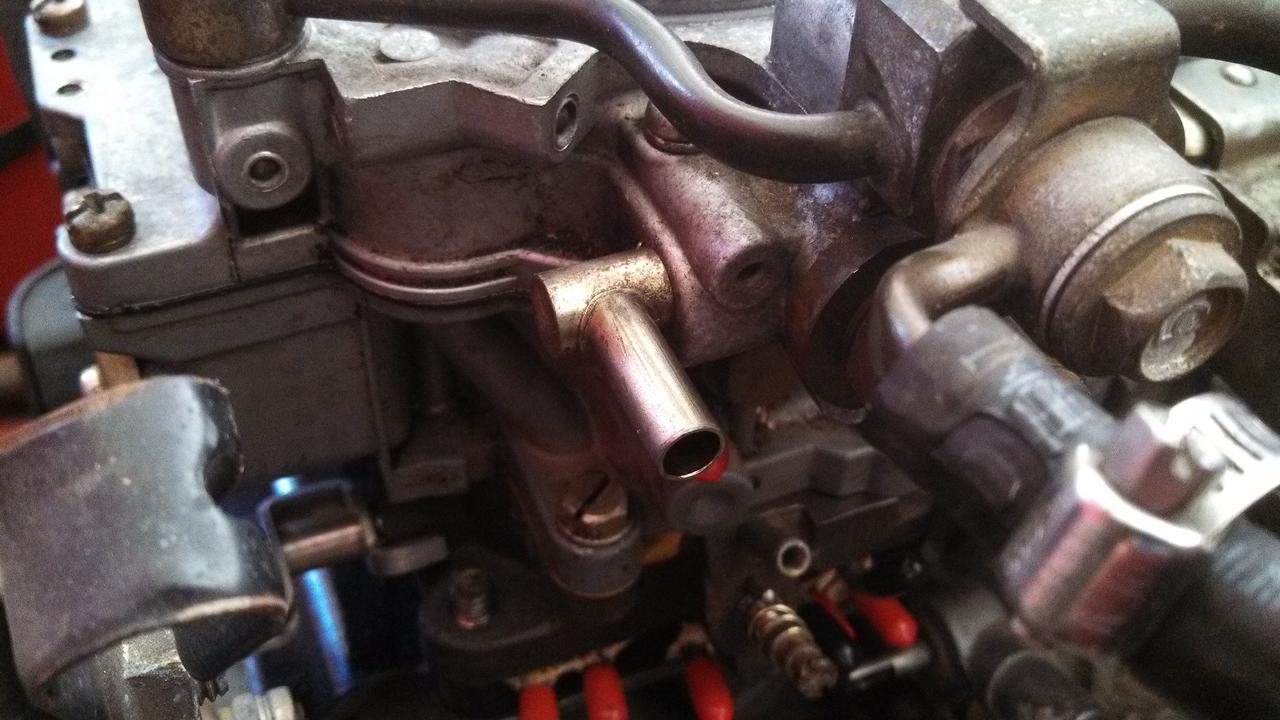
There's also this solid line coming from the car that doesn't go to anything I just blocked it off originally but I'd like to know what it is.

There's a bit of flex on the butterflys when I try to twist it past the throttle stop. Guess I just need to be light on the pedal at WOT.
Last edited by Shrimp; Jun 16, 2013 at 12:27 PM.