
Seth's 94 SSM R2 "Resto-mod" Build Thread

Thread Starter
I Raise Chickens
Joined: Jul 2001
Posts: 1,219
Likes: 35
From: Half Moon Bay, CA
Seth's 94 SSM R2 "Resto-mod" Build Thread
tl;dr - I bought a 90k, nearly all original R2 that needs everything. Plan to keep it as factory as possible with a few small upgrades here and there. Appearance wise, will be completely stock. Interior, was planning on upgrading to the Spirit R bits (minus the seats).
Should be a fun project. Will NOT be a frame-off restoration like what I did to my old T2. With the price of Mazda parts these days, I'd need a kickstarter to do that. Plus, I want to drive the beast...soon. Figured I'd create a thread so you guys can critique me and tell me how I'm doing it all wrong. Parts are slowly trickling in, so I've started wrenching on it a bit. Will make an attempt to get the motor pulled out this weekend for a rebuild.
Was bored tonight so I finished cleaning up the electric fans and bolted it up to the new Koyo radiator. Also pulled the (leaky) power steering pump out.


Thread Starter
I Raise Chickens
Joined: Jul 2001
Posts: 1,219
Likes: 35
From: Half Moon Bay, CA
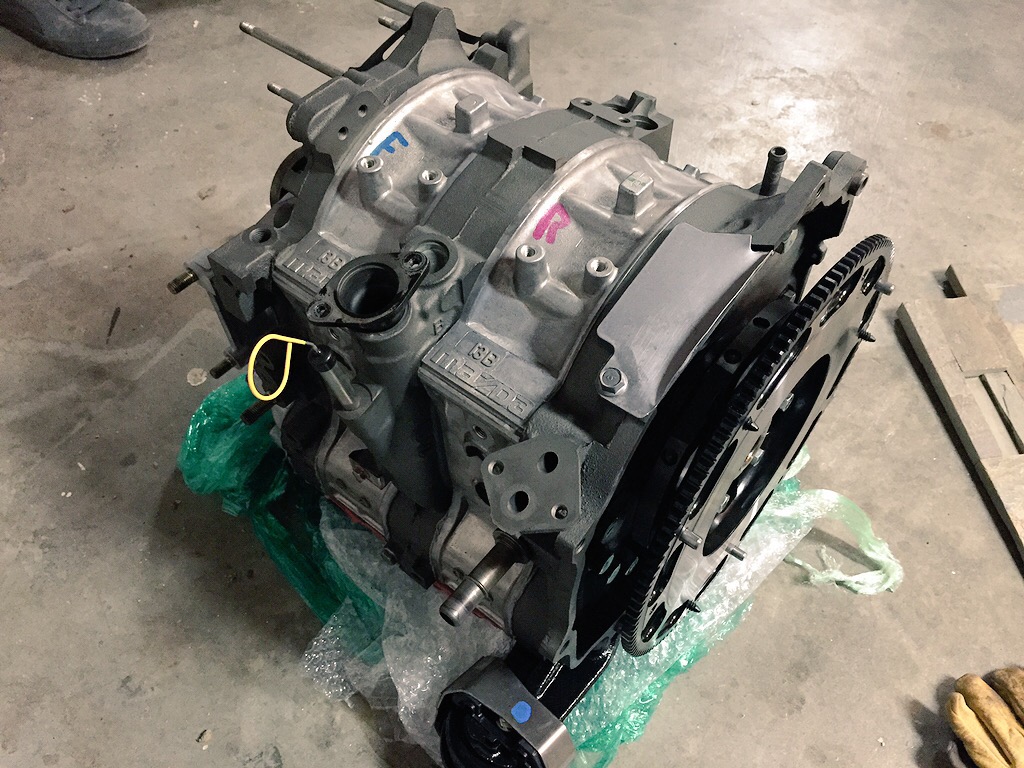
Got the engine pulled today. No drama. Started taking apart the suspension, the fender liners were trashed so I pulled them out as well. Its going to take some hours of scrubbing to clean up the engine bay, its just soaked in oil.
Apologies, this is probably the most boring build thread ever. Will eventually get to the shiny bits.
Apologies, this is probably the most boring build thread ever. Will eventually get to the shiny bits.
Thread Starter
I Raise Chickens
Joined: Jul 2001
Posts: 1,219
Likes: 35
From: Half Moon Bay, CA
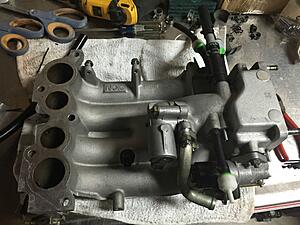
Nothing special, started to break down the motor. Everything is baked and/or coated in oil. Taking my time and reusing all my amazon boxes to compartmentalize the bolts, brackets, etc to make it easier to put back together.
Making a huge mess of the garage floor, any tips for cleaning sealed concrete?? LOL
Making a huge mess of the garage floor, any tips for cleaning sealed concrete?? LOL

Last edited by RCCAZ 1; Apr 21, 2015 at 01:38 PM.
Thread Starter
I Raise Chickens
Joined: Jul 2001
Posts: 1,219
Likes: 35
From: Half Moon Bay, CA
Found the issue with the engine, it was covered in nuts! Seriously though, I will never understand why rodents love to climb into engines.
In other news, got the turbo off with no drama. But that was expected. Mechanics law for working on turbochargers/exhaust systems:
If turbocharger/exhaust component is freely accessible and/or out of the car; bolts, studs and nuts will easily be removed.
If turbocharger/exhaust component is in a difficult place to access or still in the vehicle; bolts, studs and nuts will strip, snap or seize.
Trending Topics
Thread Starter
I Raise Chickens
Joined: Jul 2001
Posts: 1,219
Likes: 35
From: Half Moon Bay, CA
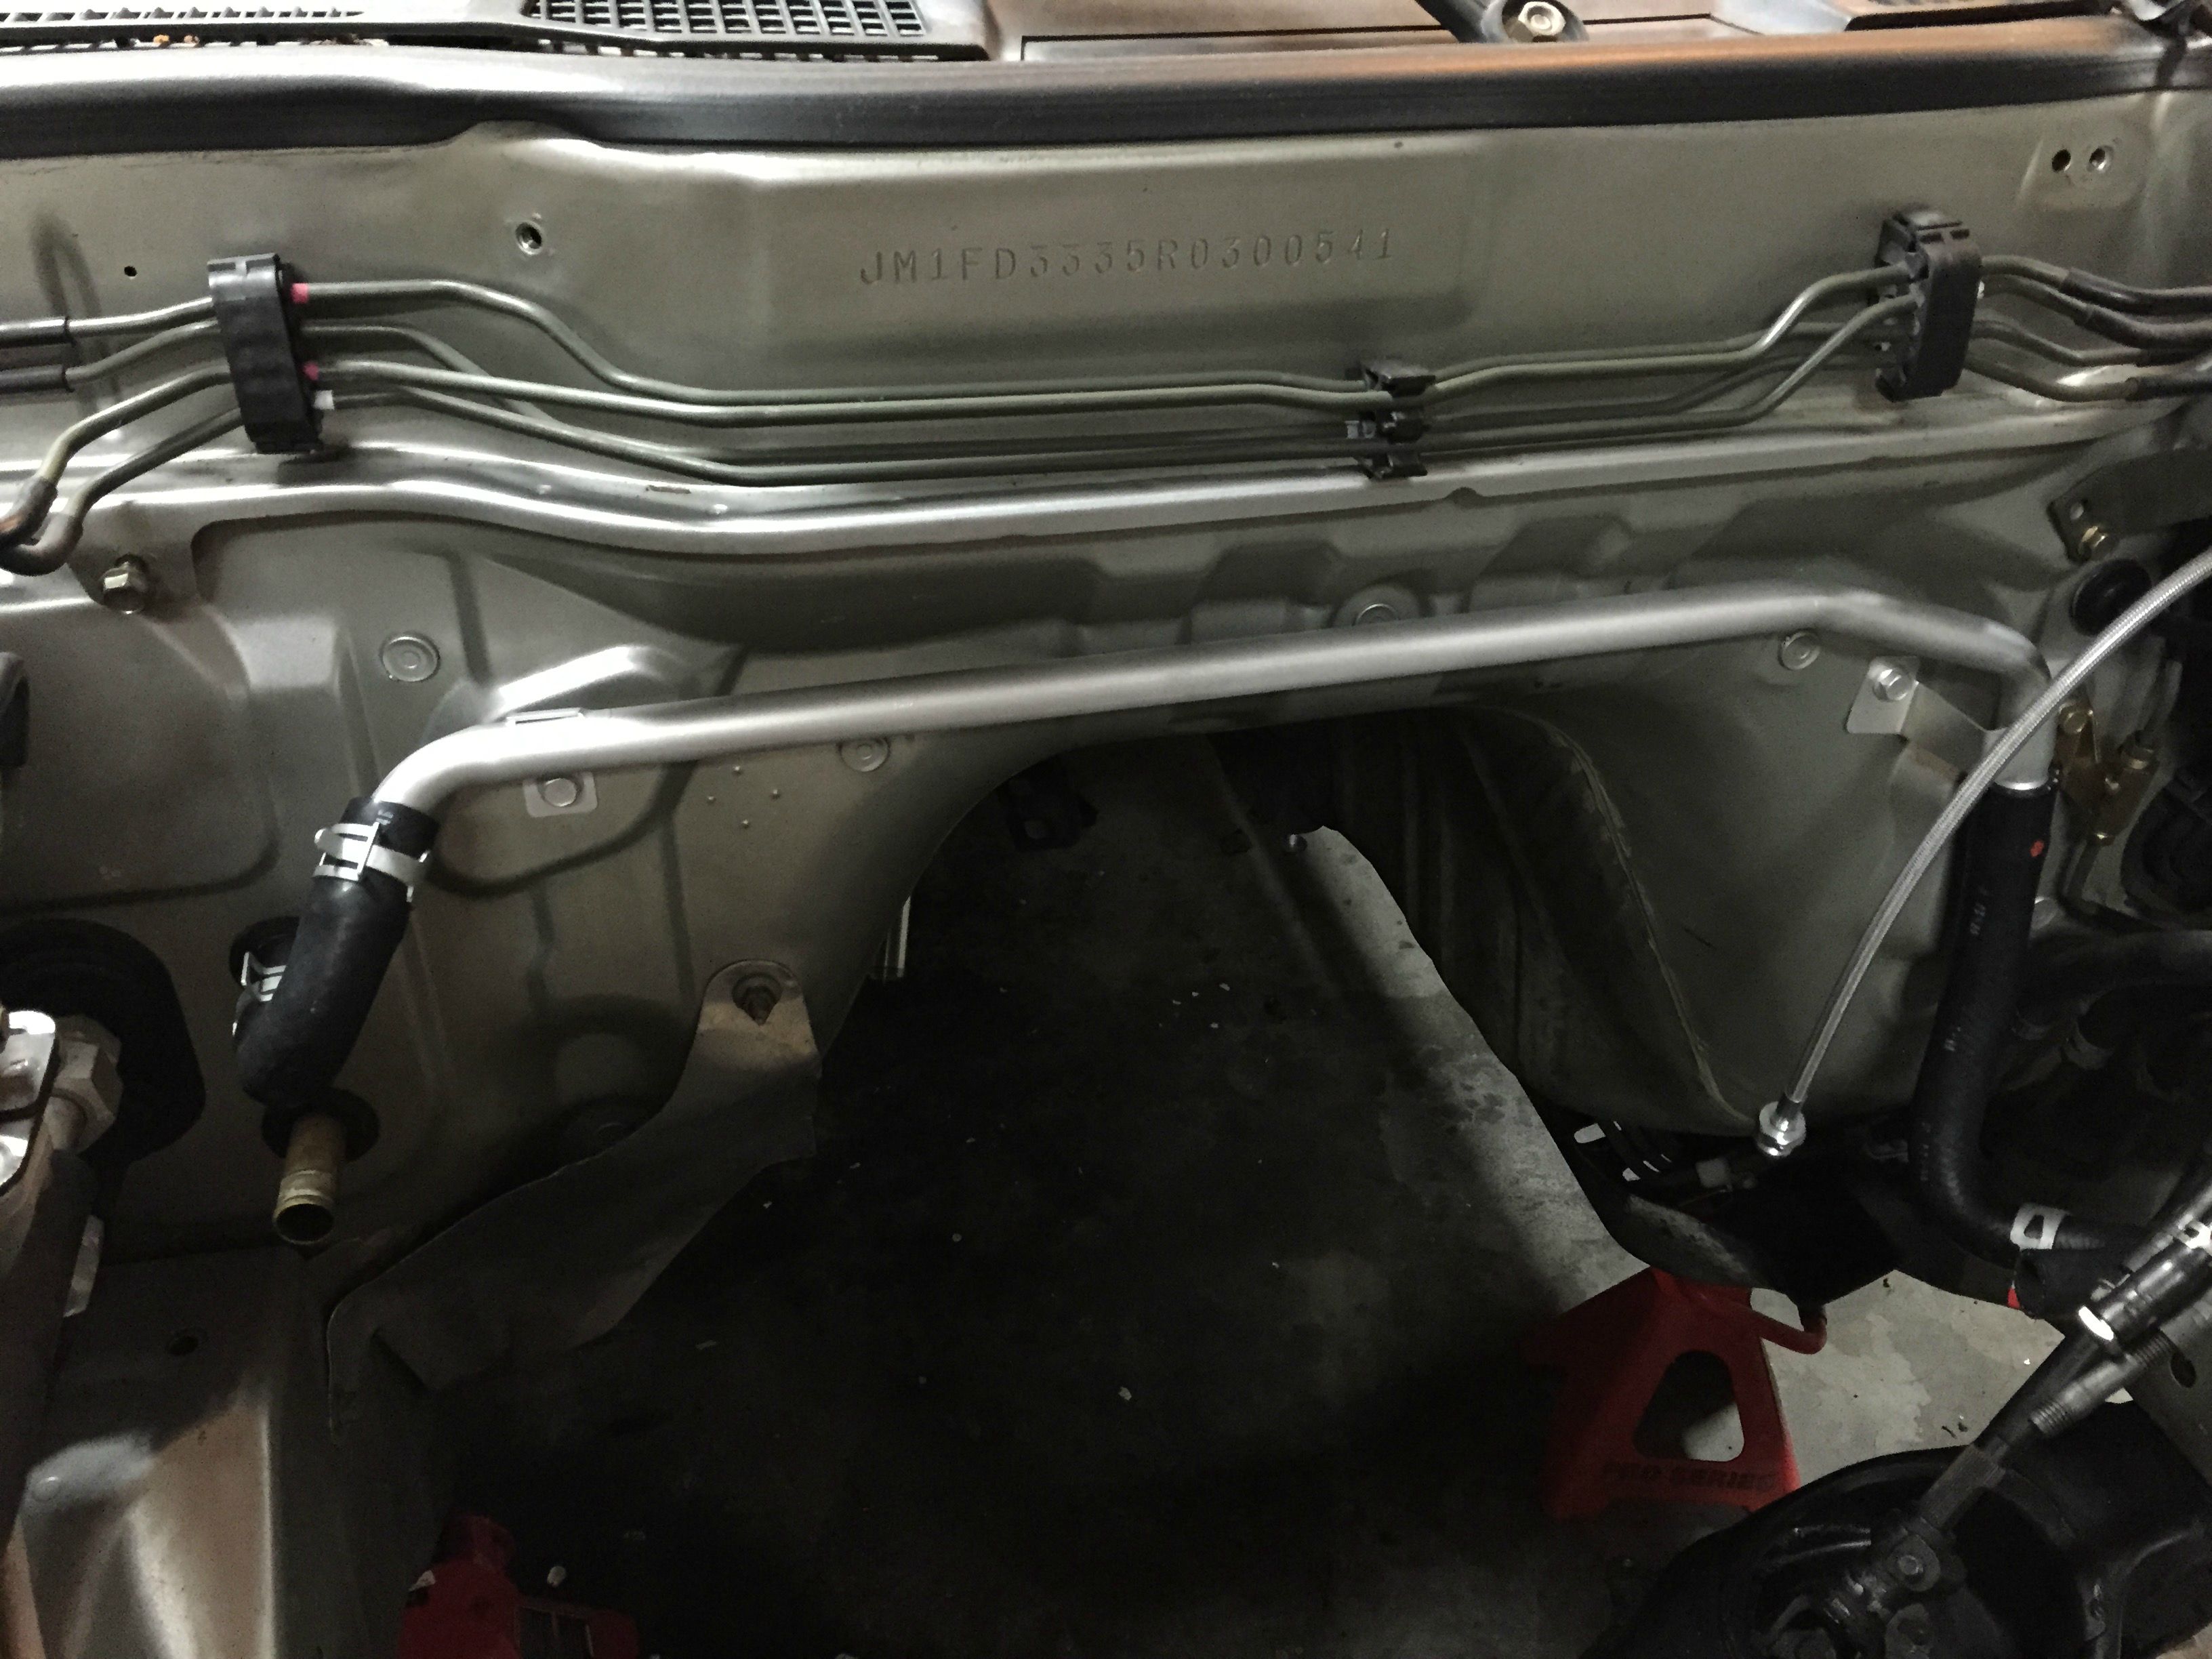
Slowly making progress, been spending a ton of time cleaning, degreasing, ordering parts, etc. The engine bay is almost ready for when the engine is done.
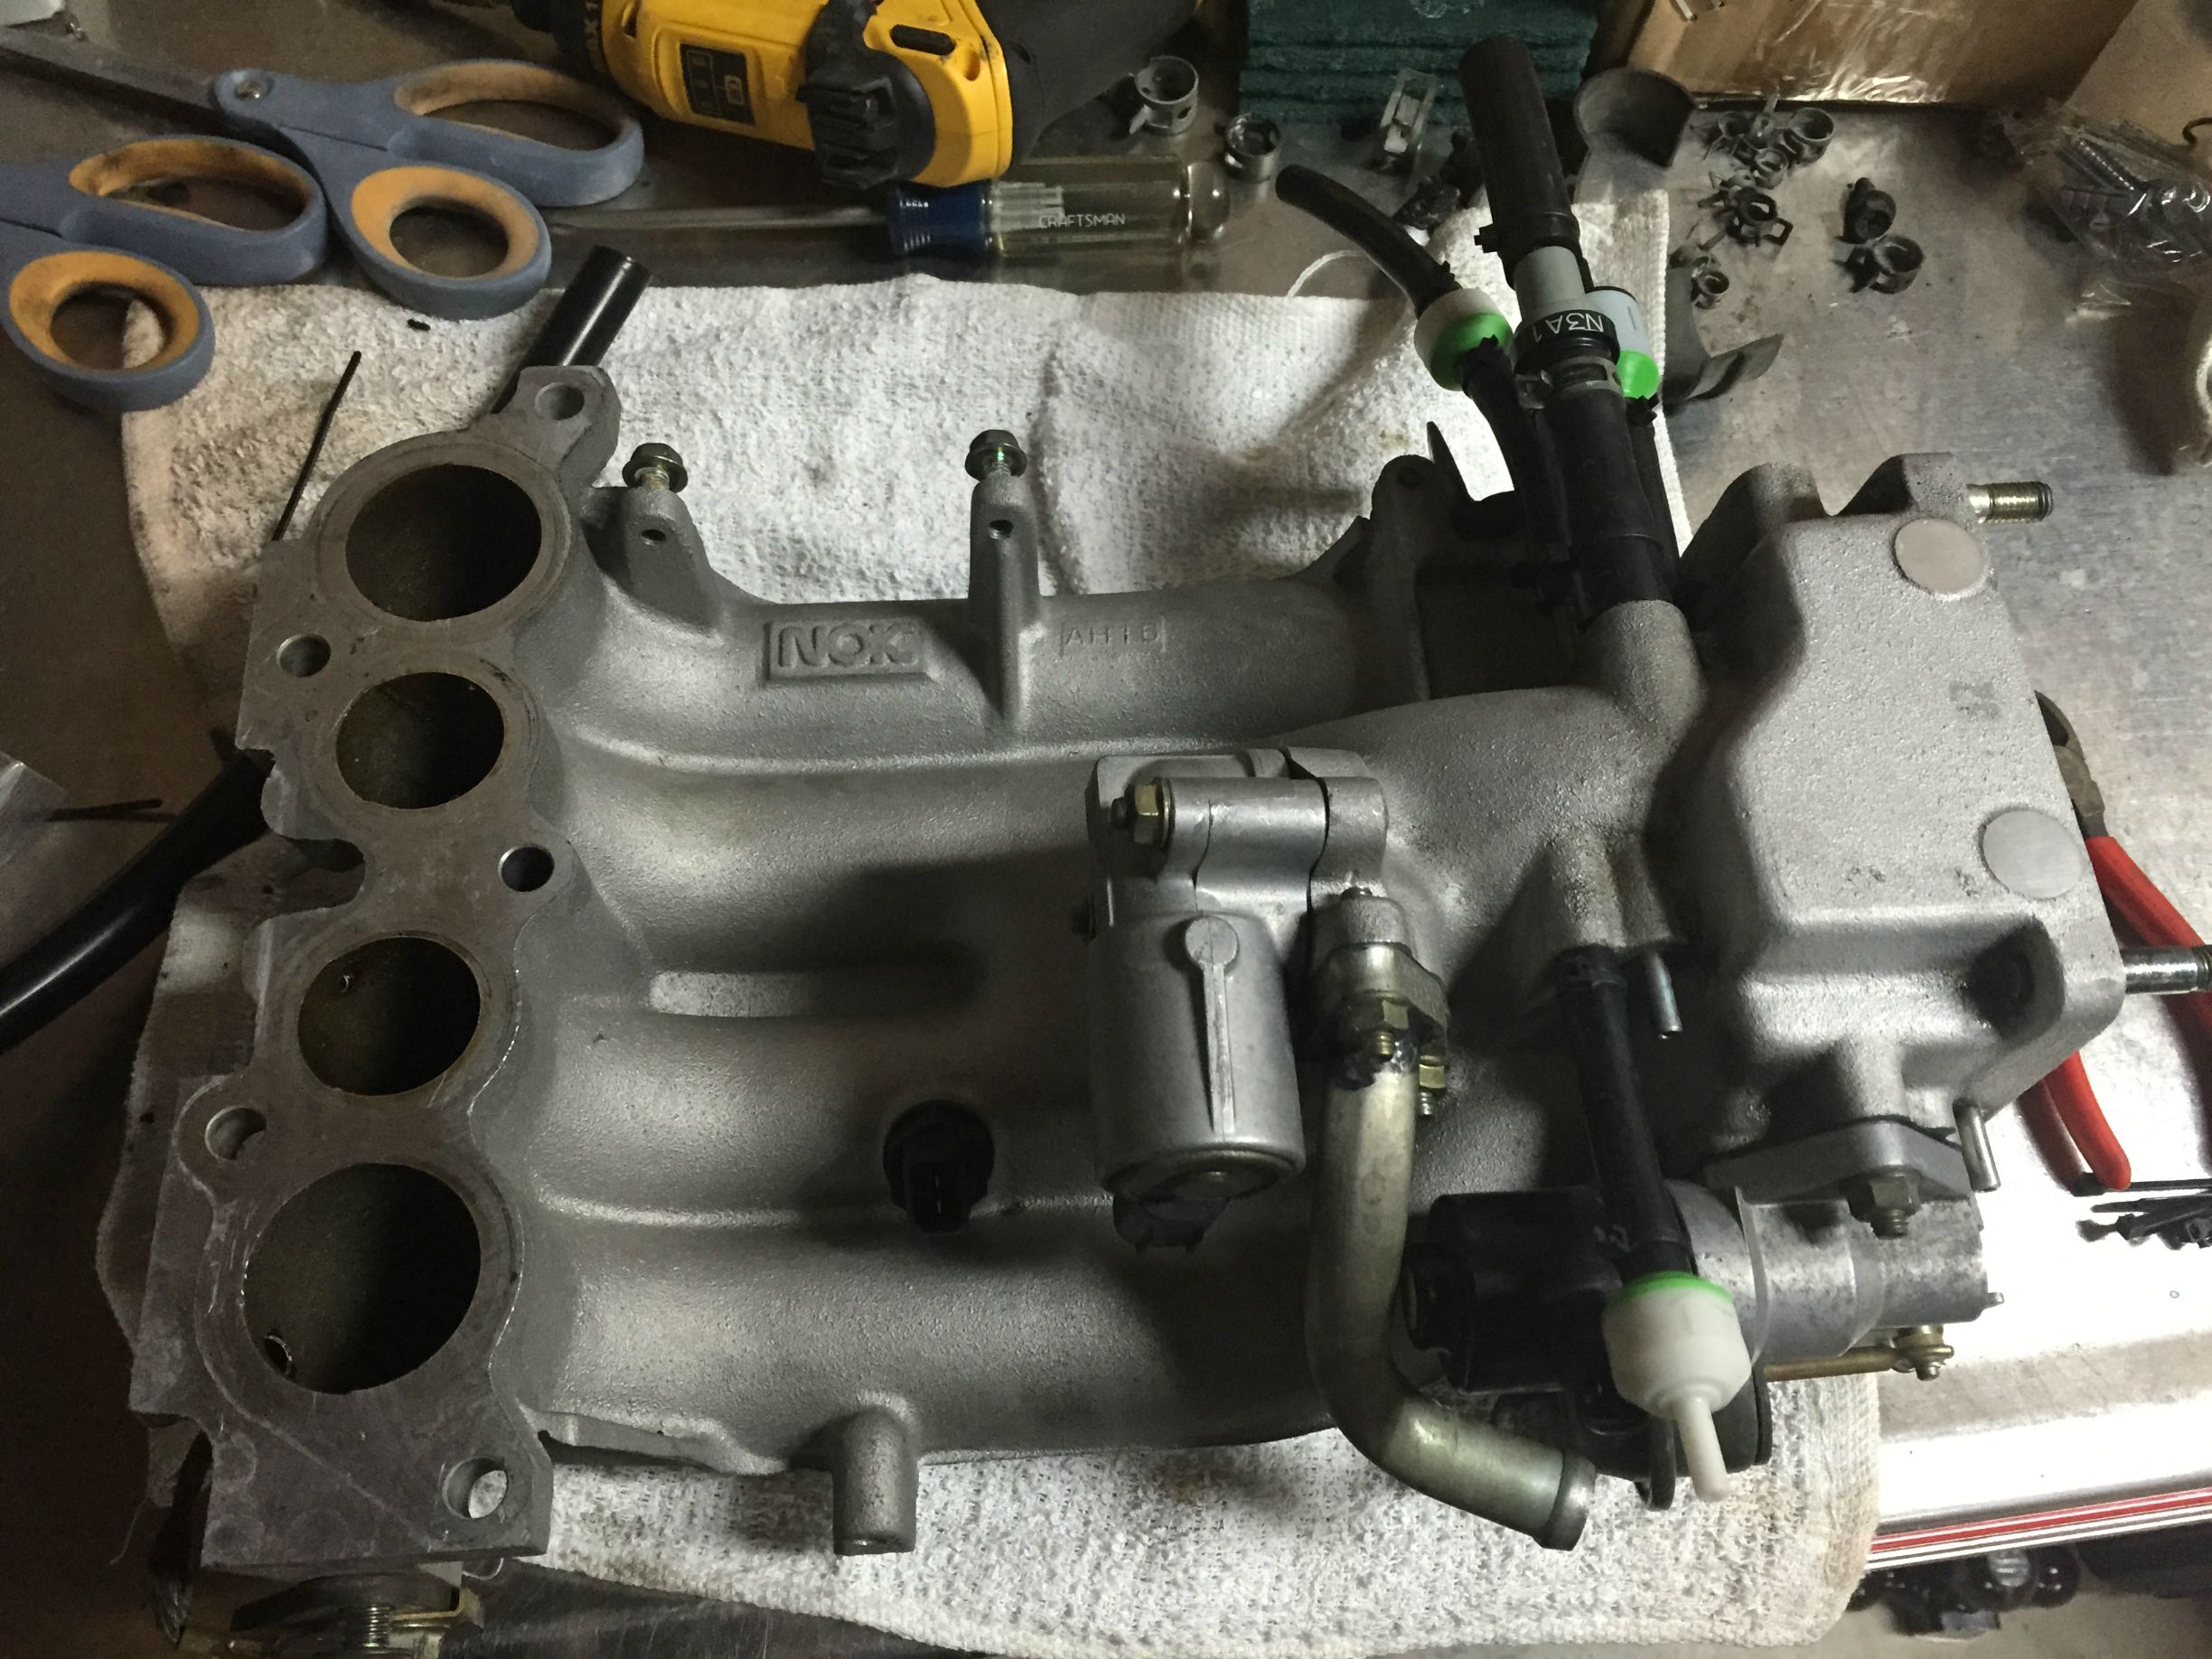
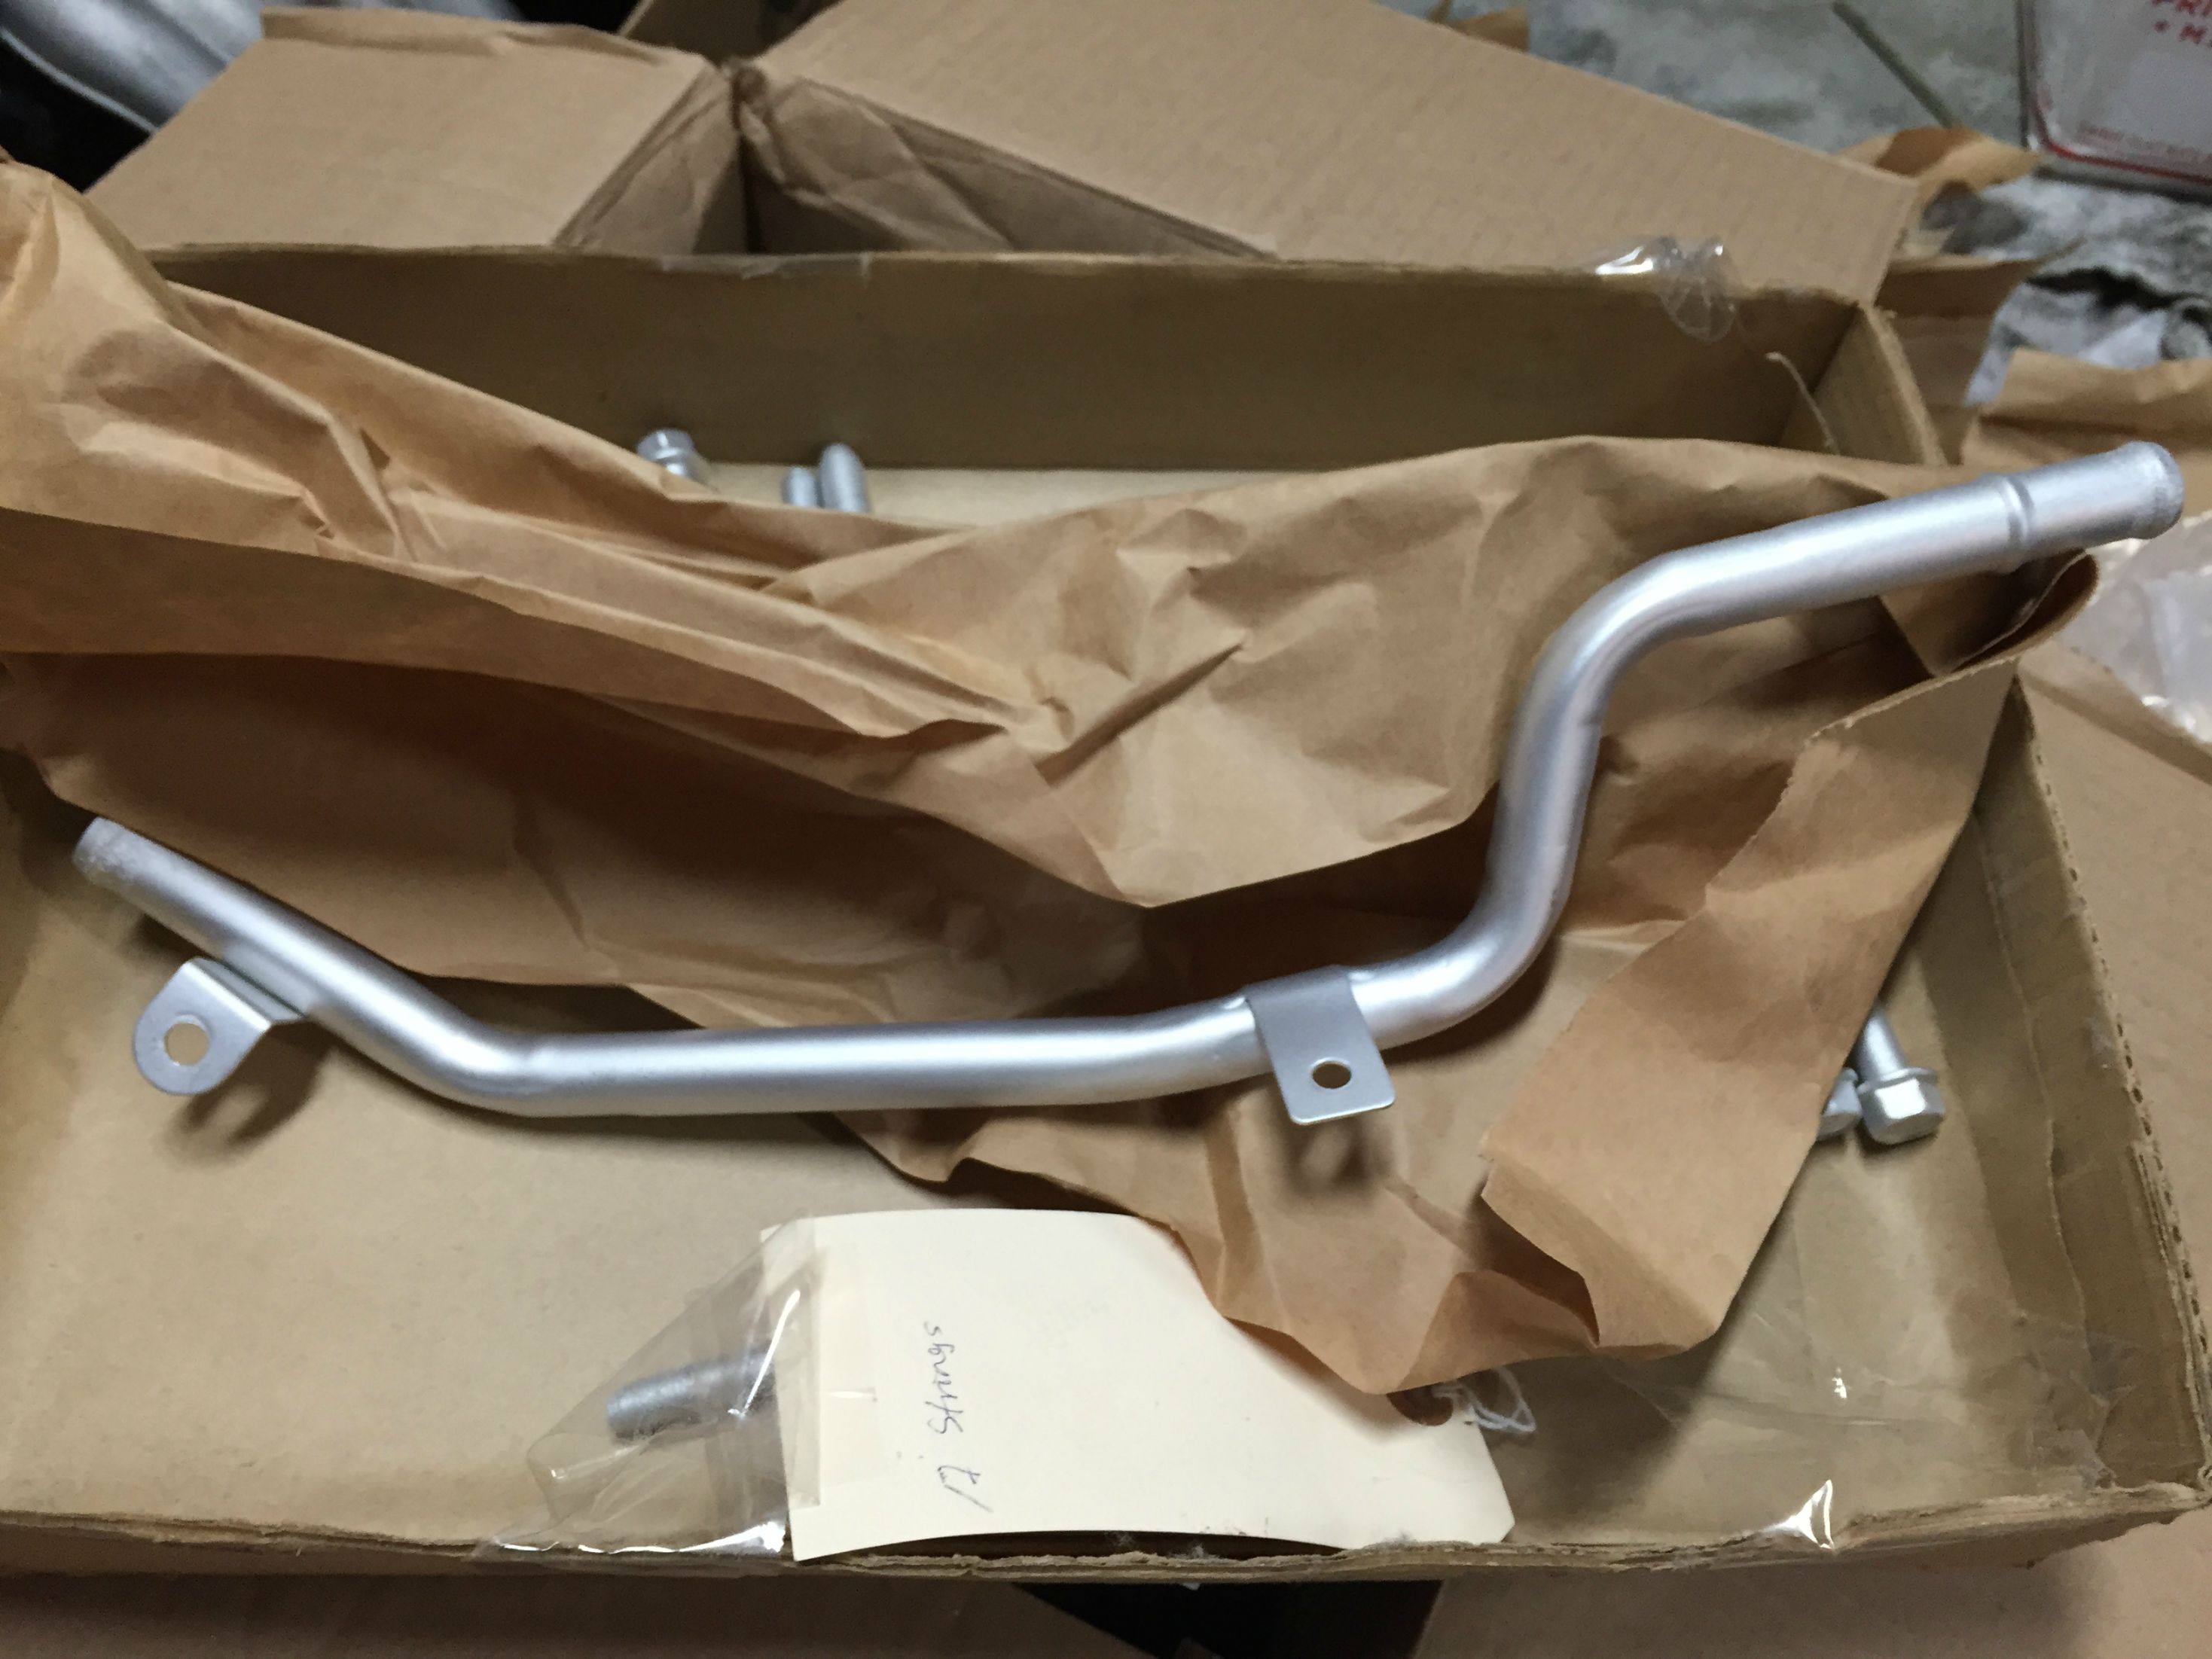
Worked on the upper and lower manifolds this evening. Cleaned, installed new vacuum lines, PCV valve, check valves and upgraded to a responsive air temp sensor:
Worked on the upper and lower manifolds this evening. Cleaned, installed new vacuum lines, PCV valve, check valves and upgraded to a responsive air temp sensor:
Last edited by cymfc3s; May 13, 2015 at 03:53 AM.
Thread Starter
I Raise Chickens
Joined: Jul 2001
Posts: 1,219
Likes: 35
From: Half Moon Bay, CA
Good advice, unfortunately I had already bought all the check valves before I caught his thread on the viton ones. That being said, even though all the plastic bits were totally baked to a crisp, all the OEM check valves were actually not bad. None broke when I removed them surprisingly.
Thread Starter
I Raise Chickens
Joined: Jul 2001
Posts: 1,219
Likes: 35
From: Half Moon Bay, CA
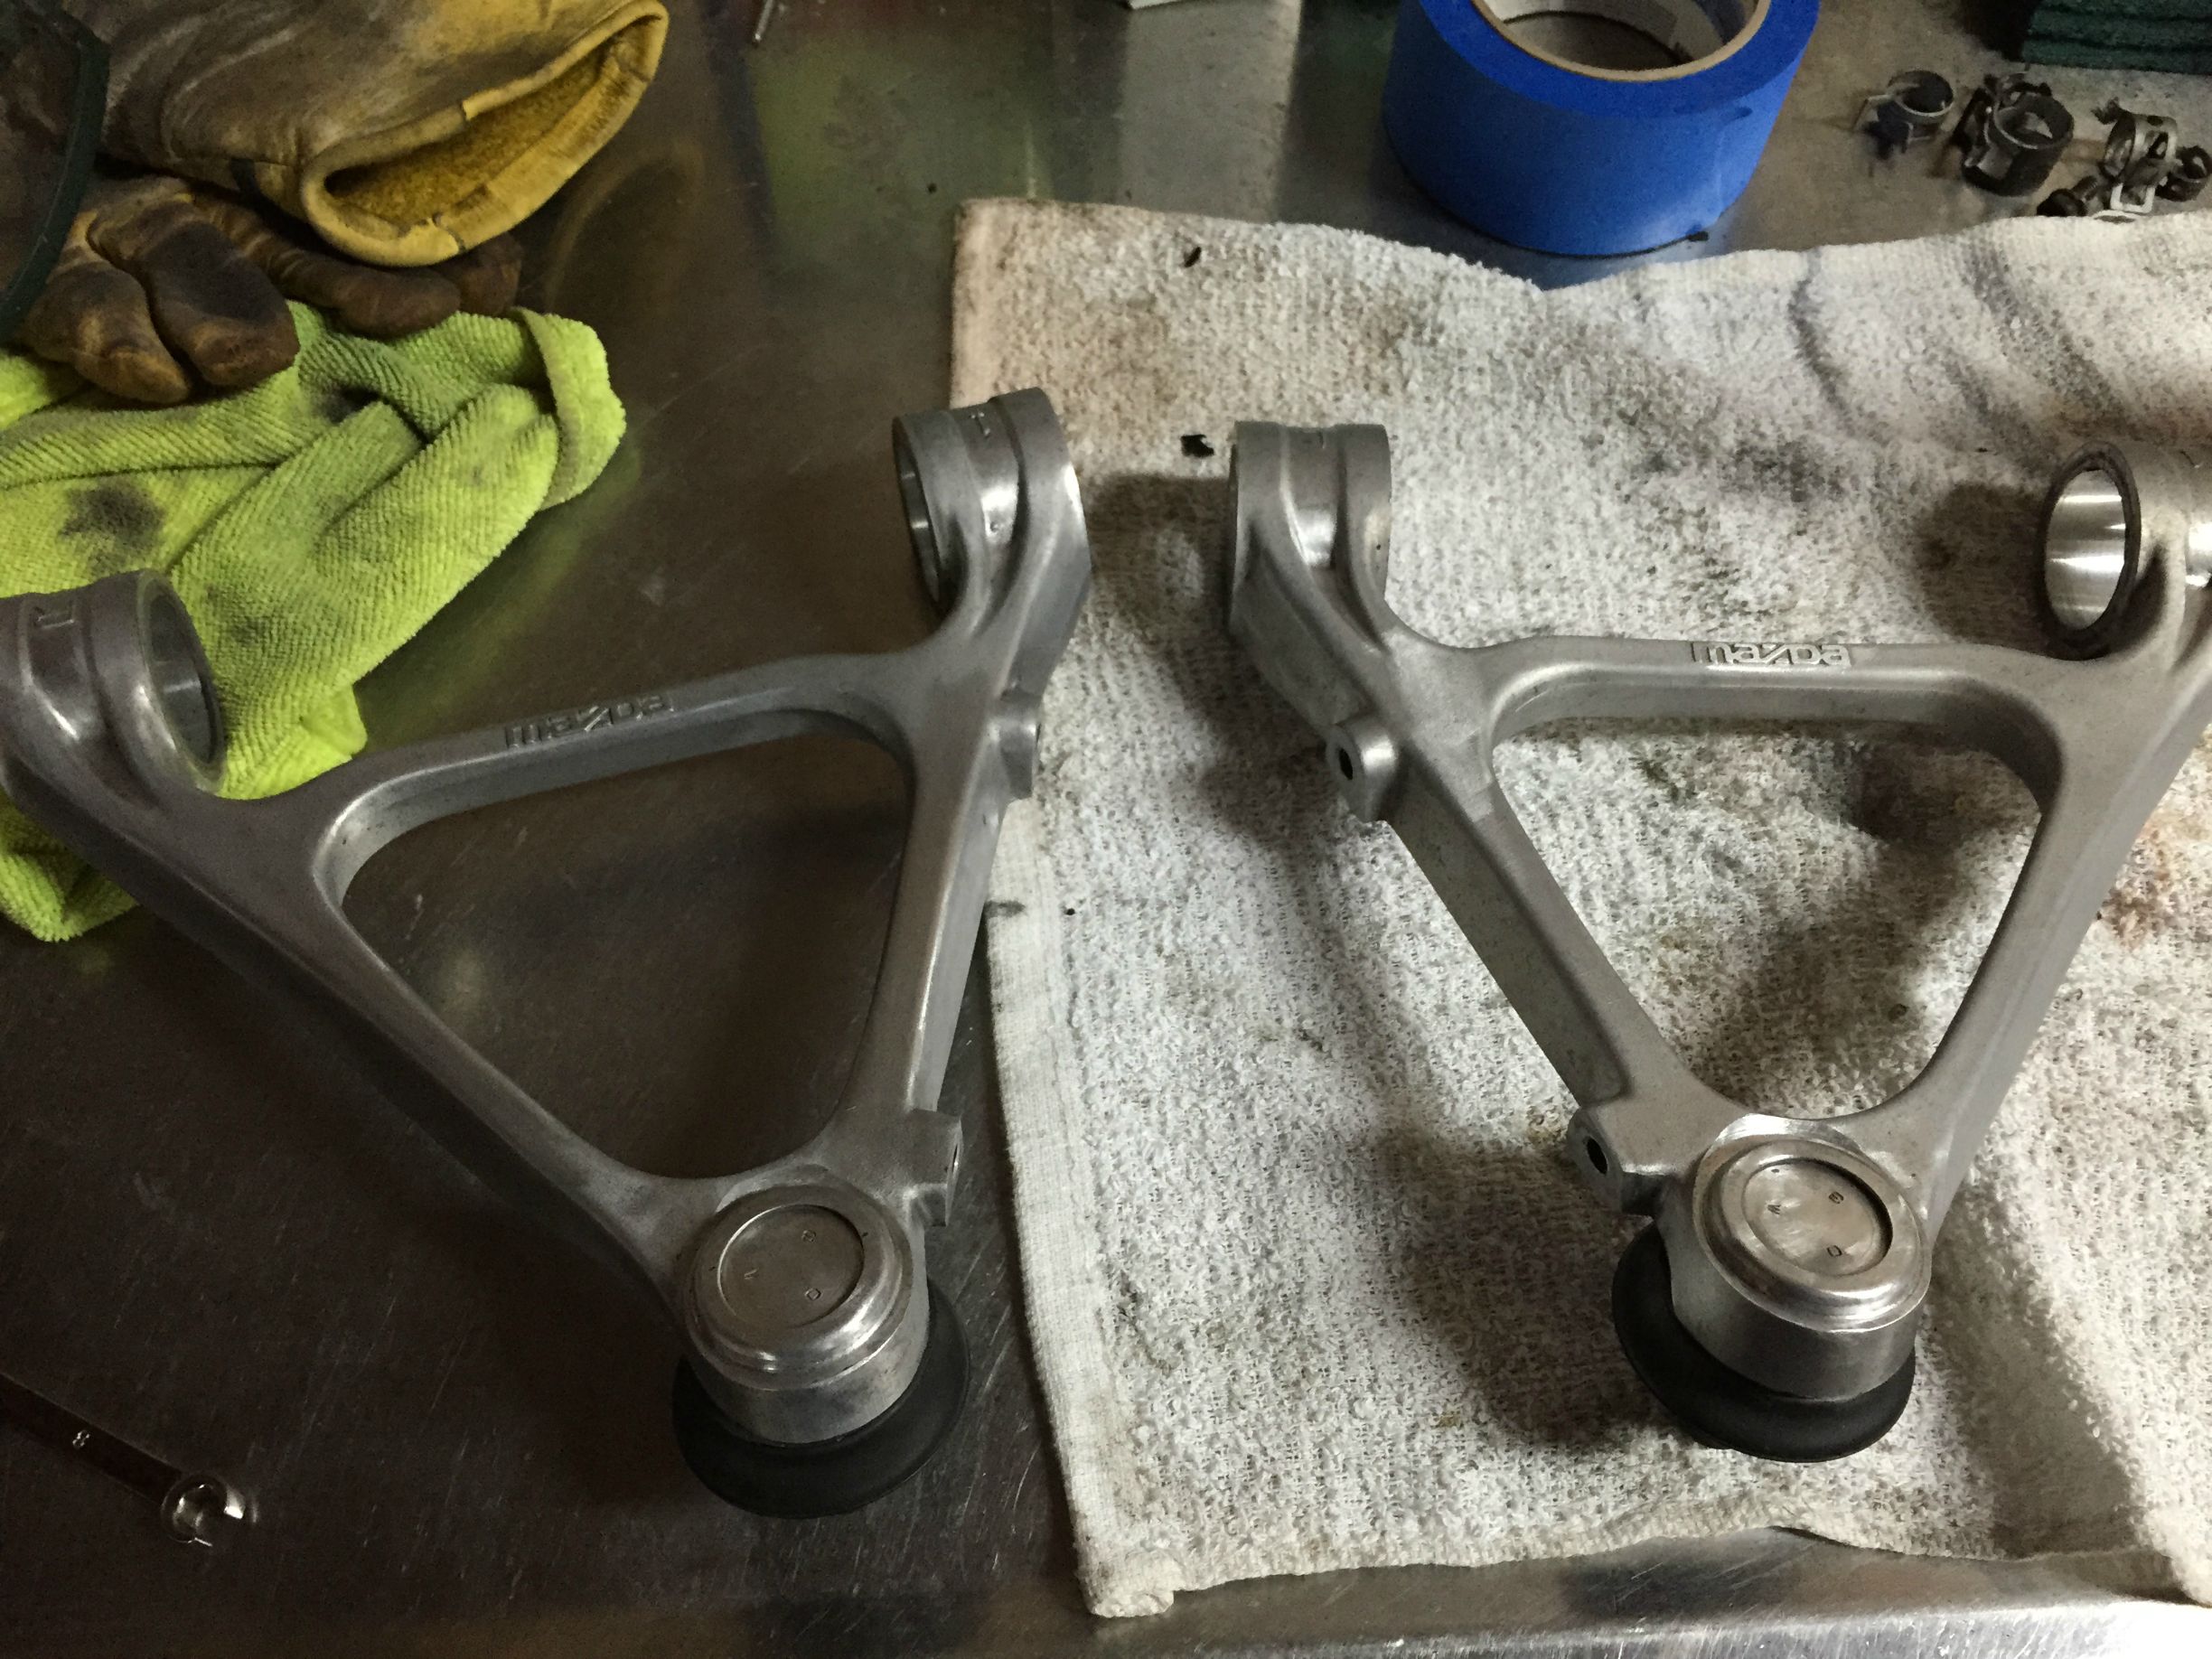
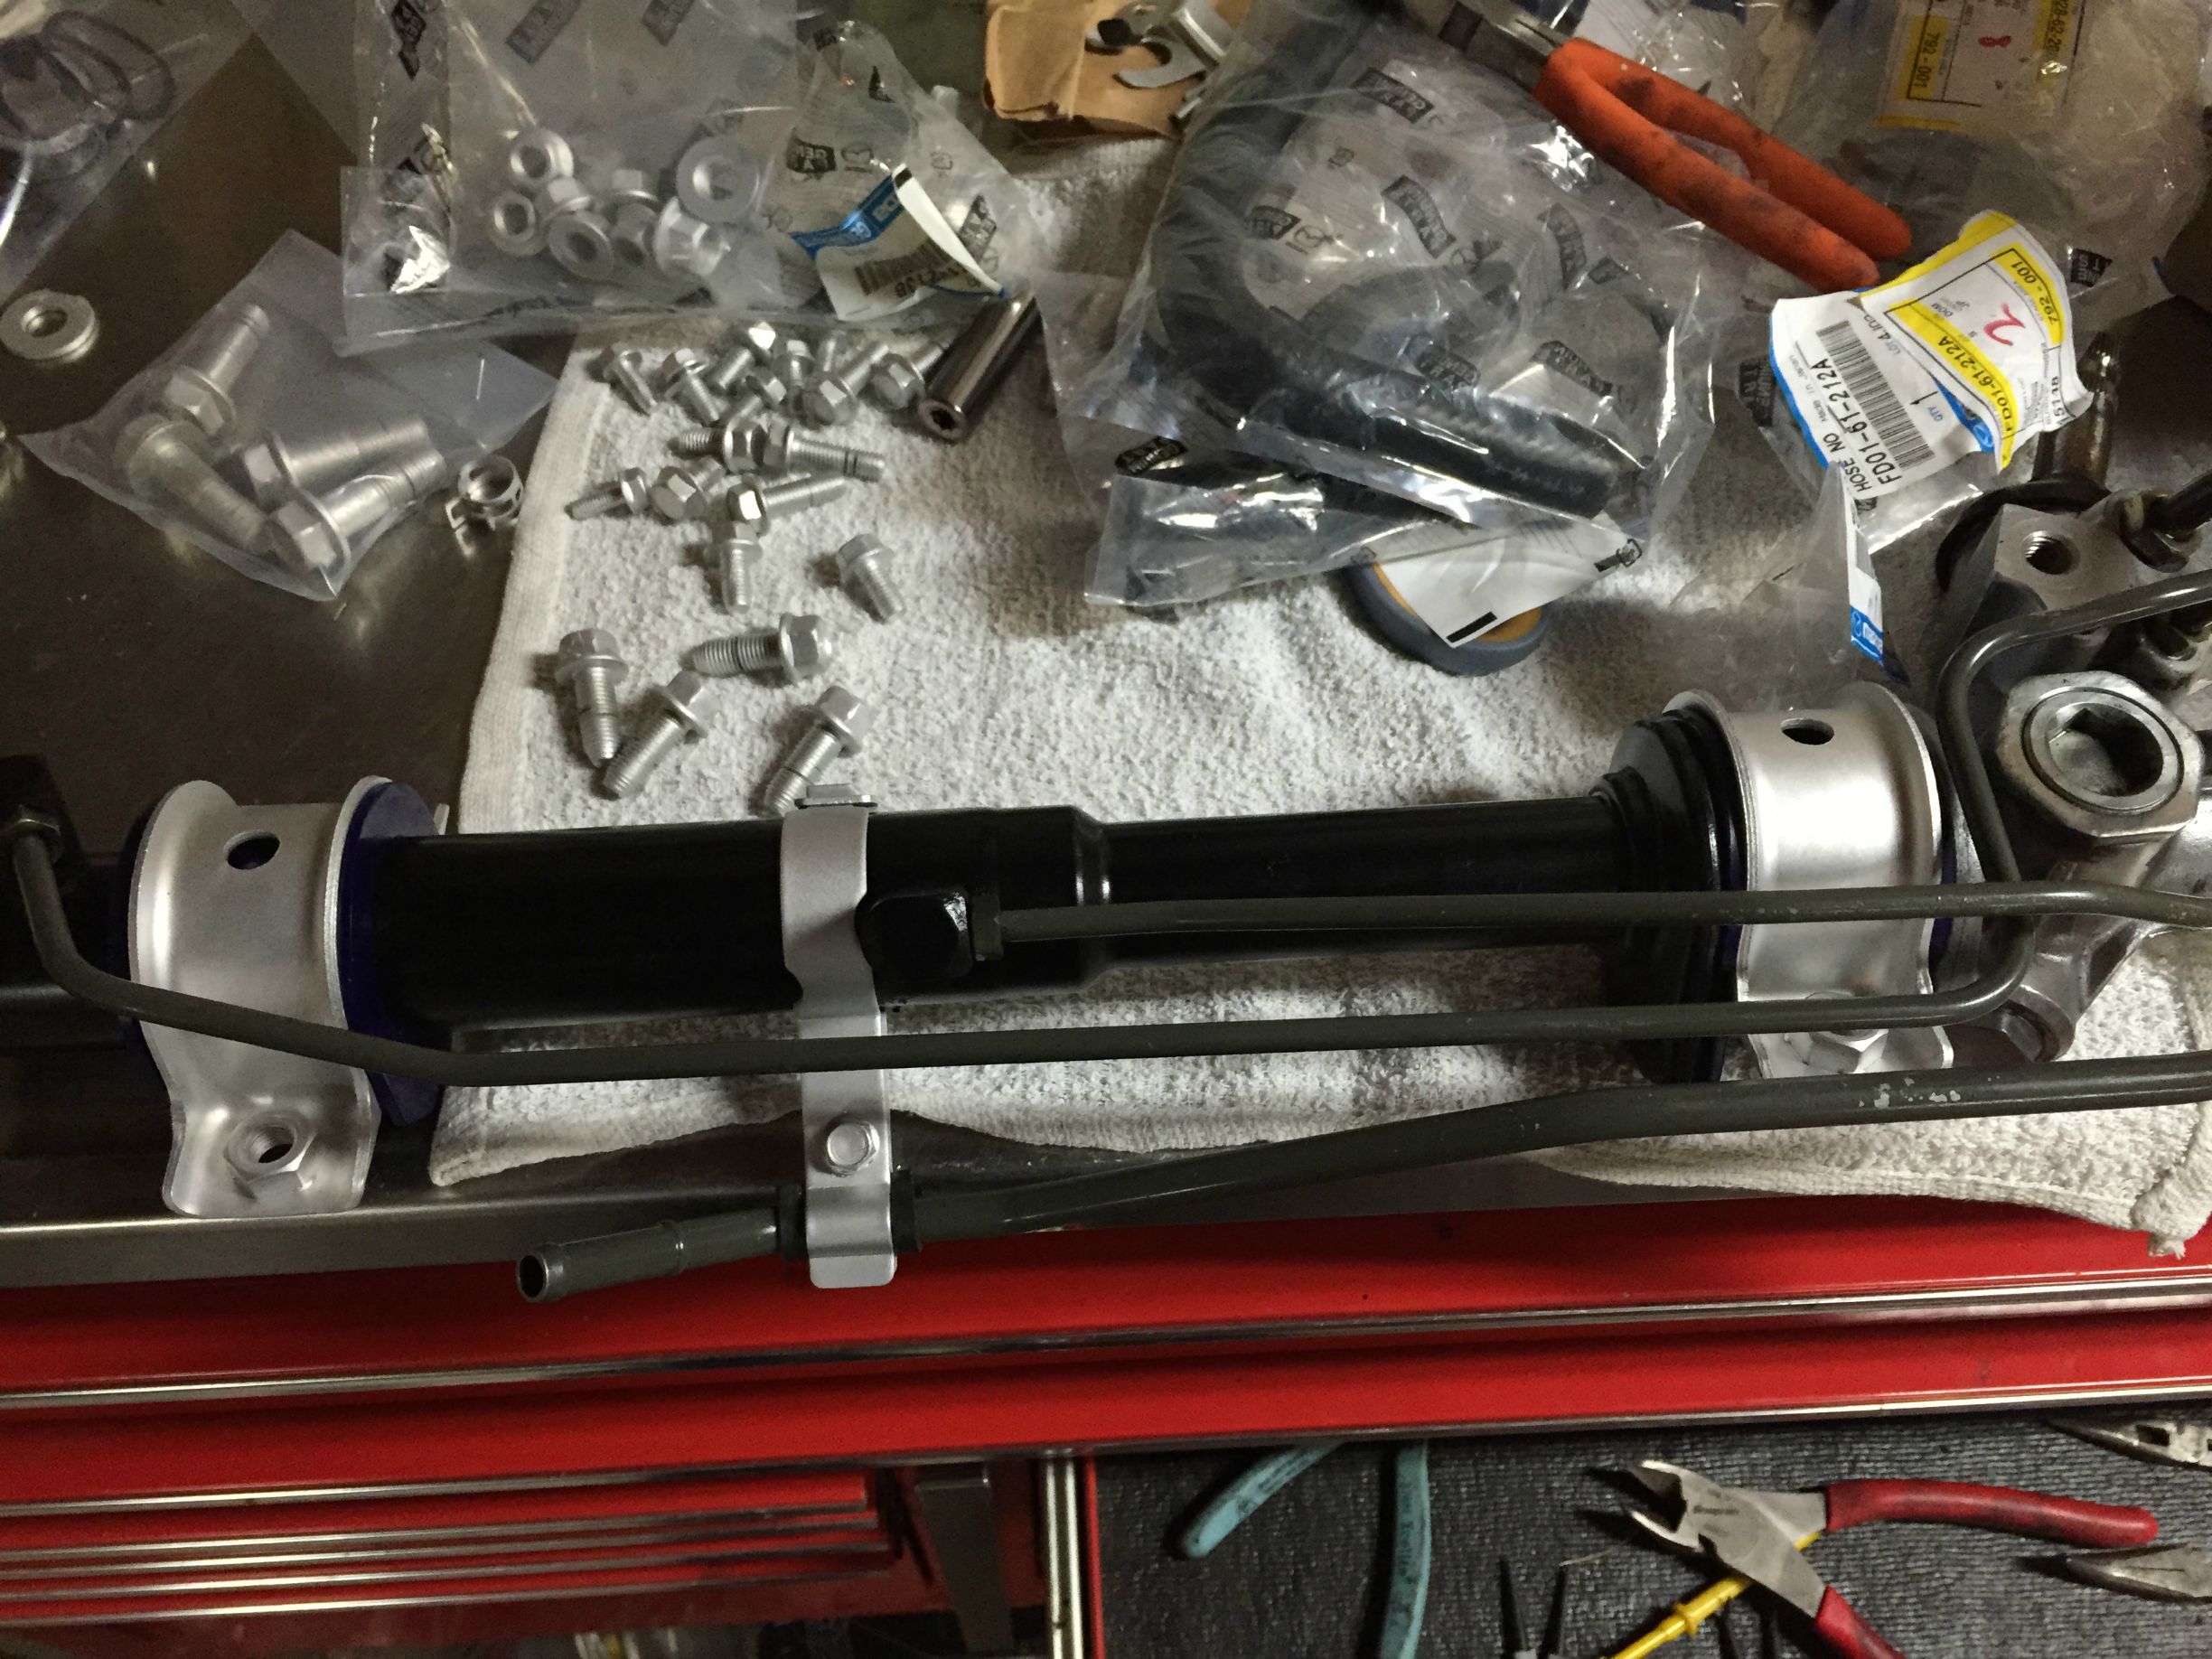
The passenger side upper a-arm bushings were in poor shape, so I decided the pull both of them out. Pressed out the bushings and cleaned them up with scotchbrite and purple power. Not too bad!
Thread Starter
I Raise Chickens
Joined: Jul 2001
Posts: 1,219
Likes: 35
From: Half Moon Bay, CA
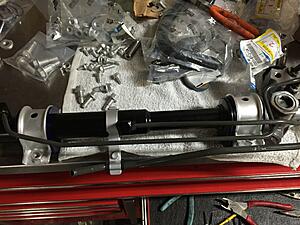
Got some parts back from the platers, so I was able to finish putting back together the steering rack. I went through the steering rack, installed new inner and outer tierods, boots and re-painted it. I may lose some points for originality here, but I decided against plating the bits yellow cad and went with a bright (silver) cad. I think the bright cad gives it more of a modern look and blends in really nicely with the silver engine bay.

Seth! This is Fred.
Glad to see you getting back into a FD. I want to do the same thing in the near future!
Keep the updates coming. We should all have a gathering again... with Mike, Paul, Dr Ho. etc...
Glad to see you getting back into a FD. I want to do the same thing in the near future!
Keep the updates coming. We should all have a gathering again... with Mike, Paul, Dr Ho. etc...
That fresh Silver Cad plating looks great against the Silver Stone Metallic paint!
Who do you send your plating to? SF Bay area is going to the closest platers to me as well.
If you do any aluminum parts I have been really impressed with the durability of Teflon impregnated anodize finish and it doesn't look to "fancy" either if you are keeping it low key.
Of course the headache is you have to get all the steel fittings out of Aluminum to anodize it...
Thread Starter
I Raise Chickens
Joined: Jul 2001
Posts: 1,219
Likes: 35
From: Half Moon Bay, CA
I had Industrial Plating in San Carlos do the work. The bad news is, they are going out of business after nearly 60 years  After May 31st, they are done. But, I did buy a plating kit from Caswell (Plating Kits Electroplating Kits Aluminum Anodizing Kits Powder Coating Systems Metal Polishing And Buffing Supplies - Caswell Inc). I'll do a review of the kit in this thread at some point.
Thanks for the tip on the plating Aluminum!
After May 31st, they are done. But, I did buy a plating kit from Caswell (Plating Kits Electroplating Kits Aluminum Anodizing Kits Powder Coating Systems Metal Polishing And Buffing Supplies - Caswell Inc). I'll do a review of the kit in this thread at some point. Thanks for the tip on the plating Aluminum!
That fresh Silver Cad plating looks great against the Silver Stone Metallic paint!
Who do you send your plating to? SF Bay area is going to the closest platers to me as well.
If you do any aluminum parts I have been really impressed with the durability of Teflon impregnated anodize finish and it doesn't look to "fancy" either if you are keeping it low key.
Of course the headache is you have to get all the steel fittings out of Aluminum to anodize it...
Who do you send your plating to? SF Bay area is going to the closest platers to me as well.
If you do any aluminum parts I have been really impressed with the durability of Teflon impregnated anodize finish and it doesn't look to "fancy" either if you are keeping it low key.
Of course the headache is you have to get all the steel fittings out of Aluminum to anodize it...
Thread Starter
I Raise Chickens
Joined: Jul 2001
Posts: 1,219
Likes: 35
From: Half Moon Bay, CA
Whats up man? Good to hear from you! Totally, would love to get together. Been ages since I've seen any of you guys
Thread Starter
I Raise Chickens
Joined: Jul 2001
Posts: 1,219
Likes: 35
From: Half Moon Bay, CA
Going to do a quick product review. I decided to purchase a small ultrasonic cleaner, this is the one that I purchased from Amazon:
I opted for a smaller cleaner (3 liters) mostly because I would be cleaning up smaller parts (e.g. nuts, bolts). So far, super impressed and I'm kicking myself for not getting one sooner
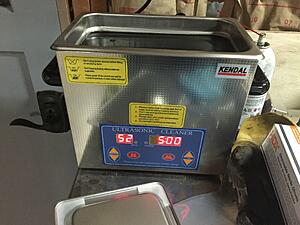
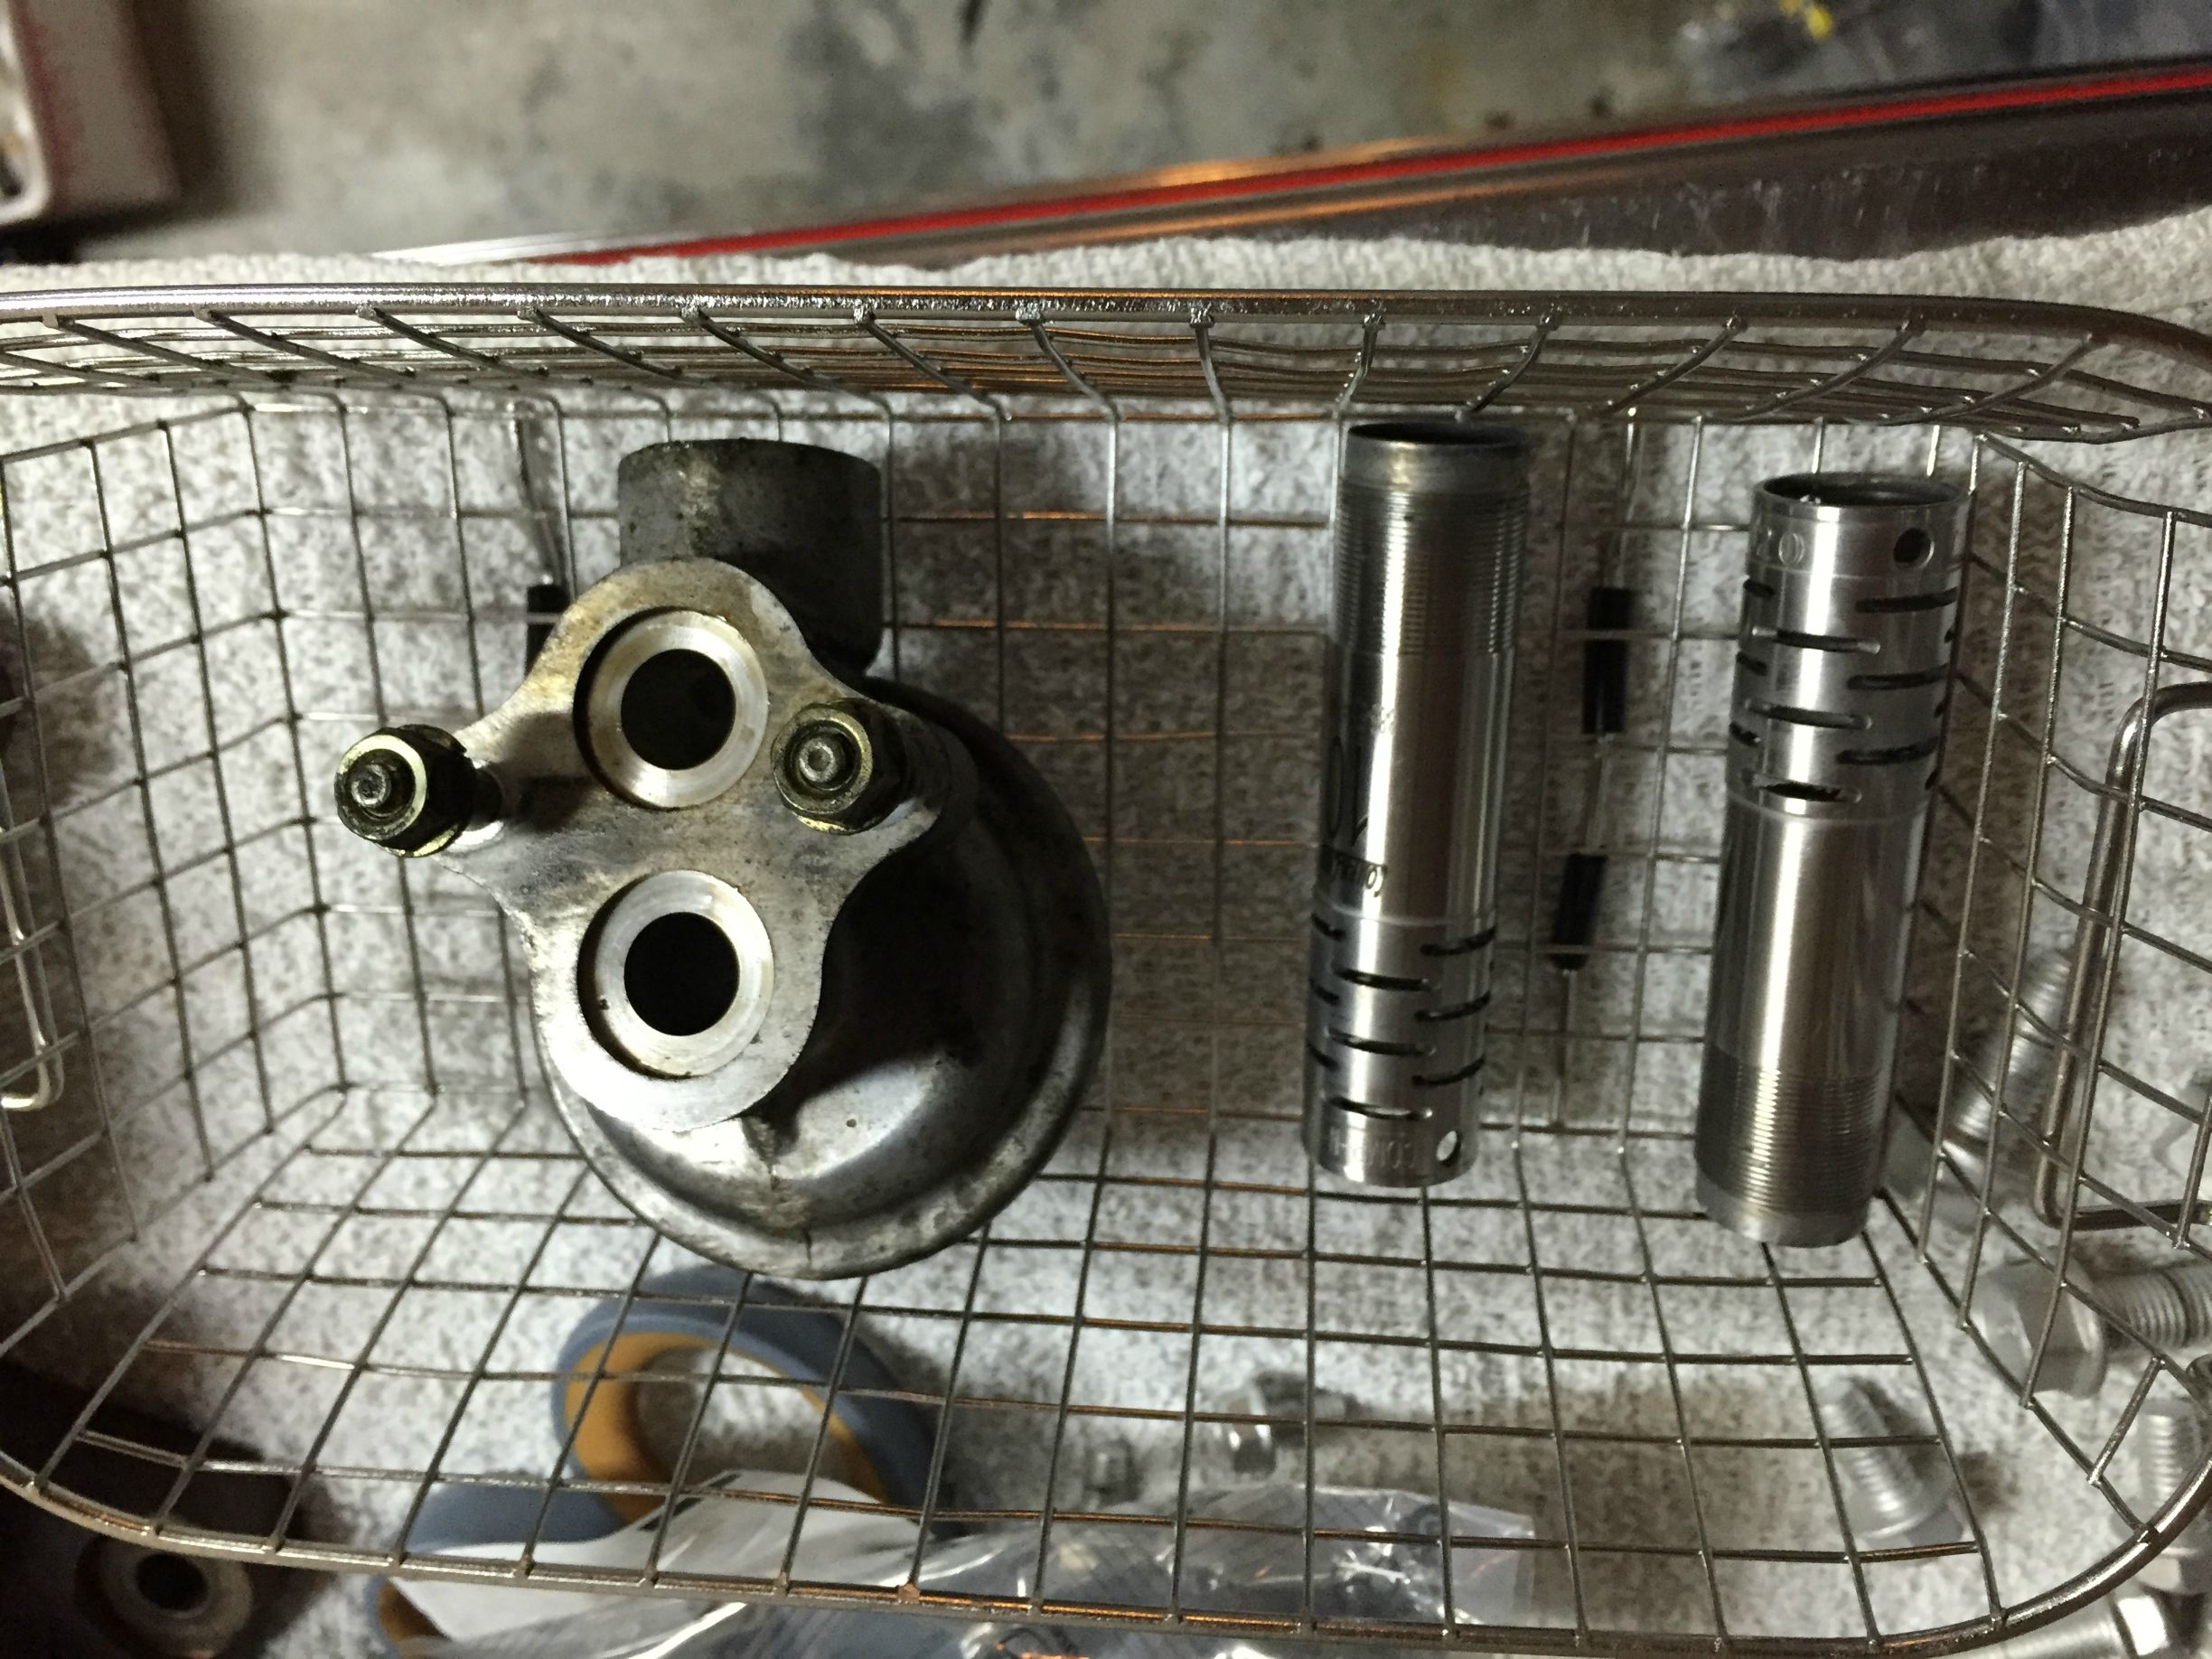
Heres is a quick before and after. I put some dirty choke tubes and the nasty oil filter pedestal in the cleaner for 5 minutes:
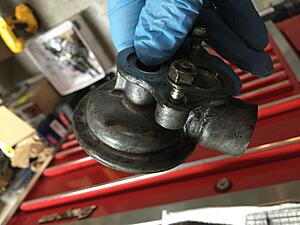
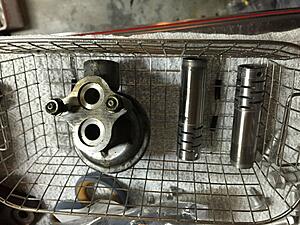
And the after
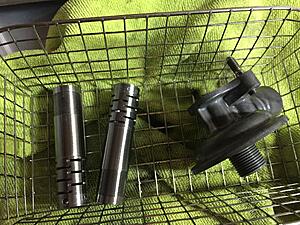
Like new!
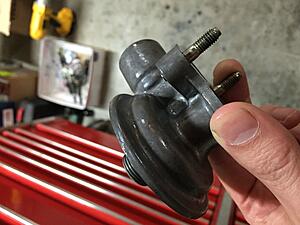
Its actually a huge timesaver. As I am starting to put the engine back together, I throw the nasty hardware in the cleaner while I prep the part and then a few minutes later the hardware is all sparkly new and ready to go back on.
I opted for a smaller cleaner (3 liters) mostly because I would be cleaning up smaller parts (e.g. nuts, bolts). So far, super impressed and I'm kicking myself for not getting one sooner

Heres is a quick before and after. I put some dirty choke tubes and the nasty oil filter pedestal in the cleaner for 5 minutes:

And the after

Like new!
Its actually a huge timesaver. As I am starting to put the engine back together, I throw the nasty hardware in the cleaner while I prep the part and then a few minutes later the hardware is all sparkly new and ready to go back on.
Thread Starter
I Raise Chickens
Joined: Jul 2001
Posts: 1,219
Likes: 35
From: Half Moon Bay, CA
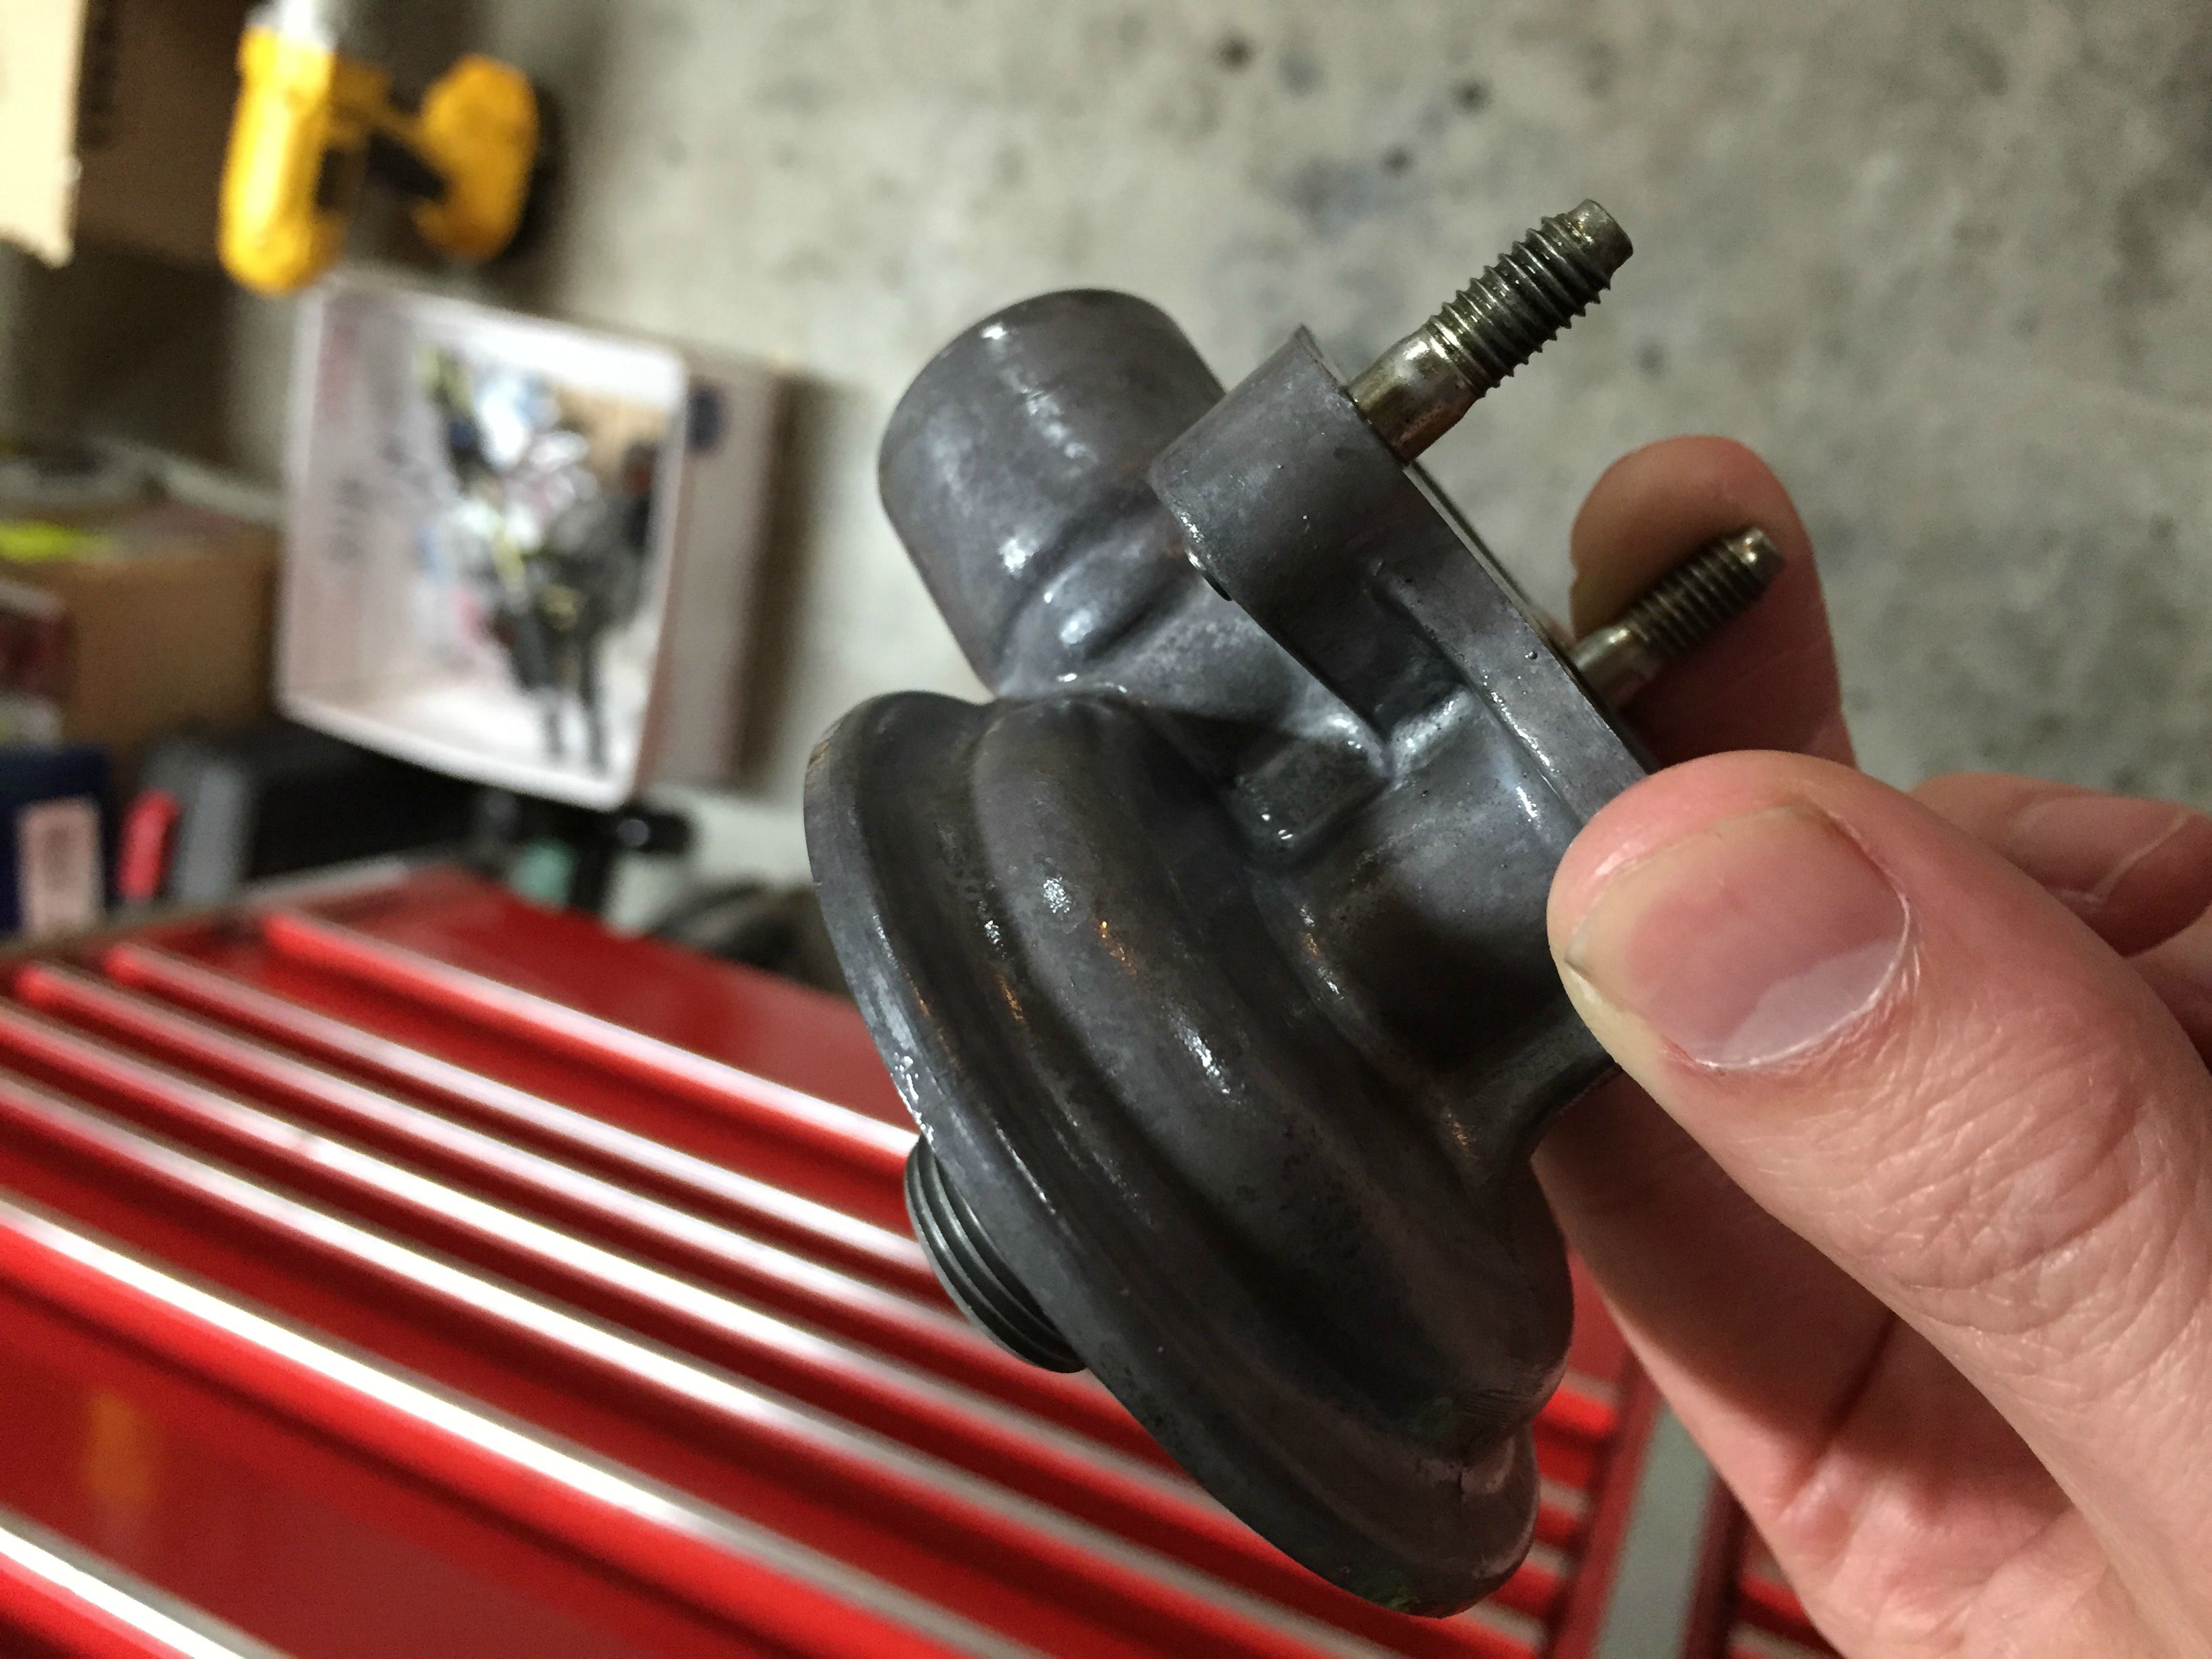
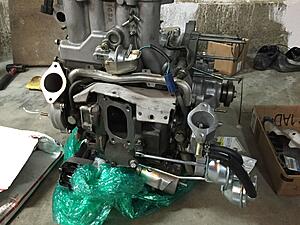
New Efini Twin Turbos are on. Got the oil lines all back together and bolted the lower intake manifold back on. The turbo control actuator was really nasty, covered in baked oil. But cleaned up really nice, almost looks new!


You're doing what I dream about. Tearing it all down, cleaning it as you put it back together, and so many NEW OEM PARTS! I see that new EGR valve, NEW TWINS, and it even looks like NEW OEM mounts too! There's just something about new OEM that is satisfying on a 20 year old car.
Great build and I look forward to more pictures!
Great build and I look forward to more pictures!

Flashback Friday
But, I did buy a plating kit from Caswell (Plating Kits Electroplating Kits Aluminum Anodizing Kits Powder Coating Systems Metal Polishing And Buffing Supplies - Caswell Inc). I'll do a review of the kit in this thread at some point.
Long time buddy, hope all is going well!
Project looks fun. I've yet to do anything with any of the rx7 parts I've had laying around or collected in the last 10 years.
As to your plating kit, I'm interested to hear your thoughts, but I swore off ever doing DIY plating again after my FC project so many years ago

-C
Thread Starter
I Raise Chickens
Joined: Jul 2001
Posts: 1,219
Likes: 35
From: Half Moon Bay, CA
Ari from RX7.com. Right now the Japanese Yen is trading at 1 USD to 125.58 Yen, which is really great for us. Strong dollar = cheaper parts from Japan. So now the twins from RX7.com are selling for a few hundred dollars cheaper ($2,595.00) than they were a few months ago.