
Seth's 94 SSM R2 "Resto-mod" Build Thread


Thread Starter
I Raise Chickens
Joined: Jul 2001
Posts: 1,219
Likes: 35
From: Half Moon Bay, CA
So, I just glanced at my linked in account and had a recommendation that I might know Fred. Further that he and I have this "Seth" person in common. Hmm. So I leave linked in and click on Rx7club to see a front page thread and the word "Resto-mod" catches my eye. Seth again with Fred posting as well. Ha.
Long time buddy, hope all is going well!
Project looks fun. I've yet to do anything with any of the rx7 parts I've had laying around or collected in the last 10 years.
As to your plating kit, I'm interested to hear your thoughts, but I swore off ever doing DIY plating again after my FC project so many years ago
-C

Yeah, so far been having a lot of fun with the FD. Feel good getting a rare R2 back on the road. Trying hard not to go crazy like I did with the CYM so I can drive it this summer.
Thread Starter
I Raise Chickens
Joined: Jul 2001
Posts: 1,219
Likes: 35
From: Half Moon Bay, CA
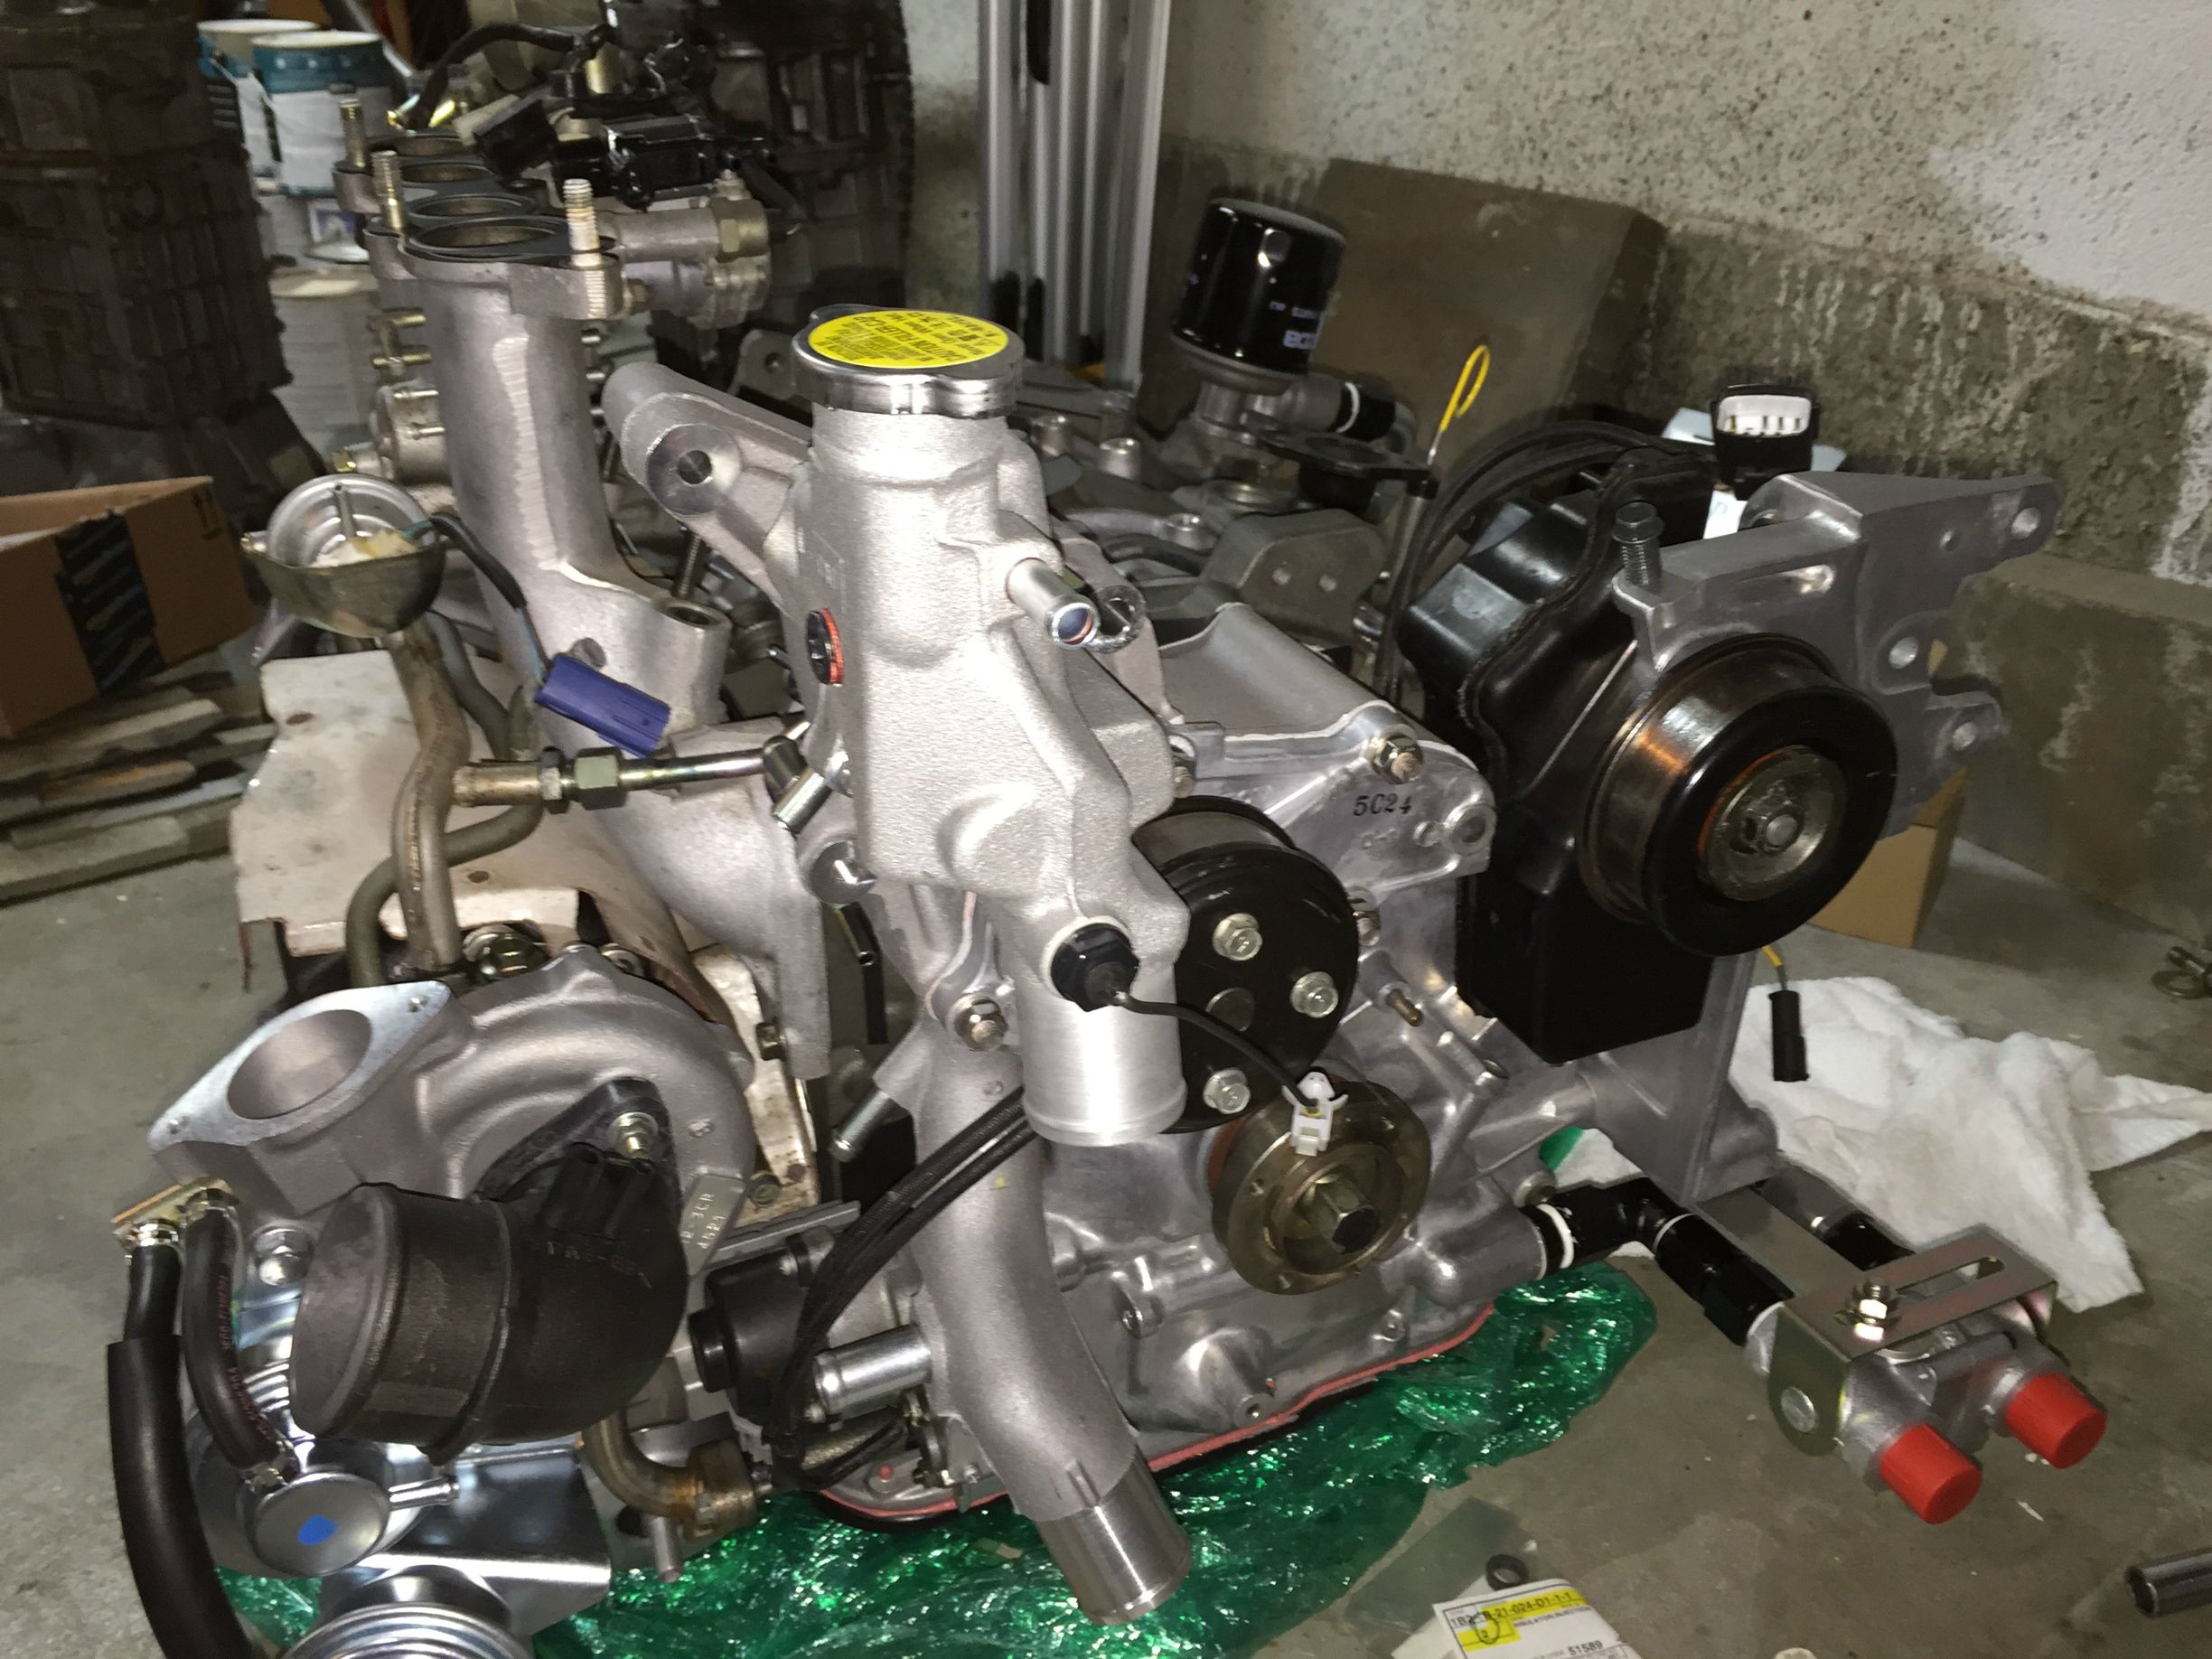
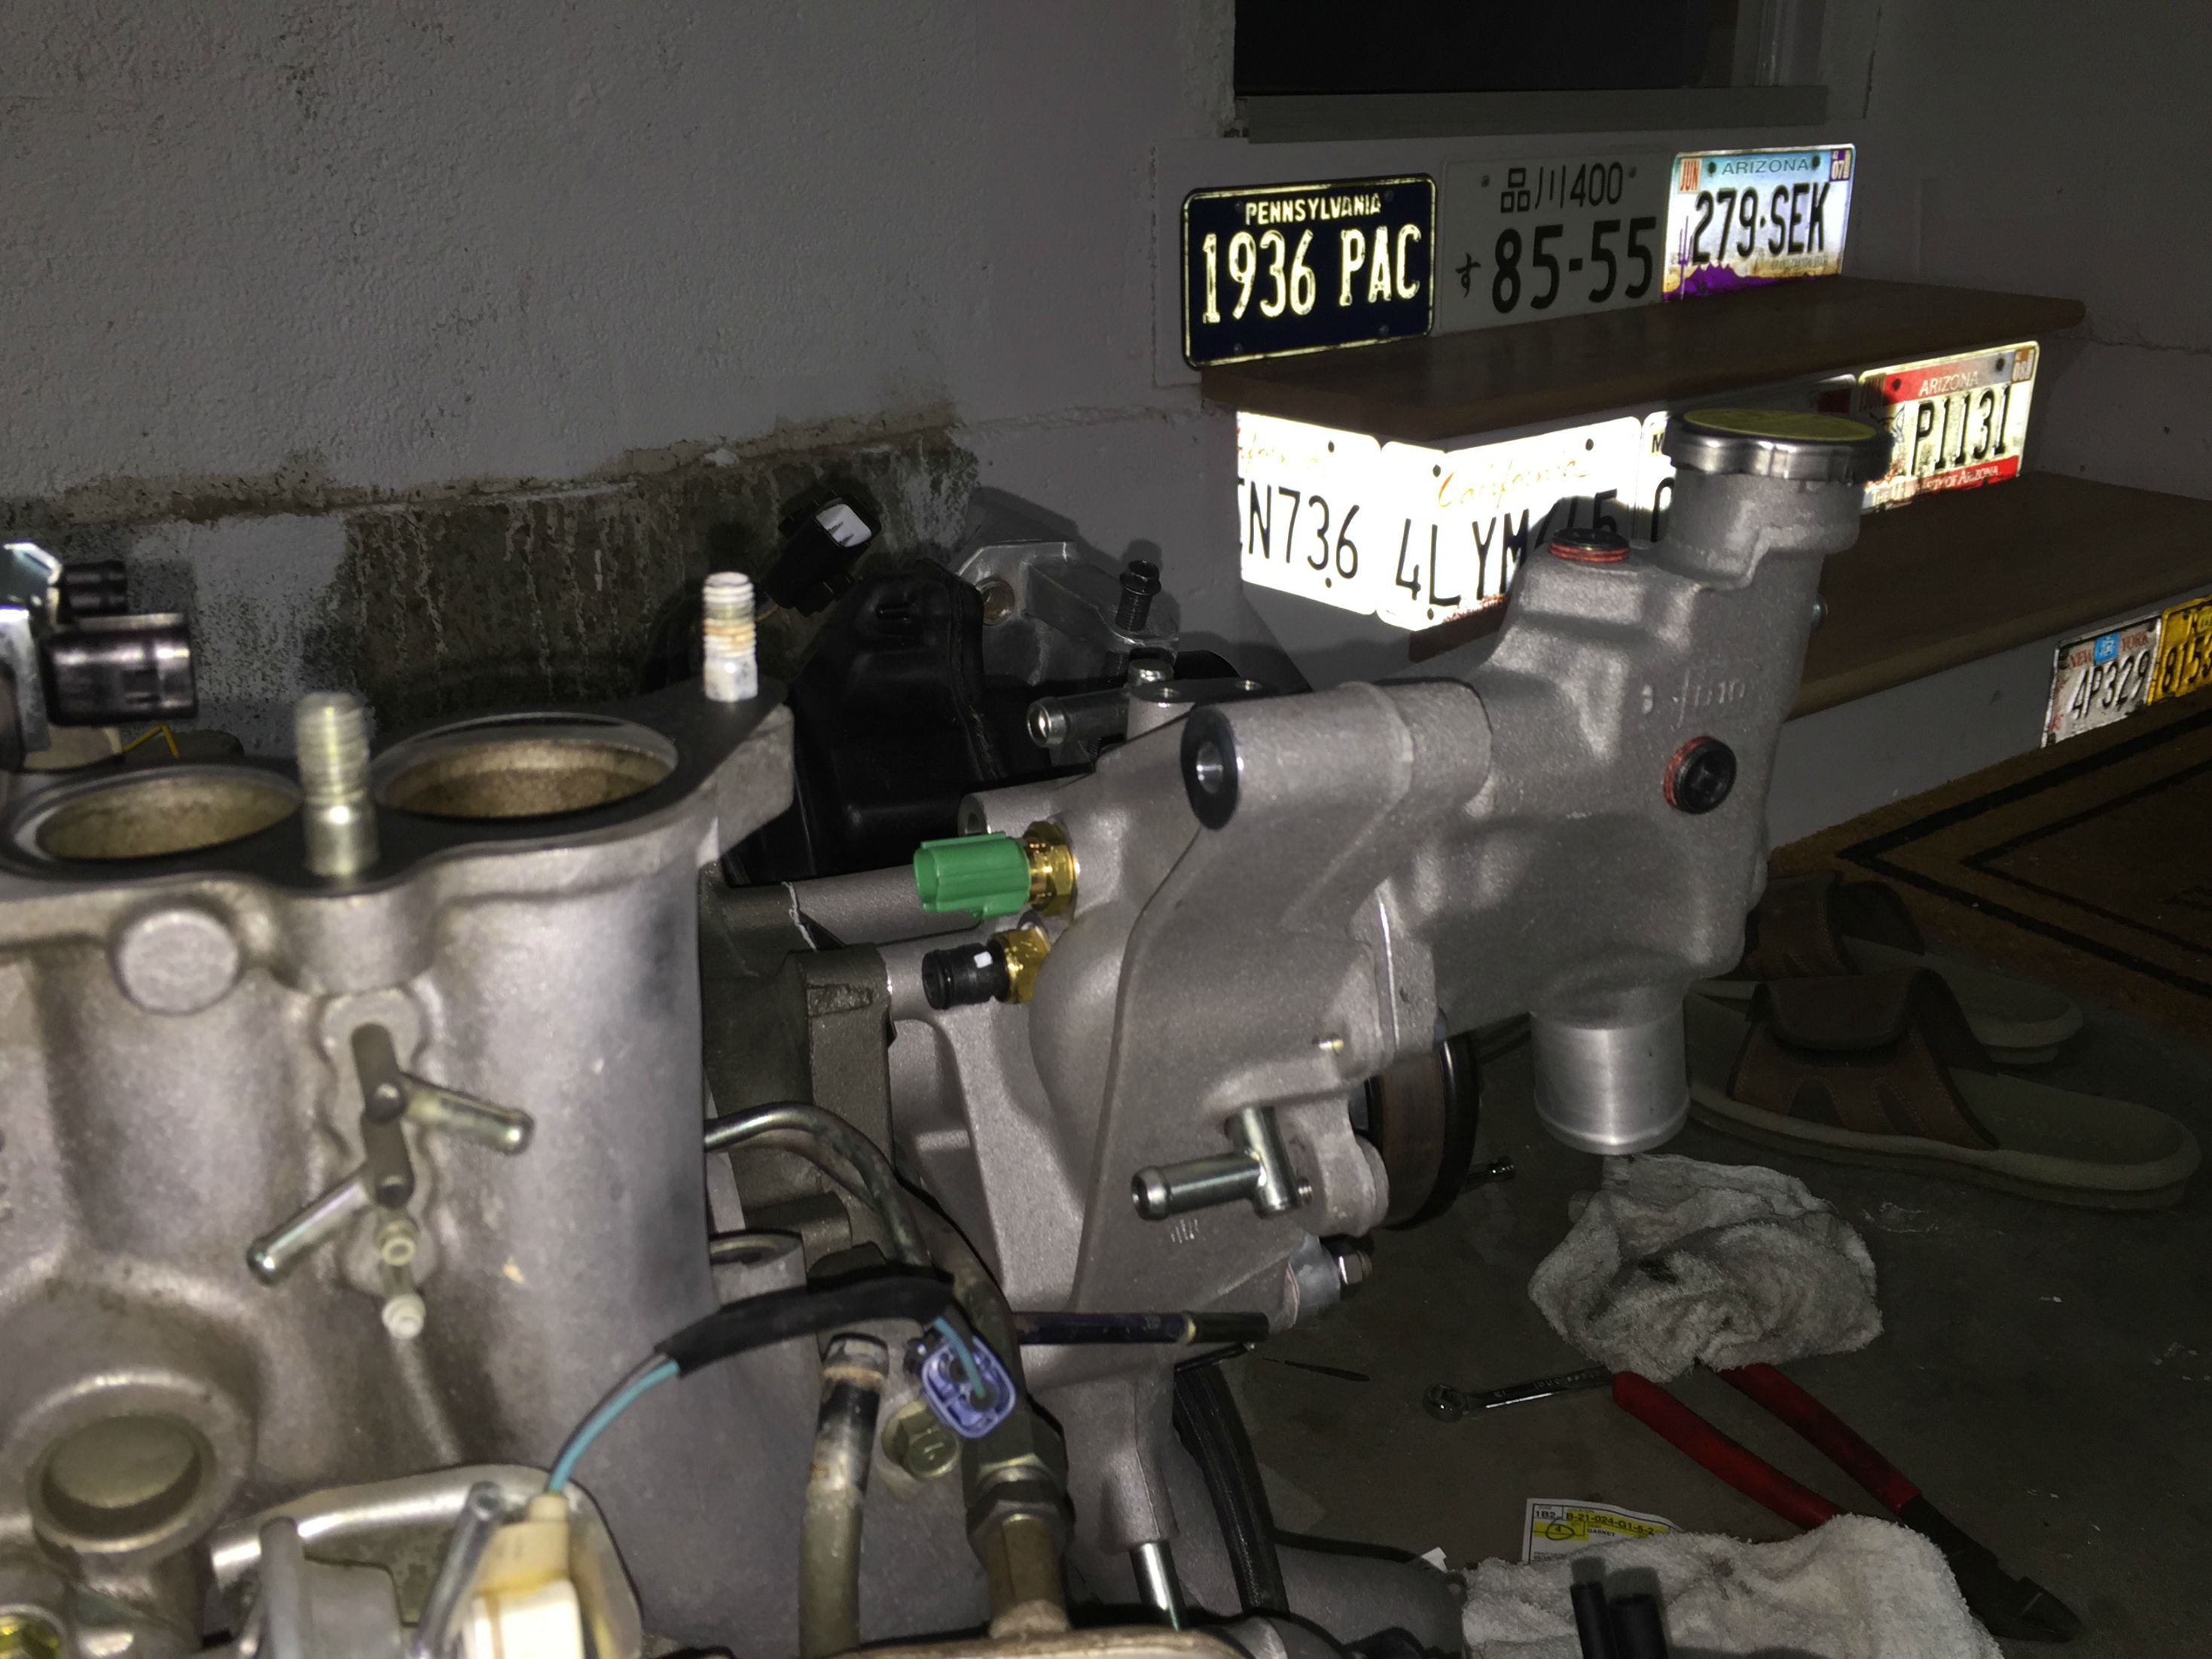
Here is one of the few mods I am doing to the FD: upgrading the oil coolers. The existing oil coolers were pretty badly beaten up (most of the fins were bent flat and the driver's side must have taken a sizable rock at one point). So I decided in-lieu of sending them out to get rebuilt, that I would try the Sake Bomb Garage oil cooler upgrade. Even a small drop in oil temperature will improve the longevity of the engine and components, so I bucket this as a good reliability upgrade over the OEM setup. Overall impressions: the hoses are very well made, use quality fittings and hose. So far, the fitment is perfect as well, no complaints.
Here is a picture of thermostat union:
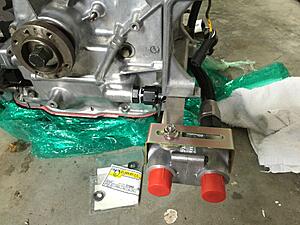
and the hose from the oil filter pedestal:
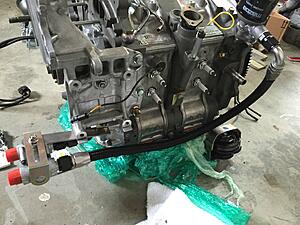
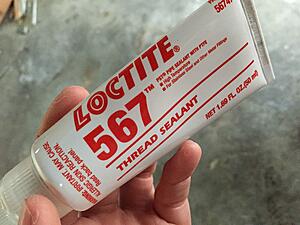
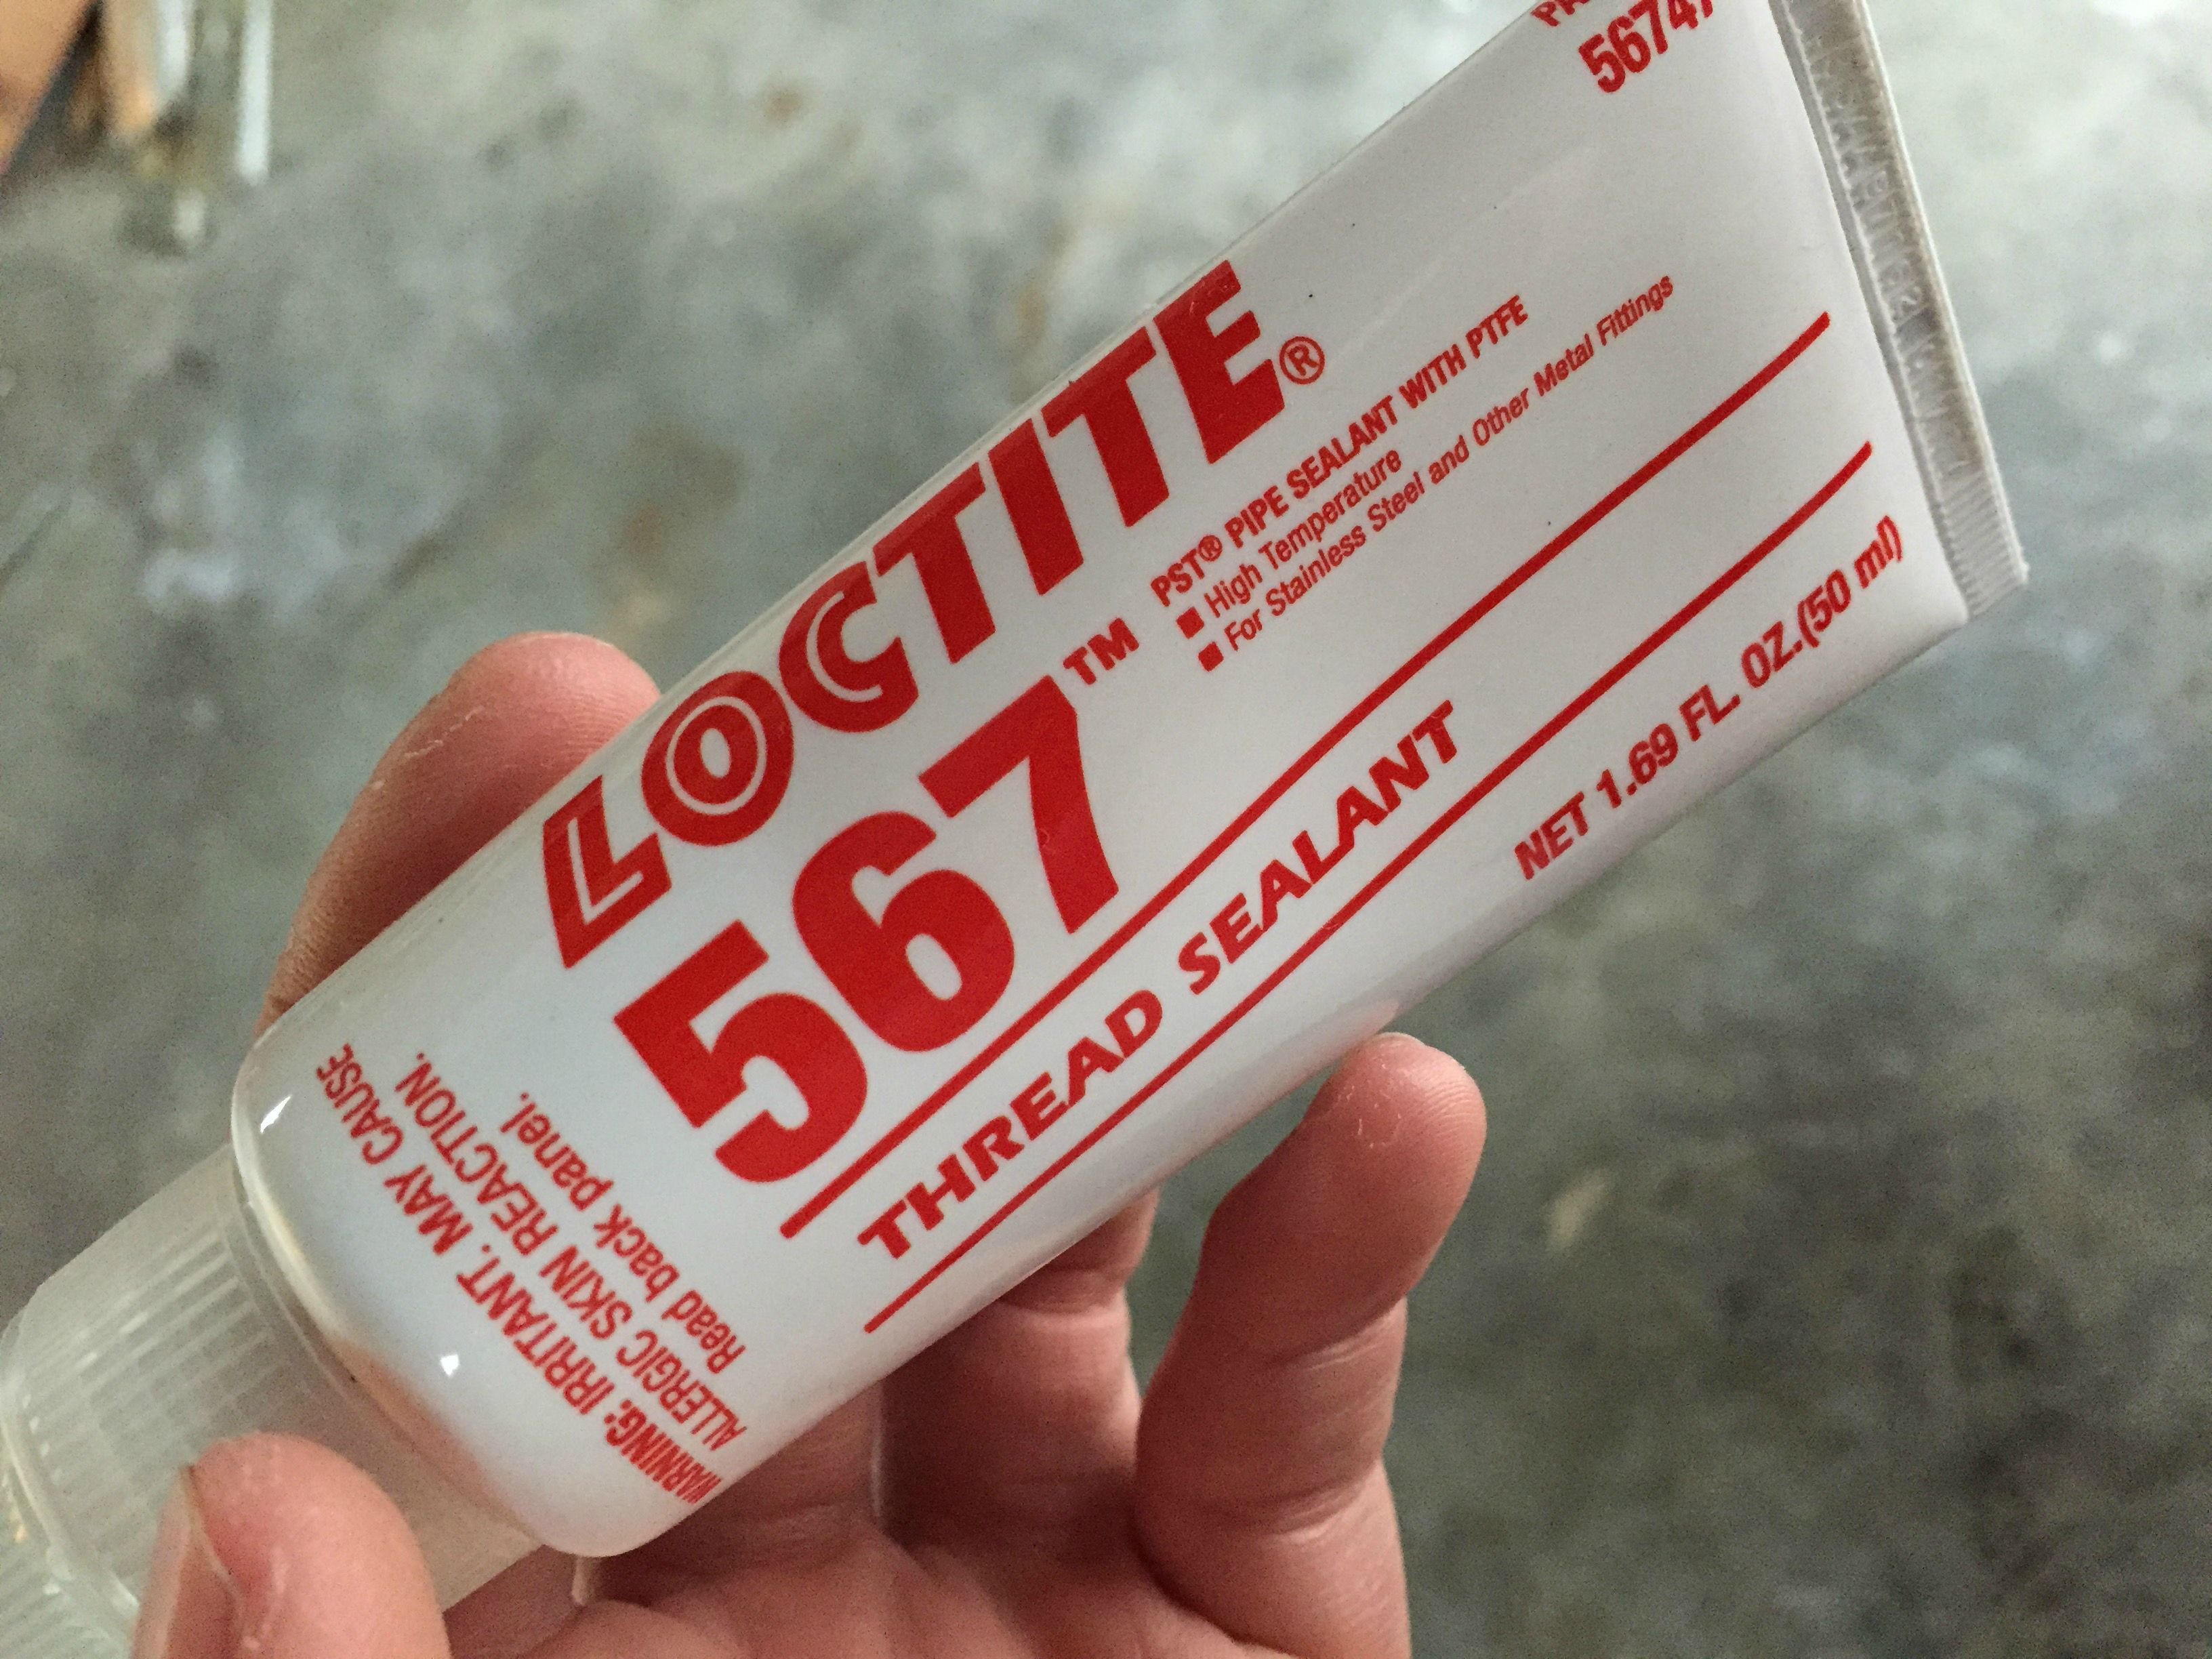
The only part where I deviated from the instructions was to add a small amount of high temp thread sealant. This stuff is super expensive, but its added insurance against chasing down oil leaks from all the fittings:
More good stuff to come...
Here is a picture of thermostat union:

and the hose from the oil filter pedestal:

The only part where I deviated from the instructions was to add a small amount of high temp thread sealant. This stuff is super expensive, but its added insurance against chasing down oil leaks from all the fittings:
More good stuff to come...
Thread Starter
I Raise Chickens
Joined: Jul 2001
Posts: 1,219
Likes: 35
From: Half Moon Bay, CA
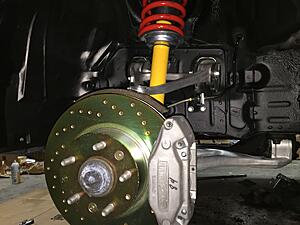
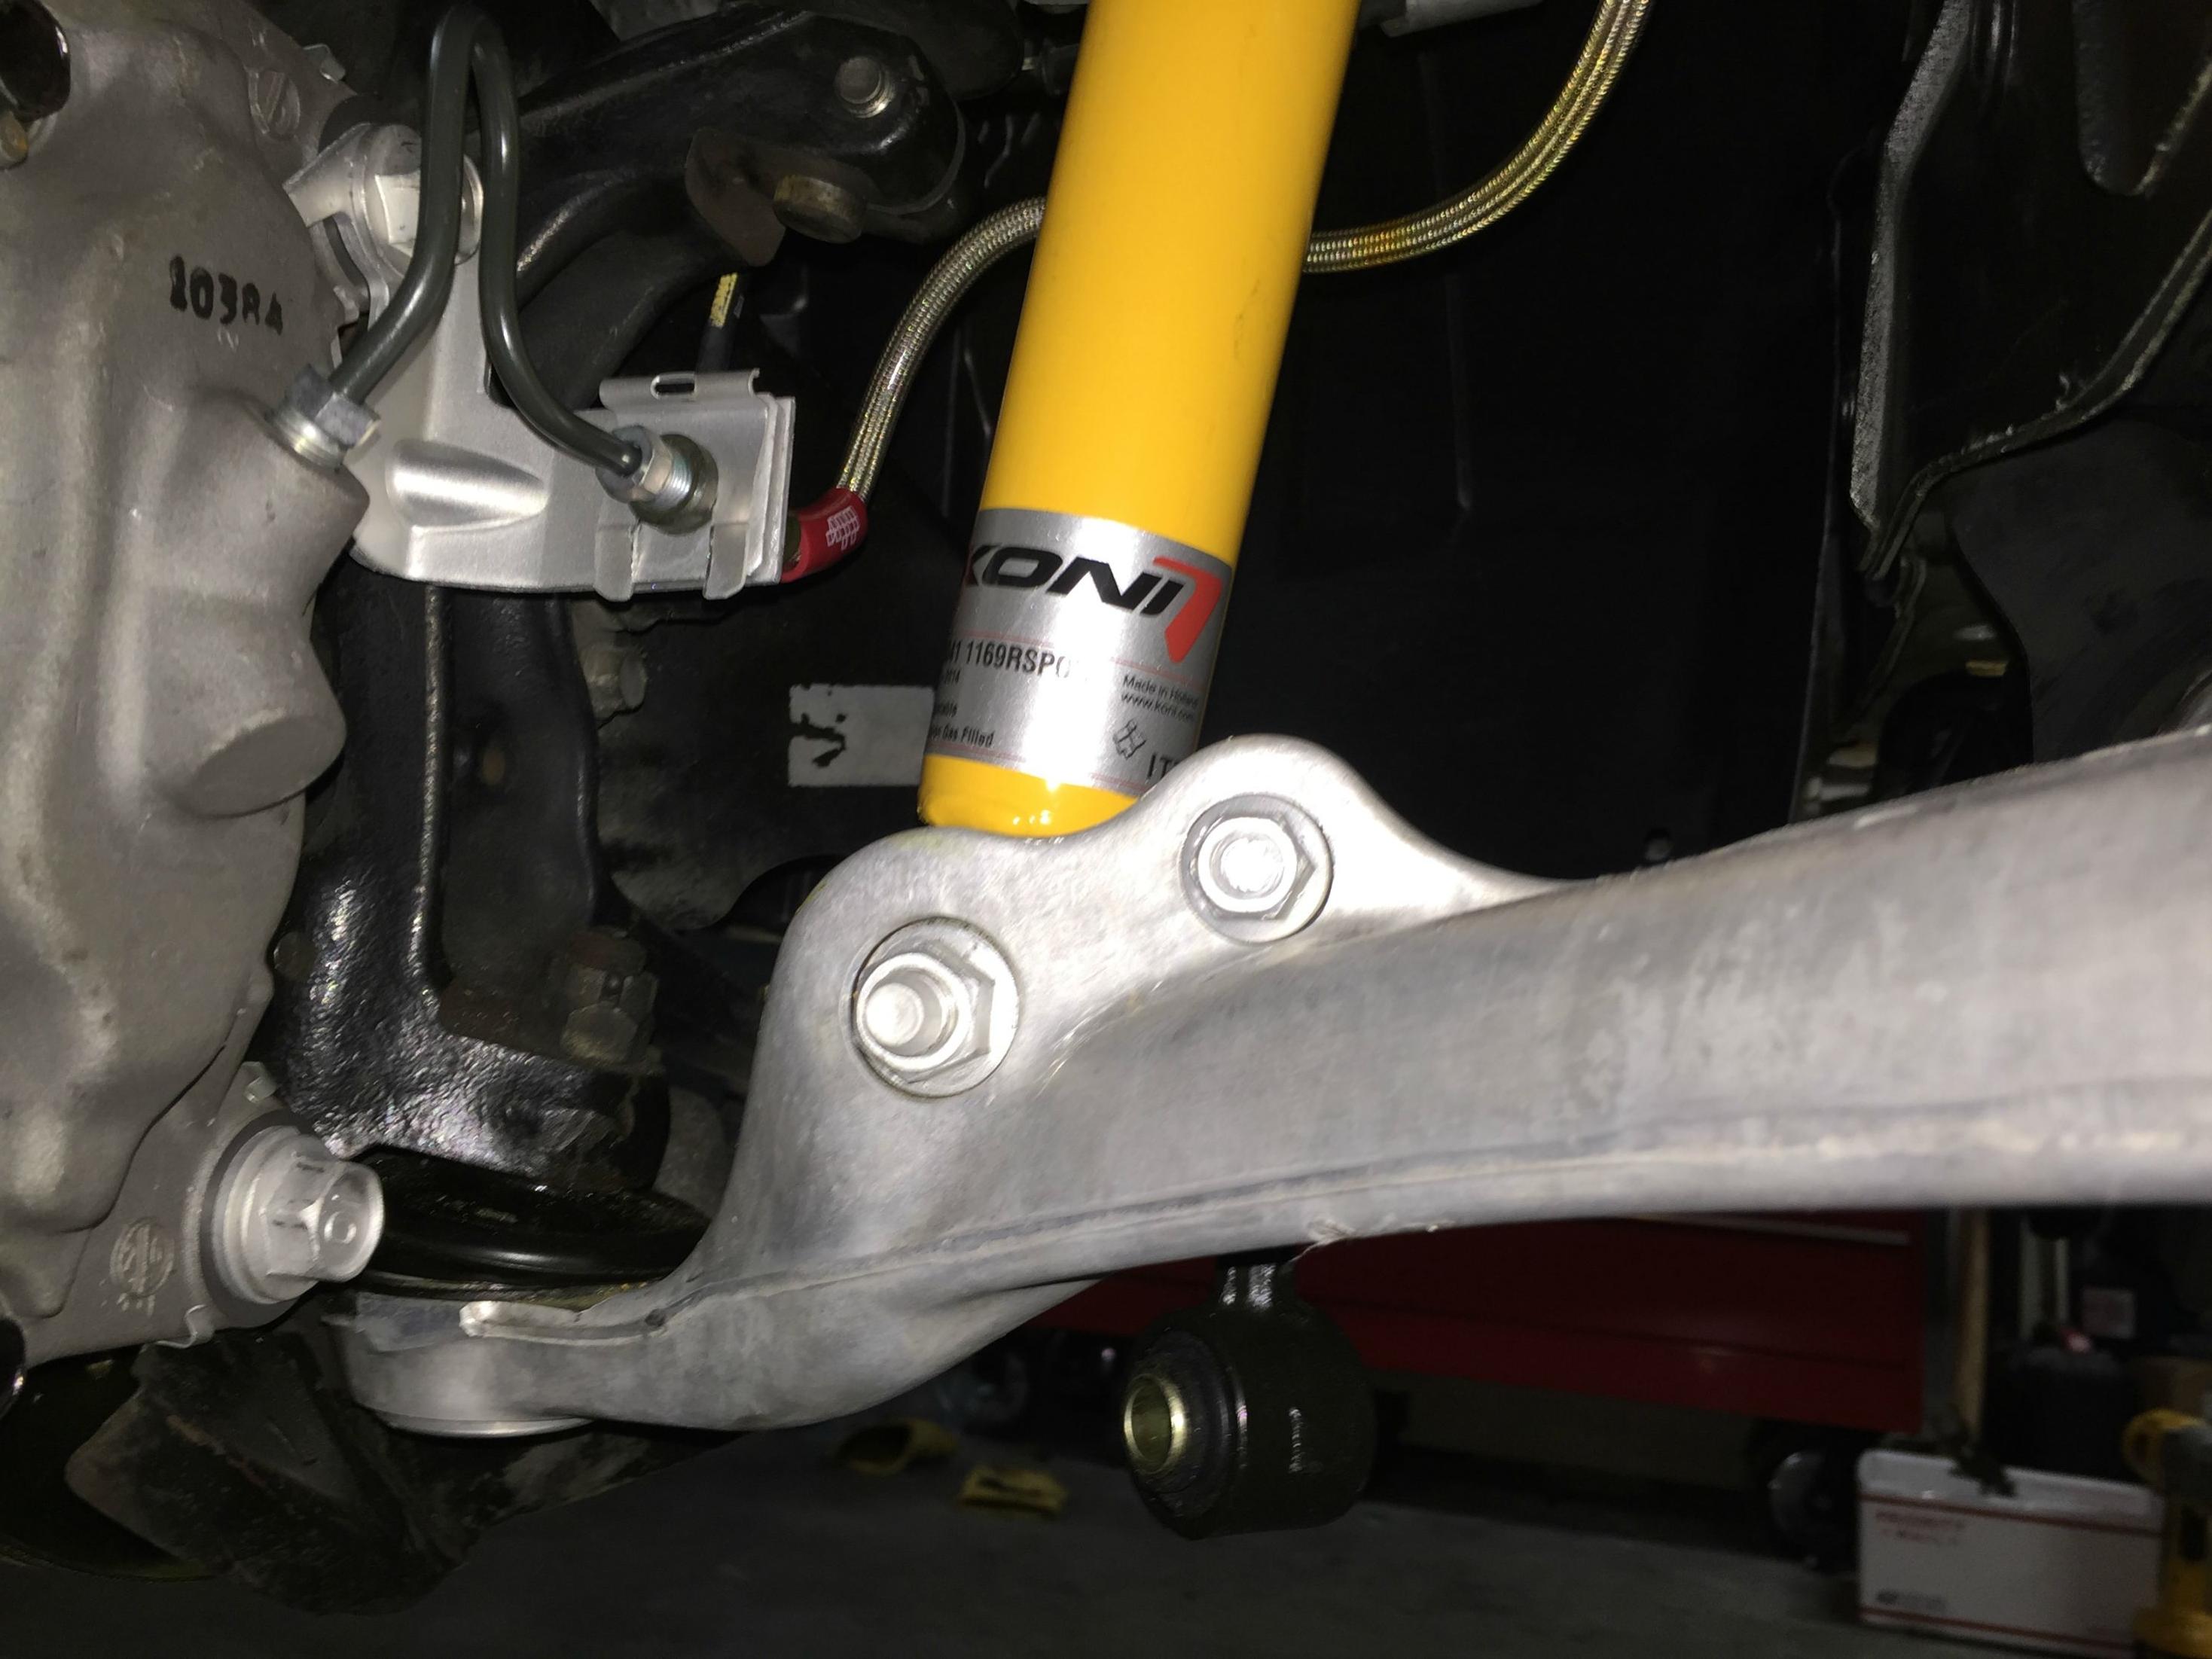
Front suspension and brake restoration is done. Konis with Racing Beat springs. New OEM shock mounts. Brembo rotors, new OEM calipers, hardlines and upgraded stainless steel lines.

Last edited by cymfc3s; Jun 10, 2015 at 12:20 AM.
Thread Starter
I Raise Chickens
Joined: Jul 2001
Posts: 1,219
Likes: 35
From: Half Moon Bay, CA
Yep! Stock fuel system. Found a good used set of low mileage injectors and rails. Going with a new pulsation damper and pressure regulator, but thats it.
Thread Starter
I Raise Chickens
Joined: Jul 2001
Posts: 1,219
Likes: 35
From: Half Moon Bay, CA
Question for those actually reading my crummy build thread: Have any of you reinstalled the motor with the downpipe bolted up? I wanted to see if could drop the engine w/transmission together with the downpipe bolted up. Or is it too tight of squeeze and I should leave it off?
Question for those actually reading my crummy build thread: Have any of you reinstalled the motor with the downpipe bolted up? I wanted to see if could drop the engine w/transmission together with the downpipe bolted up. Or is it too tight of squeeze and I should leave it off?
I talked to Mike last week and we plan on making a trip to see you and Justin once I get back from Central America. I have some parts to drop off for Justin. I have some fender liners if you need. Also, might think about getting the FC thermoswitch if you haven't done so.
Build looks great so far. Did you rebuild the engine or just clean up the accessories?
Kevin
Thread Starter
I Raise Chickens
Joined: Jul 2001
Posts: 1,219
Likes: 35
From: Half Moon Bay, CA
I have dropped a motor in w/ the downpipe, though its a tight squeeze. It'll be good to have an extra set of hands to maneuver the engine around and line it up. Otherwise, it's not a huge PITA to install the downpipe once the engine is in.
I talked to Mike last week and we plan on making a trip to see you and Justin once I get back from Central America. I have some parts to drop off for Justin. I have some fender liners if you need. Also, might think about getting the FC thermoswitch if you haven't done so.
Build looks great so far. Did you rebuild the engine or just clean up the accessories?
Kevin

Junior Member
Joined: May 2015
Posts: 39
Likes: 2
From: Brooklyn ny
Hey! Just want to say this is a great build! I love that your going for that oem look and feel! Will be following closely. I will probably have to get the engine out for a refresher but have never done it, especially on a rotary...
Thread Starter
I Raise Chickens
Joined: Jul 2001
Posts: 1,219
Likes: 35
From: Half Moon Bay, CA
Really slow progress, been upgrading the chicken coop and built a raised vegetable box at the house.
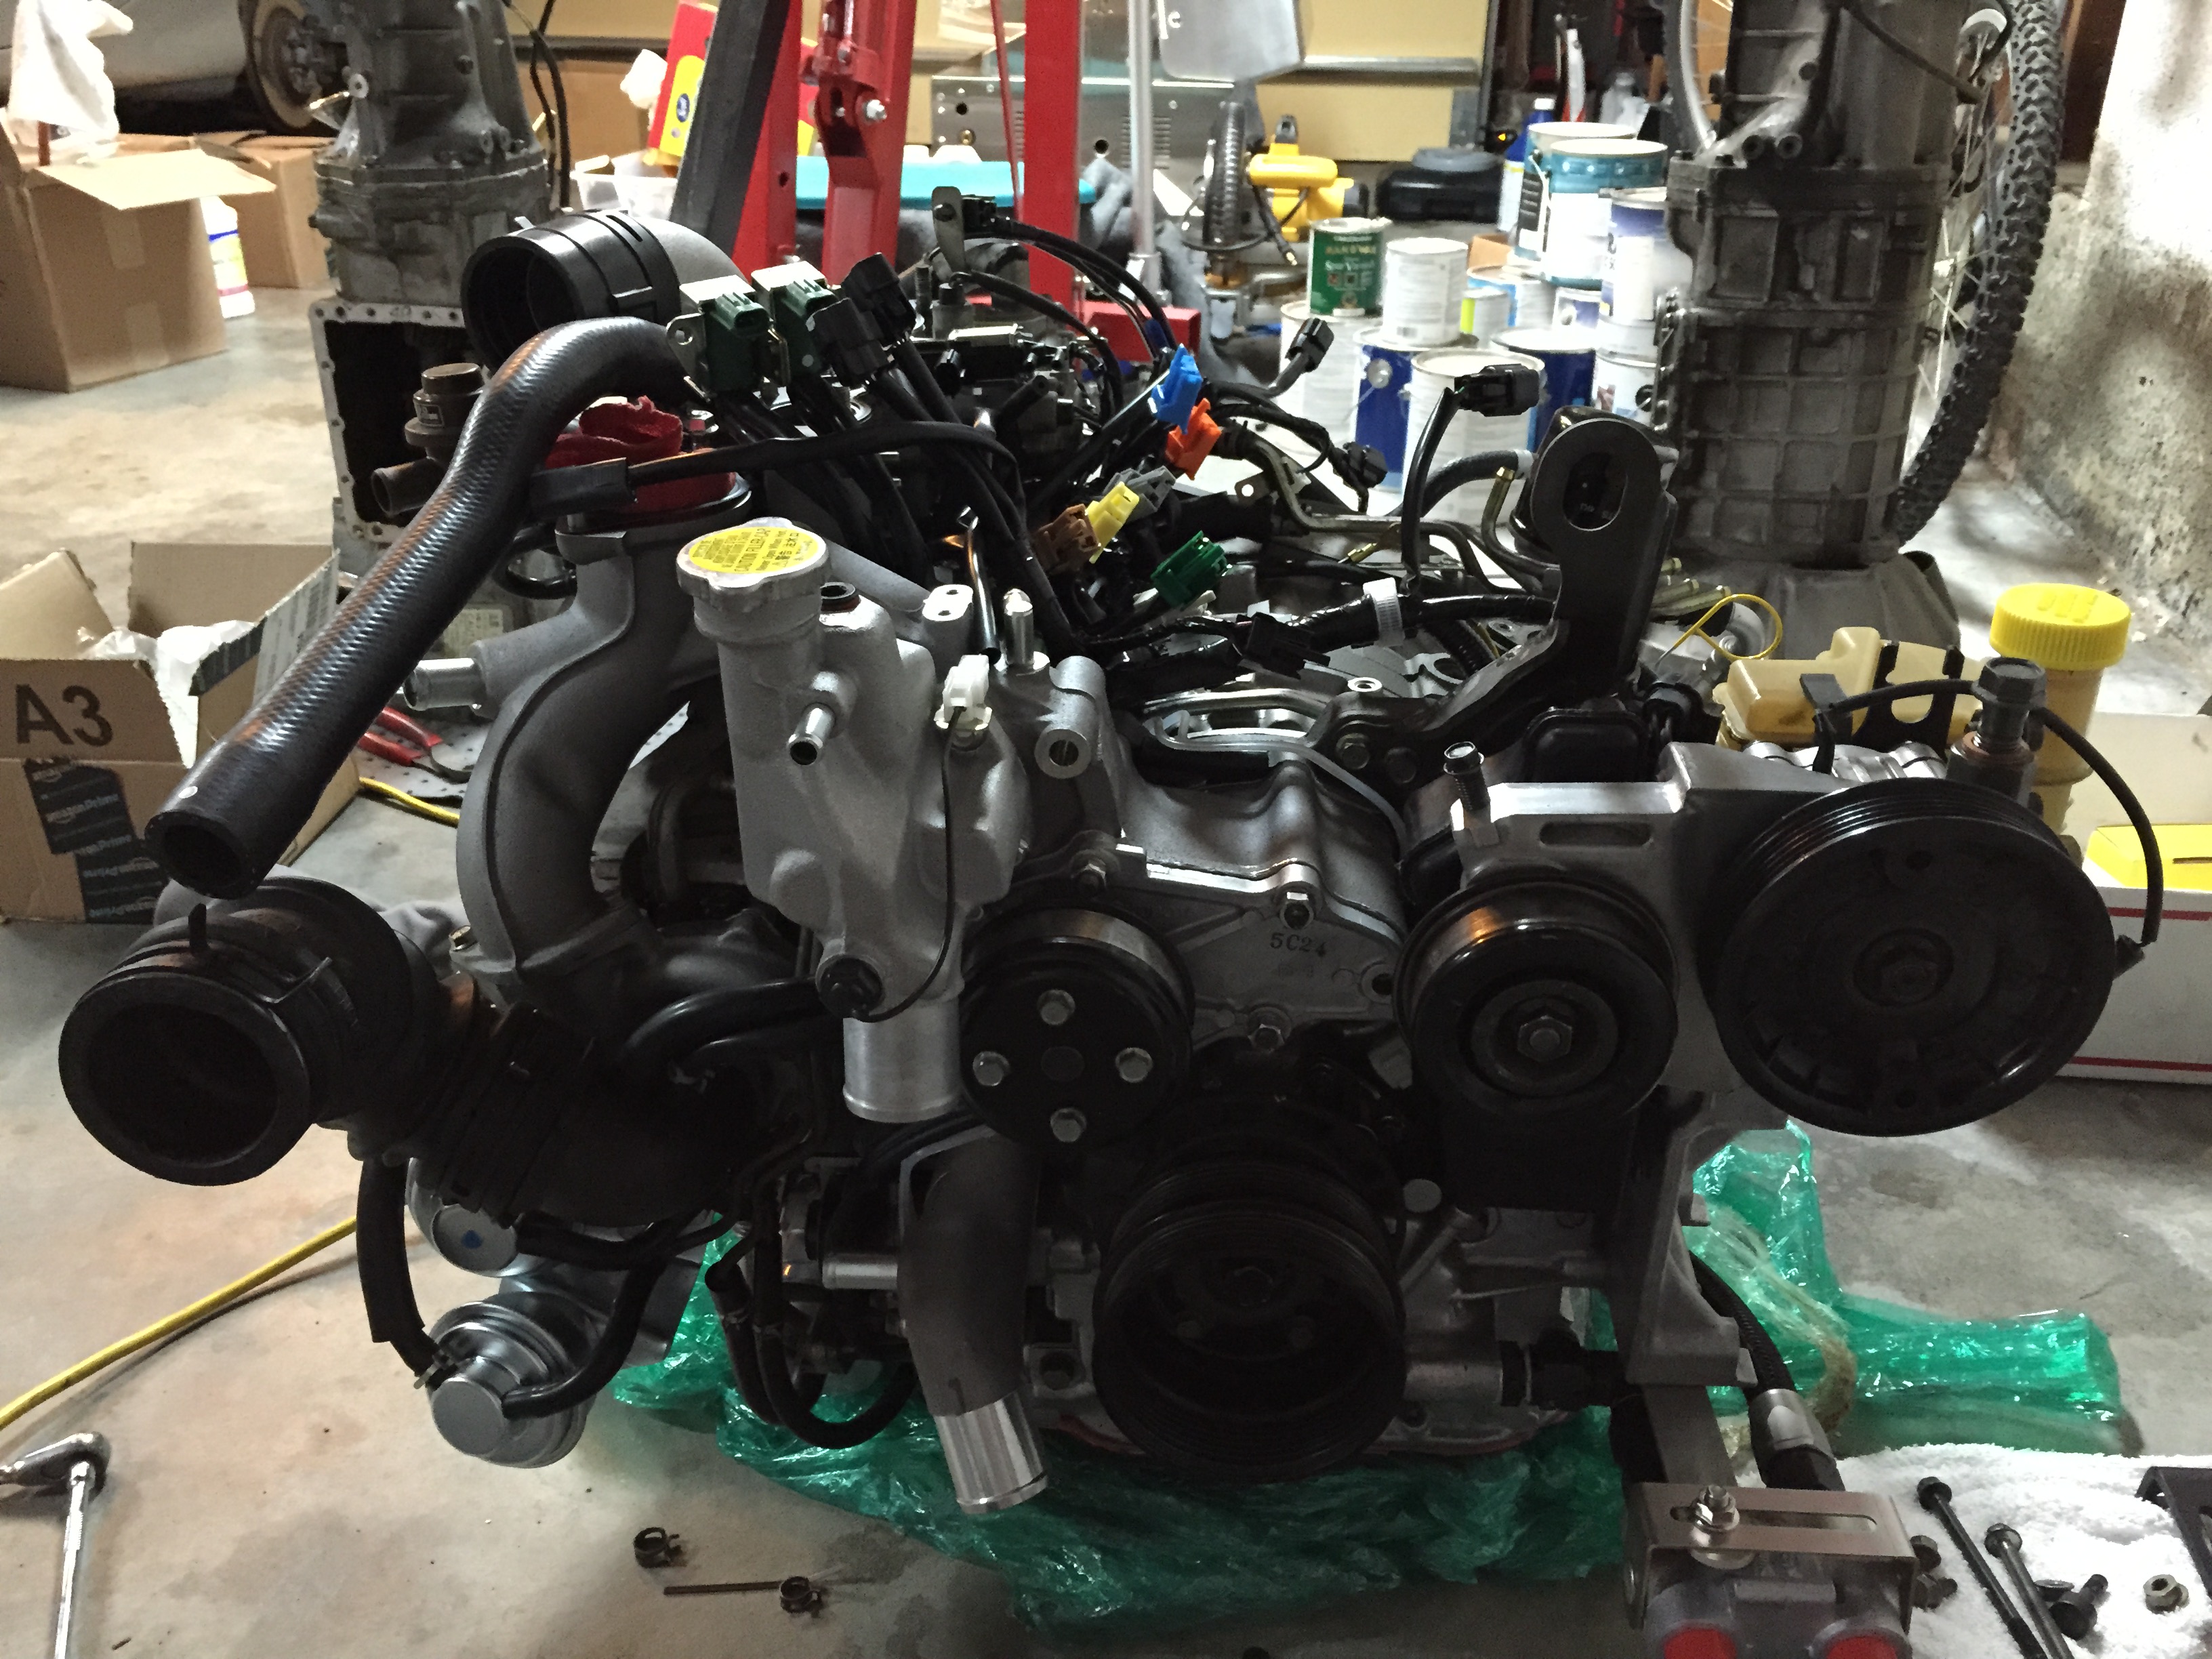
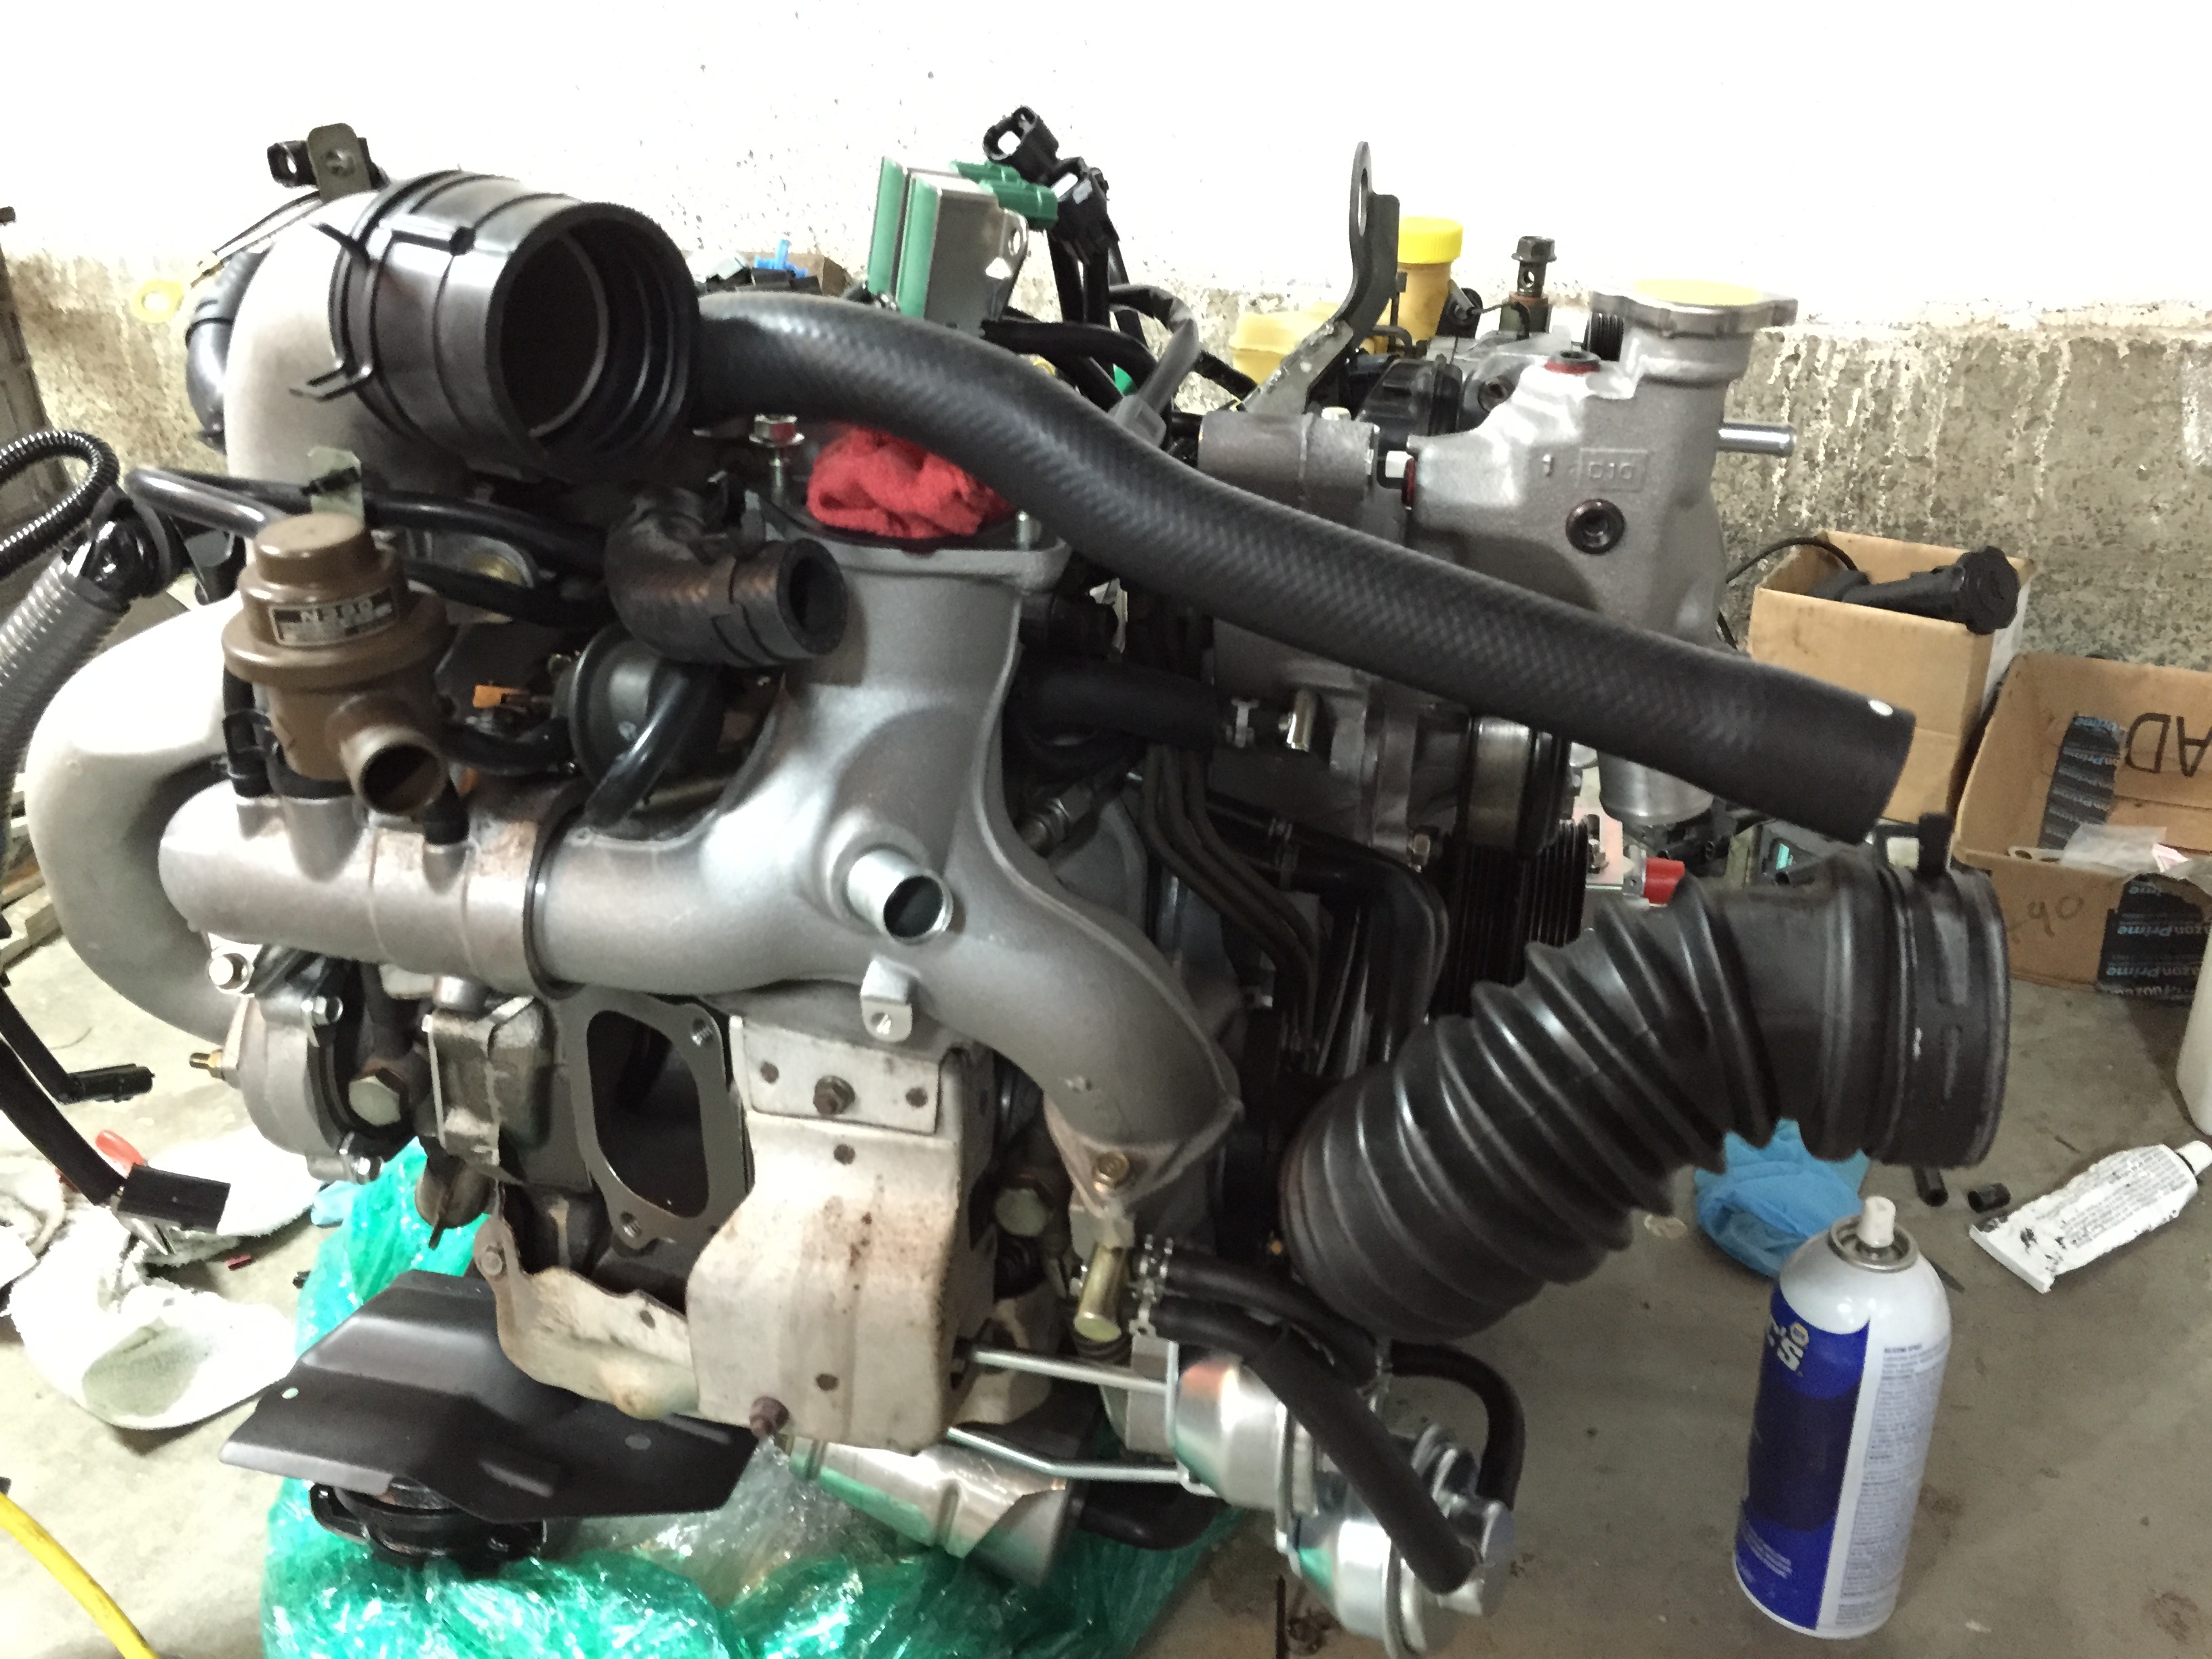
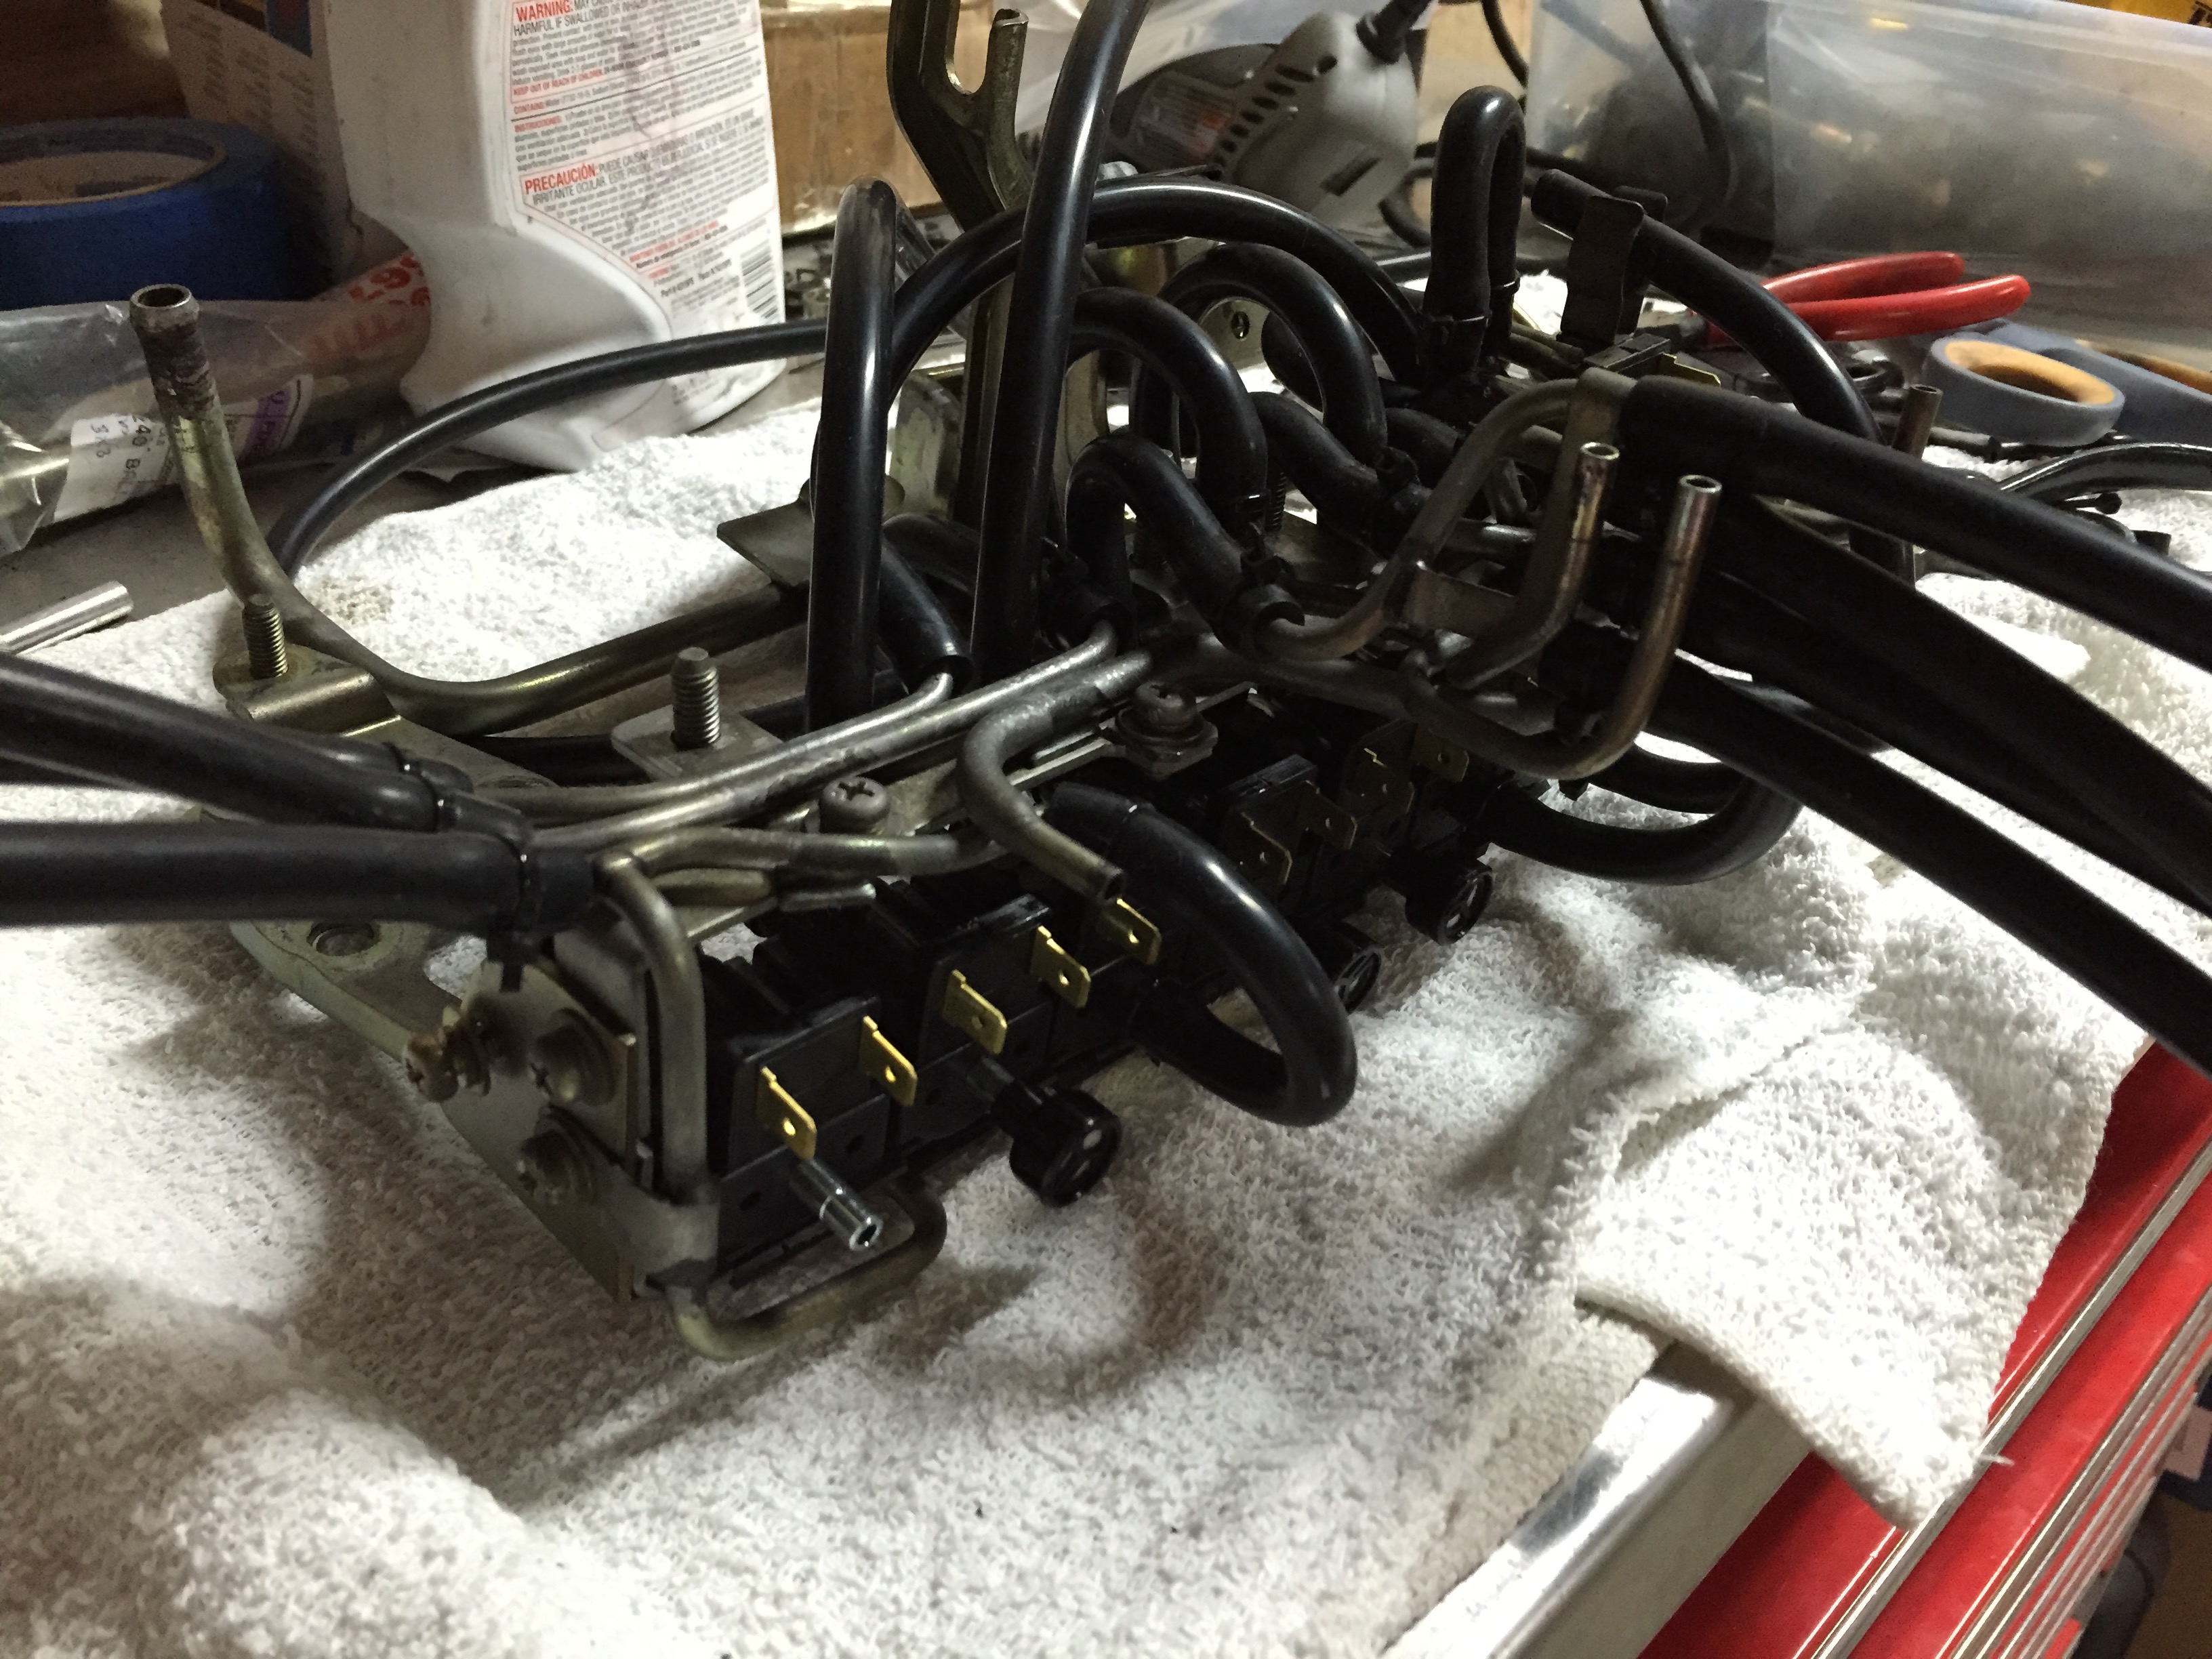
Heres what I got so far: Intake and efini y-pipes installed. All new OEM rubber joints, elbows and hoses. New harness is sort of installed, mostly placed in there until i get rats nest done.
Heres what I got so far: Intake and efini y-pipes installed. All new OEM rubber joints, elbows and hoses. New harness is sort of installed, mostly placed in there until i get rats nest done.
Thread Starter
I Raise Chickens
Joined: Jul 2001
Posts: 1,219
Likes: 35
From: Half Moon Bay, CA
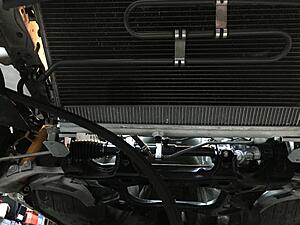
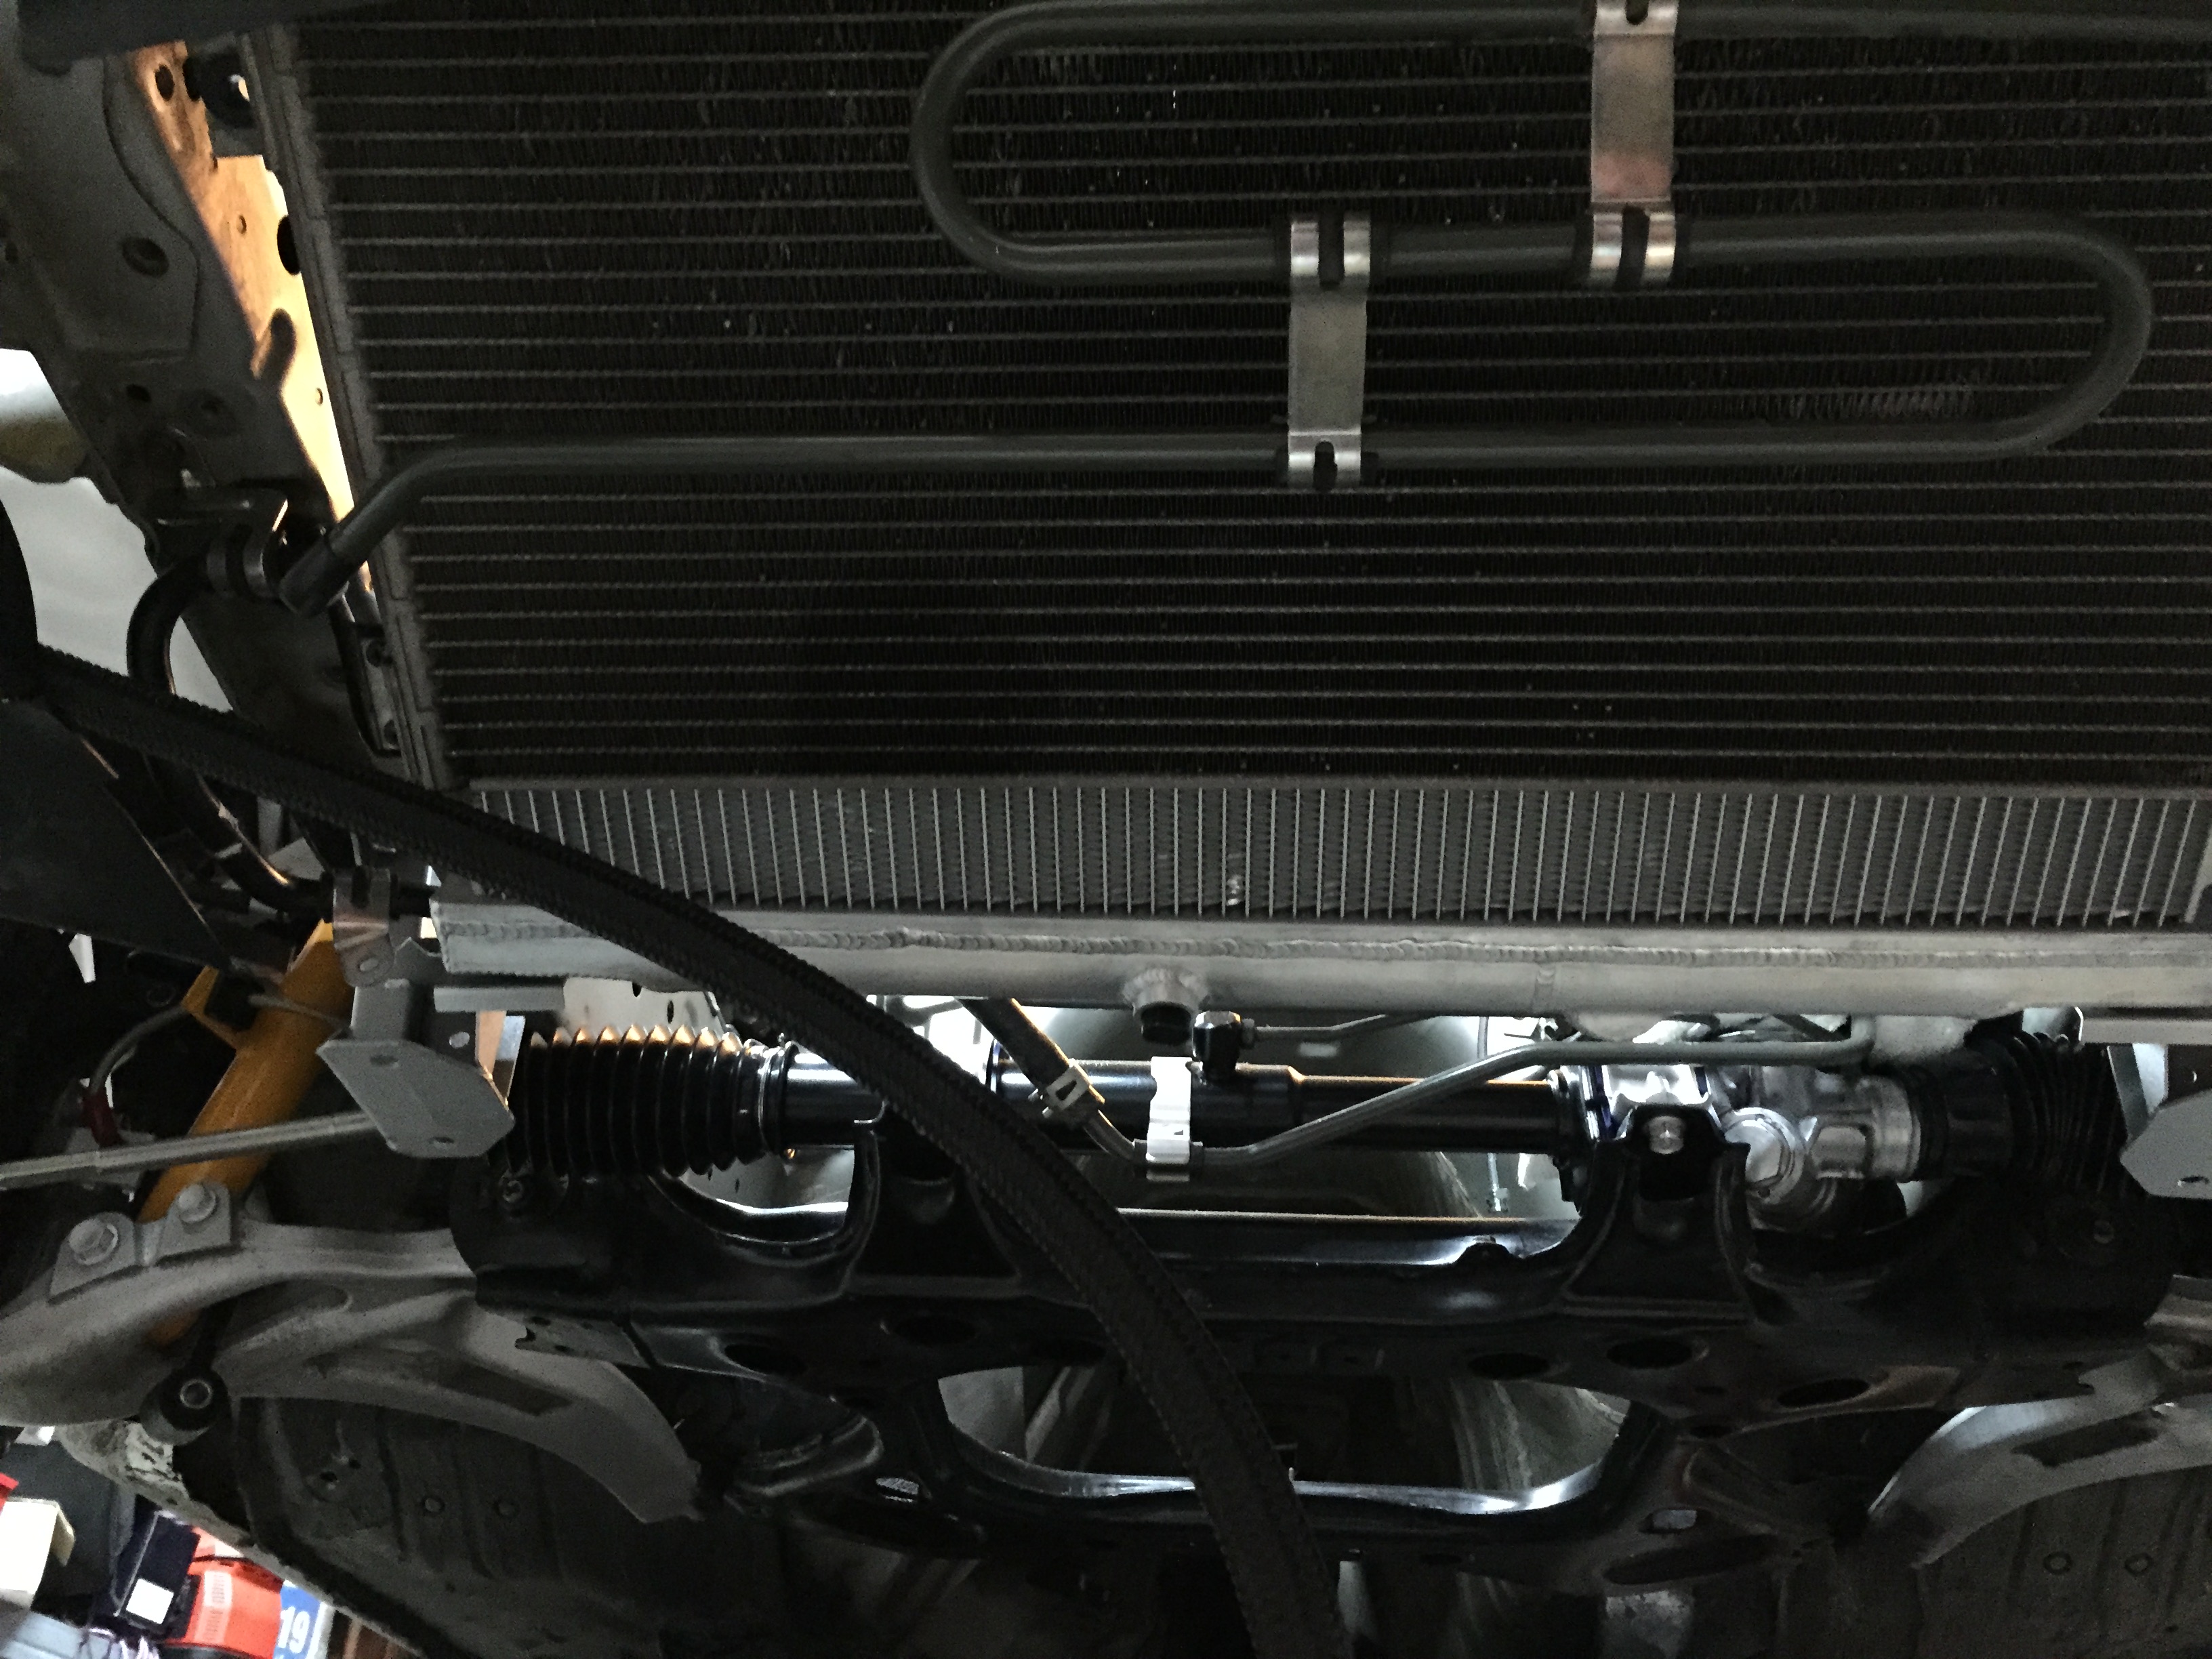
Heres a shot after cleaning up the power steering system and new radiator. New inner, outer tierods, oem boots. Rack cleaned up nice. All the power steering hoses are new. Hard to see in the picture, but I am running the AWR (Sway Bar Bracket - 7304 ? 1993-1995 RX-7 - AWR Racing Store) sway bar brackets. They come powdercoated in silver, so it looks OEM-ish.
Swaybar not installed yet, but I'll be running an OEM sway bar with new OEM links.
Swaybar not installed yet, but I'll be running an OEM sway bar with new OEM links.
Last edited by cymfc3s; Jun 22, 2015 at 12:06 PM.
Thread Starter
I Raise Chickens
Joined: Jul 2001
Posts: 1,219
Likes: 35
From: Half Moon Bay, CA
But yeah, totally agree, I'd rather do it once and not have to chase issues down the road related to the rats nest. I hope I didn't just jinx myself...
Thread Starter
I Raise Chickens
Joined: Jul 2001
Posts: 1,219
Likes: 35
From: Half Moon Bay, CA
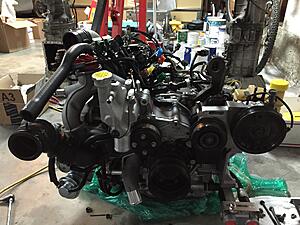
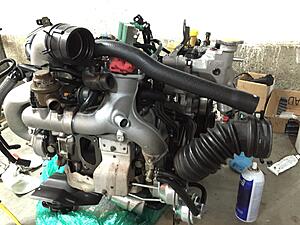
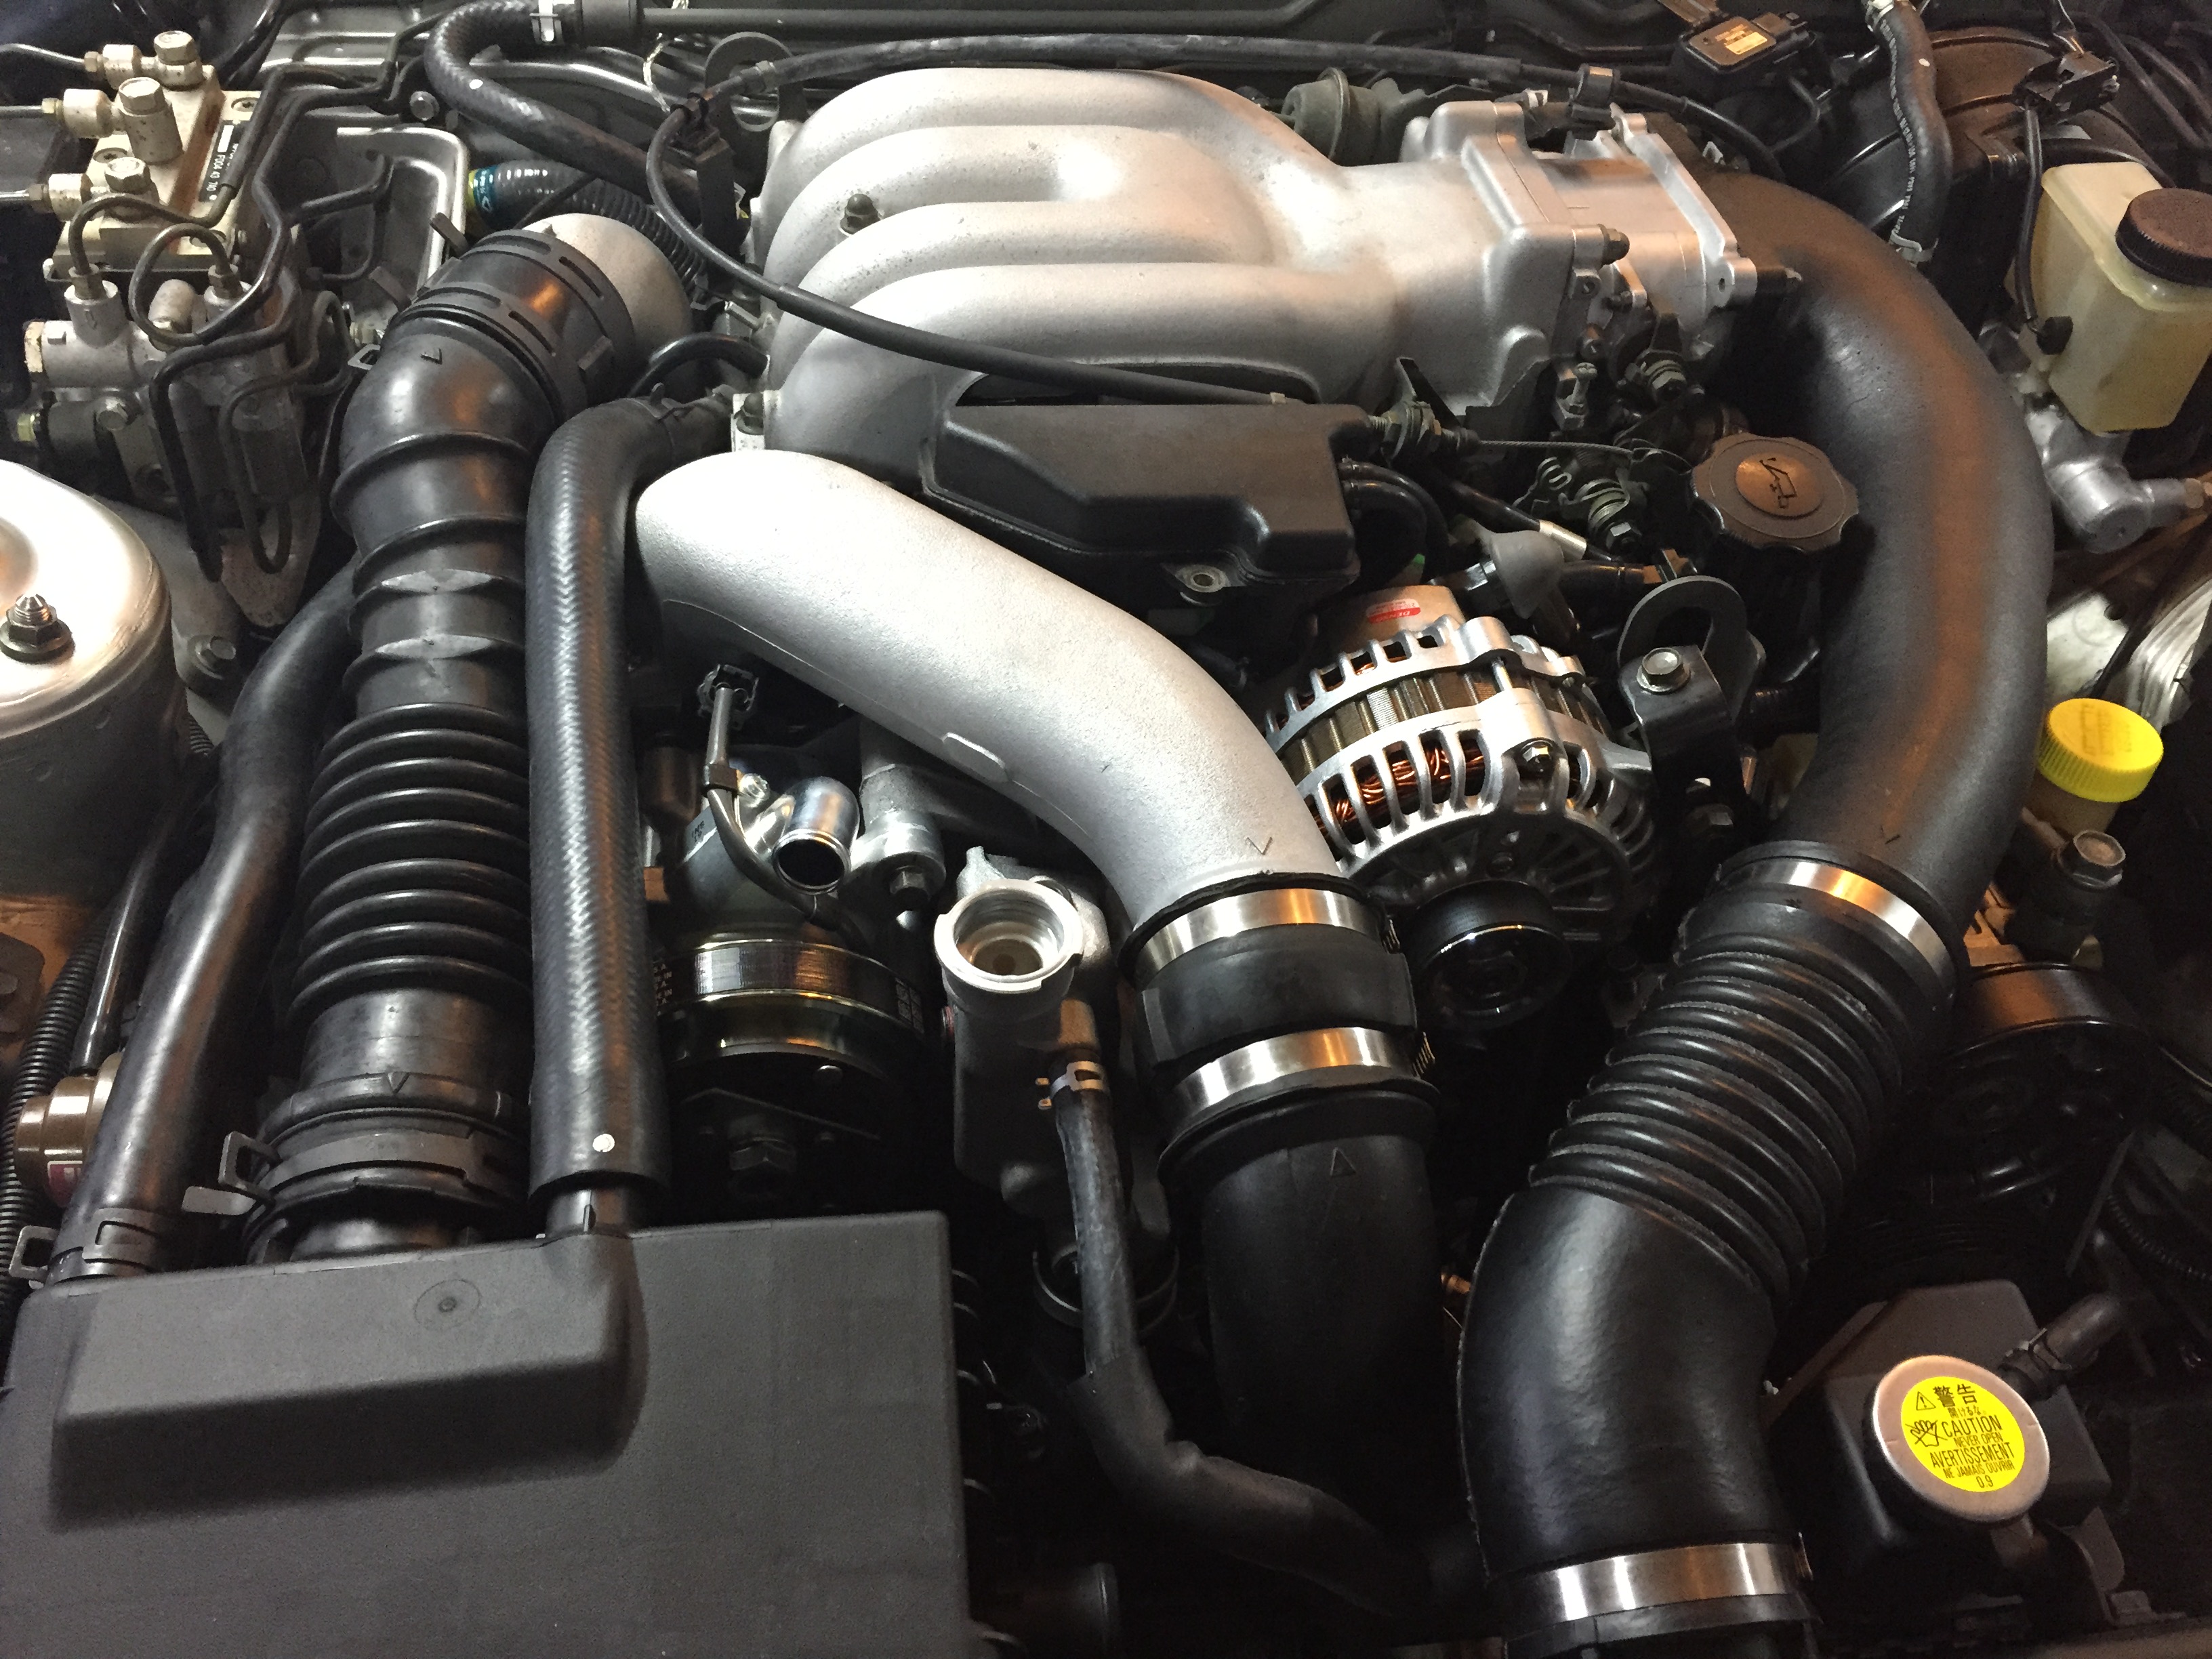
Took me long enough, but I finally got the lump back in the car. Have not yet fired it up. The bumper is still off so I can leak check the oil coolers.
Airbox lid is new, all the connecting hoses and clamps are new. New intercooler duct, isolaters and hardware. Also for those of you still running the stock intercooler and duct, those plastic snaps that connect the intercooler brackets to the duct (and brace) are NLA from Mazda. However, these snaps: Mazda Trim Panel Retainers B003-68-865-00 are a perfect fit and look exactly like the OEM ones. So if yours are broken (mine were), order a box of these or ask me to mail you a few
What do you guys think so far?
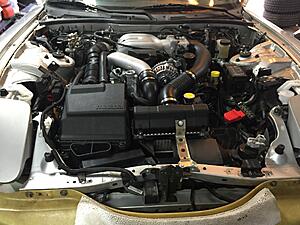

Thread Starter
I Raise Chickens
Joined: Jul 2001
Posts: 1,219
Likes: 35
From: Half Moon Bay, CA
Went to start it up after work, and no joy. Tons of cranking, not even an attempt at starting. Checked spark, good! Checked the plugs, perfect (not flooded). Not even a whiff of fuel smell. So I narrowed it down to fuel. Fuel pump works when I ground the diagnostic pin (f/p).
But the strange thing is, when I turn the key ON, the fuel pump does not prime. I get silence. So my hypothesis is, the fuel pump relay circuit is borked. Going to bypass it and give it a go tomorrow. Hope this works. If it does, will need to investigate why the fuel pump relay circuit isn't working :|
But the strange thing is, when I turn the key ON, the fuel pump does not prime. I get silence. So my hypothesis is, the fuel pump relay circuit is borked. Going to bypass it and give it a go tomorrow. Hope this works. If it does, will need to investigate why the fuel pump relay circuit isn't working :|
Thread Starter
I Raise Chickens
Joined: Jul 2001
Posts: 1,219
Likes: 35
From: Half Moon Bay, CA
welp, I was wrong. Fuel pump and relay system is fine. Did a flow test while cranking and fuel is definitely flowing to the rails. So, I need to plug a noid into the injector connectors and see if I've got signal going to the primaries. But with a new harness, I'm guessing thats OK. Bad primaries? Stuck closed?
Thread Starter
I Raise Chickens
Joined: Jul 2001
Posts: 1,219
Likes: 35
From: Half Moon Bay, CA
So I pulled the rats nest out and plugged an injector harness node (
) cranked it over and the wiring is good. Going to pull the injectors out tomorrow, must be something up with the injectors. Regardless, I'm going to drop in a new set of primaries when I'm done troubleshooting this mess.
Thread Starter
I Raise Chickens
Joined: Jul 2001
Posts: 1,219
Likes: 35
From: Half Moon Bay, CA
Tested both primary injectors with a 12v source. injector #1 started clicking after a few minutes of tapping the wire with the battery. Injector #2, never activated. So frustrating, but at least I got to the root of the problem. New injectors on order.
that sucks! i know the feeling of relief though, when you figure out the source of the frustration. are you buying NEW injectors, or remans? also, did you considering a cleaning service? people seem to have good luck with sending the injectors off for cleaning, and most send back flow analysis sheets.