
rebuild of a 95 fd shave, tuck and going to make a lot of power with a 13b


I just pulled the motor out the one i traded my civic for since the motor is in healthier shape then the one in my original FD. So doing a swap and taking other goodies off the FD i just got like vmount setup if i find it better than my apexi fmic setup. Also it had the large size dual setrab oil cooler kit so im snatching that off it too lol. So overall on parts wise i got more than my civic's value


Thread Starter
Full Member
Joined: Oct 2011
Posts: 199
Likes: 0
From: maryland
I just pulled the motor out the one i traded my civic for since the motor is in healthier shape then the one in my original FD. So doing a swap and taking other goodies off the FD i just got like vmount setup if i find it better than my apexi fmic setup. Also it had the large size dual setrab oil cooler kit so im snatching that off it too lol. So overall on parts wise i got more than my civic's value
and me either should be done in a few weeks with primer on it
Recovering Milkaholic
iTrader: (7)
Joined: Jan 2002
Posts: 8,206
Likes: 0
From: Budds Creek, Maryland
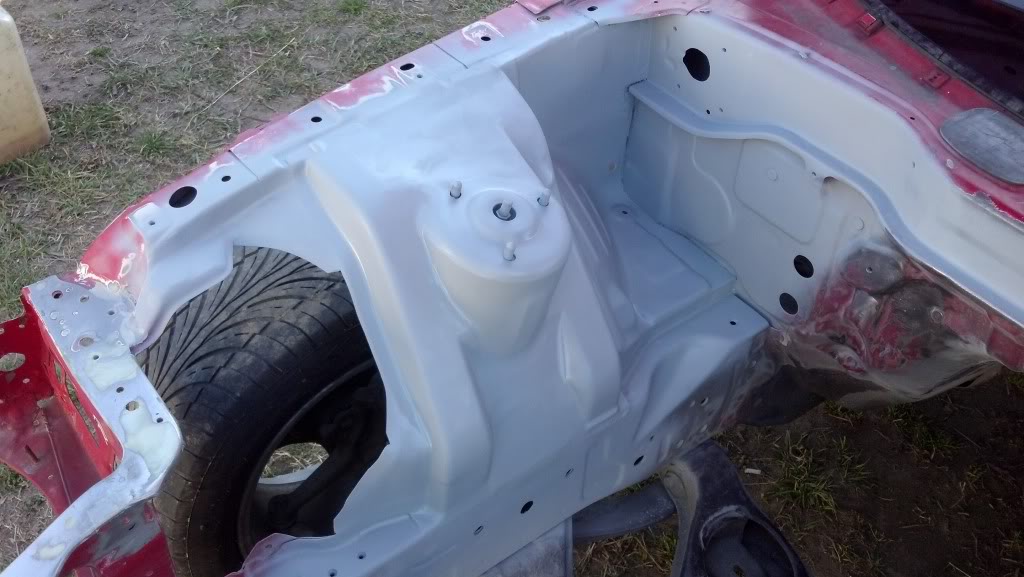
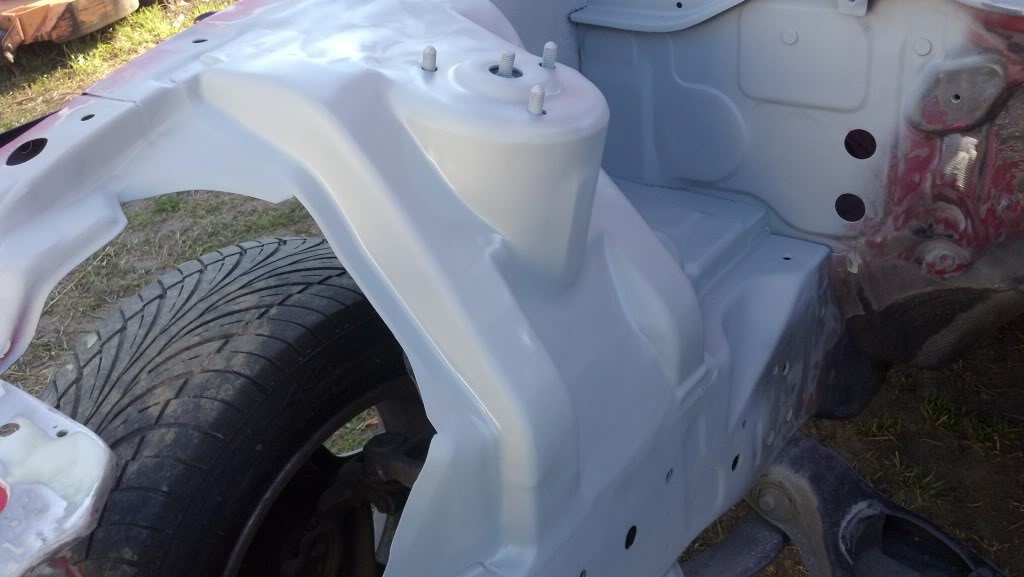
Found your thread. Looks interesting, Maybe I've been out of the loop for a while, Whats with all the body work in the engine bay? Seems to me like your just adding unnecessary weight albeit not much weight. Whats the thought with that? Purely esthetic?
Anyway looks interesting, I'll check back. I don't know if you have built an engine yet or not but if you have not watched the box wrench video yet it's pretty helpful to have. http://store.boxwrench.net/Mazda-RX-...deo_p_147.html
Nice job on the press though for sure! I need one. I am just as bad with my cj as I used to be with my 3rd gen.
Dave
Thread Starter
Full Member
Joined: Oct 2011
Posts: 199
Likes: 0
From: maryland
Found your thread. Looks interesting, Maybe I've been out of the loop for a while, Whats with all the body work in the engine bay? Seems to me like your just adding unnecessary weight albeit not much weight. Whats the thought with that? Purely esthetic?
Anyway looks interesting, I'll check back. I don't know if you have built an engine yet or not but if you have not watched the box wrench video yet it's pretty helpful to have. http://store.boxwrench.net/Mazda-RX-...deo_p_147.html
Nice job on the press though for sure! I need one. I am just as bad with my cj as I used to be with my 3rd gen.
Dave
Anyway looks interesting, I'll check back. I don't know if you have built an engine yet or not but if you have not watched the box wrench video yet it's pretty helpful to have. http://store.boxwrench.net/Mazda-RX-...deo_p_147.html
Nice job on the press though for sure! I need one. I am just as bad with my cj as I used to be with my 3rd gen.
Dave

Junior Member
Joined: Jan 2012
Posts: 8
Likes: 0
From: MD
Thoroughly enjoyed looking through all 5 pages of this so far! Great build thread, and am looking forward to following it through.
I live in Odenton, however, my rents live in Queenstown, Where in annapolis are you? I don't have an FD but I may be coming into grips with one soon (crosses fingers). Keep up the great work man, very inspirational!
I live in Odenton, however, my rents live in Queenstown, Where in annapolis are you? I don't have an FD but I may be coming into grips with one soon (crosses fingers). Keep up the great work man, very inspirational!
Thread Starter
Full Member
Joined: Oct 2011
Posts: 199
Likes: 0
From: maryland
so i havent really had much time to work on the car latley so i got some work done today. the bay is coming alone really nice.
my buddy doing some sanding
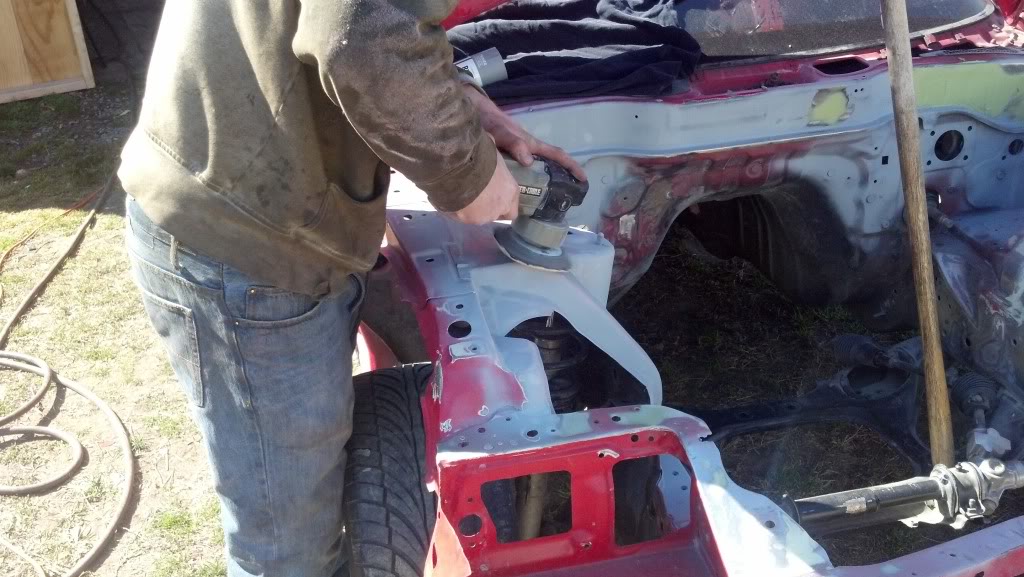
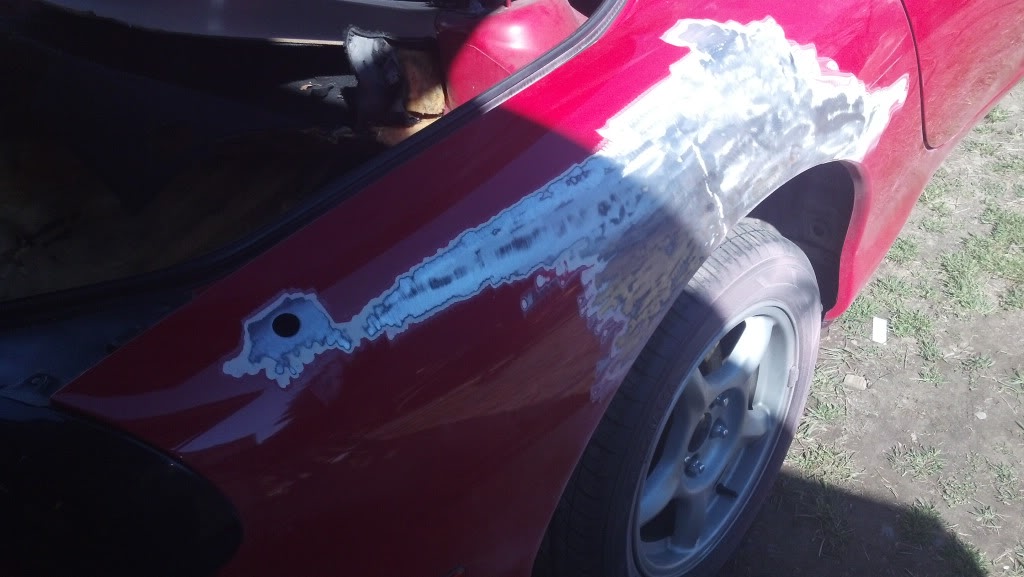
while he was doing that i started gringing all the old paint off the rear quarter panel i thought something was sketchy bout this and the car had been hit right there so now i have more body work to do. also filled the antenna hole.
a shot of our shop we have an evo inside my car is outside 2 tegs and a 240 lol lots of projects going on
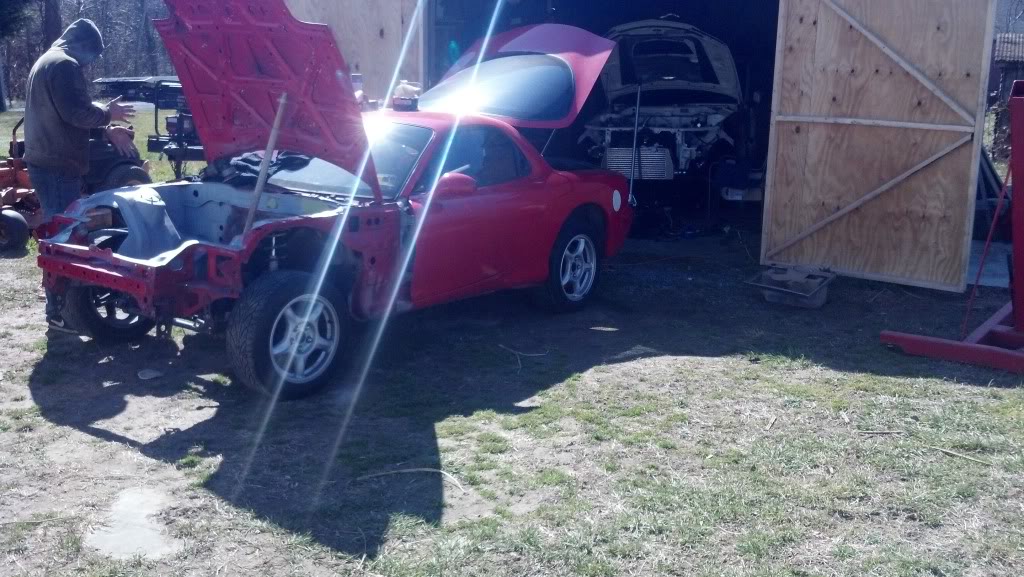
and this is how i left it for today

everything still needs to be wet sanded and reprimed but this will do for now. thanx for looking guys
my buddy doing some sanding
while he was doing that i started gringing all the old paint off the rear quarter panel i thought something was sketchy bout this and the car had been hit right there so now i have more body work to do. also filled the antenna hole.
a shot of our shop we have an evo inside my car is outside 2 tegs and a 240 lol lots of projects going on
and this is how i left it for today
everything still needs to be wet sanded and reprimed but this will do for now. thanx for looking guys


Thread Starter
Full Member
Joined: Oct 2011
Posts: 199
Likes: 0
From: maryland
Thanx guys I prob worked on that one shock tower for 2 days lol till I got it the way I wanted. Things are going to be going slow here now I'm in the middle of buying a house. I did however weld up the hole for the omp since ill be running premix and no chance for It to leak now
Thread Starter
Full Member
Joined: Oct 2011
Posts: 199
Likes: 0
From: maryland
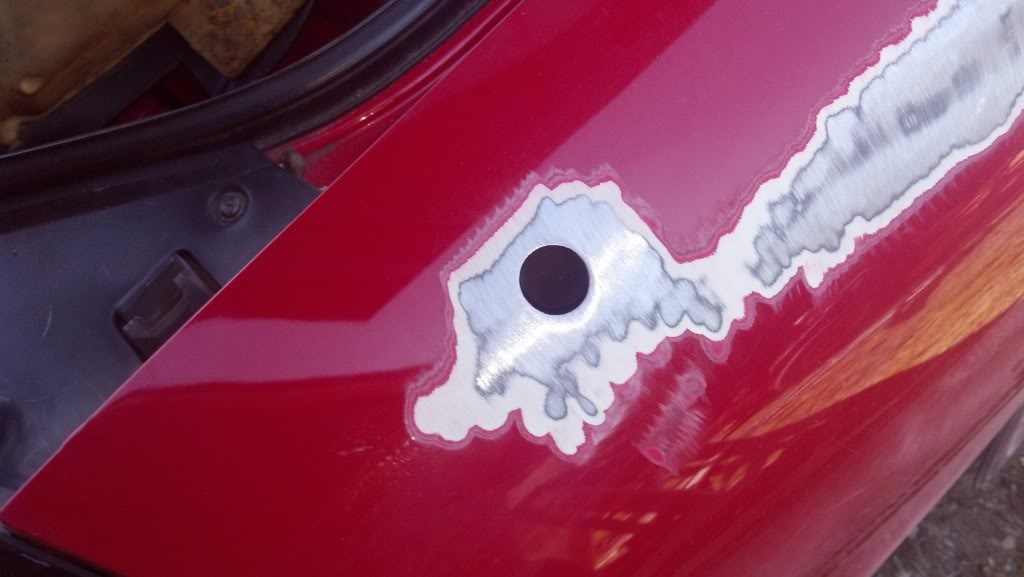
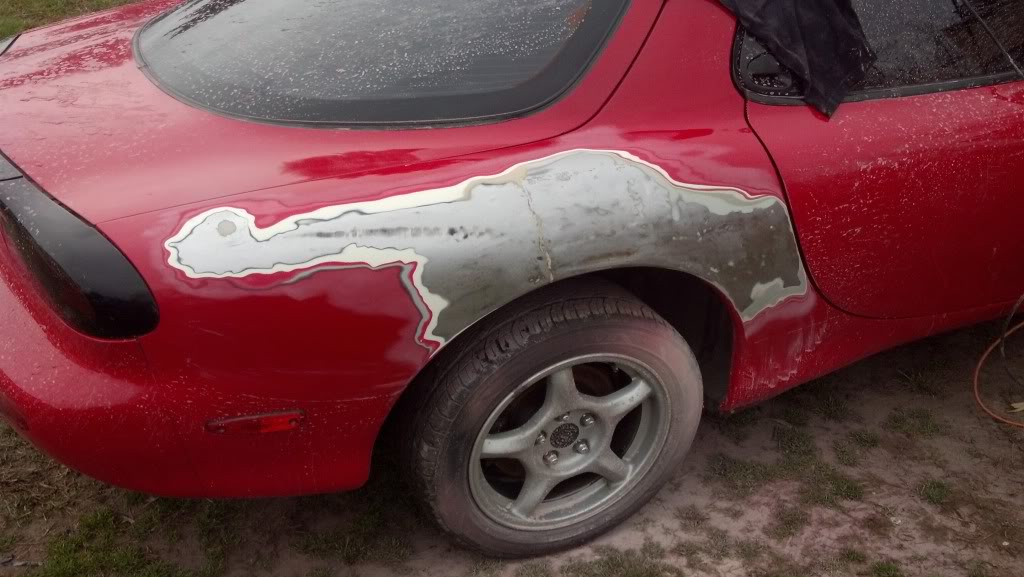
so i had to take a break from the bay and i started to work on that messed up quarter panel.
so this is how the day started
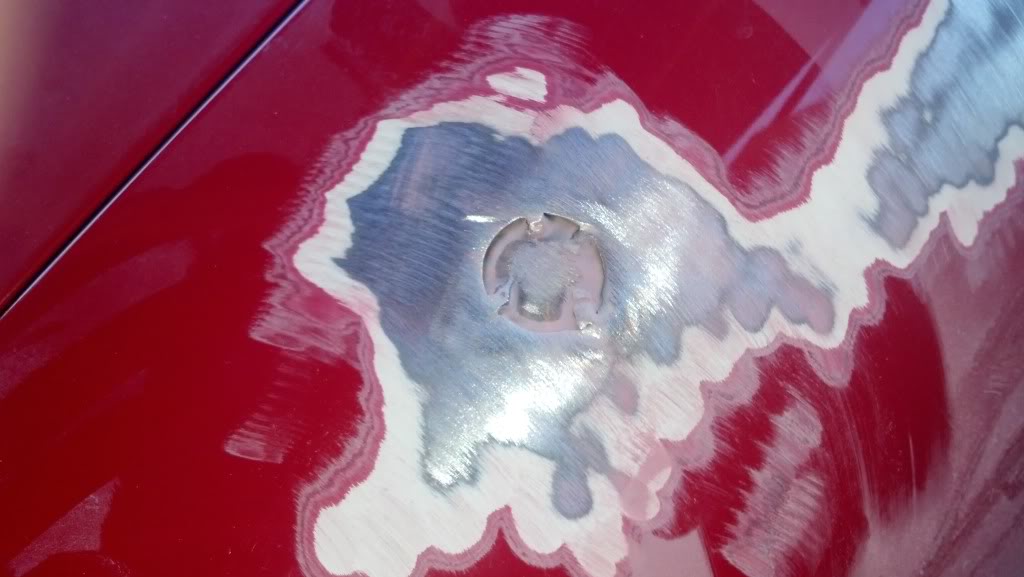
then the filler
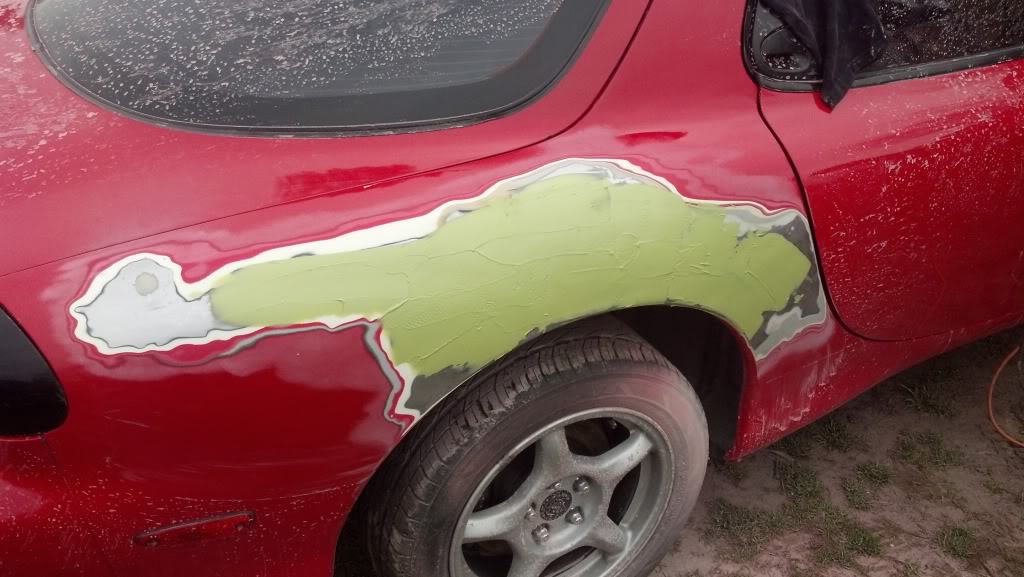
there was a lot of sanding and filling sanding and filling lol then you get this
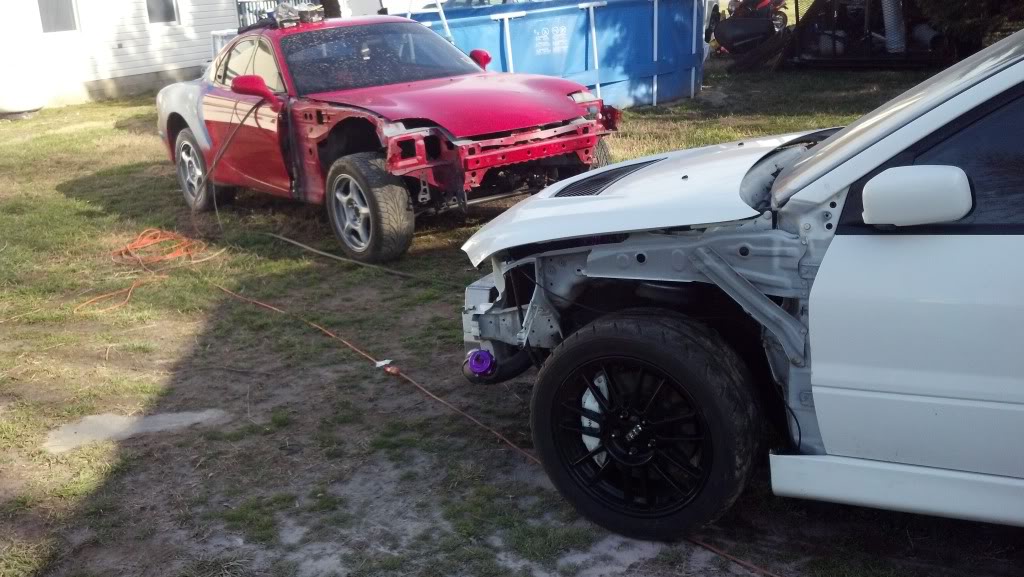
some random pic of the car with the shop evo
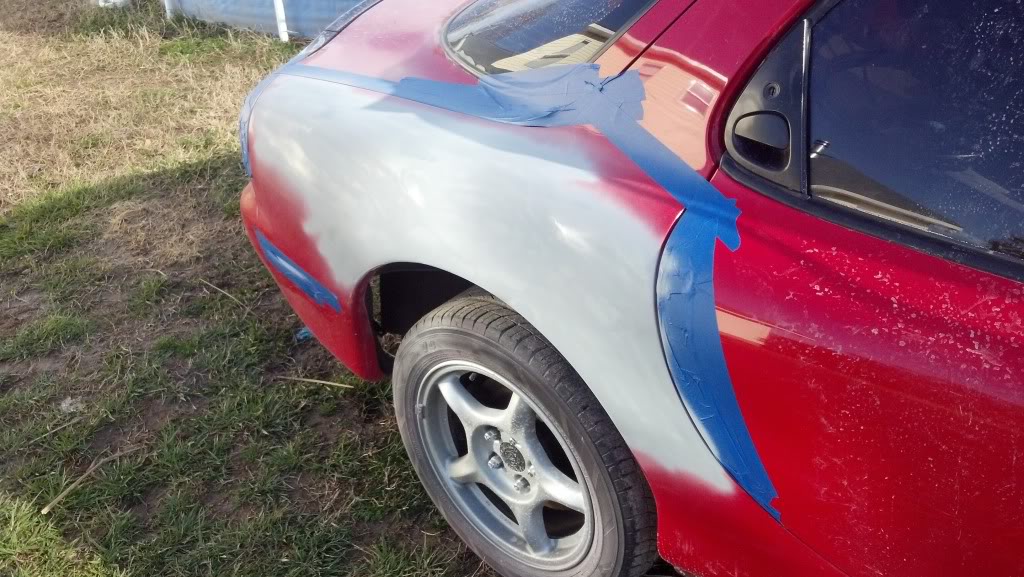
then the end result this took bout 6 hours
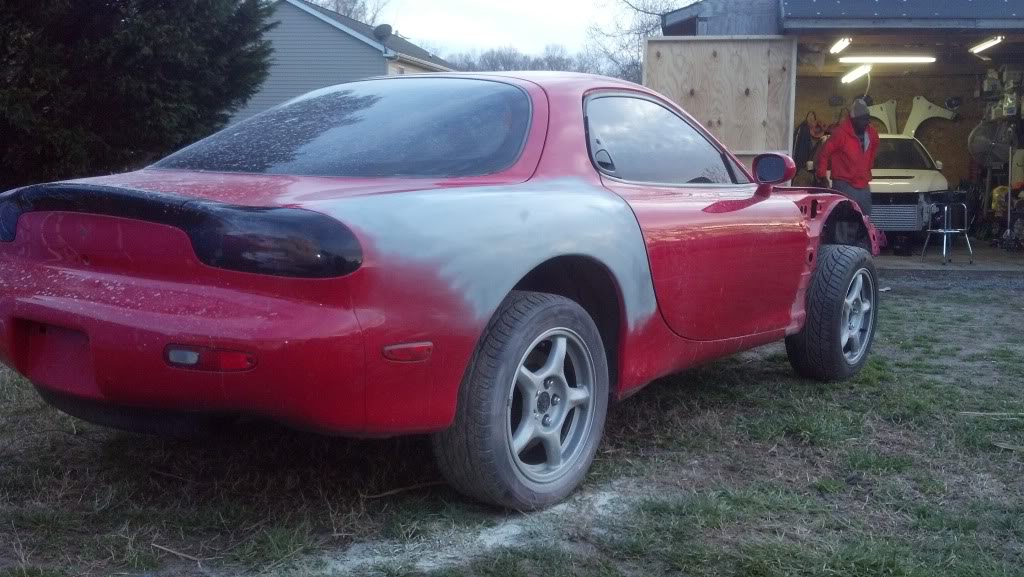
thats all for now
so this is how the day started
then the filler
there was a lot of sanding and filling sanding and filling lol then you get this
some random pic of the car with the shop evo
then the end result this took bout 6 hours
thats all for now


Thread Starter
Full Member
Joined: Oct 2011
Posts: 199
Likes: 0
From: maryland
if you plan on rolling your fenders you might want to think about doing it before you get bodywork done on the rear quarter panels. It would be a shame to ruin all that hard work you've done if you decide to roll the inside lip and mess up on accident ya know?
Thread Starter
Full Member
Joined: Oct 2011
Posts: 199
Likes: 0
From: maryland
Yea I thought bout that after I did the body work lol . Its cool it I mess anything up ill just fix it lol.