
My RX7s build threads/progression


Thread Starter
Full Member
Joined: Feb 2013
Posts: 121
Likes: 0
From: South Africa
My RX7s build threads/progression
Hi guys, names Luke, I'm 19 years old and am addicted to the rotary scene and am in love with my FD  I'm always reading and expanding my knowledge on the forum about the car and the rotary engine. I can sit on the forum for hours
  I first started looking at buying an RX8 and didn't really know much about the car or the RX7 at the time until I saw one in person and straight away changed my mind and my dream was the RX7..
So I got a 1992 silver one in February 2013 after looking for the right one for about 18 months because all of the RX7s are imported from Japan and along with Japan comes some bad rust on the cars. So we eventually found one that was in a good condition with absolutely no rust and in a great condition with a few minor dents that I still need to get pulled out.
I haven't got any big plans for the silver one as I just want to keep it in a stock condition as in the years to come a stock unmolested RX7 will be worth quite a bit. I want to make the car as clean as a showroom condition car which it is already close to!
I love pictures so with every update there will be pictures to support it.
This is what it looked like the day I got it!
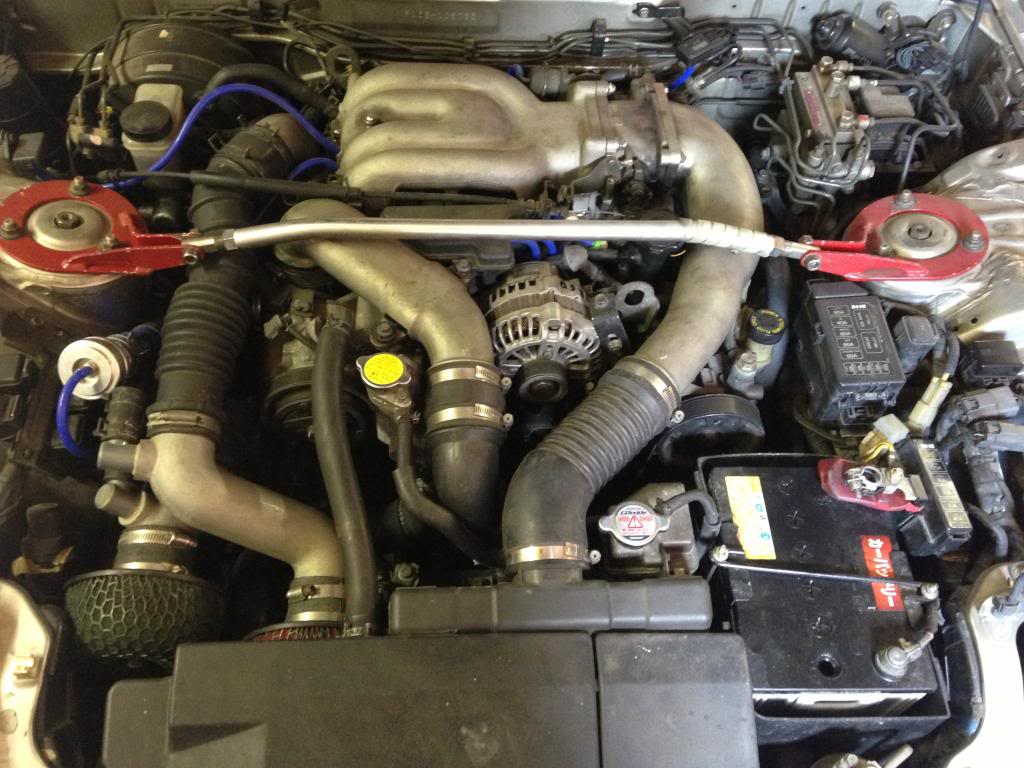
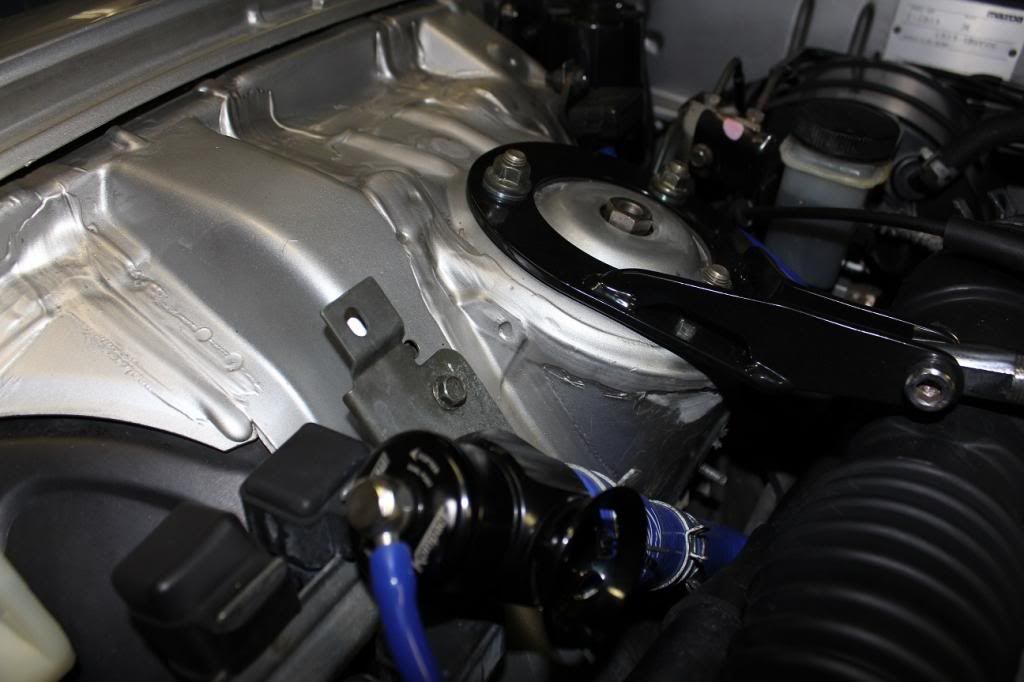
Dirty Engine Bay!! With an aftermarket strut bar, I don't know the make but I think its a Cusco? and with an old Japanese battery still in it and the twin HKS intake with a crappy dump valve! All the vacuum pipes were already replaced with silicone pipes.
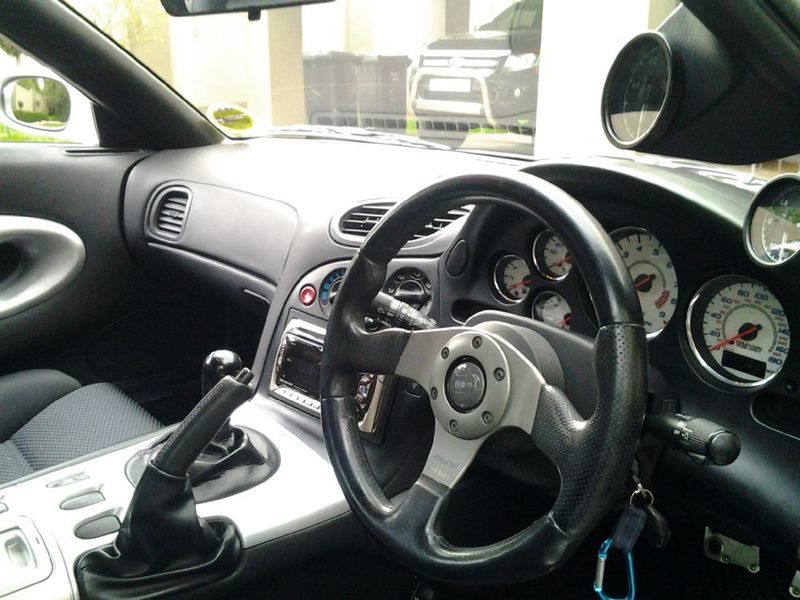
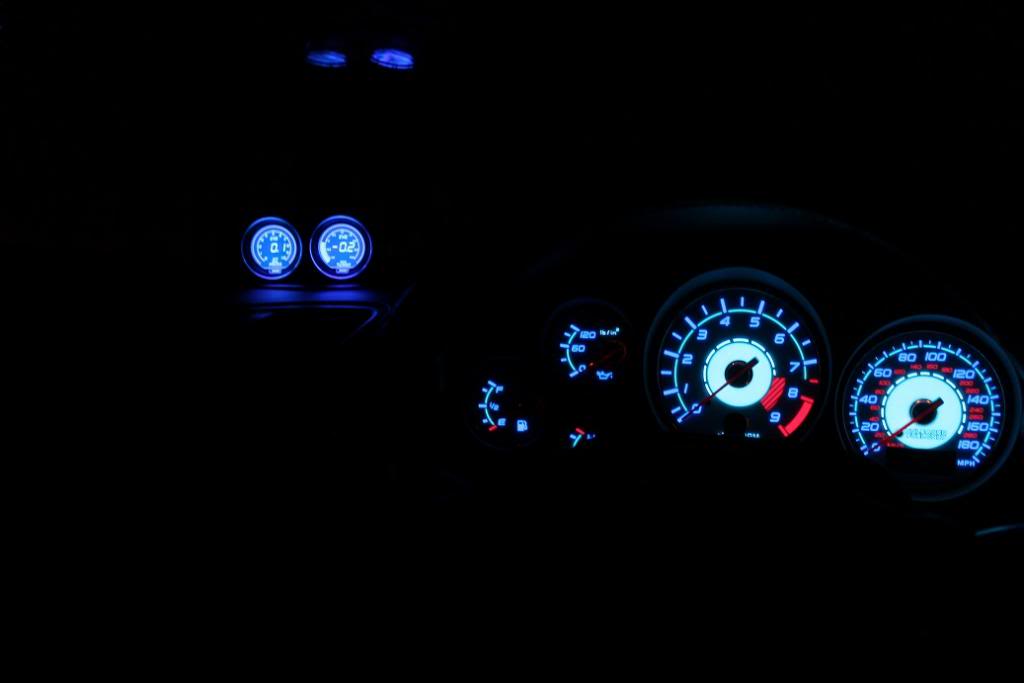
Clean interior besides from the bad sliver paint job on some of the plastics! With a Japanese radio that's worthless here because we have different radio frequencies to them and two Greddy boost and oil pressure gauges along with the gauge covers that have a built in blue light.
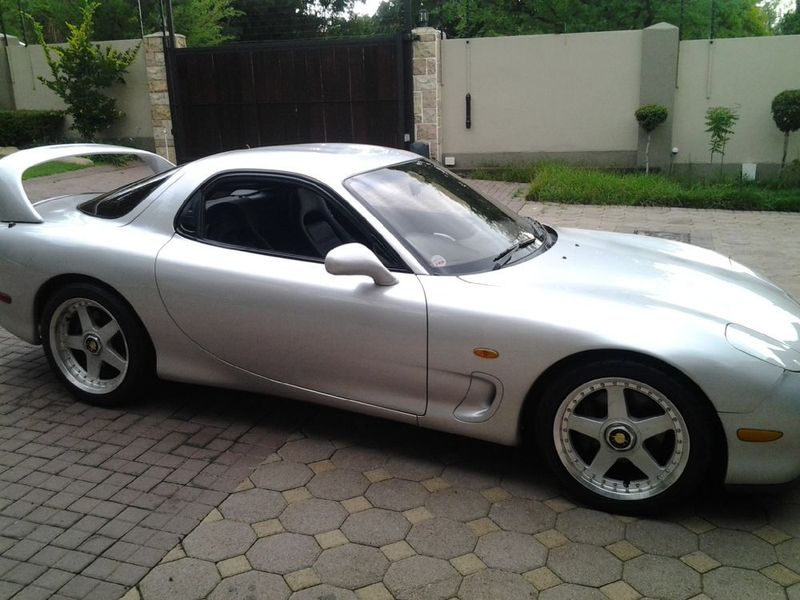
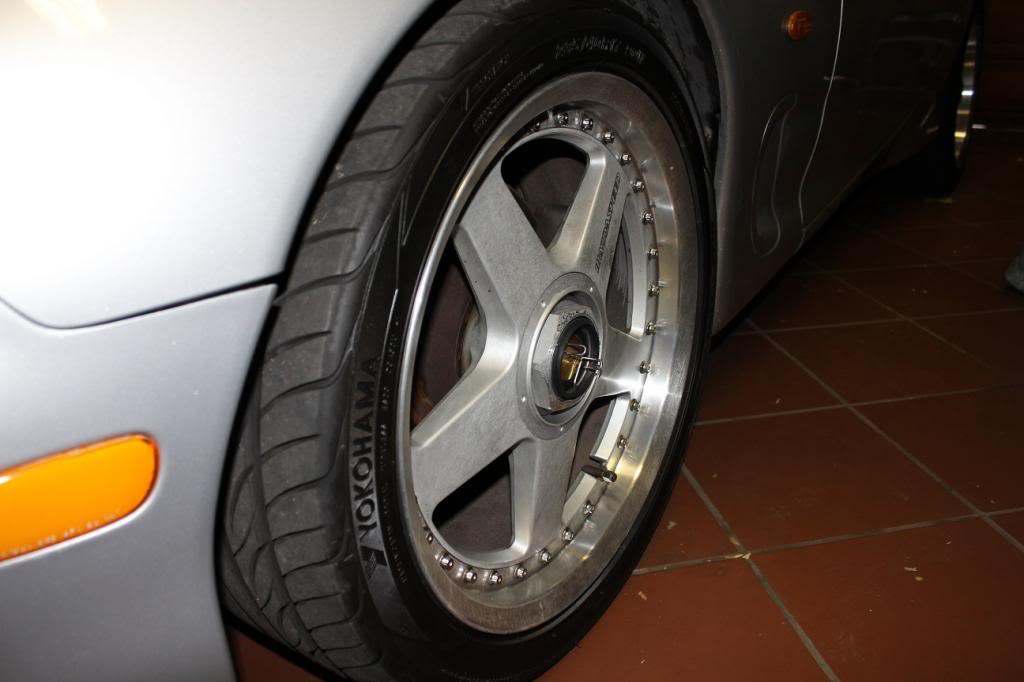
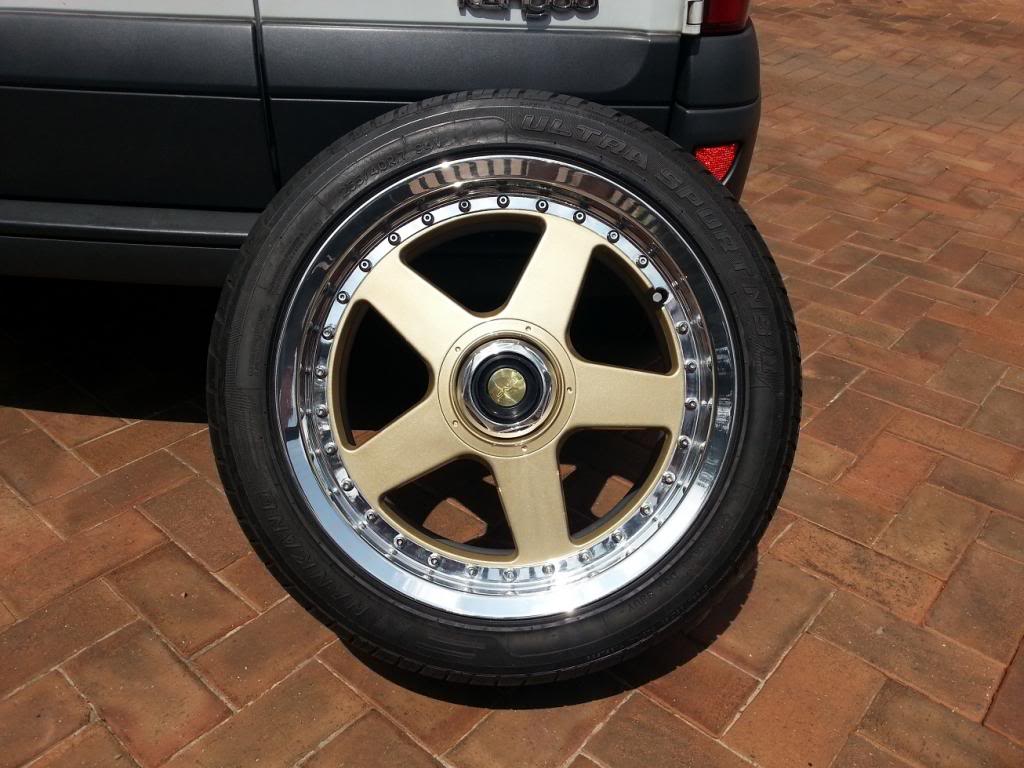
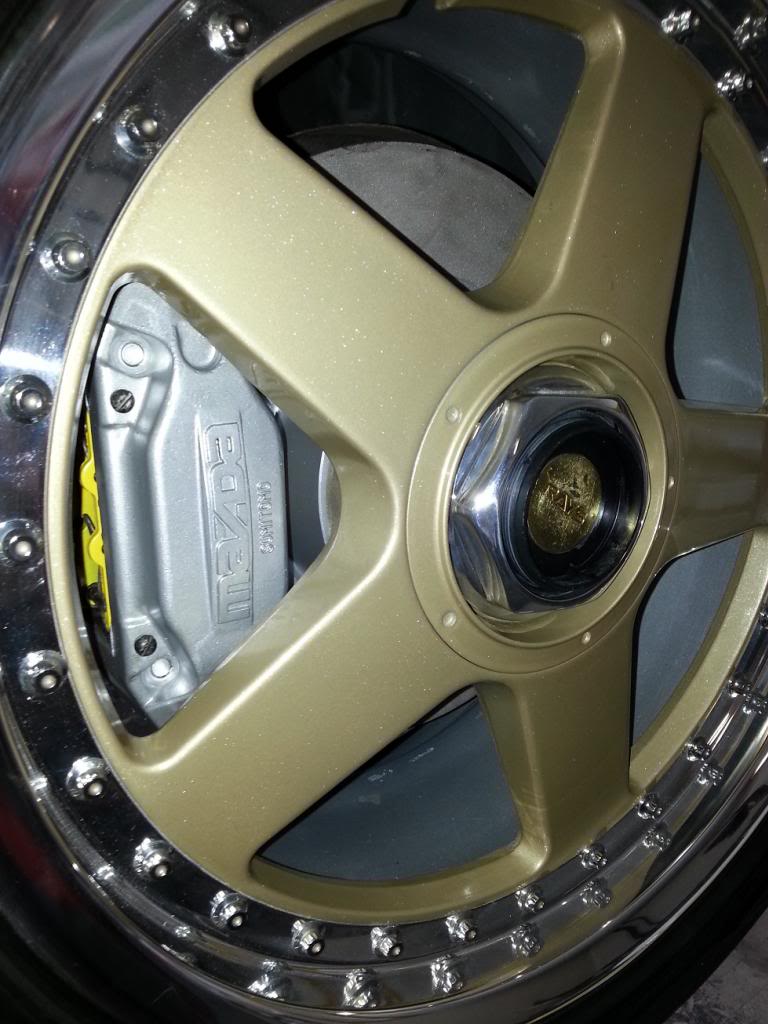
Paint is great on the car, no accident damage, no rust, but the Mazdaspeed 2piece rims needed some new paint and also came with some HKS coil overs and an Apexi Catback.
I'm always reading and expanding my knowledge on the forum about the car and the rotary engine. I can sit on the forum for hours I first started looking at buying an RX8 and didn't really know much about the car or the RX7 at the time until I saw one in person and straight away changed my mind and my dream was the RX7..So I got a 1992 silver one in February 2013 after looking for the right one for about 18 months because all of the RX7s are imported from Japan and along with Japan comes some bad rust on the cars. So we eventually found one that was in a good condition with absolutely no rust and in a great condition with a few minor dents that I still need to get pulled out.
I haven't got any big plans for the silver one as I just want to keep it in a stock condition as in the years to come a stock unmolested RX7 will be worth quite a bit. I want to make the car as clean as a showroom condition car which it is already close to!
I love pictures so with every update there will be pictures to support it.
This is what it looked like the day I got it!
Dirty Engine Bay!! With an aftermarket strut bar, I don't know the make but I think its a Cusco? and with an old Japanese battery still in it and the twin HKS intake with a crappy dump valve! All the vacuum pipes were already replaced with silicone pipes.
Clean interior besides from the bad sliver paint job on some of the plastics! With a Japanese radio that's worthless here because we have different radio frequencies to them and two Greddy boost and oil pressure gauges along with the gauge covers that have a built in blue light.
Paint is great on the car, no accident damage, no rust, but the Mazdaspeed 2piece rims needed some new paint and also came with some HKS coil overs and an Apexi Catback.
Thread Starter
Full Member
Joined: Feb 2013
Posts: 121
Likes: 0
From: South Africa
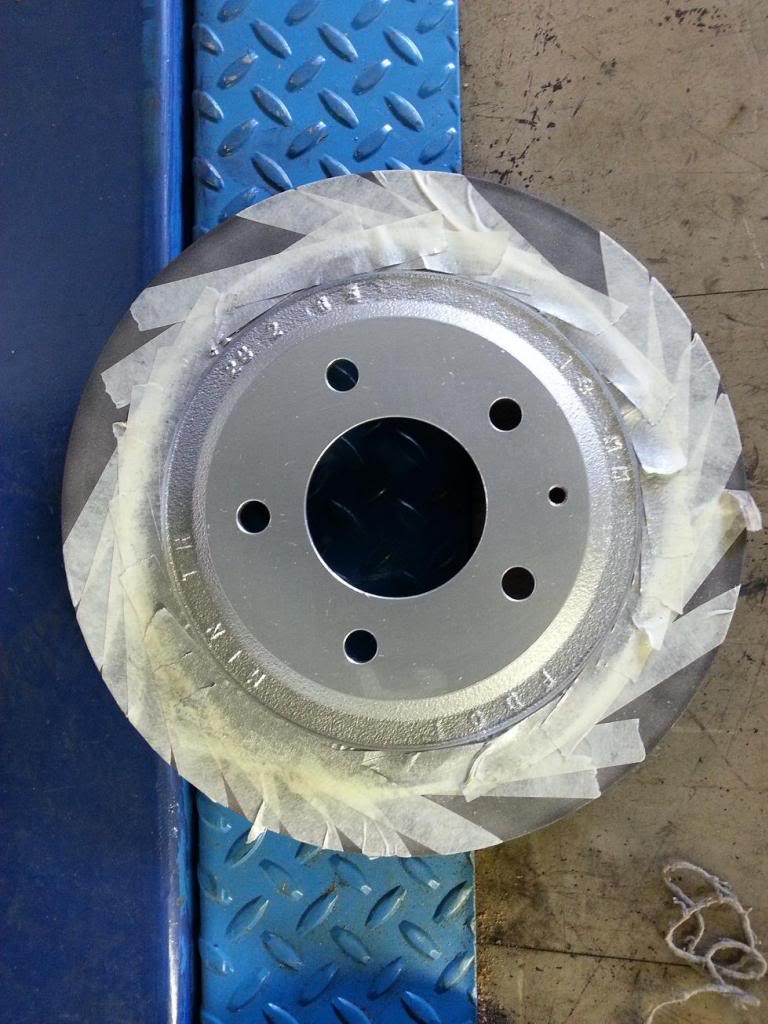
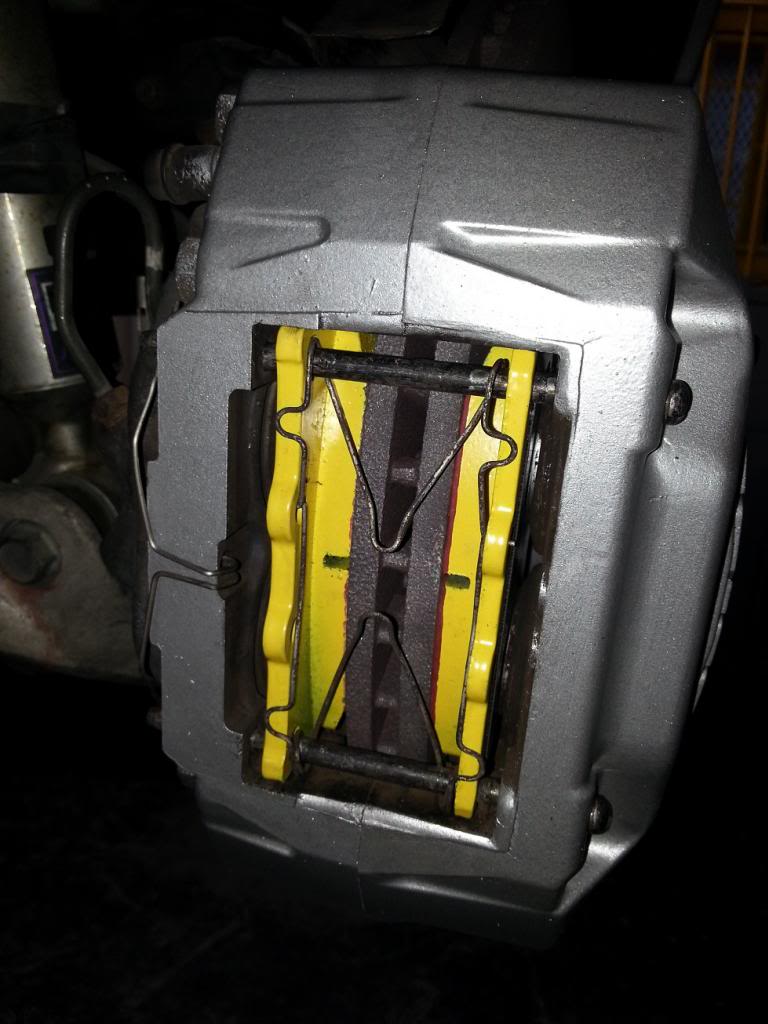
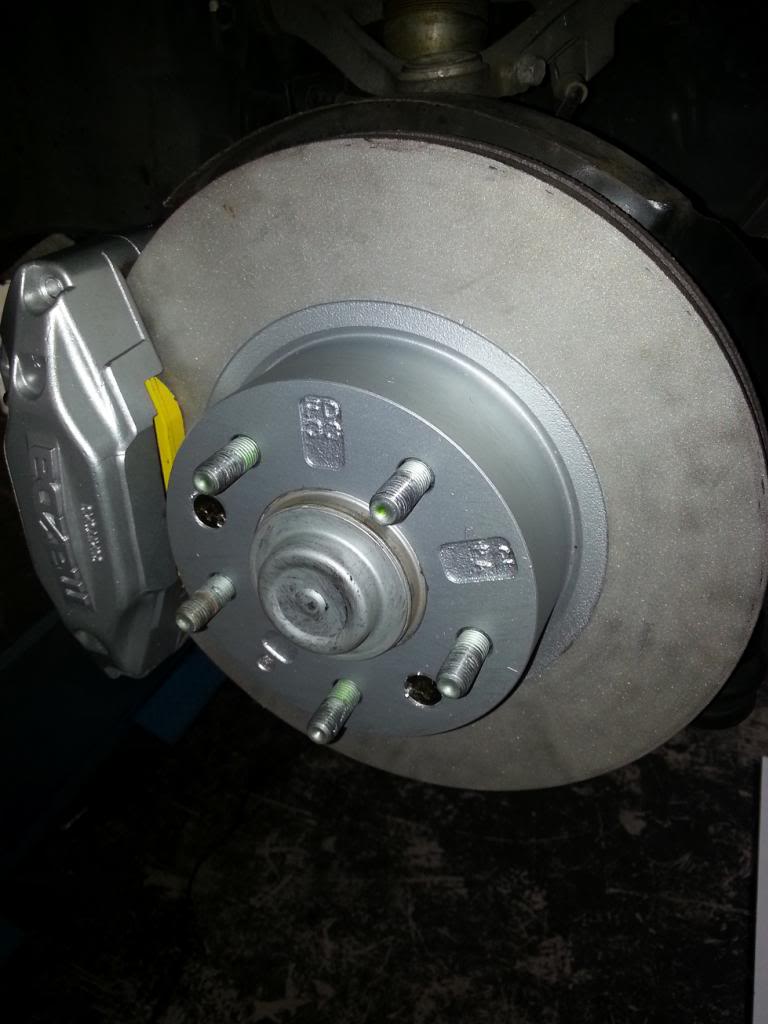
So the first thing we did was get some new EBC yellow stuff brake pads and refurbished the old discs. Gave them a sand blasting and a paint to prevent them from rusting and also gave the callipers a fresh coat of paint as well. Also a better picture of what the interior looked like and gave the engine bay a well deserved cleaning!


Thread Starter
Full Member
Joined: Feb 2013
Posts: 121
Likes: 0
From: South Africa
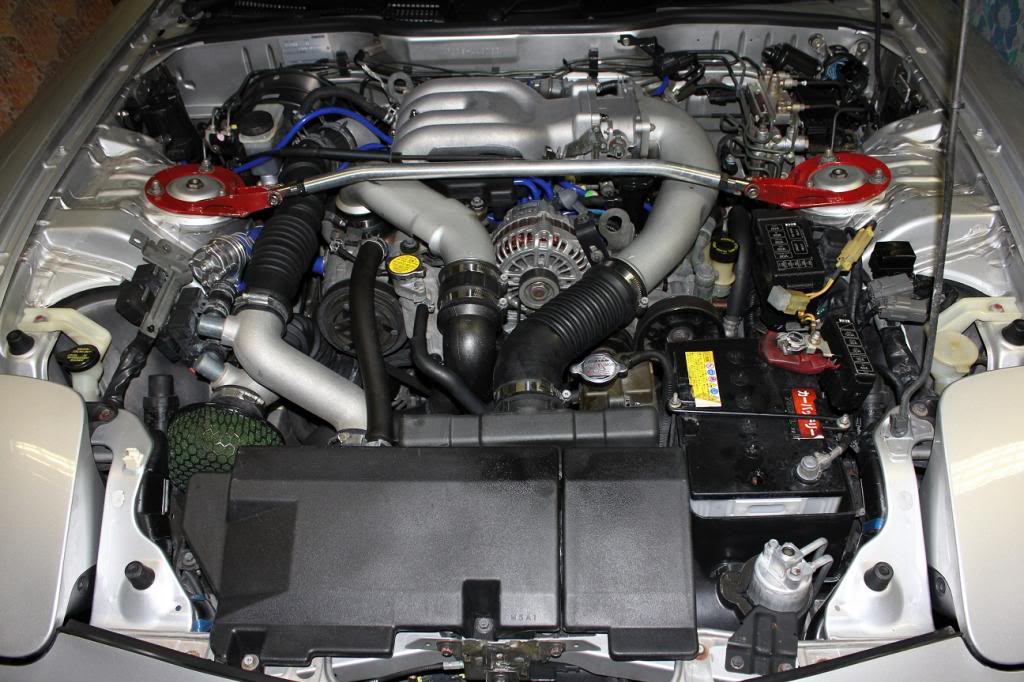
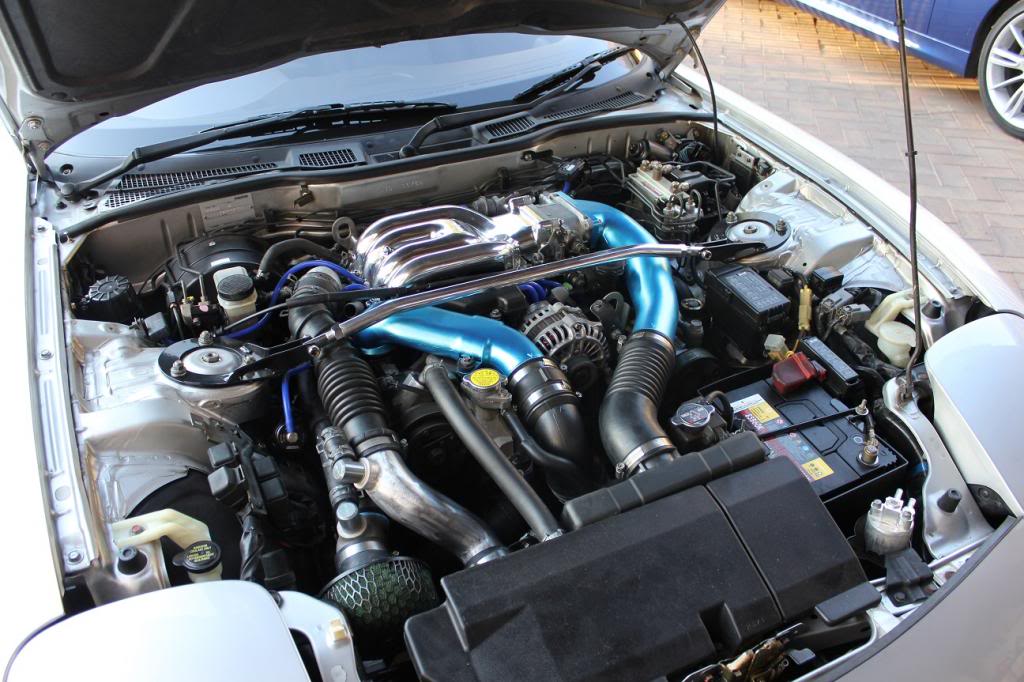
So I decided to give the engine bay some much needed attention.. So got a new battery as the one I had was battling to start the car, gave UIM and the strut bar a polish and also got its mounts powder coated black and painted the intake pipe a metallic blue which I figured looks good.. It's just amazing what a few things can do to make the engine bay have a much nicer appearance! Also picked up a new turbosmart dump valve..
The outcome was very pleasing! but wow, what a job to get it to where it is.. sanding for days
Before:

Busy sanding:

finally finished! not a job to be done in just one day!
The outcome was very pleasing! but wow, what a job to get it to where it is.. sanding for days
Before:
Busy sanding:
finally finished! not a job to be done in just one day!
Trending Topics
Thread Starter
Full Member
Joined: Feb 2013
Posts: 121
Likes: 0
From: South Africa
Time to update the thread, haven't had any time post anything lately.
Decided to fix up the crappy paint job done to the interior plastics, so sent in all the plastics to get hydro-dipped in a carbon style. This really made the interior look much better and more modern. taking apart all the plastics is not something I would want to do often cause all the clips and what not break so easily..


Decided to fix up the crappy paint job done to the interior plastics, so sent in all the plastics to get hydro-dipped in a carbon style. This really made the interior look much better and more modern. taking apart all the plastics is not something I would want to do often cause all the clips and what not break so easily..


Recovering Milkaholic
iTrader: (7)
Joined: Jan 2002
Posts: 8,206
Likes: 0
From: Budds Creek, Maryland
Time to update the thread, haven't had any time post anything lately. Decided to fix up the crappy paint job done to the interior plastics, so sent in all the plastics to get hydro-dipped in a carbon style. This really made the interior look much better and more modern. taking apart all the plastics is not something I would want to do often cause all the clips and what not break so easily..
Thread Starter
Full Member
Joined: Feb 2013
Posts: 121
Likes: 0
From: South Africa
So I enjoyed the car for the whole of last year with doing a few things here and there, all modifications that have been done have been either visually or for reliability. Drove her often during the week putting about 3000km on her in about 10 months pulling strong.. then I decided to take her to the coast in December which is 600km away and roughly 1500m lower altitude and wow, car performed like a beast!! Then things took a turn for the worst..  2 days before I was supposed to leave, Rexy decided to blow an apex seal although I didn't diagnose the problem straight away as a blown motor, I tried a few things to get her started but nothing.. I have family close to where I was staying so I could stay there until I could organise someone to come from home with a trailer to pick me up.. So I got back home and took the plugs out and turn the motor by hand and soon saw what was wrong..
I personally think the car was somehow running lean and by taking it to a lower altitude made things even worse..
I haven't opened the motor yet but have pulled it out of the car.. looks like some serious damage has been done to the motor by the looks of it.. rotor is definitely not usable..
But I guess this is all part of the fun when buying one of these cars

2 days before I was supposed to leave, Rexy decided to blow an apex seal although I didn't diagnose the problem straight away as a blown motor, I tried a few things to get her started but nothing.. I have family close to where I was staying so I could stay there until I could organise someone to come from home with a trailer to pick me up.. So I got back home and took the plugs out and turn the motor by hand and soon saw what was wrong..I personally think the car was somehow running lean and by taking it to a lower altitude made things even worse..
I haven't opened the motor yet but have pulled it out of the car.. looks like some serious damage has been done to the motor by the looks of it.. rotor is definitely not usable..
But I guess this is all part of the fun when buying one of these cars
Thread Starter
Full Member
Joined: Feb 2013
Posts: 121
Likes: 0
From: South Africa
Thread Starter
Full Member
Joined: Feb 2013
Posts: 121
Likes: 0
From: South Africa
Pictures of when the motor was pulled. Decided to pull the gearbox at the same time because I didn't feel like struggling with the separation of the clutch and also the box was battling with 2nd and 3rd gear as well as making a grinding noise when a load was put on it at a low RPM.. don't know what's causing it?


Thread Starter
Full Member
Joined: Feb 2013
Posts: 121
Likes: 0
From: South Africa
So the cars been out of commission for about 6 months now but I'm not in a big rush to get it up and running, When things get rushed they don't often turn out like they should especially in this case..
So I decide to install some speakers in the car, now I know a lot of you will probably think that it's just a lot of weight being added to the car and it's overkill for the size of the car, but I love my music.. it calms me down
My main aim with the subwoofer enclosure was to get it to the shape and height of the boot cover so that when its closed it will fit snug.. So off I went to the hardware and bought some wood and began with the box..
Took a while but eventually finished everything.. There's a 600watt Rms mono block pushing two JBL 12inch 300watt RMS each subs and a 4 channel pushing Focal 5-1/4 inch speakers at the front and Focal 5x7 inch at the back and also decided to update the head unit to a Kenwood 4033bt.. Extremely nice head unit
Thread Starter
Full Member
Joined: Feb 2013
Posts: 121
Likes: 0
From: South Africa
Update.
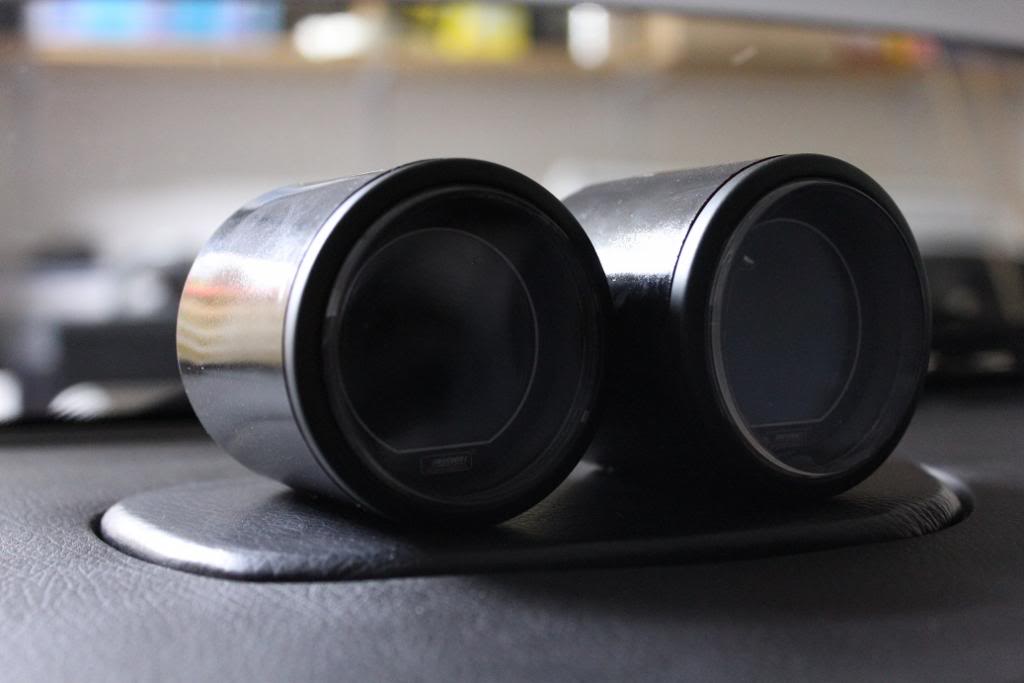
Decided to get rid of the Greddy gauges on the A-pillar as they cause such an obstruction when you driving and irritate me. So I got some 52mm gauges and made a custom gauge pod for the centre speaker as I didn't want to spend 100+ $$ on a piece of plastic. Came out nice I guess?

Thread Starter
Full Member
Joined: Feb 2013
Posts: 121
Likes: 0
From: South Africa
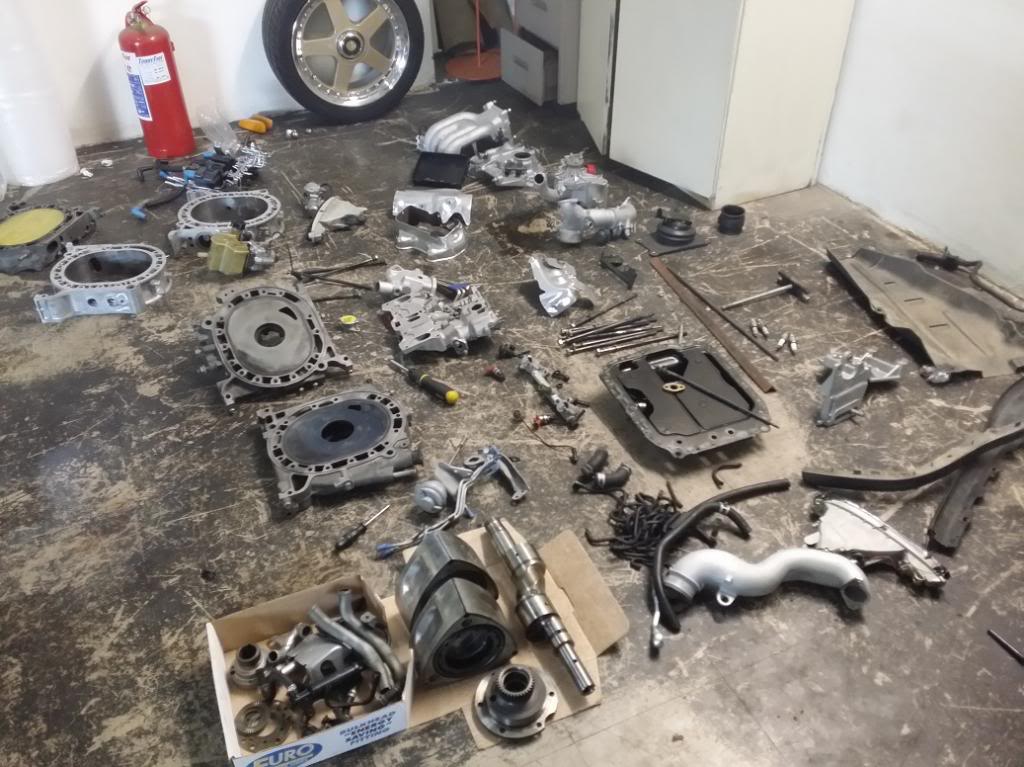
Got a replacement engine thinking, well I'll just take out the blown one and put the one I bought in to get the car running again while I rebuild the other.. I thought wrong.. I decided to turn the motor with a drilling machine and the bottom plugs out and to my disappointment there was hardly any compression in general and no compression on two of the rear faces.. So I decided to not take the motor back to the supplier and stripped it for a rebuild..
Turns out the stationary bearings are on their way.
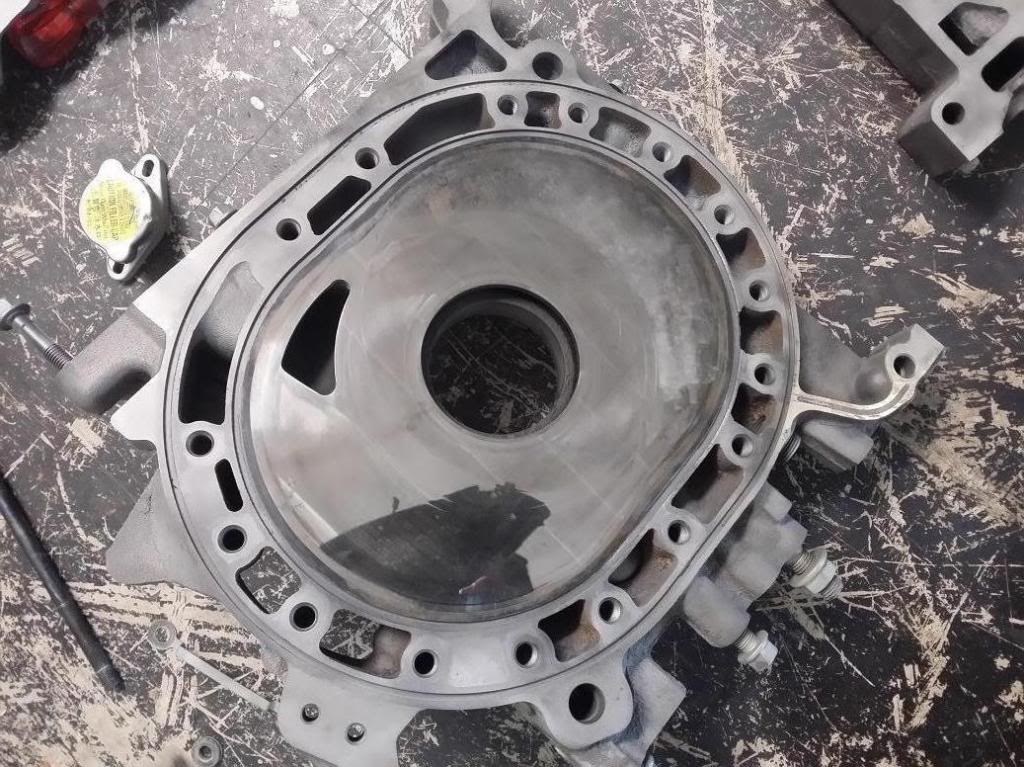
One water jacket wall broke on the front plate.
One of the side seal slots and apex seal slots on the rear rotor have been pinched, something a small file would fix.
And surprisingly the housings were still in a good condition.
You can see the water jacket at the bottom of the plate.
This is my first time rebuilding a motor.. Hope everything goes back correctly
Turns out the stationary bearings are on their way.
One water jacket wall broke on the front plate.
One of the side seal slots and apex seal slots on the rear rotor have been pinched, something a small file would fix.
And surprisingly the housings were still in a good condition.
You can see the water jacket at the bottom of the plate.
This is my first time rebuilding a motor.. Hope everything goes back correctly
Thread Starter
Full Member
Joined: Feb 2013
Posts: 121
Likes: 0
From: South Africa
A question as well, I recall when disassembling the motor one of the corner seals didn't have a spring, now I cant remember if I just missed it and it fell out while handling the rotor or it just didn't have one at all, but what would happen if no corner spring was present?

A question as well, I recall when disassembling the motor one of the corner seals didn't have a spring, now I cant remember if I just missed it and it fell out while handling the rotor or it just didn't have one at all, but what would happen if no corner spring was present?

Thread
Thread Starter
Forum
Replies
Last Post
Azevedo
Other Engine Conversions - non V-8
26
Mar 1, 2019 09:19 PM