Mannykillers/ AAPARKAH Street/time Attack/Drift Build (heavy Pics) #Thisisthewolf
 04-17-14, 10:10 AM
#1826
What's going on Aaron?! Your build is nuts bro! I wish I had time to take on a task like this. It's coming along great man. Just don't let barriers get you frustrated because in the end, it will all be worth it. Looking forward to seeing the final product.

 04-18-14, 11:42 AM
#1829
Small Update:
My battery install took much longer than expected haha. I spent all day after 2 re doing the whole thing. I had to go help a buddy put up a wooden fence at his rental that took about 30 min but then I was back at it. It was funny though...I got there...and lined up all the post support beam mounts before we started and he was like.. "what are you doing?..." I was like.."this is faster man...I got **** to do on the car." Hah.. he was like.. "guess your right."
Anyways. I mounted the battery mount in the same location as the battery box previously. The only difference was I used better hardware and Now I had a ton of room. I had to re-route my coil ignition harness for the direct fire AEM coils around the cage ..which meant pulling the whole thing off and feeding it through the necessary bars. I didn't want anything to be ran on the inside of the cage. I have some braided covering I'll be putting on that will make things look neater but First I had to make sure I had everything planned correctly so it wasn't all un organized etc. Started with mounting the battery...then ran grounds and power wires.
But before all of this I had to clean all of the overspray off and extra flake dust/paint from the entire cabin. That took a while but glad most of it is gone at least..
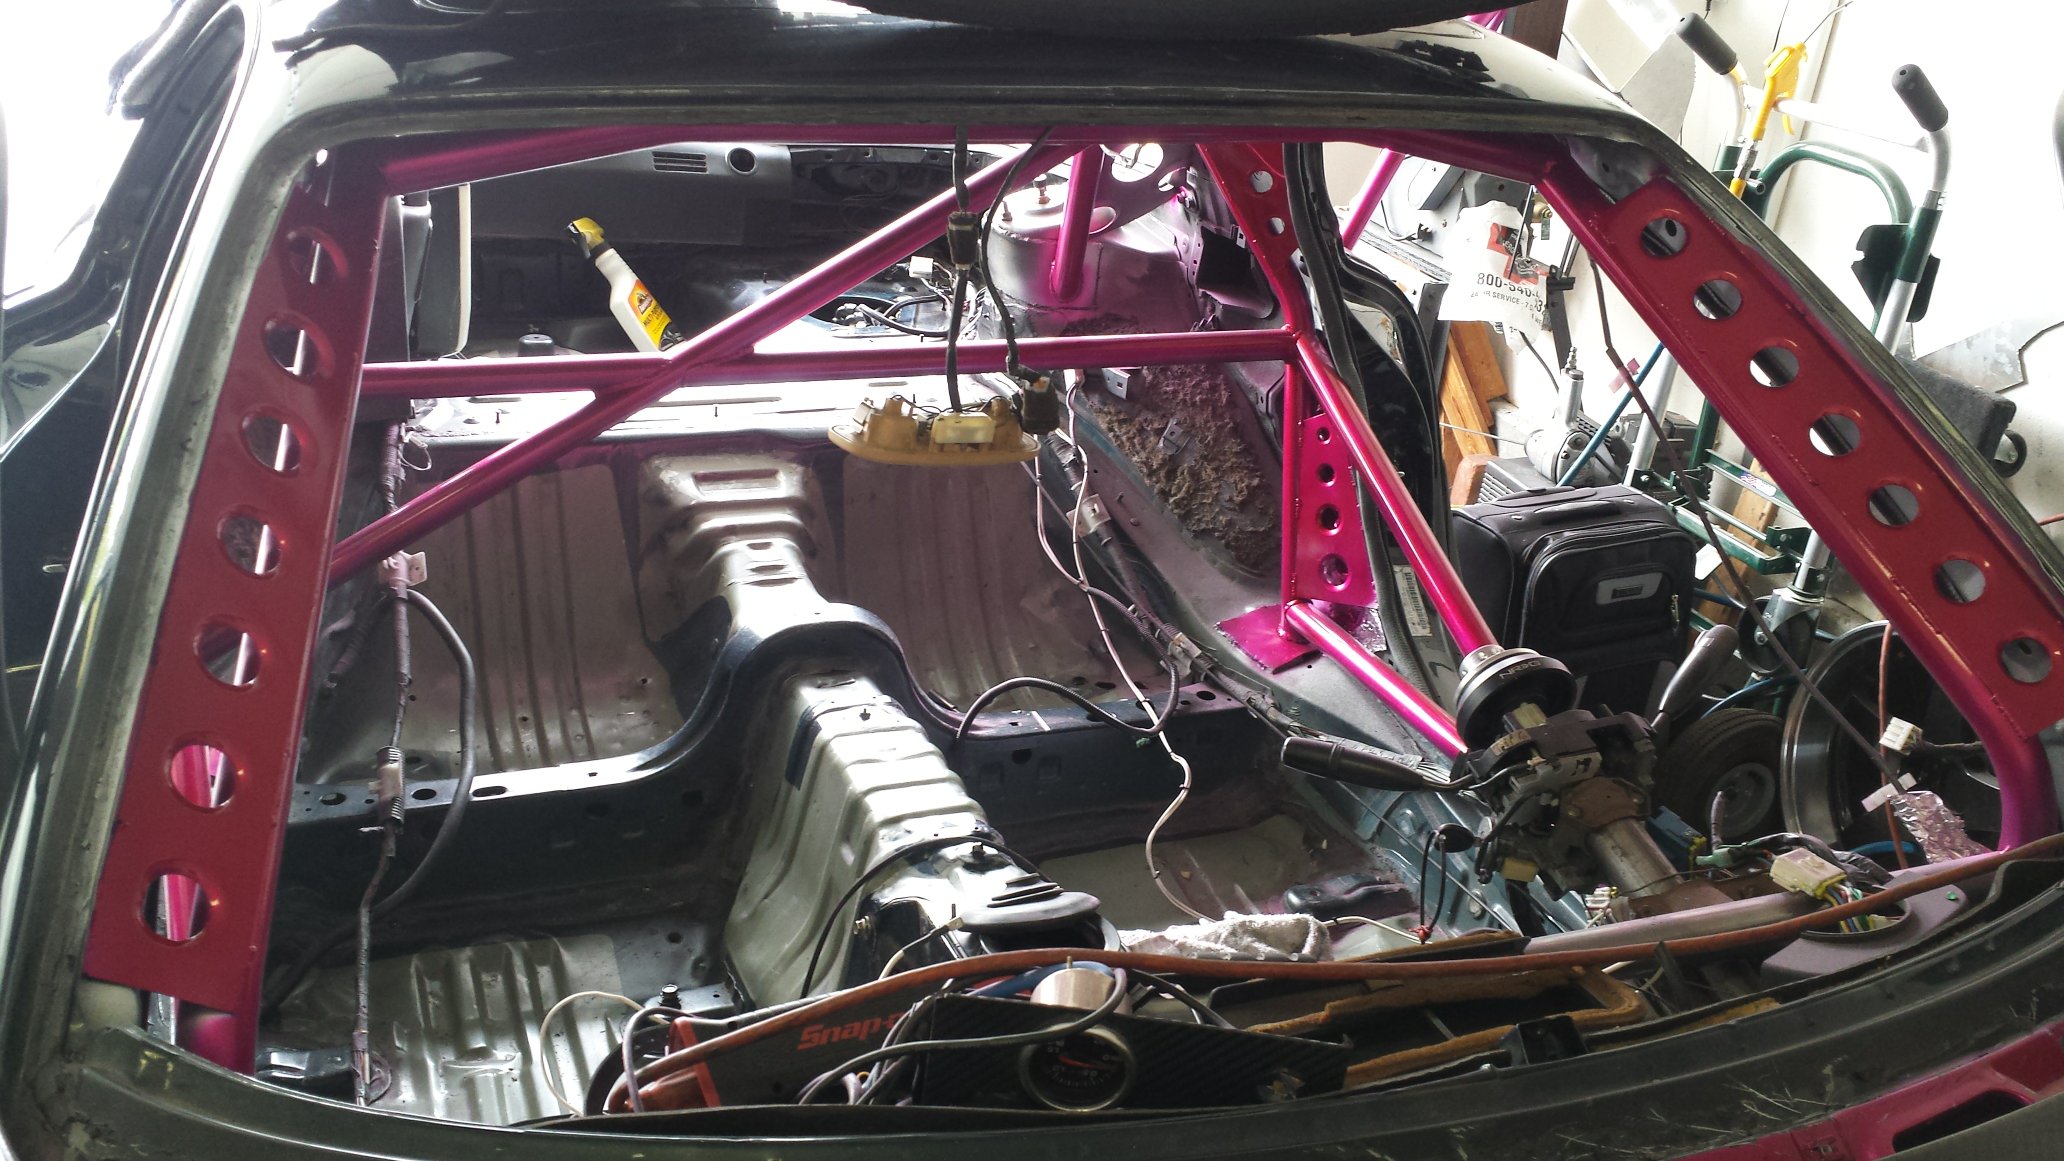
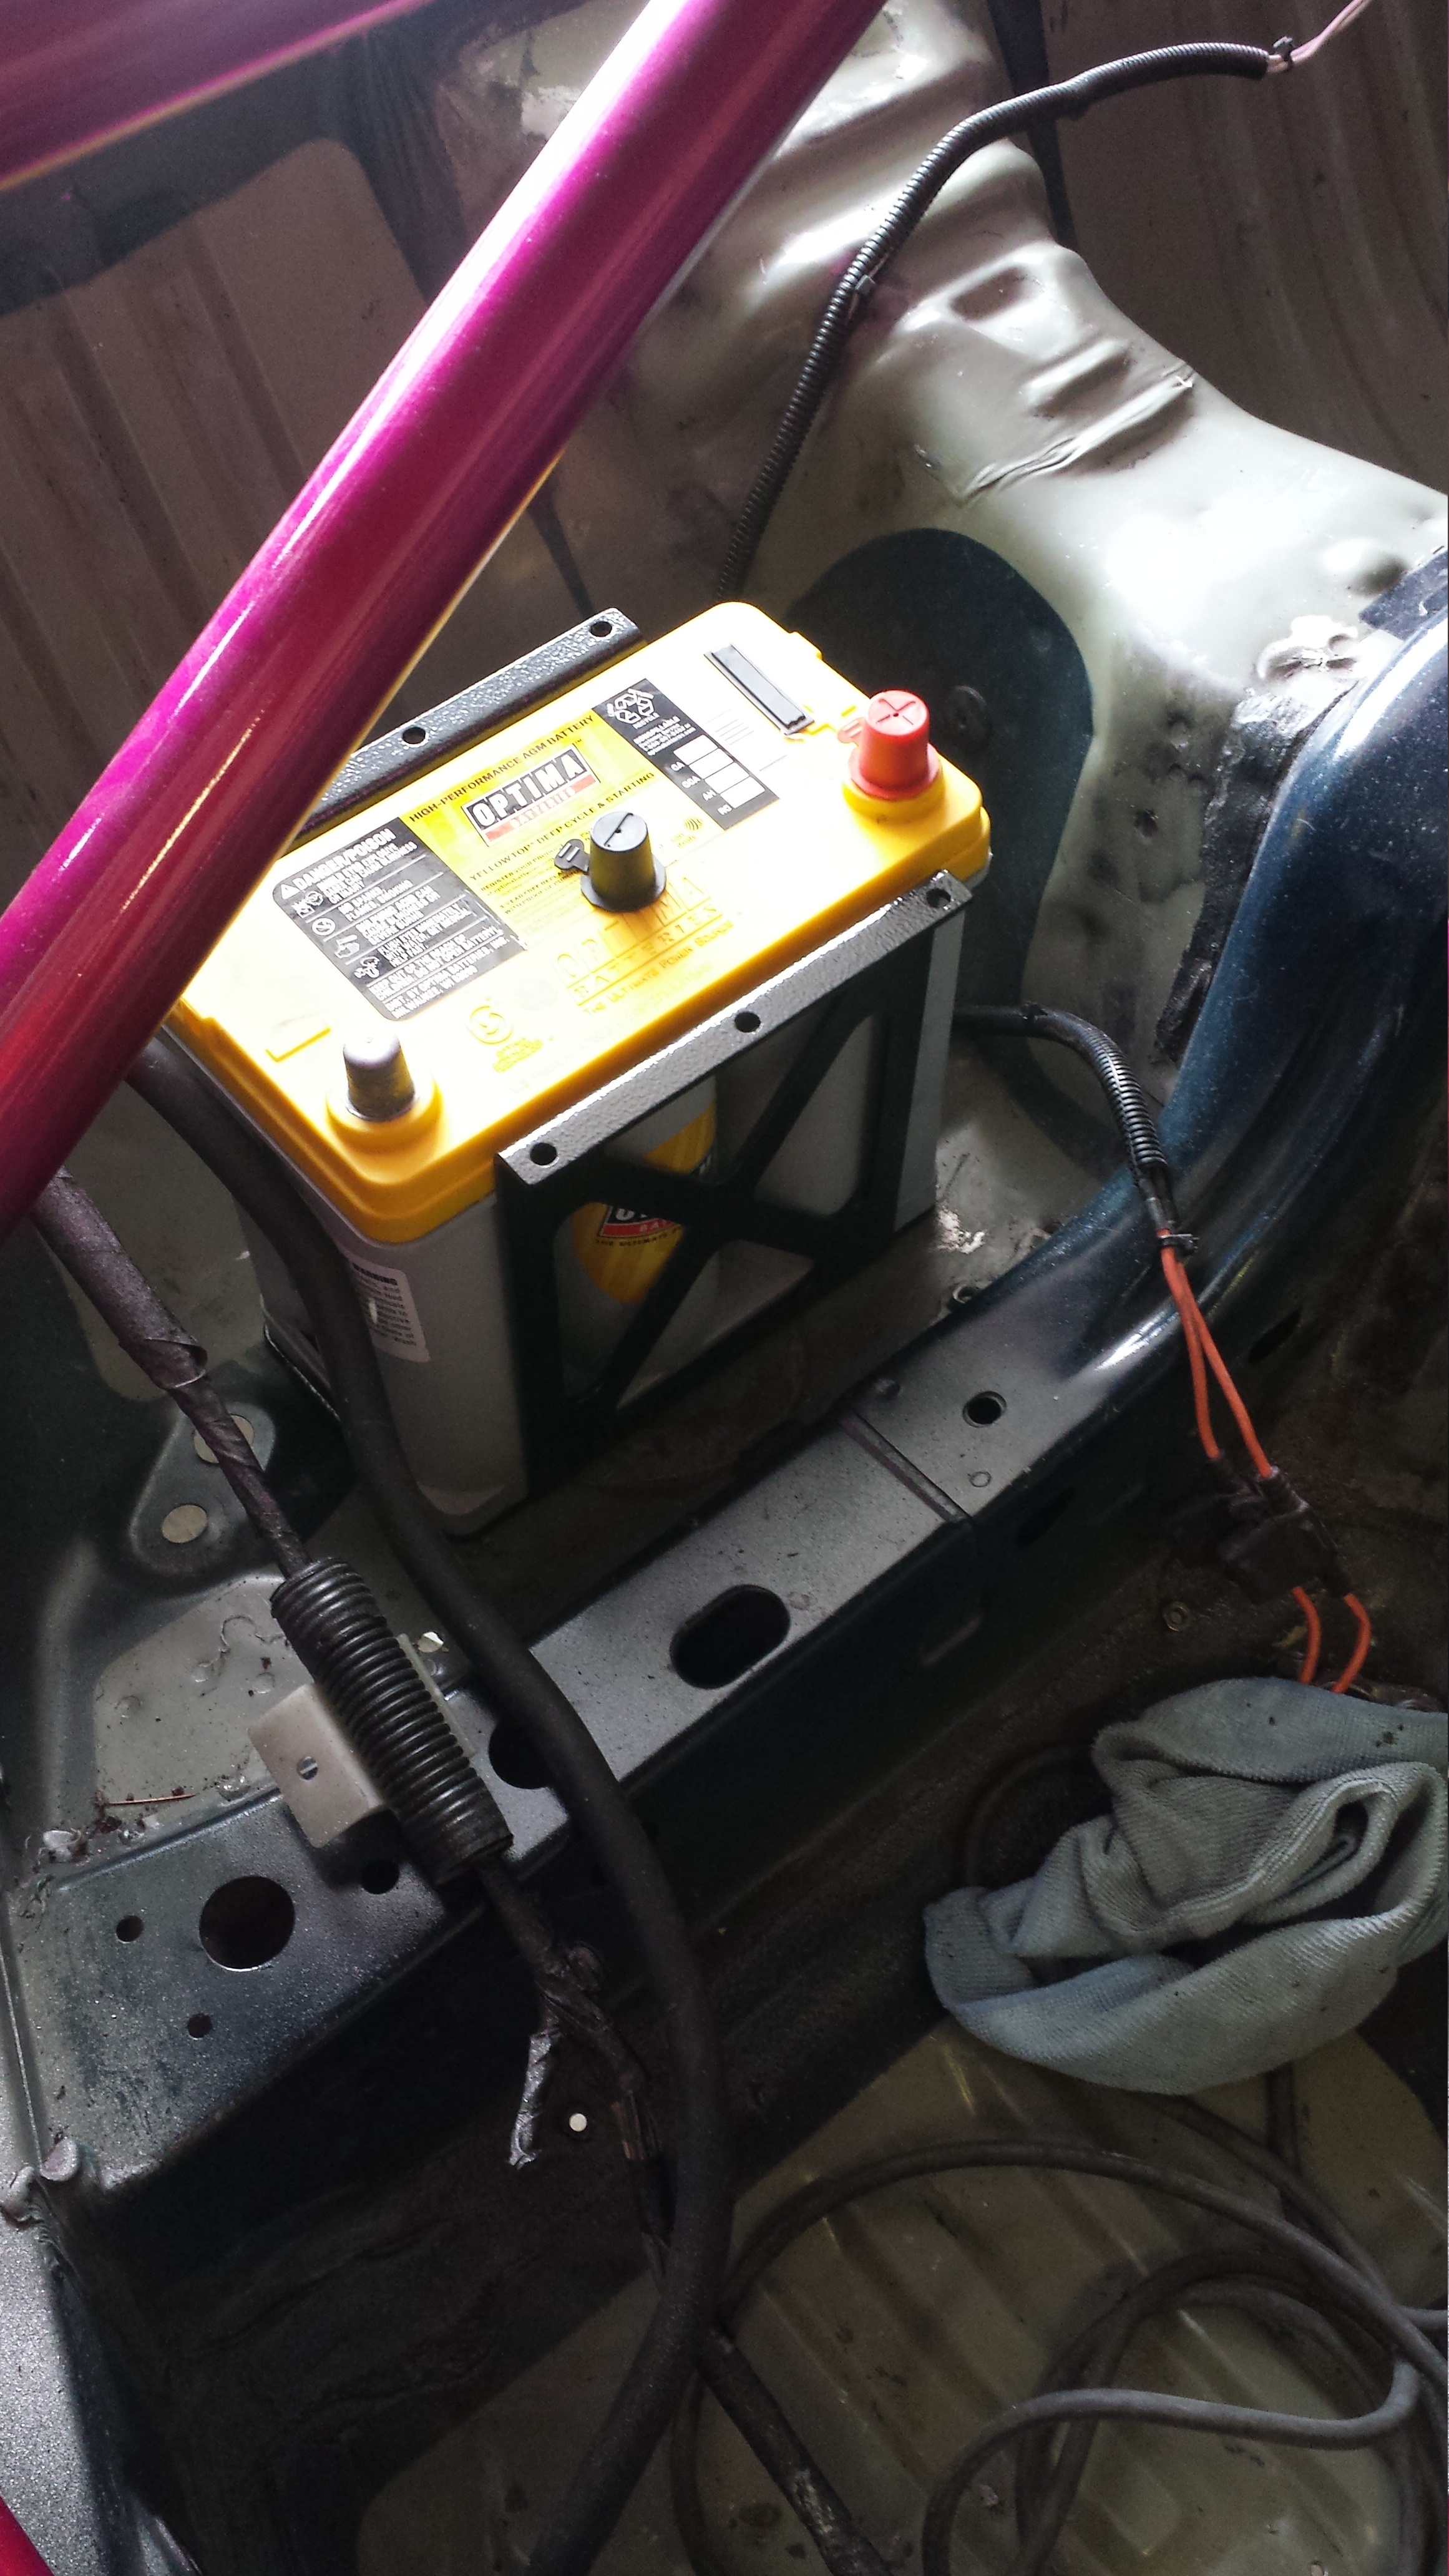
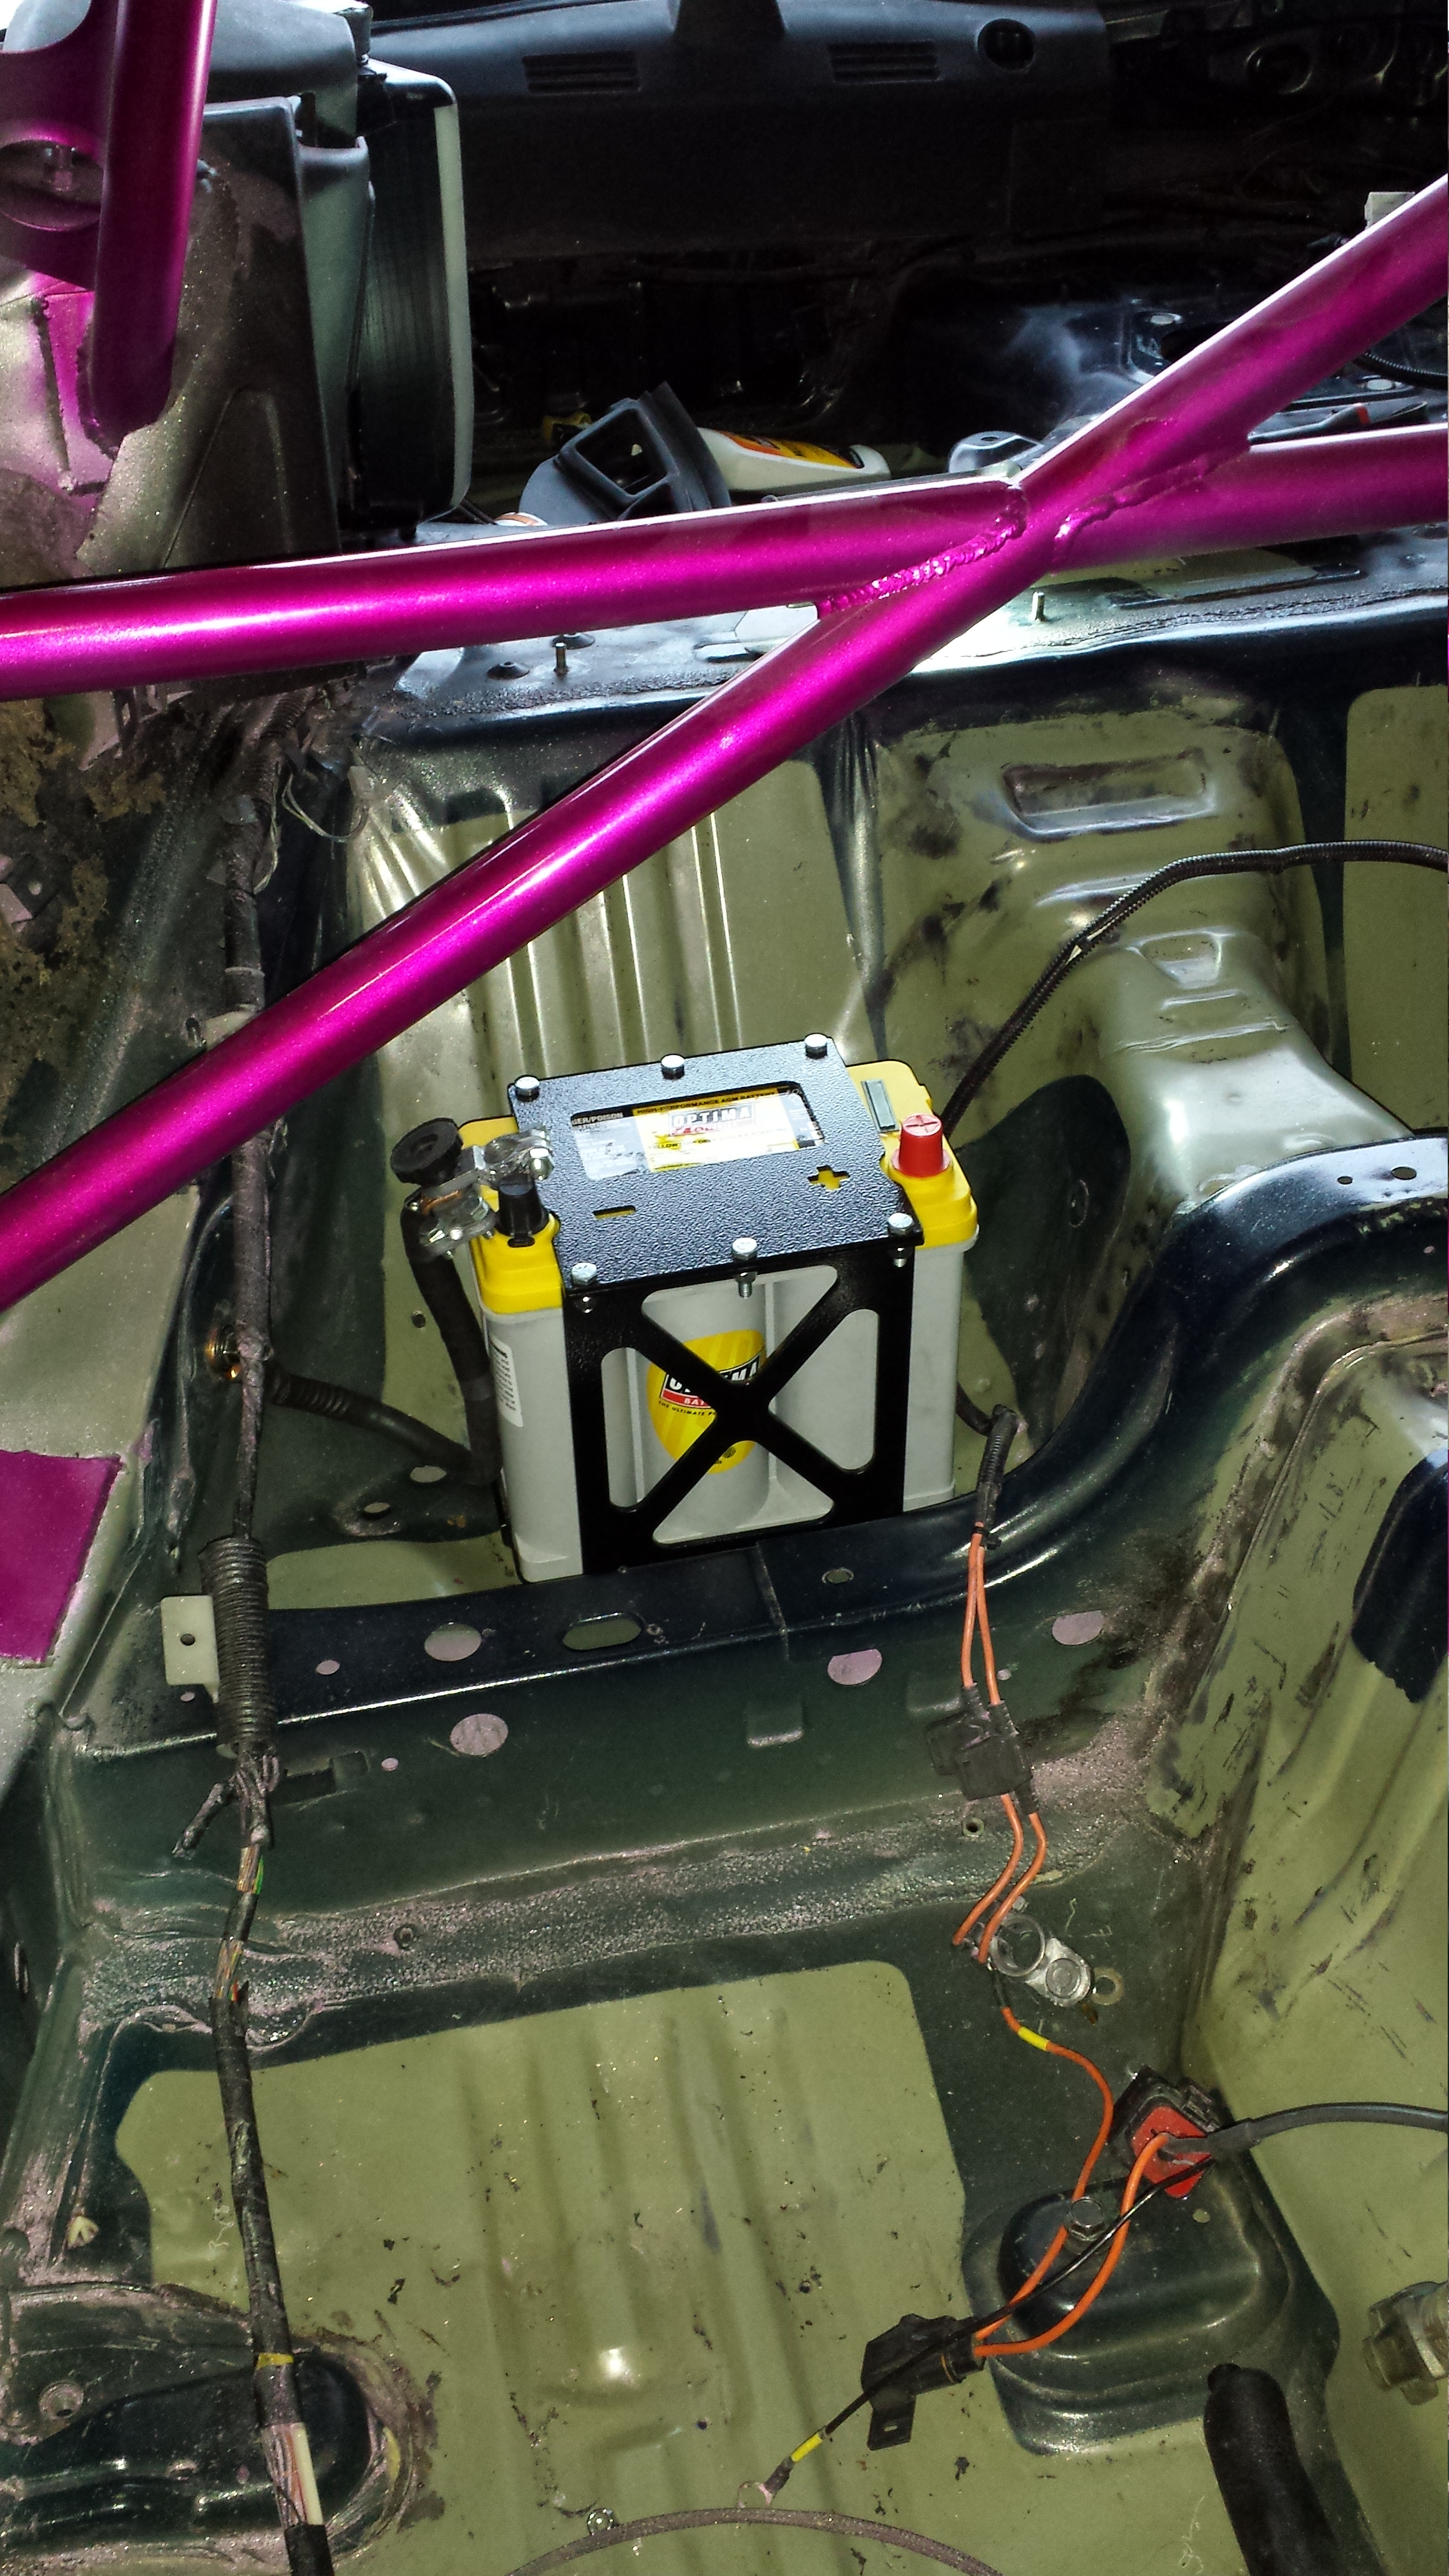
Where I would mount the Optima yellowtop d51R..love this battery braket by the way..really sturdy too!!
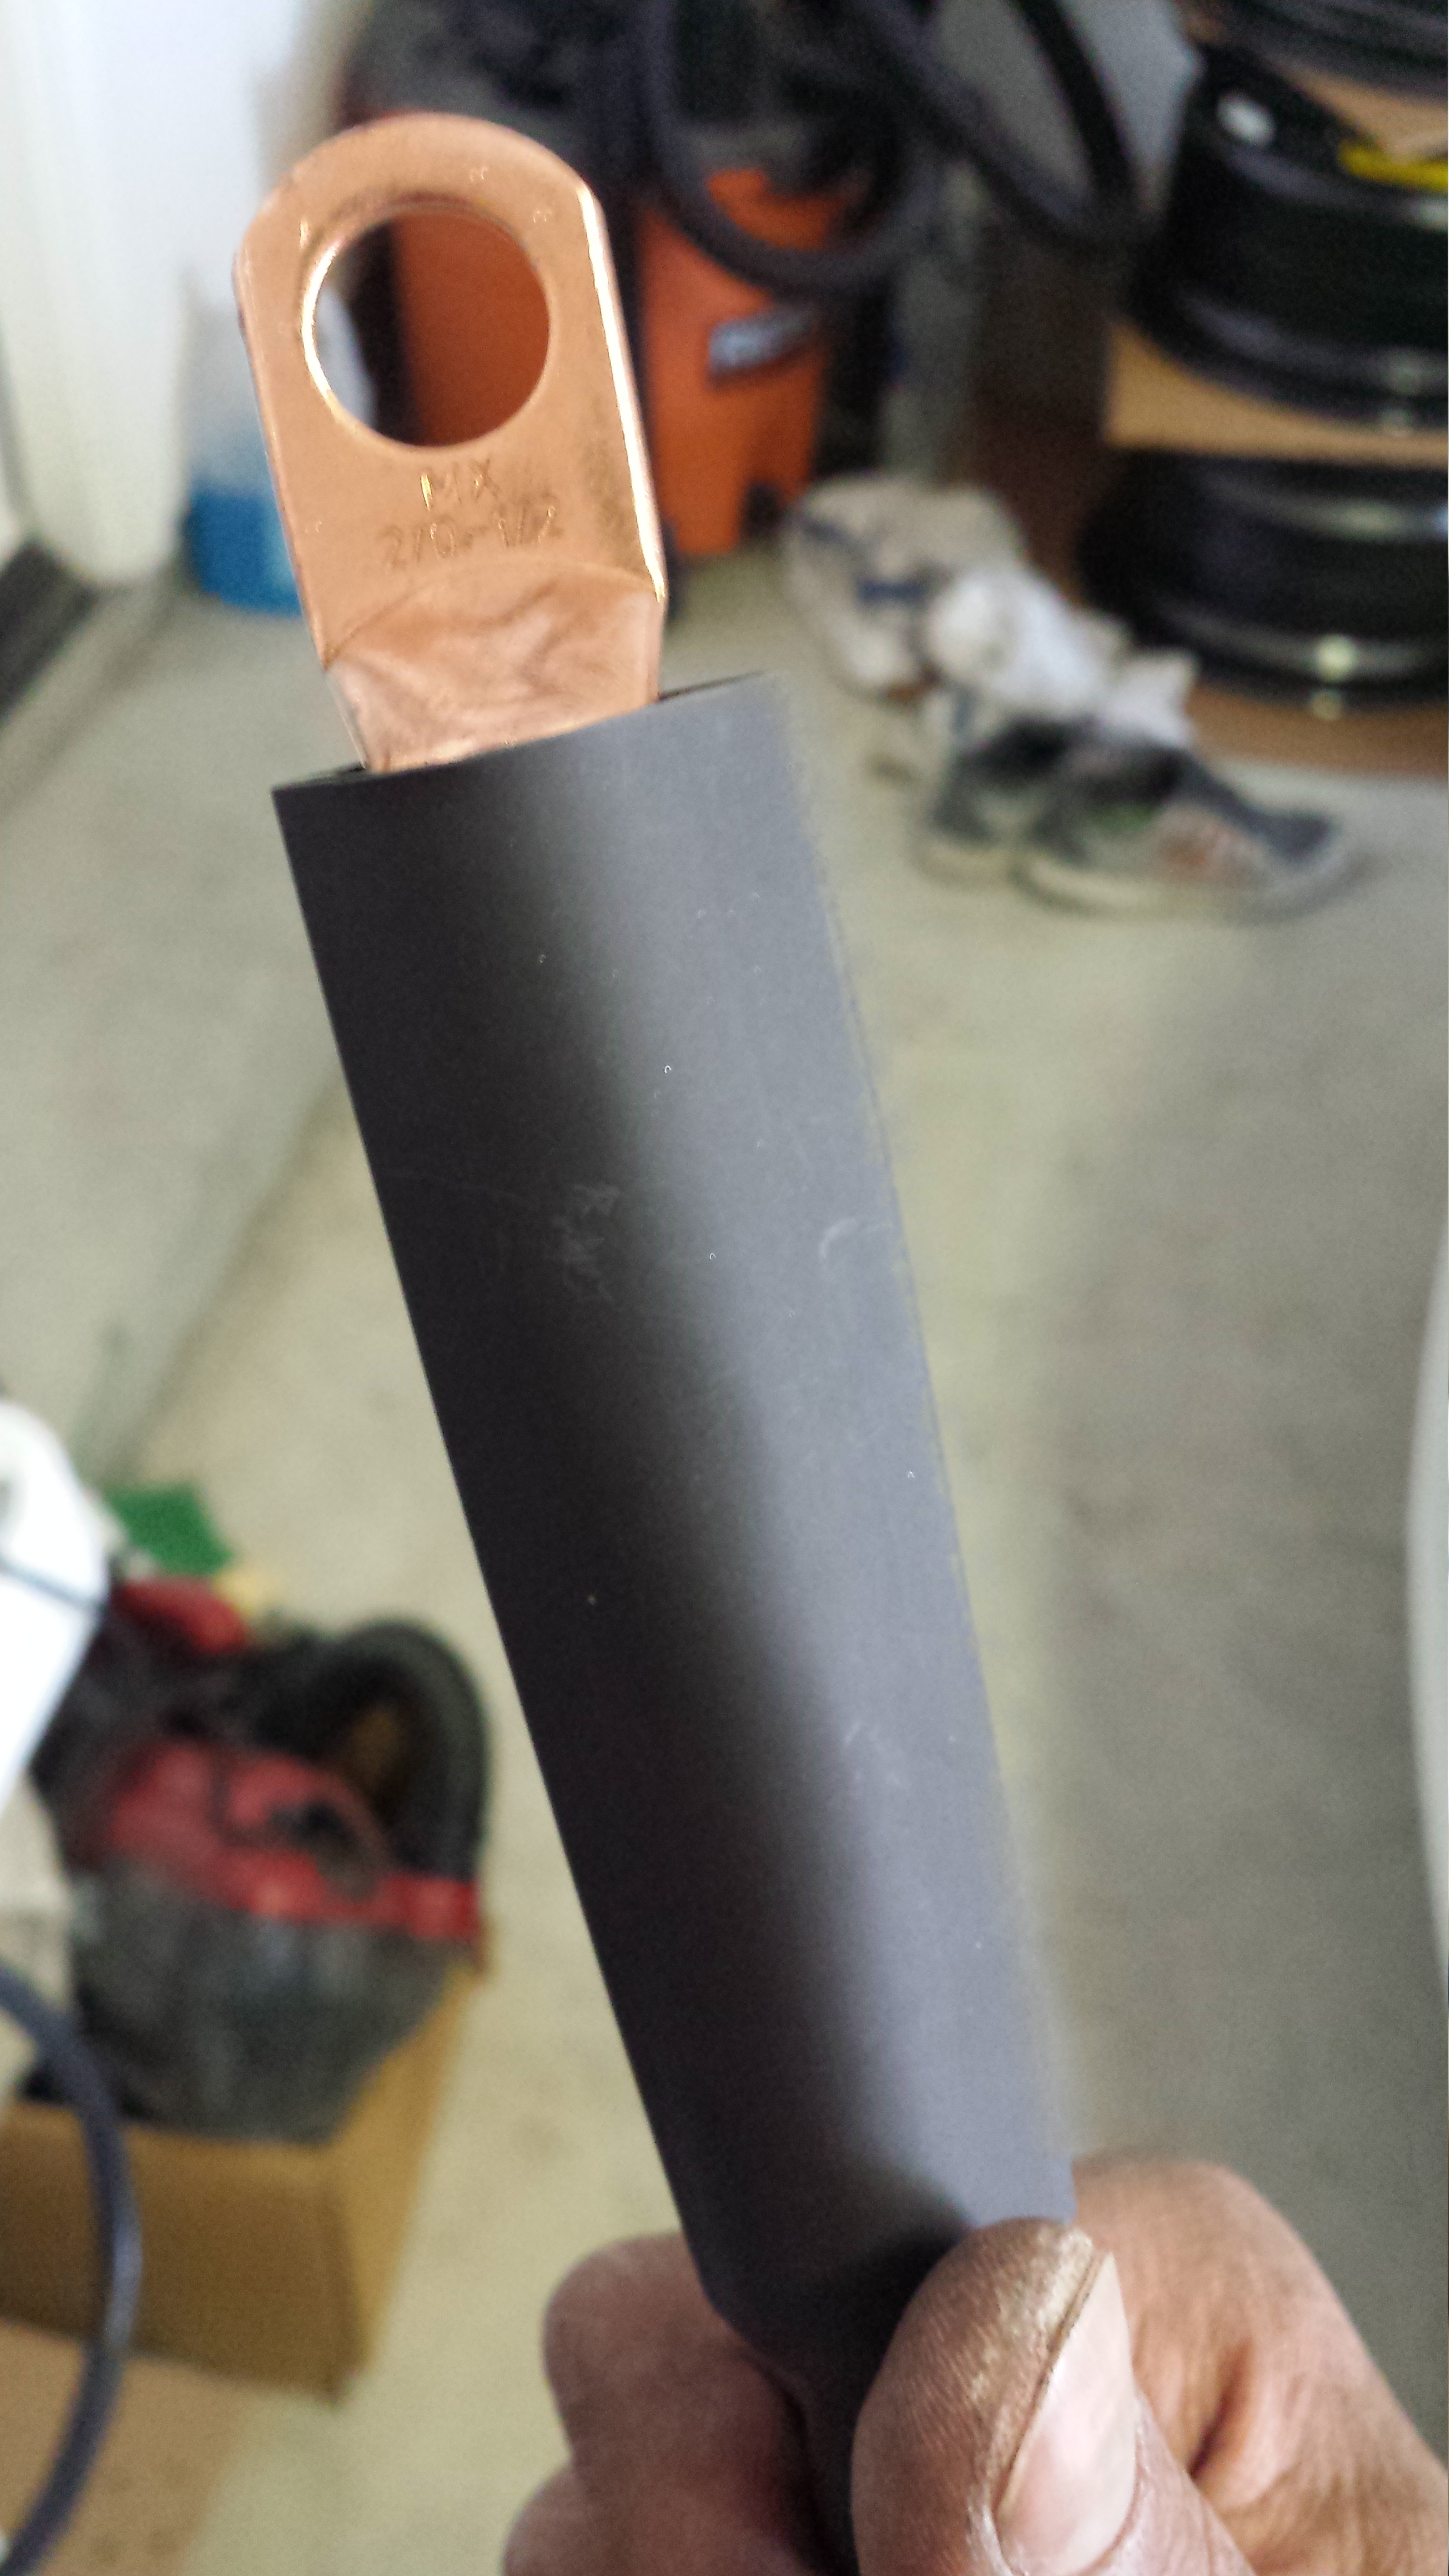
then worked on the ground cable.. I wanted it to be much shorter than it was. So I cut out about 16" built up a ton of solder then hit it with a torch and it sucked the solder straight in. Thanks Shawn for the tip! forgot to take pics but it was a bit hard with 2 hands.

Best part..looking clean!!

Not bad!
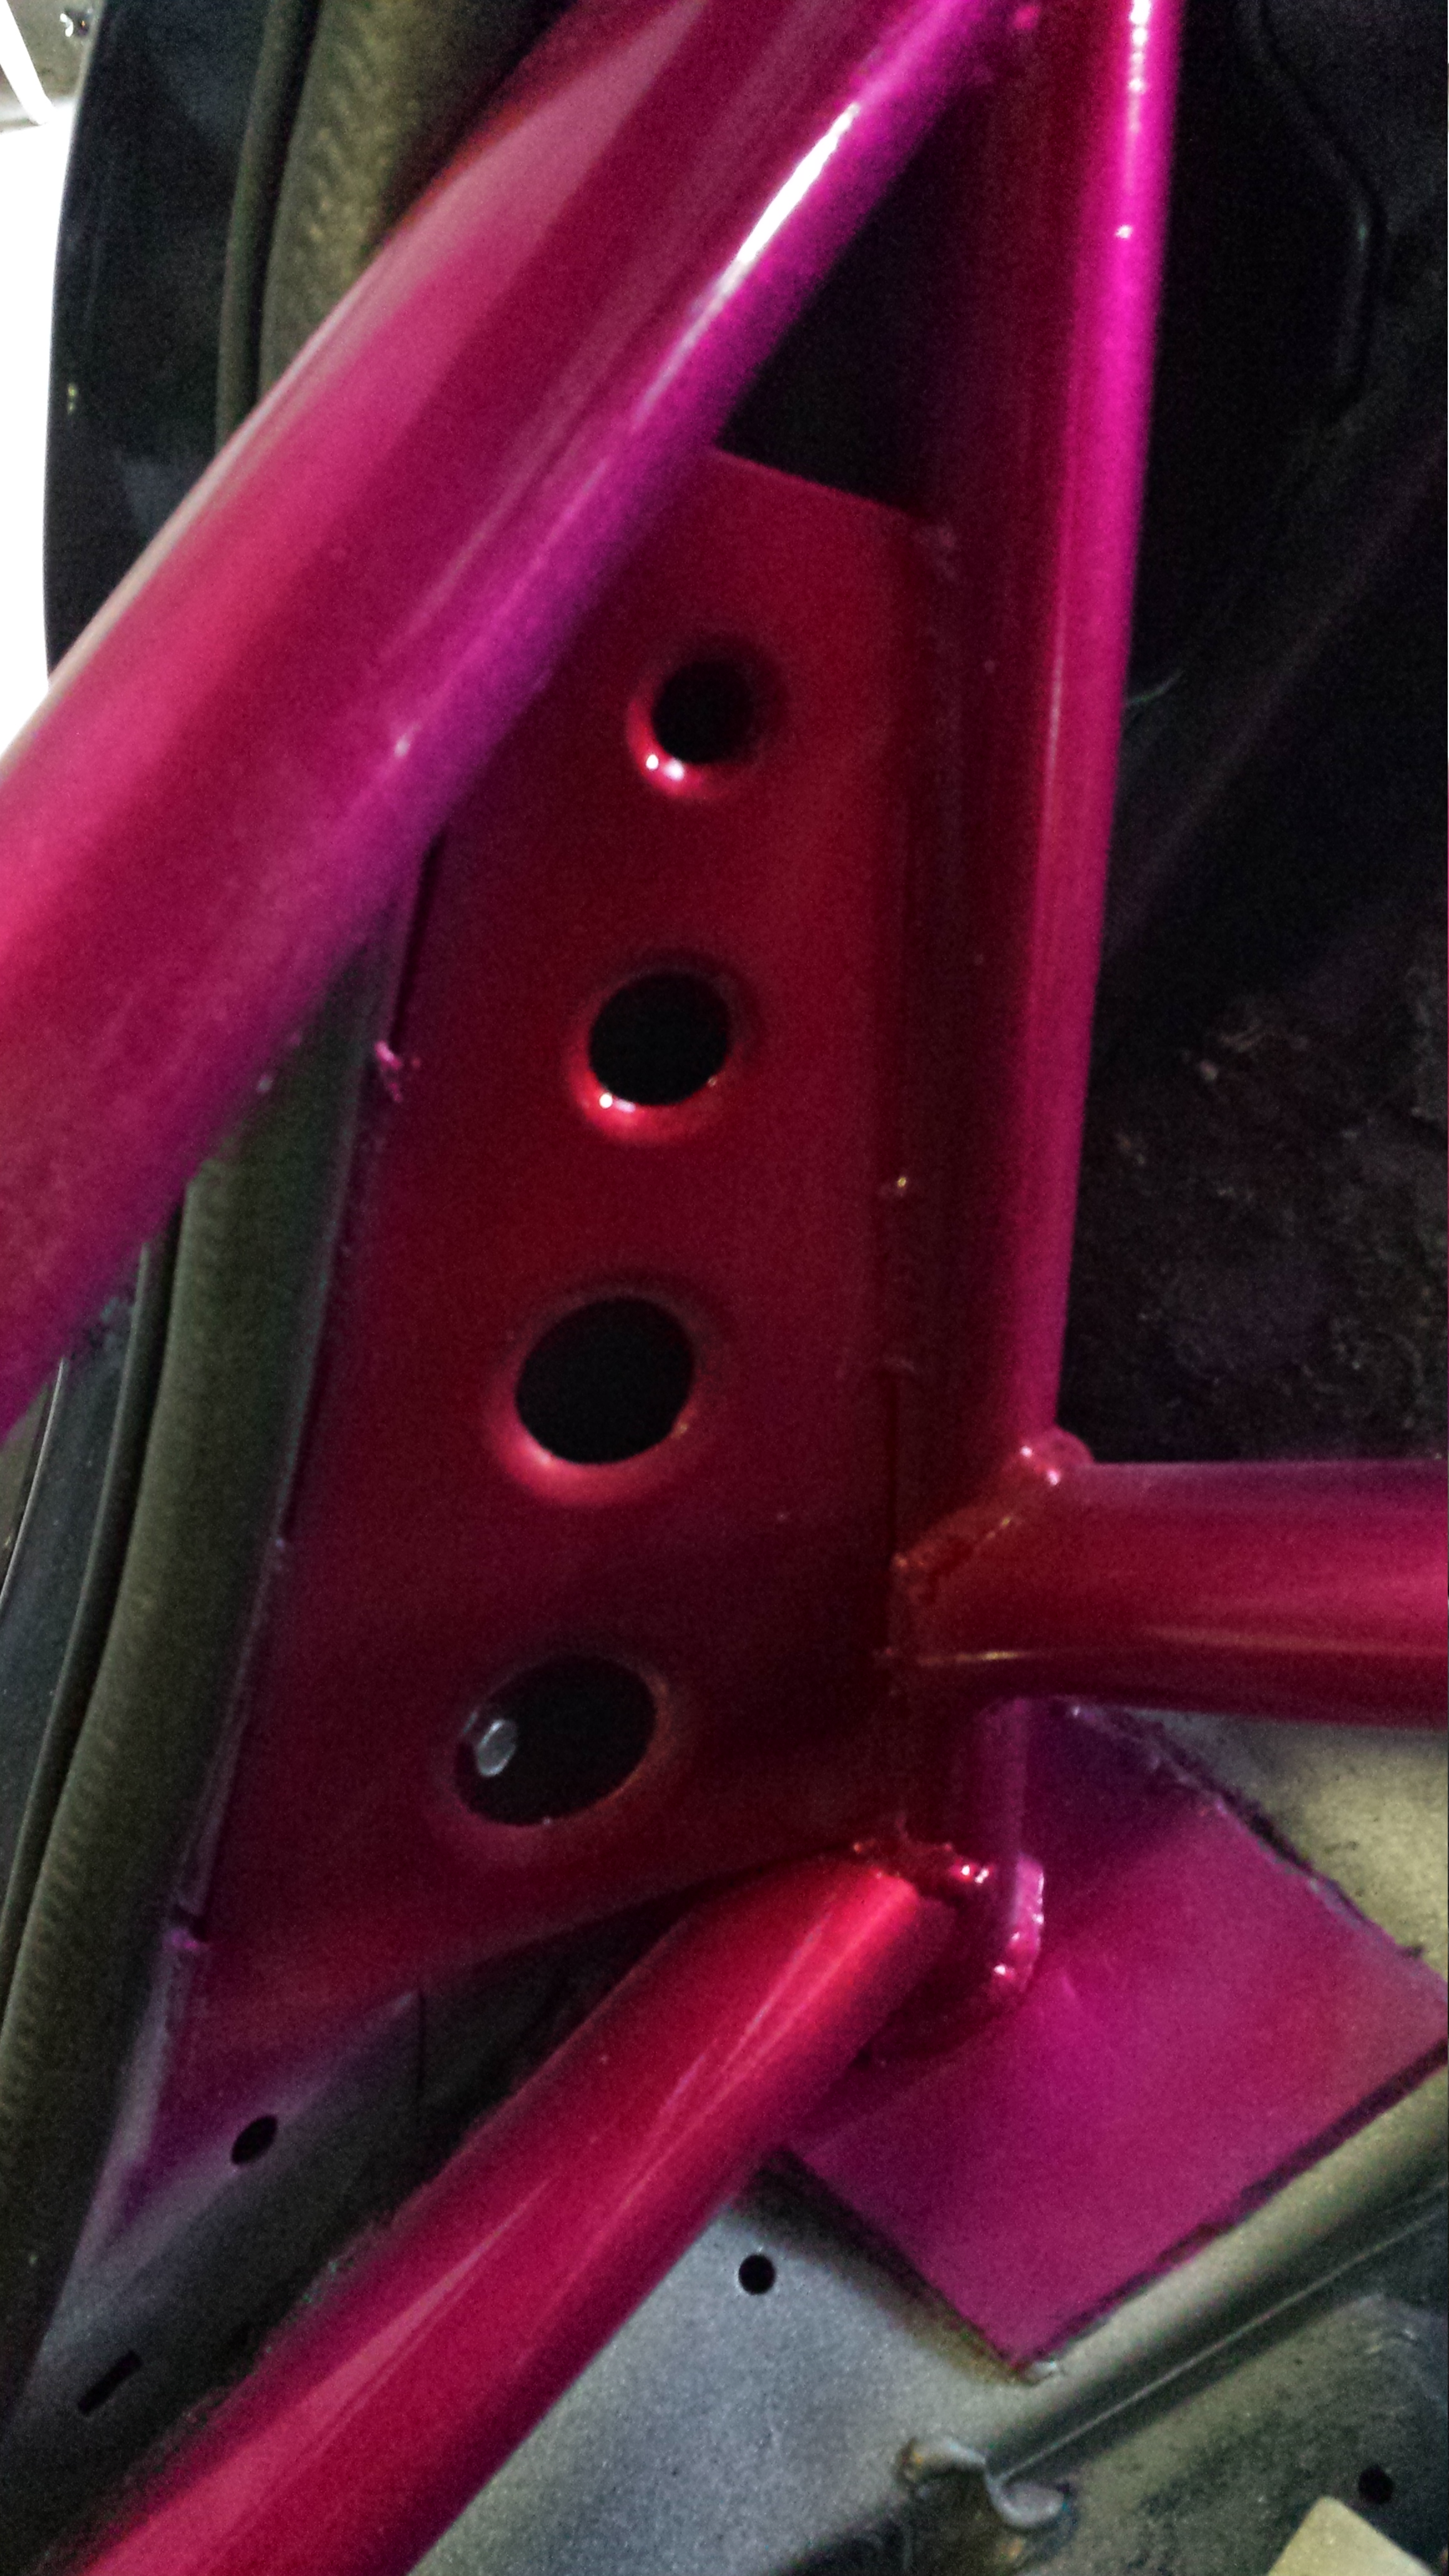
The paint came out pretty good. It's not perfect but the clear should protect it a little bit at least. I also have some lighter spots on the undersides of the bars because I got lazy and didn't want to get on my back and shoot the paint.
Work process, had to cut and solder some things to clean up excessive lengths and re-route things
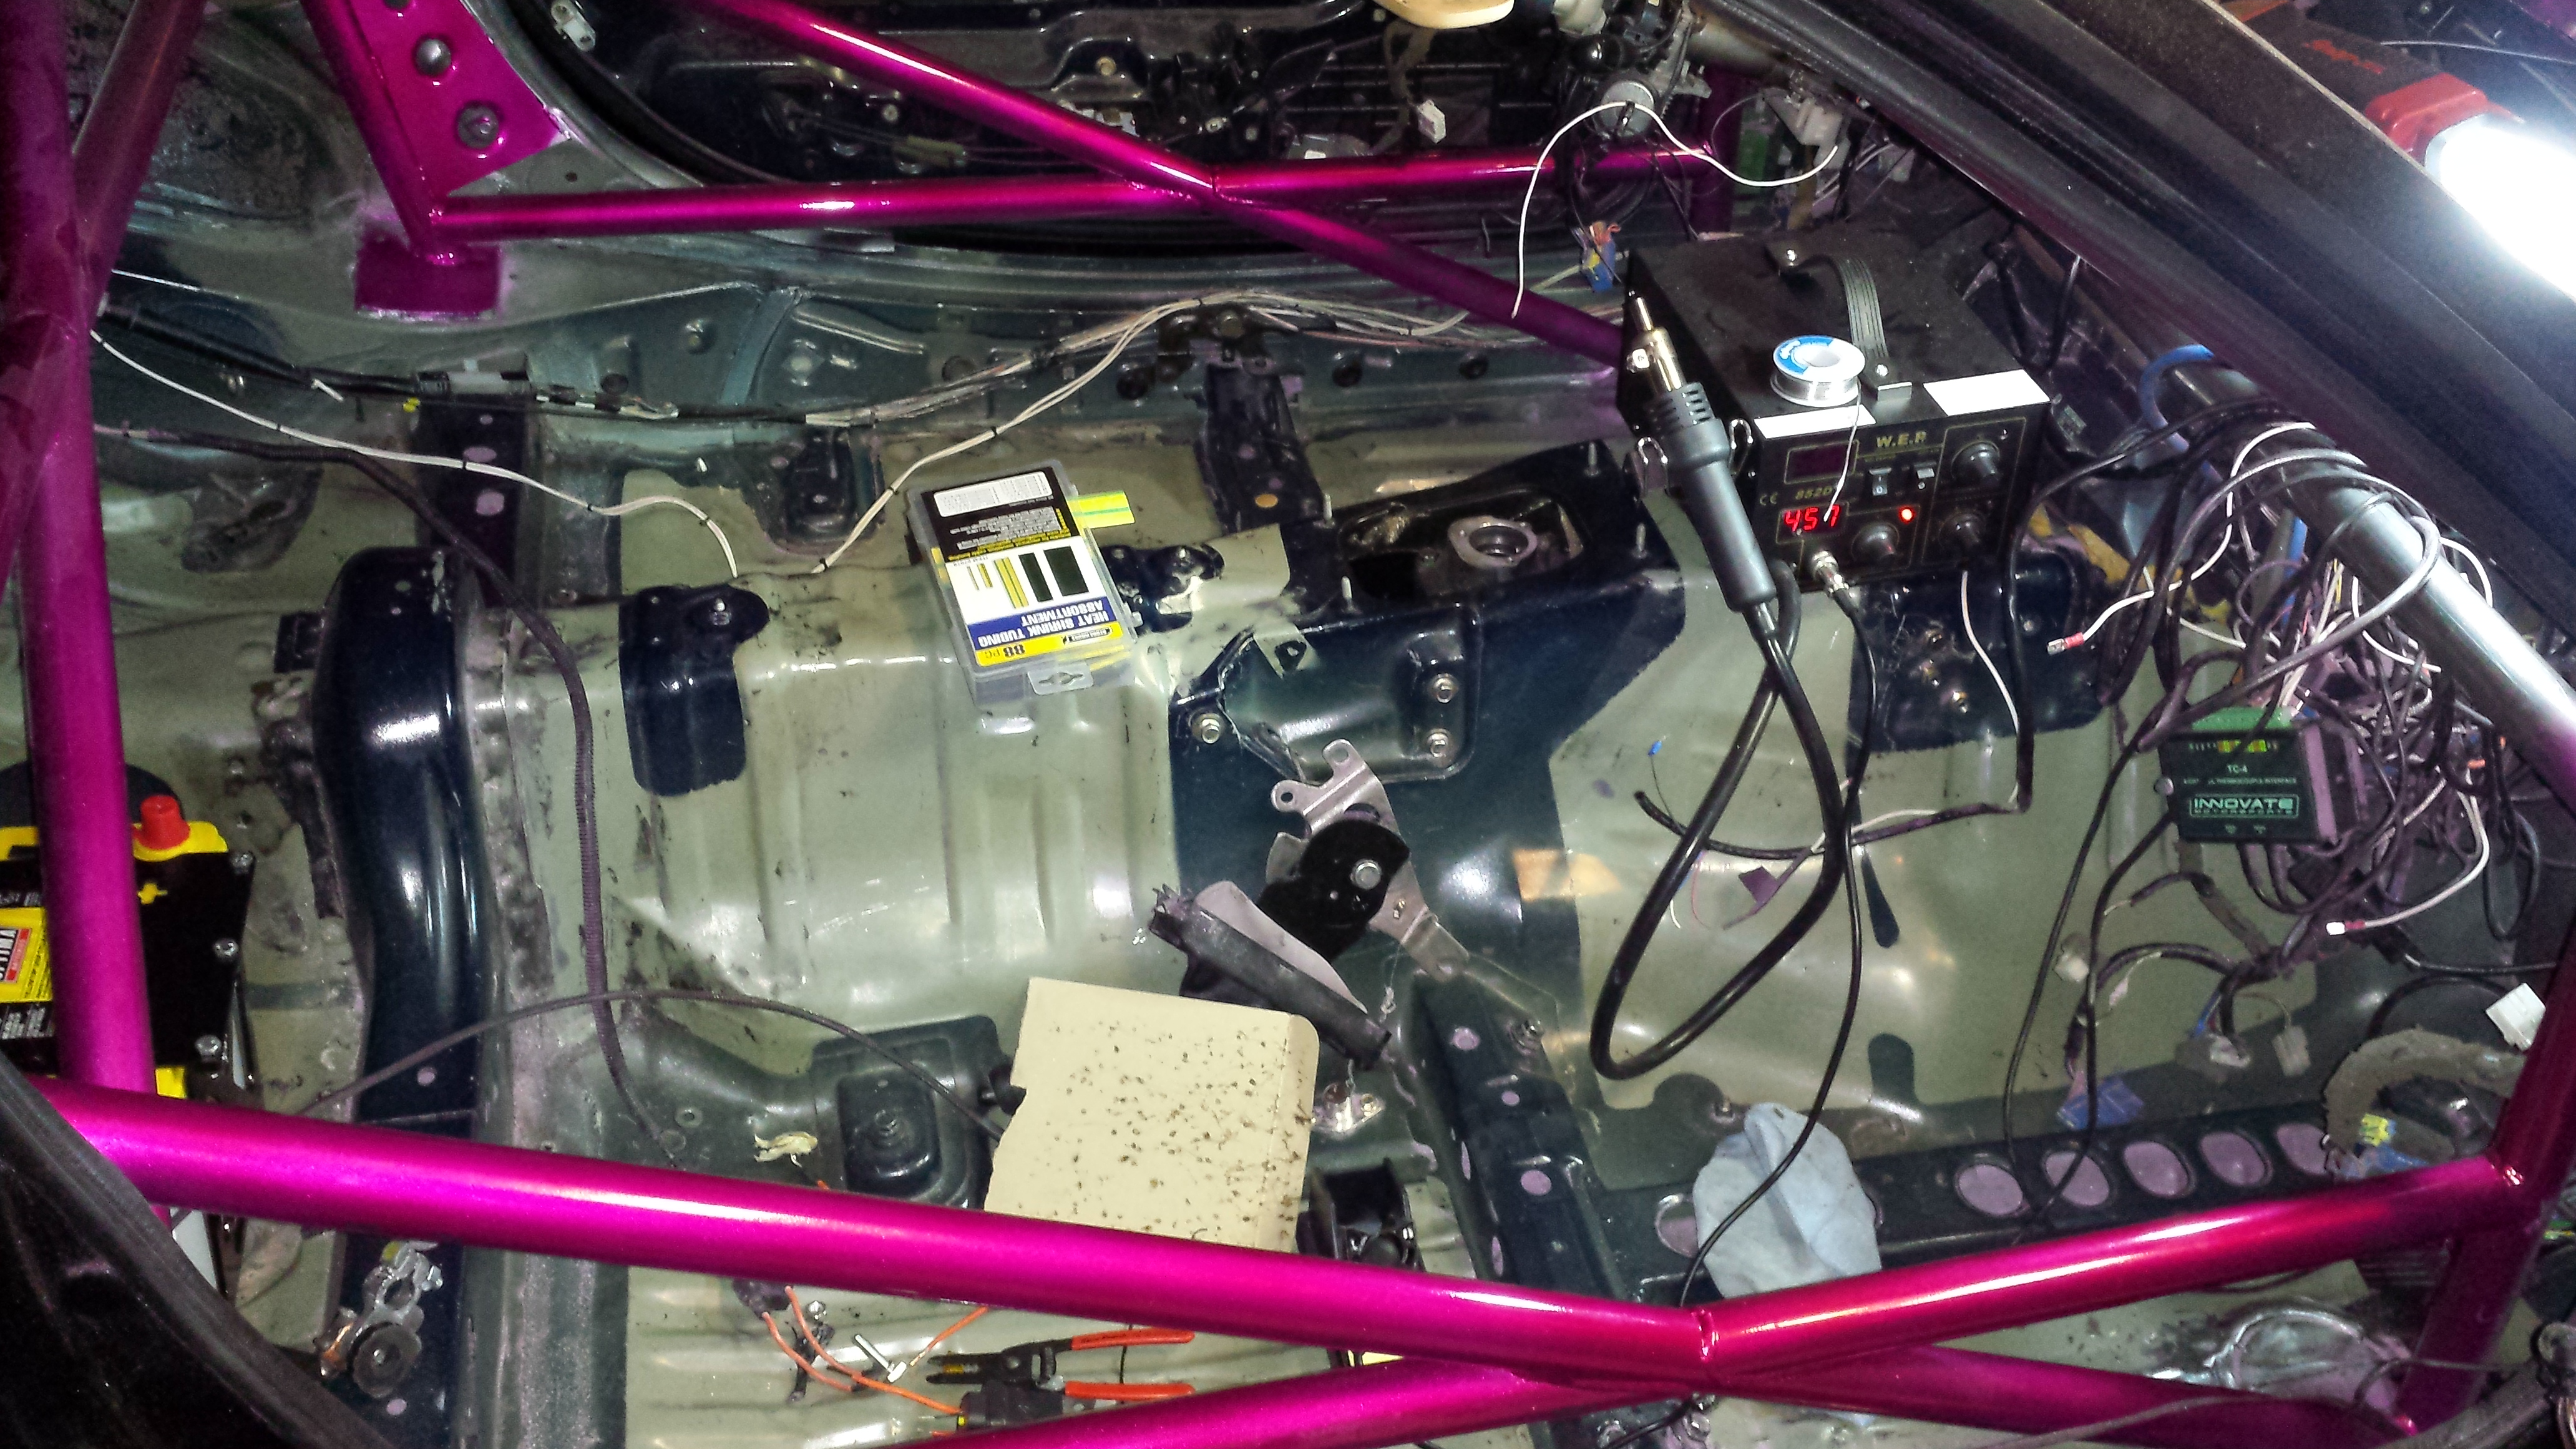
and how I left it for the night

I'm still looking to find someone to weld up my manifold for me. I really want a good job done on it...but at the same time I have a lot in materials so I don't want to end up paying 900-1500 just to have someone weld it out. I simply need a good welder who is into good precision welding that isn't looking to rape me lol. I have a couple options out there and I'm currently weighing them.. just going to be certain before I pull the trigger.
Things are moving in the right direction though and It should be ready to fire up sooner than later. More progress soon!
My battery install took much longer than expected haha. I spent all day after 2 re doing the whole thing. I had to go help a buddy put up a wooden fence at his rental that took about 30 min but then I was back at it. It was funny though...I got there...and lined up all the post support beam mounts before we started and he was like.. "what are you doing?..." I was like.."this is faster man...I got **** to do on the car." Hah.. he was like.. "guess your right."
Anyways. I mounted the battery mount in the same location as the battery box previously. The only difference was I used better hardware and Now I had a ton of room. I had to re-route my coil ignition harness for the direct fire AEM coils around the cage ..which meant pulling the whole thing off and feeding it through the necessary bars. I didn't want anything to be ran on the inside of the cage. I have some braided covering I'll be putting on that will make things look neater but First I had to make sure I had everything planned correctly so it wasn't all un organized etc. Started with mounting the battery...then ran grounds and power wires.
But before all of this I had to clean all of the overspray off and extra flake dust/paint from the entire cabin. That took a while but glad most of it is gone at least..
Where I would mount the Optima yellowtop d51R..love this battery braket by the way..really sturdy too!!
then worked on the ground cable.. I wanted it to be much shorter than it was. So I cut out about 16" built up a ton of solder then hit it with a torch and it sucked the solder straight in. Thanks Shawn for the tip! forgot to take pics but it was a bit hard with 2 hands.
Best part..looking clean!!
Not bad!
The paint came out pretty good. It's not perfect but the clear should protect it a little bit at least. I also have some lighter spots on the undersides of the bars because I got lazy and didn't want to get on my back and shoot the paint.
Work process, had to cut and solder some things to clean up excessive lengths and re-route things
and how I left it for the night
I'm still looking to find someone to weld up my manifold for me. I really want a good job done on it...but at the same time I have a lot in materials so I don't want to end up paying 900-1500 just to have someone weld it out. I simply need a good welder who is into good precision welding that isn't looking to rape me lol. I have a couple options out there and I'm currently weighing them.. just going to be certain before I pull the trigger.
Things are moving in the right direction though and It should be ready to fire up sooner than later. More progress soon!
 04-21-14, 10:26 AM
#1835
Small Update:
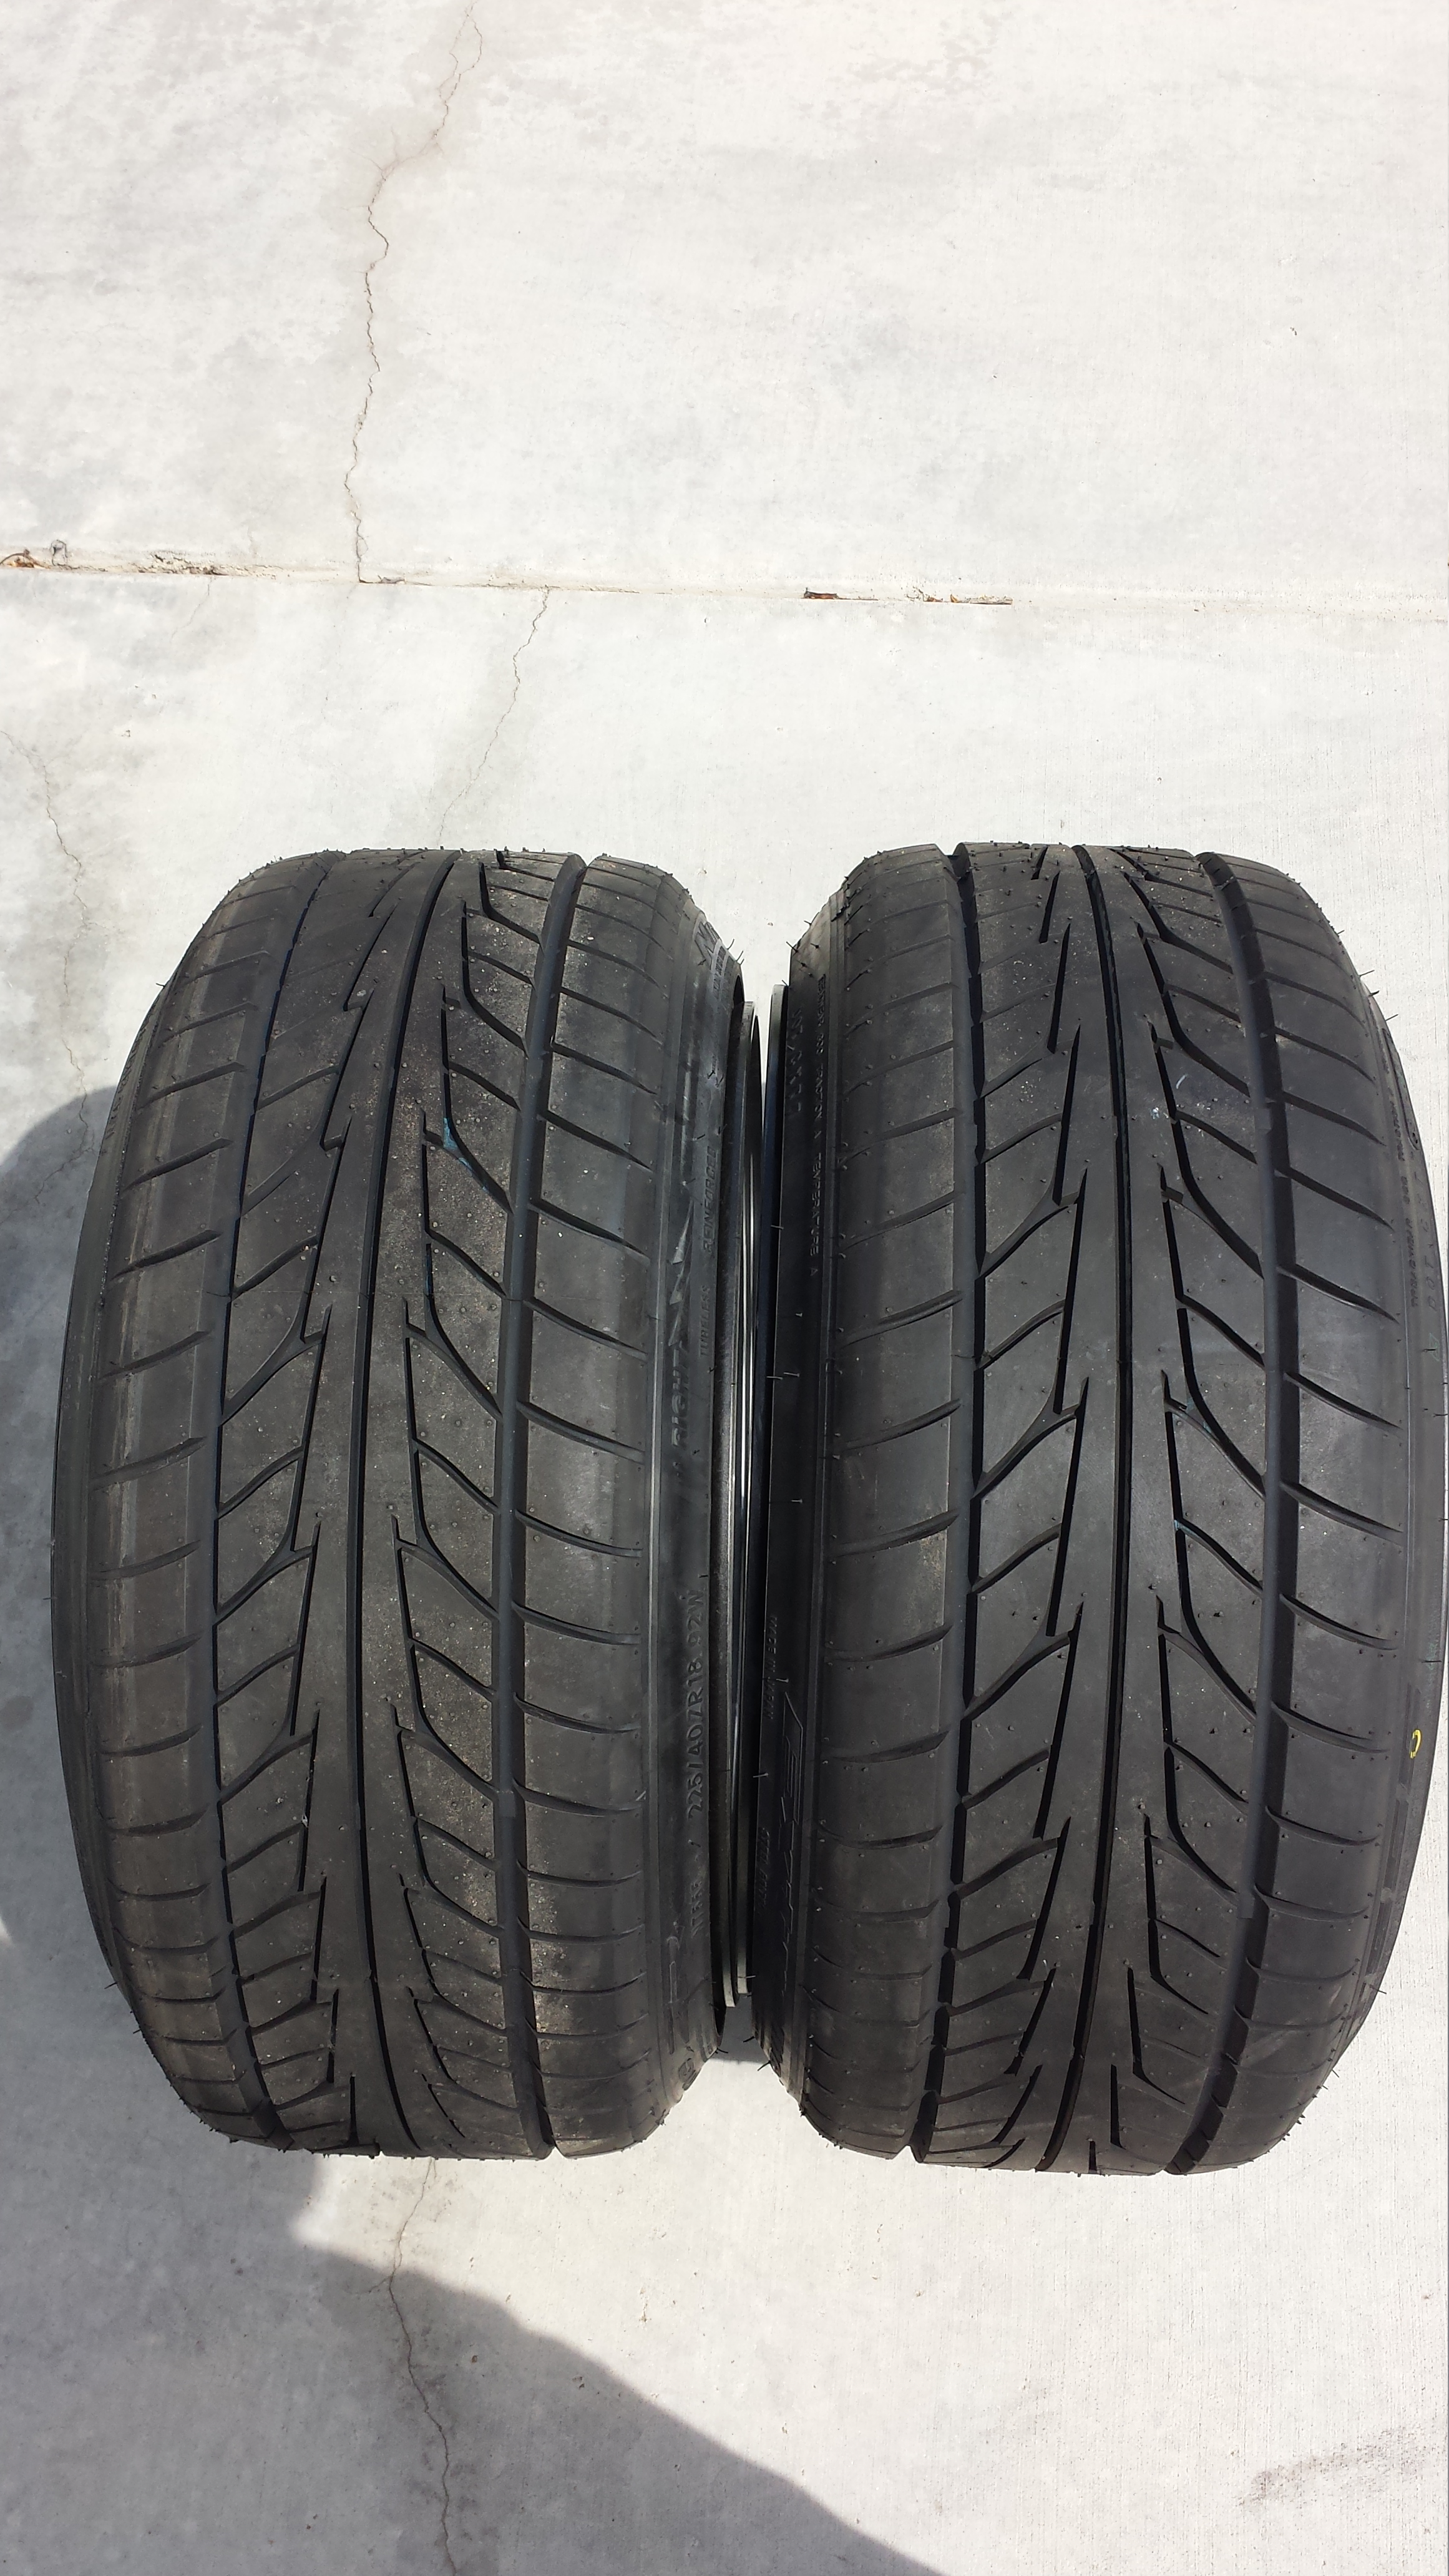
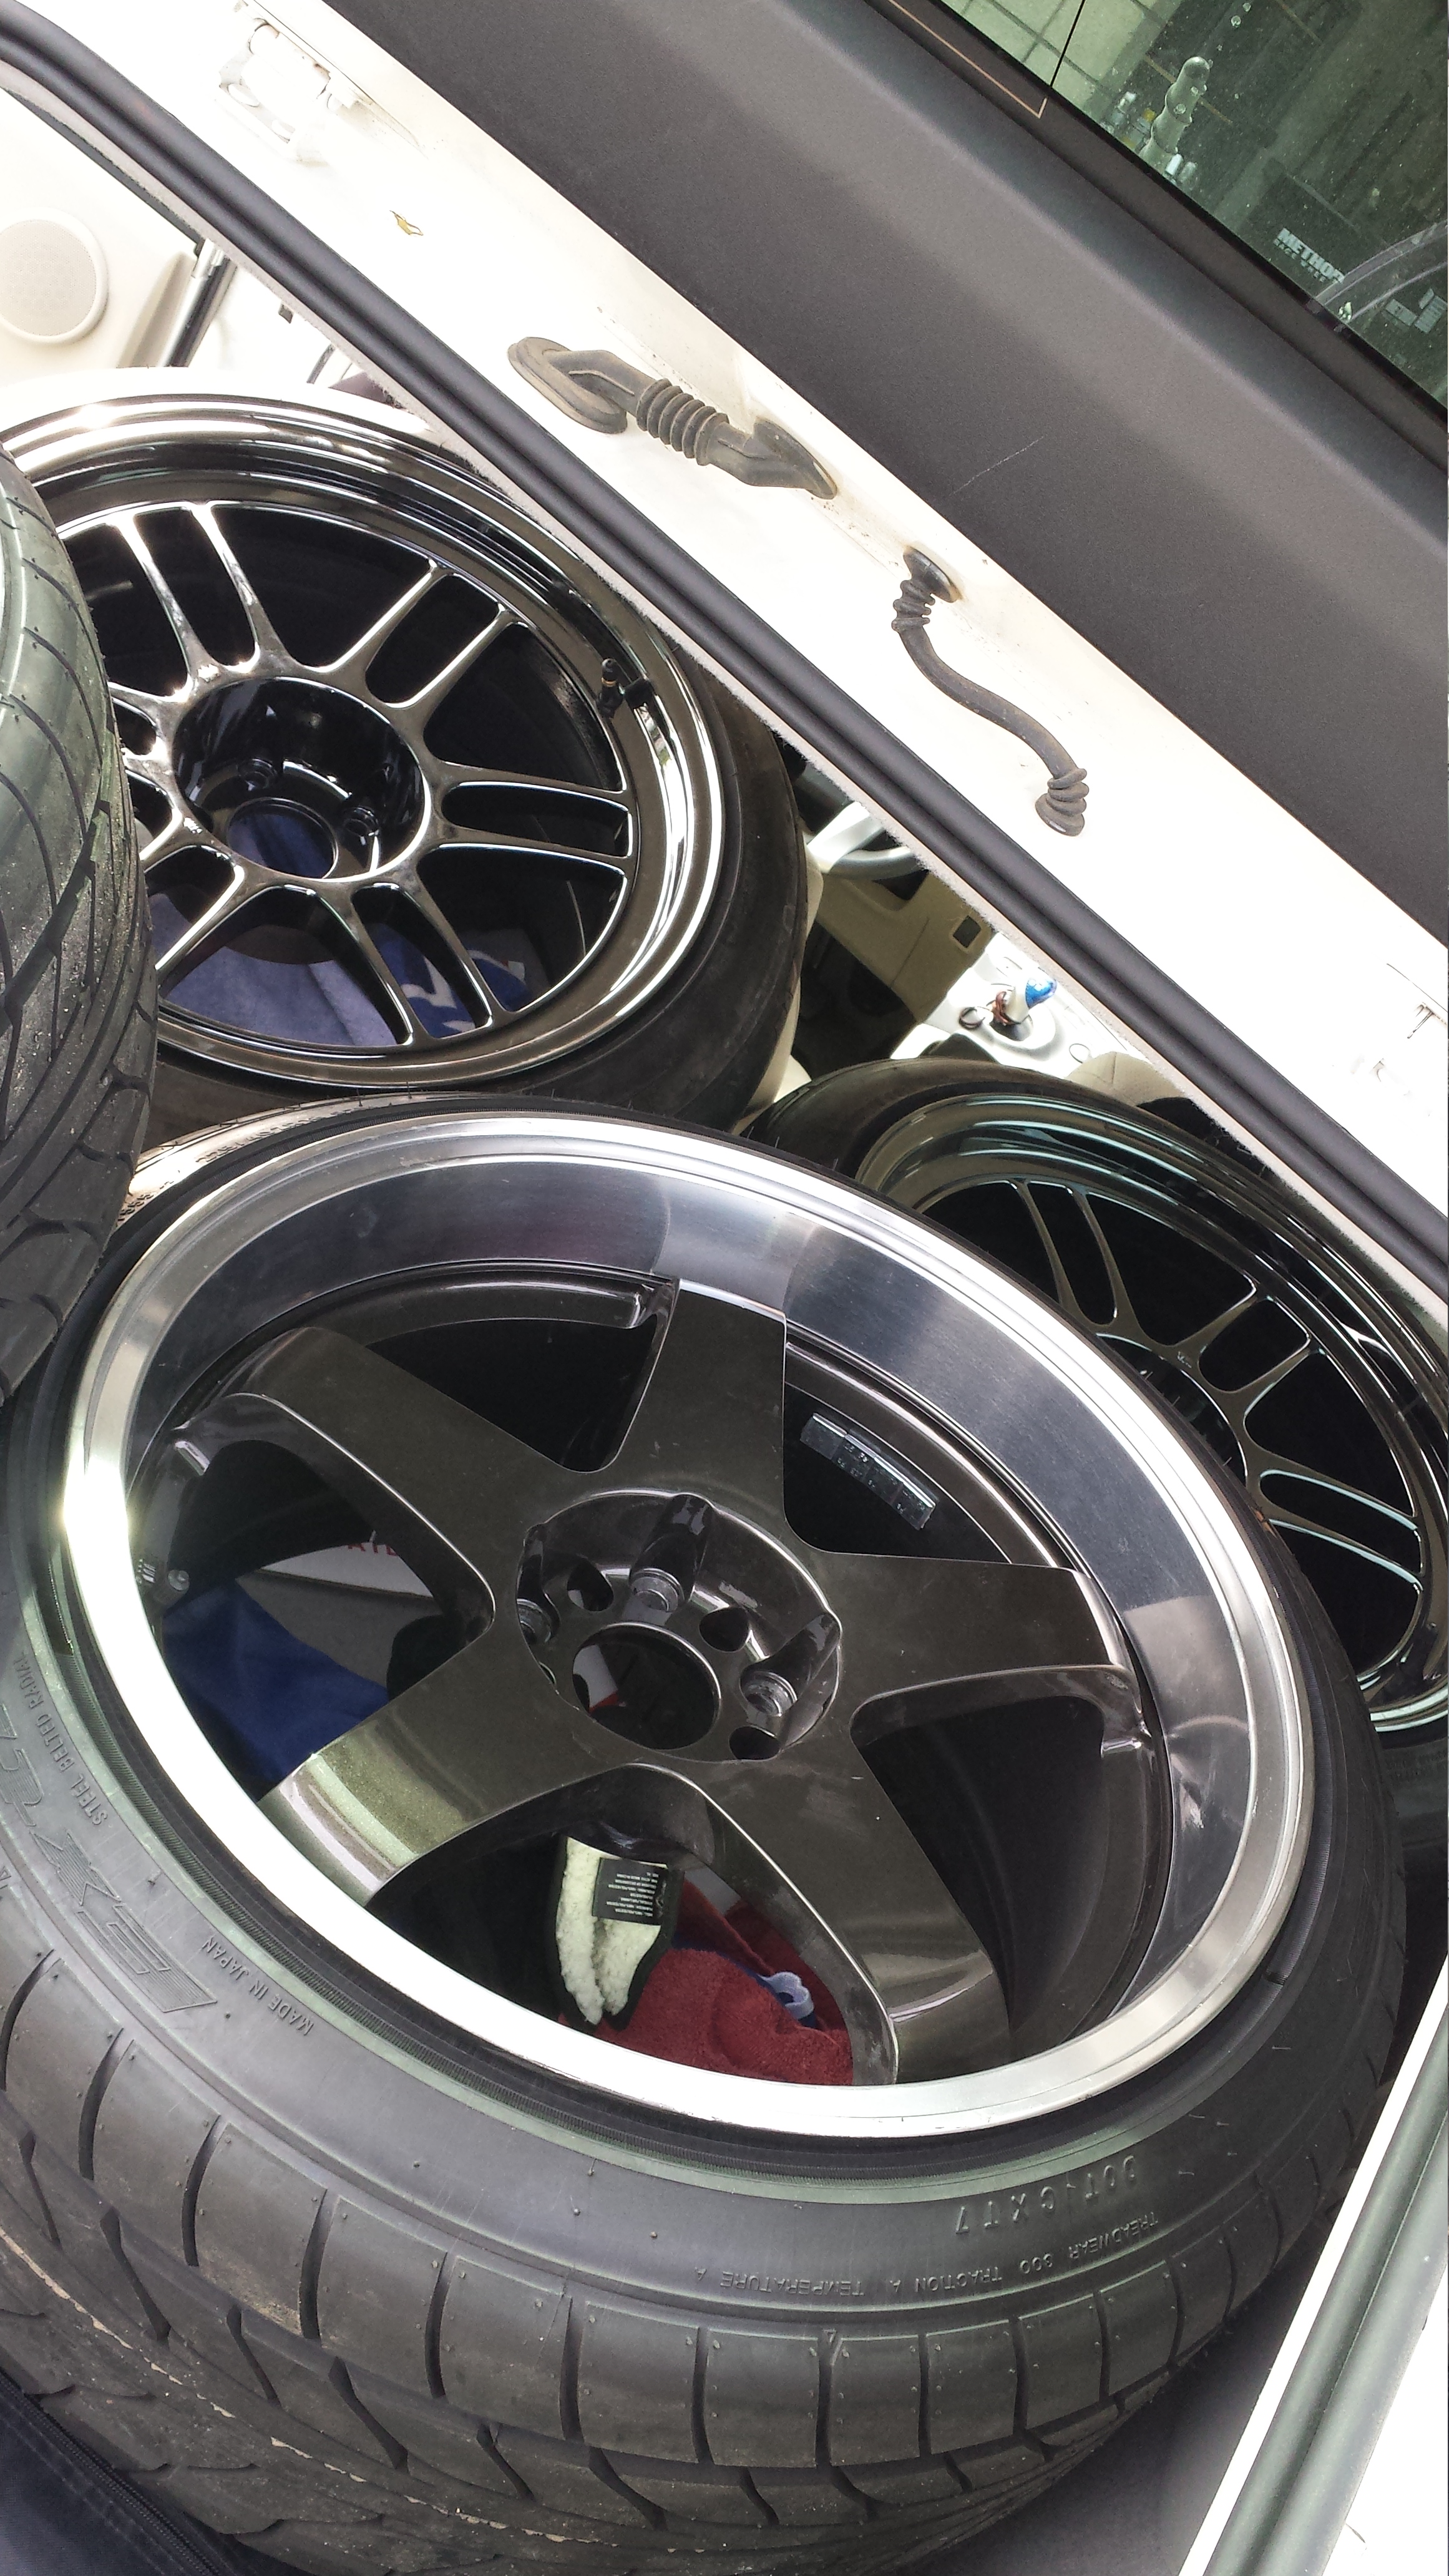
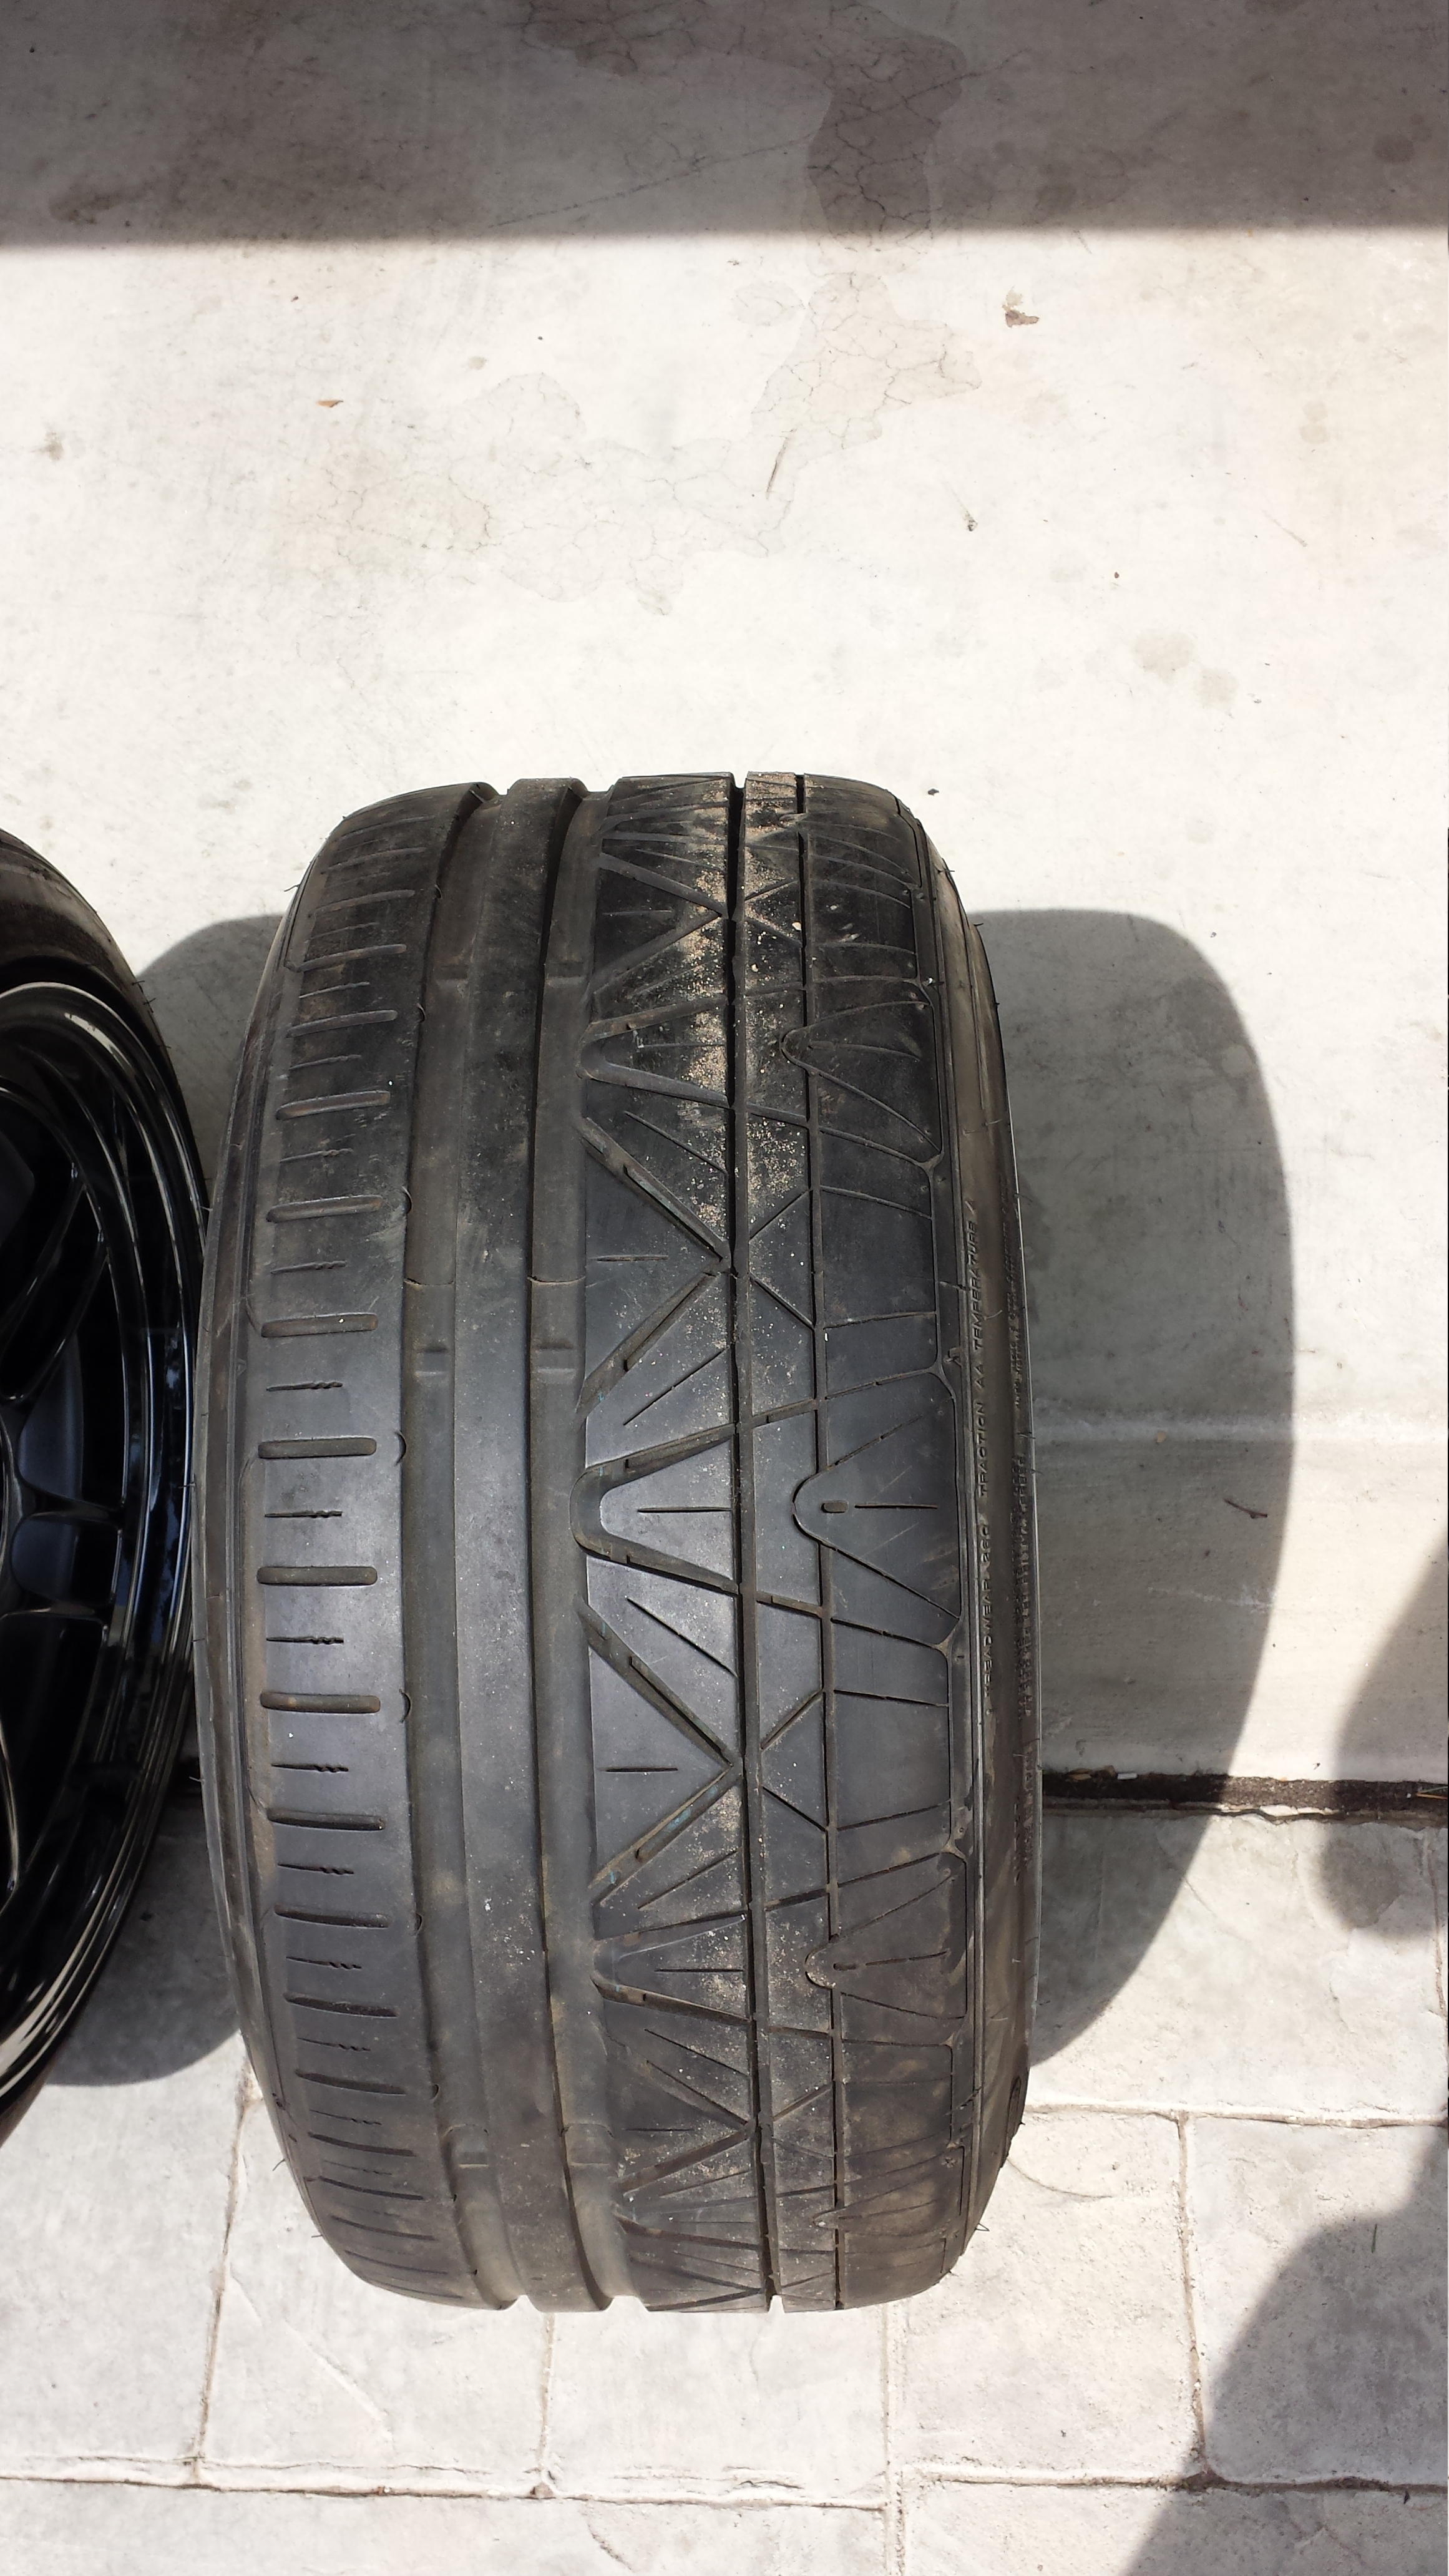
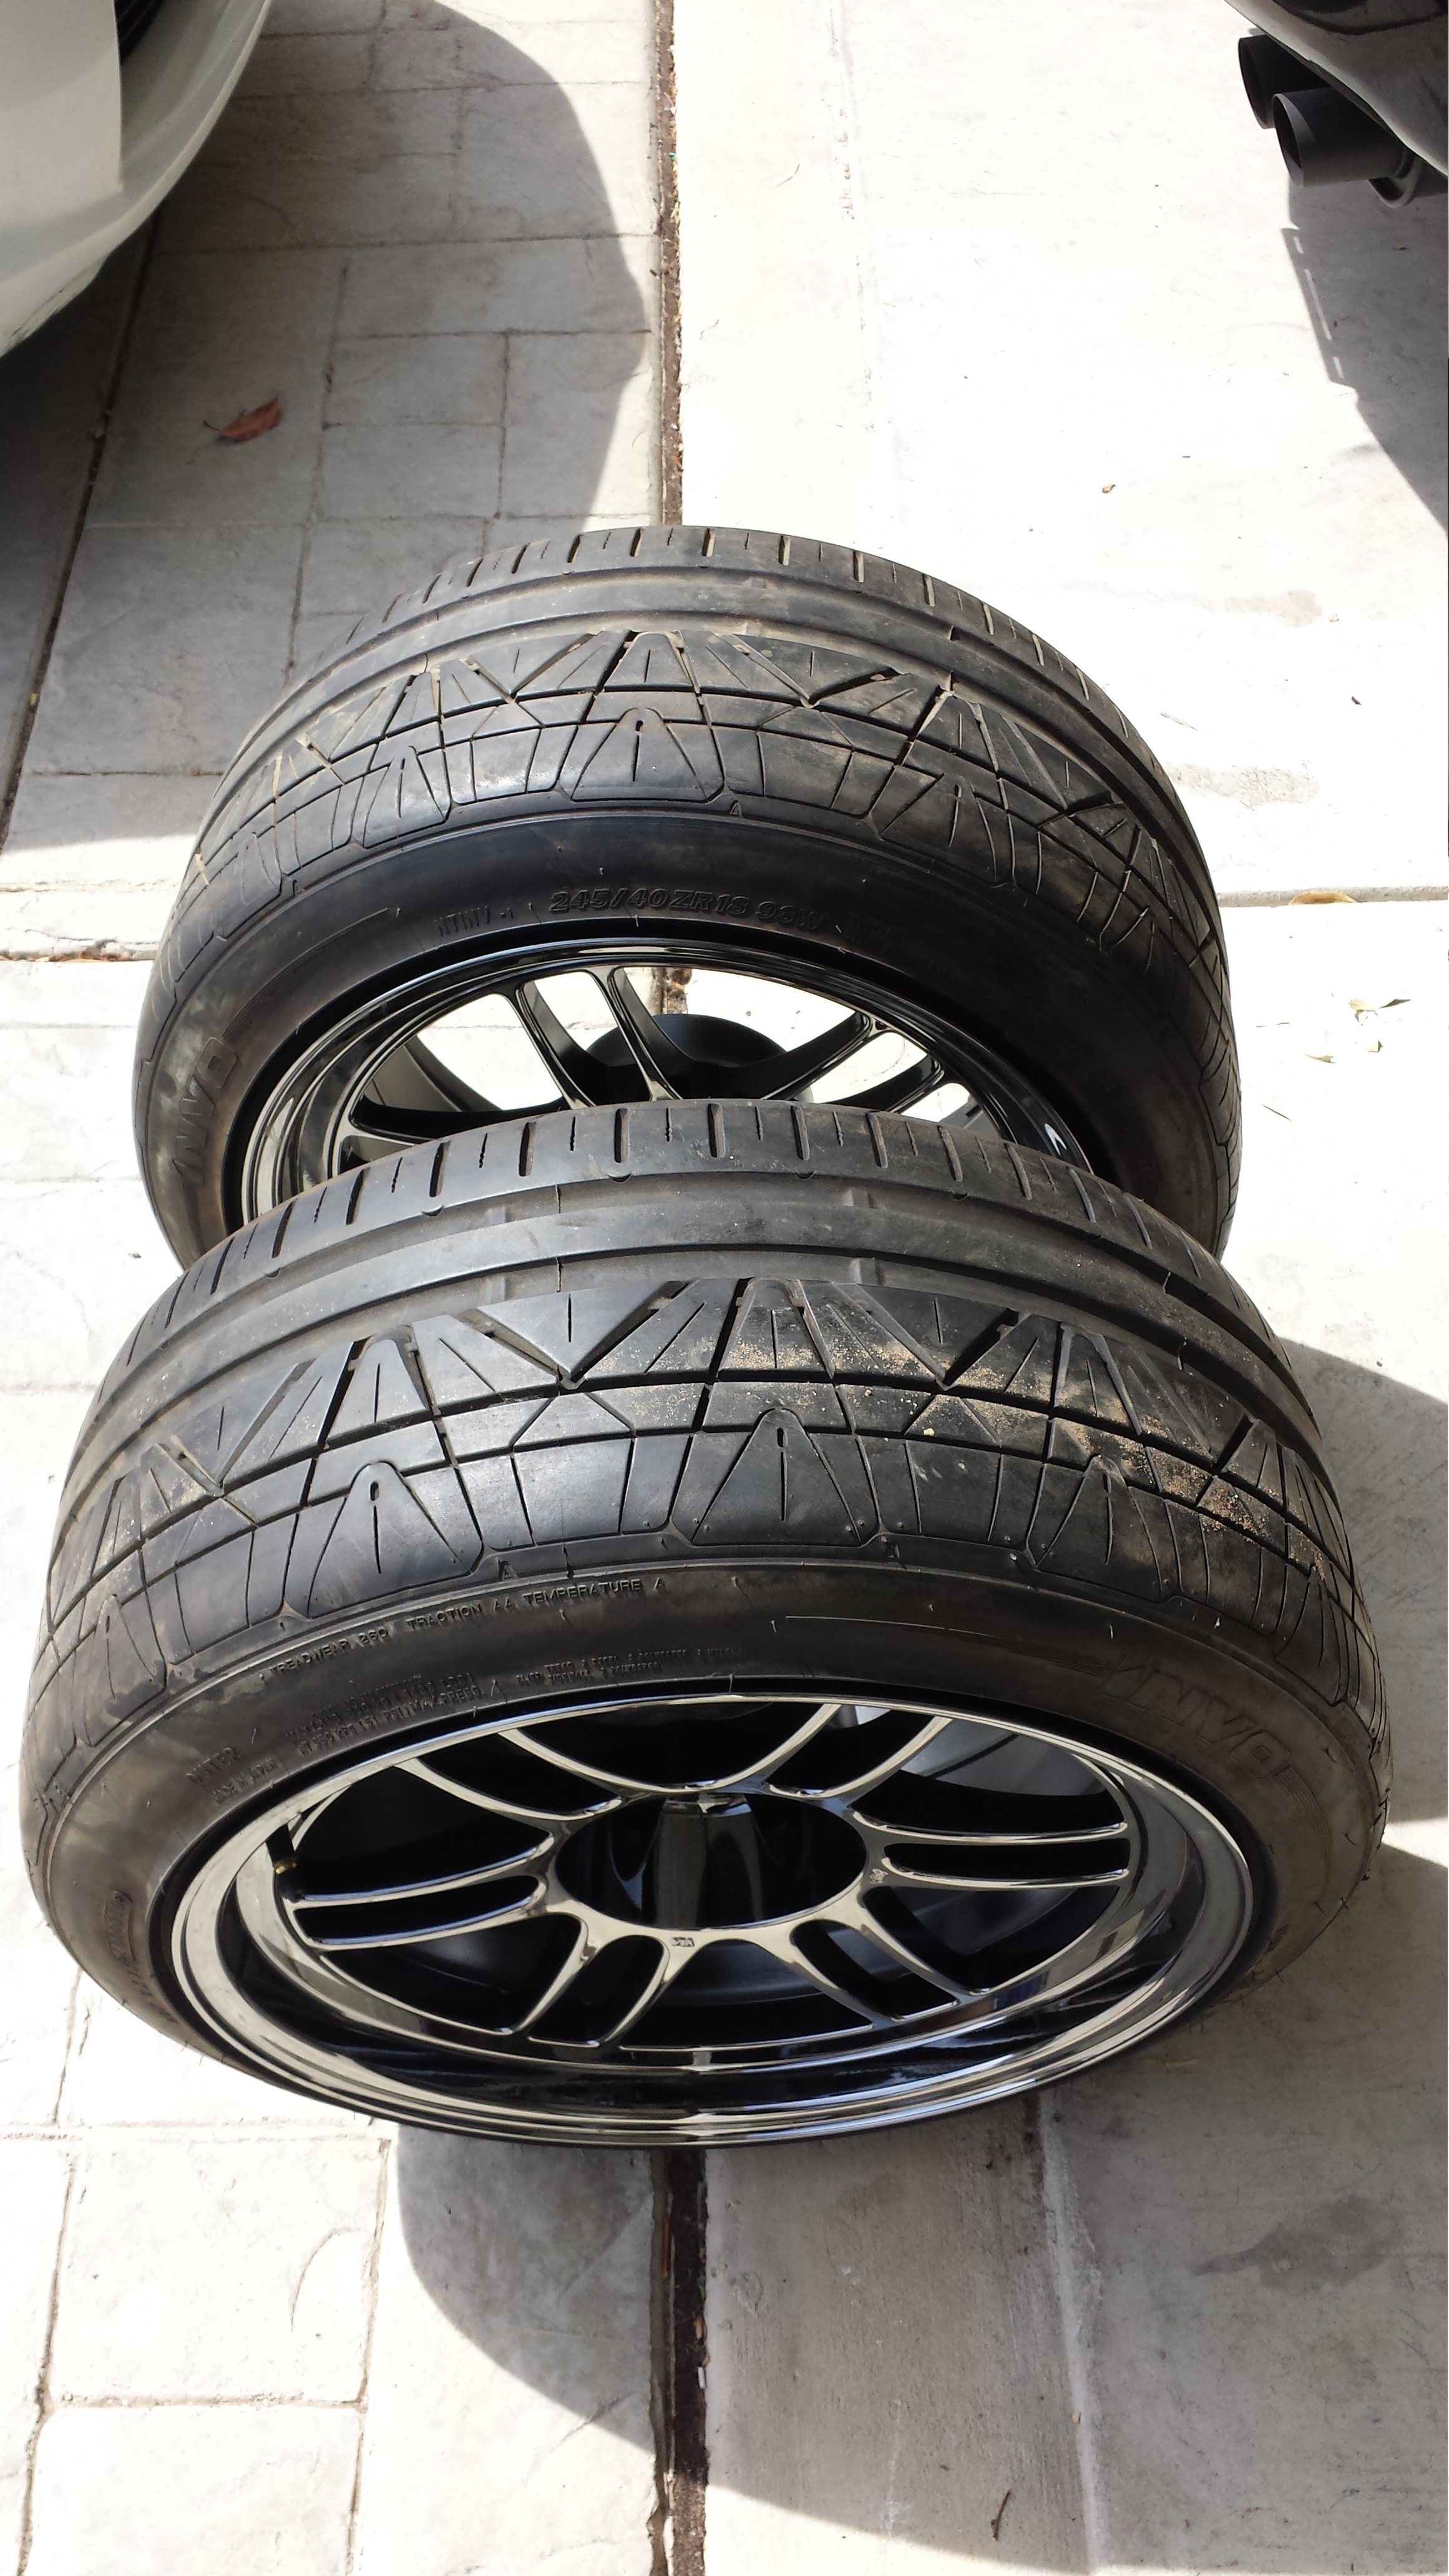
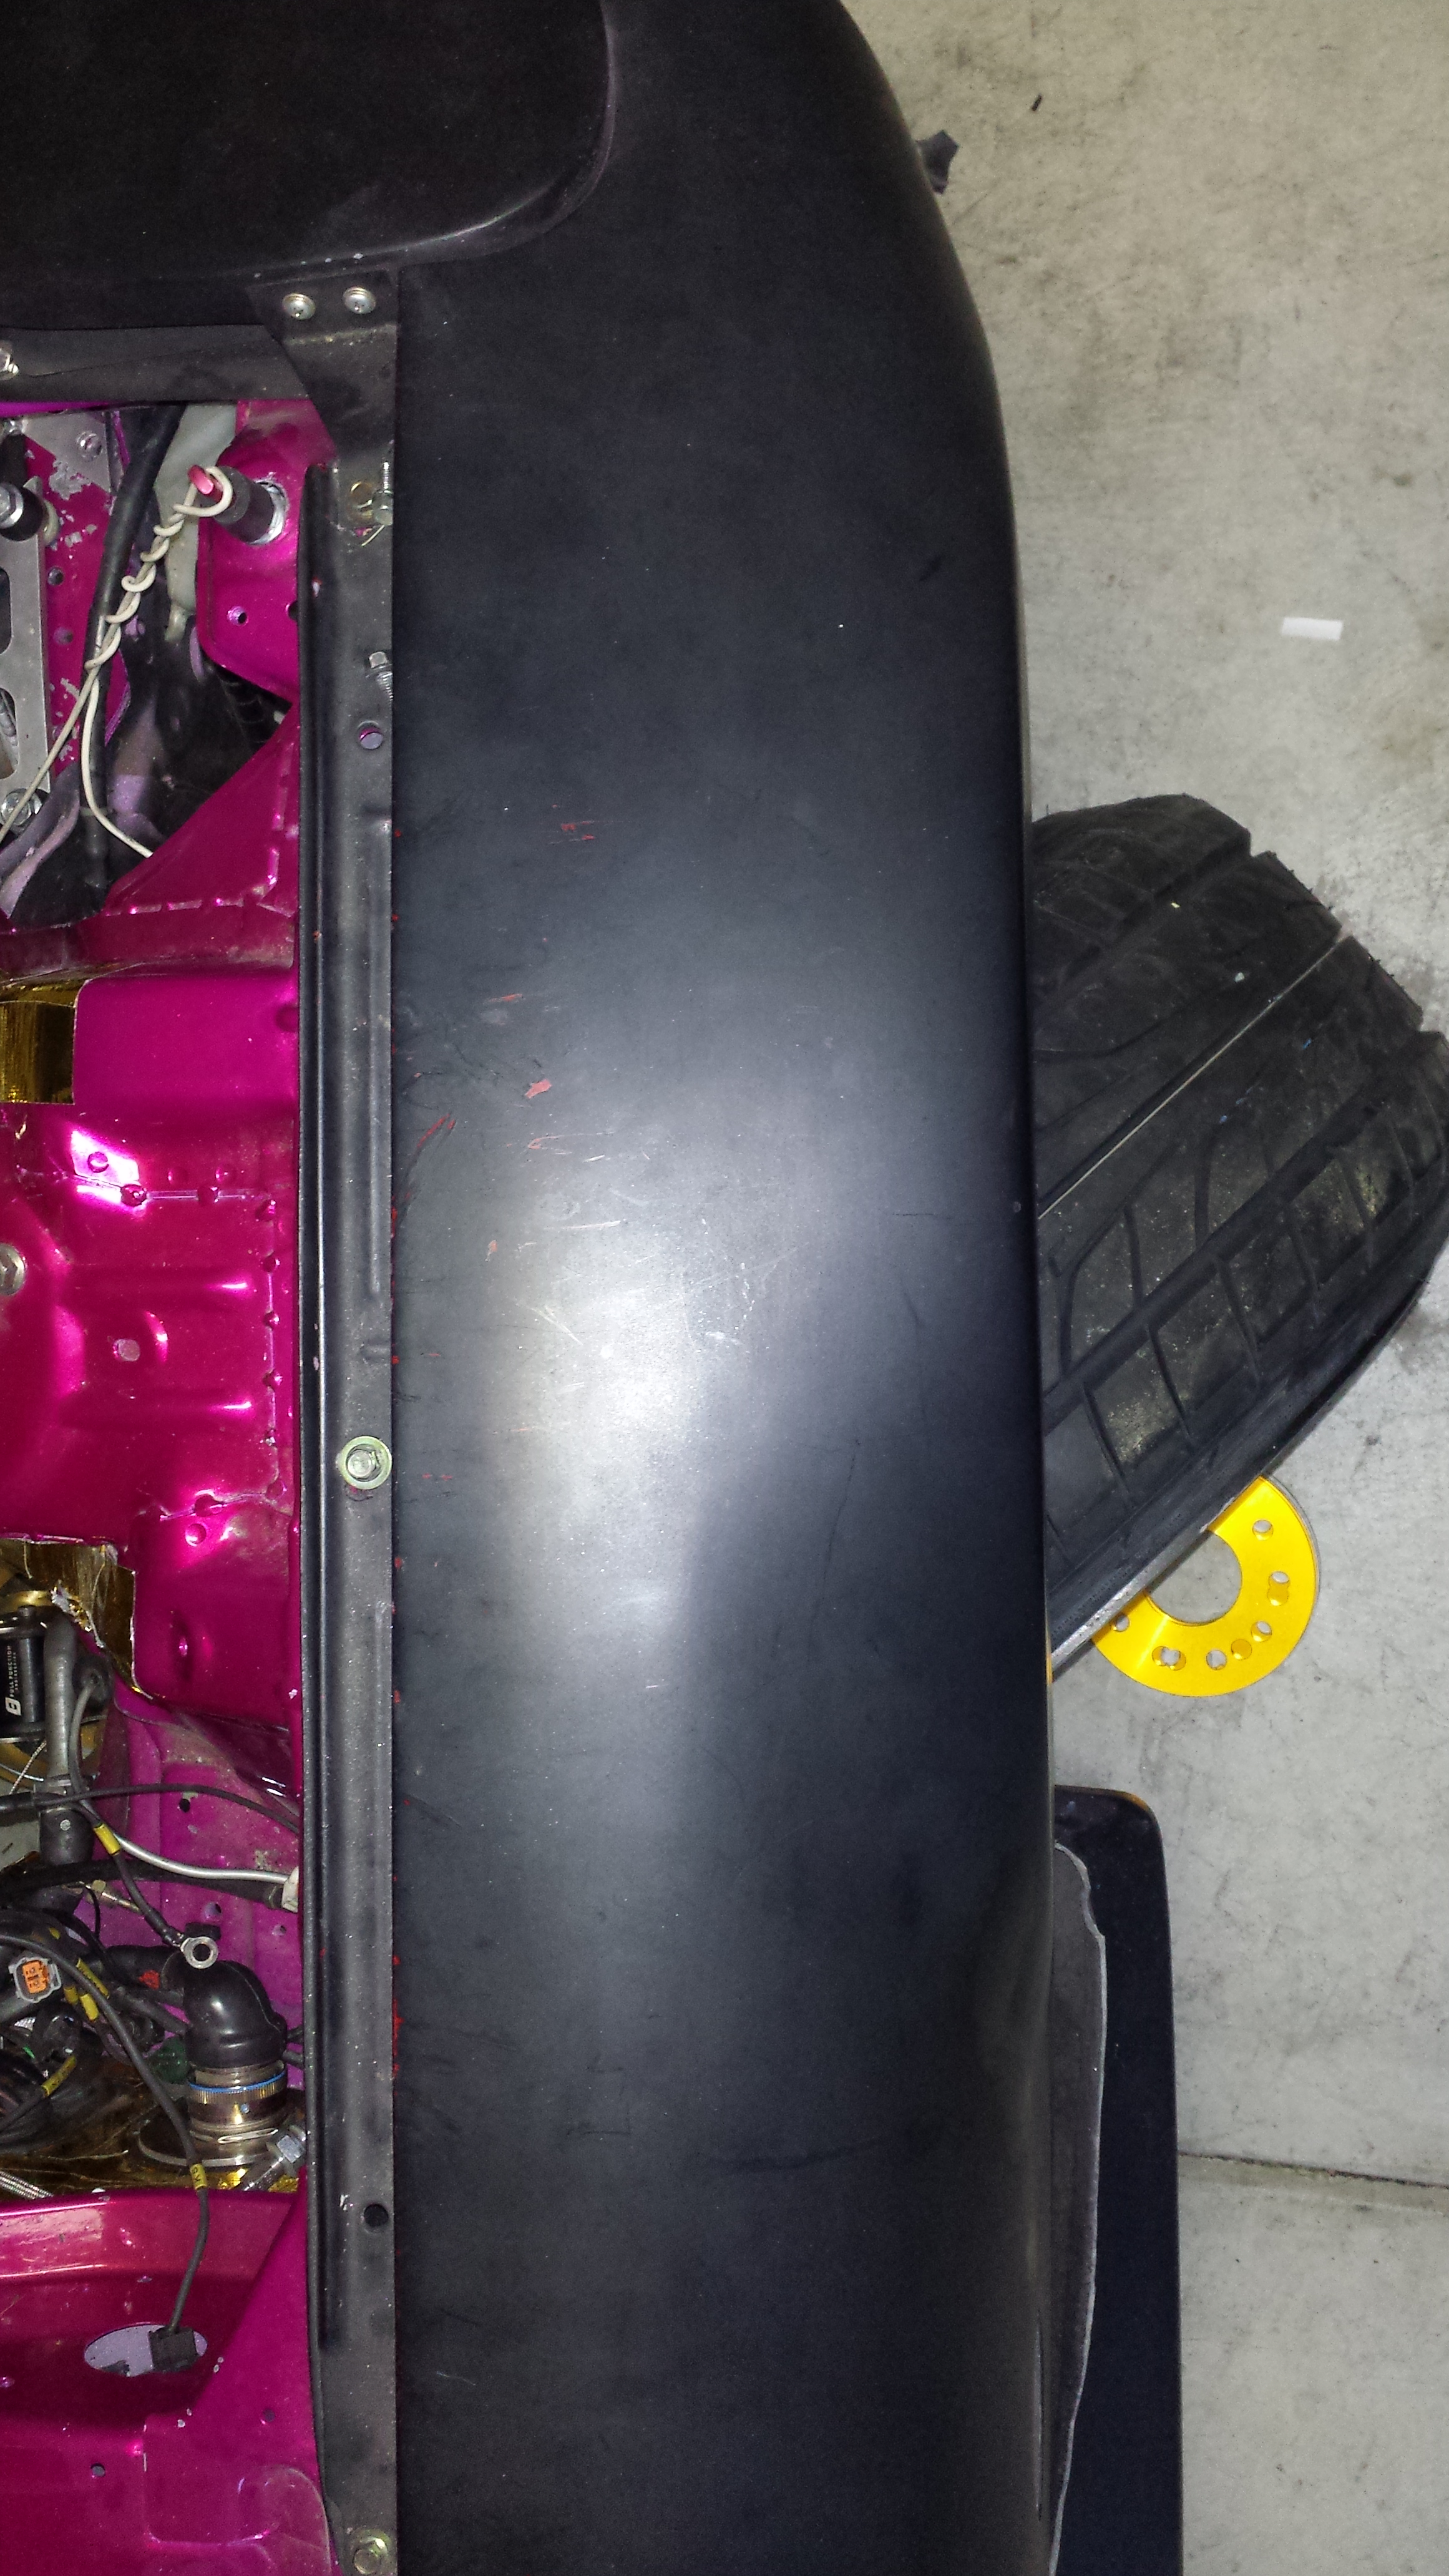
I had to work Fri-sat and sunday.. LOOOOng days too. But that didn't stop me from hustling a bit on the car. I havn't been able to find fronts yet to complete my wheels so I used some spare fronts I forgot about. It's nice to forget about these things...then when you find them your like "oh crap" SAVE!! I'm trying to have the car running again in 2 weeks time. We will see if I can swing it. Front spares are Rota p45R's. 18x10 +20. I got an excellent deal on the 4 rears with 4 brand new Nitto Nt555's 225/35/18 so I threw a pair on for the time being.
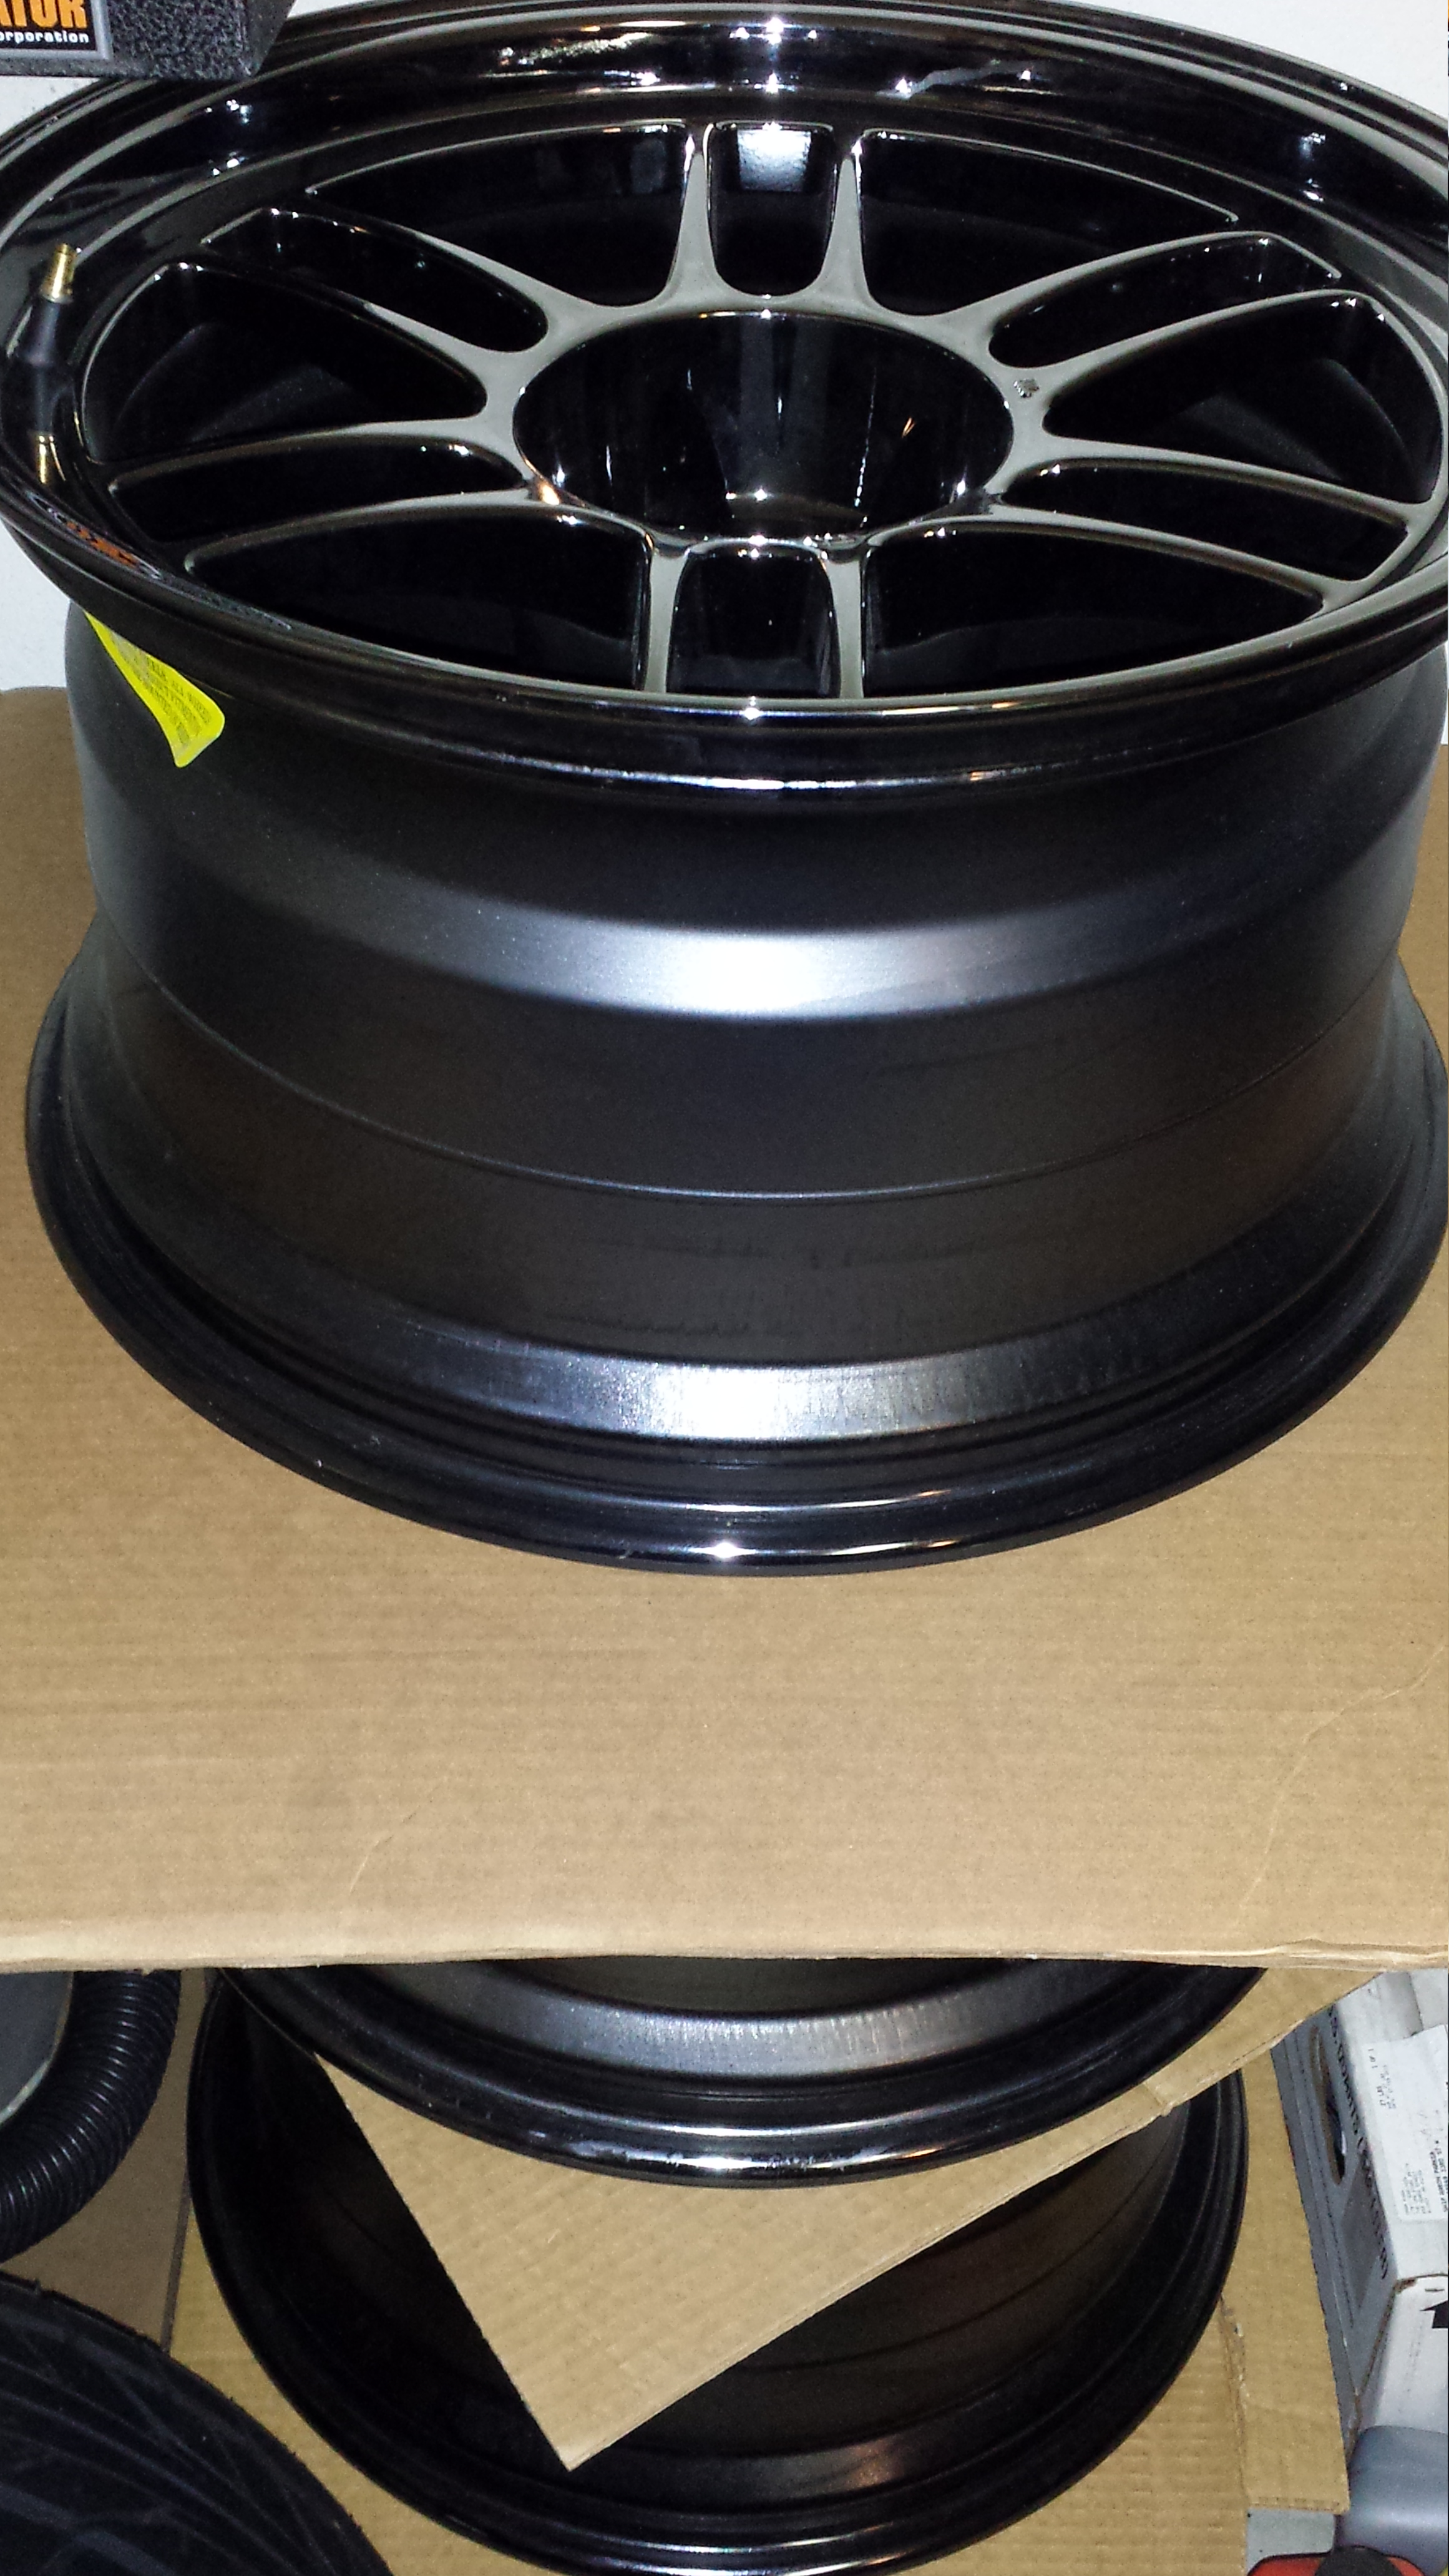
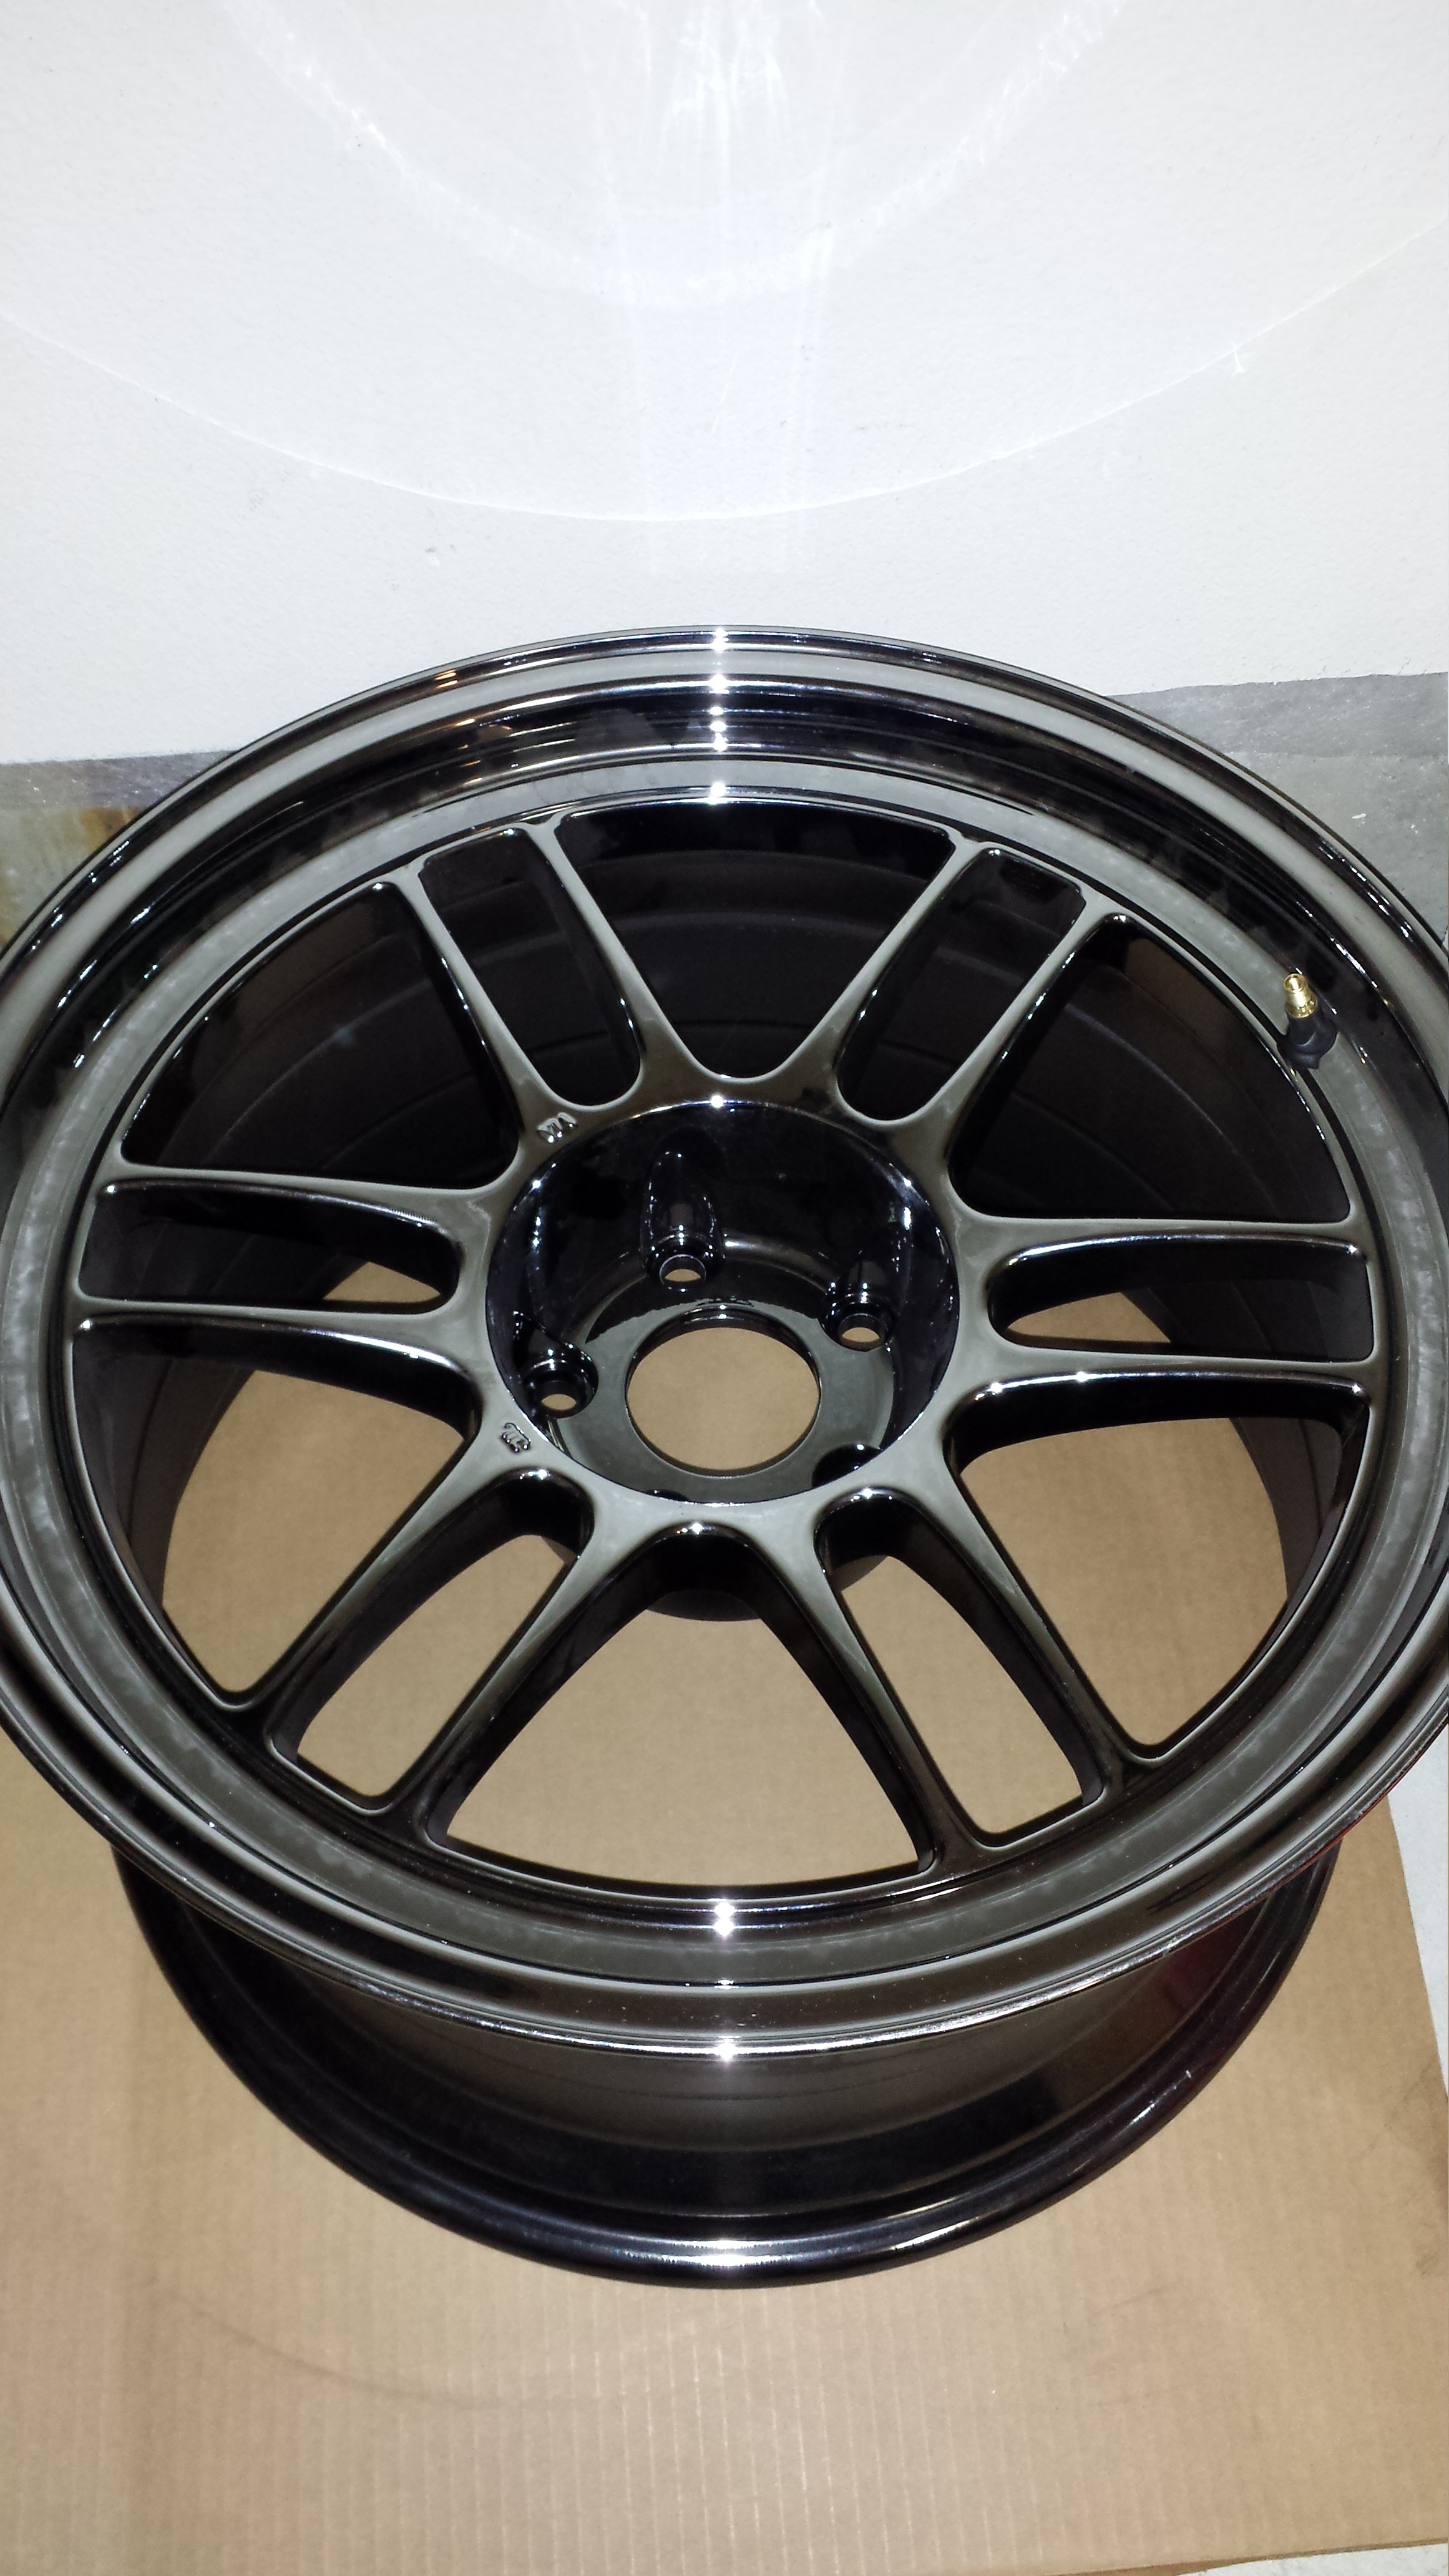
And my rears =-) Enkei Rpf1 18x10.5 +15 SBC finish.
The Prius fits it all
Wrapped in some left over Nitto Invo's I had in the backyard. 245/45/18
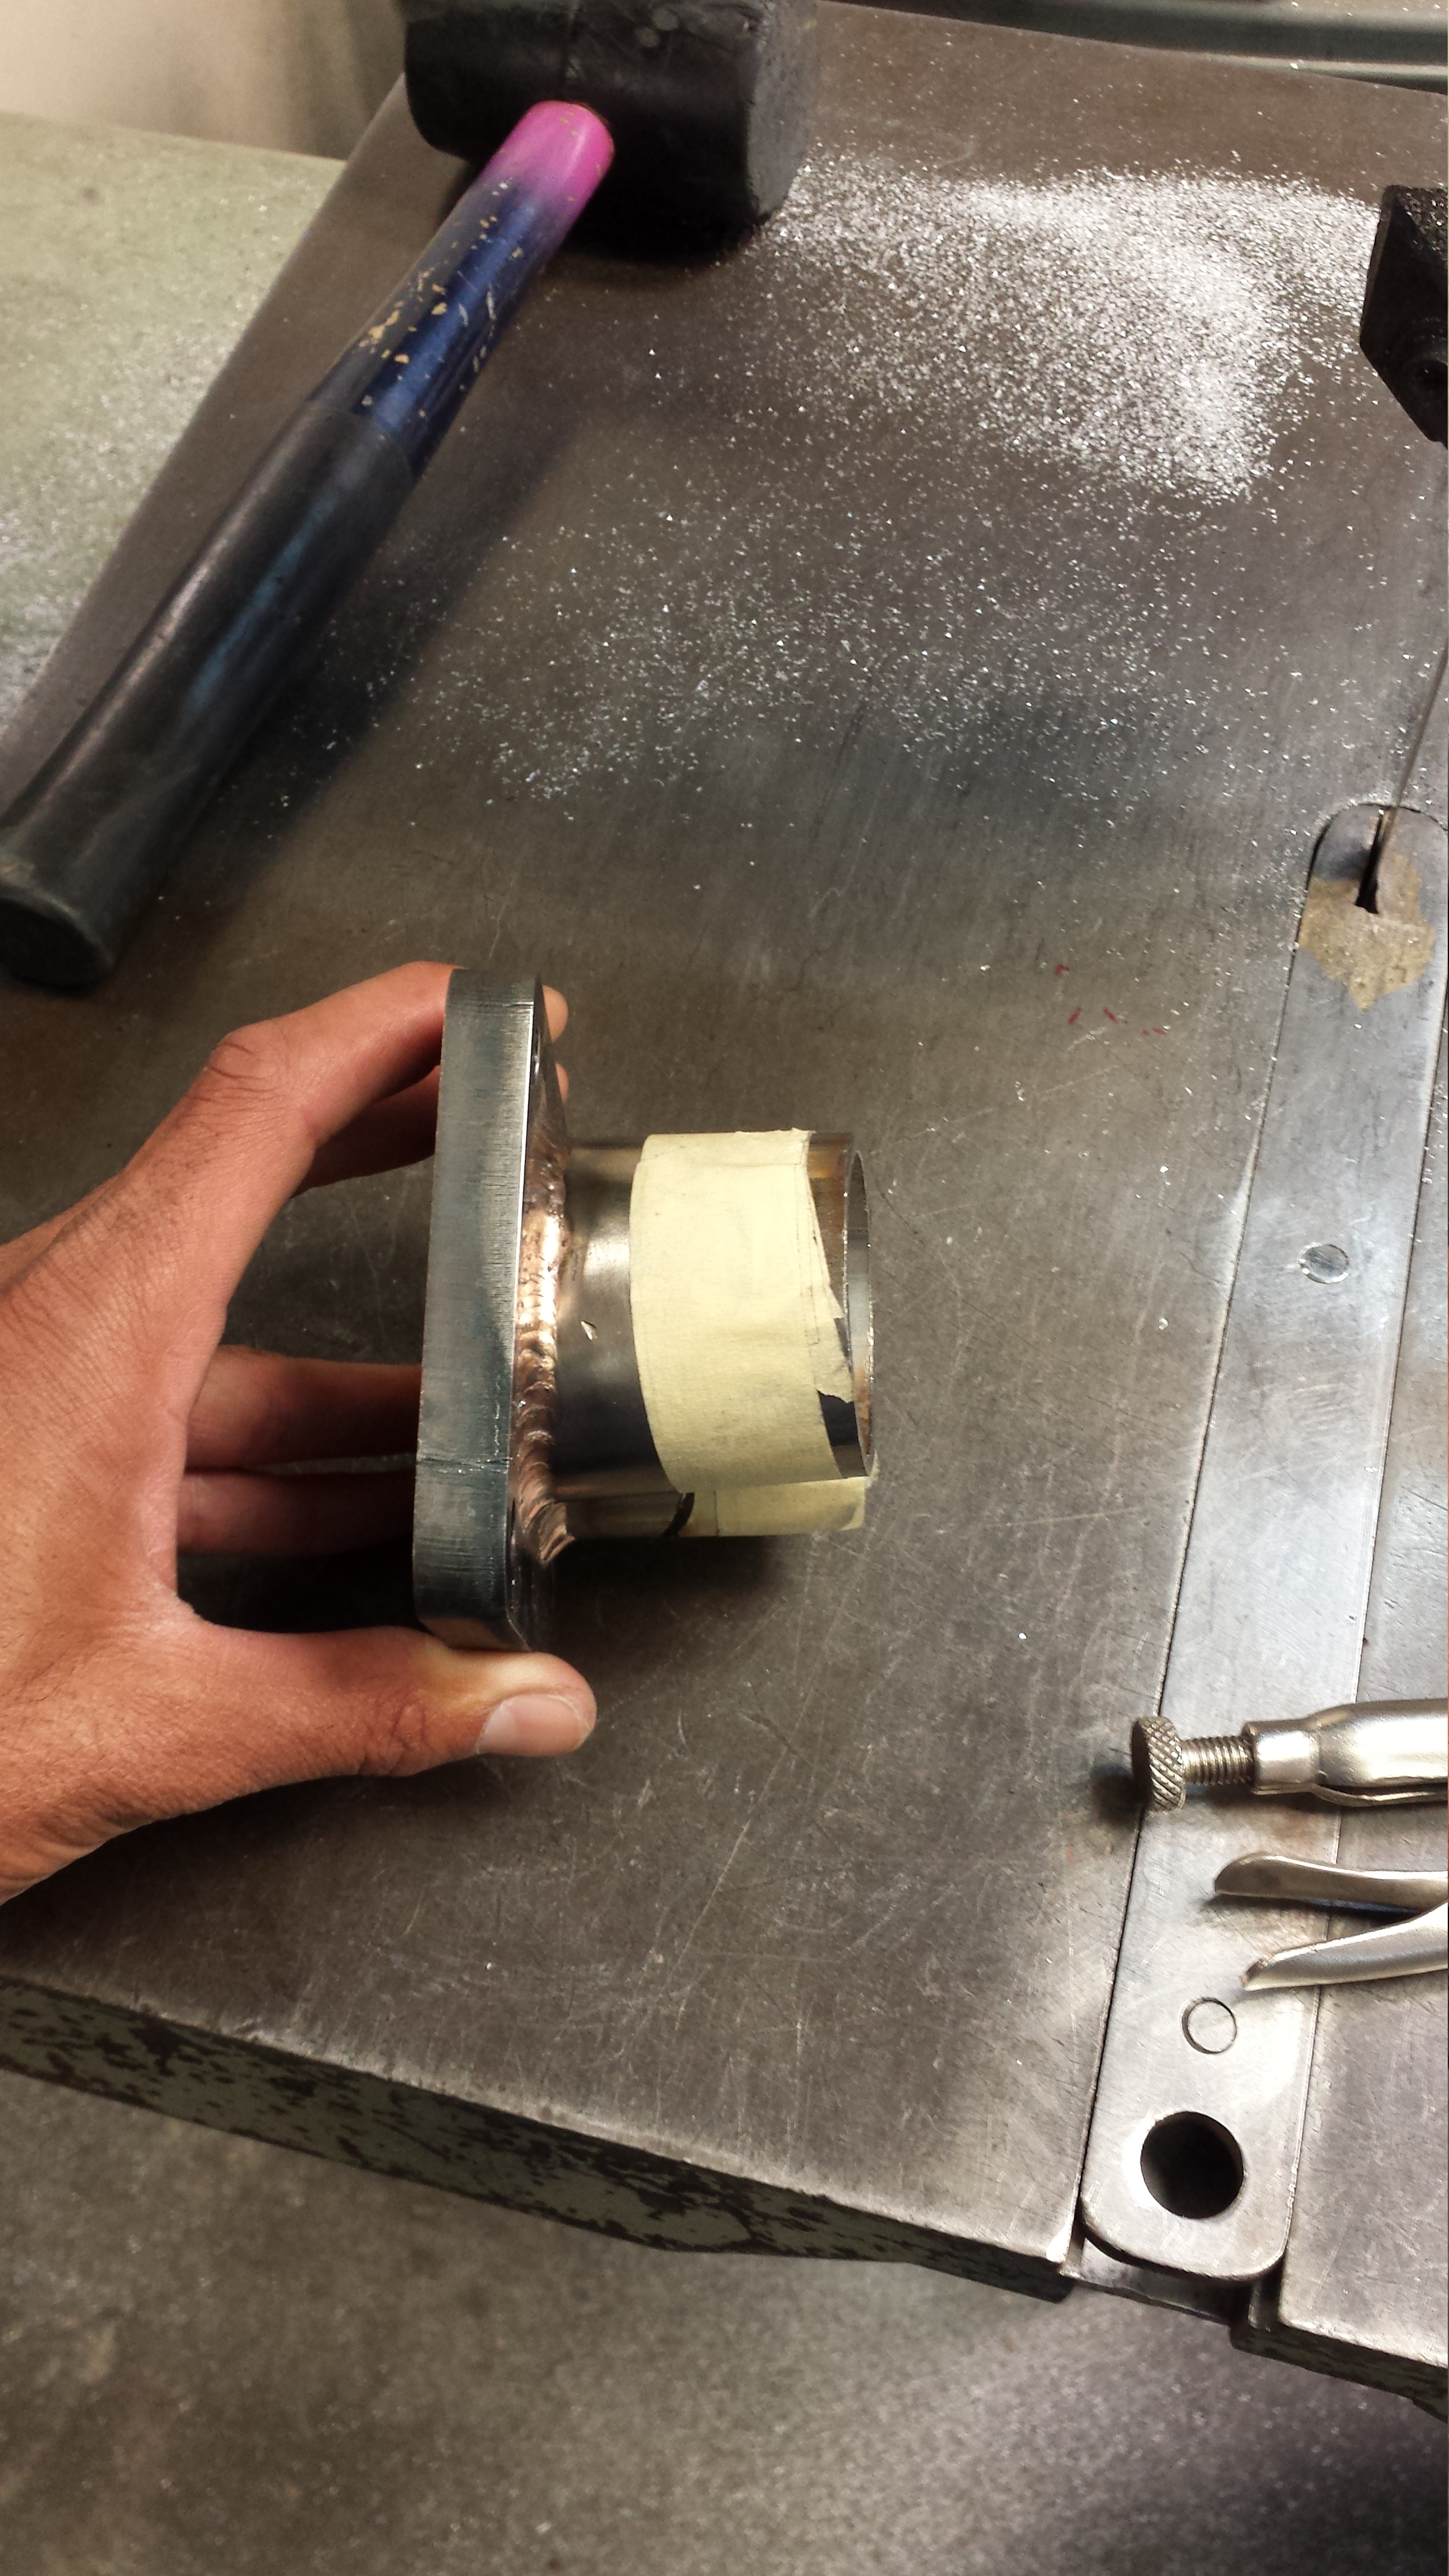
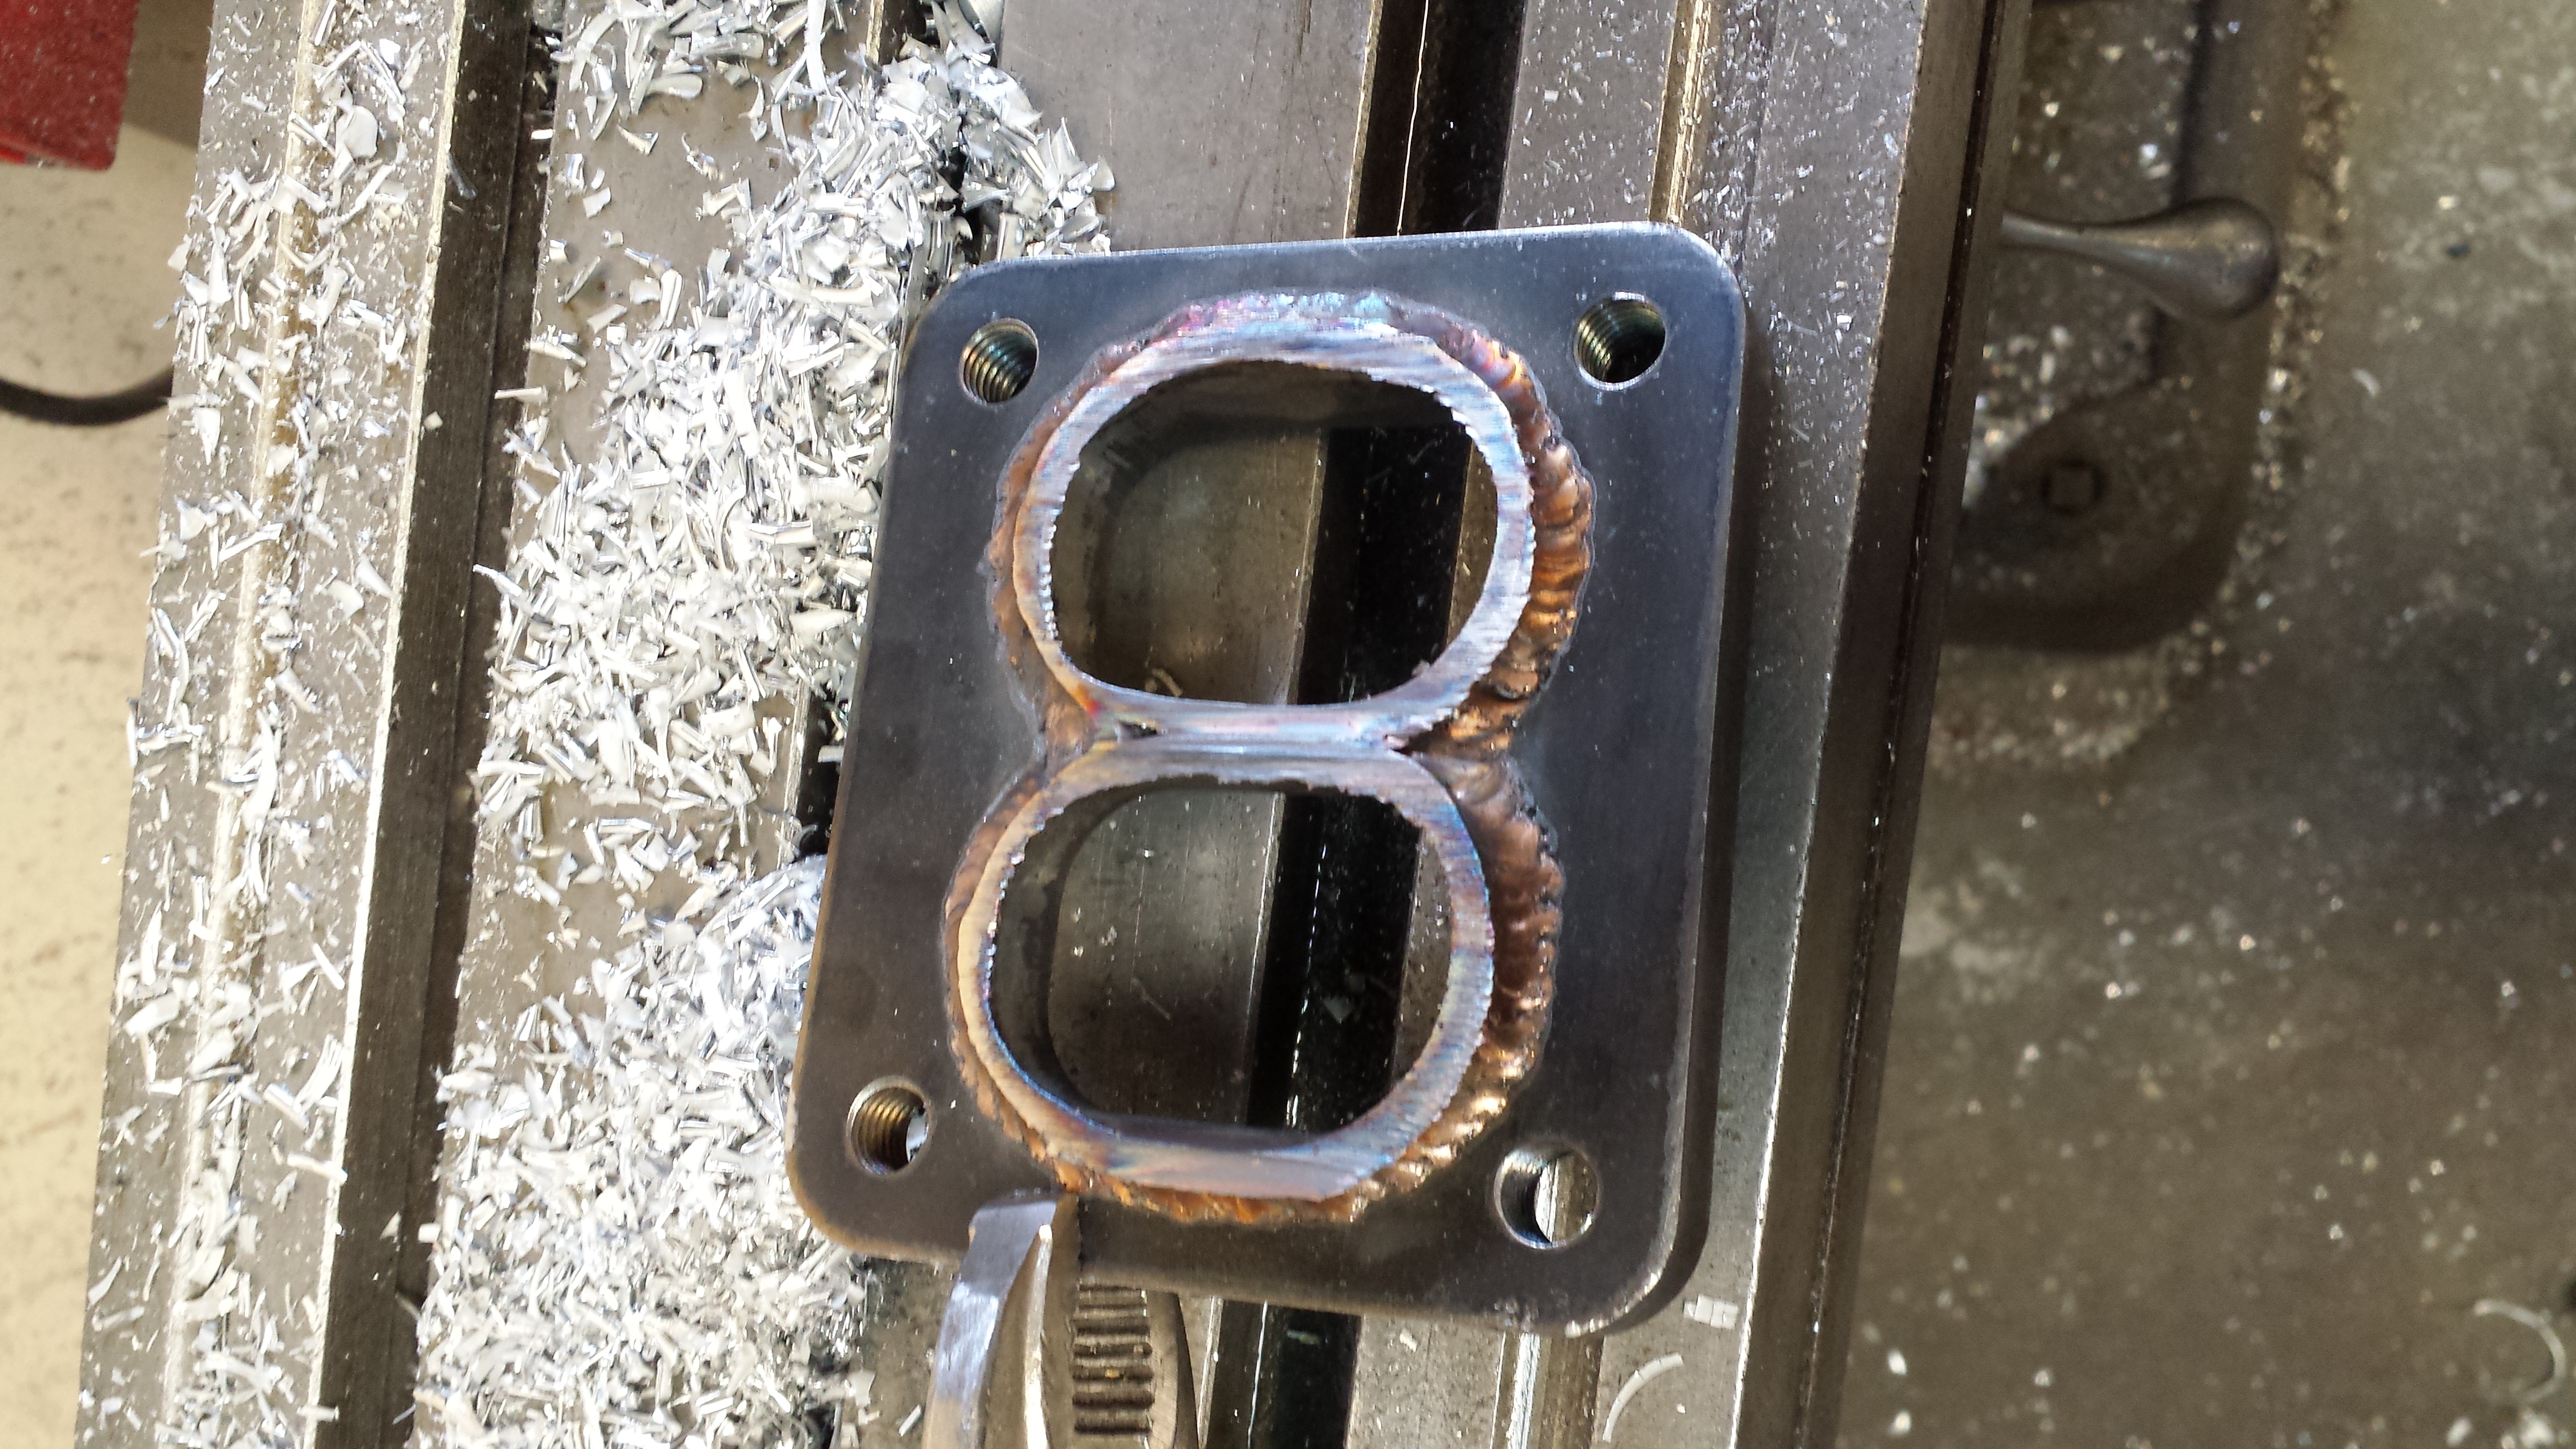
And This one came back to bite me. I originally expected to mount my turbo much lower than I am currently going to.. So I needed to change the inlet angles of runners into the turbo flange.
So I had to cut the only inlets off
So Even though my buddy has been working crazy hours plus overtime and everything else in-between at his work.. he said we can make the manifold happen. I'm looking for a trailer to purchase here pretty damn soon, but i'll probly borrow one today or tomorrow so I can transport the car over there at night. We'll be working on it after hours from 6-8/9ish for this next week or so till we get it finished. It's again...going to be much more work than just purchasing a manifold from turblown..but I really want the long runner and and I have a lot of $$ in materials that I don't feel like trying to sell. Plus all of the material I have is top notch and took a bit of research to figure out/plan out. I'll keep you guys updated. I'll be running a second ground from the battery to the transmission bell or housing or block on top of the ground I already made, installing my knuckles wheels and dropping the car down onto the ground...as well as anything else I can get to before I pass out tonight haha. I'm motivated to finish and I can't wait to see what the long runner and manifold do on the dyno.
I had to work Fri-sat and sunday.. LOOOOng days too. But that didn't stop me from hustling a bit on the car. I havn't been able to find fronts yet to complete my wheels so I used some spare fronts I forgot about. It's nice to forget about these things...then when you find them your like "oh crap" SAVE!! I'm trying to have the car running again in 2 weeks time. We will see if I can swing it. Front spares are Rota p45R's. 18x10 +20. I got an excellent deal on the 4 rears with 4 brand new Nitto Nt555's 225/35/18 so I threw a pair on for the time being.
And my rears =-) Enkei Rpf1 18x10.5 +15 SBC finish.
The Prius fits it all
Wrapped in some left over Nitto Invo's I had in the backyard. 245/45/18
And This one came back to bite me. I originally expected to mount my turbo much lower than I am currently going to.. So I needed to change the inlet angles of runners into the turbo flange.
So I had to cut the only inlets off
So Even though my buddy has been working crazy hours plus overtime and everything else in-between at his work.. he said we can make the manifold happen. I'm looking for a trailer to purchase here pretty damn soon, but i'll probly borrow one today or tomorrow so I can transport the car over there at night. We'll be working on it after hours from 6-8/9ish for this next week or so till we get it finished. It's again...going to be much more work than just purchasing a manifold from turblown..but I really want the long runner and and I have a lot of $$ in materials that I don't feel like trying to sell. Plus all of the material I have is top notch and took a bit of research to figure out/plan out. I'll keep you guys updated. I'll be running a second ground from the battery to the transmission bell or housing or block on top of the ground I already made, installing my knuckles wheels and dropping the car down onto the ground...as well as anything else I can get to before I pass out tonight haha. I'm motivated to finish and I can't wait to see what the long runner and manifold do on the dyno.
04-21-14, 12:02 PM
#1837
But Elliot?...that dudes probly talking on 3 phones, answering e-mails and welding out mani's simultaneously
04-21-14, 12:32 PM
#1838
01000101
(So pulling power directly from (+) constant and switching the relay from the ignition.)
04-21-14, 12:51 PM
#1839
It could be a number of factors but in my opinion...which is very limited (I base all of my knowledge off of the best in motorsports by regurgitation), ...it has got to be exhaust gas expansion. There's probably a length that is too long...where gas stops expanding...and THEN loses heat energy. But that factor probably changes with RPM. Your simply going to have gas expelled quicker at higher rpm.
But Elliot?...that dudes probly talking on 3 phones, answering e-mails and welding out mani's simultaneously
But Elliot?...that dudes probly talking on 3 phones, answering e-mails and welding out mani's simultaneously
 elliot is definitely talking on multiple phones right this second.
04-21-14, 01:54 PM
elliot is definitely talking on multiple phones right this second.
04-21-14, 01:54 PM
#1841
it could be a number of factors but in my opinion...which is very limited (i base all of my knowledge off of the best in motorsports by regurgitation), ...it has got to be exhaust gas expansion. There's probably a length that is too long...where gas stops expanding...and then loses heat energy. But that factor probably changes with rpm. Your simply going to have gas expelled quicker at higher rpm.
but elliot?...that dudes probly talking on 3 phones, answering e-mails and welding out mani's simultaneously
but elliot?...that dudes probly talking on 3 phones, answering e-mails and welding out mani's simultaneously

 04-22-14, 11:30 AM
#1844
Update: 8 Hours after 8 hours
Where the hell did 8 hours go?!! Well yesterday was "one of those days." It was good because I made a lot of un-noticed progress, but at the same time in my mind...I can pump out anything in 30 min haha. I got home around 3:15 after work and got straight to work. When I say "un-noticed" it's because sometimes there are things that you will never remember doing. For instance..you'll always remember when you got a new set of wheels. But you will probly never remember that you went to install a wheel hub and the bearing was shot. You'll remember what to do to fix it but the memory....its all selective haha. Everything I did yesterday fell under this category. I spent another 8 hours working on the car.
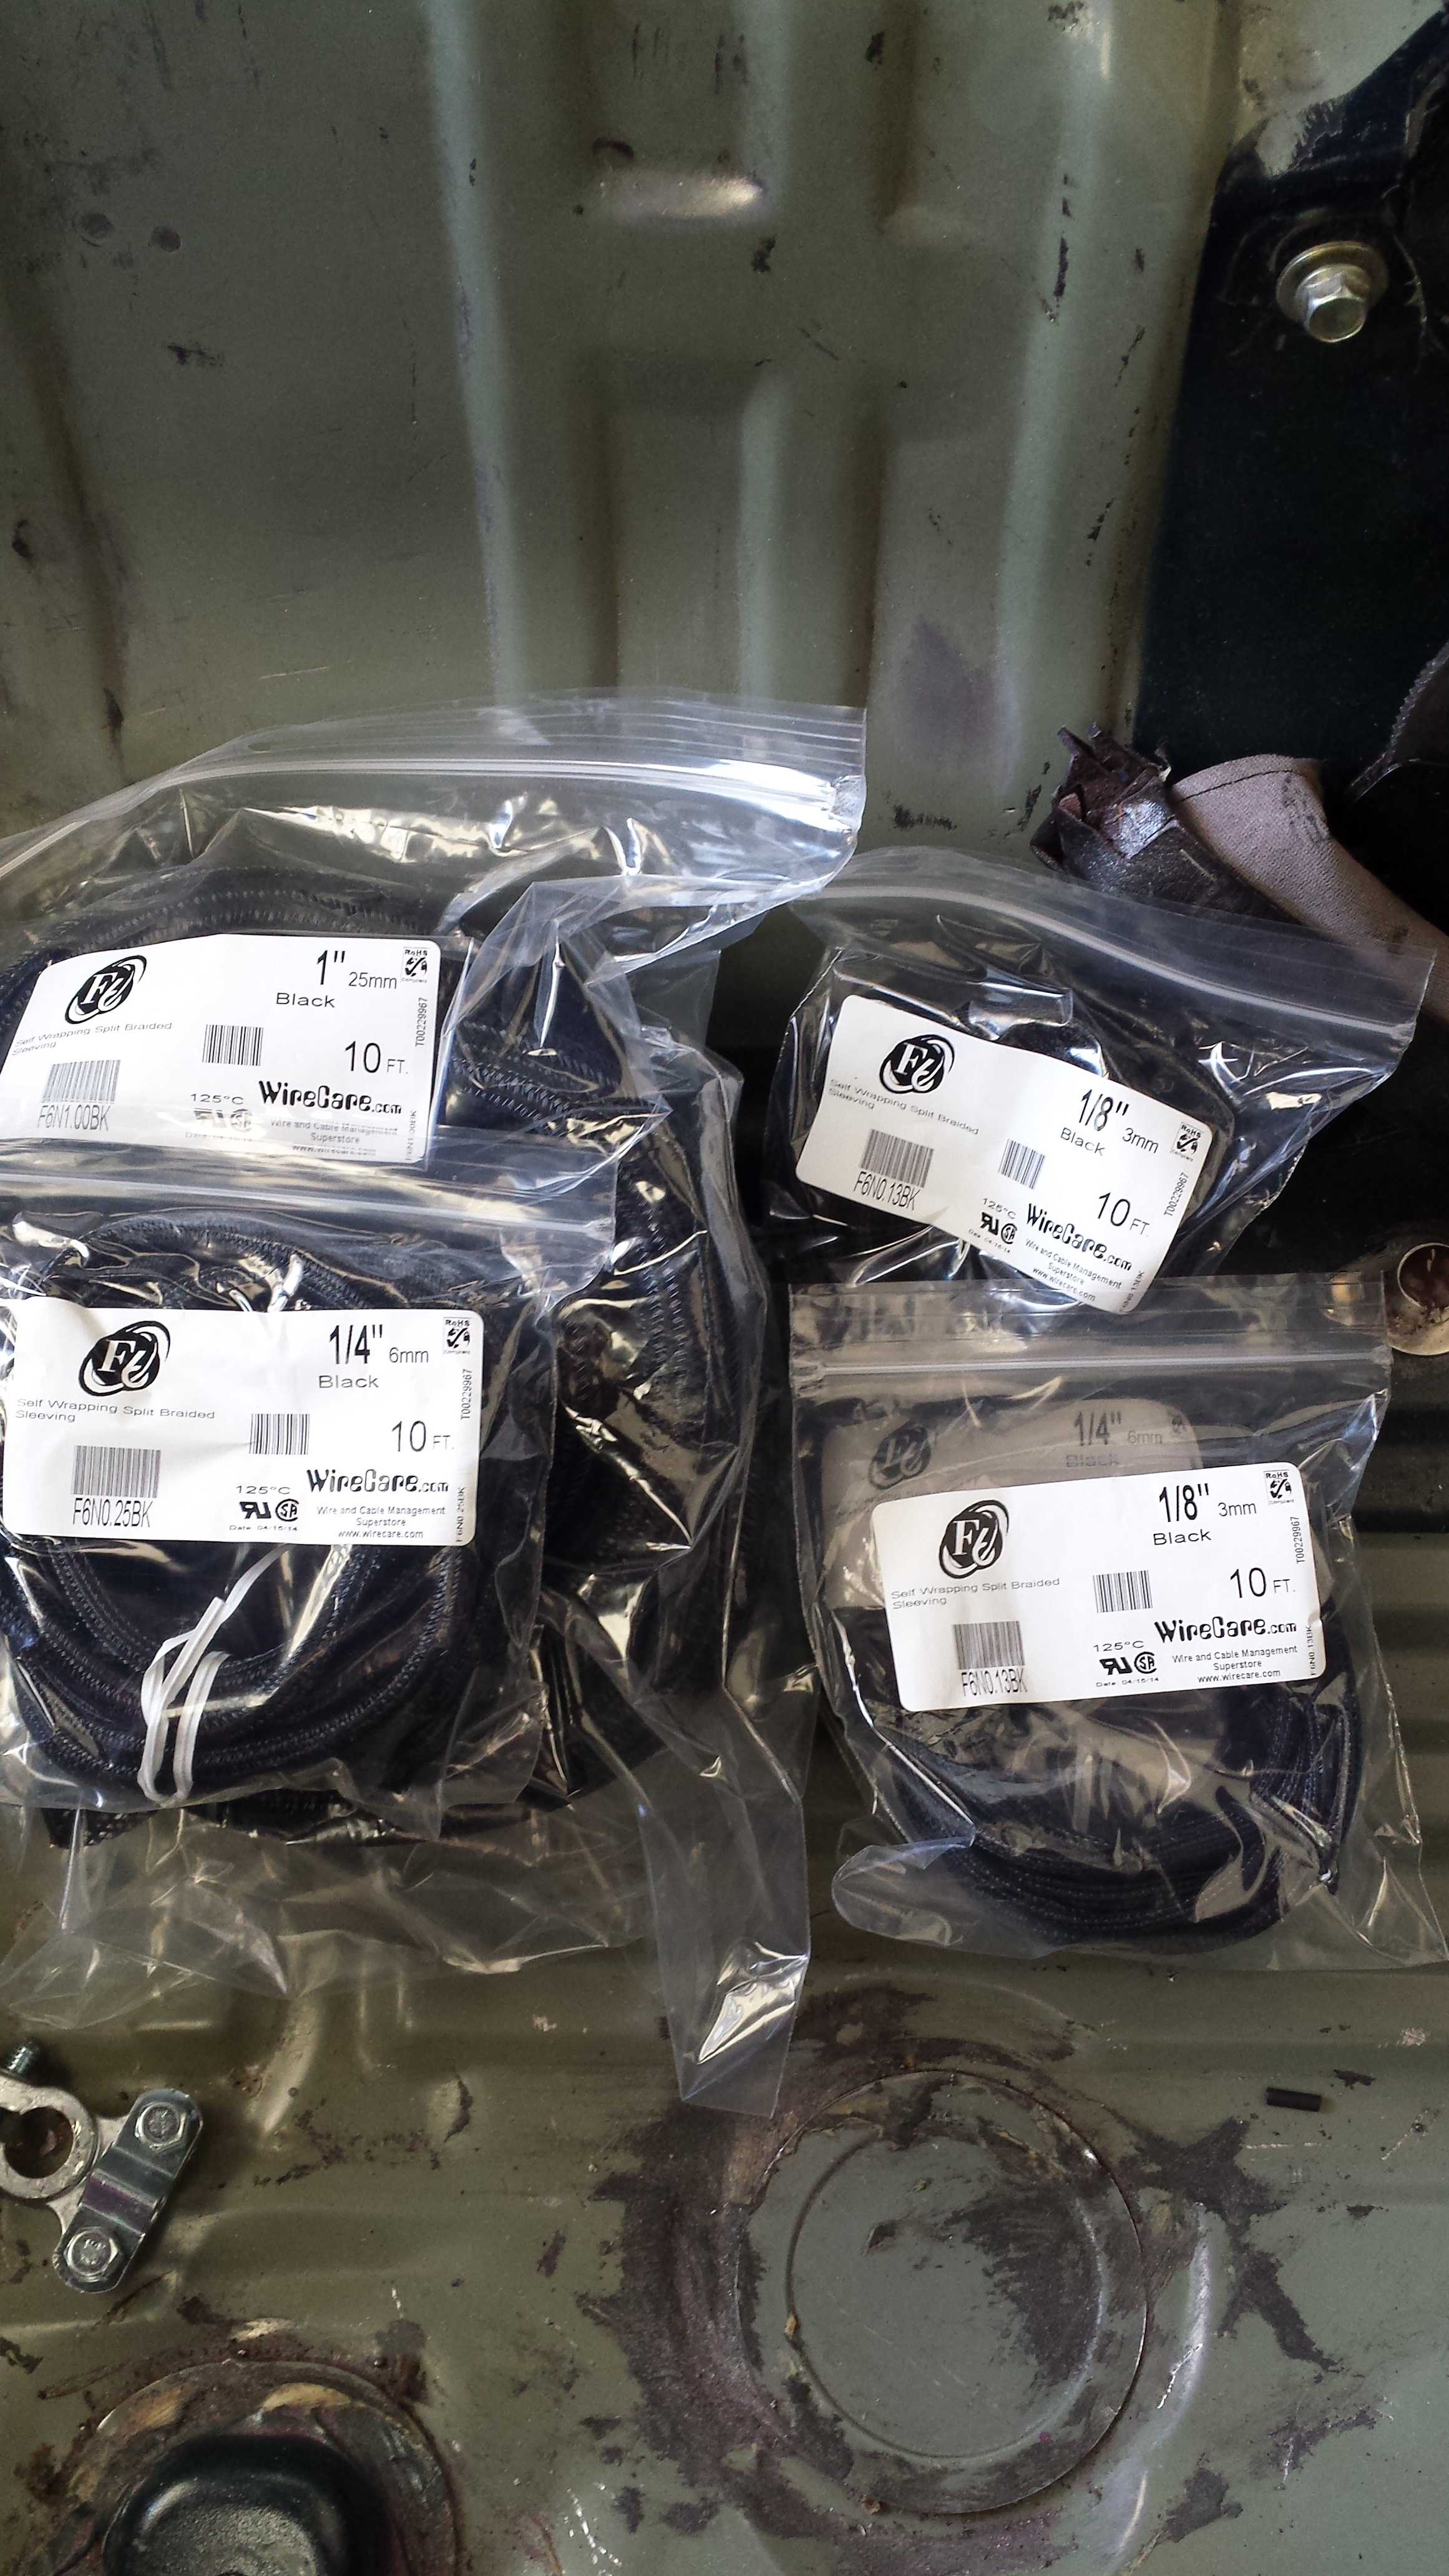
I got my order from Wirecare.com A bunch of braided sleeving in various sizes to clean up and help keep jagged edges from biting through anything important.
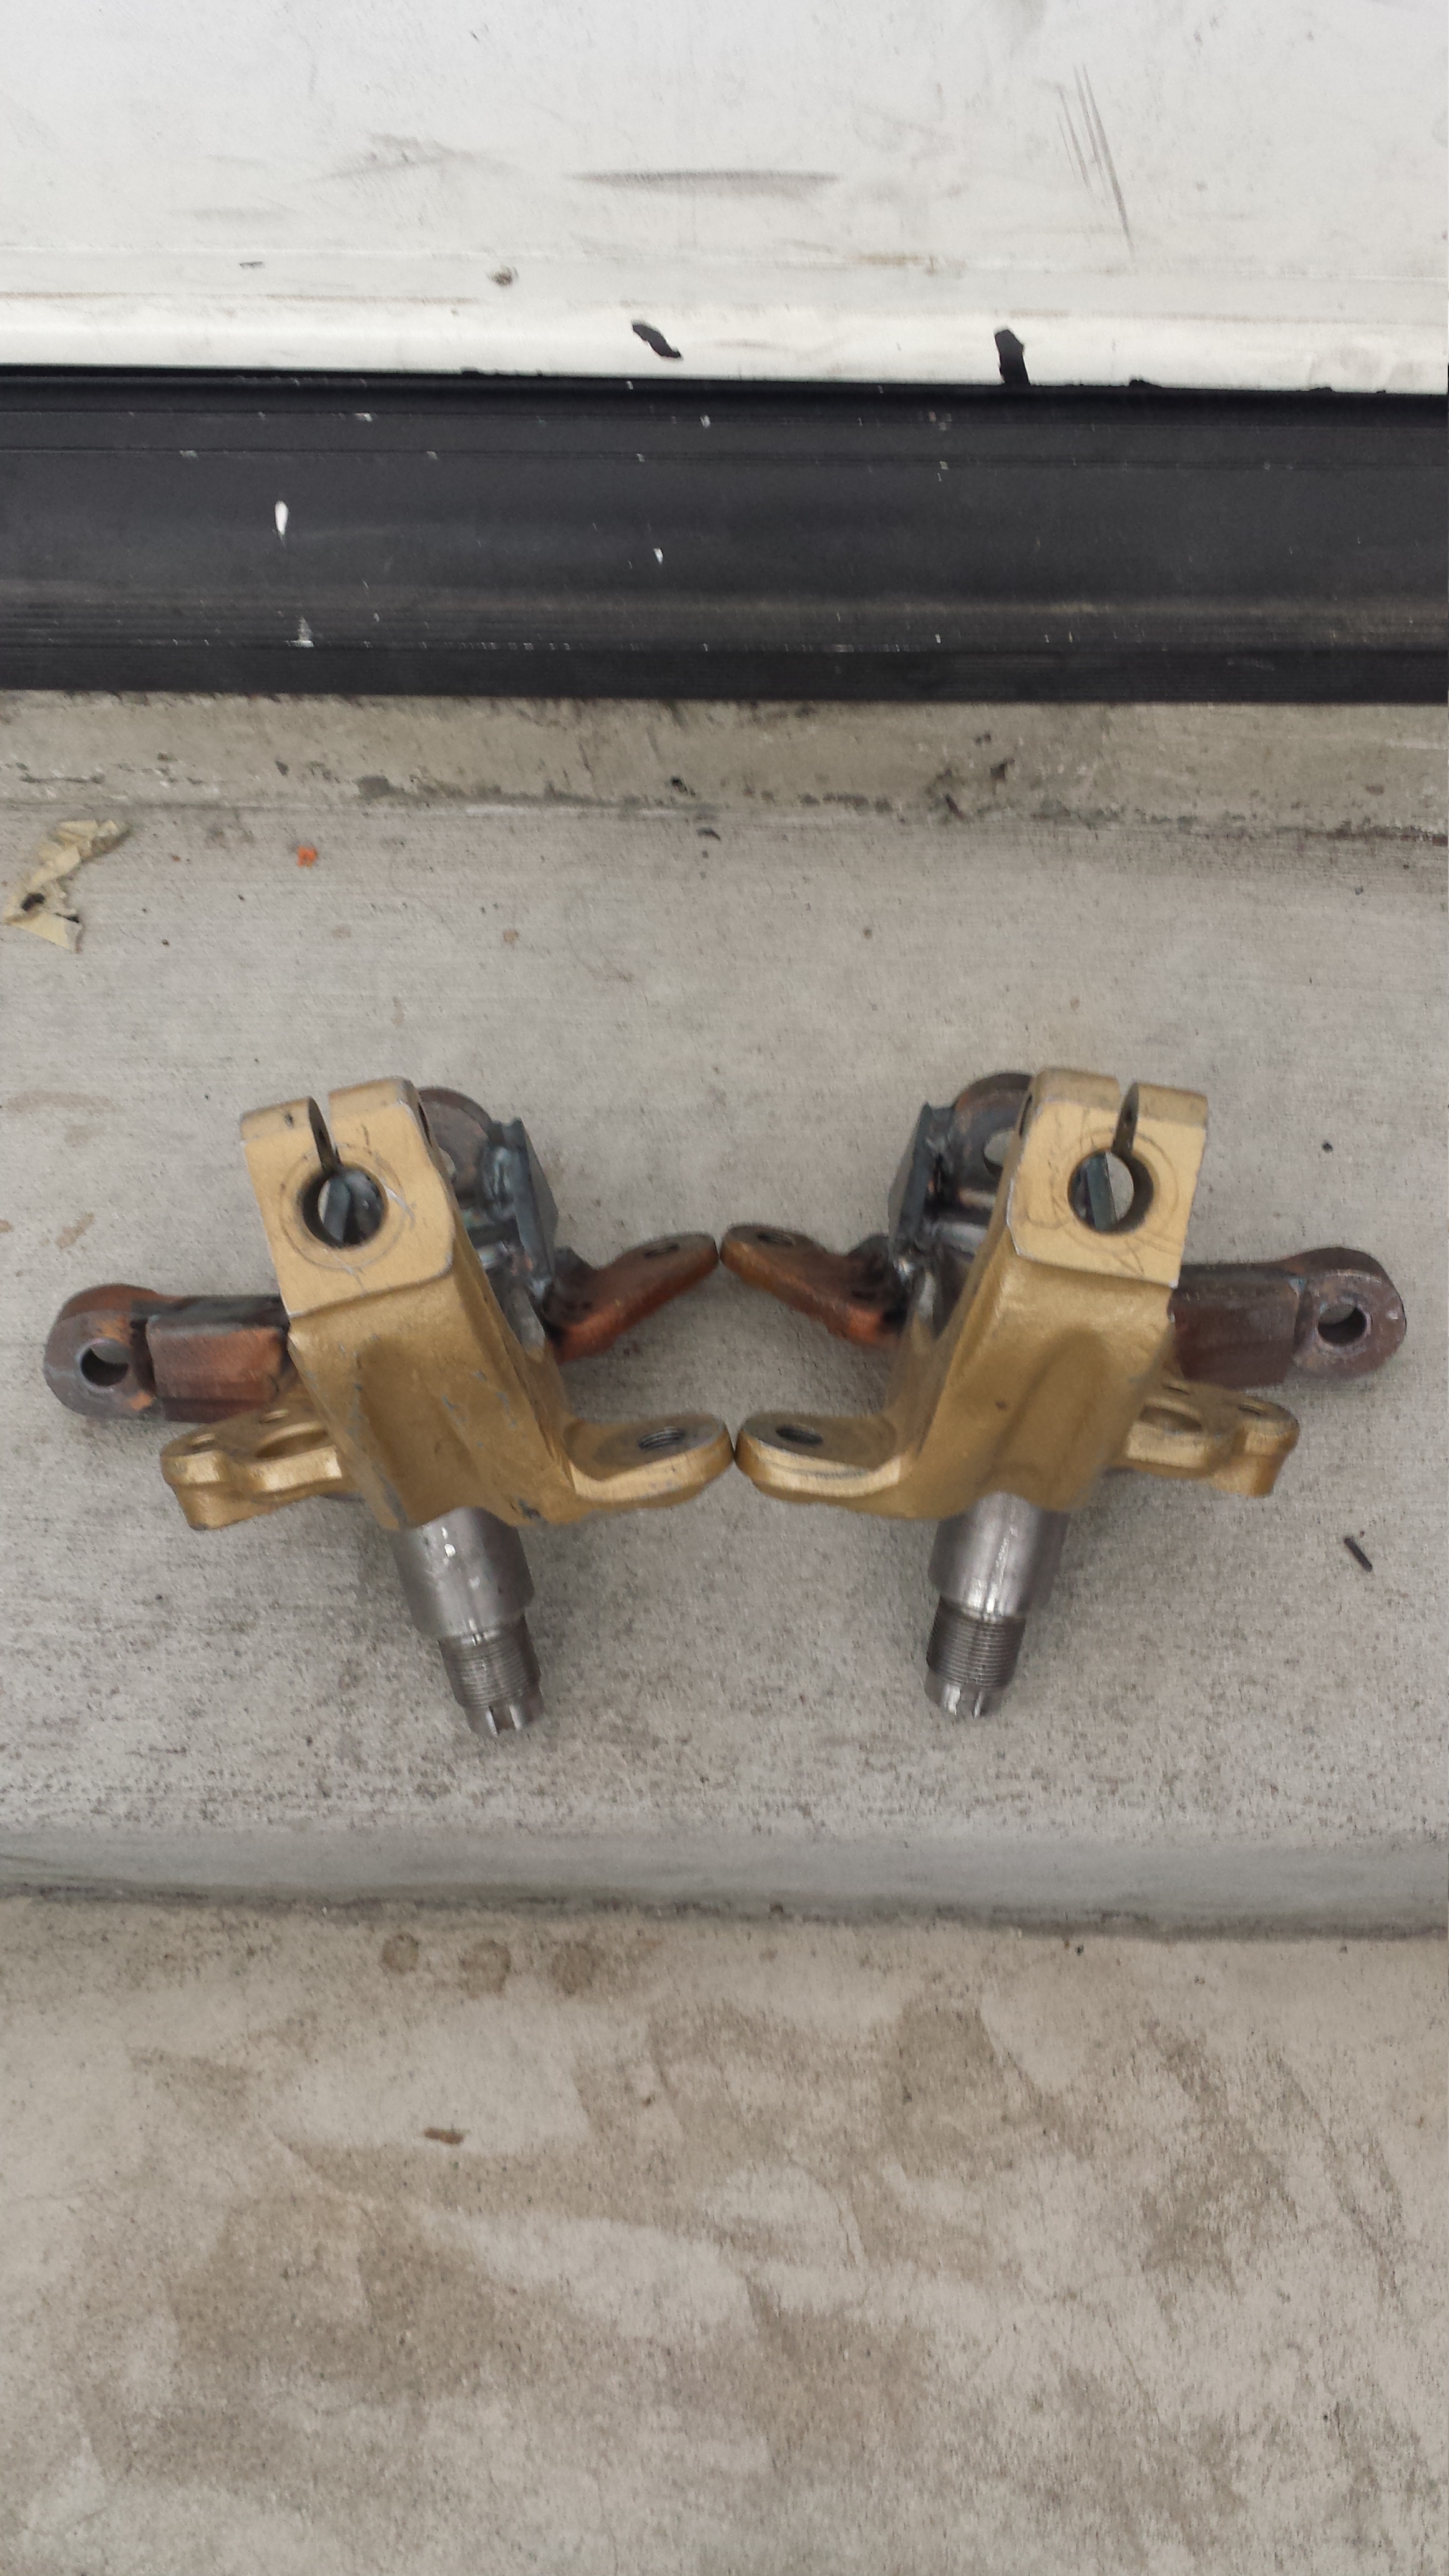
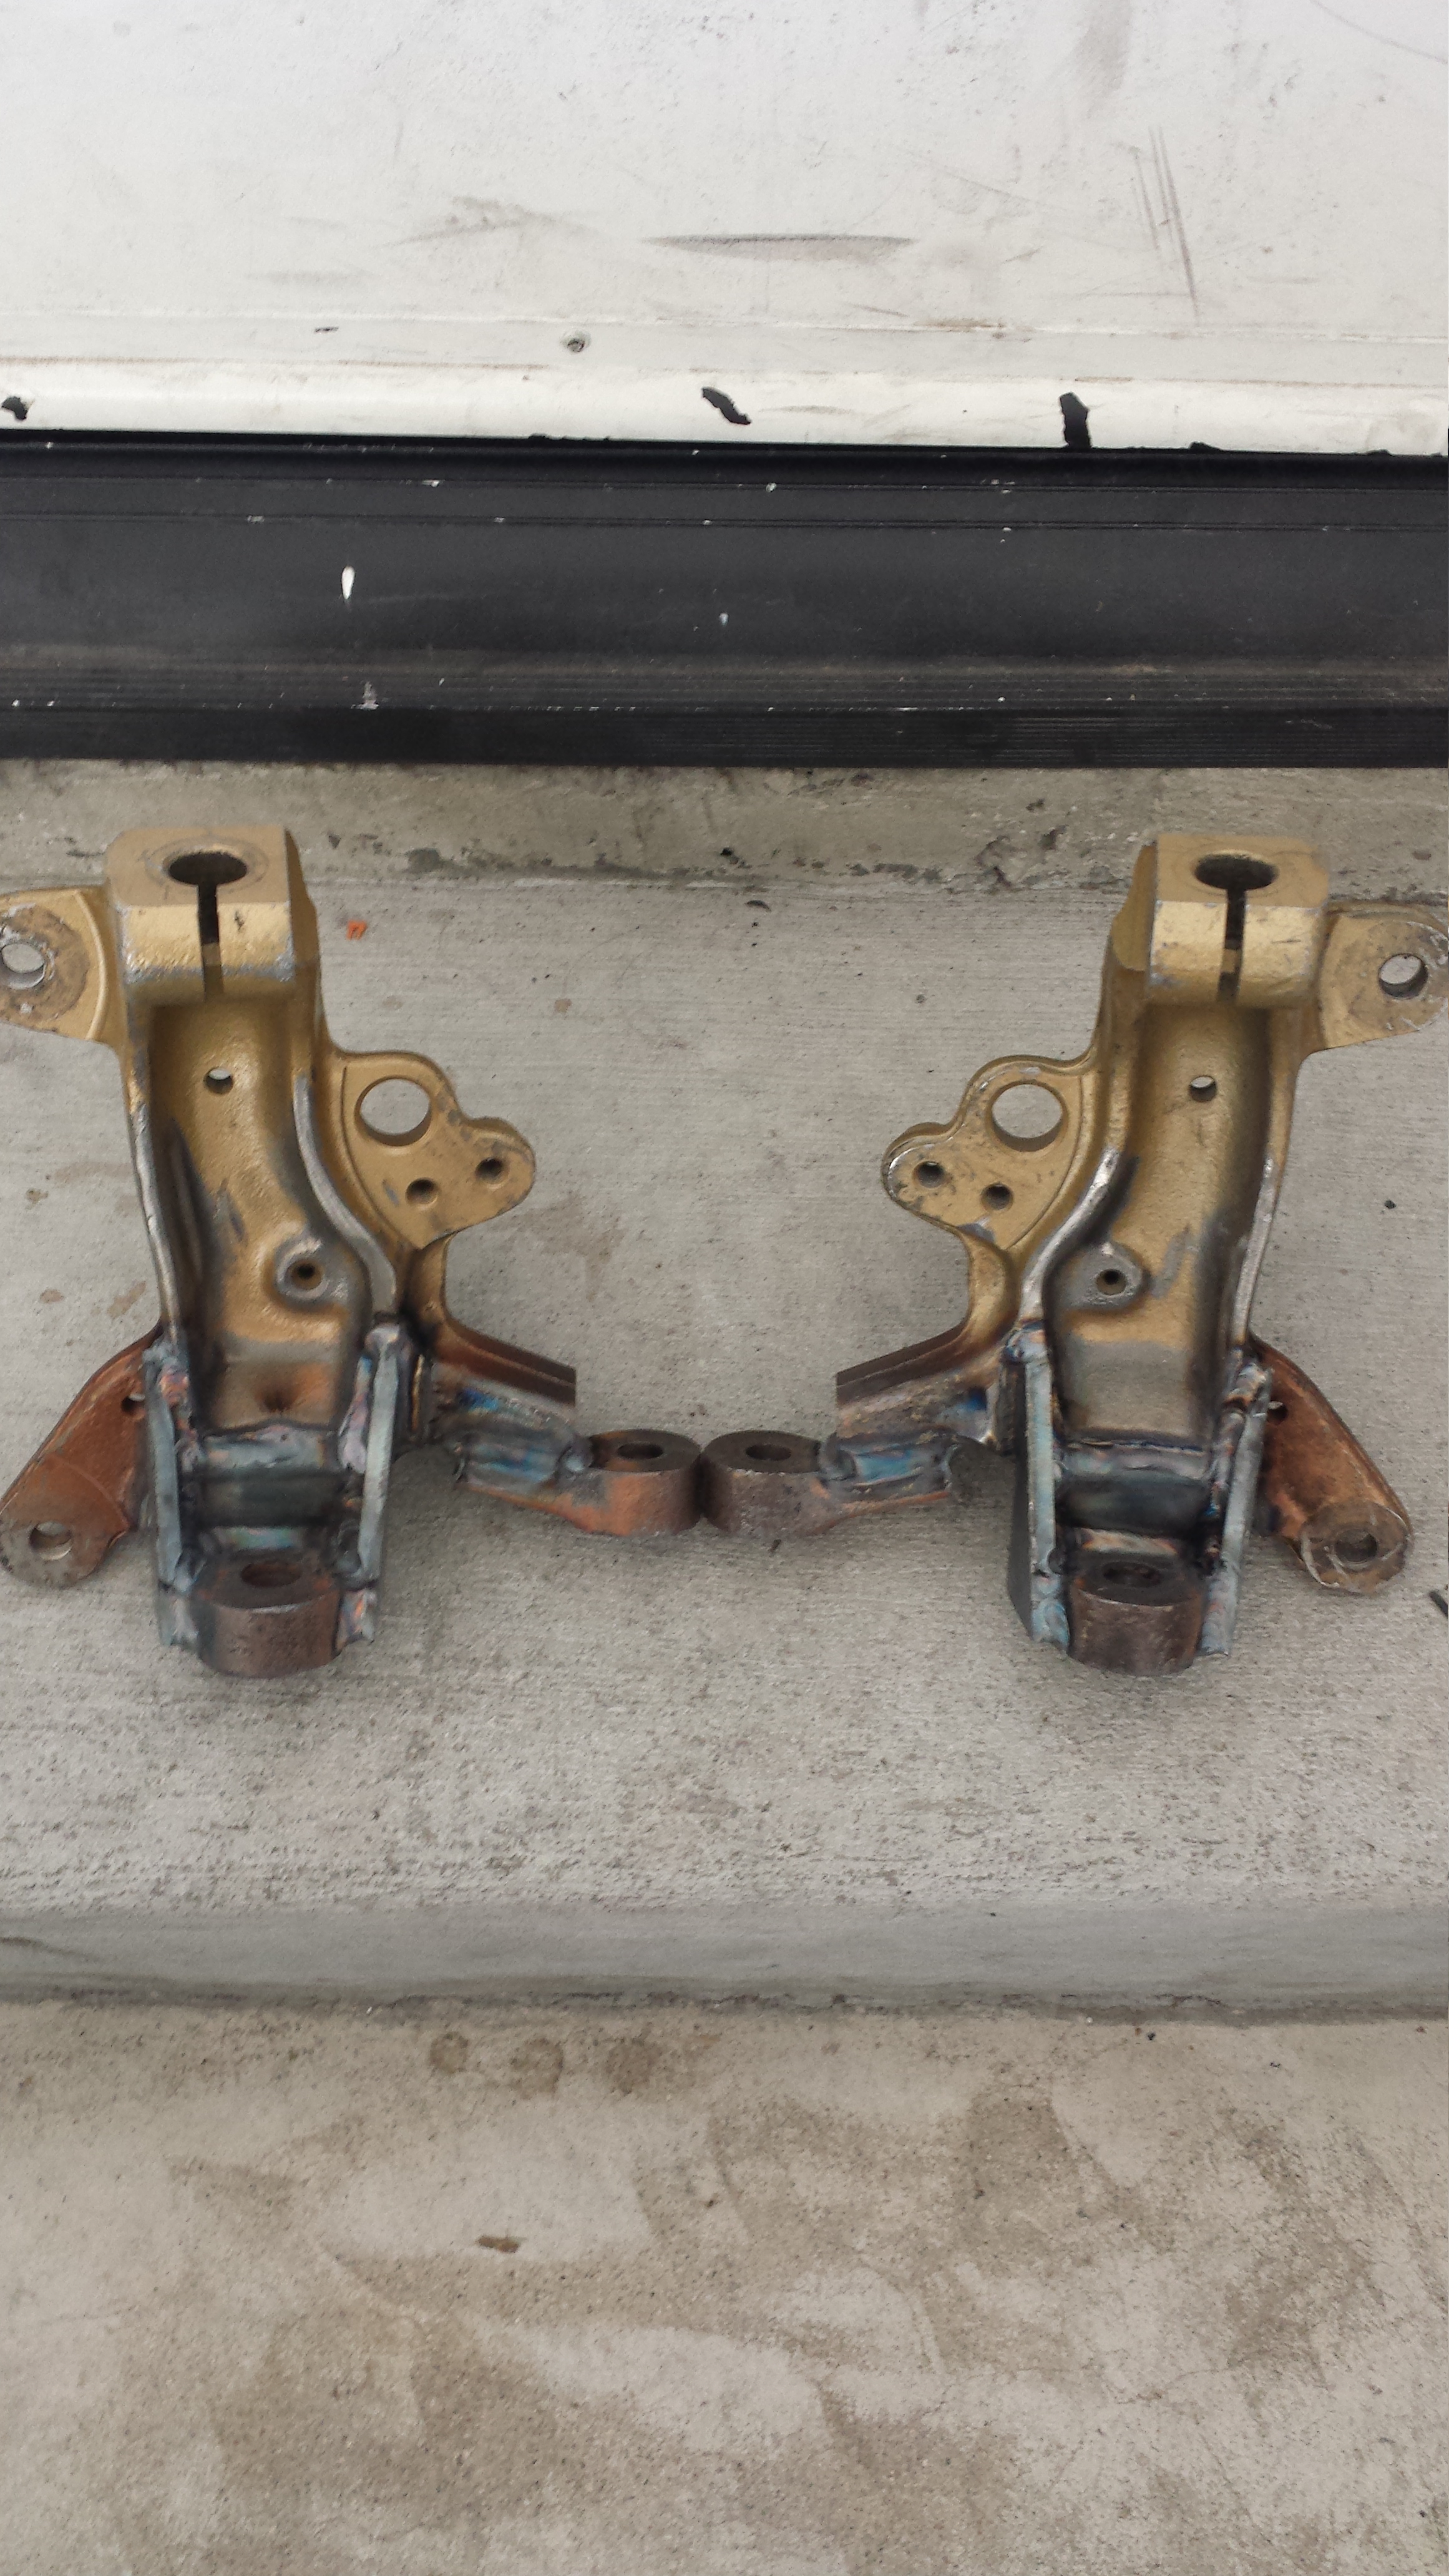
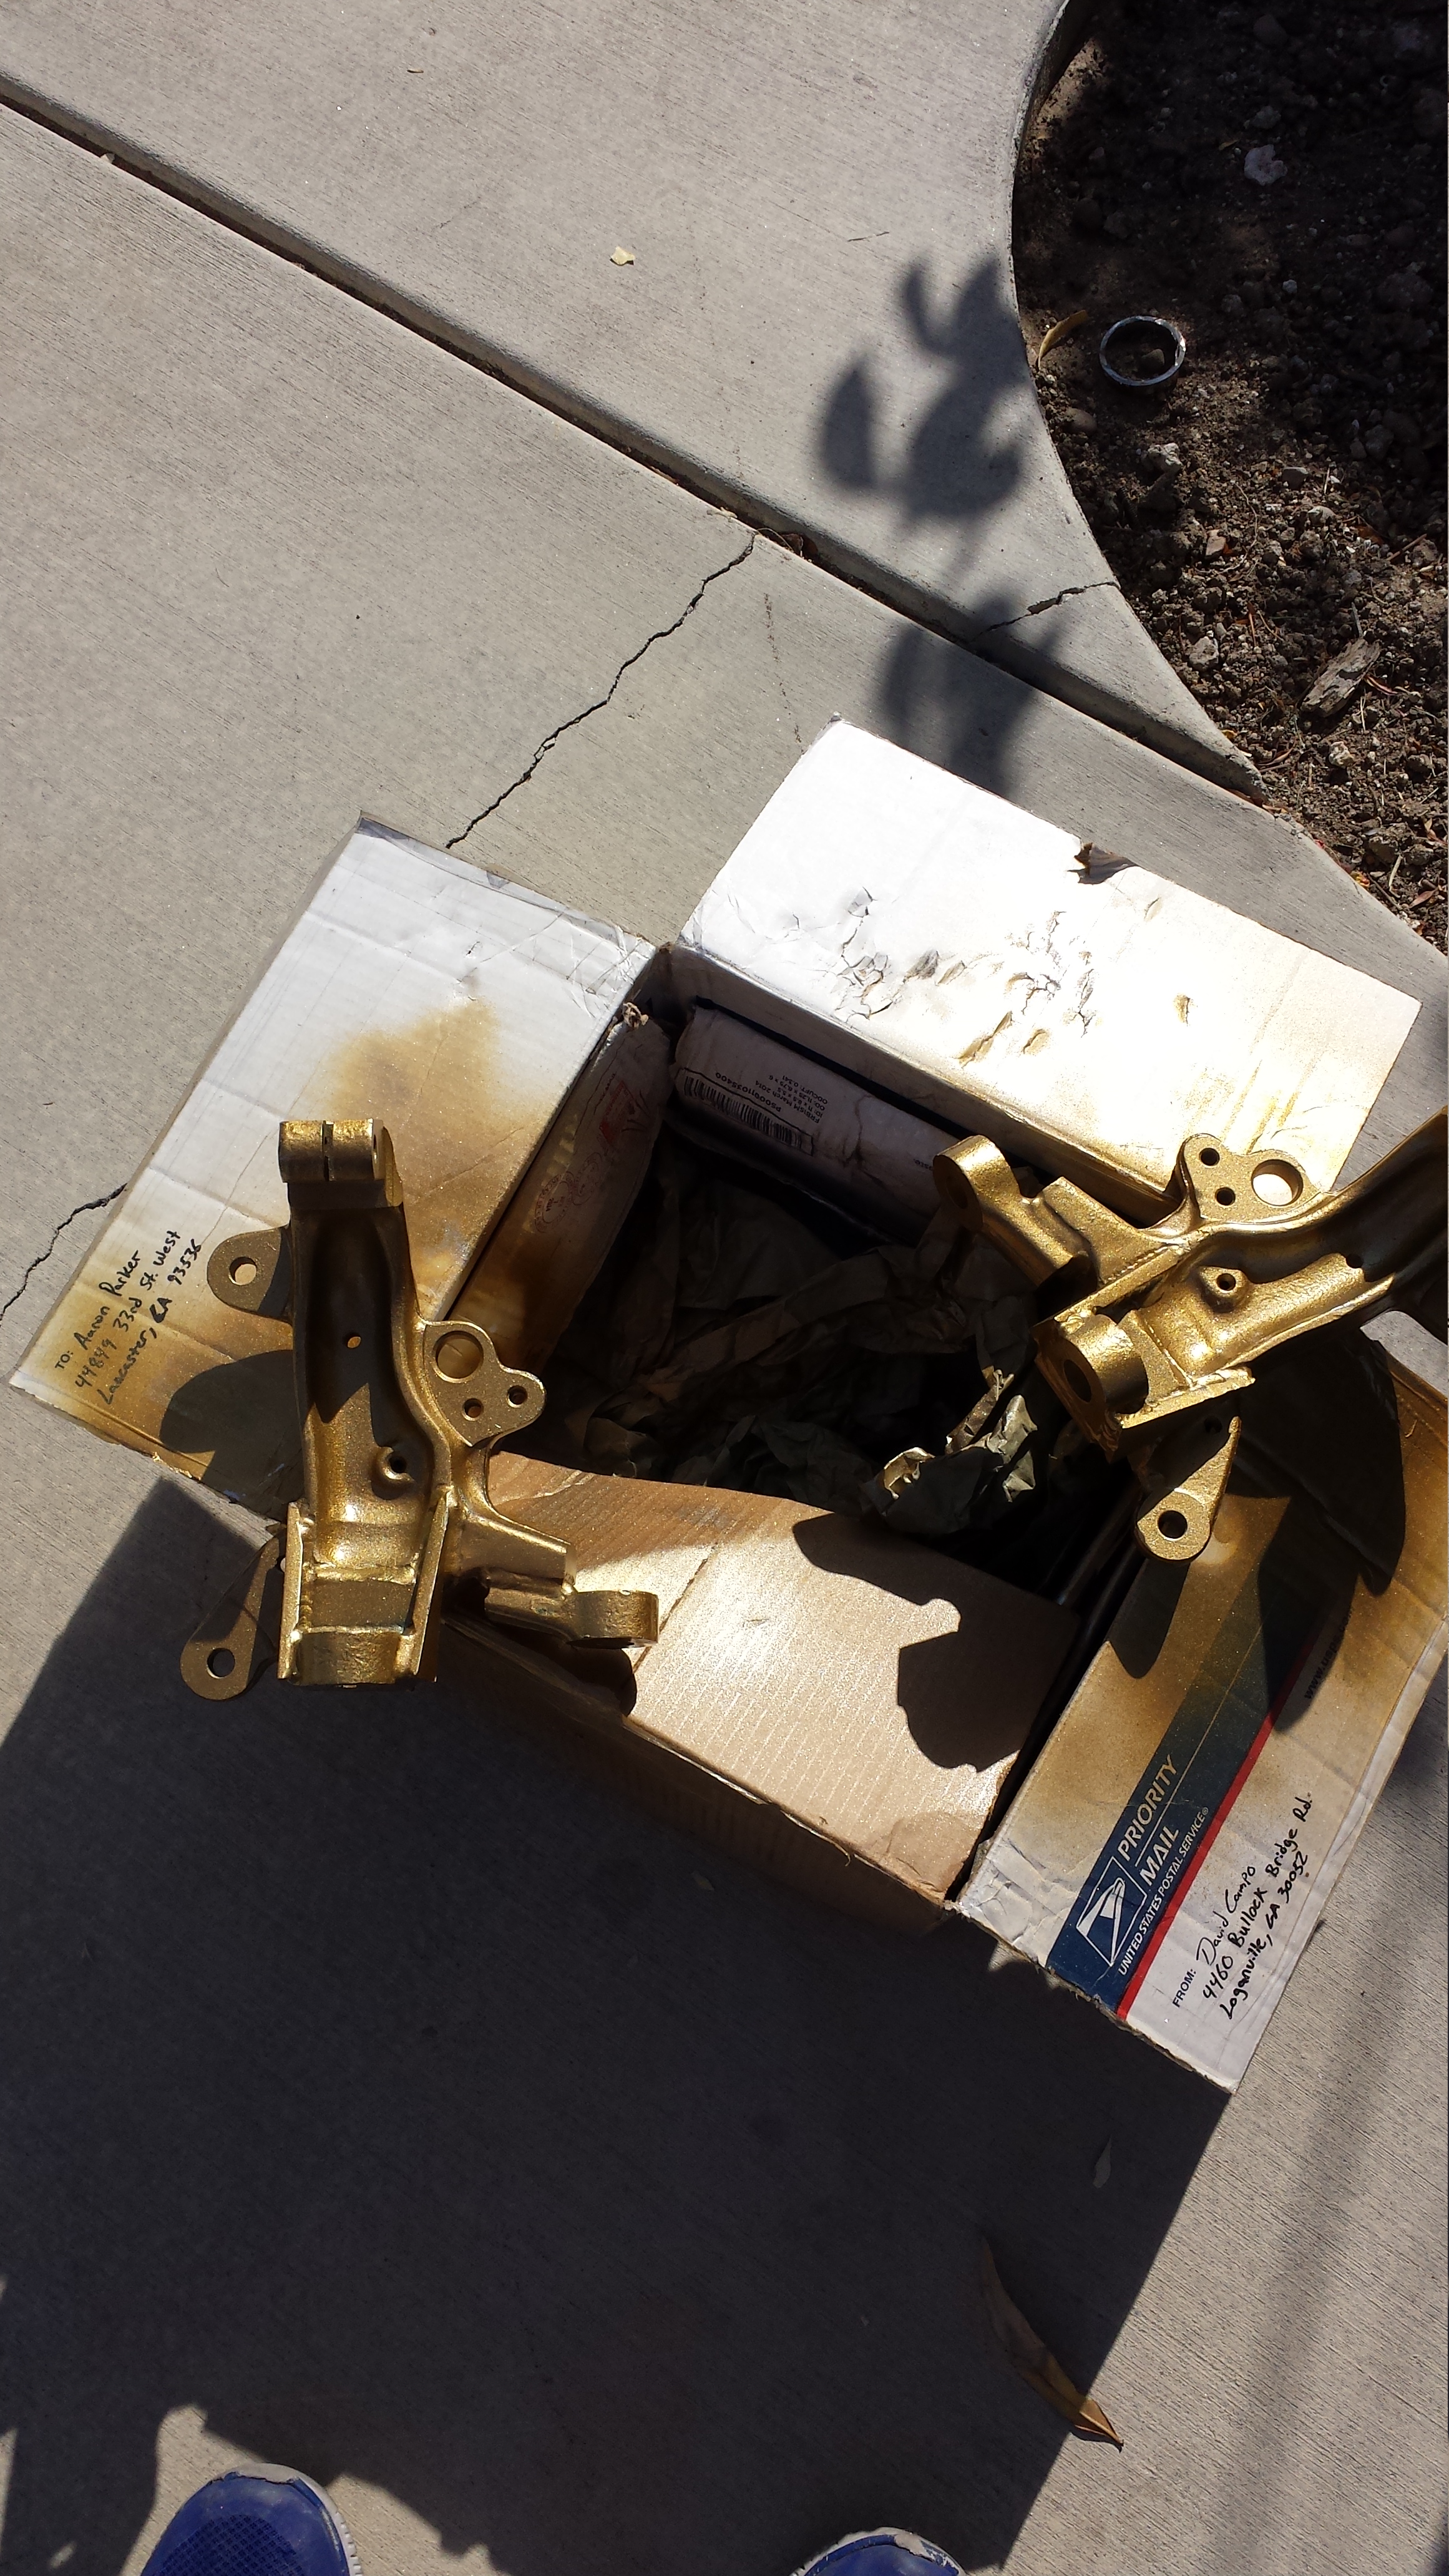
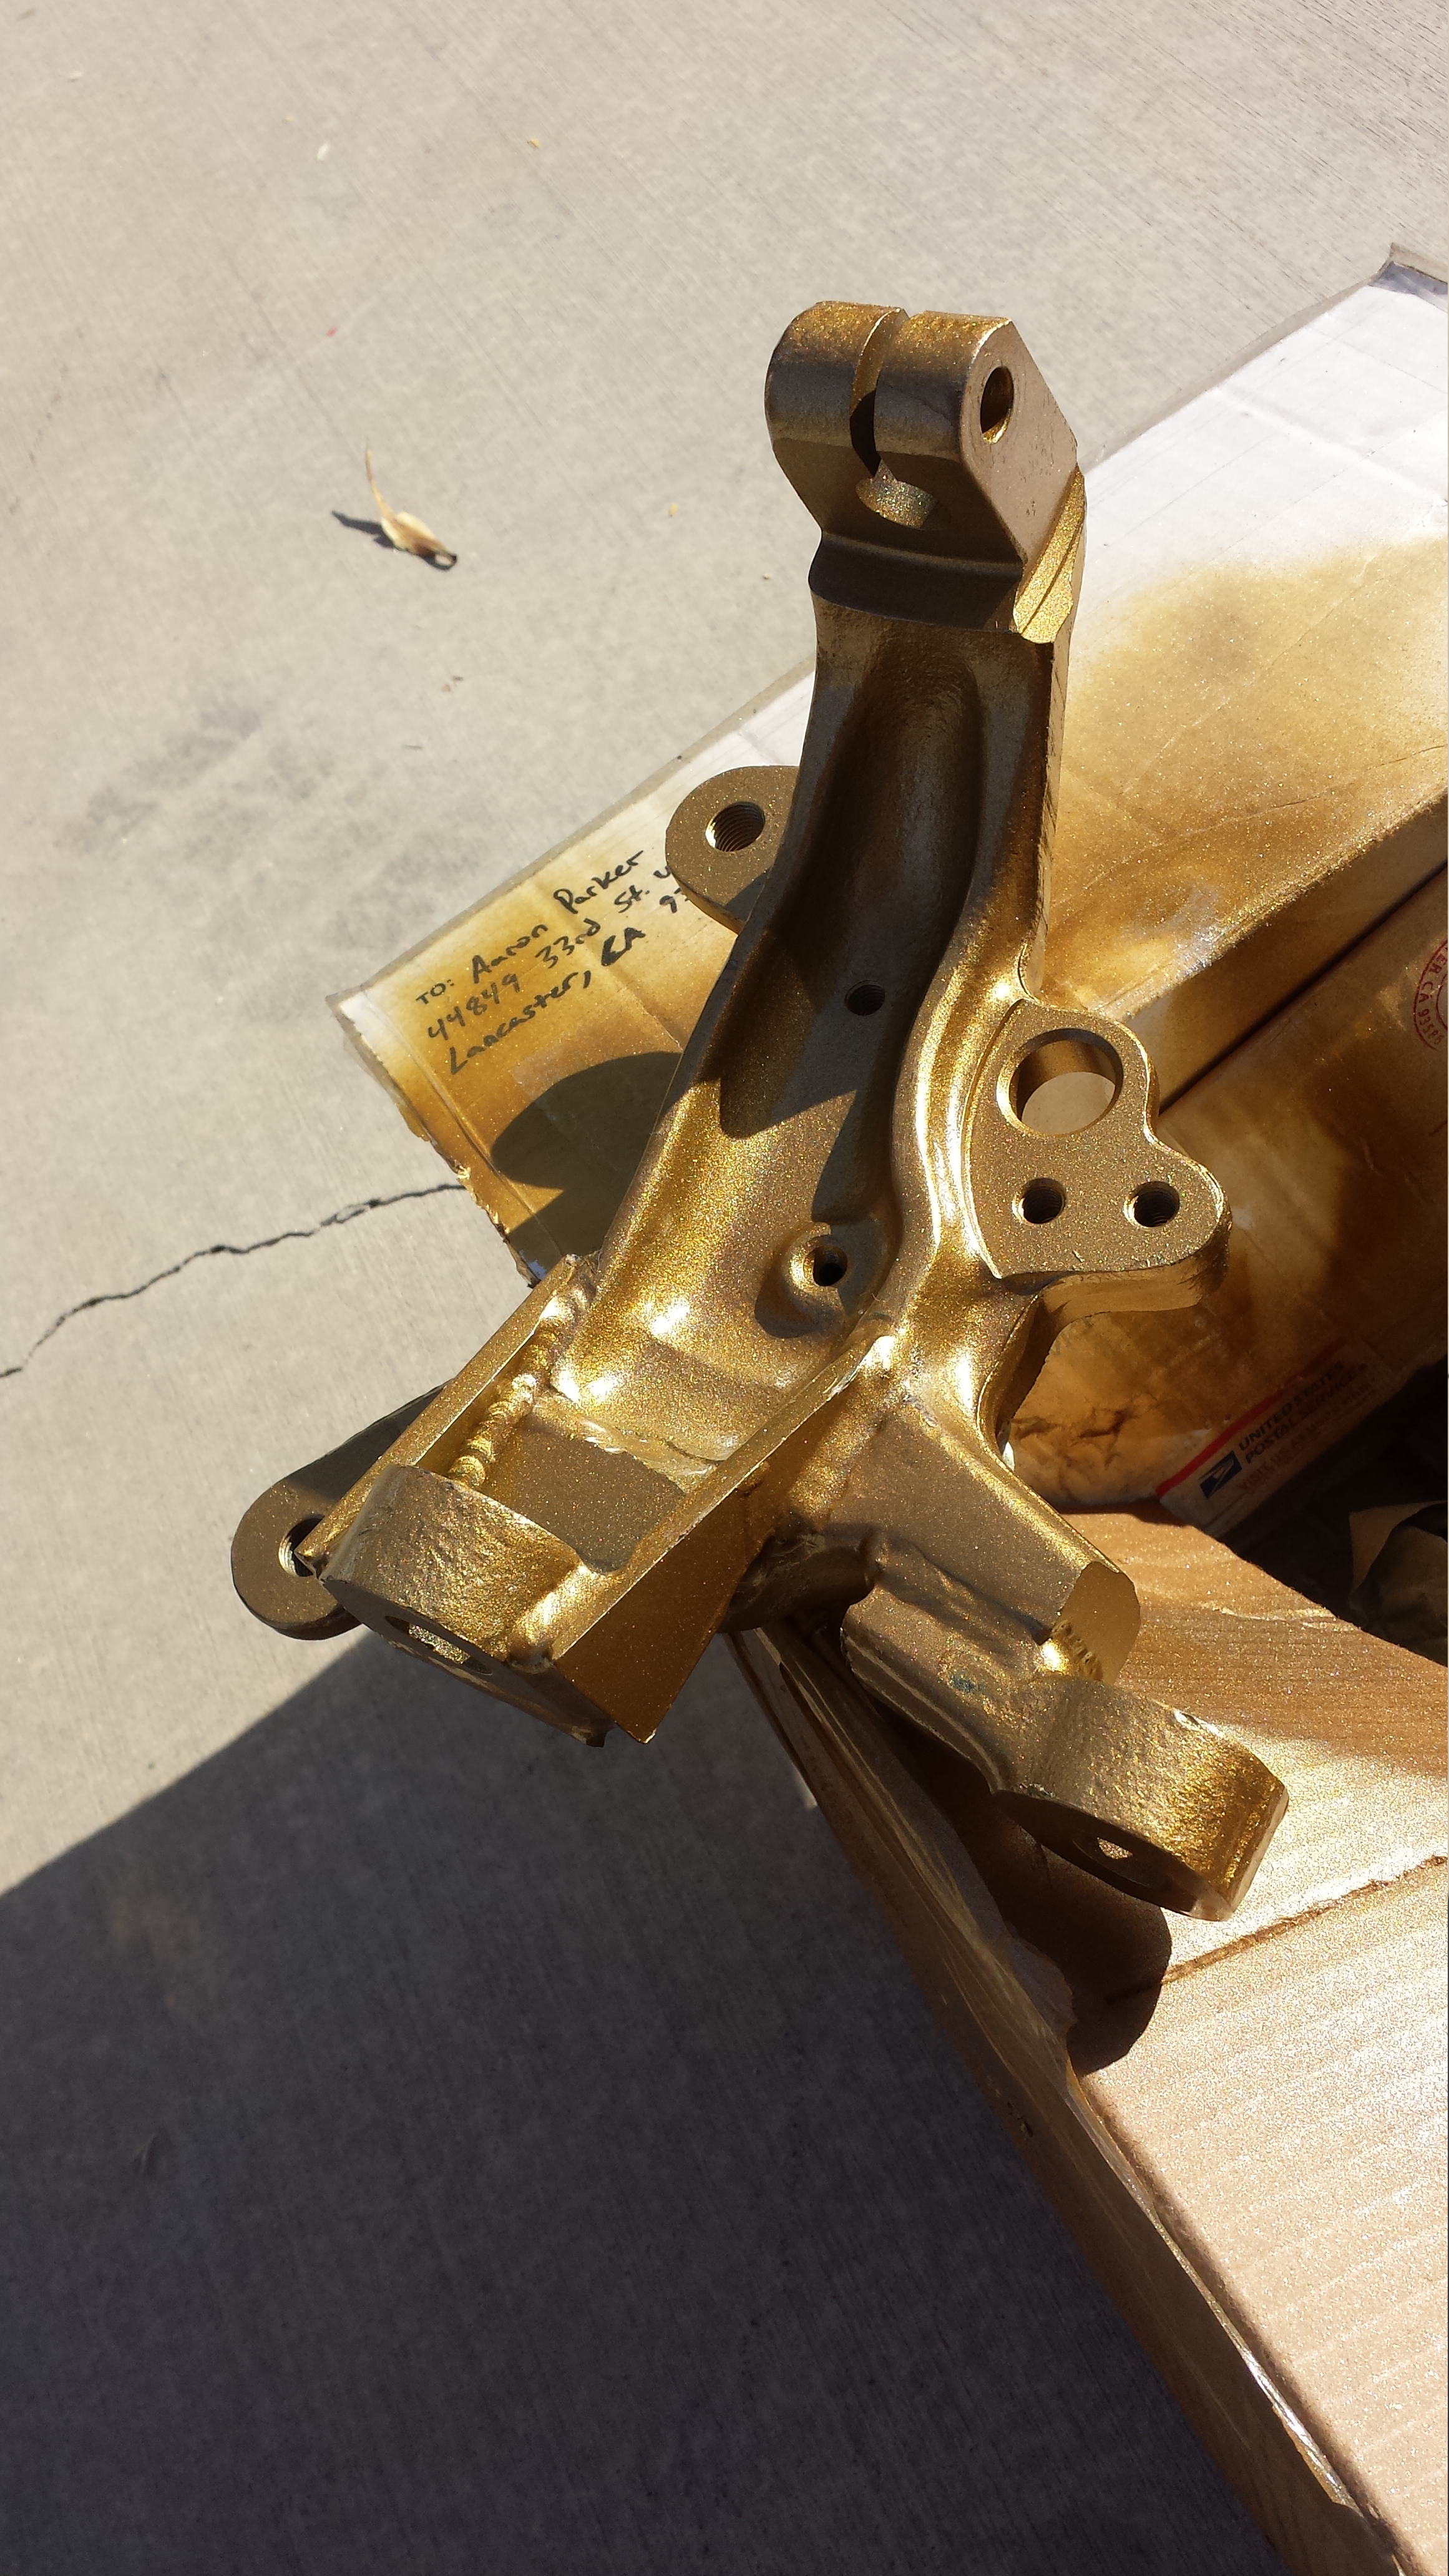
And I got my Modified Knuckles from David Campo. He did a great job on them, but I couldnt' leave the steel raw.
found some leftover flake from over 2 years ago!!! still sprays like a champ!
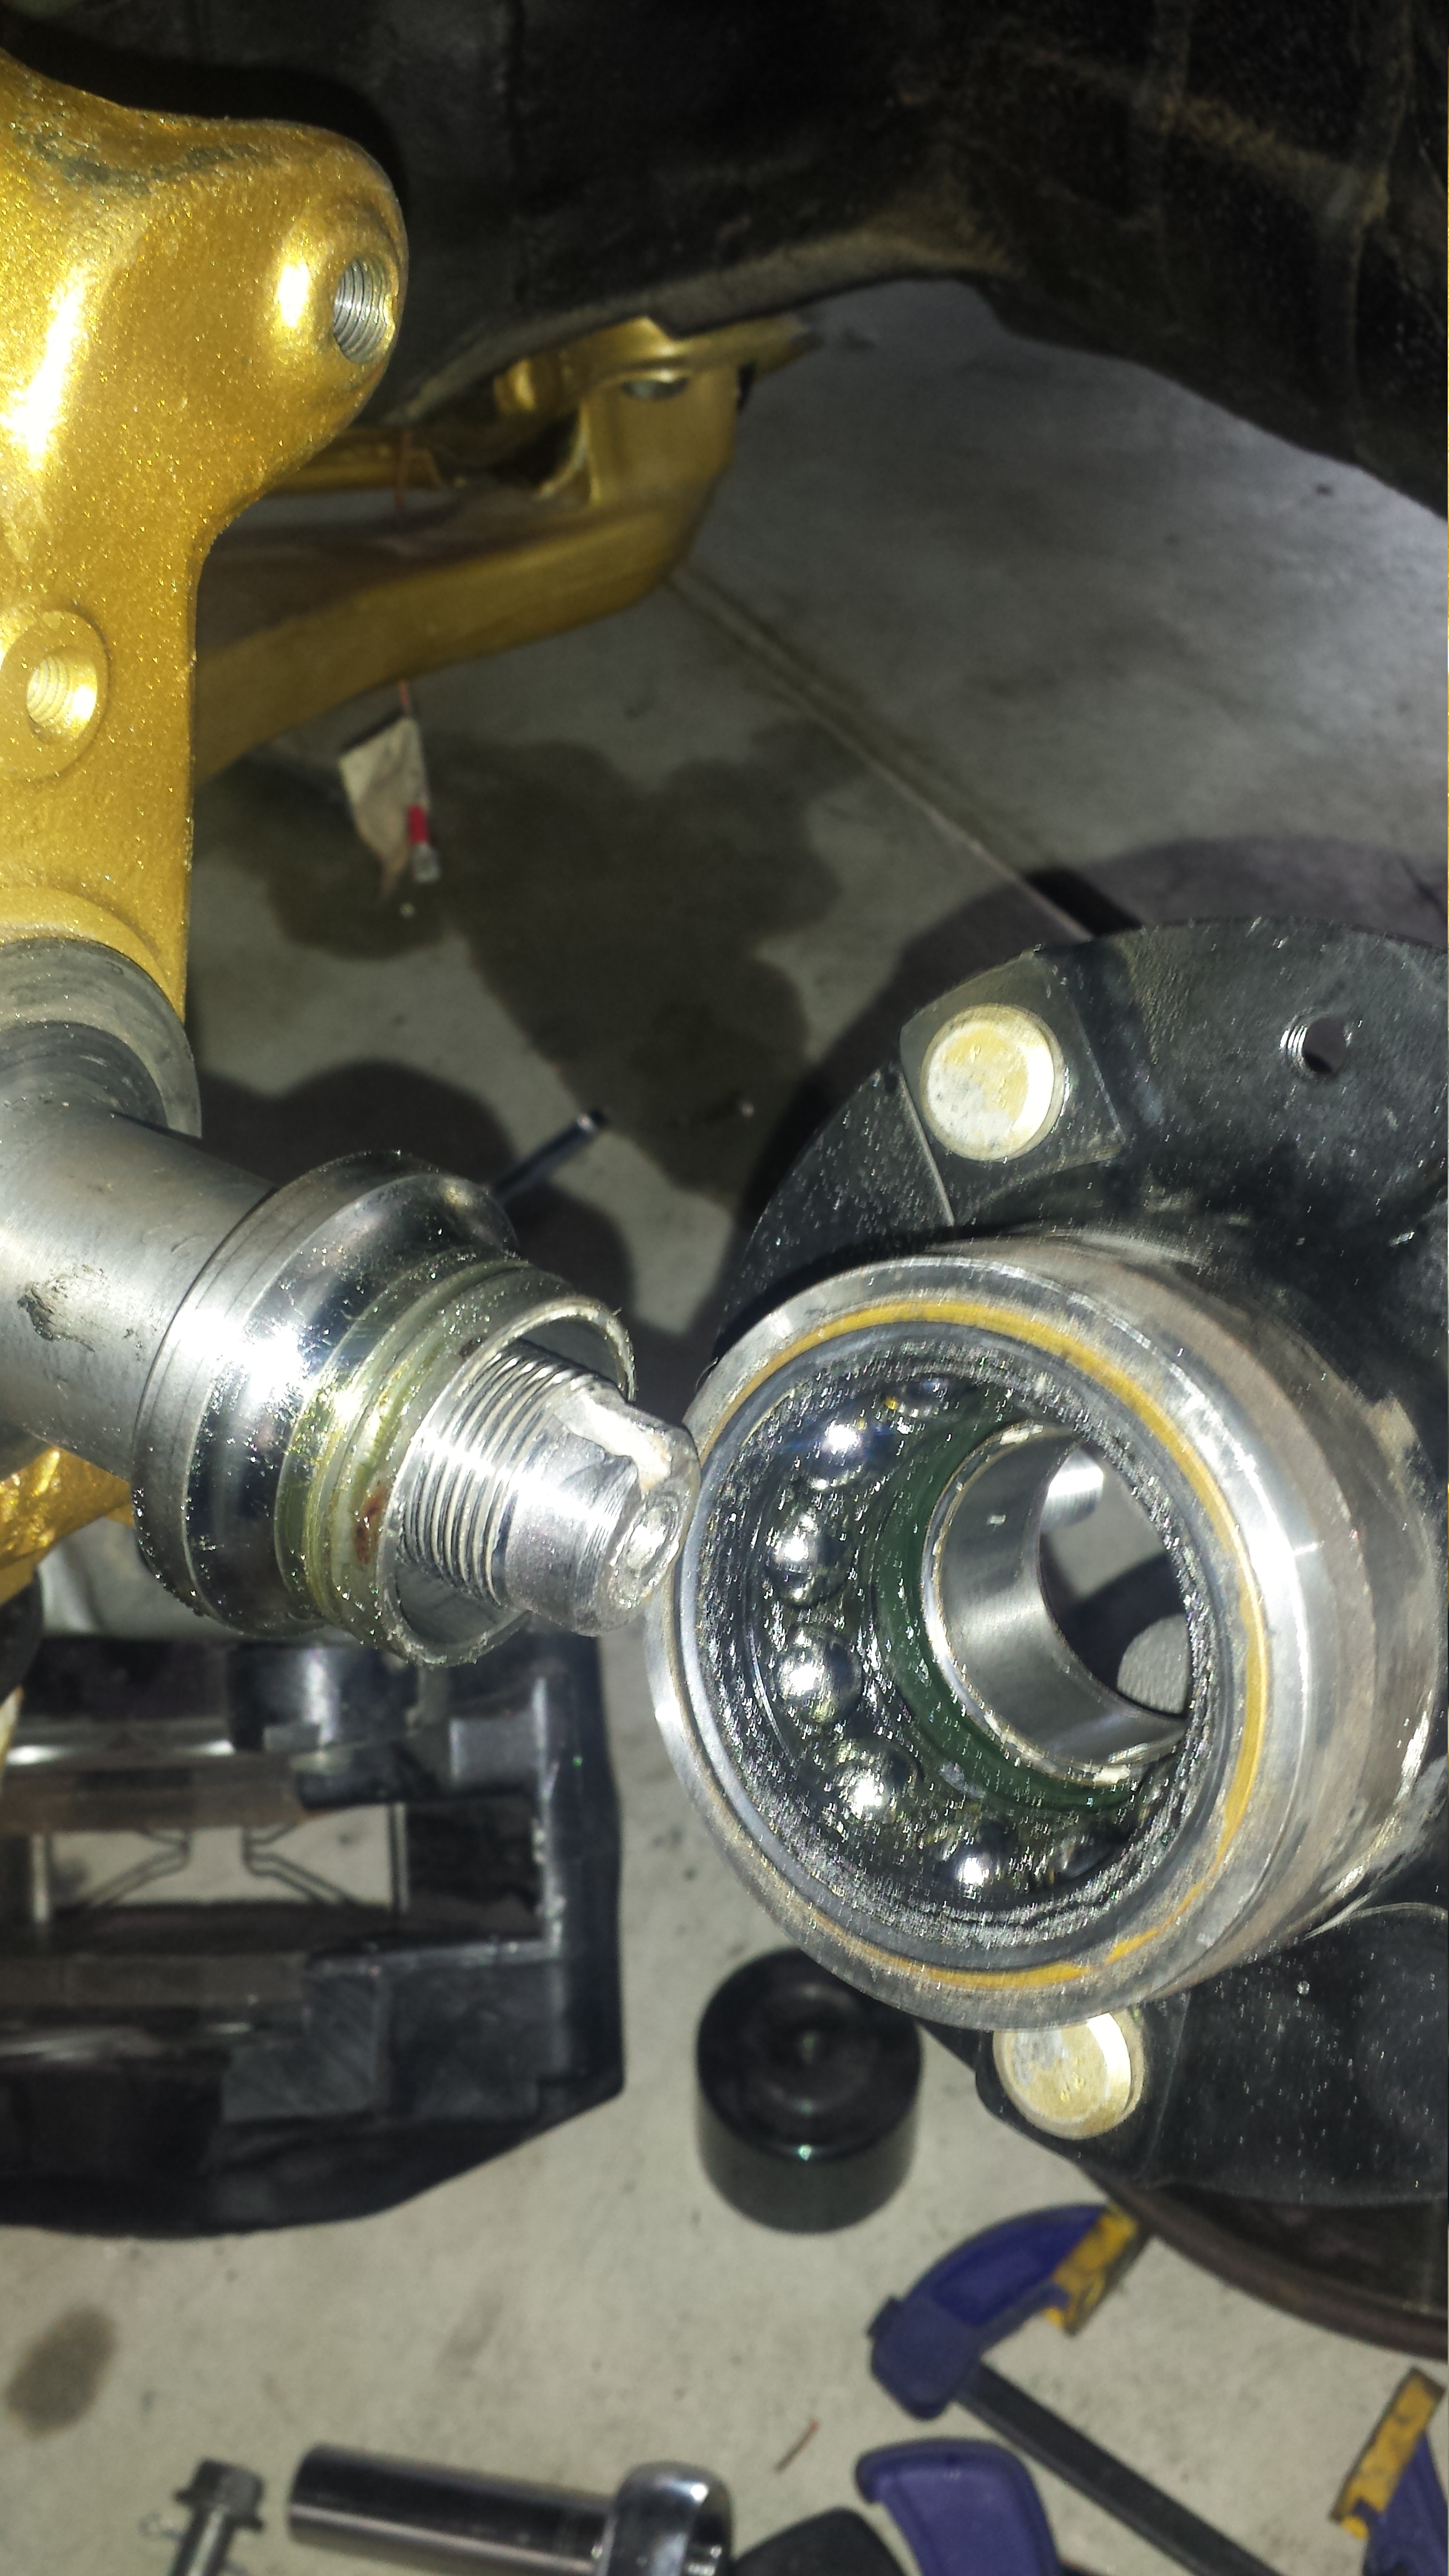
I started the install but......that's when I found my drivers side wheel bearing all jacked up. But here is the passenger side
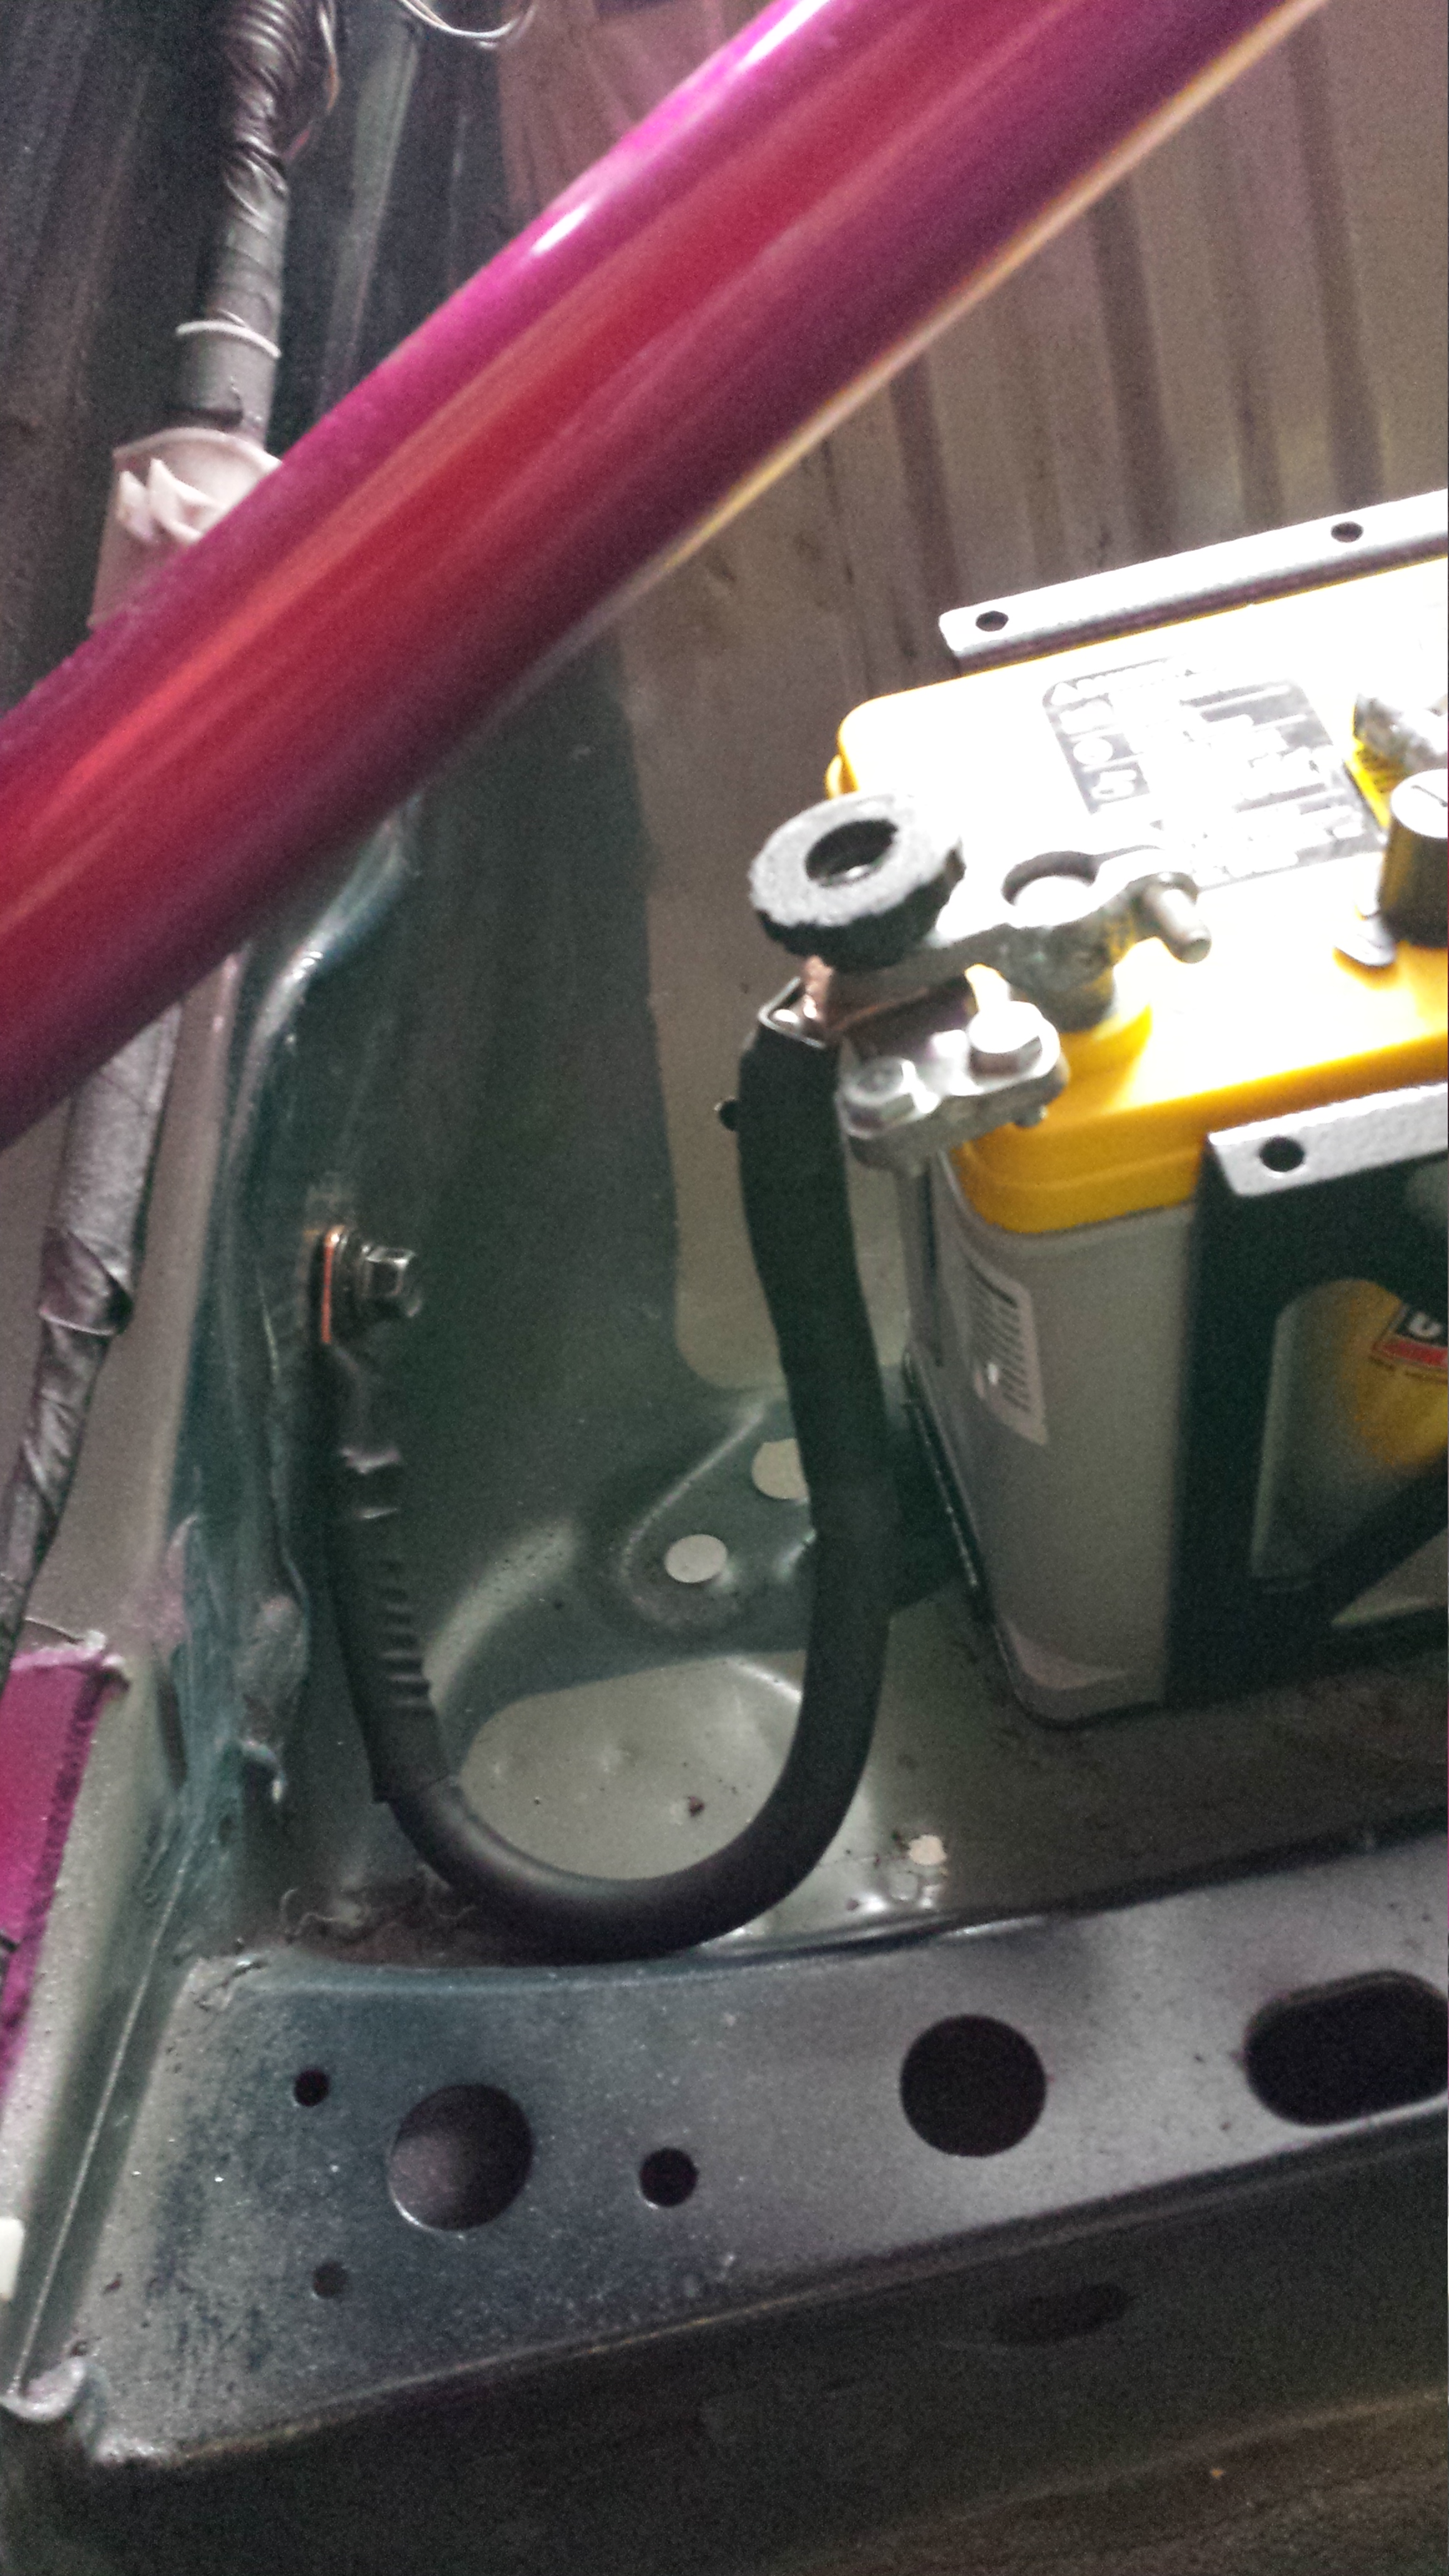
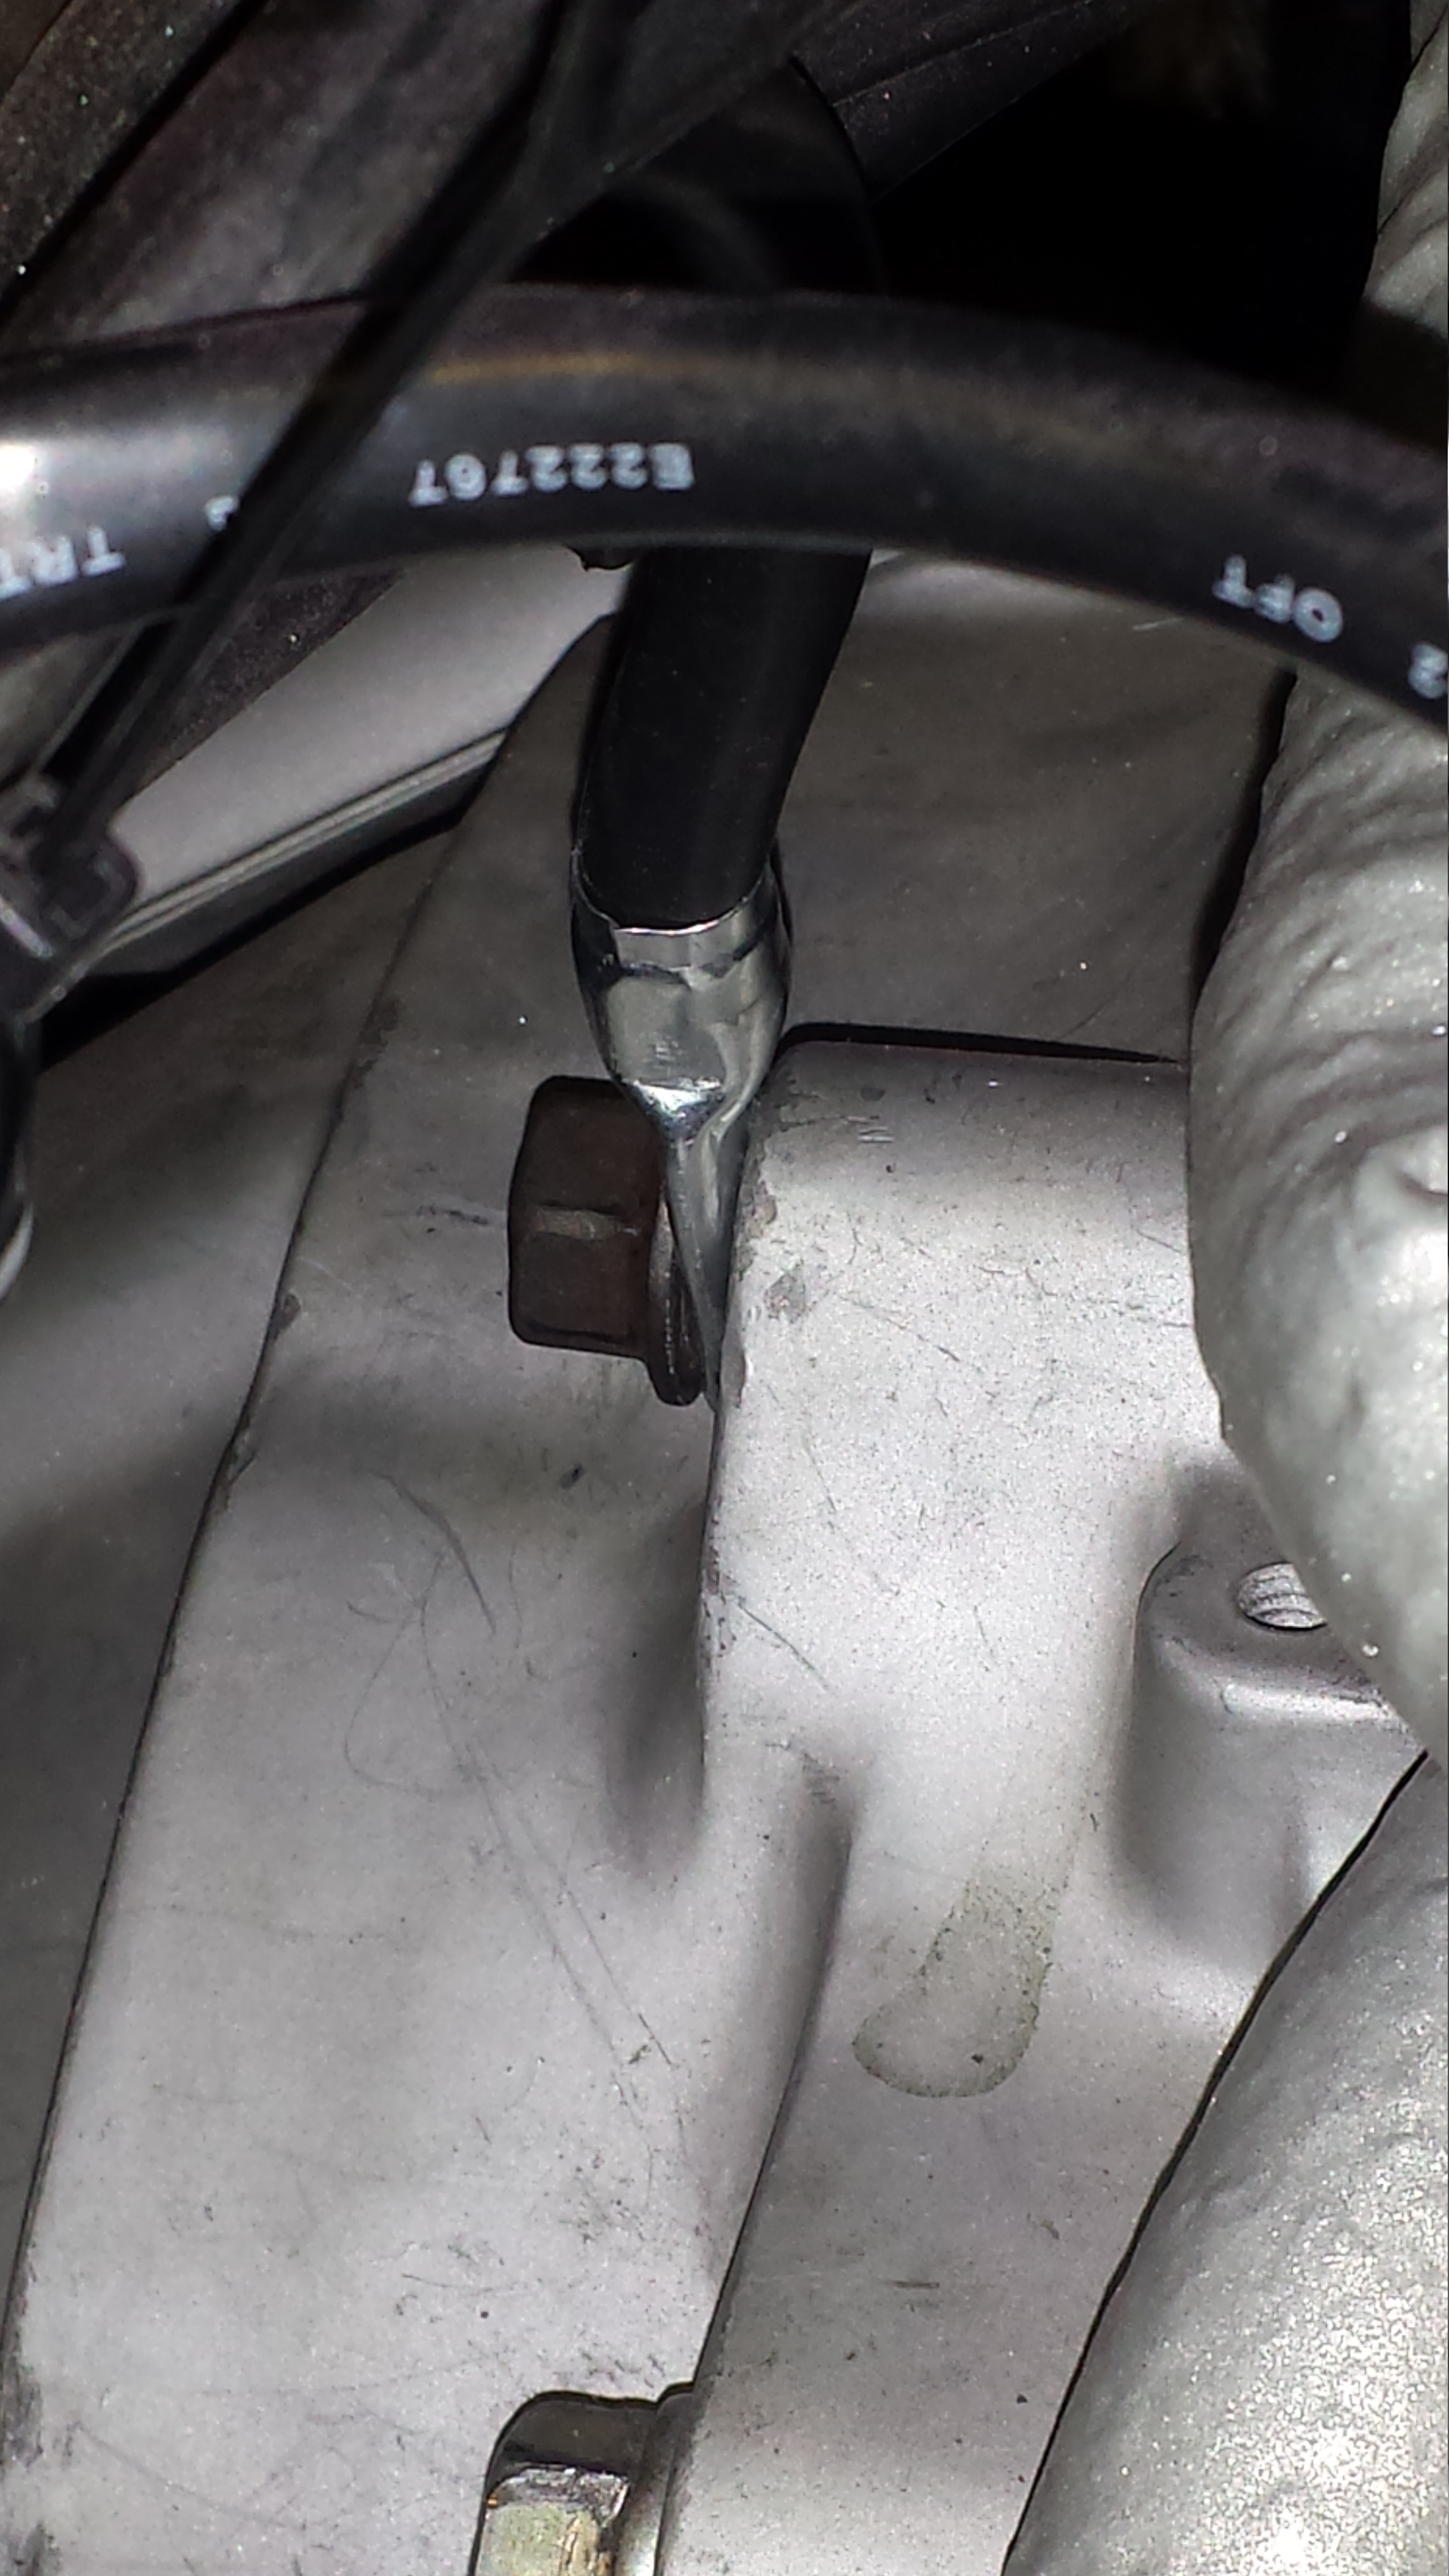
Also needed to add a ground from the Battery to the engine. I chose the uppermost transmission to rear Iron bolt hole. Fit around the terminal nice and flush.
around the cage on the body side of it will wrap up nicely in the braided sleeving.
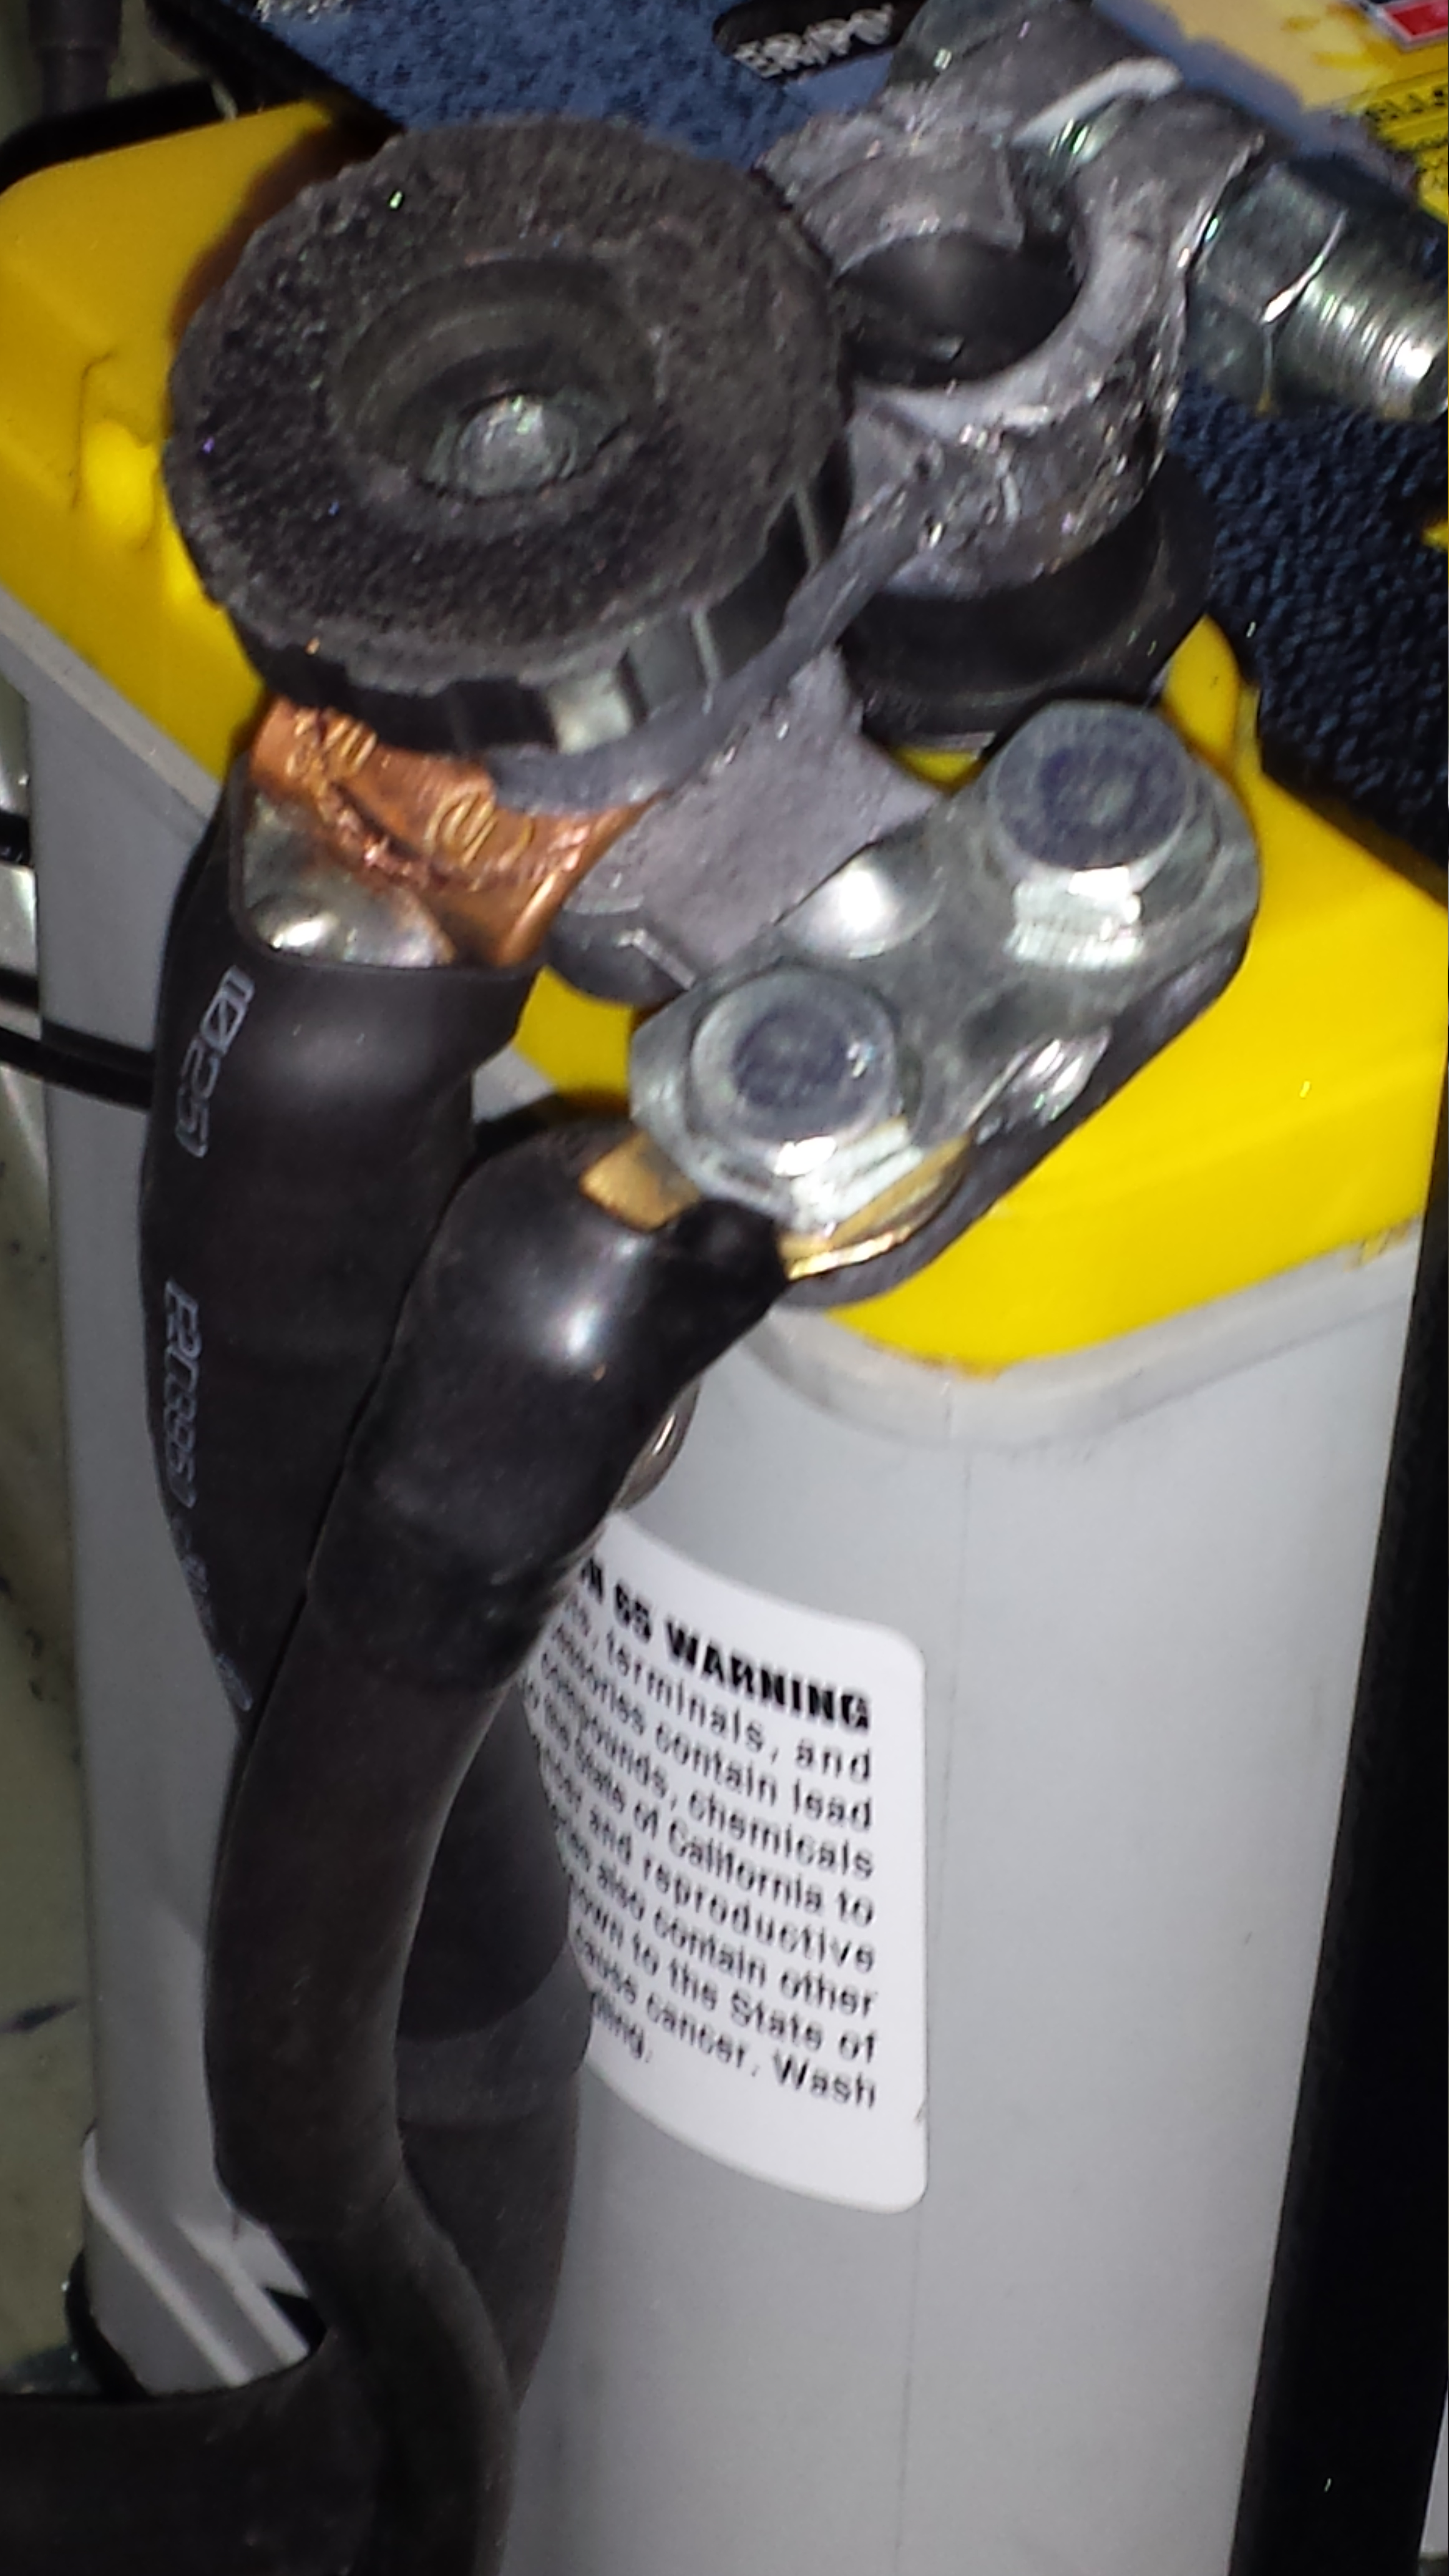
Battery connection
Where the hell did 8 hours go?!! Well yesterday was "one of those days." It was good because I made a lot of un-noticed progress, but at the same time in my mind...I can pump out anything in 30 min haha. I got home around 3:15 after work and got straight to work. When I say "un-noticed" it's because sometimes there are things that you will never remember doing. For instance..you'll always remember when you got a new set of wheels. But you will probly never remember that you went to install a wheel hub and the bearing was shot. You'll remember what to do to fix it but the memory....its all selective haha. Everything I did yesterday fell under this category. I spent another 8 hours working on the car.
I got my order from Wirecare.com A bunch of braided sleeving in various sizes to clean up and help keep jagged edges from biting through anything important.
And I got my Modified Knuckles from David Campo. He did a great job on them, but I couldnt' leave the steel raw.
found some leftover flake from over 2 years ago!!! still sprays like a champ!
I started the install but......that's when I found my drivers side wheel bearing all jacked up. But here is the passenger side
Also needed to add a ground from the Battery to the engine. I chose the uppermost transmission to rear Iron bolt hole. Fit around the terminal nice and flush.
around the cage on the body side of it will wrap up nicely in the braided sleeving.
Battery connection
04-22-14, 11:55 AM
#1845
Continued:
So I needed to address this mess
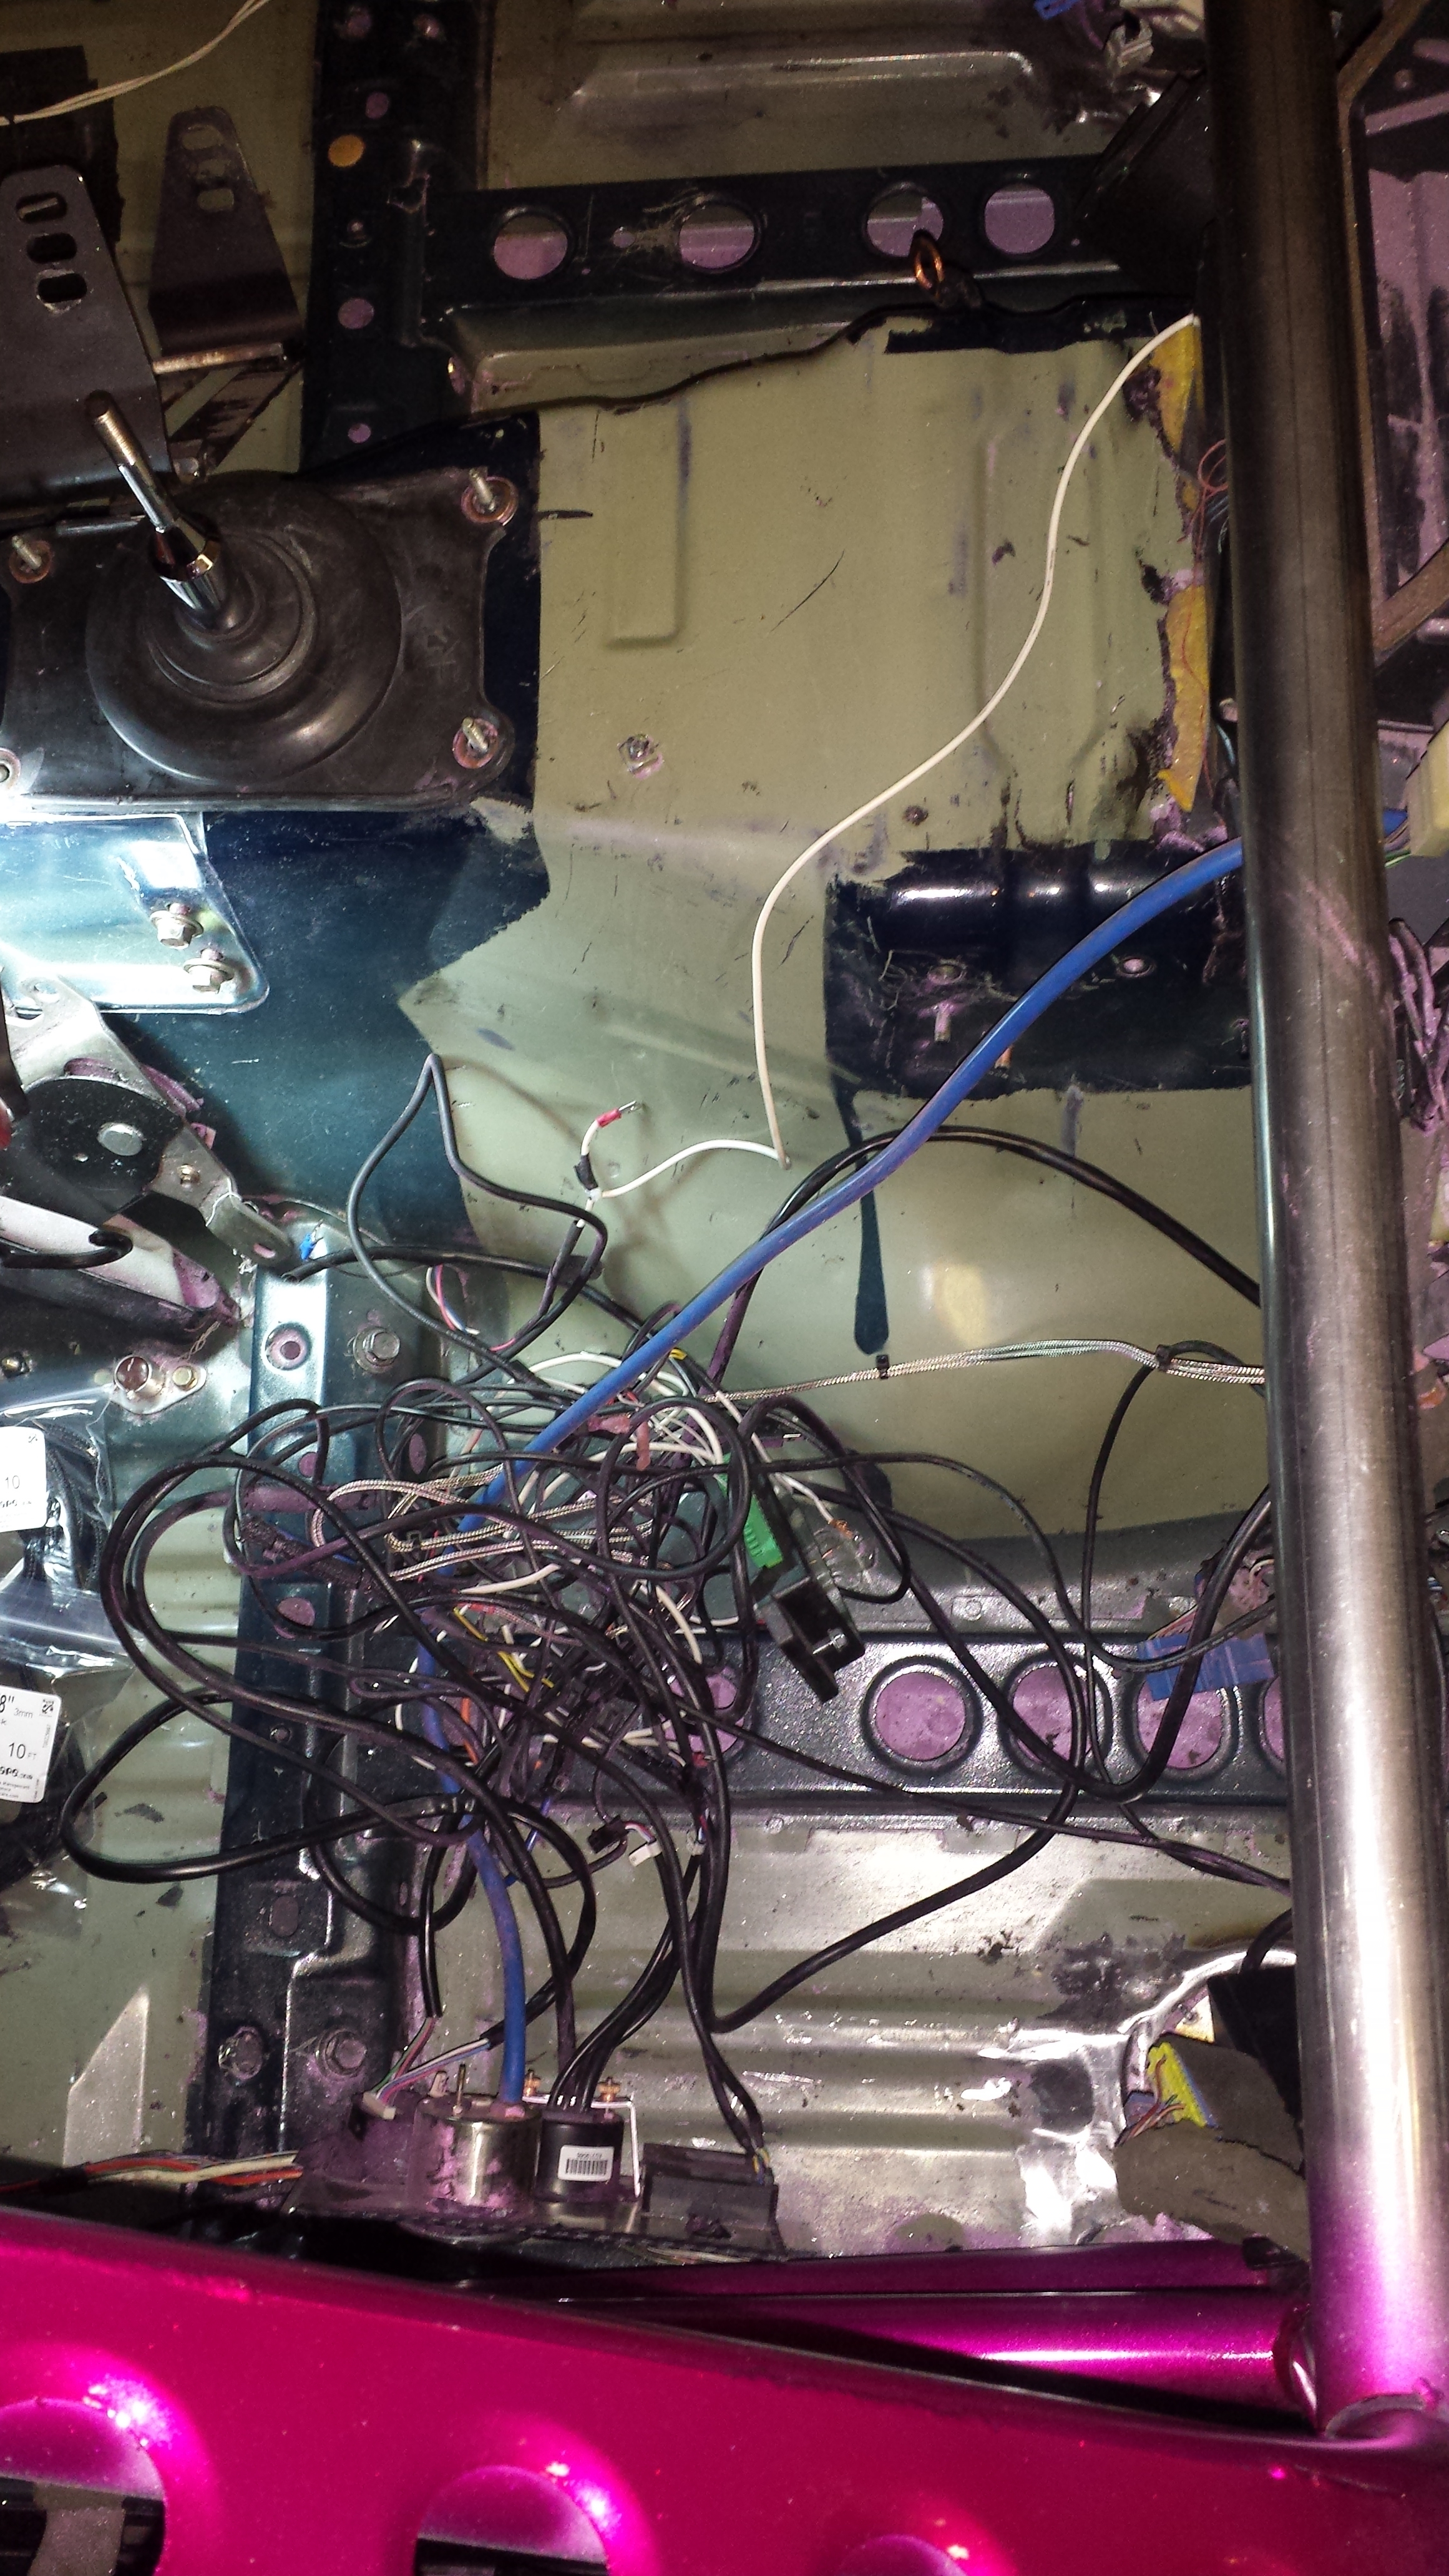
First thing was to separate everything. Mount all my components and THEN route everything/run wiring.
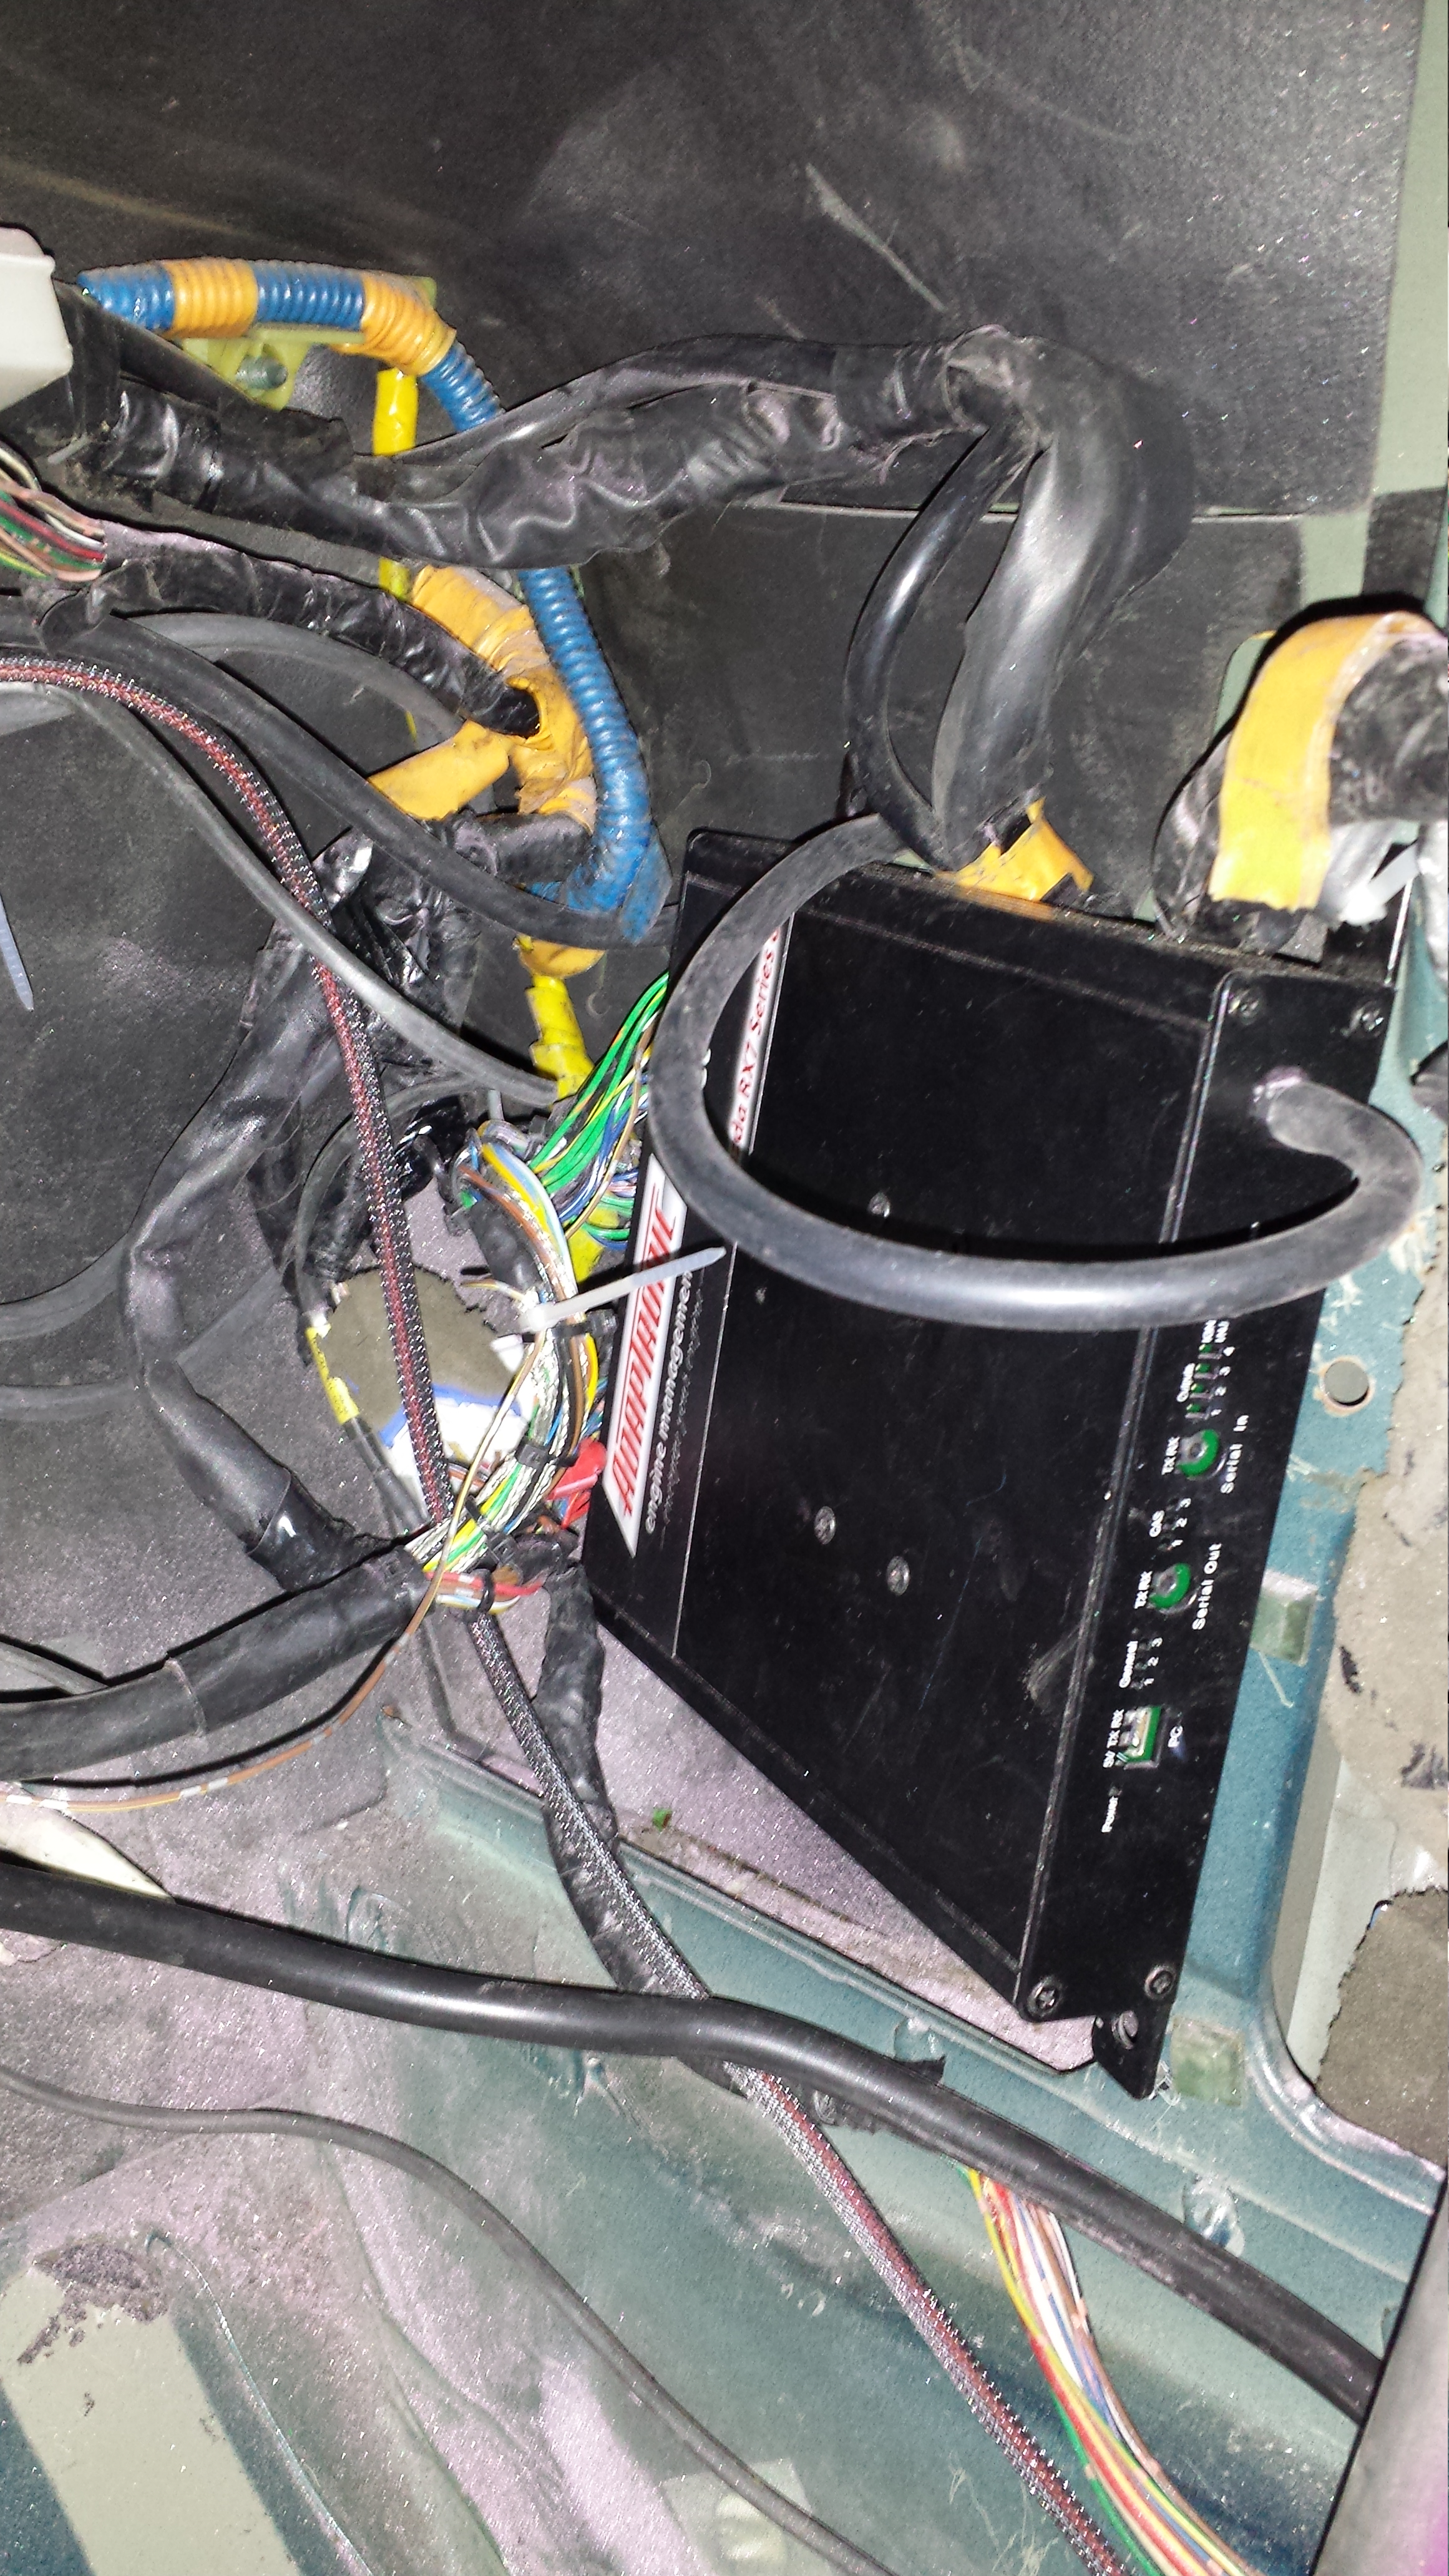
I had to angle grind off one of the welded bolts that stuck out of the trans tunnel for something OEM (don't even remember what it was for) but after that I got two solid positions for the Innovate products. Innovate Tc-3 and SSI-4. leaves position to plug in all necessary cables & inputs.

Also Mounted my Adaptronic Select in the foot well area. Half of it is recessed into the void and the other I'll be putting on the frame area. I liked this because it angled the ecu inputs towards the driver, which makes plugging in things and getting to it much easier. As you can see, I still have a lot of cleaning to do. The flake overspray gets everywhere!!!
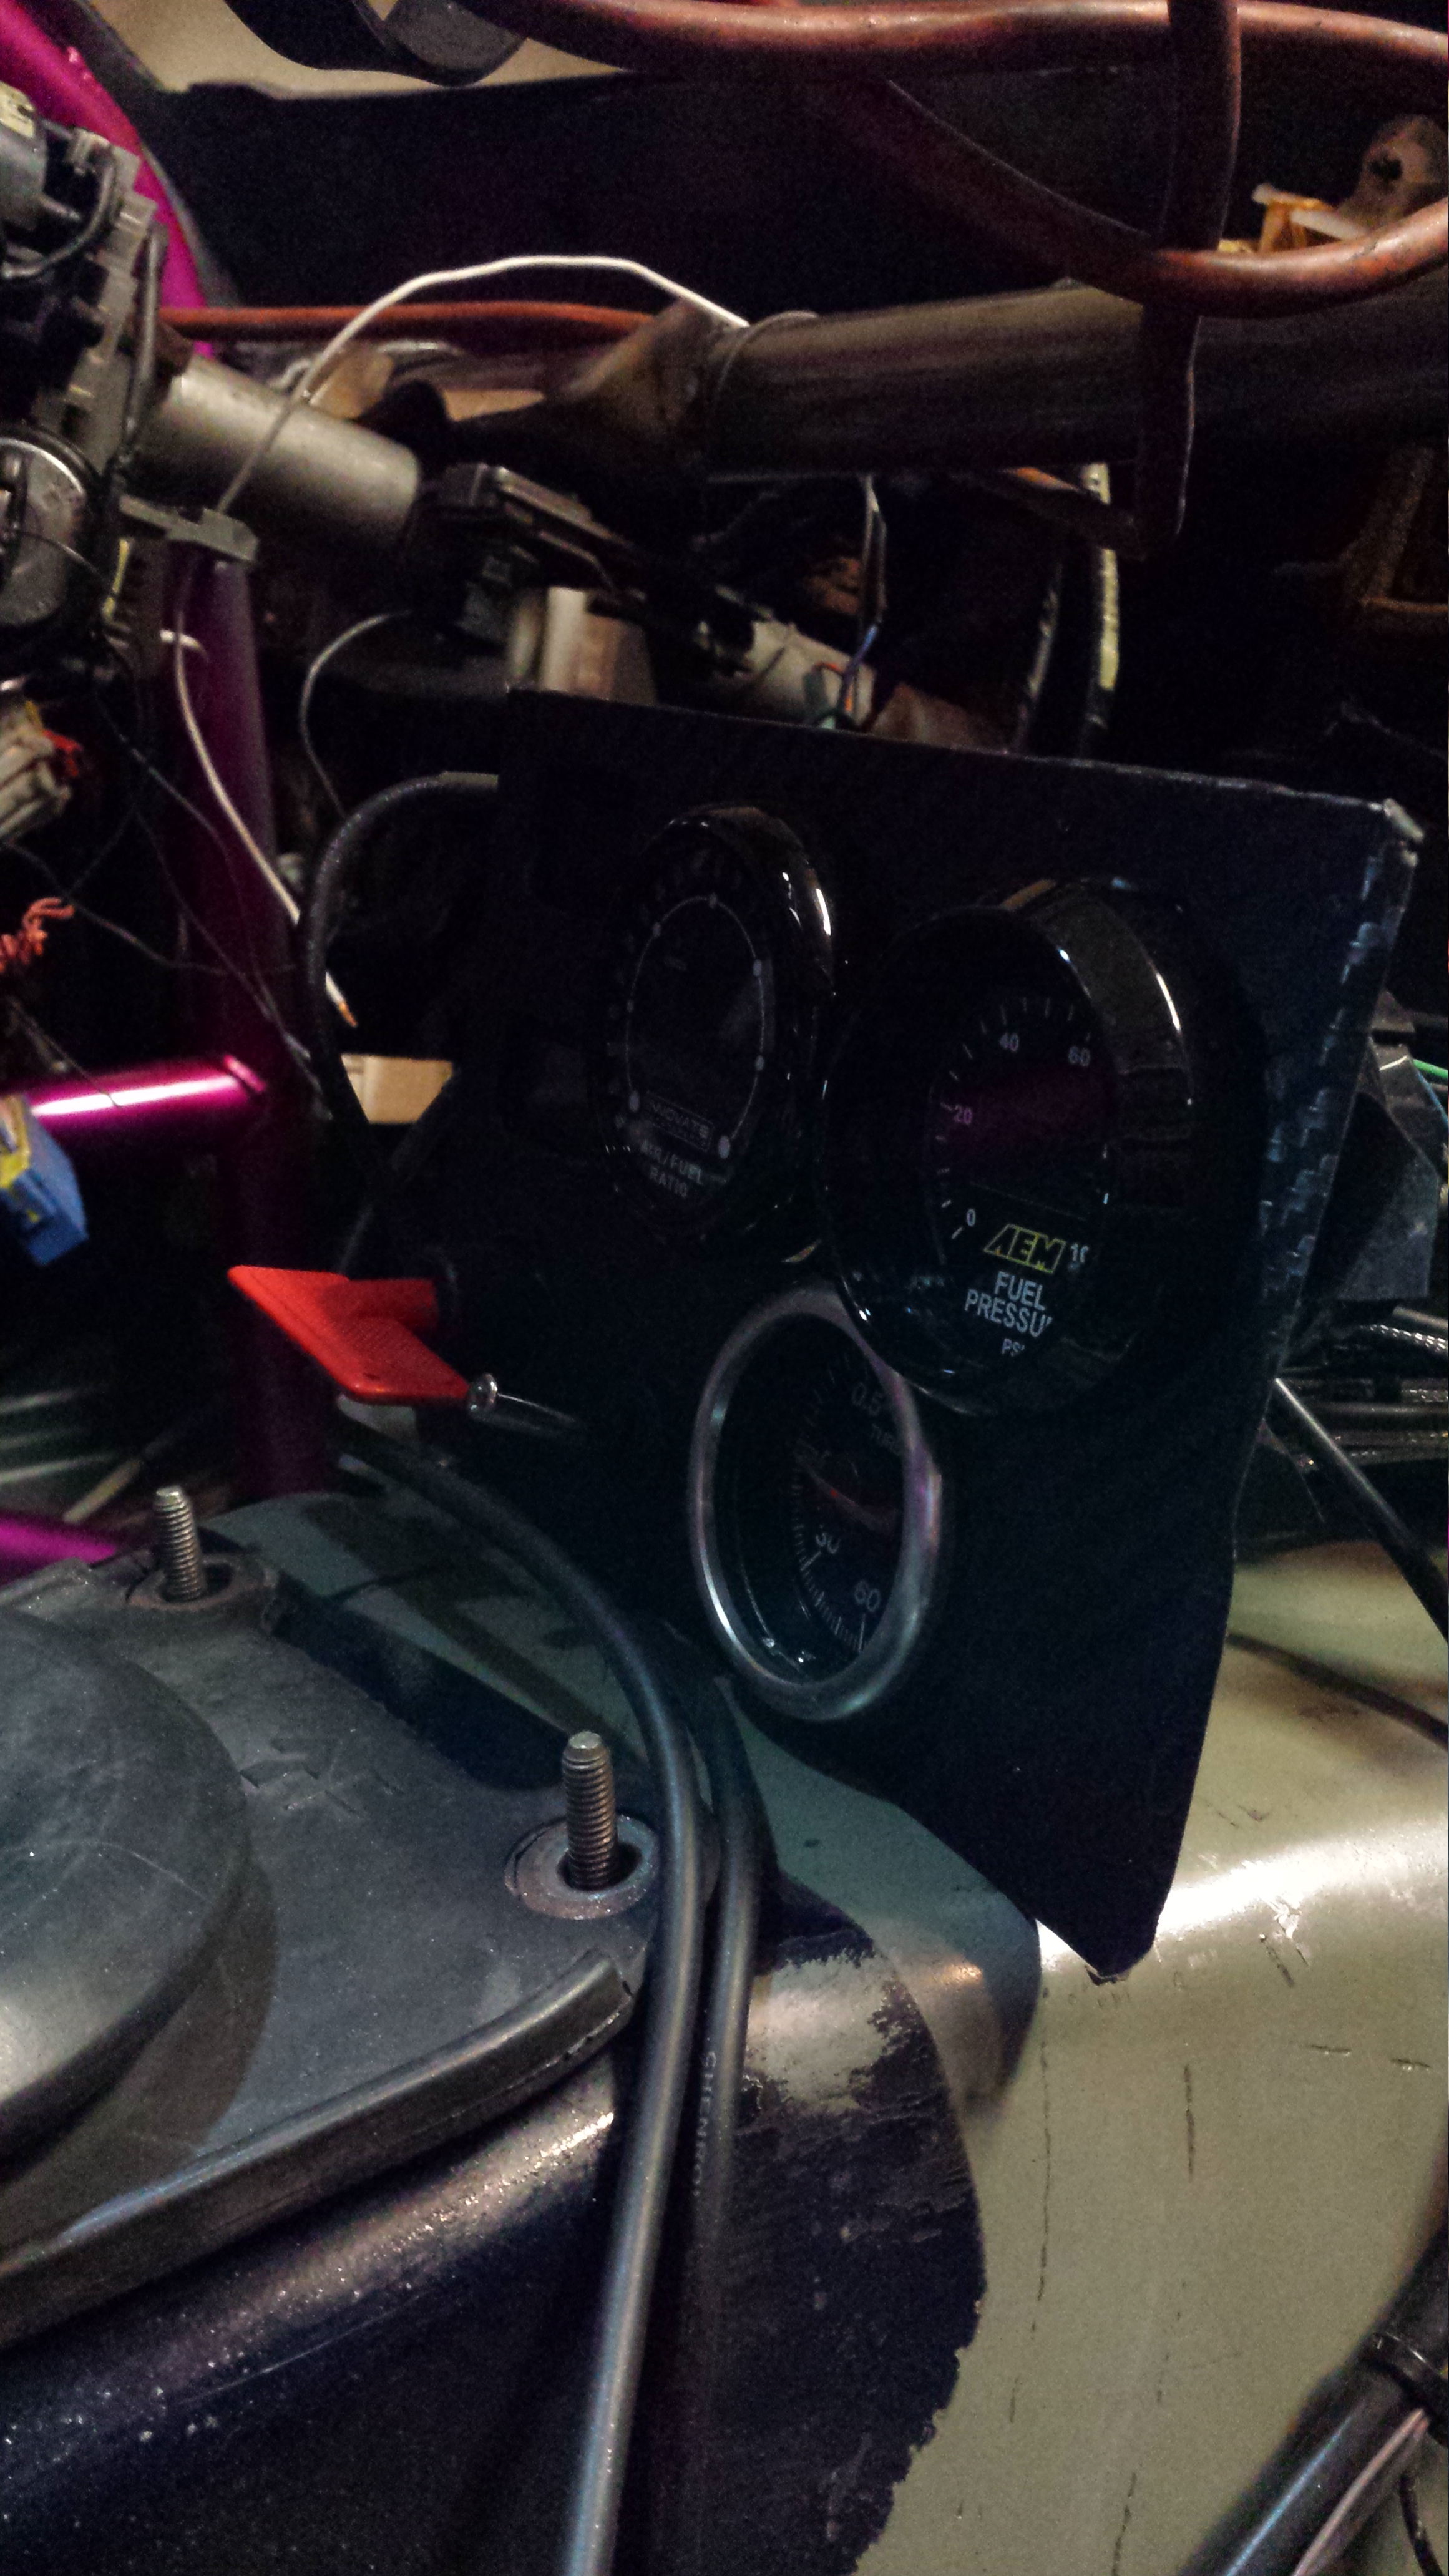
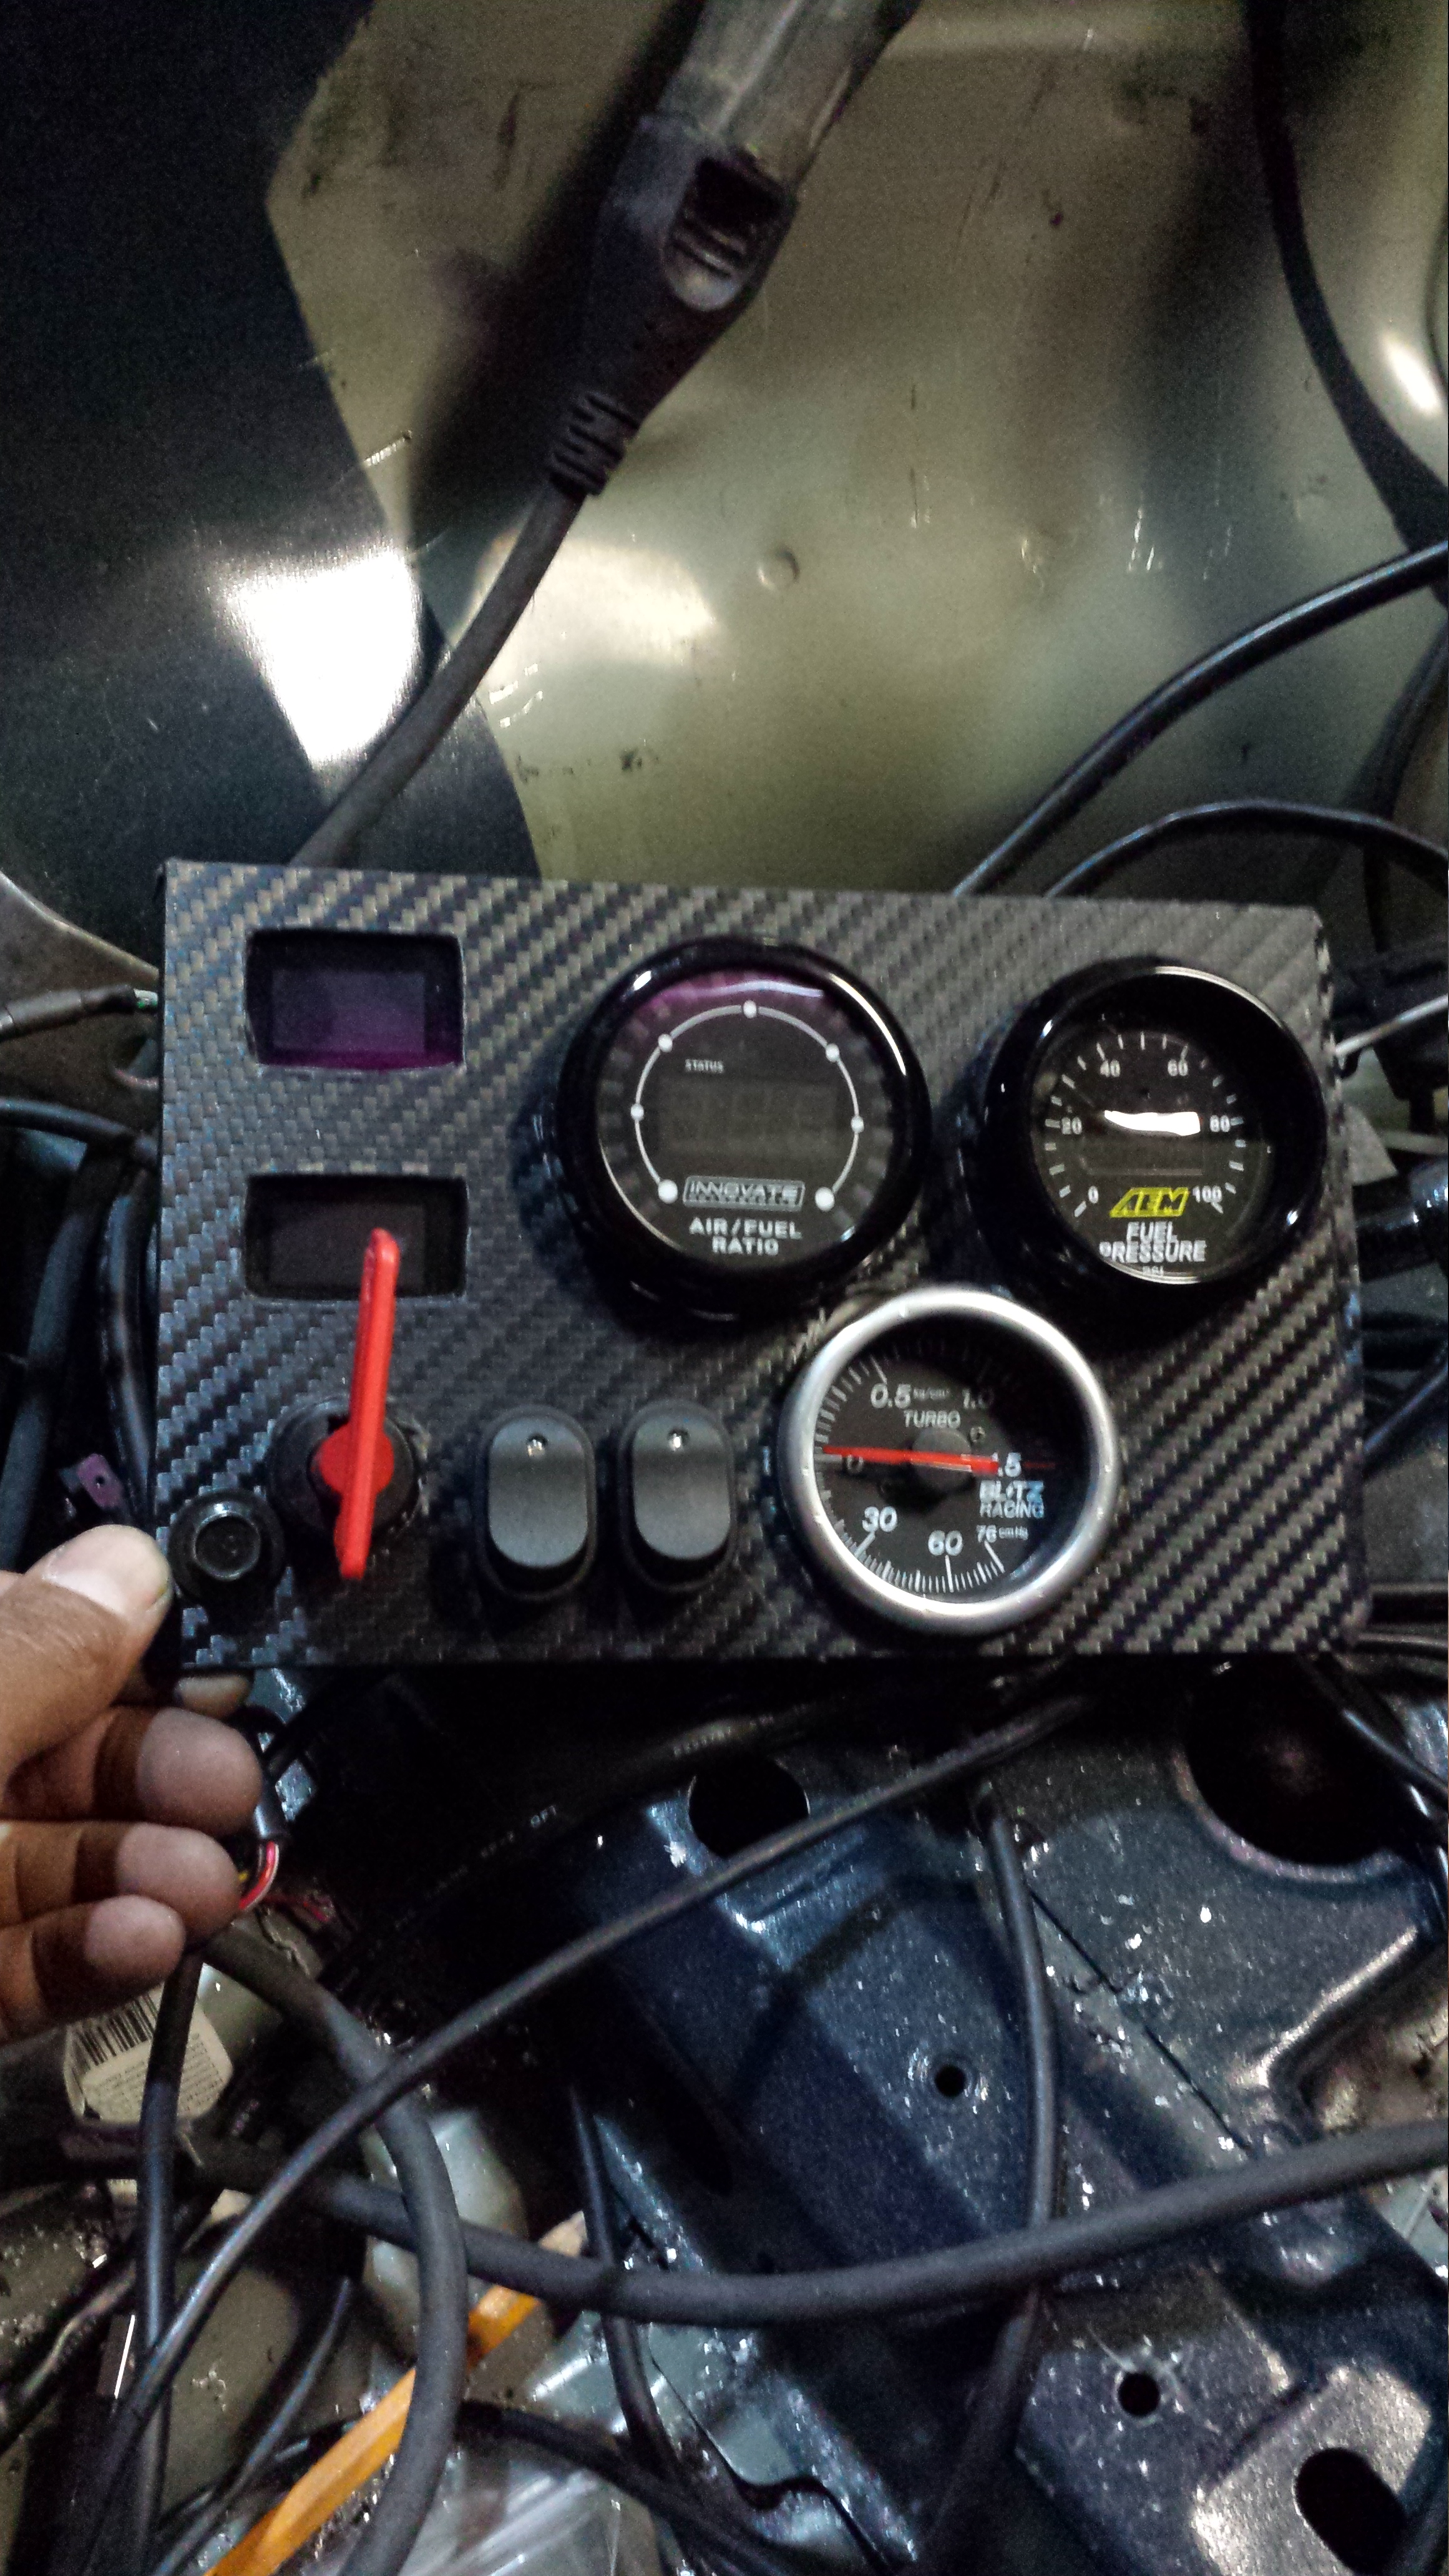
And here is a horrible picture of my gauge and switch panel. I added a switch for my oil cooler fans.
That's it for pictures. But What was so frustrating yesterday was those things you don't hear about as well.
I let the neighbors kid sit in the drivers seat before the car went out for a cage and before I even thought about it he was mashing the breaks and clutch.. well by the time I noticed it was too late. SO now I have to re-bleed the system. only one clutch slave bolt was holding it in place with about 4 turns on it...well it bent the bolt and it was a bitch to back out because it was caddywhomped out and there is limited space... then I went to put the hub on.and it was jacked beyond supreme, and my roommate came home and moved my box that I was letting dry in the sun (Knuckles) and they fell in messing up the fresh coat, ......had to find the right size spacers to hard mount my kill switch on my panel and that was annoying, then when organizing wiring.. you just have to go at it and that takes time too. But All in all, that was a solid day. Better than finding out I need a new wheel bearing etc on the road. Today I'll be working on some wiring harnesses for customers after work so I won't be able to get too much done till I finish. but I'm going to order a new hub assembly from autozone. Lifetime warranty. Now that's a deal! And hopefully tonight I can finish up routing my ecu wiring/wideband/egt's/fuel pressure/oil pressure etc.
Updates soon!!
So I needed to address this mess
First thing was to separate everything. Mount all my components and THEN route everything/run wiring.
I had to angle grind off one of the welded bolts that stuck out of the trans tunnel for something OEM (don't even remember what it was for) but after that I got two solid positions for the Innovate products. Innovate Tc-3 and SSI-4. leaves position to plug in all necessary cables & inputs.
Also Mounted my Adaptronic Select in the foot well area. Half of it is recessed into the void and the other I'll be putting on the frame area. I liked this because it angled the ecu inputs towards the driver, which makes plugging in things and getting to it much easier. As you can see, I still have a lot of cleaning to do. The flake overspray gets everywhere!!!
And here is a horrible picture of my gauge and switch panel. I added a switch for my oil cooler fans.
That's it for pictures. But What was so frustrating yesterday was those things you don't hear about as well.
I let the neighbors kid sit in the drivers seat before the car went out for a cage and before I even thought about it he was mashing the breaks and clutch.. well by the time I noticed it was too late. SO now I have to re-bleed the system. only one clutch slave bolt was holding it in place with about 4 turns on it...well it bent the bolt and it was a bitch to back out because it was caddywhomped out and there is limited space... then I went to put the hub on.and it was jacked beyond supreme, and my roommate came home and moved my box that I was letting dry in the sun (Knuckles) and they fell in messing up the fresh coat, ......had to find the right size spacers to hard mount my kill switch on my panel and that was annoying, then when organizing wiring.. you just have to go at it and that takes time too. But All in all, that was a solid day. Better than finding out I need a new wheel bearing etc on the road. Today I'll be working on some wiring harnesses for customers after work so I won't be able to get too much done till I finish. but I'm going to order a new hub assembly from autozone. Lifetime warranty. Now that's a deal! And hopefully tonight I can finish up routing my ecu wiring/wideband/egt's/fuel pressure/oil pressure etc.
Updates soon!!
04-23-14, 01:09 PM
#1846
Small Update:
Autozone got my hub and bearing in, same day!!! not lifetime warranty but 1 year. Optional 3 year but the price difference was 40 bucks. SO I paid 70 for the hub and bearing. Also got a e85 switch. It'll simply control my EBC so that when my flex fuel content gauge shows a certain percentage i'll hit the switch and bump boost up. Otherwise I'll be running 91 Octane at spring pressure for reliability. Really don't need much more at this point. Spring pressure is 14lbs. An EBC E85 will be 18-20LBS. Any input on this will be considered. "Open minded" to yield the best possible option to do the best job I can.
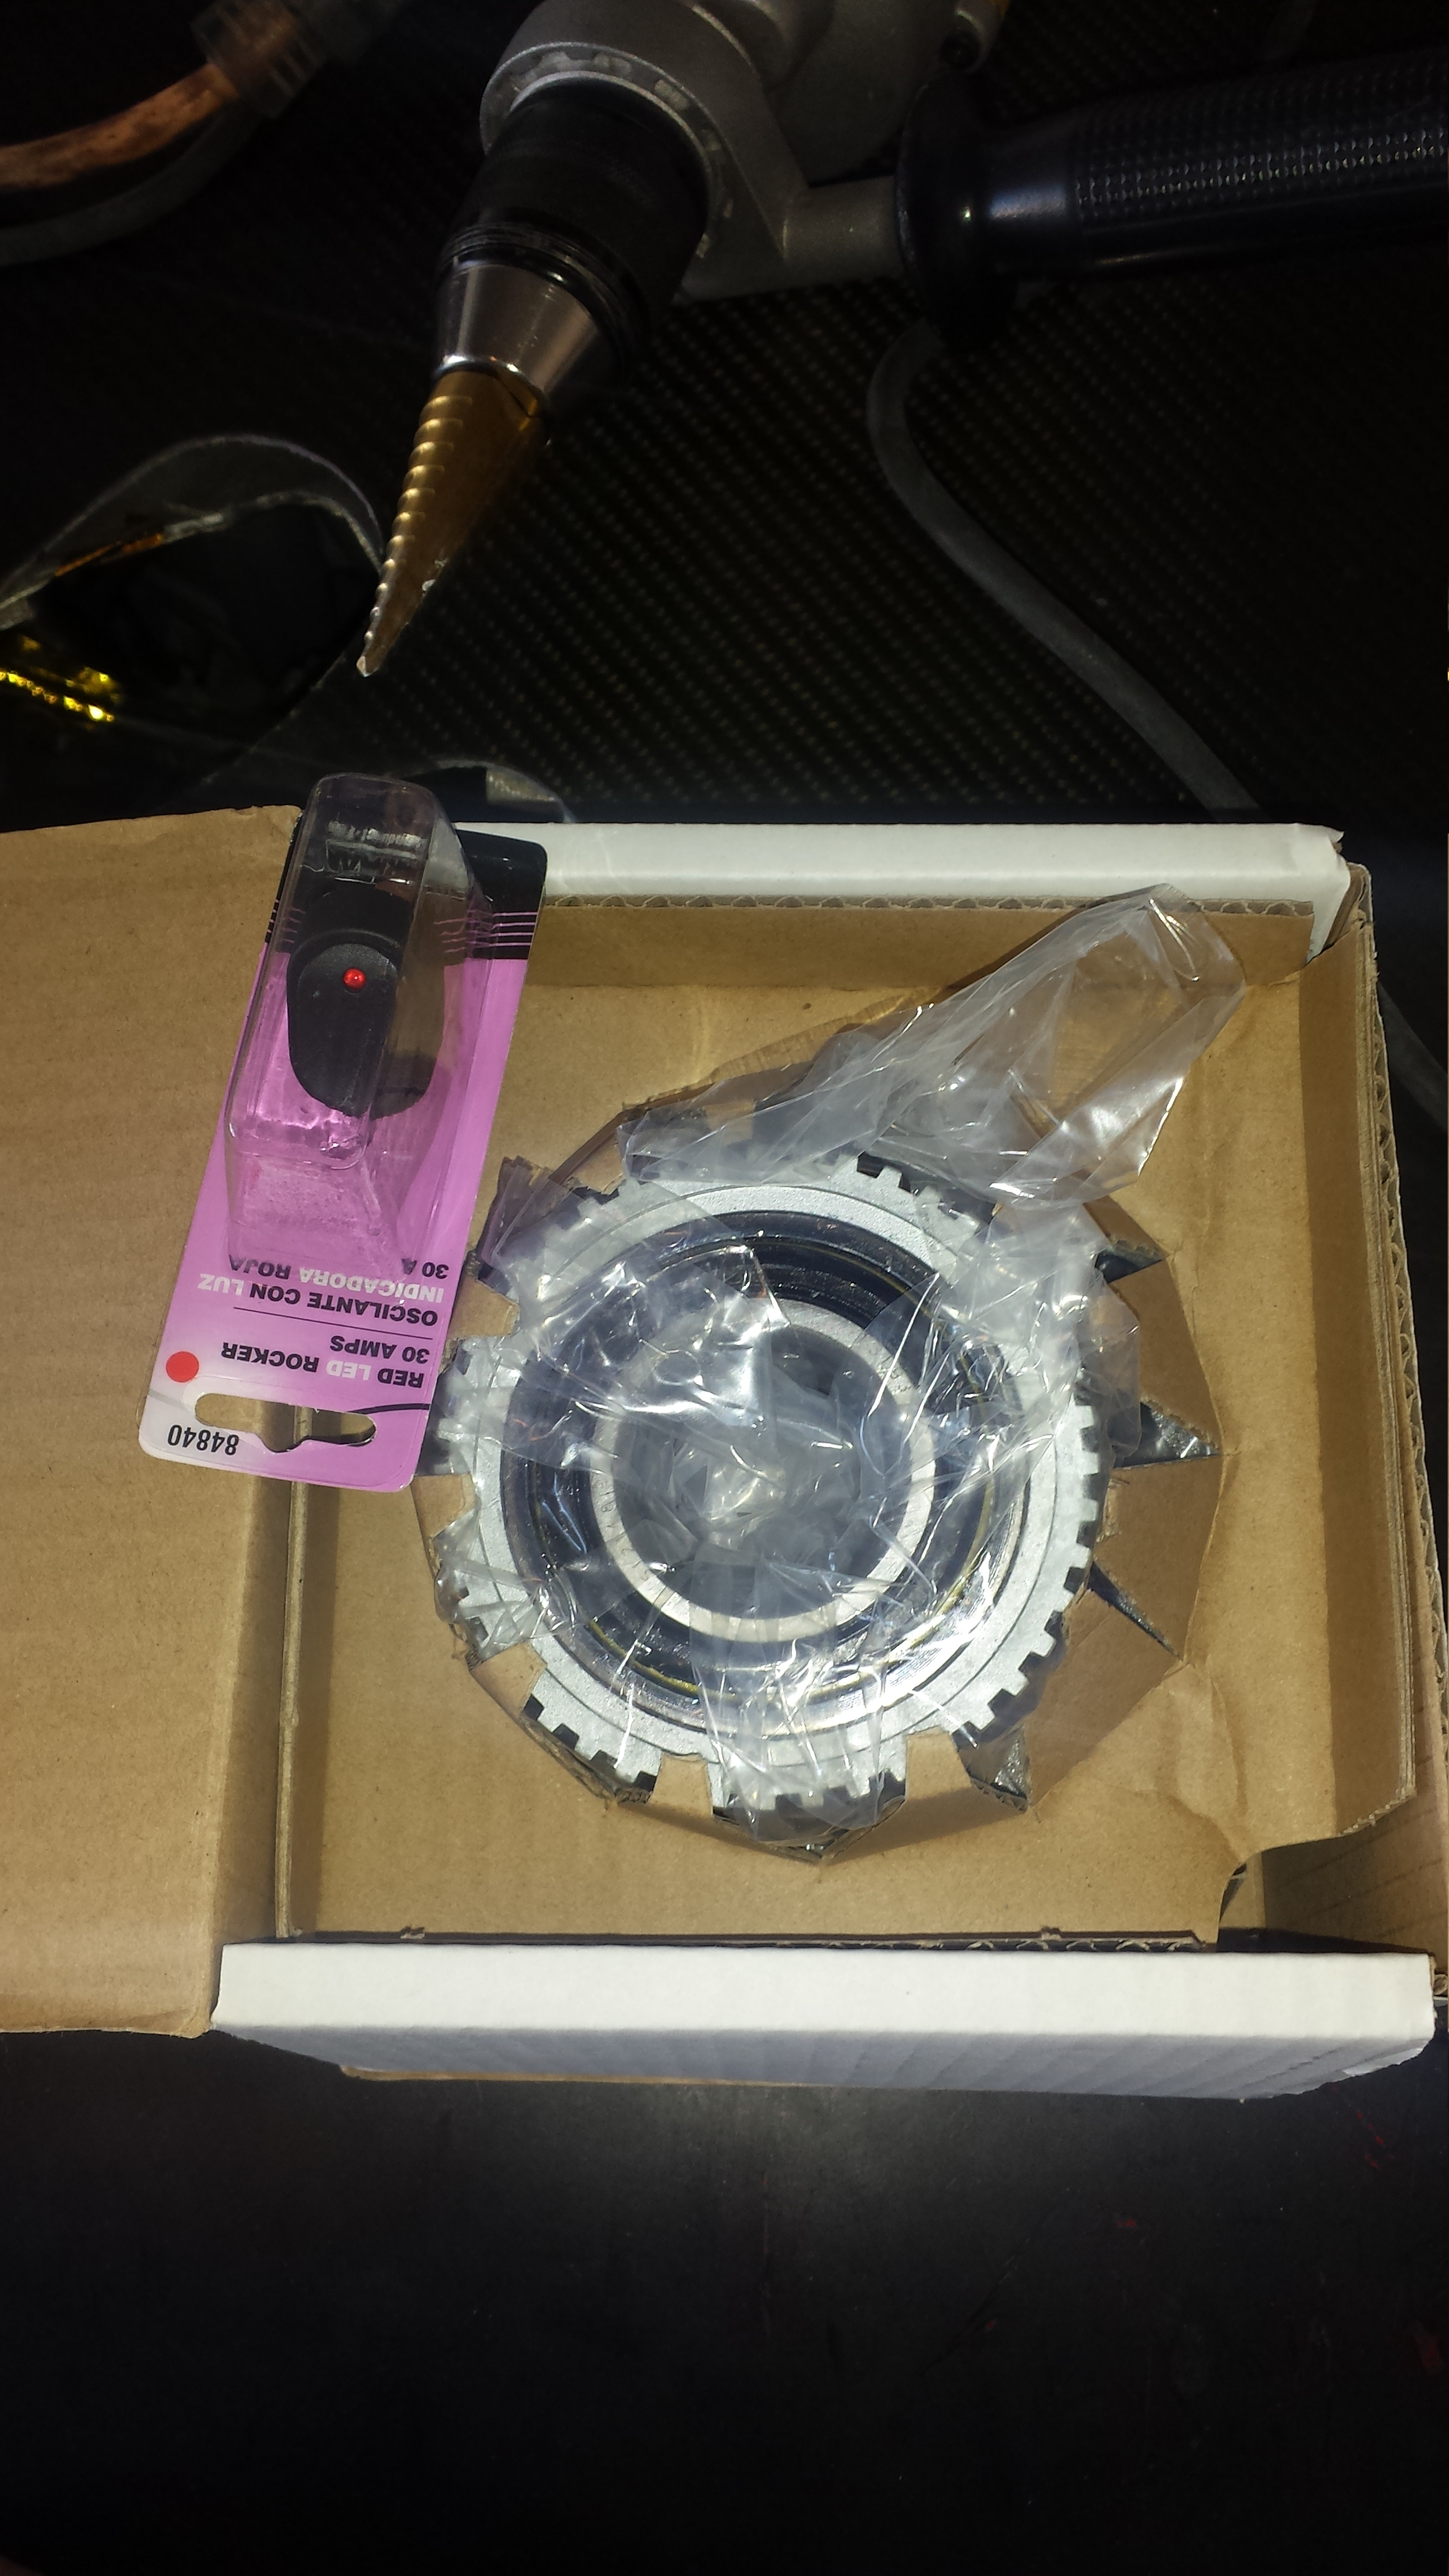
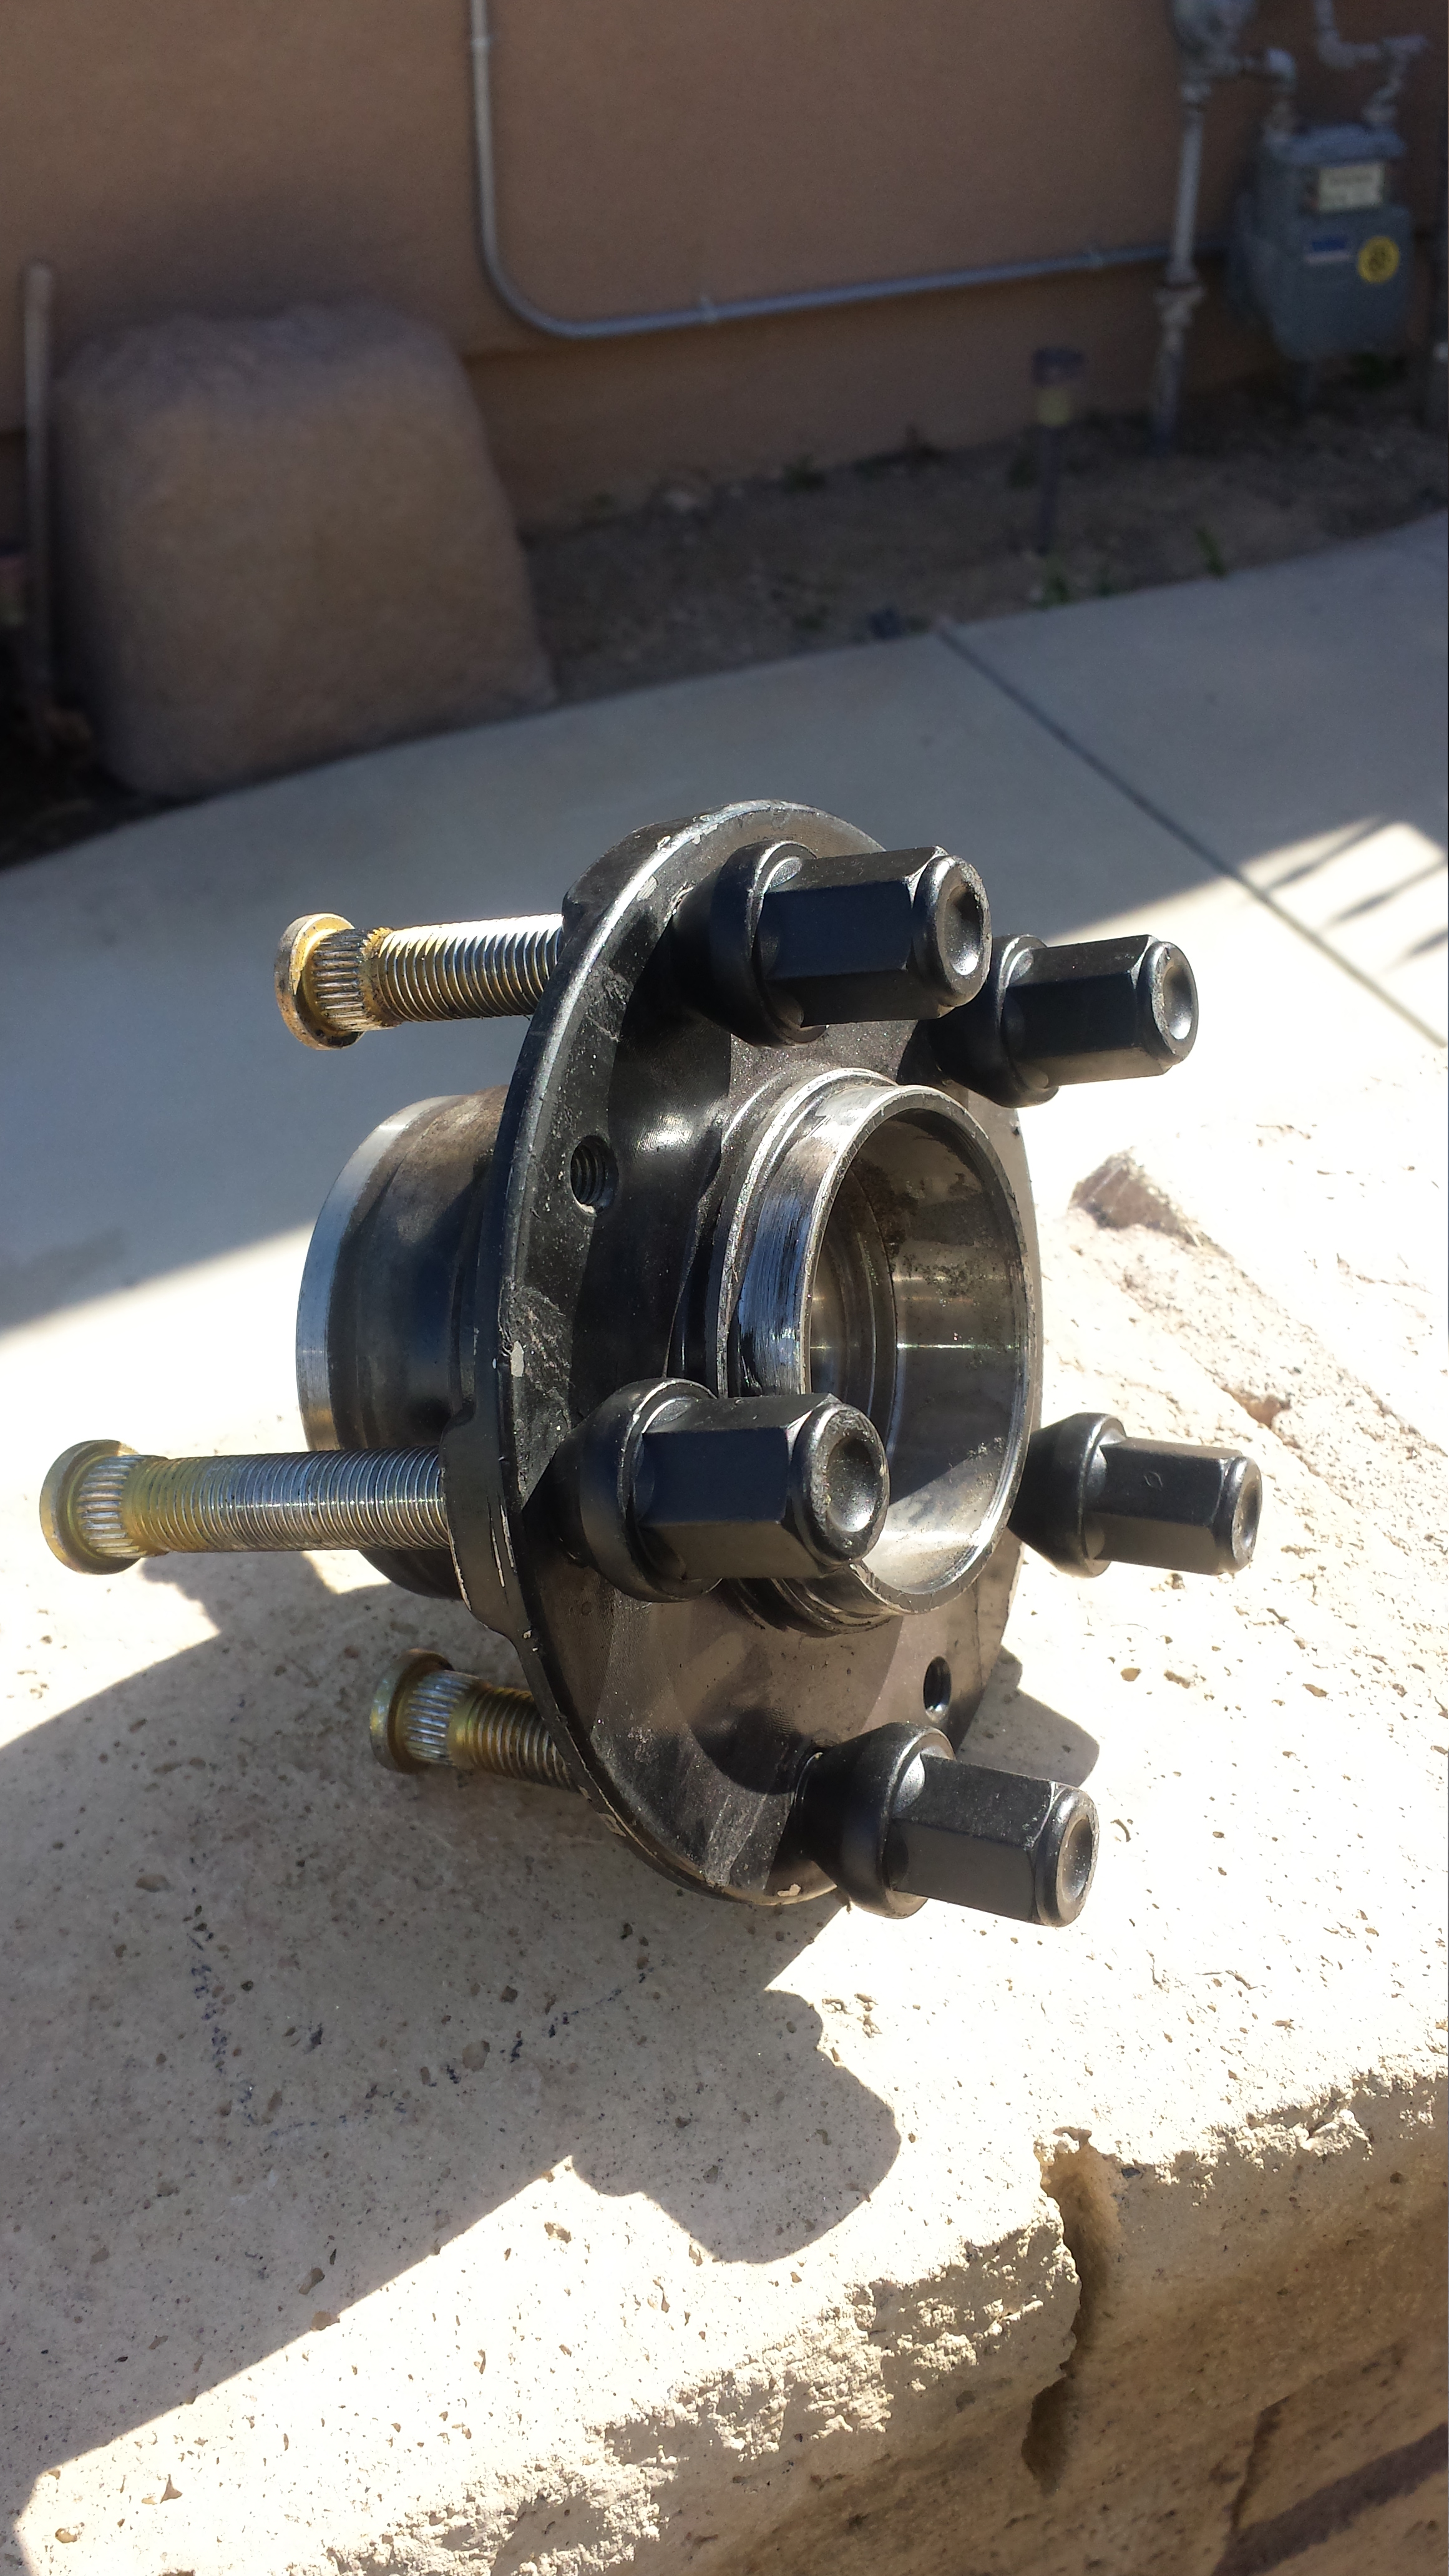
here is the hub assembly and switch
Its amazing the methods you develop to get things done. I remember slamming my first studs out with a mallet...gaulling up the threads and it being a total pain/learning experience. Now I use spare close ended lug nuts fully threaded in so I don't ruin the threads. The 5 lb sledge is still useful, but I use an open ended pipe to prop on. Works like a charm and literally took me 5 min.
knocking included studs out of the new hub assembly, (good spares)


Heres the jacked up bearing
knocking my extended ARP studs out of the old garbage hub
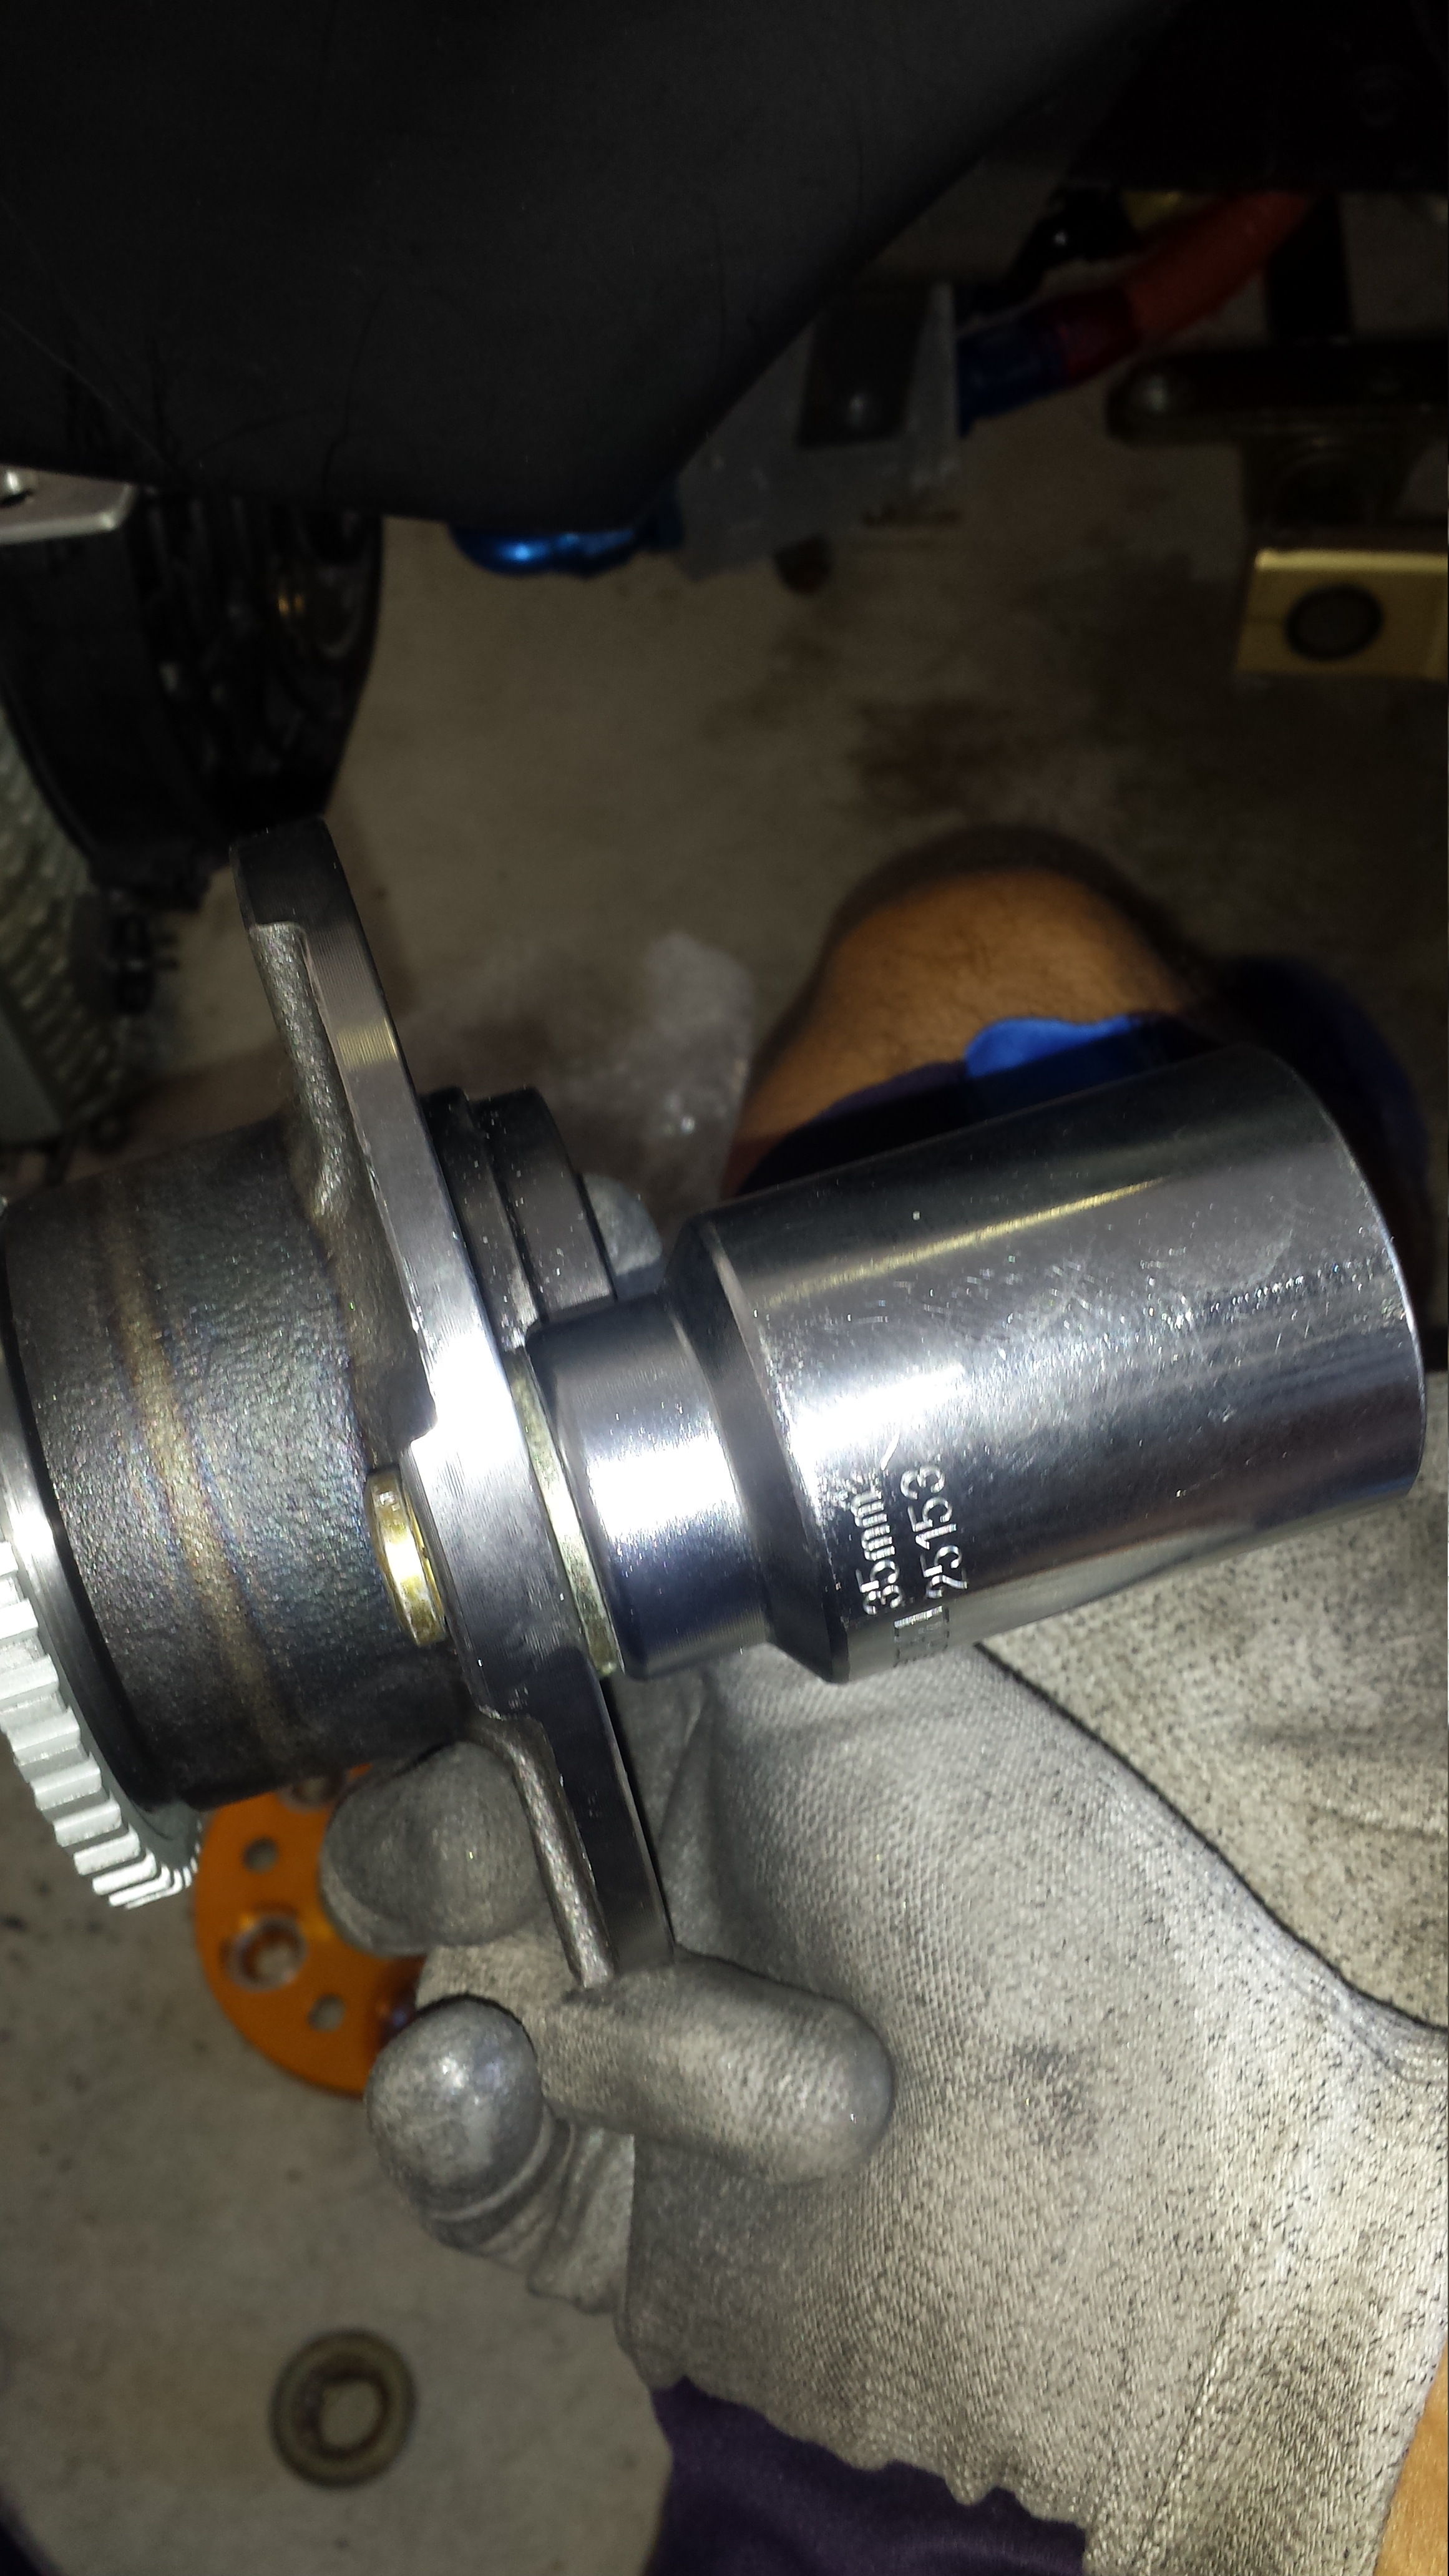
And heres how I installed the extended studs into the new assembly. I pulled them through using an impact and my wheel hub nut socket. It's giant so it allows the smaller lug nut socket to fit down into it all the while providing enough spacing to make sure you can fully tighten the stud down before running out of depth on the socket.
Used a little bit of grease for the spindle..
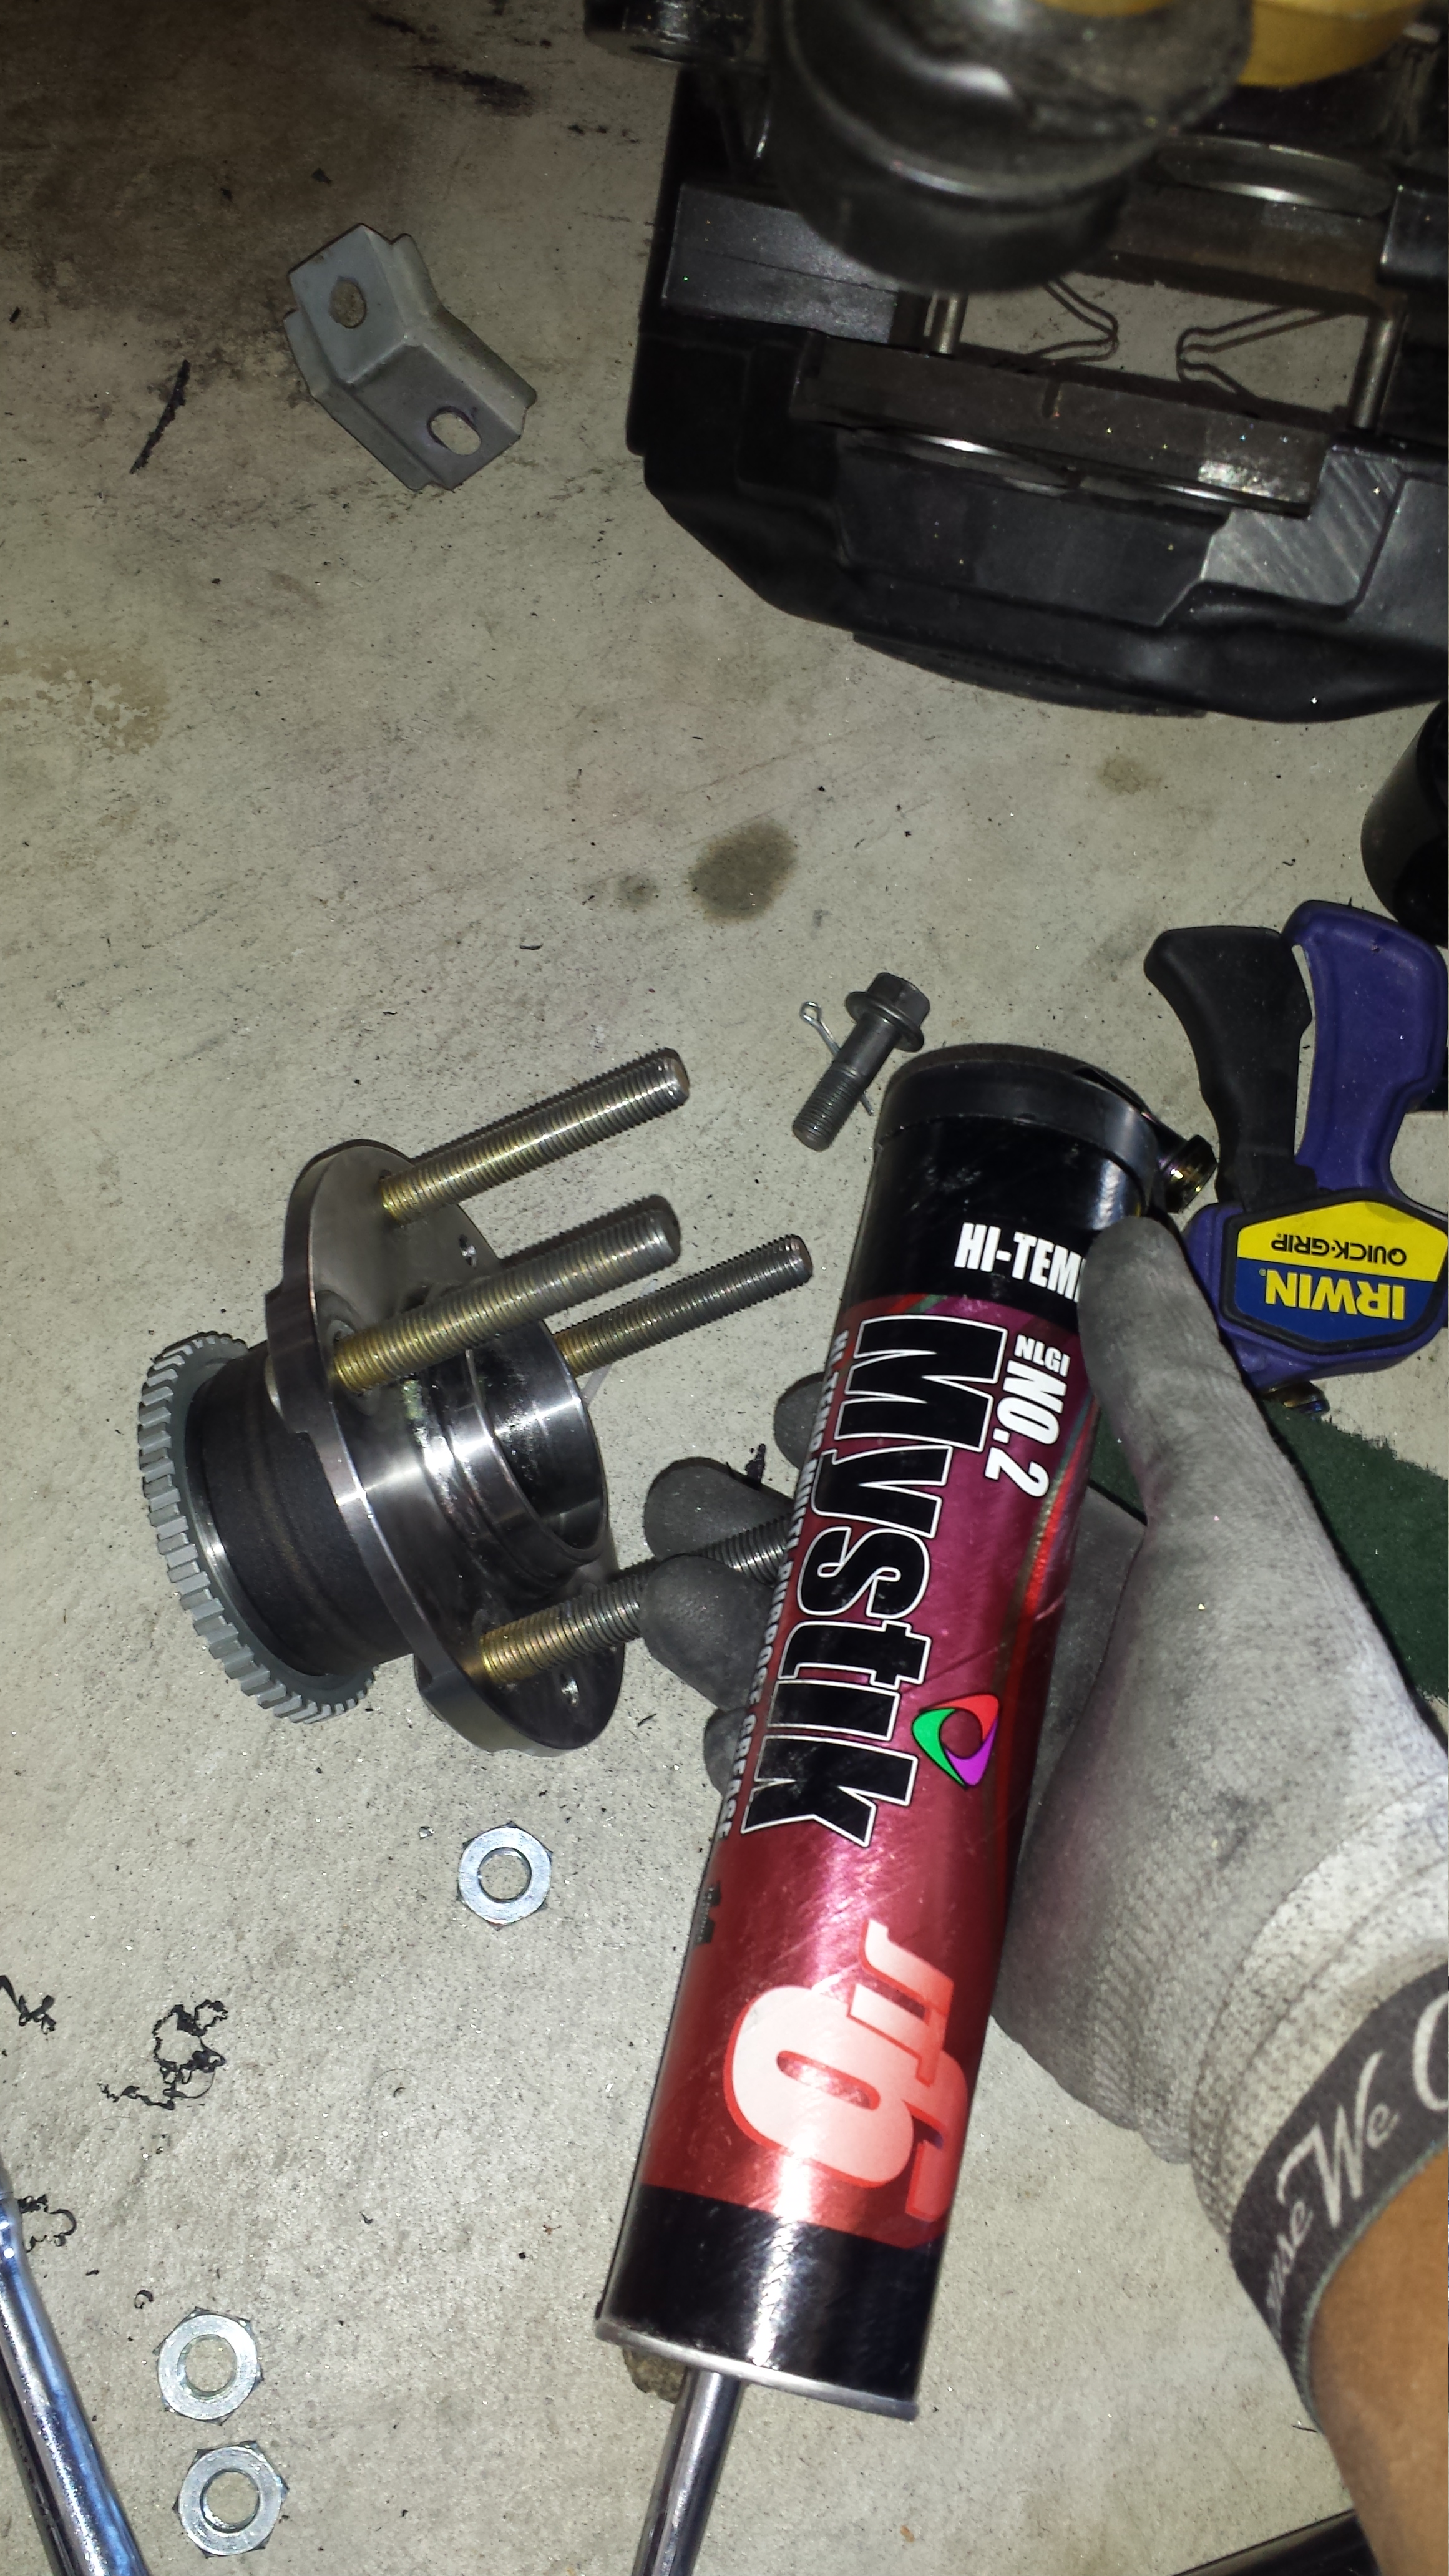
Installed =-)
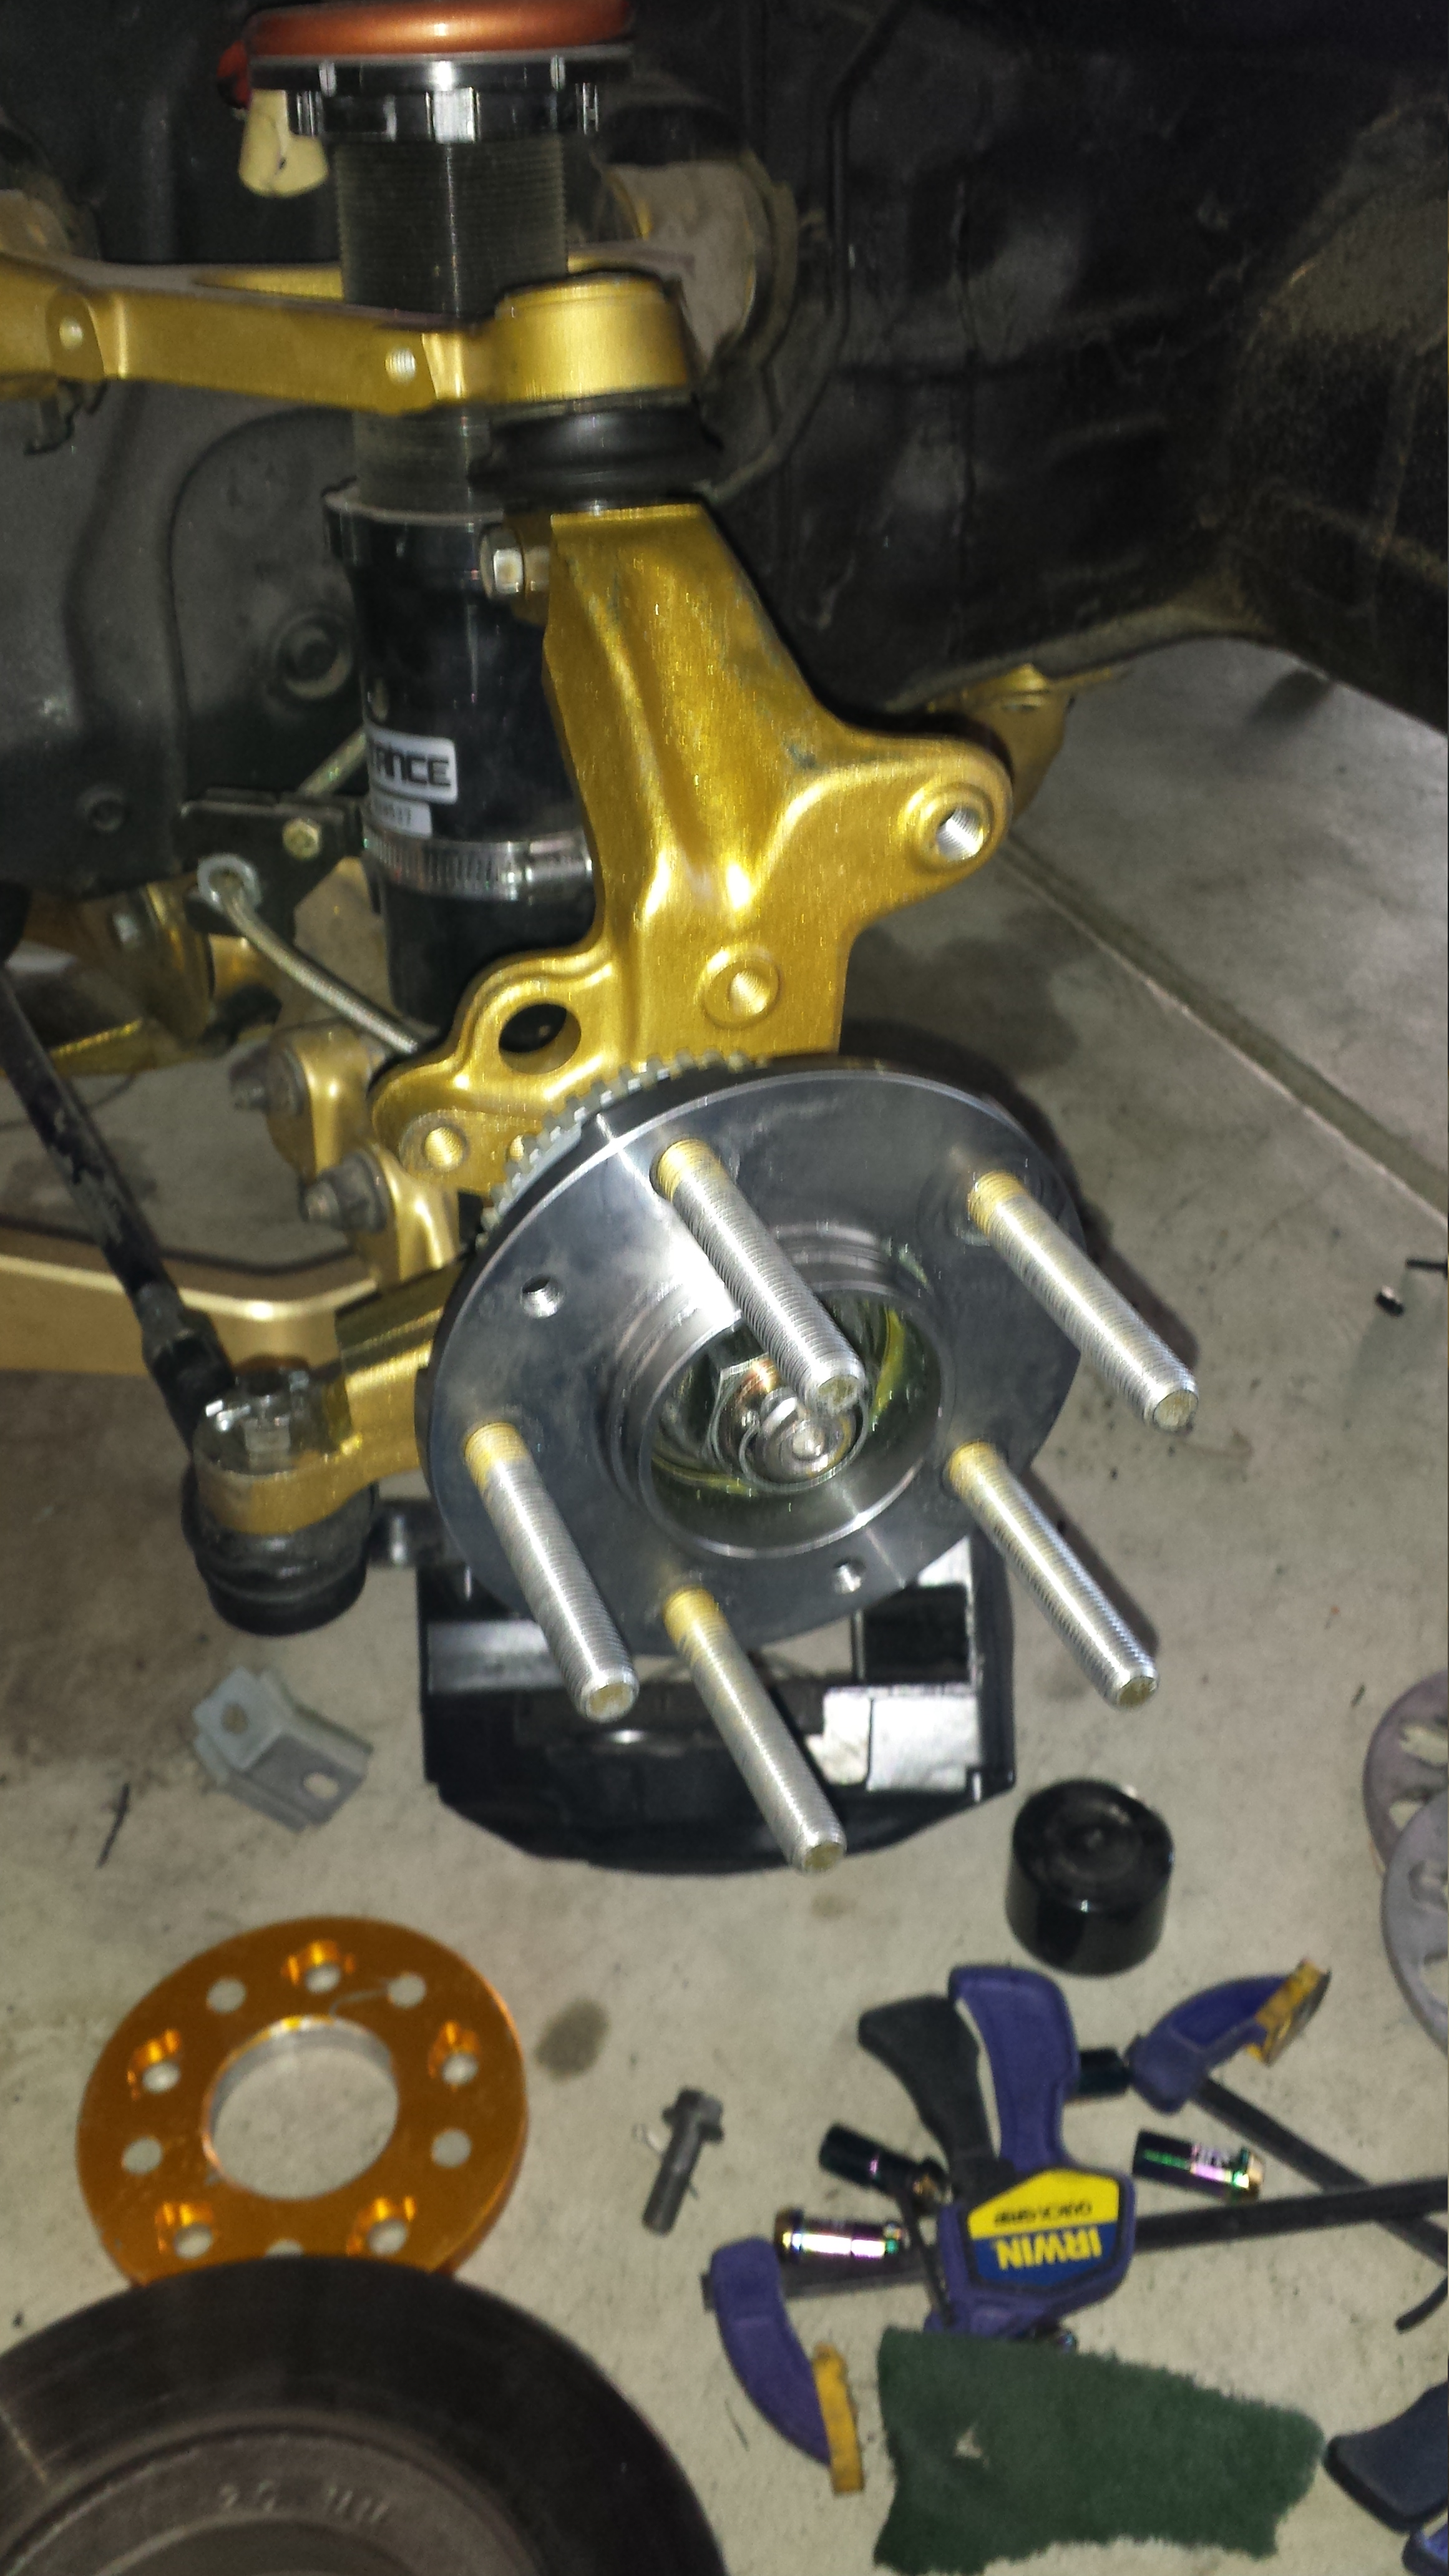
And here is what I'm doing to the switch panel. These two little rockers next to the kill switch will be for my two in tank bosch 044's. I wanted to move the switches closer to the driver so that I wouldn't have to get out every time I needed to turn a pump on or off/problem solve/troubleshoot etc. So these two switches will be pump 1 and pump 2. They aren't secured yet but you get the general idea. The E85/EBC switch will be on the opposite side...it has a RED LED light.
Now I just need to figure out where I'll be mounting my accessory fuse box for gauges and switches etc.
More Updates soon! Stay Tuned!
Autozone got my hub and bearing in, same day!!! not lifetime warranty but 1 year. Optional 3 year but the price difference was 40 bucks. SO I paid 70 for the hub and bearing. Also got a e85 switch. It'll simply control my EBC so that when my flex fuel content gauge shows a certain percentage i'll hit the switch and bump boost up. Otherwise I'll be running 91 Octane at spring pressure for reliability. Really don't need much more at this point. Spring pressure is 14lbs. An EBC E85 will be 18-20LBS. Any input on this will be considered. "Open minded" to yield the best possible option to do the best job I can.
here is the hub assembly and switch
Its amazing the methods you develop to get things done. I remember slamming my first studs out with a mallet...gaulling up the threads and it being a total pain/learning experience. Now I use spare close ended lug nuts fully threaded in so I don't ruin the threads. The 5 lb sledge is still useful, but I use an open ended pipe to prop on. Works like a charm and literally took me 5 min.
knocking included studs out of the new hub assembly, (good spares)
Heres the jacked up bearing
knocking my extended ARP studs out of the old garbage hub
And heres how I installed the extended studs into the new assembly. I pulled them through using an impact and my wheel hub nut socket. It's giant so it allows the smaller lug nut socket to fit down into it all the while providing enough spacing to make sure you can fully tighten the stud down before running out of depth on the socket.
Used a little bit of grease for the spindle..
Installed =-)
And here is what I'm doing to the switch panel. These two little rockers next to the kill switch will be for my two in tank bosch 044's. I wanted to move the switches closer to the driver so that I wouldn't have to get out every time I needed to turn a pump on or off/problem solve/troubleshoot etc. So these two switches will be pump 1 and pump 2. They aren't secured yet but you get the general idea. The E85/EBC switch will be on the opposite side...it has a RED LED light.
Now I just need to figure out where I'll be mounting my accessory fuse box for gauges and switches etc.
More Updates soon! Stay Tuned!
 04-24-14, 11:00 AM
#1849
04-25-14, 12:19 PM
#1850
Junior Member
Hi Aaron
Incredible this project underway! entails a lot of sacrifice, if not daring with mine.
I hope you can soon enjoy!
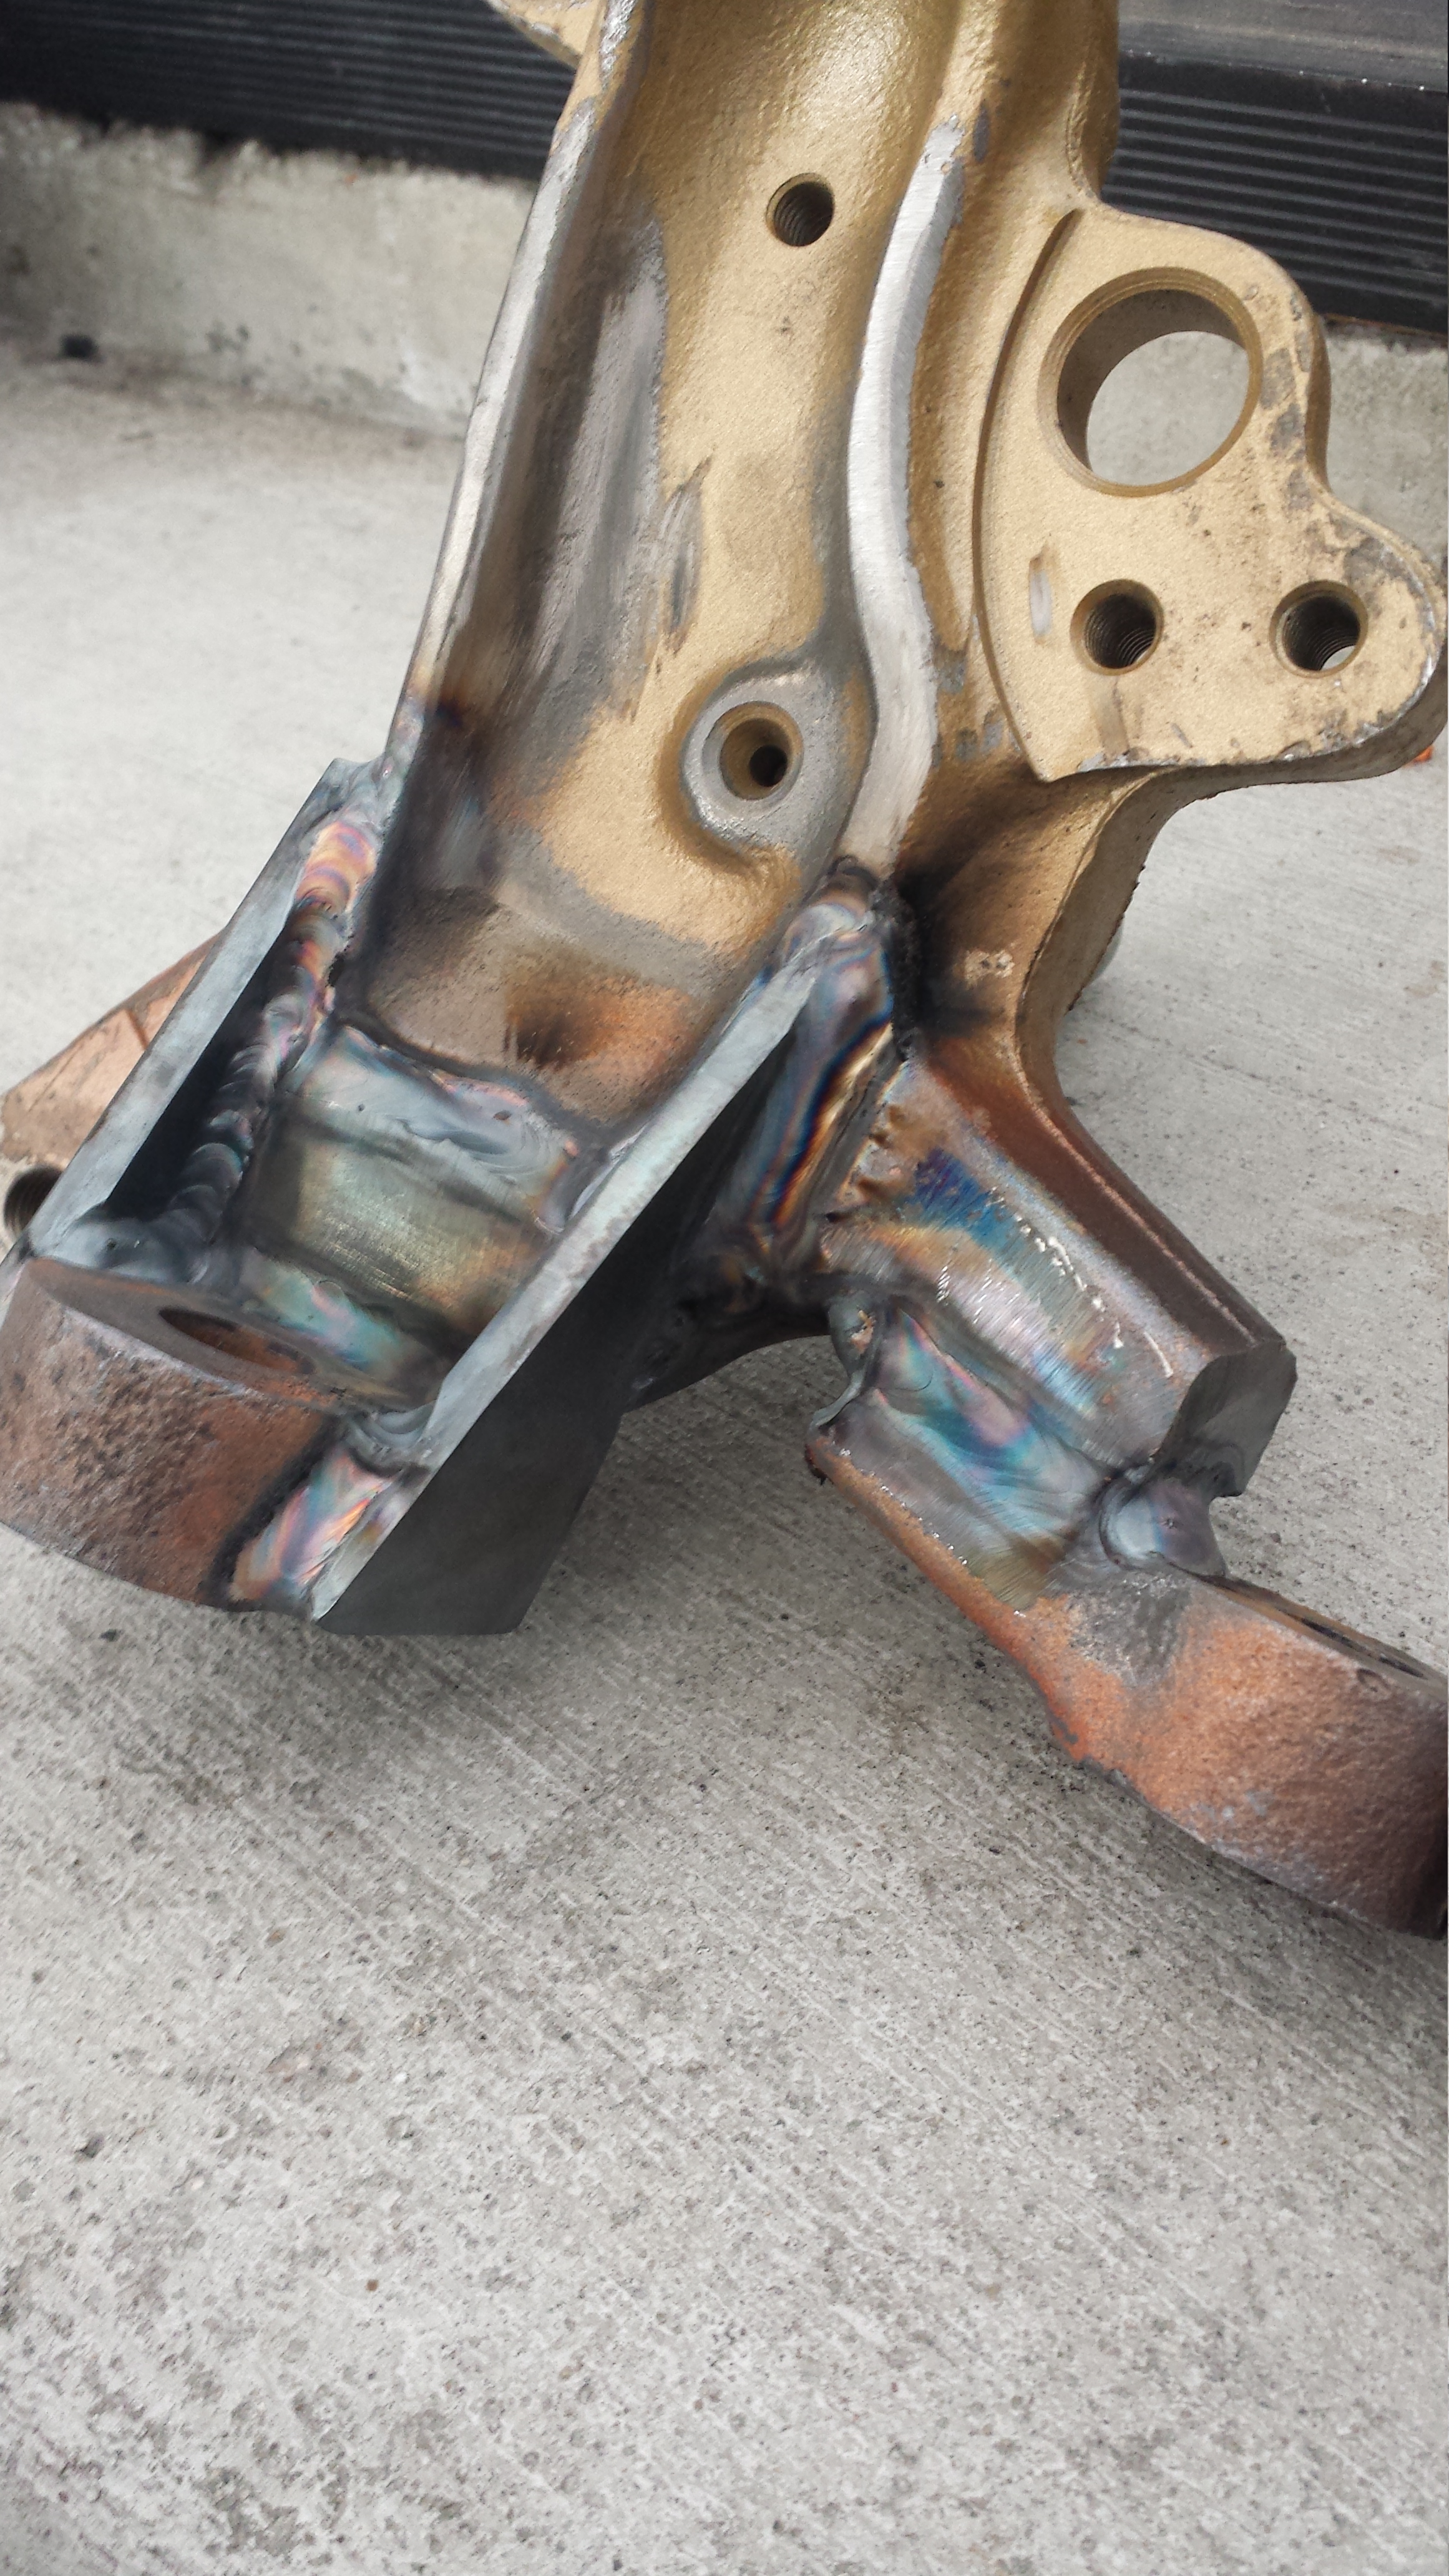
I wanted to ask, how you welded the knuckles?
I have a couple to spare at home, I like to try to improve the angle of direction. And to be cast, not if electrode casting, or tig, argon gas supply and use. I would help you to tell me how!
thank you very much
__________________________________________________ ___________
Hola Aaron
Menudo proyecto estas llevando a cabo!!! mucho sacrificio conlleva, no se si atreverme con el mio.
Espero que pronto lo puedas disfrutar!!!
Te queria preguntar, �como has soldado las manguetas?
tengo un par de sobra en casa, me gustaria probar, para mejorar el angulo de direccion. Y al ser de fundicion, no se si se utiliza electrodo de fundicion, o tig, aporte y gas argon. Me seria de ayuda que me dijeras como!!
Muchas gracias
Incredible this project underway! entails a lot of sacrifice, if not daring with mine.
I hope you can soon enjoy!
I wanted to ask, how you welded the knuckles?
I have a couple to spare at home, I like to try to improve the angle of direction. And to be cast, not if electrode casting, or tig, argon gas supply and use. I would help you to tell me how!
thank you very much
__________________________________________________ ___________
Hola Aaron
Menudo proyecto estas llevando a cabo!!! mucho sacrificio conlleva, no se si atreverme con el mio.
Espero que pronto lo puedas disfrutar!!!
Te queria preguntar, �como has soldado las manguetas?
tengo un par de sobra en casa, me gustaria probar, para mejorar el angulo de direccion. Y al ser de fundicion, no se si se utiliza electrodo de fundicion, o tig, aporte y gas argon. Me seria de ayuda que me dijeras como!!
Muchas gracias