
Mannykillers/ AAPARKAH Street/time Attack/Drift Build (heavy Pics) #Thisisthewolf


When doin the clutch you can keep it going like that. or another way to do it is to open the bleeder, then slowly press in the clutch, close it off at the bottom. Do that 2-3 times then pump it up like you have been doing.
Soldering is cake. Mesh the wires together, put the soldering gun below but touchin the wire and let the solder "melt" into the wires. It will suck in and have the best connection.
Soldering is cake. Mesh the wires together, put the soldering gun below but touchin the wire and let the solder "melt" into the wires. It will suck in and have the best connection.

Thanks for the info on the clutch...but after really just stopping and thinking about it. I'mgoing to pull the slave cylinder off and inspect it. I think it's bad.... because after bleeding it for this long it should at least re-coil on it's own. I have a spare I'm going to open up and inspect as well... and see if theres a difference in o-rings then if need be just order a rebuild kit.
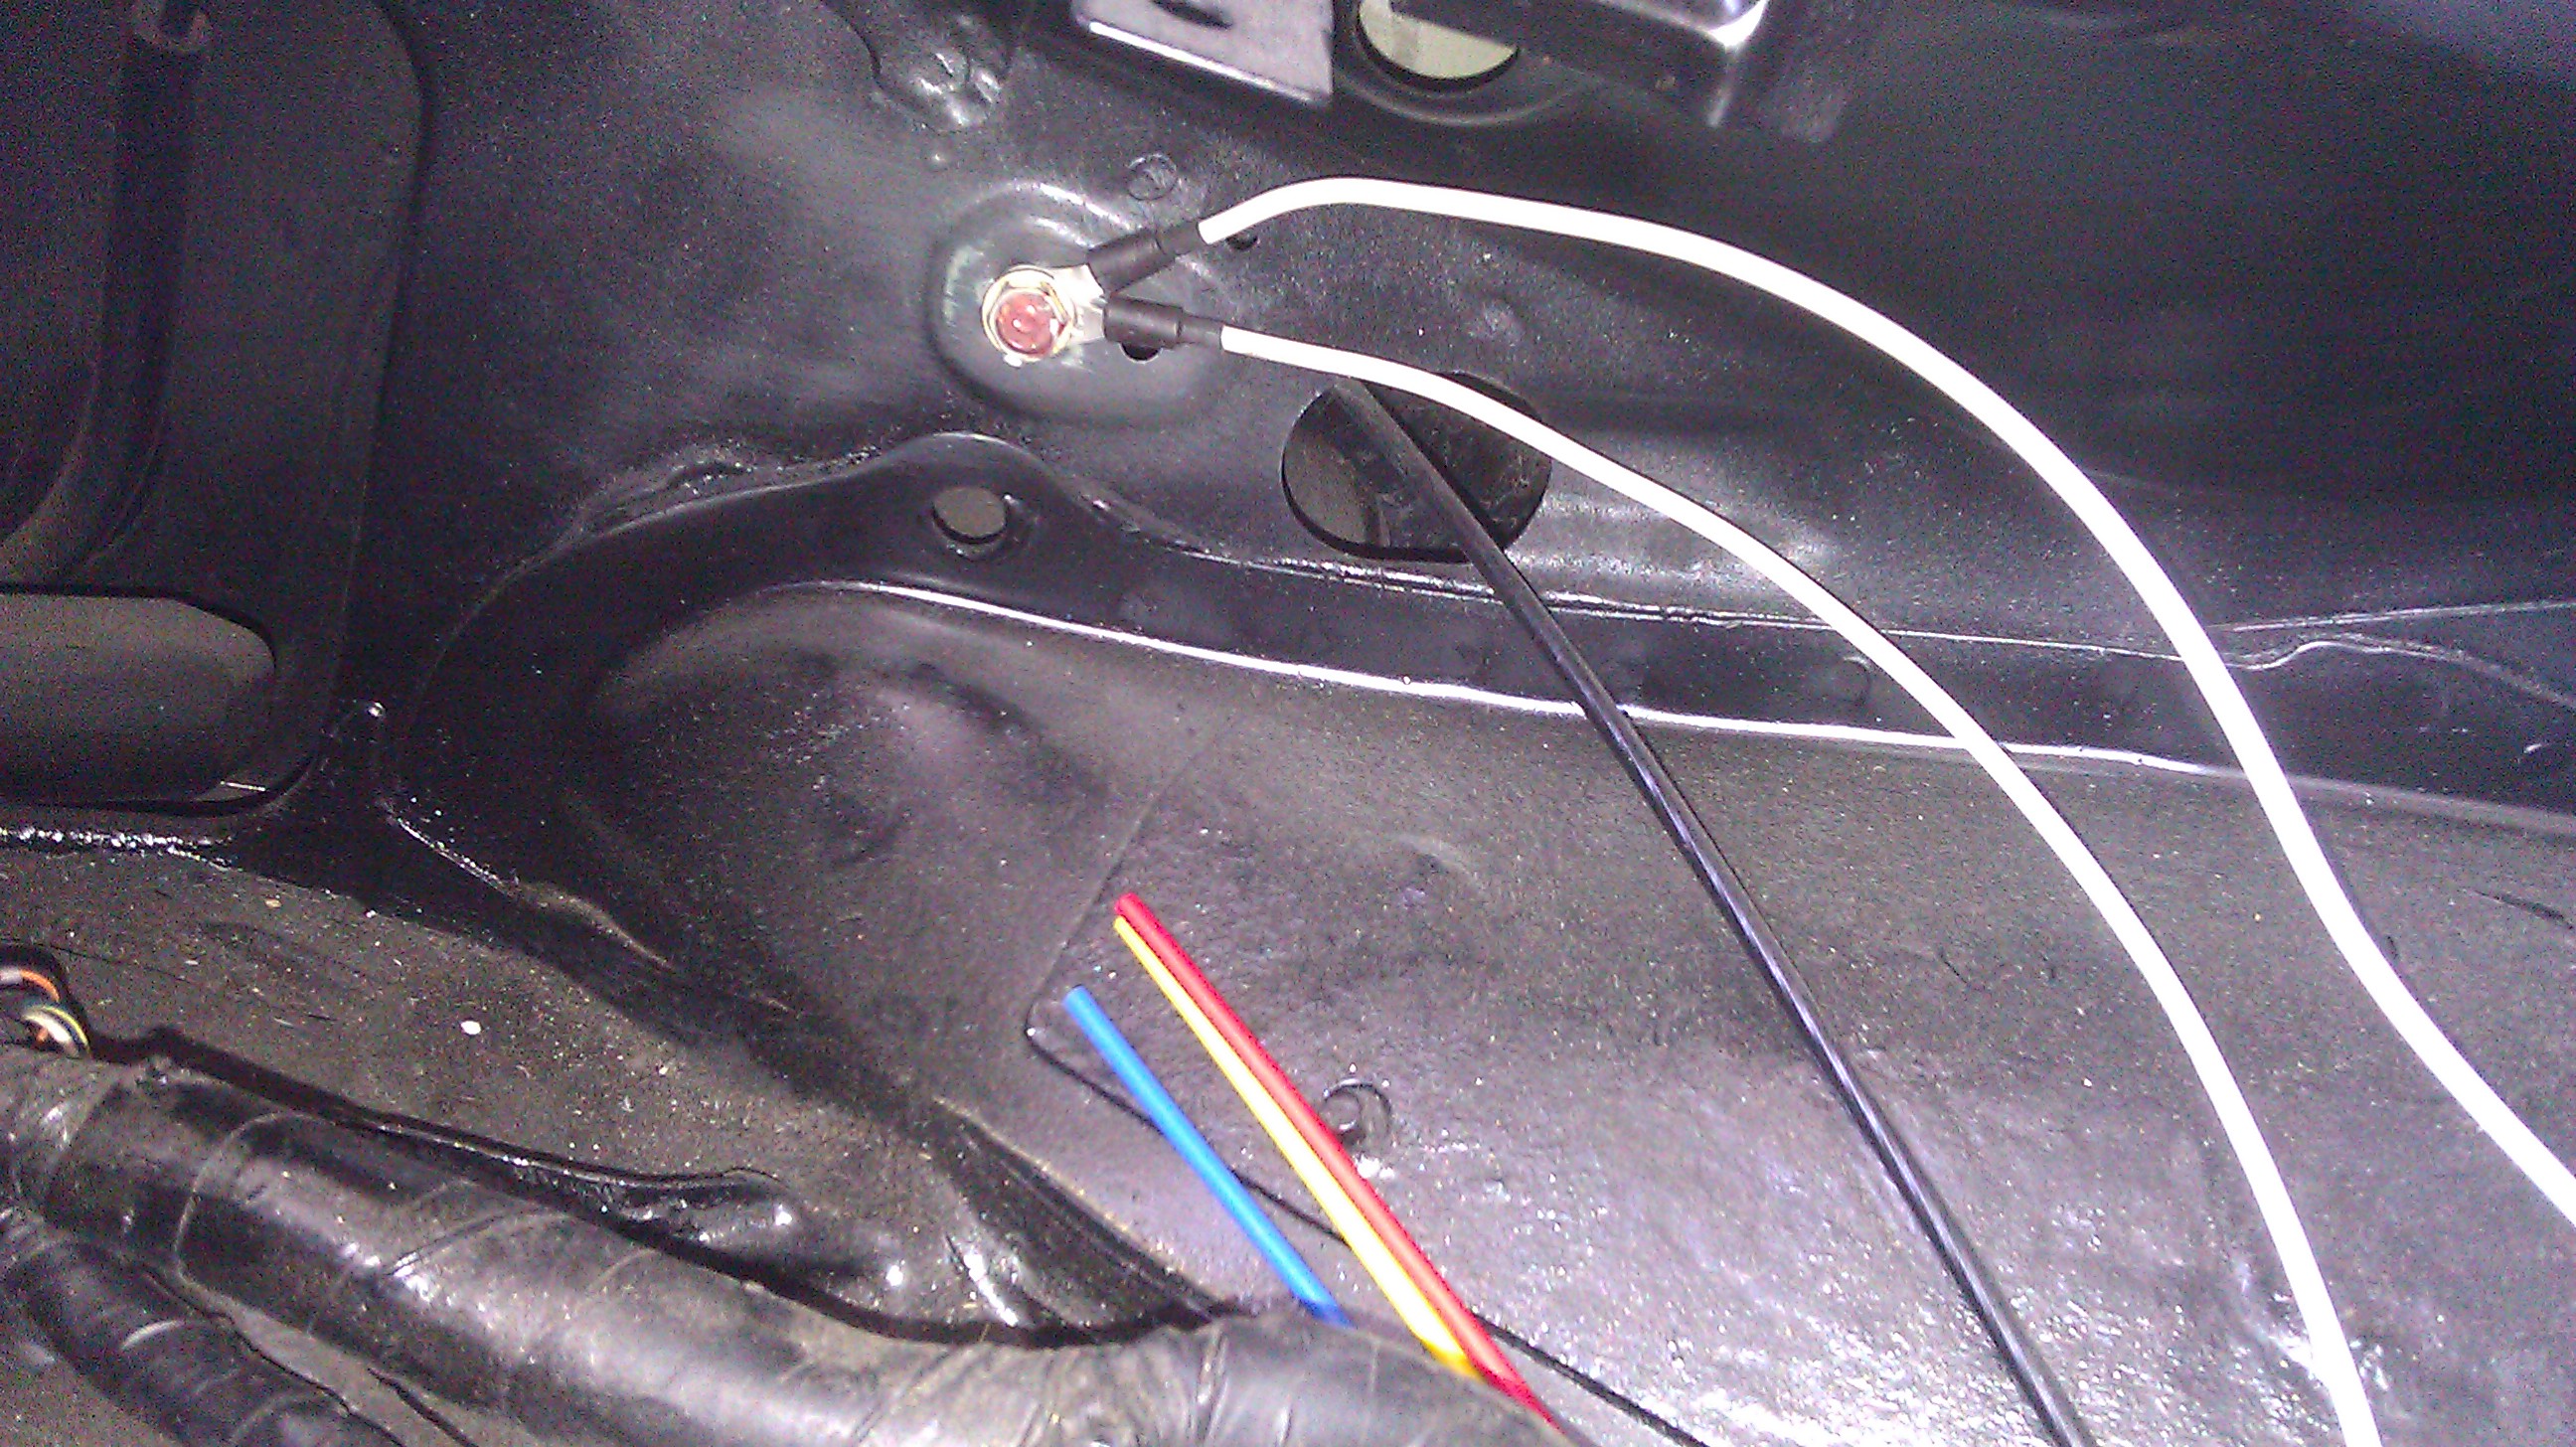
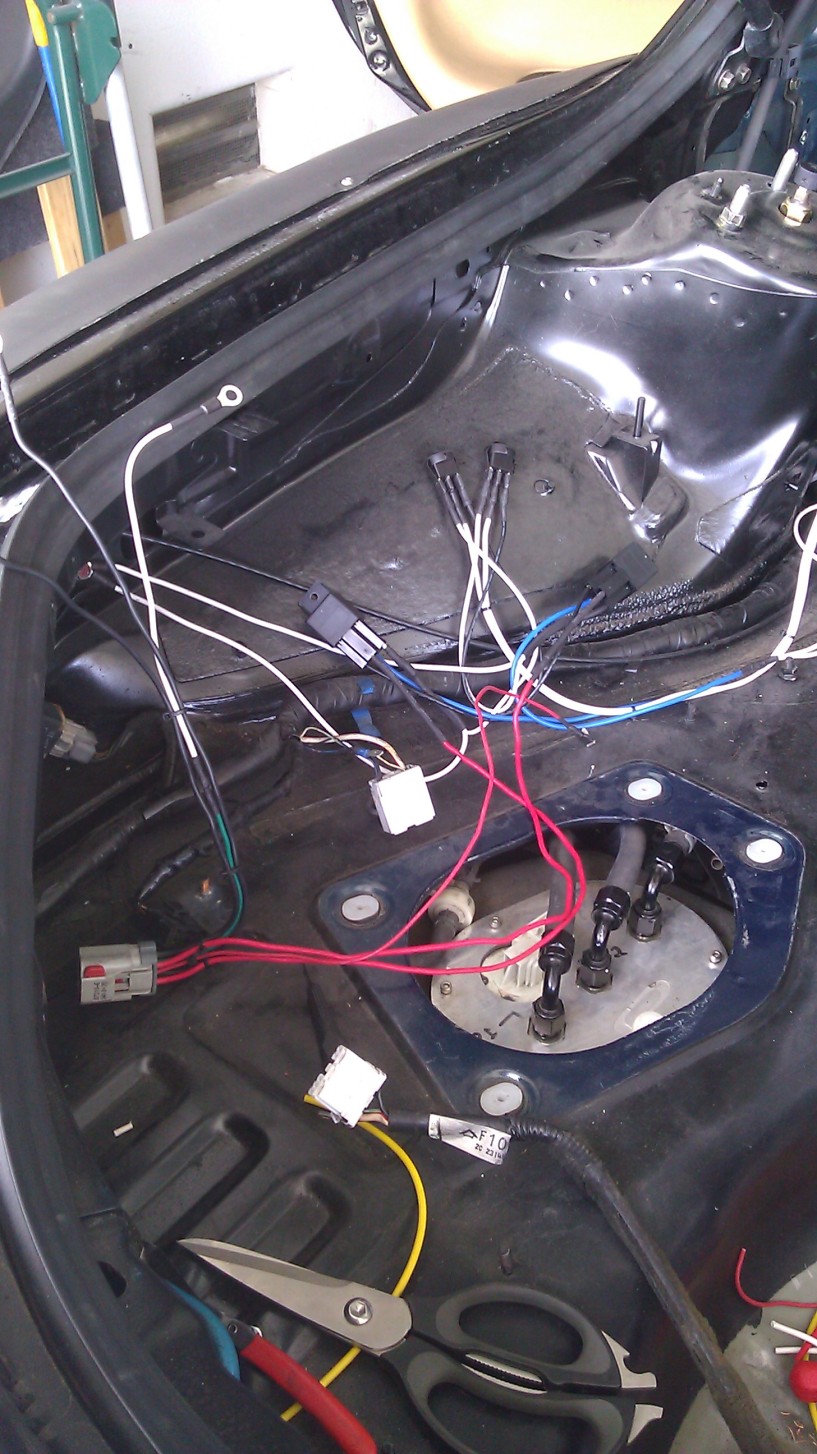
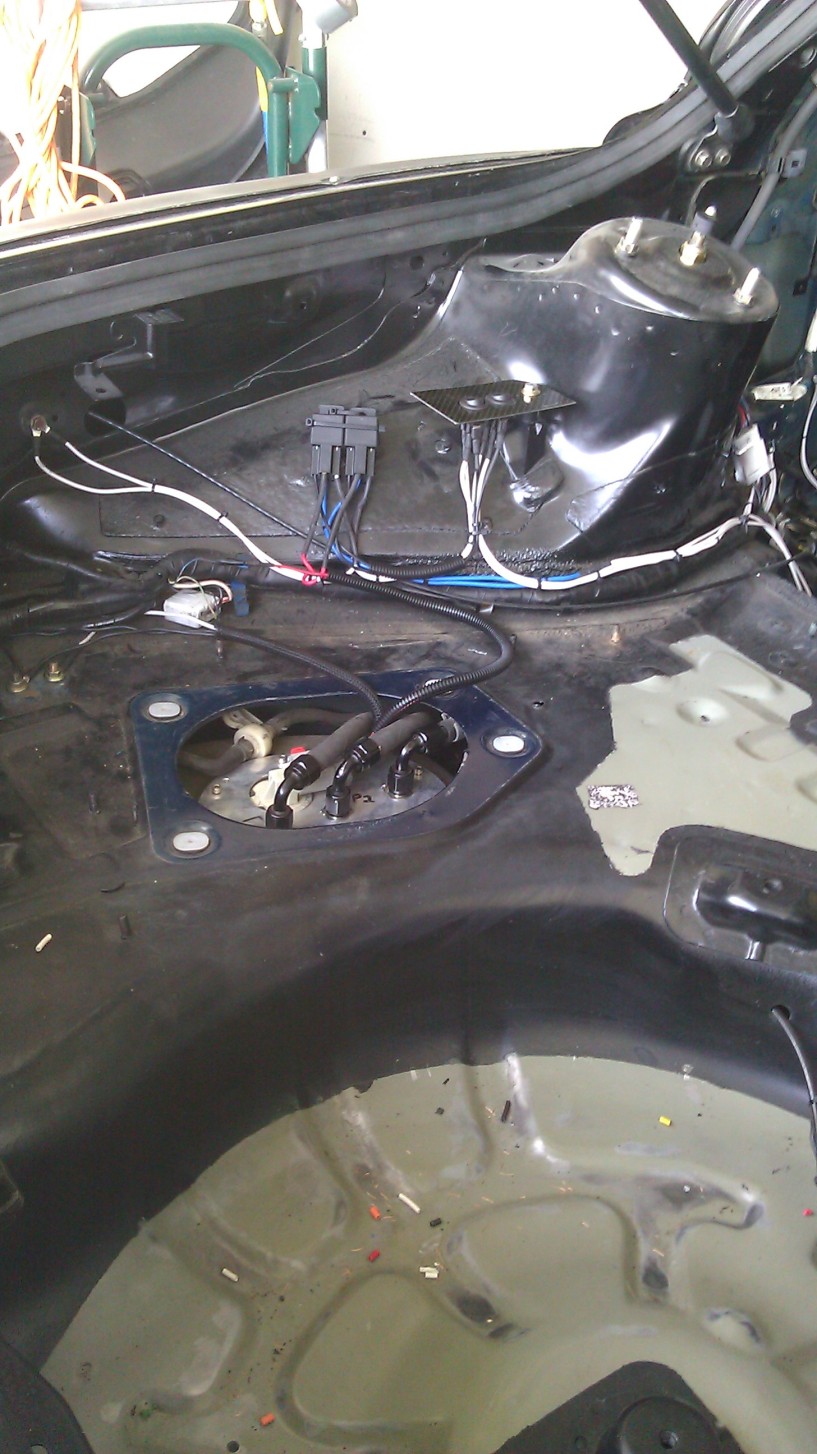
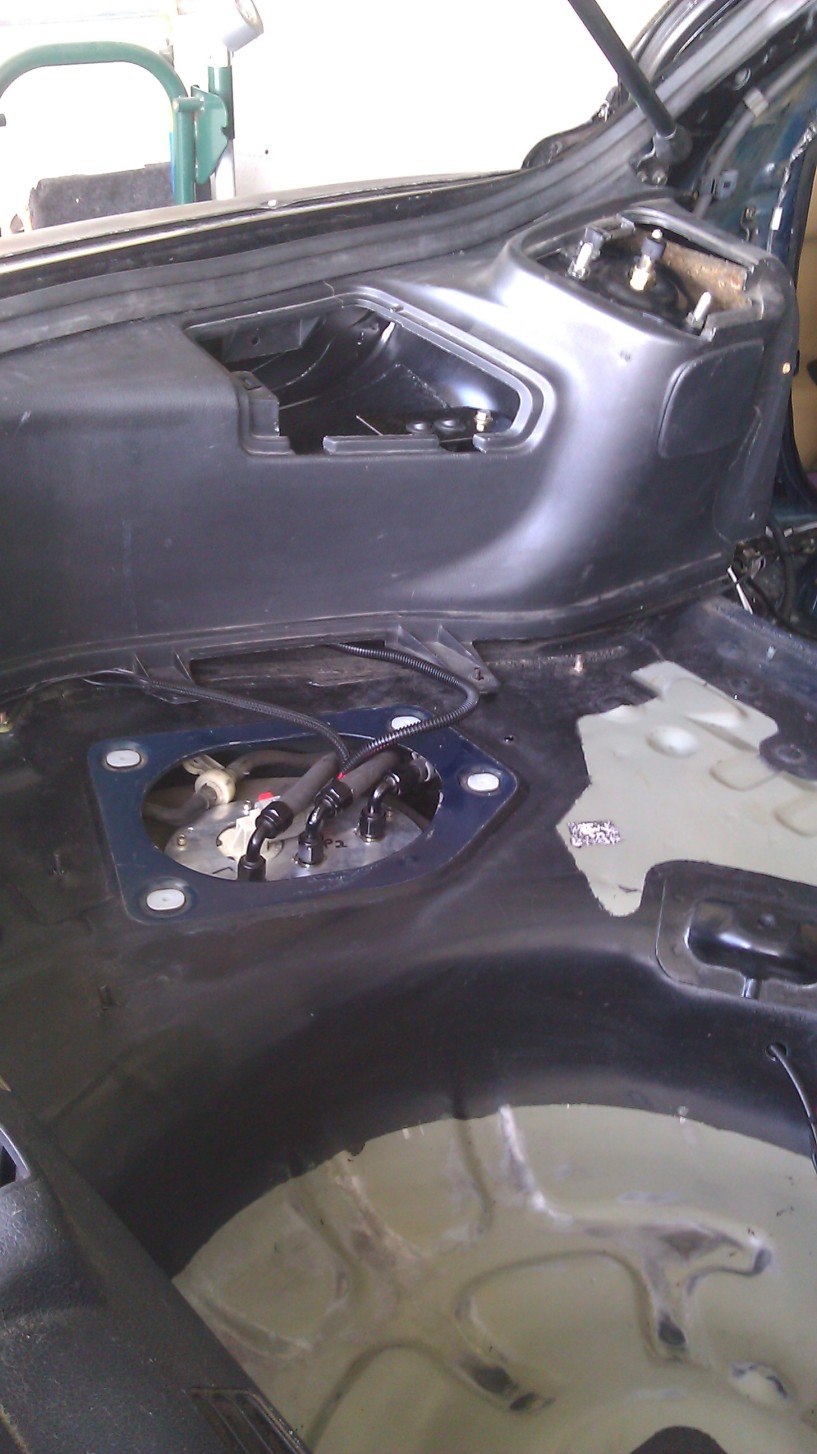
Other updates..Not a ton of stuff but wiring the fuel pumps up was definitely a huge move and a time consuming one as well
Got the grounds all figured out, power to pumps, Relay/rocker switch and Battery terminals as well. Just need to run 12V to the rocker switches now.
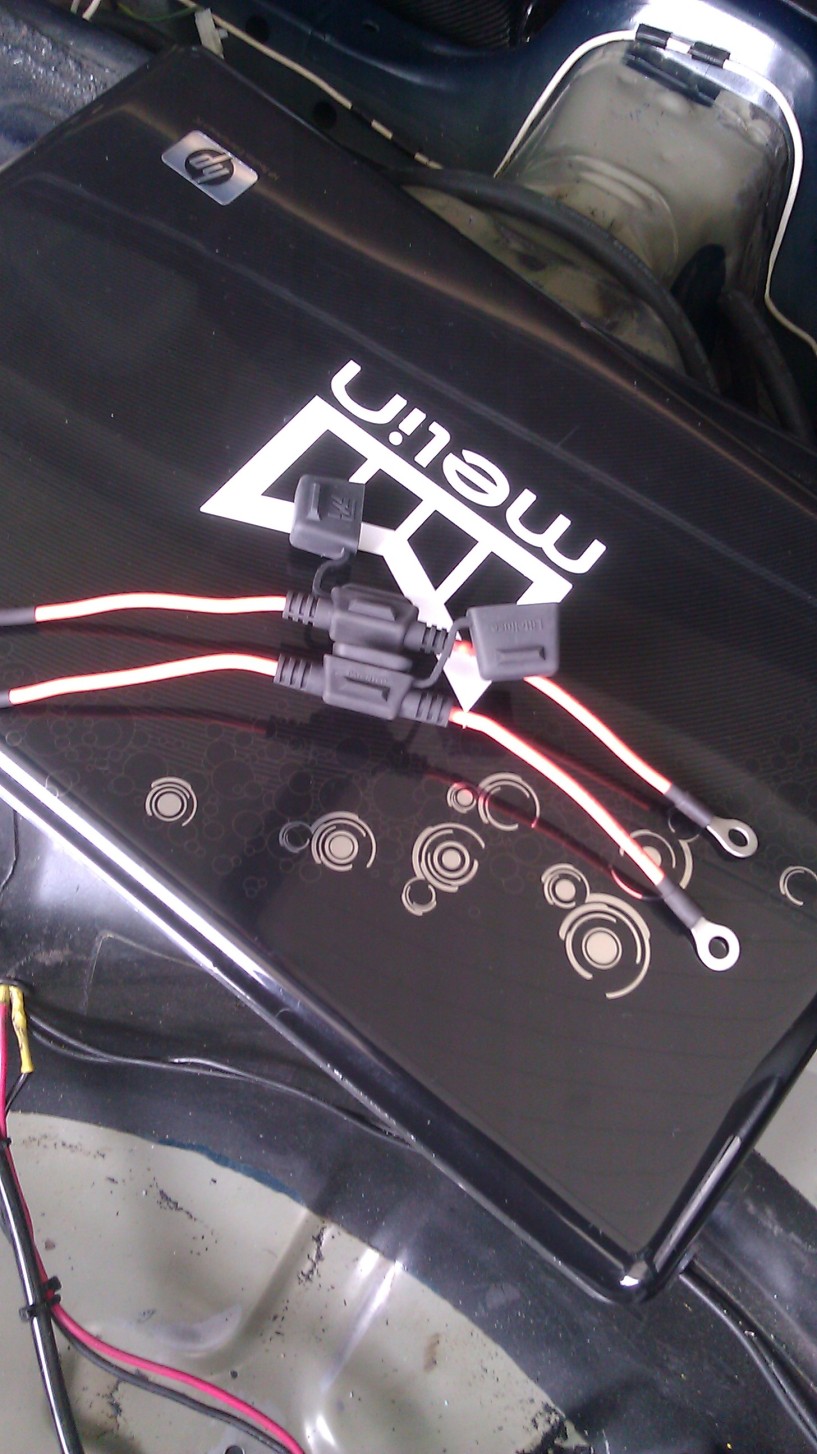
But here is an incomplete Pic of the relay harness's incomplete
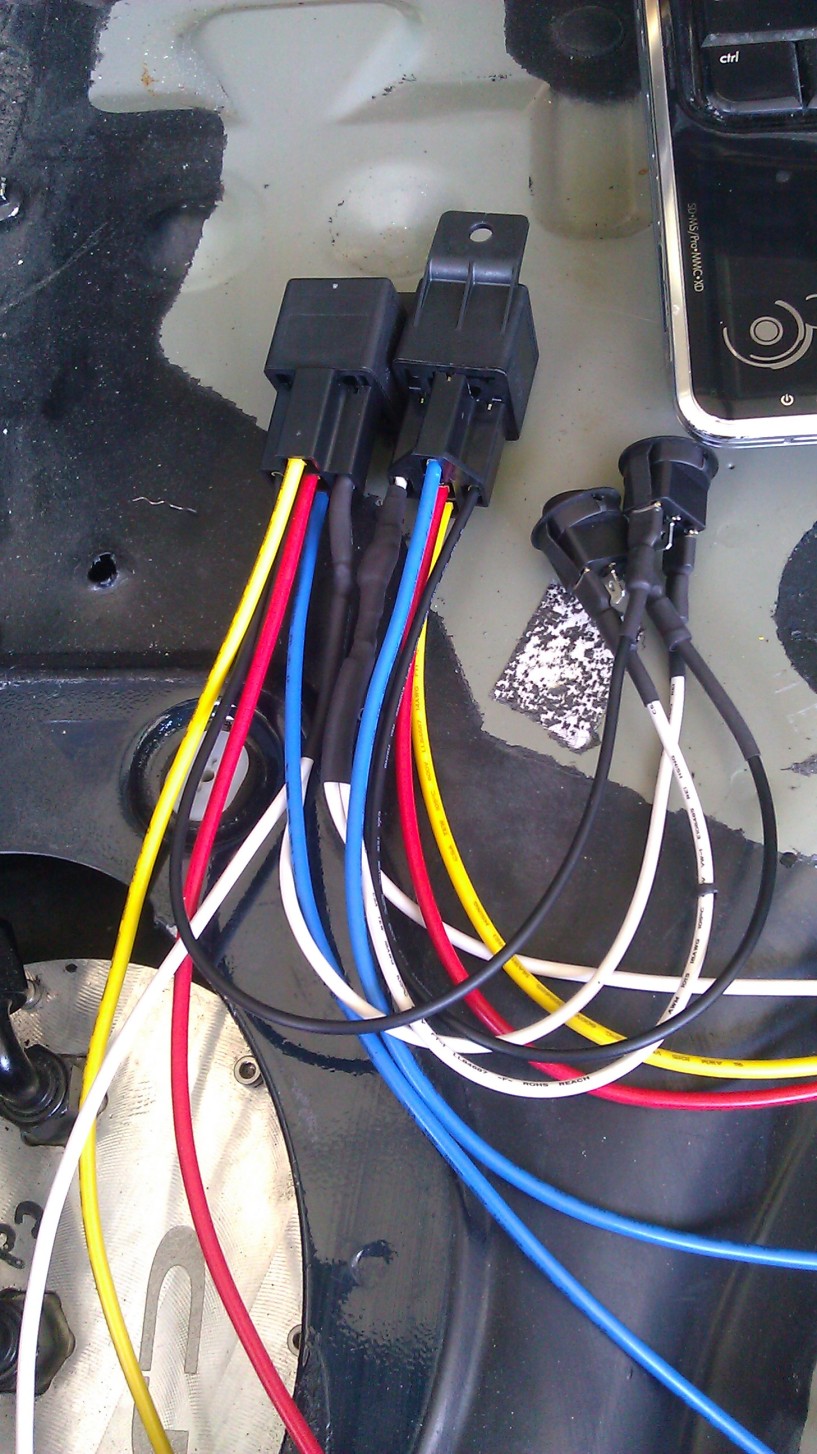
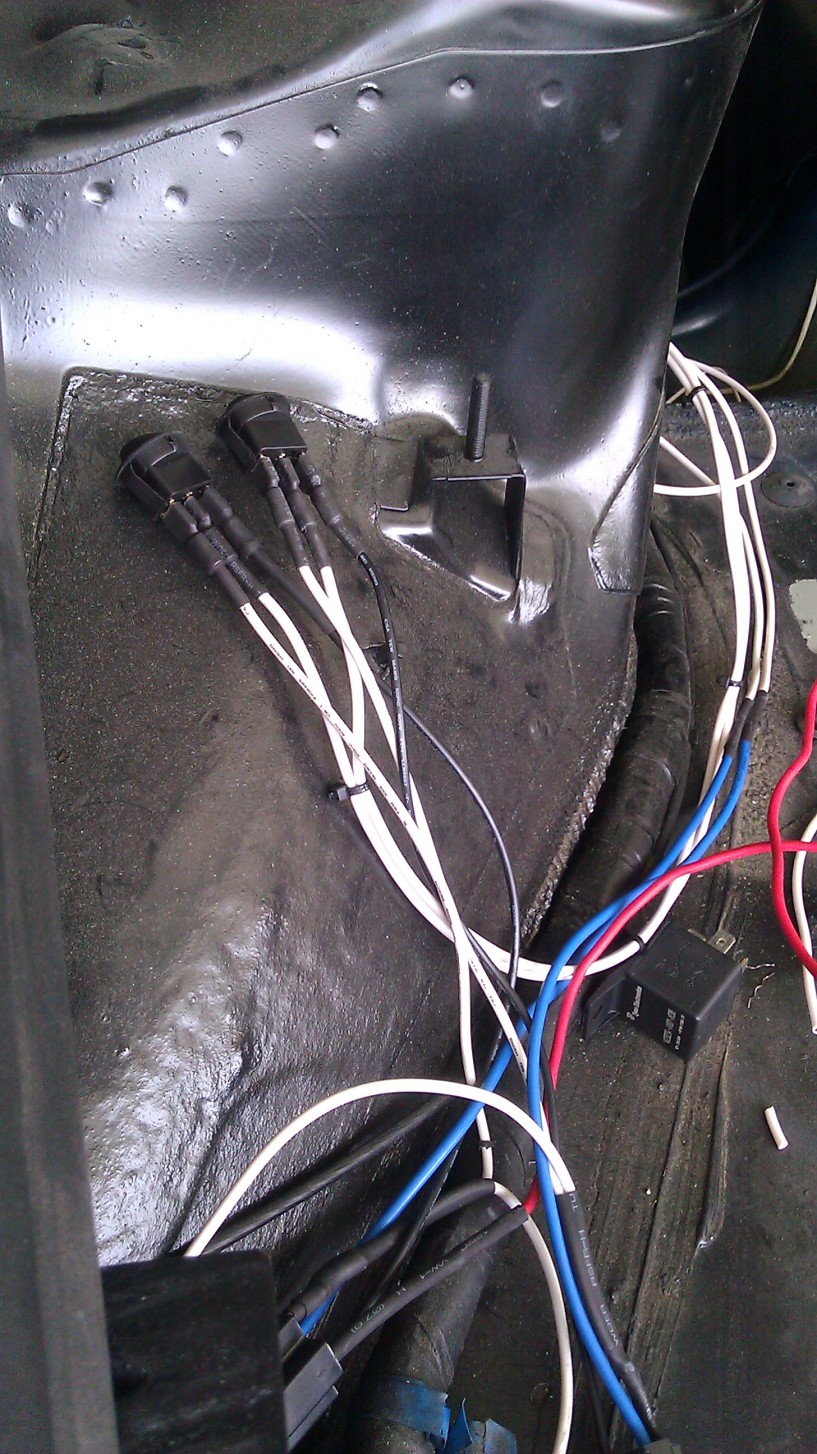
Grounds for relay/rocker switch & i'll most likely use the same location or one close to it for the pumps as well.
You know what I'm getting damn good at soldering as well =-) I almost burnt myself because I realized I was actually enjoying myself...WHILE Wiring!!
not a pic of the bare solder but the power wire from Battery to Relay.
More Updates soon!!!
Other updates..Not a ton of stuff but wiring the fuel pumps up was definitely a huge move and a time consuming one as well
Got the grounds all figured out, power to pumps, Relay/rocker switch and Battery terminals as well. Just need to run 12V to the rocker switches now.
But here is an incomplete Pic of the relay harness's incomplete
Grounds for relay/rocker switch & i'll most likely use the same location or one close to it for the pumps as well.
You know what I'm getting damn good at soldering as well =-) I almost burnt myself because I realized I was actually enjoying myself...WHILE Wiring!!
not a pic of the bare solder but the power wire from Battery to Relay.
More Updates soon!!!

 LEET! just like this build! ha
^lol
Big Update:
Yesterday was awesome because I spent about 8 hours straight working on the car.
I started off where I left off.... Wiring. Ran 2x 12V wires up to the steering column ignition harness. Finished the power wires to the battery with 30AMP fuses, Got my Rocker switches all taken care of, and all my grounds in order as well.
Battery Terminal eyelits straight to relays
came out nice
Coming together
I noticed that using zip ties really really helps with orgnizing and making things look better
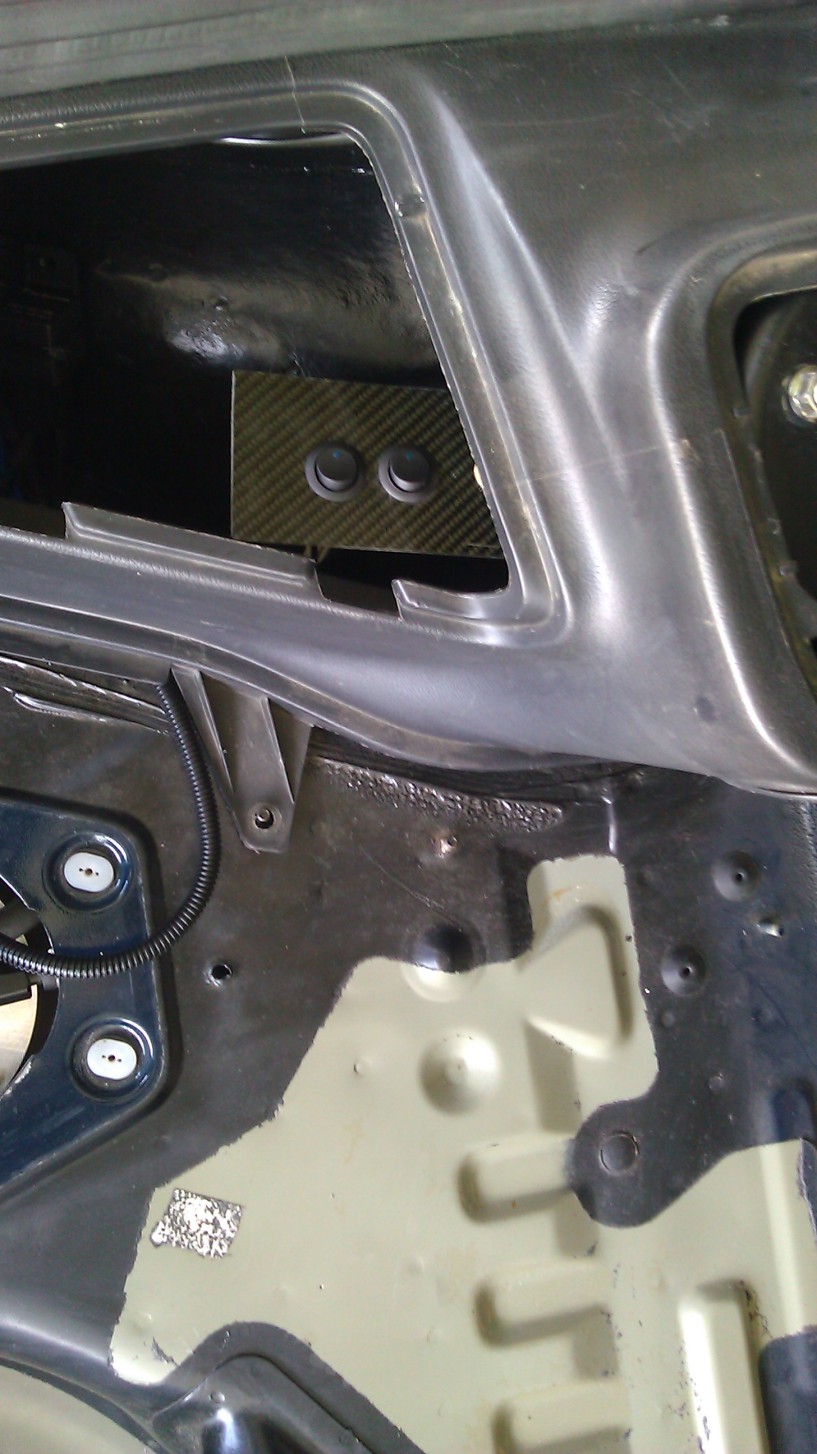
...I also needed somewhere to mount my rocker switches. The previous owner used this horrible piece of wannabe carbon fiber scrap metal with a sticker overlay for the din pocket. he cut a hole and put the boost guage in there.. it not only looked horrible but it also wouldn't stay in place. I don't kjnow why i've kept it around because I always thought to myself "...man that thing is useless ..why don't I just trash it." Well I finally found a use for it haha. I drilled 2 holes in it and figured it'll work for now to mount my rocker switches.
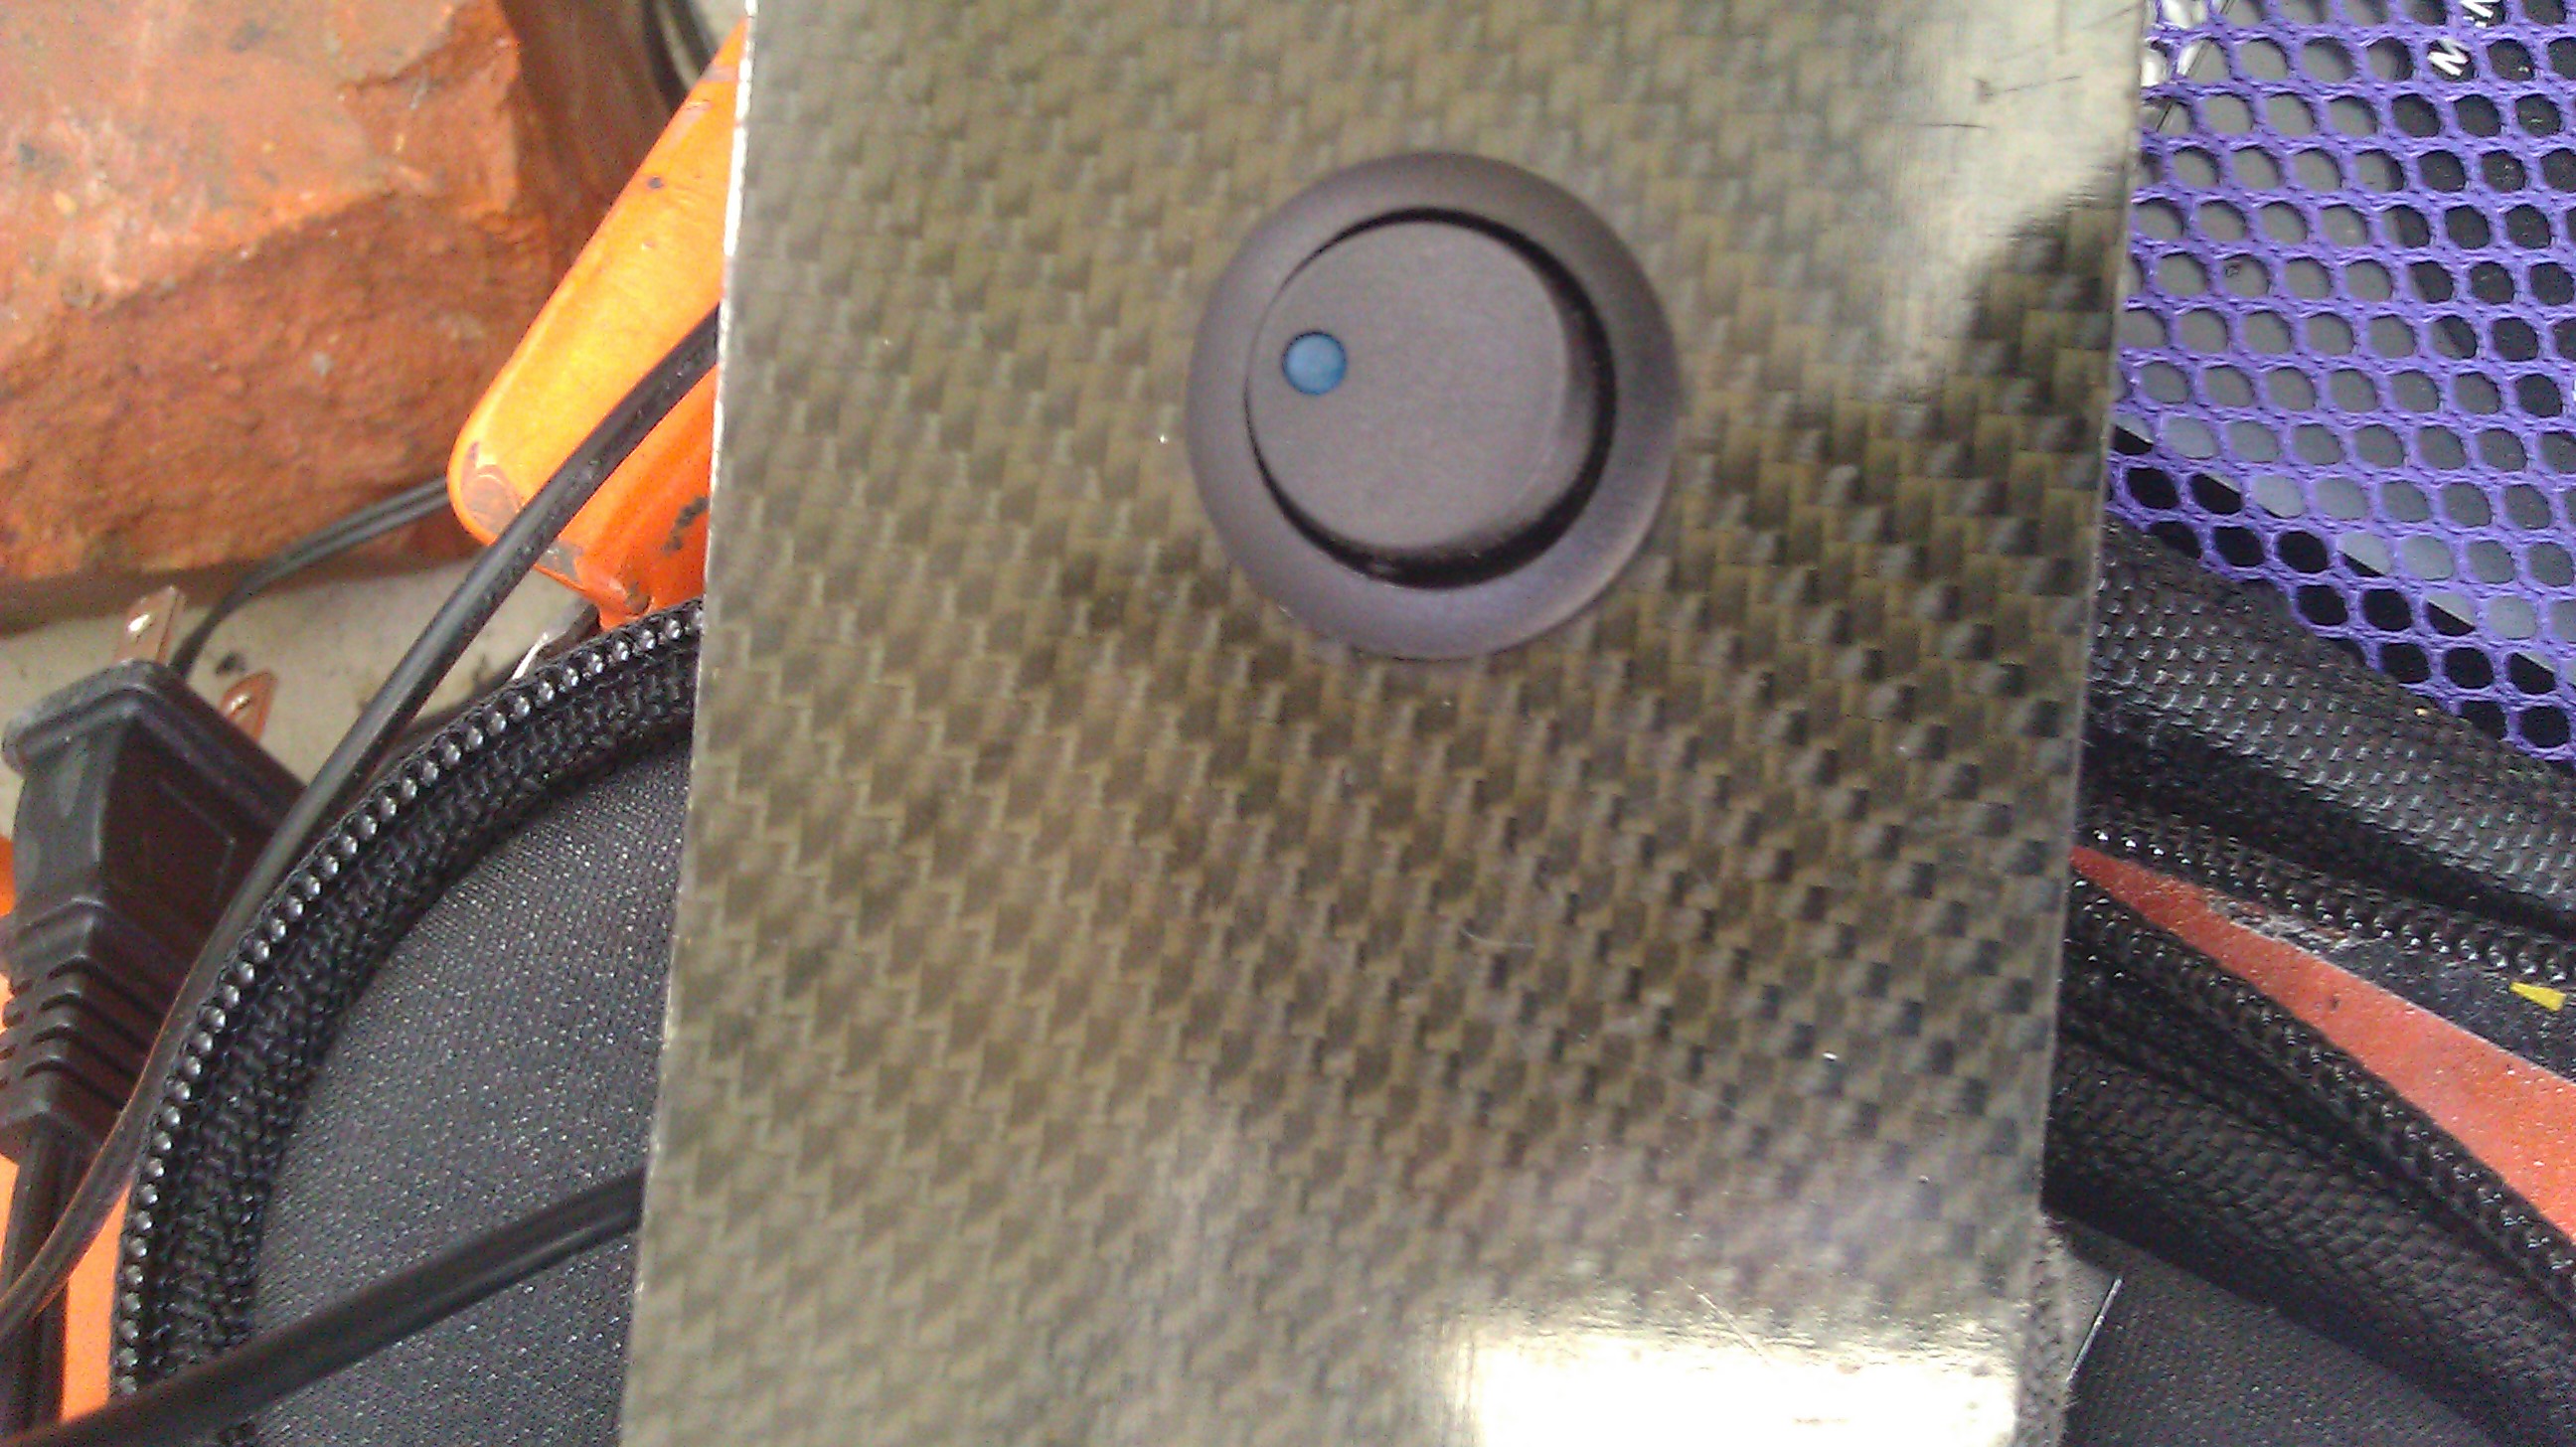
So here it is in all it's glory... This took me a total of about 6 hours all together. Not proud of that..but at least I know that if I need to do it again I could do it in 2 haha.
With cover on all finished up
Finally I was time to work on the coil mounting bracket I had started. Bj made me a quick little bracket out of some scrap alum.
I simply drilled 2 holes.. found 2 bolts... used 2 Fuel Rail risers I had laying around as spacers.. tightened them up..and mounted them on the drivers side frame.
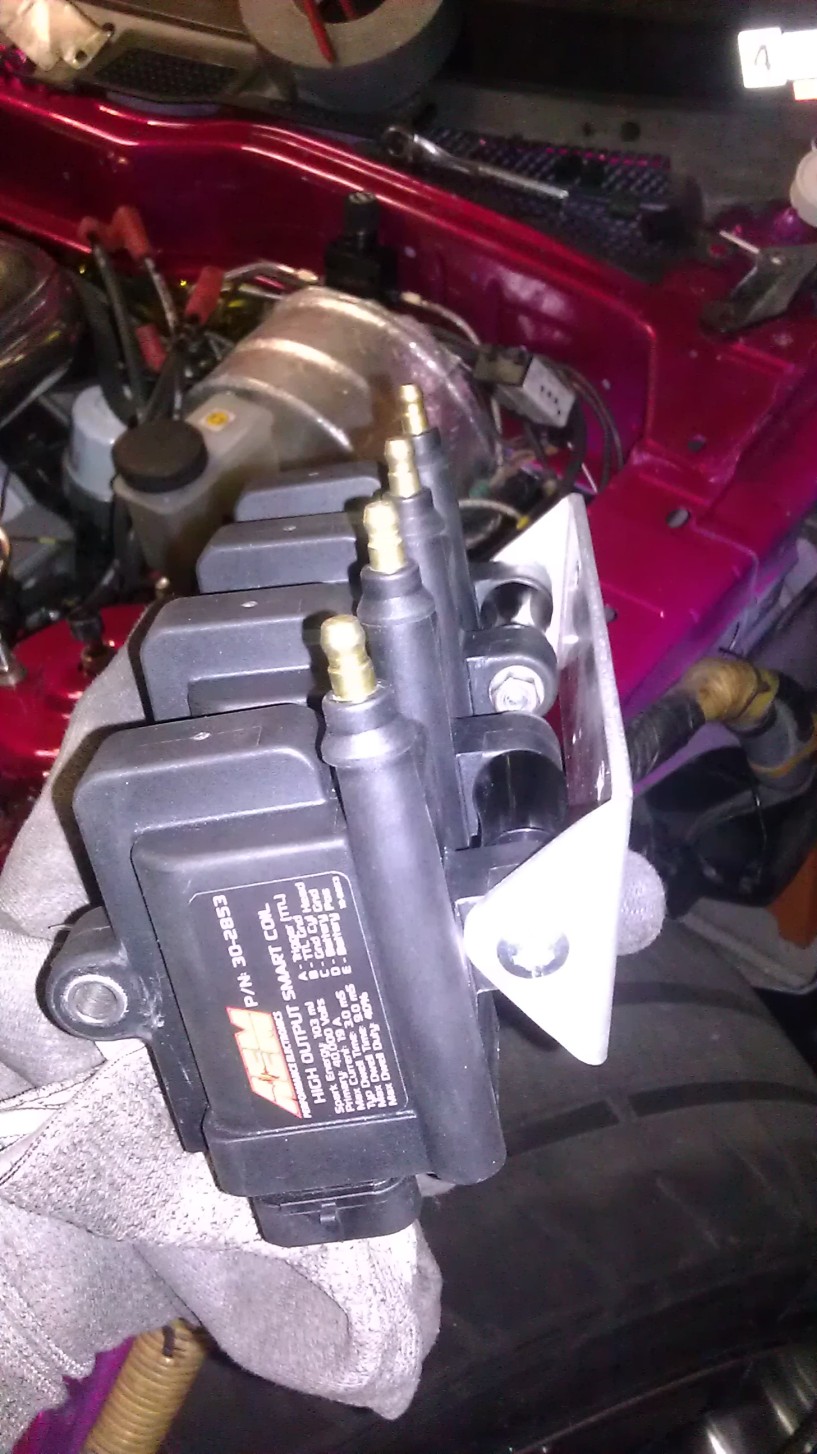
The plugs are all plugged in here and nothing has pressure on it. It really came together nicely because I thought the plugs weren't going to fit. Also I was worried about the hood not closing all the way or the plugs hitting the hood. But I measured and the hood will lay an inch and a quarter higher than the frame rail. The coils lay almost exactly an inch and an 8th. So i'm pretty sure they won't hit. But i'll have to make sure when i get the hood back on. Also used some scotch brite to give the aluminum a brushed look, and used a couple washers in between the frame and bracket on the closest mounting point to the strut because there is a slight indent on the frame which would make the bracket sit uneven or funny looking without. Still need to figure out neat wire routing but you get the idea and I'm happy with it.

So after that I pulled out a spare Slave cylinder I had laying around, opened it up and cleaned it out really well because I thought my slave might be the reason my clutch wouldn't hold pressure. When I opened it up...it had a little bit of flaking on the inside closest to the bleed valve. Does anyone have any experience with these? I'm not sure if it is ok to use with that flaking..but then again I don't think the piston even gets to that point. I was going to replace mine with this one but when I pulled the line off with the slave attatched....I pushed on the piston and a bunch of bubbles shot out the master cylinder..maybe it needed to be sort of bench bled? it recoiled from the little pressure that is in there so I figured i'd bleed it today and if it didn't hold then move to the master cylinder as that may just be my luck. Good thing I have a nice low mileage spare laying around. More updates Soon!!! stay tuned!!
Big Update:
Yesterday was awesome because I spent about 8 hours straight working on the car.
I started off where I left off.... Wiring. Ran 2x 12V wires up to the steering column ignition harness. Finished the power wires to the battery with 30AMP fuses, Got my Rocker switches all taken care of, and all my grounds in order as well.
Battery Terminal eyelits straight to relays
came out nice
Coming together
I noticed that using zip ties really really helps with orgnizing and making things look better
...I also needed somewhere to mount my rocker switches. The previous owner used this horrible piece of wannabe carbon fiber scrap metal with a sticker overlay for the din pocket. he cut a hole and put the boost guage in there.. it not only looked horrible but it also wouldn't stay in place. I don't kjnow why i've kept it around because I always thought to myself "...man that thing is useless ..why don't I just trash it." Well I finally found a use for it haha. I drilled 2 holes in it and figured it'll work for now to mount my rocker switches.
So here it is in all it's glory... This took me a total of about 6 hours all together. Not proud of that..but at least I know that if I need to do it again I could do it in 2 haha.
With cover on all finished up
Finally I was time to work on the coil mounting bracket I had started. Bj made me a quick little bracket out of some scrap alum.
I simply drilled 2 holes.. found 2 bolts... used 2 Fuel Rail risers I had laying around as spacers.. tightened them up..and mounted them on the drivers side frame.
The plugs are all plugged in here and nothing has pressure on it. It really came together nicely because I thought the plugs weren't going to fit. Also I was worried about the hood not closing all the way or the plugs hitting the hood. But I measured and the hood will lay an inch and a quarter higher than the frame rail. The coils lay almost exactly an inch and an 8th. So i'm pretty sure they won't hit. But i'll have to make sure when i get the hood back on. Also used some scotch brite to give the aluminum a brushed look, and used a couple washers in between the frame and bracket on the closest mounting point to the strut because there is a slight indent on the frame which would make the bracket sit uneven or funny looking without. Still need to figure out neat wire routing but you get the idea and I'm happy with it.
So after that I pulled out a spare Slave cylinder I had laying around, opened it up and cleaned it out really well because I thought my slave might be the reason my clutch wouldn't hold pressure. When I opened it up...it had a little bit of flaking on the inside closest to the bleed valve. Does anyone have any experience with these? I'm not sure if it is ok to use with that flaking..but then again I don't think the piston even gets to that point. I was going to replace mine with this one but when I pulled the line off with the slave attatched....I pushed on the piston and a bunch of bubbles shot out the master cylinder..maybe it needed to be sort of bench bled? it recoiled from the little pressure that is in there so I figured i'd bleed it today and if it didn't hold then move to the master cylinder as that may just be my luck. Good thing I have a nice low mileage spare laying around. More updates Soon!!! stay tuned!!
What are the rocker switches for?
Also, are you going to secure the other side of the coils to the bracket as well?
I have the pleasure of wiring up my fuel pumps this weekend.
Also, are you going to secure the other side of the coils to the bracket as well?
I have the pleasure of wiring up my fuel pumps this weekend.
Last edited by RENESISFD; Mar 21, 2013 at 10:24 AM.


You're always better off with a new Mazda master and slave. If you're getting air, it's getting in *somewhere*, if that's the case you should have a leak manifesting somewhere. The master is more complicated than the slave, check that it's not leaking back inside the car where the clutch rod goes into it.
I just put a new Mazda master and slave on my car with a braided clutch line and it took a good amount of work to bleed it. You do really need a helper to pump the pedal while you open and close the bleed valve. You will also see bubbles that will be pulled in through the threads on the slave cylinder bleed nipple, so sometimes that will throw you off.
Dale
 Excellent bit of Information!! Thank you. If all else fails with a helper Its new Master and slave time
Yes! It it will absolutely be done before then! no questions asked. going to drive out there
you know I've thought about doing the other side of the coils as well but....no i'm
not going to secure the other side of the coils to the bracket. It doesn't move. And with the Delrin spacers i'm making... it'll be even less heat soak. Running another set of spacers and bolts through the other side is unnecessary IMO, it would be massively bulky, more heat soak, ugly, more work and nothing to gain. But thats just my opinion. I mean...the coils are fixed and very secure.
I actually enjoyed wiring up the fuel pumps after I learned what everything was and where it needed to be routed etc. Have fun!
I know the switches are for the fuel pumps, but what purpose do they serve? They are mounted in the rear of the car and not easily accessible from the drivers seat.
Small update:
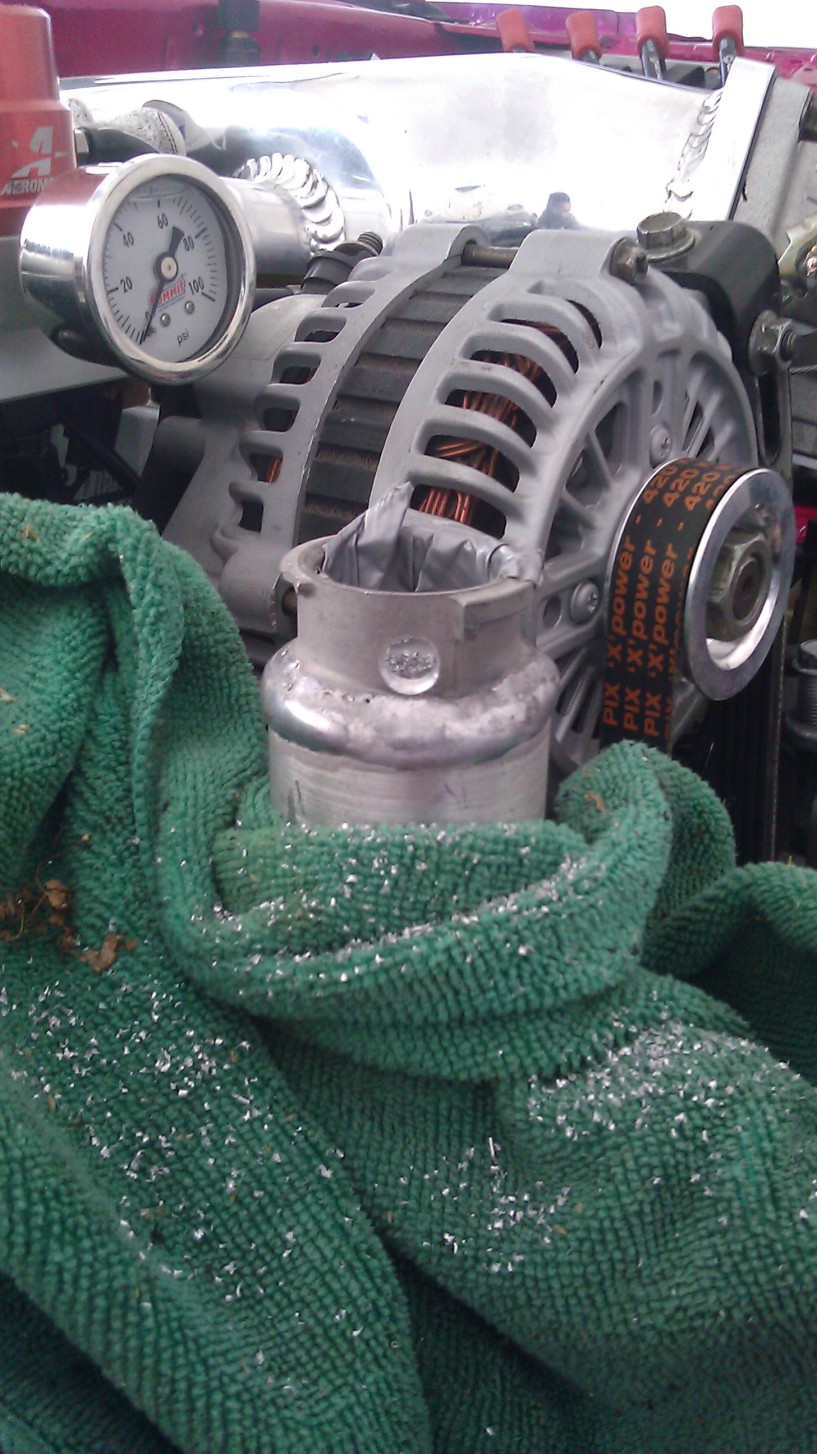
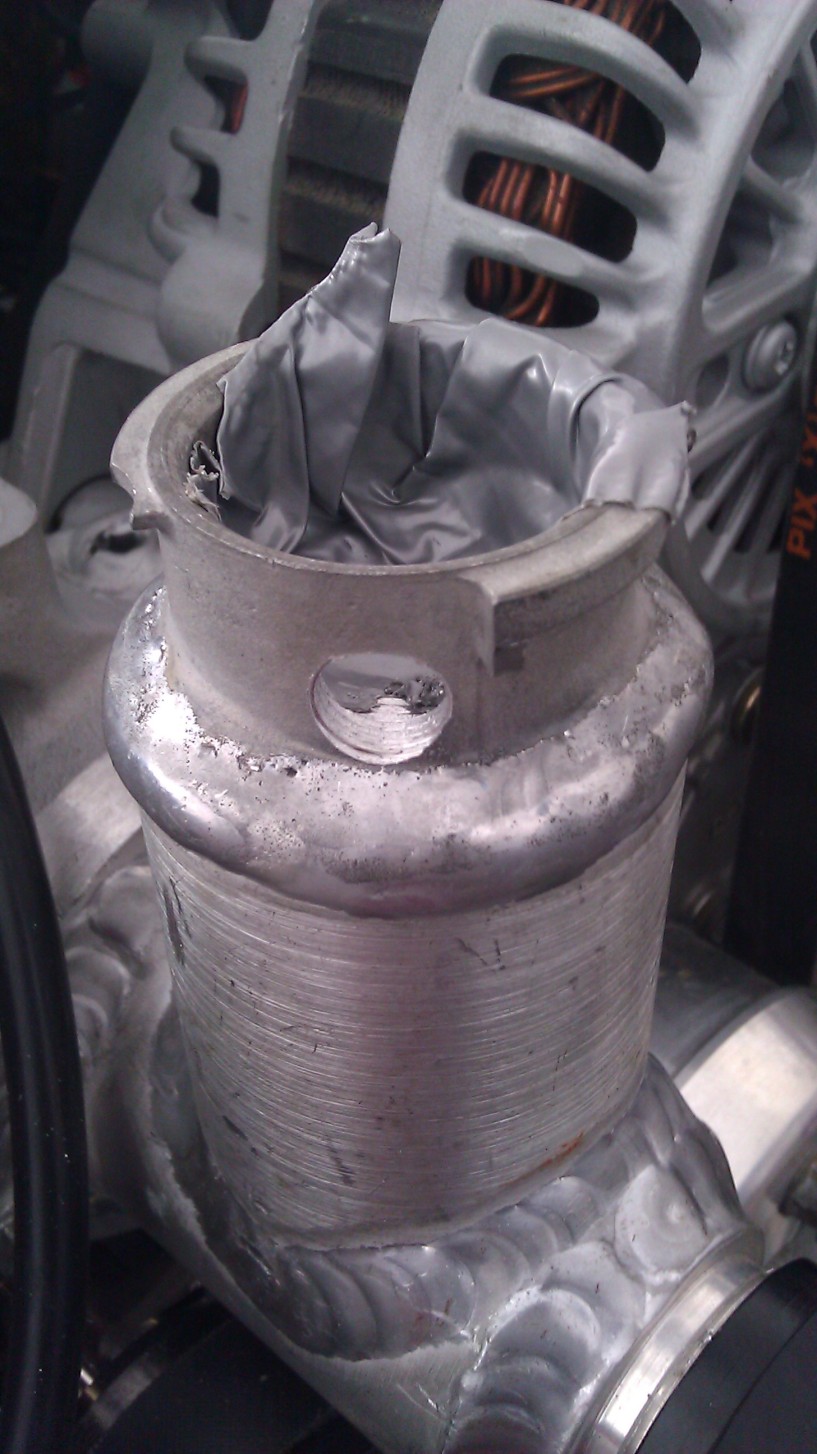
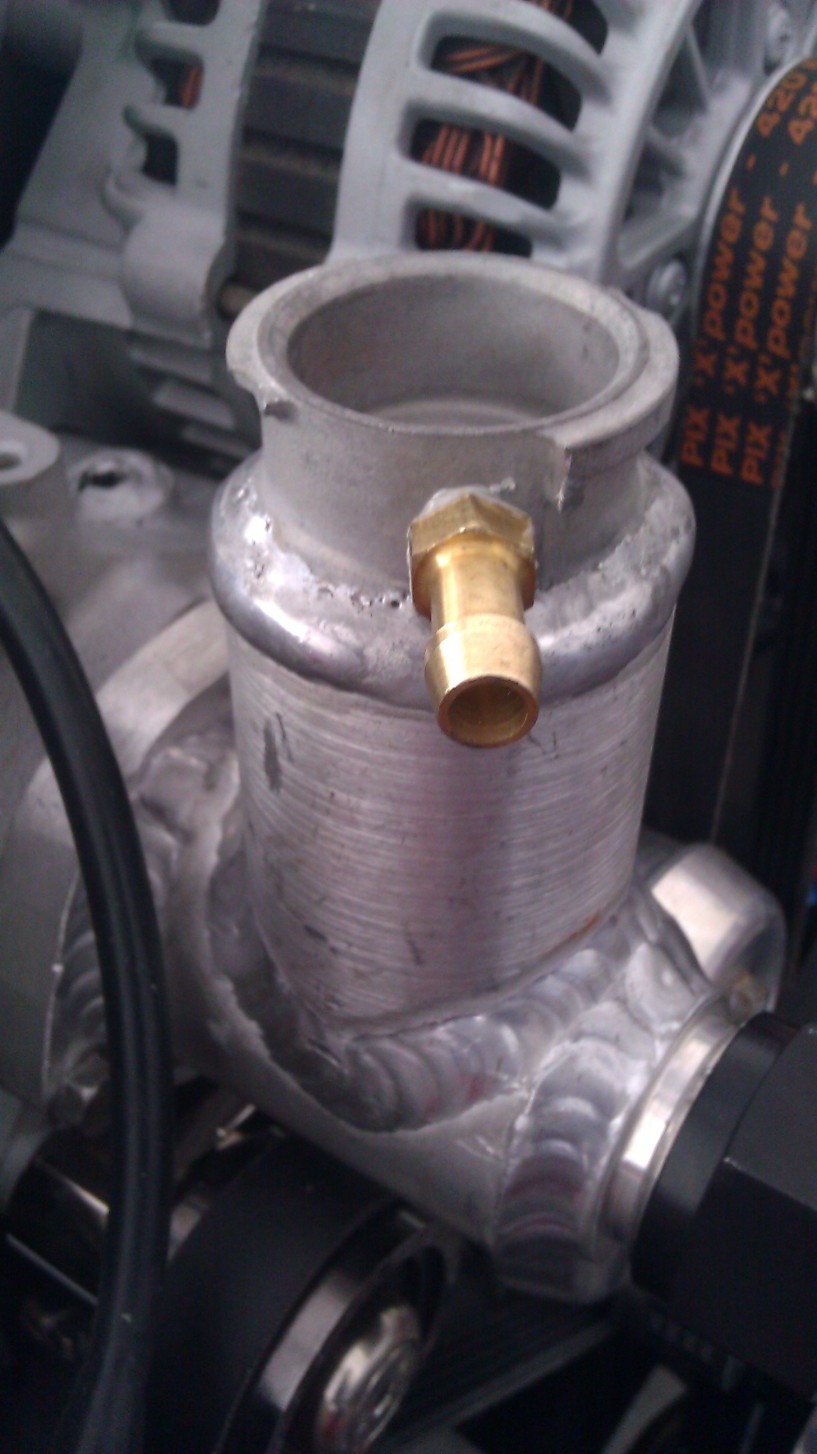
Well as I was telling dale I forgot to fully tighten the clutch pedal assembly so now it recoils..but it still doesn't feel as good as it should. I want the throw to be mid push ya know? Not all the way to the floor. Also, forgot to have a Coolant overflow bung welded to my filler. So I used a brass fitting instead. Drilled and tapped it, sealed it with High temp honda-bond just in case..and whaalahh
drill and tap
brass fitting installed
also I put the tape there so metal shavings wouldn't get into the motors cooling system
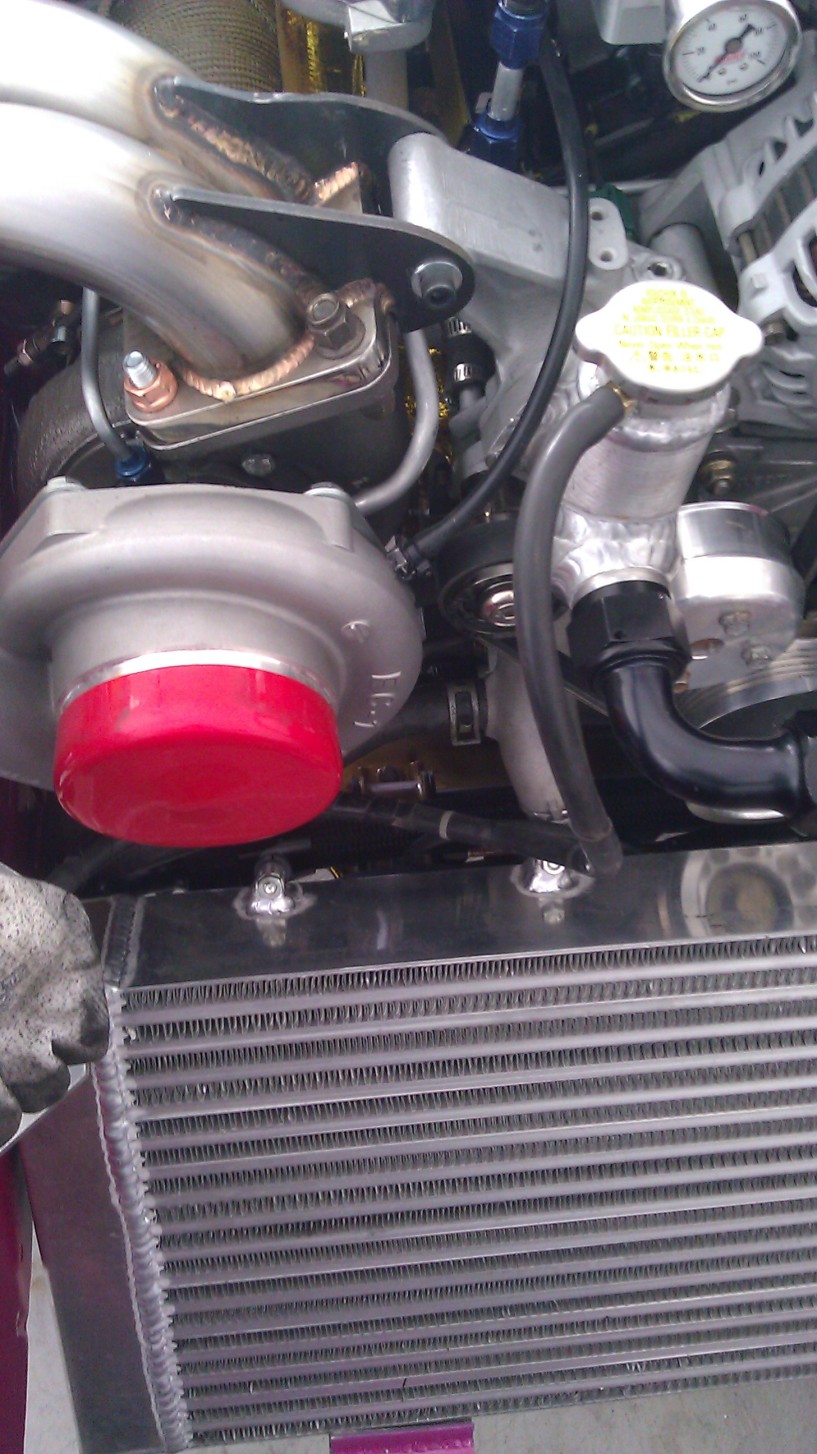
And finished......anyone have a oem over flow cap resevoir cap and dip stick for sale? I accidently sold mine thinking I had 2 or 3!!!
Also, here is a good Guide if anyone wants to copy the fuel pump re-wire. I used Tom's page as a guide...and specifically this picture. I took the time to make a little visual guide using his pic for anyone who is directions illiterate and more of a visual person (like me).
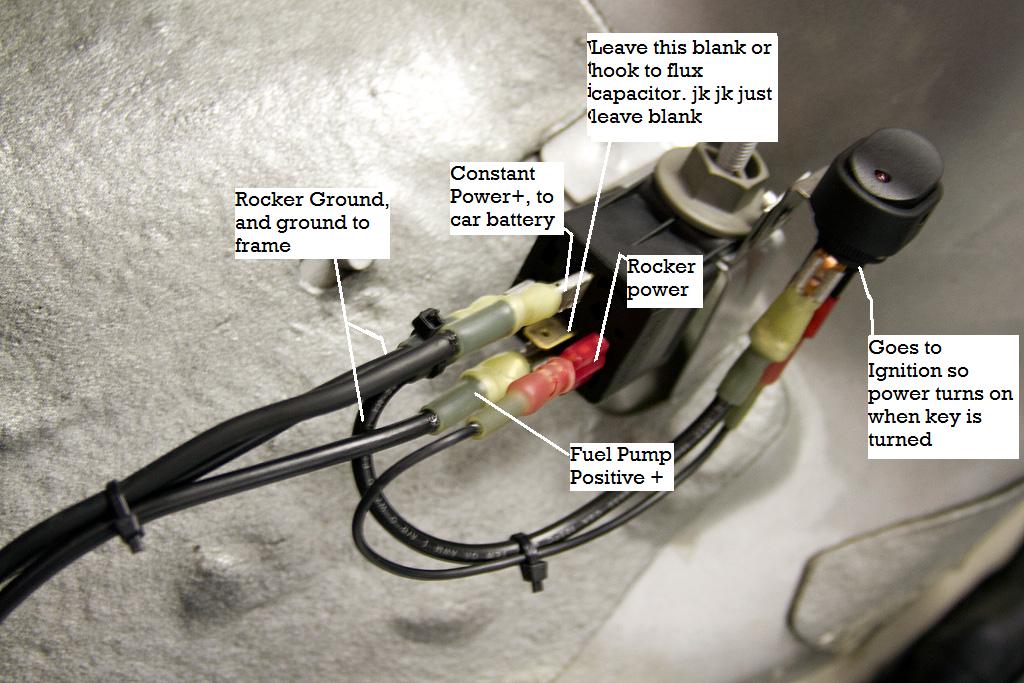
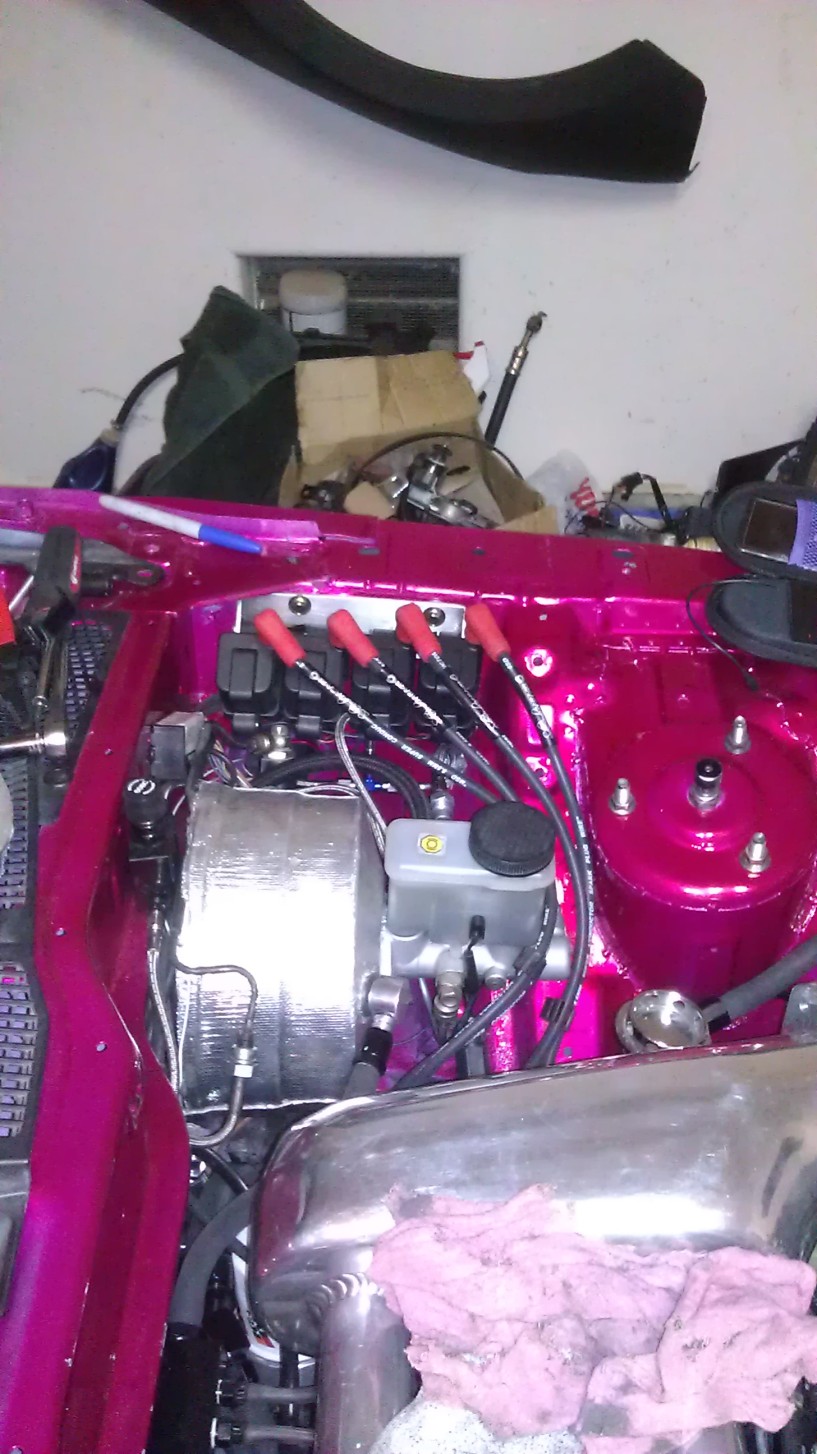
And I realized that there was no reason Why I shouldn't put my bumper, hood and drivers side fender on since all that is left to re-wire the front body harness is just routing and secureing. So I wanted to just go to sleep because I was tired last night..but I always seem to say..just one more thing haha.
Anyways she's almost ready to fire guys!
More updates soon!! going to purchase a battery today, and some coolant and if everything works out I should be able to put some petrol in and crank her over =-)
Well as I was telling dale I forgot to fully tighten the clutch pedal assembly so now it recoils..but it still doesn't feel as good as it should. I want the throw to be mid push ya know? Not all the way to the floor. Also, forgot to have a Coolant overflow bung welded to my filler. So I used a brass fitting instead. Drilled and tapped it, sealed it with High temp honda-bond just in case..and whaalahh
drill and tap
brass fitting installed
also I put the tape there so metal shavings wouldn't get into the motors cooling system
And finished......anyone have a oem over flow cap resevoir cap and dip stick for sale? I accidently sold mine thinking I had 2 or 3!!!
Also, here is a good Guide if anyone wants to copy the fuel pump re-wire. I used Tom's page as a guide...and specifically this picture. I took the time to make a little visual guide using his pic for anyone who is directions illiterate and more of a visual person (like me).
And I realized that there was no reason Why I shouldn't put my bumper, hood and drivers side fender on since all that is left to re-wire the front body harness is just routing and secureing. So I wanted to just go to sleep because I was tired last night..but I always seem to say..just one more thing haha.
Anyways she's almost ready to fire guys!
More updates soon!! going to purchase a battery today, and some coolant and if everything works out I should be able to put some petrol in and crank her over =-)
I didn't want to put them close to the drivers seat because that would put them close to where someone could turn them off. They're just one of the many anti-theft devices i've installed on the car. The switches are also good for trouble shooting. If i'm unsure if a pump is on....simply turn the other one off and listen.


I would switch to a 4 terminal relay (DPST?) That middle terminal is live based on how it's wired up, i know its unlike that something could touch it, but its so easy just to switch it out for a 4 terminal version that doesn't have the center terminal.
Yeah, he used my photo. I forgot to mention that I bought 5-pin relays in bulk, so that's why I used a 5-pin instead of a 4-pin. I wasn't worried about the middle pin because the relay was mounted inside the rear-interior plastics where nothing would ever get to it, but if you have the relay exposed you can always though an insulated female spade connector on it with no wire crimped in, to protect it from ever making contact with anything metal.

quick question on the vacuum block. what fittings did you use to adapt to the 6an line in and out? have one on the way and want to order the fittings now but they only list the size of the smaller ports. Thanks
. I think it's-10 on the vac block. I think thats what you were talking about..nah?
Update:
Got a lot of little "Need to" things done..
Filled the car up with 50/50 coolant and distilled water and while I was filling it up I had 4 leaks. Forgot to tighten down the turbo coolant lines. Only the drain was leaking though, but gave the rest of the fittings a once over and found the feed was also loose. Then My radiator Petcock was leaking as well. Guess I tightened the drain but not the female that threaded into the actual radiator. And lastly the heater core feed off the drivers side motor was leaking. Fixed all those leaks and topped off the coolant. I also didn't use a lisle funnel but A ghetto funnel that has worked for me very well in the past haha. a 2-liter soda bottle with electrical tape on the cap end to make it snugly fit into the coolant filler top. Put the car up on jack stands to angle the car up to help get rid of dumb air in the system...which some of you know is a royal pain in the *** if you don't do it correctly. But onto pics:
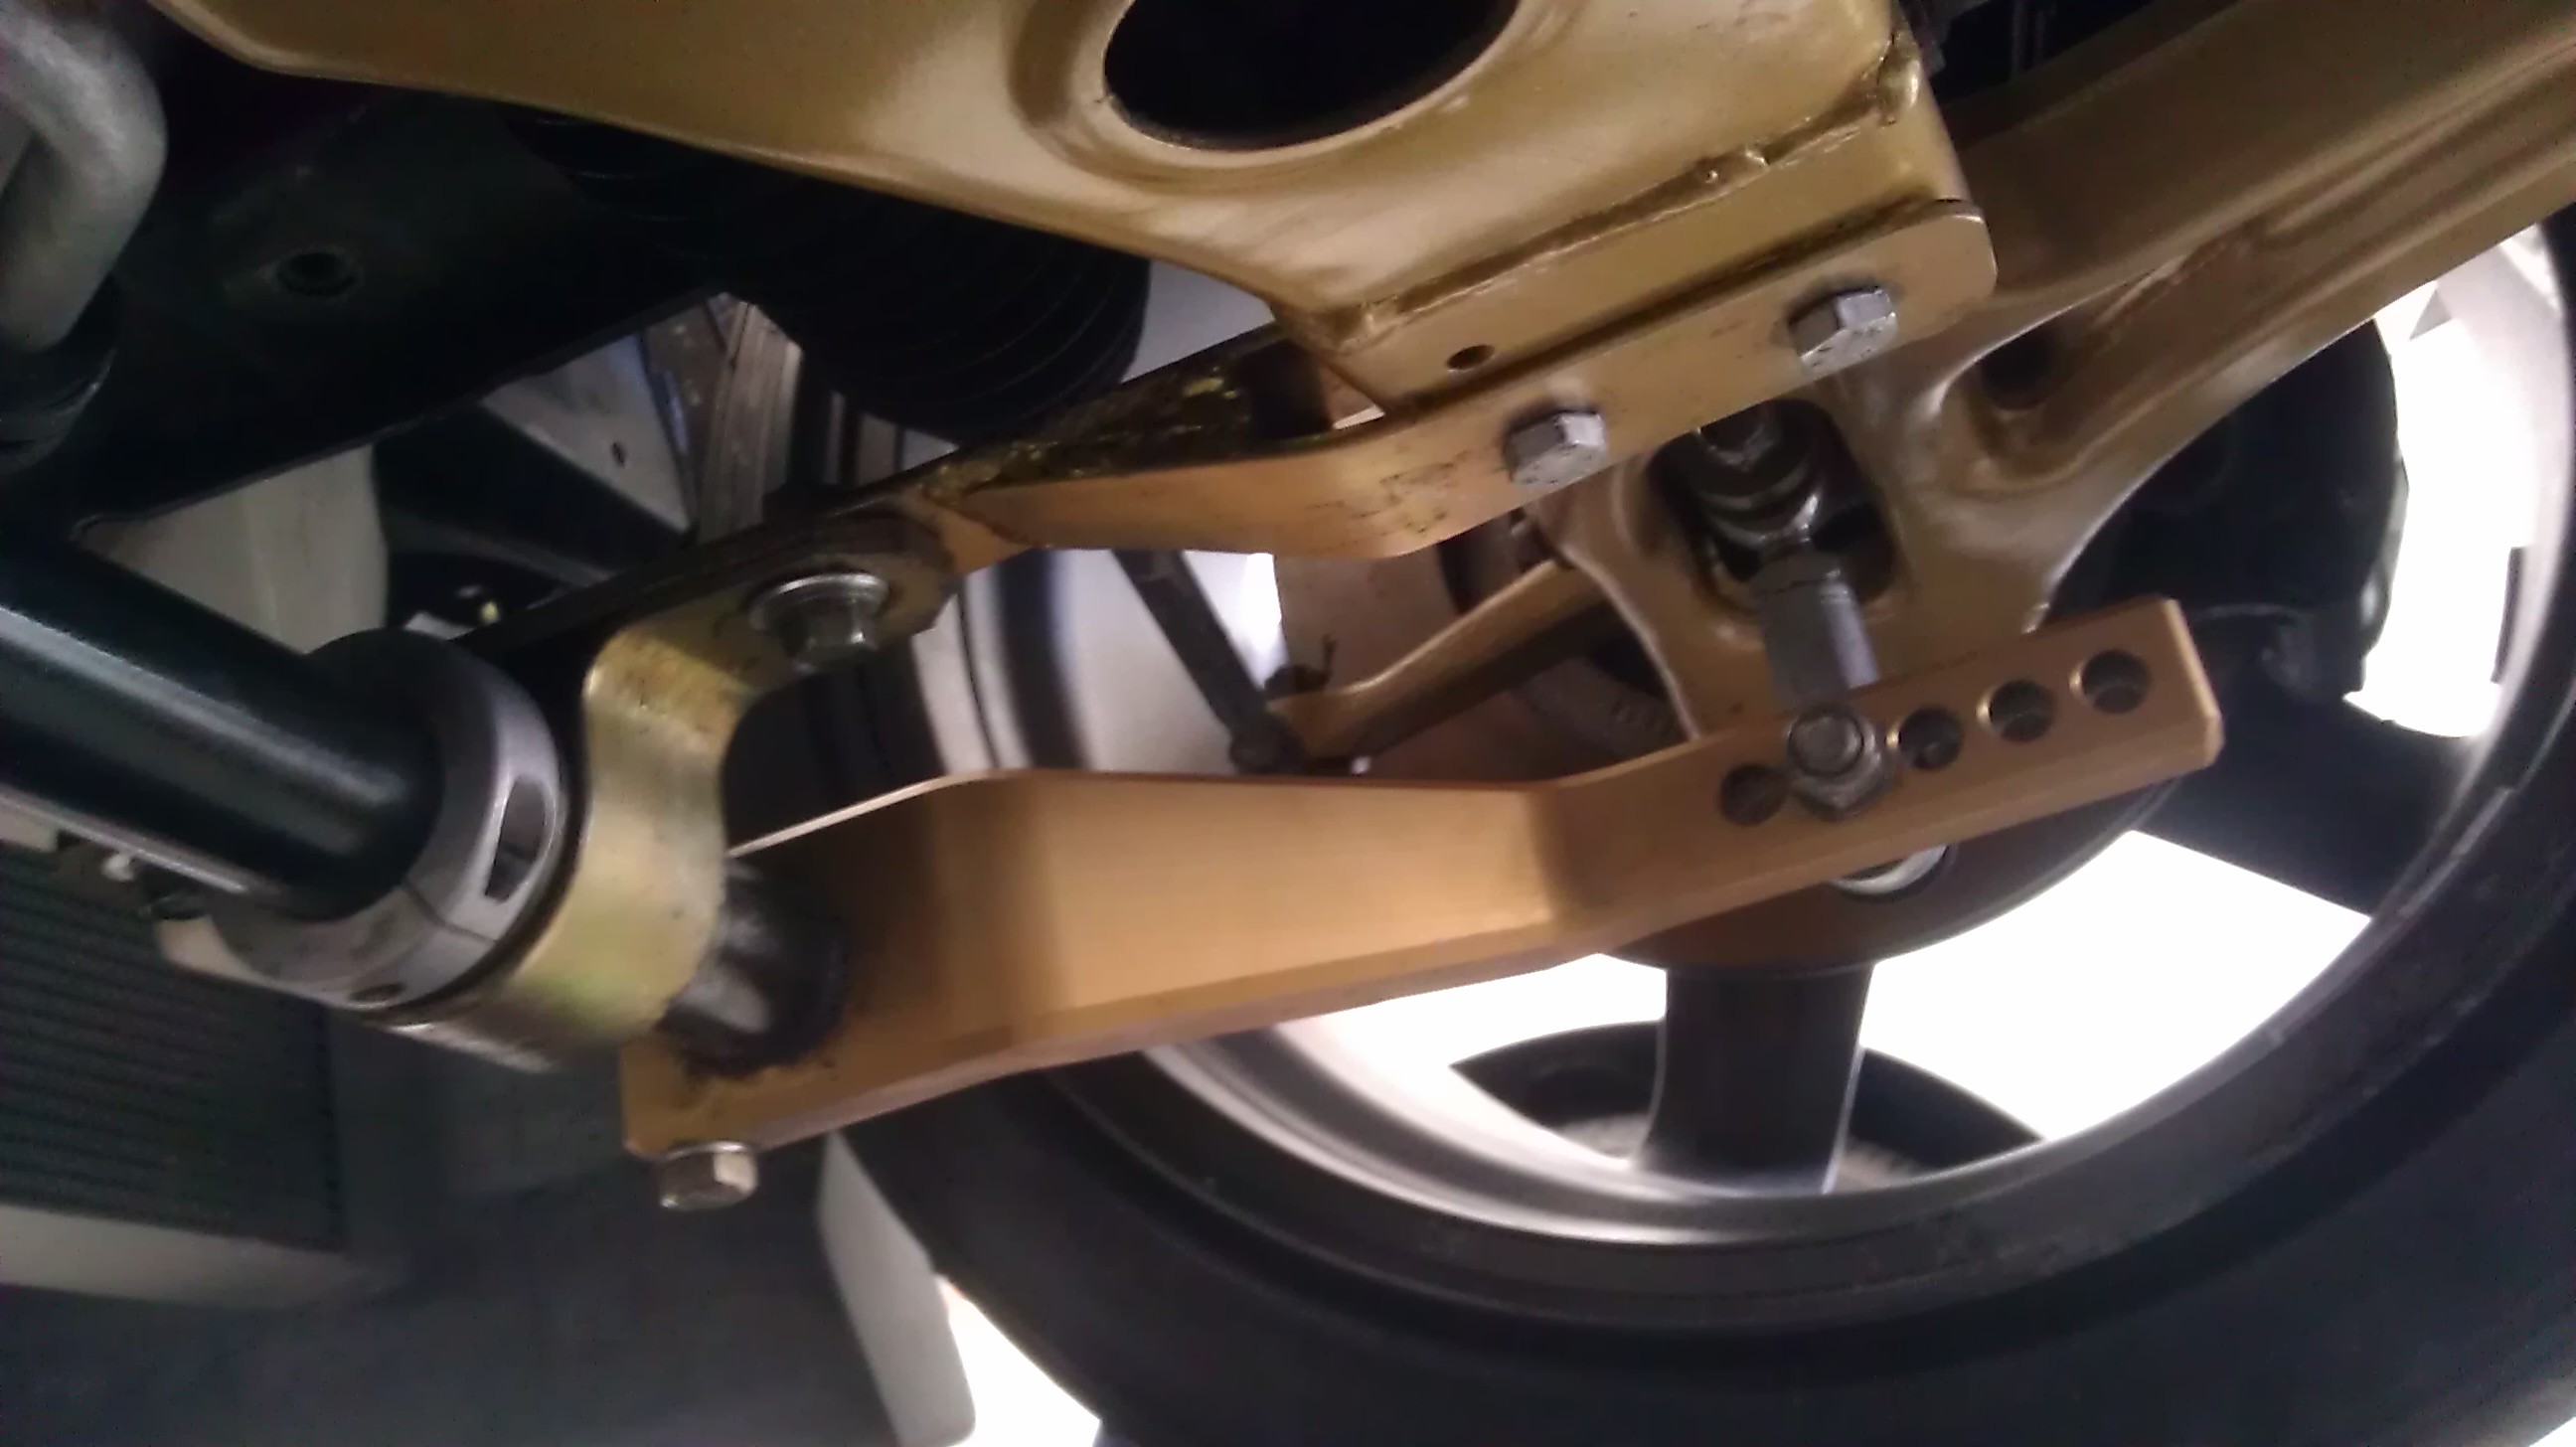
Not in chronological order...but something else came in the mail yesterday morning. A piece of this master puzzle that i've wanted ever since I laid eyes on it. And I know a lot of people may or may not think they're that rare...but they've become pretty hard to find used...which is the only way I purchase parts such as these. A tri-point front modular sway bar.. with adjustable end-links...the thing is damn expensive..and it was hard for me to justify the purchase of a new one. But luckily I got it on a trade =-) So here it is one of my favorite pieces!
It was a little dirty but in excellent used condition
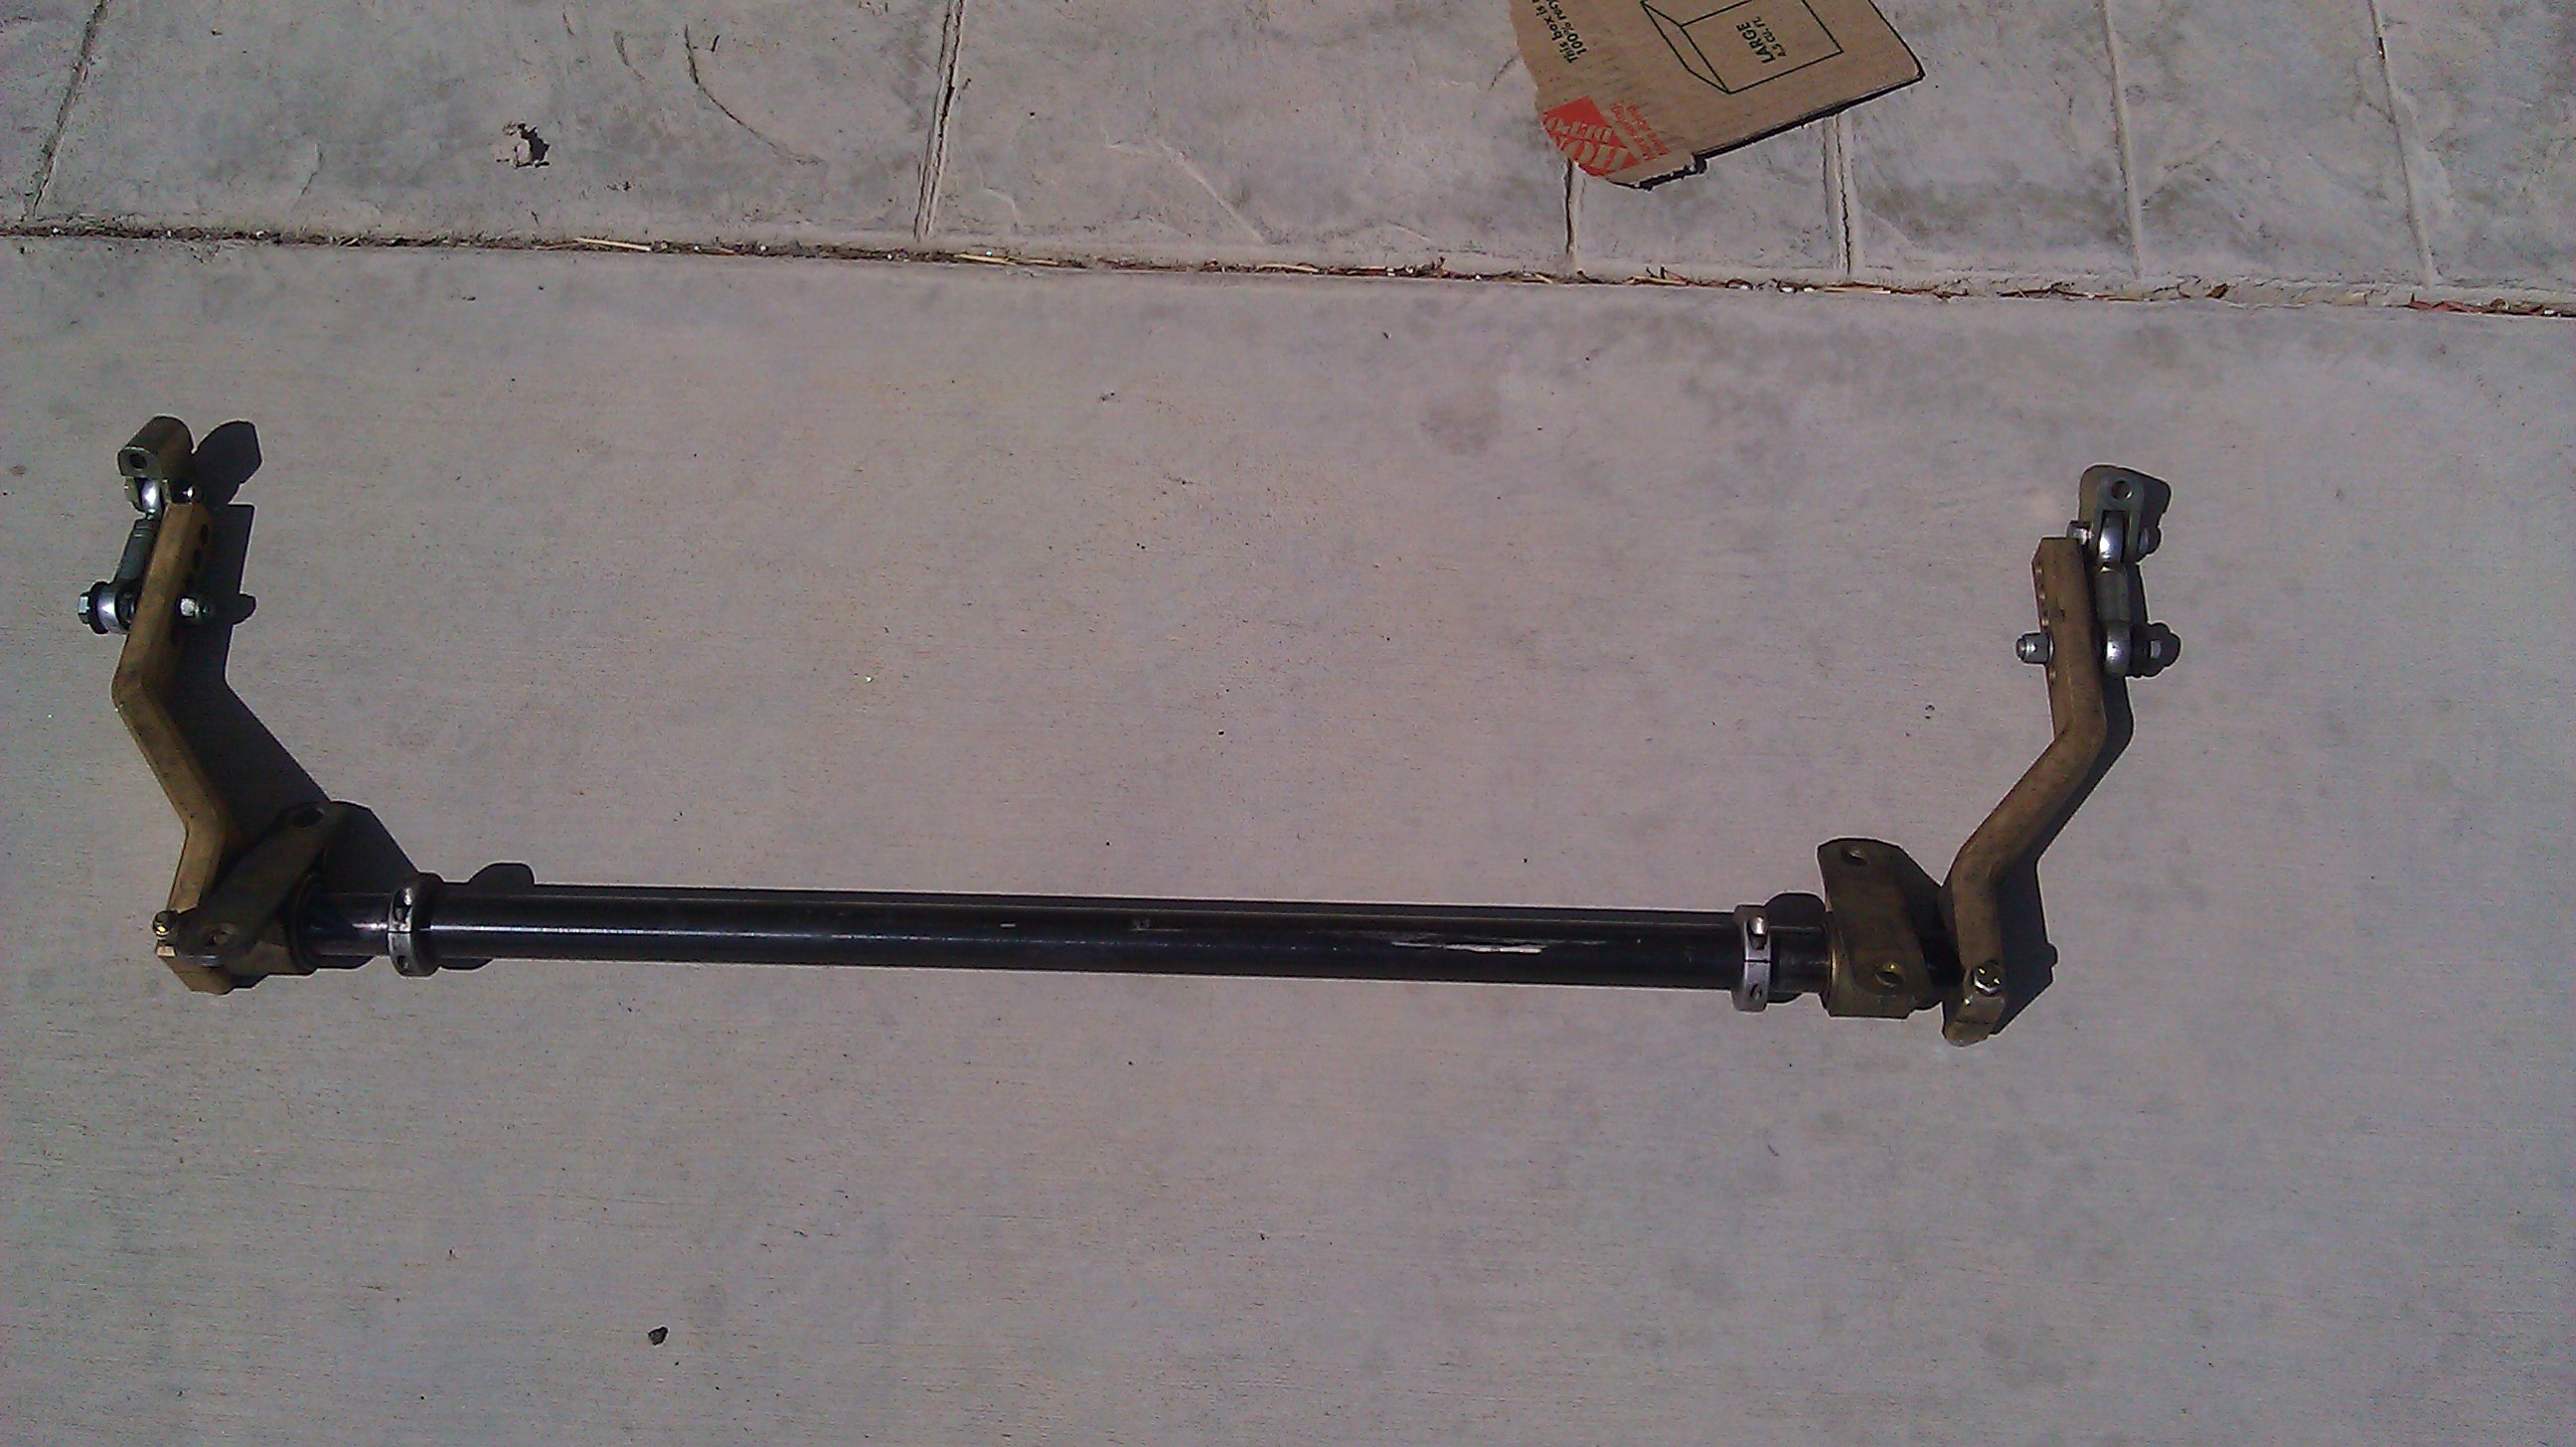
So of course I cleaned it off and had it installed right away haha!! couldn't wait to complete the puzzle!!
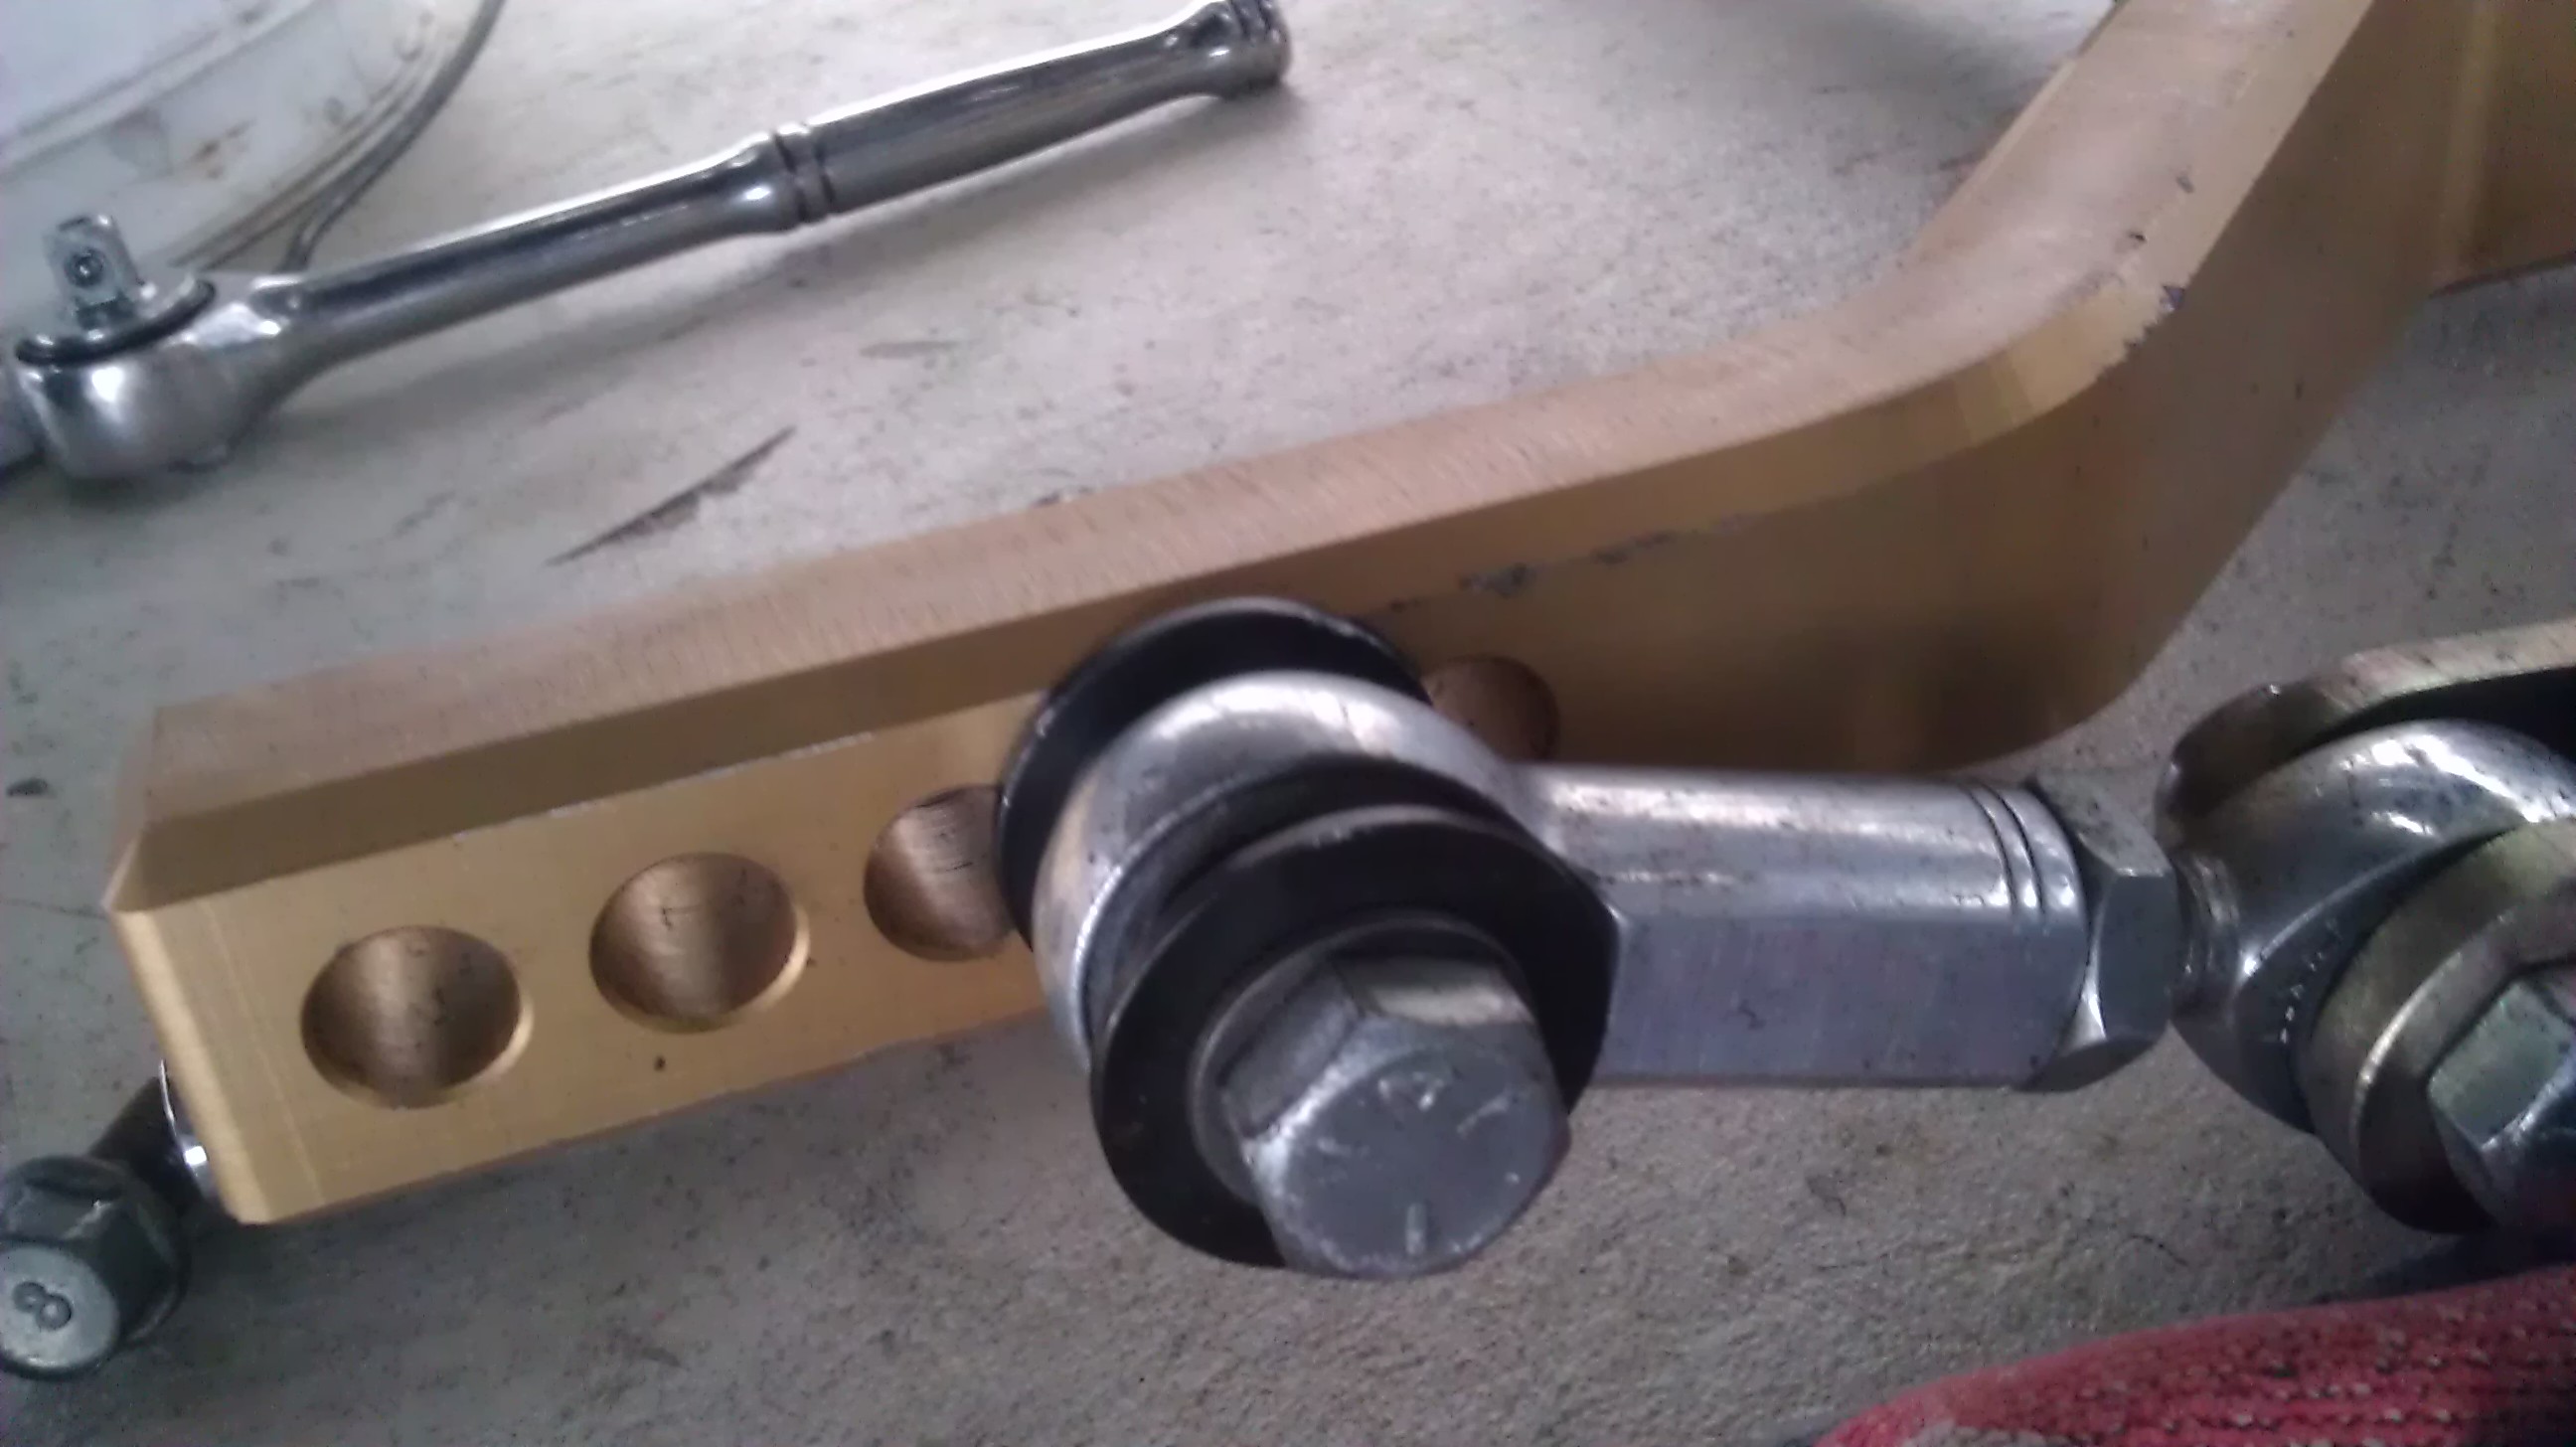
soo nice! everything about it is just well thought out. Install was a breeze and weirdly it matches my suspension paint exactly.
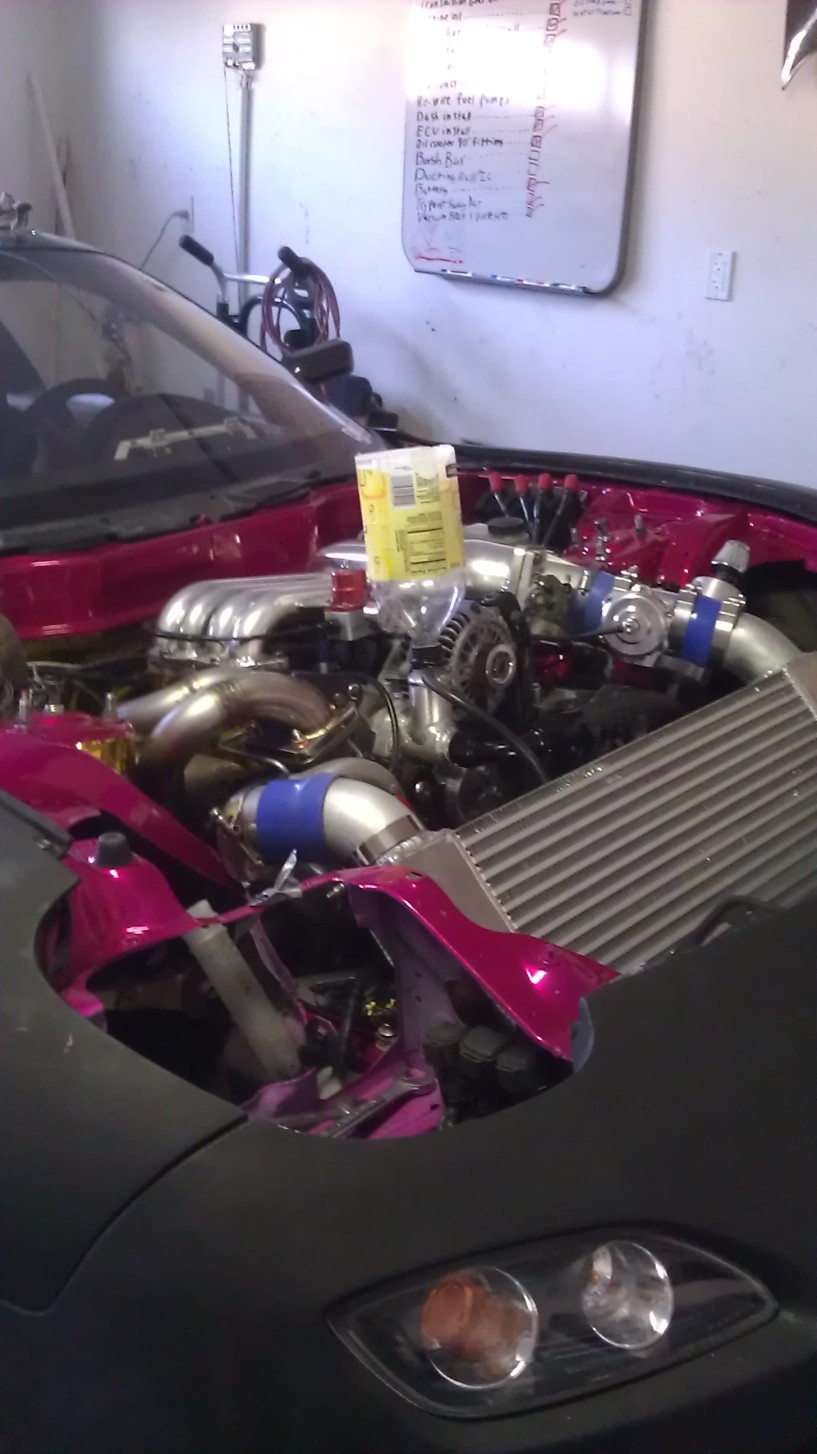
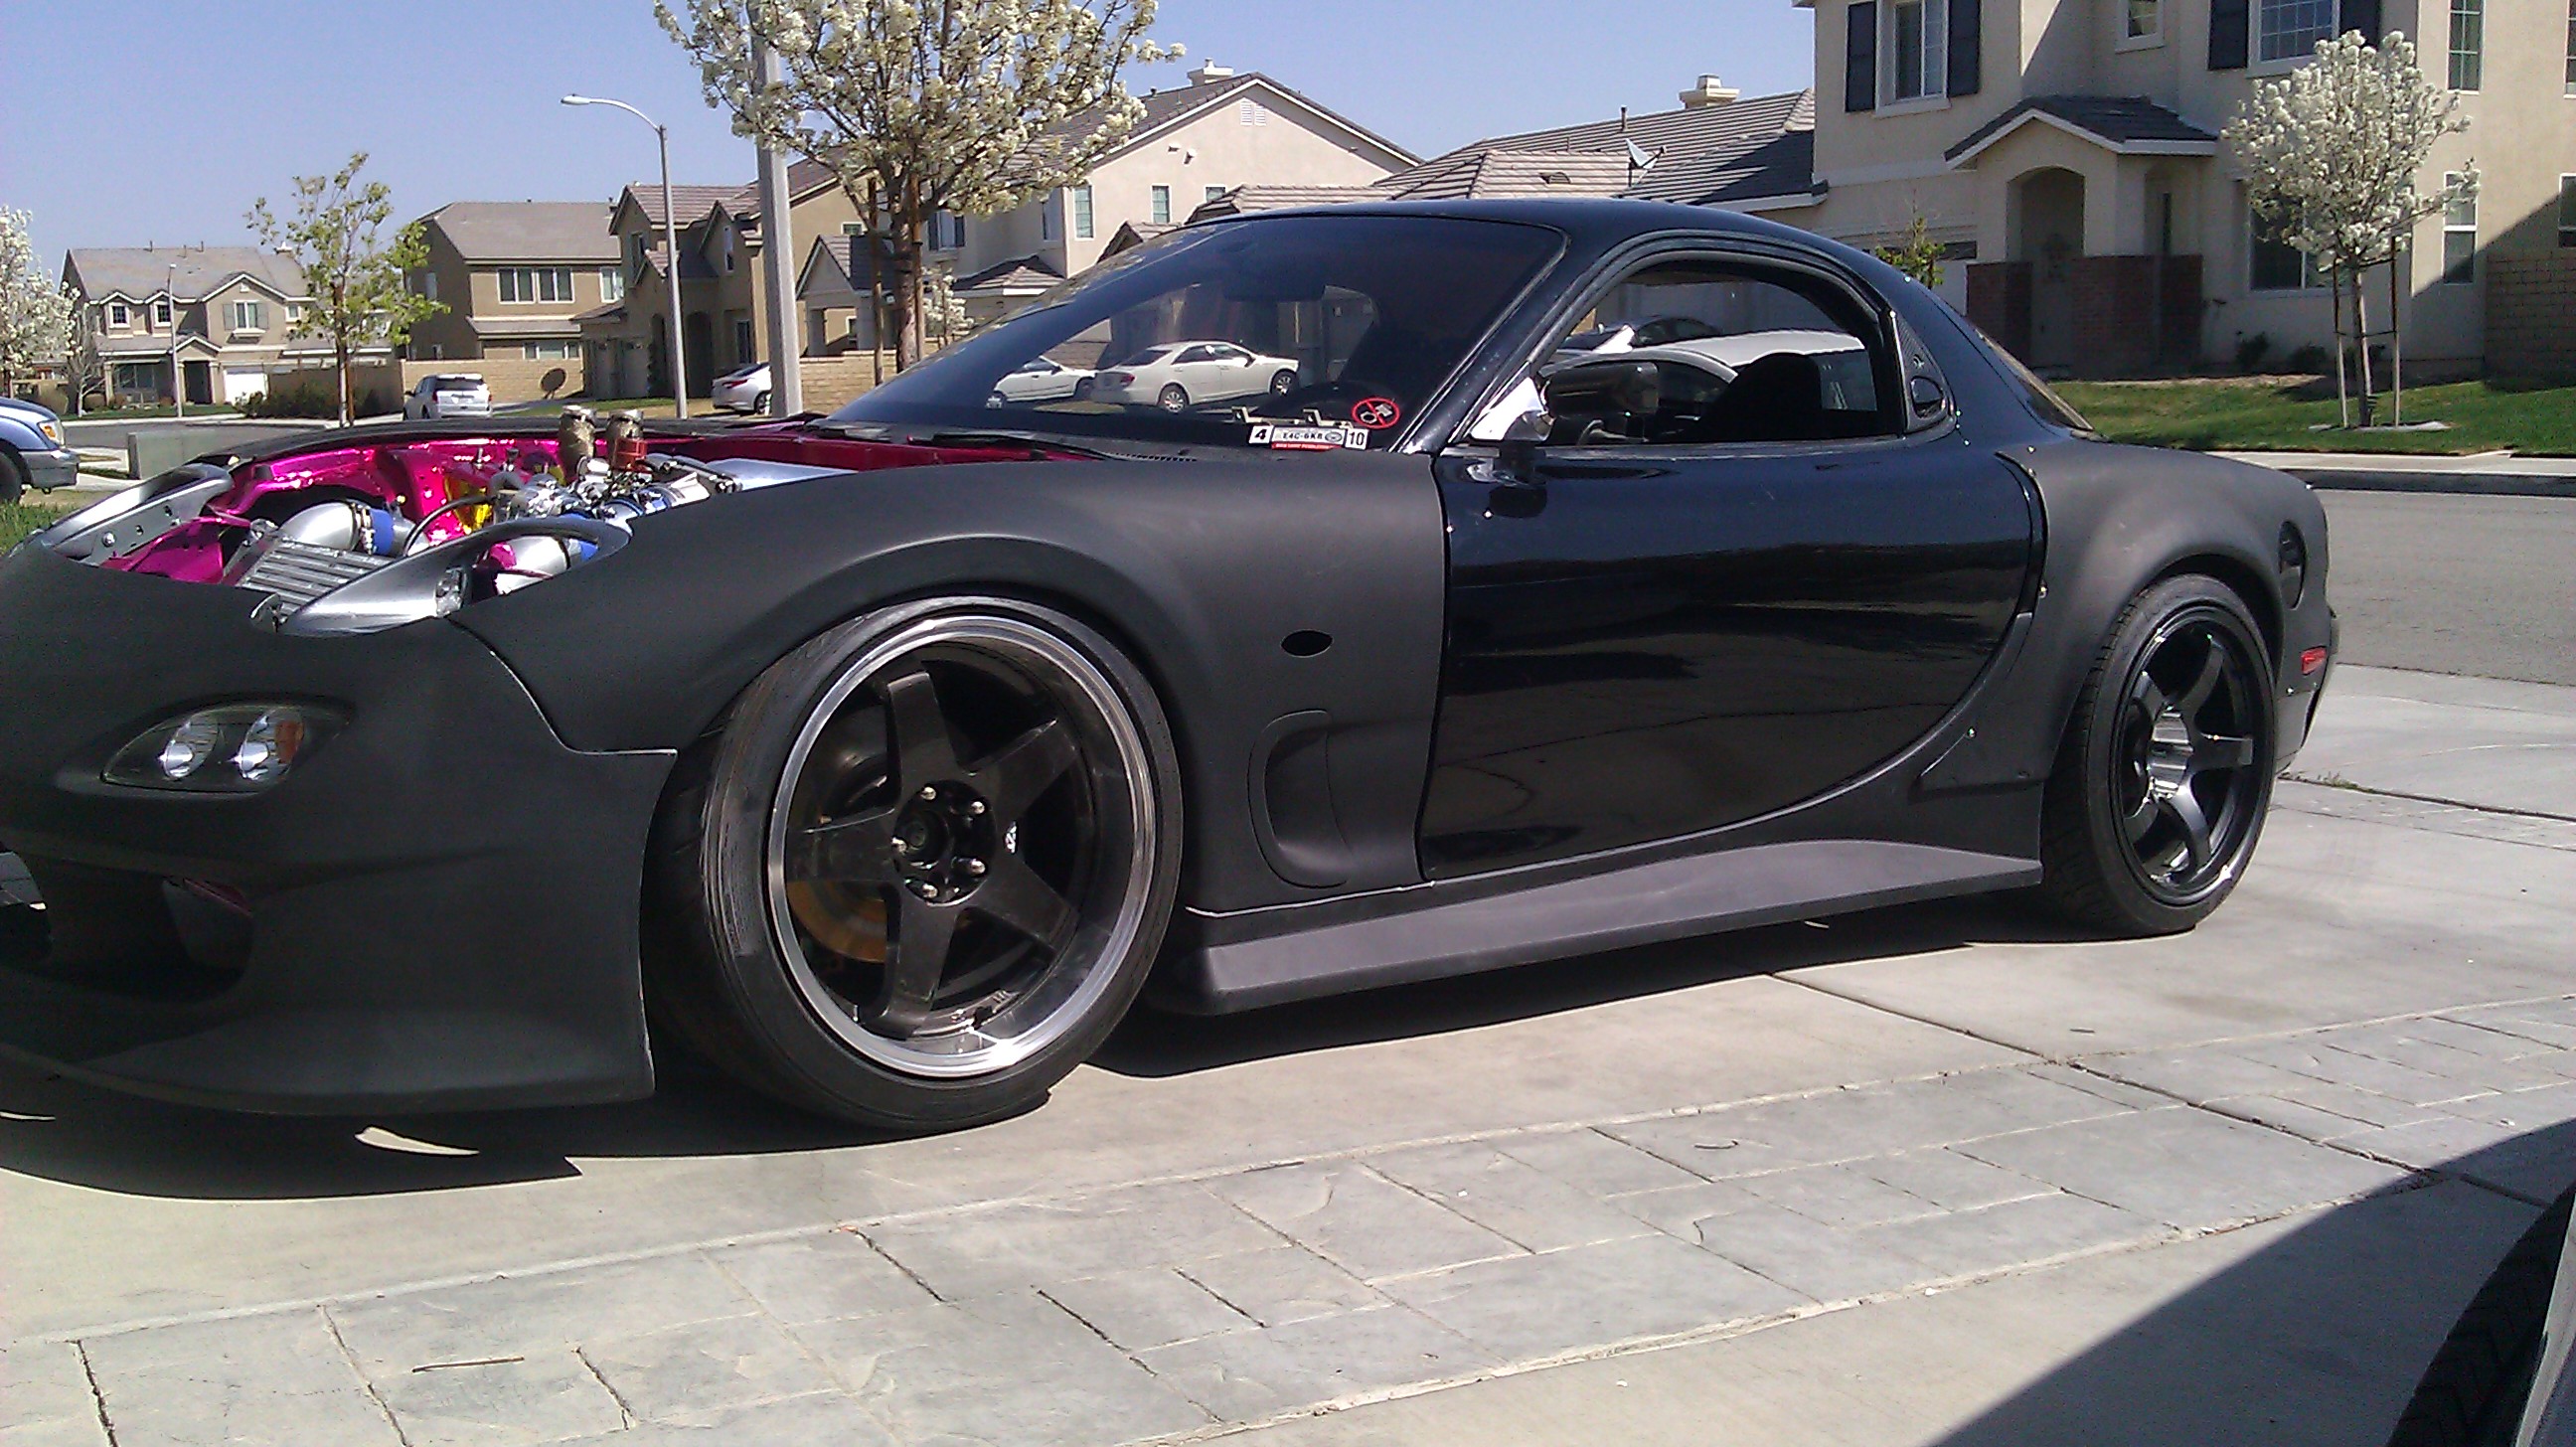
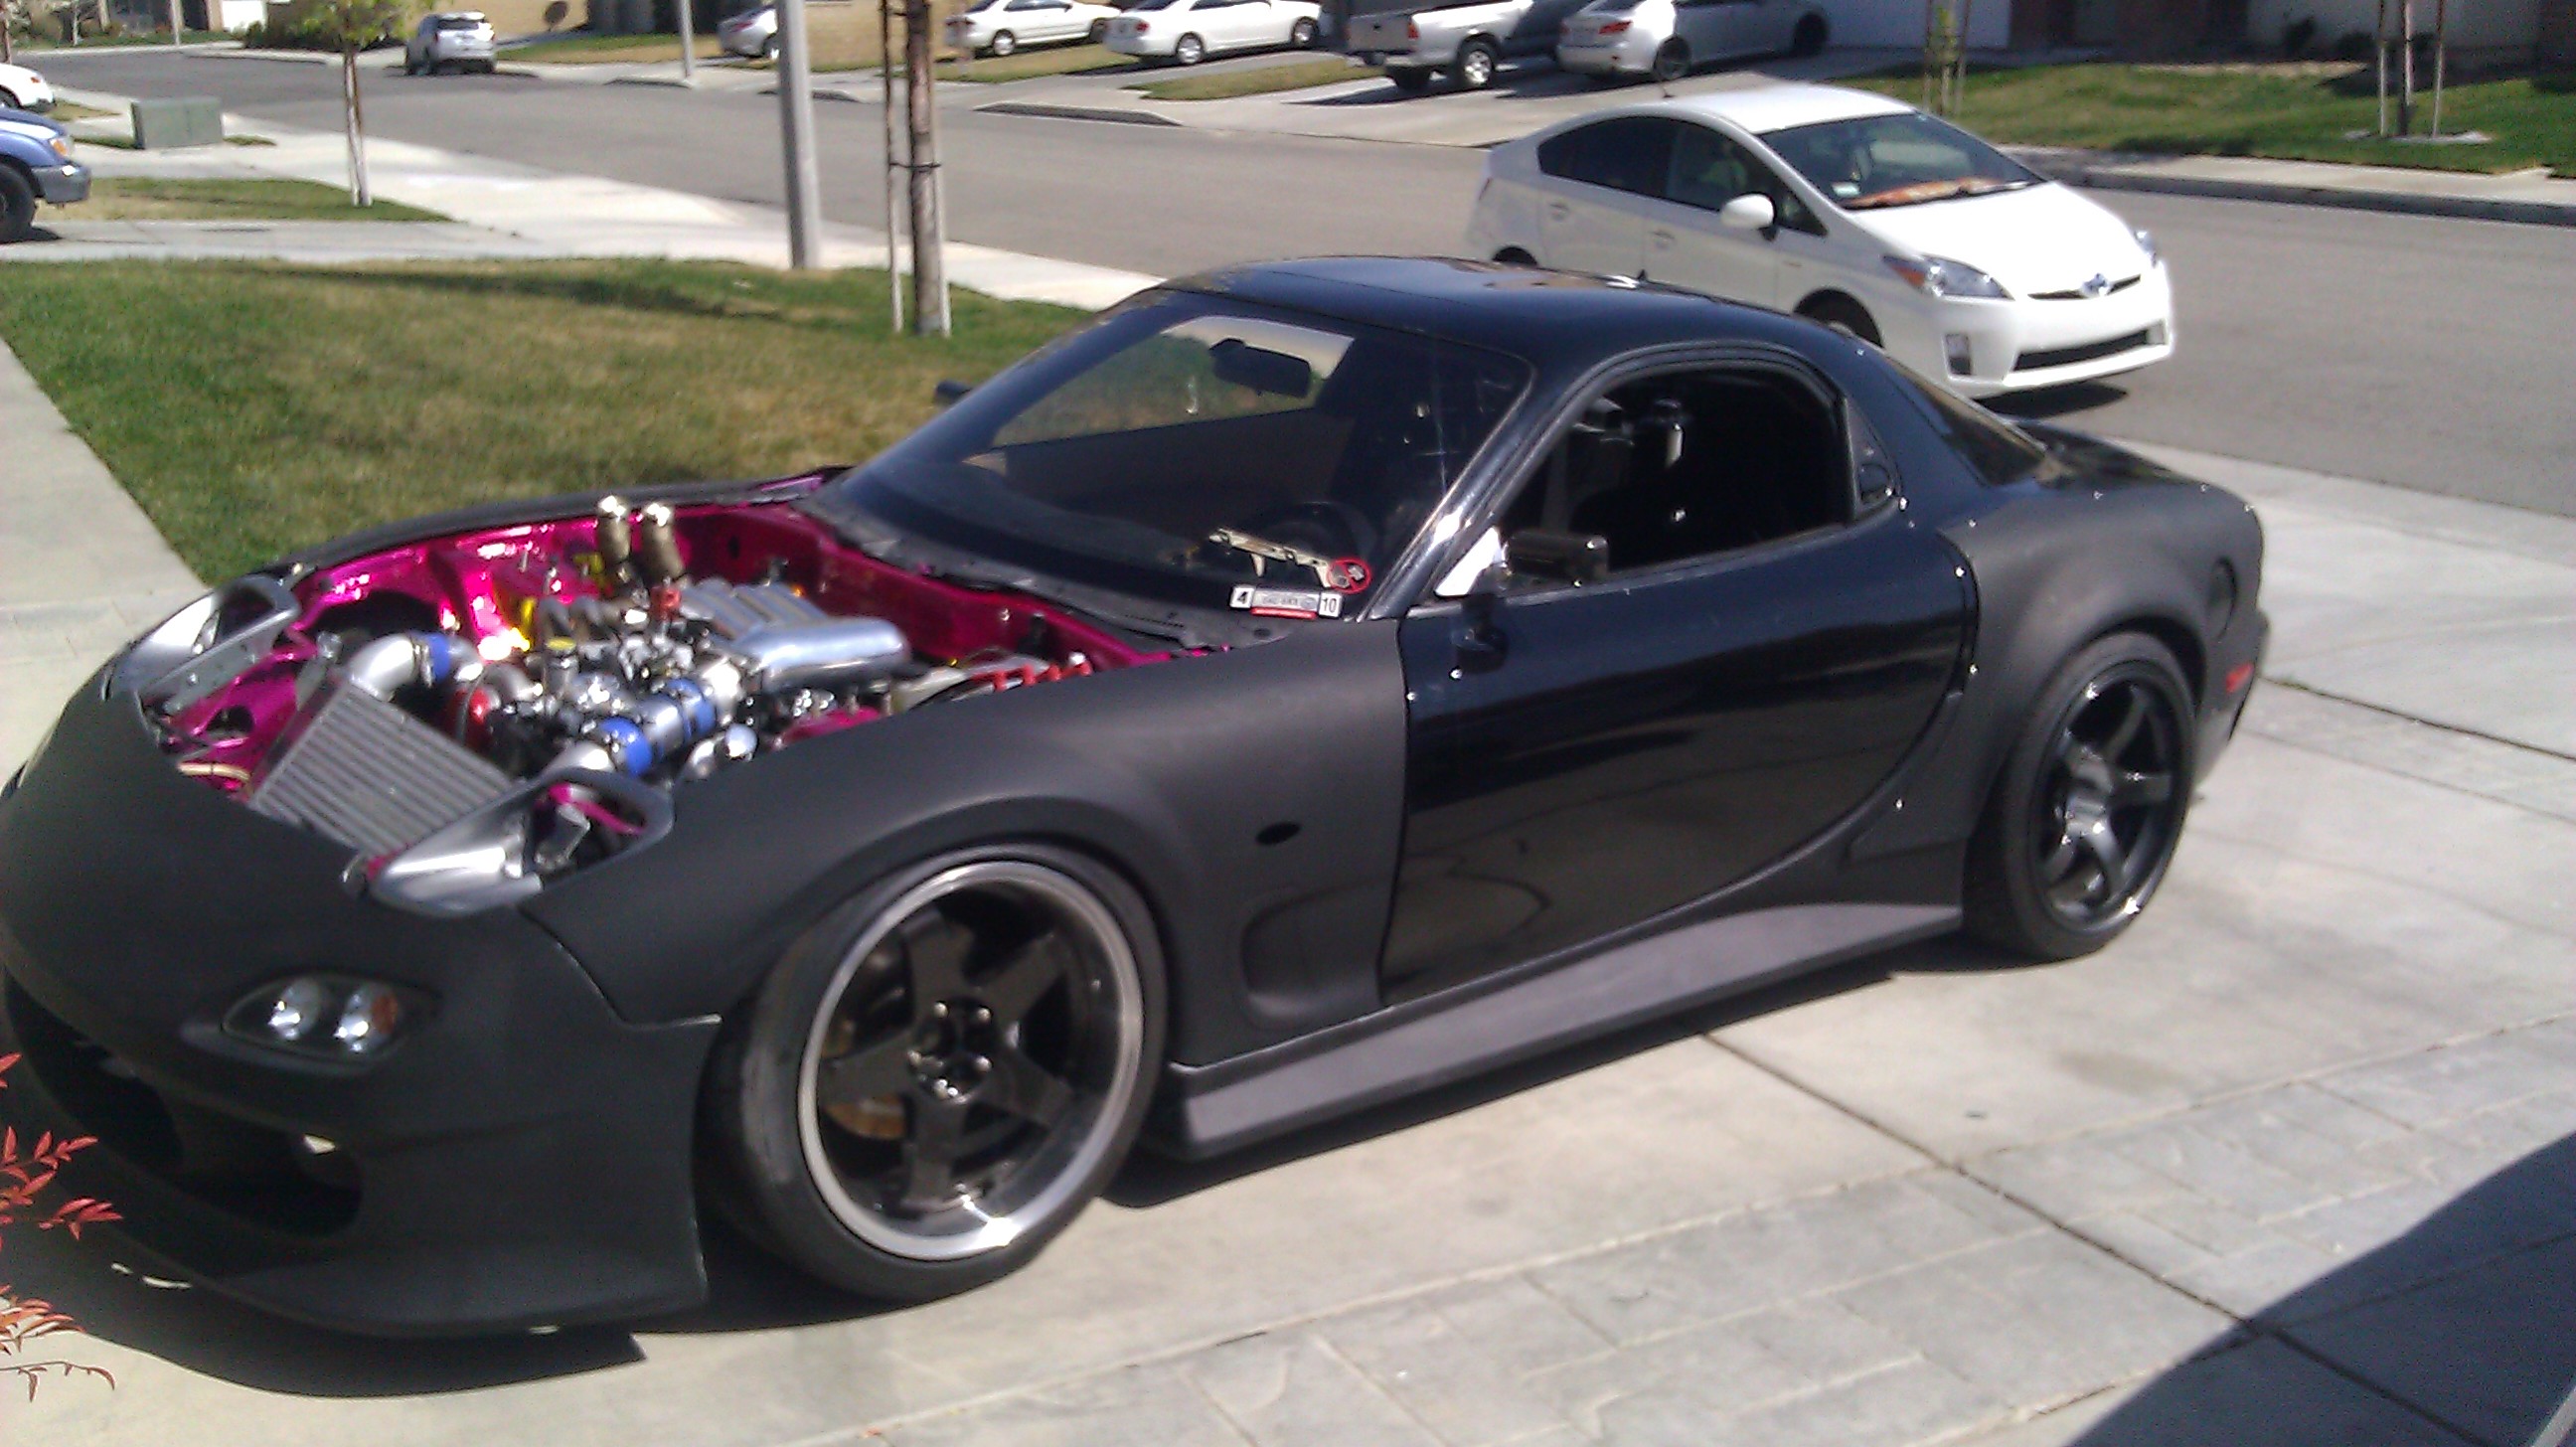
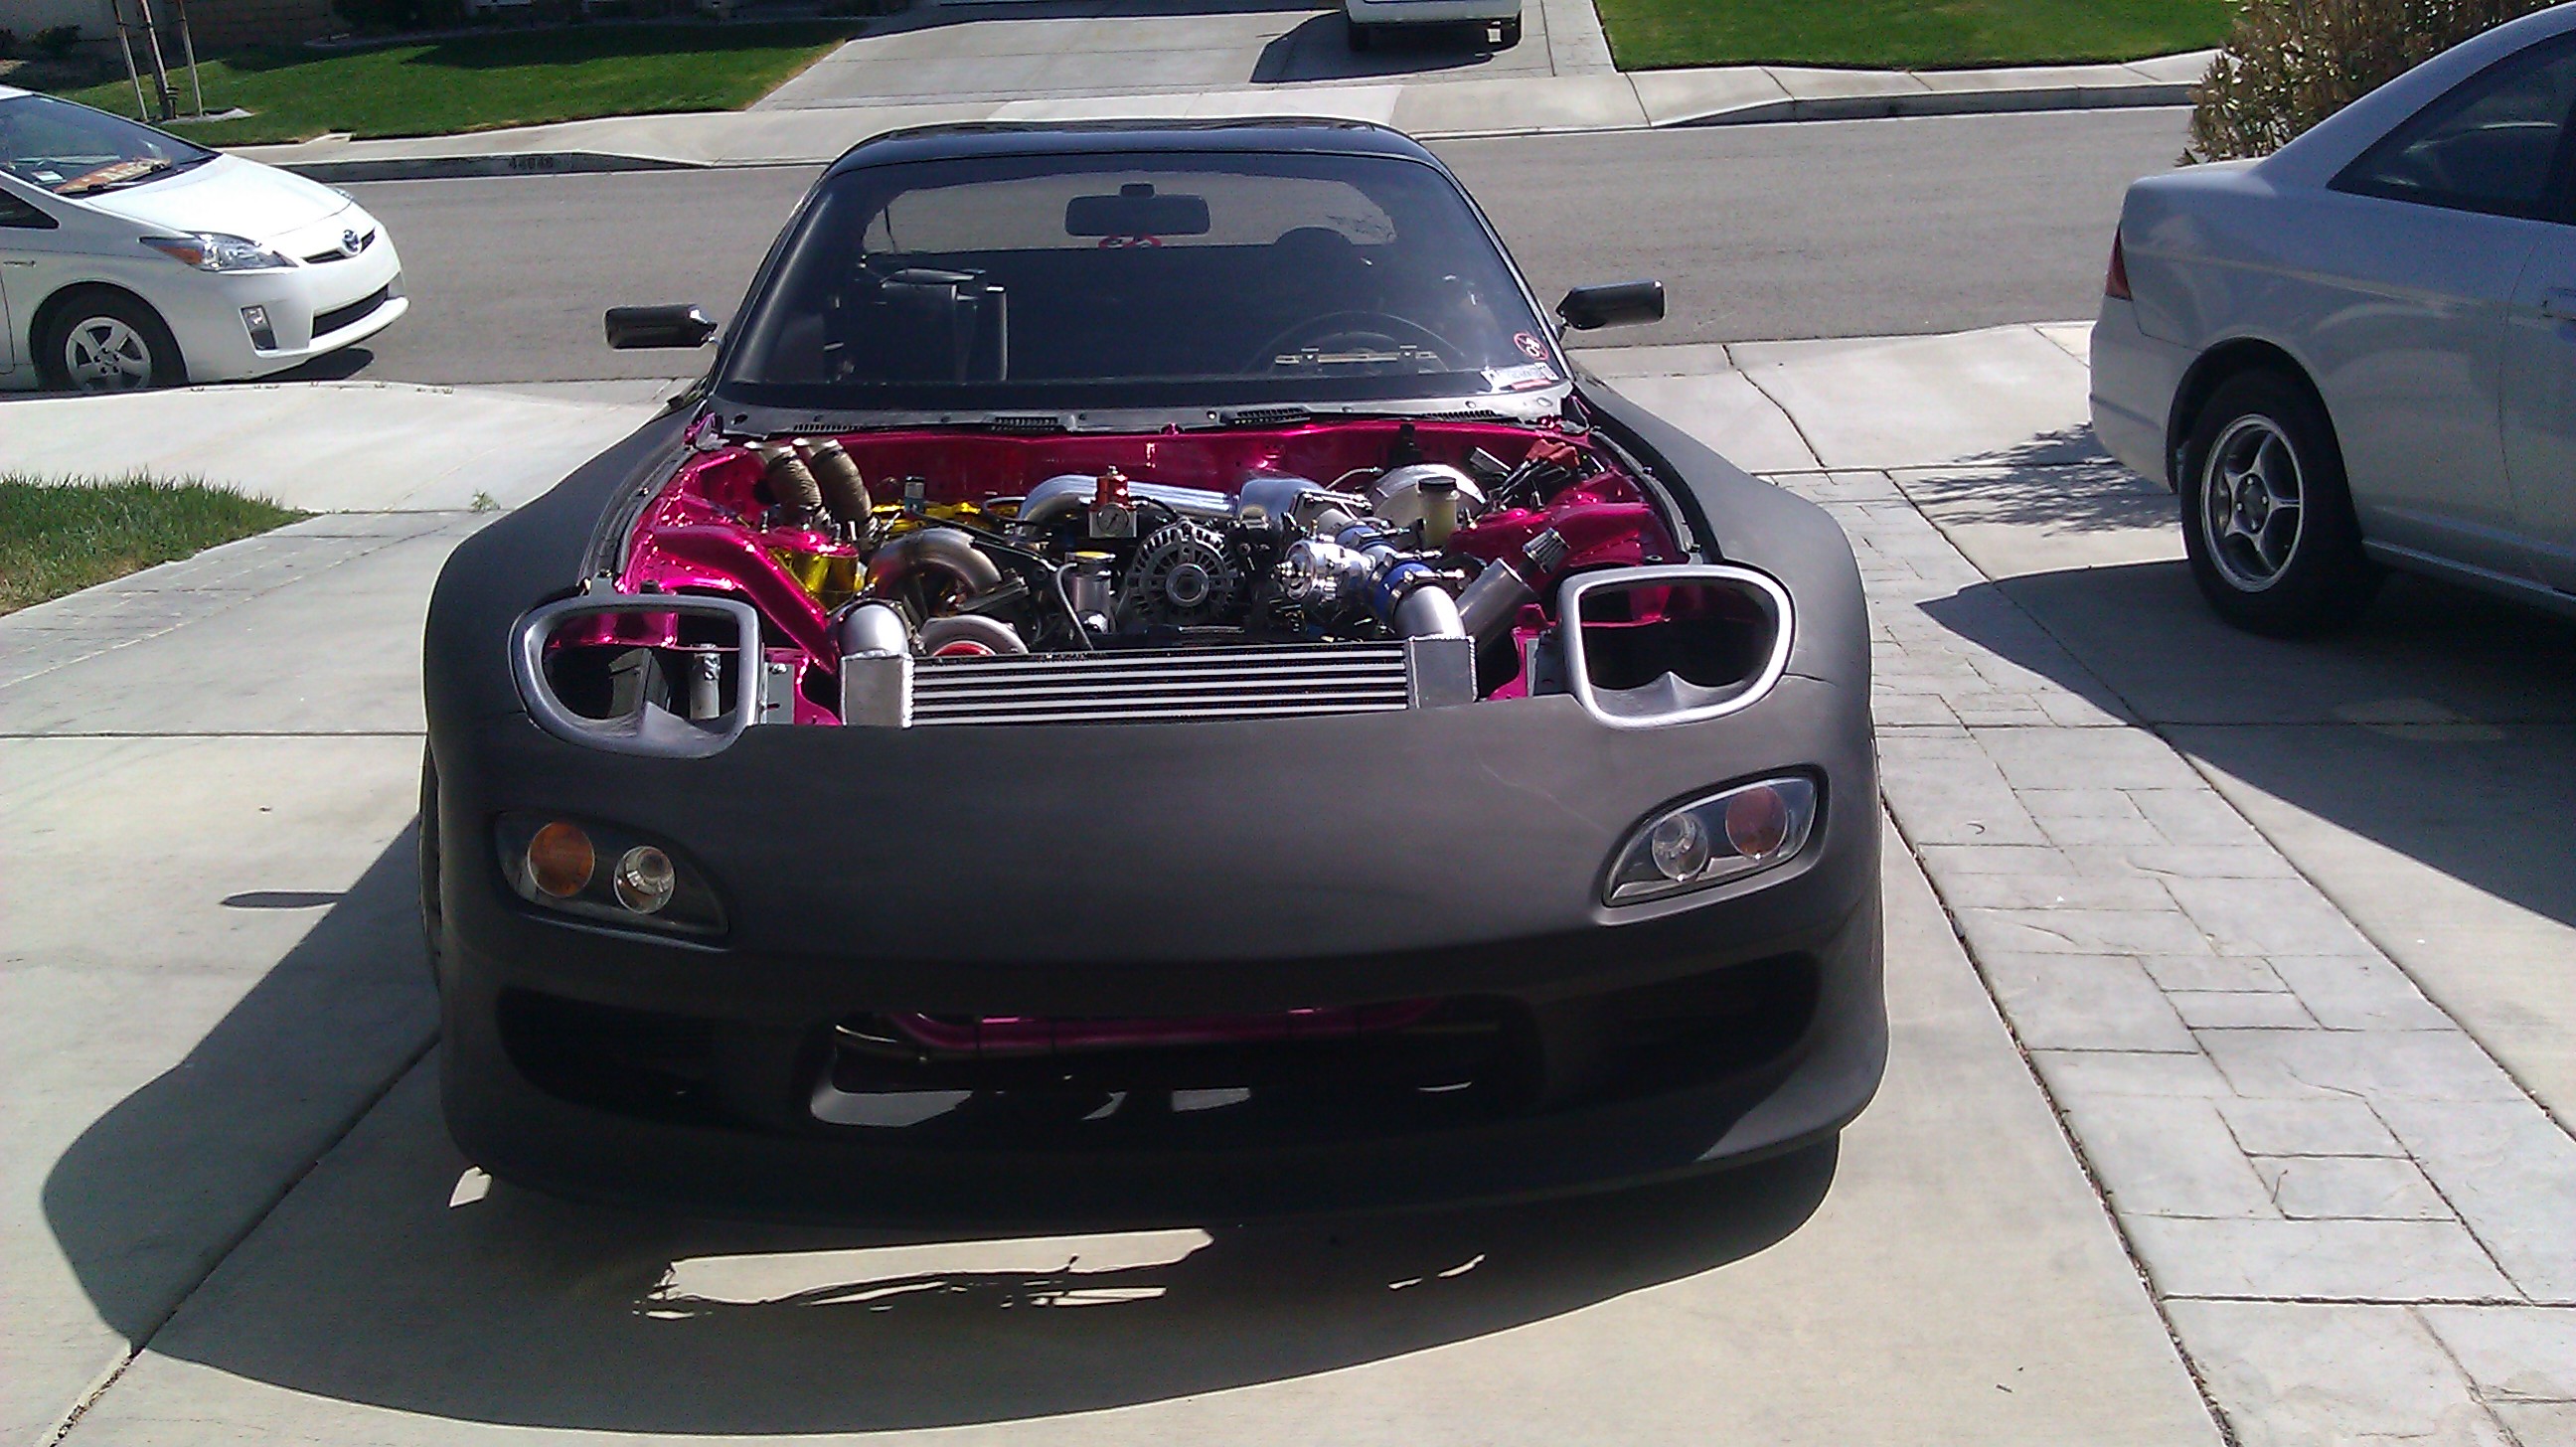
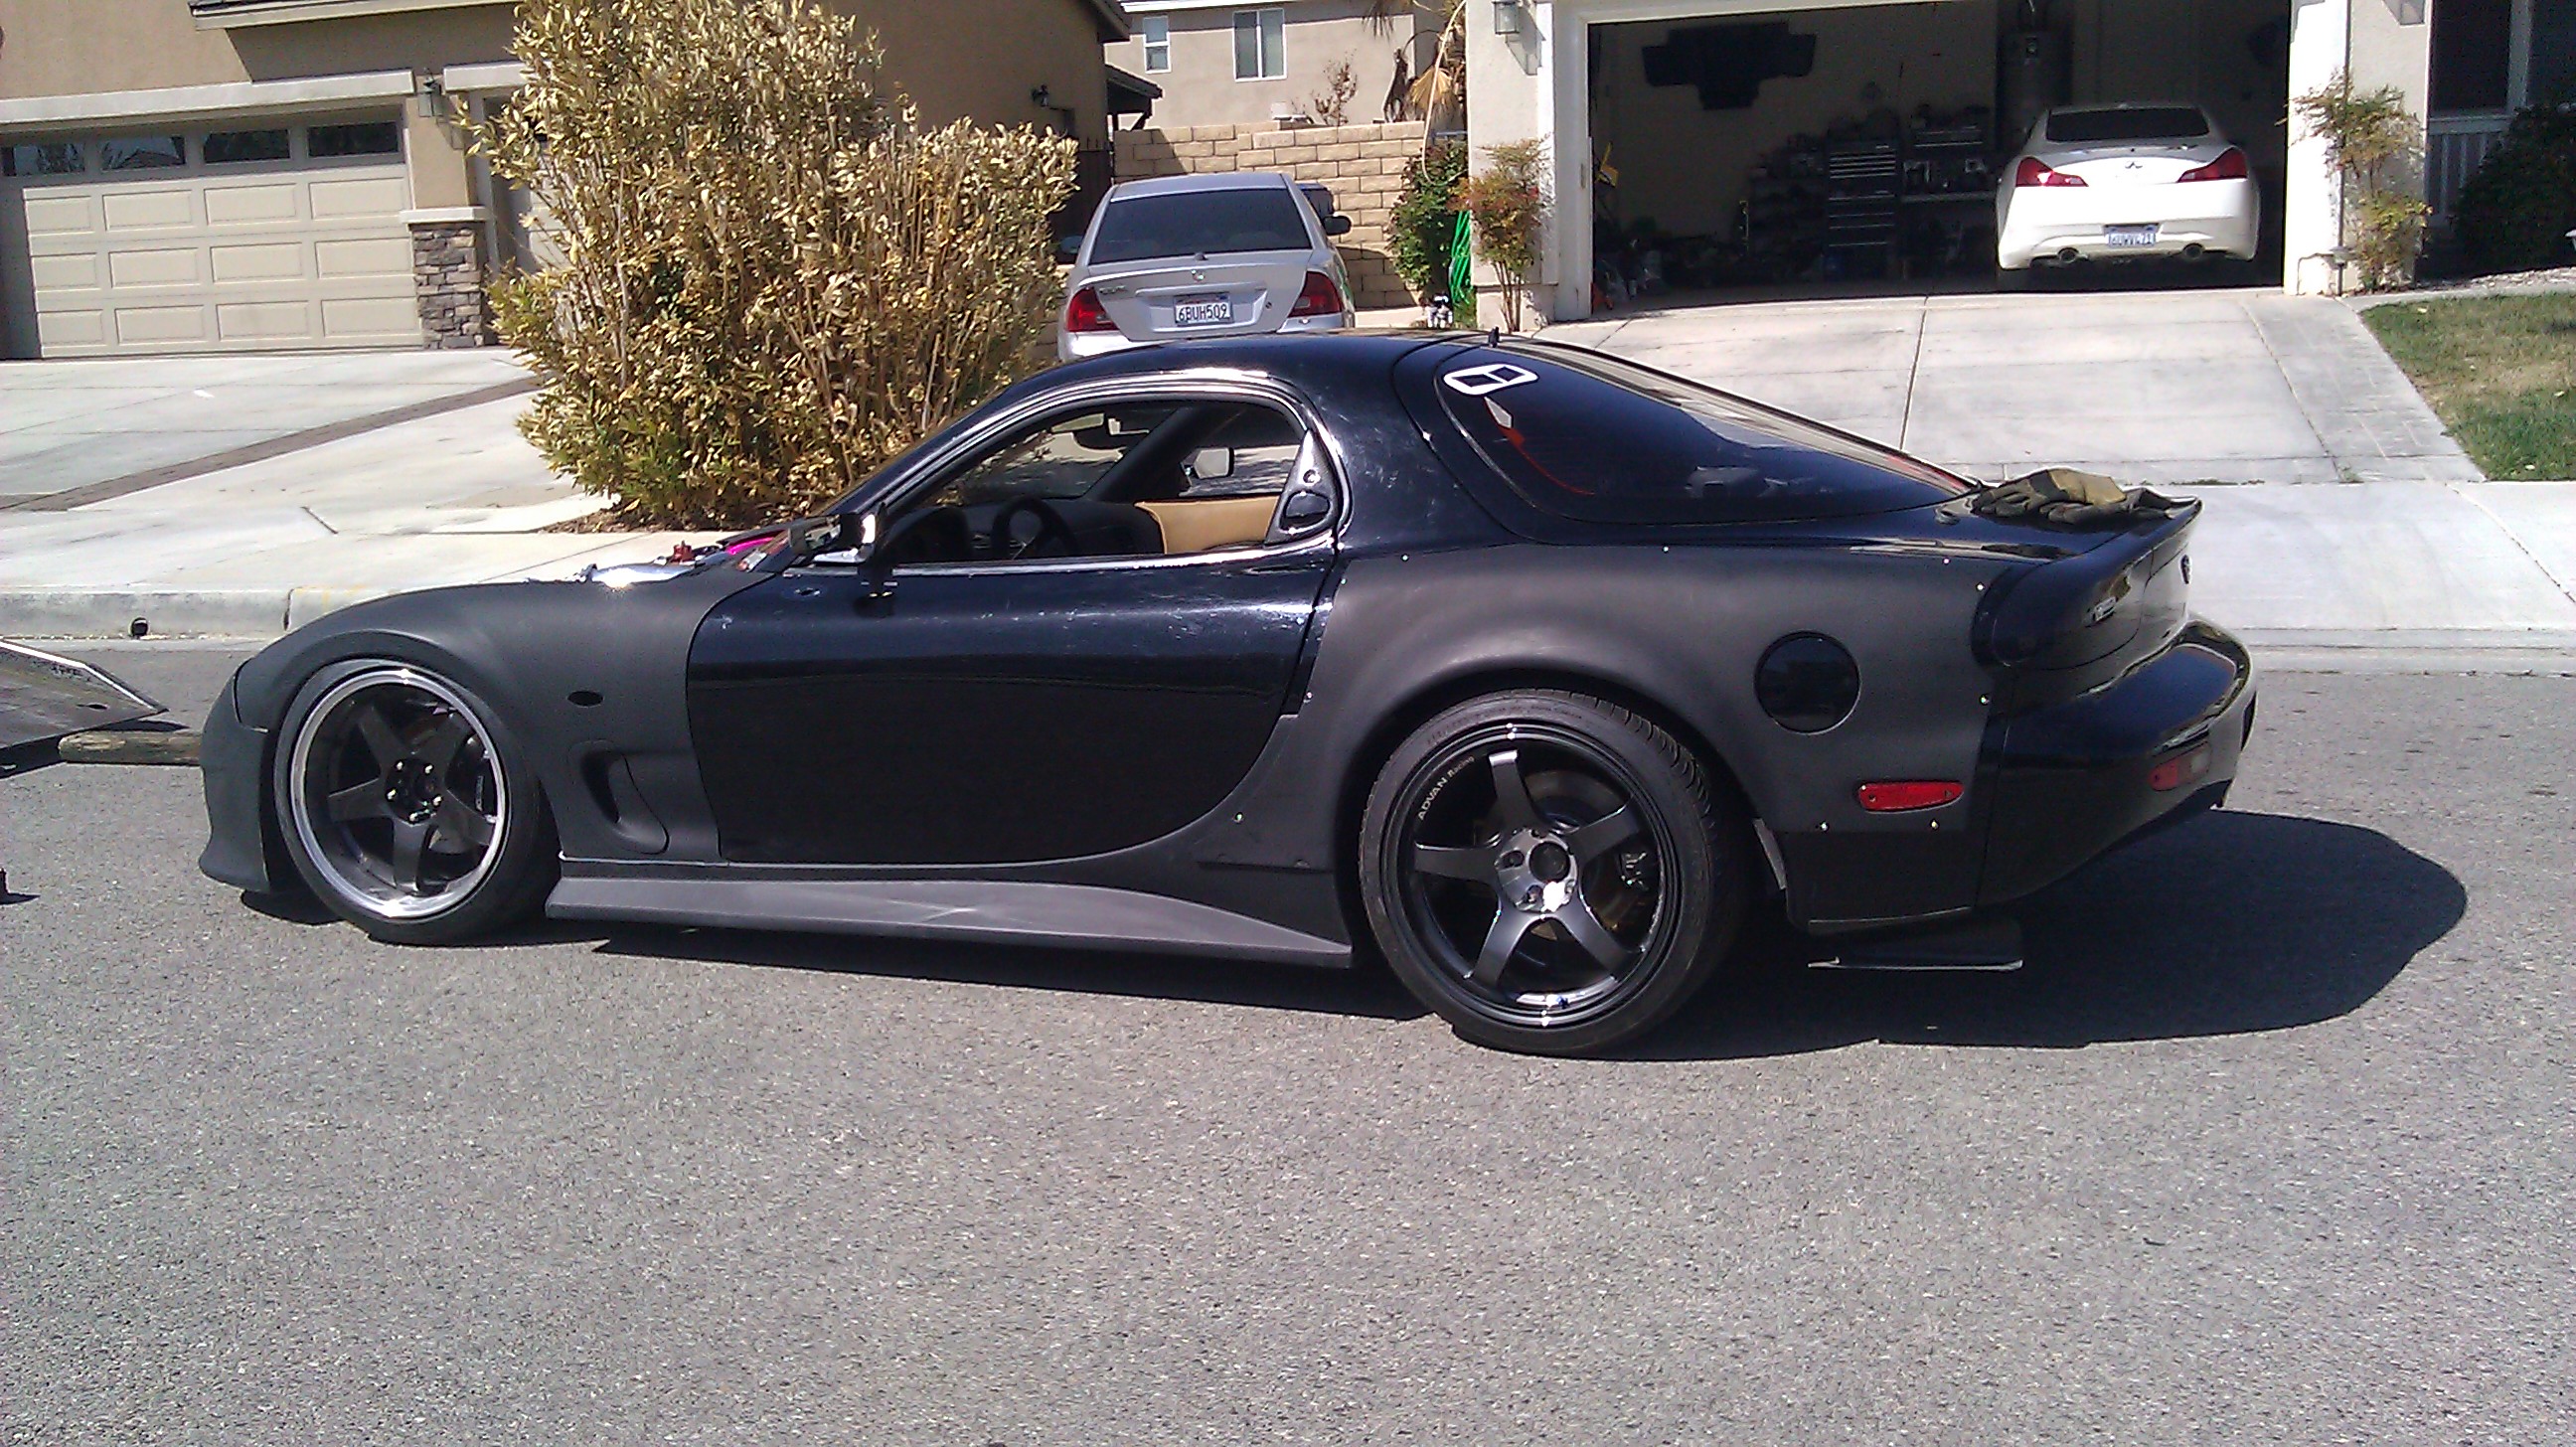
Installed the front bumper and didn't realize how much coolant weighs... so I'll have to re-adjust my front coilovers a little higher. The tires actually clear my fenders at full lock but they're 45 series, i'll be running 35 series tires so I'll have a little more clearance. The rear will be dropped about an Inch and a half. But i'm VERY happy with how the kit looks. Working on trimming the over fender/skirt overlap in a nice way but I don't want to do too much just in case I need to replace them on the fly.
Over-all when I saw the car on the ground in the sun.....out of her garage recovery bed......I fell in love with her all over again. I think the neighbor looked at me weired because she was watering her roses on the side of the house and right when I pulled it out and parked it, i took a good ten steps back to admire this gorgeous, timeless beautiful piece of machinery...and I said to myself "JESUS CHRIST" a little louder than I had expected hahaha. She popped her head around the corner to check if everything was ok... I just smiled and gave her the thumbs up. She did the same..but i'm sure i'll get the thumbs down once she turns over LOL going to be very loud. 4" dumped under the car.. Anyways PICS!
Got a lot of little "Need to" things done..
Filled the car up with 50/50 coolant and distilled water and while I was filling it up I had 4 leaks. Forgot to tighten down the turbo coolant lines. Only the drain was leaking though, but gave the rest of the fittings a once over and found the feed was also loose. Then My radiator Petcock was leaking as well. Guess I tightened the drain but not the female that threaded into the actual radiator. And lastly the heater core feed off the drivers side motor was leaking. Fixed all those leaks and topped off the coolant. I also didn't use a lisle funnel but A ghetto funnel that has worked for me very well in the past haha. a 2-liter soda bottle with electrical tape on the cap end to make it snugly fit into the coolant filler top. Put the car up on jack stands to angle the car up to help get rid of dumb air in the system...which some of you know is a royal pain in the *** if you don't do it correctly. But onto pics:
Not in chronological order...but something else came in the mail yesterday morning. A piece of this master puzzle that i've wanted ever since I laid eyes on it. And I know a lot of people may or may not think they're that rare...but they've become pretty hard to find used...which is the only way I purchase parts such as these. A tri-point front modular sway bar.. with adjustable end-links...the thing is damn expensive..and it was hard for me to justify the purchase of a new one. But luckily I got it on a trade =-) So here it is one of my favorite pieces!
It was a little dirty but in excellent used condition
So of course I cleaned it off and had it installed right away haha!! couldn't wait to complete the puzzle!!
soo nice! everything about it is just well thought out. Install was a breeze and weirdly it matches my suspension paint exactly.
Installed the front bumper and didn't realize how much coolant weighs... so I'll have to re-adjust my front coilovers a little higher. The tires actually clear my fenders at full lock but they're 45 series, i'll be running 35 series tires so I'll have a little more clearance. The rear will be dropped about an Inch and a half. But i'm VERY happy with how the kit looks. Working on trimming the over fender/skirt overlap in a nice way but I don't want to do too much just in case I need to replace them on the fly.
Over-all when I saw the car on the ground in the sun.....out of her garage recovery bed......I fell in love with her all over again. I think the neighbor looked at me weired because she was watering her roses on the side of the house and right when I pulled it out and parked it, i took a good ten steps back to admire this gorgeous, timeless beautiful piece of machinery...and I said to myself "JESUS CHRIST" a little louder than I had expected hahaha. She popped her head around the corner to check if everything was ok... I just smiled and gave her the thumbs up. She did the same..but i'm sure i'll get the thumbs down once she turns over LOL going to be very loud. 4" dumped under the car.. Anyways PICS!
