
Mannykillers/ AAPARKAH Street/time Attack/Drift Build (heavy Pics) #Thisisthewolf


I know you said you might get a Smartwire, but look into this. Cheaper and more modern. I think I'll be saving for a 3 cell since I don't plan on getting rid of my car anytime soon.
ISIS Intelligent Multiplex System - Automotive Wiring Harnesses, Car Wire Harness, Engine Wiring Harness, Auto Wiring Harness, Truck Wiring Harness, Car Wiring Kits
ISIS Intelligent Multiplex System - Automotive Wiring Harnesses, Car Wire Harness, Engine Wiring Harness, Auto Wiring Harness, Truck Wiring Harness, Car Wiring Kits
 Going to take this to the fab shop and make a nice one with it. I'll take pics and let you know how it comes out
 I know you said you might get a Smartwire, but look into this. Cheaper and more modern. I think I'll be saving for a 3 cell since I don't plan on getting rid of my car anytime soon.
ISIS Intelligent Multiplex System - Automotive Wiring Harnesses, Car Wire Harness, Engine Wiring Harness, Auto Wiring Harness, Truck Wiring Harness, Car Wiring Kits
ISIS Intelligent Multiplex System - Automotive Wiring Harnesses, Car Wire Harness, Engine Wiring Harness, Auto Wiring Harness, Truck Wiring Harness, Car Wiring Kits
nice find though! cheaper than 1700 thats for sure!
Tiny Update:
I got fed up with my brake/clutch system and started over. This time I started with the clutch pedal side of the Master cylinder piston.
I watched a youtube video of a guy who was having similar problems in a jeep cherokee or something. His clutch pedal wasn't getting hard no matter how much bleeding he did. So he pulled off the C-Clip on Cabin side of the Clutch pedal/Piston. And there was an air pocket that had developed and was stuck between the piston and the Master cylinder. You pull the piston out just until you see fluid leak out and then push it back in. This can be a little tricky if you don't have C-clip pliers. SO I'd advise you not to do it unless you have some. Also DONT pull it out too much otherwise you may let more air into the system. But I did it..and It fixed my problem immediately. As soon as I pushed the piston back in the pedal was instantly firmer. Bled it a couple times and It was back to normal. It was really late and I was exhausted so I called it quits at around 12:15 since I had to be up at 5, but Now I can properly bleed the brakes. I also Bench Bled the master cylinder after that to ensure no bubbles were hindering the bleed. So Today I'll finish up Bleeding the Brakes and Clutch and Move onto something else!!


^ no need to complicate things... The OEM pull type works just fine for me. Some people prefere it otherwise but at this point in the build if I don't have to replace it... I'm not going to unless it's unsafe, hindering performance etc..
Update:
Lots of work done..but nothing off the list?!
I've been working at a min of 3-4 hours a night the past couple days and yesterday I realized I only got one thing done on my "to do" list haha.
There are tons of little things that a lot of people dont think about when building a car. They see a car and think well thats really cool. I'm going to buy that part too! But they don't think about the install or parts associated to make it work etc. For instance... Installing the IAT in my Upper intake manifold...Well it's not just drilling and tapping. Its taking the manifold off the car, matching the sensor with the correct Tap, finding the correct drill. Drilling the manifold without scratching the eff out of it on a secure surface. Measureing how much play you'll have from your wiring harness to the sensor so you don't tap the hole too far away for the harness to reach. So mocking up the manifold again. Making a mark. Then drilling, then tapping, then really really cleaning the manifold because there can't be any little shavings or pieces of metal inside the manifold otherwise your brand new engine will eat them and possibly ruin everything. After the cleaning it's finally time to install the sensor. I use honda bond high temp rtv on the threads of the IAT sensor to ensure there are no leaks. Install it, make sure it's nice and toight. Then finding a nice neat route to the hole so your harness isn't overlapping a million hosses etc.. plug the sensor in and then install the UIM. All while making sure not to drop anything big or small into the Lower Intake manifold ports because they are completely open all the way till the rotor housing (remember no valves). Anything falls in there and game over. Not to rant..because I actually enjoy all the steps that go into such a small task of installing a IAT sensor into an aftermarket UIM that doesn't have a port. But These little things take time. Just the sensor install took me about 45 min. And then On top of that you run into tiny little hiccups.. such as the fact that the LIM rear most bolt hole happened to strip out halfway (baught it used and previous owner must've used a bolt that was too short). But everything takes time.... It's something you don't think about when you first start building a car, or people who have never attempted larger installs, motor swaps, or builds themselves don't think about. It's just... put the turbo on and start itup. Nahhh....lots of stuff that goes into it. But I love it all... and believe me I'm on it.... Hoping to making this years Thunder on the Lot Drift (mick Friel's) event and ASB!!!
anyways...back to updates!
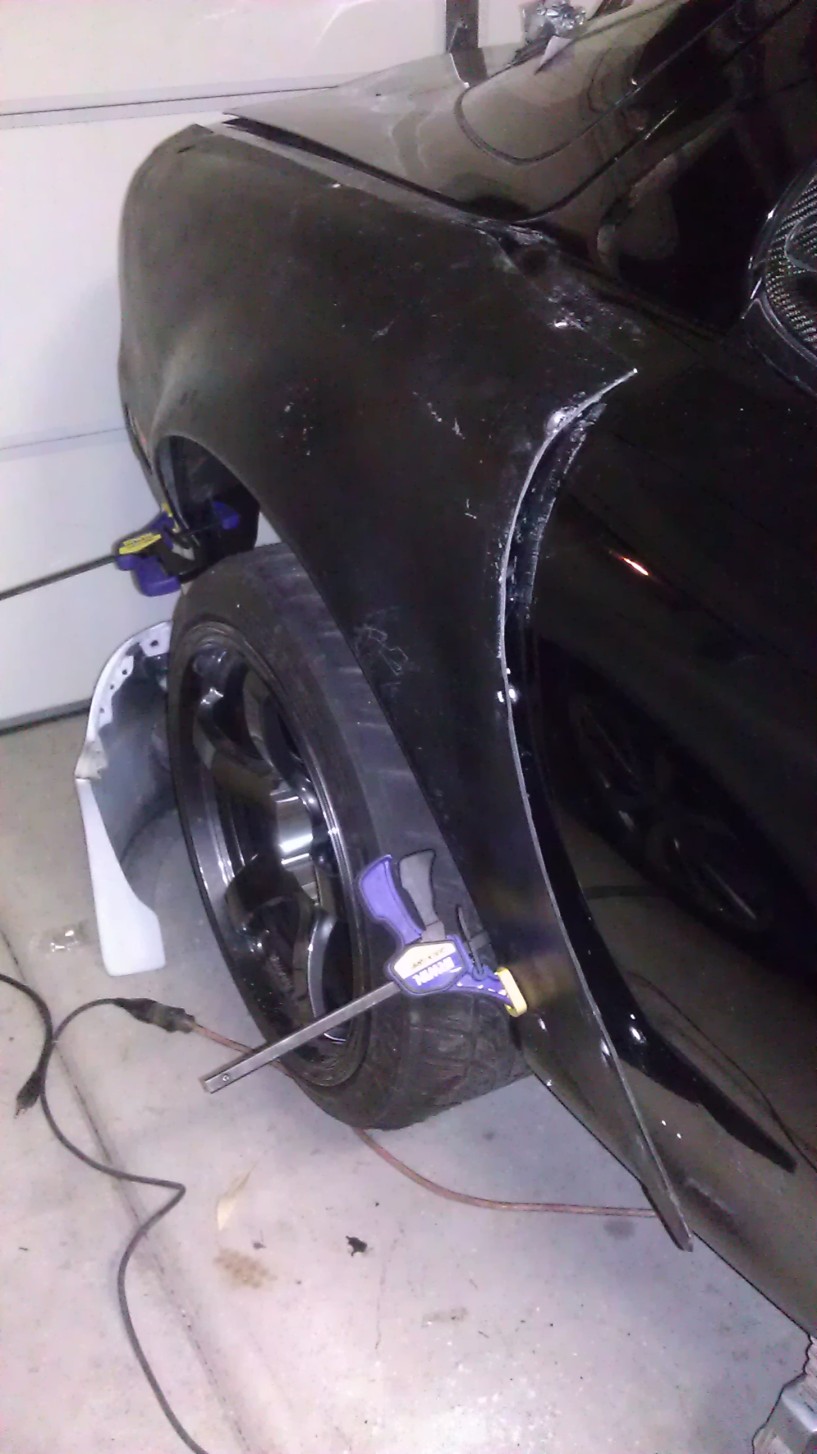
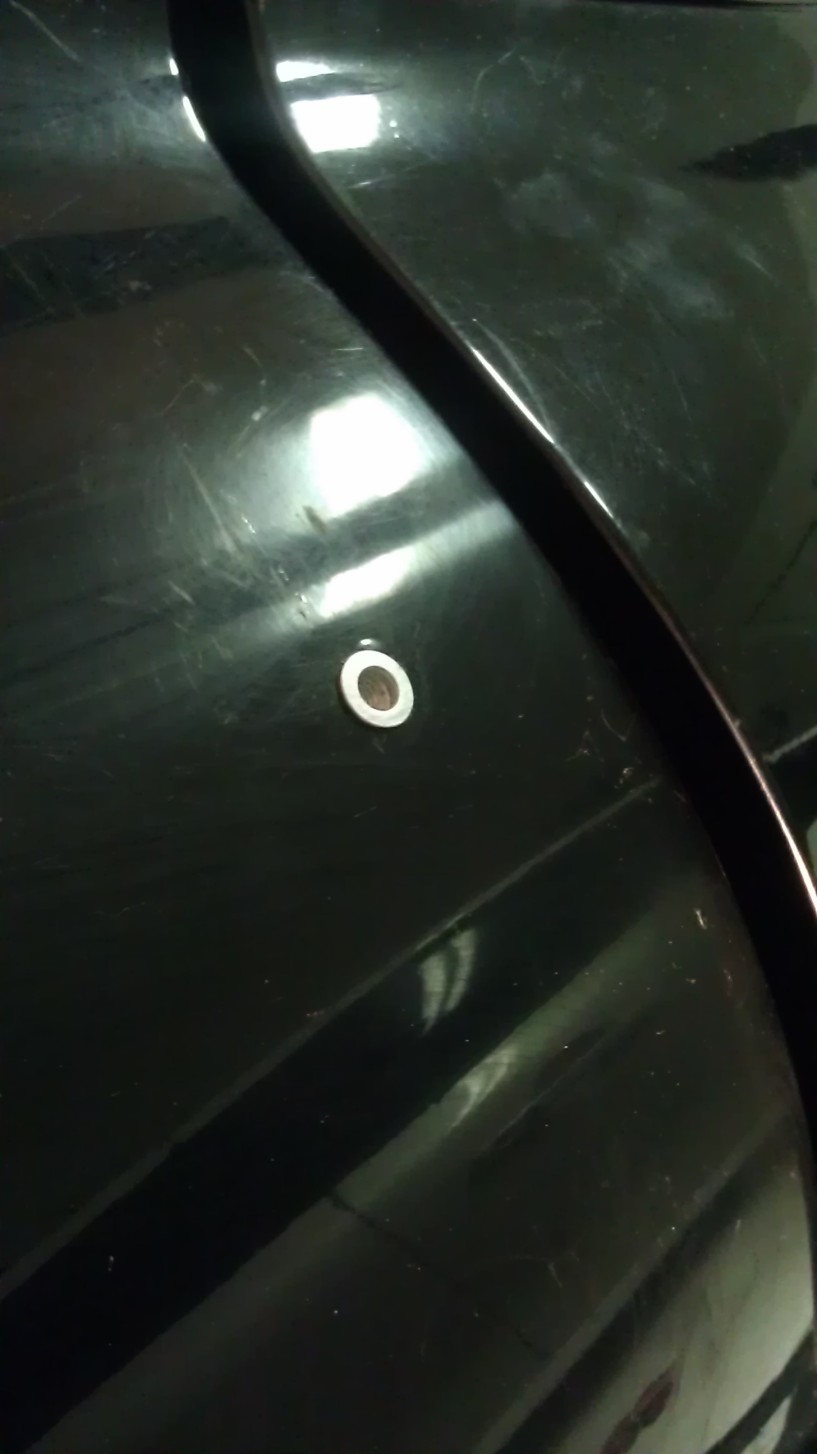
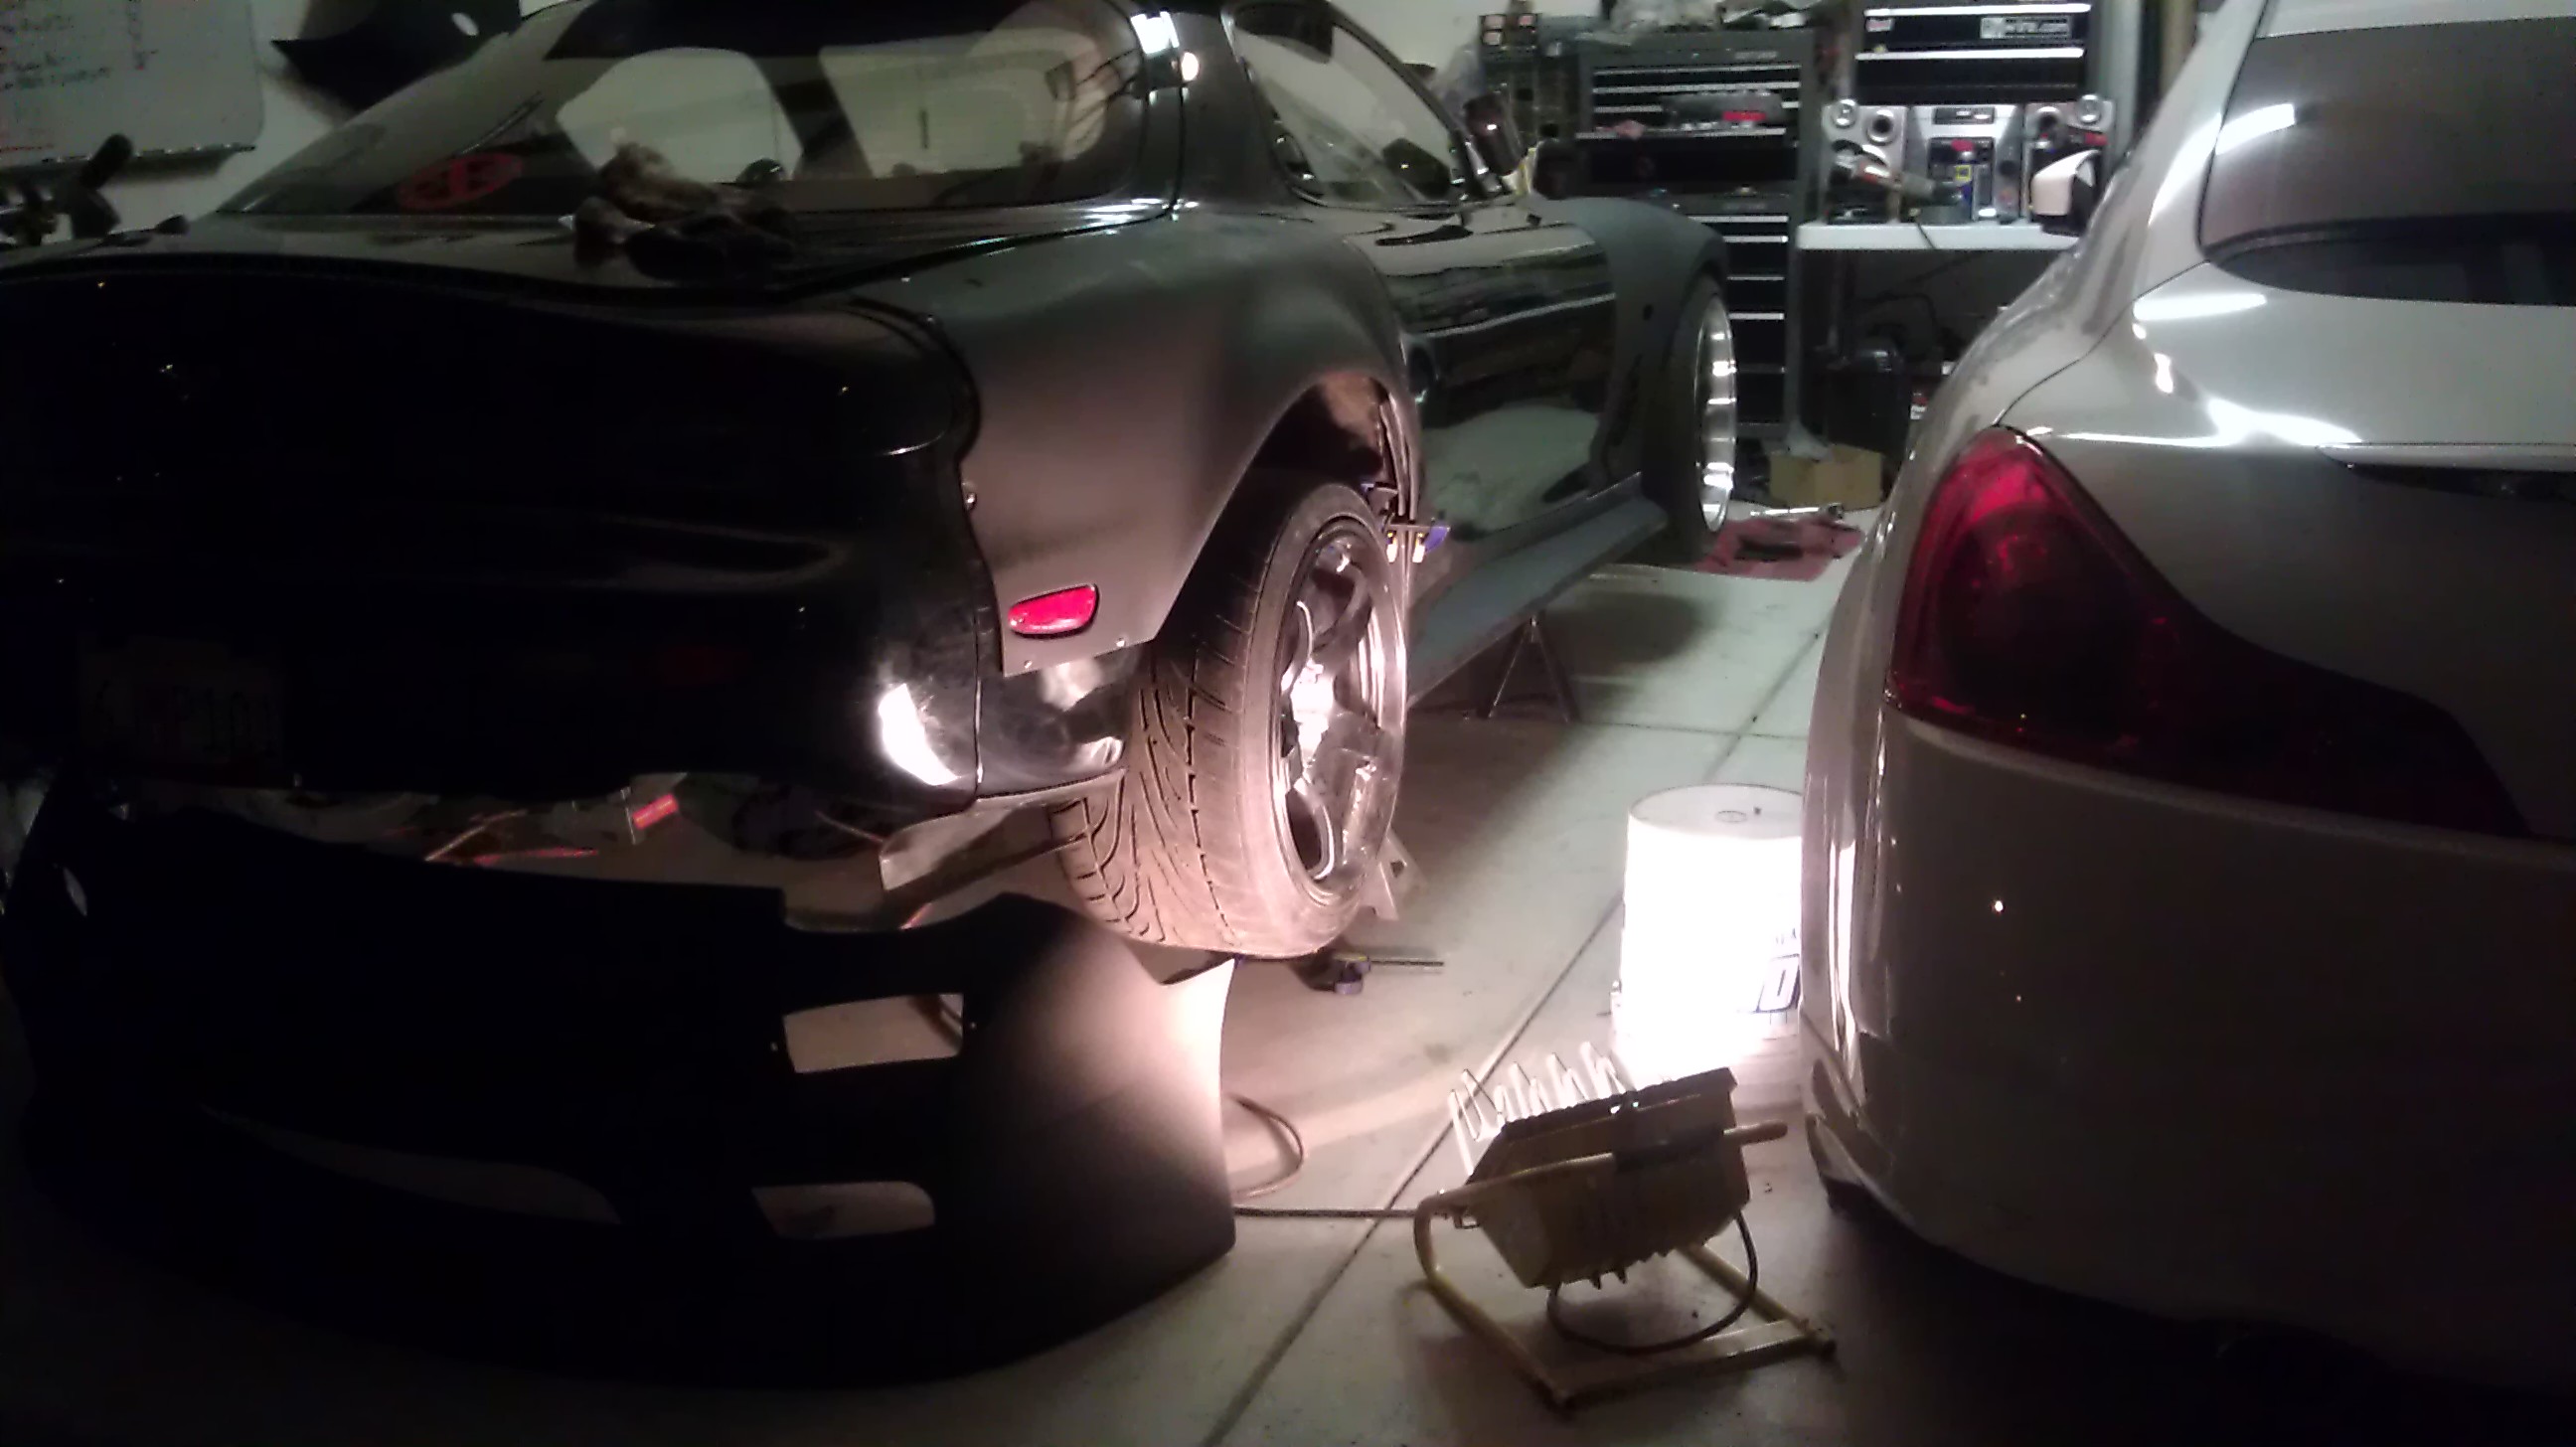
Wanted to get the Origin rear fenders rivited on and didn't like the idea of having to drill out rivits if I needed to replace a damaged fender. So I looked around online and saw that people were using Nut-certs. You pretty much push the threaded rivit onto the body panel and it pressure sandwhiches the fastner in place which you can then bolt stuff to securely. You just have to be careful to make a good "cert." So I found a low cost alternative and this is why I love Harbor Freight.....and hate them haha.
I got the kit from Harbor frieght and after searching for 2 days all around locally and on the internet I ended up purchasing ANOTHER kit and tool just to be able to have enough Certs to finish the Over fender Install. I couldn't find the certs anywhere local and I searched thoroughly.. You can find them online but some places wanted some 37 cents per cert..and ebay didn't have any that had a big enough outer lip for me to feel comfortable using. Anyways I'll take pics of the tool later, but heres the install.
drill
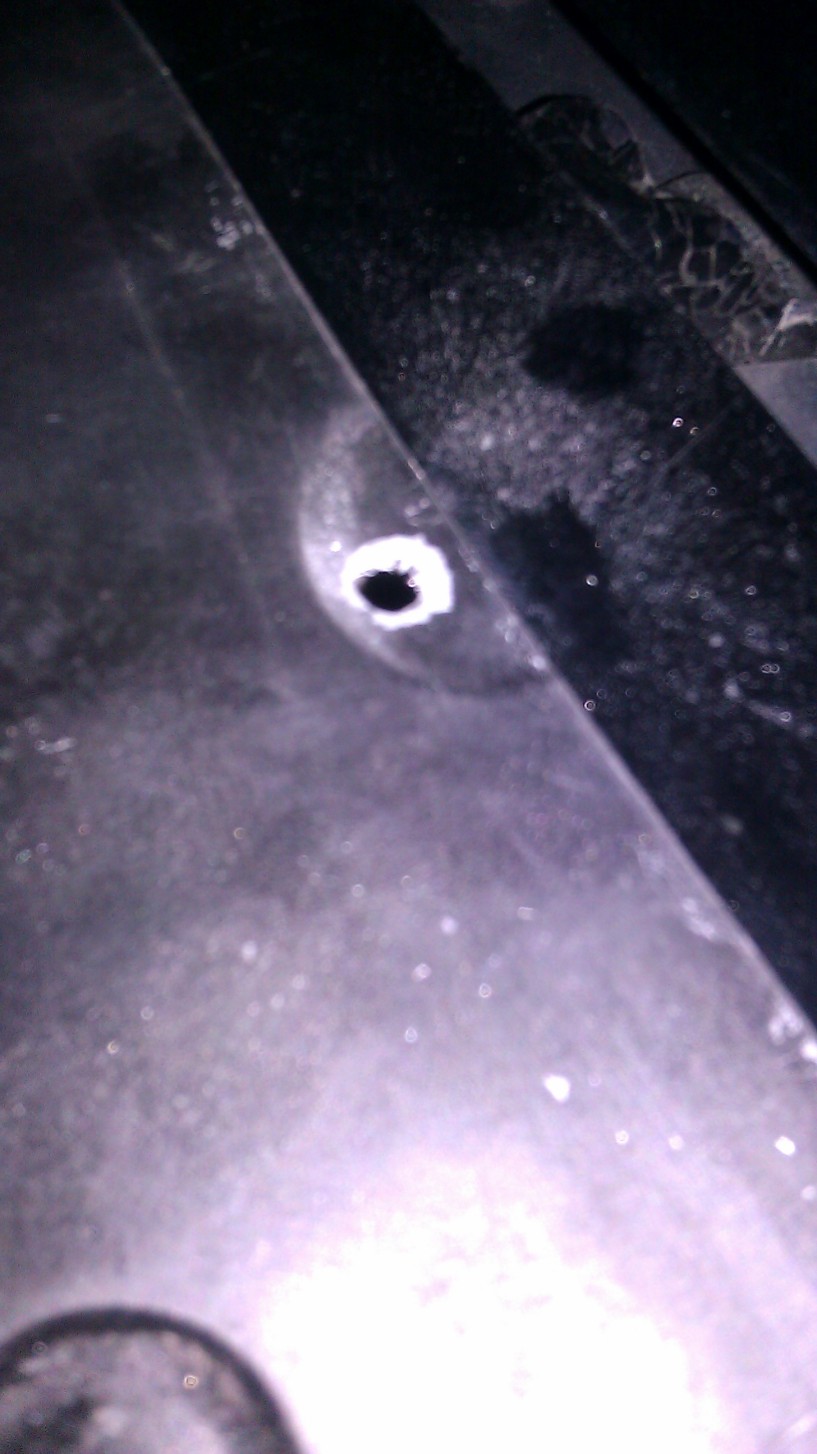
Nut-cert

another
Fender install
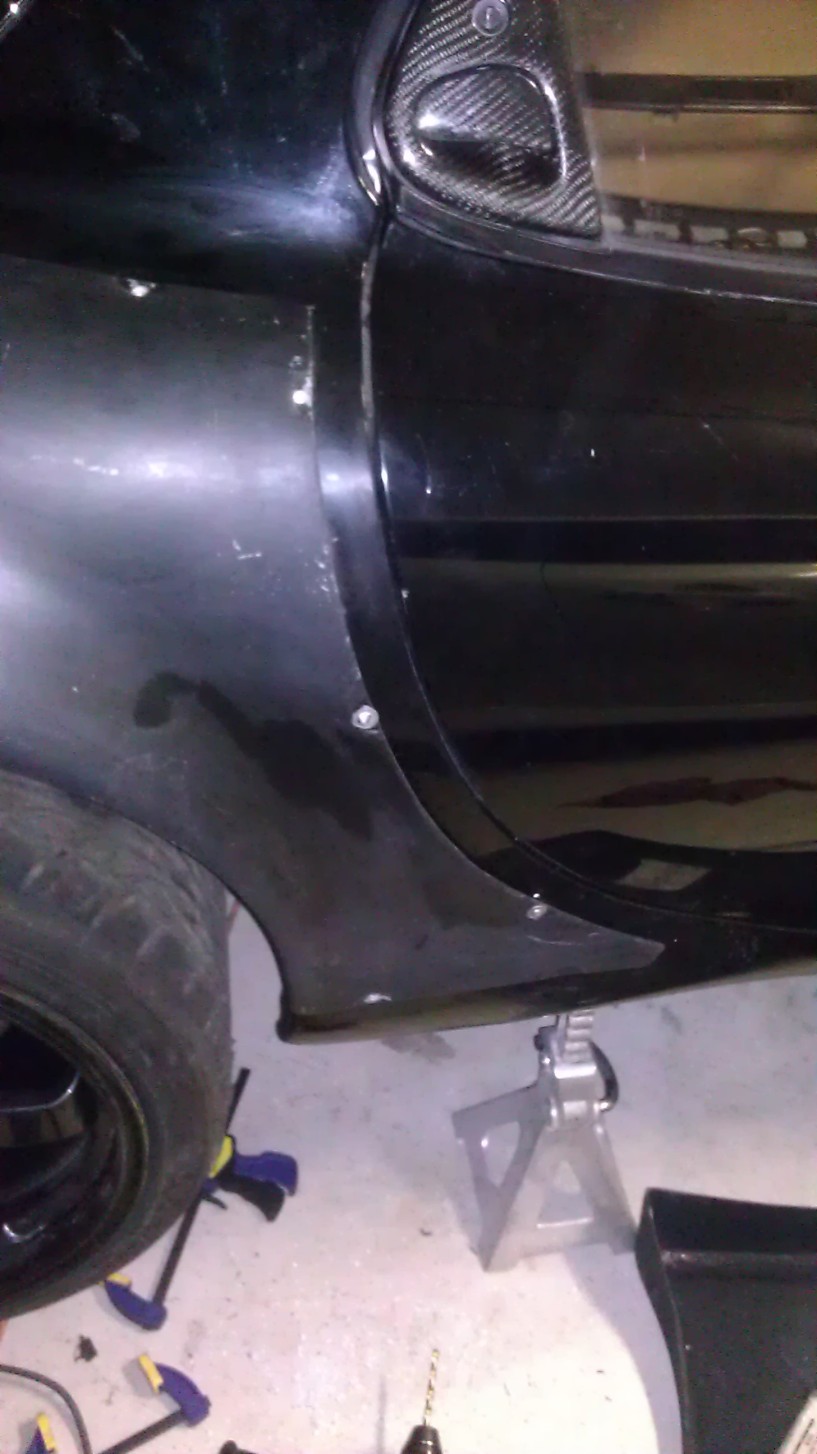
cleaned and finished
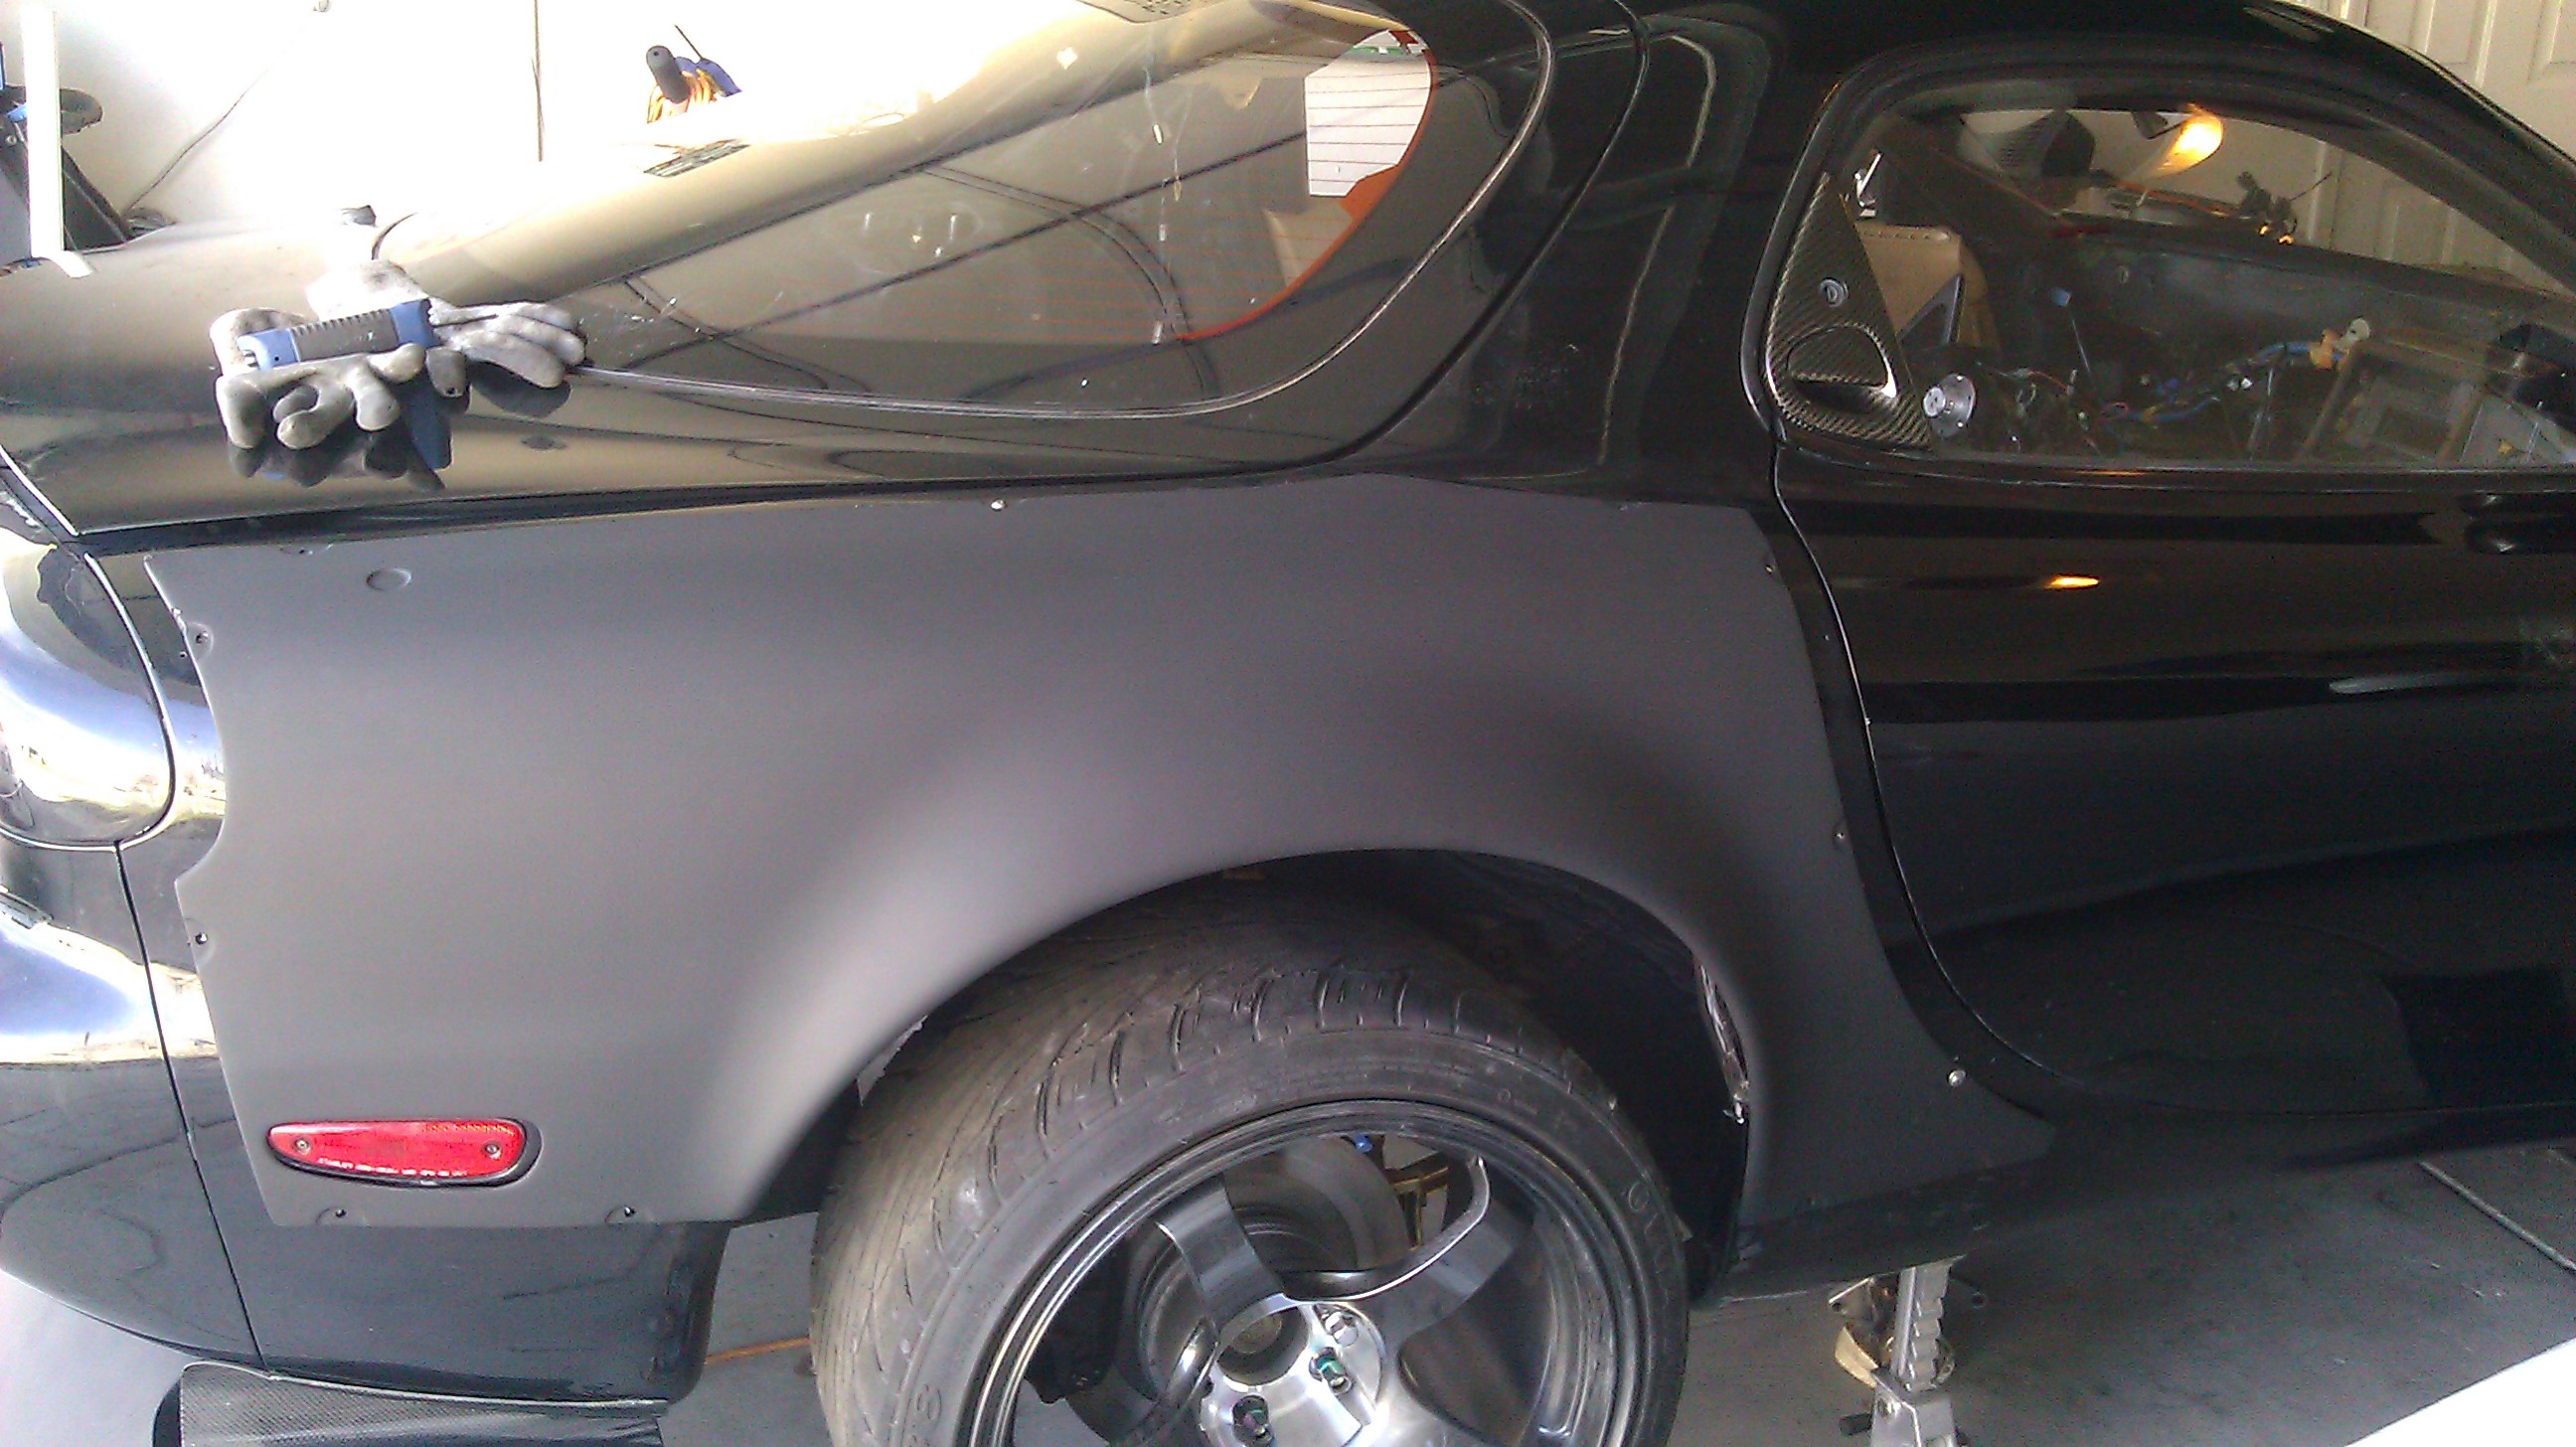
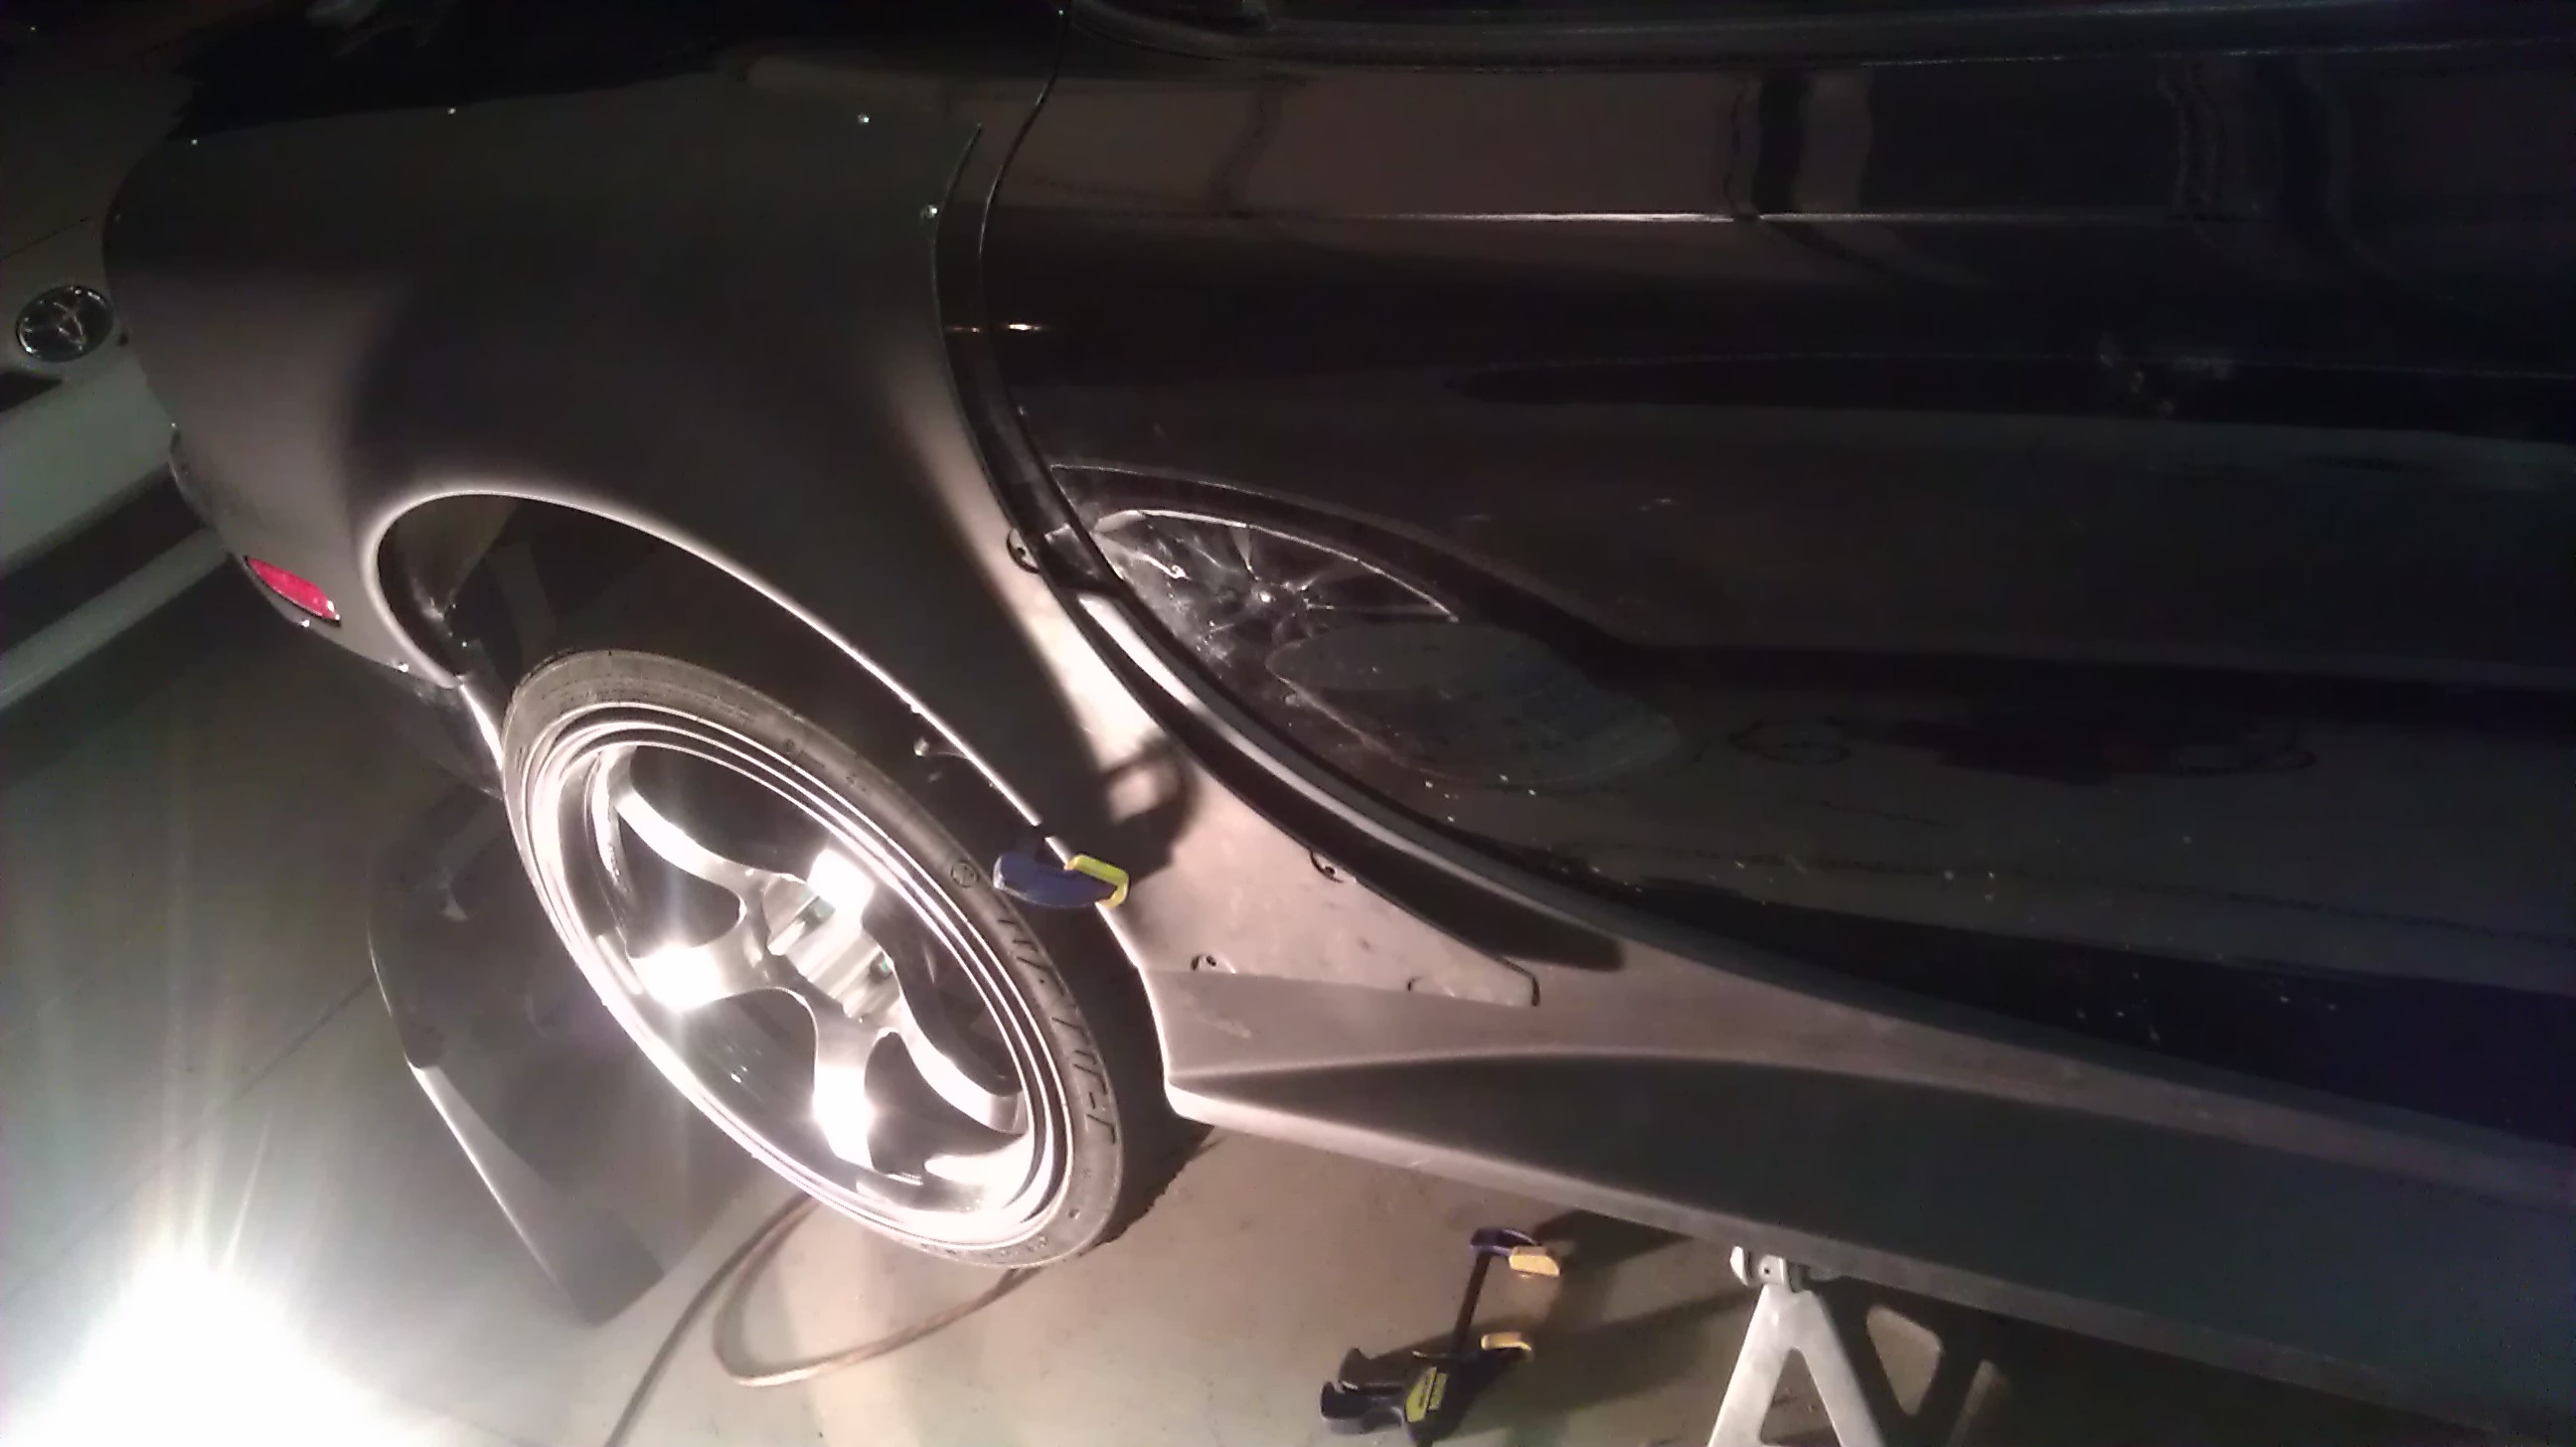
Side skirts.... So after admitting that i'm not so good at paint and body.. I decided not to cut my side skirts up. But instead.. I'm going to use more Nut-serts (cert/"sert"..sert is actually correct but who gives a ****...) to fasten the Side skirts. First I had the over fenders under the side skirts and although it could look cool. It would take a lot of work and customization. So I flipped it..and i'm going to lay the over fenders ON TOP of the side skirts. The skirts fit flush and the over fenders sit nice and flat against the body. So i'll have to figure out a couple cert locations and then make some alum brackets for the underside.
fender on bottom, skirt on top
Fender on top, skirt on bottom
Lots of work done..but nothing off the list?!
I've been working at a min of 3-4 hours a night the past couple days and yesterday I realized I only got one thing done on my "to do" list haha.
There are tons of little things that a lot of people dont think about when building a car. They see a car and think well thats really cool. I'm going to buy that part too! But they don't think about the install or parts associated to make it work etc. For instance... Installing the IAT in my Upper intake manifold...Well it's not just drilling and tapping. Its taking the manifold off the car, matching the sensor with the correct Tap, finding the correct drill. Drilling the manifold without scratching the eff out of it on a secure surface. Measureing how much play you'll have from your wiring harness to the sensor so you don't tap the hole too far away for the harness to reach. So mocking up the manifold again. Making a mark. Then drilling, then tapping, then really really cleaning the manifold because there can't be any little shavings or pieces of metal inside the manifold otherwise your brand new engine will eat them and possibly ruin everything. After the cleaning it's finally time to install the sensor. I use honda bond high temp rtv on the threads of the IAT sensor to ensure there are no leaks. Install it, make sure it's nice and toight. Then finding a nice neat route to the hole so your harness isn't overlapping a million hosses etc.. plug the sensor in and then install the UIM. All while making sure not to drop anything big or small into the Lower Intake manifold ports because they are completely open all the way till the rotor housing (remember no valves). Anything falls in there and game over. Not to rant..because I actually enjoy all the steps that go into such a small task of installing a IAT sensor into an aftermarket UIM that doesn't have a port. But These little things take time. Just the sensor install took me about 45 min. And then On top of that you run into tiny little hiccups.. such as the fact that the LIM rear most bolt hole happened to strip out halfway (baught it used and previous owner must've used a bolt that was too short). But everything takes time.... It's something you don't think about when you first start building a car, or people who have never attempted larger installs, motor swaps, or builds themselves don't think about. It's just... put the turbo on and start itup. Nahhh....lots of stuff that goes into it. But I love it all... and believe me I'm on it.... Hoping to making this years Thunder on the Lot Drift (mick Friel's) event and ASB!!!
anyways...back to updates!
Wanted to get the Origin rear fenders rivited on and didn't like the idea of having to drill out rivits if I needed to replace a damaged fender. So I looked around online and saw that people were using Nut-certs. You pretty much push the threaded rivit onto the body panel and it pressure sandwhiches the fastner in place which you can then bolt stuff to securely. You just have to be careful to make a good "cert." So I found a low cost alternative and this is why I love Harbor Freight.....and hate them haha.
I got the kit from Harbor frieght and after searching for 2 days all around locally and on the internet I ended up purchasing ANOTHER kit and tool just to be able to have enough Certs to finish the Over fender Install. I couldn't find the certs anywhere local and I searched thoroughly.. You can find them online but some places wanted some 37 cents per cert..and ebay didn't have any that had a big enough outer lip for me to feel comfortable using. Anyways I'll take pics of the tool later, but heres the install.
drill
Nut-cert
another
Fender install
cleaned and finished
Side skirts.... So after admitting that i'm not so good at paint and body.. I decided not to cut my side skirts up. But instead.. I'm going to use more Nut-serts (cert/"sert"..sert is actually correct but who gives a ****...) to fasten the Side skirts. First I had the over fenders under the side skirts and although it could look cool. It would take a lot of work and customization. So I flipped it..and i'm going to lay the over fenders ON TOP of the side skirts. The skirts fit flush and the over fenders sit nice and flat against the body. So i'll have to figure out a couple cert locations and then make some alum brackets for the underside.
fender on bottom, skirt on top
Fender on top, skirt on bottom
Continued....
Couldn't help but mock up the front fenders as well to get a good look at how the car will look.
One more pic just because
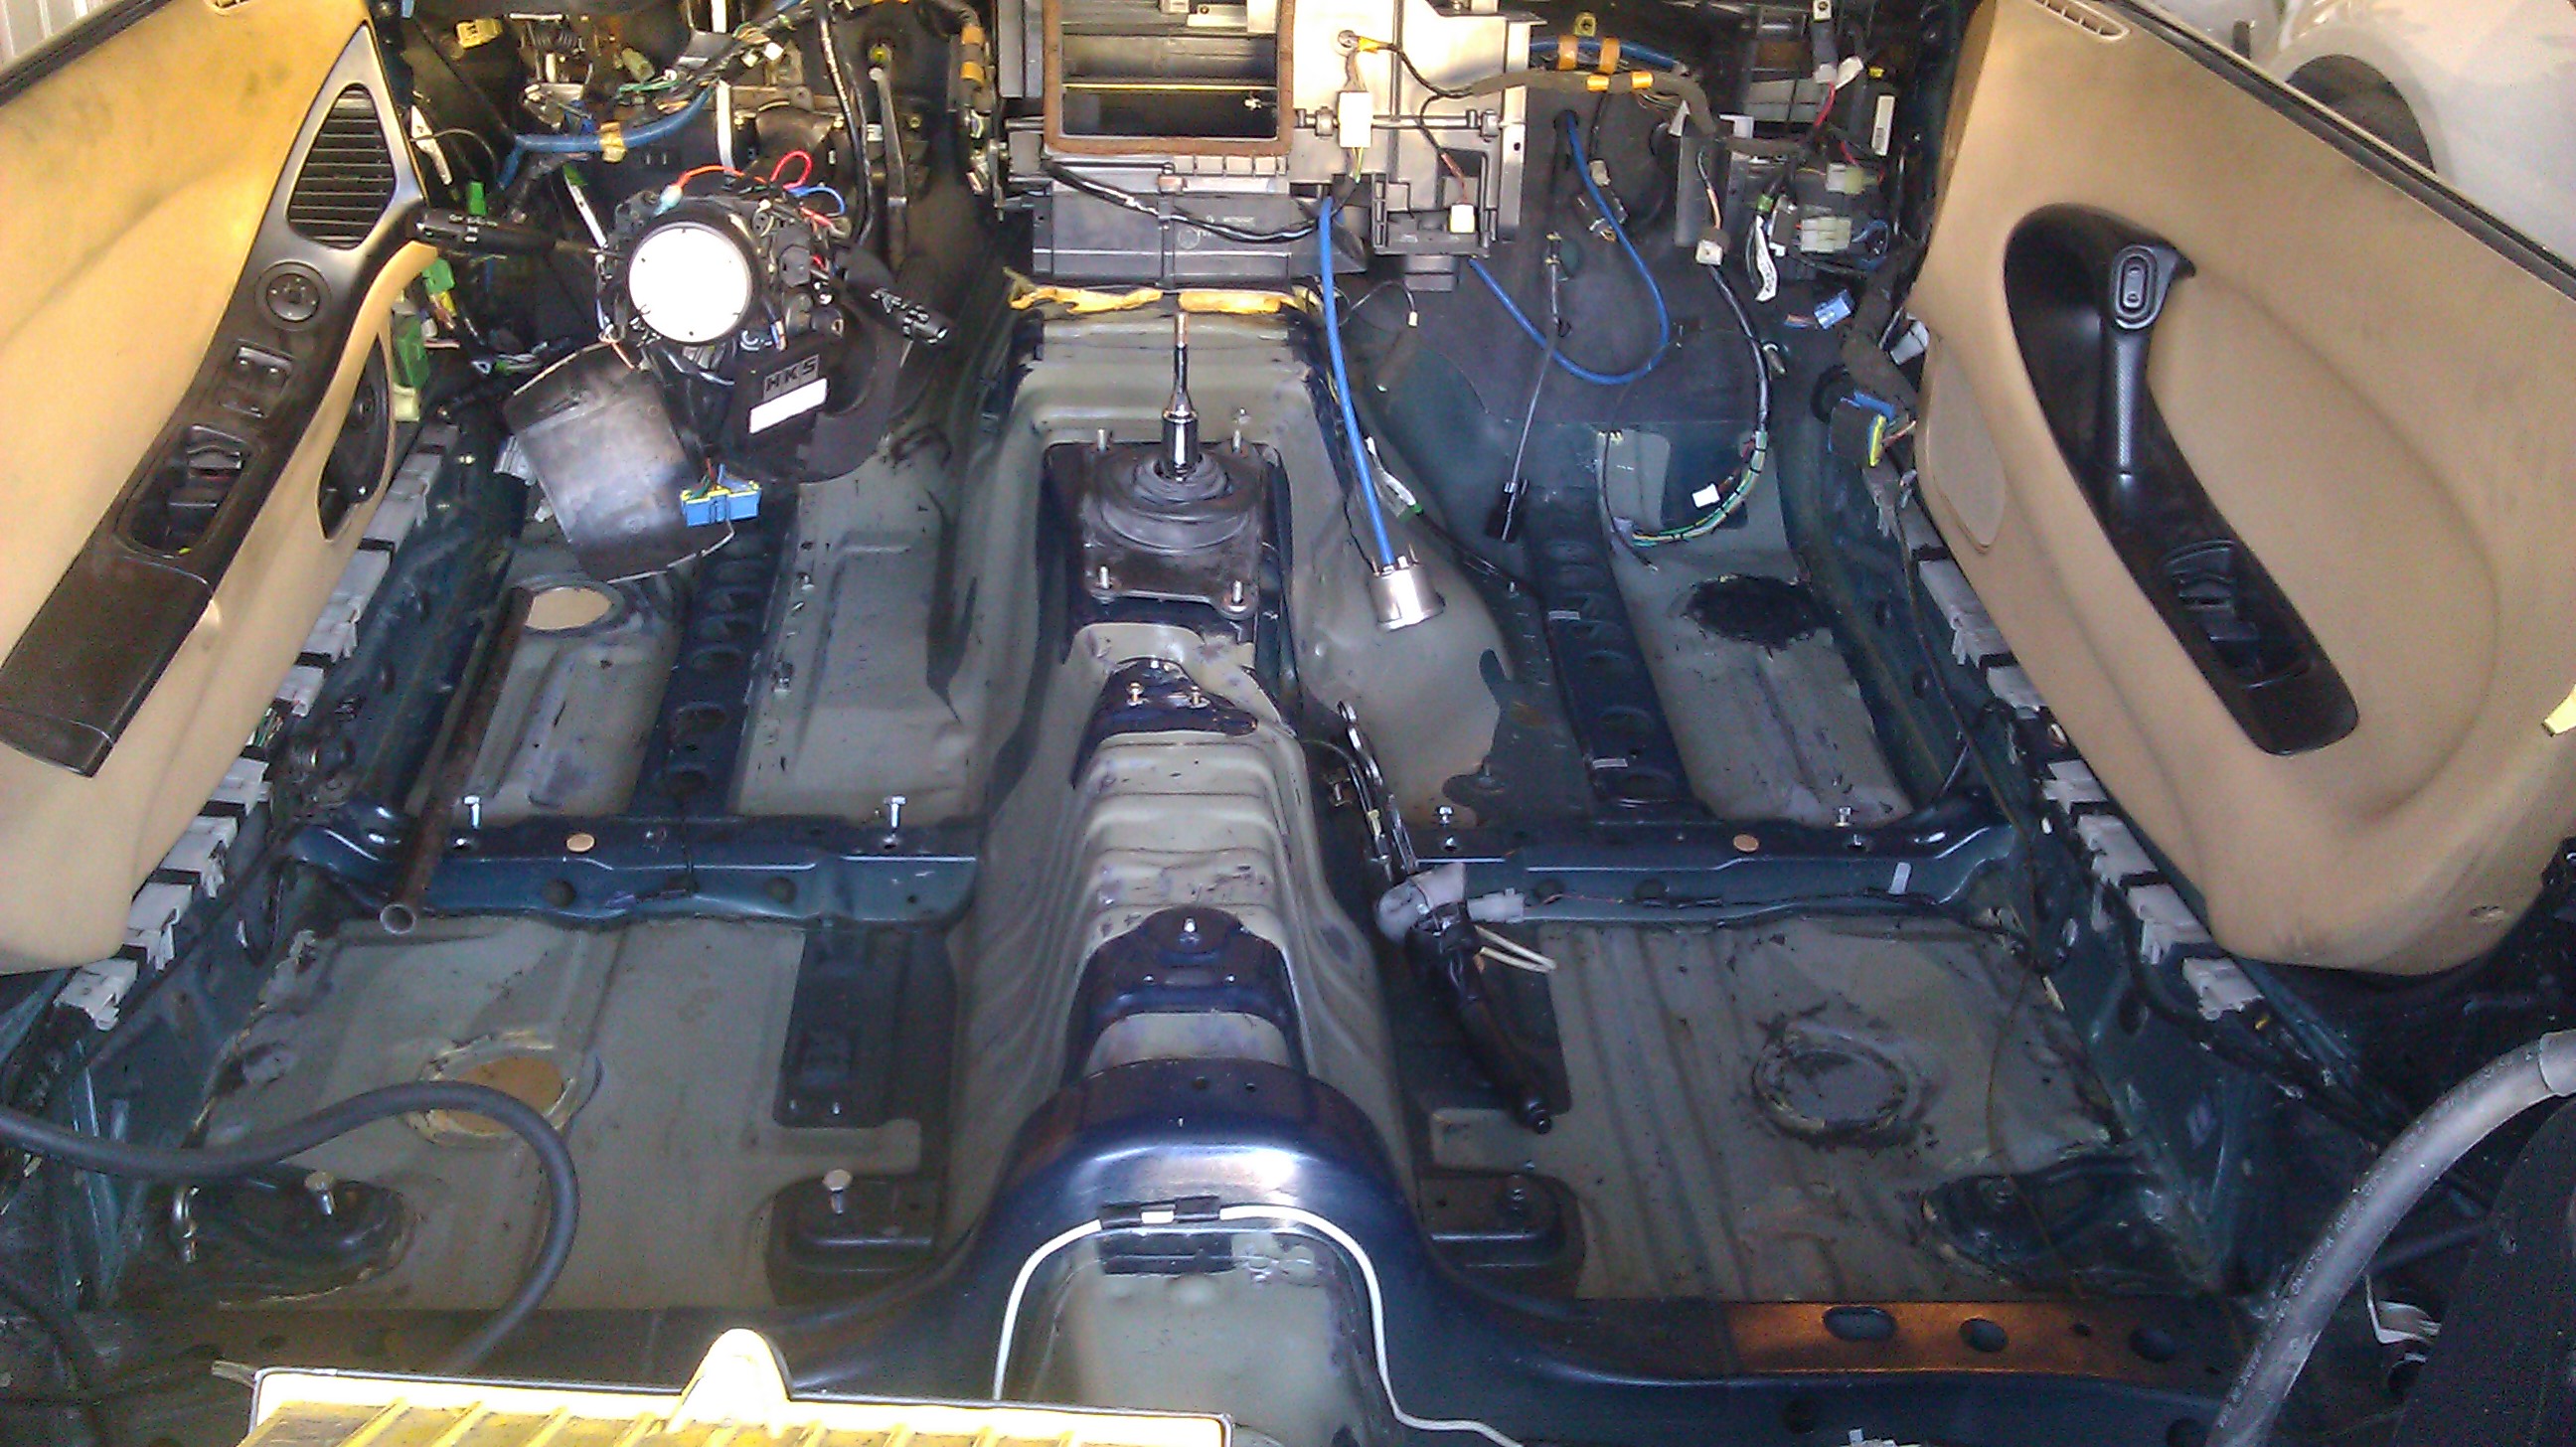
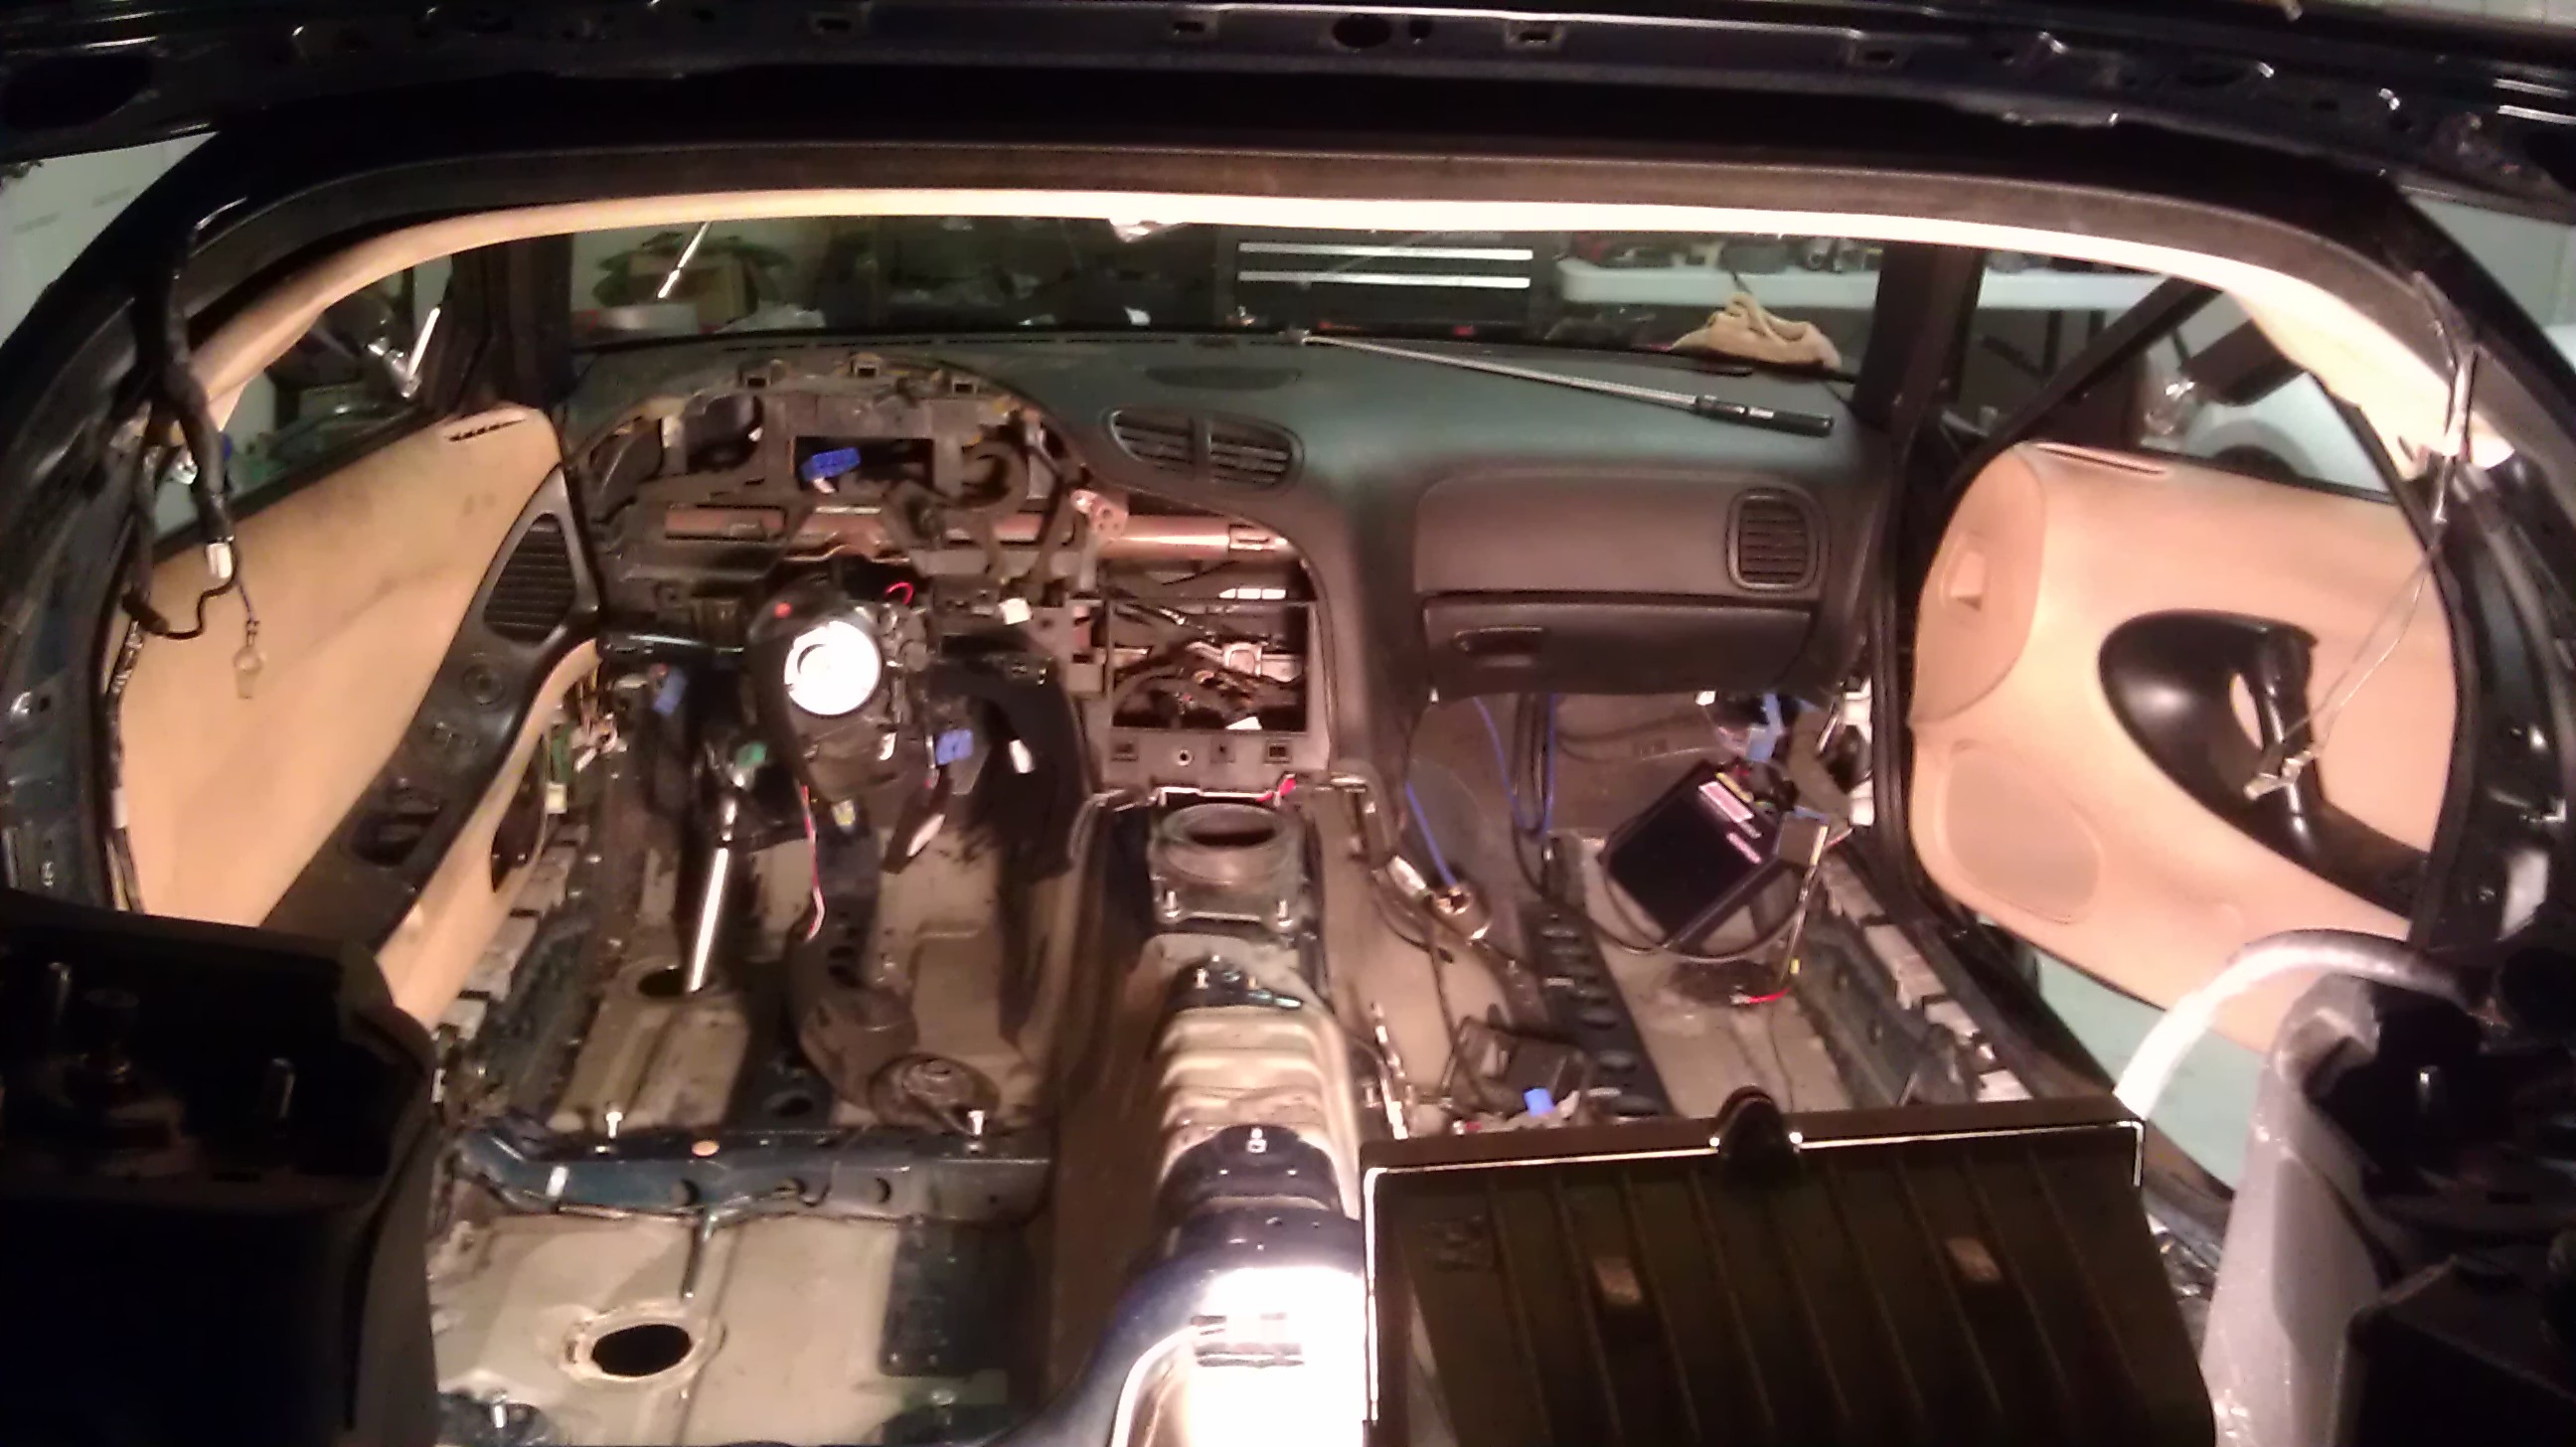
I also got the Dash back in the car..not bolted in but just in place.

So what did I accomplish last night?
- Went and purchased 25 10-24 sized allen head fastners for the over fenders
- Installed over-fenders (only thing that I had listed on my "to do" list
- Mocked up Side skirts to figure out mounting points
- Hit everything "Kit" oriented with black primer
- Connected all Body harness Connectors in-cabin on pass/Drvs side (so I know what I can delete)
- Ran my Coil harness (thanks C.Ludwig) from passenger side rear bin/battery..through firewall/found neat routing and around motor/vac block and around brake booster to coil location
- Connected grounds Engine/Chassis for that same harness
- Put dash in, ready for install
Also... wasn't paying attention and I cracked the windshield wiper lever when I was putting the dash in. Really sucks..as I'm keeping the wipers etc. I'll have to replace that and the Gauge hood I accidently sold thinking I had 2..<---Stooopes..
Well, ...more updates soon!! stay tuned!!
Couldn't help but mock up the front fenders as well to get a good look at how the car will look.
One more pic just because
I also got the Dash back in the car..not bolted in but just in place.
So what did I accomplish last night?
- Went and purchased 25 10-24 sized allen head fastners for the over fenders
- Installed over-fenders (only thing that I had listed on my "to do" list
- Mocked up Side skirts to figure out mounting points
- Hit everything "Kit" oriented with black primer
- Connected all Body harness Connectors in-cabin on pass/Drvs side (so I know what I can delete)
- Ran my Coil harness (thanks C.Ludwig) from passenger side rear bin/battery..through firewall/found neat routing and around motor/vac block and around brake booster to coil location
- Connected grounds Engine/Chassis for that same harness
- Put dash in, ready for install
Also... wasn't paying attention and I cracked the windshield wiper lever when I was putting the dash in. Really sucks..as I'm keeping the wipers etc. I'll have to replace that and the Gauge hood I accidently sold thinking I had 2..<---Stooopes..
Well, ...more updates soon!! stay tuned!!
That's how I had planned on mounting the rear fenders if I were to do over fenders. Will work great. Also, Mcmaster Carr has tones of sizes in the nutserts that you can buy by the bag.
^ Yea I'm going to keep them for the time being. As i'm sure you guys have noticed i'm not really willing to start making life difficult for myself. I don't have the patience for body work haha

RX 4BPT
Joined: Feb 2011
Posts: 293
Likes: 0
From: Huddersfield, England
im sure whoever your getting to paint the car will be able to glass over the gap in thre over fender before painting, nice and easy
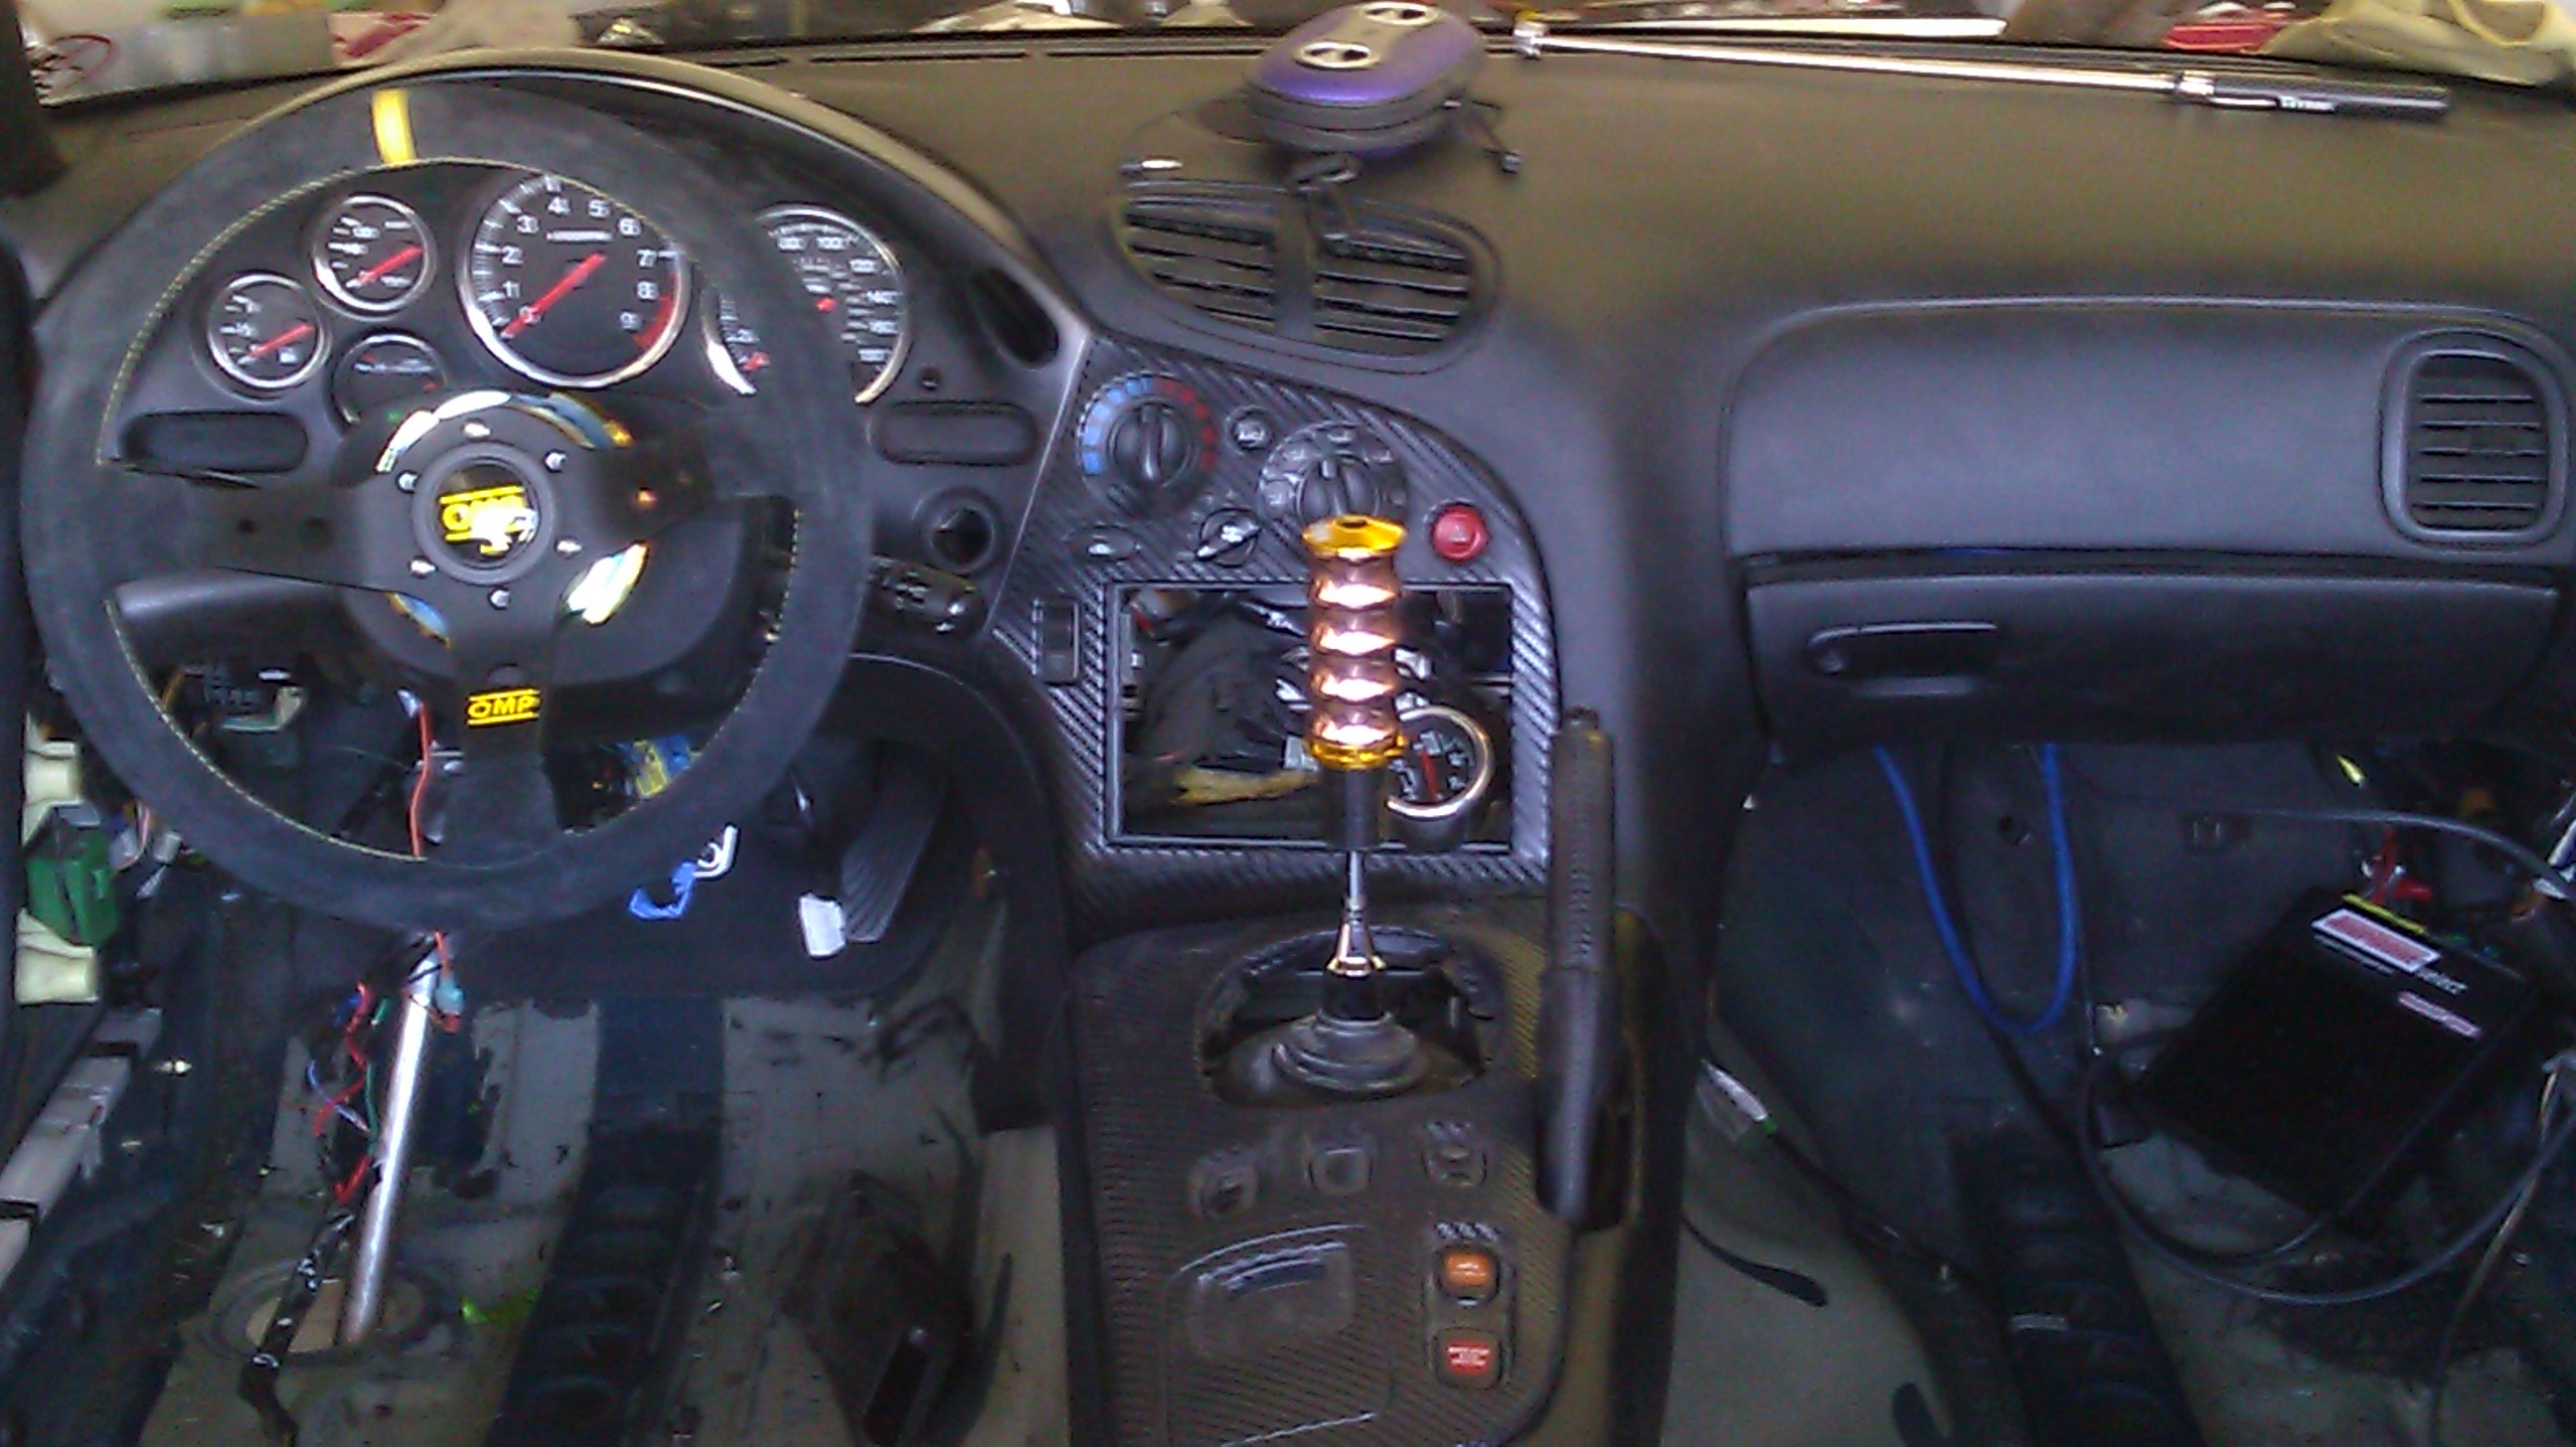
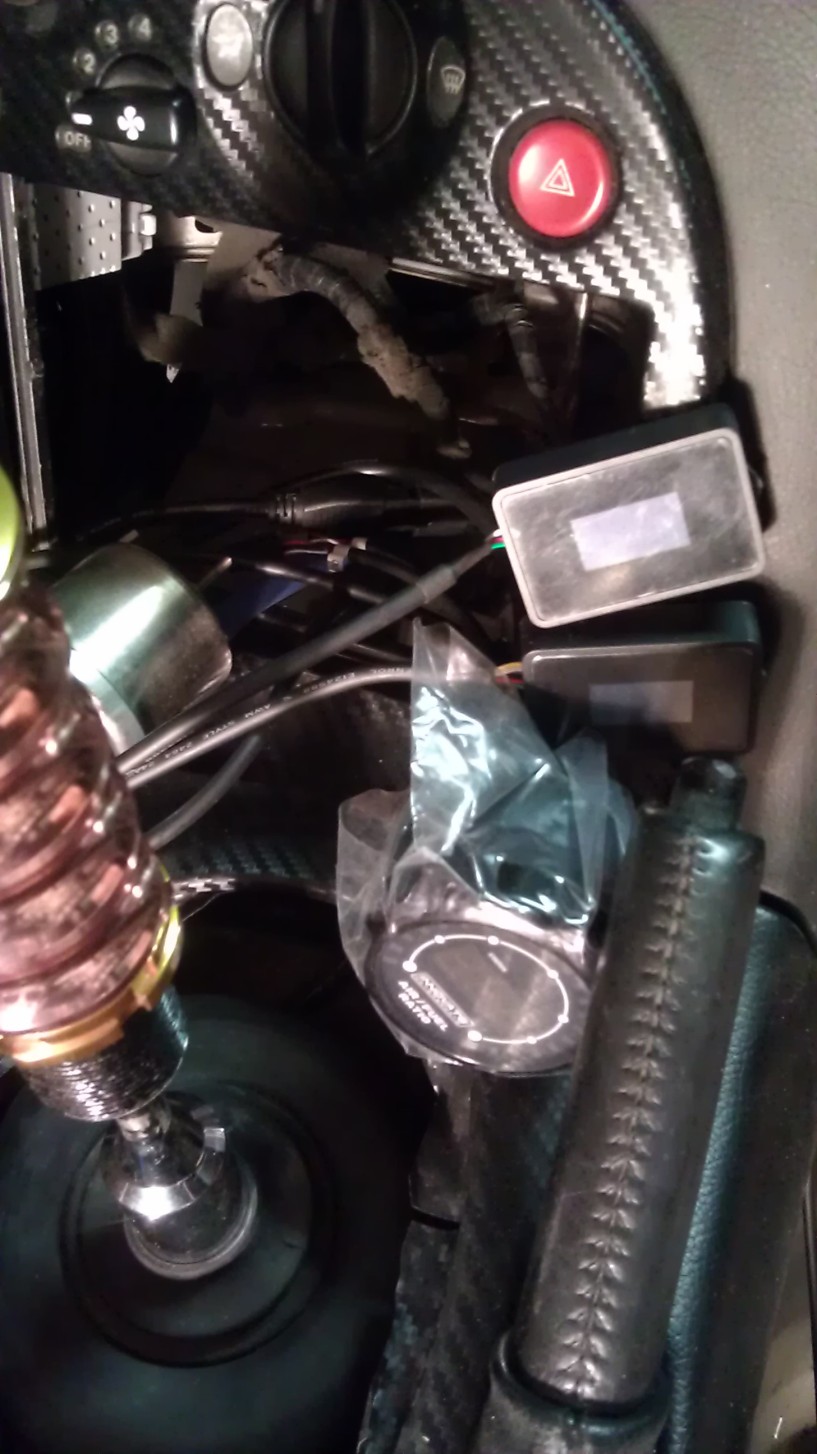
Update: "ahhh the little things..and wiring...and wiring..and routing..and wiring.."
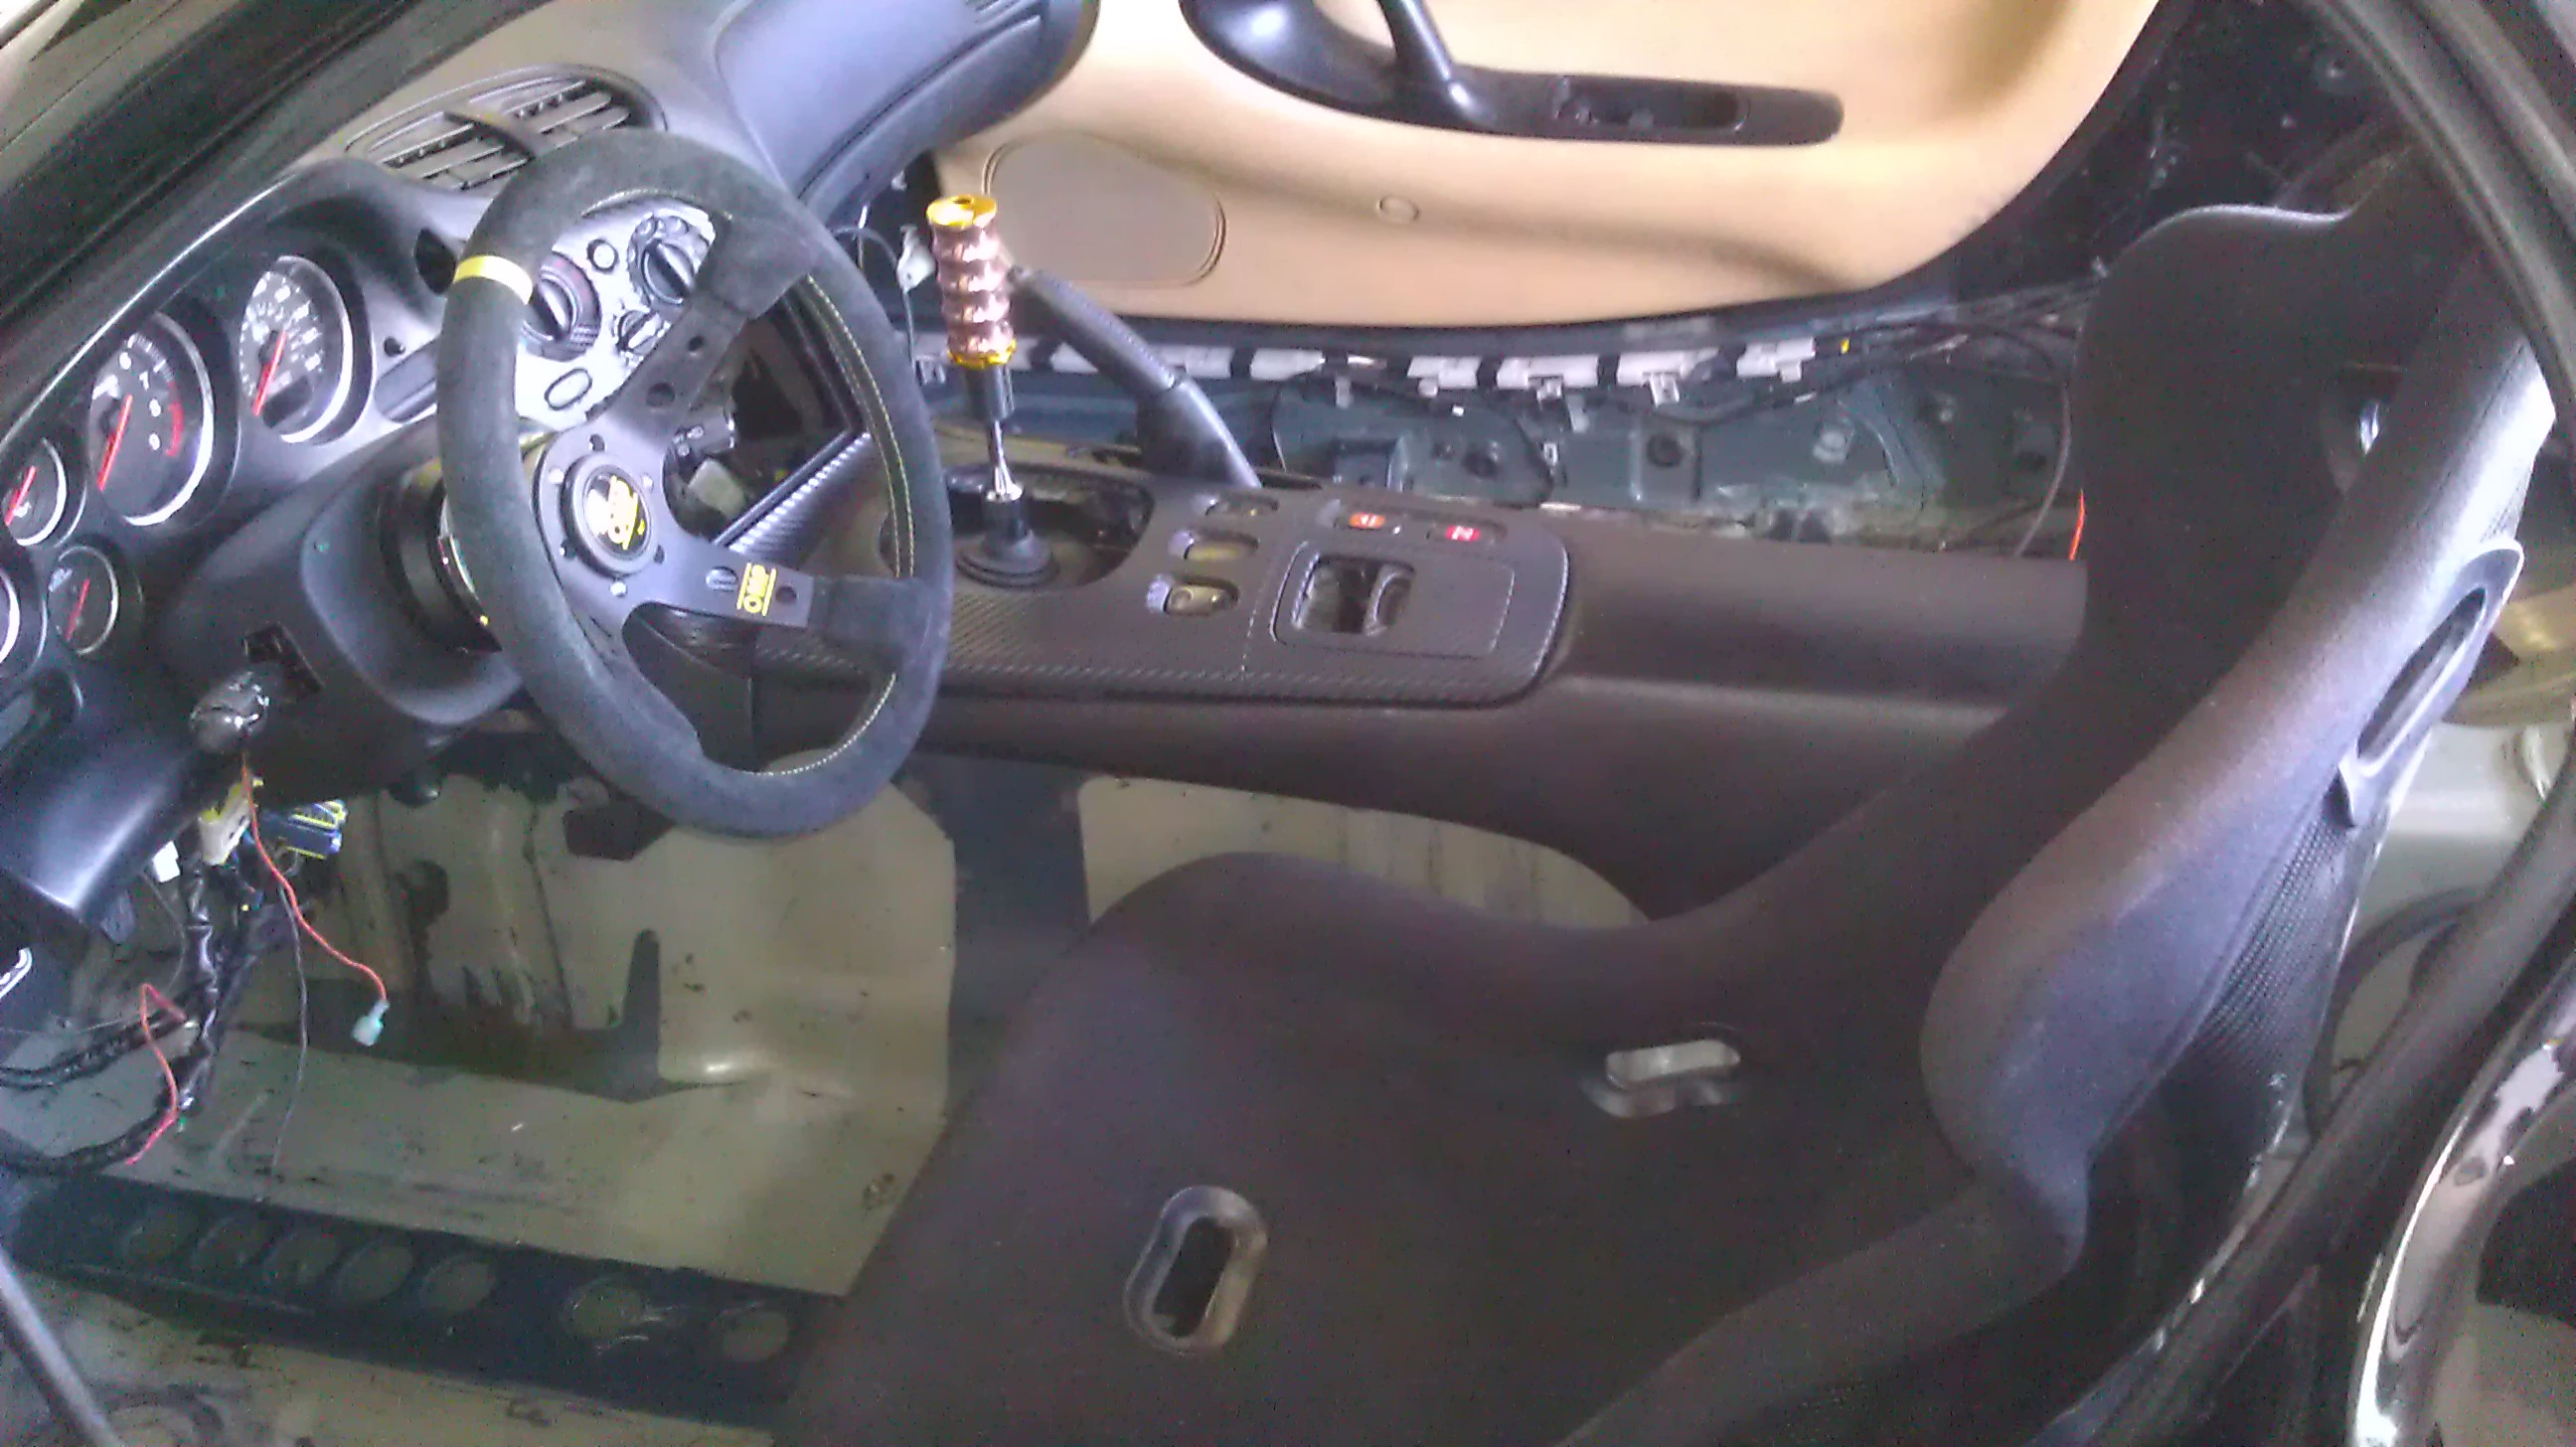
So I got to working on the Interior
before
dash in
Progress
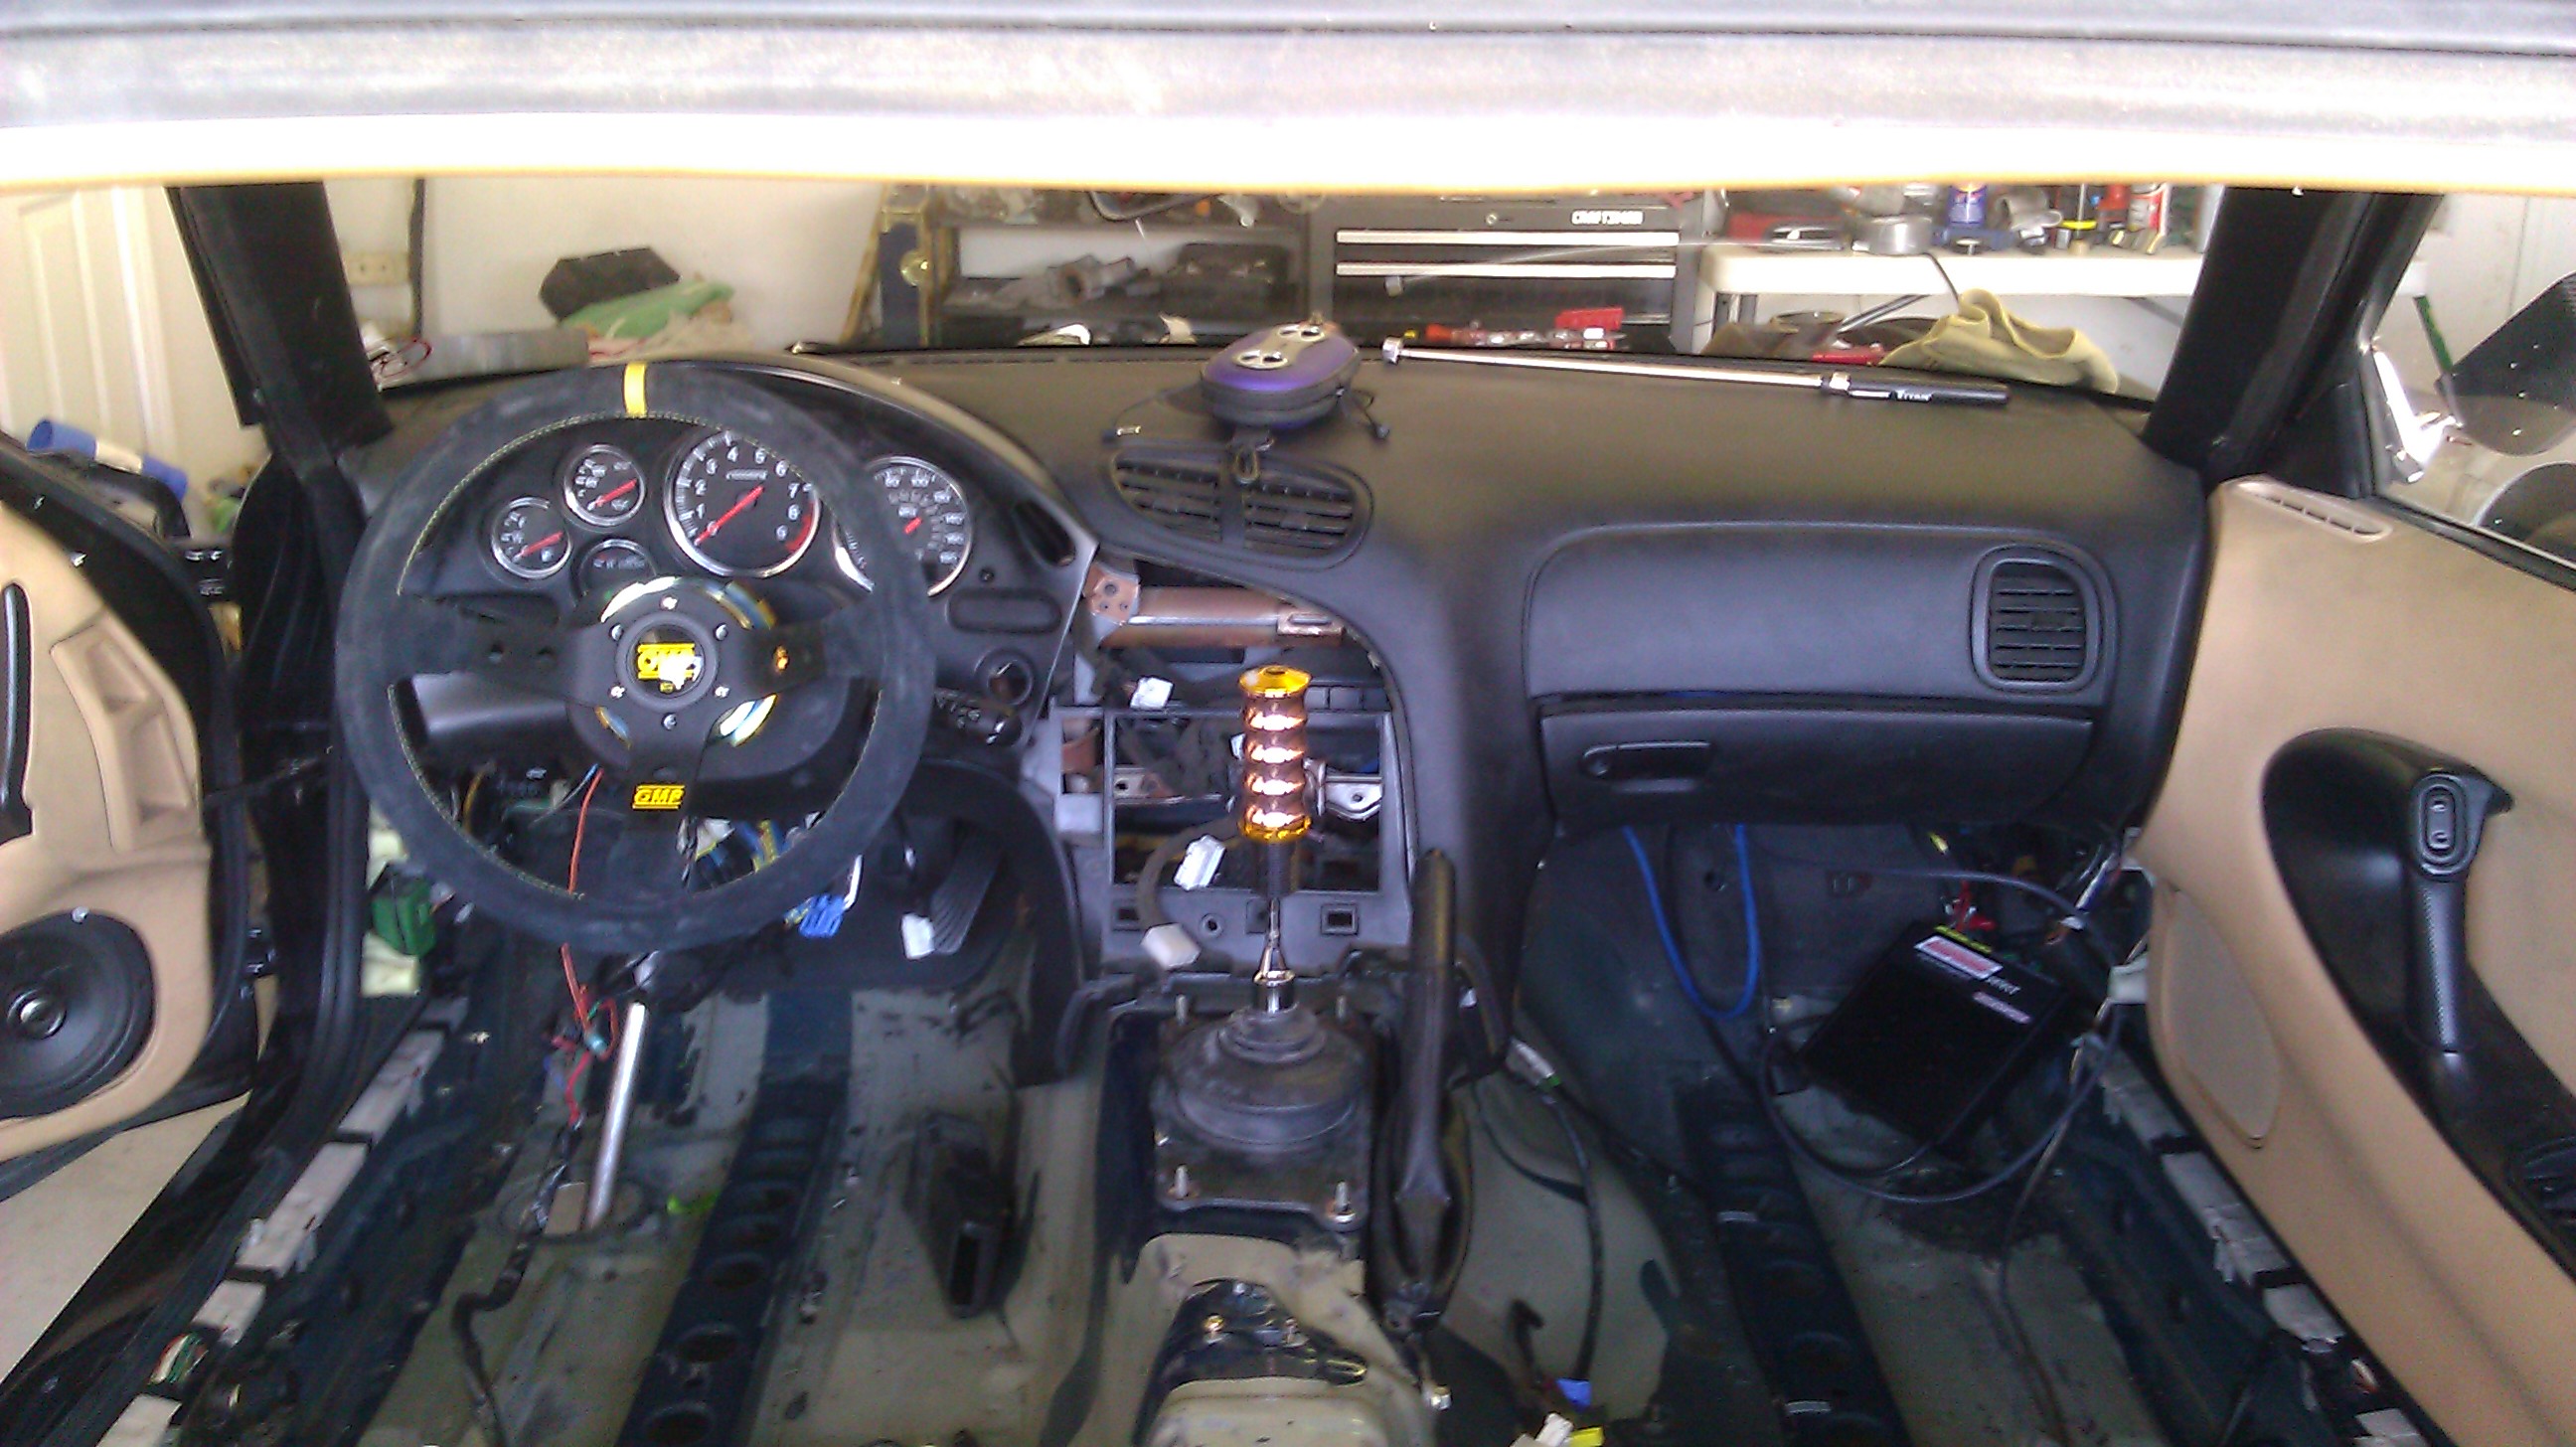
ahh nice.....look it's actually a car I'm working on!! haha
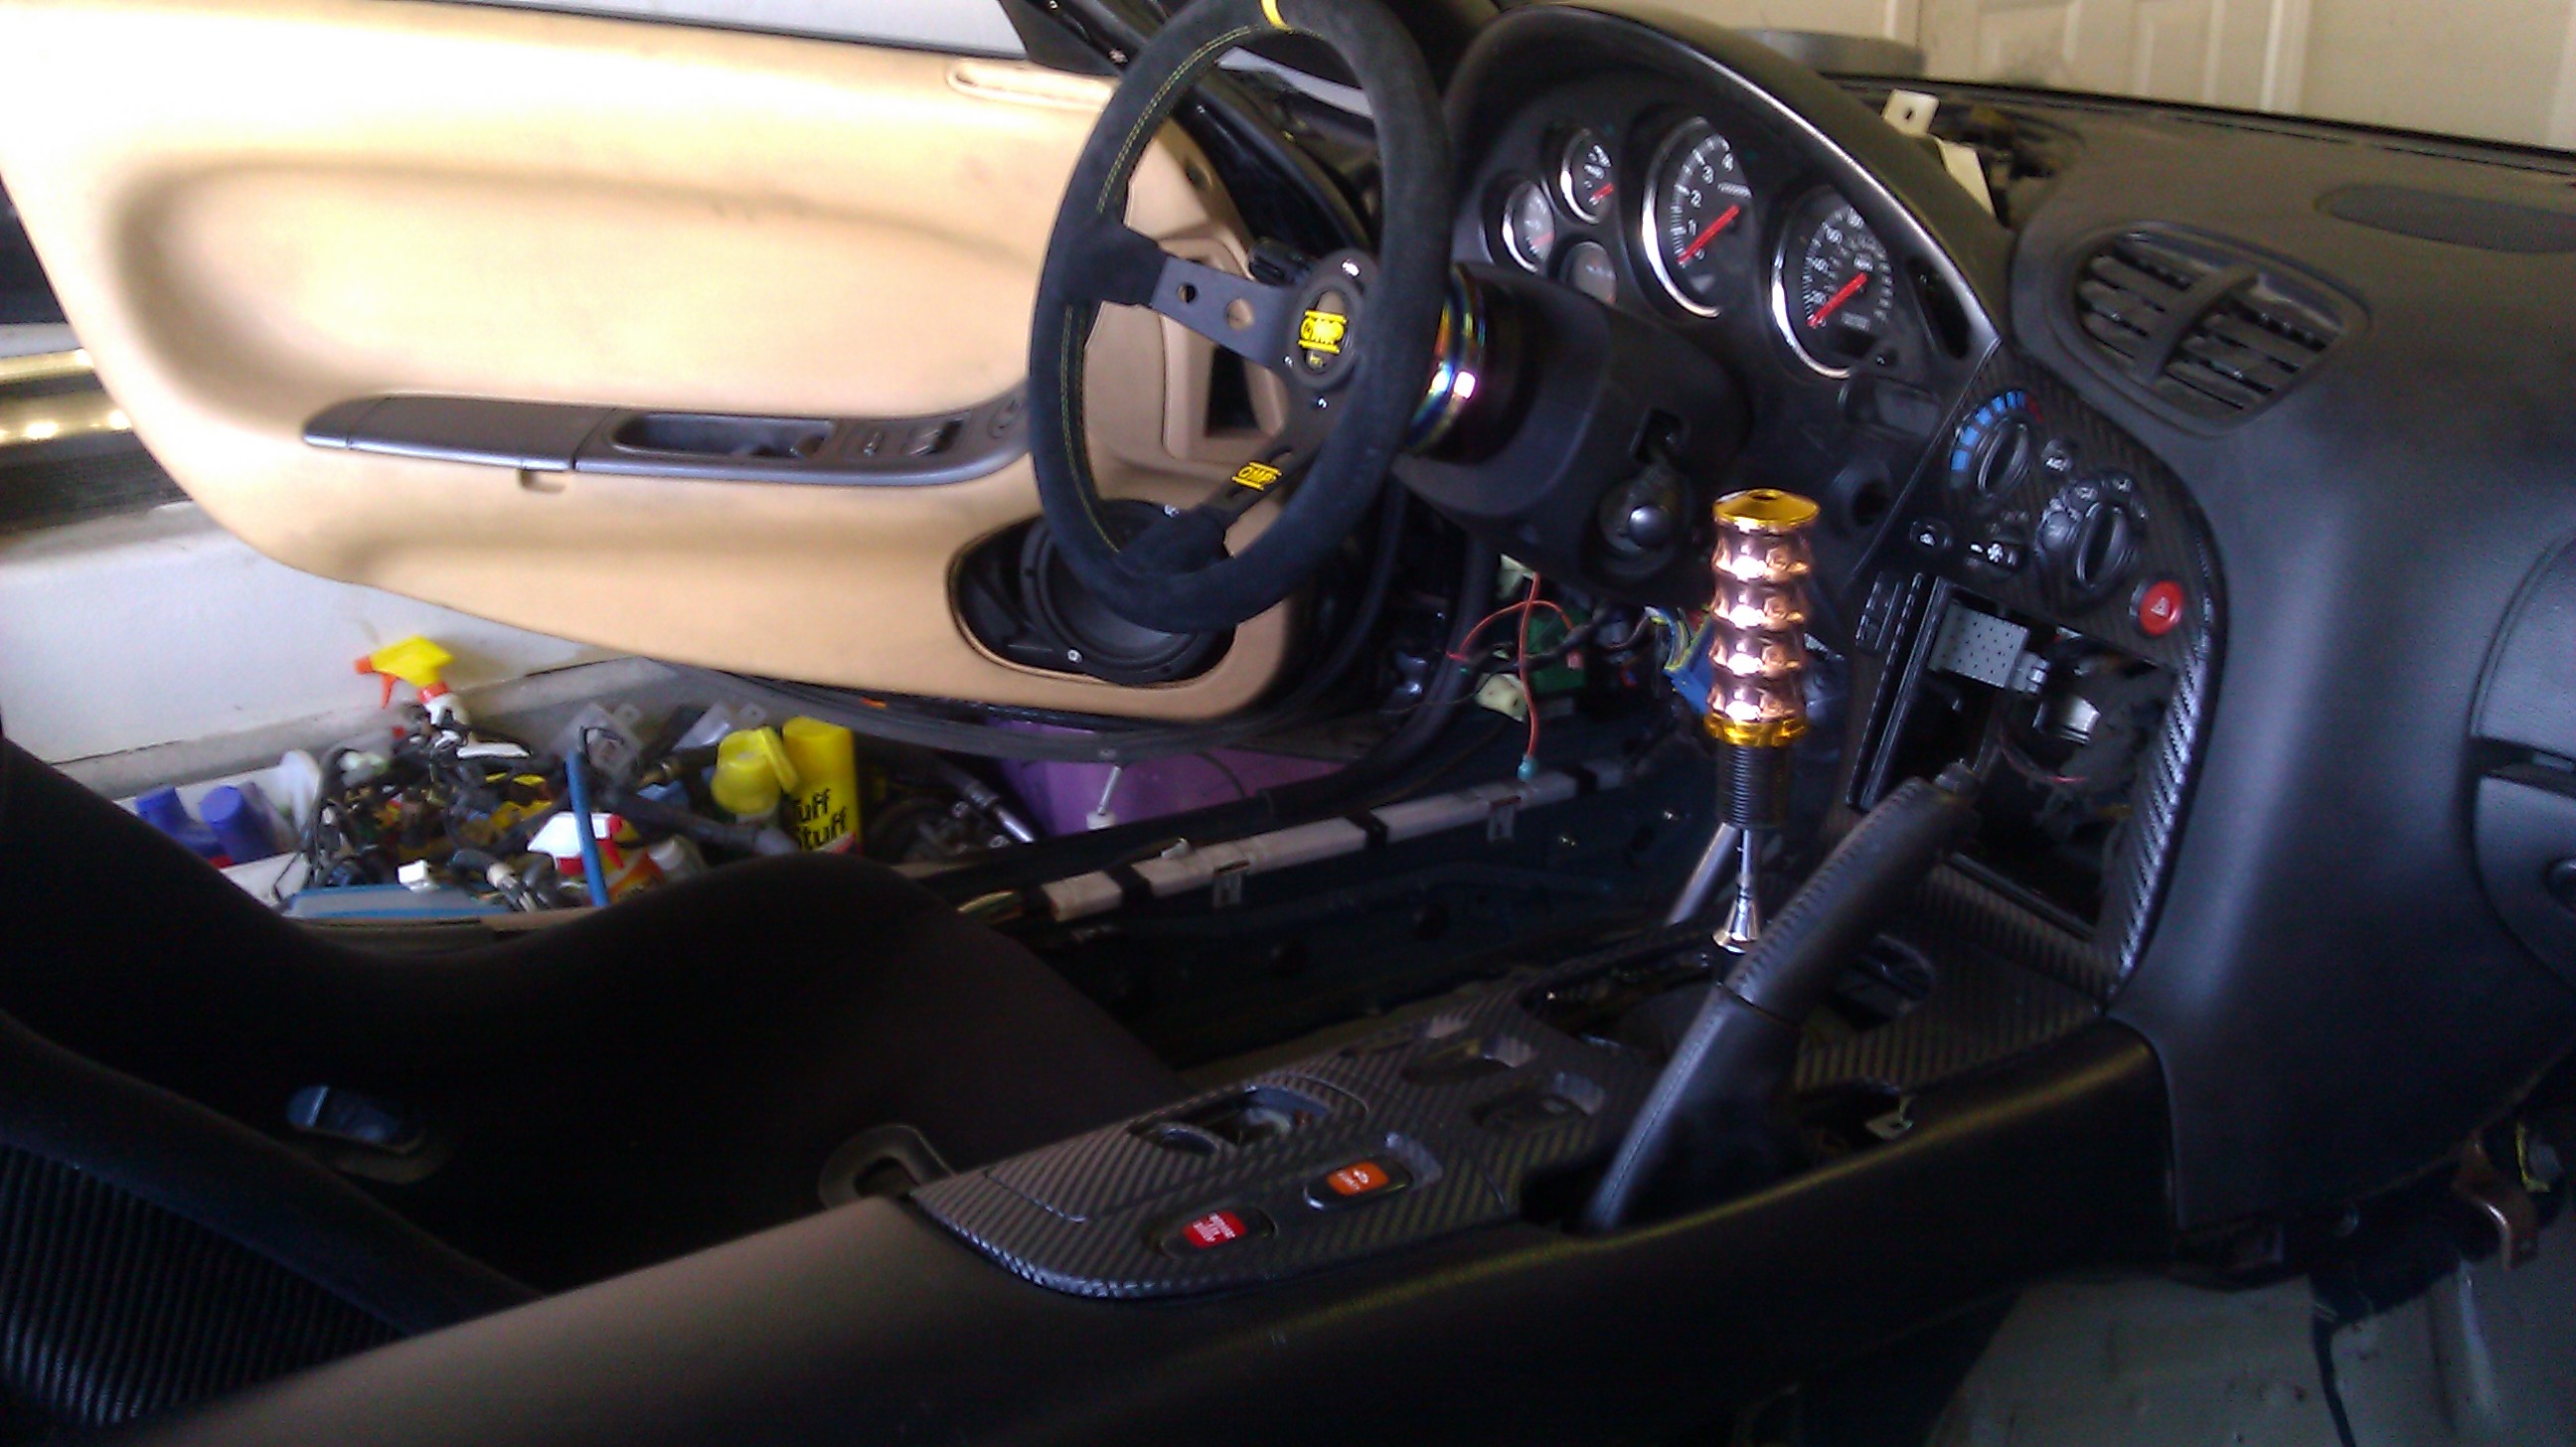
Seat in
money angle
So I got to working on the Interior
before
dash in
Progress
ahh nice.....look it's actually a car I'm working on!! haha
Seat in
money angle
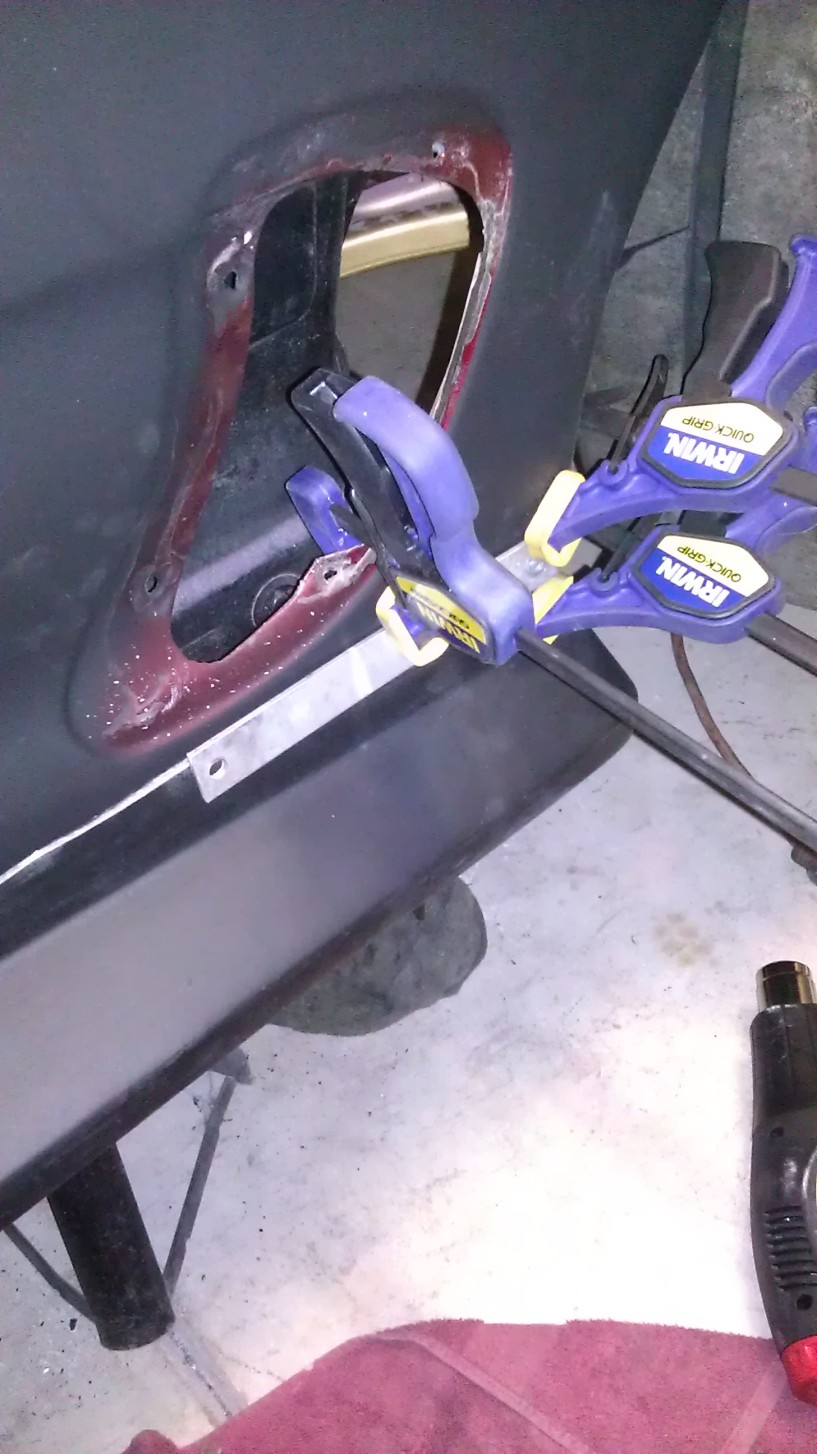
Continued......
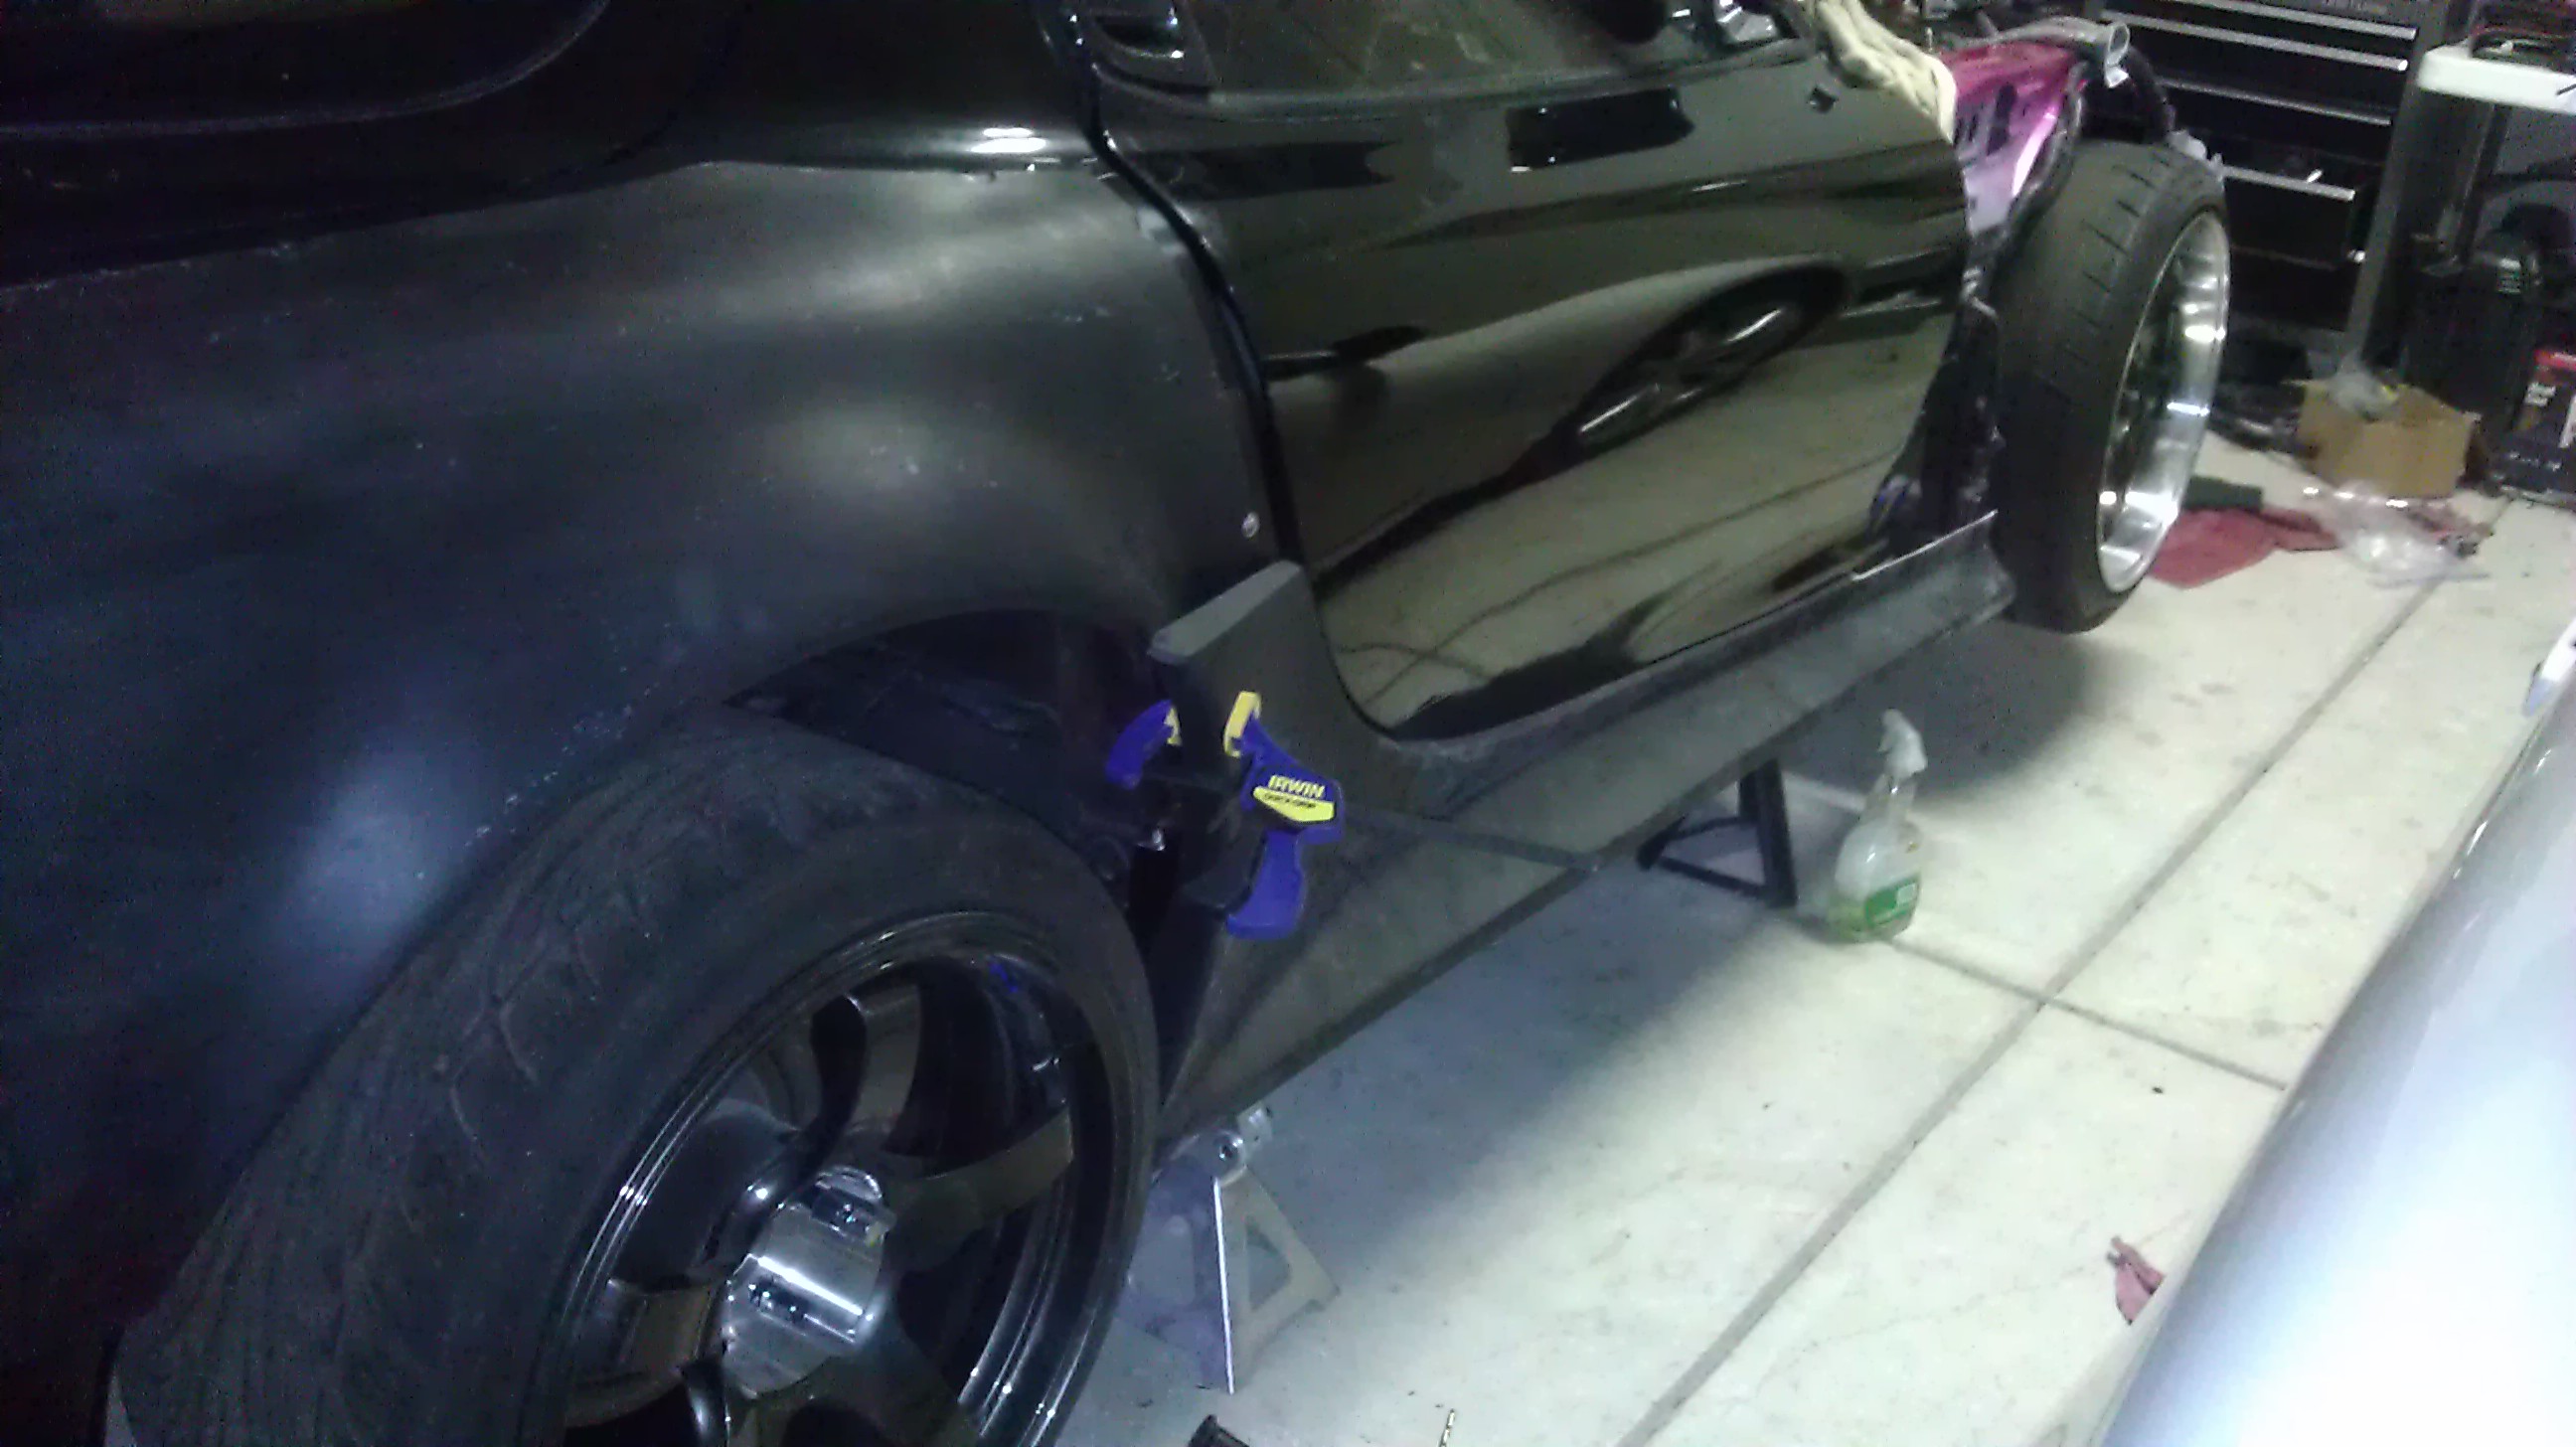
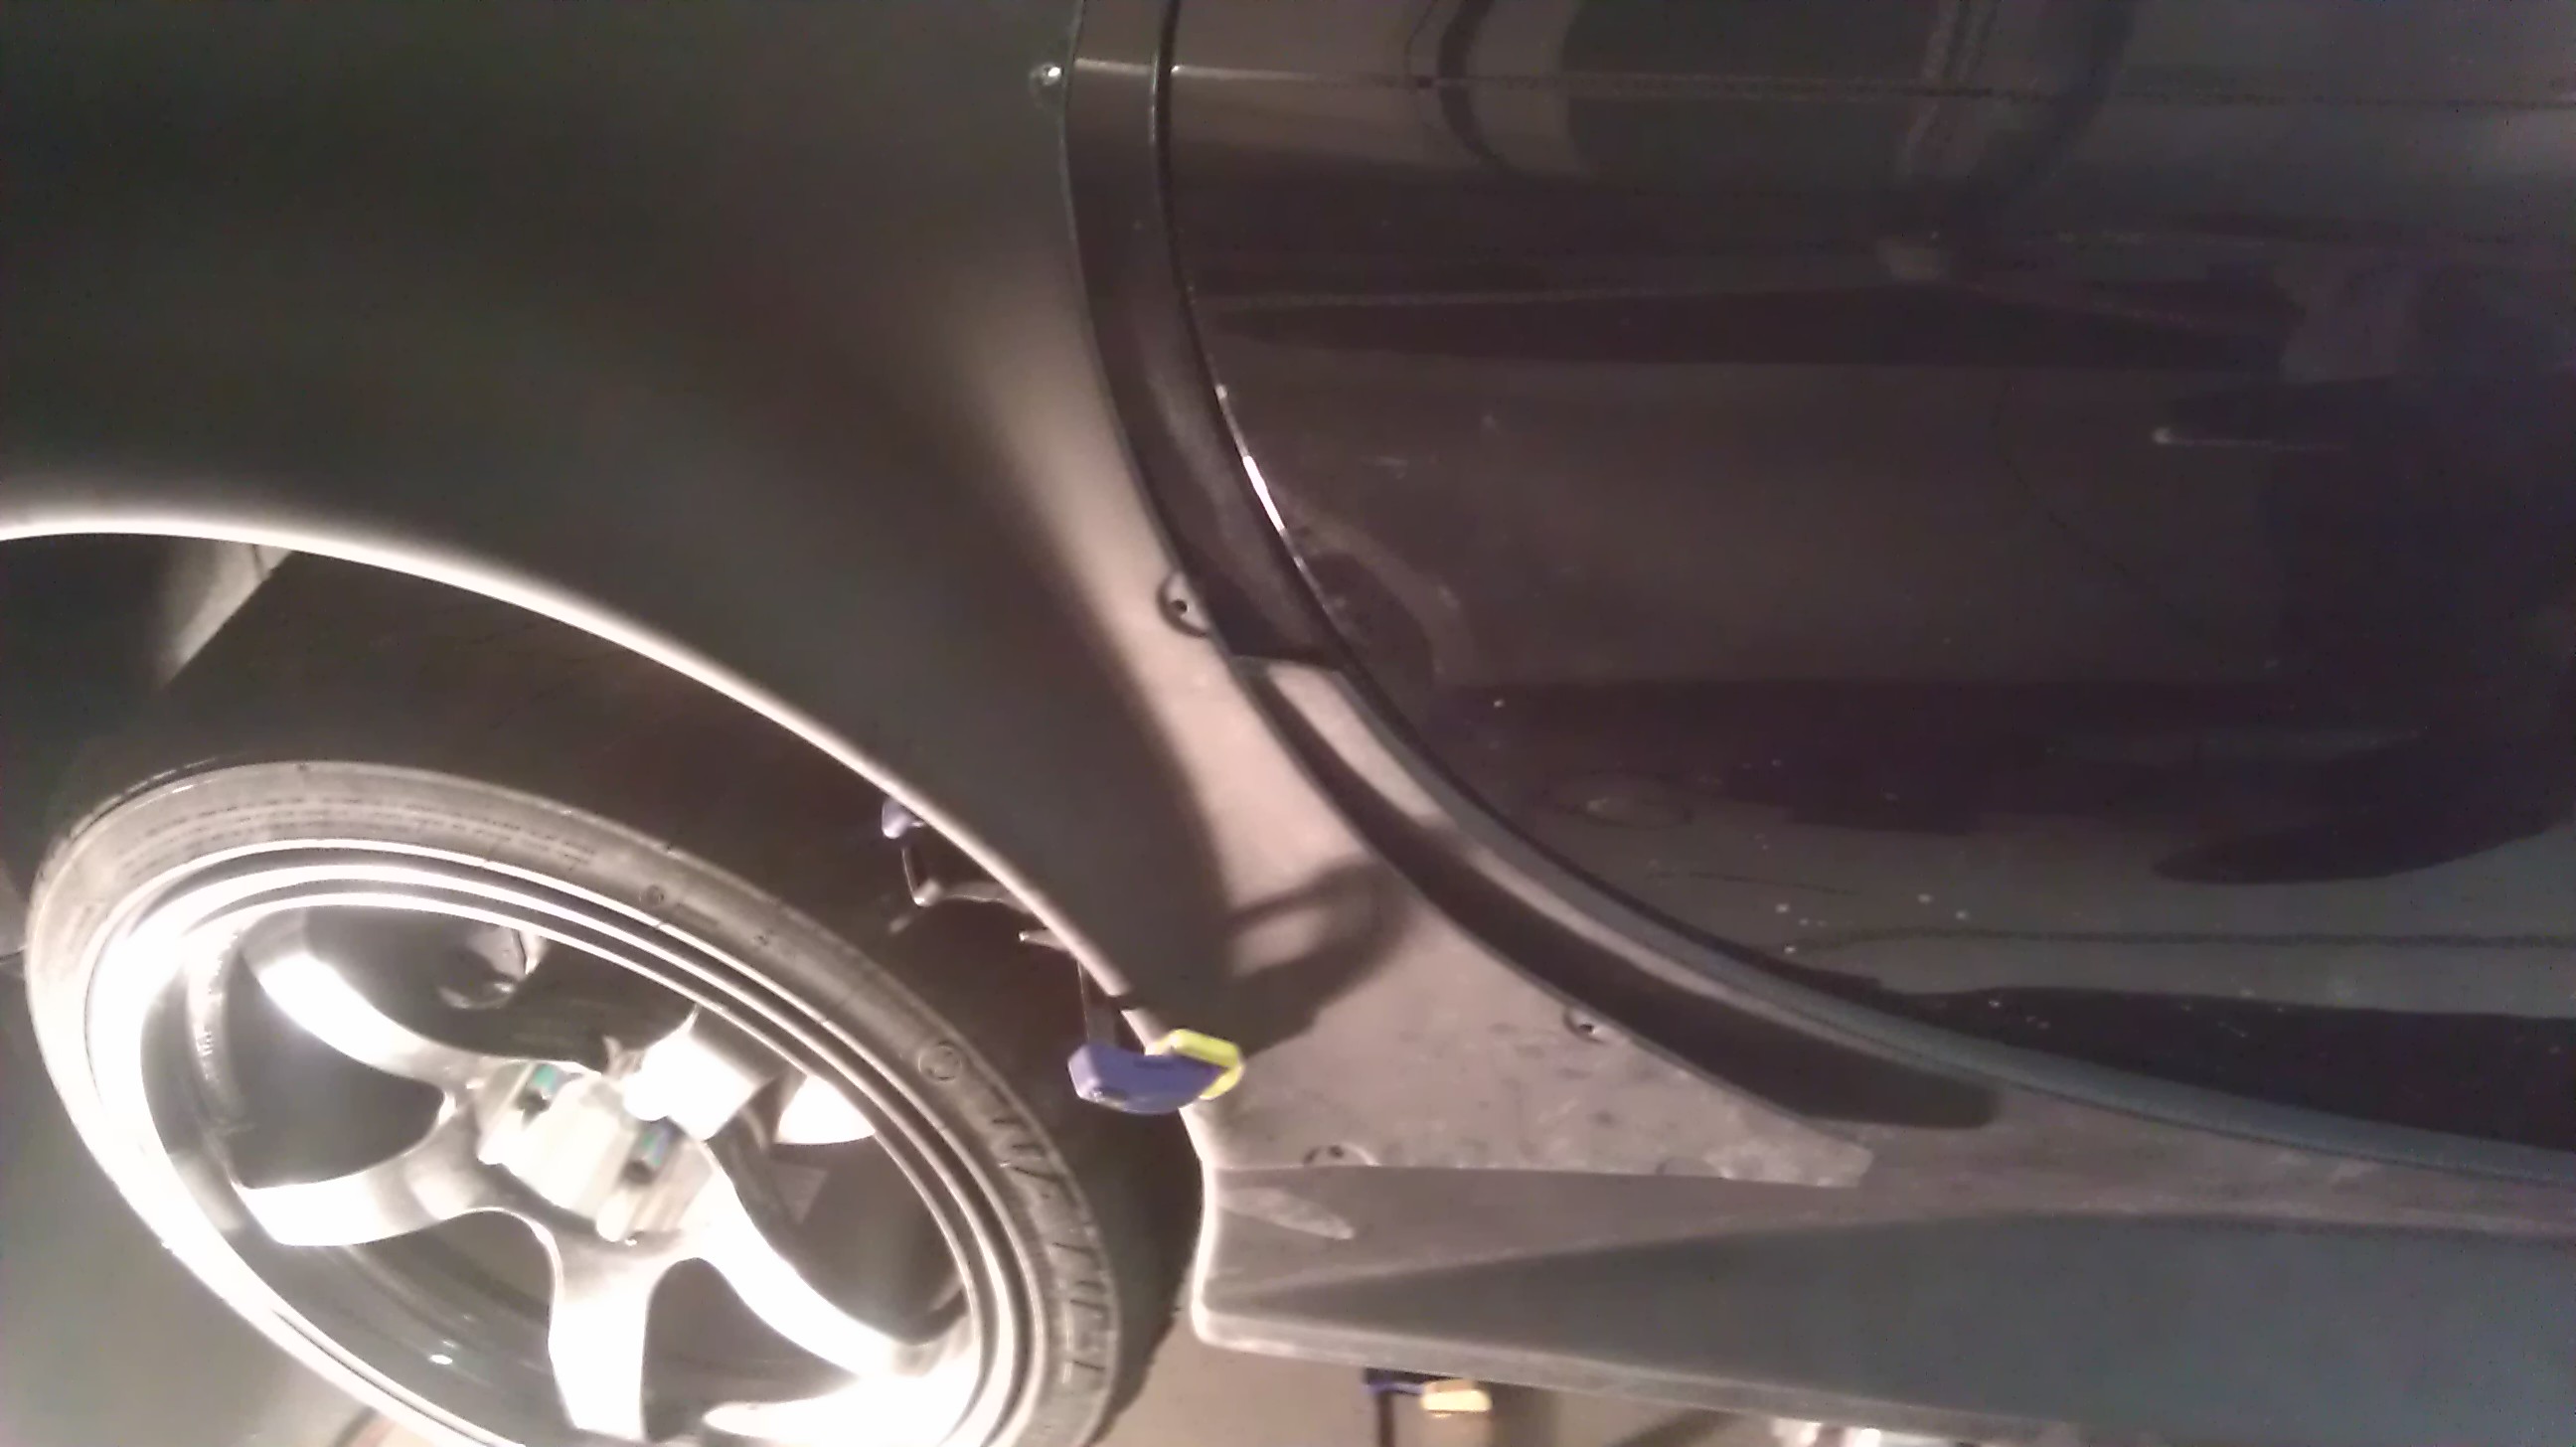
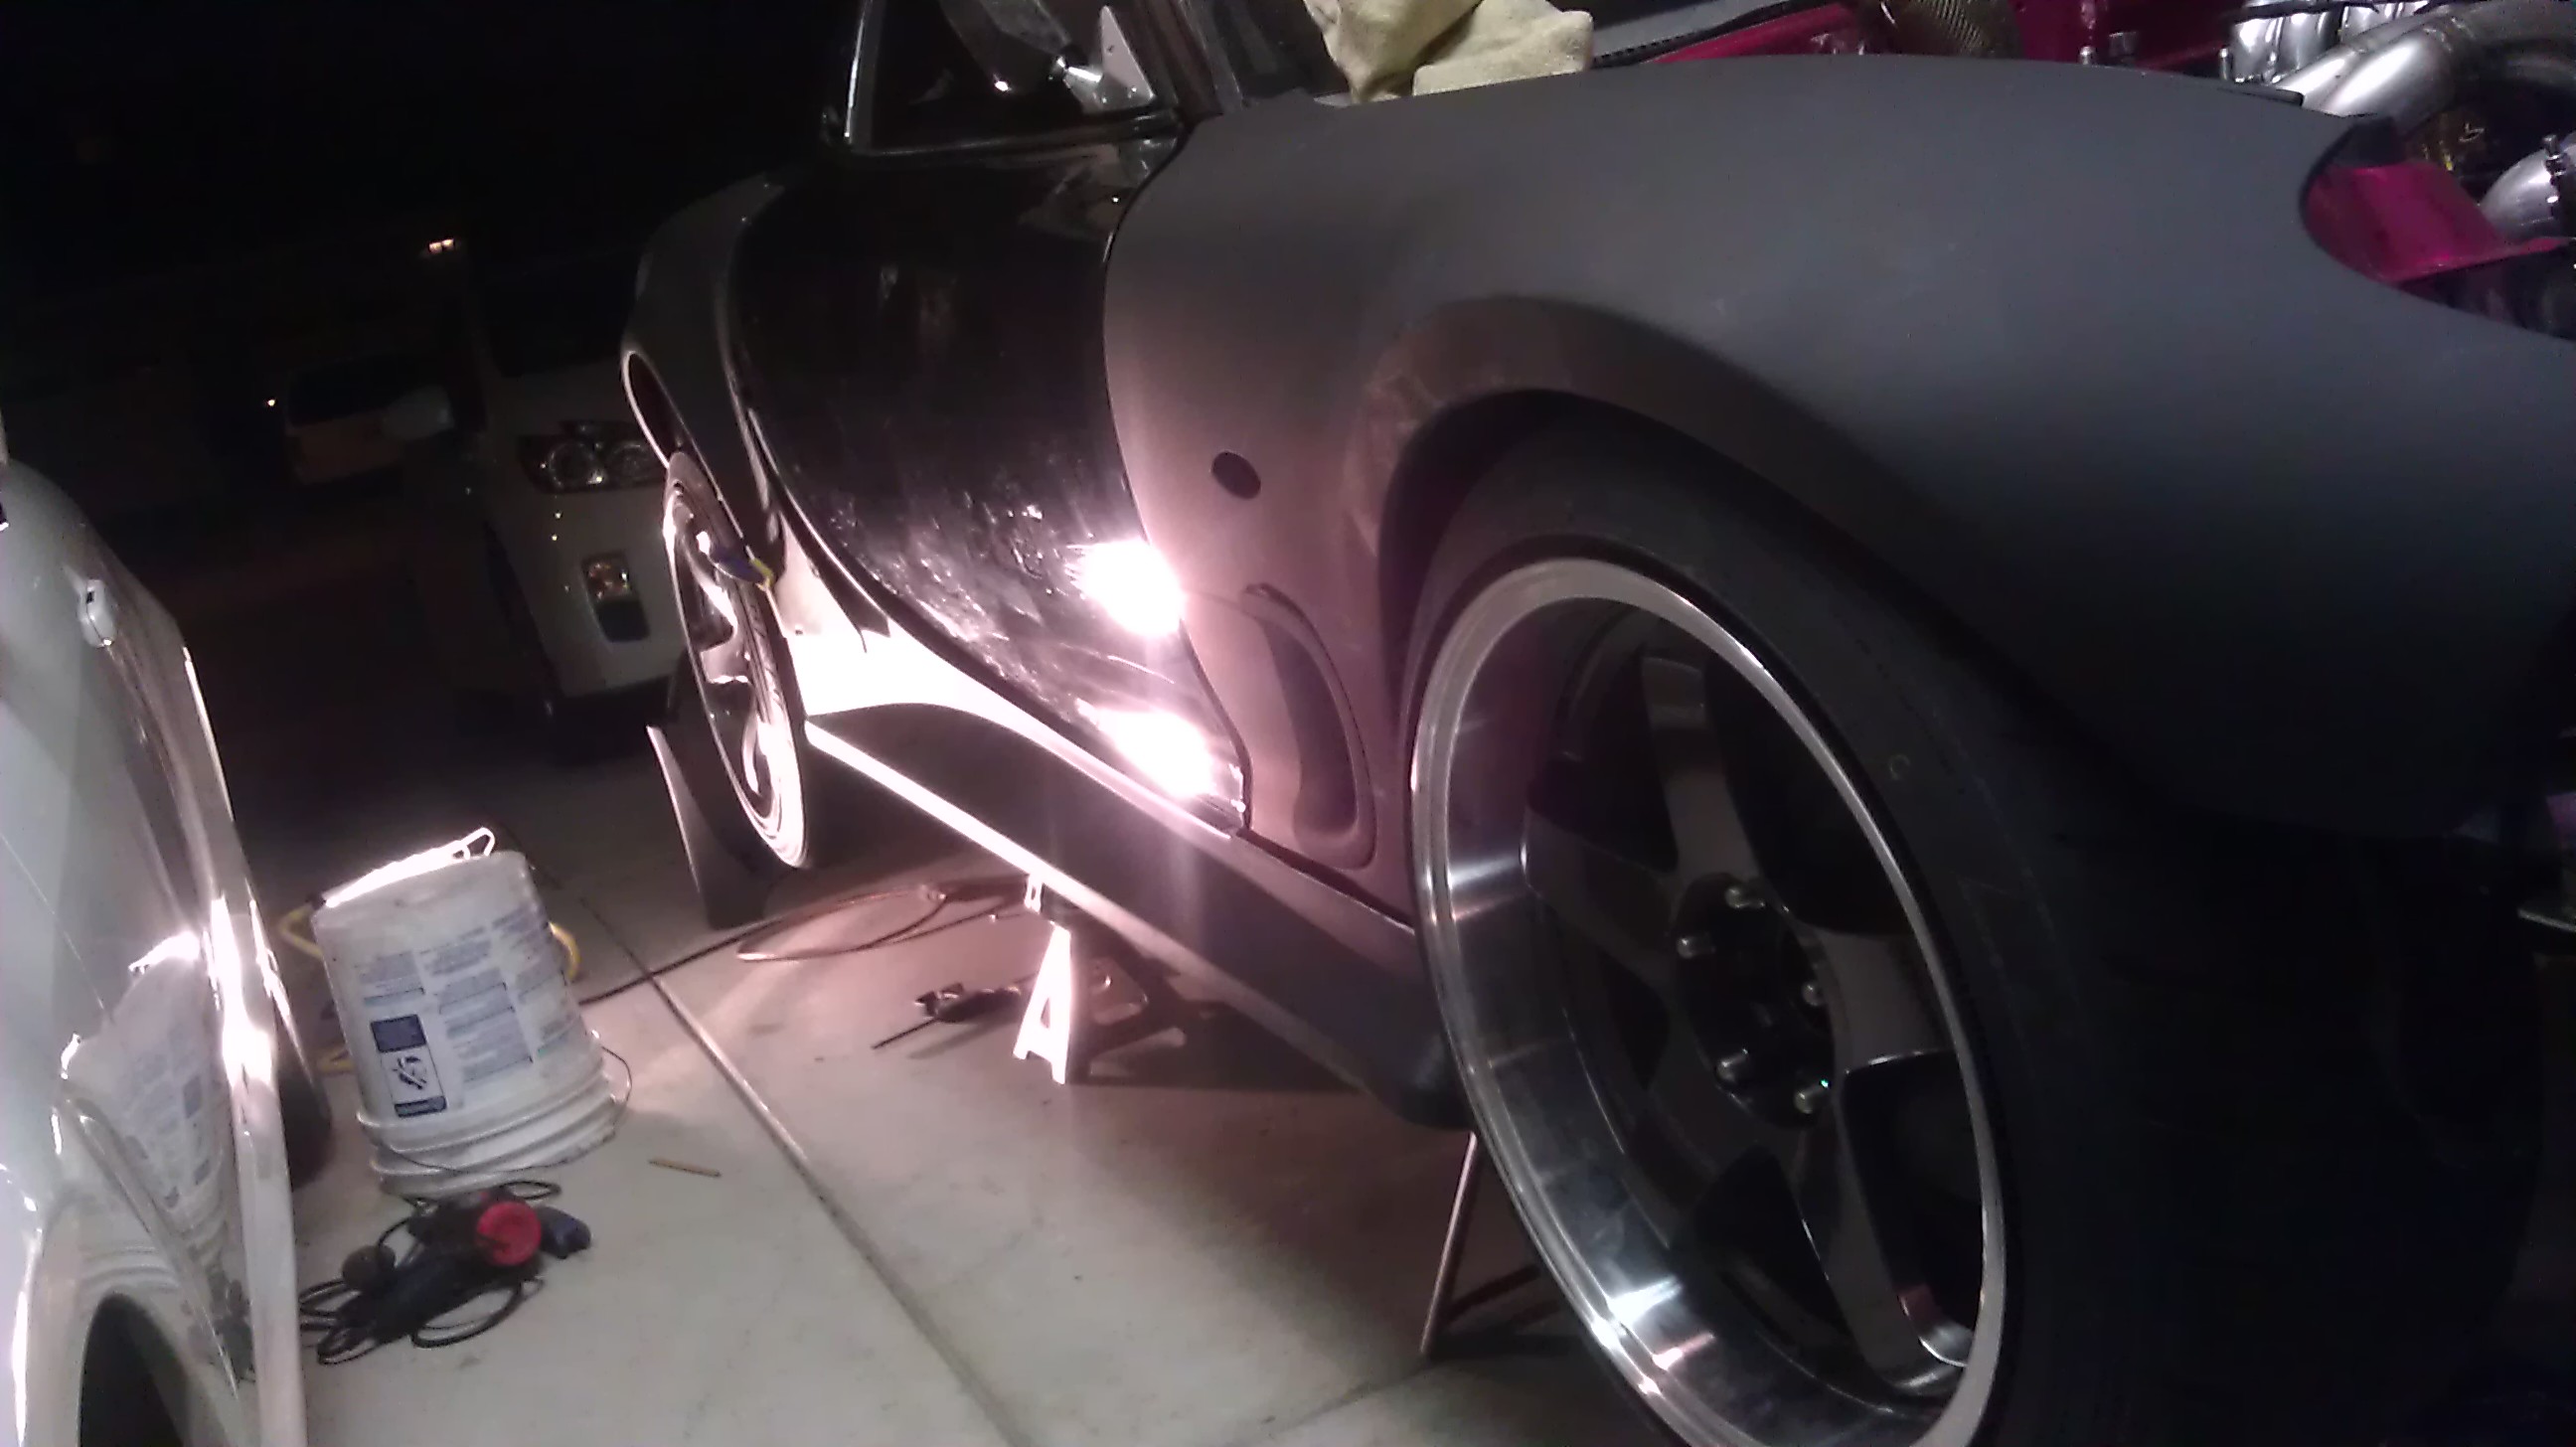
Got to mounting the side skirts in a more permanent solid way.. these harbor freight clamps have helped tremendously
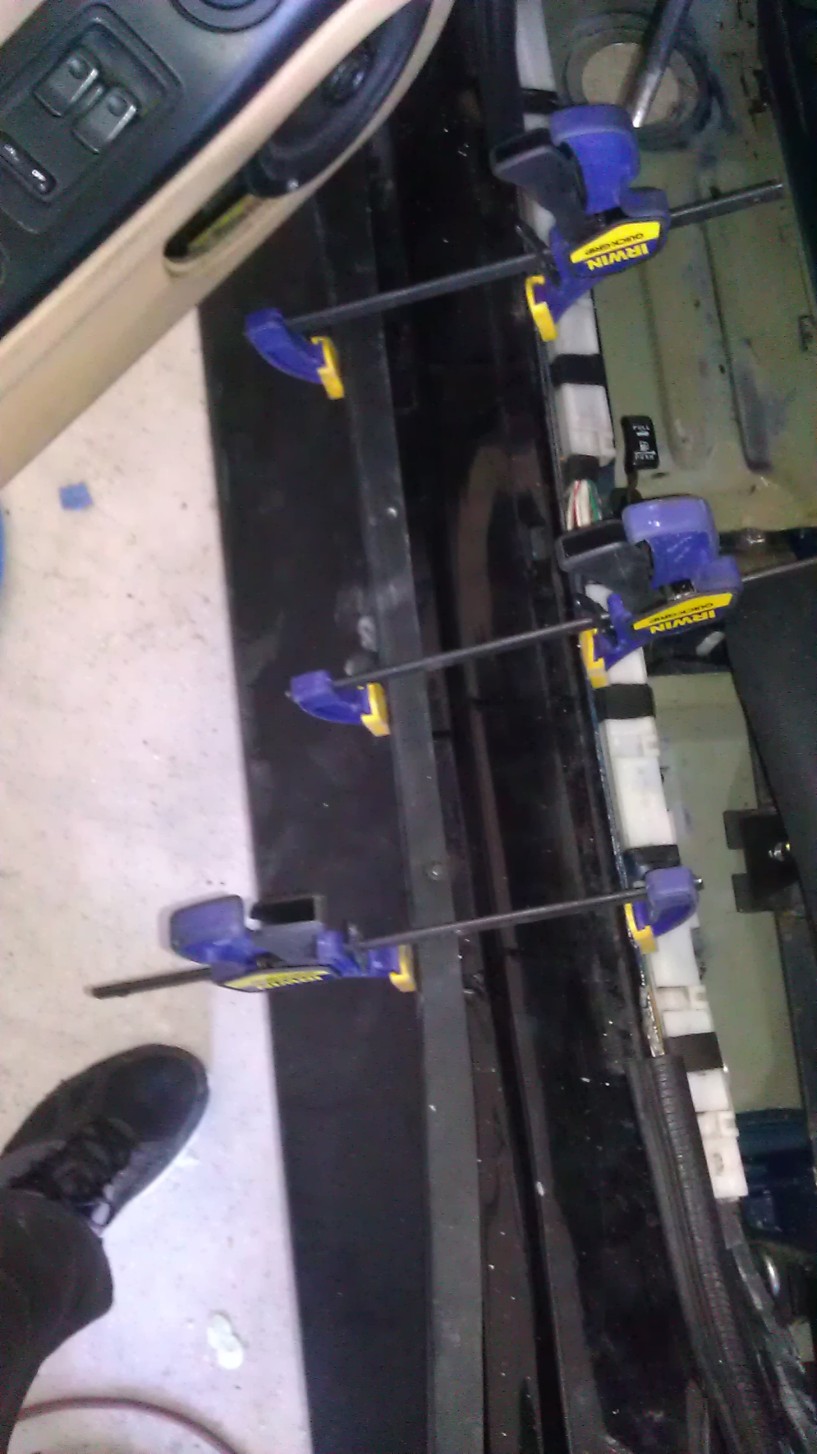
Needed to make sure nothing rubbed or hit when I opened the door. This took me about 45 min on each side... it's definitely a process...especially with crappy fitting kit pieces
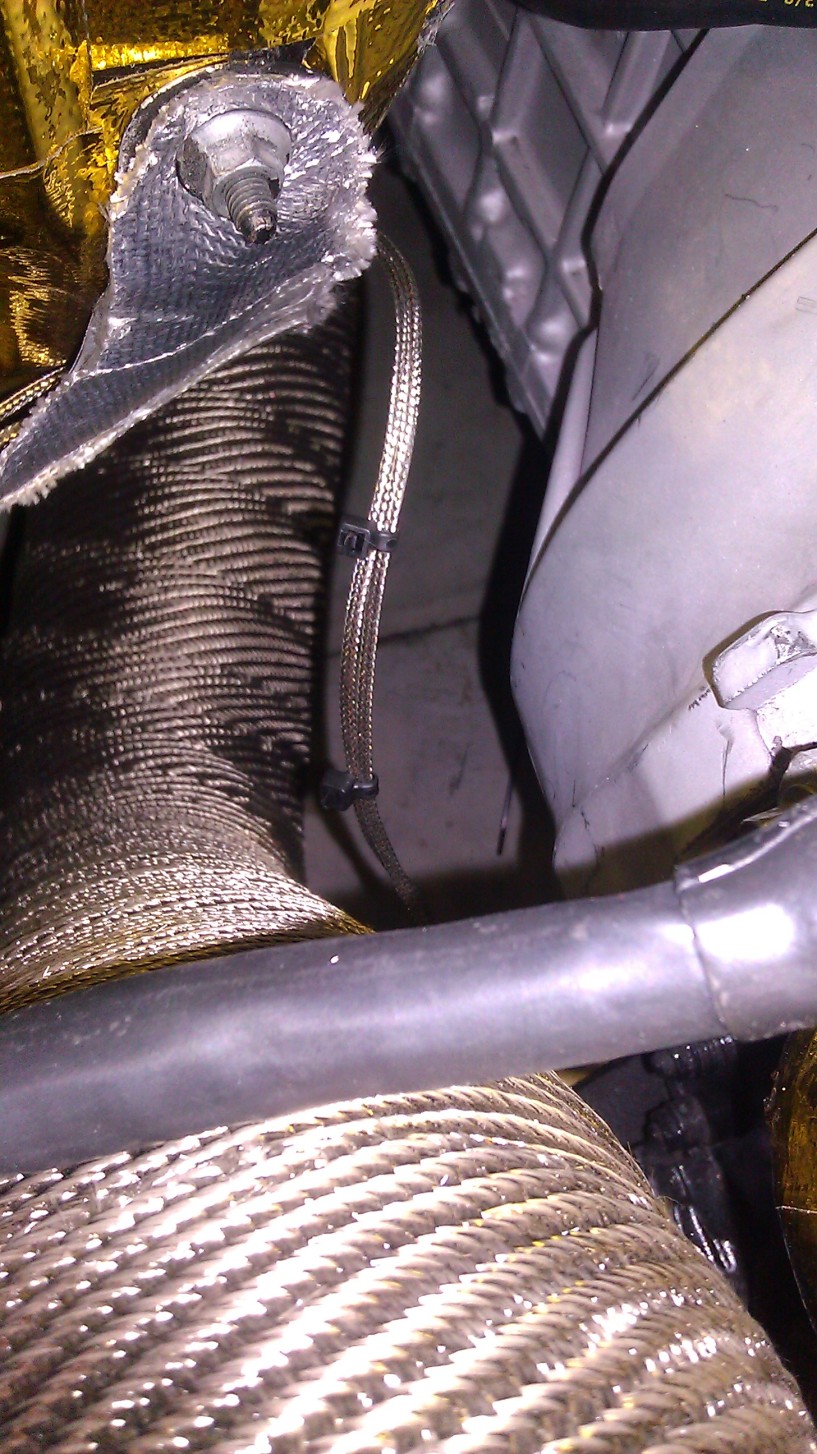
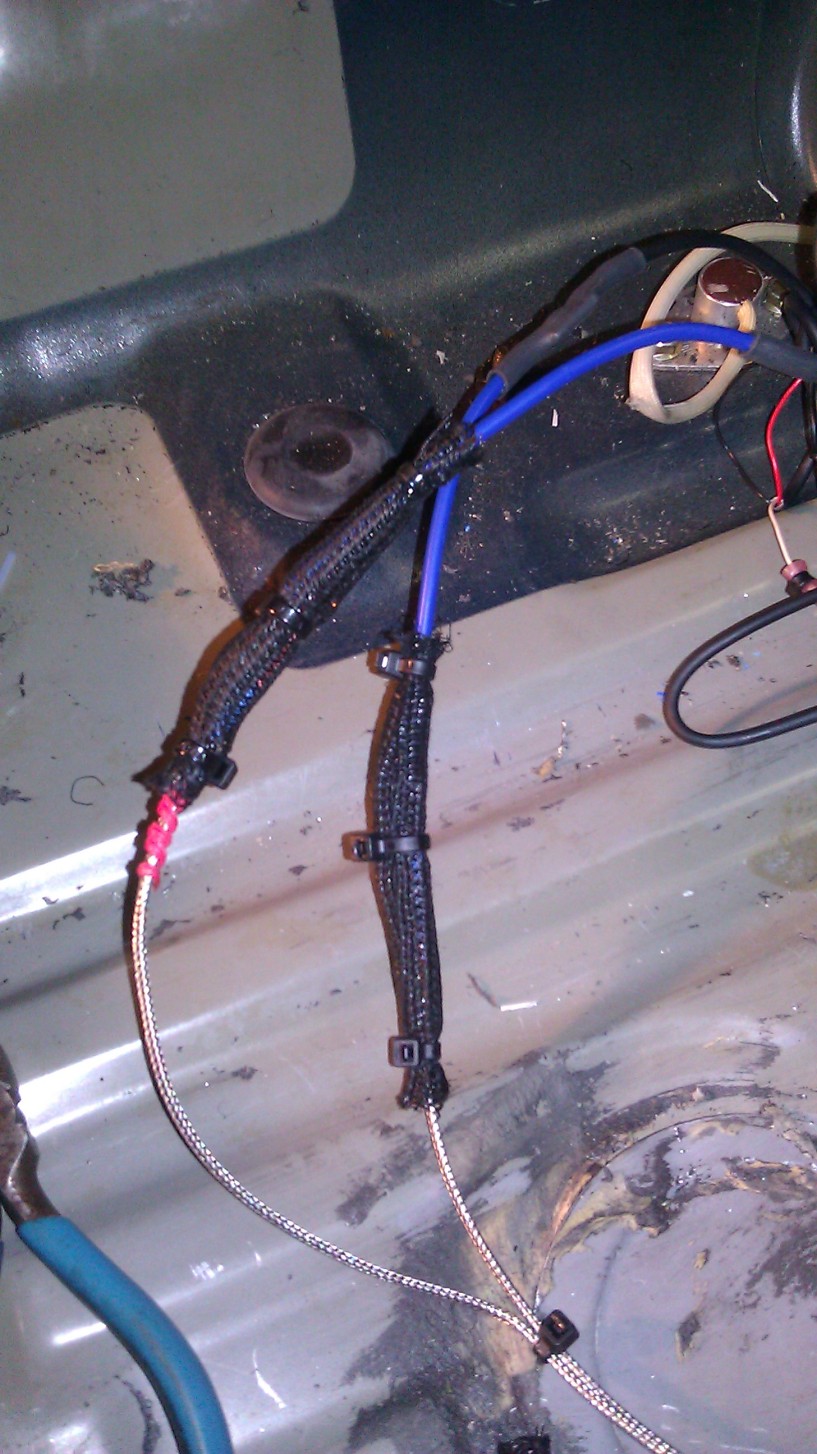
Then I routed my EGT sensor wiring through the smaller of the 2 openings in the fire-wall, and into the cabin nice and neat.
Powered By Max wiring kit was very easy to install and the directions were simple and easy with a picture tutorial if you couldn't understand the writing.
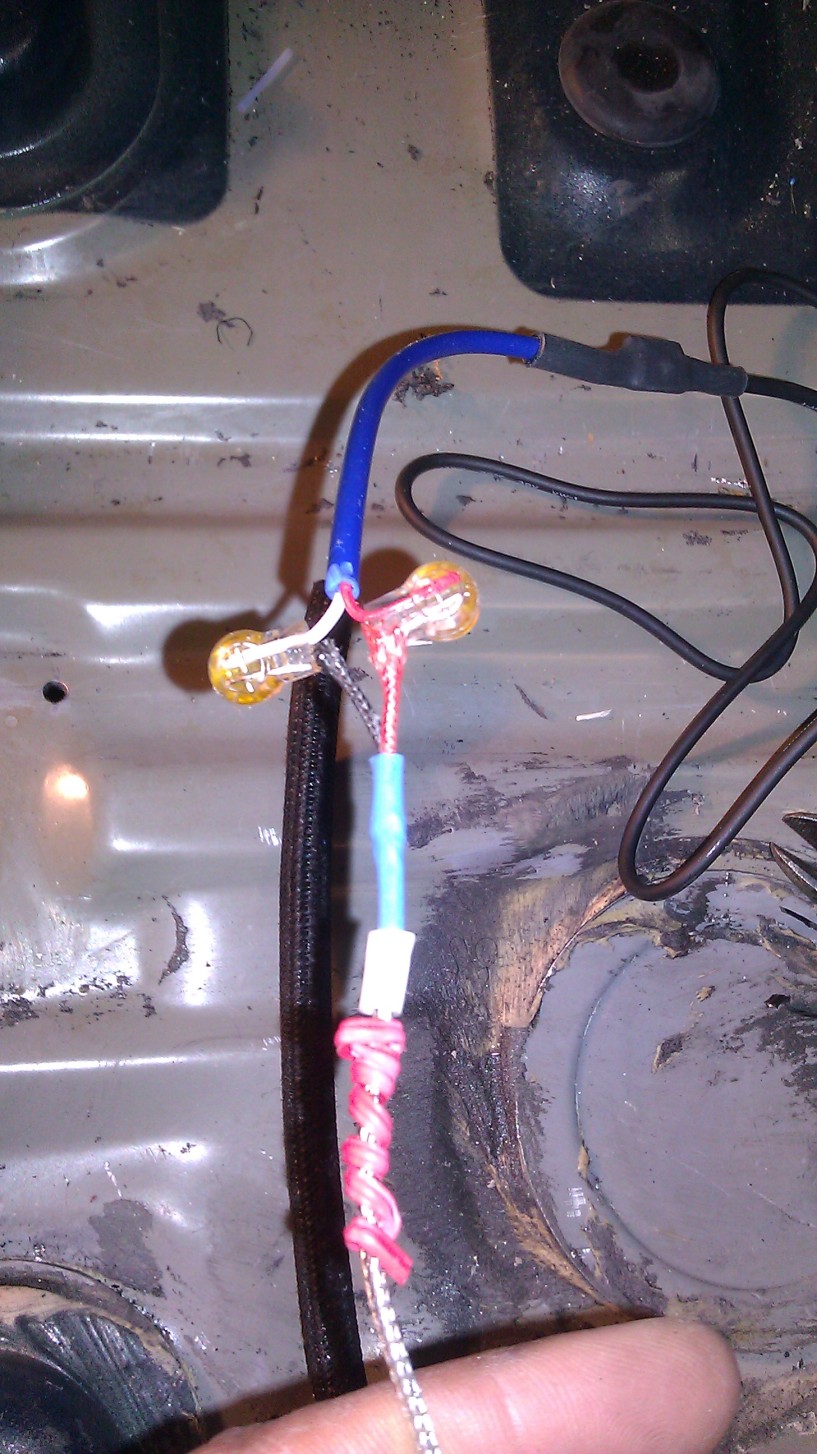
zip ties=neat
used a little sheathing covering to clean things up and keep the connectors protected. The red twisty tie represents the rear rotor housings so I knew which goes where. I also labeled the Digital gauge so I know which is which
rear egt gauge
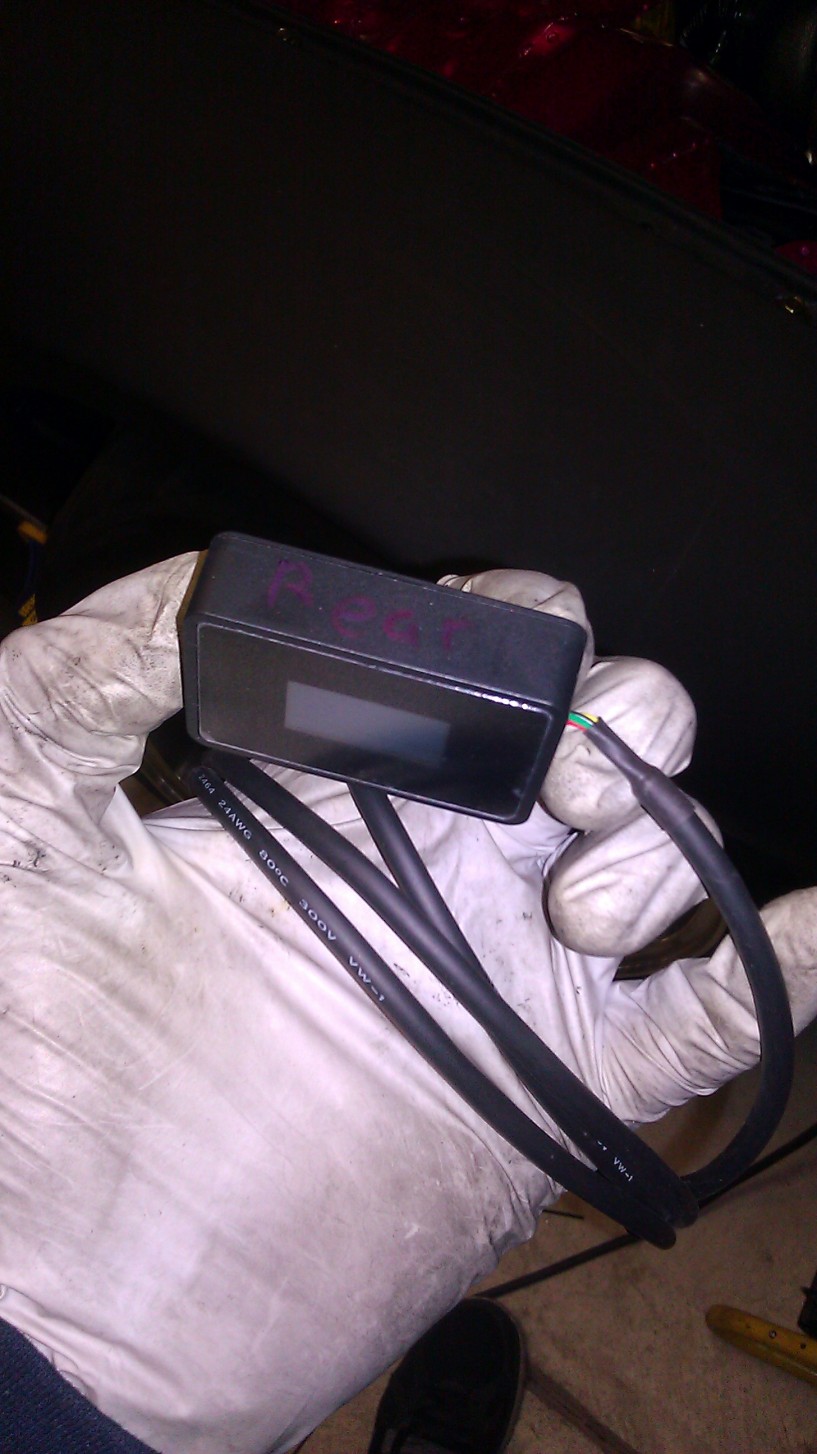
Both Gauges routed cleanly, and ready to be mounted somewhere cool. Just need to tie in 12v power and Grounds. Same with my Innovate MTX-L..
Ready to go
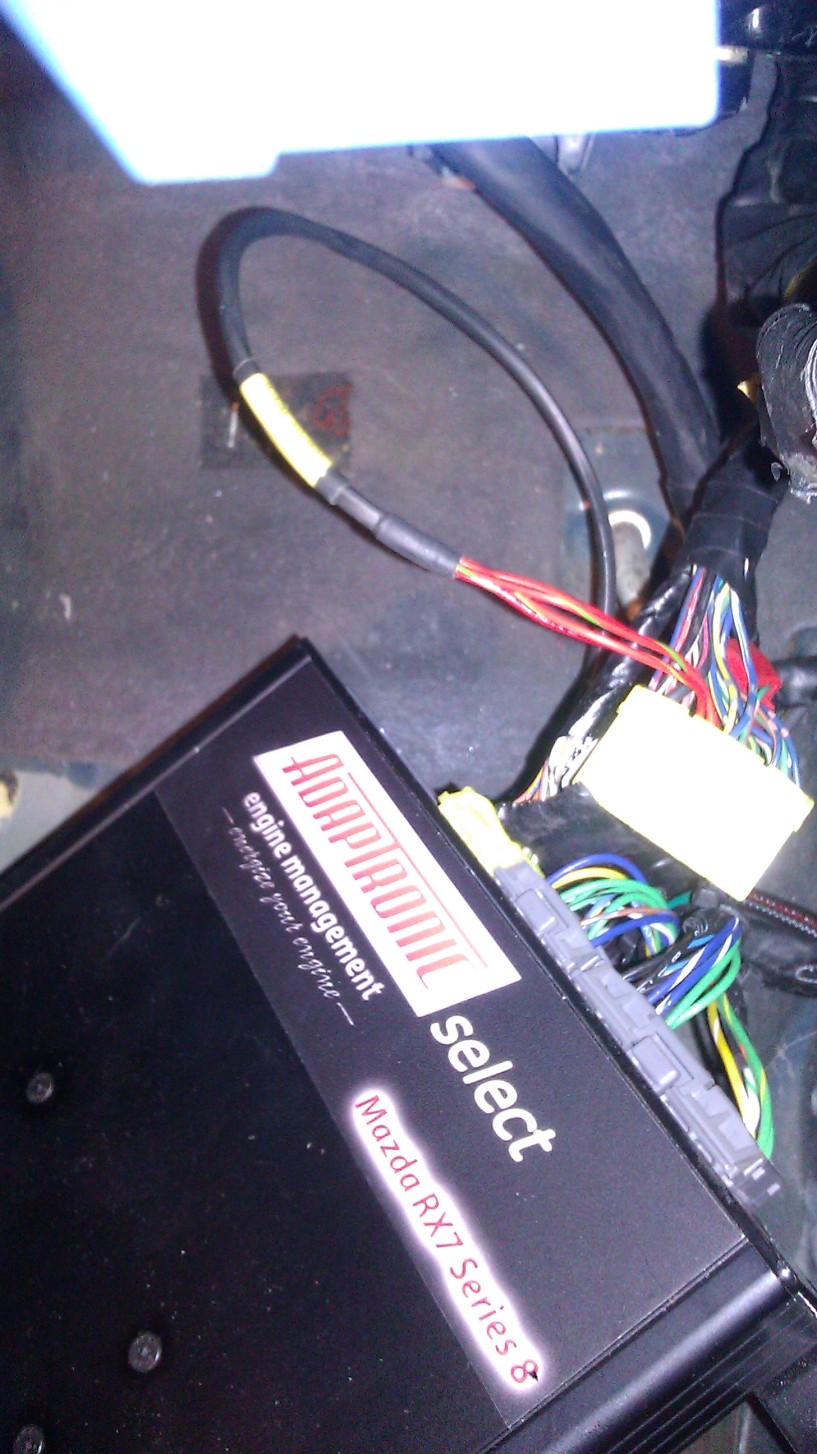
de-pinned the OEM igniter wiring from the ecu plug and replaced them with the correct pins for Chris Ludwings direct Fire ignition harness.....which by the way is one hell of a nice harness.. Very impressed with the harness, materials used, well thought out location for things, and easy to use directions for install. Even a dummy (me with wiring) could install it.
Got to mounting the side skirts in a more permanent solid way.. these harbor freight clamps have helped tremendously
Needed to make sure nothing rubbed or hit when I opened the door. This took me about 45 min on each side... it's definitely a process...especially with crappy fitting kit pieces
Then I routed my EGT sensor wiring through the smaller of the 2 openings in the fire-wall, and into the cabin nice and neat.
Powered By Max wiring kit was very easy to install and the directions were simple and easy with a picture tutorial if you couldn't understand the writing.
zip ties=neat
used a little sheathing covering to clean things up and keep the connectors protected. The red twisty tie represents the rear rotor housings so I knew which goes where. I also labeled the Digital gauge so I know which is which
rear egt gauge
Both Gauges routed cleanly, and ready to be mounted somewhere cool. Just need to tie in 12v power and Grounds. Same with my Innovate MTX-L..
Ready to go
de-pinned the OEM igniter wiring from the ecu plug and replaced them with the correct pins for Chris Ludwings direct Fire ignition harness.....which by the way is one hell of a nice harness.. Very impressed with the harness, materials used, well thought out location for things, and easy to use directions for install. Even a dummy (me with wiring) could install it.
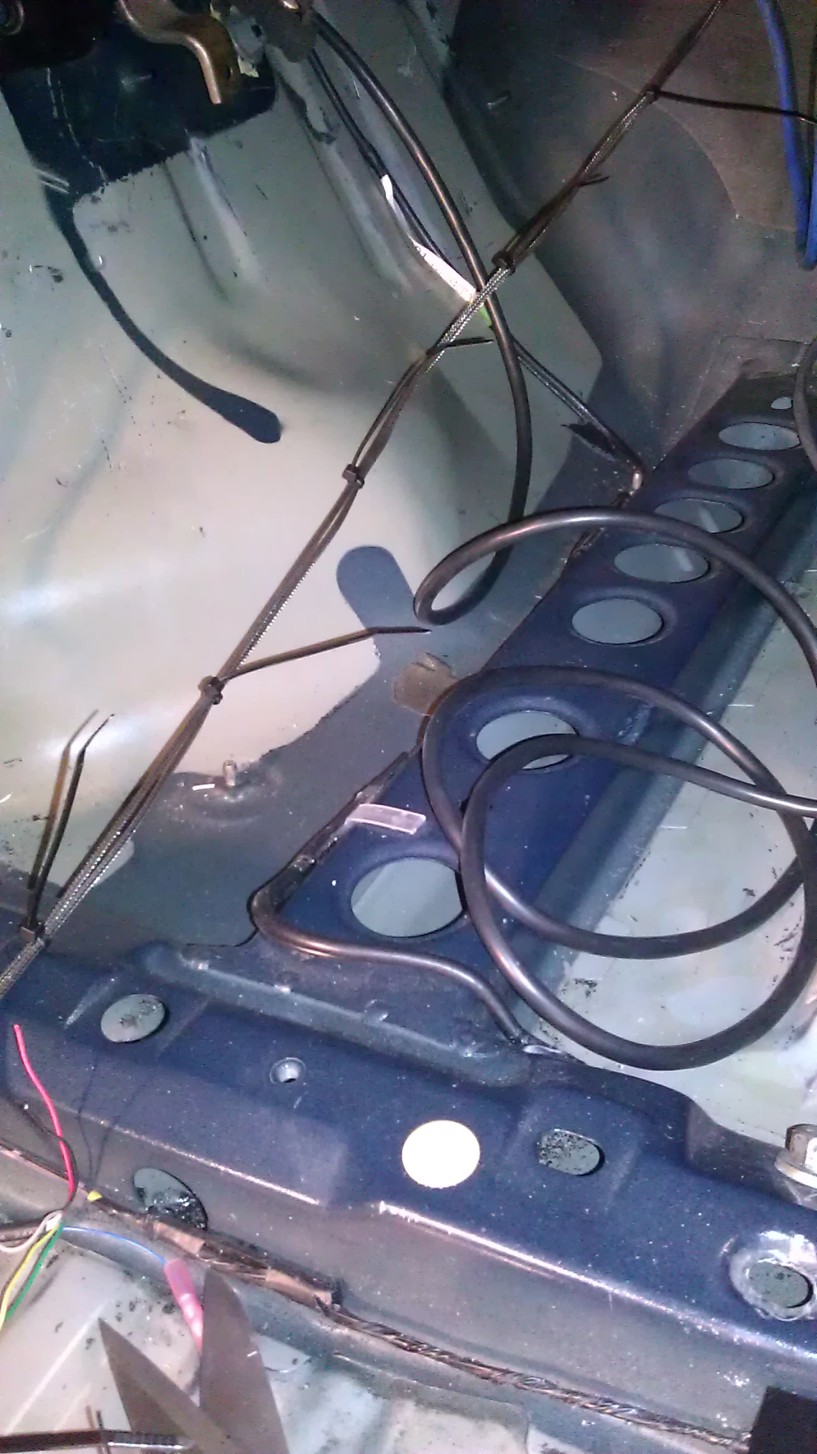
I think in total I used about 35/40 zip ties to clean things up.
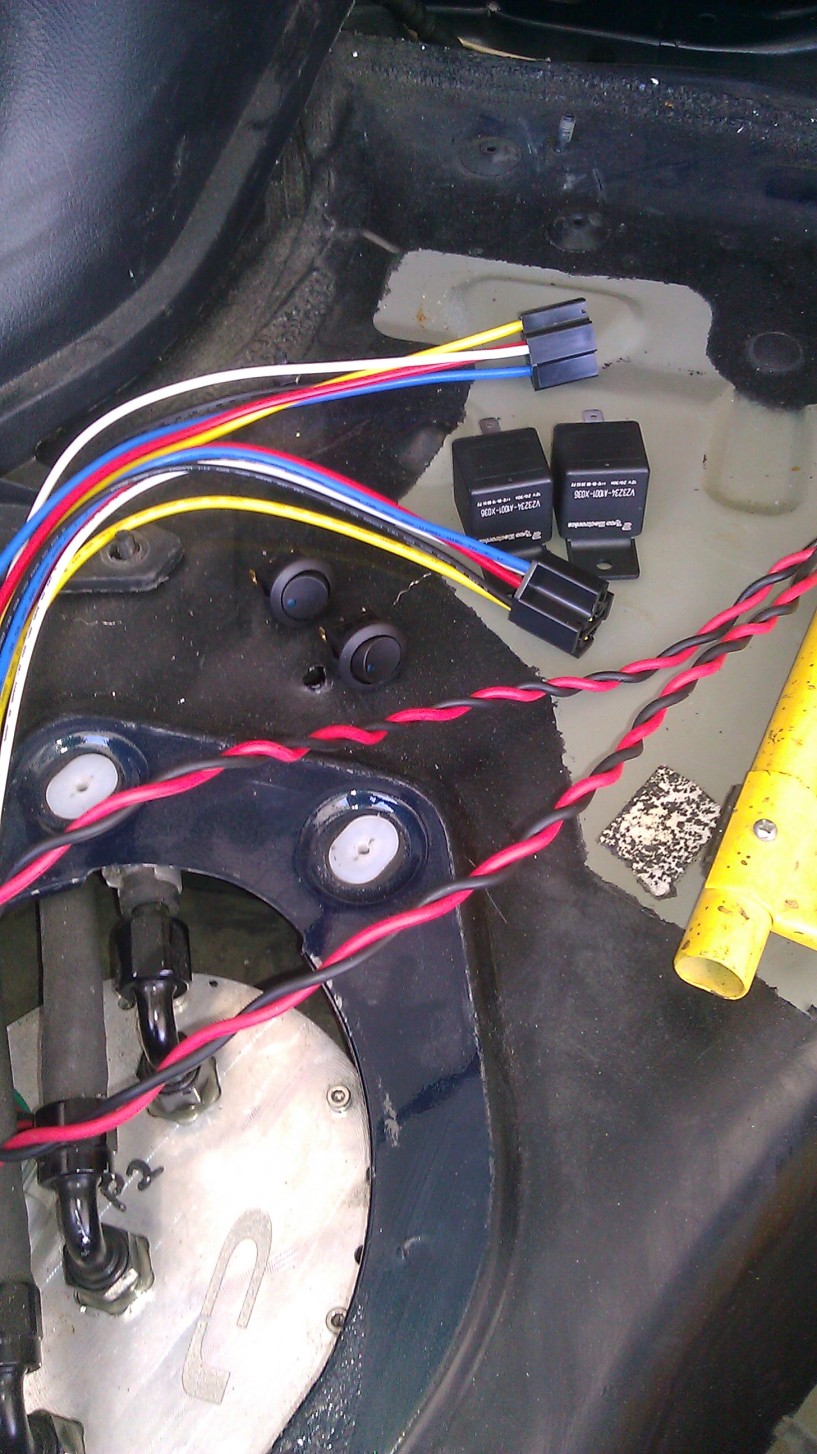
Last night I got:
Both EGT's routed into cabin and wired up to digital gauges
Side skirts mounted both passenger & drivers side nice and clean without altering door open/close function
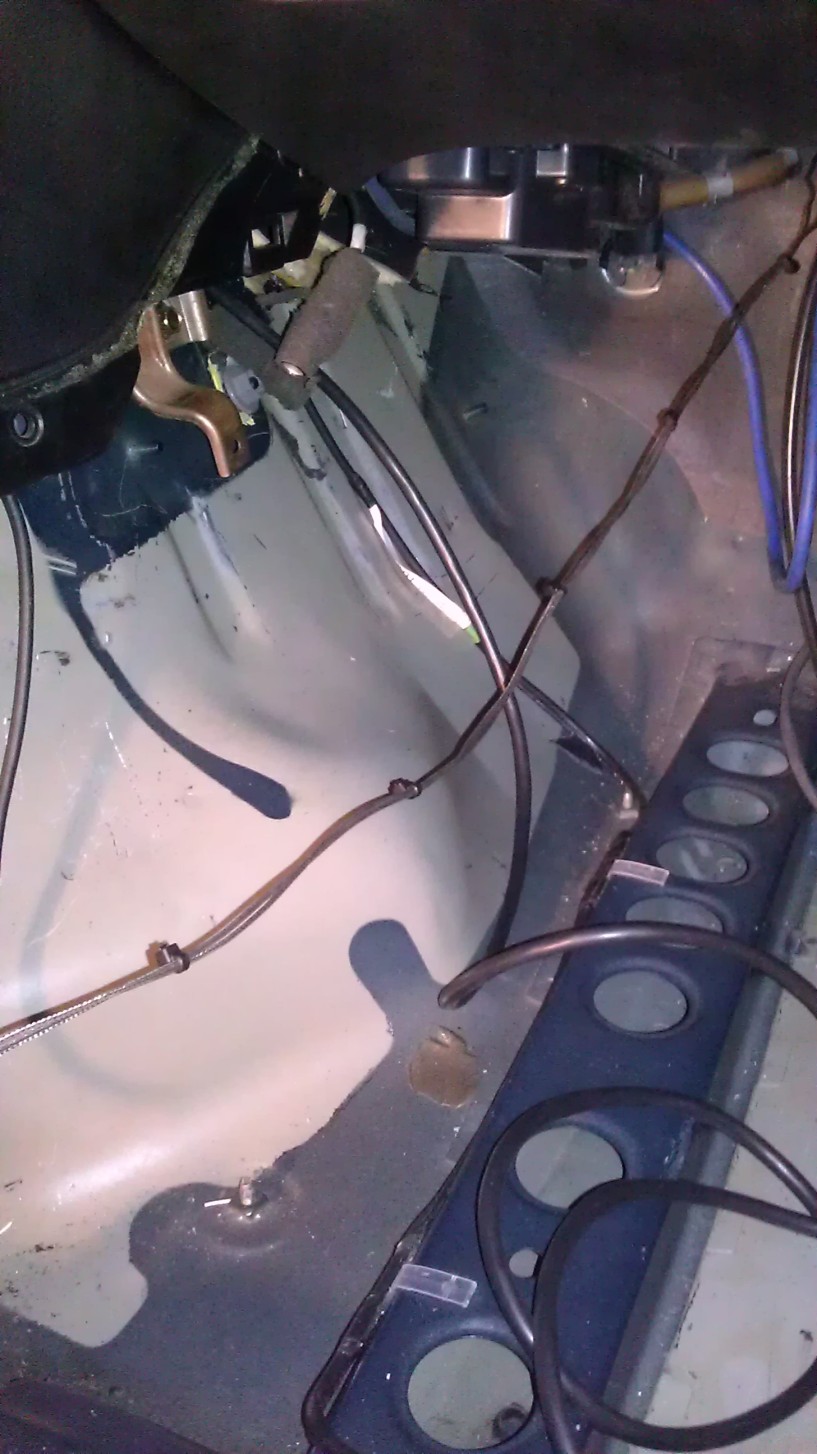
Re-routed vacuum lines through fire-wall nice and clean
Installed Starter
Installed Starter harness connectors to alternator and 2 Grounds (except I'm missing a couple, hope I don't need them)
zip tied main fuse box under drivers side headlight bucket ready to be hard mounted
routing the main harness sucks and I don't think there will be any way to get it routed without looking like butthole....without completely re-doing it in the cabin and runnning everything individually to the front. Does anyone know if I absolutely need the Ignition plug on the starter harness? or have I completely by-passed it with the direct fire? I guess I could message Chris..
Anyways..more nut-serts on their way from Mcmaster-carr, so i'll be able to finishe the skirt/overfender sections of the kit install. Then i'll only have to worry about the Front bumper which needs some work for sure..
I was going to order a nice Battery...any suggestions?
Fuel pump relay stuff should come in today. I'll get that all figured out too.
More updates soon!! getting close!!
Last night I got:
Both EGT's routed into cabin and wired up to digital gauges
Side skirts mounted both passenger & drivers side nice and clean without altering door open/close function
Re-routed vacuum lines through fire-wall nice and clean
Installed Starter
Installed Starter harness connectors to alternator and 2 Grounds (except I'm missing a couple, hope I don't need them)
zip tied main fuse box under drivers side headlight bucket ready to be hard mounted
routing the main harness sucks and I don't think there will be any way to get it routed without looking like butthole....without completely re-doing it in the cabin and runnning everything individually to the front. Does anyone know if I absolutely need the Ignition plug on the starter harness? or have I completely by-passed it with the direct fire? I guess I could message Chris..
Anyways..more nut-serts on their way from Mcmaster-carr, so i'll be able to finishe the skirt/overfender sections of the kit install. Then i'll only have to worry about the Front bumper which needs some work for sure..
I was going to order a nice Battery...any suggestions?
Fuel pump relay stuff should come in today. I'll get that all figured out too.
More updates soon!! getting close!!
^^Hey! thanks man! i'm trying to get this thing going!
Small Update:
Worked on bleeding the clutch some more... and I don't know how long it takes but it's taking forever. I found a leak a few nights ago in one of the braided lines that goes to the master cylinder, and after that I kinda took a break from it. Well I started again and there are no leaks..but the Clutch pedal isn't getting stiff. It seems as if there is endless amounts of bubbles. Is this the correct way to bleed? I don't know.. but this is what I've been doing:
Pump Clutch 5-8 times and hold to floor
Crack Bleed Screw open ( bubbles always flow out)
Tighten Bleed screw
Release Clutch pedal
AND repeat.
So is air getting into the system somewhere? But the pedal still won't get hard and it won't even get stiff enough to propel itself back off the floor after a bleed rotation. Any help would be appreciated.
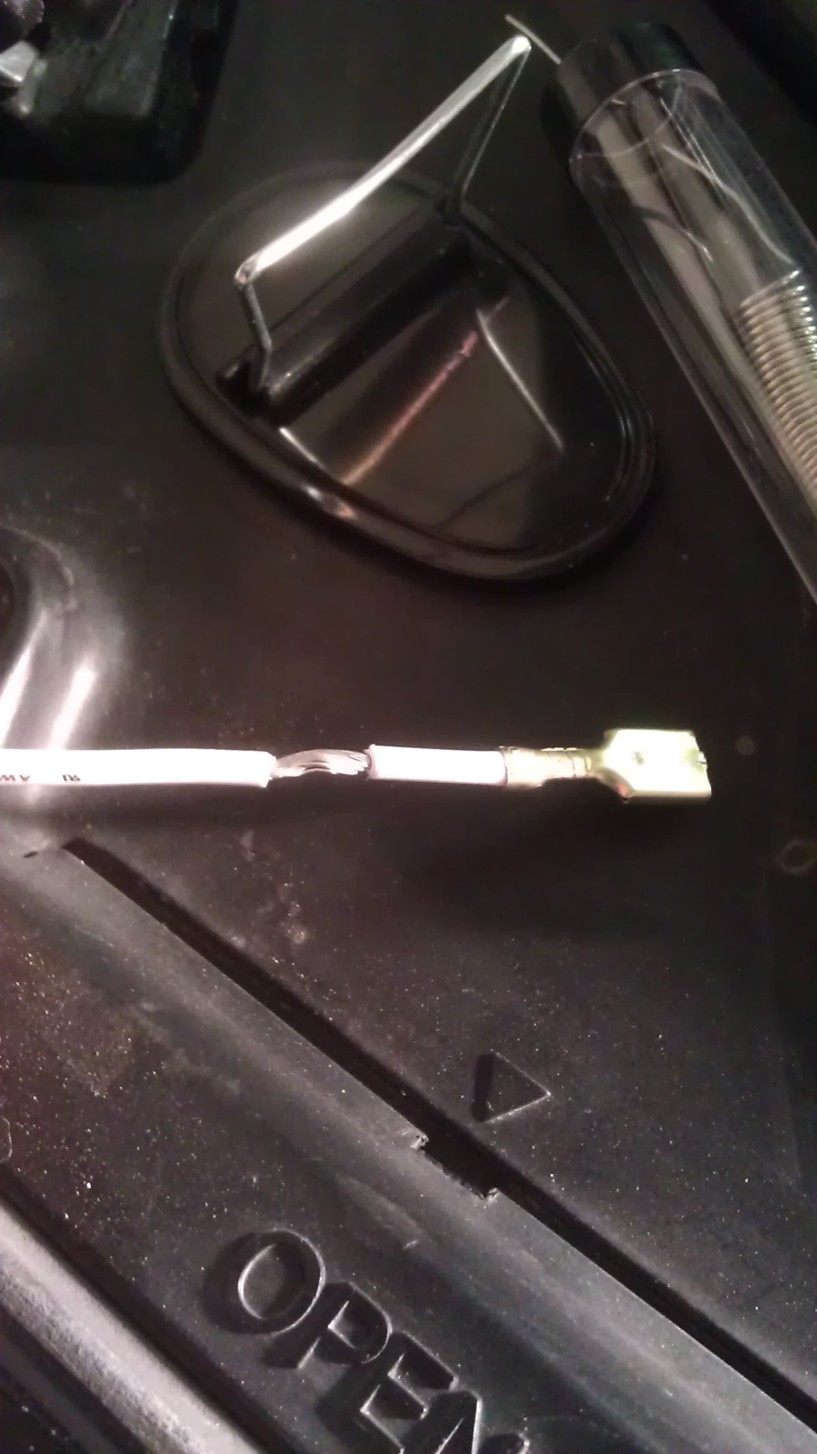
So I made a nice new Bleed bottle out of an old hand soap bottle, it's a lot thicker than the plastic bottle and much more clear.

After spending about an hour working on the clutch bleed...
I gave up and started working on the Fuel Pump wiring:
Got these little rocker switches as well...(using "Theories"re-wire) Thanks tom
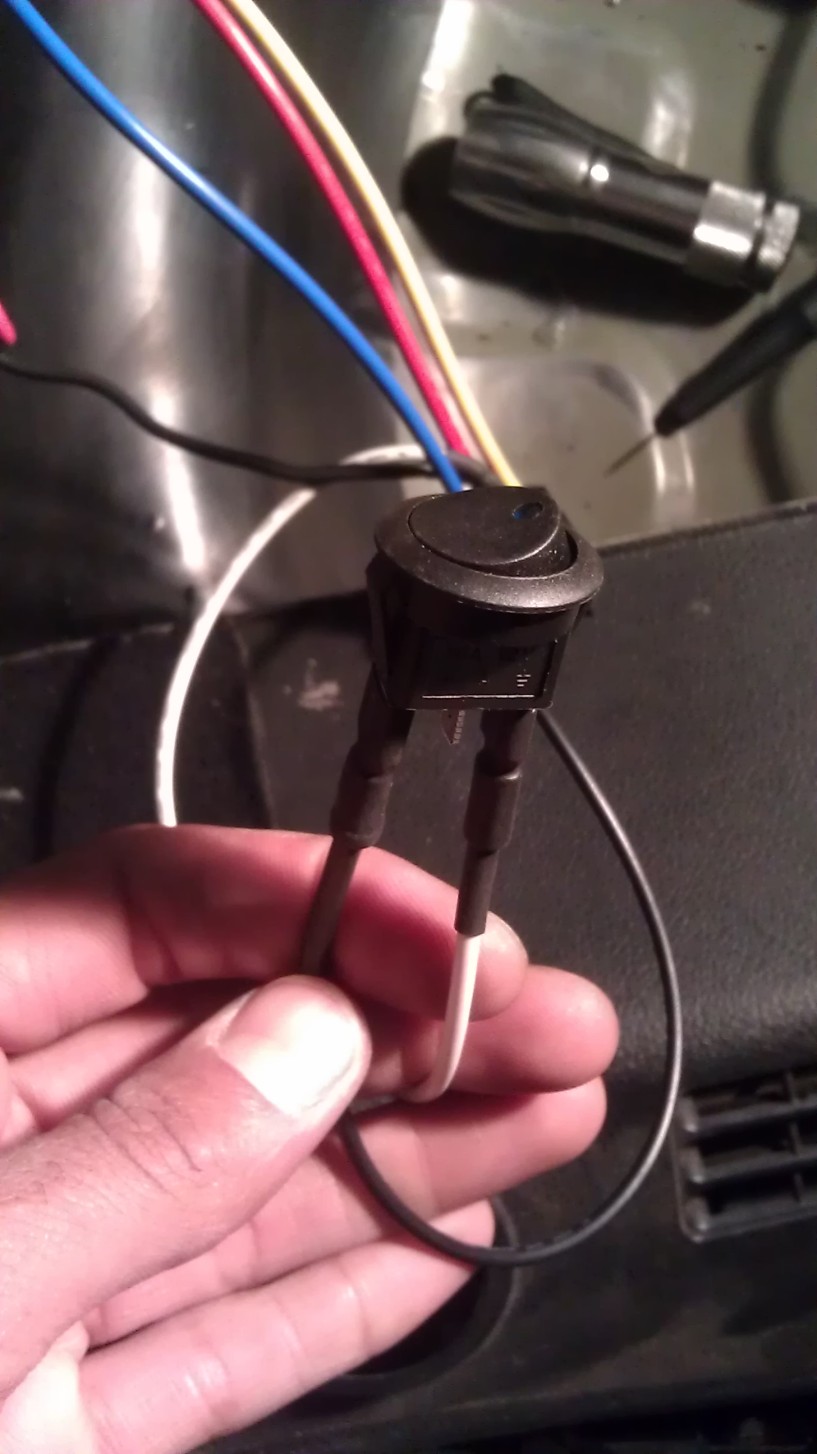
I suck at wiring.. but heres how I doubled the rocker ground wire/relay to the frame
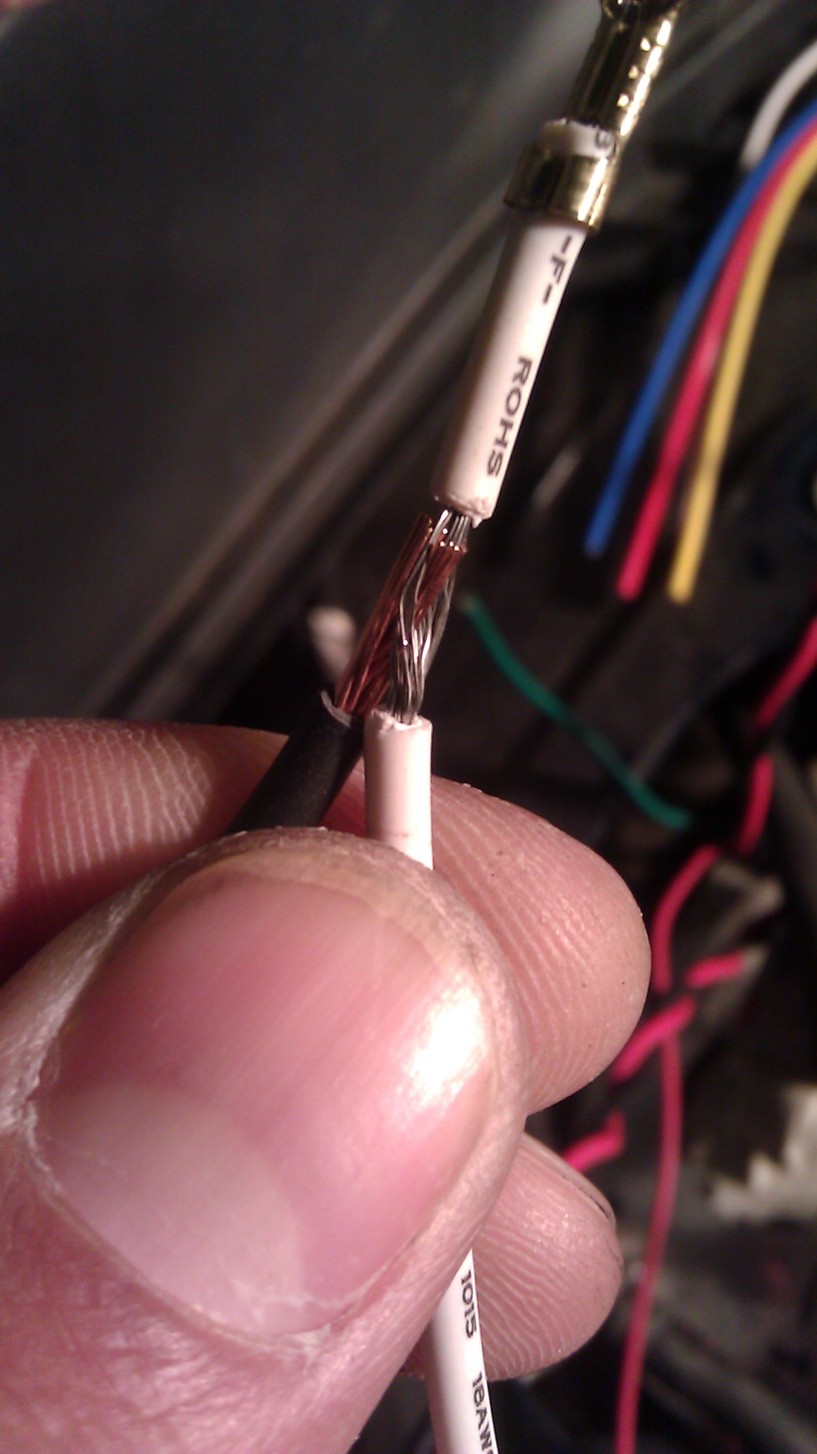
then I got out my soldering Iron and laid down some wannabe beads haha
put some shrink wrap on it and called it done.
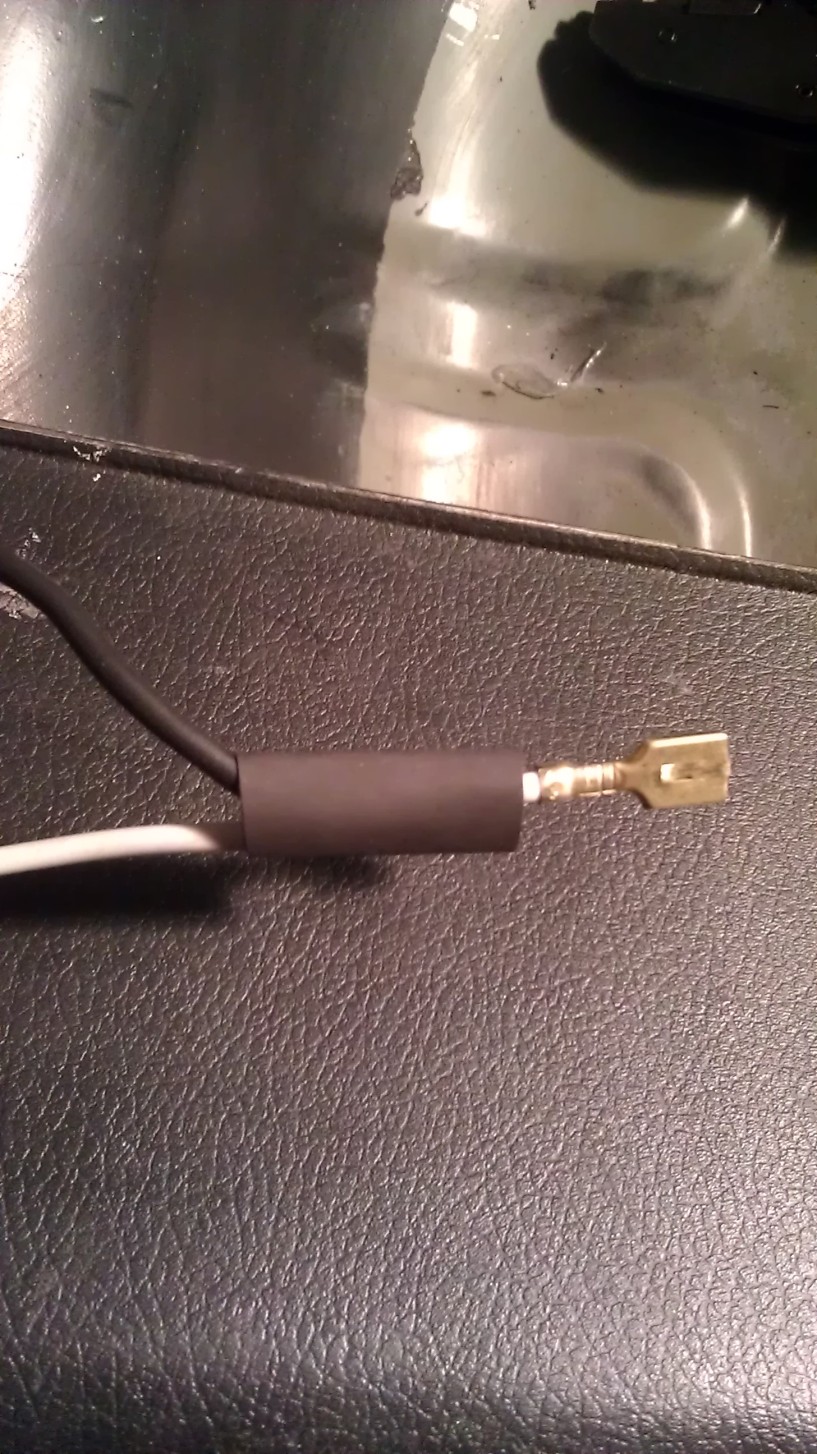
shrink wrap over terminal

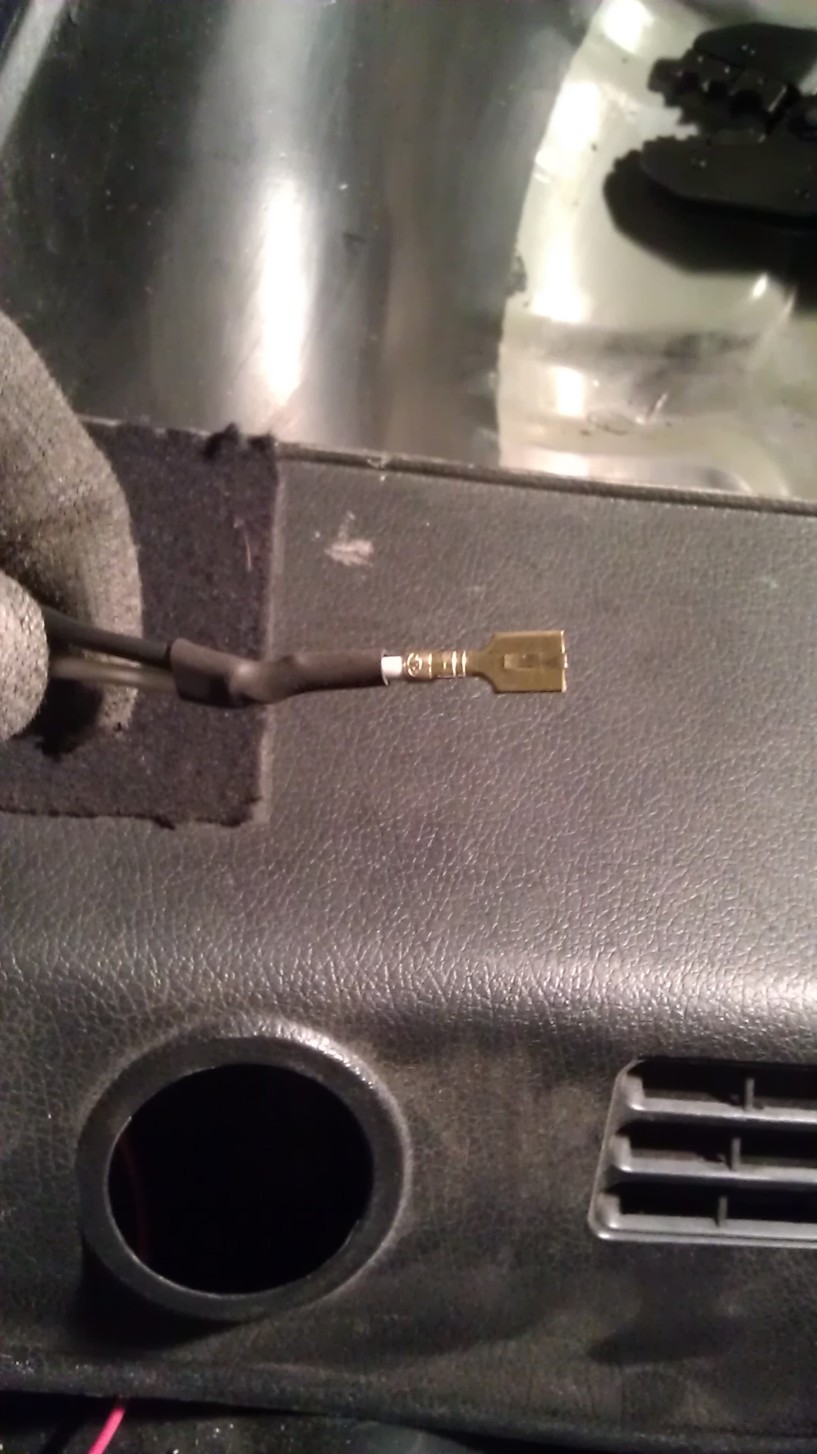
Hoping to finish it all off today. THe pics I posted are a little dis-organized..but I'll get some better ones today when I finish it off.
After the fuel pumps are wired up I should be able to actually turn the key in the ignition and I'm totally expacting.....
Small Update:
Worked on bleeding the clutch some more... and I don't know how long it takes but it's taking forever. I found a leak a few nights ago in one of the braided lines that goes to the master cylinder, and after that I kinda took a break from it. Well I started again and there are no leaks..but the Clutch pedal isn't getting stiff. It seems as if there is endless amounts of bubbles. Is this the correct way to bleed? I don't know.. but this is what I've been doing:
Pump Clutch 5-8 times and hold to floor
Crack Bleed Screw open ( bubbles always flow out)
Tighten Bleed screw
Release Clutch pedal
AND repeat.
So is air getting into the system somewhere? But the pedal still won't get hard and it won't even get stiff enough to propel itself back off the floor after a bleed rotation. Any help would be appreciated.
So I made a nice new Bleed bottle out of an old hand soap bottle, it's a lot thicker than the plastic bottle and much more clear.
After spending about an hour working on the clutch bleed...
I gave up and started working on the Fuel Pump wiring:
Got these little rocker switches as well...(using "Theories"re-wire) Thanks tom
I suck at wiring.. but heres how I doubled the rocker ground wire/relay to the frame
then I got out my soldering Iron and laid down some wannabe beads haha
put some shrink wrap on it and called it done.
shrink wrap over terminal
Hoping to finish it all off today. THe pics I posted are a little dis-organized..but I'll get some better ones today when I finish it off.
After the fuel pumps are wired up I should be able to actually turn the key in the ignition and I'm totally expacting.....

