Kilo Racing 3 Rotor FD Conversion


 12-13-07, 11:23 AM
#1928
I havent commented yet, but i have been keeping up with this thread and am very excited to see the finished project, I kind of talked my significant other into the money spent on a rebuild race port, front mount, ect.....being worth while but after watching this all come together i am going to have to start working on her again so that the 20b project i will have to do someday wont scare her too bad..
ps. i always use the excuse that if i HAD to do it you cant be mad. and my transmission had a broken fork in first gear so i "HAD" to have the motor rebuilt with lots of goodies because who wants to pay labor twice in unhooking a tranny right?
ps. i always use the excuse that if i HAD to do it you cant be mad. and my transmission had a broken fork in first gear so i "HAD" to have the motor rebuilt with lots of goodies because who wants to pay labor twice in unhooking a tranny right?
If you ever go the 20B route, call me first. I'll save you lost of time, heartache and money. Maybe I should write a book on the subject - One Man's Track to Rotary Nirvana".
 12-13-07, 06:01 PM
#1932
Last time I posted in this thread was over two years ago. I was still a student and only dreamed about FD ownership. I am stunned that I have graduated and own an FD and your project is still under the knife. You are very patient man and I am extremely impressed with the way you have carried yourself in light of countless delays and disappointments. I hope to meet you and your ride someday. Good luck with the rest of the project.
12-14-07, 11:13 AM
#1934
Minor Update
Well, we ran into a snag with the CNC machine work done for the Xtreme Rotaries stud kit. The shop forgot to drill the two outer holes on the front plate and it appears the shop didn't ream the holes so we're having a difficult time inserting the studs.
George is on his way back from the machine shop with a reamer and we're going to fix the problem and hopefully get this bad boy assembled later today.
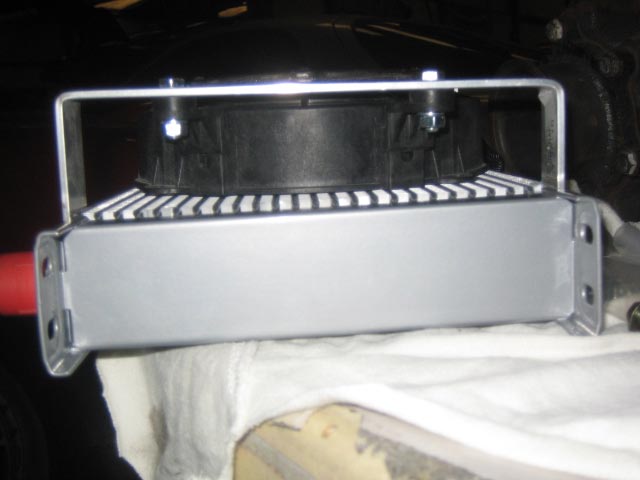
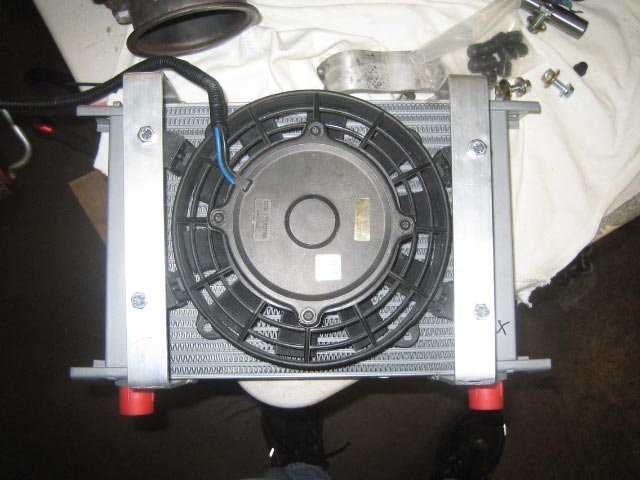
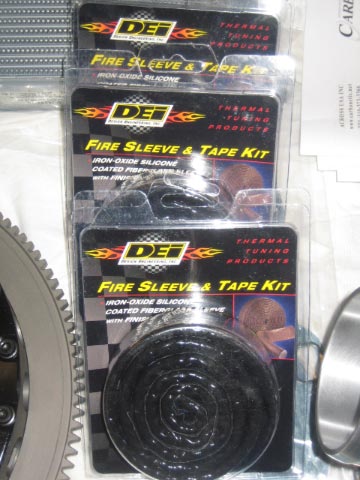
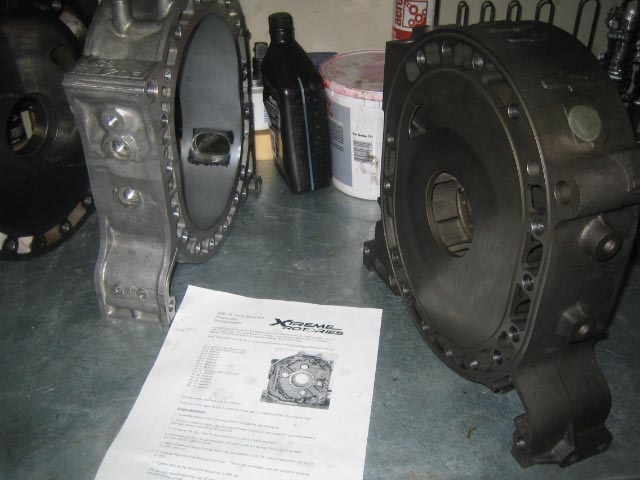
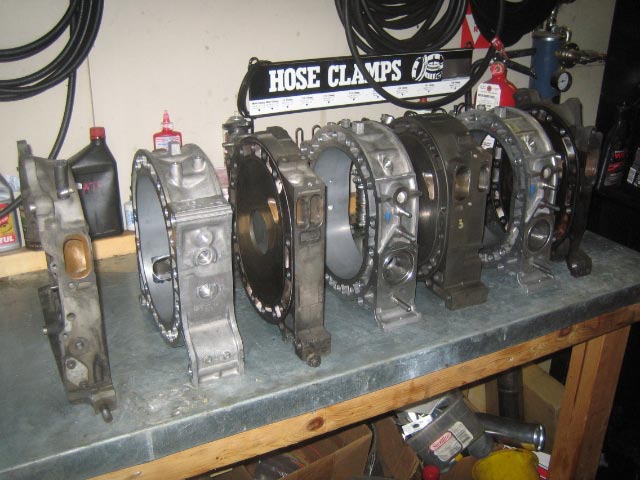
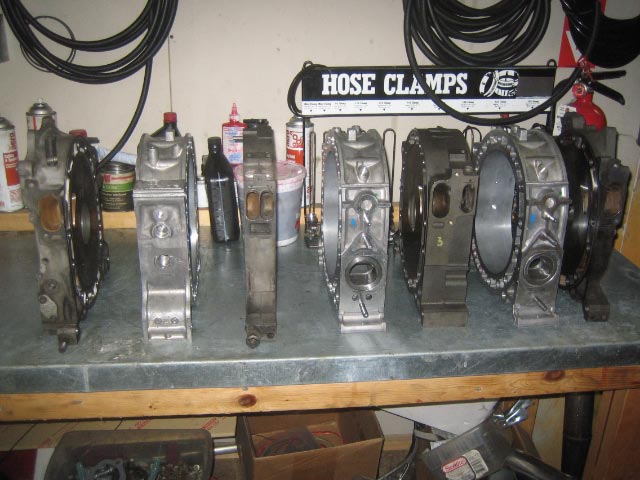
A few pics for now:
Fan installed on left oil cooler:
DEI Fire Sleeve to protect basically everything on the turbo side. Pricey stuff - $225 from Summit Racing for 9 feet of 1 inch and 15 feet of 5/8 inch product:
The dreaded Xtreme Rotaries stud kit:

Instructions, brand new thick center plate and housing (no, the porting is not complete yet):
George is on his way back from the machine shop with a reamer and we're going to fix the problem and hopefully get this bad boy assembled later today.
A few pics for now:
Fan installed on left oil cooler:
DEI Fire Sleeve to protect basically everything on the turbo side. Pricey stuff - $225 from Summit Racing for 9 feet of 1 inch and 15 feet of 5/8 inch product:
The dreaded Xtreme Rotaries stud kit:
Instructions, brand new thick center plate and housing (no, the porting is not complete yet):

 12-14-07, 07:45 PM
#1941
I believe they're hooked up in series.
12-14-07, 08:00 PM
#1943
Update: "If it weren't for three holes"
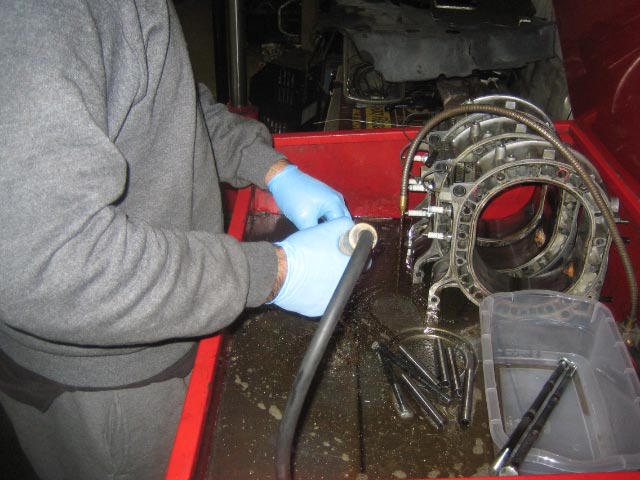
So it didn't go exactly as according to plan but when has it for me? The stud kit has put a halt today to the engine assembly. The CNC machine shop got a few of the holes (3 out of over 20 to be exact) slightly wrong. What I mean by this is the studs don't easily slide in the holes. You could tap them in with a hammer but George didn't want to do this because he felt the studs have to have clearance or they'll crack the irons. This would certainly be bad.
So, after much discussion and advice from crispeed (thanks so much again for the help) we bought a reamer and tried to correct the problem. Didn't work though. We then contemplated honing the remaining holes but felt uncomfortable with screwing something up and a mistake here could be very costly. Our conclusion was we needed to go back to the CNC machine shop and have the job done right. Rohan from Xtreme Rotaries in Australia called and confirmed this would be the best plan. He also indicated we have more of a clearance margin than we originally thought (6-8 1,000ths is ideal but you can go up to 12 1,000ths).
So, it's back to the machine shop tomorrow where George is going to personally work with the CNC guy to ensure the work is done properly. He's taking all of the engine parts and the stud kit with him and they're going to go one hole at a time and one piece at a time, stacking them to ensure the studs clear properly. A tedious job to say at the least.
Unfortunately I've exhausted my ability to stay in Dallas and I have to get home before my wife forgets what I look like. So sadly I won't get to see the engine reassembled and started. You guys will though as George is going to document the whole thing including a video of the initial startup.
His plan is to have the parts CNC completed no later than Monday (could be tomorrow nest case) and then to have the engine assembled by Wednesday. Sartup should occur no later than one week from now. We think everything is ready and have inventoried the parts numerous times so hopefully the above will hold true.
So that's it for now. I'm going to see if I can arrange an earlier flight out tomorrow and surprise my Wife
 12-15-07, 04:33 AM
#1947
^Yes, I've posted one or two in this thread probably about 4-6 months ago. Will post some more up for you when I get home.
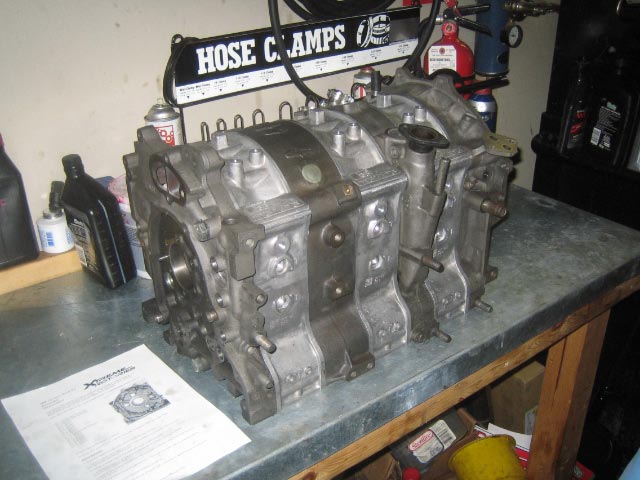
You can see the "beast" but it's not together yet. Lot's of cool parts on a table right now. The engine should be back together over the next few days though.
You can see the "beast" but it's not together yet. Lot's of cool parts on a table right now. The engine should be back together over the next few days though.
12-16-07, 12:00 PM
#1948
Rotary Enthusiast
Machining for the larger stud kit is always a real pain and probably not necessary unless you're build a huge HP drag racing engine. Maybe with a 20B it's a bit different... I don't know. I went with the stock size stud kit. At least it should be as strong of an engine as possible when you're done!
12-16-07, 04:59 PM
#1949
Machining for the larger stud kit is always a real pain and probably not necessary unless you're build a huge HP drag racing engine. Maybe with a 20B it's a bit different... I don't know. I went with the stock size stud kit. At least it should be as strong of an engine as possible when you're done!
Am going to call Gotham tomorrow to see if the corrections were done with the machining.
12-16-07, 05:17 PM
#1950
rebreaking things
Join Date: Apr 2006
Location: Manhattan
Posts: 866
Likes: 0
Received 0 Likes
on
0 Posts
I passed on doing an oversized stud kit, regerted it, and am now feeling ok about it. Thats for that . A CNC machined stud kit is on its way to market soon that is supposed to address some of the issues you're dealing with, but it costs twice as much and some machine work is still required. I might look into it down the road, but at this point I'm project'd out. When George is done with the reamer, I have a few places I want him to stop by on his way back to the machine shop 
. A CNC machined stud kit is on its way to market soon that is supposed to address some of the issues you're dealing with, but it costs twice as much and some machine work is still required. I might look into it down the road, but at this point I'm project'd out. When George is done with the reamer, I have a few places I want him to stop by on his way back to the machine shop
Last edited by CMonakar; 12-16-07 at 05:42 PM.