Build Threads The place to discuss complete builds

1996 JDM LS swap build

Old Jan 4, 2015 | 11:12 AM
  #1  
Mysta Joe's Avatar
Thread Starter
Junior Member
Tenured Member: 10 Years
iTrader: (1)
 
Joined: May 2013
Posts: 34
Likes: 0
From: Caribbean
1996 JDM LS swap build

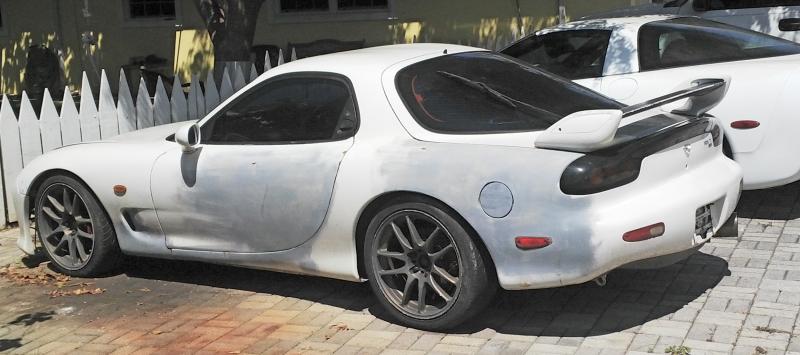
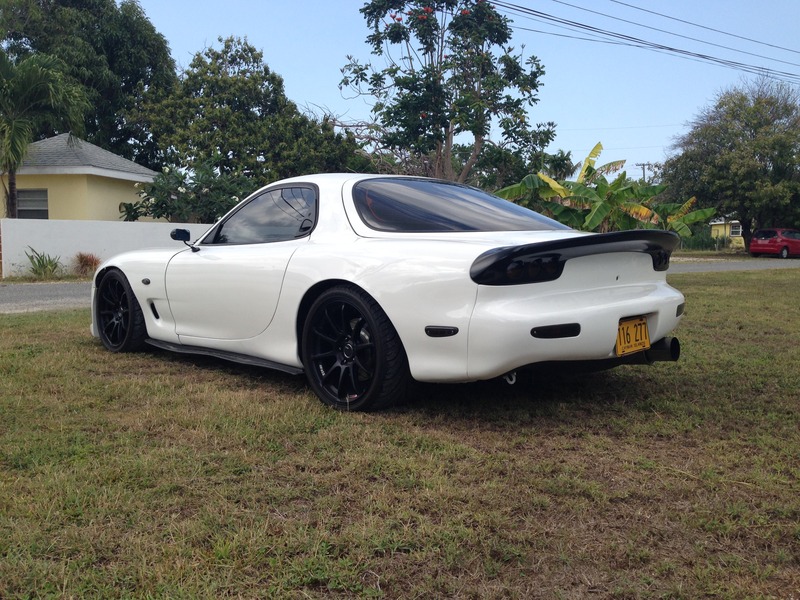
Here is my build. What was supposed to be the purchase of a cheap FD, fix some electrical gremlins, paint it and drive, has turned into far more.
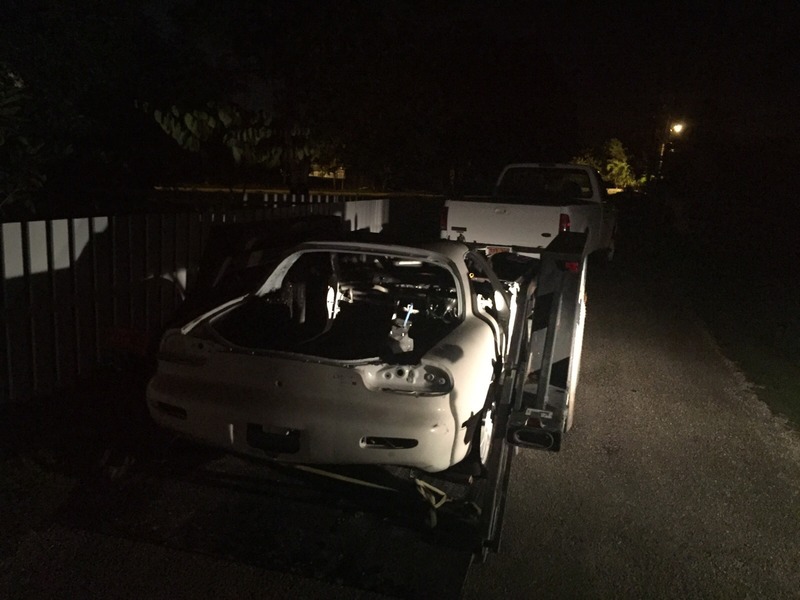
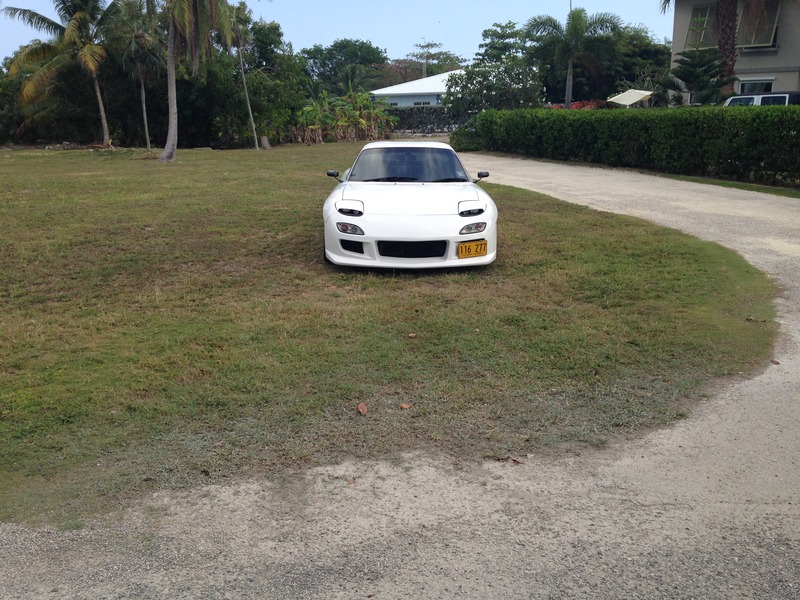
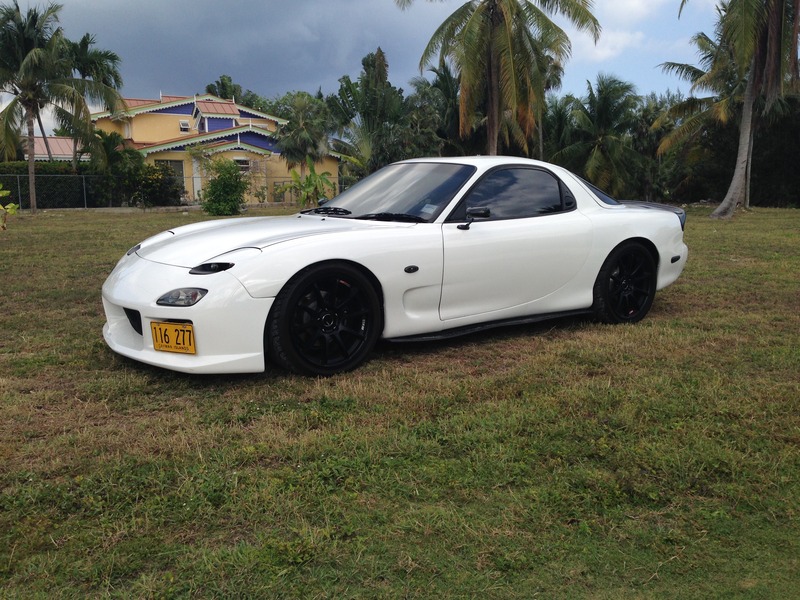
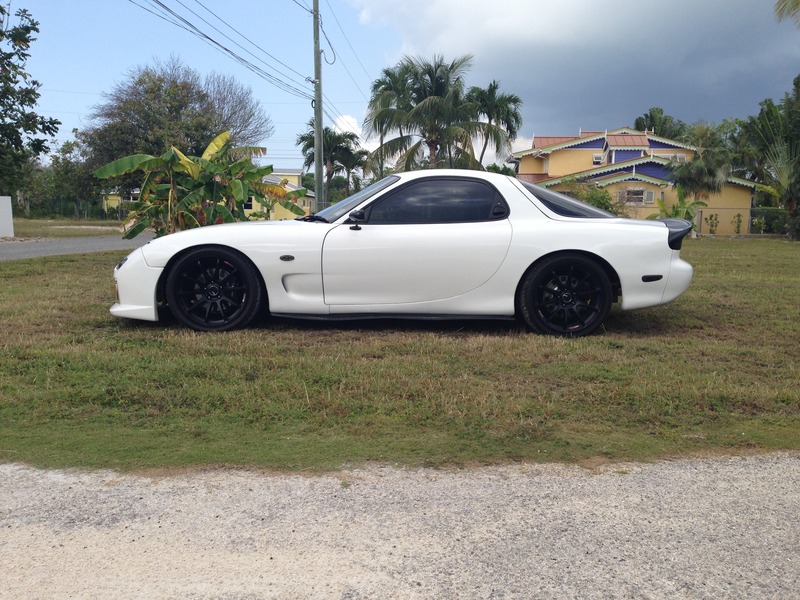
Purchased this...
Name:  IMG_20140920_134408_edit_zps03422e83.jpg
Views: 1403
Size:  48.6 KB

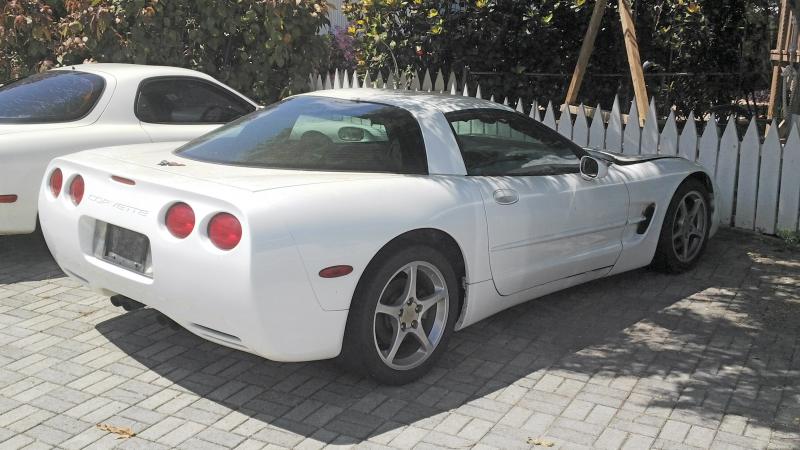
Only then two days later to also come across a small front end fire burnt C5 corvette, so I bought that too...
Name:  IMG_20140920_134425_edit_zps892814c5.jpg
Views: 740
Size:  64.8 KB

Getting new front accessories and doing a conversion to the transmission to an f-body style.

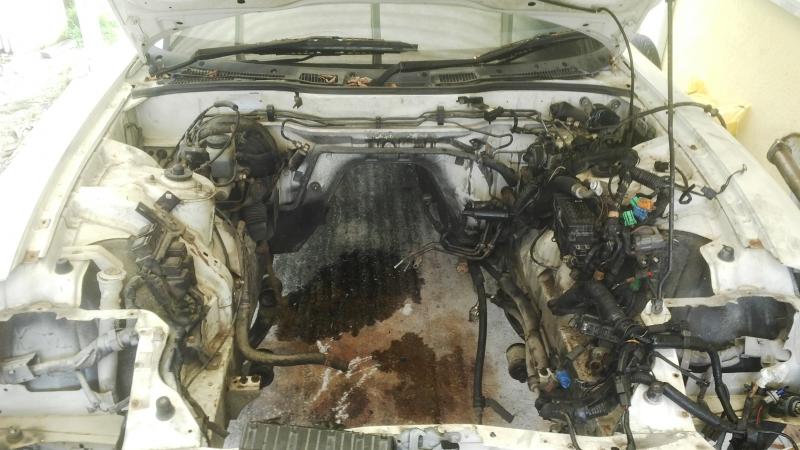
So I pulled the rotary. This will be easy, rotary out, get subframe kit, LS in...
Name:  IMG_20141102_143042_zpsc78c0135.jpg
Views: 534
Size:  64.0 KB

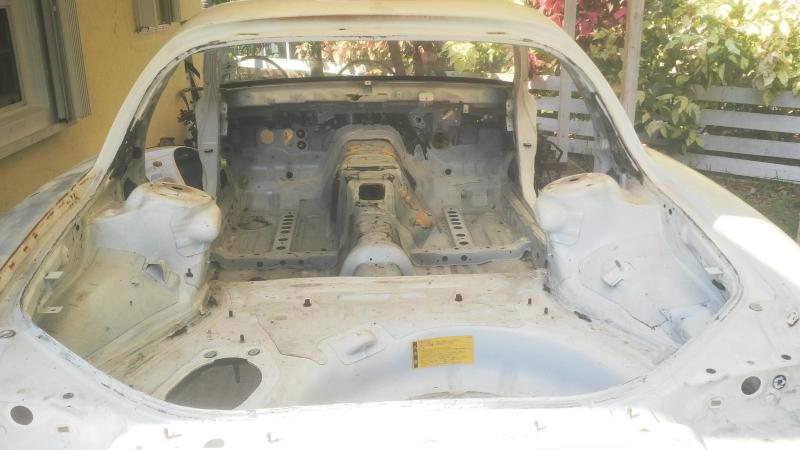
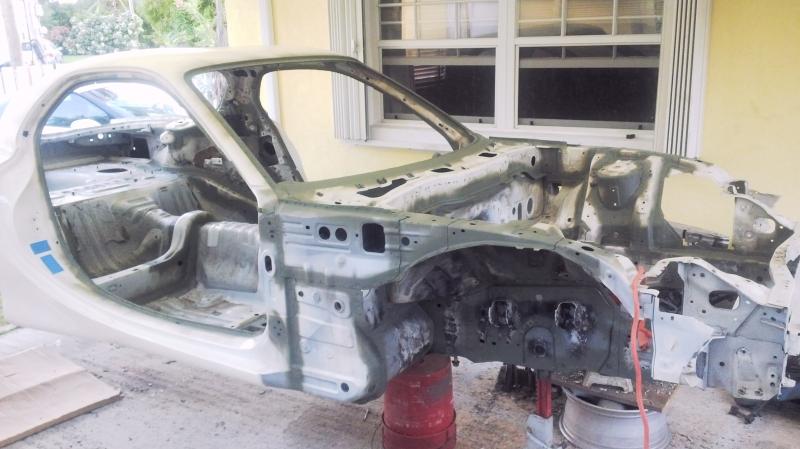
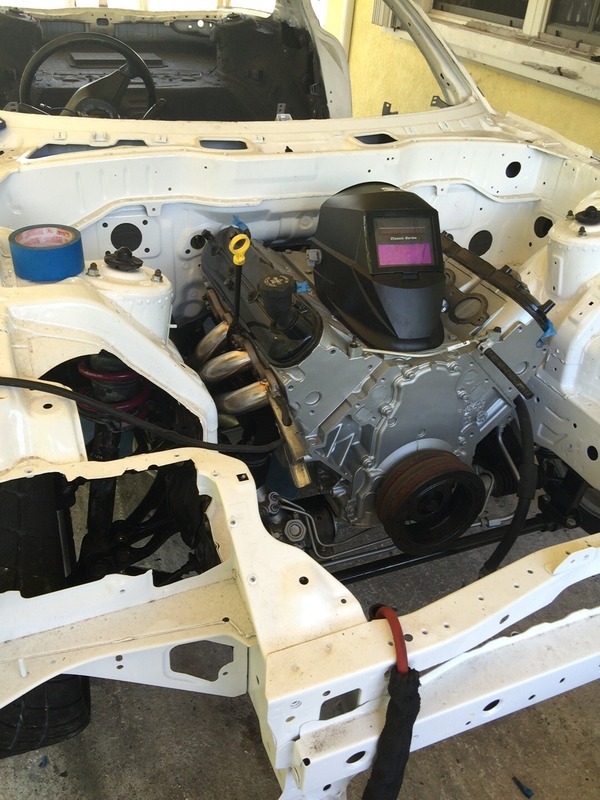
But, I decided, since I'm here and I'm painting the whole car, why not remove more and paint engine bay...
Name:  IMG_20141108_144114_zpsc82f3dc8.jpg
Views: 529
Size:  59.3 KB

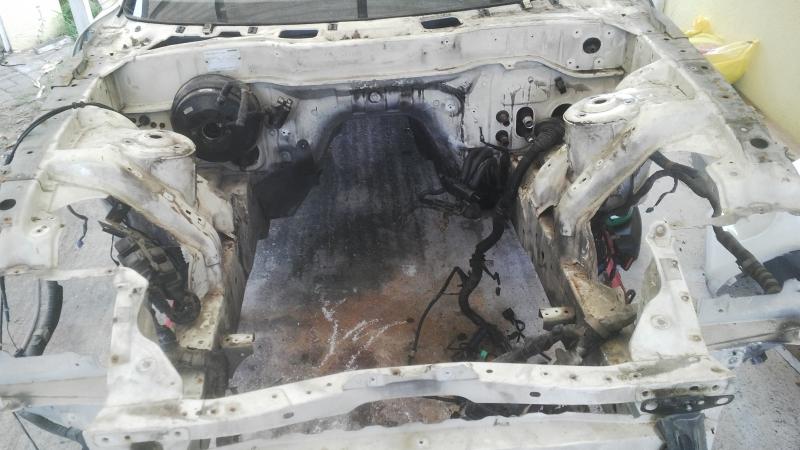
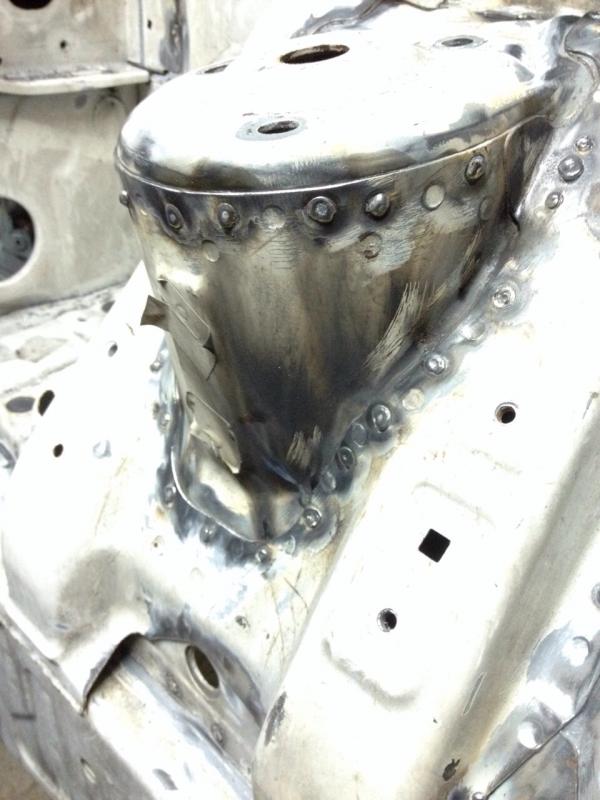
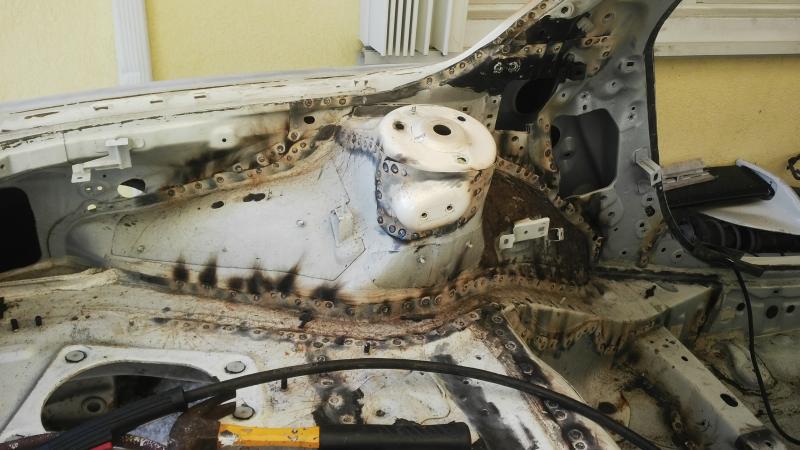
While I'm here might as well order fender braces, and if I'm going to do fender braces, why not just seam weld the whole car, so out comes everything...
Name:  IMG_20141110_143547_edit_zps9398f9e7.jpg
Views: 487
Size:  48.1 KB
Name:  IMG-20141121-WA009_zpsd311468a.jpg
Views: 491
Size:  56.4 KB
Name:  IMG_20141123_130345_zpsc8416472.jpg
Views: 493
Size:  64.9 KB
Name:  IMG_20141123_150317_zps85b994a9.jpg
Views: 501
Size:  61.2 KB

Apart from what's seen above I did the trunk surround areas, windshield, door areas, firewall areas and under car like rear subrame mounted areas, wheel well areas F&R, etc. Everything was then treated with Ospho and primered so it can wait until I'm ready to paint.
Name:  IMG_20141130_171017_edit_zpsbe853580.jpg
Views: 495
Size:  54.8 KB
Name:  IMG_20141130_170954_edit_zps5ec985cf.jpg
Views: 497
Size:  62.8 KB
Reply
Old Jan 4, 2015 | 11:13 AM
  #2  
Mysta Joe's Avatar
Thread Starter
Junior Member
Tenured Member: 10 Years
iTrader: (1)
 
Joined: May 2013
Posts: 34
Likes: 0
From: Caribbean
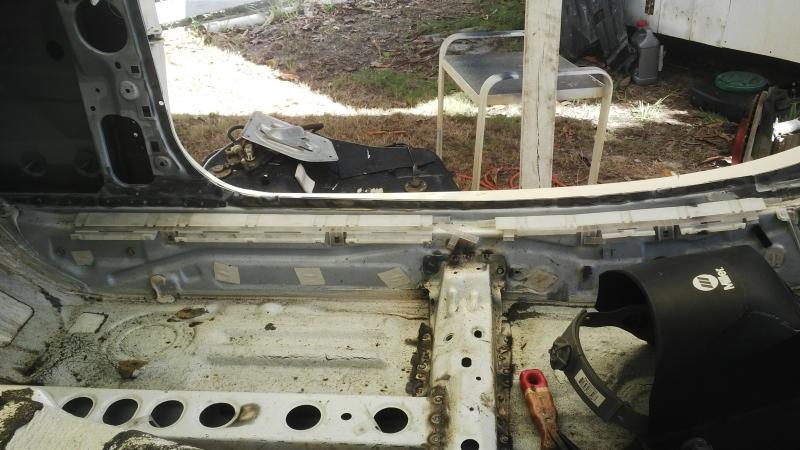
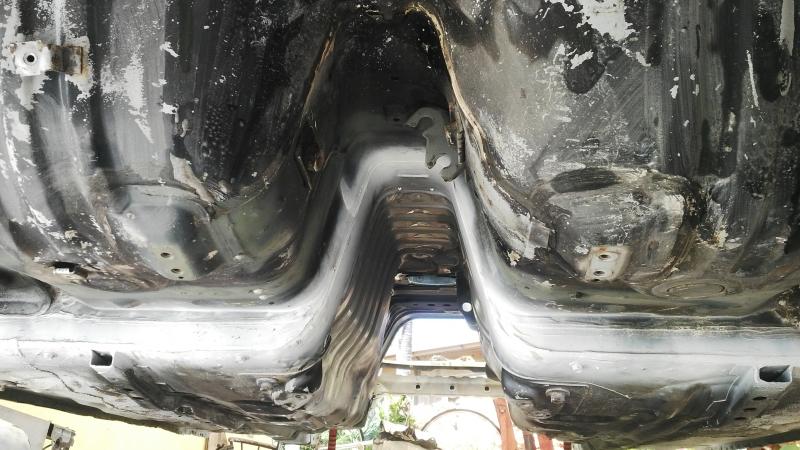
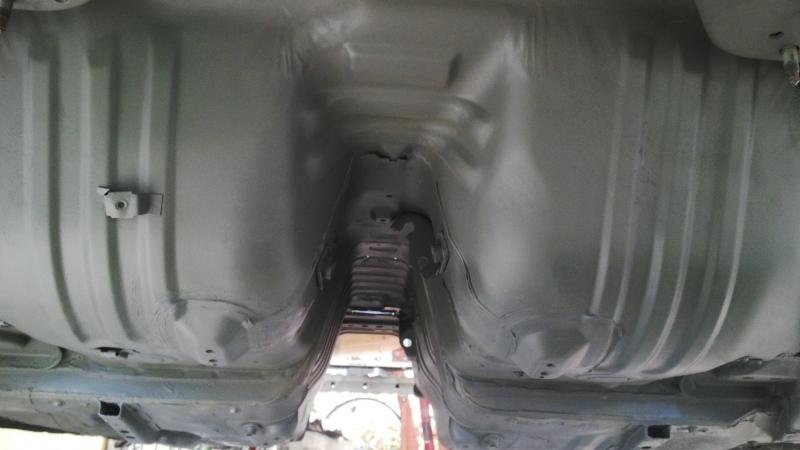
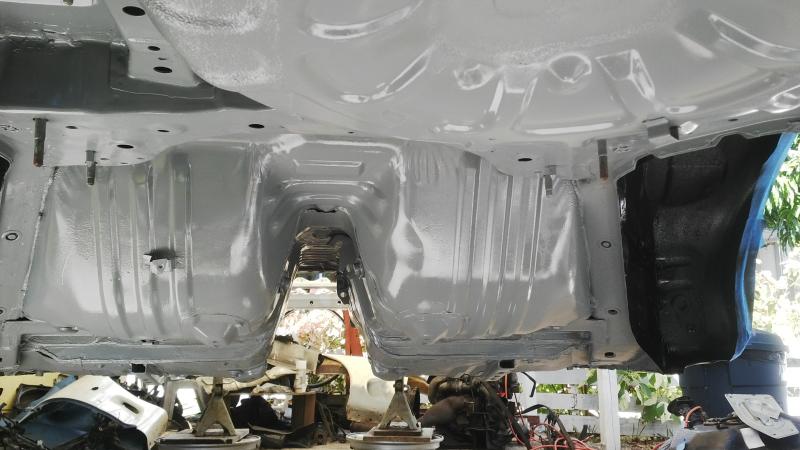
While under the car I thought, this is ugly, I'll sort that out too...
Name:  IMG_20141214_121842_zpsf74aaa51.jpg
Views: 427
Size:  71.9 KB
Name:  IMG_20141214_132851_zps4a97745f.jpg
Views: 420
Size:  32.7 KB
Name:  IMG_20141221_132103_zpse1104447.jpg
Views: 435
Size:  54.3 KB

Now the body itself is sitting until a body man comes and fixes some rust on rear fender between wheel and bumper, I will also have him seal off all the antennae hole in fender, all trunk holes for wing (not going back on so that will be for sale), rear wiper arm and nozzle spray holes also, then he will prepare the entire exterior to the point that all I need to do is apply paint.

I also will spray lizard skin in the interior.
Name:  IMG_20141210_131120_zps58bbc88f.jpg
Views: 405
Size:  62.5 KB

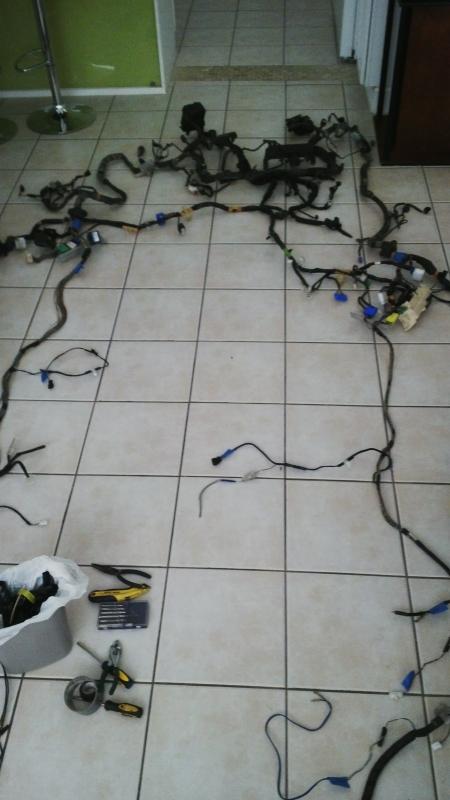
Began wiring work to remove wires I will no longer need, and just to clean up the bulk, make it all neat and will replace new expandable braided wire sleeving on entire harness once everything is test fitted and cars starts and everything functions.
Name:  IMG_20141211_090110_zpscab70900.jpg
Views: 421
Size:  42.9 KB

That's where I'm currently at. I have lots of parts accumulated but still have lots more to gather.

I will update as progress is made.
Reply
Old Jan 5, 2015 | 12:20 AM
  #3  
Broke_A_Baller's Avatar
OMG a Chupacabra!
Tenured Member: 10 Years
iTrader: (26)
 
Joined: May 2012
Posts: 1,363
Likes: 7
From: Florida
LMK (us know?) how difficult it is to work with lizard skin. That is what I am planning on using when I get to the bodywork of my FD. However, I was planning on undercoating it too.

Good luck with the build. Not a fan of v8s, but I enjoy your attention to detail (ugliness is not acceptable :p).

-Nick
Reply
Old Jan 6, 2015 | 10:37 AM
  #4  
04G35S's Avatar
Rotary Enthusiast
Tenured Member 05 Years
iTrader: (10)
 
Joined: Jan 2013
Posts: 1,053
Likes: 4
From: Madison, WI
Wow subscribed!

I cant wait to see the progress.
Reply
Old Jul 19, 2015 | 09:29 PM
  #5  
Mysta Joe's Avatar
Thread Starter
Junior Member
Tenured Member: 10 Years
iTrader: (1)
 
Joined: May 2013
Posts: 34
Likes: 0
From: Caribbean
Ok, I have not been doing updates often, but here's what has been going on.
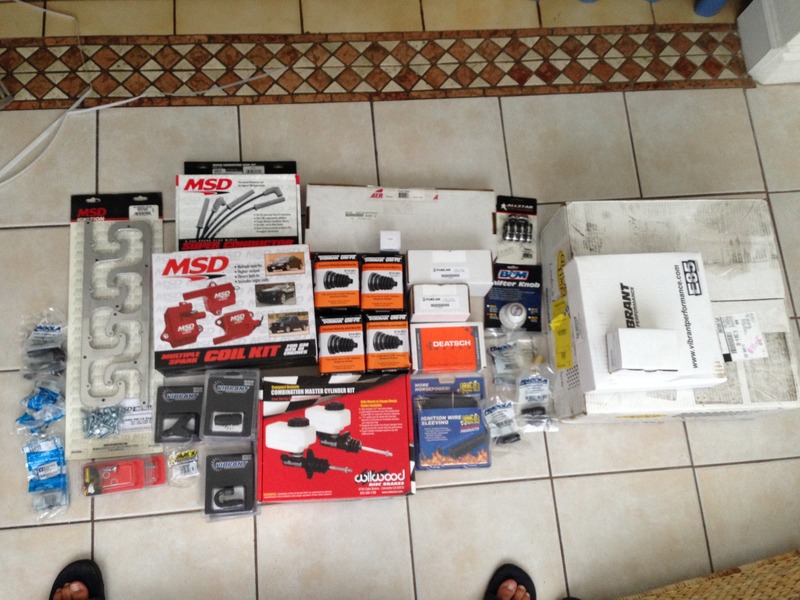
Accumulated parts:

From Samberg Performance:


Mounting kit has been powdercoated after received.


From forum member "Alex Rodriguez"


From Ebay:


From Improved Racing:


Forum member "Juan" J-Auto:


I also got some Chevy OEM things; new accessory kit for the LS motor (alternator, AC, Power steering, etc), miscellaneous parts to convert the C5 corvette T56 to F-body type. I have a transmission guy doing the conversion, thought I would have had it back to install this weekend, but he called me to come to the shop to show me chipped teeth on the 5th gear, so I need to order one of those.

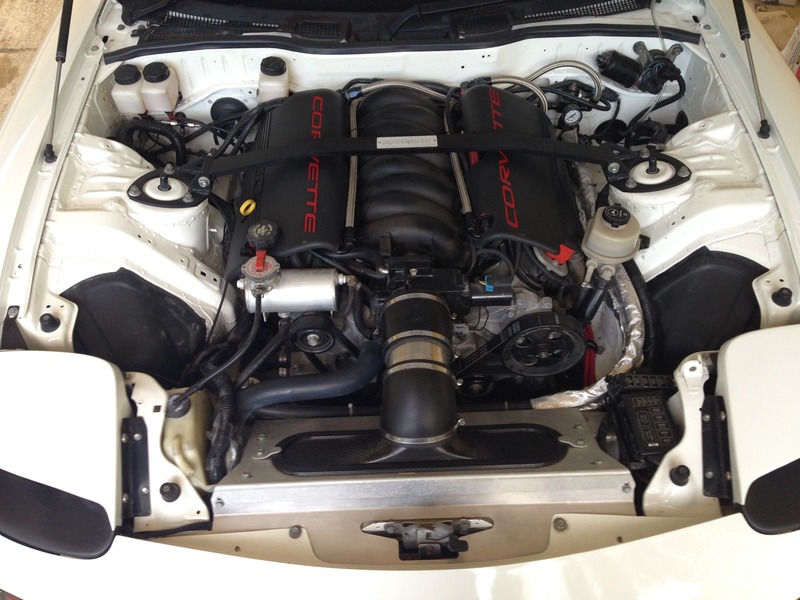
I painted the engine bay and mounted the LS.


Cleaned all the suspension bits and rear subframe and diff and then painted everything.

Suspension bits before:


After cleaning and new bushings and pillowballs pressed in:


Painted:


I have also reinstalled the rear subframe, diff and all suspension. I haven't taken pics of that because I'm waiting for new axle boots to replace and then paint my axles, and I need to get new coilovers. I did reinstall the axles, old shocks and springs, hubs, etc, because I am going to roll the fenders before I do the bodywork and paint.

That's all for now.
Reply
Old Jul 19, 2015 | 11:12 PM
  #6  
GTR's Avatar
GTR
Senior Member
Tenured Member 20 Years
iTrader: (6)
 
Joined: Mar 2001
Posts: 444
Likes: 0
From: San Jose, CA
Looks good.
Reply
Old Jul 20, 2015 | 09:28 AM
  #7  
04G35S's Avatar
Rotary Enthusiast
Tenured Member 05 Years
iTrader: (10)
 
Joined: Jan 2013
Posts: 1,053
Likes: 4
From: Madison, WI
You have some great parts! I love seeing the progress!
Reply
Old Jul 20, 2015 | 01:14 PM
  #8  
jasonn's Avatar
Half Triangle
Tenured Member: 15 Years
iTrader: (10)
 
Joined: Mar 2009
Posts: 408
Likes: 2
From: Walnut, CA
Wow! Great build!
Reply
Old Oct 31, 2015 | 09:36 AM
  #9  
Mysta Joe's Avatar
Thread Starter
Junior Member
Tenured Member: 10 Years
iTrader: (1)
 
Joined: May 2013
Posts: 34
Likes: 0
From: Caribbean
OK, slacked off on the updates but the build has been progressing.
More goodies piled up….
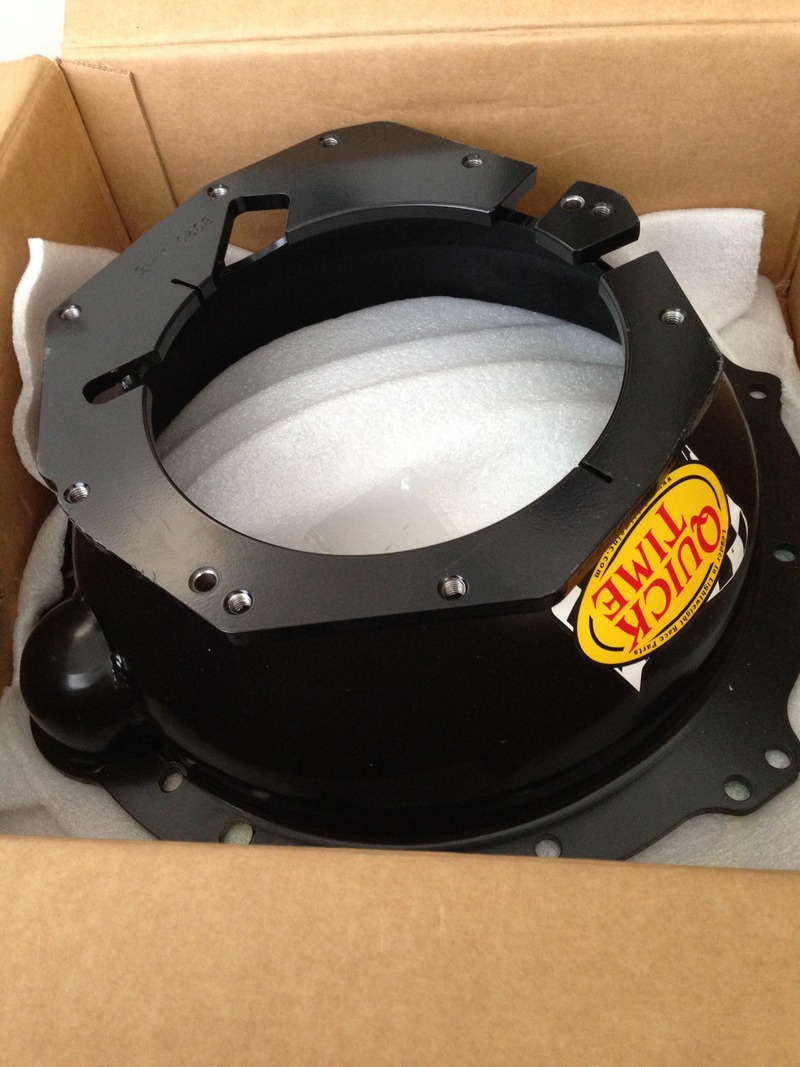
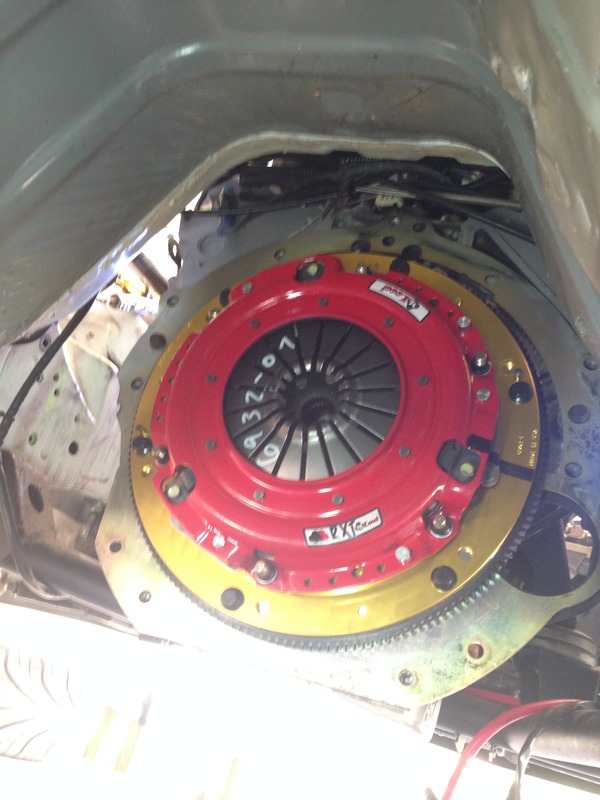
Quick Time bell housing
Name:  IMG_0258_zpsubasvqmw.jpg
Views: 418
Size:  196.0 KB
Random Stuff….
Name:  IMG_0260_zpshveq3zmk.jpg
Views: 424
Size:  157.2 KB
Name:  IMG_1371_zpsahc6rffc.jpg
Views: 421
Size:  210.9 KB
Name:  IMG_2909_zpsyjc6cxr4.jpg
Views: 452
Size:  93.8 KB
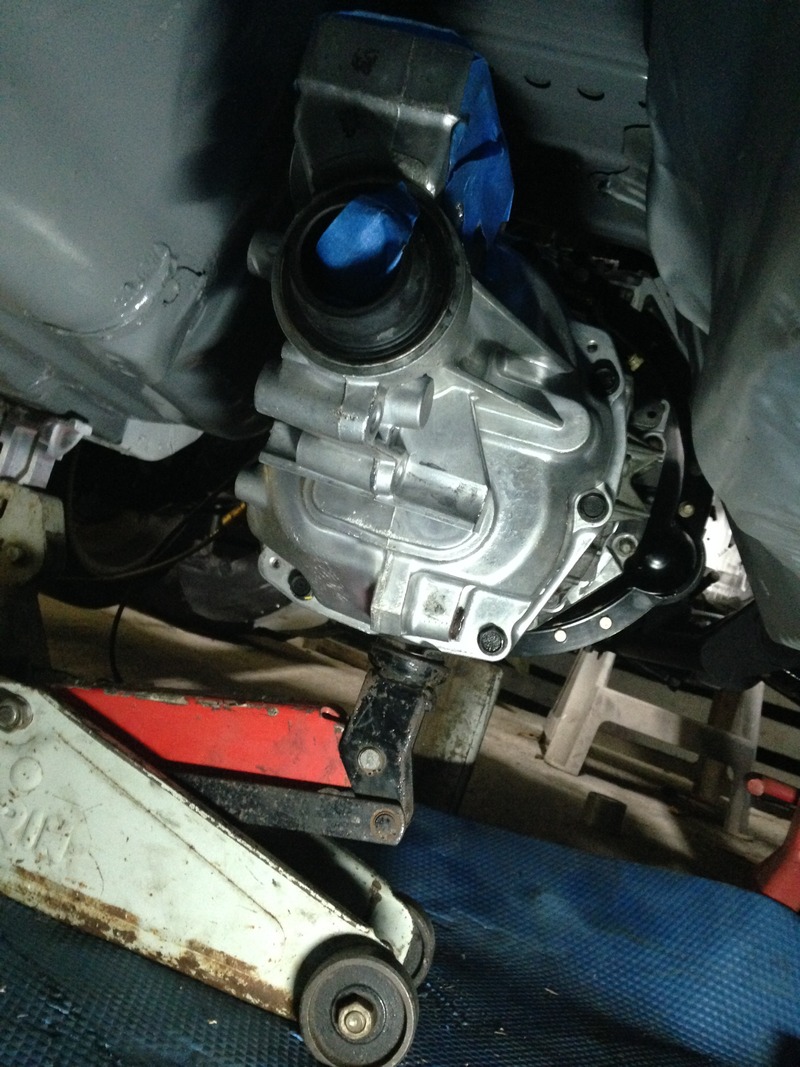
Transmission in. This was the C5 corvette trans that I converted to a fbody
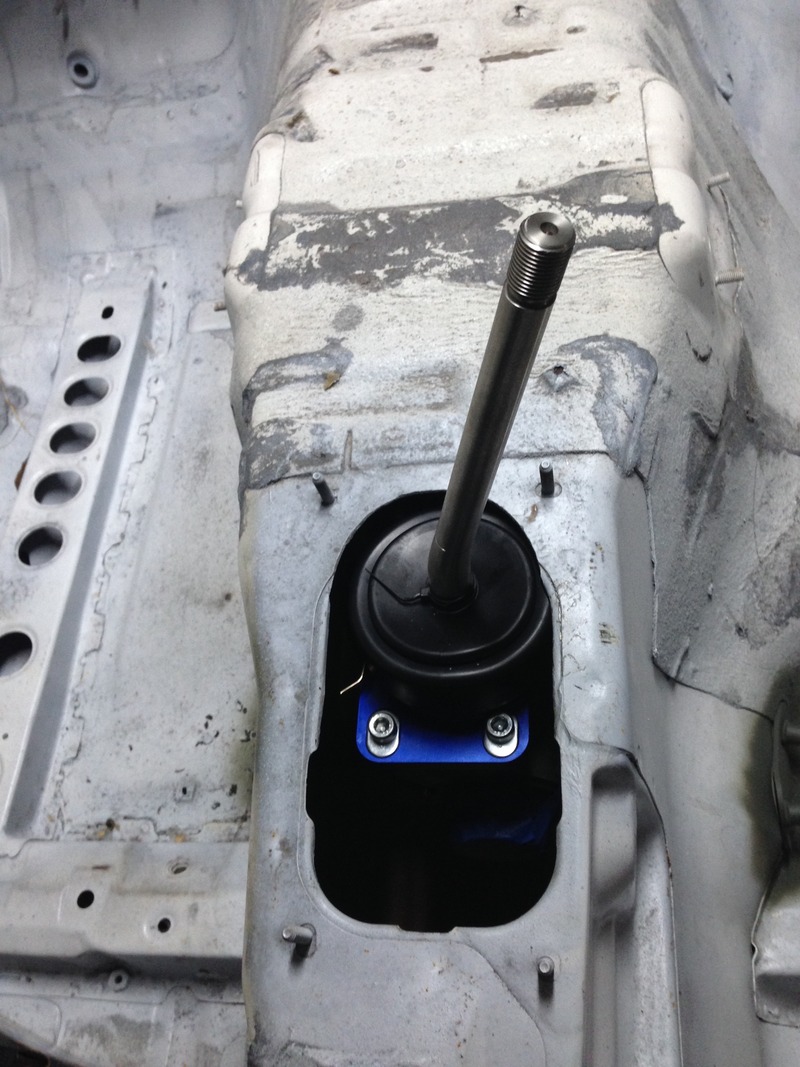
Name:  IMG_0512_zpsrnupg7mt.jpg
Views: 393
Size:  237.6 KB
Reply
Old Oct 31, 2015 | 09:37 AM
  #10  
Mysta Joe's Avatar
Thread Starter
Junior Member
Tenured Member: 10 Years
iTrader: (1)
 
Joined: May 2013
Posts: 34
Likes: 0
From: Caribbean
Shifter in
Name:  IMG_1426_zpsgt6k3hiz.jpg
Views: 427
Size:  213.2 KB
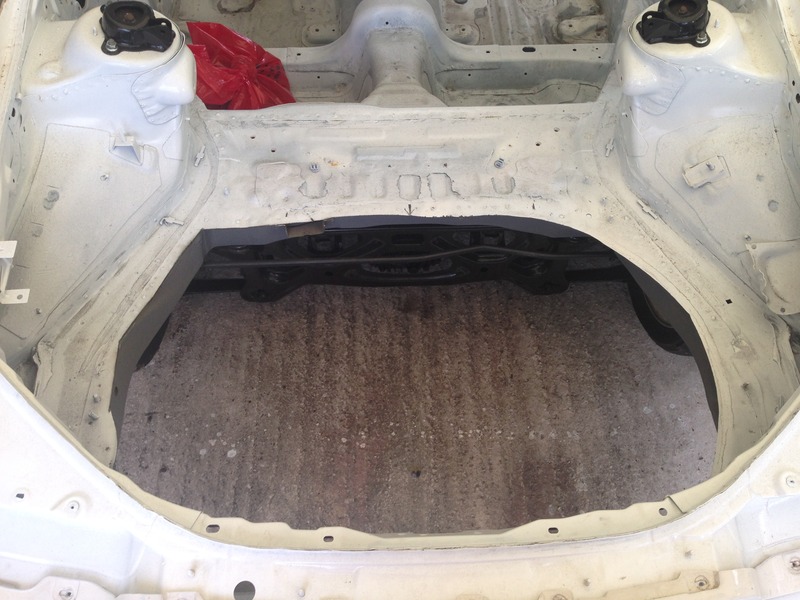
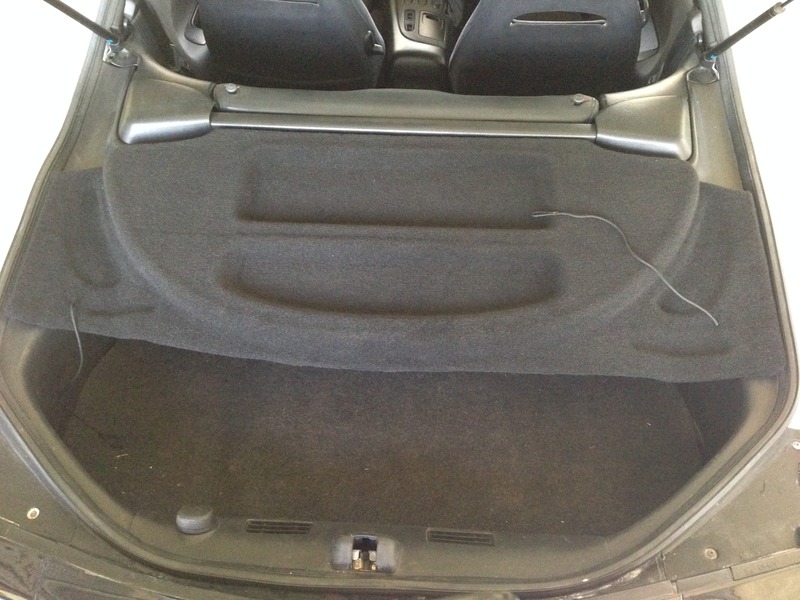
Cut out trunk for new gas tank
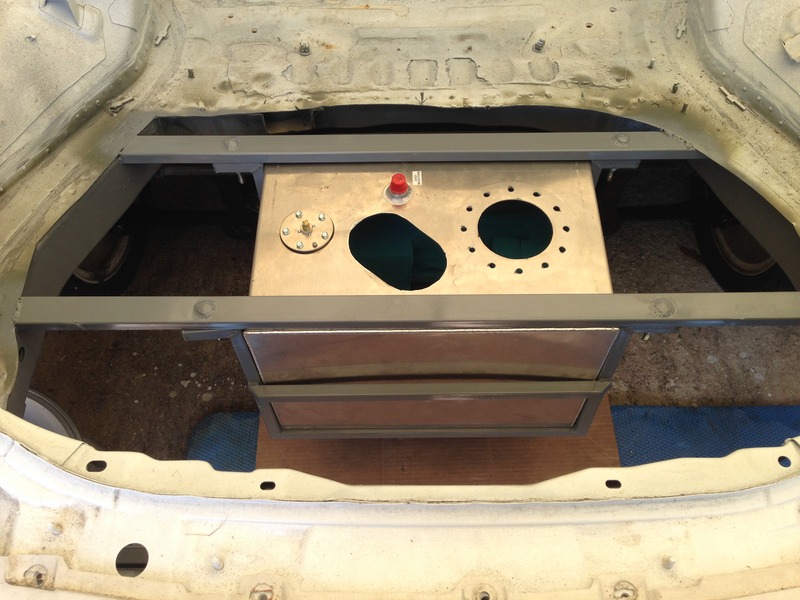
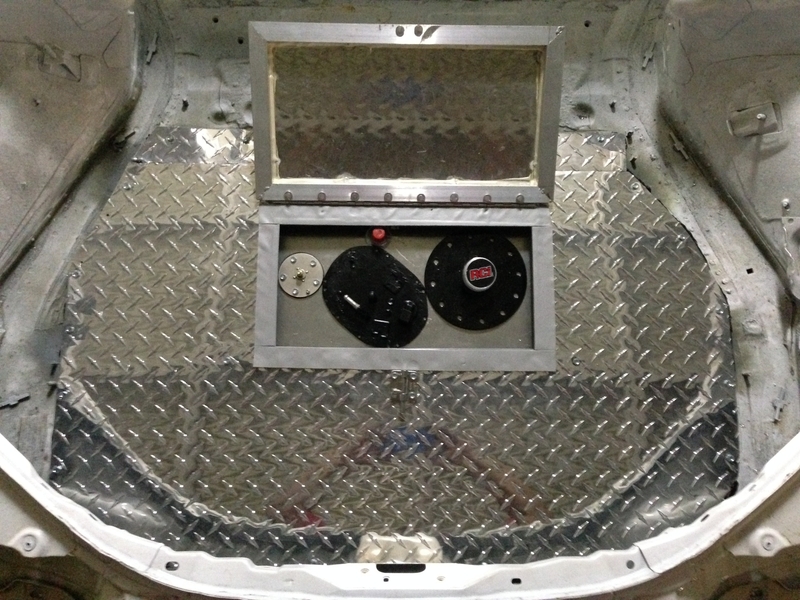
Name:  IMG_1258_zpshw2btyg7.jpg
Views: 440
Size:  137.8 KB
Fuel tank in
Name:  IMG_1753_zpsoxwbnz7a.jpg
Views: 406
Size:  133.4 KB
New trunk floor and fuel lid, this whole new fuel tank and lid setup worked out 15lbs lighter than the stock floor and tank.
Name:  IMG_1889_zpsknspzwzj.jpg
Views: 426
Size:  378.1 KB
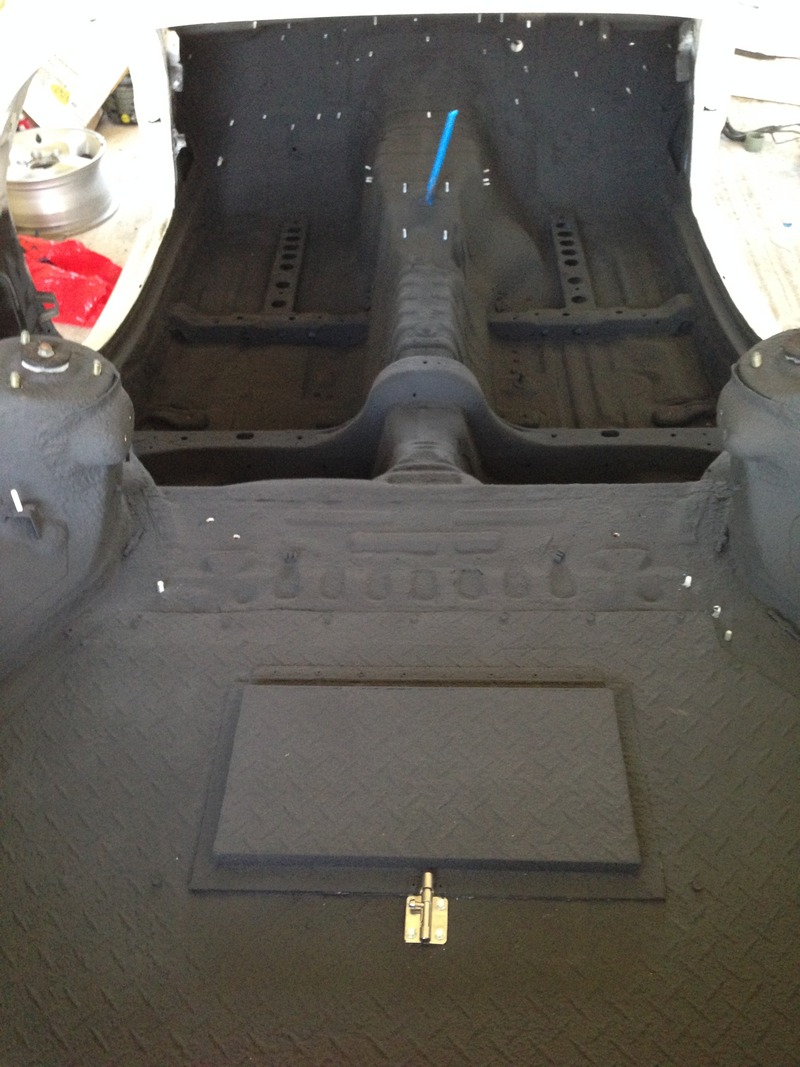
Lizard skin sprayed down, sound control and ceramic insulation, used 2 gallons of each, also did the inner roof. I weighed the containers full and they were about 42lbs total, I weighed them after to get an idea of how much weight was sprayed in, so I figured about 34lbs of material.
Name:  IMG_2353_zpsyihl7wwj.jpg
Views: 408
Size:  195.9 KB
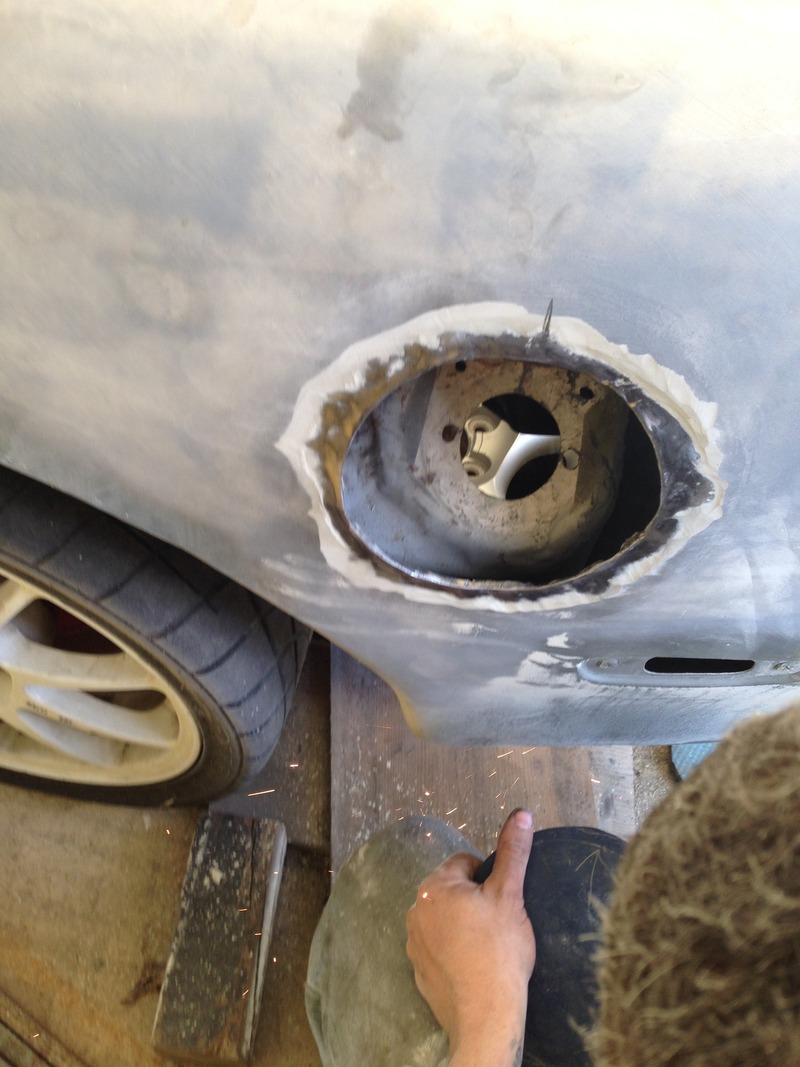
Cleaned down to bare metal to block off filler hole, forgot to take a pic after welded up
Name:  IMG_1668_zpscvucugum.jpg
Views: 429
Size:  174.9 KB
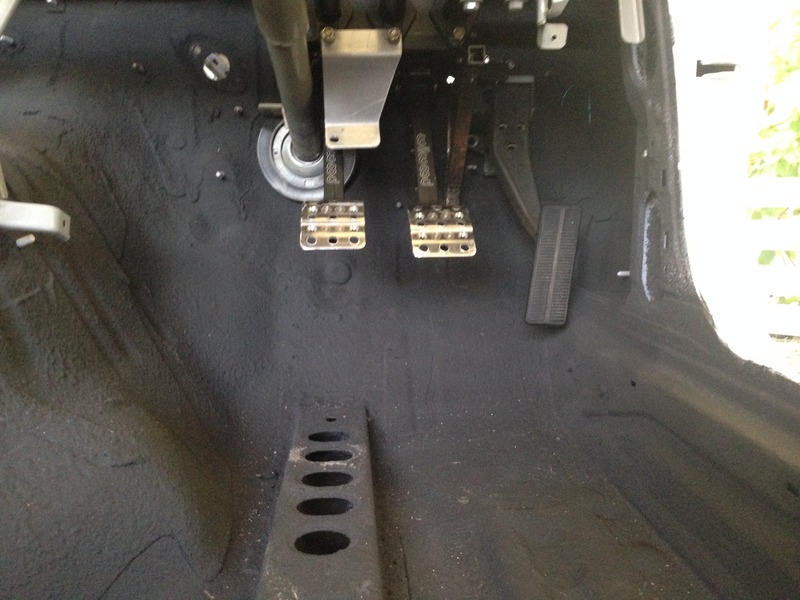
Mocking up the wilwood pedal box and C5 DBW pedal
Name:  IMG_2679_zpsk5wf8wz0.jpg
Views: 428
Size:  125.7 KB
Reply
Old Oct 31, 2015 | 09:38 AM
  #11  
Mysta Joe's Avatar
Thread Starter
Junior Member
Tenured Member: 10 Years
iTrader: (1)
 
Joined: May 2013
Posts: 34
Likes: 0
From: Caribbean
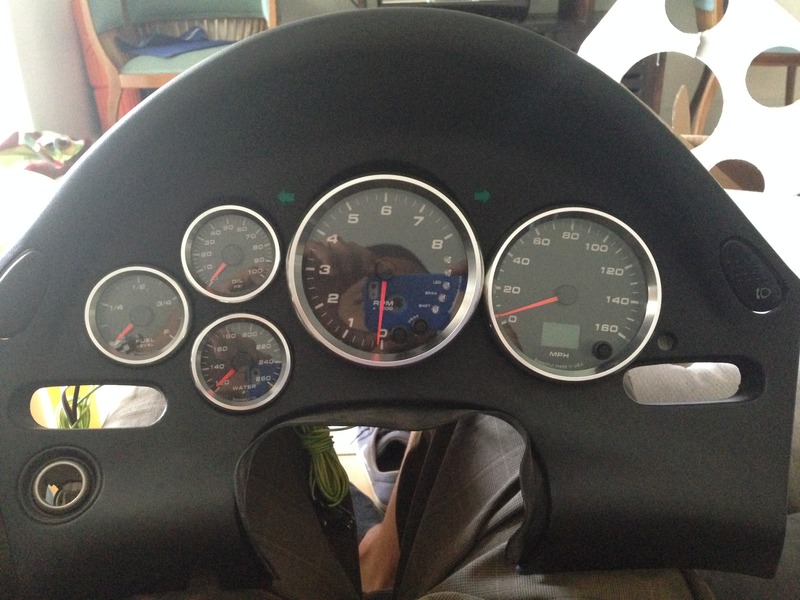
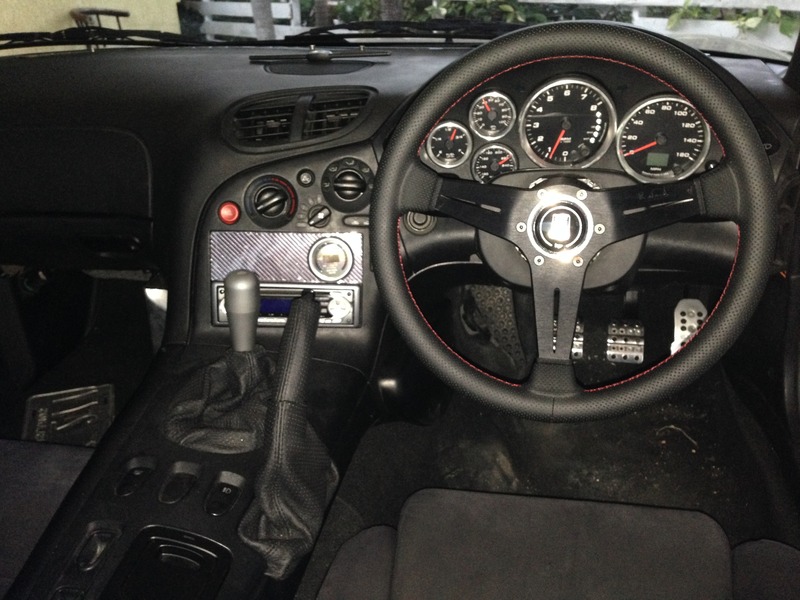
Speedhut gauges mocked up
Name:  IMG_2984_zps1dgsezcf.jpg
Views: 520
Size:  135.2 KB
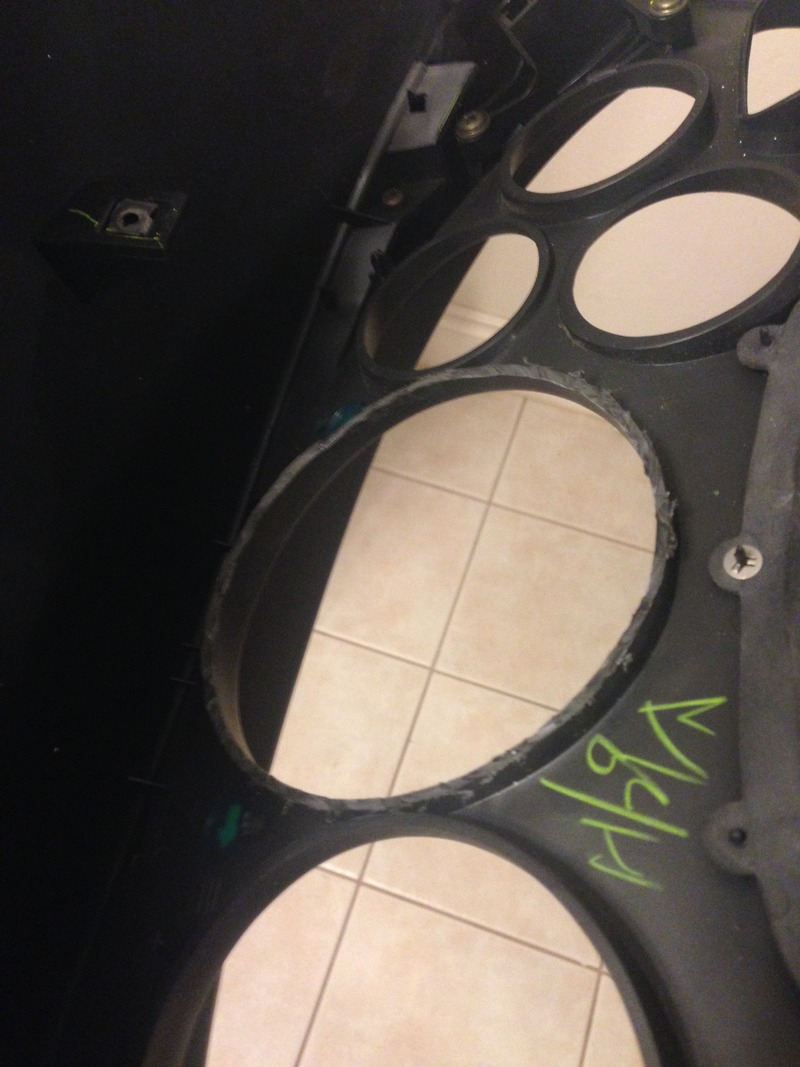
Trimmed the back ring for the tach gauge to fit. (Basically I just put all gauges through the front and screw the back locking ring on, it worked out good)
Name:  IMG_3118_zpso3gjalpw.jpg
Views: 420
Size:  159.8 KB
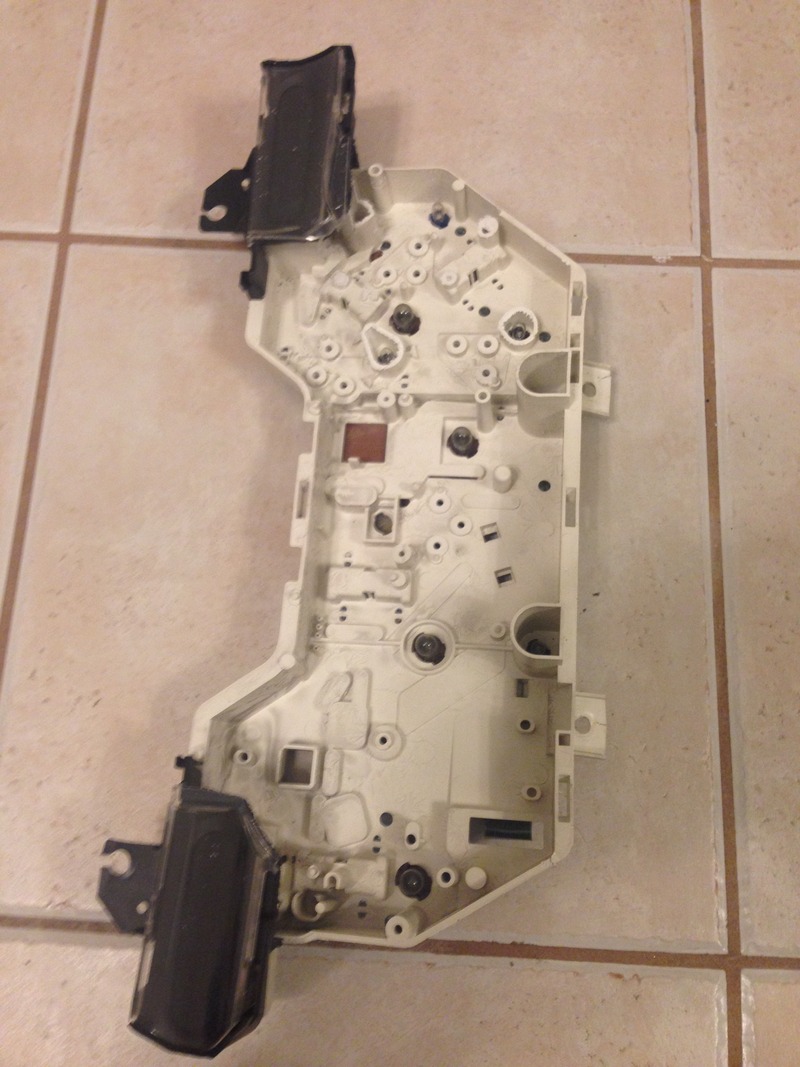
Took off OEM gauges from board, and you can see the trimmed side for the warning lights to have a clean fit back up, also had to trim some of the plastic “tubes” that stick up around the oil, water and fuel area
Name:  IMG_3119_zpsavizshe6.jpg
Views: 424
Size:  179.4 KB
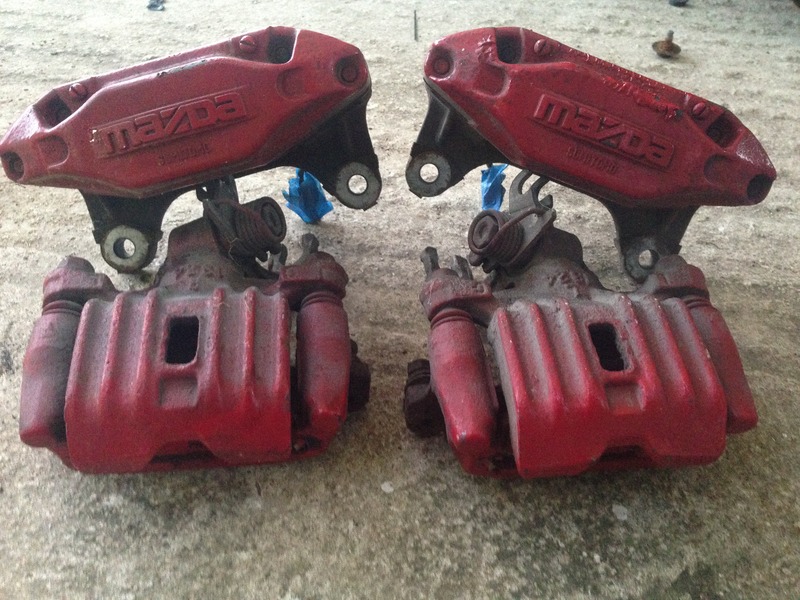
Calipers before, I am rebuilding them and painting them, will show after when completed
Name:  IMG_3120_zpseqnmhhbo.jpg
Views: 423
Size:  181.3 KB
Mocking up my Sureflo exhaust (from Greg Stevenson in Australia), it comes with flanges, pre-bent piping, merge collectors. It’s done this way so it can then be tailored as setups can vary (different subframes etc). Still need to finish final welding, will post after pics.
Name:  IMG_2633_zps9ppczmsq.jpg
Views: 430
Size:  159.8 KB
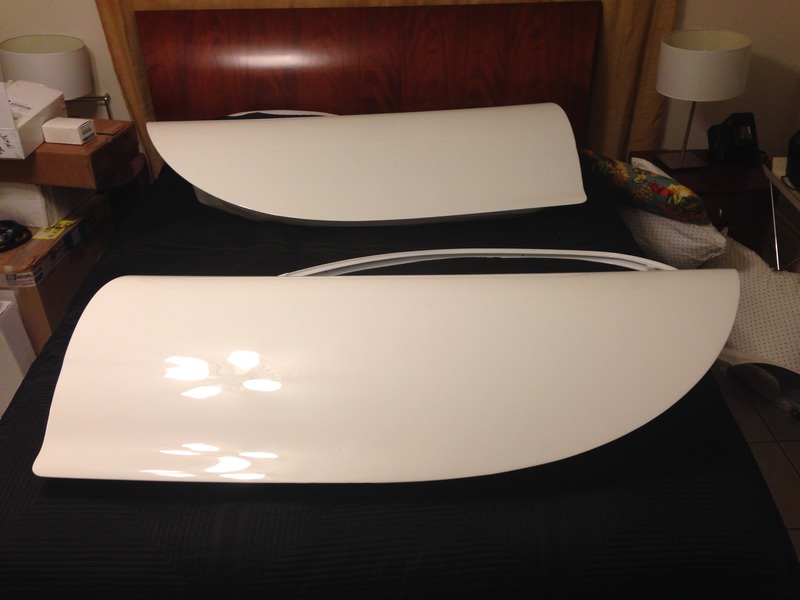
Doors, fenders, trunk and hood were painted, here’s the doors
Name:  IMG_2682_zpskjwummds.jpg
Views: 410
Size:  73.5 KB
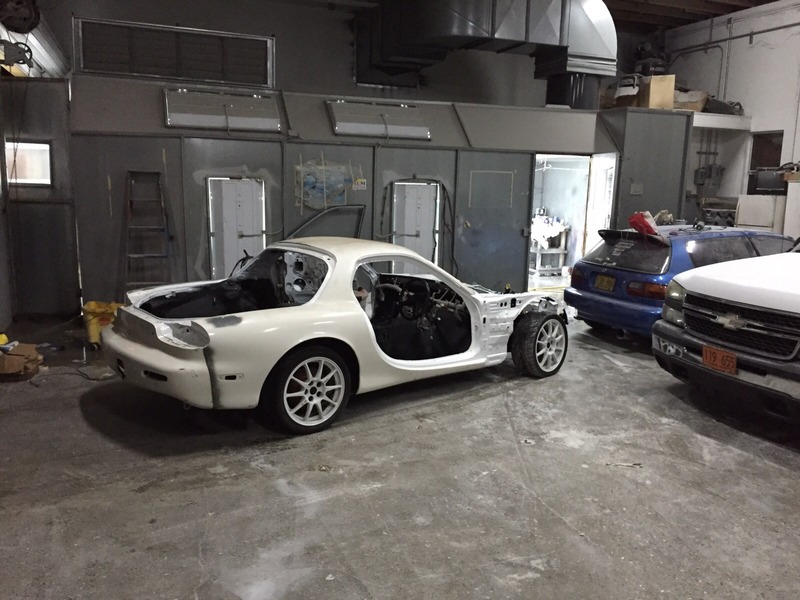
Rest of car heading to the paint booth
Name:  IMG_2735_zpsihlfip44.jpg
Views: 430
Size:  96.1 KB
At the booth, should be back home this weekend, then the rest of the fun can begin putting together the fuel system, brake lines, engine accessories, radiator, and then wiring (which I am not exited about the wiring)
Name:  IMG_2745_zpsim39ncgf.jpg
Views: 449
Size:  135.9 KB
That’s about it for now, will update once more progress is made.
Reply
Old Oct 31, 2015 | 11:26 PM
  #12  
automationLED's Avatar
Senior Member
iTrader: (5)
 
Joined: Apr 2012
Posts: 278
Likes: 0
From: USA
how hard was it to make that cut in the rear tub? i just got my car painted and i'm looking to replace my fuel tank with a fuel cell, but i want to make sure i can cut the tub without too much paint damage
Reply
Old Nov 1, 2015 | 05:46 AM
  #13  
240sxcess's Avatar
Junior Member
 
Joined: Apr 2013
Posts: 13
Likes: 0
From: Milwaukee wi
Nice work man looks like it's coming along good scoop on the vetted at least you'll have whole car instead of a junk yard pull out
Reply
Old Nov 2, 2015 | 08:52 AM
  #14  
Mysta Joe's Avatar
Thread Starter
Junior Member
Tenured Member: 10 Years
iTrader: (1)
 
Joined: May 2013
Posts: 34
Likes: 0
From: Caribbean
Cut out in the rear tub was not hard, I just used a drill to make a pre hole then I used a sawzall mainly and a cut off wheel on a grinder in a few tight space, especially right against the rear frame. You should be fine to not damage any paint.

If you are a bit worried just cover the rear panels and bumper with some cardboard stuck on with painter tape.
Reply
Old Nov 3, 2015 | 09:10 AM
  #15  
Project88Turbo's Avatar
Stock boost FTW!
Tenured Member: 20 Years
Liked
Loved
Community Favorite
iTrader: (22)
 
Joined: Nov 2004
Posts: 1,139
Likes: 114
From: Berlin, MD
The title made me think I would hate it, but everything is so nice, and the parts are all high quality. I can't help but love it.

Awesome build!

Vince
Reply
Old May 31, 2016 | 09:35 AM
  #16  
Hybrid G's Avatar
Rotary Enthusiast
Tenured Member 20 Years
iTrader: (4)
 
Joined: Jan 2005
Posts: 1,101
Likes: 0
From: toronto
updates joe bro!!!!
Reply
Old Apr 9, 2017 | 04:24 PM
  #17  
Mysta Joe's Avatar
Thread Starter
Junior Member
Tenured Member: 10 Years
iTrader: (1)
 
Joined: May 2013
Posts: 34
Likes: 0
From: Caribbean
Well it has been a long time since I updated. I'll just do a quick update. The build is "complete" for now....

Cargo cover
Name:  IMG_3239_zpsxswo0gin.jpg
Views: 437
Size:  135.9 KB

McLeod RXT Twin went in
Name:  IMG_4190_zpspam9u48l.jpg
Views: 432
Size:  115.1 KB

AC works!
Name:  IMG_0355_zpsj0sc0oqo.jpg
Views: 411
Size:  85.6 KB

How the complete package looks...
Engine
Name:  IMG_4792_zpsznwr1hec.jpg
Views: 449
Size:  142.9 KB

Driver cockpit
Name:  IMG_3375_zpsnp3zbwpr.jpg
Views: 407
Size:  140.3 KB

Body
Name:  IMG_4784_zpsfw3qgl8v.jpg
Views: 426
Size:  205.5 KB
Name:  IMG_4786_zpslbxkji1c.jpg
Views: 475
Size:  202.5 KB
Name:  IMG_4787_zpskedgachs.jpg
Views: 455
Size:  193.6 KB
Name:  IMG_4789_zpssjw6szt8.jpg
Views: 479
Size:  210.0 KB
Name:  IMG_4790_zpsxxg1r7i0.jpg
Views: 455
Size:  223.1 KB
Reply
Old Apr 20, 2017 | 08:16 PM
  #18  
HPatternHero's Avatar
Junior Member
 
Joined: Apr 2017
Posts: 10
Likes: 0
From: Ann Arbor, MI
Wow, I love the integrated spoiler! That car is super clean and I wish I had an RX-7 like that!
Reply
Old Apr 20, 2017 | 08:25 PM
  #19  
rocketman2440's Avatar
Junior Member
Tenured Member 15 Years
 
Joined: Jan 2007
Posts: 19
Likes: 1
From: Georgia
Build turned out great! What spoiler/tail light surround is that?
Reply
Old Apr 21, 2017 | 07:47 AM
  #20  
04G35S's Avatar
Rotary Enthusiast
Tenured Member 05 Years
iTrader: (10)
 
Joined: Jan 2013
Posts: 1,053
Likes: 4
From: Madison, WI
Wow! This came out so clean. I love it!

It is weird seeing the left quarter panel with no fill hole door for the fuel.
Reply
Old Apr 21, 2017 | 02:50 PM
  #21  
Mysta Joe's Avatar
Thread Starter
Junior Member
Tenured Member: 10 Years
iTrader: (1)
 
Joined: May 2013
Posts: 34
Likes: 0
From: Caribbean
Originally Posted by rocketman2440
Build turned out great! What spoiler/tail light surround is that?
It is the Espirit Style Taillight cover from Shine Auto Project.

See link here: https://www.rx7club.com/shineautopro...-item-1102823/
Reply
Old Apr 21, 2017 | 02:52 PM
  #22  
Mysta Joe's Avatar
Thread Starter
Junior Member
Tenured Member: 10 Years
iTrader: (1)
 
Joined: May 2013
Posts: 34
Likes: 0
From: Caribbean
And thanks to everyone for the positive comments. Was a long time in the making and as we all know it's never truly "finished"...
Reply
Old Apr 25, 2017 | 12:59 PM
  #23  
Jez's Avatar
Jez
Junior Member
Tenured Member 05 Years
 
Joined: Dec 2015
Posts: 41
Likes: 5
From: Grand Cayman
Nice Build!! Honk at me if you see the Black FD around W.Bay!! Nice to see another RX7 back on the road!

Last edited by Jez; Apr 25, 2017 at 01:04 PM.
Reply
Old Apr 29, 2017 | 07:27 PM
  #24  
Project88Turbo's Avatar
Stock boost FTW!
Tenured Member: 20 Years
Liked
Loved
Community Favorite
iTrader: (22)
 
Joined: Nov 2004
Posts: 1,139
Likes: 114
From: Berlin, MD
All I can say is WOW! This turned out so nice. Can you post up some videos of how it sounds?

Vince
Reply
Related Topics
Thread
Thread Starter
Forum
Replies
Last Post
Azevedo
Other Engine Conversions - non V-8
26
Mar 1, 2019 09:19 PM
bb6guy
Old School and Other Rotary
10
Oct 1, 2018 08:07 AM
Professorpeanutrx7
New Member RX-7 Technical
5
Aug 15, 2015 01:38 PM


Thread Tools
Search this Thread

All times are GMT -5. The time now is 12:45 AM.