When you click on links to various merchants on this site and make a purchase, this can result in this site earning a commission. Affiliate programs and affiliations include, but are not limited to, the eBay Partner Network.
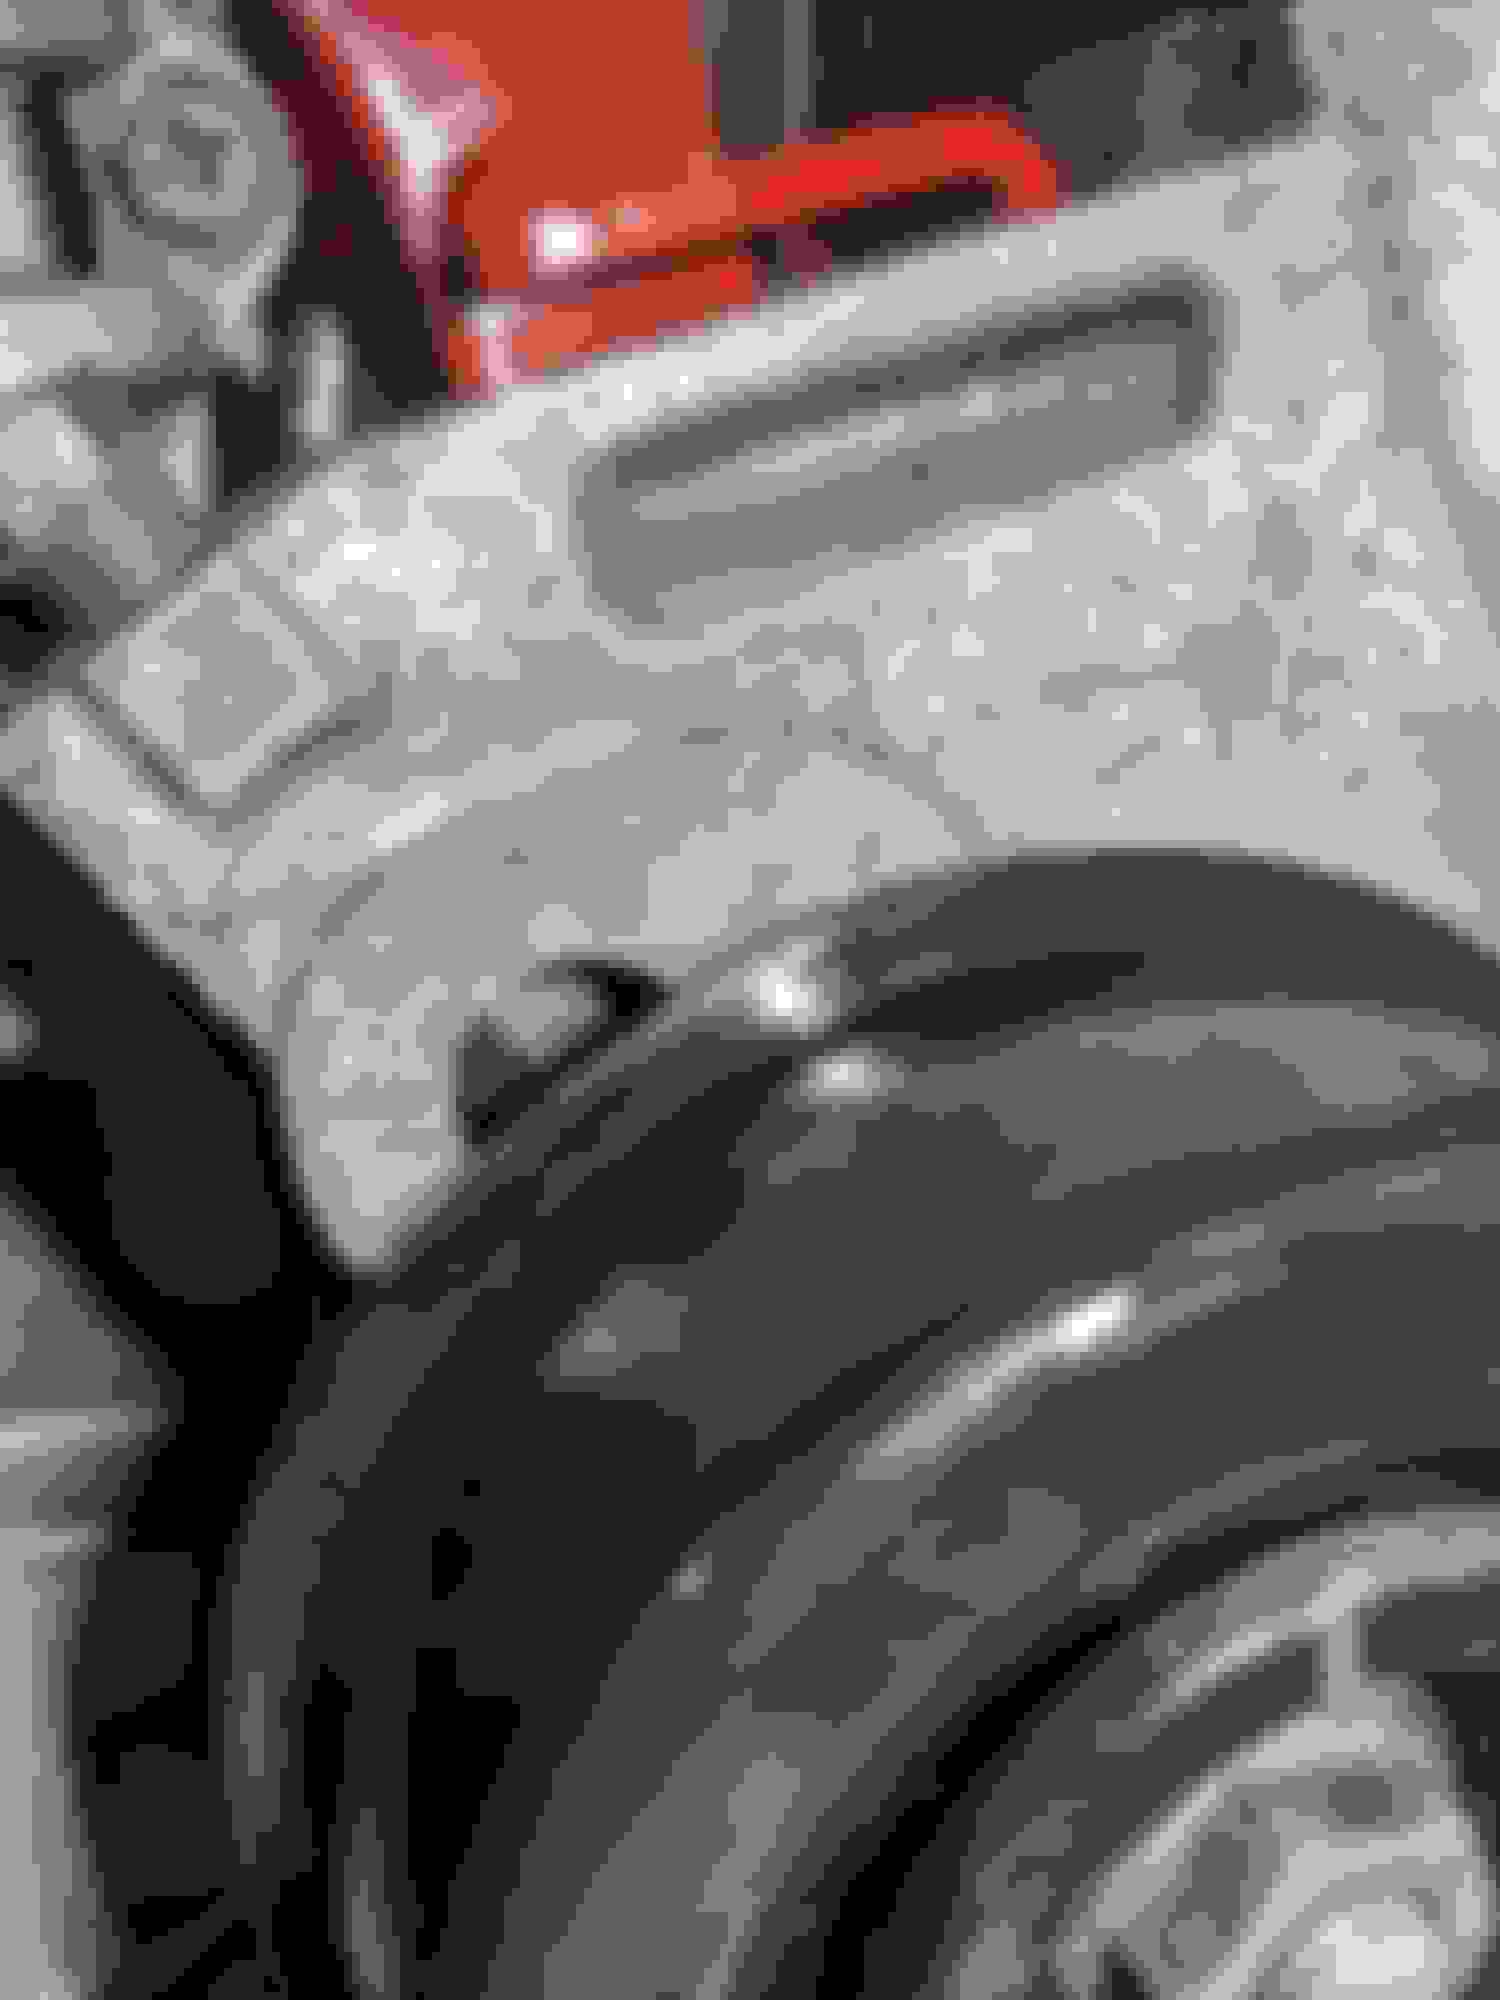
I don't think that part is threaded in the first place. The long bolt you're holding in that video threads into the square-shaped part that is just below the bolt in your video. The top part of the bolt needs to be free to spin in the place you're spinning it, in order to move the square-shaped part up or down to adjust the position of the tensioner pulley. Page C-7 in the factory service manual shows the procedure for adjusting the belt tension.
I think that other thread is referencing that they stripped the square-shaped part because they tried to twist the long bolt before loosening the idler pulley locknut (which is labeled part A in the service manual page C-7).
IIRC the top part of that bolt is threaded one way for the support bracket…so yes the support bracket does look stripped to me. Look at the bolt closely. The upper threads run opposite of the lower threads. It’s reverse threaded so that when the pulley is attached and the bolt is turned it pushes down on the pulley and tensions the belt sufficiently.
I think you’ll need a new support
I figured as much, otherwise the reverse threads have no purpose. Looking closely I can see very light thread markings in the bracket. The bolt was so rusted when I removed it that I bet it was thick enough to latch onto those slight threads.
That's stripped yes. An easier repair would be to put a jam nut on the rod if the threads are salvageable. The other end threads into the block that tensions the pulley so a jam nut will be a fine substitute. You could buy another ps/ac bracket or try other repair methods if you'd like but any kind of repair would be relatively extensive.
That's stripped yes. An easier repair would be to put a jam nut on the rod if the threads are salvageable. The other end threads into the block that tensions the pulley so a jam nut will be a fine substitute. You could buy another ps/ac bracket or try other repair methods if you'd like but any kind of repair would be relatively extensive.
i was going to say Heli-coil but jamb nut is way easier, you win this time!
Stripped. I�m running jamb nuts on mine. I had the same experience as you. The first time I took it out, threads came with it. The entire bracket gets replaced to fix it the right way.
The rod's threads are in good condition, both top and bottom.
I'm not grokking the jam nut idea though. I think I'd have to put a jam nut on the underside, otherwise the pulley tension would push the bolt back out the top. It doesn't look like there would be room to thread a jam nut in from the back side. Either I'm misjudging the clearance or I'm missing something.
the jam nut would go on top. once you set the tension you'll snug the nut down. keep in the mind the center nut on the pulley is what locks everything in place so it doesn't move itself. trying to run through it in my head on how it would work with the reverse threads is confusing me a little lol but put the nut on top and run through the process. you can use a regular nut but in a jam fashion lol. flanged would be ideal
I'll give it a shot and see if I can wrap my head around it. I guess when you tighten the pulley nut it pulls the whole mechanism inward which creates some friction to hold it in place. Thanks for all the help, I'll report back success or fail. Definitely beats taking more stuff apart.
Here is a photo for you. I grabbed what I could find at the parts store. There is also a nut on the bottom that doesn�t fit as nicely (stops at top of channel). It works. I don�t like it, but don�t want to redo all of the ps and ac stuff.
I finally got enough engine assembled to swing over to this. The extra nut approach works but what I found is that you only need a single nut underneath. Putting a nut on top actually just makes the job harder, and this double threaded, reverse action contraption is already enough of a mind f@%k.
So here are the exact steps I took to get this working:
1) With pulley fully removed, make sure the adjuster nut (the square backside of the pulley bolt) is loose, sitting at the bottom of the channel (If not then turn the bolt clockwise until the adjuster nut comes loose).
2) Slide the bolt through the top hole, but don�t hook it into the adjuster yet (honestly, this whole operation is probably easier without any threads at all. I think it could get hella frustrating if there are partial threads that cause the bolt to grab)
3) Take a M10 1.25 pitch nut and slide it over the bottom of the bolt (from behind the bracket). Don�t thread it yet, keep it loose. There is plenty of room for a man's fingers behind the bracket though you may need to nudge the bolt diagonally a bit to get everything to line up.
4) Pull the adjuster nut up onto the bolt and turn the bolt counter-clockwise (reverse) to start threading. Our new nut should now be resting loose on top of the adjuster nut which is steadily working its way up the bolt as you continue turning counter-clockwise. Keep going until most of the lower threads are eaten up.
5) Once the adjuster is up pretty high, lightly thread our new nut onto the upper threads (clockwise). You should be able to get left hand index finger around the back and thumb through the channel to do this. Again you may need to nudge the bolt diagonally a bit. You basically want to fully thread the nut onto the top threads but not too far, maybe 2 or 3 of the wide threads exposed beneath the nut.
6) Now you can probably turn the bolt counter clockwise a bit further to pull the adjuster nut fully to the top of the lower threads. This will give you maximum pulley adjustment. Just be careful not to unthread our new bolt while you�re at it (again, nudging diagonally you can probably keep a finger on the new nut to keep it from spinning).
7) Put the pulley back on. Make the pulley nut snug but don't fully tight yet. Loop the belt into place.
8) Now tighten the bolt as normal, turning clockwise until the belt is fully tensioned. Turning the bolt clockwise now does two things: the adjuster will be working its way downward (along the lower reverse threads), and our new nut will be working its way upwards. At some point, the edge of the new nut will jam against the side of the bracket near the top of the channel (like coxxoc described and like mine in the photo) at which point it becomes a friction point that resists upward force. Tension on the pulley pushes upwards on the bolt so I don't think there is need for a nut on the topside of the bracket.
9) Fully tighten the pulley nut.
10) You can feel the nut back behind the channel. It should be wedged in tight, unturnable.
I think a more durable fix would be to tack weld a nut to the top of the bracket. I�m not a welder so I might just get that done in a batch with other future welding work.