
My custom vmount setup

My custom vmount setup
Here is my for converting my Koyo radiator and Greddy FMIC into a vmount configuration. If you feel I have left anything out or I should have done something another way feel free to comment.
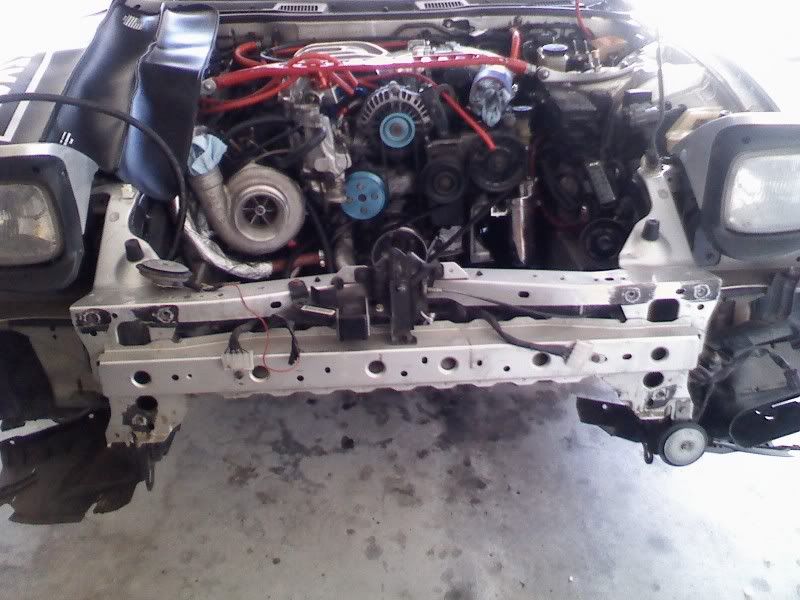
First I placed the car solidly on jack stands making sure to loosen front rim lugs prior to lifting off the ground. Next follow FSM on removing front bumper, radiator, and any other factory components that are in the way. Remove Greddy FMIC referencing the Greddy instructions that may be found on their website.
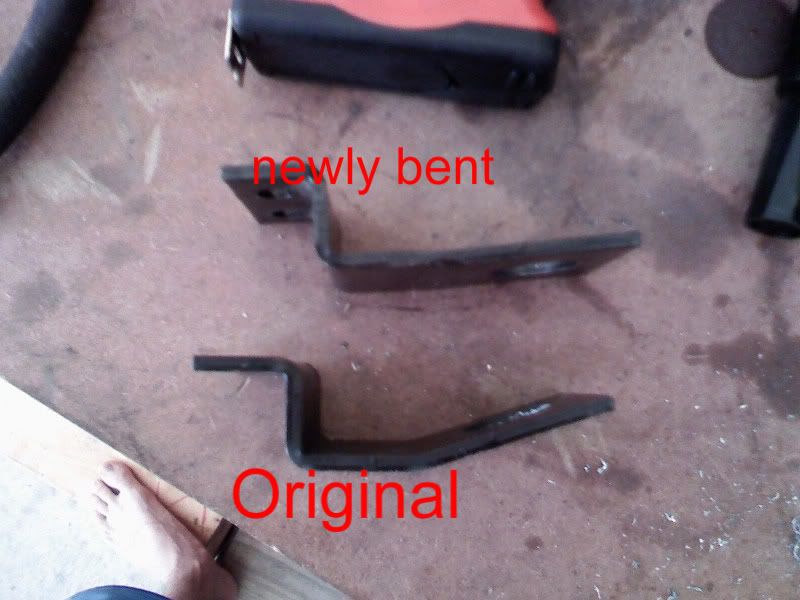
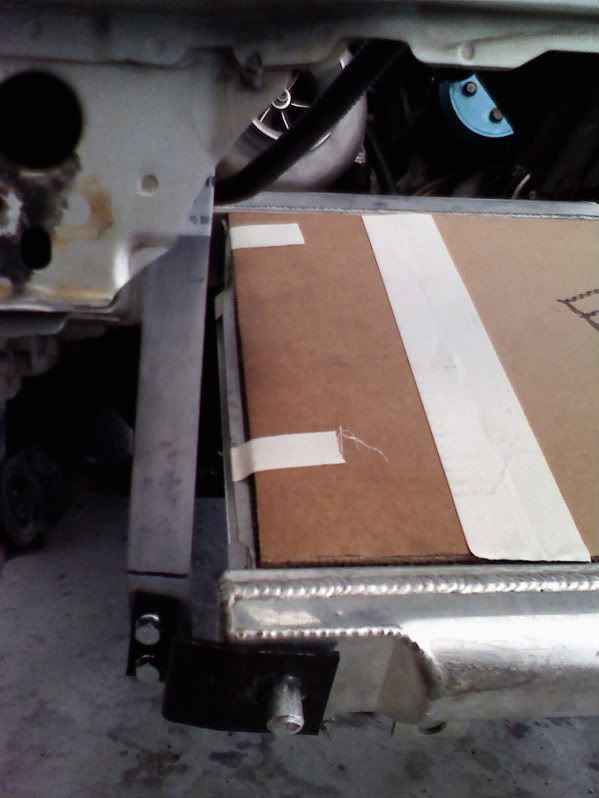
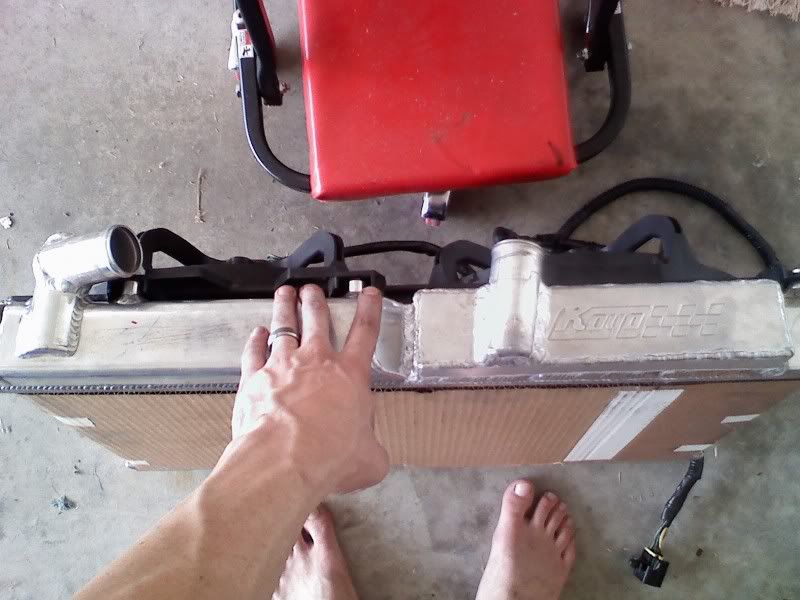
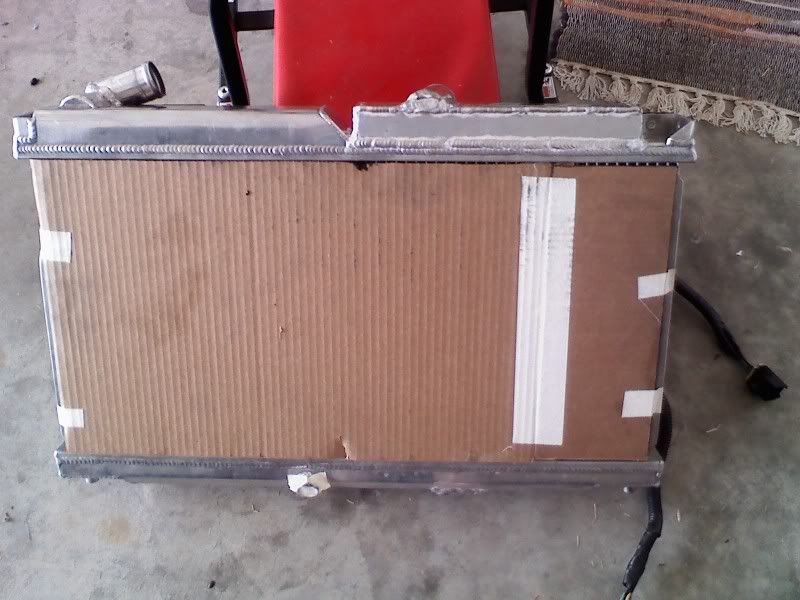
Next I began by fabricating the brackets that would be needed to mount the radiator. I used steel and aluminum that I purchased from the local Lowes. I began with the lower mounts (front of car) utilizing the stock radiator upper mount locations. I reused the lower radiator mounts provided by Greddy in the FMIC kit to hold the bottom posts of the radiator. I did re-bend them so that they fit more appropriately. Here are a few shots of the brackets. **Note: I did cover both sides of the radiator with cardboard to help it from being damaged during the building process.


All finished
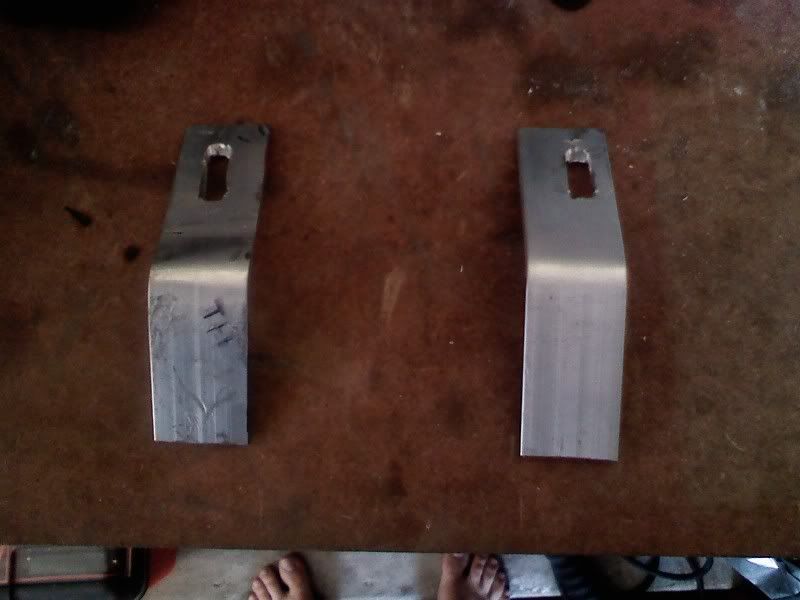
I then moved onto the upper radiator brackets. I started by drilling a few new holes in the upper side sections of the radiator so that the brackets could be appropriately mounted allowing the radiator to lie down a bit further. Then I simply measured out for my brackets.
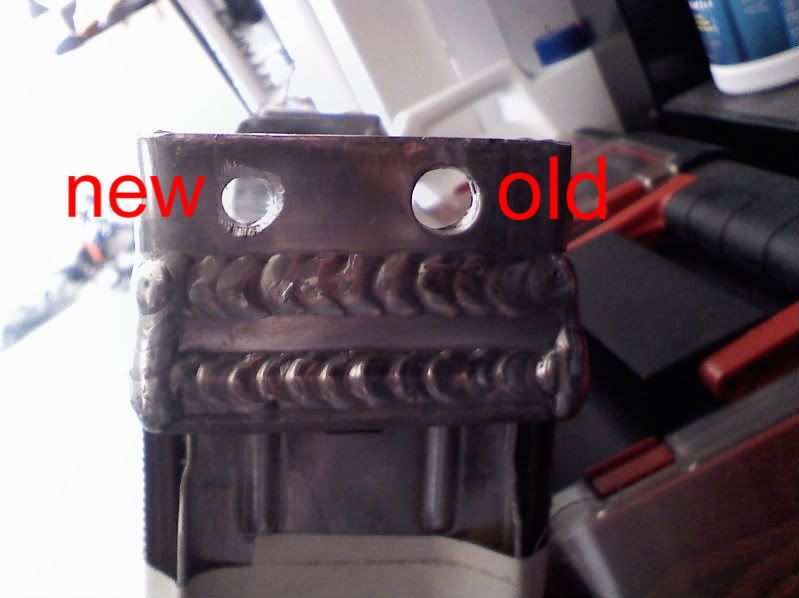
Of coarse the new hole did not stay that rough. It was later smoothed off nicely.
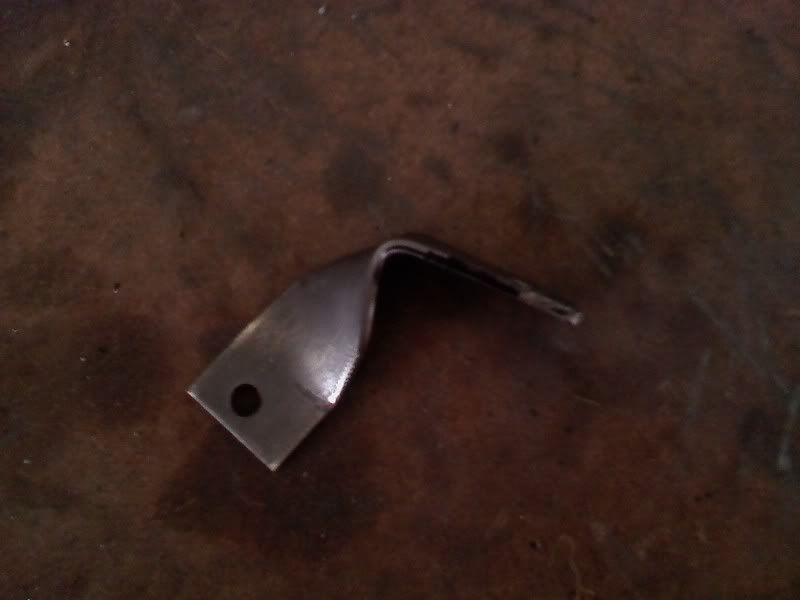
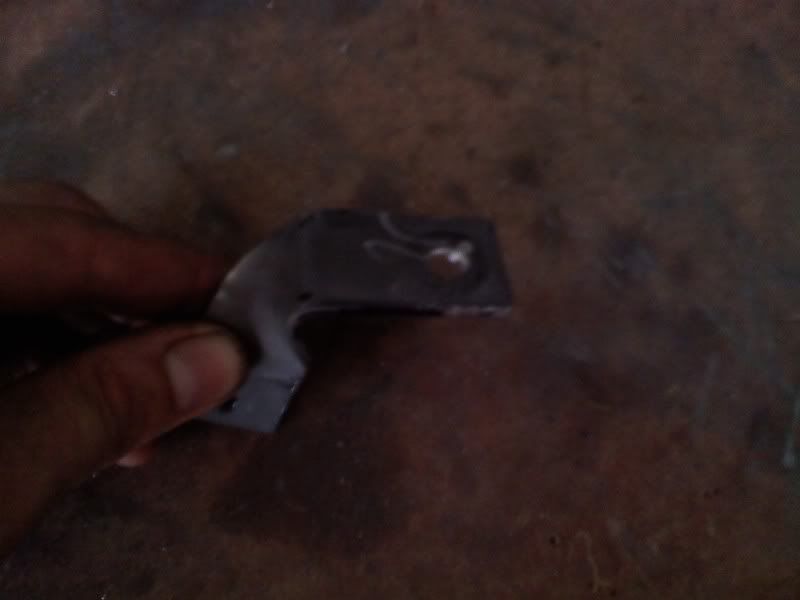
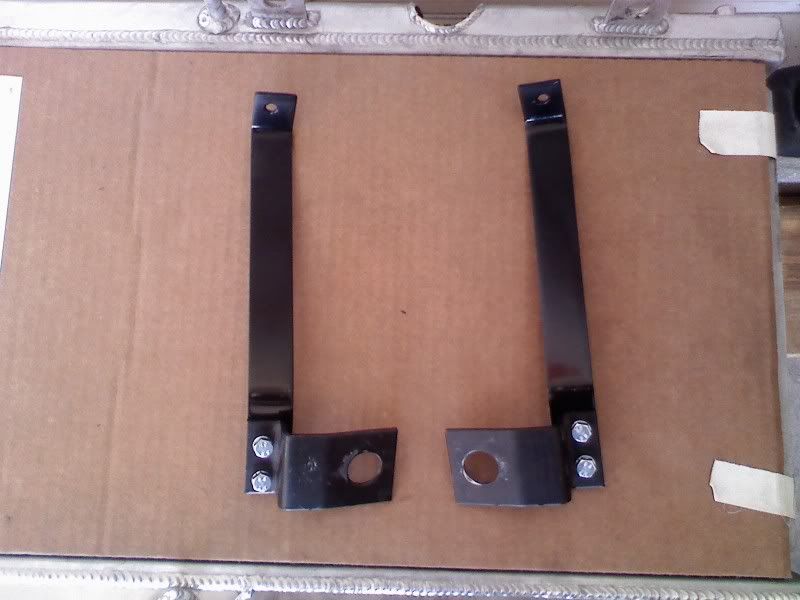
Both upper and lower brackets were made out of steel and were manipulated by using vice-grips, a small sledge hammer, vice, and anvil. Between each bracket and where it mounts to the car are buffered by rubber washers to help with vibrations.
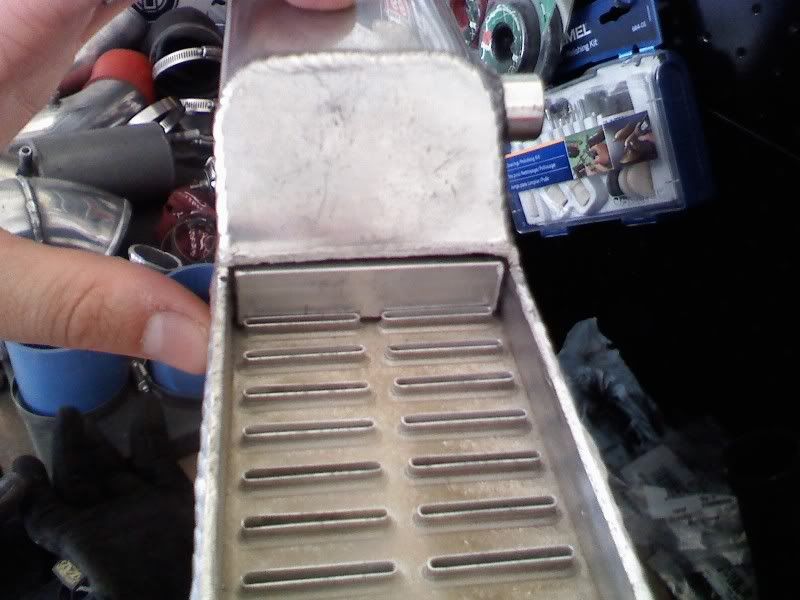
Once I was happy with how the radiator sat I began planning out the hoses so that they would flow freely and not come in contact with anything in the engine bay. The input hose will need to be reangled to allow for better flow. I also decided how large I wanted the new end tank to be. After all that was done I removed it, painted the brackets and began cutting up the radiator. After it was all cut, I measured aluminum and cut pieces for the new end tank, separator, and block off plates for the original output hose.
**IMPORTANT: For the radiator to function properly you will need to weld a small plate on the inside of the radiator between the two upper end tanks. This will force the fluid down through the radiator and then back up and out the other side.
First I placed the car solidly on jack stands making sure to loosen front rim lugs prior to lifting off the ground. Next follow FSM on removing front bumper, radiator, and any other factory components that are in the way. Remove Greddy FMIC referencing the Greddy instructions that may be found on their website.
Next I began by fabricating the brackets that would be needed to mount the radiator. I used steel and aluminum that I purchased from the local Lowes. I began with the lower mounts (front of car) utilizing the stock radiator upper mount locations. I reused the lower radiator mounts provided by Greddy in the FMIC kit to hold the bottom posts of the radiator. I did re-bend them so that they fit more appropriately. Here are a few shots of the brackets. **Note: I did cover both sides of the radiator with cardboard to help it from being damaged during the building process.
All finished
I then moved onto the upper radiator brackets. I started by drilling a few new holes in the upper side sections of the radiator so that the brackets could be appropriately mounted allowing the radiator to lie down a bit further. Then I simply measured out for my brackets.
Of coarse the new hole did not stay that rough. It was later smoothed off nicely.
Both upper and lower brackets were made out of steel and were manipulated by using vice-grips, a small sledge hammer, vice, and anvil. Between each bracket and where it mounts to the car are buffered by rubber washers to help with vibrations.
Once I was happy with how the radiator sat I began planning out the hoses so that they would flow freely and not come in contact with anything in the engine bay. The input hose will need to be reangled to allow for better flow. I also decided how large I wanted the new end tank to be. After all that was done I removed it, painted the brackets and began cutting up the radiator. After it was all cut, I measured aluminum and cut pieces for the new end tank, separator, and block off plates for the original output hose.
**IMPORTANT: For the radiator to function properly you will need to weld a small plate on the inside of the radiator between the two upper end tanks. This will force the fluid down through the radiator and then back up and out the other side.
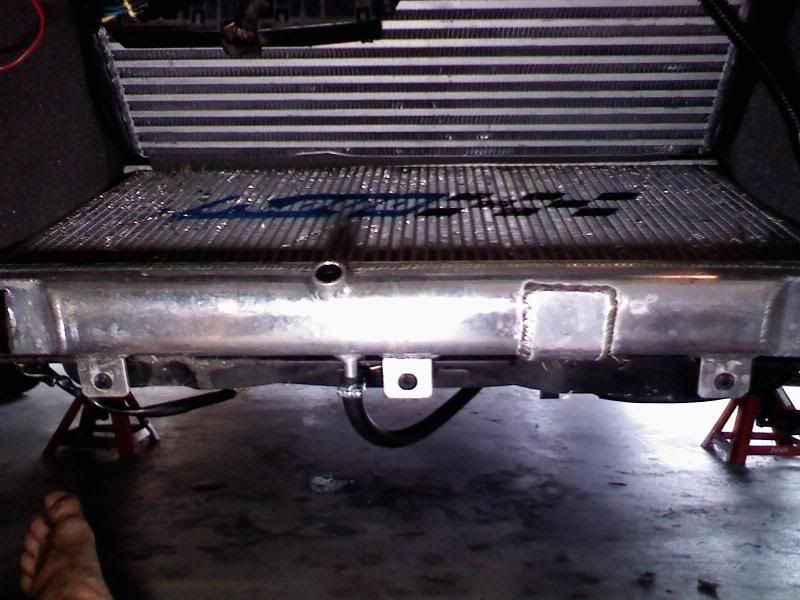
Here is the radiator after it is all welded up. I even managed to save the original Koyo logo and reuse it!!
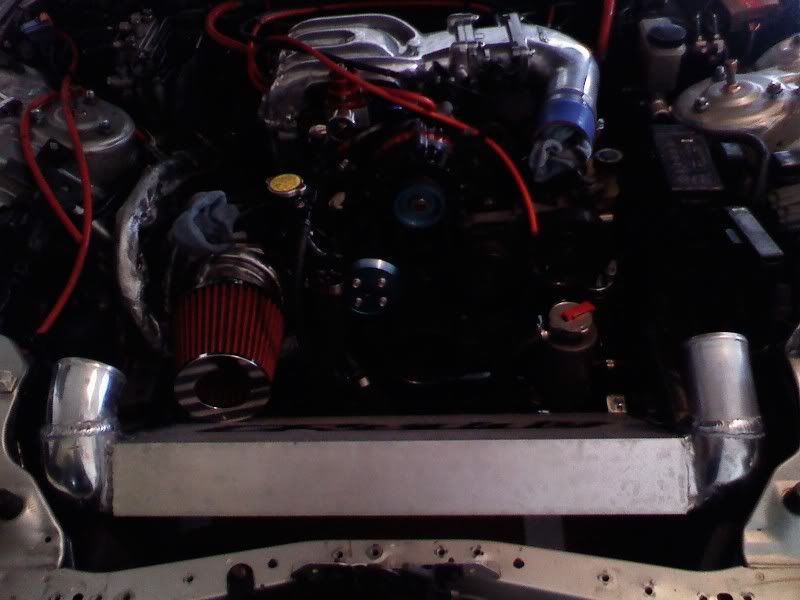
After the radiator was reinstalled I began to mock up the intercooler brackets. After spending far too long deciding how to go about it I decided to flip the intercooler upside down, and create brackets to mount the new bottom of the intercooler right next to the upper radiator mounts. The upper portion of the intercooler will be help stable and given support with the soon-to-be connected intercooler piping. The inlet and outlets of the intercooler were cut off to more appropriately orient them so that it would allow for smooth airflow. I did seek the advice of a few boost gooroos here on the forum about the possible repercussions on having a 3.5” inlet and a 3” outlet and was assured it would make no difference or only one that would be negligible.
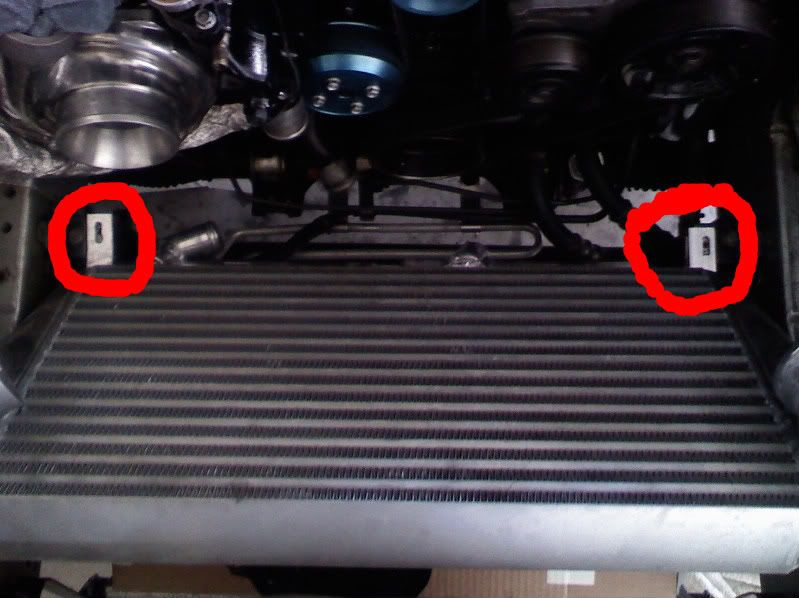
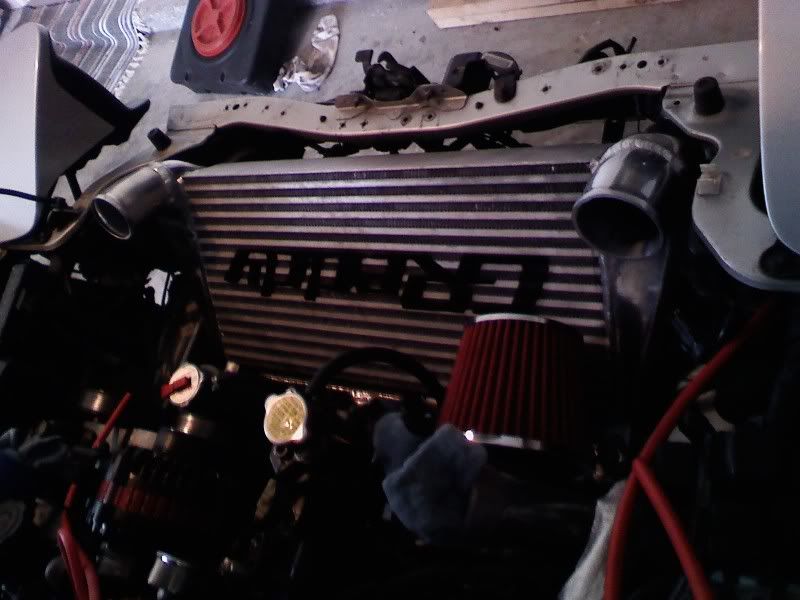
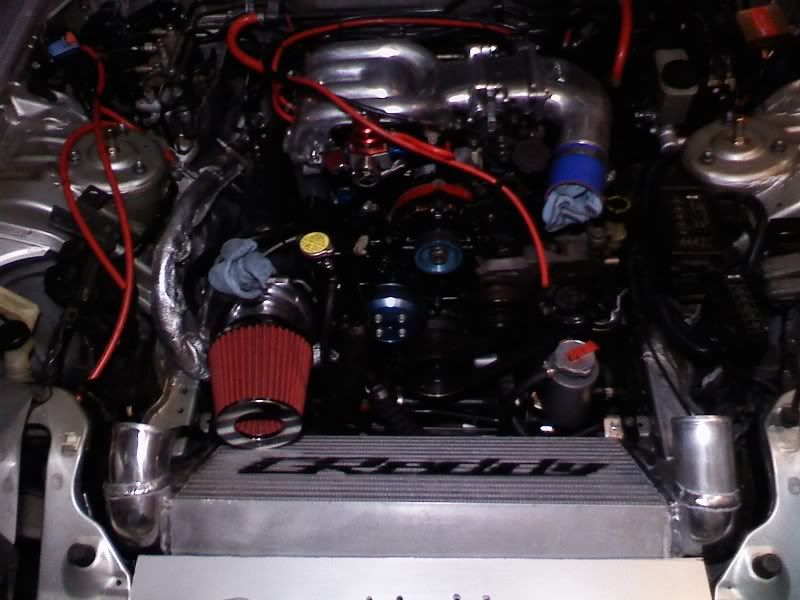
Here it all is reinstalled (minus the IC piping).
Notice that I also had to relocate the AST. Maybe I will delete it eventually...
Reinstalled with high dense foam placed between radiator and intercooler.
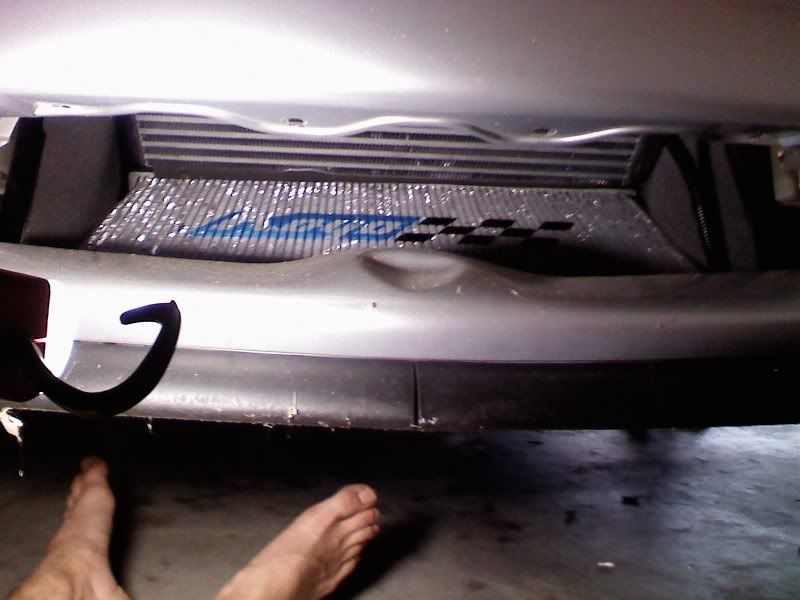
Front bumper reinstalled and ducting placed on both sides.
All finished up with block off plate in the front.
After the radiator was reinstalled I began to mock up the intercooler brackets. After spending far too long deciding how to go about it I decided to flip the intercooler upside down, and create brackets to mount the new bottom of the intercooler right next to the upper radiator mounts. The upper portion of the intercooler will be help stable and given support with the soon-to-be connected intercooler piping. The inlet and outlets of the intercooler were cut off to more appropriately orient them so that it would allow for smooth airflow. I did seek the advice of a few boost gooroos here on the forum about the possible repercussions on having a 3.5” inlet and a 3” outlet and was assured it would make no difference or only one that would be negligible.
Here it all is reinstalled (minus the IC piping).
Notice that I also had to relocate the AST. Maybe I will delete it eventually...
Reinstalled with high dense foam placed between radiator and intercooler.
Front bumper reinstalled and ducting placed on both sides.
All finished up with block off plate in the front.
While waiting on my welder (I really wish I new how to weld and had access to a TIG...) I was able to do a few other small projects.
1) polished turbine housing
2) removed, cleaned and painted water pump housing and bracket black
3) removed, cleaned and painted altranator
4) Painted all rims flat black
5) Relocated fuel filter
6) Disassembled and painted in the inside housing of my turn signals black.
1) polished turbine housing
2) removed, cleaned and painted water pump housing and bracket black
3) removed, cleaned and painted altranator
4) Painted all rims flat black
5) Relocated fuel filter
6) Disassembled and painted in the inside housing of my turn signals black.


Originally Posted by borx7
Is it possible to perform this mod on a tripple pass koyo rad?
Trending Topics

yeah, I knew someone was going to say something about that. Right now I plan to do just exactly what you said actually and just remove the hose that runs from the bottom of the radiator to the ast. That may not be ideal, but it will allow the radiator to drain completely. Next time I drain the fluid I plan on having a better solution.

^^Bingo. I already had my KOYO so I had my father-in-law weld it for me after I cut it up and told him what I would like. If you do not already have an aftermarket radiator I would just buy one from Jason. Really, you can purchase the whole kit which is basically identical to what I have done here. Mine is just welded up a bit differently and my IC flipped to better suit me.
What is up Cyan!! She is running well, I just cannot wait for a few more months when I am gonna order my new rims/tires and I can actually drive the car a lil harder...
How is your new build going? I will be waiting for a ride in your corrupted FD when it is finished btw...
It is very well worth it... My intake and water temps are great. I really even notice my intake temps dropping off just as fast, if not FASTER than with just the fmic. Maybe it was the hot air trapped between the rad and IC???? I dunno, just happy it is working very, very well.
Yes, as mentioned above here you go. It is a pretty good deal if you do not already have any of these components. Since I already had both and I really enjoy doing projects like this myself, I used those and just built my own.
How is your new build going? I will be waiting for a ride in your corrupted FD when it is finished btw...
What is up Cyan!! She is running well, I just cannot wait for a few more months when I am gonna order my new rims/tires and I can actually drive the car a lil harder...
How is your new build going? I will be waiting for a ride in your corrupted FD when it is finished btw...
How is your new build going? I will be waiting for a ride in your corrupted FD when it is finished btw...
 . I'll definately take you for a spin when it's back on the road. Then we can go around and terrorize Tulsa lol

Sounds great!! Yeah I need a few ppl to go cruize with. My poor FD is a bit neglected. I do not get to drive it much, though when I do I seem to **** off or scare half the ppl in the parking garage at work... Ah well...

It is very well worth it... My intake and water temps are great. I really even notice my intake temps dropping off just as fast, if not FASTER than with just the fmic. Maybe it was the hot air trapped between the rad and IC???? I dunno, just happy it is working very, very well.
Once I was happy with how the radiator sat I began planning out the hoses so that they would flow freely and not come in contact with anything in the engine bay. The input hose will need to be reangled to allow for better flow. I also decided how large I wanted the new end tank to be. After all that was done I removed it, painted the brackets and began cutting up the radiator. After it was all cut, I measured aluminum and cut pieces for the new end tank, separator, and block off plates for the original output hose.
**IMPORTANT: For the radiator to function properly you will need to weld a small plate on the inside of the radiator between the two upper end tanks. This will force the fluid down through the radiator and then back up and out the other side.
**IMPORTANT: For the radiator to function properly you will need to weld a small plate on the inside of the radiator between the two upper end tanks. This will force the fluid down through the radiator and then back up and out the other side.
Joined: Feb 2003
Posts: 277
Likes: 0
From: Smyrna, DE and/or Baltimore, MD
So with this setup I assume you're eliminating the A/C or are you just moving it? I have a 3 row Greddy intercooler in my Vmount setup, mine has a larger angle (Intercooler is more horizontal) and I'm bending the A/C condensor and black A/C tube thing down and am making brackets for them.
Wouldn't you then have to run a real long radiator hose to get to the end at the bottom front? This way you just run two short hoses.
So with this setup I assume you're eliminating the A/C or are you just moving it? I have a 3 row Greddy intercooler in my Vmount setup, mine has a larger angle (Intercooler is more horizontal) and I'm bending the A/C condensor and black A/C tube thing down and am making brackets for them.
So with this setup I assume you're eliminating the A/C or are you just moving it? I have a 3 row Greddy intercooler in my Vmount setup, mine has a larger angle (Intercooler is more horizontal) and I'm bending the A/C condensor and black A/C tube thing down and am making brackets for them.

