
David Hayes DIY LED Taillight Modification


Hey Bryan, see the pic in post #124 for what the back of the led assembly should look like on the 75 mm turn signals. See how the plastic ring is placed over the edge of the metal ring? That is how yours should look like for the tun signal 75 mm units. For the 80 mm units, the plastic ring fits into the metal as you've done. Make sure to silicone all the capacitor joints (the little rectangles and metal connections) before placing the metal back plate over it.

To bring this thread back to friendliness... 
I did a good bit of the the last couple of days. I painted my tail light for the 99 spec conversion. I also have 2 completed brake light assemblies. I now need to begin work on the turn signal assembly. I'm close to having a completed tail light side.
I did a good bit of the the last couple of days. I painted my tail light for the 99 spec conversion. I also have 2 completed brake light assemblies. I now need to begin work on the turn signal assembly. I'm close to having a completed tail light side.
Very nice! How about taking and posting some pics? Any thoughts about the process and how to improve it?
For the turn signals – to get the turn lamp assemblies to fit properly into the turn lamp back plastic housing - you need to create more space on the inside wall section of each back plastic housing. In short, you need to push out the inside back section and make it flat so the turn signal assembly can slide in. Theorie accomplished this by using a heat gun to heat up the back black plastic until it was pliable enough to manipulate out. I suggest using a flat dry wall blade for this task.
For the turn signals – to get the turn lamp assemblies to fit properly into the turn lamp back plastic housing - you need to create more space on the inside wall section of each back plastic housing. In short, you need to push out the inside back section and make it flat so the turn signal assembly can slide in. Theorie accomplished this by using a heat gun to heat up the back black plastic until it was pliable enough to manipulate out. I suggest using a flat dry wall blade for this task.
Thread crapping removed - sigs directed at other members is addressed in the rules as conduct in rules 4: "....nor will any type of "trolling" for a fight in any forum..." and several people already know how I like to deal with sigs that don't talk about the person but are meant to demean or mock another member  - I've already sent one misfit on a vacation for breaking the stated rules for this specific thread and that's always the part I enjoy best about moderation.
Don't tempt me any further.
Great thread, it should be sticky'd except that the sticky's for this board are very general type topics, so it'd be out of place up there.
Mario III
- I've already sent one misfit on a vacation for breaking the stated rules for this specific thread and that's always the part I enjoy best about moderation.Don't tempt me any further.
Great thread, it should be sticky'd except that the sticky's for this board are very general type topics, so it'd be out of place up there.
Mario III
here they come
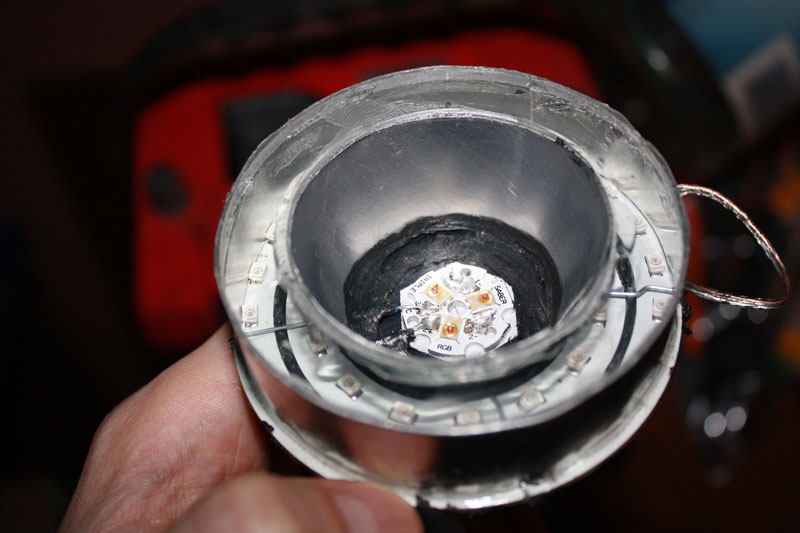
I rolled up to Lowes and picked up these grommets after getting concerned that the wires might eventually rub their coating off on the nearly sharp aluminum.
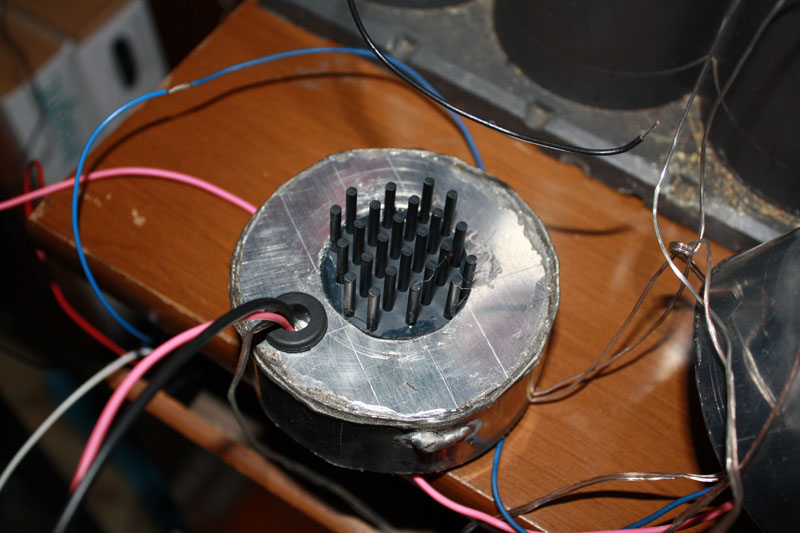
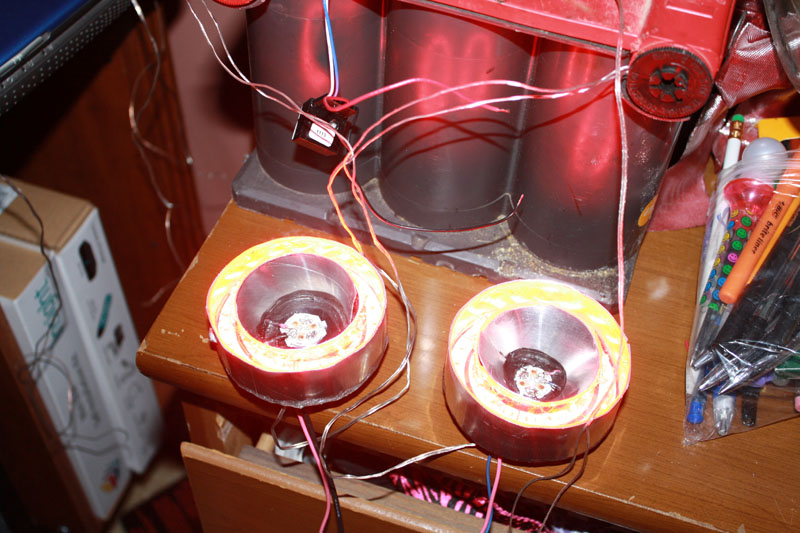
I sealed the inside bottom with "Right-Stuff" in an attempt to keep it sealed from bleeding light. The heat sink's get pretty hot, but I figure this stuff can hold onto really hot stuff in the engine so it'll probably be ok there?
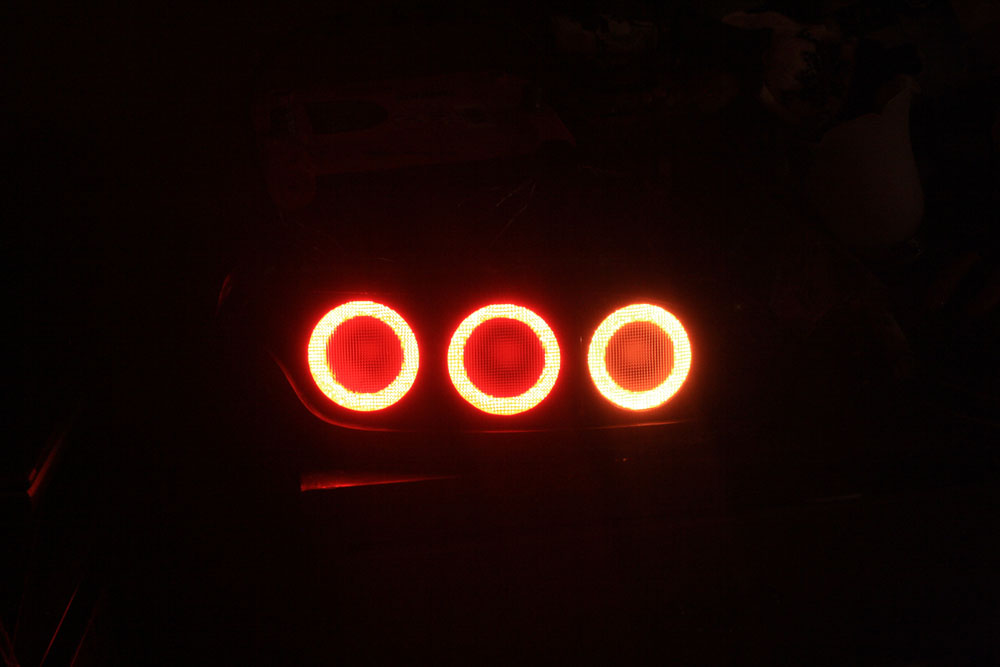
This picture makes it look like they are barely lit up, but that's actually just the camera adjusting to the lighting. Notice the really strong reflection on the battery case behind them in the picture.

Here I've painted the turn signal piece and just sat it on top of the turn signal assembly.
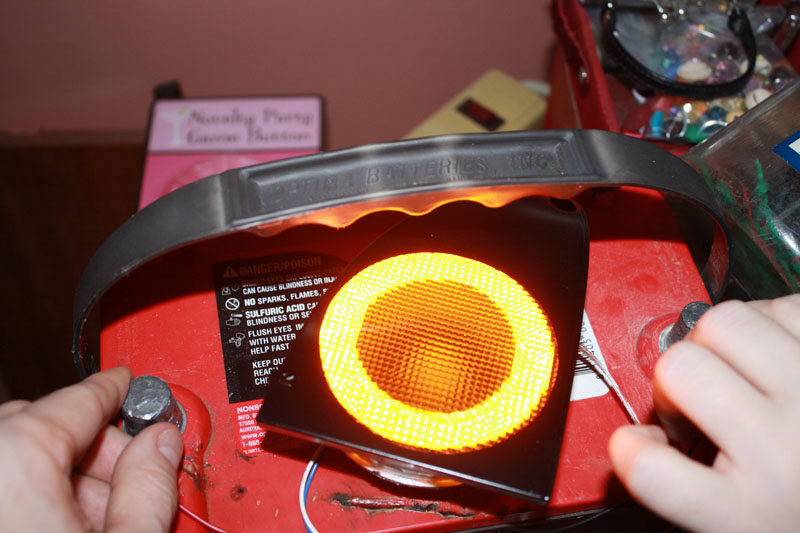
Turn signal lit up.
I rolled up to Lowes and picked up these grommets after getting concerned that the wires might eventually rub their coating off on the nearly sharp aluminum.
I sealed the inside bottom with "Right-Stuff" in an attempt to keep it sealed from bleeding light. The heat sink's get pretty hot, but I figure this stuff can hold onto really hot stuff in the engine so it'll probably be ok there?
This picture makes it look like they are barely lit up, but that's actually just the camera adjusting to the lighting. Notice the really strong reflection on the battery case behind them in the picture.
Here I've painted the turn signal piece and just sat it on top of the turn signal assembly.
Turn signal lit up.
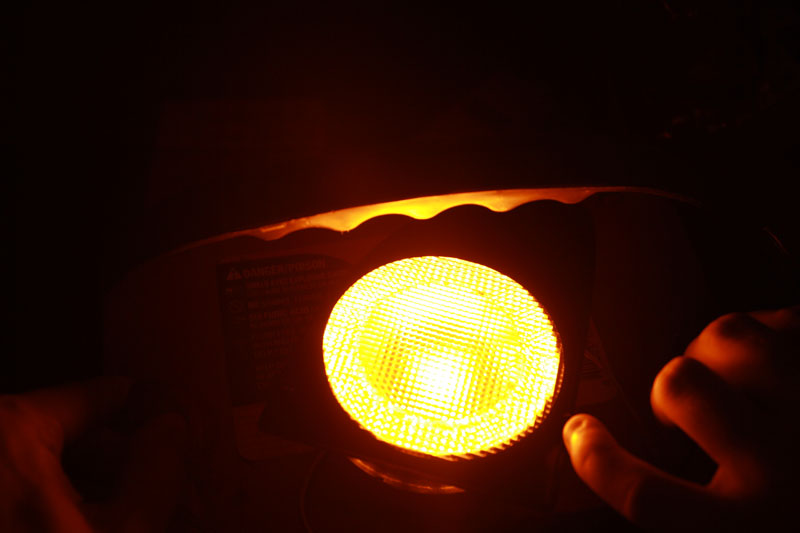
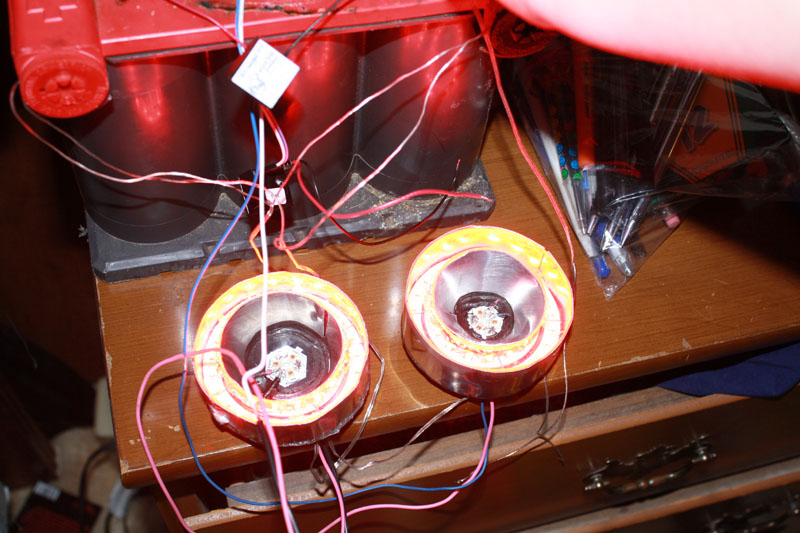
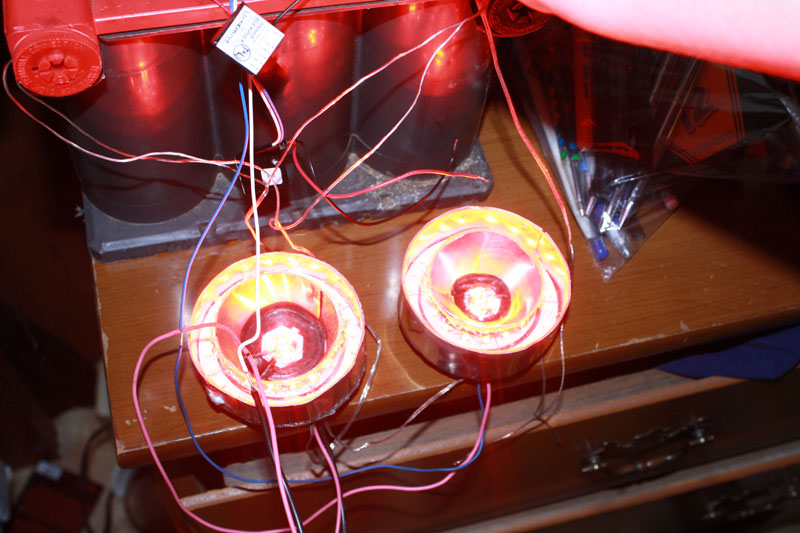
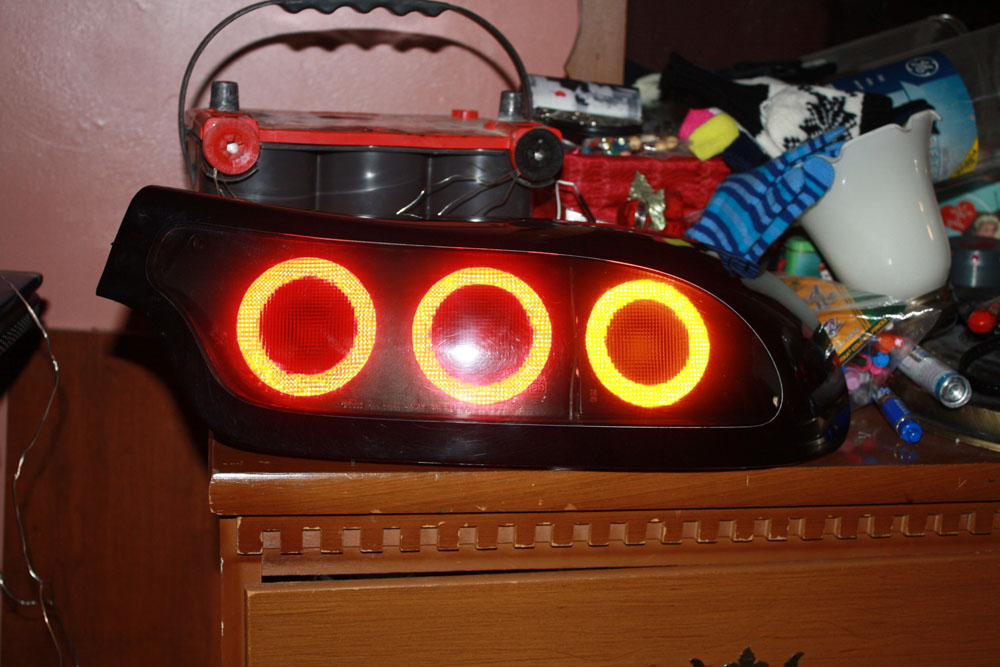
Just a couple more. These also dont appear nearly as bright in the picture as they do in real life. Notice the reflection on the batter casing for these pictures too. After taking the pictures I could hardly see because of the spots in my eyes.
Right now I've got to paint the big red piece for 99 spec tails. (I had a paint issue the first time... long story, but it sucks) Big thanks to Theorie's 99 spec link he provided earlier in the thread, and of course big thanks to David for posting the tutorial and getting me this far along in the process. Hopefully the next pics have me connecting the assemblies to the oem diffusers.
Right now I've got to paint the big red piece for 99 spec tails. (I had a paint issue the first time... long story, but it sucks) Big thanks to Theorie's 99 spec link he provided earlier in the thread, and of course big thanks to David for posting the tutorial and getting me this far along in the process. Hopefully the next pics have me connecting the assemblies to the oem diffusers.
Bryan, those look awesome. Very nice work. Don't think you have to worry about the temps from the heat sinks. I've turned on the brake lights and the turn signals for over 30 minutes to test and the heat sinks do a great job of removing the heat. So the "Right Stuff"will work fin. I sealed up the same area with hi temp gasket sealant and it works as well.
The brake lights will need to be adjusted down a bit so you won't blind anyone behind you. I'd go with around 80% of the total.
Have you modified the turn signal housing plastic so there is more room to fit in the light component?
The brake lights will need to be adjusted down a bit so you won't blind anyone behind you. I'd go with around 80% of the total.
Have you modified the turn signal housing plastic so there is more room to fit in the light component?
Made some more progress...
Something I've noticed is that the thickness of the LED "ring" seems to change depending on the angle you view it at. If you view it perfectly straight on they seem to be pretty even (of course it also depends on if I actually centered it well!) if you view at a highly skewed angle some of the "ring" appears thicker and other parts appear thinner.
I ended up having to use a heat gun on the housing for the turn signal, and also on the inner brake light. It appears after the heat gun there is no going back for this set of tail lights. Not that its a huge problem since its a spare set... but just FYI for others who might follow this thread and do it at home too.
I need to wire these up correctly, and I need to finish plastic polishing the outer cover then I'll be putting this side together fully and installing it on my FD for pics. Assuming it all turns out good I'll tear apart the other side tail light and finish it up too. (I have all the LED stuff already made, I just have to mod the housing to attach to it.)
I get the same thing with mine. At strange angles, they look wider at certain points. But they are bang on in the housings. Don't know why this would be.
So you had to increase the spacing for the brake light? Interesting as I didn't have to do this. Wonder if the housings are slightly different? When you did that, you had to modify something that won't let you go back? Take a pic if you don't mind.
So you had to increase the spacing for the brake light? Interesting as I didn't have to do this. Wonder if the housings are slightly different? When you did that, you had to modify something that won't let you go back? Take a pic if you don't mind.
It could be that I put my 99 spec circles in a different (wrong?) spot. Thinking about it... I could go back. It isnt necessarily hurting anything being slightly warped in that spot (I dont think? I'll find out for sure on car install) I essentially had to get it hot and flatted out the stepped lip on the inside of the housing. I'd take a picture of that but its together now and I didnt want to take a chance yanking it apart if I didnt have to.
Pic is attached
Pic is attached
Last edited by mar3; Dec 16, 2011 at 06:43 PM. Reason: Killed quote since reply was back-to-back to post in question...
^I'd say the 99 spec circles are slightly in the wrong place. Theorie did my conversion and there is no issue like that. I'd agree you won't have a problem going back if you wanted to as what you have done won't affect reinserting a regular bulb.
Of course you're not going to want to do this though as the new look will be great
Did you use the internal adjustment on the LED power supplies to turn down the brightness of the brake units before you sealed up the unit?
Of course you're not going to want to do this though as the new look will be great
Did you use the internal adjustment on the LED power supplies to turn down the brightness of the brake units before you sealed up the unit?
It could be that I put my 99 spec circles in a different (wrong?) spot. Thinking about it... I could go back. It isnt necessarily hurting anything being slightly warped in that spot (I dont think? I'll find out for sure on car install) I essentially had to get it hot and flatted out the stepped lip on the inside of the housing. I'd take a picture of that but its together now and I didnt want to take a chance yanking it apart if I didnt have to.
Pic is attached
Pic is attached
Did you use this guide guide?

This is the reason why I went from using a 1.5" tall prototype unit to a 1" tall production one - it allowed more clearance inside the housing. The downside is that the individual LEDs become visible as "hot spots" dotted around the ring, so that's why I started using the diffused rings.
Either way, it's perfectly fine to warp the housings a little in order to have the LED units fit.
Yep, I used the 99 spec template you provided when marking them off. It looks right (enough? Since I RARELY sit next to another FD, let alone one with 99 spec tails) to me so it didnt really bother me other than having to warp the housing a bit. I'm happy with the look so far.
I got done polishing the housing up last night with a 3M kit. Maybe if time permits tonight I'll start more permanent wiring of the lights to the bulb connector thingies.
I actually hung the adjusters out the holes in the back so I can play with them as needed. I think the Optima you see in the pictures is slightly low since my multi-meter reads 11.6V w/out a load so I didnt want to base my adjustments on that. IIRC when the car is running the voltage is somewhere north of 12v (12.6ish?). I figure I can just stuff the adjusters back into the hole or something after they are set?
Hoping the look is worthwhile! Sure looks cool on all the cars I've seen them on.
I got done polishing the housing up last night with a 3M kit. Maybe if time permits tonight I'll start more permanent wiring of the lights to the bulb connector thingies.
^I'd say the 99 spec circles are slightly in the wrong place. Theorie did my conversion and there is no issue like that. I'd agree you won't have a problem going back if you wanted to as what you have done won't affect reinserting a regular bulb.
Of course you're not going to want to do this though as the new look will be great
Did you use the internal adjustment on the LED power supplies to turn down the brightness of the brake units before you sealed up the unit?
Of course you're not going to want to do this though as the new look will be great
Did you use the internal adjustment on the LED power supplies to turn down the brightness of the brake units before you sealed up the unit?
I actually hung the adjusters out the holes in the back so I can play with them as needed. I think the Optima you see in the pictures is slightly low since my multi-meter reads 11.6V w/out a load so I didnt want to base my adjustments on that. IIRC when the car is running the voltage is somewhere north of 12v (12.6ish?). I figure I can just stuff the adjusters back into the hole or something after they are set?
Hoping the look is worthwhile! Sure looks cool on all the cars I've seen them on.
Last edited by mar3; Dec 16, 2011 at 06:45 PM. Reason: Merged back-to-back posts...
^That is a good idea, to keep the LED drivers out of the housings for adjustment. Never thought of that - duh! If they can fit right back in one of the bulb holes that's a very cool way to get the level of light you want and then shove them back in.
May I ask what 3M kit you used to polish up the taillights? I need to do this also.
Theorie - thanks for posting up the 99 spec templates. I know that will be helpful to others that want to do this. Can we trouble you to post up your templates for the metal rings and brake reflectors? I am sure those are better than mu hand traced ones. Once could use those and then use what I posted for the turn signals as those have changed.
Looks like this kit: http://www.amazon.com/3M-39008-Headl.../dp/B001AIZ5HY
They are available at all my local autozones, albeit at around $23. Its alot better than the Turtle Wax kit I picked up initially. The 3M kit comes with an attachment to your drill. The turtle wax kit wanted you to hand buff them, which was taking FOREVER. Tail light cover is brand new looking now
They are available at all my local autozones, albeit at around $23. Its alot better than the Turtle Wax kit I picked up initially. The 3M kit comes with an attachment to your drill. The turtle wax kit wanted you to hand buff them, which was taking FOREVER. Tail light cover is brand new looking now
^ If you feel like posting them in the thread, it would be much appreciated.
Bryan, I had wondered about using a headlight rest kit and glad it turned out well for you. I'll do the same
Bryan, I had wondered about using a headlight rest kit and glad it turned out well for you. I'll do the same
New metal recommendation: Gibraltar "Valley Roll AL EC 14" X 10' Model #17306
Great stuff. It's aluminum so it's nice and shiny and a roll of it is 10 feet long and costs around $11. What's so good about it is it's about 2-3 times thicker than soda can stock so it is easy to cut and then to bend but it's much more rigid so it will most definitely hold its shape even under the abuse of the FD. I jus got done using it on a set of taillights I am working on and couldn't be happier.
Two thumbs up for the new metal recommendation

Updates! I'm finally done!
For anyone wishing to pursue this conversion on their own, DO NOT take my time as a "how long it takes" measuring stick. I got distracted by the holidays, by my job, by purchasing and working on an arcade machine, refinishing my bathroom, watching TV, and also the orange thing next to my FD in the pictures. Suffice it to say, while I was excited about this conversion other things also excited me. Since insurance is dropped on the FD during winter and I knew I wouldn't be driving it for several more months it kind of fell to the bottom of my list for a while. In fact, I probably wouldn't be done if it weren't for the fact that I felt I had too many unfinished projects and I wanted the working space in my house back from the tail lights. That being said... I'd have finished them either way, it probably would have just been closer to when it was warm outside
Pictures are to follow, then I'll make some comments on overall impression of the process and the outcome.
Here they are with just the parking lights on
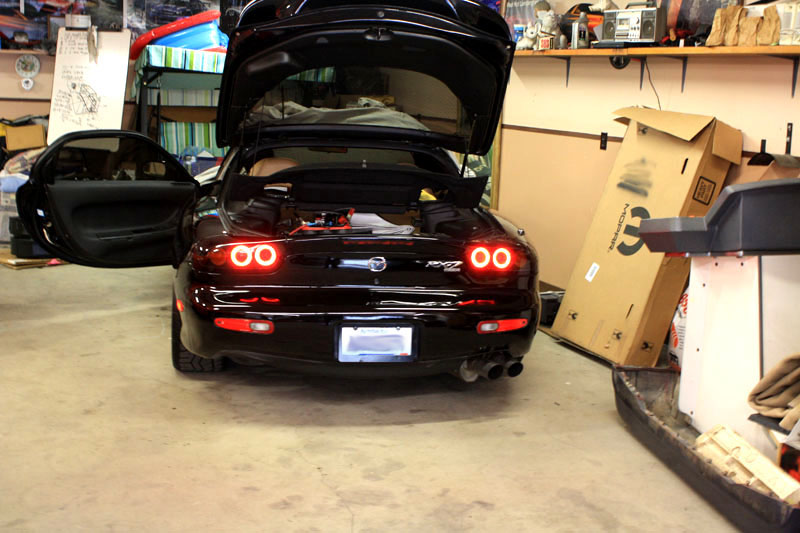
Me attempting to catch the emergency blinkers with my camera
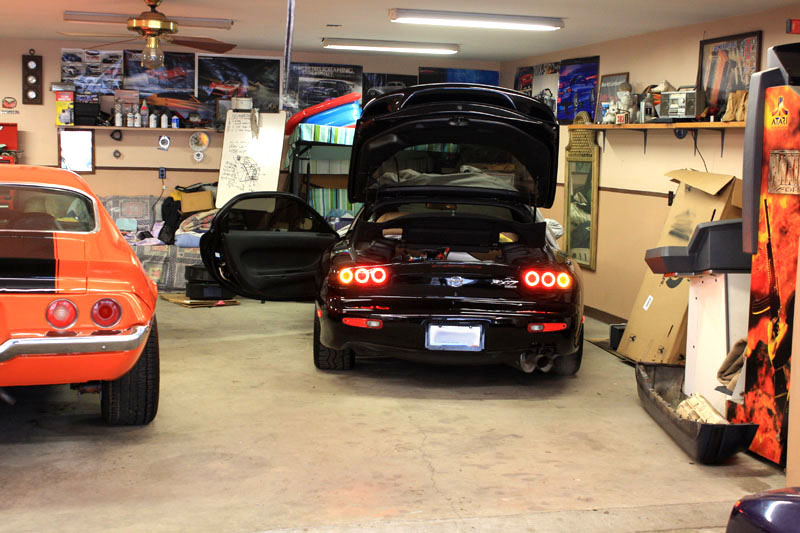
Zoomed out shot to show relative brightness compared to the surrounding area
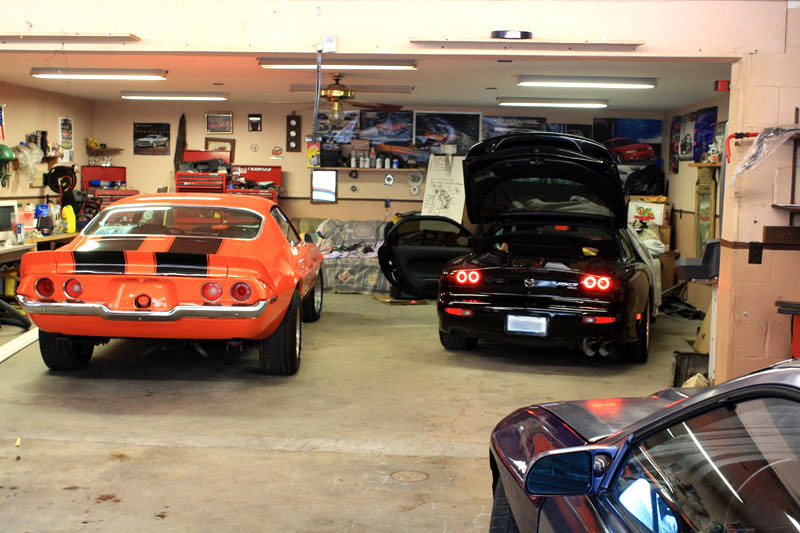
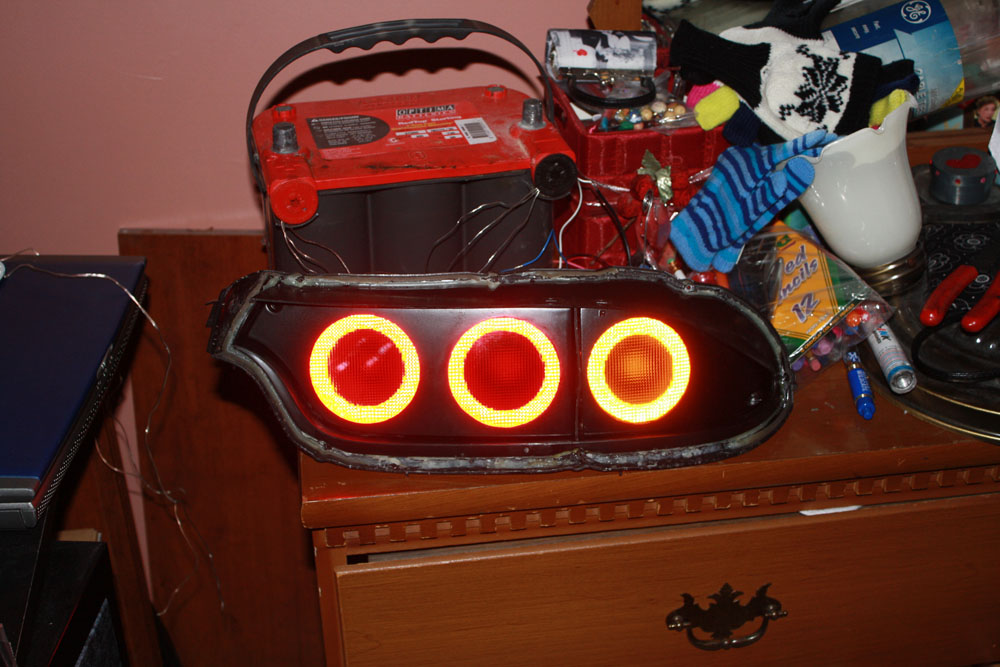
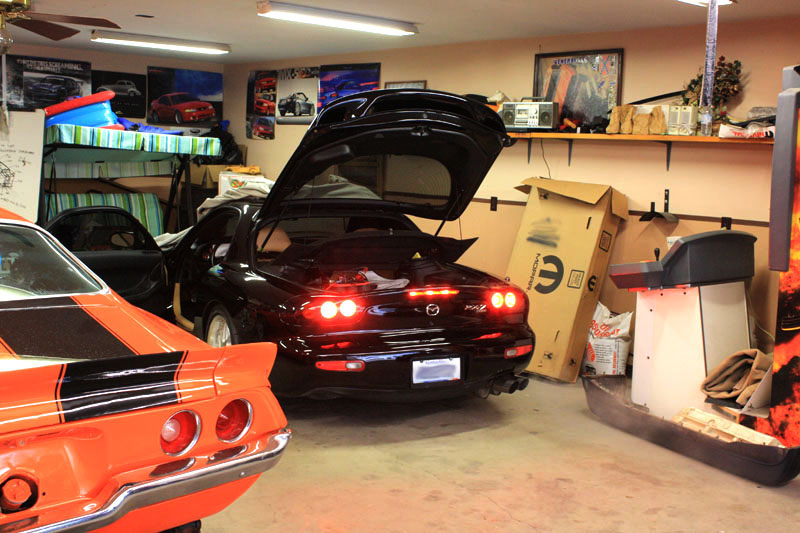
Parking lights and brake lights on. The brake lights are indeed pretty damned bright.
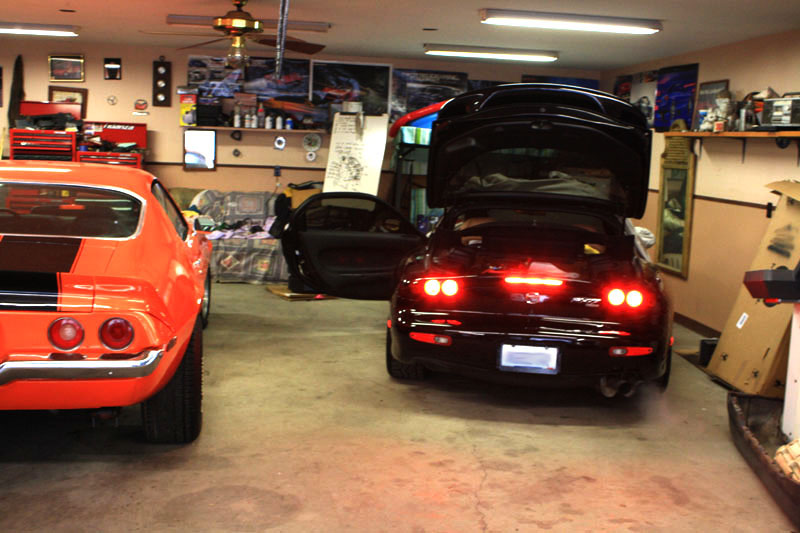
Parking light and brake lights on from the side
More to follow...
For anyone wishing to pursue this conversion on their own, DO NOT take my time as a "how long it takes" measuring stick. I got distracted by the holidays, by my job, by purchasing and working on an arcade machine, refinishing my bathroom, watching TV, and also the orange thing next to my FD in the pictures. Suffice it to say, while I was excited about this conversion other things also excited me. Since insurance is dropped on the FD during winter and I knew I wouldn't be driving it for several more months it kind of fell to the bottom of my list for a while. In fact, I probably wouldn't be done if it weren't for the fact that I felt I had too many unfinished projects and I wanted the working space in my house back from the tail lights. That being said... I'd have finished them either way, it probably would have just been closer to when it was warm outside
Pictures are to follow, then I'll make some comments on overall impression of the process and the outcome.
Here they are with just the parking lights on
Me attempting to catch the emergency blinkers with my camera
Zoomed out shot to show relative brightness compared to the surrounding area
Parking lights and brake lights on. The brake lights are indeed pretty damned bright.
Parking light and brake lights on from the side
More to follow...