She Followed Me Home, Honest
 09-24-12, 04:48 PM
#151
Moderator
iTrader: (3)
Join Date: Mar 2001
Location: https://www2.mazda.com/en/100th/
Posts: 30,826
Received 2,594 Likes
on
1,842 Posts
If one were to get all the mickey mouse detail work out of the way in the beginning, your entire future experience with the car changes. Never again will that last bloody bolt (it's usually the last one or the hardest one to reach) hold up the install of the latest bling thing.
You no longer need to expect to pay a pound of flesh or a bucket of blood just to complete a job.
Everything will just be right.
You no longer need to expect to pay a pound of flesh or a bucket of blood just to complete a job.
Everything will just be right.
oh and sorry for the actual content, i didn't think honda's counted!
Last edited by j9fd3s; 09-24-12 at 04:51 PM. Reason: oops!

 09-24-12, 09:09 PM
#154
Aw, too bad.
Calipers are done, rebuilt both fronts and one rear.
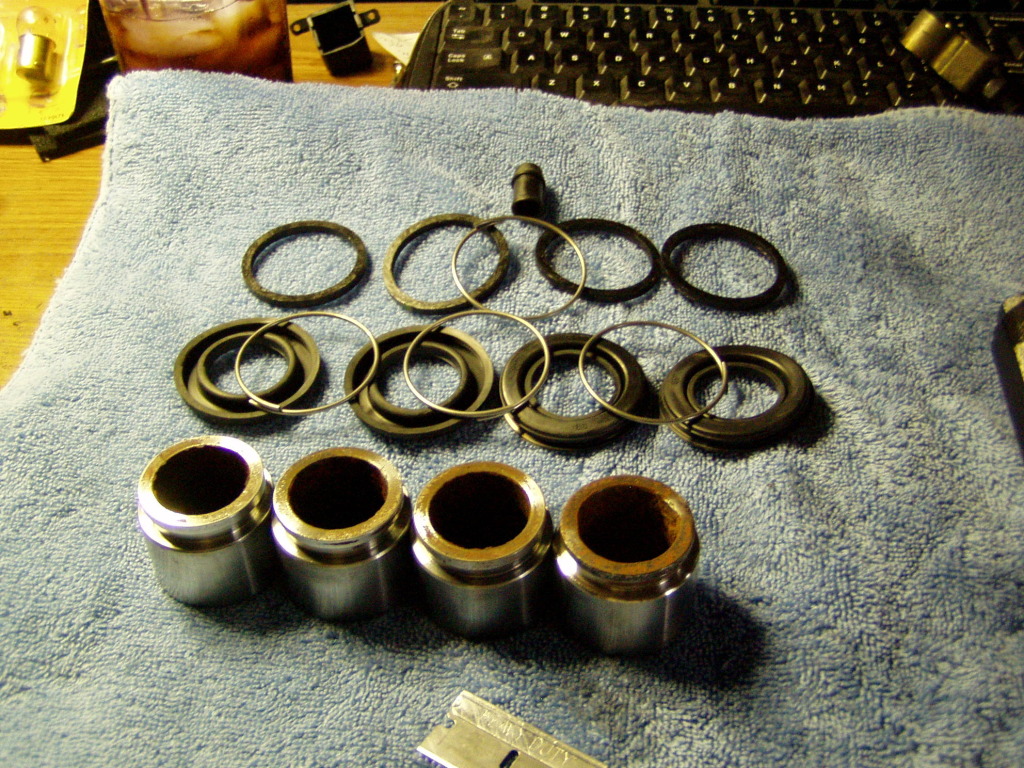
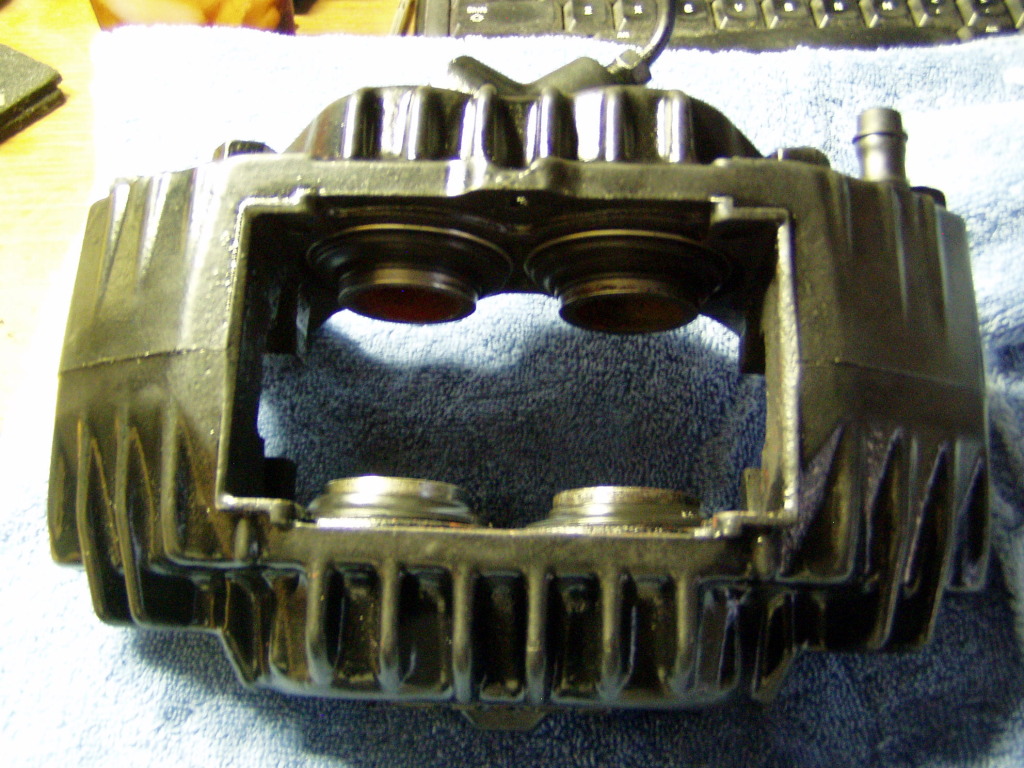
The fronts can now go on and final hook up but the rears will wait till after the diff swap is finished.
Just another brick in the wall.
I actually ordered some new parts for the GTU!
A full set of Hawk HPS brake pads and the seal/oring for the speedo drive on the transmission.
Baby steps.
Calipers are done, rebuilt both fronts and one rear.
The fronts can now go on and final hook up but the rears will wait till after the diff swap is finished.
Just another brick in the wall.
I actually ordered some new parts for the GTU!
A full set of Hawk HPS brake pads and the seal/oring for the speedo drive on the transmission.
Baby steps.
09-26-12, 08:11 AM
#155
What a weird stage of the project...I have nothing to do.
I'm used to a seemingly endless list of little things to deal with but they're all done and all I can do is start amassing parts for the engine install.
Which takes money and I'm working- albeit slowly- on that.
It's also sad that most of what I'll be ordering is so prosaic- gaskets, filters...the sort of stuff you absolutely need but is no real thrill to receive.
"Oh boy, a liter of brake fluid...this is the bestest Christmas ever!"
The last non-engine related project will be the diff swap, a job I simultaneously dread and look forward to.
The dread is because of the weight and awkward size of the parts I'll be dealing with, dealing with alone and undertooled.
The anticipation comes from the realization that when I'm done I'll have basically stripped the car entirely (only the doors, hatch and fuel tank are untouched), checked for problems and cleaned/lubed the hardware.
A few years ago I was mortified while getting an alignment, the rear driver side eccentric adjuster was completely and inextricably frozen in position. This sort of neglect just offends me and it won't happen on the GTU.
Compounding the ennui is my ambivalence towards the engine itself.
My NA has well over 200k miles and any sensible person would assume it's on it's last legs.
Mine however, cheerfully and consistently refuses to act it's age and runs- on a daily basis year round- like the proverbial top.
Current circumstance does not allow for the "preventive" engine swap I'd prefer, so this motor/tranny combo must go back in and serve for another 6-9 months as more funds are accrued.
This is where my silly emotional attachment to hardware causes problems.
It seems ungrateful and miserly to just throw the engine back in with no attempt to ensure it's longevity, she's earned some respect/love.
The problem is, any money that goes into this combination ( NA motors/trannys are not highly sought after), stays with this combo when/if the motor blows thus forcing my hand.
After struggling with this conundrum for a while, I finally decided to do this:
Spend the money on a clutch, headers and spiffy OMP lines, get the injectors serviced, all new gaskets for the intake and exhaust.
Pull the front cover and check the o-ring, hope that's the cause of my persistent low oil pressure.
New oil cooler lines, either Corksport or locally fabbed hydraulic shop hoses.
With this "exterior rebuild", I've dealt with the obvious and relatively cheap problems I might expect without committing to a rebuild of the short block (a move that makes no financial sense under any circumstances, IMO).
It also allows me to drive the car sooner and with relative confidence it'll work through the winter months. Nothing sucks like being forced to fix an issue while on freezing concrete in dim winter light.
Finally, the motor refresh brings the whole of the car into balance...I've spent a lot of time on the chassis, it's not logical to apply a lower standard to the drivetrain.
Who knows, I may fall in love again.
I'd previously considered any cash spent now on the engine as robbed from the desired engine swap fund but finally realized that if $500-700 (the expected cost of my "extravagances") was a make/break for the swap, then I really couldn't afford the swap at all.
One thing I learned from the FD project was that you need a very healthy slush fund because it's not the big things that get you, it's the myriad nickel/dime items that crush a budget.
Anyway, enough blather...on to the visual.
Today's picture is rather boring, sorry:
09-26-12, 12:09 PM
#156
Moderator
iTrader: (3)
Join Date: Mar 2001
Location: https://www2.mazda.com/en/100th/
Posts: 30,826
Received 2,594 Likes
on
1,842 Posts
my first assumption was that i could put the diff in, and then the subframe on, and this is not quite correct. the second was that flipping the adjusters on the rear would let me put the subframe in and then install the control arms, which is also incorrect.
that being said, i did put the diff on the floor jack, and put it on its studs, with the nuts on a turn or two, and then i put the subframe up, bolted the diff to the subframe, then i put the control arms on. it sounds easier than it was, as the diff and subframe kind of need to be lowered together to line up enough to bolt up to each other.
the yoga move was holding the diff from falling off the jack to the side, and using my feet to operate the floor jack....
now that i think about it, i wonder about putting the rear suspension on jack stands and lowering the car onto it....
09-26-12, 10:24 PM
#159
I Always Pull and install the subframe and Diff all together. Its Much easier with 2 people of course but i do it solo as well. Ive done it all sorts of different ways. Currently i have to take my time, think the stragity threw and move very slowly so i dont scratch anything underneith.
09-26-12, 11:12 PM
#160
Here was my sub frame getting re-installed. The diff is already up and in place. One set of jack stands to hold the chassis up. Second set of jack stands under the sub frame as I slowly raised in up into position. One set of tall wooden specially made ones (with a V notch on top) to hold the axles in place horizontal and then used to hold up the trailing arms.
Slow and careful - not much fun when you are working by yourself.
Slow and careful - not much fun when you are working by yourself.
09-27-12, 06:51 AM
#161
Thanks folks, all the info is appreciated.
This weekend the car is getting set up in the garage...jackstands on all four corners, wheels off, tailend at the door.
I can fully install the front brakes (but not bleed them) and finally get a good look at the diff/subframe.
Obviously, I've been under there before, but never with the intention of removing the assembly, so my grasp of the project is hazy and theoretical at the moment.
I need to stare at some greasy metal and meet my foe face to face.
I've begun ordering the parts for the external engine "refresh".
New intake gaskets, new OMP lines from Rotary Evolution (my concession to bling), pilot bearing and seal (in prep for the new clutch) and front cover o-ring/teflon ring.
Still need new spark plugs, new thermosensor (mine has a flat spot @160� that screws up the transition from cold start to normal running) and to get the injectors serviced.
I also need to seriously clean up the engine/tranny/differential...a task I've been avoiding as my hands recover from the first stage of the project. My fingernails are almost clean again and the inevitable knuckle nicks are nearly healed.
The diff and trans are actually pretty easy because they're sealed, it's the engine that will require care.
I'm beginning to see light at the end of this tunnel.
09-27-12, 08:54 AM
#163
Senior Member
iTrader: (2)

Join Date: Apr 2010
Location: Michigan
Posts: 258
Likes: 0
Received 0 Likes
on
0 Posts
Project is looking good, your attention to detail is admirable. I am on roughly the same path as you although my car is a turbo and I bought it blown up so the rebuild happened before the body/interior was attended to. Im quite jealous of your light at the end of the tunnel. Mine is still just a little dot lol. Keep up the good work, the car looks great!
 09-27-12, 02:40 PM
#165
The symptom:
From a cold start all was well till a mile or two down the road and water temp hit @160�.
From 160� to 180� the engine went flat (did not die) but recovered and ran well as temp cleared 180� (this usually lasts only a few seconds).
This was not RPM sensitive/dependent and does not occur once the engine is warmed up.
My thinking:
The ECU is getting a wonky signal from the thermosensor just at the time it should be transitioning from the cold start fuel map to the normal temp map. It defaults to cold start even though the engine is nearly warmed up, semi-flooding it.
Once past this "dead zone", the sensor sends a correct signal and the ECU is happy again.
I have not one iota of proof that this theory is even plausible in the FC, it's based on an episode with the FD V-8.
T'would not surprise me at all if you mocked my diagnosis, I devised it digitally to solve an analogue problem.
Even if the theory makes no sense ( and please tell me if that's the case) it doesn't matter, the sensor is getting replaced anyway.
With the motor stripped bare, there's no simpler time to do so and who knows how old it is...I've never touched it.
09-27-12, 08:08 PM
#166
I have always had help putting it in though so I can't give you any pointers for that.
09-27-12, 08:39 PM
#167
Lately I've been working for the car rather than on it.
Not complaining mind you, this simple refresh is going to cost more than you'd think.
I've made a list of the things I need (gaskets, filters, etc) and a list of things best done with the engine out (clutch, injectors, etc.)
Then there's a smaller, third list...things I'm torn about buying.
For instance, Mazdatrix has a bit of a screed along with their heater hoses, describing how catastrophic a blowout can be and all the reasons the hoses (particularly the driver side intake hose) live a hard and crappy life.
So, it makes sense to replace the pair, right?
Yes, it does, so add another $73 to the budget.
Yikes.
Anyway, I did lay hands on the GTU...rolled her out of the garage, turned her around and back in and up on jackstands. This is in prep for the subframe removal, which I'm not ready for yet.
I still need to clean the diff and get oil for it (much easier to fill on the floor than in situ.
The front brakes can now be installed and I finally got around to a little interior "glitch" that's been bothering me.
The outboard plastic seatbase trim has a nice little slot for the seat belt:

Unfortunately, the seatbelt has to feed through this, which means every time the seat is removed, the lower seatbelt mount must be undone as well.
This is stupid but I liked the idea of the guide so I cut a slot in the loop allowing the belt to get in/out without further ado:
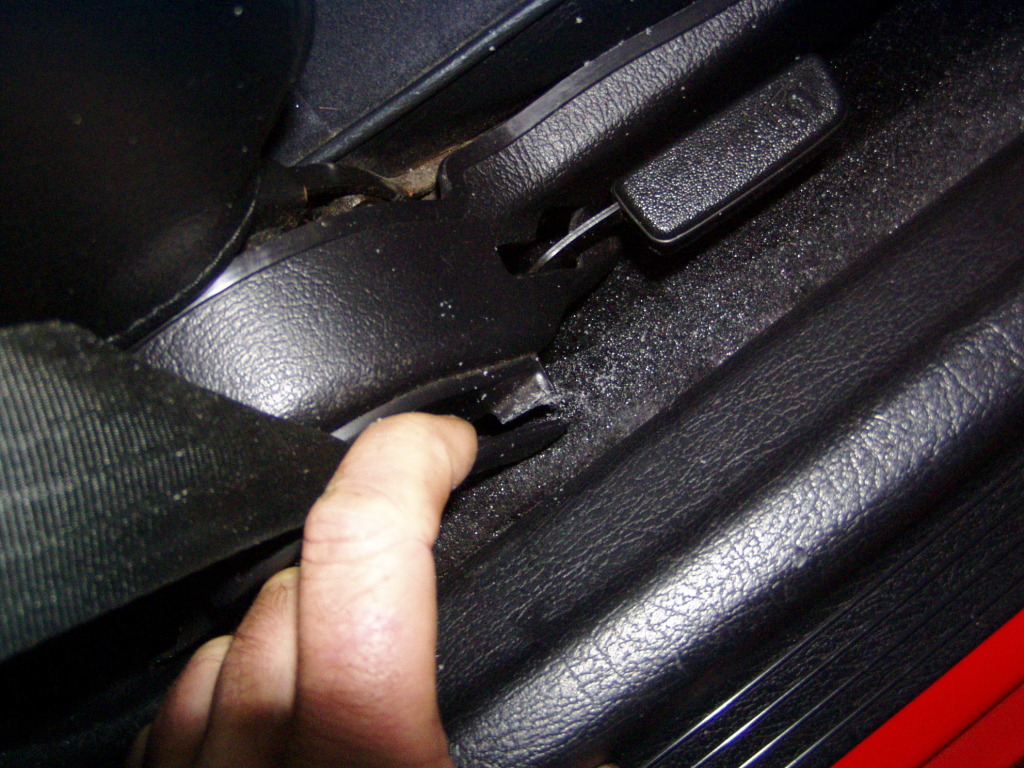
Yes, this is the sort of nit-picky bushwa I'm doing right now.
Because pictures are always good, even if they have no particular wow factor, here are two shots of the GTU in the air. The second shot best shows my (so far) feeble attempts to equalize the muffler tips:
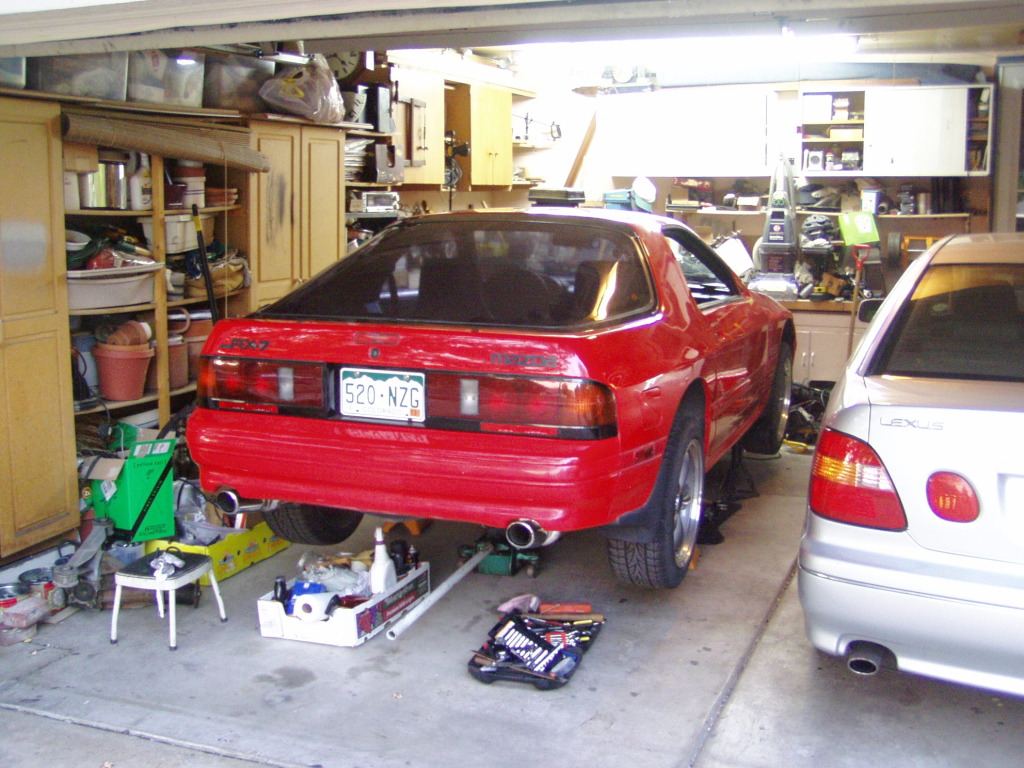
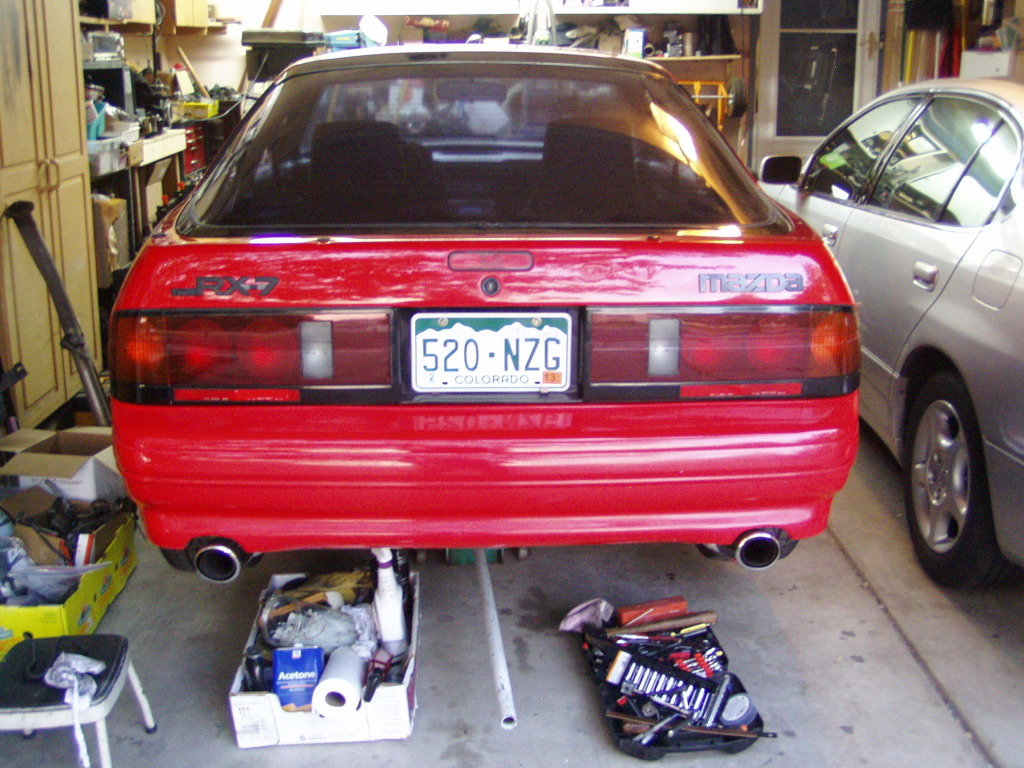
I have a sneaking suspicion that all this tweaking is for naught and the y-pipe is going to screw the alignment all over again.
We'll see.
Not complaining mind you, this simple refresh is going to cost more than you'd think.
I've made a list of the things I need (gaskets, filters, etc) and a list of things best done with the engine out (clutch, injectors, etc.)
Then there's a smaller, third list...things I'm torn about buying.
For instance, Mazdatrix has a bit of a screed along with their heater hoses, describing how catastrophic a blowout can be and all the reasons the hoses (particularly the driver side intake hose) live a hard and crappy life.
So, it makes sense to replace the pair, right?
Yes, it does, so add another $73 to the budget.
Yikes.
Anyway, I did lay hands on the GTU...rolled her out of the garage, turned her around and back in and up on jackstands. This is in prep for the subframe removal, which I'm not ready for yet.
I still need to clean the diff and get oil for it (much easier to fill on the floor than in situ.
The front brakes can now be installed and I finally got around to a little interior "glitch" that's been bothering me.
The outboard plastic seatbase trim has a nice little slot for the seat belt:
Unfortunately, the seatbelt has to feed through this, which means every time the seat is removed, the lower seatbelt mount must be undone as well.
This is stupid but I liked the idea of the guide so I cut a slot in the loop allowing the belt to get in/out without further ado:
Yes, this is the sort of nit-picky bushwa I'm doing right now.
Because pictures are always good, even if they have no particular wow factor, here are two shots of the GTU in the air. The second shot best shows my (so far) feeble attempts to equalize the muffler tips:
I have a sneaking suspicion that all this tweaking is for naught and the y-pipe is going to screw the alignment all over again.
We'll see.
09-28-12, 12:41 AM
#168
Wow i actually took the time to read the thread through and it is precise and articulate. You have the patience of a saint.
Let me know if you need help with that diff install. I still owe ya one
Looking good though Steve, that little puppy that followed you home has grown into a show winning breed!
Let me know if you need help with that diff install. I still owe ya one
Looking good though Steve, that little puppy that followed you home has grown into a show winning breed!
09-28-12, 08:09 AM
#169
Greetings and thanks for the offer, I may take you up on it.
I have the weekend off and the weather gets nicer, so it's going to be a cleaning spree, I think.
At some point I'll slide under the car and observe the diff/subframe assembly in it's natural habitat. At the very least, I'd like to get a wrench on all the relevant bolts and see how much fight to expect. If possible, I'd also like to measure for a pinion snubber, which seems like a useful but cheap mod to adopt.
The Hawk brake pads are "out for delivery", so I'll have them in hand soon.
The front brakes can then be loaded and installed for the final time. The safest place for reconditioned/painted parts is on the car itself, where I'm not tiptoeing around them all the time.
Besides, it'll look bitchin'.
09-29-12, 01:46 PM
#170
Today's episode begins with my feeble parts "money shot".
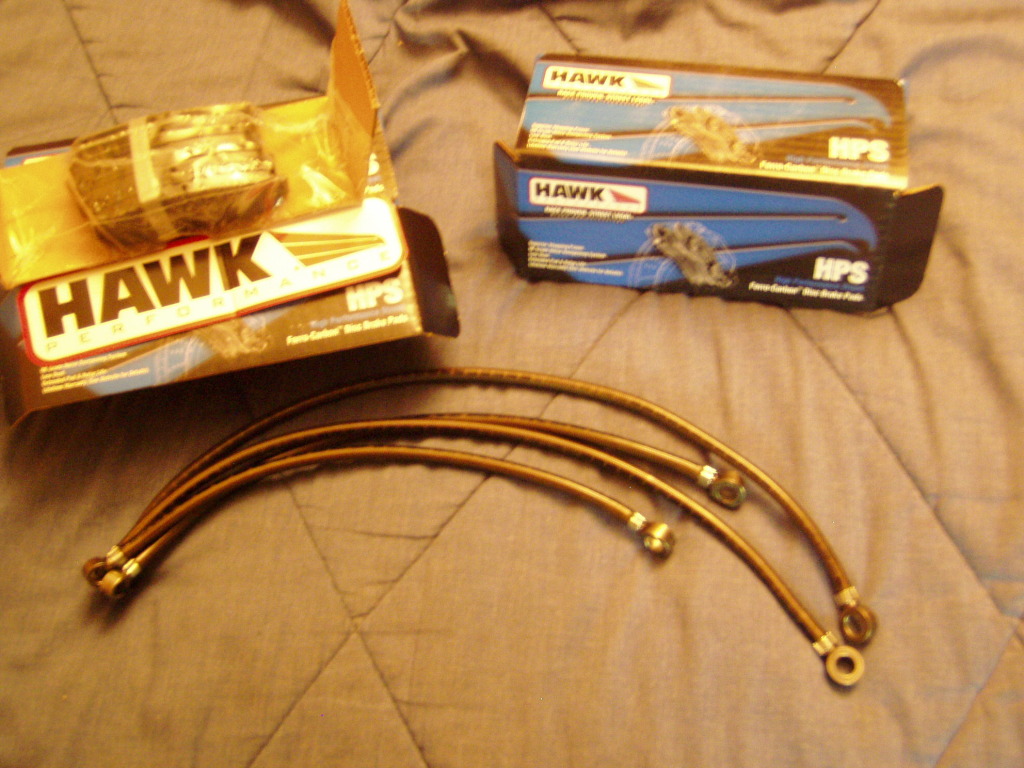
Brake pads and some Rotary Evolution OMP lines.
The OMP lines are extremely nice for what they are and the order/delivery process was drama free and very fast. I'd recommend RE as a vendor based on my experience.
I thought it was cute that Hawk includes a whopping big decal with each set of pads.
I'll tell you what Hawk...when you start giving me product or contingency cash, I'll be happy to display your name. However, since I paid for the pads, you should be flying my name, not the reverse.
Anyway, the front brakes went on smoothly, here's some hot pad on rotor action for y'all:

Then you put on the wheel, cover it all up and also emphasize how tiny are brakes really are:
This is how the prop valve/hard lines turned out:
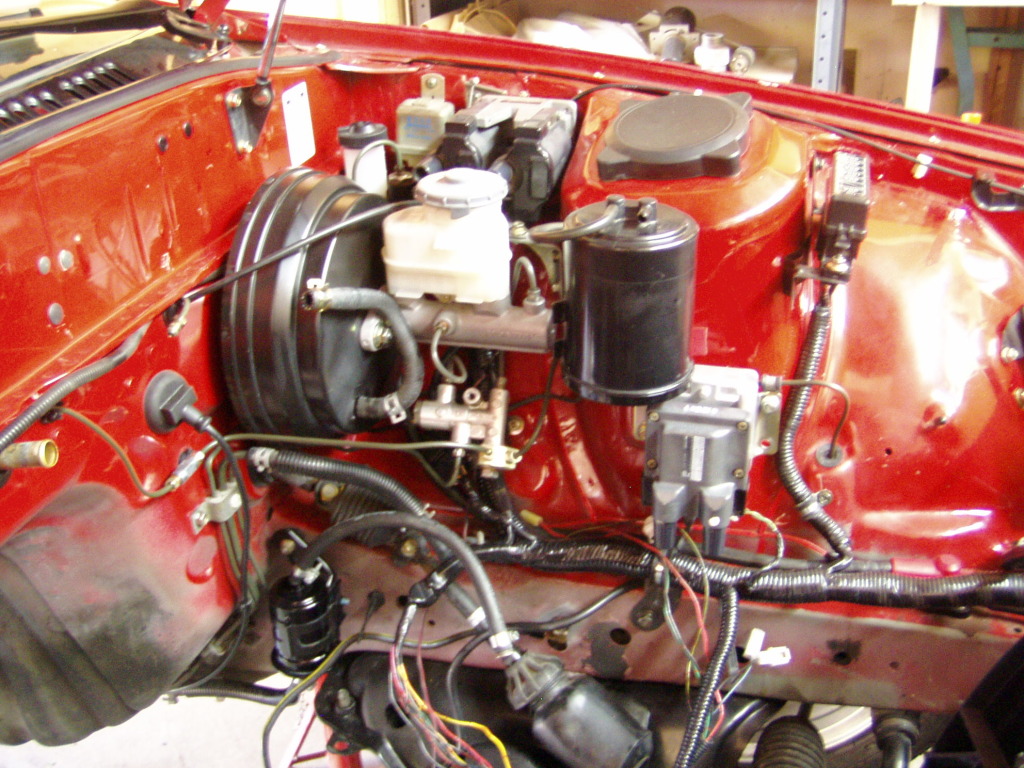
I'm not in love with the look but it's completely serviceable and appropriate for the space, so that'll do, pig, that will do.
Now to clean....yuck.
Brake pads and some Rotary Evolution OMP lines.
The OMP lines are extremely nice for what they are and the order/delivery process was drama free and very fast. I'd recommend RE as a vendor based on my experience.
I thought it was cute that Hawk includes a whopping big decal with each set of pads.
I'll tell you what Hawk...when you start giving me product or contingency cash, I'll be happy to display your name. However, since I paid for the pads, you should be flying my name, not the reverse.
Anyway, the front brakes went on smoothly, here's some hot pad on rotor action for y'all:
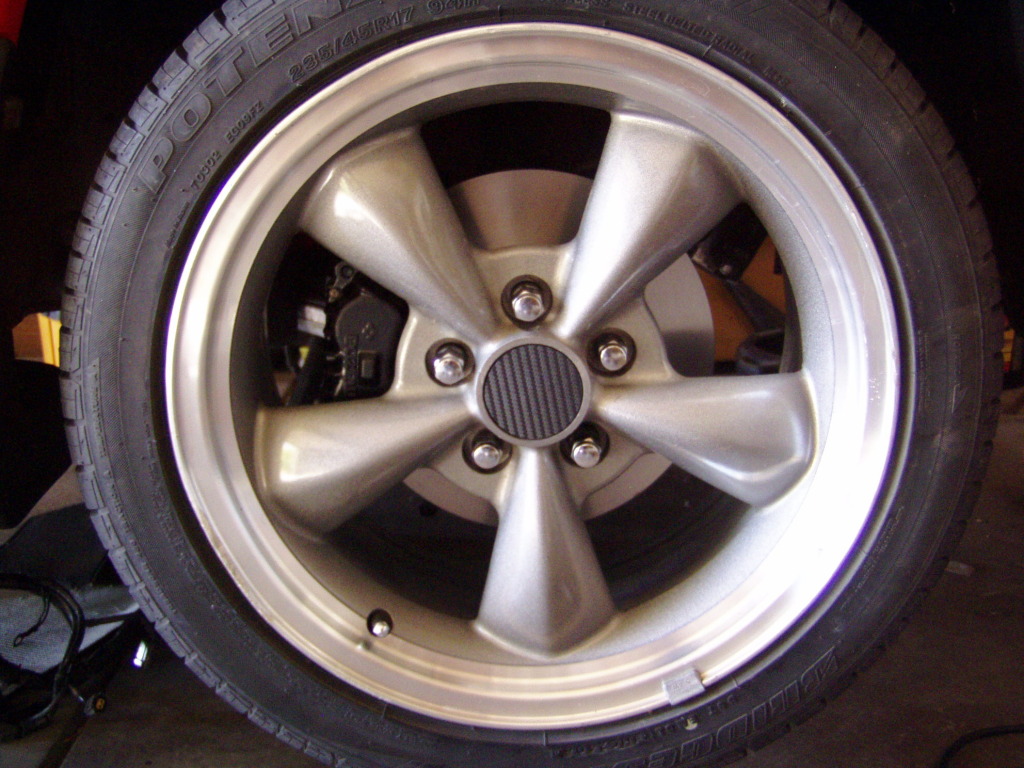
Then you put on the wheel, cover it all up and also emphasize how tiny are brakes really are:
This is how the prop valve/hard lines turned out:
I'm not in love with the look but it's completely serviceable and appropriate for the space, so that'll do, pig, that will do.
Now to clean....yuck.
09-30-12, 04:54 AM
#172
Wow, all caps...you must really mean it.
They are Mustang "Bullit" wheels, 17 x 8.
My cleaning efforts are going poorly.
None of my chemicals (Purple Power and acetone mainly) are really effective, the greasy areas, particularly on the trans tail, are too thick.
I think I need something like Varsol that doesn't flash off so quickly, hopefully soak in and dissolve this gunk.
09-30-12, 08:53 AM
#173
Originally Posted by clokker
Wow, all caps...you must really mean it.
They are Mustang "Bullit" wheels, 17 x 8.
My cleaning efforts are going poorly.
None of my chemicals (Purple Power and acetone mainly) are really effective, the greasy areas, particularly on the trans tail, are too thick.
I think I need something like Varsol that doesn't flash off so quickly, hopefully soak in and dissolve this gunk.
They are Mustang "Bullit" wheels, 17 x 8.
My cleaning efforts are going poorly.
None of my chemicals (Purple Power and acetone mainly) are really effective, the greasy areas, particularly on the trans tail, are too thick.
I think I need something like Varsol that doesn't flash off so quickly, hopefully soak in and dissolve this gunk.
I love Torque Thrust style wheels, and the "Bullit" version is my favorite. Are they 17x8 on all for corners?
Sent from my iPhone using RX7Club
09-30-12, 09:23 AM
#174
Yes, 235/45 tires.
Since the main purpose of the car is street driving, being able to rotate the tires is a nice convenience (not that I do it, but still...) and this size is a good balance between having some tread on the road and not overwhelming the power output or the manual steering.
Since the main purpose of the car is street driving, being able to rotate the tires is a nice convenience (not that I do it, but still...) and this size is a good balance between having some tread on the road and not overwhelming the power output or the manual steering.
09-30-12, 12:42 PM
#175
Speed Racer

Im thinking about moving to westminster/denver and I was wondering how the rx7 runs during the winter season as a daily driver. I dont want to have to sell my car and get a subaru, but if that's the case then i have no choice. When I was there earlier this month, i've seen a lot of fwd like integras and civics souped up rolling in the streets, and I'm going to assume that they come out during the snow as well. Are our cars any different from theirs in the snow? I have never driven in the snow before nor have I been there in the winter time, so this is going to be something new to me.
Last edited by jlee916; 09-30-12 at 12:55 PM.