
Progress on the 7

A couple updates:
I raced a late model C5 vette on the way to work a couple days ago. I ended up pulling on the vette twice. Though it was an exciting race, it exposed a couple weaknesses that need to be addressed.
First of all, during launch, my car was wheel-hopping all over the place. It was a pretty bumpy ride. My Konis are on their softest setting so it's obvious that they are set too stiff. I am having the valving softened this weekend.
Second, The engine ground wire ripped out of the wire terminal (probably when I launched). I replaced it a while back but obviously didn't crimp it tight enough. I fixed that right away.
Which leads to another issue. My motor mounts are old and worn. I have a set of solid polyurethane mounts in the works, but have been waiting for a while for them to be finished. After a little pressure, they are done now; time for install.
Next issue, my low oil sensor is leaking. That is a previous issue, and will hopefully be fixed this weekend as well.
Another pre-existing issue is the brake master cylinder leaks. I ordered a new one from SpooledUpRacing, be here monday-ish
I finally got a check valve to work with my methanol set up. (no methanol during vette race)
Finally, they turbo is drinking oil like crazy. It was kinda bad before, when I boosted like 16psi I damaged the seal. Well the recent vette match up seems to have compounded that issue. I may have the turbo rebuilt by Tuesday.
I'll try to get pics of the damage, repairs and new toys.

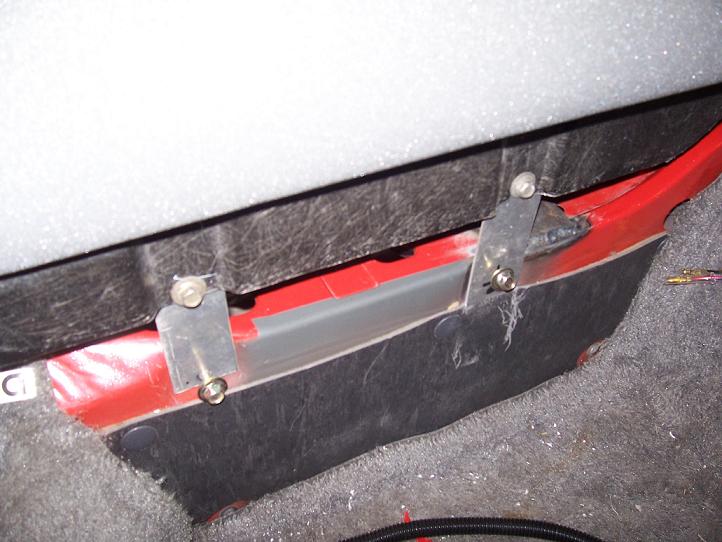
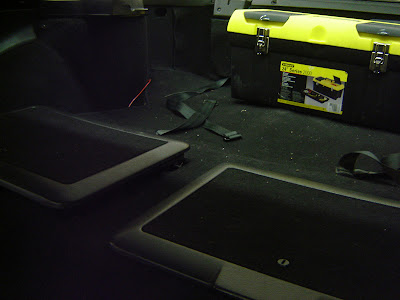
You can see the extension brackets i made in the pic here:
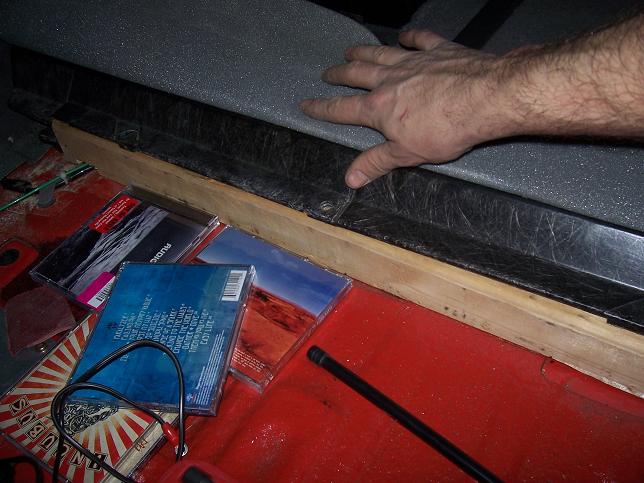
And the rear "extension bracket" which is actually a piece of wood cut to fit
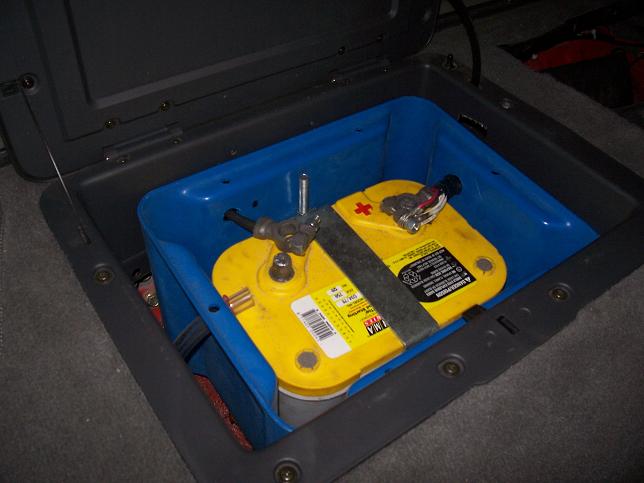
And the fit around the battery:
And the finished fit:
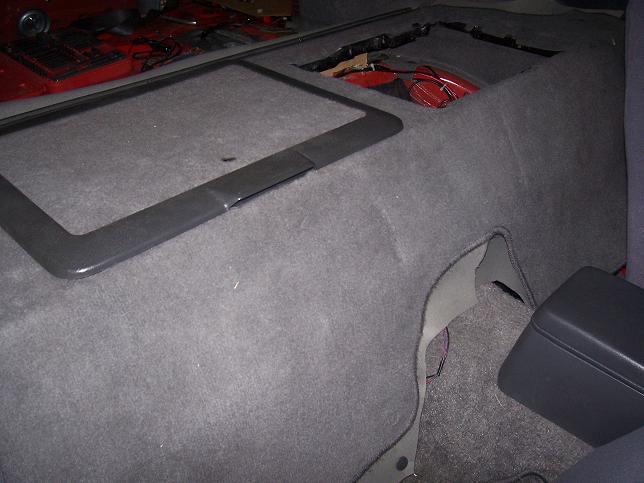

The only way to make this any better, which I may do in the winter of '09, is to make another larger piece of carpeting to surround the bins. The stock piece becomes too short after raising it up, which is why there's headliner filling in the gaps around it. But you never see it anyways because the seats are back. Fits my needs just fine for now.
The mystery of the prize.
Joined: Aug 2002
Posts: 832
Likes: 2
From: Bay area
Why wouldnt you just use a battery and container that fits in the bins if you want to keep the bins? What a kludge...
Last edited by Aaron Cake; Jan 13, 2008 at 10:38 AM. Reason: Request by thread owner
You raised the WHole Bin!!
You sneaky Russian!
That looks very nice. I like that effect. At fisrt I couldnt tell you raised it... looked like you got the bin to fit right in. Then I figured it out on that last pic...
I was thinking of raisng just the area where the lid fits in, but hadn't really thought it through. This may be a cleaner route.
Great work Bro!
This bin is one of the cheapest and best for NHRA and SCCA rated. You'd be lucky to find a BATTERY that fits into the bin with the lid closed.
Last edited by stylEmon; Jan 9, 2008 at 12:12 PM.
The mystery of the prize.
Joined: Aug 2002
Posts: 832
Likes: 2
From: Bay area
NHRA only requires a box of specific thickness and that it be vented when theres no firewall seperating the cabin from the battery. It does not require that you purchase a box whos manufacturer has advertised that it happens to be NHRA compliant. You clearly have metal working capabilities, so making a box that fit and using a smaller & lighter battery should have been possible.
Here you go:
Originally Posted by NHRA
This means a metal bulkhead must separate the trunk from the driver compartment, or the battery must be located in a sealed, metal box constructed of minimum .024 inch steel or .032 inch aluminum, or in an NHRA accepted plastic box.
Judging by how far you lifted the bin top, something like a PC680 would probably do just fine in there, while saving weight too.
that's a great suggestion, but how much would it cost to have it made?
This product is readily available and cheap. It has the ratings we desire, and with a little effort, it may be able to fit seamlessly.
There are some other methods that I have been playing with:
One, massage the body under the bin, and lower the mounting of the bin that way.
Two, raise just the area where the lid mounts.
Classics attempt is a good one, and with a little more carpet, you'd never even know it was done.
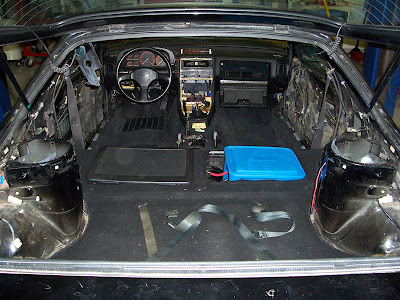
Just thought I'd show you how little the box actually sticks out. I didn't rasie the bin AT ALL.
This product is readily available and cheap. It has the ratings we desire, and with a little effort, it may be able to fit seamlessly.
There are some other methods that I have been playing with:
One, massage the body under the bin, and lower the mounting of the bin that way.
Two, raise just the area where the lid mounts.
Classics attempt is a good one, and with a little more carpet, you'd never even know it was done.
Just thought I'd show you how little the box actually sticks out. I didn't rasie the bin AT ALL.
Last edited by stylEmon; Jan 9, 2008 at 05:43 PM.
NHRA only requires a box of specific thickness and that it be vented when theres no firewall seperating the cabin from the battery. It does not require that you purchase a box whos manufacturer has advertised that it happens to be NHRA compliant. You clearly have metal working capabilities, so making a box that fit and using a smaller & lighter battery should have been possible.
Here you go:
NHRA doesnt care if you make your own steel or aluminum box. You're restricted to the Moroso monopoly if for some reason you are limiting yourself to a PLASTIC box.
Judging by how far you lifted the bin top, something like a PC680 would probably do just fine in there, while saving weight too.
I could have used a smaller battery, but my experience with most smaller batteries in the past wasn't ideal given the amount i drive the car. I had an Optima yellow top and LOVED its durability - so I fit it in there.
You can fit a regular battery in the bin without lifitng it, heck, you could fit a LARGER battery in there without lifting it. The problem arose from the box itself not being able to be fit down into the "butt cavities" of the body under the bins. Its just not the right shape.
Long Past Due Pics...
Here is my exhaust before emissions

This is what I ran through smog with


The old motor mounts. There where not mounted like this for the most part. I put the stock cups around these while I was waiting for the solid mounts

Finally got them

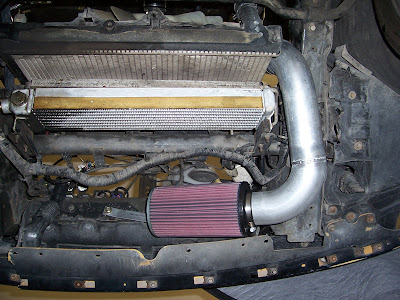
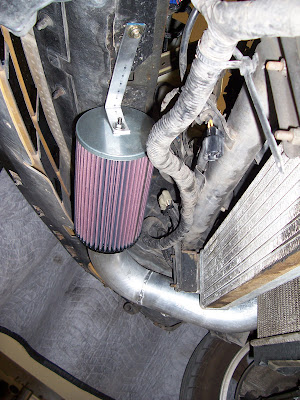
Not sure if I mentioned it, but I've busted 3 K&N air filters because of this CAI mounting position.

Check this out! All the way in the front of the bumper, but still doesn't block the radiator or the oil cooler.

Ya'll should check out the BLOG more pics and details
Here is my exhaust before emissions
This is what I ran through smog with
The old motor mounts. There where not mounted like this for the most part. I put the stock cups around these while I was waiting for the solid mounts
Finally got them
Not sure if I mentioned it, but I've busted 3 K&N air filters because of this CAI mounting position.
Check this out! All the way in the front of the bumper, but still doesn't block the radiator or the oil cooler.
Ya'll should check out the BLOG more pics and details
i've spent about $900 on the stock turbo I have.
s5 turbo and manifold in decent shape = 125
ported waste gate and coated turbine, housing and downpipe = 400
rebuild = 250
And yes, it is getting the job done thus far, but man, it would be so nice to ditch it for a nice t04 with a tubular manifold, and an external waste-gate!!!
s5 turbo and manifold in decent shape = 125
ported waste gate and coated turbine, housing and downpipe = 400
rebuild = 250
And yes, it is getting the job done thus far, but man, it would be so nice to ditch it for a nice t04 with a tubular manifold, and an external waste-gate!!!

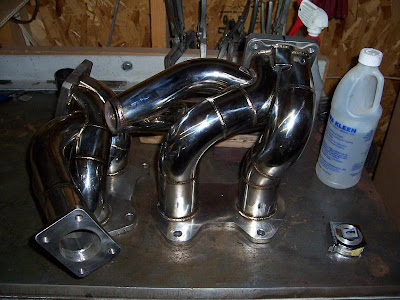
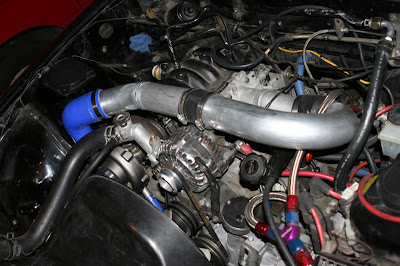
I got a BIG TURBO!!!!!!!!!!!!!!!!!!!!!!!!!!!!!!!!!!!!!!!!!!!!! !!!!!!!!!!!!!!!!!!!!!!!!!!!!!!
T04E 57 trim.
Turblown Exhaust Mani and hardlines
Tail Wategate, 9psi spring.
Maxed my injectors out while tuning tonight...
Lots of work to do on this baby now. But DAMN! It's a whole new car. This turbo is FUN!
T04E 57 trim.
Turblown Exhaust Mani and hardlines
Tail Wategate, 9psi spring.
Maxed my injectors out while tuning tonight...
Lots of work to do on this baby now. But DAMN! It's a whole new car. This turbo is FUN!


Where is this big turbo you speak of? 
Are you running AI or is that turbo outlet to TB pipe only temporary till you get an IC?
Are you running AI or is that turbo outlet to TB pipe only temporary till you get an IC?
Last edited by Juiceh; Jan 17, 2008 at 11:53 AM.
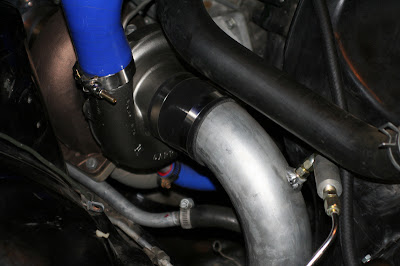
right now, it's el cheapo kit. I am temporarily using my washer pump, with an adjustable soliniod currently set to 6 psi. But got my eye on the ShurFlow pump. Once I get that, the MoTeC will control it.
I am not gonna buy a kit, but rather build my own. Since I have MoTeC, I don't need a controller. I already have the injector and check valve.
I am wiring in some simple LEDs that will tell me if pump is on, or if the tank is low.
I am also looking at a sensor that will measure flow, and let me know if the line is clogged, or if something fails.