
Endo's engine build


Thread Starter
Full Member
Joined: Aug 2007
Posts: 75
Likes: 0
From: California
Endo's engine build
Hi everyone this is the first full build I have done. so I will be going through my frustrations build highlights and asking for general advise, I kinda started this with another thread but I am restarting this with a more general thread for the whole build. the thread I started with will be linked at the bottom.
so for the background I was looking for a car to turn into a track only car since my daily driver is a 06' scion tc I know it isn't much but it gets me around. so I see this 87' gxl with a turbo engine for $1500 here in Sacramento so I call the guy check it out and end up buying it for $800 saved some money right so I trouble shoot it got the factory service manual and looked it over. since it had two ecu's an s4 and s5 and a botched engine harness with foam pipe insulation for a firewall grommet so once replacing the engine harness with an s5 chopping in the resistor pack I got it to sputter like it was going to fire then I read Aron_cake's page of a ghetto compression test and realized the front rotor had one apex seal gone so then I tore the engine out and broke it down once I got it apart I found the bad apex seal the rotor housings where gouged and the rotors had damage to them (pictures are posted in the other thread) before I threw the rotor housings away I noticed that the coolant port on the housing by to cool the turbo was drilled and not factory and that the exhaust inserts had N/A baffles that where cut out (my expression --> ) so now I am where I am.
Original thread.
https://www.rx7club.com/general-rotary-tech-support-11/tell-me-rotor-good-695799/
so for the background I was looking for a car to turn into a track only car since my daily driver is a 06' scion tc I know it isn't much but it gets me around. so I see this 87' gxl with a turbo engine for $1500 here in Sacramento so I call the guy check it out and end up buying it for $800 saved some money right so I trouble shoot it got the factory service manual and looked it over. since it had two ecu's an s4 and s5 and a botched engine harness with foam pipe insulation for a firewall grommet so once replacing the engine harness with an s5 chopping in the resistor pack I got it to sputter like it was going to fire then I read Aron_cake's page of a ghetto compression test and realized the front rotor had one apex seal gone so then I tore the engine out and broke it down once I got it apart I found the bad apex seal the rotor housings where gouged and the rotors had damage to them (pictures are posted in the other thread) before I threw the rotor housings away I noticed that the coolant port on the housing by to cool the turbo was drilled and not factory and that the exhaust inserts had N/A baffles that where cut out (my expression -->
) so now I am where I am.Original thread.
https://www.rx7club.com/general-rotary-tech-support-11/tell-me-rotor-good-695799/
Thread Starter
Full Member
Joined: Aug 2007
Posts: 75
Likes: 0
From: California
so here is one of my current frustrations I go to the local motor machine shop and drop what parts that where left of the engine, intermediate side housing, front side housing and the front cover, to have them hot tanked and the sides bead blasted so I go to pick them up today and they just bead blasted the exterior of the sides and didn't even tough the water jacked where all the rust was so I took some muriatic acid and let it eat the rust well long story short I need to find someone to bead blast them again that will do the water jacked, it pissed me off man I paid $70.00 to have them tank band blast those parts so I wont be going there anymore... ok so next on the list when I got the front cover I noticed some spider cracks on the inside and outside, pictures attached, so my question is, are these cracks normal are they cracks or what anyone help. thanks oh by the way I think the one hole is just a bubble in the casting not sure though.
Winter sucks
Joined: Jan 2004
Posts: 3,083
Likes: 0
From: Newberg, Oregon
All of those things are normal.
They aren't cracks.. they are casting marks... all of them have that. The hole thing on the first picture looks less normal, but I think my front iron has something like that on it. below it is threads on mine... Maybe I'll take some pics of mine
They aren't cracks.. they are casting marks... all of them have that. The hole thing on the first picture looks less normal, but I think my front iron has something like that on it. below it is threads on mine... Maybe I'll take some pics of mine

Lives on the Forum
Joined: Feb 2001
Posts: 26,664
Likes: 23
From: n
Please don't do stupid things like this!
Pouring acid onto metal can weaken it to the point of failure.
It's due to the way the piece of casted - it's normal.
The front oil cover does not take any stress / strain, so there's no reason why it has to be that strong.
-Ted
Pouring acid onto metal can weaken it to the point of failure.
ok so next on the list when I got the front cover I noticed some spider cracks on the inside and outside, pictures attached, so my question is, are these cracks normal are they cracks or what anyone help. thanks oh by the way I think the one hole is just a bubble in the casting not sure though.
The front oil cover does not take any stress / strain, so there's no reason why it has to be that strong.
-Ted
Thread Starter
Full Member
Joined: Aug 2007
Posts: 75
Likes: 0
From: California
I guess I neglected to say I only let the acid stay on the metel for about 30 seconds then washed it off and its the same thing that is in navel jelly and other rust eaters I would have had to let the acid stay on the part for hours before it started to take considerable amounts of metal away. I use it to remove galvanization and zink plating when welding so I get better penetration and a cleaner weld without getting metal fume fever and it takes about 30-60 seconts to remove some of the calvanization... thanks for the post though
Lives on the Forum
Joined: Feb 2001
Posts: 26,664
Likes: 23
From: n
I guess I neglected to say I only let the acid stay on the metel for about 30 seconds then washed it off and its the same thing that is in navel jelly and other rust eaters I would have had to let the acid stay on the part for hours before it started to take considerable amounts of metal away. I use it to remove galvanization and zink plating when welding so I get better penetration and a cleaner weld without getting metal fume fever and it takes about 30-60 seconts to remove some of the calvanization... thanks for the post though
The acid, even dilute, will soak into the metal and weaken it.
When it comes to delicate areas like the inner water jacket groove, this can cause failure.
-Ted
Trending Topics
Thread Starter
Full Member
Joined: Aug 2007
Posts: 75
Likes: 0
From: California
well then do you know of an alternative way of getting the rust out of the water jacket on the cast iron parts?
I understand what you are saying and I could see where that could happen if someone didn't take care to rinse very well afterwards and dry after rinsing I patted each part dry then used a heat gun to dry the parts on the inside that I couldn't get to and from what I understand the acid no longer functions once it has dried.
I understand what you are saying and I could see where that could happen if someone didn't take care to rinse very well afterwards and dry after rinsing I patted each part dry then used a heat gun to dry the parts on the inside that I couldn't get to and from what I understand the acid no longer functions once it has dried.
Joined: Feb 2001
Posts: 29,798
Likes: 128
From: London, Ontario, Canada
Thread Starter
Full Member
Joined: Aug 2007
Posts: 75
Likes: 0
From: California
I didn't think of a pressure washer and I used some wire brushes that are used to clean copper pipe fittings for soldering and that got alot of it off then I used the muriatic to get the rest but really if you don't have a good means of rinsing it just flash rusts but its not like years of rust so the clean up is easy. now on to my next question I am planning on doing a standard size bridge port and I got the RB template so when I got the sides back I dykem and scribed them so I will start porting in a couple of days the question I had is when you do a bridge port I get people saying you have to use carbon apex seals and some saying you can use 2-piece seals I want to use 2-piece cause they withstand high compression and boost but if I bridge the intake and have to use carbon seals they don't stand up as good as metal ones. also from my understanding when you bridge port an engine you do all three of the side housings not just the front and rear sides am I correct in this?
Lives on the Forum
Joined: Feb 2001
Posts: 26,664
Likes: 23
From: n
On flat surfaces, I use fine grint sandpaper and lots of motor oil.
The motor oil acts as a lubricant that keeps the sandpaper from digging in too much.
Brushes for irregular surfaces - brass for aluminum and SS for steel
If you don't believe me the metal is porous, soak the parts in virgin cleaner.
Carb cleaner in the can (no spray stuff) works well here.
You'll see the oil darken the cleaner in no time.
Or, you can torch the metal with a propane torch, and you'll see the oil come to the surface.
-Ted
Joined: Feb 2001
Posts: 29,798
Likes: 128
From: London, Ontario, Canada
I didn't think of a pressure washer and I used some wire brushes that are used to clean copper pipe fittings for soldering and that got alot of it off then I used the muriatic to get the rest but really if you don't have a good means of rinsing it just flash rusts but its not like years of rust so the clean up is easy. now on to my next question I am planning on doing a standard size bridge port and I got the RB template so when I got the sides back I dykem and scribed them so I will start porting in a couple of days the question I had is when you do a bridge port I get people saying you have to use carbon apex seals and some saying you can use 2-piece seals I want to use 2-piece cause they withstand high compression and boost but if I bridge the intake and have to use carbon seals they don't stand up as good as metal ones. also from my understanding when you bridge port an engine you do all three of the side housings not just the front and rear sides am I correct in this?
All irons = full bridge
With a full bridge you may need single piece apex seals depending on the size of the cuts. If you go into the rotor housing at all, single piece seals are a must.
Thread Starter
Full Member
Joined: Aug 2007
Posts: 75
Likes: 0
From: California
Ted I never said that metal was not porous that is why I will be painting all the oil surfaces with glyptol before finishing this engine.
Aaron about the apex seals since I have to use carbon 1 piece seals what is the durability of them I plan on getting a set of RB race rotors the ones with the snap ring in machined in the gear RB part # 10035 they have a slightly higher compression ratio than the 87-88 rotors 8.5:1 and 9.0:1 and I only plan on putting about 10 psi of boost on the engine just for prolonged life so my question is would carbon seals stand up to that kind of abuse I know they are pretty much gone on one knock or detonation so it will have a pretty conservative tune for the sake of the new rotors and housings...
Aaron about the apex seals since I have to use carbon 1 piece seals what is the durability of them I plan on getting a set of RB race rotors the ones with the snap ring in machined in the gear RB part # 10035 they have a slightly higher compression ratio than the 87-88 rotors 8.5:1 and 9.0:1 and I only plan on putting about 10 psi of boost on the engine just for prolonged life so my question is would carbon seals stand up to that kind of abuse I know they are pretty much gone on one knock or detonation so it will have a pretty conservative tune for the sake of the new rotors and housings...
Thread Starter
Full Member
Joined: Aug 2007
Posts: 75
Likes: 0
From: California
looks like I will be doing a large street port with oem apex seals
Ted I am quite new to rotaries so I am not familiar with running oil temps peak oil temps and cooling efficiency so when I get this motor together I will do some research on weather it improves cooling efficiency and or running temp the oil system will be fairly stock the only thing that will change is oil lines to the cooler and the turbo I will be using some fairly decent gauges along with either an ecu auxiliary senor or like a innovate aux box to record the oil temp and pressure levels.
Ted I am quite new to rotaries so I am not familiar with running oil temps peak oil temps and cooling efficiency so when I get this motor together I will do some research on weather it improves cooling efficiency and or running temp the oil system will be fairly stock the only thing that will change is oil lines to the cooler and the turbo I will be using some fairly decent gauges along with either an ecu auxiliary senor or like a innovate aux box to record the oil temp and pressure levels.
Thread Starter
Full Member
Joined: Aug 2007
Posts: 75
Likes: 0
From: California
anyways on a different note the chassis is an 87' gsl or gxl can't remember anyways can you guys guess what color it is??
I will try and take some pictures of of it later I really want to get a full roll cage put in it so I can get ride of the factory dash but when I get done with porting the sides and am waiting for funds I have to finish removing the oe sound deadener luckily its winter and the cooler temp makes it chip off easier.
I will try and take some pictures of of it later I really want to get a full roll cage put in it so I can get ride of the factory dash but when I get done with porting the sides and am waiting for funds I have to finish removing the oe sound deadener luckily its winter and the cooler temp makes it chip off easier.
Thread Starter
Full Member
Joined: Aug 2007
Posts: 75
Likes: 0
From: California
ok here a some pics
most of the stuff in the hatch area is probably going to be sold along with the rest of the interior and yes that is the radiator behind the driver seat. the engine bay is going to get striped of wires and then striped of paint and then repainted. and for the exterior after the small amount of body work that it needs is done I kinda want to acid dip and paint it but that wont be for a while so I will probably get some stickers to cover up the blemishes. yes those are old school 350z rims on it I bought it with them on and I also got a set of TII rims but I need to take the time and money and get the some rubber on them nothing special just something that will hold air and get rid of those z rims


most of the stuff in the hatch area is probably going to be sold along with the rest of the interior and yes that is the radiator behind the driver seat. the engine bay is going to get striped of wires and then striped of paint and then repainted. and for the exterior after the small amount of body work that it needs is done I kinda want to acid dip and paint it but that wont be for a while so I will probably get some stickers to cover up the blemishes. yes those are old school 350z rims on it I bought it with them on and I also got a set of TII rims but I need to take the time and money and get the some rubber on them nothing special just something that will hold air and get rid of those z rims
Thread Starter
Full Member
Joined: Aug 2007
Posts: 75
Likes: 0
From: California
So I got some parts in today... well a part since this build is being done over a longer time period than one would normally take to build an engine.
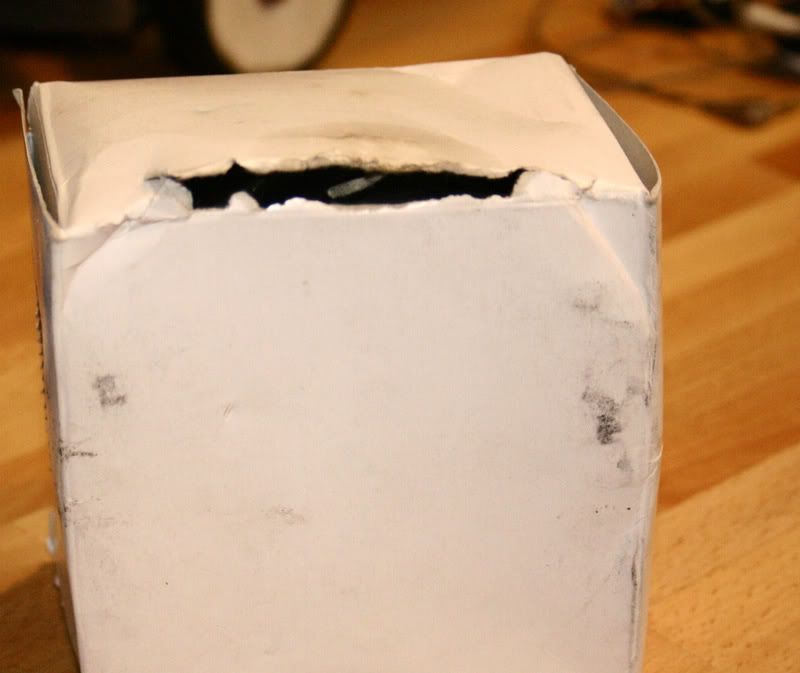
so here is the box off the UPS truck,

my driver Dave was like I sure hope this isn't his box so I opened it there just to make sure it wasn't damaged.
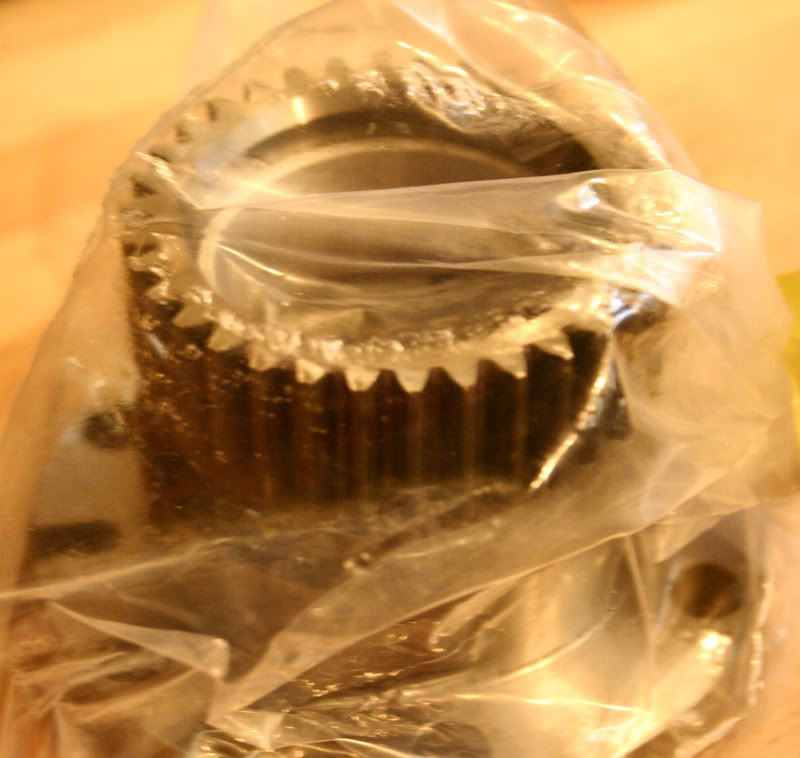
by the way this is an rx8 renesis front stationary gear I will be getting the rear renesis gear and the renesis e-shaft.
so when I got it home from work I took some pics to show you guys what it looked like.

you can see in this picture the plastic was a little torn from being banged up but upon further inspection it is perfectly fine so I put it in a zip lock to make sure the babbitt stays moisture and dirt free..
so here is the box off the UPS truck,
my driver Dave was like I sure hope this isn't his box so I opened it there just to make sure it wasn't damaged.
by the way this is an rx8 renesis front stationary gear I will be getting the rear renesis gear and the renesis e-shaft.
so when I got it home from work I took some pics to show you guys what it looked like.
you can see in this picture the plastic was a little torn from being banged up but upon further inspection it is perfectly fine so I put it in a zip lock to make sure the babbitt stays moisture and dirt free..

Thread
Thread Starter
Forum
Replies
Last Post
immanuel__7
2nd Generation Specific (1986-1992)
89
Sep 5, 2015 10:23 AM
rx8volks
Canadian Forum
0
Aug 13, 2015 04:55 AM