Easy Hood Strut
 07-08-10, 11:08 AM
#1
Easy Hood Strut
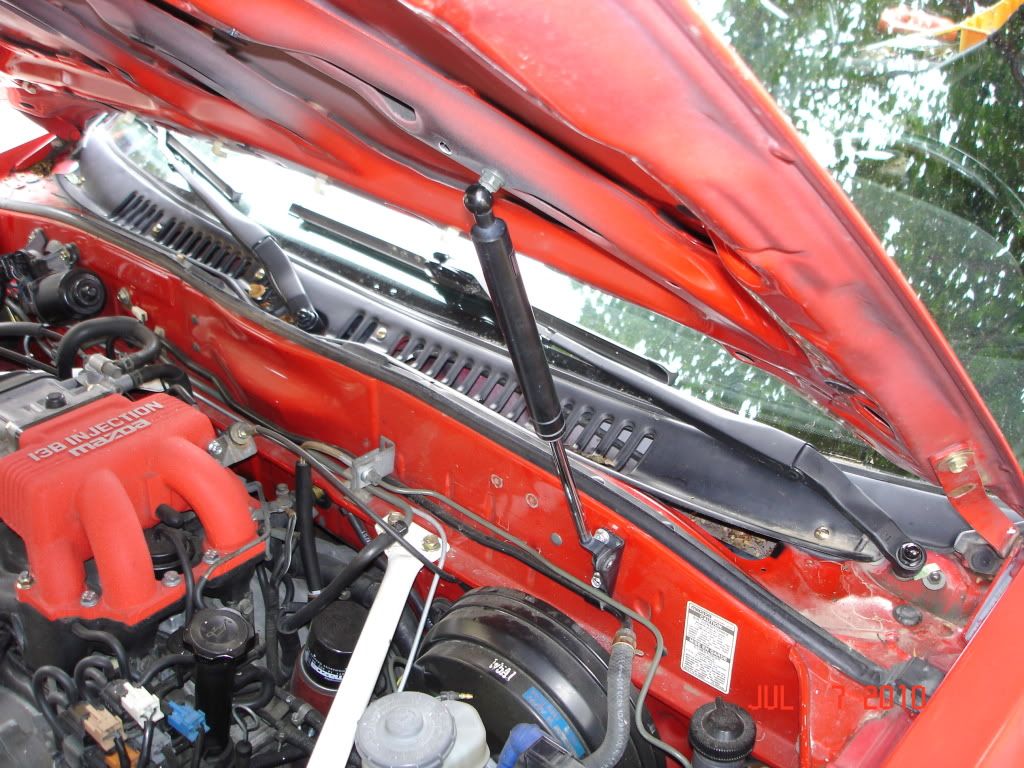
While working on our swapped 3rd gen, we decided to try to adapt hood strut(s) in place of the prop rod.
I snagged a set of struts from a Nissan in the junkyard and since the 3rd gen only required one, I decided to fit the other to my 2nd gen DD.
Install took less than 1/2 hour and only required drilling two holes (one in the hood, one in the firewall).
I'd like to be more specific about year/model but my junkyard obliterates the vehicle ID tags on the door jambs and the donor car had no body panels remaining. I did see several other Nissans with very similar looking struts, so it shouldn't be hard to find- just look for the ones with a bracket on one end and a ball stud on the other.
I used one existing hole on the firewall that holds the brake booster hardline and then drilled a second hole to match the bracket.
Access to the back of the firewall only required removing a few of the screws that fasten the trim panel over the wiper linkage cavity and there is a ton of room for the nuts/washers.
The hood only requires one hole and I placed it to get easy access through a pre-existing slot on the underhood bracing.
I'll be adding some fender washers on both sides of the ball stud to add a bit more support (although I've seen no deformation yet and it's only precautionary at this point).
Mine is an aluminum hood, I have no idea how a single strut would work on a steel unit...probably require two.
Anyway, this was simple, fast and cheap ($5 for the pair of struts at the yard) and makes for an amusing modification, so I thought I'd share...


Trending Topics
07-08-10, 11:24 PM
#8
It's weird, this is the first thing I've done to the 2nd gen in months.
All of my energy has been going into the swapped 3rd gen lately and it was kind of nice to play with this car again.
The 2nd gen DD still has the Integra brake setup in it, the third gen has a Subie 1 1/16" unit.
Both have MC braces, which I now consider mandatory.
When Frojolee's big brake kit is available, I'll be getting one to try.
 ABS plus MAZDA emblem wouldn't be expensive at all!

 07-09-10, 08:35 PM
#20
Yes it does.
If you look at the first picture you'll see a hole about 2 1/2" in front of the current ball mount.
That was marked and drilled as the hood sat on the stock prop.
It then occurred to me that moving the hole back would not only raise the hood but make access to the back of the hole easier because it's closer to the opening in the support web.
07-09-10, 08:42 PM
#22
Mine's alloy (which I stated in the first post) and I know how heavy the steel hood can be.
I think two struts would probably work though.
With the aluminum hood, raise it just a few inches and it will go the rest of the way by itself...this might not happen with the heavier bonnet but I'd bet that once in position, two struts would hold it, no problem.
Remember, the Nissan these came off (as noted above, probably a Maxima) didn't have a lightweight hood either.