
Banzai Racing FC Oil Pan Brace Installation Instructions

Thread Starter
Banzai Racing
Joined: Aug 2001
Posts: 2,632
Likes: 3
From: Indiana
Banzai Racing FC Oil Pan Brace Installation Instructions
I figure I would do a write up on the installation of our new FC Oil pan brace
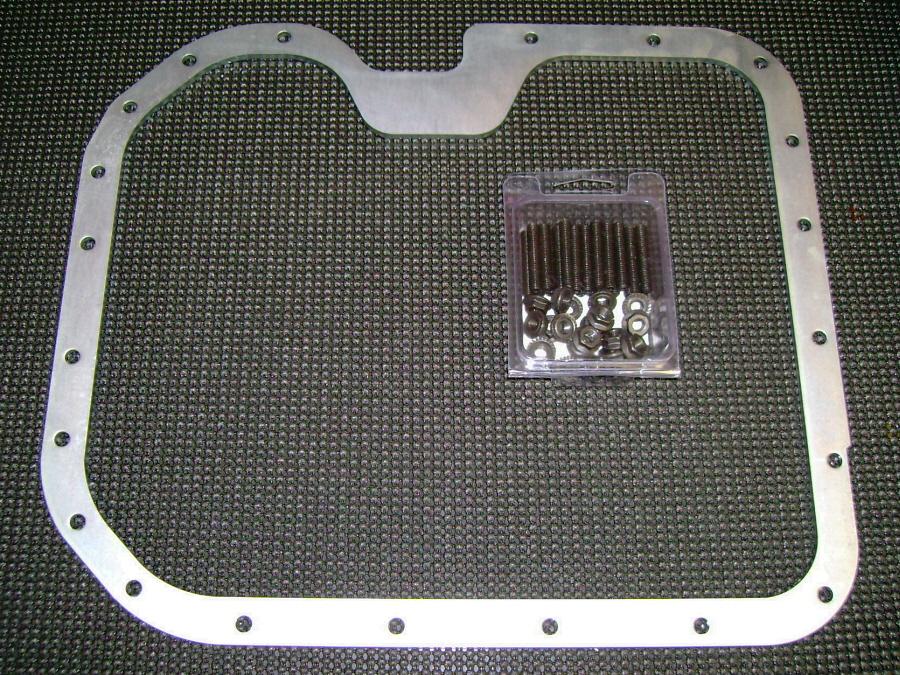
First thing you need is the Oil Pan brace kit
Tools & Materials Required
M6 x 1.0 Tap (recommended) or Pick
3mm Allen Wrench
Torque Wrench
10mm Socket
17mm Socket & Rachet
RTV Silicone Gasket Maker
Let's assume that you know how to remove your oil pan.
First step is to clean the oil pan and engine contact surfaces thoroughly.
Clean out oil pan stud holes completely, ensuring that there is NO RTV, dirt, etc. at base of holes. Failure to do so may result in cracking of plates. We recommend using a M6 x 1.0 Tap , but you may use a pick if necessary

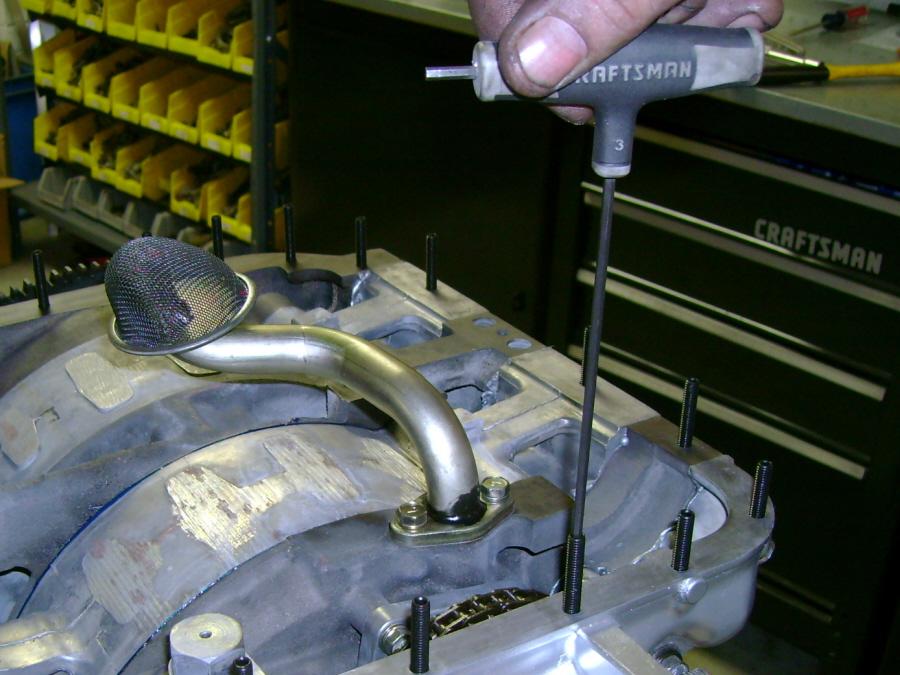
Next using 3mm allen wrench, thread studs into oil pan mounting holes. If you experience difficulty inserting the studs, ensure that the holes are thoroughly clean
Check Oil Pan for rim defects. If necessary, use pliers to straighten edges

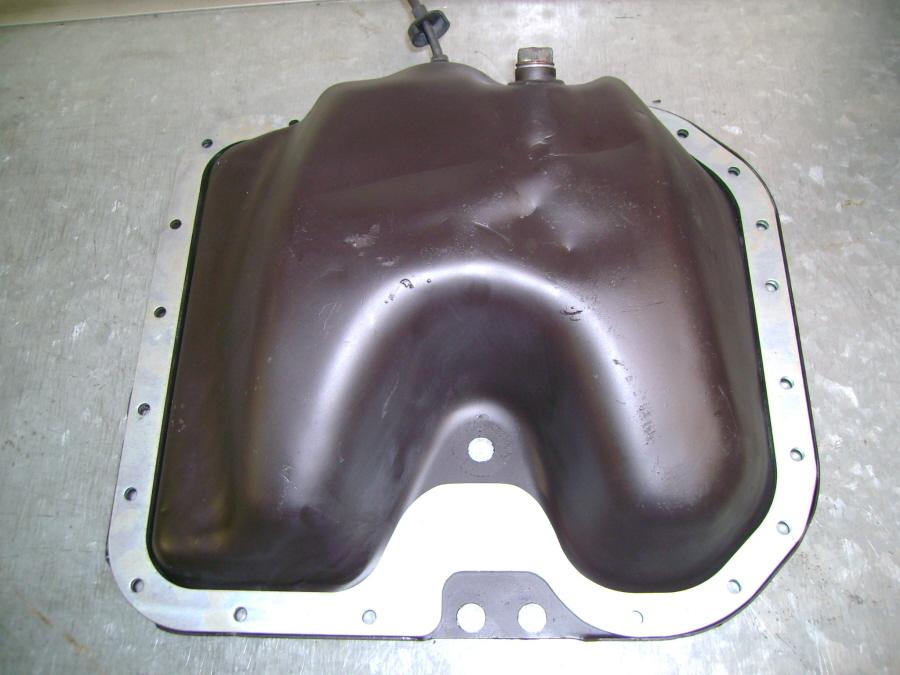
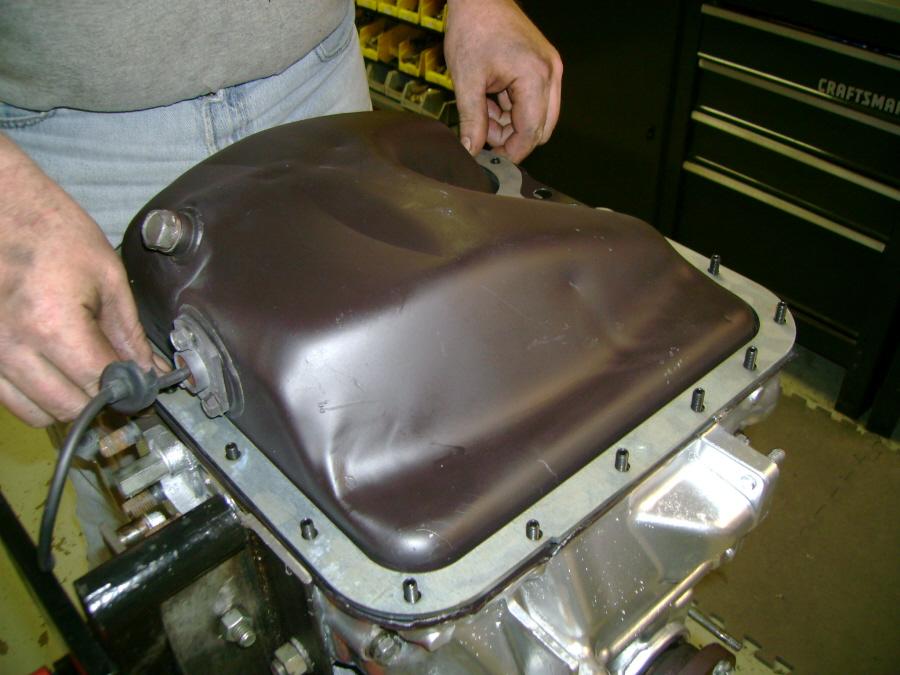
Place oil pan brace on oil pan
Apply a 4 - 6mm continuous bead of RTV Silicone Gasket Maker to the bottom of the engine components along the inside of the studs and around bolt holes. Install oil pan within 5 minutes.
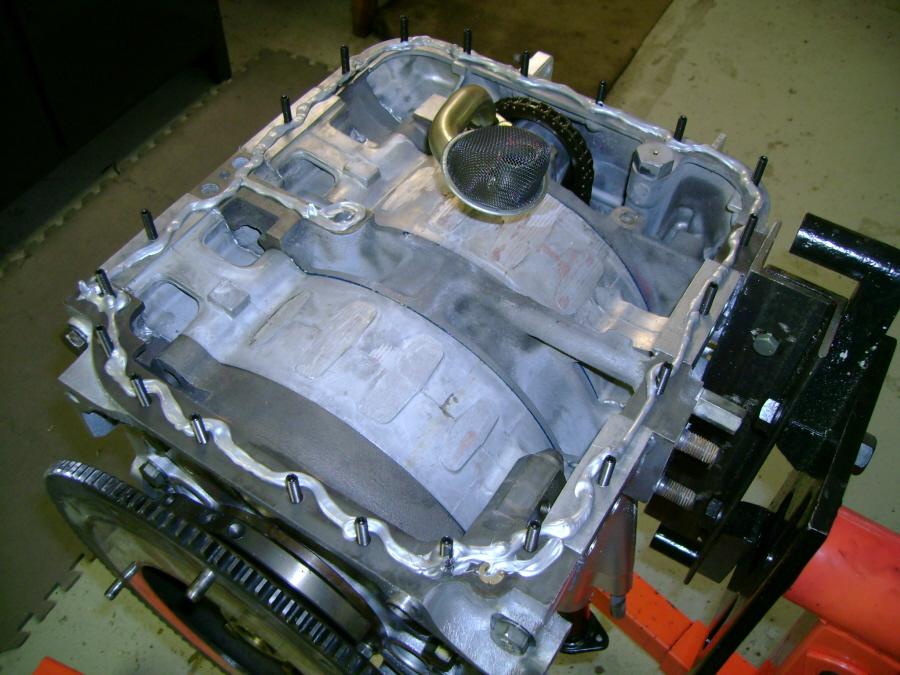
Install oil pan and brace as pictured, lowering onto the studs
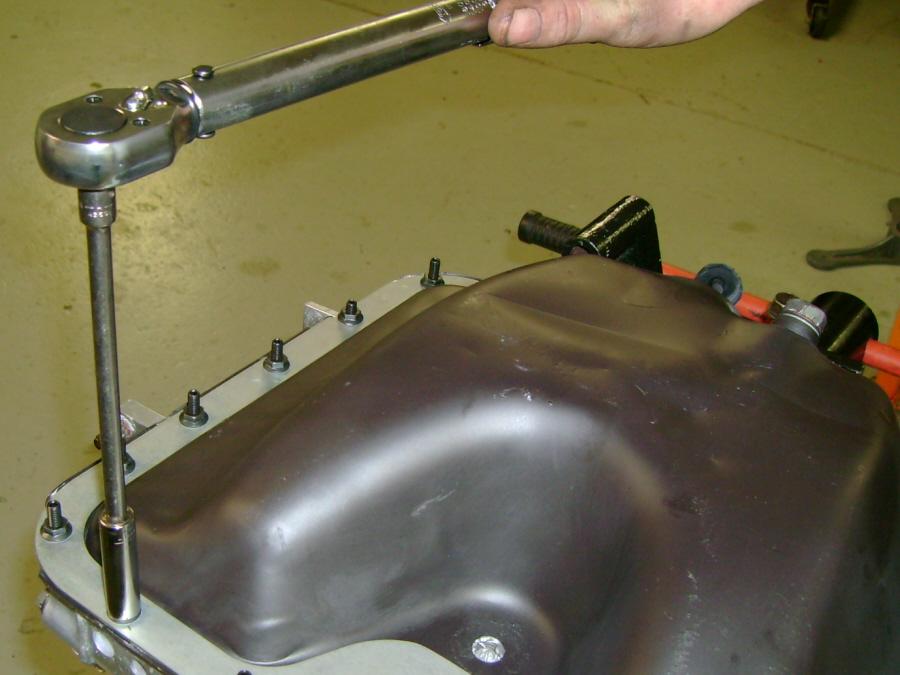
Thread hex nuts onto oil pan studs. Torque nuts gradually and evenly to 8.9 - 11 N-m {79 - 104 in-lbf}
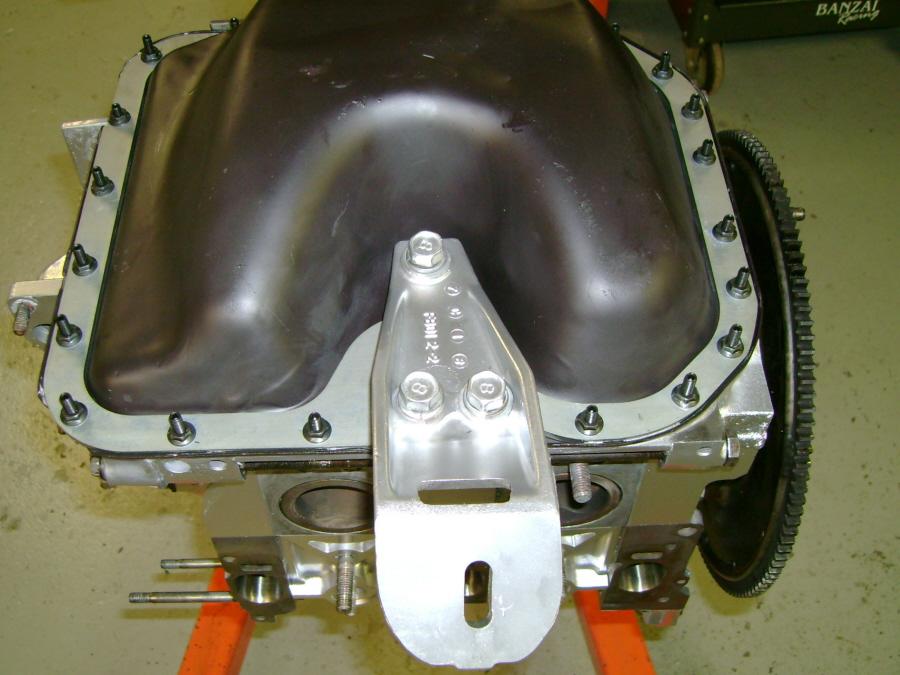
Using stock hardware (17mm bolts & washers), install passenger-side engine bracket. Torque engine mount bolts to 75 - 93 N-m (55 - 68 ft-lbf).
Allow to cure over night, and you are done. This is a little more difficult when you are installing the brace on an engine that is in a car.
First thing you need is the Oil Pan brace kit
Tools & Materials Required
M6 x 1.0 Tap (recommended) or Pick
3mm Allen Wrench
Torque Wrench
10mm Socket
17mm Socket & Rachet
RTV Silicone Gasket Maker
Let's assume that you know how to remove your oil pan.
First step is to clean the oil pan and engine contact surfaces thoroughly.
Clean out oil pan stud holes completely, ensuring that there is NO RTV, dirt, etc. at base of holes. Failure to do so may result in cracking of plates. We recommend using a M6 x 1.0 Tap , but you may use a pick if necessary
Next using 3mm allen wrench, thread studs into oil pan mounting holes. If you experience difficulty inserting the studs, ensure that the holes are thoroughly clean
Check Oil Pan for rim defects. If necessary, use pliers to straighten edges
Place oil pan brace on oil pan
Apply a 4 - 6mm continuous bead of RTV Silicone Gasket Maker to the bottom of the engine components along the inside of the studs and around bolt holes. Install oil pan within 5 minutes.
Install oil pan and brace as pictured, lowering onto the studs
Thread hex nuts onto oil pan studs. Torque nuts gradually and evenly to 8.9 - 11 N-m {79 - 104 in-lbf}
Using stock hardware (17mm bolts & washers), install passenger-side engine bracket. Torque engine mount bolts to 75 - 93 N-m (55 - 68 ft-lbf).
Allow to cure over night, and you are done. This is a little more difficult when you are installing the brace on an engine that is in a car.


The Silver Bullet
Joined: Mar 2004
Posts: 864
Likes: 0
From: Kansas City/Springfield, MO
Now sorry if I sound like an idiot, but what does the brace do in comparison with your oil pan (witch is pure sex by the way, very nice job guys I can't wait to get mine)? What is the cost compared to your oil pan?
Trending Topics
Lives on the Forum
Joined: Sep 2003
Posts: 5,707
Likes: 6
From: BC, Canada
I can see how it would help to even out the pressure on the joint and help with sealing, but are you serious about stiffening the engine? I mean it'll be way more flexible than the engine to start with, so that won't really help, and if it does anything, I doubt it's enough to make any real difference.
Thread Starter
Banzai Racing
Joined: Aug 2001
Posts: 2,632
Likes: 3
From: Indiana
Lives on the Forum
Joined: Sep 2003
Posts: 5,707
Likes: 6
From: BC, Canada
It's just a thin piece of metal (3/16" thick) with a big hole in the middle compared to these vast chunks of metal held together with many dowels and studs plus there's the compressive friction holding them stationary (that's what holds the wheels on your car). I can't see how it'd give any significant increase in stiffness, especially as it's so thin, has a hole in the middle and it isn't bolted down immediately adjacent to every joint, so if the plates move a bit it's easy for it to lift off on one side. It's probably not hard to get it to flex in your hands, so how's that going to contribute significantly to the stiffness?
I'm a 4th year Mechanical Engineering student and I seriously doubt it'll improve the stiffness of the engine a measurable amount. Now as a solution to oil pan sealing I can see it working, but not for stiffness.
I'm a 4th year Mechanical Engineering student and I seriously doubt it'll improve the stiffness of the engine a measurable amount. Now as a solution to oil pan sealing I can see it working, but not for stiffness.


Thread Starter
Banzai Racing
Joined: Aug 2001
Posts: 2,632
Likes: 3
From: Indiana
The cast aluminum pans are good if you only drive your car on the track, unfortunately they are too brittle from common road debris. I also would not attach our brace to an aluminum pan for fear that the flange would crack.
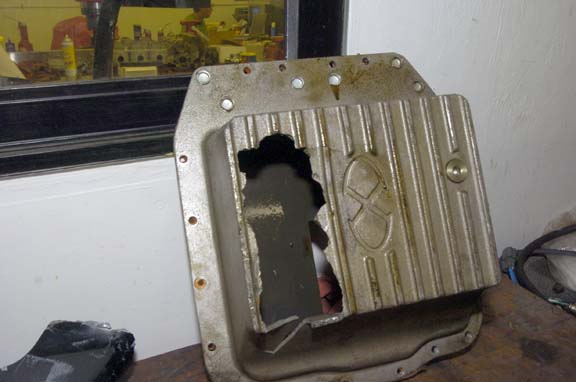
As for the brace being flexible, you would be hard pressed to bend it by hand. It weighs 3 lbs even with the big "hole". Think of the brace as a splint, it gets it's rigidity from being mounted to the engine, the engine stack movement is them limited by the brace. They help each other and in turn negates the need for a 2" thick steel plate to be mounted to the bottom on the engine.
15 year UMASS Engineering Graduate & Rotary Engine Builder.
Last edited by BlueTII; Oct 2, 2007 at 06:27 AM.
Chris,
I ordered the pan Friday, So your opinion is not to use a gasket? And Im installing it on an engine already installed.
I use you motor mounts and trans mounts, Thanks for making quality products.
Johny
I ordered the pan Friday, So your opinion is not to use a gasket? And Im installing it on an engine already installed.
I use you motor mounts and trans mounts, Thanks for making quality products.
Johny

if you don't want a ton of oil blowing out the back then yep  . I run a catch can.
i tried to explain that to my friend who blocked off the crankcase vents on his VR4 which runs 25 psi, but he didn't believe me at first... Result: insane smokeage. also blew out the dipstick.
. I run a catch can.i tried to explain that to my friend who blocked off the crankcase vents on his VR4 which runs 25 psi, but he didn't believe me at first... Result: insane smokeage. also blew out the dipstick.

Thread
Thread Starter
Forum
Replies
Last Post

