
'87 TII Ovehaul - from bouncing idle to engine refurbishment

Ok, I just found these which should really help me out:
Between the two i have a good idea what I'm looking for at the end.
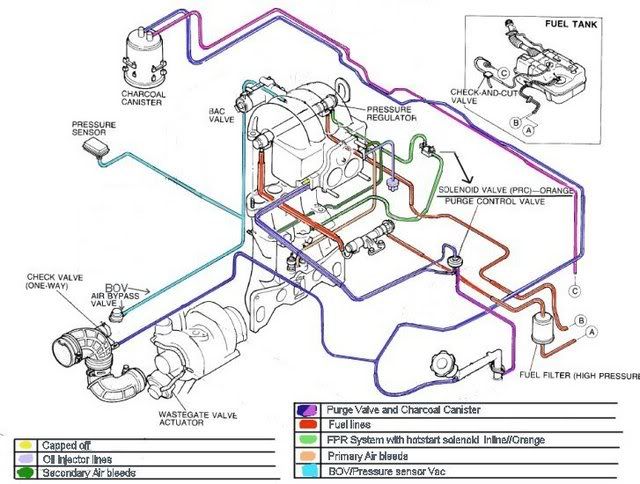
I want to run the new FPR line like shown in the 1st pic, so I'll just run the Pressure Regulator Control solenoid valve in line.
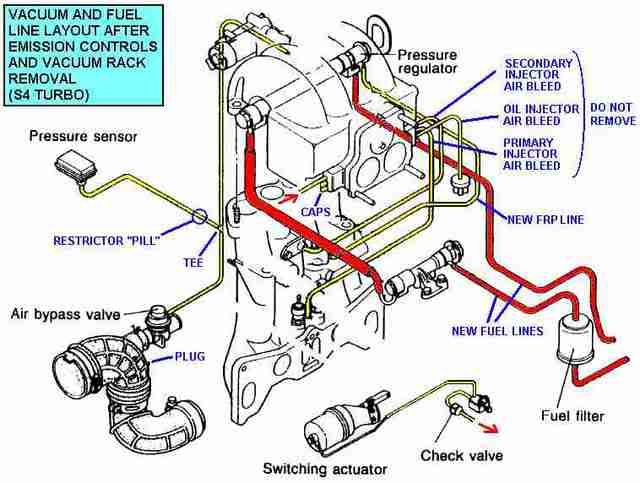
Is the "switching actuator" and solenoid valve shown in 2nd pic for the twin scroll? It looks like their pointing to the twin scroll solenoid valve but their is also a "switching solenoid valve" positioned right next to the twin scroll solenoid valve in the stock setup and I need to know which to use.
Also do I need to extend the old harness to these solenoids in their new locations or do they work solely on vacuum?
I'm looking at the illustration 1.6c Vacuum hose routing for 1987 and 1988 turbo models on p. 162 of the Haynes manual as well for reference.
Between the two i have a good idea what I'm looking for at the end.
I want to run the new FPR line like shown in the 1st pic, so I'll just run the Pressure Regulator Control solenoid valve in line.
Is the "switching actuator" and solenoid valve shown in 2nd pic for the twin scroll? It looks like their pointing to the twin scroll solenoid valve but their is also a "switching solenoid valve" positioned right next to the twin scroll solenoid valve in the stock setup and I need to know which to use.
Also do I need to extend the old harness to these solenoids in their new locations or do they work solely on vacuum?
I'm looking at the illustration 1.6c Vacuum hose routing for 1987 and 1988 turbo models on p. 162 of the Haynes manual as well for reference.
So basically I needed to finalize my plan for my emissions devices and rats nest removal.
I have already removed and blocked off :
Sub-Zero Start Assist Device
Exhaust Gas Recirculation Valve
Air Control Valve
Split Air Pipe
I am going to keep/use:
Bypass Air Control valve
Thermowax Device
Air Supply Valve
Pressure Sensor
Oil Metering Pump
Stock Purge Valve and crankcase ventilation system w/ charcoal can
Blitz BOV
I think I want to keep but need to figure out how:
twin scroll turbocharger solenoid valve
fuel pressure regulator control solenoid valve
In my previous post I mentioned that I was unsure as to which solenoid valve to use with the switching actuator in order to keep the twin scroll function of the turbo. I have since came to the conclusion to use the twin scroll solenoid valve(duh) in conjunction with the switching actuator for the twin scroll system. It shows it pretty clearly in the Haynes manual:

The FPR vacuum line will be ran like pictured in the first diagram of my last post.
And I guess if the solenoids are to operate correctly they would need to be connected electrically, so I'll extend the wires for the plugs for both to wherever the solenoids end up.
I'm not confused about the crankcase ventilation system, charcoal canister and purge, I have a good idea of whats going on there and I'm just going to keep pretty much the stock configuration.
Please fill me in if I'm missing something, this is just what I have been able to figure out on my own with the Haynes and searching around on here.

I have already removed and blocked off :
Sub-Zero Start Assist Device
Exhaust Gas Recirculation Valve
Air Control Valve
Split Air Pipe
I am going to keep/use:
Bypass Air Control valve
Thermowax Device
Air Supply Valve
Pressure Sensor
Oil Metering Pump
Stock Purge Valve and crankcase ventilation system w/ charcoal can
Blitz BOV
I think I want to keep but need to figure out how:
twin scroll turbocharger solenoid valve
fuel pressure regulator control solenoid valve
In my previous post I mentioned that I was unsure as to which solenoid valve to use with the switching actuator in order to keep the twin scroll function of the turbo. I have since came to the conclusion to use the twin scroll solenoid valve(duh) in conjunction with the switching actuator for the twin scroll system. It shows it pretty clearly in the Haynes manual:
The FPR vacuum line will be ran like pictured in the first diagram of my last post.
And I guess if the solenoids are to operate correctly they would need to be connected electrically, so I'll extend the wires for the plugs for both to wherever the solenoids end up.
I'm not confused about the crankcase ventilation system, charcoal canister and purge, I have a good idea of whats going on there and I'm just going to keep pretty much the stock configuration.
Please fill me in if I'm missing something, this is just what I have been able to figure out on my own with the Haynes and searching around on here.
Would it be okay to run my Autometer Boost gauge from the same vacuum line as the one that will go the the BOV and pressure sensor? Or should I try to spread give each it's own source of vacuum? Sorry for all the questions.
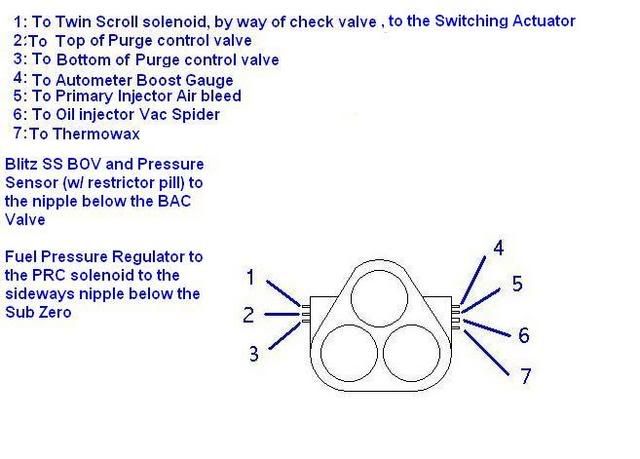
you're right on. Excellent schematic. I have seen it before but it's been a while. That setup should work well for you. Remember to use the restrictor pill in the boost sensor hose to prevent bottom-end sag and surge. Now would be a good time to either replace the pulsation damper or do the banjo bolt mod, whichever you choose to do. Fire is not our friend haha.
I'm not sure if it makes a difference, but in my mind I prefer to use a separate source for each item. I think Aaron Cake mentioned the best place to tap into for the boost gauge, perhaps he will chime in with that.
My Pulsation Dampener looked really good but I'll see about sourcing either a new oem or simlar most likely, I'd rather have one than not.
And thank you for all of your input.
And thank you for all of your input.
Very good illustrations and info. And don't ever be sorry for asking questions....it's what we're all here for. I know you well enough to know you don't ask stupid questions. Looks like you're pretty close to getting that bad boy running aren't you?
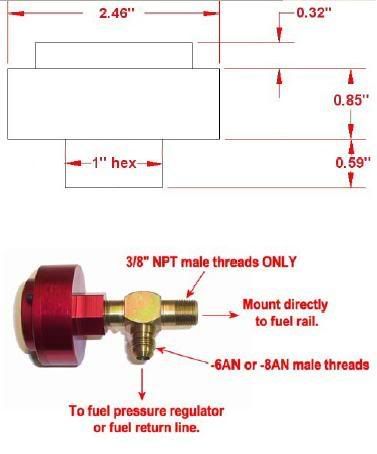
Something like this marren damper, or something similar that fits, would be alright with me, what do you think? Better than a bolt?
And yeah, I'm getting there. I got held up with the pilot bearing for a bit, but this weekend I should be able to put the pilot seal in, put the new throwout bearing, clutch and pressure plate on. Then I'll be able to put the trans and motor back together, install new motor mounts and drop the whole thing back in.
But I'm gonna be in the process of putting up a 20' x 20' tent garage and helping round the house as well so we'll see how far i get. But I'm not really waiting on any parts anyways.
Last edited by NJGreenBudd; Oct 31, 2007 at 12:25 AM.
The oem damper threads are fine pitch (something like 12mm x 1.00) which might interfere with the marren one in the pic. The oem one lasts at least 5 to 10 years and is still available from Mazdatrix or a dealer. I did the banjo bolt mod on mine about a year ago with no issues since then.
Well, I have decided to go the banjo bolt route. I wouldn't normally do this sort of thing but I what the hell, if the banjo bolt fails in two years from now I'll be forced to do it all over again. The way I see it is if it works for so many people I'll give it a shot and the worst that happens is I learn how to build a new streetported motor after an engine fire.
I'm gonna find a good write up on the banjo mod unless someone has it already.
I can't decide what to buy next, either the NGK AF/x wideband unit or the Greddy Profec B Spec II boost controller. My turbo is going out this weekend to BNR as well.
I'm gonna find a good write up on the banjo mod unless someone has it already.
I can't decide what to buy next, either the NGK AF/x wideband unit or the Greddy Profec B Spec II boost controller. My turbo is going out this weekend to BNR as well.
The banjo bolt mod is permanent. There is no chance of fire at that location. Any fuel leak is a potential fire hazard, so just make sure all hoses are in good condition and tight and the injector seals are not too old and all is good. All you do is find someone with a spare fuel rail and use the banjo bolt from it to replace your damper with. I got mine from a salvage yard but if you post in the classified section perhaps someone will have one.
yeah i was a bit jumbled from reading so many post about the banjo bolt mod that i was mixing up pro's and cons....your right though, if the banjo bolt goes in there's no risk of leakage type failure, the type of failure thats supposedly due to the banjo bolt mod would be internal engine damage due to lean conditions caused by these pulsations.
So after getting all confused, I'm just gonna go with the banjo bolt from summit for $10 and be done with it for now. I will most likely be adding an after market FPR
soon anyways.
Thanks.
So after getting all confused, I'm just gonna go with the banjo bolt from summit for $10 and be done with it for now. I will most likely be adding an after market FPR
soon anyways.
Thanks.
Update
So I was finally able to get some work done this weekend. Here's what was accomplished:
Pilot Bearing Seal installed-

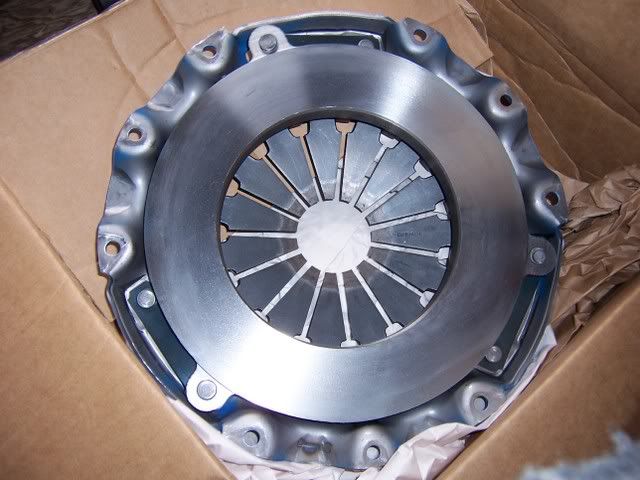
New Clutch Disc and Pressure Plate installed-

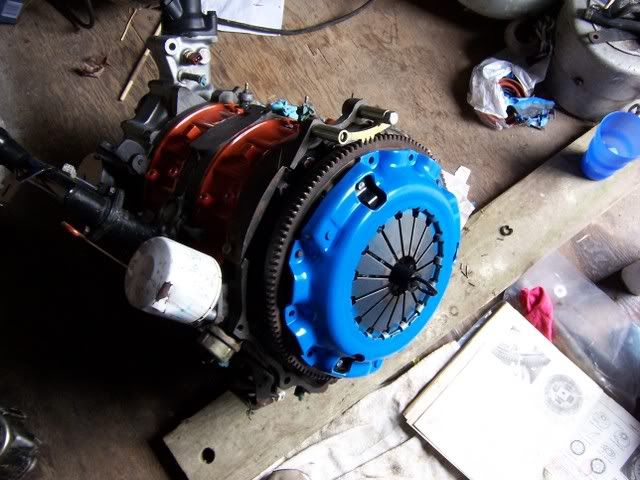
New Throwout Bearing installed-
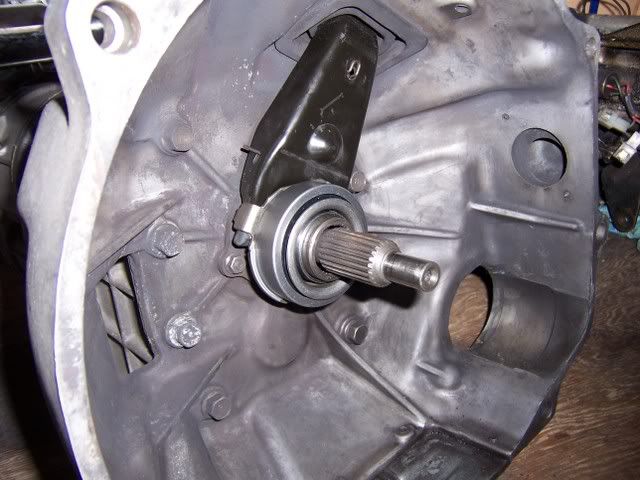
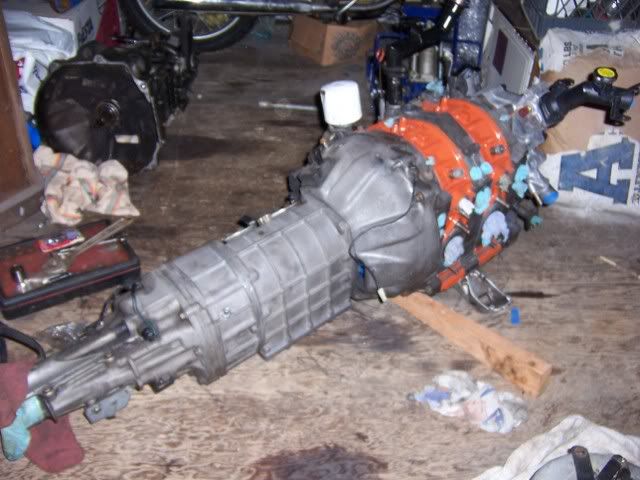
Transmission back on motor-
I messed with the GXL a bit, removed the pads from the back brakes because the wheels would turn at all.... the rotors are so rusted, so just to be able to move it around I took out the pads. Tied up the stock cats to the drive shaft so it wasn't on the ground... This used to be my daily driver a few years ago but is currently used for storage, I'll do something crazy with it once we're done with the TII's build -

I also managed to set up this tent garage for some cover until the actual garage is completed-

Pilot Bearing Seal installed-
New Clutch Disc and Pressure Plate installed-
New Throwout Bearing installed-
Transmission back on motor-
I messed with the GXL a bit, removed the pads from the back brakes because the wheels would turn at all.... the rotors are so rusted, so just to be able to move it around I took out the pads. Tied up the stock cats to the drive shaft so it wasn't on the ground... This used to be my daily driver a few years ago but is currently used for storage, I'll do something crazy with it once we're done with the TII's build -
I also managed to set up this tent garage for some cover until the actual garage is completed-
If you haven't already torqued your flywheel nut, it's a good idea to use Locktite on the back side of the nut and on the threads (per the FSM). I also prefer to put a dab of Moly grease on a pinky and work it into the pilot bearing, a tiny bit on the seal and a thin film of it on the trans input shaft and clutch disc splines. Remember, too much of the stuff and it gets slung out onto the clutch friction surfaces, so the "more is better" theory doesn't apply here haha. Man it looks like Christmas has come early for you with all those shiny new parts 
I greased the release fork, pilot bearing and input shaft all according to the FSM.
I did not however use locktite on the flywheel nut. I hope that doesn't ruin anything.
I did not however use locktite on the flywheel nut. I hope that doesn't ruin anything.

Junior Member
Joined: Aug 2007
Posts: 30
Likes: 0
From: north dakota
paint
should have used some wax and grease remover instead of carb cleaner, and do some light sanding before you paint so it will adhere, would be a shame to do all that work get the new engine in and have all your paint flake off.
210,000 miles & counting!
Joined: Feb 2005
Posts: 180
Likes: 0
From: Atlanta
Holy ****-*****! I cant believe a roaming idle issue has turned into such a monster project. Your a brave guy. These two threads have contained so much good info. I cant wait to see what happens next :-)
Thanks guys.
The carb cleaner seemed to work okay, the paint is holding up great so far but I wouldn't be terribly surprised to find some wear and tear down the road. I'll be more than willing to redo it with a paint gun if that time comes.
The thread about the idle condition is what gave me the confidence to address the rest of these issues. I need to give credit to Scrip7 as well for helping out with all of his good advice. I wanted to keep this all posted so that others may benefit in some way. If you find these useful feel free to rate the threads at the top.
I'll be hanging a big *** light in that tent garage so I can do a little work each night after work.
I'll keep everyone posted.
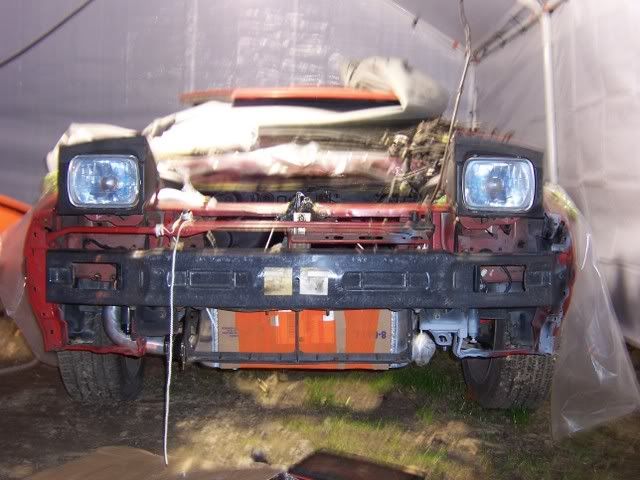
Intercooler roughly in position....
Here the intercooler that I got, 27" end to end, 3" thick and 12" tall:
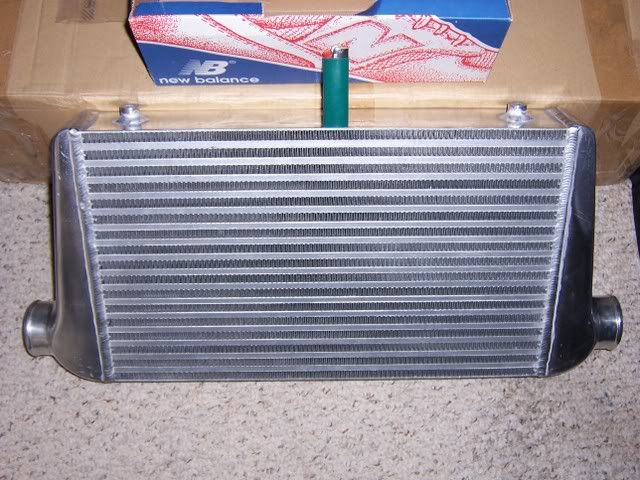
I almost managed to get it where I wanted it, i just have to cut the old brackets for the horns off and it will sit up about another 2" :
But it looks like it will fit. I have pics that show exactly how the piping will be routed and it seems pretty straight forward.
I'm going out in a bit to install the motor mounts, possible drop the motor/trans back in tomorrow. we'll see.
Intercooler progress question time
I installed the new motor mounts last night:

I'm a little unsure how these are supposed to oriented in there, the posts aren't exactly in the center of each mount, so I might have to losses them a bit when dropping the motor back in if their off any. The once its back in we'll just tighten them back down. Does this sound okay?
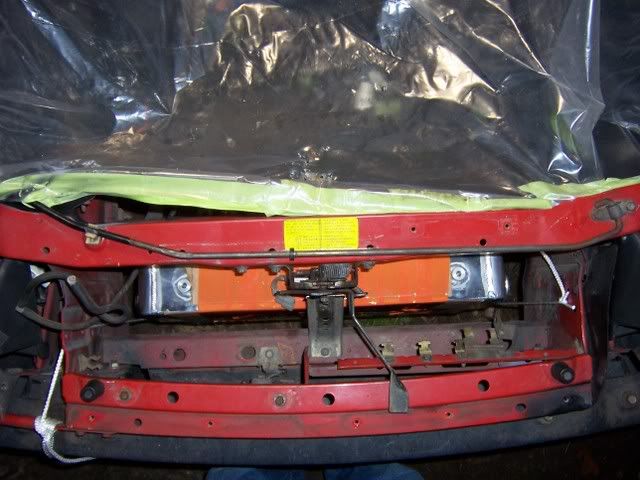
Then I got some more done with the intercooler today, I removed the brake ducts, the air pump muffler and the windshild wiper fluid resovoir to make room:
Drilled a 3" hole in the engine bay:

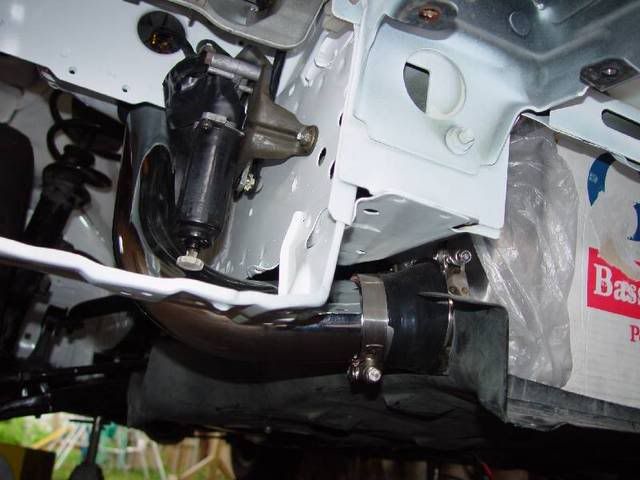
Then fit the upper and lower pipes on the passenger's side:
65 degree bend-
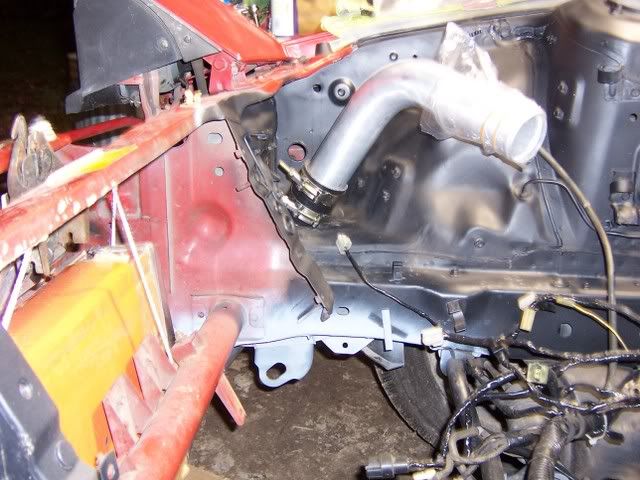
09 degree bend

Both
I now realize that the pipe is what limits how high up the cooler can be mounted, see here my pipe is hitting metal, I already bent a tab that was there to make more room:
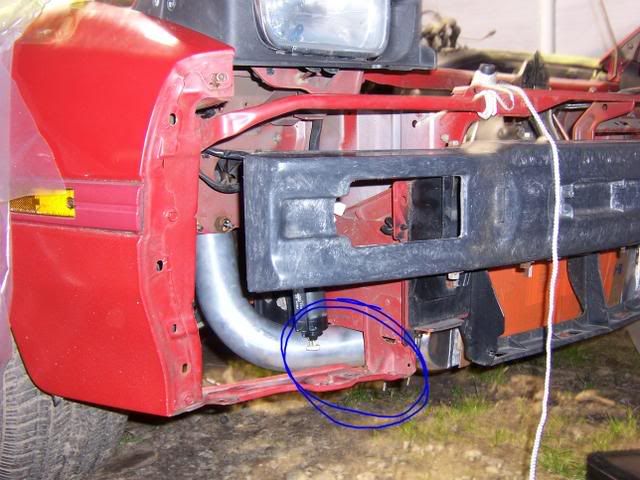
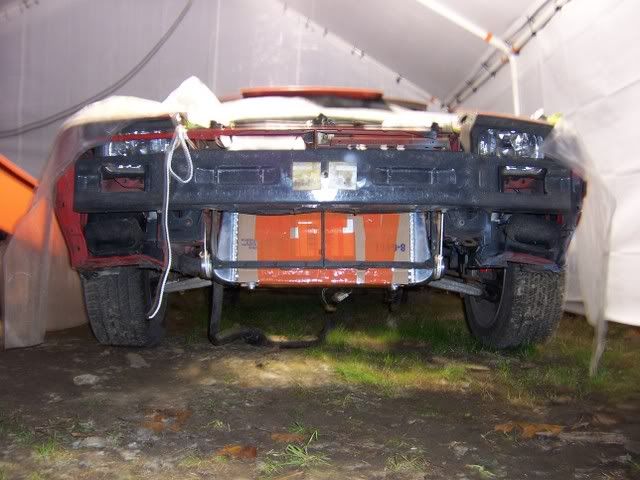
I am afraid what will happen is that the cooler will not sit high enough to let the stock under panel lay flush in the front.
Here's a pic i was using to guide me and i see he is having the same problem,:
So I guess trim the panel to fit around the pipe and maybe seal the gaps with foam or something, what do you guys suggest to do here. I just want to ensure good airflow and retain the stock under panel. Thanks.
Oh and I have decided to keep my the stock bumber on instead of the GP sports one, I just don't want the TII looking riced out, I'll keep the kit for my GXL....
I'm a little unsure how these are supposed to oriented in there, the posts aren't exactly in the center of each mount, so I might have to losses them a bit when dropping the motor back in if their off any. The once its back in we'll just tighten them back down. Does this sound okay?
Then I got some more done with the intercooler today, I removed the brake ducts, the air pump muffler and the windshild wiper fluid resovoir to make room:
Drilled a 3" hole in the engine bay:
Then fit the upper and lower pipes on the passenger's side:
65 degree bend-
09 degree bend
Both
I now realize that the pipe is what limits how high up the cooler can be mounted, see here my pipe is hitting metal, I already bent a tab that was there to make more room:
I am afraid what will happen is that the cooler will not sit high enough to let the stock under panel lay flush in the front.
Here's a pic i was using to guide me and i see he is having the same problem,:
So I guess trim the panel to fit around the pipe and maybe seal the gaps with foam or something, what do you guys suggest to do here. I just want to ensure good airflow and retain the stock under panel. Thanks.
Oh and I have decided to keep my the stock bumber on instead of the GP sports one, I just don't want the TII looking riced out, I'll keep the kit for my GXL....
Last edited by NJGreenBudd; Nov 11, 2007 at 05:21 PM. Reason: added title and pics of motot mounts.

As for the motor mounts, I leave them bolted to the motor instead of the crossmember, and just put the nuts on from underneath after the motor settles into place. Much easier. I'm not a FMIC expert, so not much help from me there.