
'87 TII Ovehaul - from bouncing idle to engine refurbishment

'87 TII Ovehaul - from bouncing idle to engine refurbishment
So this is a continuation of my other thread:
https://www.rx7club.com/2nd-generation-specific-1986-1992-17/video-still-crappy-idle-no-response-idle-adjustment-657023/
We had resolved the major idle issue but I was determined to make sure every line and wire, all of the hoses and gaskets were in good as new shape.I wanted start this thread so I can continue to post my progress on my build and leave the other thread for the Idle Issue.
So here's a quick recap.
When I got her:

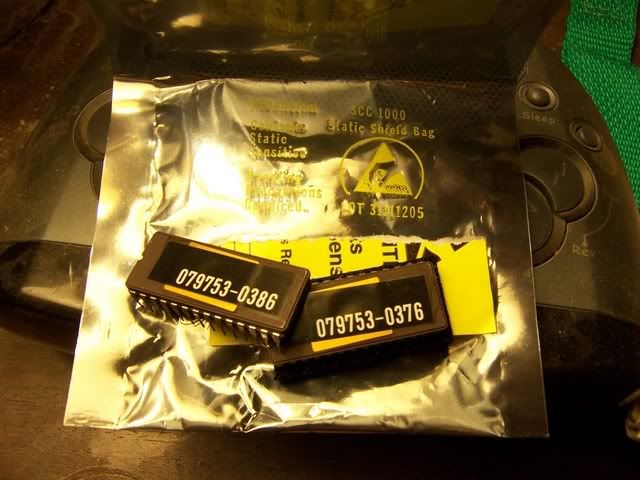
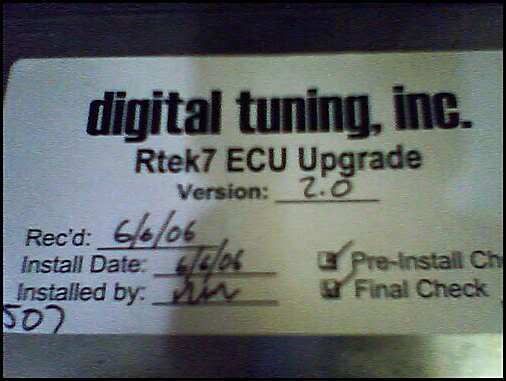
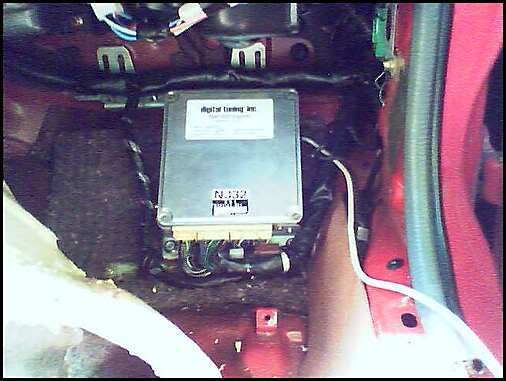
Rtek7 Stage 2.0 ECU Upgrade:
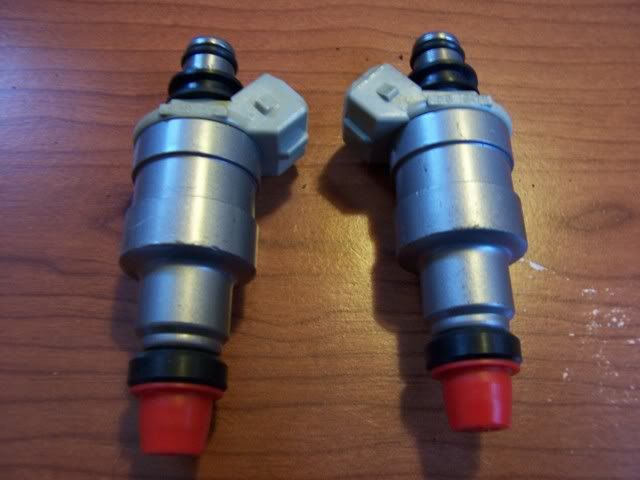
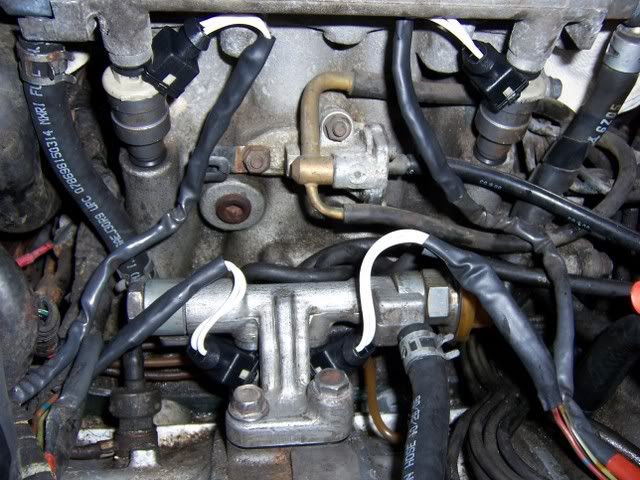
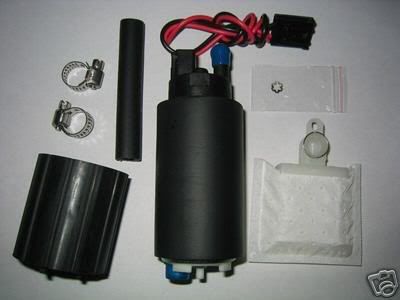
(4) Venom 720cc Fuel Injectors, Fuel Pump and lines:


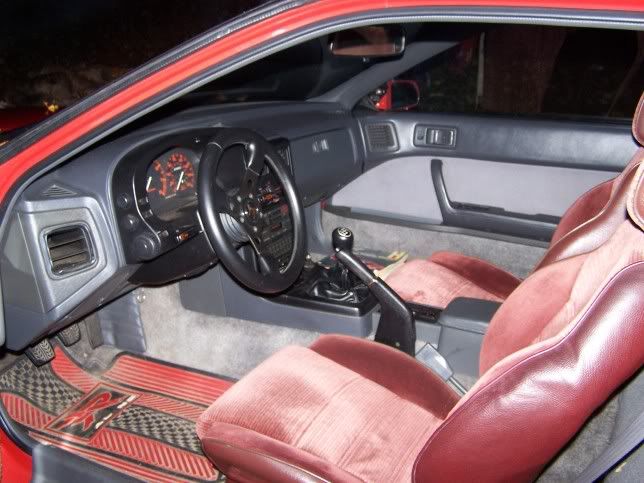
Seats Swapped from my GXL, like new compared to beat *** seats from the TII:
Blitz SS Blow Off Valve:
https://www.rx7club.com/2nd-generation-specific-1986-1992-17/video-still-crappy-idle-no-response-idle-adjustment-657023/
We had resolved the major idle issue but I was determined to make sure every line and wire, all of the hoses and gaskets were in good as new shape.I wanted start this thread so I can continue to post my progress on my build and leave the other thread for the Idle Issue.
So here's a quick recap.
When I got her:
Rtek7 Stage 2.0 ECU Upgrade:
(4) Venom 720cc Fuel Injectors, Fuel Pump and lines:
Seats Swapped from my GXL, like new compared to beat *** seats from the TII:
Blitz SS Blow Off Valve:
Haha, I'd noticed that before, can't hurt right?
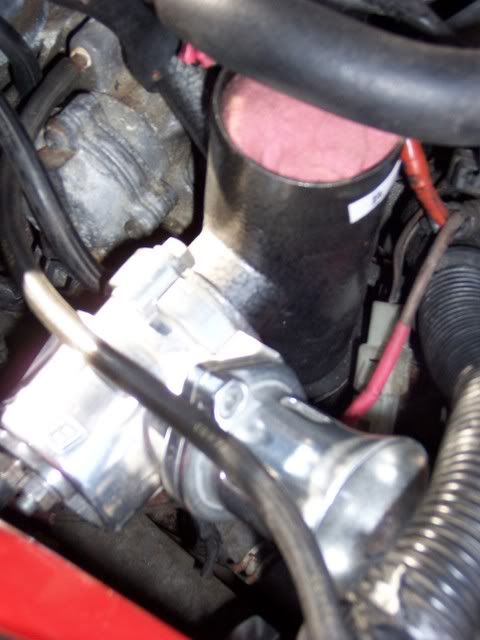
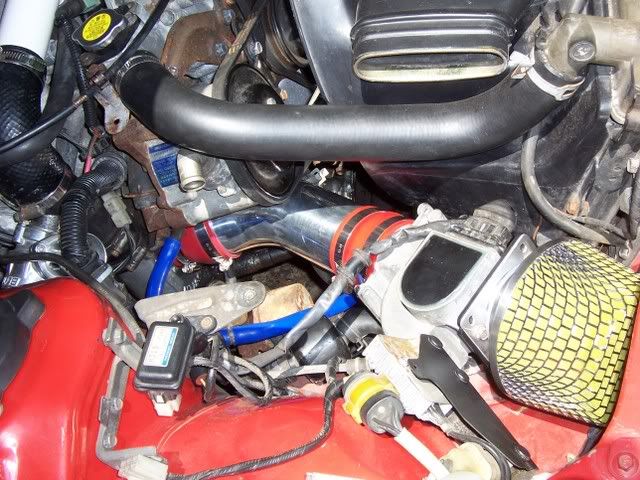
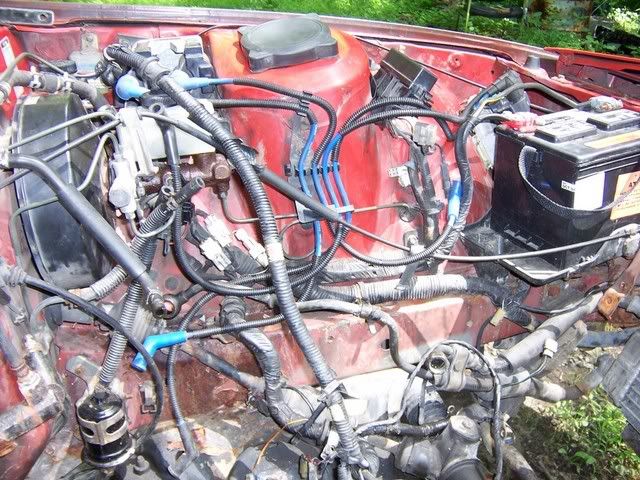
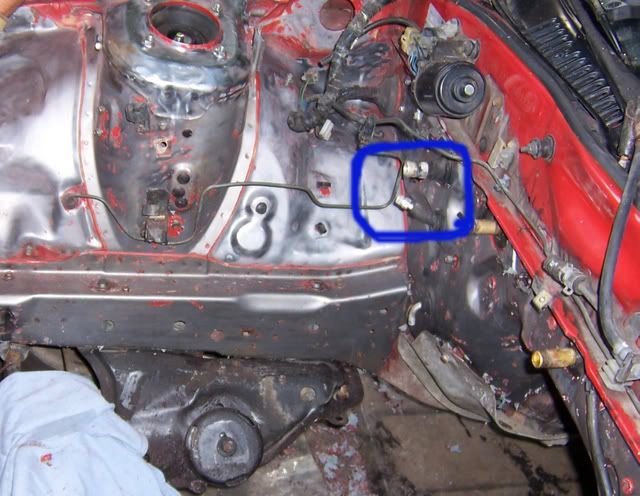
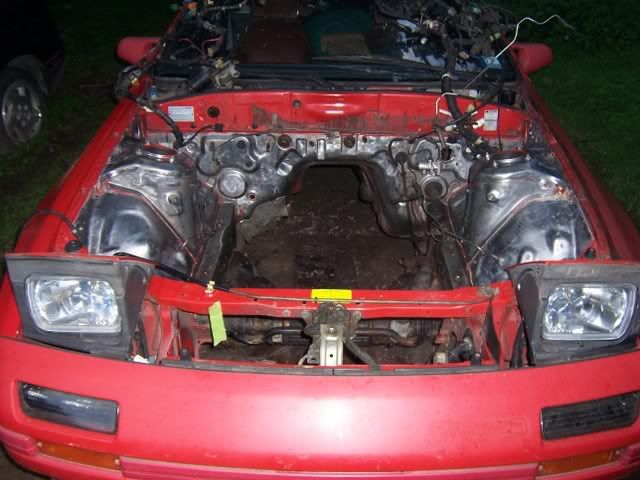
Crappy old TID and newer leak free intake w/o cold air box, at this point the TMIC has been bypassed w/ PVC for troubleshooting:
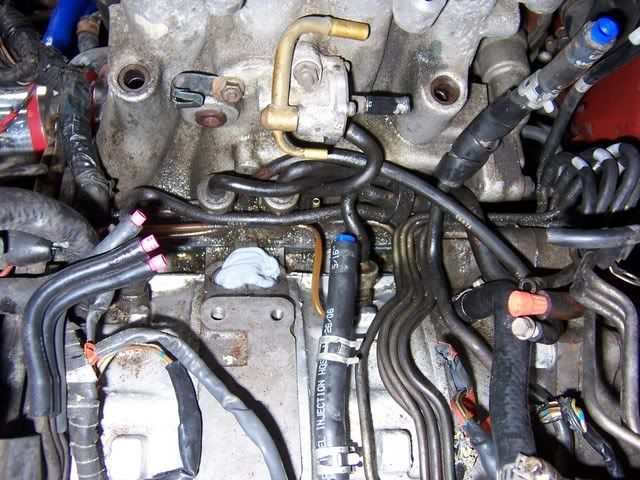
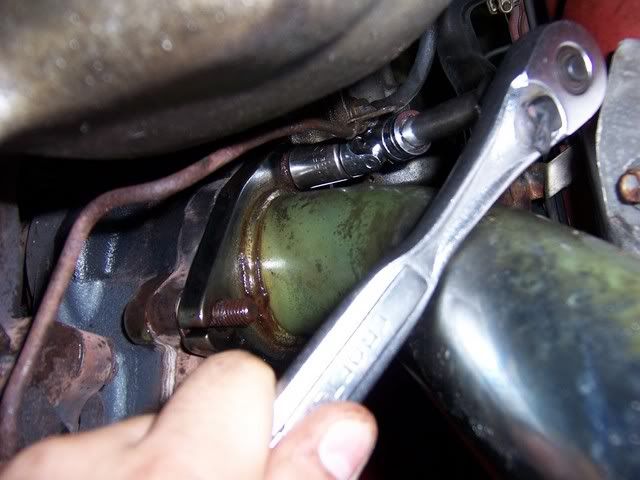
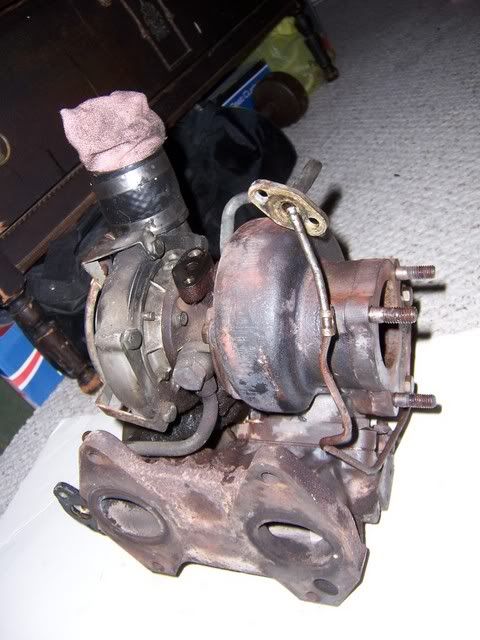
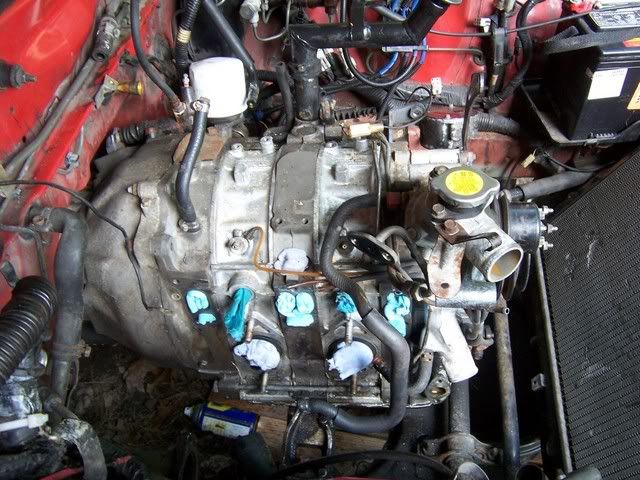
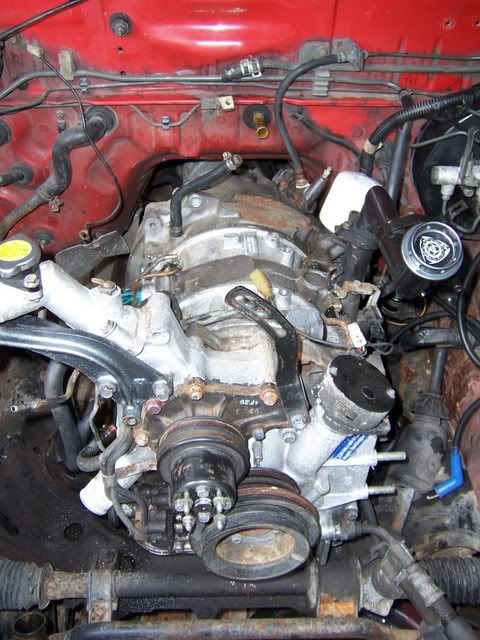
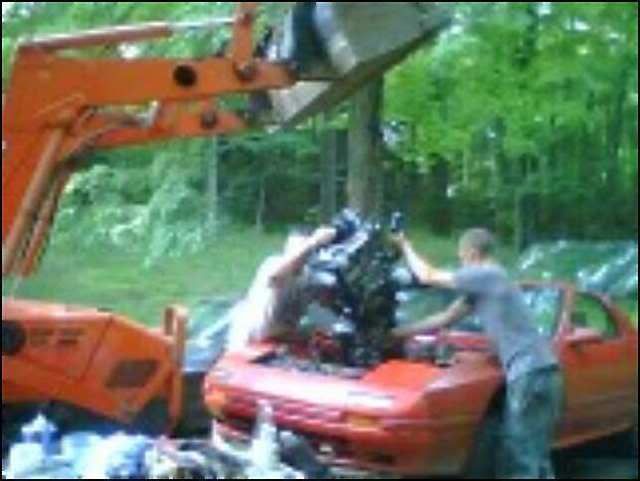
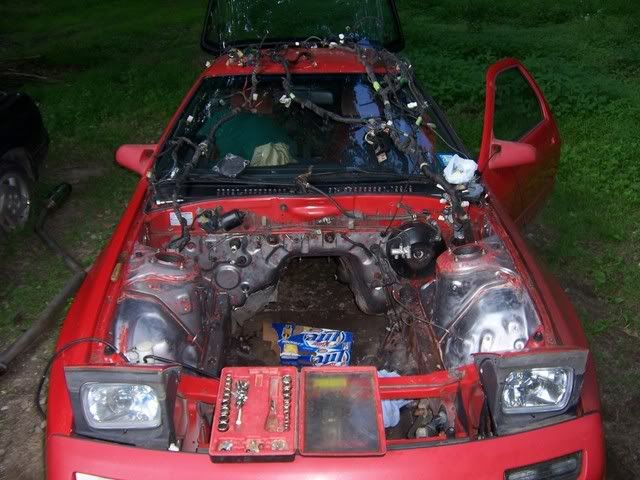
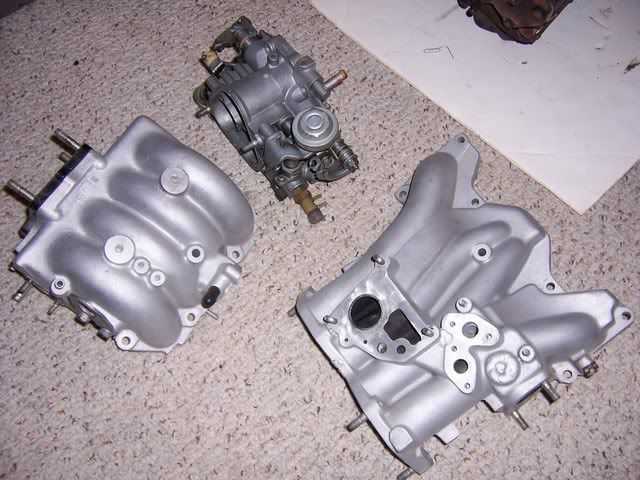
TB. UIM, LIM and turbo Removal:
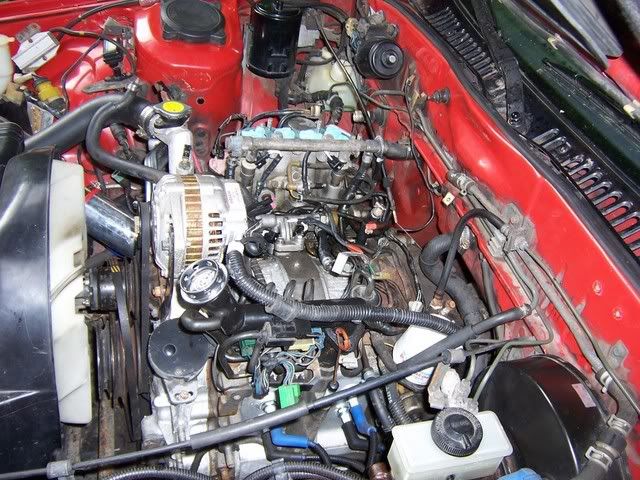
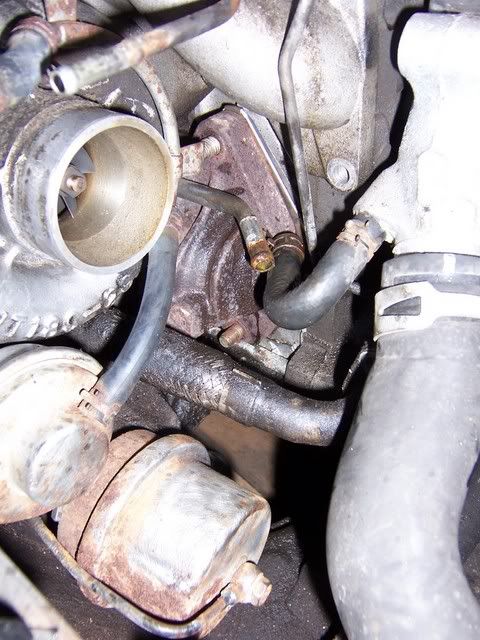
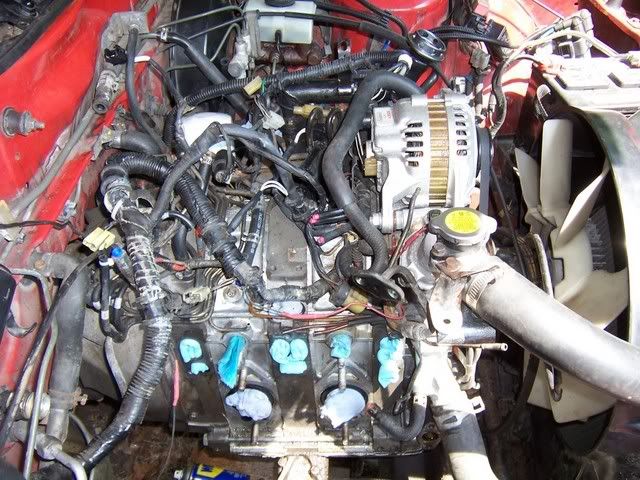
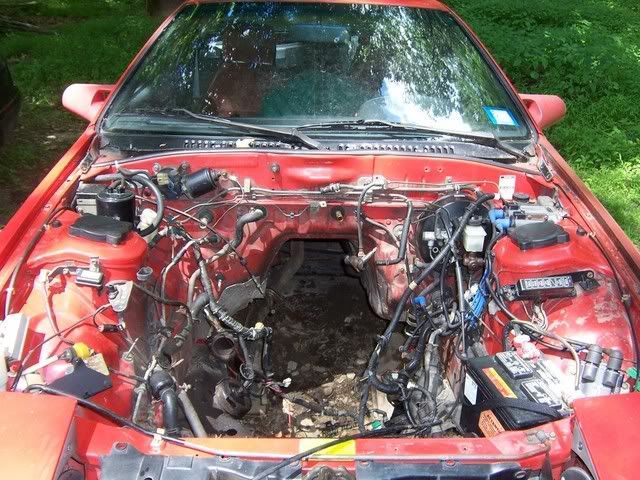
Crappy old TID and newer leak free intake w/o cold air box, at this point the TMIC has been bypassed w/ PVC for troubleshooting:
TB. UIM, LIM and turbo Removal:
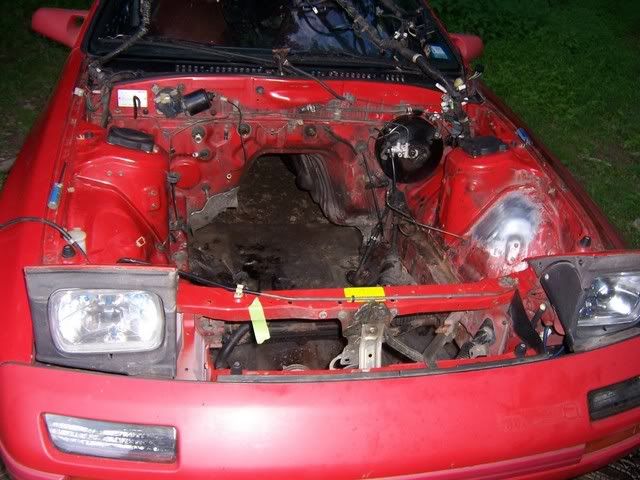
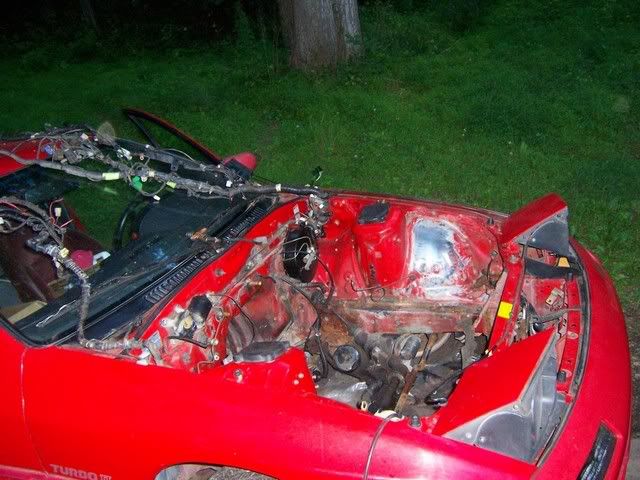
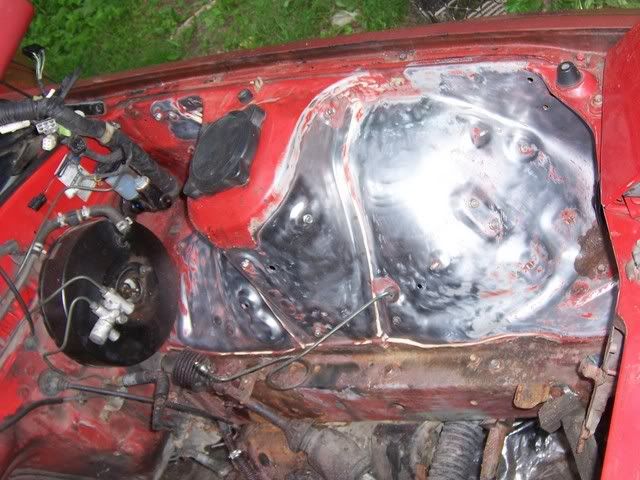
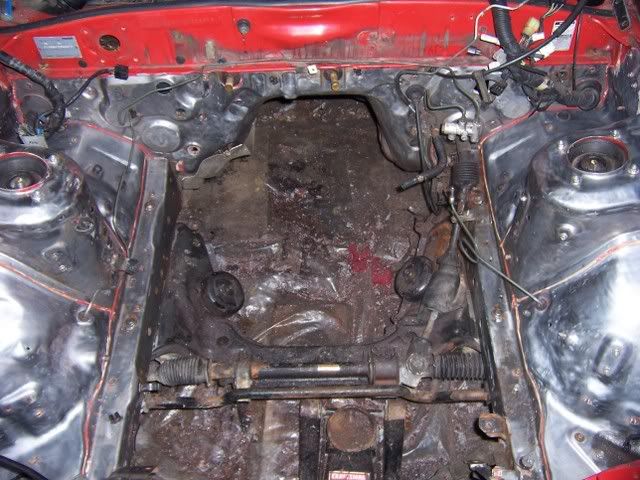
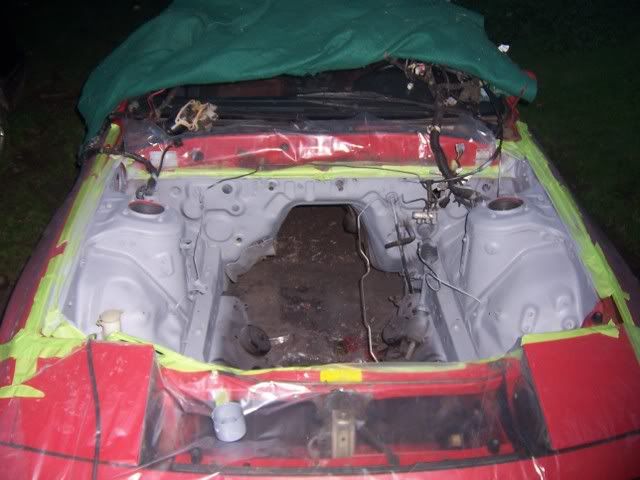
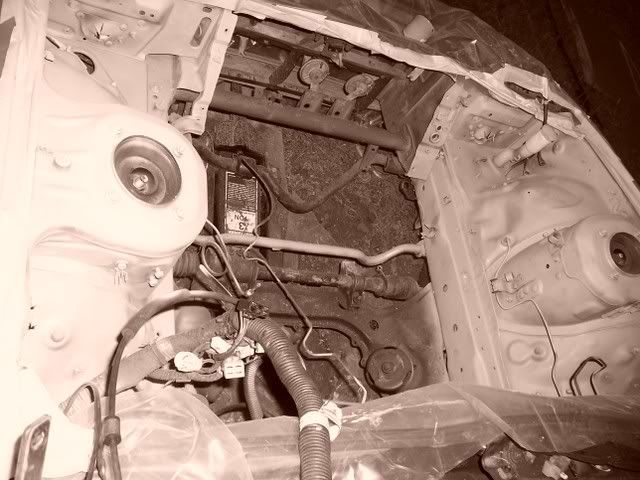
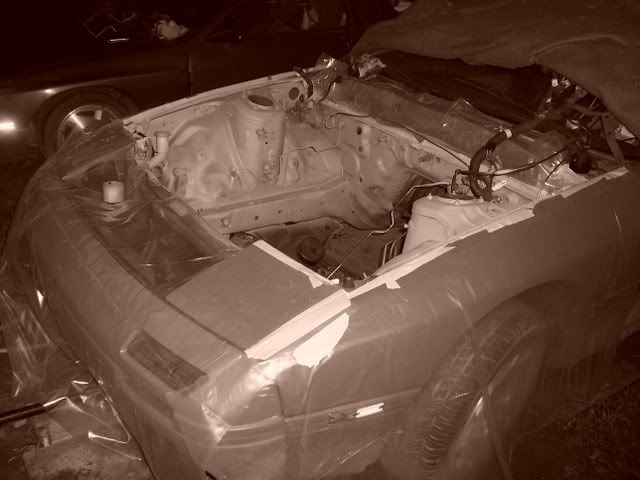
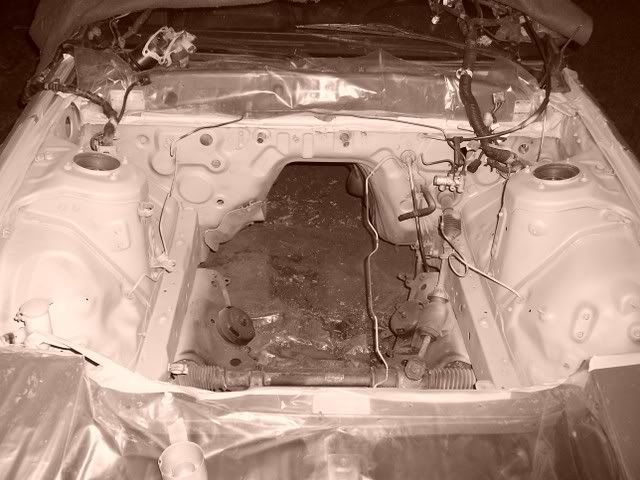
so while we were fixing the idle I was getting more concerned about the overall quality of rubber hoses, wires, seals in the engine bay and thats what pretty much made me decide to redo the entire engine bay. The car has a new motor installed when I got it but all of th other wstuff was still from '87. Plus my MC was leaking onto the frame rail and ate the paint off, the trans also needs to be replaced so this was just the right time to remove the engine and rebuild from the frame up in the engine bay.
So I plan on redoing just about all of the vac hoses, oil lines, coolant lines, gaskets, grommets, inspect/repair harness, turbo is going to BNR for Stage 1 upgrade, NGK F/Fx and Greddy bspec will go in then.
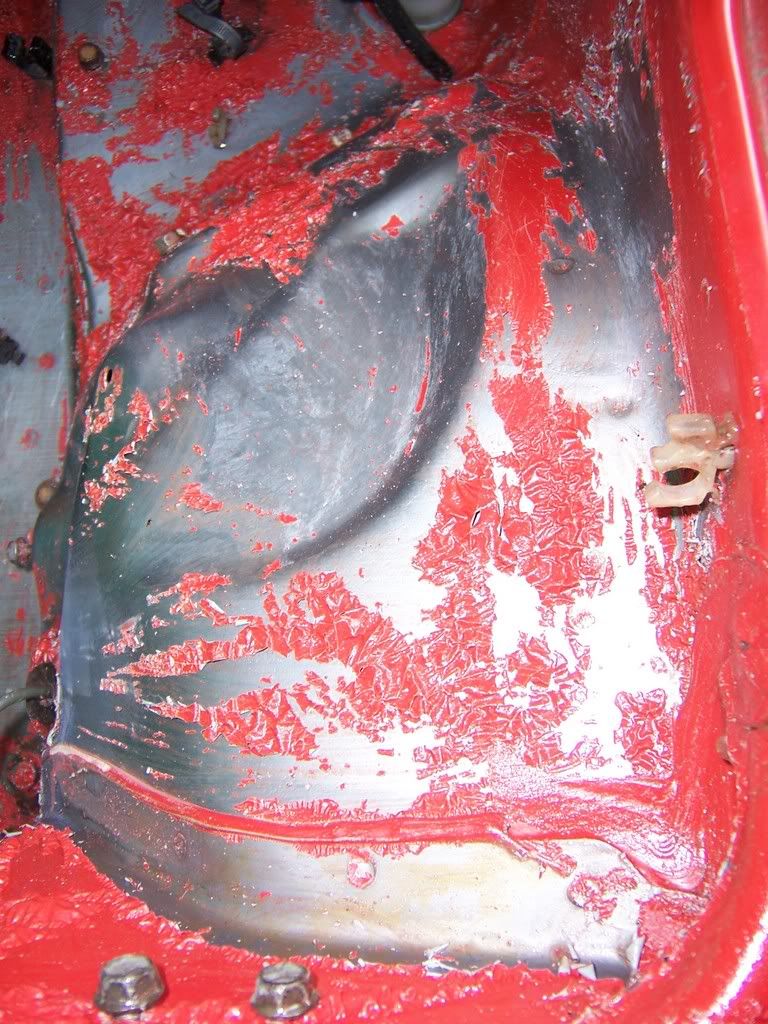
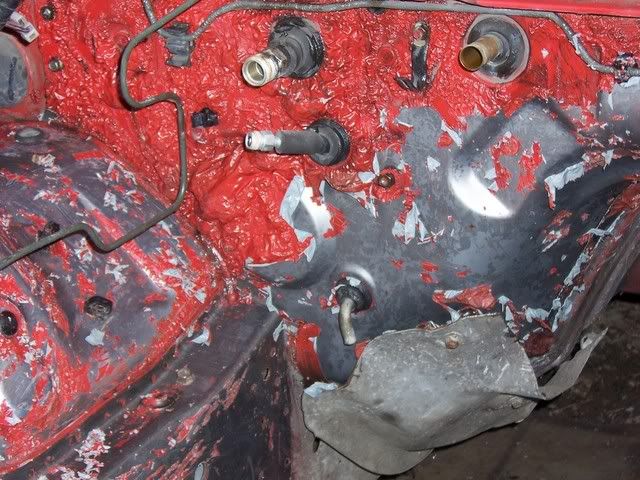
General Condition:
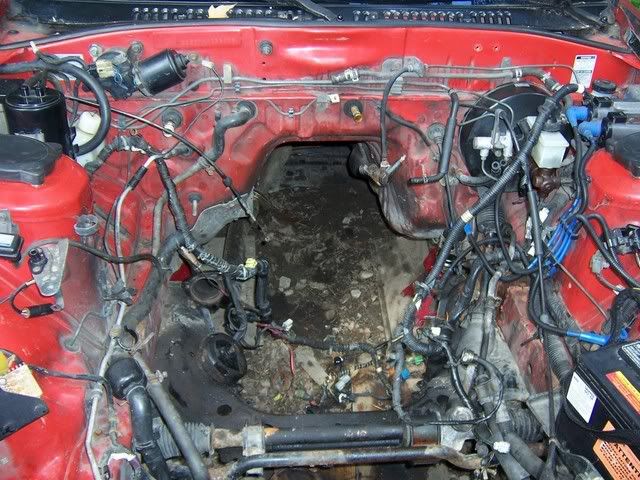

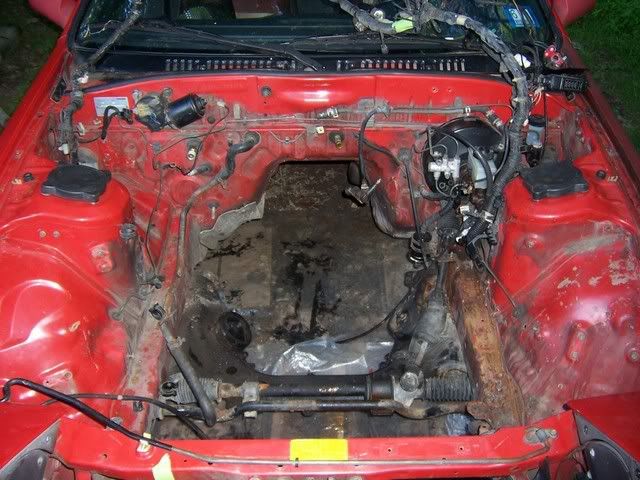
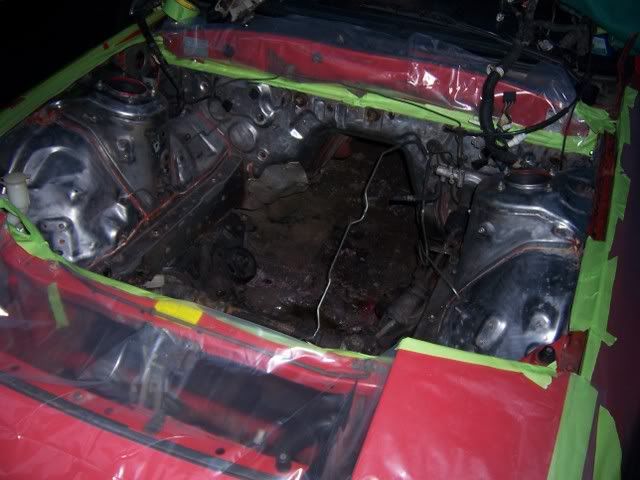
Stripping:
This is my first attempt at major work on this TII. I have swapped motors in American cars but this is the first rotary restoration for me personally.
So I plan on redoing just about all of the vac hoses, oil lines, coolant lines, gaskets, grommets, inspect/repair harness, turbo is going to BNR for Stage 1 upgrade, NGK F/Fx and Greddy bspec will go in then.
General Condition:
Stripping:
This is my first attempt at major work on this TII. I have swapped motors in American cars but this is the first rotary restoration for me personally.
Last edited by NJGreenBudd; Jul 23, 2007 at 02:18 AM.
Thanks guys!
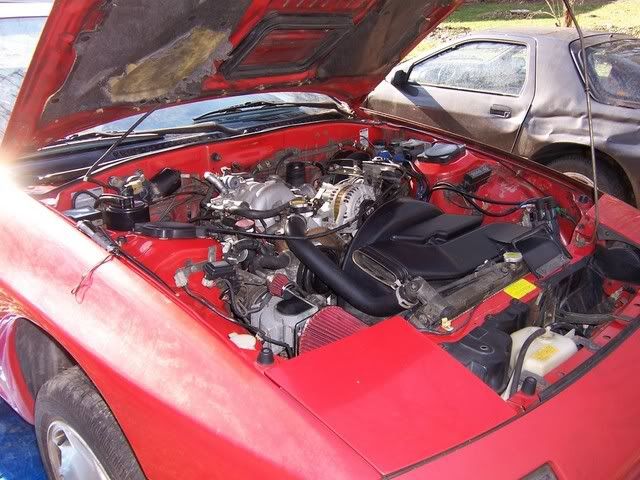
When I brought it home it had just had the freshly rebuilt (by Mazda) engine installed, it had the straight exhaust and an intake but the rest was bone stock.
I initially just wanted to keep it all stock but replace what needed to be replaced and improve on the fuel system for preventative measures. But like I said, once I was done with the minor repairs, I couldn't help but be paranoid of a what was going on where I couldn't see. I didn't want an oil dline to let go or the stock turbo to die and kill the new motor so I started this project to get down to the bottom and build back up.
I have a bunch of new parts that are waiting for the right time to be installed, but I am only able to work on this car on Saturday afternoons ans Sundays so it takes me a minute to make some progress.
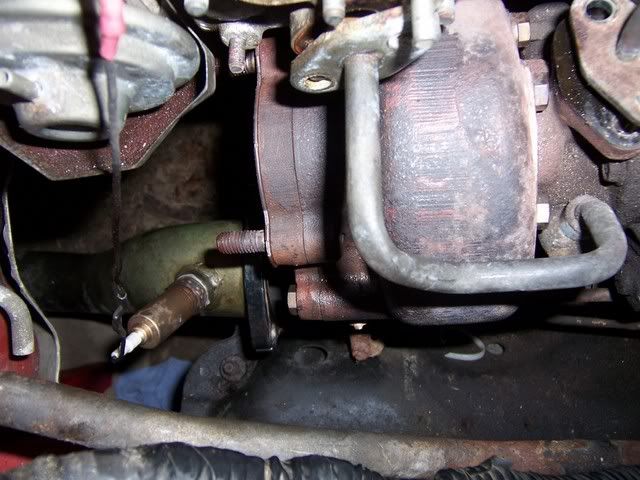
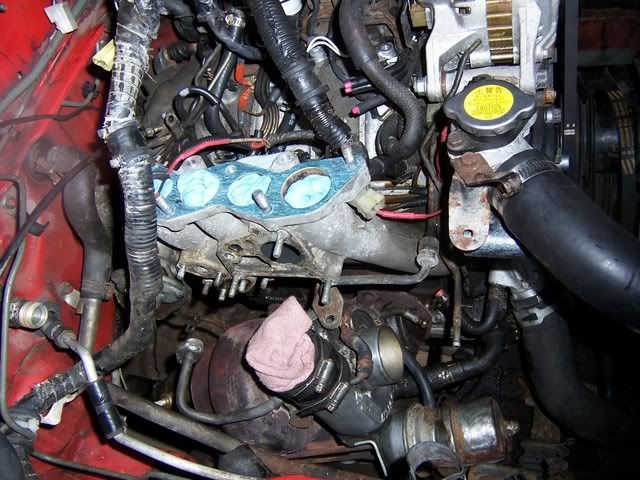
New TB, UIM and LIM:
When I brought it home it had just had the freshly rebuilt (by Mazda) engine installed, it had the straight exhaust and an intake but the rest was bone stock.
I initially just wanted to keep it all stock but replace what needed to be replaced and improve on the fuel system for preventative measures. But like I said, once I was done with the minor repairs, I couldn't help but be paranoid of a what was going on where I couldn't see. I didn't want an oil dline to let go or the stock turbo to die and kill the new motor so I started this project to get down to the bottom and build back up.
I have a bunch of new parts that are waiting for the right time to be installed, but I am only able to work on this car on Saturday afternoons ans Sundays so it takes me a minute to make some progress.
New TB, UIM and LIM:
Trending Topics
^
What about it? I use $$$ the same way everyone else uses it, I work 6 days a week and then blow it on my cars. Hahahaha. but seriously,
The TB, UIM and LIM I got for $120 shipped to my door from a forum member. I should have said, "Like new" or "reconditioned" as they are used, and still almost 20yrs old, just blasted and cleaned real good. My LIM was starting to peel inside and I couldn't pass up the deal on all three.
My Old Peeling LIM:
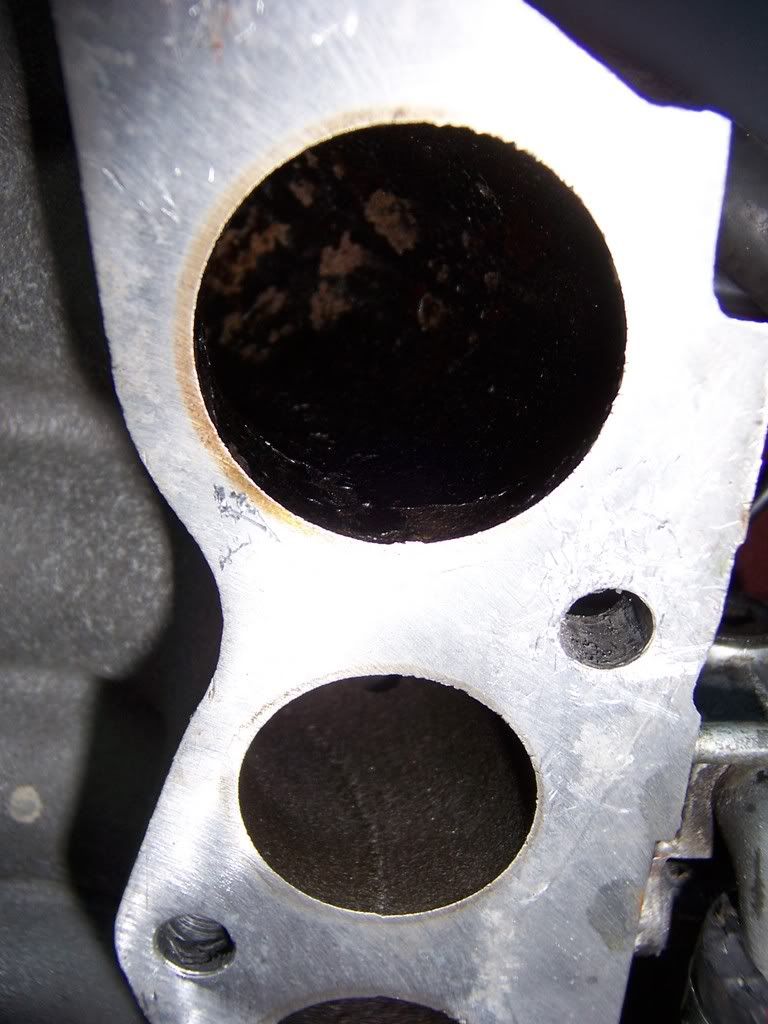
Good thing all those flakes came off when I hit it with compressed air when it was removed from the car huh??
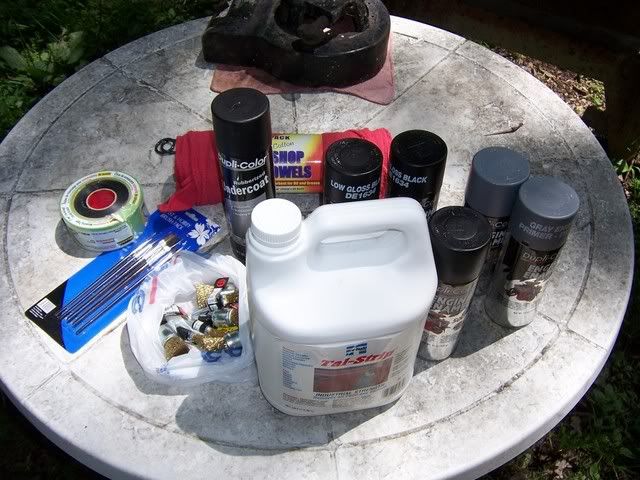
So this is what I got for the engine bay - Tal Strip, Duplicolor Ceramic Primer and Low Gloss Black Paint,and some Rubberized Underspray for the trannsmission tunnel, I was curious as to how the rubber spray would work, figured I'd test it out:
Some new parts - OEM Front and Rear main seals, Atkins solid thermal pellet, OEM MOP vacuum spider, OEM rear iron to TB coolant line, Block off plates, double belted alternator pulley:
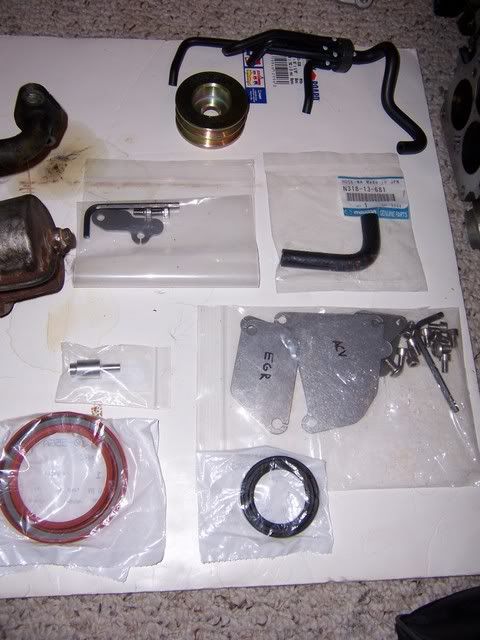
I still have all of the new gaskets, grommets, o-rings, OEM MOP lines and OEM thermostat on their way from Mazdatrix.......also I just bought my first Mig welder as well. it's like Christmas in July for me only it's really a gift to me from me for my B-day in two weeks...I'll use whatever excuse I can...
What about it? I use $$$ the same way everyone else uses it, I work 6 days a week and then blow it on my cars. Hahahaha. but seriously,
The TB, UIM and LIM I got for $120 shipped to my door from a forum member. I should have said, "Like new" or "reconditioned" as they are used, and still almost 20yrs old, just blasted and cleaned real good. My LIM was starting to peel inside and I couldn't pass up the deal on all three.
My Old Peeling LIM:
Good thing all those flakes came off when I hit it with compressed air when it was removed from the car huh??
So this is what I got for the engine bay - Tal Strip, Duplicolor Ceramic Primer and Low Gloss Black Paint,and some Rubberized Underspray for the trannsmission tunnel, I was curious as to how the rubber spray would work, figured I'd test it out:
Some new parts - OEM Front and Rear main seals, Atkins solid thermal pellet, OEM MOP vacuum spider, OEM rear iron to TB coolant line, Block off plates, double belted alternator pulley:
I still have all of the new gaskets, grommets, o-rings, OEM MOP lines and OEM thermostat on their way from Mazdatrix.......also I just bought my first Mig welder as well. it's like Christmas in July for me only it's really a gift to me from me for my B-day in two weeks...I'll use whatever excuse I can...
This is the first time I have used Tal Strip and I learned real quick that a thick layer of it works better than a thin layer. I just brushed it on generously and with in 10 mins it's bubbling and by 20 the paint is falling off almost by itself. You must use enough to keep the surface wet throughout the process. It was $30 for the jug and I think I'll have plenty left over after this.
Sometimes the paint that is in really good shape might need a second application for the tough spots if you use too little Tal Strip, so I went back and just did some spots over. I'd lay it down on one fender and then go to brush it on the other fender and scrape( w/ a screw driver or putty knife) the first while the second was bubbling.
Here's a tip, have water nearby so you can rinse your hands/arms/face off when you get it on you. It takes a minute or two for the burning to start and then it kinda kicks up to "Ouch!!!" real quick. I imagine I could've used a full body suit and face mask but I found that a jug of water and a wet rag seemed to keep me from getting chemical burns, it was just funny at times burning but trying to get more done before running for the hose.
I just rinsed the surfaces with water and then carb cleaner to make it safe to touch again. I am also glad that I laid down plastic under the car to catch all of the paint peelings and scrapings, probably not good stuff for my well water.
I'd highly recommend using something along these lines for this type of work, might not be necessary but I am confident the results will be of a higher quality than if i didn't strip it all first. It also allows you to check the condition of the metal under the paint, in my case there are only one or two spots that need to be wire wheeled due to some surface rust (under the batTery tray and where the MC was leaking on the frame rail).
thats looking real nice. 4 bolts and the wiper motor will come out. arm pops off the back...like a ball and socket. dont get paint on the wiper wire harness connector. the heat shield above the down pipe comes off pretty easy too. might want to shine it up (its aluminum) paint that area and undercoat it. it will help prevent rust and help deaden engine noise. might want to weld up all the seams while you have them bare metal. sorry if i said anything u already know. post more pics of your progress! cant wait to see what that engine bay looks like all done up and pretty like
Don't be sorry for saying anything. I was gonna try to remove as much as possible from the bay, I just hadn't taken the time to finish yet so thats good info for the wiper motor and shield. I also want to get that power brake booster thing out of the way- looks like a cotter pin and four bolts from under the dash will do that. That'll clear most of the junk out of the way and make the job easier I think.
I'm open to input on what do do here, I actually have some questions for you guys if you'd like to chime in constructively.
1) For the engine harness, I was planning on doing a general inspection/repair/rewrap and was curious what tape you guys had the best experience with wrapping the engine harness. I was thinking about this stuff:
Self-Fusing High Heat Engine Harness Wrap
2)Also when removing some emissions items, I was planning on keeping the twin scroll solenoid and the fpr solenoid from the rats nest , as well as the pressure sensor and some other little things, but i was curious as to where a good spot to tuck these out of the way would be. I'd like to have the bay as easily accessible and simple as possible whilst still maintaining proper functioning of the engine.
Other various things to do when reinstalling engine - rewire fuel pump, new battery terminals, boost gauge, all new fluids in everything....
I don't know if I have a concise list of current/ planned mods but I'll get that together for ya.
I had originally posted this in your Idle thread, so I pasted it here in case it's useful to you:
Just a side note, I noticed you still have the a/c liquid line and evaporator still installed. If you wanted to tidy things up a bit, you can remove the evaporator case from under the dash, remove the evap core, put the case back in and use rubber plugs to cover the holes on the firewall. It's very easy to do and takes about an hour to do all that. Just remove the glove box, lower dash trim panel, evap case screws and the case comes right out. And if you haven't already done it, you can remove the condenser and dryer too. A little weight saving here and there adds up.
Just a side note, I noticed you still have the a/c liquid line and evaporator still installed. If you wanted to tidy things up a bit, you can remove the evaporator case from under the dash, remove the evap core, put the case back in and use rubber plugs to cover the holes on the firewall. It's very easy to do and takes about an hour to do all that. Just remove the glove box, lower dash trim panel, evap case screws and the case comes right out. And if you haven't already done it, you can remove the condenser and dryer too. A little weight saving here and there adds up.
Liquid line and low pressure return, right? So if I drop the glove box, remove the trim panel, theres a case with the evap core inside of it? If I'm already removing the core, why would I reinstall the case? Is there any use for the case after the core has been removed. I guess I'll see when we dig into it.
And when that core is removed it'll take those two line ends with it?
Sounds easy enough and there's no reason to have those open line ends on the firewall. Thanks for the tip. Thats the kinda stuff I'm looking for.
Yes, the lines will come out with the core. You will have a better understanding about the system once you get the case out. There are 3 main sections to the hvac unit.....the blower case which houses the blower motor and recirc door and to the left of that is the evaporator case, and to the left of that is the heater/ distribution box which houses the heater core and mode doors and actuators. You will see when you get it apart that without the case in place, the air from the blower would not reach the ducts for distribution. The evap case comes out separately without having to remove the others. It's easier than it sounds. Once you have the case out, just remove the clips and screws holding the 2 halves together, remove the core and re-assemble. Piece of cake. Then you can make a trip to the hardware store and grab a couple rubber grommet plugs to cover the holes in the firewall.
Yay!!
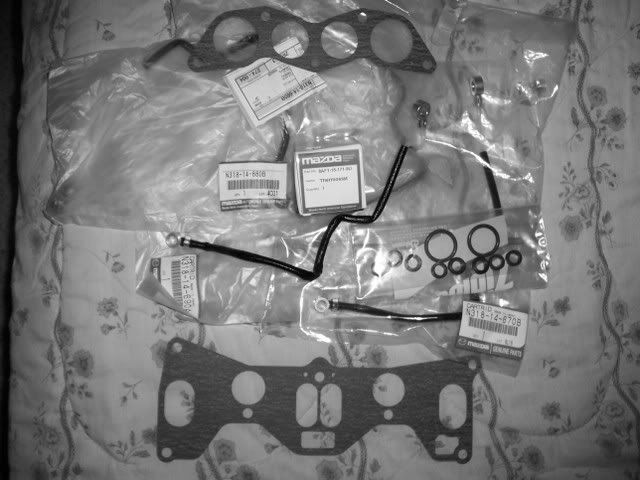
More new parts arrived. Here are the OEM metering oil pump injector lines, both lower and upper injector grommets, coolant o rings, UIM to LIM gasket, LIM to Engine gasket, and OEM thermostat.
I was planning on getting some work done tomorrow afternoon after work, but we'll see if it's pouring or not. I was hoping to at least get primered by Monday.
I was planning on getting some work done tomorrow afternoon after work, but we'll see if it's pouring or not. I was hoping to at least get primered by Monday.
Last edited by NJGreenBudd; Jul 27, 2007 at 08:29 PM.

Do you intend to use your blower if you remove the evap core? There is a small electronic doohickey on the evap core casing that needs to stay plugged in! Otherwise unplugging it result in a relay click and a blower not working.I pulled out my evap core and found this out. I then opened the case, pulled the actual core out and reinstalled just the empty case, plugging the small device back in. Everything then worked.
Joined: Feb 2001
Posts: 29,798
Likes: 128
From: London, Ontario, Canada
Great work so far! Did you crimp your injectors or solder them? I can't tell from the picture but it looks like you crimped and then heatshrunk? If that's the case, you will want to go back and solder. That heatshrink doesn't have an adhesive lining so it's going to allow water inside and then trap it, which will attack the crimps.
That stripper looks very impressive.
Instead of black and white, next time go for sepia.
That stripper looks very impressive.
Instead of black and white, next time go for sepia.
Looks great!
A tip with the paint stripper....run over the areas with a rough sand paper (40grit) before application. This will cut through the layers and allow the stripper to penetrate faster and easier making the tough to remove areas (the ones where you needed a second coat) come off in one coat.
A tip with the paint stripper....run over the areas with a rough sand paper (40grit) before application. This will cut through the layers and allow the stripper to penetrate faster and easier making the tough to remove areas (the ones where you needed a second coat) come off in one coat.

Do you intend to use your blower if you remove the evap core? There is a small electronic doohickey on the evap core casing that needs to stay plugged in! Otherwise unplugging it result in a relay click and a blower not working.I pulled out my evap core and found this out. I then opened the case, pulled the actual core out and reinstalled just the empty case, plugging the small device back in. Everything then worked.
Great work so far! Did you crimp your injectors or solder them? I can't tell from the picture but it looks like you crimped and then heatshrunk? If that's the case, you will want to go back and solder. That heatshrink doesn't have an adhesive lining so it's going to allow water inside and then trap it, which will attack the crimps.
That stripper looks very impressive.
Instead of black and white, next time go for sepia.
That stripper looks very impressive.
Instead of black and white, next time go for sepia.
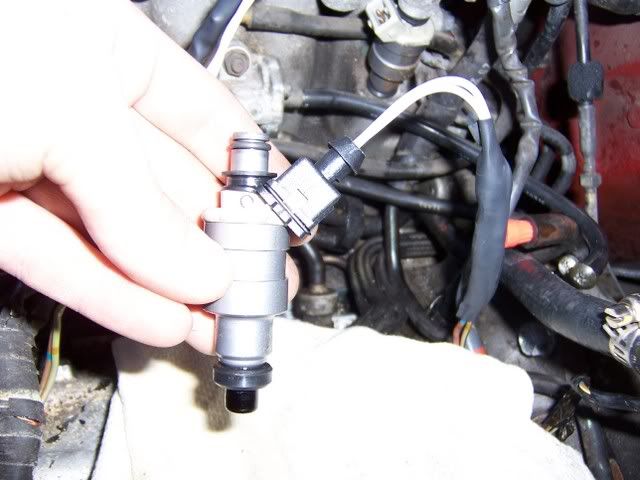
Soldered connections with dielectric grease and small individual heatshrink:
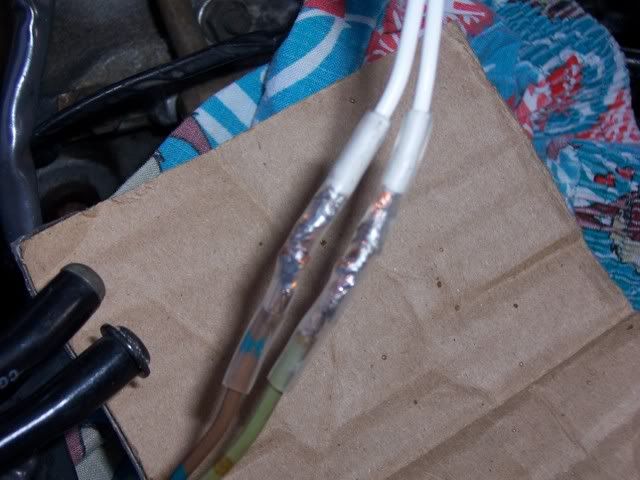
Additional heatshrink tubing:
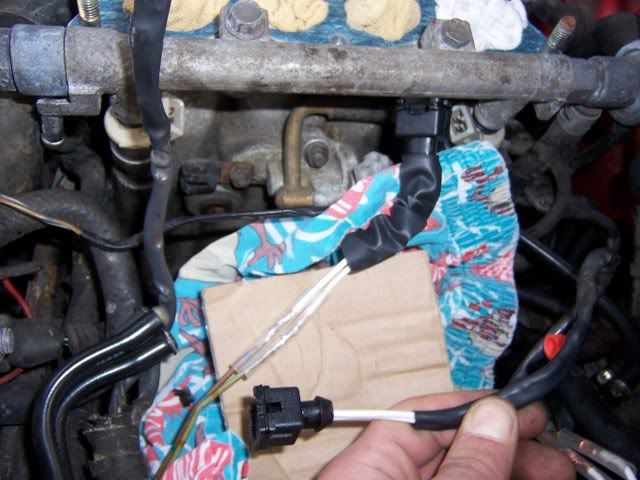
Connected and clip onto new injector:
All four Venom 720cc injectors rewired, soldered, greased and heatshrunk tubing:
I also used new rubber fuel line in the engine bay, I;m trying to do this the right way.
As for the stripper (paint), Tal Strip will remain a useful tool to me even after this particular project, I just love it.
We'll see about that sepia.....
Looks great!
A tip with the paint stripper....run over the areas with a rough sand paper (40grit) before application. This will cut through the layers and allow the stripper to penetrate faster and easier making the tough to remove areas (the ones where you needed a second coat) come off in one coat.
A tip with the paint stripper....run over the areas with a rough sand paper (40grit) before application. This will cut through the layers and allow the stripper to penetrate faster and easier making the tough to remove areas (the ones where you needed a second coat) come off in one coat.
Fuel Injector Parts @ Mazdatrix.com
Scroll down to Grommets, there are two different ones needed for each injector - upper and lower, you might want to get the o-rings too, I already had new ones.
Thansk for all the great input guys. I'll post back later today with my progress.
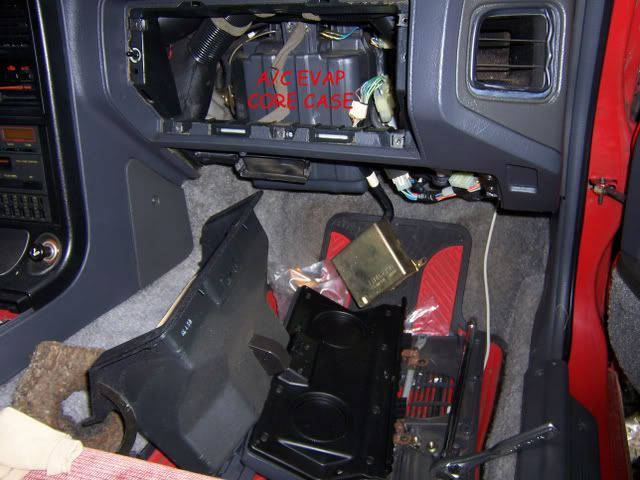
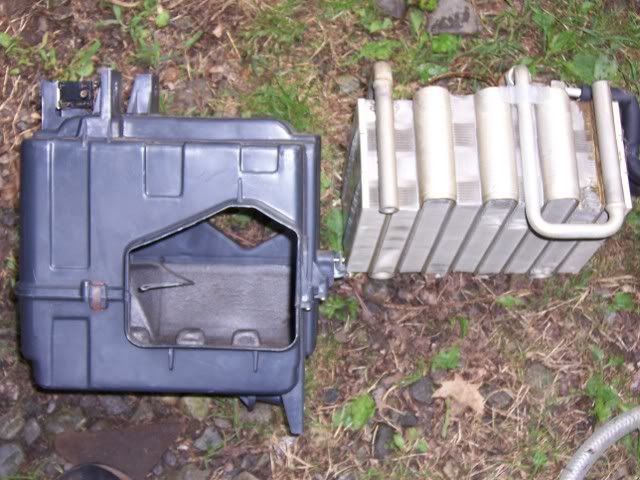
The evap core and it's 3 lines were removed, this took about 20 mins:
Core case still in car, had to remove glove box and lower dash trim to get access. There are three bolts, two duct clamps and two wires that need to be disconnected. Then just pull out.
Case and core separate
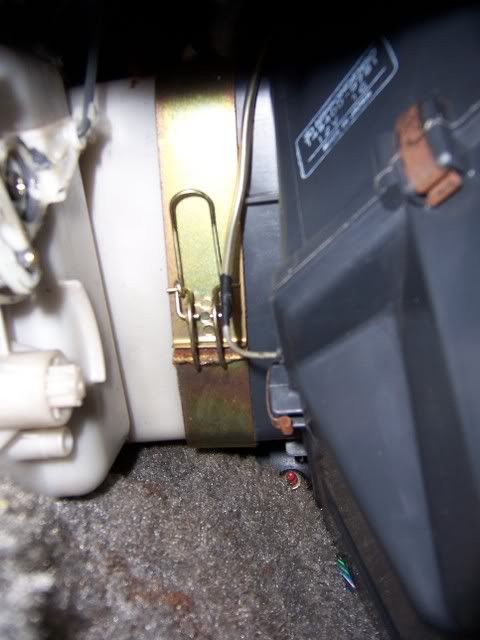
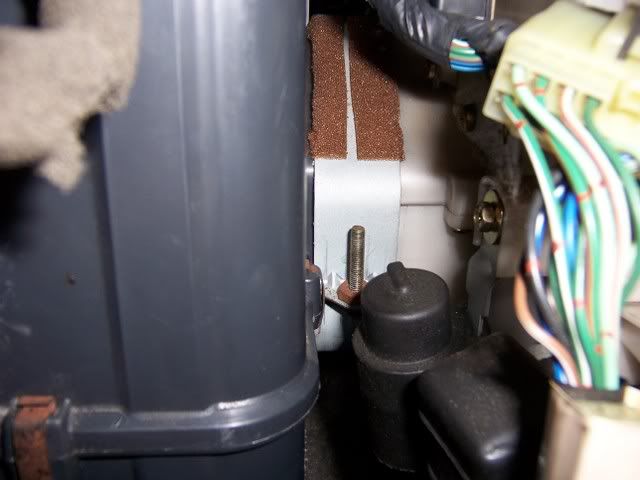
Clamps have to be secured properly to reinstall:
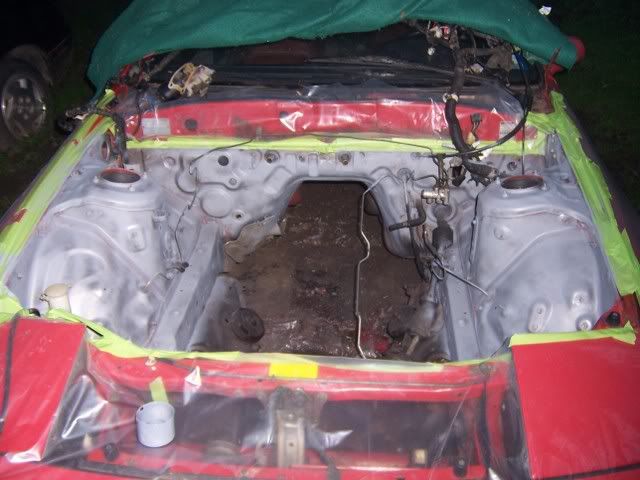
So after that was done I removed the brake booster and clutch master cylinder as well as the wiper motor, got all the old paint off with a lil more Tal Strip and then wire wheeled her clean, scrubbed with carb cleaner., rinse and dry with towels:
Plastic taped and ready for paint:
First of many light coats of Duplicolor Ceramic Primer:
Pretty much done primer:

next is paint, then check and repair wiring harness.
Core case still in car, had to remove glove box and lower dash trim to get access. There are three bolts, two duct clamps and two wires that need to be disconnected. Then just pull out.
Case and core separate
Clamps have to be secured properly to reinstall:
So after that was done I removed the brake booster and clutch master cylinder as well as the wiper motor, got all the old paint off with a lil more Tal Strip and then wire wheeled her clean, scrubbed with carb cleaner., rinse and dry with towels:
Plastic taped and ready for paint:
First of many light coats of Duplicolor Ceramic Primer:
Pretty much done primer:
next is paint, then check and repair wiring harness.