Dave's First gen 20B - a work in progress...

Thread Starter
Full Member
Joined: May 2011
Posts: 144
Likes: 1
From: Australia
Been busy cleaning all the Irons/housing and rotors, given the Irons a good bath in the sonic cleaner. Still need to check all the tolerances, hoping to get to that soon..
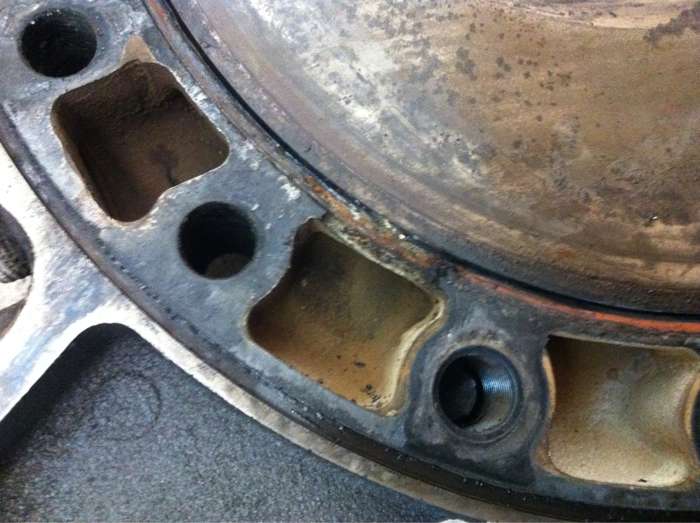
Found time to take the exhaust sleeves out of the housings, painful job but needed to get the Cosmo sleeves out of there to make way for the FC sleeves I have.

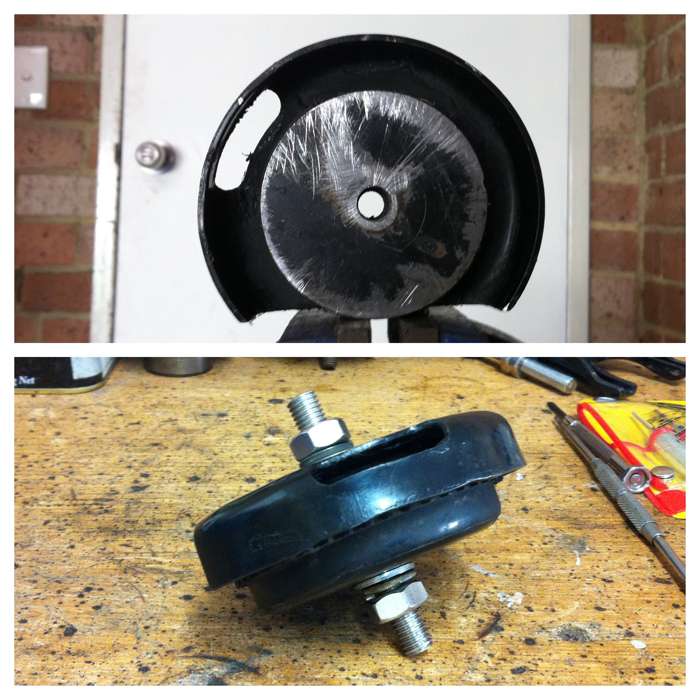
Modified one of the factory mounts I have too, only done the power side, I think i'll do the other mount as well.
I drilled out the threaded shaft on both sides and put in one length of stainless thread, should work well and mean no more broken mounts.
Still a heap to do, i'll be starting on the porting soon..
Found time to take the exhaust sleeves out of the housings, painful job but needed to get the Cosmo sleeves out of there to make way for the FC sleeves I have.
Modified one of the factory mounts I have too, only done the power side, I think i'll do the other mount as well.
I drilled out the threaded shaft on both sides and put in one length of stainless thread, should work well and mean no more broken mounts.
Still a heap to do, i'll be starting on the porting soon..

Thread Starter
Full Member
Joined: May 2011
Posts: 144
Likes: 1
From: Australia
^^Thanks Mate.
A few more up dates:
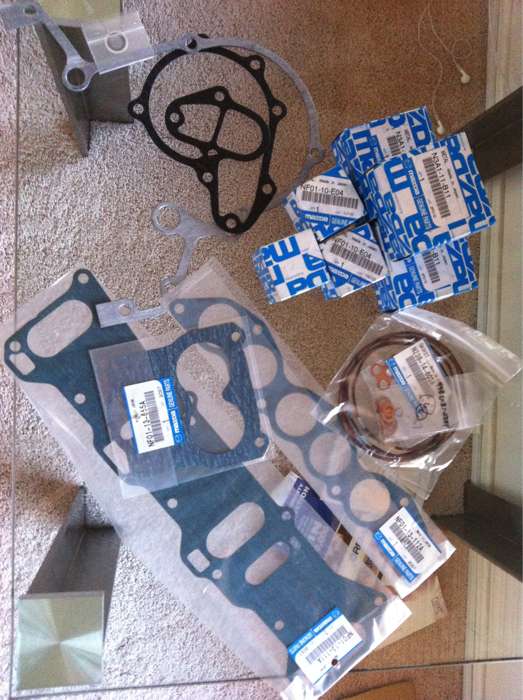
Picked up some more parts..gaskets, bearings etc.
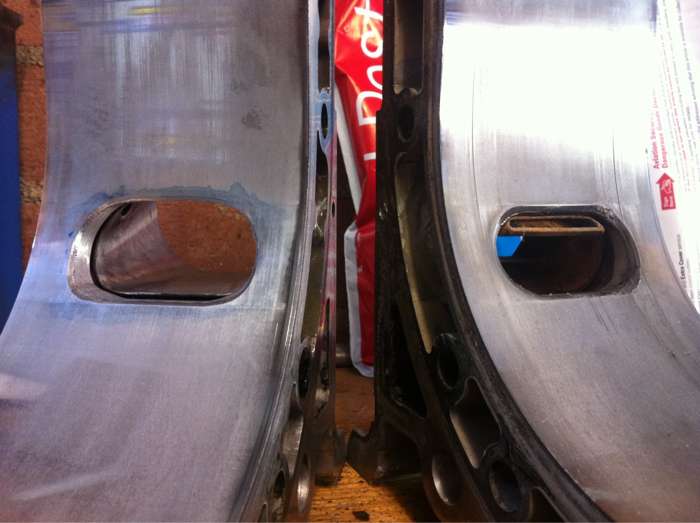
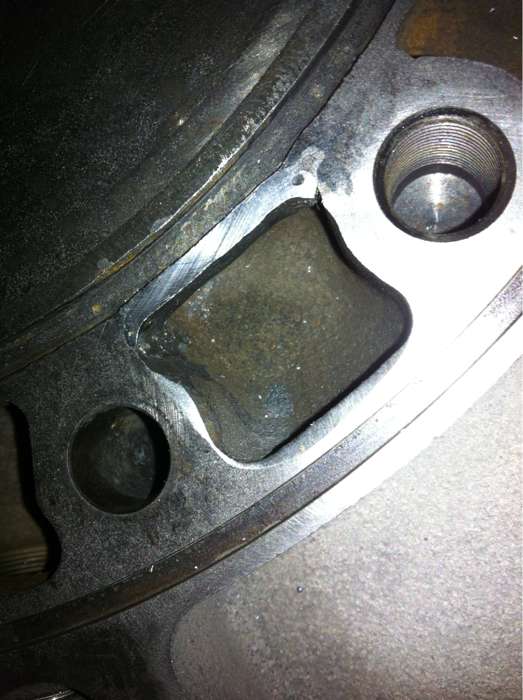
Swapped out exhaust sleeves and have done a bit of exhaust porting.
FC v's Cosmo exhaust sleeves.
Ported v's stock
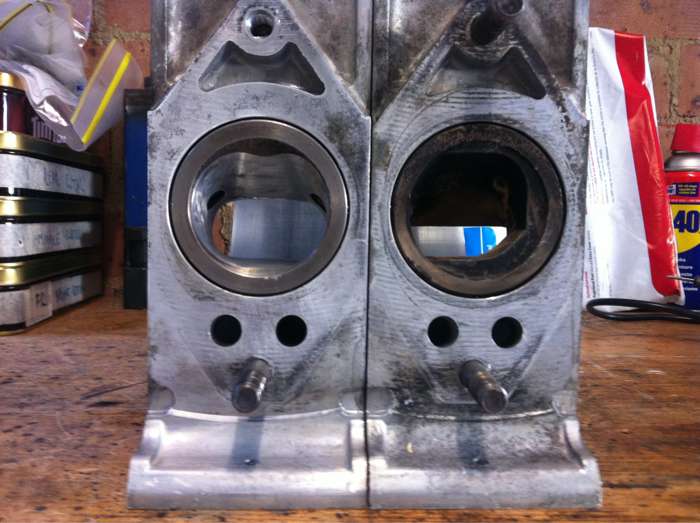
Unfortunatetly the front iron had a collapsed water jacket, casting is way to thin...
Fixed. Quite pleased how it turned out.
Had some bearing presses spun up, one for the stationary gears and one for the rotors.

The new bearings pressed in..

Next step will be to port the irons..
A few more up dates:
Picked up some more parts..gaskets, bearings etc.
Swapped out exhaust sleeves and have done a bit of exhaust porting.
FC v's Cosmo exhaust sleeves.
Ported v's stock
Unfortunatetly the front iron had a collapsed water jacket, casting is way to thin...
Fixed. Quite pleased how it turned out.
Had some bearing presses spun up, one for the stationary gears and one for the rotors.
The new bearings pressed in..
Next step will be to port the irons..
You might want to rethink your motor mounts. The problem with used stock mounts is they are very squishy. Somethng that is squishy but held under tension by a through bolt will work for a while, but it has lots of "give" and will cause problems later.
I went with hockey pucks which are way stiffer. I wanted to go with RB's competition motor mounts, but for now hockey pucks do the job well. I did go with a competiiton tranny mount though. Highly recommended!
RB describes the competition mounts as 40% stiffer than stock. I figure hockey pucks are 60% stiffer than stock. Your stock mounts are anyone's guess. You'll find the more you tighten them down, the lower your engine will sit in the bay. Could cause oil pan clearance issues.
Glad you fixed the iron. I have had to do the same with steel irons a few housings. People not running coolant with good anti wear protection properties dont understand the harm they are causing.
Thread Starter
Full Member
Joined: May 2011
Posts: 144
Likes: 1
From: Australia
First off..Happy new year everyone 
Update time again..Been working on little bits and pieces over the last few weeks, making slow progress but getting there..
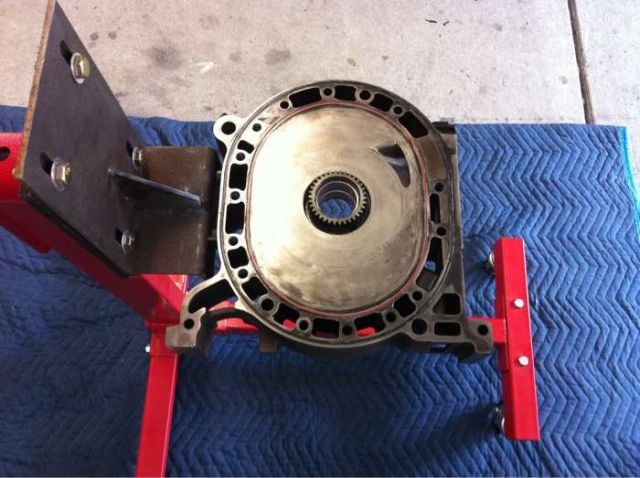
Gear box member is finished and powder coated.

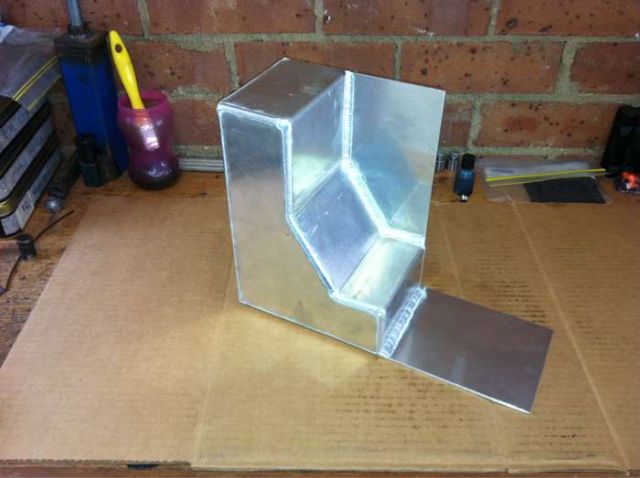
The start of the surge tank..The extended plate will hold two pumps and i'll mount the pre pump on the side.
Rotors all cleaned and new bearings installed.
Sizing up the extended oil pick-up.
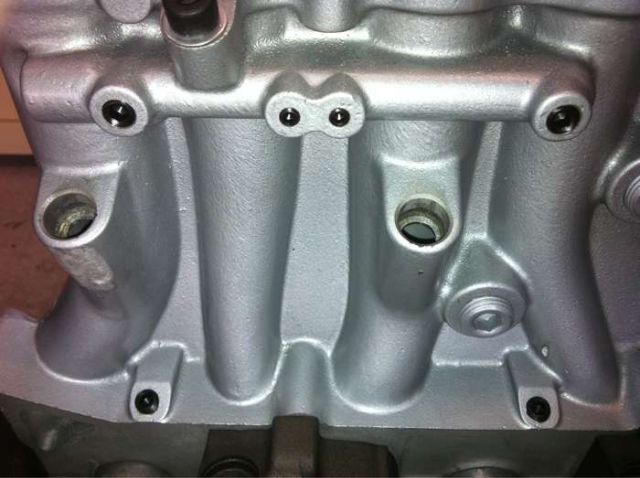
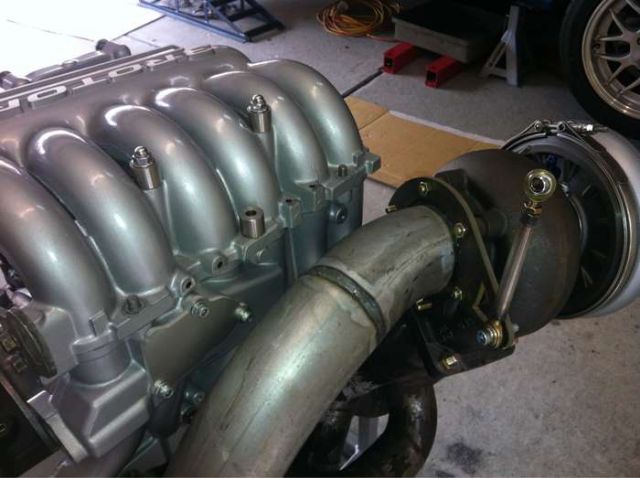
Blanked off all the vacuum points on the LIM & UIM with grub screws that I'll dont think I will be using.
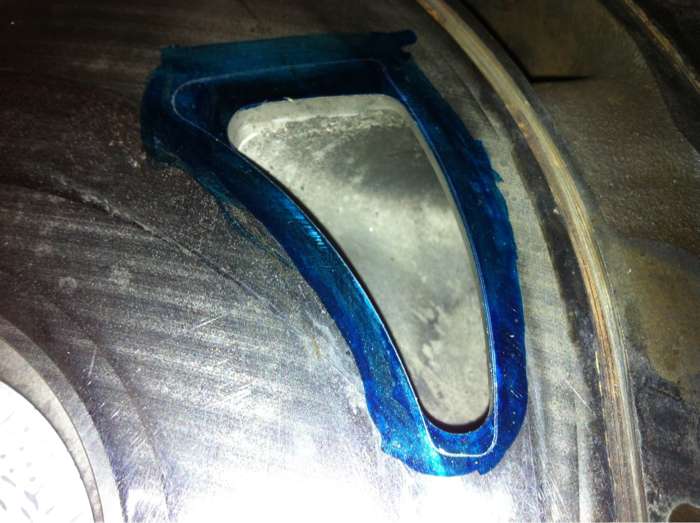
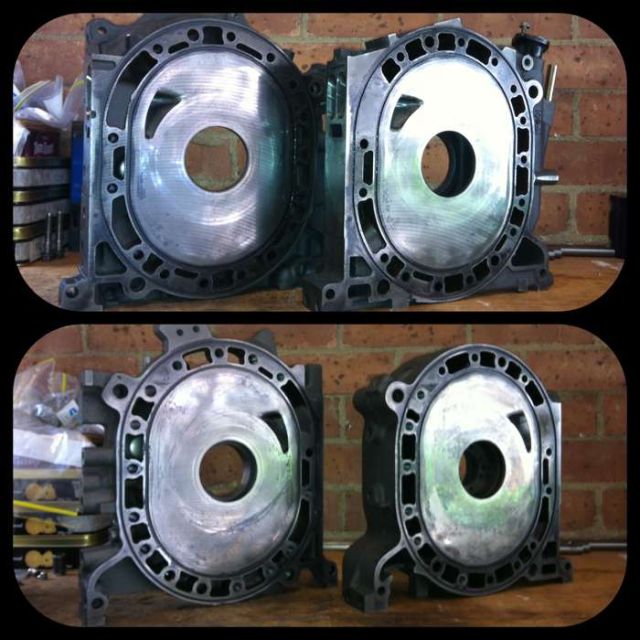
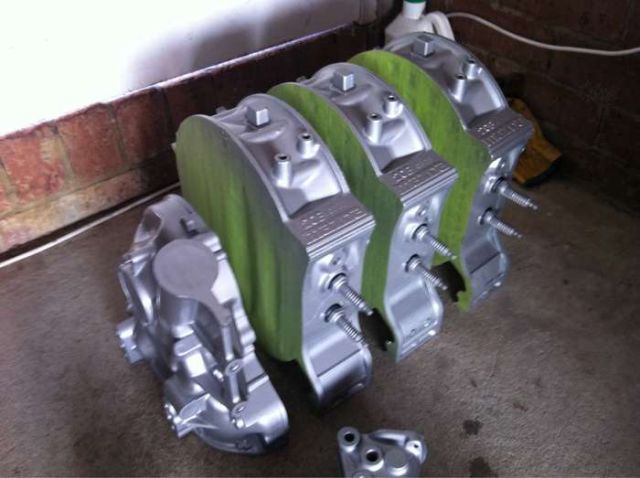
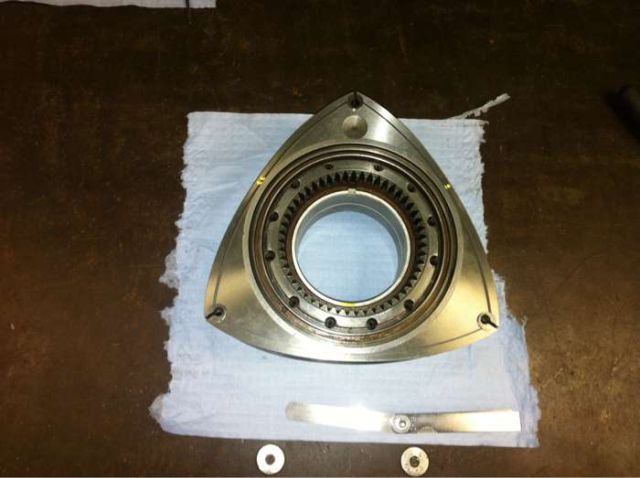
Finished porting the plates, a nice streetable port and will help me reach the goals im aiming for with the car.
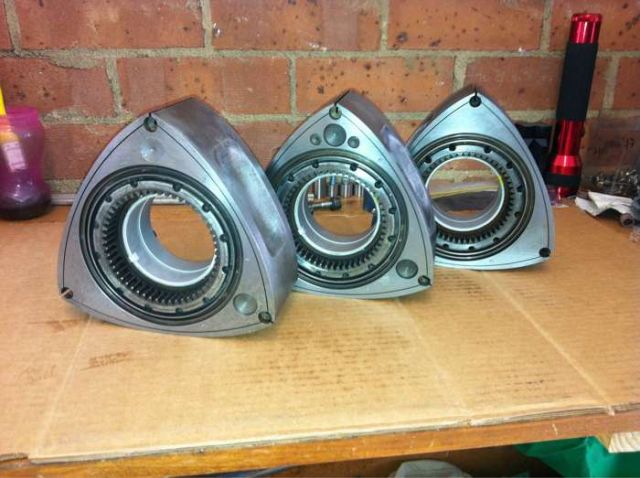
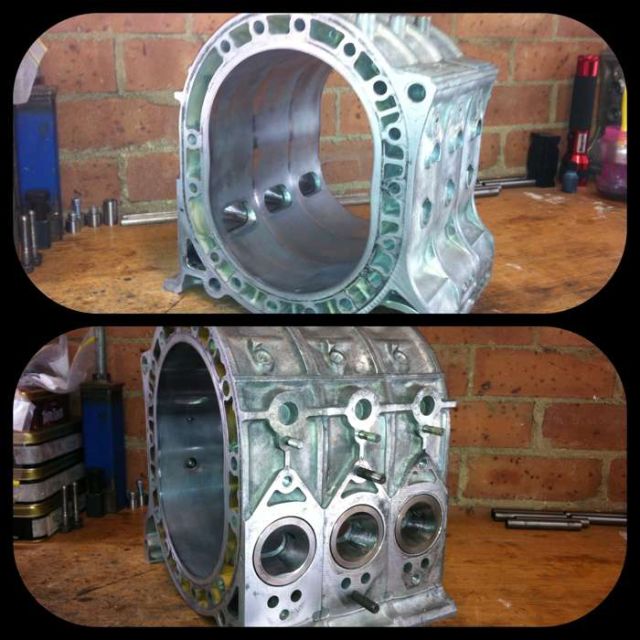
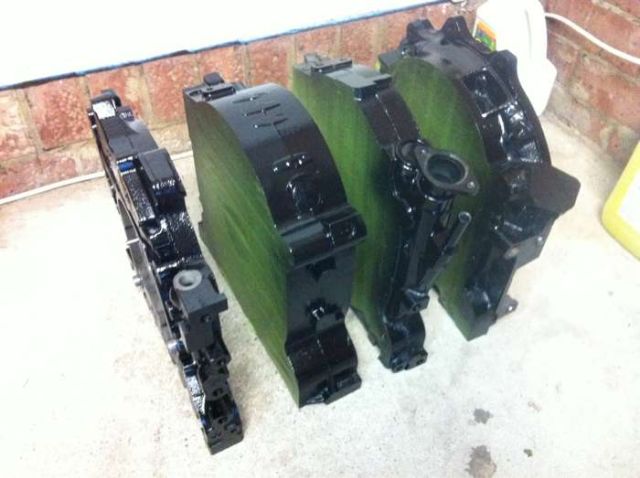
The Housing's all ready for paint. Have cleaned, ported them and swapped out the 20B exhaust sleeves with 13Bt ones.
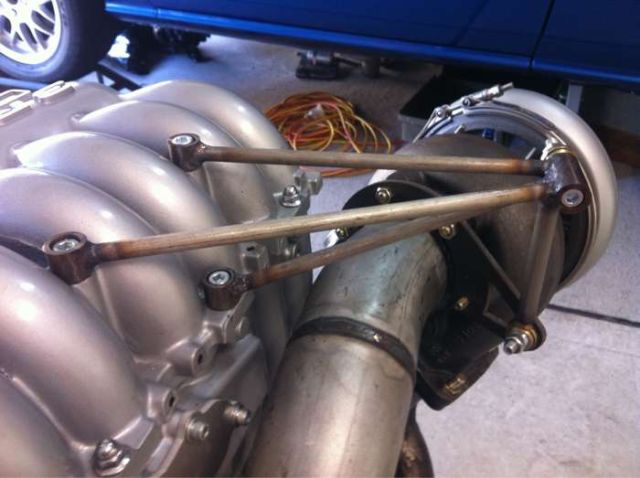
Playing around with the turbo suppport, I'll be running the support arms from the three stainless steel bosses that can be seen in the picture, should do a great deal for supporting the turbo's weight.
After all that i need a spiced rum with these chicks..

Update time again..Been working on little bits and pieces over the last few weeks, making slow progress but getting there..
Gear box member is finished and powder coated.
The start of the surge tank..The extended plate will hold two pumps and i'll mount the pre pump on the side.
Rotors all cleaned and new bearings installed.
Sizing up the extended oil pick-up.
Blanked off all the vacuum points on the LIM & UIM with grub screws that I'll dont think I will be using.
Finished porting the plates, a nice streetable port and will help me reach the goals im aiming for with the car.
The Housing's all ready for paint. Have cleaned, ported them and swapped out the 20B exhaust sleeves with 13Bt ones.
Playing around with the turbo suppport, I'll be running the support arms from the three stainless steel bosses that can be seen in the picture, should do a great deal for supporting the turbo's weight.
After all that i need a spiced rum with these chicks..
 Great job so far. Keep up the good work!


Thread Starter
Full Member
Joined: May 2011
Posts: 144
Likes: 1
From: Australia
Work has been keeping me out of town, so not much progress.. except little jobs here and there.
I got the rotors and rotating assembly balanced.
Also got the rotors clearanced, you can just make it out in the pic.
For those that are unsure what it is, its the machining of both sides of the rotor, removing the slightest amount of metal.

Next on the list is to clearance the side seals and pretty up the housings and irons with some paint.
I got the rotors and rotating assembly balanced.
Also got the rotors clearanced, you can just make it out in the pic.
For those that are unsure what it is, its the machining of both sides of the rotor, removing the slightest amount of metal.
Next on the list is to clearance the side seals and pretty up the housings and irons with some paint.
Hey fyi. If you decide to use the rx8 pedestal the oil galleys dont line up you will have to add some material and then port the holes to match the block. Im using the rx8 pedestal on mine and I came across this thread again so I figure id give the heads up.
Nice build!
Nice build!
Thread Starter
Full Member
Joined: May 2011
Posts: 144
Likes: 1
From: Australia
I'm using the standard pedistal now. I knew about the misalignment of the Rx8 pedistal, you'll just need a little sandwich plate to align the two like you mentioned. It's the way to go if your engine is moved right back.

Thread Starter
Full Member
Joined: May 2011
Posts: 144
Likes: 1
From: Australia
Another small update.
It's been impossible to make any progress with the car, too busy with work and the time I do have available I spend it with my wife and daughter. However the turbo support is finished and have picked up some new 044's and a carter black, should be able to have a crack at finishing the under car surge tank/fuel supply set up over this month.
It's been impossible to make any progress with the car, too busy with work and the time I do have available I spend it with my wife and daughter. However the turbo support is finished and have picked up some new 044's and a carter black, should be able to have a crack at finishing the under car surge tank/fuel supply set up over this month.
Thread Starter
Full Member
Joined: May 2011
Posts: 144
Likes: 1
From: Australia
Been a busy few weeks and have made some good progress.
First up lots of silver to match the UIM & LIM.
Black to match.
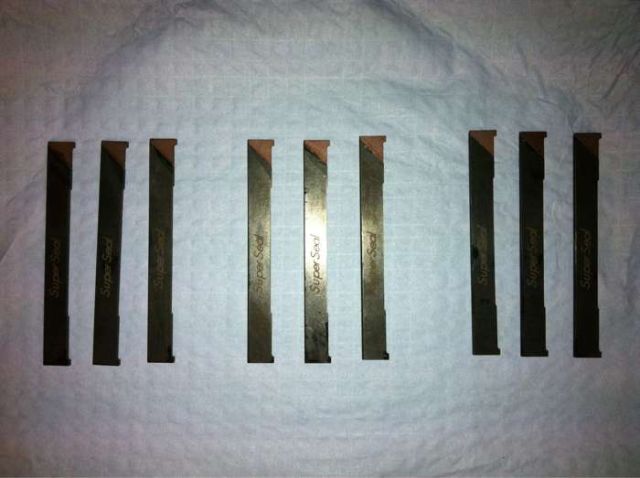
Clearenced the side seals last week. Took some time with 18 side seals to do
Been piecing together the fuel set up for some time now. Finally got it screwed together.

Glued the apex seals together, ready for the rotors.
First up lots of silver to match the UIM & LIM.
Black to match.
Clearenced the side seals last week. Took some time with 18 side seals to do
Been piecing together the fuel set up for some time now. Finally got it screwed together.
Glued the apex seals together, ready for the rotors.

Thread Starter
Full Member
Joined: May 2011
Posts: 144
Likes: 1
From: Australia
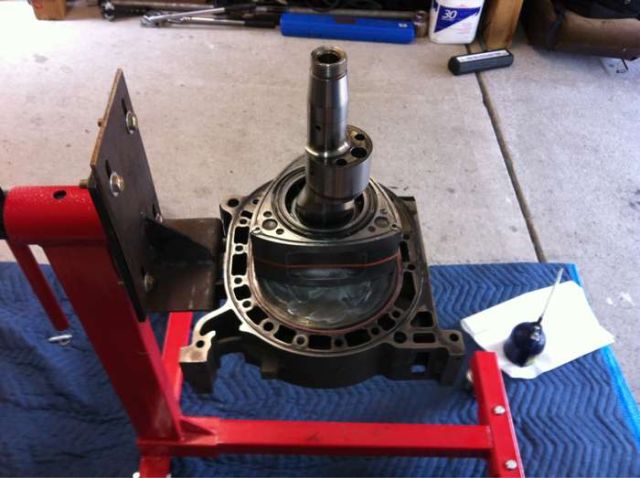
With all the prep work done to the irons, housing and rotors. It's time to have some fun and assemble the motor.
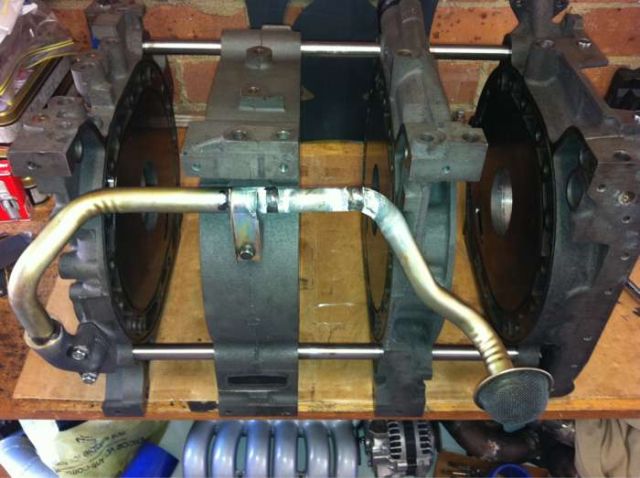
Large Iron set up and ready to be stacked..
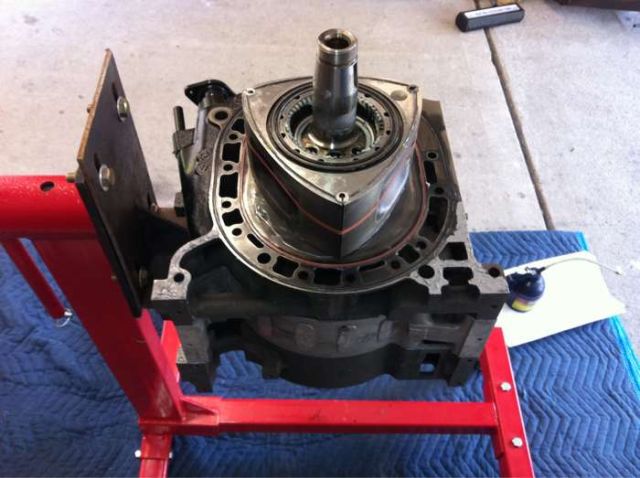
Center rotor and E-shaft in place.
Intermediate iron and rear rotor in place.
Rear iron on. Block flipped and ready for the front rotor and iron.
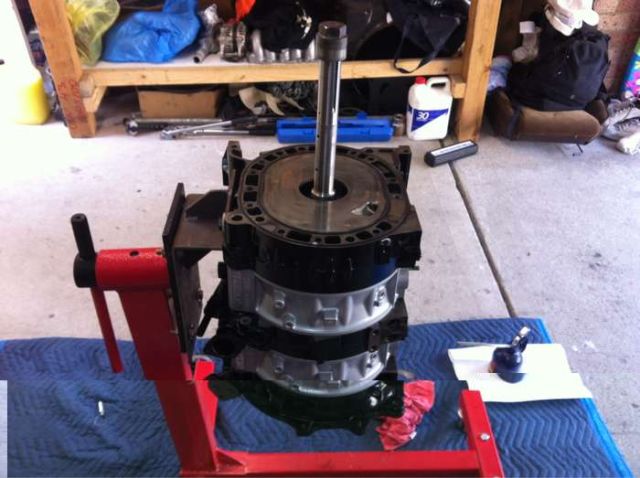
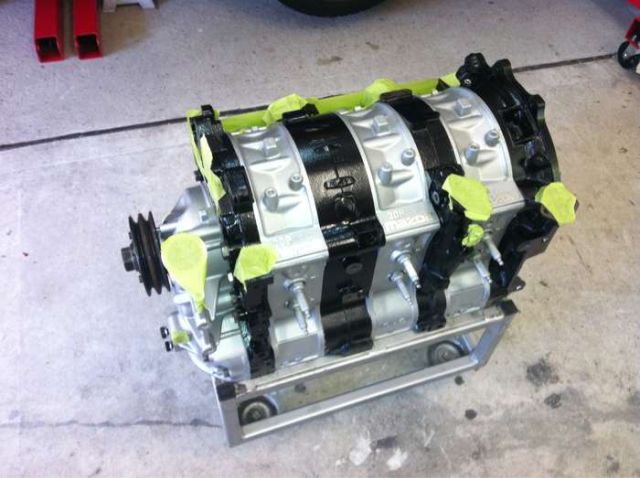
Block assembled!
Torquing up the rear nut with a super sized torque wrench!

Checking the end play.
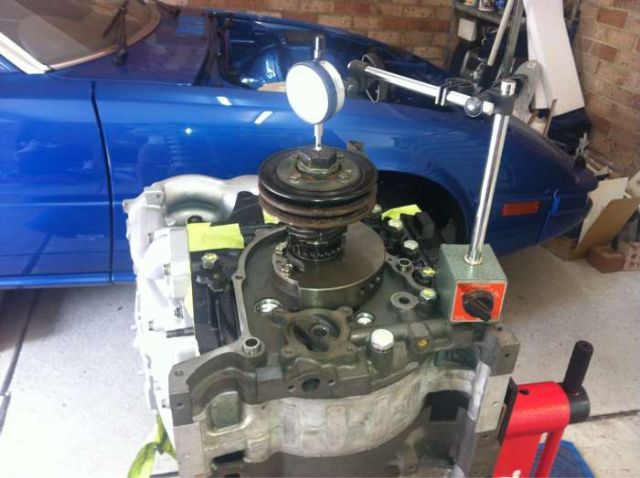
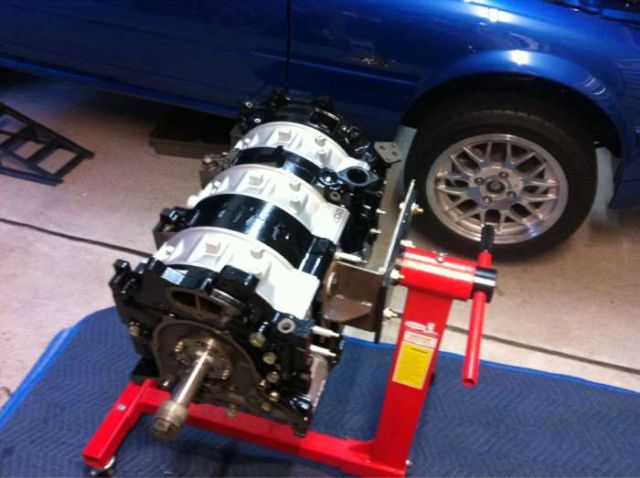
All set up and waiting....
Large Iron set up and ready to be stacked..
Center rotor and E-shaft in place.
Intermediate iron and rear rotor in place.
Rear iron on. Block flipped and ready for the front rotor and iron.
Block assembled!
Torquing up the rear nut with a super sized torque wrench!
Checking the end play.
All set up and waiting....
Thread Starter
Full Member
Joined: May 2011
Posts: 144
Likes: 1
From: Australia
It been some time since I have touched the car, spent six months in the middle east. Back in Oz now and it's time to get cracking on the rx7!!
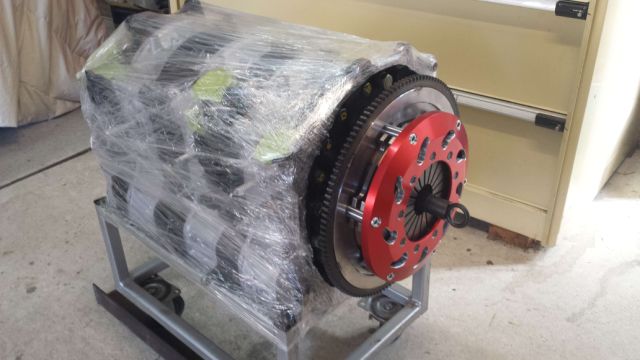
Ordered a twin plate a few days back, bolted it up today..
Next will be to put the on the oil regulators, oil pick up, sump and bolt up the gearbox and drop it back in
Ordered a twin plate a few days back, bolted it up today..
Next will be to put the on the oil regulators, oil pick up, sump and bolt up the gearbox and drop it back in
Thread Starter
Full Member
Joined: May 2011
Posts: 144
Likes: 1
From: Australia
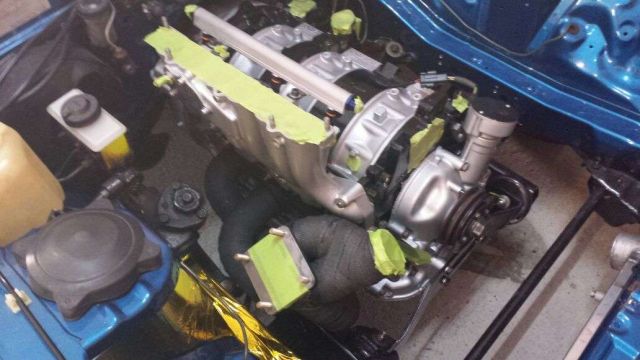
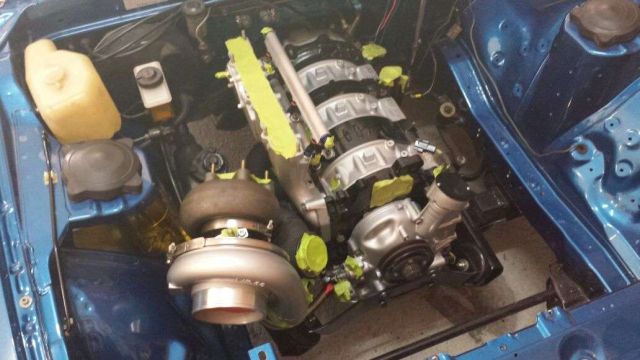
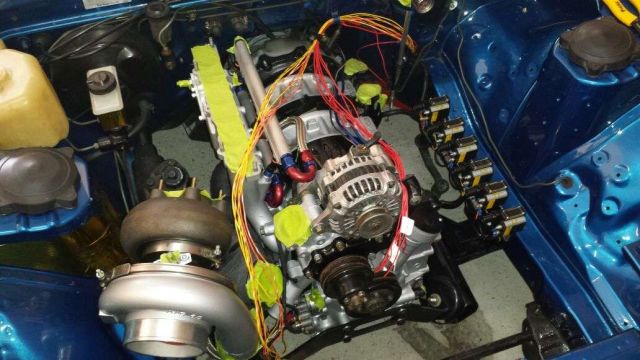
Ok, some more progress!
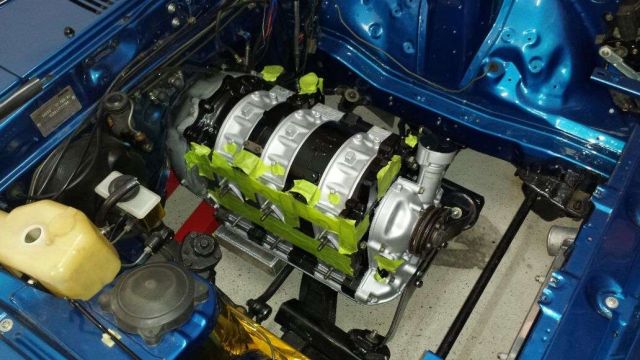
Bolted on the sump, bolted the gearbox up and dropped the motor back in
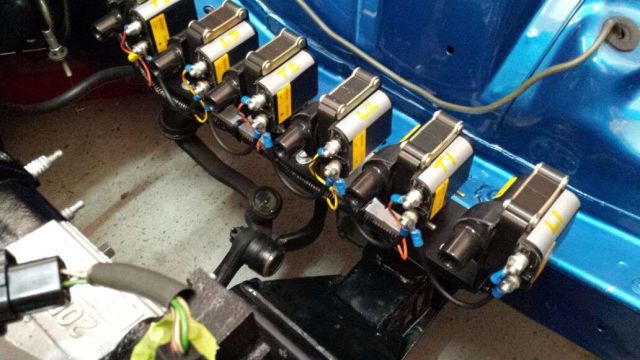
Time to start putting some homeward bounders on the bolts Bolted on the LIM, fuel rails and injectors!
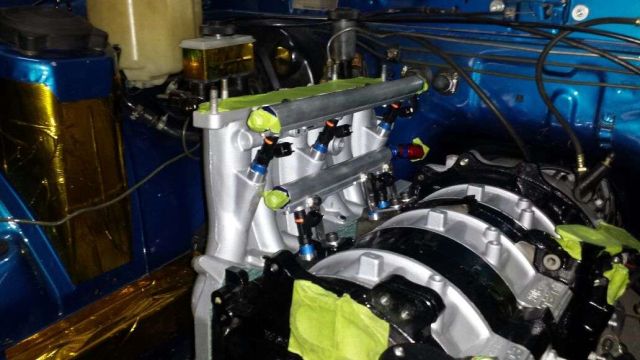
Bolted on the sump, bolted the gearbox up and dropped the motor back in
Time to start putting some homeward bounders on the bolts
Bolted on the LIM, fuel rails and injectors!