
Dave's First gen 20B - a work in progress...

Thread Starter
Full Member
Joined: May 2011
Posts: 144
Likes: 1
From: Australia
Ok a few small updates. Nothing major, but progress is progress 
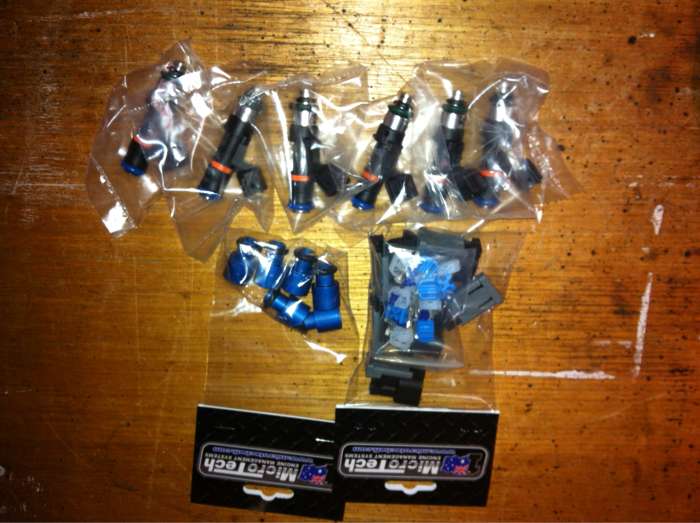
My injectors arrived. x6 ID 1000's. Should suit my purpose well.
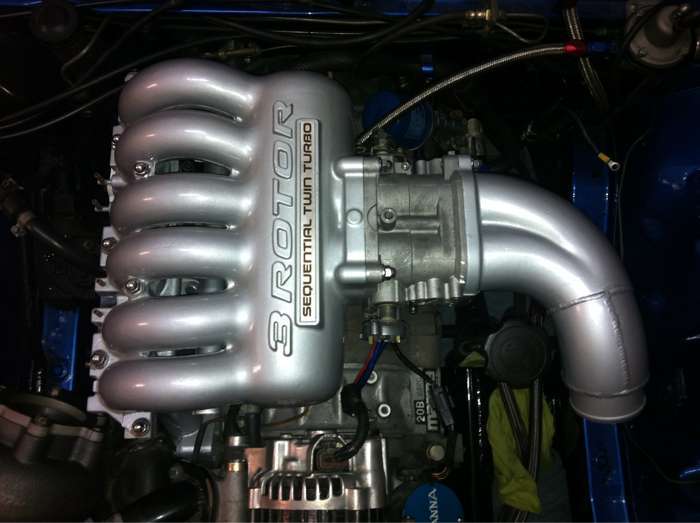
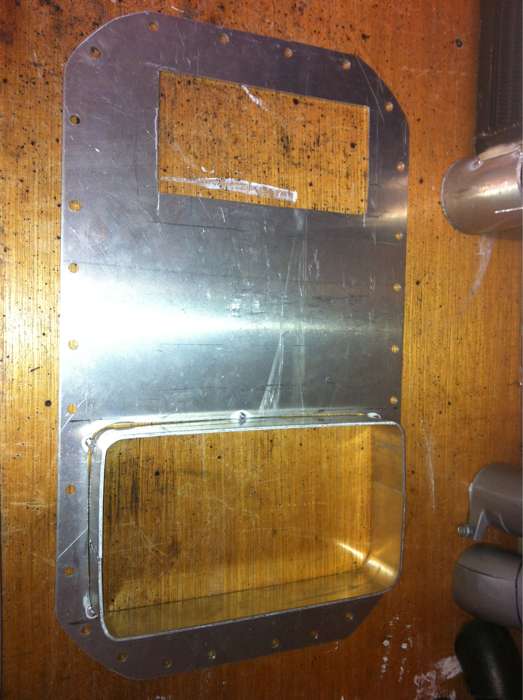
Modified the throttle body outlet piping.
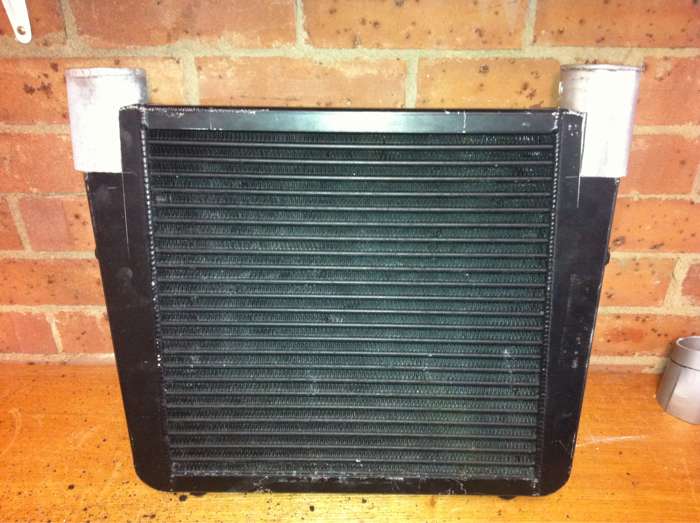
Modified the IC too. Changed the outlet piping from 90deg bends to straight. Trying to take as many bends out of the IC piping as possible, so had to re-think the IC route.
Started to make some progress on the sump. Need to mount this up on the motor & check ground clearance. This will determin how big I can make the lower extension section of the pan.
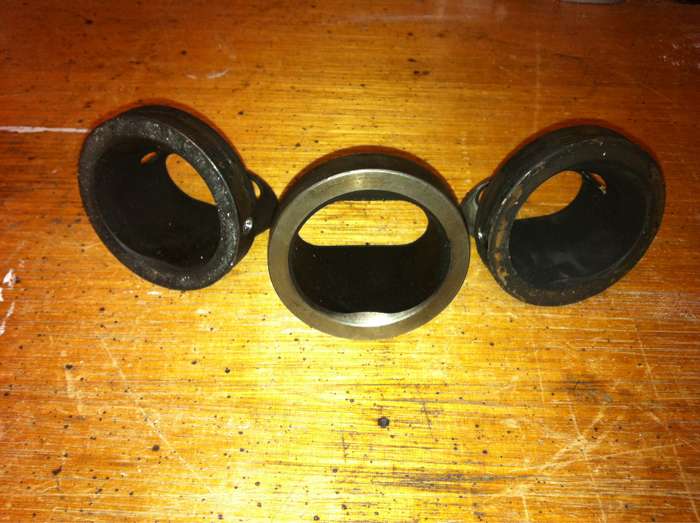
Also picked up some FC exhaust sleeves too. You all know what 20B sleeves are like..
My injectors arrived. x6 ID 1000's. Should suit my purpose well.
Modified the throttle body outlet piping.
Modified the IC too. Changed the outlet piping from 90deg bends to straight. Trying to take as many bends out of the IC piping as possible, so had to re-think the IC route.
Started to make some progress on the sump. Need to mount this up on the motor & check ground clearance. This will determin how big I can make the lower extension section of the pan.
Also picked up some FC exhaust sleeves too. You all know what 20B sleeves are like..
Thread Starter
Full Member
Joined: May 2011
Posts: 144
Likes: 1
From: Australia
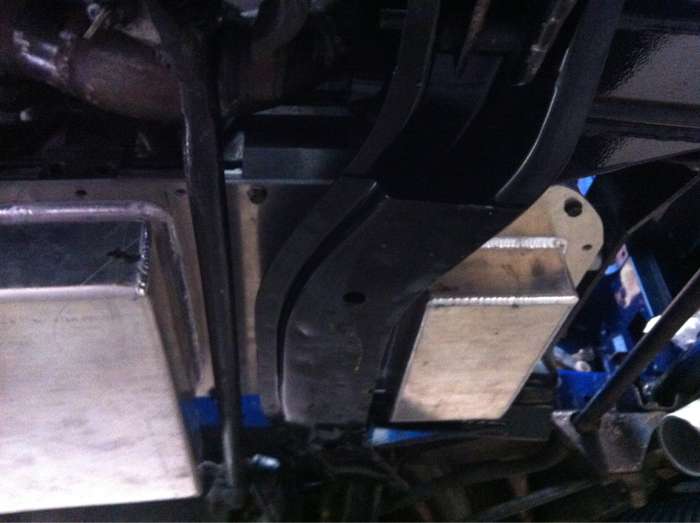
A bit more progress with the sump. Rear pan is done.
Ground clearance is ok, around 110mm.

Front pan is made as well, I have left it off so I can slide the sump between the block and crossmember to check everything.
Checking the oil pick up clearance, pick up has to be cut and shut to add some extra length.
Ground clearance is ok, around 110mm.
Front pan is made as well, I have left it off so I can slide the sump between the block and crossmember to check everything.
Checking the oil pick up clearance, pick up has to be cut and shut to add some extra length.
Thread Starter
Full Member
Joined: May 2011
Posts: 144
Likes: 1
From: Australia
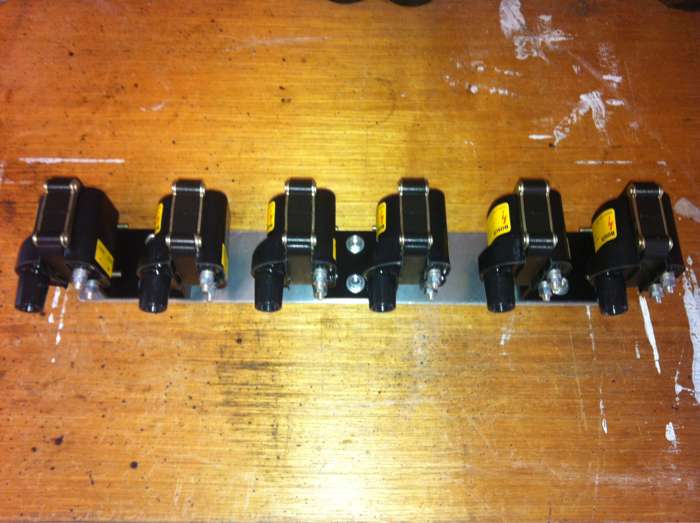
Coils all mounted up on some plate. Just need a nut insert tool and i'll be able to mount the plate on the chassis rail.
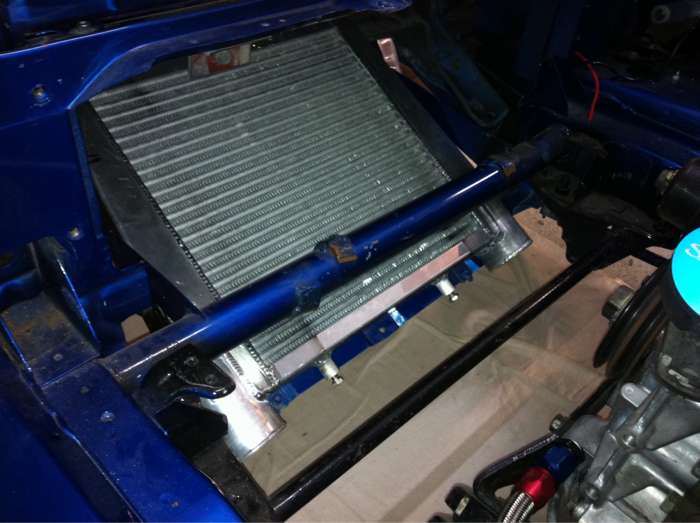
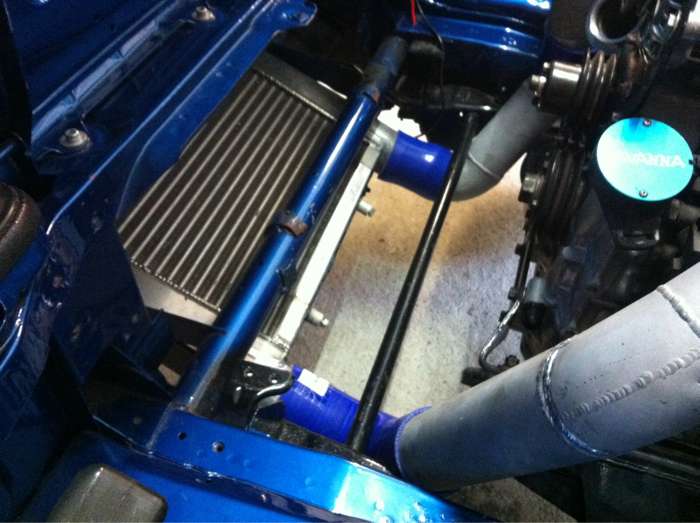
The IC has been modified,(flipped 180deg to how I had it mounted with the 13b) and re-mounted, l'll be running the IC pipe's under the sway bar, which will reduced the total length of the IC pipe work.
Next on the list is to finish the IC pipe's, mount the oil cooler, finish the sump and make up the turbo exhaust down pipe...then to buy a rebuild kit..
Thread Starter
Full Member
Joined: May 2011
Posts: 144
Likes: 1
From: Australia
Ok, I have made some progress..
The dump pipe is tacked up and sorted. The dump is 3.5" down to the cat and the remaining exhaust system is all 3".
Here is a quick pic.
Also have the all the intercooler piping plumbed up. Im pretty happy with it, as the overall length of the pipe isn't too great.
Cooler piping is all 3".
All taped up here. Just need another length of silcone for the compressor outlet.
Thread Starter
Full Member
Joined: May 2011
Posts: 144
Likes: 1
From: Australia
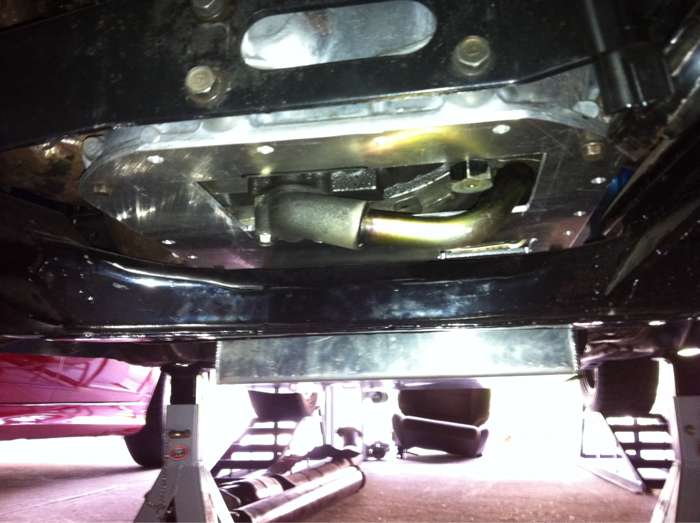
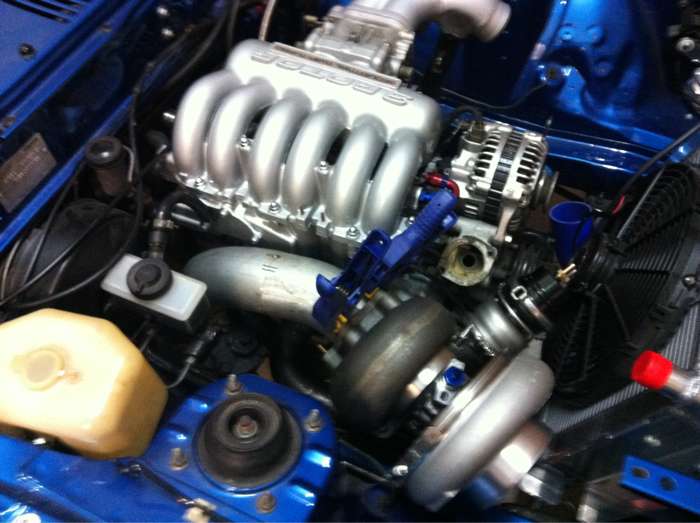
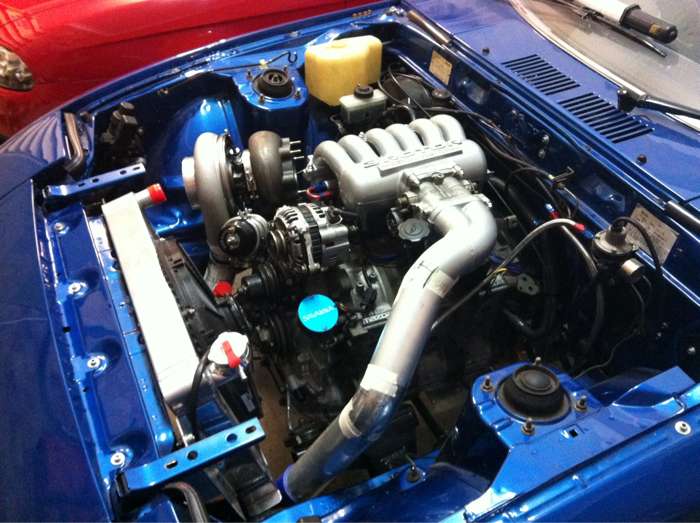
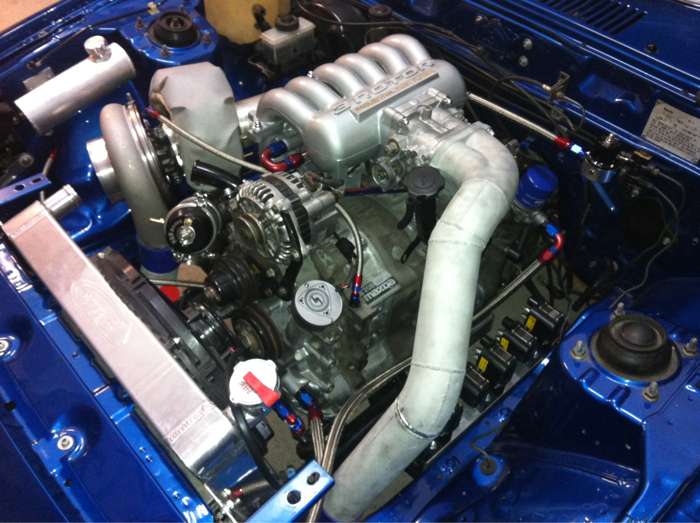
Ok, a bit more progress. The dump pipe is all welded and the water neck has been modded.
The job list is slowly getting smaller but seems to get longer at the same time...
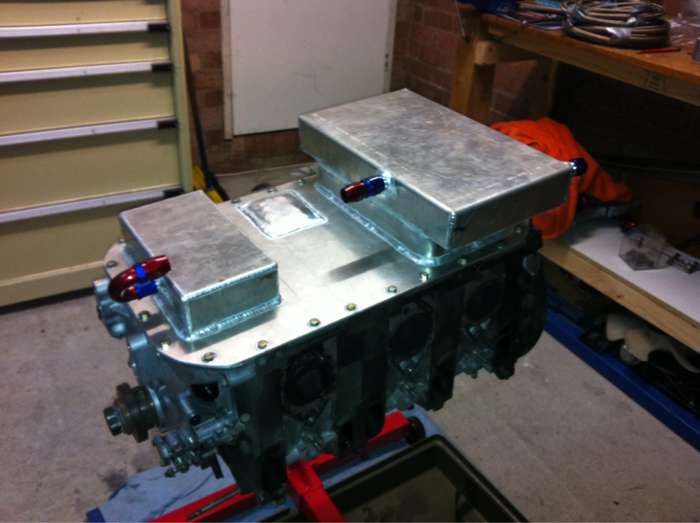
Sump nearly finished, fits perfectly. Need to do some internal mods, i'll be running a line from front to rear too.
I/C pipes all finished, tight fit but they have clearance all round. Just need a nice coat of paint.
Thanks for the top welds rob
Good ground clearance too.

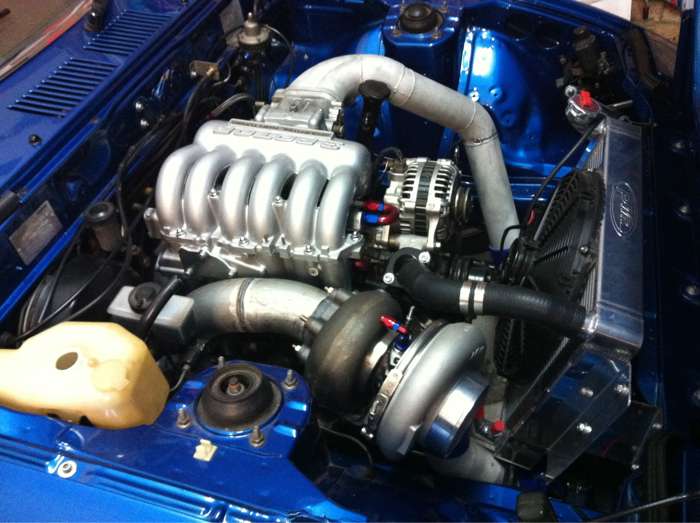
Engine bay pics.

Next on the list is to mount the oil cooler, do all the braided lines and set up the the fuel system.
The job list is slowly getting smaller but seems to get longer at the same time...
Sump nearly finished, fits perfectly. Need to do some internal mods, i'll be running a line from front to rear too.
I/C pipes all finished, tight fit but they have clearance all round. Just need a nice coat of paint.
Thanks for the top welds rob
Good ground clearance too.
Engine bay pics.
Next on the list is to mount the oil cooler, do all the braided lines and set up the the fuel system.
Thread Starter
Full Member
Joined: May 2011
Posts: 144
Likes: 1
From: Australia
Thread Starter
Full Member
Joined: May 2011
Posts: 144
Likes: 1
From: Australia
Some more updates.
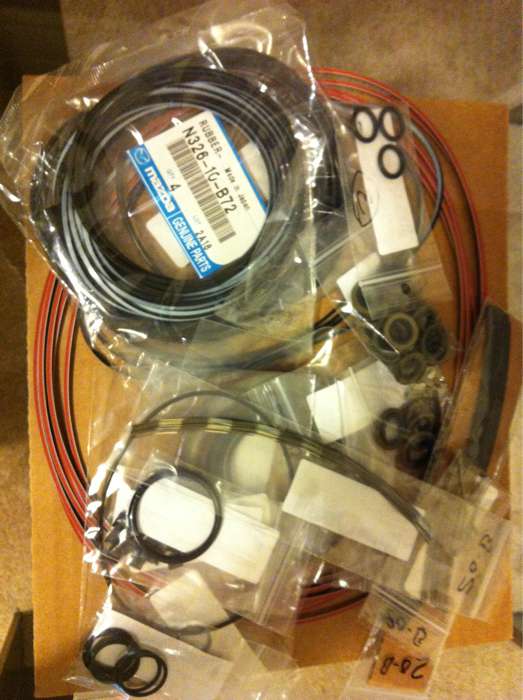
Have done some shopping, have bought all new internals for the motor
Decided on what apex seals i'll be using...
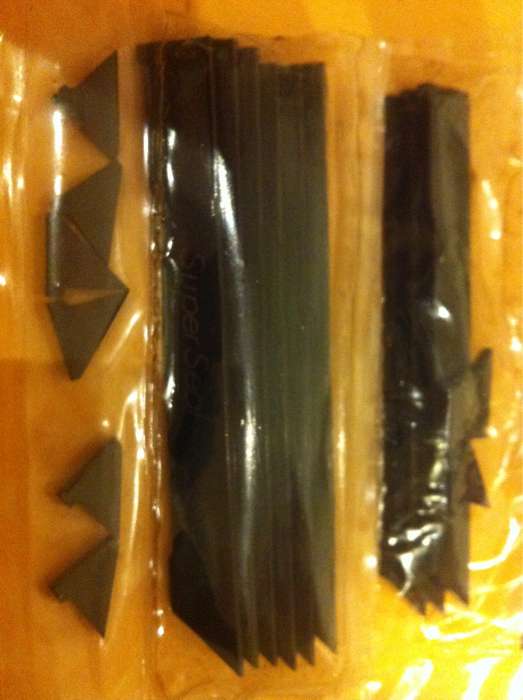
RA Super seals!
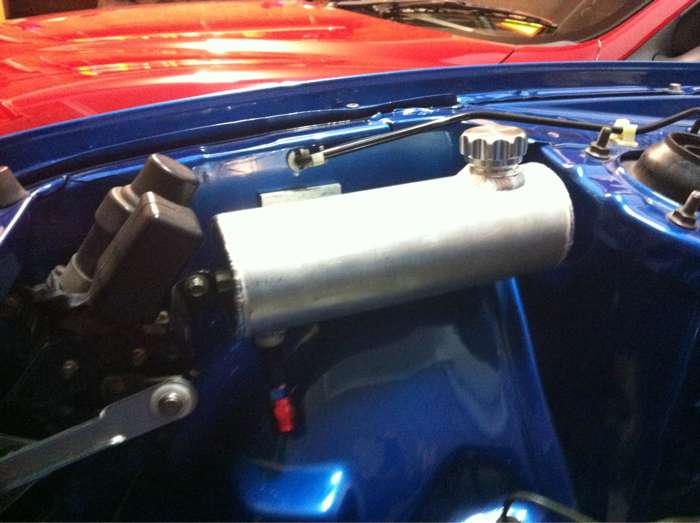
2-stroke gravity tank finished, and fitted up for use with the Sohn omp adaptor.
Adaptor for the engine stand.
It works!

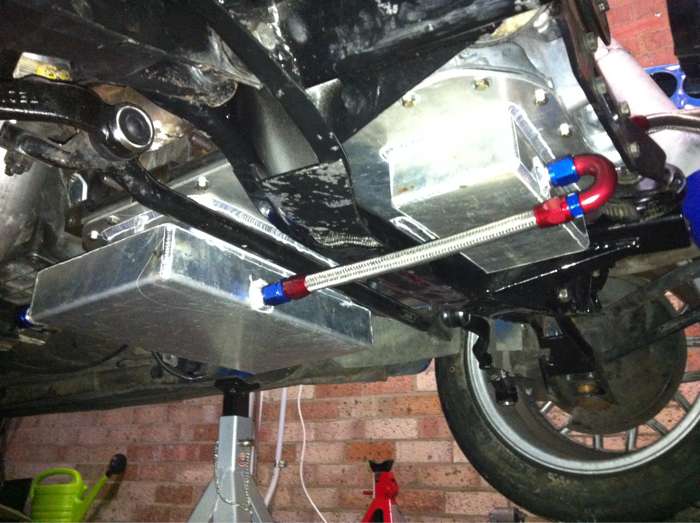
The sump all finished & bolted up. A -8 line will join the two tanks.
Getting closer...
Have done some shopping, have bought all new internals for the motor
Decided on what apex seals i'll be using...
RA Super seals!
2-stroke gravity tank finished, and fitted up for use with the Sohn omp adaptor.
Adaptor for the engine stand.
It works!
The sump all finished & bolted up. A -8 line will join the two tanks.
Getting closer...


Bad *** build looking real clean and real eom look that's what I wish I could do to my rx3 but now working on my rx8 and that took a big chunk of my rx3 project . Can't wait to see more
Thread Starter
Full Member
Joined: May 2011
Posts: 144
Likes: 1
From: Australia
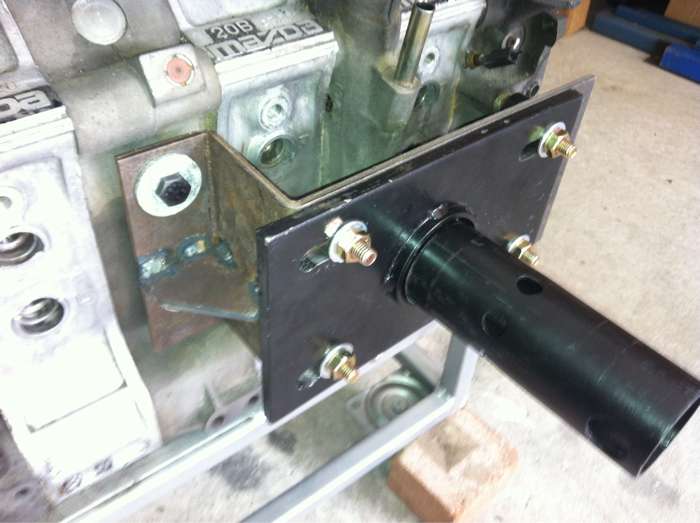
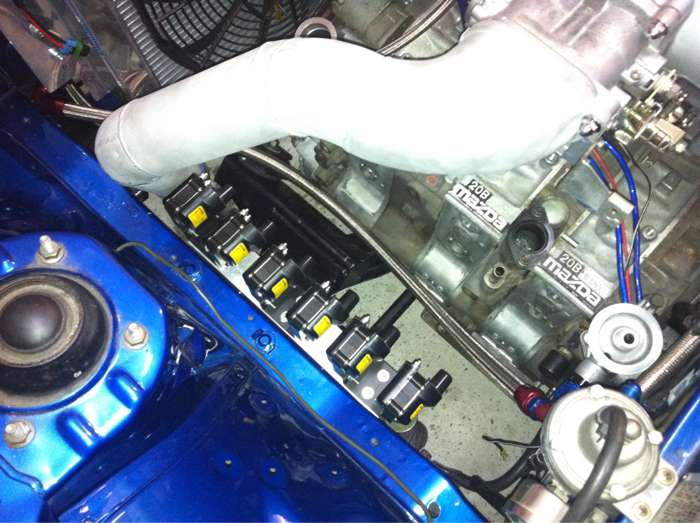
Sorted out the mounting of the coils, used nutsert's into the chassis rail - nice neat way to secure the bracket.
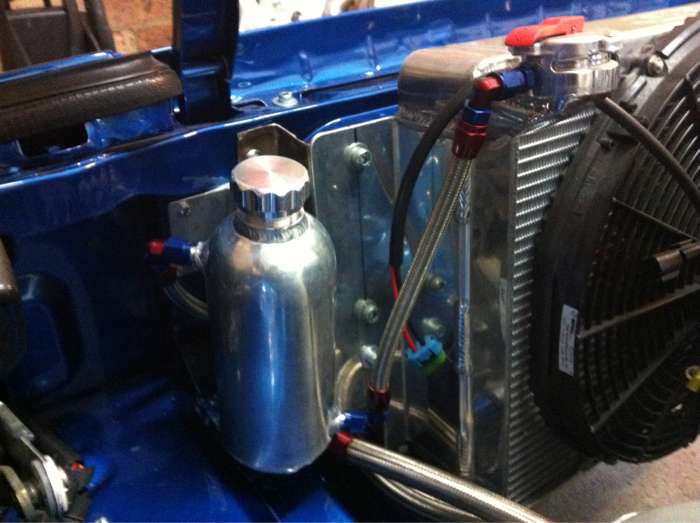
Raided the piggy bank this week and picked up a TurboSmart fuel reg and some more hose fittings and hoses. Amazing how much this all cost..
Sump bridging line sorted.
Spent some time plumbing up the car. Still have some more to do, but have a fair bit sorted.
Most of the dummie up work is done in the bay, just need to sort a radiator overflow,catch can, bottom radiator hose, a few more plumbing lines and WG screamer then im sorted..
Thread Starter
Full Member
Joined: May 2011
Posts: 144
Likes: 1
From: Australia
A few updates.
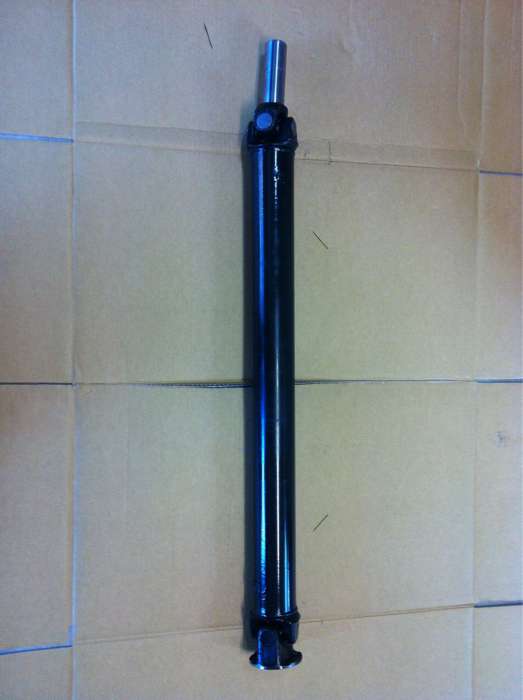
Had the tail shaft shortened, drive line is nearly sorted. Just need to buy a clutch..
Spent some time yesterday with a mate spraying up the throttle body/IC piping/compressor cover. Finished the radiator overflow bottle and the turbo oil return. Also mounted up a pod filter.

Had the tail shaft shortened, drive line is nearly sorted. Just need to buy a clutch..
Spent some time yesterday with a mate spraying up the throttle body/IC piping/compressor cover. Finished the radiator overflow bottle and the turbo oil return. Also mounted up a pod filter.


Thread Starter
Full Member
Joined: May 2011
Posts: 144
Likes: 1
From: Australia
Ok, finally found some spare time over the last few weekends and have been able to get stuck back into the car.
With the majority of the fabrication work completed in the engine bay it's time to turn attention to the motor. So the motor is back out...
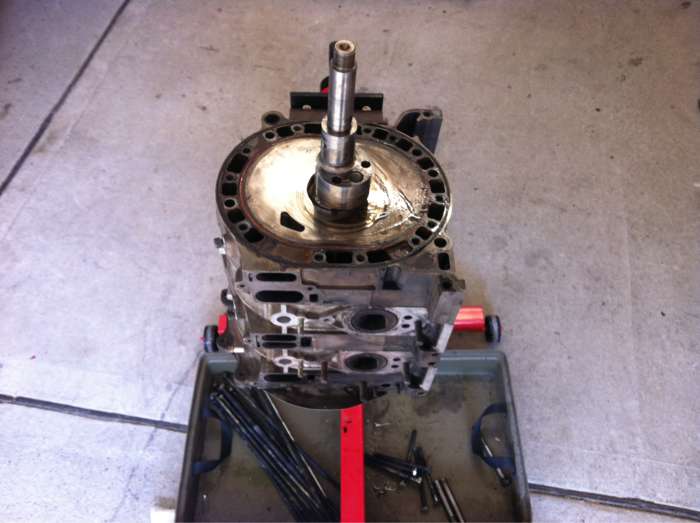
Setting up & ready to crack the rear nut.
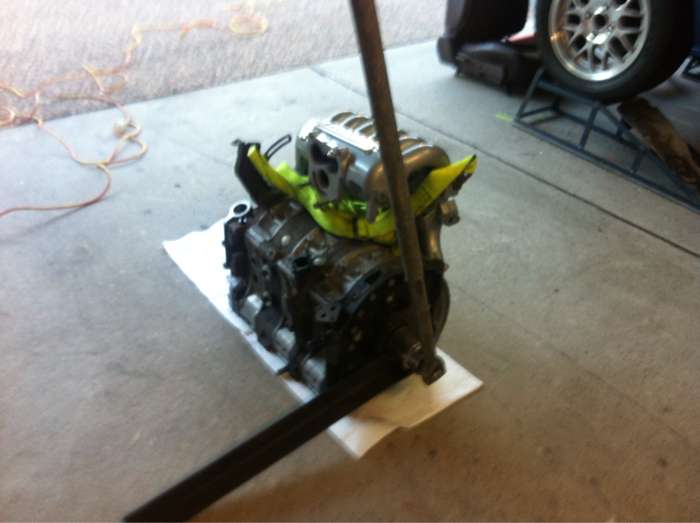
A few pics of the tear down.
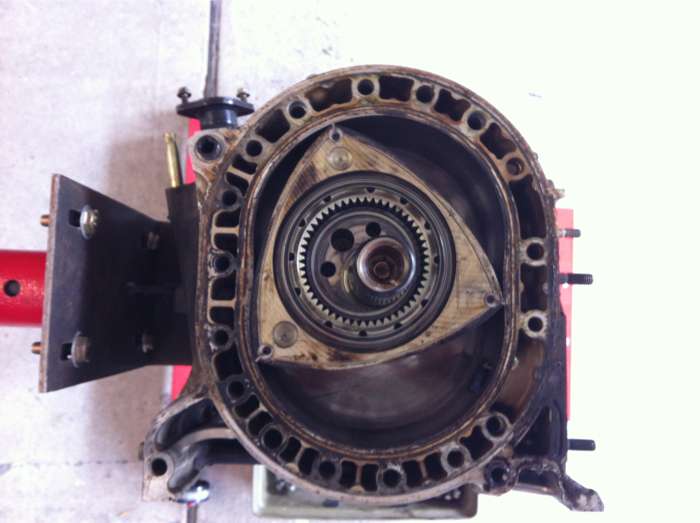
Front Iron,housing/rotor off.
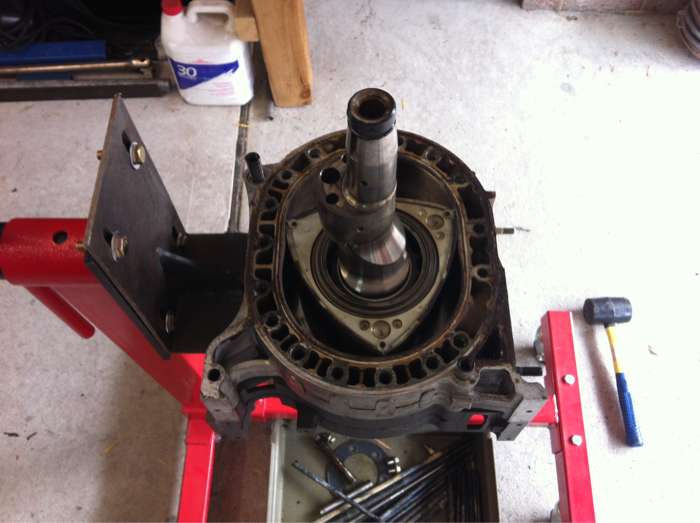
Motor flipped. Working down to the large Iron.
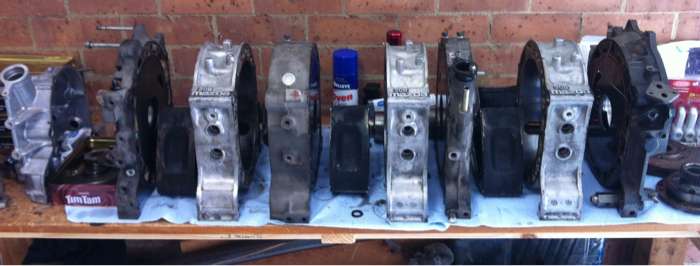
And fully stripped down.
Time to clean now...
With the majority of the fabrication work completed in the engine bay it's time to turn attention to the motor. So the motor is back out...
Setting up & ready to crack the rear nut.
A few pics of the tear down.
Front Iron,housing/rotor off.
Motor flipped. Working down to the large Iron.
And fully stripped down.
Time to clean now...
Thread Starter
Full Member
Joined: May 2011
Posts: 144
Likes: 1
From: Australia
Hey guys, Just to answer a few questions. I am going to port it, just a mild port at this stage. I really just want to clean up the ports a little and improve the flow.
I'm in the process of cleaning the engine atm, the rear rotor was slightly damaged by a chipped apex seal. Only quite a small chip, but the rotor is not usable, either is the rear housing.
The remaining rotating assembly is spot on, just needs a good clean. Being a 'C' stamp, the rotors are late model 20B rotors, the same as 13B Cosmo rotors, so I have a second hand Cosmo rotor lined up. I'll most likely use a S6 13B housing for the replacement rear housing.
I purchased the long block locally for 5k. I knew of the chipped seal/damaged rotor when I bought the engine. Glad I picked it up as they are getting super hard to find the 20B long block now, over here in Sydney they all find there way into drag cars..
Cheers.
-Dave.
Last edited by stokrx; Oct 9, 2012 at 05:43 AM.