
Turn in spacers and camber


Thread Starter
Senior Member
Joined: Sep 2013
Posts: 301
Likes: 34
From: asheville
Turn in spacers and camber
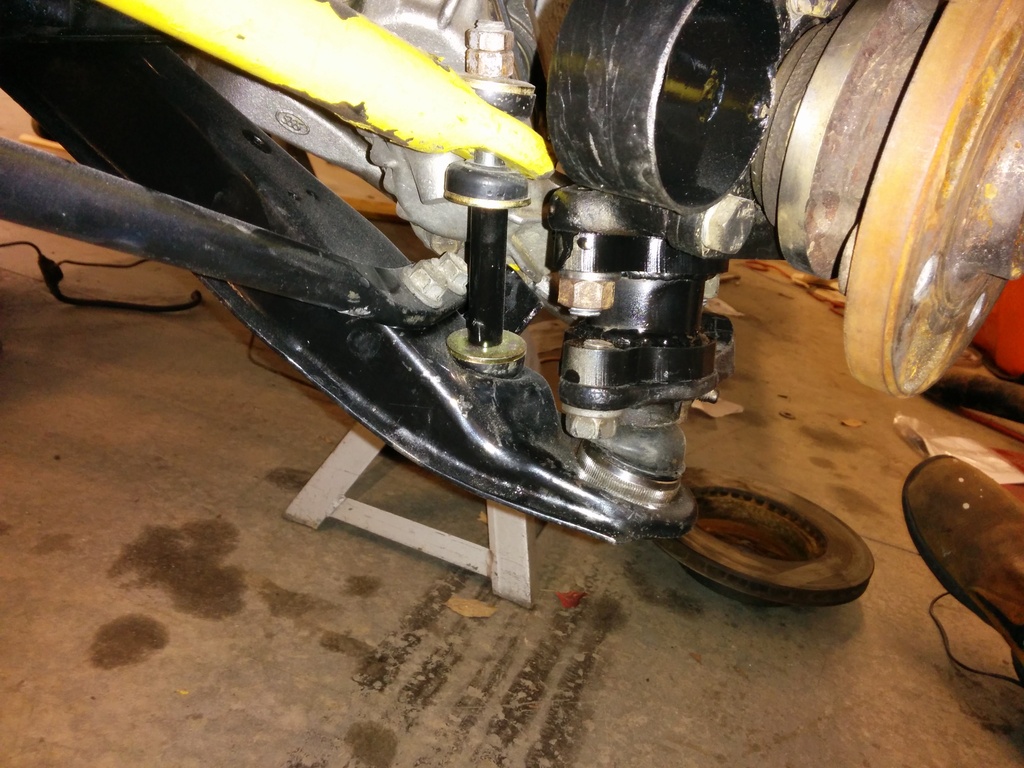
Anyone else have a problem getting adequate camber after installing turn in spacers? I made some 2 inch spacers for my car and when I set up the suspension I was only able to get 2⁰ of camber. We ran a 12hr race like that but it was very brutal on the front tires. I did some more grinding on the strut towers so I could adjust the camber plates more and that got me about an extra half degree, but now the upper spring seats are so far in they are touching the strut towers so that is the limit of that adjustment. It makes sense that the camber would be reduced since you are keeping the control arms lower in their arc so the wheels are not as far outboard as they would be for the same ride height without the spacers. I think I will pull the crossmember out and drill new holes moving the control arms out, I know I can get adjustable control arms but they won�t fit easily into the rules for the series that I run.


Thread Starter
Senior Member
Joined: Sep 2013
Posts: 301
Likes: 34
From: asheville
Many of the older ones are not as thick because back in the day the rules required that they run 13 inch wheels so they made them as thick as they could and still fit inside the small wheels. With 15 inch wheels it is not a problem to run thicker ones.
Moving the control arms out in the crossmember is exactly what I am going to do.
Moving the control arms out in the crossmember is exactly what I am going to do.


I am surprised that 2" spacers make that much difference. I use 1" and have easily gotten 3.5 deg. I think I could have gotten more. I have found that with 13" wheels, at least, 2.5 deg is the max. Beyond that I lose braking ability and end up flatspotting the inside of the tires. Not sure how that works with 15" wheels, although with 1.5-2 deg on our chumpcar (15" wheels and no camber plates just stock tophat) we really don't have a significant problem with wearing out the outer shoulder.
Carl
Carl
Thread Starter
Senior Member
Joined: Sep 2013
Posts: 301
Likes: 34
From: asheville
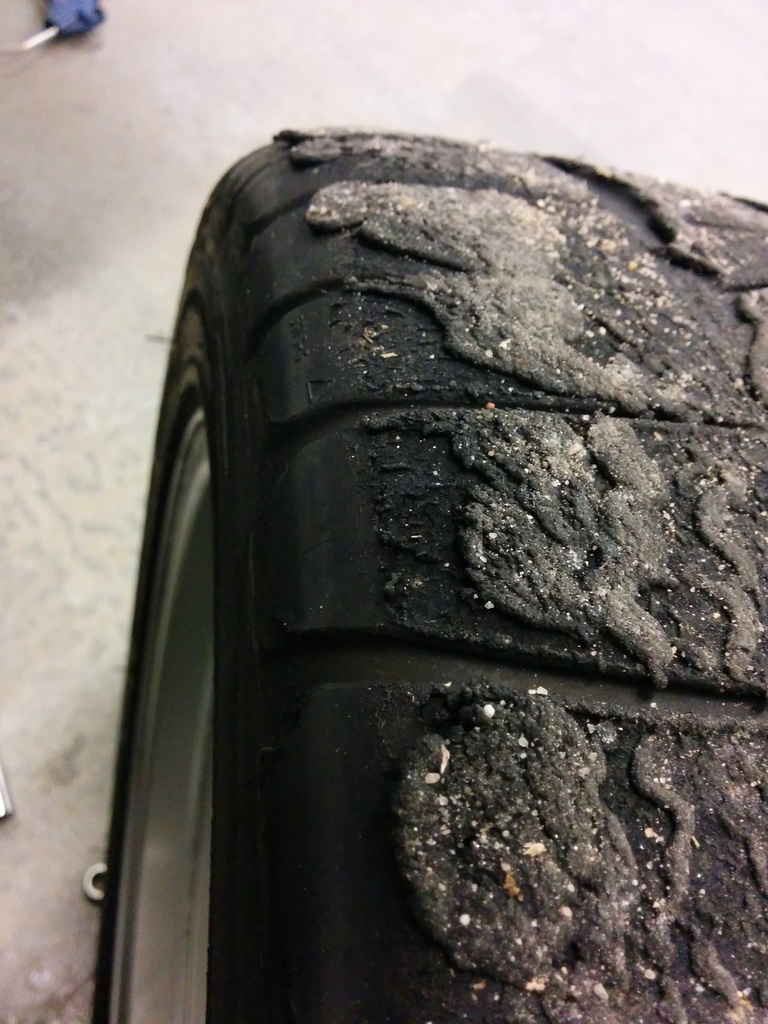
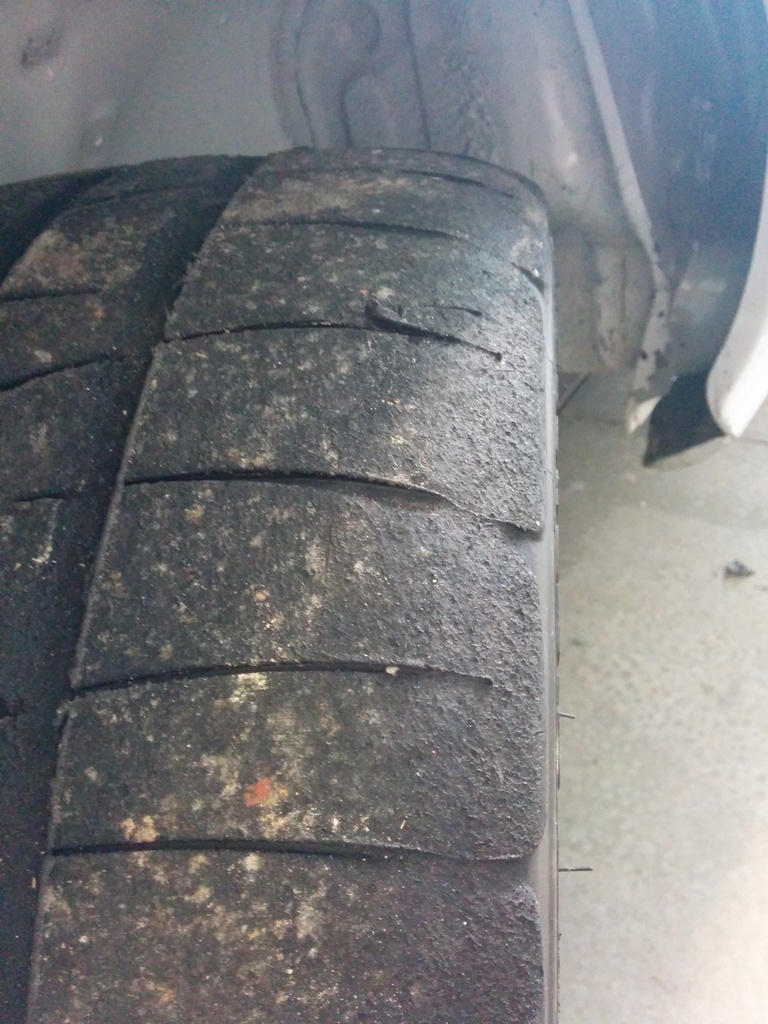
You can see that we got some pretty terrible wear at our last 12hr race, this is with 2⁰ of camber. Other things were working against us, the track was very abrasive, the conditions were difficult with mixed rain and dry so the tires were never getting all the way warmed up. And we had one team member who was used to driving his Spec Racer Ford around this track and kept thinking he had to really stab the brake pedal hard like he does in the spec racer, with the vacuum booster in our car you don’t have to push very hard so he wound up flat spotting the fronts pretty bad.
I think I will pull the crossmember and drill some new mounting holes about a half inch further out and weld some washers on to reinforce the holes, then I can get my camber plates back in their normal range and use them to fine tune the adjustment.
I think I will pull the crossmember and drill some new mounting holes about a half inch further out and weld some washers on to reinforce the holes, then I can get my camber plates back in their normal range and use them to fine tune the adjustment.


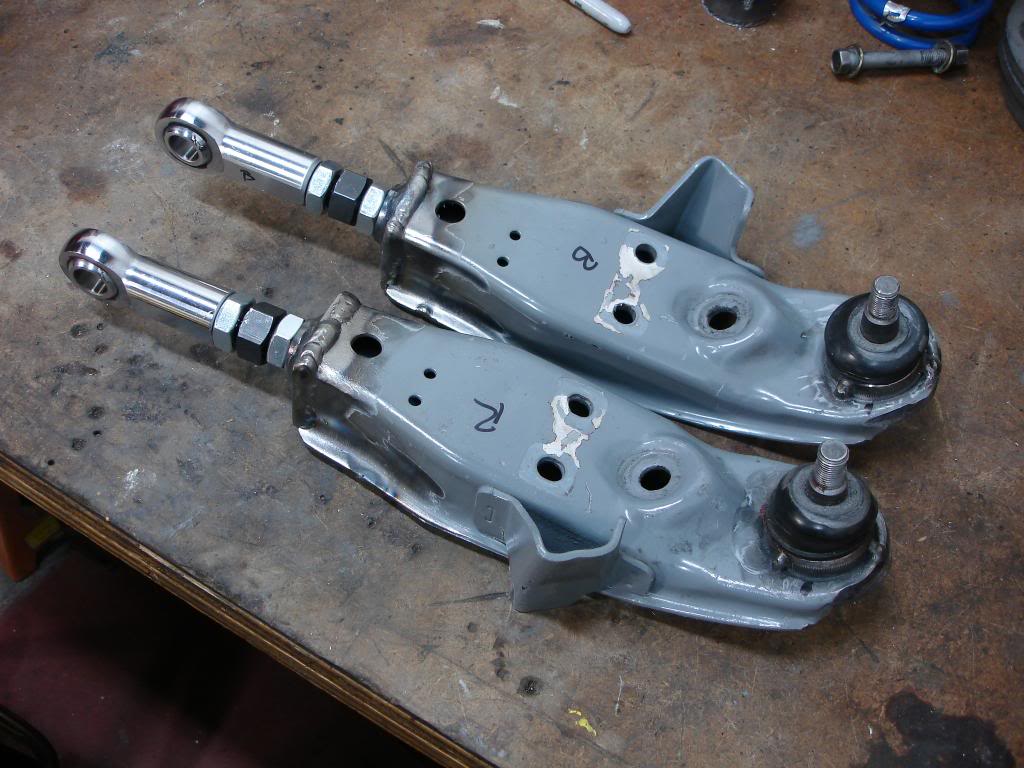
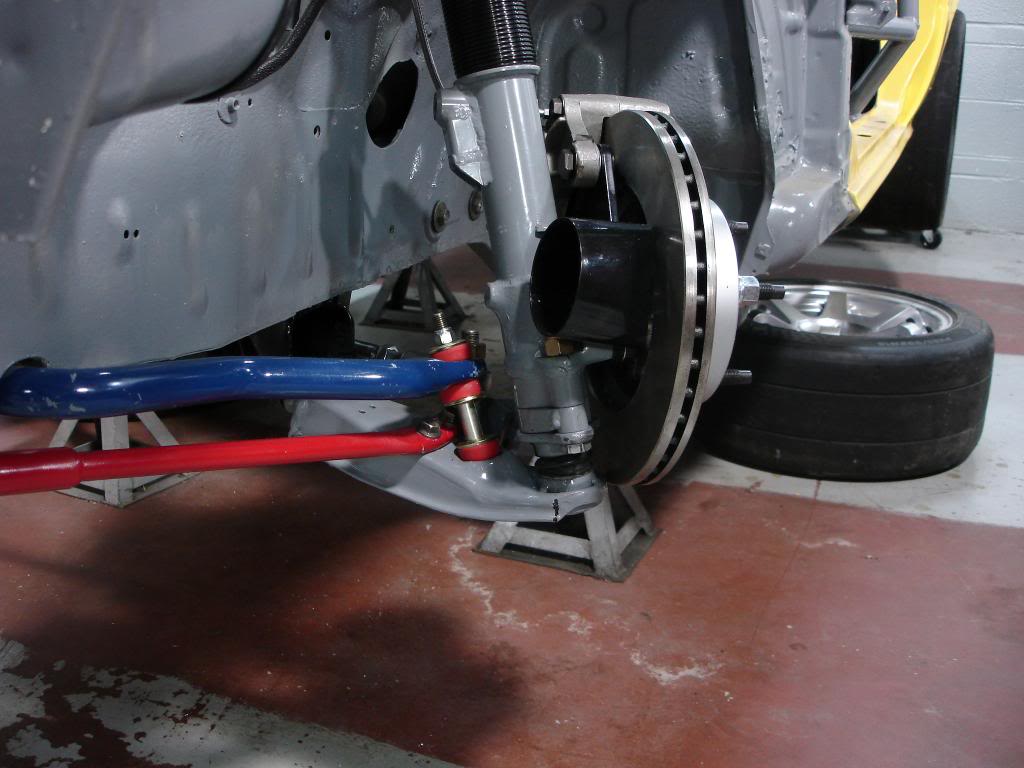
Turn in spacers can have an affect on camber because they effectively shorten the length of the control arm. This also affects track width.
To resolve this on my race car build I made the lower control arms adjustable for length. This increased track width and gave me an additional way to adjust camber. I set the control arms to be about 1/2" longer and now have 3.5 degrees of camber with the struts in the center of their adjustment in the camber plates.
To resolve this on my race car build I made the lower control arms adjustable for length. This increased track width and gave me an additional way to adjust camber. I set the control arms to be about 1/2" longer and now have 3.5 degrees of camber with the struts in the center of their adjustment in the camber plates.


Trending Topics
Joined: Aug 2011
Posts: 3,078
Likes: 42
From: Cambridge, Minnesota
^Man that is cool! You race guys could teach us street guys so much about suspension geometry it would be insane. I really need to grab a book and start reading about the suspension components besides just replacing stock units.
Thread Starter
Senior Member
Joined: Sep 2013
Posts: 301
Likes: 34
From: asheville
The rules don’t specifically forbid adjustable control arms, in ChumpCar if I used them I should claim them and be assigned points for value added. Adjustable control arms would be pretty hard to disguise and since my spring tops are integrated into the camber plates I would be paying points for 2 different camber adjustment devices. Redrilling the holes in the crossmember would be “free”.
The problem with just drilling new holes is that if you only move the holes out a half inch or so you end up with a very thin web between the old and new holes, I plan to solve that by welding on some washers at the new holes, that will reinforce the holes and cover the old holes.
The problem with just drilling new holes is that if you only move the holes out a half inch or so you end up with a very thin web between the old and new holes, I plan to solve that by welding on some washers at the new holes, that will reinforce the holes and cover the old holes.
Thread Starter
Senior Member
Joined: Sep 2013
Posts: 301
Likes: 34
From: asheville
Got the crossmember modified, like most machining operations it was a half hour setup for a minutes drilling. Now I can get 3.5 degrees of camber so I am happy.
Now I have to learn about the strut rods, it makes sense that I will have to adjust them after moving the control arms out but how much and which direction… I adjusted them but I am not entirely sure I have what I need now off to research.
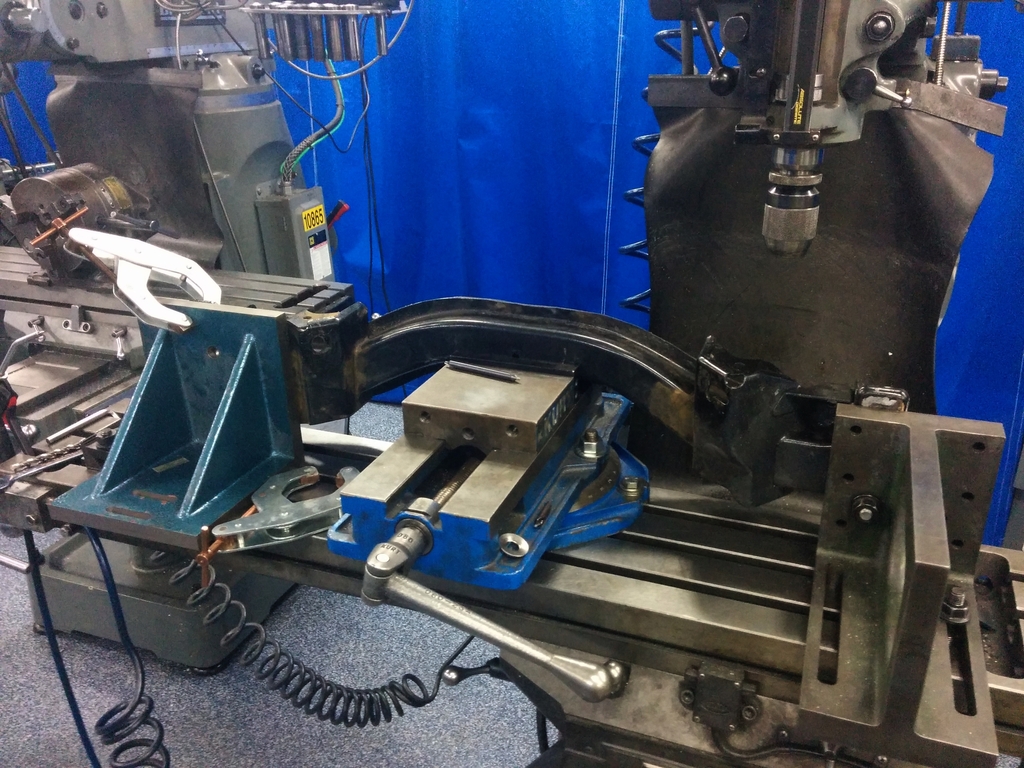
Now I have to learn about the strut rods, it makes sense that I will have to adjust them after moving the control arms out but how much and which direction… I adjusted them but I am not entirely sure I have what I need now off to research.

Good solution - cheap and effective! I had to drill out the lower control arm holes on my cross member and reinforced the holes with washers too. Worked great.
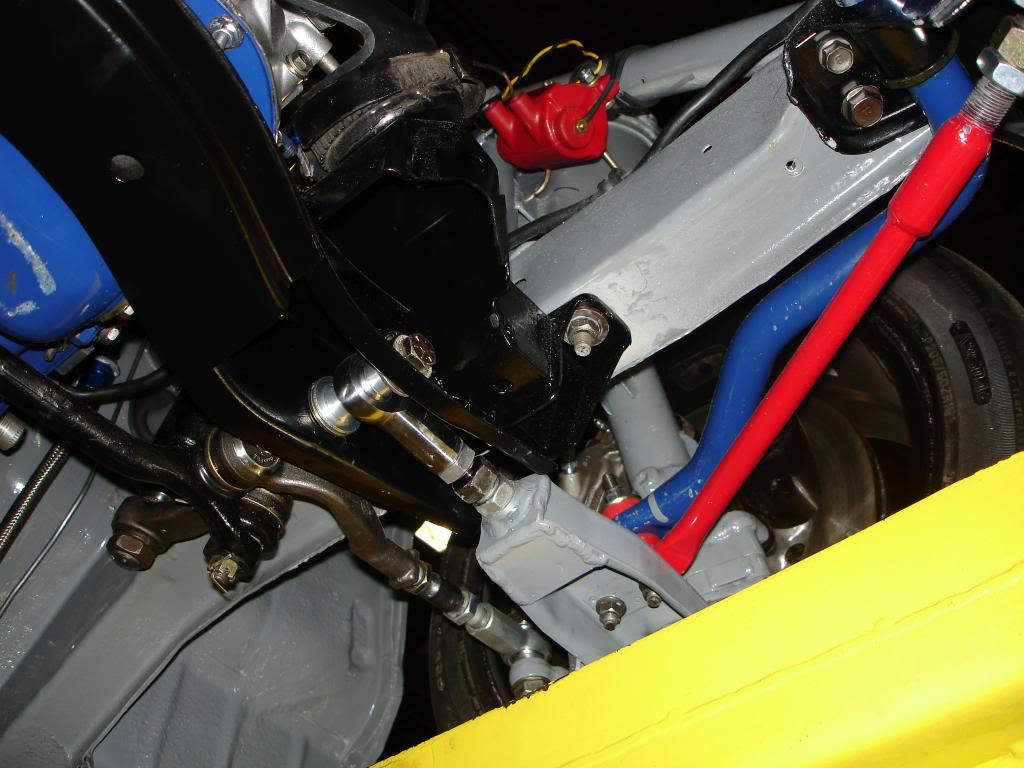
The strut rods are for caster adjustment. On my car caster was adjusted to 6 degrees positive. This did create a clearance issue between the lower control arm and cross member so some cutting and trimming was required.
Question for you. Did you raise the top of your strut towers? On my car I raised the strut towers an inch to accommodate the 2" turn in spacers. I had to do this to keep the struts from bottoming out in bump.
Thread Starter
Senior Member
Joined: Sep 2013
Posts: 301
Likes: 34
From: asheville
Good solution - cheap and effective! I had to drill out the lower control arm holes on my cross member and reinforced the holes with washers too. Worked great.
The strut rods are for caster adjustment. On my car caster was adjusted to 6 degrees positive. This did create a clearance issue between the lower control arm and cross member so some cutting and trimming was required.
Question for you. Did you raise the top of your strut towers? On my car I raised the strut towers an inch to accommodate the 2" turn in spacers. I had to do this to keep the struts from bottoming out in bump.
https://www.rx7club.com/1st-generati.../#post11904648
Last edited by mhr650; May 17, 2015 at 04:38 PM.

Thread
Thread Starter
Forum
Replies
Last Post
The1Sun
1st Generation Specific (1979-1985)
7
Sep 18, 2015 07:13 PM
The1Sun
New Member RX-7 Technical
5
Sep 15, 2015 04:45 PM